Embed Size (px)
Citation preview
®
1
© 2004 - 2009 NC Interactive, Inc. All Rights Reserved. NCsoft, the interlocking NC Logo, City of Heroes, Cityof Villains, Statesman, Positron, Sister Psyche, Synapse, Back Alley Brawler, Ms. Liberty, Citadel, Numina,Clockwork King, Longbow, Arachnos, Lord Recluse, Paragon City, Atlas Park, The Rogue Isles, and all associatedlogos and designs are trademarks or registered trademarks NCsoft Corporation. Cryptic Studios is a trademarkof Cryptic Studios, Inc. All other trademarks or registered trademarks are property of their respective owners.
2
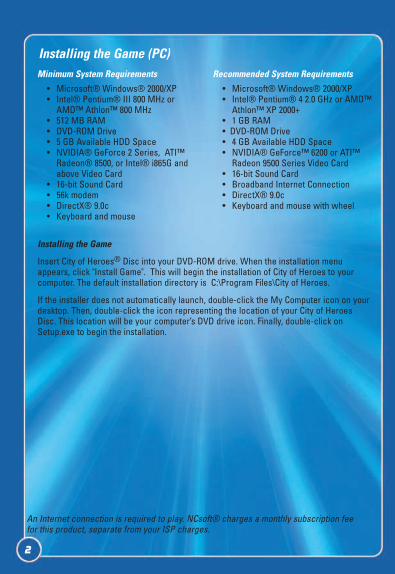
An Internet connection is required to play. NCsoft® charges a monthly subscription feefor this product, separate from your ISP charges.
Minimum System Requirements
• Microsoft® Windows® 2000/XP• Intel® Pentium® III 800 MHz or
AMD™ Athlon™ 800 MHz• 512 MB RAM• DVD-ROM Drive• 5 GB Available HDD Space• NVIDIA® GeForce 2 Series, ATI™
Radeon® 8500, or Intel® i865G andabove Video Card
• 16-bit Sound Card• 56k modem• DirectX® 9.0c• Keyboard and mouse
Recommended System Requirements
• Microsoft® Windows® 2000/XP• Intel® Pentium® 4 2.0 GHz or AMD™
Athlon™ XP 2000+• 1 GB RAM • DVD-ROM Drive• 4 GB Available HDD Space• NVIDIA® GeForce™ 6200 or ATI™
Radeon 9500 Series Video Card• 16-bit Sound Card• Broadband Internet Connection• DirectX® 9.0c• Keyboard and mouse with wheel
Installing the Game (PC)
Installing the Game
Insert City of Heroes® Disc into your DVD-ROM drive. When the installation menuappears, click "Install Game". This will begin the installation of City of Heroes to yourcomputer. The default installation directory is C:\Program Files\City of Heroes.
If the installer does not automatically launch, double-click the My Computer icon on yourdesktop. Then, double-click the icon representing the location of your City of HeroesDisc. This location will be your computer’s DVD drive icon. Finally, double-click onSetup.exe to begin the installation.
3
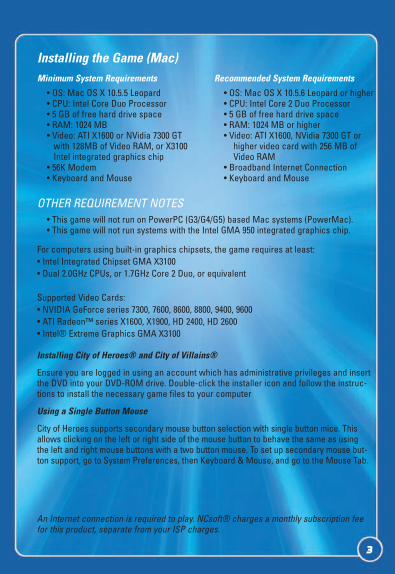
An Internet connection is required to play. NCsoft® charges a monthly subscription feefor this product, separate from your ISP charges.
Minimum System Requirements
• OS: Mac OS X 10.5.5 Leopard• CPU: Intel Core Duo Processor• 5 GB of free hard drive space• RAM: 1024 MB• Video: ATI X1600 or NVidia 7300 GT
with 128MB of Video RAM, or X3100Intel integrated graphics chip
• 56K Modem• Keyboard and Mouse
Recommended System Requirements
• OS: Mac OS X 10.5.6 Leopard or higher• CPU: Intel Core 2 Duo Processor• 5 GB of free hard drive space• RAM: 1024 MB or higher• Video: ATI X1600, NVidia 7300 GT or
higher video card with 256 MB ofVideo RAM
• Broadband Internet Connection• Keyboard and Mouse
Installing the Game (Mac)
Installing City of Heroes® and City of Villains®
Ensure you are logged in using an account which has administrative privileges and insertthe DVD into your DVD-ROM drive. Double-click the installer icon and follow the instruc-tions to install the necessary game files to your computer
Using a Single Button Mouse
City of Heroes supports secondary mouse button selection with single button mice. Thisallows clicking on the left or right side of the mouse button to behave the same as usingthe left and right mouse buttons with a two button mouse. To set up secondary mouse but-ton support, go to System Preferences, then Keyboard & Mouse, and go to the Mouse Tab.
OTHER REQUIREMENT NOTES• This game will not run on PowerPC (G3/G4/G5) based Mac systems (PowerMac).• This game will not run systems with the Intel GMA 950 integrated graphics chip.
For computers using built-in graphics chipsets, the game requires at least:• Intel Integrated Chipset GMA X3100• Dual 2.0GHz CPUs, or 1.7GHz Core 2 Duo, or equivalent
Supported Video Cards:• NVIDIA GeForce series 7300, 7600, 8600, 8800, 9400, 9600• ATI Radeon™ series X1600, X1900, HD 2400, HD 2600• Intel® Extreme Graphics GMA X3100
4
Entering The game 6
Creating a Hero 7
Origin ................................................7Archetype ........................................9Power Sets & Starting Powers ..11Body Type ......................................12Costume..........................................14Name & Extras..............................17
Your First Day on Patrol 17
Mappable Commands 19
Movement 20
Using Objects 23
Player Interactions 24
Fighting, Powers, Actions 26
Power Tray ....................................26Stat Bars ........................................27Using Your Powers ......................29Taking Damage &
Restoring Hit Points ..................30Damage Displays in Combat ......31Powers, Endurance & Recharge ..32Targeting ........................................33Color Coding..................................34Combat Options ............................35
Powers 36
Powers Terminology....................36Power Outer Ring Key ................37Leveling Table ..............................37Inherent ..........................................40Multiple Builds ............................41
Influence 42
Enhancements 42
Types of Enhancements ..............44Enhancement Origins ..................45Enhancement Strength ................46Combining Enhancements ..........47
Inspirations 49
Windows 52
Chat ................................................52Tray..................................................62Target ..............................................64Nav ..................................................64
The Map 70
Fog of War......................................71Map Icons ......................................72Waypoints & Thumbtacks ..........73
Missions 74
Contacts ........................................75Clues ..............................................76Story Arcs ......................................77Mission Types ..............................77
day jobs 79
team ups 80
Team Leaders ................................81Team Ups & Missions..................81Sidekicks ......................................82Exemplars ......................................83Leveling Pacts ..............................84Task Forces....................................85Trials ..............................................85
Super Groups 88
Trading 89
Table of ContentsTable of Contents
5
Slash Commands 90
Macros ..........................................95Keybindings ..................................98
Emotes 99
Emote Menu ................................100Thought Balloons ......................102
Options 103
General ........................................103Controls ........................................106Graphics & Audio ......................107
Paragon City™ 111
City Zones ....................................111Safe Areas ..................................112Arenas ..........................................112Monorail ......................................112Ferry System................................113
Zones 113
Atlas Park™ (map) ......................114Galaxy City (map) ......................117
Pvp: old and new 118
Arena PVP....................................118
PVP Heroes and Villains ..........121
Bases 130
Super Groups and Bases ..........130
inventions & Consignment house 143
The Invention System ................143Wentworth’s Consignment House ..145
Enemies 147
The Skulls & The Hellions........147Clockwork ..................................148Circle of Thorns ..........................148The Council..................................149Vahzilok........................................150
mission architect 151
Creating Stories..........................153Mission Goals ............................157Playing Stories............................163Custom Characters ....................168Custom Enemy Groups ..............171
Credits 174
Photosensitive SeizuresSEIZURE WARNING – Please Read Prior to PlayingA very small percentage of individuals may experience seizures when exposed to certainlight patterns, flashing lights, or flashing images. Children and teenagers are more susceptiblethem while playing or watching video games.
Symptoms of seizures include: lightheadedness, altered vision, jerking or shaking of theextremities, loss of awareness, confusion, twitching, or full convulsions. Convulsions canlead to other injuries by causing an individual to fall off of a chair and/or strike objects nearby. If you or anyone in your family has an epileptic condition or history of seizures, consult your physi-cian prior to playing this game – you could have an undiagnosed condition. If you experience anyof the aforementioned symptoms of a seizure while playing STOP PLAYING AND CONSULT YOURDOCTOR IMMEDIATELY. Parents should ensure their children are not experiencing symptoms. In order to reduce the risk of photosensitive epileptic seizures, you should play NCsoft games ina well-lit room while you are alert and awake. Avoid poorly-lit rooms and playing when fatigued.
It Begins...9
To enter City of Heroes, click on the game icon on your desktop orStart menu. Each time you enter the game it will check for and (ifthere are any) automatically load any updates posted by the team.
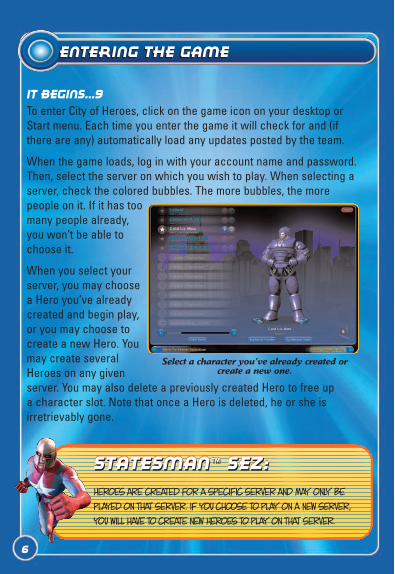
When the game loads, log in with your account name and password.Then, select the server on which you wish to play. When selecting aserver, check the colored bubbles. The more bubbles, the more people on it. If it has toomany people already,you won’t be able tochoose it.
When you select yourserver, you may choosea Hero you’ve alreadycreated and begin play,or you may choose tocreate a new Hero. Youmay create severalHeroes on any givenserver. You may also delete a previously created Hero to free up a character slot. Note that once a Hero is deleted, he or she is irretrievably gone.
6
Entering The GameEntering the Game
Select a character you’ve already created or create a new one.
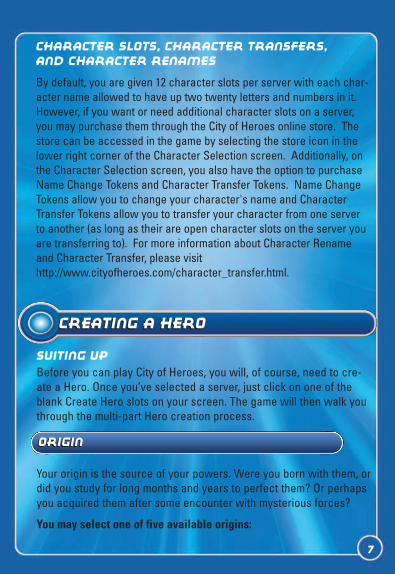
Heroes are created for a specific server and may only beplayed on that server. If you choose to play on a new server,you will have to create new Heroes to play on that server.
Statesman™ Sez:Statesman™ Sez:Statesman™ Sez:
Your origin is the source of your powers. Were you born with them, ordid you study for long months and years to perfect them? Or perhapsyou acquired them after some encounter with mysterious forces?
You may select one of five available origins:
Creating a HeroCreating a Hero
OriginOrigin
Suiting Up
Before you can play City of Heroes, you will, of course, need to cre-ate a Hero. Once you’ve selected a server, just click on one of theblank Create Hero slots on your screen. The game will then walk youthrough the multi-part Hero creation process.
Character Slots, Character Transfers, and Character Renames
By default, you are given 12 character slots per server with each char-acter name allowed to have up two twenty letters and numbers in it.However, if you want or need additional character slots on a server,you may purchase them through the City of Heroes online store. Thestore can be accessed in the game by selecting the store icon in thelower right corner of the Character Selection screen. Additionally, onthe Character Selection screen, you also have the option to purchaseName Change Tokens and Character Transfer Tokens. Name ChangeTokens allow you to change your character's name and CharacterTransfer Tokens allow you to transfer your character from one serverto another (as long as their are open character slots on the server youare transferring to). For more information about Character Renameand Character Transfer, please visithttp://www.cityofheroes.com/character_transfer.html.
7
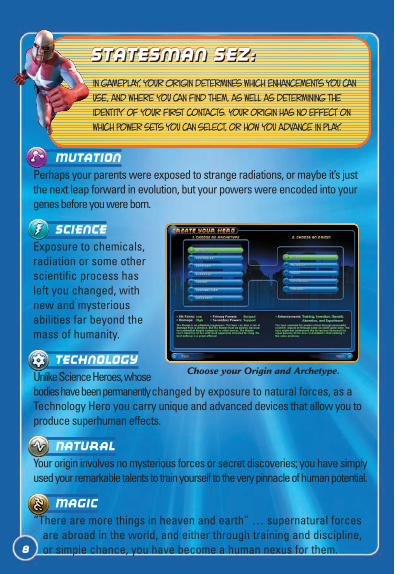
In gameplay, your Origin determines which Enhancements you canuse, and where you can find them, as well as determining theidentity of your first contacts. Your origin has no effect onwhich power sets you can select, or how you advance in play.
Statesman Sez:Statesman Sez:Statesman Sez:
Mutation
Perhaps your parents were exposed to strange radiations, or maybe it’s justthe next leap forward in evolution, but your powers were encoded into yourgenes before you were born.
Science
Exposure to chemicals,radiation or some otherscientific process hasleft you changed, withnew and mysteriousabilities far beyond themass of humanity.
Technology
Unlike Science Heroes, whosebodies have been permanently changed by exposure to natural forces, as aTechnology Hero you carry unique and advanced devices that allow you toproduce superhuman effects.
Natural
Your origin involves no mysterious forces or secret discoveries; you have simplyused your remarkable talents to train yourself to the very pinnacle of human potential.
Magic
“There are more things in heaven and earth” … supernatural forcesare abroad in the world, and either through training and discipline,or simple chance, you have become a human nexus for them.
Choose your Origin and Archetype.
8
Your archetype determines the nature of your powers. This choice will actuallydetermine which power sets you can select for your primary and secondary powers.
You may select one of five available archetypes.
Blaster
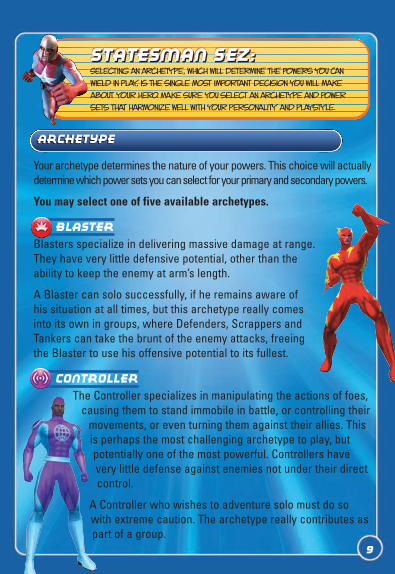
Blasters specialize in delivering massive damage at range.They have very little defensive potential, other than theability to keep the enemy at arm’s length.
A Blaster can solo successfully, if he remains aware ofhis situation at all times, but this archetype really comesinto its own in groups, where Defenders, Scrappers andTankers can take the brunt of the enemy attacks, freeingthe Blaster to use his offensive potential to its fullest.
Controller
The Controller specializes in manipulating the actions of foes,causing them to stand immobile in battle, or controlling their
movements, or even turning them against their allies. Thisis perhaps the most challenging archetype to play, butpotentially one of the most powerful. Controllers havevery little defense against enemies not under their directcontrol.
A Controller who wishes to adventure solo must do sowith extreme caution. The archetype really contributes aspart of a group.
Statesman Sez:Statesman Sez:Statesman Sez:
ArchetypeArchetype
Selecting an archetype, which will determine the powers you canwield in play, is the single most important decision you will makeabout your Hero. Make sure you select an archetype and powersets that harmonize well with your personality and playstyle.
9
Defender
The Defender’s powers focus on healing allies, increasingtheir abilities and decreasing foes’ abilities. The Defender
has little offensive or defensive punch of his own, but canradically increase the effectiveness of even the smallest
team up, and he, the Controller, and the Blaster have theonly ranged attacks.
The Defender is a suitable archetype for grouping, thoughsoloing is possible—difficult, but possible. However, the
tremendous usefulness of Defenders’ powers shouldguarantee that they will always be able to find a team up
to adventure with.
Scrapper
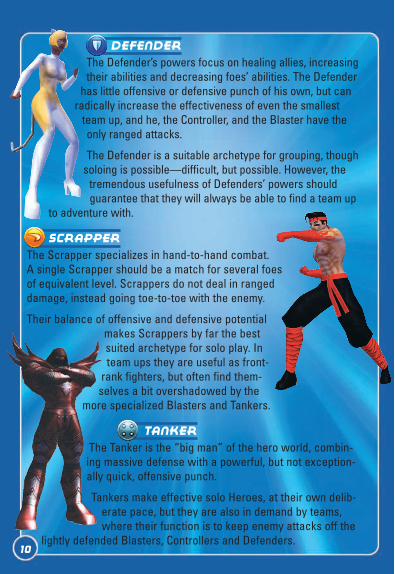
The Scrapper specializes in hand-to-hand combat.A single Scrapper should be a match for several foesof equivalent level. Scrappers do not deal in rangeddamage, instead going toe-to-toe with the enemy.
Their balance of offensive and defensive potentialmakes Scrappers by far the bestsuited archetype for solo play. Inteam ups they are useful as front-
rank fighters, but often find them-selves a bit overshadowed by the
more specialized Blasters and Tankers.
Tanker
The Tanker is the “big man” of the hero world, combin-ing massive defense with a powerful, but not exception-ally quick, offensive punch.
Tankers make effective solo Heroes, at their own delib-erate pace, but they are also in demand by teams,where their function is to keep enemy attacks off the
lightly defended Blasters, Controllers and Defenders.10
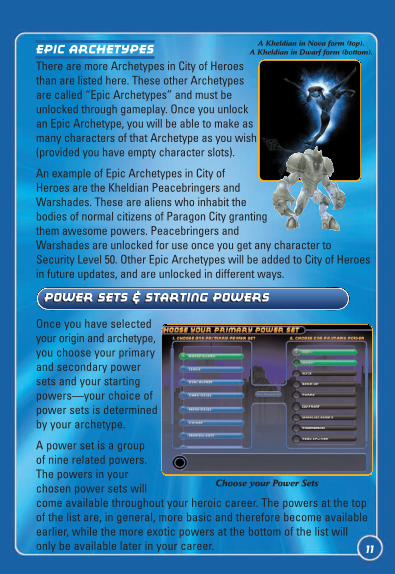
Once you have selectedyour origin and archetype,you choose your primaryand secondary powersets and your startingpowers—your choice ofpower sets is determinedby your archetype.
A power set is a group of nine related powers.The powers in yourchosen power sets willcome available throughout your heroic career. The powers at the topof the list are, in general, more basic and therefore become availableearlier, while the more exotic powers at the bottom of the list willonly be available later in your career.
Power Sets & Starting PowersPower Sets & Starting Powers
Choose your Power Sets
Epic Archetypes
There are more Archetypes in City of Heroesthan are listed here. These other Archetypesare called “Epic Archetypes” and must beunlocked through gameplay. Once you unlockan Epic Archetype, you will be able to make asmany characters of that Archetype as you wish(provided you have empty character slots).
An example of Epic Archetypes in City ofHeroes are the Kheldian Peacebringers andWarshades. These are aliens who inhabit the bodies of normal citizens of Paragon City grantingthem awesome powers. Peacebringers andWarshades are unlocked for use once you get any character toSecurity Level 50. Other Epic Archetypes will be added to City of Heroesin future updates, and are unlocked in different ways.
A Kheldian in Nova form (top).A Kheldian in Dwarf form (bottom).
11
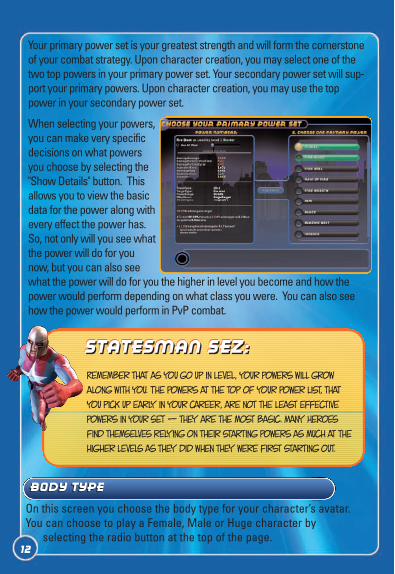
Your primary power set is your greatest strength and will form the cornerstoneof your combat strategy. Upon character creation, you may select one of thetwo top powers in your primary power set. Your secondary power set will sup-port your primary powers. Upon character creation, you may use the toppower in your secondary power set.
When selecting your powers,you can make very specificdecisions on what powersyou choose by selecting the"Show Details" button. Thisallows you to view the basicdata for the power along withevery effect the power has.So, not only will you see whatthe power will do for younow, but you can also seewhat the power will do for you the higher in level you become and how thepower would perform depending on what class you were. You can also seehow the power would perform in PvP combat.
Remember that as you go up in level, your powers will growalong with you. The powers at the top of your power list, thatyou pick up early in your career, are not the least effectivepowers in your set — they are the most basic. Many Heroesfind themselves relying on their starting powers as much at thehigher levels as they did when they were first starting out.
Statesman Sez:Statesman Sez:Statesman Sez:
Body TypeBody Type
On this screen you choose the body type for your character’s avatar.You can choose to play a Female, Male or Huge character by
selecting the radio button at the top of the page.12
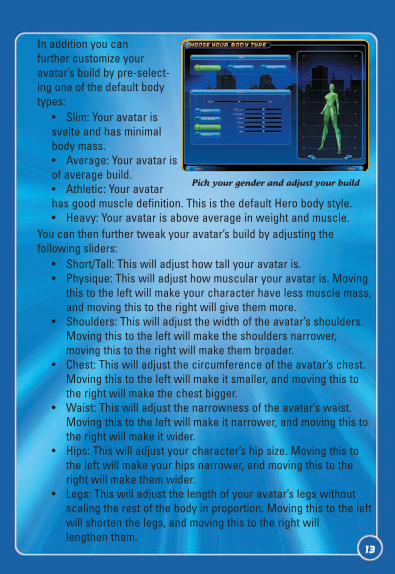
In addition you can further customize youravatar’s build by pre-select-ing one of the default bodytypes:
• Slim: Your avatar issvelte and has minimalbody mass.• Average: Your avatar isof average build.• Athletic: Your avatarhas good muscle definition. This is the default Hero body style.• Heavy: Your avatar is above average in weight and muscle.
You can then further tweak your avatar’s build by adjusting the following sliders:
• Short/Tall: This will adjust how tall your avatar is.• Physique: This will adjust how muscular your avatar is. Moving
this to the left will make your character have less muscle mass,and moving this to the right will give them more.
• Shoulders: This will adjust the width of the avatar’s shoulders. Moving this to the left will make the shoulders narrower,moving this to the right will make them broader.
• Chest: This will adjust the circumference of the avatar’s chest. Moving this to the left will make it smaller, and moving this to the right will make the chest bigger.
• Waist: This will adjust the narrowness of the avatar’s waist. Moving this to the left will make it narrower, and moving this to the right will make it wider.
• Hips: This will adjust your character’s hip size. Moving this to the left will make your hips narrower, and moving this to the right will make them wider.
• Legs: This will adjust the length of your avatar’s legs without scaling the rest of the body in proportion. Moving this to the leftwill shorten the legs, and moving this to the right will lengthen them.
Pick your gender and adjust your build
13
14
CostumeCostume
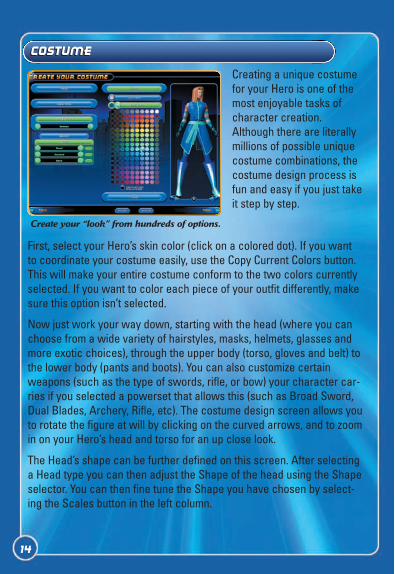
Creating a unique costumefor your Hero is one of themost enjoyable tasks ofcharacter creation.Although there are literallymillions of possible uniquecostume combinations, thecostume design process isfun and easy if you just takeit step by step.
First, select your Hero’s skin color (click on a colored dot). If you wantto coordinate your costume easily, use the Copy Current Colors button.This will make your entire costume conform to the two colors currentlyselected. If you want to color each piece of your outfit differently, makesure this option isn’t selected.
Now just work your way down, starting with the head (where you canchoose from a wide variety of hairstyles, masks, helmets, glasses andmore exotic choices), through the upper body (torso, gloves and belt) tothe lower body (pants and boots). You can also customize certainweapons (such as the type of swords, rifle, or bow) your character car-ries if you selected a powerset that allows this (such as Broad Sword,Dual Blades, Archery, Rifle, etc). The costume design screen allows youto rotate the figure at will by clicking on the curved arrows, and to zoomin on your Hero’s head and torso for an up close look.
The Head’s shape can be further defined on this screen. After selectinga Head type you can then adjust the Shape of the head using the Shapeselector. You can then fine tune the Shape you have chosen by select-ing the Scales button in the left column.
Create your “look” from hundreds of options.
15
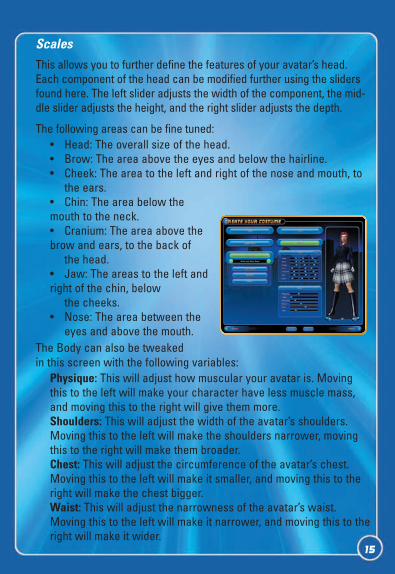
Scales
This allows you to further define the features of your avatar’s head.Each component of the head can be modified further using the slidersfound here. The left slider adjusts the width of the component, the mid-dle slider adjusts the height, and the right slider adjusts the depth.
The following areas can be fine tuned:• Head: The overall size of the head.• Brow: The area above the eyes and below the hairline.• Cheek: The area to the left and right of the nose and mouth, to
the ears.• Chin: The area below themouth to the neck.• Cranium: The area above thebrow and ears, to the back of
the head.• Jaw: The areas to the left andright of the chin, below
the cheeks.• Nose: The area between the
eyes and above the mouth.The Body can also be tweaked in this screen with the following variables:
Physique: This will adjust how muscular your avatar is. Movingthis to the left will make your character have less muscle mass,and moving this to the right will give them more.Shoulders: This will adjust the width of the avatar’s shoulders.Moving this to the left will make the shoulders narrower, movingthis to the right will make them broader.Chest: This will adjust the circumference of the avatar’s chest.Moving this to the left will make it smaller, and moving this to theright will make the chest bigger.Waist: This will adjust the narrowness of the avatar’s waist.Moving this to the left will make it narrower, and moving this to theright will make it wider.
16
Hips: This will adjust your character’s hip size. Moving this to theleft will make your hips narrower, and moving this to the right willmake them wider.Legs: This will adjust the length of your avatar’s legs without scal-ing the rest of the body in proportion. Moving this to the left willshorten the legs, and moving this to the right will lengthen them.
Take your time, explore the possibilities, and you are virtually guaran-teed a cool and unique Hero at the end of the process.
Icon Tailors
A hero’s identity is tied to their costume almost as much as their name.A special store is located in Steel Canyon, Independence Port, andFounder’s Falls for heroes to change their look. This store is called“Icon” and is commonly referred to as the Tailor due to the amount ofwork they do on the costumes that heroes wear.
You can visit Icon at any time in your career for a makeover. They canchange anything about the look of your character except the Body Typeand Height you chose when you first created your character. Fees arescaled by level, so a lower level hero pays less than a higher level onefor the same amount of changes.
A flat fee is charged for simply accessing the Tailor. This fee covers anyand all “color alterations” you want to make for your character. You canalso change various parts of your costume for additional fees. Whenpaying for any of the fees at the Tailor, you may choose to pay withinfluence you have earned while playing the game, or with any freeTailor Tokens you have acquired.
At levels 20, 30, and 40 characters can run missions for the head tailorsin each of the Icon shops. These missions, when successful, will unlockadditional Costume Slots, allowing you to have multiple looks at yourdisposal. Simply select the Slot you want to change the next time youaccess the Tailor once you have unlocked an additional slot. You canchange your costume using the Menu or using the slash command of/costume_change X (where X is the number of the slot, 0 to 3).
17
Name & ExtrasName & Extras
Remember that a short, easy-to-spell name will help yourfellow Heroes communicate with you. Is the name you wantedalready taken? Let comics tradition come to your rescue.If you can’t be Amazing Man, try Mr. Amazing, Amazatron,CaptainAmazing or even AmazingMan.
Statesman Sez:Statesman Sez:Statesman Sez:
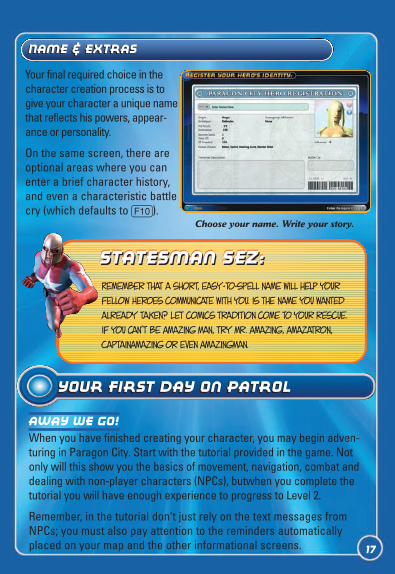
Your final required choice in thecharacter creation process is togive your character a unique namethat reflects his powers, appear-ance or personality.
On the same screen, there areoptional areas where you canenter a brief character history,and even a characteristic battlecry (which defaults to 0).
Choose your name. Write your story.
Your First Day on PatrolYour First Day on Patrol
Away We Go!
When you have finished creating your character, you may begin adven-turing in Paragon City. Start with the tutorial provided in the game. Notonly will this show you the basics of movement, navigation, combat anddealing with non-player characters (NPCs), butwhen you complete thetutorial you will have enough experience to progress to Level 2.
Remember, in the tutorial don’t just rely on the text messages fromNPCs; you must also pay attention to the reminders automaticallyplaced on your map and the other informational screens.
18
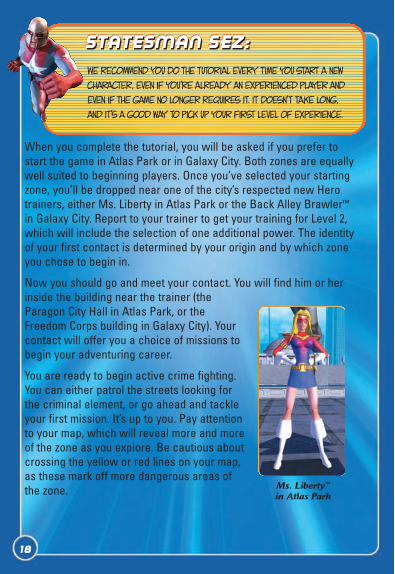
When you complete the tutorial, you will be asked if you prefer tostart the game in Atlas Park or in Galaxy City. Both zones are equallywell suited to beginning players. Once you’ve selected your startingzone, you’ll be dropped near one of the city’s respected new Herotrainers, either Ms. Liberty in Atlas Park or the Back Alley Brawler™
in Galaxy City. Report to your trainer to get your training for Level 2,which will include the selection of one additional power. The identityof your first contact is determined by your origin and by which zoneyou chose to begin in.
Now you should go and meet your contact. You will find him or herinside the building near the trainer (theParagon City Hall in Atlas Park, or theFreedom Corps building in Galaxy City). Yourcontact will offer you a choice of missions tobegin your adventuring career.
You are ready to begin active crime fighting.You can either patrol the streets looking forthe criminal element, or go ahead and tackleyour first mission. It’s up to you. Pay attentionto your map, which will reveal more and moreof the zone as you explore. Be cautious aboutcrossing the yellow or red lines on your map,as these mark off more dangerous areas ofthe zone.
We recommend you do the tutorial every time you start a newcharacter, even if you’re already an experienced player andeven if the game no longer requires it. It doesn’t take long,and it’s a good way to pick up your first level of experience.
Statesman Sez:Statesman Sez:Statesman Sez:
Ms. Liberty™
in Atlas Park
Quitting
When you are ready to leave your play session, click on Menu, thenon Quit. You can then choose to quit immediately or to wait 30 sec-onds. If you quit immediately, your character will still be visible andcan be attacked for 30 seconds after quitting. You can alternatelychoose to wait 30 seconds before the game quits to ensure your herois safe. If you press any key during this time, or take any other in-game action, the countdown will be aborted. When the countdown iscomplete, you will be logged out of the game.
Don’t bite off more than you can chew. The number of enemiesyou can take on at one time depends on your archetype andpower choices, but beware of large groups of foes. Lookfor white or blue enemies to engage; be careful about takingon yellows, and avoid orange or higher. You do have one thinggoing for you, though; for your first nine levels, you don’taccrue any XP debt if you’re defeated—you’re just taken tothe hospital and healed.
Statesman Sez:Statesman Sez:Statesman Sez:
Mappable CommandsMappable Commands
The following commands can be set from your keyboard. You can mapeach command to one or two different keys, either replacing the pre-existing default key, or keeping the default but adding a second key.
To remap your keyboard commands, click on Menu, then Options,then Controls. Click on the slot you wish to re-map (either the default,or the open slot) and press the key you wish to map to that command.When you are finished, click on Apply Changes and Return to Gameat the bottom of the Controls screen.
19
20
MovementMovement
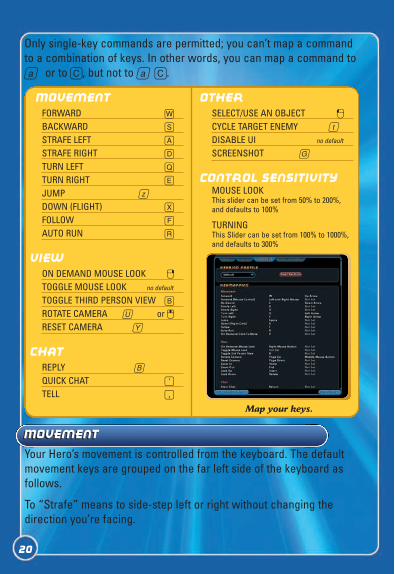
Only single-key commands are permitted; you can’t map a commandto a combination of keys. In other words, you can map a command toa or to C, but not to a C.
MovementFORWARD W
BACKWARD S
STRAFE LEFT A
STRAFE RIGHT D
TURN LEFT Q
TURN RIGHT E
JUMP z
DOWN (FLIGHT) X
FOLLOW F
AUTO RUN R
ViewON DEMAND MOUSE LOOK ?
TOGGLE MOUSE LOOK no default
TOGGLE THIRD PERSON VIEW B
ROTATE CAMERA U or >RESET CAMERA Y
ChatREPLY B
QUICK CHAT '
TELL ,
OtherSELECT/USE AN OBJECT <
CYCLE TARGET ENEMY t
DISABLE UI no default
SCREENSHOT G
Control SensitivityMOUSE LOOKThis slider can be set from 50% to 200%,and defaults to 100%
TURNINGThis Slider can be set from 100% to 1000%,and defaults to 300%
Map your keys.
Your Hero’s movement is controlled from the keyboard. The defaultmovement keys are grouped on the far left side of the keyboard asfollows.
To “Strafe” means to side-step left or right without changing thedirection you’re facing.
21
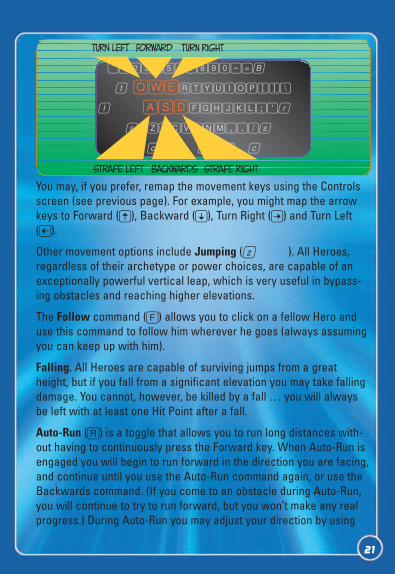
`1234567890-=B
t QWERTYUIOP[]\
l ASDFGHJKL;'r
s ZXCVBNM,./s
c a z a c
TURN LEFT Forward Turn Right
Strafe Left Backwards Strafe Right
You may, if you prefer, remap the movement keys using the Controlsscreen (see previous page). For example, you might map the arrowkeys to Forward (W), Backward (Z), Turn Right (S) and Turn Left(A).
Other movement options include Jumping (z ). All Heroes,regardless of their archetype or power choices, are capable of anexceptionally powerful vertical leap, which is very useful in bypass-ing obstacles and reaching higher elevations.
The Follow command (F) allows you to click on a fellow Hero anduse this command to follow him wherever he goes (always assumingyou can keep up with him).
Falling. All Heroes are capable of surviving jumps from a greatheight, but if you fall from a significant elevation you may take fallingdamage. You cannot, however, be killed by a fall … you will alwaysbe left with at least one Hit Point after a fall.
Auto-Run (R) is a toggle that allows you to run long distances with-out having to continuously press the Forward key. When Auto-Run isengaged you will begin to run forward in the direction you are facing,and continue until you use the Auto-Run command again, or use theBackwards command. (If you come to an obstacle during Auto-Run,you will continue to try to run forward, but you won’t make any realprogress.) During Auto-Run you may adjust your direction by using
22
the left and right turning keys. You may use Auto-Run in conjunctionwith Sprint or another movement power.
Click to Move
Under the Controls menu in Options, you can turn on Click-To-Movefor your mouse. This will allow you to maneuver your character usingonly your mouse and mouse buttons instead of your keyboard.
With this enabled you simply need to just click where you want yourcharacter to go, and they will automatically run to that point. Therange is about 100 yards. You will temporarily see a symbol on theground, or nearby terrain feature, telling you where you are running to.
Other players will not see this symbol.
Turning on Auto-run while moving in Click-To-Move will not cancelyour Click-To-Move, and Click-To-Moving while Auto-running willcancel your Auto-run.
Mouse Look
You may change your facing with the mouse. Right-click-and-hold,then move the mouse right or left, up or down to change the directionyour Hero is facing. This can be used when you need to look up ordown, or to change direction while moving.
Movement Powers
Sprint. The Sprint power is an Inherent power possessed by allHeroes. When engaged, it significantly increases your running speed,although it does drain Endurance, unlike normal running. Your sprintspeed is sufficient to outdistance most enemies, although they mightbe able to get a successful shot off at you in passing. Make sure youhave enough Hit Points left to absorb any parting shots before tryingto Sprint out of combat.
Using ObjectsUsing Objects
To use a game-world object—open a door, pick up a clue during amission, or speak to an NPC—simply position your mouse cursorover the object. The cursor will change into a blue hand over usableobjects. To use the object, left-click on it. If it is possible for theobject to be affected by your actions, this will automatically causethe appropriate effect.
Some complicated actions—for example, disarming bombs during amission—are still initiated with a simple mouse-click, but they thenrequire a certain amount of time to complete. It is wise to wait untilthe area is clear of all enemies before initiating a complicated actionlike disarming a bomb or searching a computer for a certain file.
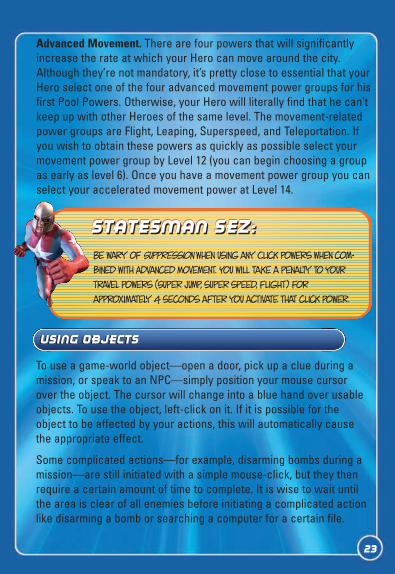
Be wary of Suppression when using any Click powers when com-bined with Advanced Movement. You will take a penalty to yourtravel powers (Super jump, super speed, flight) for approximately 4 seconds after you activate that click power.
Statesman Sez:Statesman Sez:Statesman Sez:
23
Advanced Movement. There are four powers that will significantlyincrease the rate at which your Hero can move around the city.Although they’re not mandatory, it’s pretty close to essential that yourHero select one of the four advanced movement power groups for hisfirst Pool Powers. Otherwise, your Hero will literally find that he can’tkeep up with other Heroes of the same level. The movement-relatedpower groups are Flight, Leaping, Superspeed, and Teleportation. Ifyou wish to obtain these powers as quickly as possible select yourmovement power group by Level 12 (you can begin choosing a groupas early as level 6). Once you have a movement power group you canselect your accelerated movement power at Level 14.
Player InteractionsPlayer Interactions
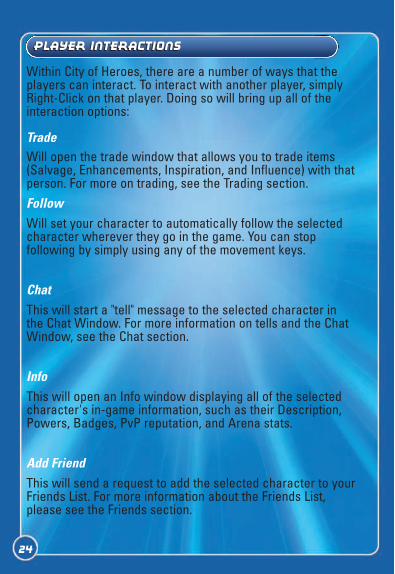
Within City of Heroes, there are a number of ways that theplayers can interact. To interact with another player, simplyRight-Click on that player. Doing so will bring up all of theinteraction options:
TradeWill open the trade window that allows you to trade items(Salvage, Enhancements, Inspiration, and Influence) with thatperson. For more on trading, see the Trading section.FollowWill set your character to automatically follow the selectedcharacter wherever they go in the game. You can stop following by simply using any of the movement keys.
ChatThis will start a "tell" message to the selected character in the Chat Window. For more information on tells and the ChatWindow, see the Chat section.
InfoThis will open an Info window displaying all of the selectedcharacter's in-game information, such as their Description,Powers, Badges, PvP reputation, and Arena stats.
Add FriendThis will send a request to add the selected character to yourFriends List. For more information about the Friends List,please see the Friends section.
24
25
Add Global FriendThis will send a request to add the selected character to yourGlobal Friends List. For more information about the GlobalFriends List, please see the Friends section.
Invite to TeamThis will send an invitation to the selected player asking themto join your team. For more about Teams and teaming up withother players, please see the Team Ups section.
Invite SidekickThis will send a Sidekick invitation to the selected player. Formore about Sidekicking, please see the Sidekick section.
Invite to Leveling Pact (only available if you and the other character is under level 5)This will send a Leveling Pact invitation to the selected player.For more information about Leveling Pacts, please see theLeveling Pacts section.
Invite ExemplarThis will send an Exemplar invitation to the selected player.For information about Exemplaring, please see the Exemplarsection.
Add NoteThis will open Player Note window and allows you to rate players and write notes about them for yourself.
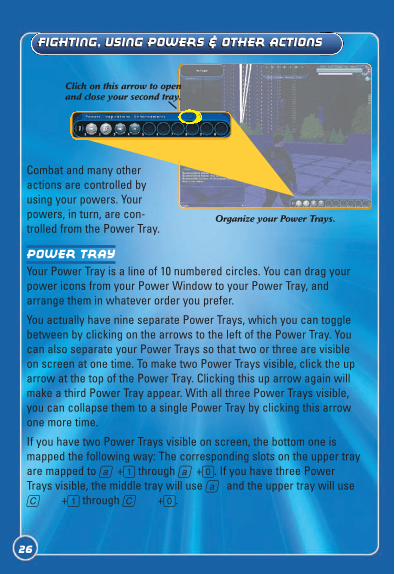
Combat and many otheractions are controlled byusing your powers. Yourpowers, in turn, are con-trolled from the Power Tray.
Power Tray
Your Power Tray is a line of 10 numbered circles. You can drag yourpower icons from your Power Window to your Power Tray, andarrange them in whatever order you prefer.
You actually have nine separate Power Trays, which you can togglebetween by clicking on the arrows to the left of the Power Tray. Youcan also separate your Power Trays so that two or three are visibleon screen at one time. To make two Power Trays visible, click the uparrow at the top of the Power Tray. Clicking this up arrow again willmake a third Power Tray appear. With all three Power Trays visible,you can collapse them to a single Power Tray by clicking this arrowone more time.
If you have two Power Trays visible on screen, the bottom one ismapped the following way: The corresponding slots on the upper trayare mapped to a +1 through a +0. If you have three PowerTrays visible, the middle tray will use a and the upper tray will useC +1 through C +0.
26
Fighting, Using Powers & Other ActionsFighting, Using Powers & Other Actions
Organize your Power Trays.
Click on this arrow to openand close your second tray.
In addition to having the three power trays visible in the Power Traywindow, you can also have up to eight additional "loose" power traysviewable on screen at any time. These trays will not be locked to thePower Tray window and can be positioned anywhere on the screen.To open these power trays, simply use the "/show tray X" where X isany number 1 - 8.
Key Bindings. In addition to powers, your Power Tray can also holdcustom key bindings, which are combinations of commands customdesigned by you, the player, and bound to a specific hotkey.
Stat Bars
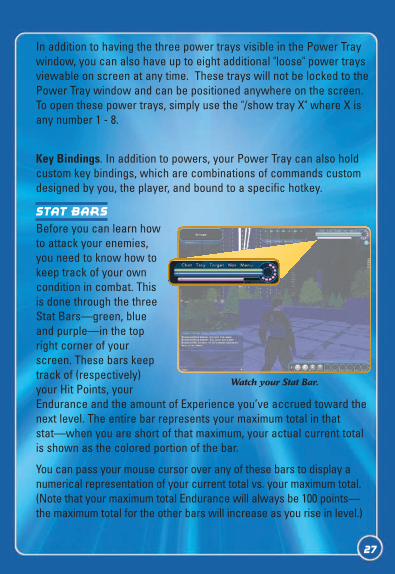
Before you can learn howto attack your enemies,you need to know how tokeep track of your owncondition in combat. Thisis done through the threeStat Bars—green, blueand purple—in the topright corner of yourscreen. These bars keeptrack of (respectively)your Hit Points, yourEndurance and the amount of Experience you’ve accrued toward thenext level. The entire bar represents your maximum total in thatstat—when you are short of that maximum, your actual current totalis shown as the colored portion of the bar.
You can pass your mouse cursor over any of these bars to display anumerical representation of your current total vs. your maximum total.(Note that your maximum total Endurance will always be 100 points—the maximum total for the other bars will increase as you rise in level.)
27
Watch your Stat Bar.
Hit Point Bar. The green bar on top keeps track of your Hit Points—the amount of physical damage you can absorb from enemy attacks(and other miscellaneous hazards, e.g., falling damage). Its maximumlength is constant, regardless of how many Hit Points you gain asyour level increases.
Endurance Bar. The blue bar in the middle indicates your currentEndurance reserves. The importance of Endurance in combat is dis-cussed more in-depth later.
Experience Bar. This bar tracks your progress in gaining experiencetoward the next level. Each time you “fill” this bar, it means you haveadvanced one tenth of the way to the next Security Level. Your totalprogress toward the next level is tracked by the ten oval “bubbles”(often called “bubs”) arrayed around the circle to the right of theExperience Bar. Each time you “fill” the Experience Bar, one of thebubbles will brighten, and the bar will reset itself for the next bubble.When all ten bubbles are brightened, you have earned a new level.
XP Debt. When you reach Level 10, you will start accruing ExperienceDebt when you are defeated in battle. If you have accrued ExperienceDebt, the approximate amount of debt you currently owe is shown bya shaded area of the Experience Bar (or, in extreme cases, shadedexperience bubbles). Note that if all the bubbles between your currentposition and the next level are shaded, your debt can (and most likelydoes) extend into the next level. When you pass your mouse over theExperience Bar, it will show you your current amount of ExperiencePoints towards the next level, the number of Experience Points need-ed to attain that level, and your total accrued debt. The amount ofdebt accrued depends on your level at the time of defeat. Until yourdebt is paid, your earned Experience will be divided betweenadvancement and debt. In effect, debt slows your rate of advance-ment from Experience by half, until it is paid off. If you are over Level10, you can accelerate your debt repyment by exemplaring anotherhero. (Note: you will only accrue debt at half the normal level if youare defeated while engaged in a mission).
28
Using Your Powers
Most of the action in City of Heroes revolves around the ongoing bat-tles between you and your heroic allies, and the many super-pow-ered villains that infest Paragon City.
You conduct your battles by using your powers (controlled, asdescribed above, from your Power Tray). Below is a general list ofthe broad effects of most of the powers in the game, and how theyare used in combat. Note that some unique powers may fall outsideof the categories below. Also note that some powers may combineeffects from more than one of these categories—for example, a vam-piric attack that damages the enemy and heals you at the same time,or an attack that stuns the enemy (a bind) if it hits.
Attack Powers. Deal damage to an enemy. Attack powers can be sin-gle-target or area of effect (damaging all targets within a given area).They can also be single-shot or damage-over-time (dealing damageto the enemy continuously for a certain amount of time).
Defense Powers. Prevent an enemy from damaging you or yourallies, either by making it more difficult for them to hit you, or byreducing damage when they do hit you.
29
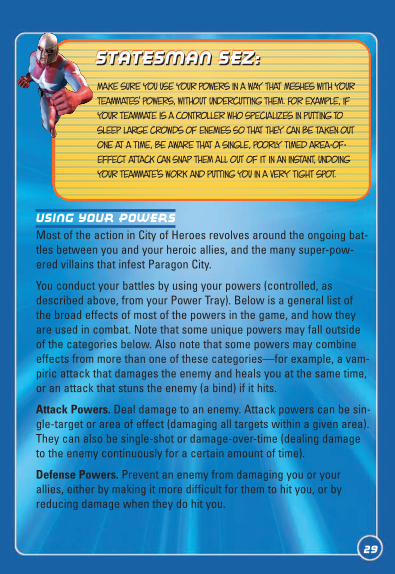
Make sure you use your powers in a way that meshes with yourteammates’ powers, without undercutting them. For example, ifyour teammate is a Controller who specializes in putting tosleep large crowds of enemies so that they can be taken outone at a time, be aware that a single, poorly timed area-of-effect attack can snap them all out of it in an instant, undoingyour teammate’s work and putting you in a very tight spot.
Statesman Sez:Statesman Sez:Statesman Sez:
Binds & Taunts. Binds prevent a target from moving, or sometimesfrom attacking at all. Some powers can even cause a foe to tem-porarily switch sides. Taunts attempt to compel an enemy to stopattacking your ally and turn his attention to you instead.
Buffs & Heals. Buffs make you or your allies more effective in combat.Heals, of course, restore Hit Points that have been lost in combat.
Debuffs. Debuffs make enemies less effective in combat; for example,reducing the speed of their attacks, or the maximum amount of dam-age they can do.
Movement Powers. See p. 18.
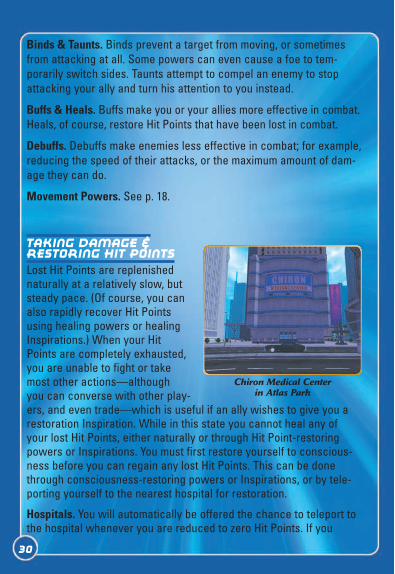
Taking Damage &Restoring Hit Points
Lost Hit Points are replenishednaturally at a relatively slow, butsteady pace. (Of course, you canalso rapidly recover Hit Pointsusing healing powers or healingInspirations.) When your HitPoints are completely exhausted,you are unable to fight or takemost other actions—althoughyou can converse with other play-ers, and even trade—which is useful if an ally wishes to give you arestoration Inspiration. While in this state you cannot heal any ofyour lost Hit Points, either naturally or through Hit Point-restoringpowers or Inspirations. You must first restore yourself to conscious-ness before you can regain any lost Hit Points. This can be donethrough consciousness-restoring powers or Inspirations, or by tele-porting yourself to the nearest hospital for restoration.
Hospitals. You will automatically be offered the chance to teleport tothe hospital whenever you are reduced to zero Hit Points. If you
30
Chiron Medical Center in Atlas Park
accept this choice, youwill be transported tothe hospital in the zoneyou are in or, if the zonehas no hospital, the last zone you were inthat did.
After Security Level 10,you will incurExperience Debt if youare defeated in combat.
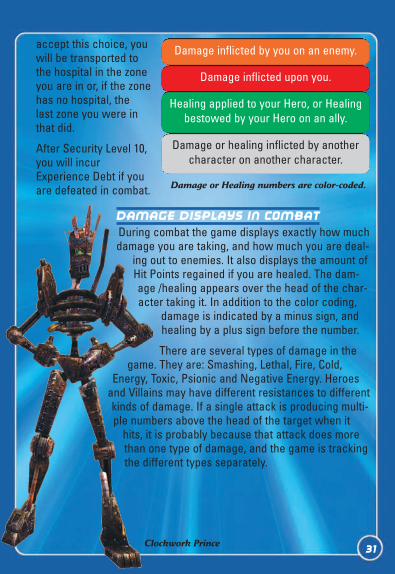
Damage Displays in Combat
During combat the game displays exactly how muchdamage you are taking, and how much you are deal-
ing out to enemies. It also displays the amount ofHit Points regained if you are healed. The dam-age /healing appears over the head of the char-acter taking it. In addition to the color coding,
damage is indicated by a minus sign, andhealing by a plus sign before the number.
There are several types of damage in thegame. They are: Smashing, Lethal, Fire, Cold,
Energy, Toxic, Psionic and Negative Energy. Heroesand Villains may have different resistances to differentkinds of damage. If a single attack is producing multi-ple numbers above the head of the target when it
hits, it is probably because that attack does morethan one type of damage, and the game is trackingthe different types separately.
31
Damage inflicted by you on an enemy.
Damage inflicted upon you.
Healing applied to your Hero, or Healingbestowed by your Hero on an ally.
Damage or healing inflicted by anothercharacter on another character.
Damage or Healing numbers are color-coded.
Clockwork Prince
Powers, Endurance& Recharge
Your powers are fueled by your personal Endurance reserves, dis-played on your Endurance bar. Your Endurance is constantly renew-ing itself at a rapid rate, but if you are using your powers aggressive-ly, it can be depleted even more rapidly. You cannot use a power ifyou do not possess sufficient Endurance reserves to fuel its use.
Most powers, including most attack powers, buffs and debuffs,deplete your Endurance by a certain amount each time they areused. Other powers, particularly defensive and movement powers,are toggled on and off. Once turned on, they will drain Endurance ata steady rate until either they are turned off or you run out ofEndurance. Most of these toggle powers, by themselves, drainEndurance at a slower rate than you naturally regain it … but ifyou’re running several toggled powers and aggressively using your attack powers, you can deplete your Endurance reserves veryrapidly.
A few powers drain no Endurance at all, and are considered to be“always on.” These include powers that increase your Healing rate,or that improve your rate of Endurance recovery. Although they arenot the most glamorous powers in the game, they are usually wellworth obtaining as early as possible.
Recharge. Powers that are not either toggled or always on require acertain amount of time to “recharge” after they are used. The amountof time depends on the power in question, and on its enhancements.The power cannot be used again until its recharge time is complete.
When a power begins to recharge, its icon in the Power Traybecomes small and dim. When the icon returns to full size and bright-ens, the power is ready to be used again. You will also get a messagein your Chat Window when a power is fully recharged.
Some, but not all, toggled powers require a recharge time after theyare turned off, before they can be reactivated.
32
Targeting
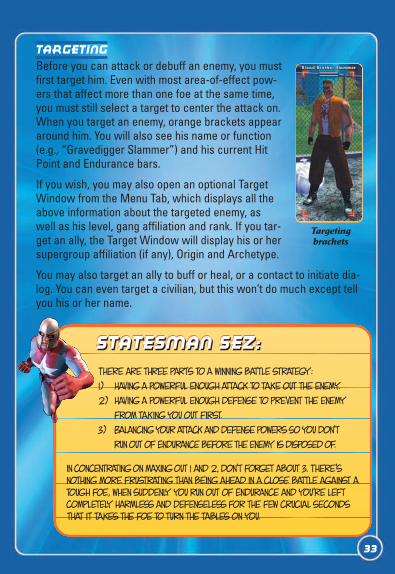
Before you can attack or debuff an enemy, you mustfirst target him. Even with most area-of-effect pow-ers that affect more than one foe at the same time,you must still select a target to center the attack on.When you target an enemy, orange brackets appeararound him. You will also see his name or function(e.g., “Gravedigger Slammer”) and his current HitPoint and Endurance bars.
If you wish, you may also open an optional TargetWindow from the Menu Tab, which displays all theabove information about the targeted enemy, aswell as his level, gang affiliation and rank. If you tar-get an ally, the Target Window will display his or hersupergroup affiliation (if any), Origin and Archetype.
You may also target an ally to buff or heal, or a contact to initiate dia-log. You can even target a civilian, but this won’t do much except tellyou his or her name.
Targetingbrackets
33
There are three parts to a winning battle strategy:1) Having a powerful enough attack to take out the enemy.2) Having a powerful enough defense to prevent the enemy
from taking you out first.3) Balancing your attack and defense powers so you don’t
run out of Endurance before the enemy is disposed of.
In concentrating on maxing out 1 and 2, don’t forget about 3. There’snothing more frustrating than being ahead in a close battle against atough foe, when suddenly you run out of Endurance and you’re leftcompletely harmless and defenseless for the few crucial secondsthat it takes the foe to turn the tables on you.
Statesman Sez:Statesman Sez:Statesman Sez:
Color Coding
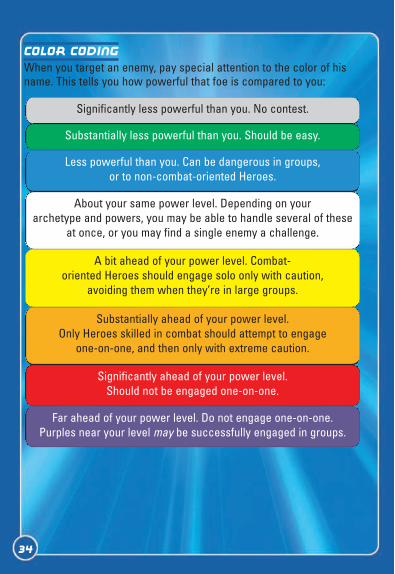
When you target an enemy, pay special attention to the color of hisname. This tells you how powerful that foe is compared to you:
34
Significantly less powerful than you. No contest.
Substantially less powerful than you. Should be easy.
Less powerful than you. Can be dangerous in groups, or to non-combat-oriented Heroes.
About your same power level. Depending on your archetype and powers, you may be able to handle several of these
at once, or you may find a single enemy a challenge.
A bit ahead of your power level. Combat-oriented Heroes should engage solo only with caution,
avoiding them when they’re in large groups.
Substantially ahead of your power level. Only Heroes skilled in combat should attempt to engage
one-on-one, and then only with extreme caution.
Significantly ahead of your power level. Should not be engaged one-on-one.
Far ahead of your power level. Do not engage one-on-one.Purples near your level may be successfully engaged in groups.

Combat Options
Assist. If you’re fighting as part of a team, and you want to focus yourattacks for maximum efficiency, you can Assist one of your teammates,so that your Hero always attacks the same target as that teammate. ToAssist a teammate, target that Hero as you enter combat, rather thanone of the enemies. Your attacks will automatically be directed againstwhichever foe the Hero you are assisting has targeted.
Auto-Attack. If you prefer to rely on a single attack type, you can setthat power to Auto-Attack, automatically going off as soon as itrecharges. To set a power to Auto-Attack, press C whilerightclicking on that power in the Power Tray.
Queued Powers. While you are executing one power, you can tell yourHero which power to use next. To queue a second power, left-click onthe power in your tray, after selecting the first power you would like touse. You can only hold one power at a time in Queue.
Knockback. Some attack powers can knock their target off his feet,and push him away from the attacker, causing him to take time to getup and move back into position. This is called Knockback. If a power iscapable of doing Knockback, the chance of a given target beingknocked back is automatically calculated each time the power hits. Asuccessful Knockback does no additional damage.
Click, Toggle and Auto. Each power is described as “Click” (click onceto use it), “Toggle” (click to turn it on, and again to turn it off), or“Auto” (it is always on, and consumes no Endurance). Don’t forget totoggle off a toggle power when you don’t need it—it’ll keep burningprecious Endurance as long as it’s on.
35
Ally Another Hero
Confuse If target is Critter (npc mon-ster), Target will attack his own alliesand ignores the player. Target can beattacked. If target is a player, Targetcan affect friends and foes equally.Confused players can heal, damage,buff and debuff friends and foes. AoEpowers affect all. Target reticule col-ors will be randomized and yourselected Target will change randomly.Confuse does not disable your Togglepowers.
Disorient Target is unable to Attackfor duration of effect. Target can moveslowly. Disorient disables your Togglepowers.
Fear Target is unable to move orattack. If target takes damage or ishealed, target is free to move for 10seconds, or execute one power,before becoming Feared again. Feardoes not disable your Toggle powers.
Hold Target is unable to move orAttack for duration of effect. Hold dis-ables your Toggle powers.
Immobilize Target is unable to movefor the duration of effect. Target can
attack. Immobilize does not disableyour Toggle powers.
Sleep Target is unable to move orAttack. If target takes damage or ishealed, target wakes. Sleep disablesyour Toggle powers.
Slow Target’s movement and attackrate are slowed.
Snare Target’s movement speed isreduced.
Taunt Taunt Forces affected villain totarget and attack you, overriding theirdesire to attack other targets. Sometaunts are Area Effect, and will causemultiple targets to target you. AllTaunts are limited in duration.
Teammate Another Hero on yourteam (some powers only affect team-mates and not Allies).
powerspowers
36
powers terminologypowers terminology
37
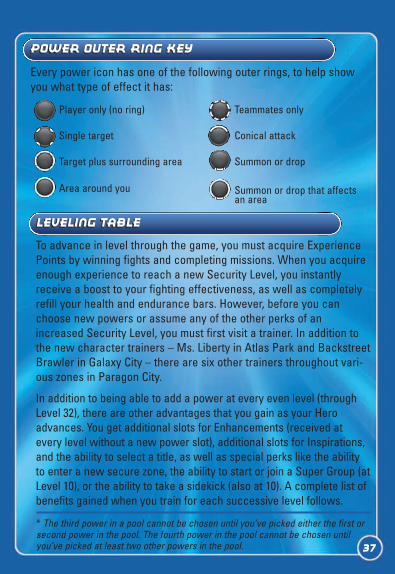
Player only (no ring)
Single target
Target plus surrounding area
Area around you
Teammates only
Conical attack
Summon or drop
Summon or drop that affectsan area
Power Outer Ring KeyPower Outer Ring Key
Every power icon has one of the following outer rings, to help showyou what type of effect it has:
To advance in level through the game, you must acquire ExperiencePoints by winning fights and completing missions. When you acquireenough experience to reach a new Security Level, you instantlyreceive a boost to your fighting effectiveness, as well as completelyrefill your health and endurance bars. However, before you canchoose new powers or assume any of the other perks of anincreased Security Level, you must first visit a trainer. In addition tothe new character trainers – Ms. Liberty in Atlas Park and BackstreetBrawler in Galaxy City – there are six other trainers throughout vari-ous zones in Paragon City.
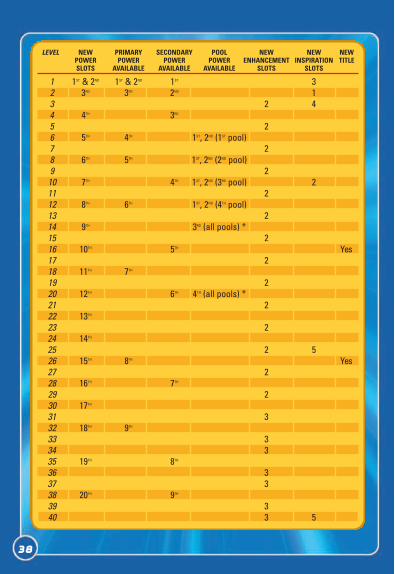
In addition to being able to add a power at every even level (throughLevel 32), there are other advantages that you gain as your Heroadvances. You get additional slots for Enhancements (received atevery level without a new power slot), additional slots for Inspirations,and the ability to select a title, as well as special perks like the abilityto enter a new secure zone, the ability to start or join a Super Group (atLevel 10), or the ability to take a sidekick (also at 10). A complete list ofbenefits gained when you train for each successive level follows.
* The third power in a pool cannot be chosen until you’ve picked either the first orsecond power in the pool. The fourth power in the pool cannot be chosen untilyou’ve picked at least two other powers in the pool.
leveling tableleveling table
38
LEVEL NEW PRIMARY SECONDARY POOL NEW NEW NEWPOWER POWER POWER POWER ENHANCEMENT INSPIRATION TITLESLOTS AVAILABLE AVAILABLE AVAILABLE SLOTS SLOTS
1 1ST & 2ND 1ST & 2ND 1ST 32 3RD 3RD 2ND 13 2 44 4TH 3RD
5 26 5TH 4TH 1ST, 2ND (1ST pool)7 28 6TH 5TH 1ST, 2ND (2ND pool)9 2
10 7TH 4TH 1ST, 2ND (3RD pool) 211 212 8TH 6TH 1ST, 2ND (4TH pool)13 214 9TH 3RD (all pools) *15 216 10TH 5TH Yes17 218 11TH 7TH
19 220 12TH 6TH 4TH (all pools) *21 222 13TH
23 224 14TH
25 2 526 15TH 8TH Yes27 228 16TH 7TH
29 230 17TH
31 332 18TH 9TH
33 334 335 19TH 8TH
36 337 338 20TH 9TH
39 340 3 5
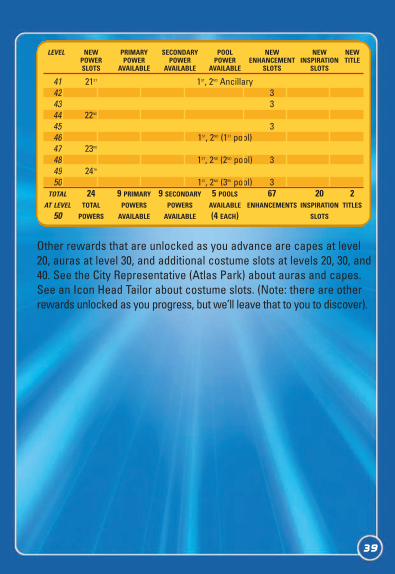
Other rewards that are unlocked as you advance are capes at level20, auras at level 30, and additional costume slots at levels 20, 30, and40. See the City Representative (Atlas Park) about auras and capes.See an Icon Head Tailor about costume slots. (Note: there are otherrewards unlocked as you progress, but we’ll leave that to you to discover).
LEVEL NEW PRIMARY SECONDARY POOL NEW NEW NEWPOWER POWER POWER POWER ENHANCEMENT INSPIRATION TITLESLOTS AVAILABLE AVAILABLE AVAILABLE SLOTS SLOTS
41 21ST 1ST, 2ND Ancillary42 343 344 22ND
45 346 1ST, 2ND (1ST pool)47 23RD
48 1ST, 2ND (2ND pool) 349 24TH
50 1ST, 2ND (3RD pool) 3TOTAL 24 9 PRIMARY 9 SECONDARY 5 POOLS 67 20 2
AT LEVEL TOTAL POWERS POWERS AVAILABLE ENHANCEMENTS INSPIRATION TITLES
50 POWERS AVAILABLE AVAILABLE (4 EACH) SLOTS
39
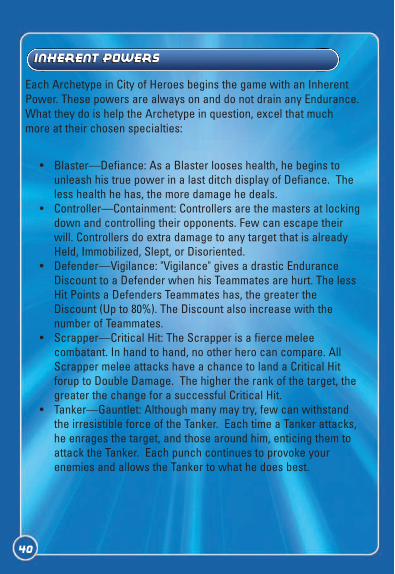
Each Archetype in City of Heroes begins the game with an InherentPower. These powers are always on and do not drain any Endurance.What they do is help the Archetype in question, excel that muchmore at their chosen specialties:
• Blaster—Defiance: As a Blaster looses health, he begins to unleash his true power in a last ditch display of Defiance. The less health he has, the more damage he deals.
• Controller—Containment: Controllers are the masters at lockingdown and controlling their opponents. Few can escape their will. Controllers do extra damage to any target that is already Held, Immobilized, Slept, or Disoriented.
• Defender—Vigilance: "Vigilance" gives a drastic Endurance Discount to a Defender when his Teammates are hurt. The less Hit Points a Defenders Teammates has, the greater the Discount (Up to 80%). The Discount also increase with the number of Teammates.
• Scrapper—Critical Hit: The Scrapper is a fierce melee combatant. In hand to hand, no other hero can compare. All Scrapper melee attacks have a chance to land a Critical Hit forup to Double Damage. The higher the rank of the target, the greater the change for a successful Critical Hit.
• Tanker—Gauntlet: Although many may try, few can withstand the irresistible force of the Tanker. Each time a Tanker attacks, he enrages the target, and those around him, enticing them to attack the Tanker. Each punch continues to provoke yourenemies and allows the Tanker to what he does best.
40
inherent powersinherent powers
41
Multiple Builds allows you to set 2 different builds of your characterfor gameplay. This lets you customize each build for different playstyles, such as a build setup for soloing and a build setup for groupor role-playing. When you set your different builds, you are allowedto change your power selections and your enhancement slotting ofthose powers.
To set up multiple builds and change between builds, go to any train-er and click “Select Your Active Build”. You will need to “level up”your new build to your character’s current Experience Level by train-ing at the trainer. Any Enhancement Slots on the alternate build willbe empty and new Enhancements must be slotted in. Enhancementsused in another build can not be “copied” into the new build.
multiple buildsmultiple Builds
42
InfluenceInfluence
EnhancementsEnhancements
Whenever you defeat an enemy or complete a mission, you receiveExperience Points and Influence Points.
The greater the deed, the greater the Influence you receive. You mayuse your Influence to acquire Enhancements and Inspirations. Youmay also trade Influence with other Heroes. Influence represents therespect you’ve earned from Paragon City, its citizens and your fellowHeroes, and you use it to improve your ability to combat the forces ofevil. Once accrued Influence is used, it is gone for good.
You can acquire Enhancements and Inspirations using Influence fromSuperpowered Field Trainers (look for uniformed Heroes, usuallynear a trainer or Signature Hero), from your Contacts, or from Storeslocated throughout Paragon City.
POWERING UP
Enhancements may be received as a reward when you win a battle. They may also be traded with other Heroes, or acquired with Influence.
Enhancements increase the effectiveness of your powers. They arenot permanent, but they do have the potential to last for several levels before needing to be replaced.

43
You receive new Enhancement Slots at every level without a newpower slot. It is up to you to decide which of your powers will receivethe new Enhancement Slots. The more Enhancement Slots you attachto a power, the more aspects of that power that can be enhanced. To place an Enhancement, just click-and-drag it to a slot in the appropriate power. Once an Enhancement is placed in a slot, it is locked there. It cannot be moved, but it can be discarded. (To discard an Enhancement—an action usually performed when thatEnhancement is no longer effective—from the Enhancement screen,click and drag it with your mouse to the trashcan at the lower leftcorner of the screen.)
In addition to the Enhancements you assign to powers, you have an inventory of 10 slots in which you can carry unassignedEnhancements. Enhancements in inventory that you have no use for may be turned in at a Store, in exchange for Influence. To find outif you can use an Enhancement in Inventory with any of your current powers, just click and hold on the Enhancement. If a power is compatible with it, the power’s Enhancement slots will highlightgreen; otherwise they will shade to gray.
If you don’t currently have any room in your Power Tray for moreEnhancements, the word “Enhancement” will turn red.
There are twenty-seven different types of Enhancements. They have various names, depending on their Origins, but each type is colorcoded. The twenty-seven are listed below, with a correspondingcolored emblem. Unless otherwise noted, the name of theEnhancement indicates the kind of power that it improves. Note thatsome Enhancements can be used with a broad range of different powers, while others are highly specific, applying only to a very few powers.
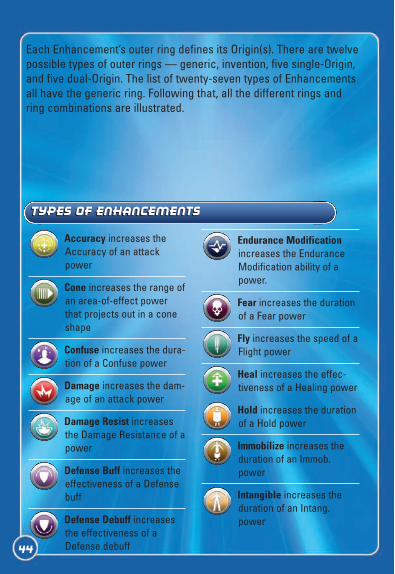
Each Enhancement’s outer ring defines its Origin(s). There are twelvepossible types of outer rings — generic, invention, five single-Origin,and five dual-Origin. The list of twenty-seven types of Enhancementsall have the generic ring. Following that, all the different rings andring combinations are illustrated.
44
Types of EnhancementsTypes of Enhancements
Accuracy increases theAccuracy of an attackpower
Cone increases the range ofan area-of-effect powerthat projects out in a coneshape
Confuse increases the dura-tion of a Confuse power
Damage increases the dam-age of an attack power
Damage Resist increasesthe Damage Resistance of apower
Defense Buff increases theeffectiveness of a Defensebuff
Defense Debuff increasesthe effectiveness of aDefense debuff
Endurance Modificationincreases the EnduranceModification ability of apower.
Fear increases the durationof a Fear power
Fly increases the speed of aFlight power
Heal increases the effec-tiveness of a Healing power
Hold increases the durationof a Hold power
Immobilize increases theduration of an Immob.power
Intangible increases theduration of an Intang.power
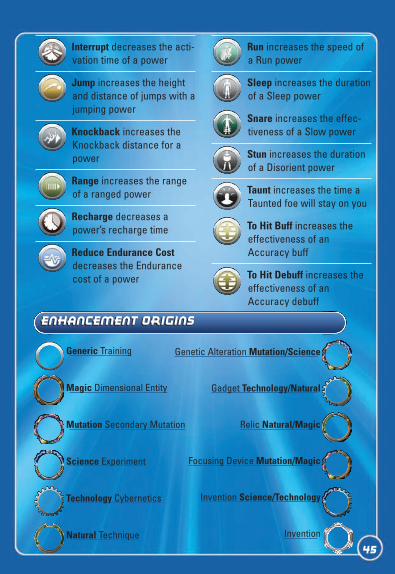
Interrupt decreases the acti-vation time of a power
Jump increases the heightand distance of jumps with ajumping power
Knockback increases theKnockback distance for apower
Range increases the rangeof a ranged power
Recharge decreases apower’s recharge time
Reduce Endurance Costdecreases the Endurancecost of a power
Run increases the speed ofa Run power
Sleep increases the durationof a Sleep power
Snare increases the effec-tiveness of a Slow power
Stun increases the durationof a Disorient power
Taunt increases the time aTaunted foe will stay on you
To Hit Buff increases theeffectiveness of anAccuracy buff
To Hit Debuff increases theeffectiveness of anAccuracy debuff
45
Enhancement OriginsEnhancement Origins
Generic Training
Magic Dimensional Entity
Mutation Secondary Mutation
Science Experiment
Technology Cybernetics
Natural Technique
Genetic Alteration Mutation/Science
Gadget Technology/Natural
Relic Natural/Magic
Focusing Device Mutation/Magic
Invention Science/Technology
Invention
Remember the Enhancement Mantra for Enhancements that youcan slot and are not grayed out: Regardless of level, a sin-gle-Origin Enhancement is always better than a dual-OriginEnhancement, which is always better than a generic enhancement.
Statesman Sez:Statesman Sez:Statesman Sez:
Enhancement StrengthEnhancement Strength
The least powerful Enhancements are training, or generic. Heroes ofany Origin can use them. If you are purchasing Enhancements, theseare cheapest.
The dual-Origin Enhancements are more powerful. Enhancements ofthis type can be used by characters of two specific Origins. Thereare five dual-Origin pairings: Mutation-Magic, Mutation-Science,Science-Technology, Technology-Natural and Natural-Magic.
The most powerful are the Invention-Origin Enhancements. There arecreated by combining salvage found or acquired throughout thegame and crafting them at a University or Base crafting station. Youcan also acquire these through Wentworth’s Consignment Houseslocated in various zones.
Enhancements that are higher than your own level have a greatereffect on your powers than Enhancements that are at your own levelor lower. However, any usable dual-Origin Enhancement is betterthan any usable generic Enhancement, regardless of level. Similarly,any usable single-Origin Enhancement is better than any usable dual-Origin Enhancement. The Exception is with Invention OriginEnhancements, which have a static bonus that remains constant nomatter what level you are. This may or may not be better than aGeneric, Dual, or Single Origin Enhancement of the same level, butInvention Enhancements never expire.
46
47
You can combine similar Enhancements to increase their effective level.To be combined, Enhancements must be identical in effect and in Origintype. They do not have to be identical in level, but the closer the levelthe more likely the combination will be successful.
Just click on an Enhancement that’s already been assigned to a Powerto open the Combination Mode screen. You may attempt to combine anEnhancement with one from inventory, or with one that has beenassigned to the same power. When two compatible Enhancements areslotted to be combined, the game will figure the odds of a successfulcombination based on the difference in level between them (the closerthe better).
If you want to win the most powerful Enhancements in battle, tryto find an enemy that’s close to your Origin in concept. Forexample, a mystical group of villains like the Circle of Thornsis more likely to yield Magic enhancements, less likely to yieldTechnology. Also, if you are acquiring Enhancements at a store,keep in mind that different stores cater to specific Origins.For the best items, make sure you find a store that matchesyour needs.
Statesman Sez:Statesman Sez:Statesman Sez:
Combining EnhancementsCombining Enhancements
48
When you reach a point where you can buy and use Single OriginEnhancements, you’ll find that stacking more than three of thesame type in a power will result in diminishing returns. In fact,the more you stack past 3, the greater the diminishing returnto the point where it’s not uncommon that it would result in a50% less effective Enhancment. Moral of the story: diversifyyour Enhancements and don’t stack one type in all six slots!
Statesman Sez:Statesman Sez:Statesman Sez:
If the combination is successful, the higher-level Enhancement willbe improved by one level. Regardless of a successful or failed com-bination attempt, the lower-level Enhancement will be lost for good.
If an Enhancement has been improved twice — that is, it is operat-ing two levels above its original level — it cannot be improved fur-ther. However, it can be used to improve a still-higher Enhancement.
49
InspirationsInspirations
Inspirations may be received as a reward when you win a battle.They may also be traded with other Heroes, or acquired withInfluence.
An Inspiration is a one-shot power-up — a little extra boost to helpyou through a particularly tight situation. Once you use an Inspirationit is gone for good.
You have a limited number of “inventory slots” for Inspirations. Theexact number of Inspirations you can carry at any time depends onyour level.
You can activate an Inspiration by clicking on it in the InspirationWindow. The bottom row of Inspirations is also mapped to the func-tion keys on your keyboard. So you can use an Inspiration by clickingon 1, 2 and so forth. You can click-and-drag Inspirationsaround the Inspiration menu to position them as you like. If you havemore than one row of Inspirations, you can click on the arrow icon tosize your window to display either all Inspirations, or only the bottom(hot-keyed) row. There are seven different types of Inspiration, eachof which comes in three power levels. The higher the level of theopponent from whom you won the Inspiration, the more powerful it islikely to be.
50
When you use an Inspiration, you have to wait for the currentlyactive power to finish before the Inspiration will take effect. Soif you use an Inspiration in the heat of battle, make sure you canspare the time it will take. Better yet, whenever possible andpractical, activate your Inspirations before entering battle.
Statesman Sez:Statesman Sez:Statesman Sez:
If you have 3 or more of the same Inspiration, you can combine 3 ofthem to form a different Inspiration of the same strength. To do this,simply right-click on one of the Inspirations you want to combine,scroll down and mouse over the "Combine 3 into..." option, and selectthe new Inspiration you would like.
51
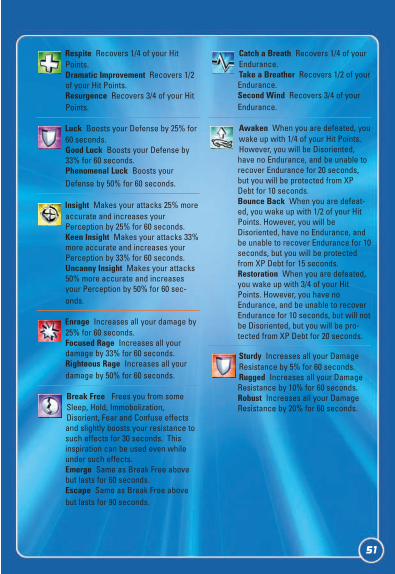
Respite Recovers 1/4 of your HitPoints.Dramatic Improvement Recovers 1/2of your Hit Points.Resurgence Recovers 3/4 of your HitPoints.
Luck Boosts your Defense by 25% for60 seconds.Good Luck Boosts your Defense by33% for 60 seconds.Phenomenal Luck Boosts yourDefense by 50% for 60 seconds.
Insight Makes your attacks 25% moreaccurate and increases yourPerception by 25% for 60 seconds.Keen Insight Makes your attacks 33%more accurate and increases yourPerception by 33% for 60 seconds.Uncanny Insight Makes your attacks50% more accurate and increasesyour Perception by 50% for 60 sec-onds.
Enrage Increases all your damage by25% for 60 seconds.Focused Rage Increases all yourdamage by 33% for 60 seconds.Righteous Rage Increases all yourdamage by 50% for 60 seconds.
Break Free Frees you from someSleep, Hold, Immobolization,Disorient, Fear and Confuse effectsand slightly boosts your resistance tosuch effects for 30 seconds. Thisinspiration can be used even whileunder such effects. Emerge Same as Break Free abovebut lasts for 60 seconds.Escape Same as Break Free abovebut lasts for 90 seconds.
Catch a Breath Recovers 1/4 of yourEndurance.Take a Breather Recovers 1/2 of yourEndurance.Second Wind Recovers 3/4 of yourEndurance.
Awaken When you are defeated, youwake up with 1/4 of your Hit Points.However, you will be Disoriented,have no Endurance, and be unable torecover Endurance for 20 seconds,but you will be protected from XPDebt for 10 seconds.Bounce Back When you are defeat-ed, you wake up with 1/2 of your HitPoints. However, you will beDisoriented, have no Endurance, andbe unable to recover Endurance for 10seconds, but you will be protectedfrom XP Debt for 15 seconds.Restoration When you are defeated,you wake up with 3/4 of your HitPoints. However, you have noEndurance, and be unable to recoverEndurance for 10 seconds, but will notbe Disoriented, but you will be pro-tected from XP Debt for 20 seconds.
Sturdy Increases all your DamageResistance by 5% for 60 seconds.Rugged Increases all your DamageResistance by 10% for 60 seconds.Robust Increases all your DamageResistance by 20% for 60 seconds.
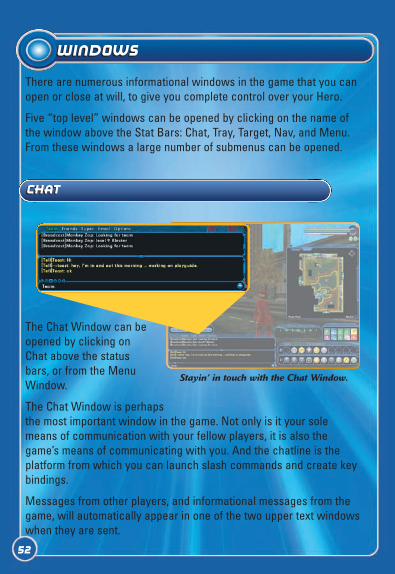
The Chat Window can beopened by clicking onChat above the statusbars, or from the MenuWindow.
The Chat Window is perhapsthe most important window in the game. Not only is it your solemeans of communication with your fellow players, it is also thegame’s means of communicating with you. And the chatline is theplatform from which you can launch slash commands and create keybindings.
Messages from other players, and informational messages from thegame, will automatically appear in one of the two upper text windowswhen they are sent.
52
WindowsWindows
chatChat
There are numerous informational windows in the game that you canopen or close at will, to give you complete control over your Hero.
Five “top level” windows can be opened by clicking on the name ofthe window above the Stat Bars: Chat, Tray, Target, Nav, and Menu.From these windows a large number of submenus can be opened.
Stayin’ in touch with the Chat Window.

In order to communicate with other Heroes using Chat, make surethat you have selected the channel you want, click on the empty Chatline at the bottom of the Chat Window, and type your message. Whenyou are finished, hit enter to send the message.
Within the chat window, Player, Power, Enhancement, Recipe,Inspiration, and Salvage names are clickable.
Clicking on a Player Name will open a menu that will allow you to usethe following commands:· Chat · Invite to Team · Add Friend · Ignore · Ignore Spammer
Clicking on a Power, Enhancement, Recipe,Inspiration, or Salvage name will open the infowindow for those items. In addition to this, youcan drag and drop any of these items into the chatwindow to create a clickabled link.
There are also a lot of built in Slash Commandsthat you can execute in the Chat Window. Formore on this and creating key bindings, pleasesee the Slash Commands section.
Tells. To send a message to a specific Hero onyour current server, you can send a “Tell.” Tosend a Tell, type:
/tell <hero’s name>, <your message>e
53
Note the comma between the Hero’s name and the message. The Tellwon’t work without it. Of course, for the Tell to work the Hero must beonline at the time it is sent. A Tell is the most common of the slashcommands.
Ignore. If you no longer wish to communicate with another player forany reason, you may Ignore him. This command stops you fromreceiving any further messages from that Hero. To Ignore someone,type:
/ignore <hero name> e
This will add that Hero to your Ignore list, and will ignore themon all global channels, as well as ignore all local characters andany new characters they create.
To remove a Hero from your Ignore list type in your Chat line:
/unignore <hero name> e
You can ignore up to 200 characters.
Global Chat
Global Chat is a method for you to communicate with your friends inCity of Heroes no matter what character they are playing, or evenwhat server they are playing on. You only need to know their “GlobalChat Handle” to send messages to.
The Global Chat Handle is an all encompassing handle that coversevery character you make. They can all be talked to through this onehandle. Global Chat Handles have an @ symbol at the beginning ofthem to differentiate them from normal character names. Your GlobalChat Handle is set when you log in, but you can change it (one timeonly) by using the command:
/change_handle <global name> e
/change_handle where <global name> is the new handle that you
wish to have. Again, you can only use this command once, ever,54
tochange your handle.
To send messages to someone’s Global Chat Handle, simply use theTell command, using an @ before the player’s Global Chat Handle,such as:
/tell @<global name>, <your message> e
tabs
If you are simply getting too much information in your chat window,you can filter out what dialog goes to what window by using Tabs.Simply right click the tab you wish to edit the filters on and select Edittab from the list. Here you will see what channels are currently beingsent to this tab (shown in the column on the left) and what channelsare also available (shown in the column on the right). Just highlightthe channel and select “Add” or “Remove” to add or remove thechannel from the tab.
Global Channels
You can create your own channel, and invite others to it using theTab interface. To create a channel either edit a tab, or click the Tabbutton in the chat window and select Create Channel. You will thenbe prompted to name your channel. With the channel named, you willautomatically join it in the currently selected tab.
Clicking the channel name of a global chat channel will give theseoptions:· Send Message · List Members · Set MotD · Set Description · Leave Channel · Set Color - allows you to set your global channel display colors.
55
Others can join your channel by selecting “Join Channel” and enter-ing the exact name of the channel you created.
As the moderator of the channel, right-clicking on a players namewill give additional options:· Silence/Unsilence · Kick
Team
This window can be opened from the Chat Window or the MenuWindow.
The Team Window contains information about any Heroes you maycurrently be teamed up with. You will see their names and Archetypeicon, plus Hit Point and Endurance bars to help you track their condi-tion. For more information about a Hero, you can right-click on his orher name in this window. It is strongly recommended that you keepthis window open whenever you are involved in a team up.
Looking for group
You can broadcast the fact that you are looking for a team of playersto group up with temporarily using the Looking for Group function.Simply click on the Team button in your chat window and you will see a drop down that lets you select what kind of group you are looking for:
Looking for any (Accept any team type)Looking for patrol (Only Street Patrolling)Looking for missions (Only Door Missions)Looking for TF (Only Task Forces)
56
Looking for Trial (Only Trials)Looking for Arena (Only Arena events)
You can also add in a search comment which will show up on the listwhen someone does a Find Member that meets a parameter you fit.
When the Find Member button is clicked you will then see a list ofoptions for you to select from. You can seek out specific Archetypes,Origins, Maps, Levels, and “Looking for” preferences and then clickSearch and the game will show you a list of Heroes who are lookingfor groups meeting all appropriate criteria. You can then use the Tellor Invite buttons to talk to (or invite) those characters. It is a commoncourtesy to send a character a tell before inviting them to a team tosee if they are a good fit for your group.
Friends
This window can be opened from the Chat Window or the MenuWindow.
Opening Friends displays your Friends list. To add a Hero to yourFriends list, type in the chat line:
/friend <hero name> e
The Friends Window tells you which of your Friends are currentlyonline and, if so, which zone they are in.
If you click on a friend’s entry to highlight it, then right-click on it, youwill open a window from which you may:
Chat (send a tell to your friend)Remove Friend (remove from Friends List)Invite to Team
If you are the leader of a Super Group (see the Super Groups section)this window will also contain various group-related options (Invite toor Kick from group, Promote or Demote).
You also have a Global Friends list separate from your normal Friendslist. The Global list contains the Global Chat Handles of your City of
57
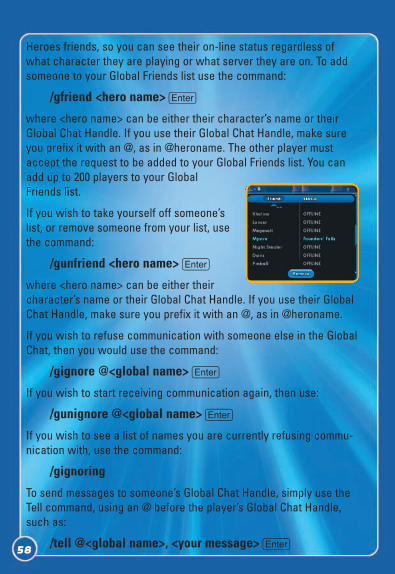
Heroes friends, so you can see their on-line status regardless ofwhat character they are playing or what server they are on. To addsomeone to your Global Friends list use the command:
/gfriend <hero name> e
where <hero name> can be either their character’s name or theirGlobal Chat Handle. If you use their Global Chat Handle, make sureyou prefix it with an @, as in @heroname. The other player mustaccept the request to be added to your Global Friends list. You canadd up to 200 players to your GlobalFriends list.
If you wish to take yourself off someone’slist, or remove someone from your list, usethe command:
/gunfriend <hero name> e
where <hero name> can be either theircharacter’s name or their Global Chat Handle. If you use their GlobalChat Handle, make sure you prefix it with an @, as in @heroname.
If you wish to refuse communication with someone else in the GlobalChat, then you would use the command:
/gignore @<global name> e
If you wish to start receiving communication again, then use:
/gunignore @<global name> e
If you wish to see a list of names you are currently refusing commu-nication with, use the command:
/gignoring
To send messages to someone’s Global Chat Handle, simply use theTell command, using an @ before the player’s Global Chat Handle,such as:
/tell @<global name>, <your message> e58
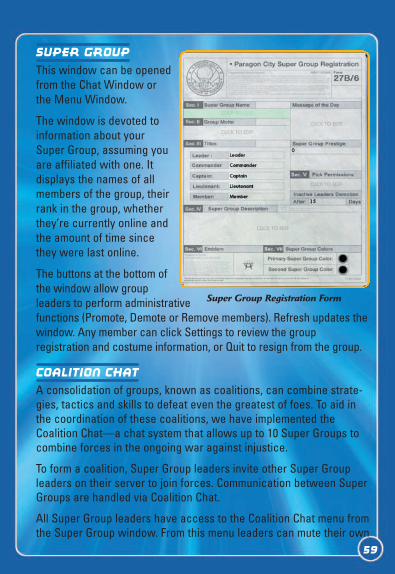
Super Group
This window can be openedfrom the Chat Window orthe Menu Window.
The window is devoted toinformation about yourSuper Group, assuming youare affiliated with one. Itdisplays the names of allmembers of the group, theirrank in the group, whetherthey’re currently online andthe amount of time sincethey were last online.
The buttons at the bottom ofthe window allow groupleaders to perform administrativefunctions (Promote, Demote or Remove members). Refresh updates thewindow. Any member can click Settings to review the group registration and costume information, or Quit to resign from the group.
Coalition Chat
A consolidation of groups, known as coalitions, can combine strate-gies, tactics and skills to defeat even the greatest of foes. To aid inthe coordination of these coalitions, we have implemented theCoalition Chat—a chat system that allows up to 10 Super Groups tocombine forces in the ongoing war against injustice.
To form a coalition, Super Group leaders invite other Super Groupleaders on their server to join forces. Communication between SuperGroups are handled via Coalition Chat.
All Super Group leaders have access to the Coalition Chat menu fromthe Super Group window. From this menu leaders can mute their own
59
Super Group Registration Form
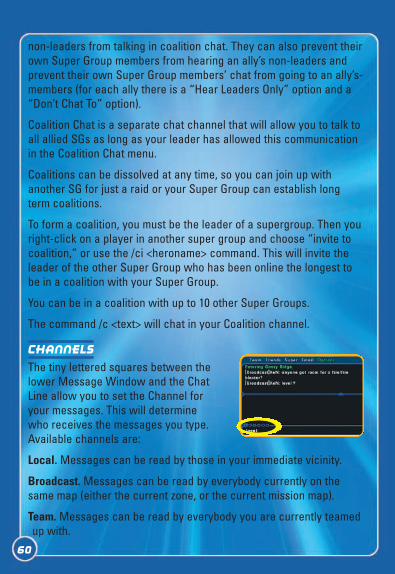
non-leaders from talking in coalition chat. They can also prevent theirown Super Group members from hearing an ally’s non-leaders andprevent their own Super Group members’ chat from going to an ally’s-members (for each ally there is a “Hear Leaders Only” option and a“Don’t Chat To” option).
Coalition Chat is a separate chat channel that will allow you to talk toall allied SGs as long as your leader has allowed this communicationin the Coalition Chat menu.
Coalitions can be dissolved at any time, so you can join up withanother SG for just a raid or your Super Group can establish longterm coalitions.
To form a coalition, you must be the leader of a supergroup. Then youright-click on a player in another super group and choose “invite tocoalition,” or use the /ci <heroname> command. This will invite theleader of the other Super Group who has been online the longest tobe in a coalition with your Super Group.
You can be in a coalition with up to 10 other Super Groups.
The command /c <text> will chat in your Coalition channel.
Channels
The tiny lettered squares between thelower Message Window and the ChatLine allow you to set the Channel for your messages. This will determine who receives the messages you type.Available channels are:
Local. Messages can be read by those in your immediate vicinity.
Broadcast. Messages can be read by everybody currently on thesame map (either the current zone, or the current mission map).
Team. Messages can be read by everybody you are currently teamedup with.
60
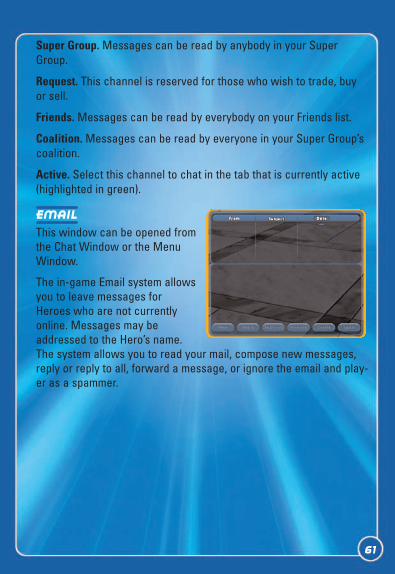
Super Group. Messages can be read by anybody in your SuperGroup.
Request. This channel is reserved for those who wish to trade, buyor sell.
Friends. Messages can be read by everybody on your Friends list.
Coalition. Messages can be read by everyone in your Super Group’scoalition.
Active. Select this channel to chat in the tab that is currently active(highlighted in green).
This window can be opened fromthe Chat Window or the MenuWindow.
The in-game Email system allowsyou to leave messages forHeroes who are not currentlyonline. Messages may beaddressed to the Hero’s name.The system allows you to read your mail, compose new messages,reply or reply to all, forward a message, or ignore the email and play-er as a spammer.
61
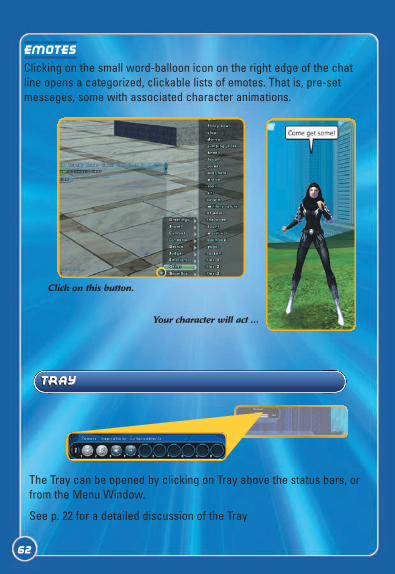
Emotes
Clicking on the small word-balloon icon on the right edge of the chatline opens a categorized, clickable lists of emotes. That is, pre-setmessages, some with associated character animations.
62
Click on this button.
Your character will act ...
TrayTray
The Tray can be opened by clicking on Tray above the status bars, orfrom the Menu Window.
See p. 22 for a detailed discussion of the Tray
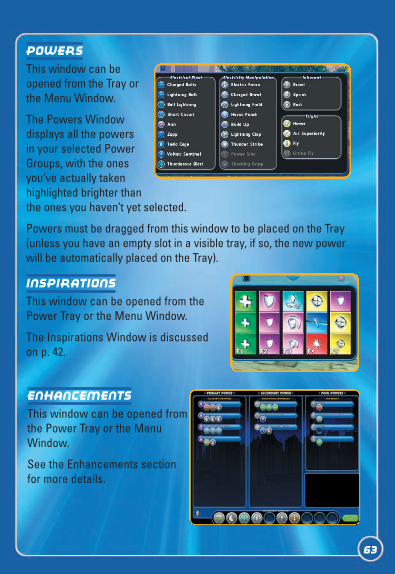
63
Powers
This window can beopened from the Tray orthe Menu Window.
The Powers Windowdisplays all the powersin your selected PowerGroups, with the onesyou’ve actually takenhighlighted brighter thanthe ones you haven’t yet selected.
Powers must be dragged from this window to be placed on the Tray(unless you have an empty slot in a visible tray, if so, the new powerwill be automatically placed on the Tray).
Inspirations
This window can be opened from thePower Tray or the Menu Window.
The Inspirations Window is discussedon p. 42.
Enhancements
This window can be opened fromthe Power Tray or the MenuWindow.
See the Enhancements sectionfor more details.
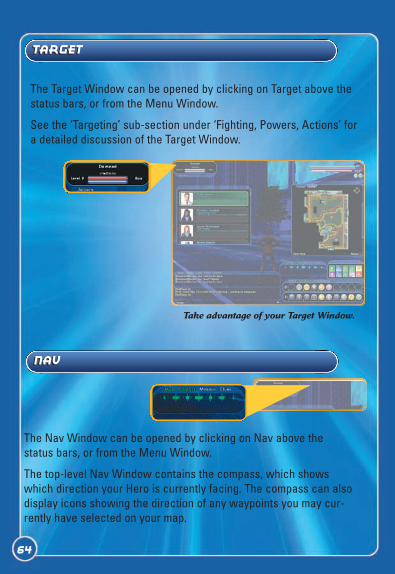
64
TargetTarget
The Target Window can be opened by clicking on Target above thestatus bars, or from the Menu Window.
See the ‘Targeting’ sub-section under ‘Fighting, Powers, Actions’ fora detailed discussion of the Target Window.
Take advantage of your Target Window.
NavNav
The Nav Window can be opened by clicking on Nav above the status bars, or from the Menu Window.
The top-level Nav Window contains the compass, which showswhich direction your Hero is currently facing. The compass can alsodisplay icons showing the direction of any waypoints you may cur-rently have selected on your map.
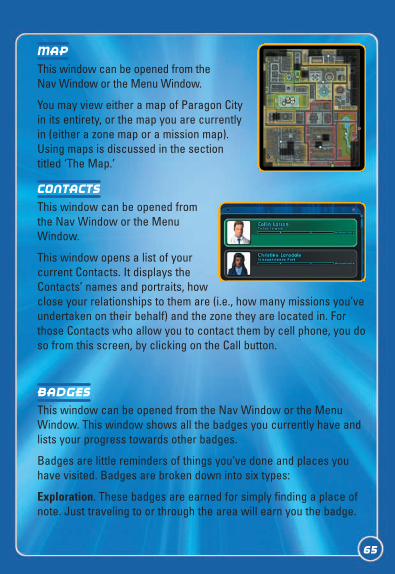
65
Map
This window can be opened from theNav Window or the Menu Window.
You may view either a map of Paragon Cityin its entirety, or the map you are currentlyin (either a zone map or a mission map).Using maps is discussed in the sectiontitled ‘The Map.’
Contacts
This window can be opened fromthe Nav Window or the MenuWindow.
This window opens a list of yourcurrent Contacts. It displays theContacts’ names and portraits, howclose your relationships to them are (i.e., how many missions you’veundertaken on their behalf) and the zone they are located in. Forthose Contacts who allow you to contact them by cell phone, you doso from this screen, by clicking on the Call button.
badges
This window can be opened from the Nav Window or the MenuWindow. This window shows all the badges you currently have andlists your progress towards other badges.
Badges are little reminders of things you’ve done and places youhave visited. Badges are broken down into six types:
Exploration. These badges are earned for simply finding a place ofnote. Just traveling to or through the area will earn you the badge.
History. History badges are collected by reading plaques in ParagonCity. Various plaques are placed all throughout the city, and somerelate to one another. By reading all plaques of a particular subject,you can earn yourself a History badge on that subject.
Accomplishment. Completing certain Missions or Task Forces canearn you these badges.
Achievement. Achieving specific goals, such as defeating so many ofa specific villain or taking so much damage, can earn you thesebadges. Some of these will have a meter showing you your progresstowards earning the badge.
Accolade. These badges are not earned by themselves, but by collecting badges in the Exploration, History, Accomplishment, andAchievement areas that all relate to one another. Once you have allthe badges that an Accolade requires, you will be issued the Accoladebadge and along with it a permanent ability added to your character.
Gladiator. These badges can be earned in a variety of ways, includingany combination of the above as you are playing your hero. Gladiatorbadges unlock “gladiators” for use in Gladiator battles in the Arena.
Veteran. These badges are earned over time the longer you play thegame and are awarded in 3 month increments. These badges alsogive a variety of awards, such as Temporary Powers, Costumepieces, and more.
Badge names are also a Title that you can attach to your character.You can add this title to your character by clicking on the badge inyour Badge List. Other characters will then see this title below yourCharacter’s name. You can turn this off by selecting “Clear BadgeTitle” in the Badge window.
66
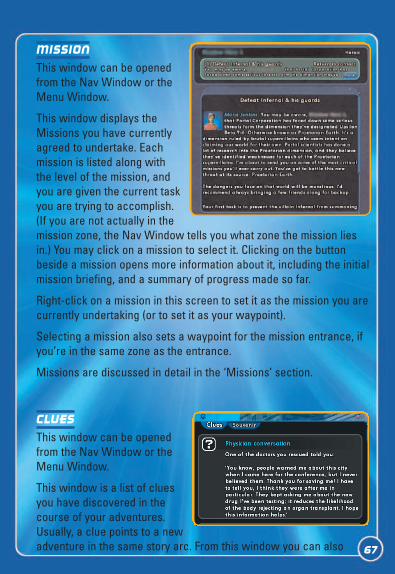
Mission
This window can be openedfrom the Nav Window or theMenu Window.
This window displays theMissions you have currentlyagreed to undertake. Eachmission is listed along withthe level of the mission, andyou are given the current taskyou are trying to accomplish.(If you are not actually in themission zone, the Nav Window tells you what zone the mission liesin.) You may click on a mission to select it. Clicking on the buttonbeside a mission opens more information about it, including the initialmission briefing, and a summary of progress made so far.
Right-click on a mission in this screen to set it as the mission you arecurrently undertaking (or to set it as your waypoint).
Selecting a mission also sets a waypoint for the mission entrance, ifyou’re in the same zone as the entrance.
Missions are discussed in detail in the ‘Missions’ section.
Clues
This window can be openedfrom the Nav Window or theMenu Window.
This window is a list of cluesyou have discovered in thecourse of your adventures.Usually, a clue points to a newadventure in the same story arc. From this window you can also 67
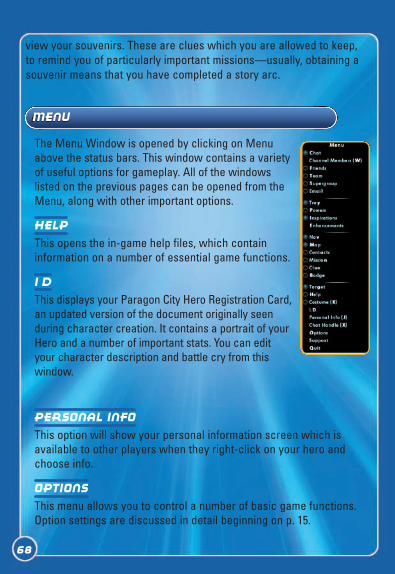
68
The Menu Window is opened by clicking on Menuabove the status bars. This window contains a varietyof useful options for gameplay. All of the windows listed on the previous pages can be opened from theMenu, along with other important options.
Help
This opens the in-game help files, which containinformation on a number of essential game functions.
I D
This displays your Paragon City Hero Registration Card,an updated version of the document originally seenduring character creation. It contains a portrait of yourHero and a number of important stats. You can edityour character description and battle cry from thiswindow.
Personal Info
This option will show your personal information screen which isavailable to other players when they right-click on your hero andchoose info.
Options
This menu allows you to control a number of basic game functions.Option settings are discussed in detail beginning on p. 15.
menuMEnu
view your souvenirs. These are clues which you are allowed to keep,to remind you of particularly important missions—usually, obtaining asouvenir means that you have completed a story arc.
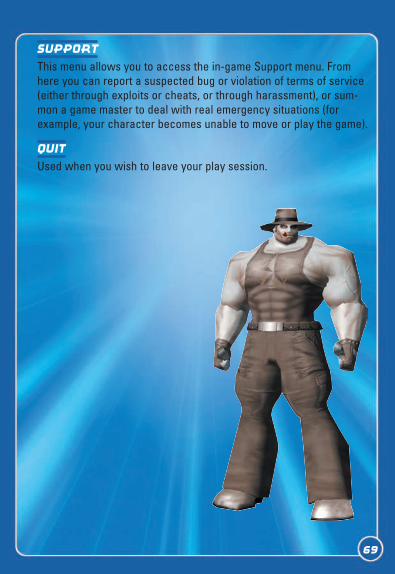
69
Support
This menu allows you to access the in-game Support menu. Fromhere you can report a suspected bug or violation of terms of service(either through exploits or cheats, or through harassment), or sum-mon a game master to deal with real emergency situations (forexample, your character becomes unable to move or play the game).
Quit
Used when you wish to leave your play session.
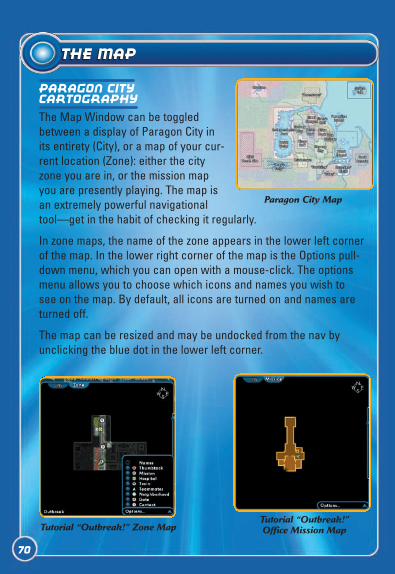
The MapThe Map
Paragon CityCartography
The Map Window can be toggledbetween a display of Paragon City inits entirety (City), or a map of your cur-rent location (Zone): either the cityzone you are in, or the mission mapyou are presently playing. The map isan extremely powerful navigationaltool—get in the habit of checking it regularly.
In zone maps, the name of the zone appears in the lower left cornerof the map. In the lower right corner of the map is the Options pull-down menu, which you can open with a mouse-click. The optionsmenu allows you to choose which icons and names you wish to see on the map. By default, all icons are turned on and names areturned off.
The map can be resized and may be undocked from the nav byunclicking the blue dot in the lower left corner.
70
Paragon City Map
Tutorial “Outbreak!” Zone MapTutorial “Outbreak!” Office Mission Map
71
Until you have visited a location,it will not appear on your map
with full clarity. Zone maps aregrayed out except for those places
you’ve actually visited, while missionmaps are completely dark except for
the areas you’ve already explored.
When you are teamed up in a missionmap, the map is visible if any mem-
ber of the team has been to thearea. This is not true of zone maps.
Fog of WarFog of War
It’s a good idea to spend a little extra time on missions to geta good, complete mission map. Be especially careful in cave andsewer areas, which can be confusing. Take special care to geta good solid outline of the outer walls of large chambers…you might miss a narrow doorway leading to something significant.
Statesman Sez:Statesman Sez:Statesman Sez:
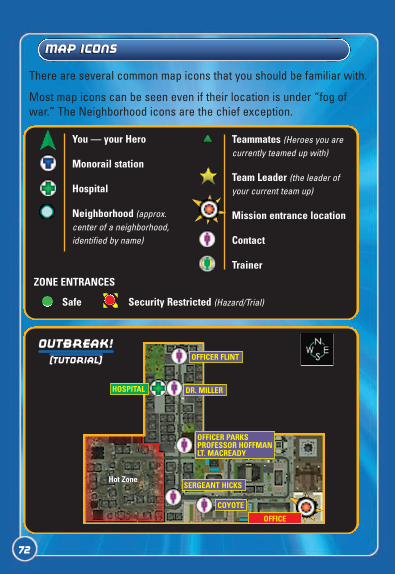
72
Map IconsMap Icons
There are several common map icons that you should be familiar with.
Most map icons can be seen even if their location is under “fog ofwar.” The Neighborhood icons are the chief exception.
OFFICER FLINT
DR. MILLER
OFFICER PARKSPROFESSOR HOFFMANLT. MACREADY
SERGEANT HICKS
COYOTE
HOSPITAL
Hot Zone
OFFICE
OUTBREAK!(TUTORIAL)
You — your Hero
Monorail station
Hospital
Neighborhood (approx.center of a neighborhood,identified by name)
Teammates (Heroes you arecurrently teamed up with)
Team Leader (the leader ofyour current team up)
Mission entrance location
Contact
Trainer
ZONE ENTRANCES
Safe Security Restricted (Hazard/Trial)
You can click on any Icon on the map (except the one representingyourself[EM]there’s just no point) to make it a waypoint. When youhave set a waypoint it acquires an animated highlight on your map,and the icon appears on your compass. Also, when you are facingtoward your waypoint, the distance to it (in yards or miles) will be vis-ible in yellow. Basically, if you know where you want to go, makingthat spot a waypoint makes it much, much easier to get there.Naturally, if you set a waypoint for a mobile icon (i.e., a teammate)the direction and distance will change as the Hero moves around.You can only have one waypoint selected at a time.
Sometimes, during missions, the game will set a waypoint for you,pointing the way toward your next mission objective.These game-set waypoints appear in red, and it is pos-sible for there to be more than one active at the sametime, or for a game-set waypoint and a player-setwaypoint to both be active at the same time.
A thumbtack is a sort of portable waypoint.
You can right-click anywhere on your Zone map toset a thumbtack at that location (and yes, youcan set thumbtacks in areas covered by thefog of war). You can only have one thumbtackvisible at any one time — if you right-click onanother part of the map, the thumbtack will movethere. If you right-click directly on the thumbtackit will vanish.
Once you have a thumbtack set, you can use itlike any other map icon, including using it as awaypoint if you wish. Note that if you log off,the thumbtack will be gone when you return.
Waypoints & ThumbtacksWaypoints & thumbtacks
73
Missions are a way to give the game variety and depth. They offer analternative to merely wandering the streets looking for villains tobring to justice. Furthermore, missions will be calibrated specificallyto your (or your team up’s) level of ability, to provide maximum chal-lenge with a good prospect of reward. Finally, missions are the pri-mary way for your Hero to learn and follow the storyline that framesthe game.
You may accept up to three missions at any one time. All missionsyou have currently accepted are displayed on the Missions Window.If you are currently actively engaged in a mission, that mission is dis-played on your Nav (compass) Window. The Nav Menu displays yourcurrent mission task, plus the zone where the task needs to be com-pleted, if you are not currently in that zone (not all mission tasks areZone-specific, but most are).
There is a substantial award of both experience and Influence forsuccessfully finishing a mission, on top of whatever you may havegained from defeating villains along the way. If you fail to completean assigned mission, you may still get a partial reward.
Note that some missions are timed… you have a certain amount oftime in which to complete them, and if you don’t finish within thattime, you fail at the mission. This is a real-time limit, that starts themoment you accept the mission. For this reason, it’s a good idea to becautious about accepting missions right before you know you’regoing to have to log off.
Also, some missions will require the help of one or more heroes. Forexample, a mission may require that several bombs are disarmedsimultaneously. Read the mission descriptions carefully beforeaccepting a mission so that you will know if you will need help tocomplete a mission.
74
MissionsMissions
ContactsContacts
A Contact is a non-player character (NPC) who gives you informationand assistance in your battle against the forces of evil. All your mis-sions will begin with a discussion between you and a Contact, andthe last thing you will do on a mission is to return to the Contact for afinal debriefing. In addition to assigning missions, Contacts can alsosell you Enhancements and Inspirations. Finally, Contacts introduceyou to new Contacts from time to time. All of your Contacts are listedin the Contacts Window (see the Contacts sub-section under‘Missions’), which can be accessed from the Nav Window or theMenu Window.
Contacts can always be found at the spot where you met them. Theyappear on your zone map as a Contact Icon.
As you successfully complete missions for a given Contact, thatContact will grow to trust you and rely on you more. In time, he willoffer you better-quality Enhancements. When he fully trusts you, hewill even allow you to contact him via cell phone for mission assign-ments and debriefings, which can save a lot of time and energy run-ning around town.
Eventually, however (after about five levels or so) your abilities willoutstrip your Contact’s needs, and he or she will no longer acceptyour services. Instead, the Contact will hand you off to a new Contactwho has need of assistance from a more powerful Hero such asyourself.
When a Contact offers to introduce you to a new Contact, you areusually given some background information on two individuals, andasked to pick one as your new Contact.
75
CluesClues
During your missions you will often uncover clues. Cluesare information about villainous plans or capabilities whichwill be useful to your Contacts and to the authorities in
fighting that group. It is usually necessary to find all available clues ina mission in order to complete that mission.
Your clues are stored in the Clues Window. Most clues are erased atthe end of the mission—if there are still clues in the Clues Windowafter the mission is over, it usually means that that mission was partof a story arc, and that further missions remain before the arc is complete.
When you find a clue, make sure you open up your CluesWindowand actually read what you’ve found. Clues can give youimportant information about the current mission, about storyarcs, and about villain groups.
Statesman Sez:Statesman Sez:Statesman Sez:
76
Pick your Contacts carefully. Pay attention to the villainousgroups they specialize in — is that a group you want to getinvolved with, and do you already have a Contact specializing intheir activities? Perhaps even more importantly (especially athigher levels), pay attention to the Enhancements theyoffer[EM]are they of a sort that you can use?
Statesman Sez:Statesman Sez:Statesman Sez:
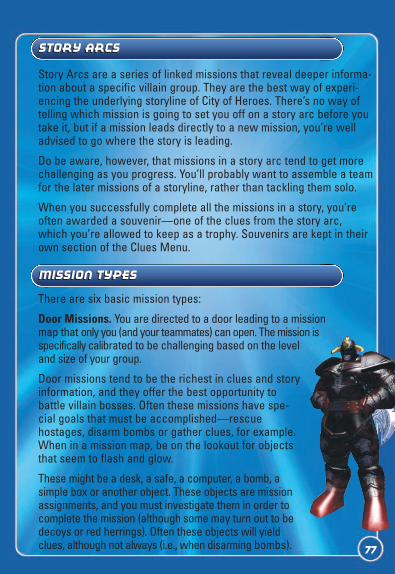
77
Story Arcs are a series of linked missions that reveal deeper informa-tion about a specific villain group. They are the best way of experi-encing the underlying storyline of City of Heroes. There’s no way oftelling which mission is going to set you off on a story arc before youtake it, but if a mission leads directly to a new mission, you’re welladvised to go where the story is leading.
Do be aware, however, that missions in a story arc tend to get morechallenging as you progress. You’ll probably want to assemble a teamfor the later missions of a storyline, rather than tackling them solo.
When you successfully complete all the missions in a story, you’reoften awarded a souvenir—one of the clues from the story arc,which you’re allowed to keep as a trophy. Souvenirs are kept in theirown section of the Clues Menu.
Story ArcsStory Arcs
Mission TypesMission Types
There are six basic mission types:
Door Missions. You are directed to a door leading to a missionmap that only you (and your teammates) can open. The mission isspecifically calibrated to be challenging based on the leveland size of your group.
Door missions tend to be the richest in clues and storyinformation, and they offer the best opportunity tobattle villain bosses. Often these missions have spe-cial goals that must be accomplished—rescuehostages, disarm bombs or gather clues, for example.When in a mission map, be on the lookout for objectsthat seem to flash and glow.
These might be a desk, a safe, a computer, a bomb, a simple box or another object. These objects are missionassignments, and you must investigate them in order tocomplete the mission (although some may turn out to bedecoys or red herrings). Often these objects will yieldclues, although not always (i.e., when disarming bombs).
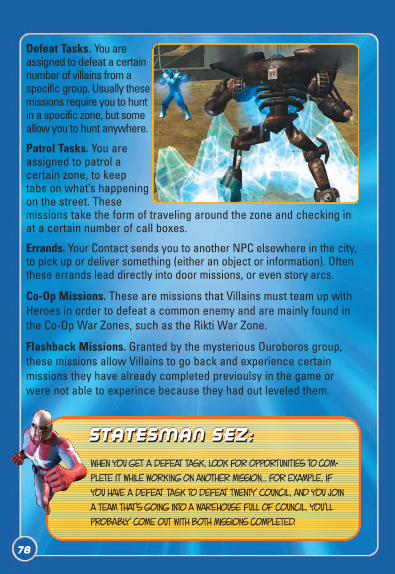
When you get a defeat task, look for opportunities to com-plete it while working on another mission… for example, ifyou have a Defeat Task to defeat twenty Council, and you joina team that’s going into a warehouse full of council, you’llprobably come out with both missions completed.
Statesman Sez:Statesman Sez:Statesman Sez:
Defeat Tasks. You areassigned to defeat a certainnumber of villains from aspecific group. Usually thesemissions require you to huntin a specific zone, but someallow you to hunt anywhere.
Patrol Tasks. You areassigned to patrol a certain zone, to keep tabs on what’s happeningon the street. These missions take the form of traveling around the zone and checking inat a certain number of call boxes.
Errands. Your Contact sends you to another NPC elsewhere in the city,to pick up or deliver something (either an object or information). Oftenthese errands lead directly into door missions, or even story arcs.
Co-Op Missions. These are missions that Villains must team up withHeroes in order to defeat a common enemy and are mainly found inthe Co-Op War Zones, such as the Rikti War Zone.
Flashback Missions. Granted by the mysterious Ouroboros group,these missions allow Villains to go back and experience certain missions they have already completed previoulsy in the game orwere not able to experince because they had out leveled them.
78
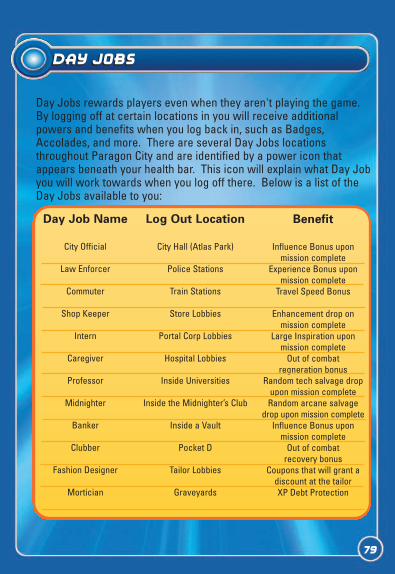
79
Day JobsDay Jobs
Day Jobs rewards players even when they aren't playing the game.By logging off at certain locations in you will receive additional powers and benefits when you log back in, such as Badges,Accolades, and more. There are several Day Jobs locations throughout Paragon City and are identified by a power icon thatappears beneath your health bar. This icon will explain what Day Jobyou will work towards when you log off there. Below is a list of theDay Jobs available to you:
Log Out Location
City Hall (Atlas Park)
Police Stations
Train Stations
Store Lobbies
Portal Corp Lobbies
Hospital Lobbies
Inside Universities
Inside the Midnighter’s Club
Inside a Vault
Pocket D
Tailor Lobbies
Graveyards
Benefit
Influence Bonus upon mission complete
Experience Bonus uponmission complete
Travel Speed Bonus
Enhancement drop on mission complete
Large Inspiration upon mission complete
Out of combat regneration bonus
Random tech salvage dropupon mission complete
Random arcane salvagedrop upon mission complete
Influence Bonus upon mission complete
Out of combat recovery bonus
Coupons that will grant adiscount at the tailorXP Debt Protection
Day Job Name
City Official
Law Enforcer
Commuter
Shop Keeper
Intern
Caregiver
Professor
Midnighter
Banker
Clubber
Fashion Designer
Mortician
80
Team ups are temporary alliances between Heroes. Two to eightHeroes may team up at one time. While teamed up, all experience andInfluence from defeating enemies and completing missions is sharedamong all members of the team. (Higher-level characters get a rough-ly proportionally larger share.) When Inspirations or Enhancementsare found, the game distributes them to team members fairly (if youget an Enhancement you can’t use, it’s always a good idea to check ifit would be useful to another member of the team).
You can invite another Hero to team up with you by clicking on him totarget him, then right-clicking to bring up a menu of interactions,including Invite to Team. If the Hero is not physically present, you caninvite him by using the slash command /invite <hero name>. You canalso invite Heroes to team up by right-clicking on their names in yourFriends or Super Group lists. Inviting another Hero to team up auto-matically makes you the team leader (next page). If another Heroinvites you to team up, you will be shown a text box from which youcan accept or decline the offer. The Hero who issued the invitationwill become the team leader.
team upsteam ups
Want a little more of a challenge? Standard missions tooeasy? Visit a Hero Corps field Analyst to increase your repu-tation which increases the difficulty of your missions for afee. Field analysts are usually found close to a trainer andwear a blue Hero corps uniform. Once your new reputation isset, all future missions will be set at the new level. You can visitan analyst as often as you like to adjust your mission difficulty.
Statesman Sez:Statesman Sez:Statesman Sez:
81
Team LeadersTeam Leaders
team ups & Missionsteam ups & Missions
Team missions may be selected by the team leader from among allthe missions currently possessed by everyone on the team. This isthe only time a Hero can enter another Hero’s mission map.
Team door missions are calibrated for difficulty based on the level ofthe character who originally obtained the mission, and on the numberof team members at the time the mission is first begun. Therefore, fora tougher mission select a mission held by a higher-level member ofthe team, and for an easier one select from a lower-level member.Also, be aware that the size of the team directly affects the numberof enemies in the mission, so a mission for a team of 6, 7 or 8 willhave many, many times the number of enemies as one for 1 or 2, andtheir levels will be slightly higher, as well.
If the team abandons the mission before it’s complete, and logs off,the next time the mission is entered it will recalibrate for the numberof Heroes who enter at that time.
Each team up has one leader. The first Hero to invite another Herointo the team automatically becomes the leader, and from then on heor she is the only one who can invite new Heroes into the team. Theleader also has the authority to kick Heroes out of the team.
In addition, the team leader has the job of selecting any missions theteam will undertake. This is done from the Team tab of the leader’sMission Window. The leader can select any mission currently held byany member of the team as the active team mission. (Other membersof the team can view all available missions from the Team tab aswell, but only the leader can choose one.)
A leader may promote another team member to leader.
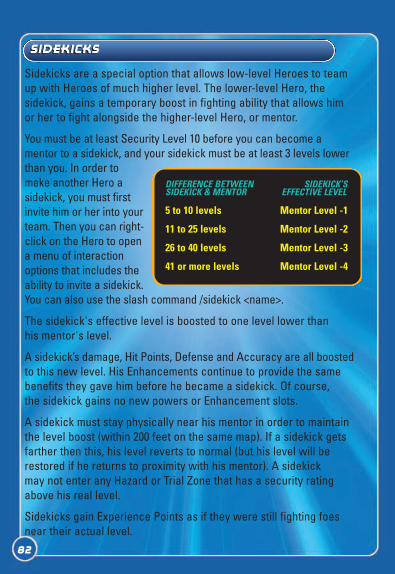
82
SidekicksSidekicks
Sidekicks are a special option that allows low-level Heroes to teamup with Heroes of much higher level. The lower-level Hero, the sidekick, gains a temporary boost in fighting ability that allows him or her to fight alongside the higher-level Hero, or mentor.
You must be at least Security Level 10 before you can become a mentor to a sidekick, and your sidekick must be at least 3 levels lowerthan you. In order tomake another Hero asidekick, you must firstinvite him or her into yourteam. Then you can right-click on the Hero to opena menu of interactionoptions that includes theability to invite a sidekick.You can also use the slash command /sidekick <name>.
The sidekick's effective level is boosted to one level lower than his mentor's level.
A sidekick’s damage, Hit Points, Defense and Accuracy are all boostedto this new level. His Enhancements continue to provide the samebenefits they gave him before he became a sidekick. Of course, the sidekick gains no new powers or Enhancement slots.
A sidekick must stay physically near his mentor in order to maintainthe level boost (within 200 feet on the same map). If a sidekick getsfarther then this, his level reverts to normal (but his level will berestored if he returns to proximity with his mentor). A sidekick may not enter any Hazard or Trial Zone that has a security ratingabove his real level.
Sidekicks gain Experience Points as if they were still fighting foesnear their actual level.
DIFFERENCE BETWEEN SIDEKICK’SSIDEKICK & MENTOR EFFECTIVE LEVEL
5 to 10 levels Mentor Level -1
11 to 25 levels Mentor Level -2
26 to 40 levels Mentor Level -3
41 or more levels Mentor Level -4
83
A mentor may have only one sidekick at any time, and a sidekick mayhave only one mentor at a time.
The mentor or sidekick can terminate the relationship by using theslash command /unsidekick.
ExemplarsExemplars
Higher level heroes can artificially lower their Combat level in orderto adventure with their lower level friends as well. This process iscalled Exemplaring. The lower level hero in this case is called theAspirant and the higher level hero is the Exemplar. The Aspirant asksa higher level hero to become his Exemplar by right clicking on themand selecting “Invite to Exemplar” or by using the command /exem-plar . There is no level restriction on Exemplaring.
When you become an Exemplar you will fight at the Combat Level ofthe Aspirant and lose access to any power you chose after the levelof the Aspirant. So if you Exemplar down to level 15 you will not beable to access any power you chose at level 16 or higher. You willstill have all the Enhancement Slots in your powers, however thestrength of those Enhancements will be artificially reduced to thestrength of Enhancements you would have at the lower level.
Sidekicks and exemplars are a great way to team up with yourfriends, even if There’s a big difference in security levelbetween you.
Statesman Sez:Statesman Sez:Statesman Sez:
When you receive XP as an Exemplar, you will receive an amountappropriate to your original level. This XP can only be used to pay off XP debt. If you have no XP debt, then you will earn influence atdouble the normal rate.
Additionally, higher level heroes can enter lower level task forcesand trials through auto-exemplaring. It is similar to exemplaring, butdoes not require another hero to bring you down to that level.
84
Leveling PactsLeveling Pacts
Available to characters that are level 5 and under, a leveling pactallows two characters to gain XP at the same rate. When a pact isestablished it essentially freezes one players XP until the other player catches. From the time the pact is initiated, all XP earned by the two characters will be split evenly between them.
To start a leveling pact, simply right click on another player and click“Invite to Leveling Pact”. When the other player accepts, you willthen be in a Leveling Pact. To leave a leveling pact, just select LeavePact in the Leveling Pact window.
85
Task ForcesTask Forces
A task force is a team up of powerful Heroes that comes together toundertake a long series of dangerous assignments, which usuallyculminates in a battle with one of the city’s Arch Villains. Task forcemissions require a great deal of commitment, and are very risky, butthe reward for success is proportionate to the risk.
Some task force missions are given by the Surviving Eight, the onlyHeroes who survived the Rikti War. The members of the SurvivingEight currently engaged in task force assignment are pictured herewith their locations.
Each task force mission requires a minimum size of team to under-take it. The NPC issuing the assignment will let you know if your teamis sufficient to attempt the mission.
Once a task force mission is accepted, teams cannot invite additionalmembers. Anyone who drops out of the task force before completioncannot rejoin. You should not join with a task force unless you arewilling and able to commit to the time and risk involved.
A task force mission is terminated if all members of the team quit.
TrialsTrials
Trials are similar to Task Forces, but are usually confined to one areaor zone. Trials may require a certain number of characters, and thosecharacters must be within a specific level range, just like a TaskForce.
Trials tend to have unique rewards, things that are available nowhereelse in the game. These can be anything from a unique type ofEnhancement to the ability to completely re-choose your character’spowers up to your current level. Trial Contacts are usually found inthe mid to upper level zones.
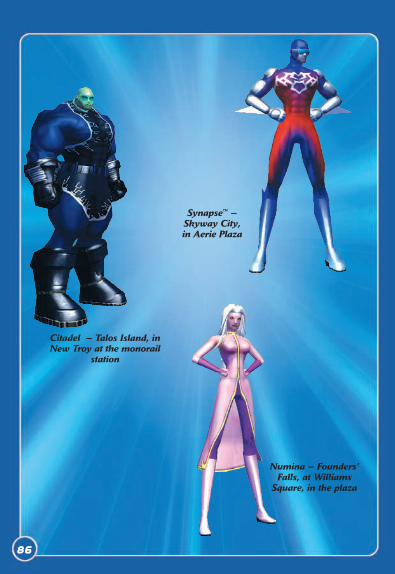
86
Synapse™ —Skyway City, in Aerie Plaza
Citadel — Talos Island, inNew Troy at the monorail
station
Numina — Founders’Falls, at Williams
Square, in the plaza
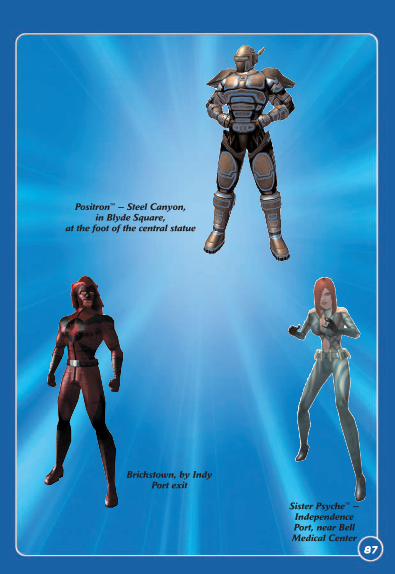
87
Positron™ — Steel Canyon, in Blyde Square,
at the foot of the central statue
Sister Psyche™ —IndependencePort, near BellMedical Center
Brickstown, by IndyPort exit
A Super Group is a permanent association of Heroes. You can join aSuper Group at any time, but must be security level 10 or higher toform one.
To form a Super Group, you must go to a Super Group Registrationdesk. One is located in City Hall in Atlas Park, the other in FreedomCorps Headquarters in Galaxy City.
You must fill out Form 27 B/6, which involves choosing a Super Groupname, motto, message of the day, team colors and team insignia. Youcan even create custom titles for different levels of membership(default ranks are Leader, Captain and Member).
Any member can assume the colors and team insignia of his SuperGroup. To do this, click the Super button in the Chat Window, then EnterSuper Group Mode in the Super Group Window. Immediately, the Hero’scostume colors and chest insignia are changed to those of the group.For more on the Super Group Window, see the ‘Windows’ section.
Members of a Super Group can all chat on the Super GroupChatChannel. If a Hero sends a message in this Channel, every member of the Super Group currently online receives it.
Super groupsSuper groups
88
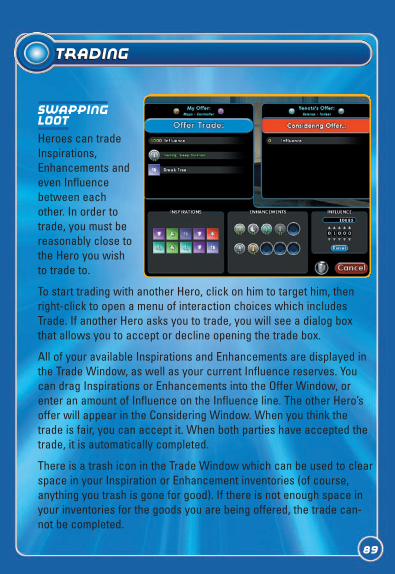
89
TradingTrading
SwappingLoot
Heroes can tradeInspirations,Enhancements andeven Influencebetween eachother. In order totrade, you must bereasonably close tothe Hero you wishto trade to.
To start trading with another Hero, click on him to target him, thenright-click to open a menu of interaction choices which includesTrade. If another Hero asks you to trade, you will see a dialog boxthat allows you to accept or decline opening the trade box.
All of your available Inspirations and Enhancements are displayed inthe Trade Window, as well as your current Influence reserves. Youcan drag Inspirations or Enhancements into the Offer Window, orenter an amount of Influence on the Influence line. The other Hero’soffer will appear in the Considering Window. When you think thetrade is fair, you can accept it. When both parties have accepted thetrade, it is automatically completed.
There is a trash icon in the Trade Window which can be used to clearspace in your Inspiration or Enhancement inventories (of course,anything you trash is gone for good). If there is not enough space inyour inventories for the goods you are being offered, the trade can-not be completed.
90
Slash CommandsSlash Commands
The following is a list of Slash Commands that you can execute fromthe Chat Window. They’re called slash commands because of thesyntax used to execute them — a forward slash (/) inserted beforethe command itself. For instance, if you wanted to use a slash com-mand to invite Meteor to team up, you’d type:
/invite meteor e
Note that most of these commands duplicate actions that you caneasily accomplish in the regular interface.
You can click on Cancel to exit the Trade Window.
You can also give away an enhancement or inspiration by dragging itfrom your tray over to a fellow hero standing nearby. You can declinegifts automatically by setting an option in the options menu.
afk Indicates that you’re away from your keyboard anddisplays a specified message.
alttray Toggles the secondary Power Tray as long as youhold down the key.
alttraysticky Toggles the secondary Power Tray.auction Starts chatting in the Request Channel.autoreply Replies to the last player to send a private message.
Note: this command works when bound to a key, butdoes not work when typed in the Chat Window.
beginchat Starts chatting in the currently selected Chat Channel.bind Binds a key to any command in the list of Slash
Commands.b OR broadcast Starts chatting in the Broadcast Channel.
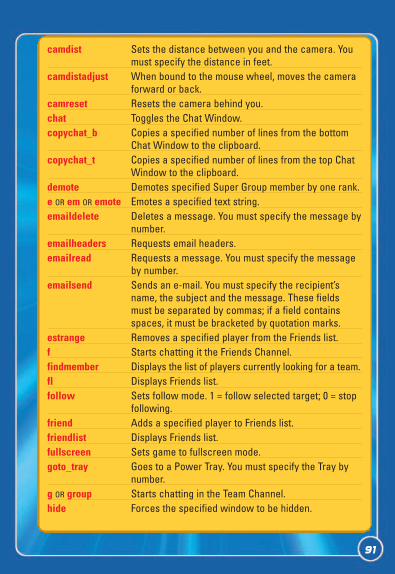
91
camdist Sets the distance between you and the camera. Youmust specify the distance in feet.
camdistadjust When bound to the mouse wheel, moves the cameraforward or back.
camreset Resets the camera behind you.chat Toggles the Chat Window.copychat_b Copies a specified number of lines from the bottom
Chat Window to the clipboard.copychat_t Copies a specified number of lines from the top Chat
Window to the clipboard.demote Demotes specified Super Group member by one rank.e OR em OR emote Emotes a specified text string.emaildelete Deletes a message. You must specify the message by
number.emailheaders Requests email headers.emailread Requests a message. You must specify the message
by number.emailsend Sends an e-mail. You must specify the recipient’s
name, the subject and the message. These fieldsmust be separated by commas; if a field containsspaces, it must be bracketed by quotation marks.
estrange Removes a specified player from the Friends list.f Starts chatting it the Friends Channel.findmember Displays the list of players currently looking for a team.fl Displays Friends list.follow Sets follow mode. 1 = follow selected target; 0 = stop
following.friend Adds a specified player to Friends list.friendlist Displays Friends list.fullscreen Sets game to fullscreen mode.goto_tray Goes to a Power Tray. You must specify the Tray by
number.g OR group Starts chatting in the Team Channel.hide Forces the specified window to be hidden.
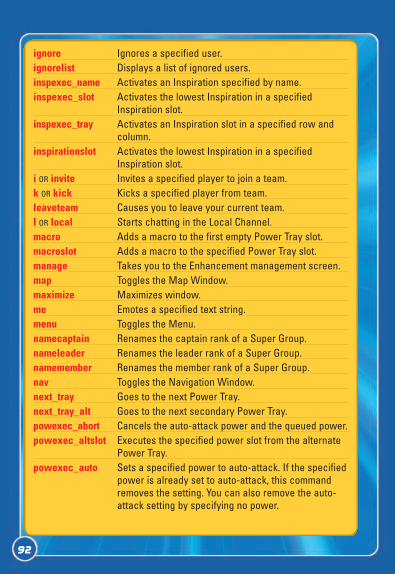
92
ignore Ignores a specified user.ignorelist Displays a list of ignored users.inspexec_name Activates an Inspiration specified by name.inspexec_slot Activates the lowest Inspiration in a specified
Inspiration slot.inspexec_tray Activates an Inspiration slot in a specified row and
column.inspirationslot Activates the lowest Inspiration in a specified
Inspiration slot.i OR invite Invites a specified player to join a team.k OR kick Kicks a specified player from team.leaveteam Causes you to leave your current team.I OR local Starts chatting in the Local Channel.macro Adds a macro to the first empty Power Tray slot.macroslot Adds a macro to the specified Power Tray slot.manage Takes you to the Enhancement management screen.map Toggles the Map Window.maximize Maximizes window.me Emotes a specified text string.menu Toggles the Menu.namecaptain Renames the captain rank of a Super Group.nameleader Renames the leader rank of a Super Group.namemember Renames the member rank of a Super Group.nav Toggles the Navigation Window.next_tray Goes to the next Power Tray.next_tray_alt Goes to the next secondary Power Tray.powexec_abort Cancels the auto-attack power and the queued power.powexec_altslot Executes the specified power slot from the alternate
Power Tray.powexec_auto Sets a specified power to auto-attack. If the specified
power is already set to auto-attack, this commandremoves the setting. You can also remove the auto-attack setting by specifying no power.
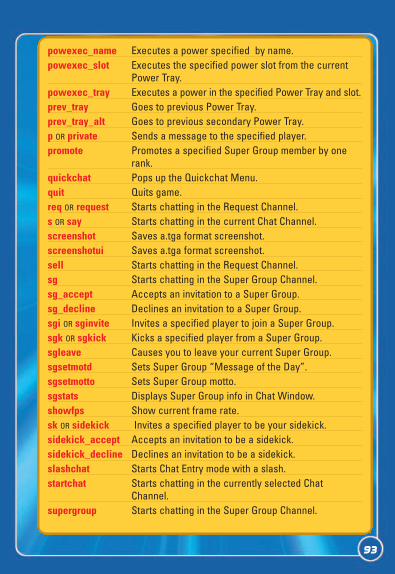
93
powexec_name Executes a power specified by name.powexec_slot Executes the specified power slot from the current
Power Tray.powexec_tray Executes a power in the specified Power Tray and slot.prev_tray Goes to previous Power Tray.prev_tray_alt Goes to previous secondary Power Tray.p OR private Sends a message to the specified player.promote Promotes a specified Super Group member by one
rank.quickchat Pops up the Quickchat Menu.quit Quits game.req OR request Starts chatting in the Request Channel.s OR say Starts chatting in the current Chat Channel.screenshot Saves a.tga format screenshot.screenshotui Saves a.tga format screenshot.sell Starts chatting in the Request Channel.sg Starts chatting in the Super Group Channel.sg_accept Accepts an invitation to a Super Group.sg_decline Declines an invitation to a Super Group.sgi OR sginvite Invites a specified player to join a Super Group.sgk OR sgkick Kicks a specified player from a Super Group.sgleave Causes you to leave your current Super Group.sgsetmotd Sets Super Group “Message of the Day”.sgsetmotto Sets Super Group motto.sgstats Displays Super Group info in Chat Window.showfps Show current frame rate.sk OR sidekick Invites a specified player to be your sidekick.sidekick_accept Accepts an invitation to be a sidekick.sidekick_decline Declines an invitation to be a sidekick.slashchat Starts Chat Entry mode with a slash.startchat Starts chatting in the currently selected Chat
Channel.supergroup Starts chatting in the Super Group Channel.
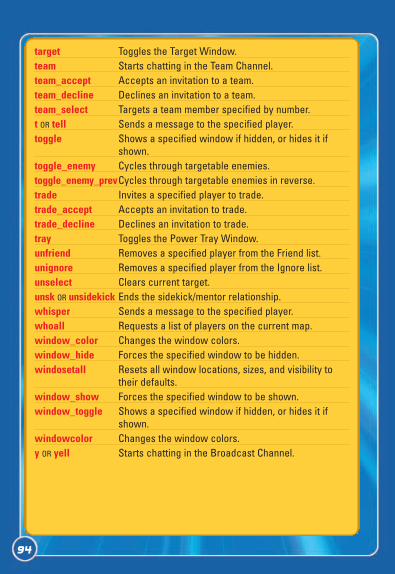
94
target Toggles the Target Window.team Starts chatting in the Team Channel.team_accept Accepts an invitation to a team.team_decline Declines an invitation to a team.team_select Targets a team member specified by number.t OR tell Sends a message to the specified player.toggle Shows a specified window if hidden, or hides it if
shown.toggle_enemy Cycles through targetable enemies.toggle_enemy_prevCycles through targetable enemies in reverse.trade Invites a specified player to trade.trade_accept Accepts an invitation to trade.trade_decline Declines an invitation to trade.tray Toggles the Power Tray Window.unfriend Removes a specified player from the Friend list.unignore Removes a specified player from the Ignore list.unselect Clears current target.unsk OR unsidekick Ends the sidekick/mentor relationship.whisper Sends a message to the specified player.whoall Requests a list of players on the current map.window_color Changes the window colors.window_hide Forces the specified window to be hidden.windosetall Resets all window locations, sizes, and visibility to
their defaults.window_show Forces the specified window to be shown.window_toggle Shows a specified window if hidden, or hides it if
shown.windowcolor Changes the window colors.y OR yell Starts chatting in the Broadcast Channel.
95
A macro is a combination of in-game functions — slash commands,powers, emotes or speeches — bound together to be executed by asingle command. The /macro slash command is used to make macrosthat can be executed from your Tray. The purpose of macros is toallow you to create custom commands that are specifically tailoredto your personal playstyle.
When you create a new macro, it automatically drops into the firstavailable slot in the tray. From there, of course, you can drag it towherever you want it.
The macro executes all its functions at same time, so you will not beable to execute, say, two powers or two emotesfrom the same macro, because two actions ofthe same sort cannot go off simultaneously. Themacro will only execute the last similar action inthe series. You can not link combat skillstogether!
Macros can be use to create personalized chats orgreetings to express your personality, or to com-bine text with powers for a combinationyell/attack.
Creating Macros
We’re not going to try to explain every element ofthe art of macro creation here. (For more onmacros visit the City of Heroes website, or seePrima’s Official Guide to City of Heroes), but wewill give a few typical examples that should giveyou the basis to experiment.
MacrosMacros
96
The macro console command allows you to create named macrosthat are automatically placed in the first available tray slot. The syn-tax is:
/macro <name> <command><name> Single unquoted word or one or more words within
quotation marks. For example, Fray does not needquotes if used as a name, but “Bug Out” does.
<command>One or more console commands separated by $$.(Use quotes if the command is longer than one word).
Examples:
/macro “Greet Team” “team hello everybody”Send message “hello everybody” on the team channel)
/macro Smite “powexec_slot 1$$ local Take that, ruffian!”Attack with the power in slot one, and display aspeech balloon reading, “Take that ruffian”
Note that when instructing a macro to execute a slash command, youshould enter only the command’s name … don’t actually put in aslash. Thus, if you wanted to create a macro using the /invite slashcommand you might use:
/macro cmon “invite$$ local C’mon $name, let’s go fightsome bad guys!” (Invites targeted Hero to team up and displays aspeech balloon reading, “C’mon (Hero’s name), let’sgo fight some bad guys!)
But not:
/macro cmon “/invite$$ local C’mon $name, let’s go fightsome bad guys!”
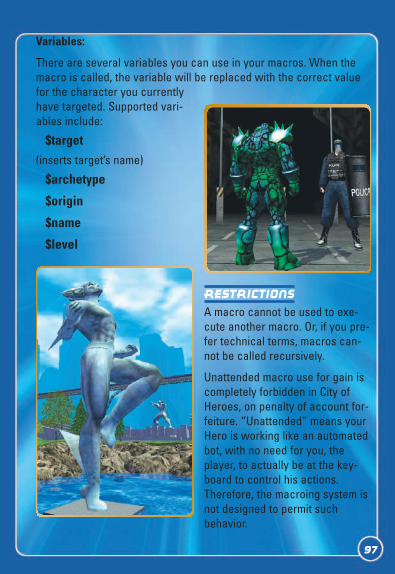
97
Variables:
There are several variables you can use in your macros. When themacro is called, the variable will be replaced with the correct valuefor the character you currentlyhave targeted. Supported vari-ables include:
$target(inserts target’s name)
$archetype
$origin
$name
$level
Restrictions
A macro cannot be used to exe-cute another macro. Or, if you pre-fer technical terms, macros can-not be called recursively.
Unattended macro use for gain iscompletely forbidden in City ofHeroes, on penalty of account for-feiture. “Unattended” means yourHero is working like an automatedbot, with no need for you, theplayer, to actually be at the key-board to control his actions.Therefore, the macroing system isnot designed to permit suchbehavior.
98
Keybindings are similar to macros, except instead of binding yourcustom commands to the Tray, they’re bound to a hotkey on yourkeyboard.
Keybindings are created using the /bind command. The syntax forthis is
/bind <keyname> <custom command>
For example, to create a keybinding to bind the power in tray slot #1to Z, you’d type:
/bind z “powexec_slot 1”
Keybindings can be used to do everything you can do with amacro—slash commands, powers, emotes and text. In fact, you caneven use keybinding to bind a single macro to the hot key. Just usethe macro’s name or tray slot when creating the keybinding.
Spell out the names of keys that aren’t simple letters, numbers ortyped characters. For example, type space to bind a command to thespace key or enter for the enter key.
KeybindingsKeybindings
It’s possible to create complex keybindings “from scratch,”but for efficiency and versatility, it’s recommended you cre-ate the custom command as a macro first, then bind that macroto a hotkey.
Statesman Sez:Statesman Sez:Statesman Sez:
99
Emotes are usually pre-set dialogs with an associated animation.Some emotes are only animation, with no words associated withthem. Emotes are designed to make gameplay more efficient (espe-cially in team ups and combat situations) and your character moreexpressive. Some of the emote text appears in colored word balloons,to help the message stand out more (i.e. Stop! is red, Go! is green,and ATTACK! is orange). The animations range from a simple motionlike a wave or a shrug, to a complex series of movements (check outWarm Up, or Lecture). A few animations will continue indefinitely untilyour Hero moves or does some other action to interrupt the emote(Jumping Jacks are an example). You can bind emotes to your Tray,using the name of the emote as given in the list that follows.
EmotesEmotes
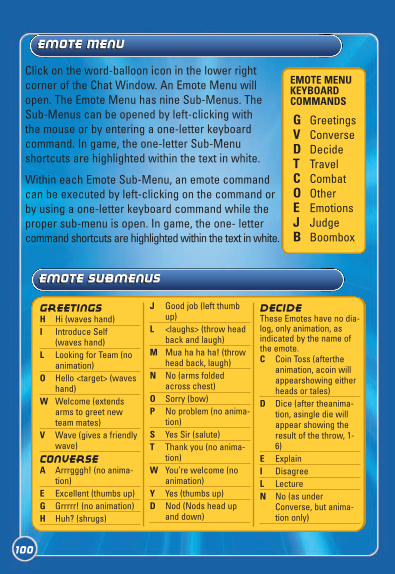
100
Click on the word-balloon icon in the lower right corner of the Chat Window. An Emote Menu willopen. The Emote Menu has nine Sub-Menus. TheSub-Menus can be opened by left-clicking with the mouse or by entering a one-letter keyboard command. In game, the one-letter Sub-Menu shortcuts are highlighted within the text in white.
Within each Emote Sub-Menu, an emote commandcan be executed by left-clicking on the command orby using a one-letter keyboard command while theproper sub-menu is open. In game, the one- lettercommand shortcuts are highlighted within the text in white.
EMOTE MENUKEYBOARDCOMMANDS
G GreetingsV ConverseD DecideT TravelC CombatO Other E Emotions J JudgeB Boombox
Emote SubmenusEmote Submenus
Emote MenuEmote Menu
GreetingsH Hi (waves hand)I Introduce Self
(waves hand)L Looking for Team (no
animation)O Hello <target> (waves
hand)W Welcome (extends
arms to greet newteam mates)
V Wave (gives a friendlywave)
ConverseA Arrrgggh! (no anima-
tion)E Excellent (thumbs up)G Grrrrr! (no animation)H Huh? (shrugs)
J Good job (left thumbup)
L <laughs> (throw headback and laugh)
M Mua ha ha ha! (throwhead back, laugh)
N No (arms foldedacross chest)
O Sorry (bow)P No problem (no anima-
tion)S Yes Sir (salute)T Thank you (no anima-
tion)W You’re welcome (no
animation)Y Yes (thumbs up)D Nod (Nods head up
and down)
DecideThese Emotes have no dia-log, only animation, asindicated by the name ofthe emote.C Coin Toss (afterthe
animation, acoin willappearshowing eitherheads or tales)
D Dice (after theanima-tion, asingle die willappear showing theresult of the throw, 1-6)
E ExplainI DisagreeL LectureN No (as under
Converse, but anima-tion only)
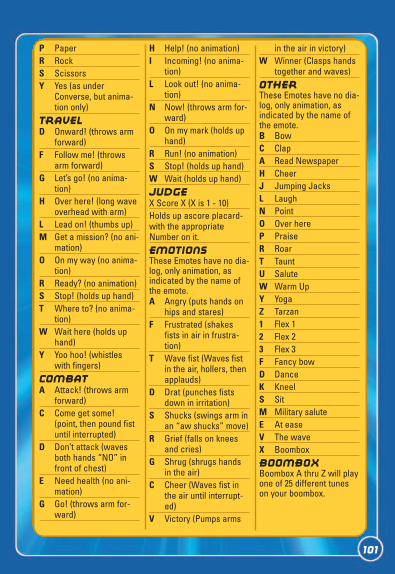
101
P PaperR RockS ScissorsY Yes (as under
Converse, but anima-tion only)
TravelD Onward! (throws arm
forward)F Follow me! (throws
arm forward)G Let’s go! (no anima-
tion)H Over here! (long wave
overhead with arm)L Lead on! (thumbs up)M Get a mission? (no ani-
mation)O On my way (no anima-
tion)R Ready? (no animation)S Stop! (holds up hand)T Where to? (no anima-
tion)W Wait here (holds up
hand)Y Yoo hoo! (whistles
with fingers)CombatA Attack! (throws arm
forward)C Come get some!
(point, then pound fistuntil interrupted)
D Don’t attack (wavesboth hands “NO” infront of chest)
E Need health (no ani-mation)
G Go! (throws arm for-ward)
H Help! (no animation)I Incoming! (no anima-
tion)L Look out! (no anima-
tion)N Now! (throws arm for-
ward)O On my mark (holds up
hand)R Run! (no animation)S Stop! (holds up hand)W Wait (holds up hand)JudgeX Score X (X is 1 - 10)Holds up ascore placard-with the appropriateNumber on it.emotionsThese Emotes have no dia-log, only animation, asindicated by the name ofthe emote.A Angry (puts hands on
hips and stares)F Frustrated (shakes
fists in air in frustra-tion)
T Wave fist (Waves fistin the air, hollers, thenapplauds)
D Drat (punches fistsdown in irritation)
S Shucks (swings arm inan “aw shucks” move)
R Grief (falls on kneesand cries)
G Shrug (shrugs handsin the air)
C Cheer (Waves fist inthe air until interrupt-ed)
V Victory (Pumps arms
in the air in victory)W Winner (Clasps hands
together and waves)OtherThese Emotes have no dia-log, only animation, asindicated by the name ofthe emote.B BowC ClapA Read NewspaperH CheerJ Jumping JacksL LaughN PointO Over hereP PraiseR RoarT TauntU SaluteW Warm UpY YogaZ Tarzan1 Flex 12 Flex 23 Flex 3F Fancy bowD DanceK KneelS SitM Military saluteE At easeV The waveX BoomboxBoomboXBoombox A thru Z will playone of 25 different tuneson your boombox.
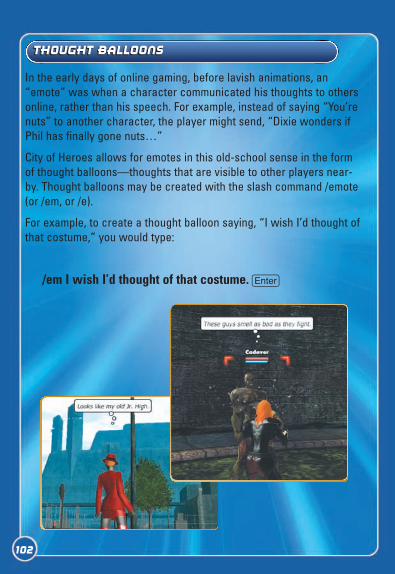
102
In the early days of online gaming, before lavish animations, an“emote” was when a character communicated his thoughts to othersonline, rather than his speech. For example, instead of saying “You’renuts” to another character, the player might send, “Dixie wonders ifPhil has finally gone nuts…”
City of Heroes allows for emotes in this old-school sense in the formof thought balloons—thoughts that are visible to other players near-by. Thought balloons may be created with the slash command /emote(or /em, or /e).
For example, to create a thought balloon saying, “I wish I’d thought ofthat costume,” you would type:
/em I wish I’d thought of that costume. e
Thought BalloonsThought Balloons
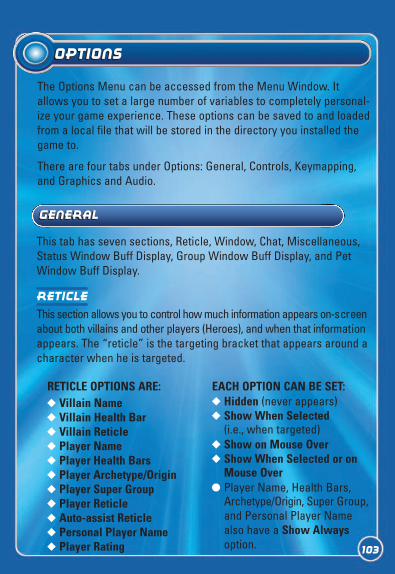
OptionsOptions
The Options Menu can be accessed from the Menu Window. Itallows you to set a large number of variables to completely personal-ize your game experience. These options can be saved to and loadedfrom a local file that will be stored in the directory you installed thegame to.
There are four tabs under Options: General, Controls, Keymapping,and Graphics and Audio.
This tab has seven sections, Reticle, Window, Chat, Miscellaneous,Status Window Buff Display, Group Window Buff Display, and PetWindow Buff Display.
Reticle
This section allows you to control how much information appears on-screenabout both villains and other players (Heroes), and when that informationappears. The “reticle” is the targeting bracket that appears around acharacter when he is targeted.
GeneralGeneral
RETICLE OPTIONS ARE:+ Villain Name+ Villain Health Bar+ Villain Reticle+ Player Name+ Player Health Bars+ Player Archetype/Origin+ Player Super Group+ Player Reticle+ Auto-assist Reticle+ Personal Player Name+ Player Rating
EACH OPTION CAN BE SET:+ Hidden (never appears)+ Show When Selected
(i.e., when targeted)+ Show on Mouse Over+ Show When Selected or on
Mouse Over_ Player Name, Health Bars,
Archetype/Origin, Super Group,and Personal Player Namealso have a Show Alwaysoption. 103
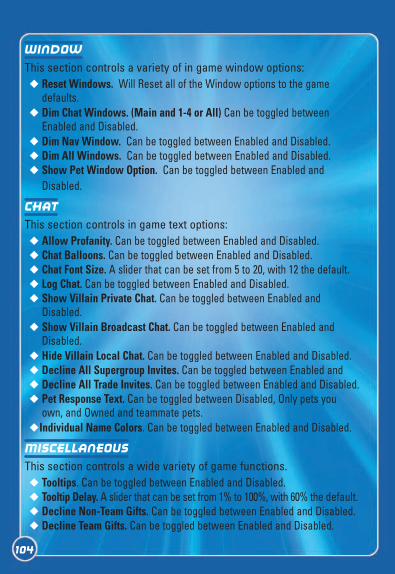
104
Window
This section controls a variety of in game window options:+ Reset Windows. Will Reset all of the Window options to the game
defaults.+ Dim Chat Windows. (Main and 1-4 or All) Can be toggled between
Enabled and Disabled.+ Dim Nav Window. Can be toggled between Enabled and Disabled.+ Dim All Windows. Can be toggled between Enabled and Disabled.+ Show Pet Window Option. Can be toggled between Enabled and
Disabled.
Chat
This section controls in game text options:+ Allow Profanity. Can be toggled between Enabled and Disabled.+ Chat Balloons. Can be toggled between Enabled and Disabled.+ Chat Font Size. A slider that can be set from 5 to 20, with 12 the default.+ Log Chat. Can be toggled between Enabled and Disabled.+ Show Villain Private Chat. Can be toggled between Enabled and
Disabled.+ Show Villain Broadcast Chat. Can be toggled between Enabled and
Disabled.+ Hide Villain Local Chat. Can be toggled between Enabled and Disabled.+ Decline All Supergroup Invites. Can be toggled between Enabled and + Decline All Trade Invites. Can be toggled between Enabled and Disabled.+ Pet Response Text. Can be toggled between Disabled, Only pets you
own, and Owned and teammate pets.+Individual Name Colors. Can be toggled between Enabled and Disabled.
Miscellaneous
This section controls a wide variety of game functions.+ Tooltips. Can be toggled between Enabled and Disabled.+ Tooltip Delay. A slider that can be set from 1% to 100%, with 60% the default.+ Decline Non-Team Gifts. Can be toggled between Enabled and Disabled.+ Decline Team Gifts. Can be toggled between Enabled and Disabled.
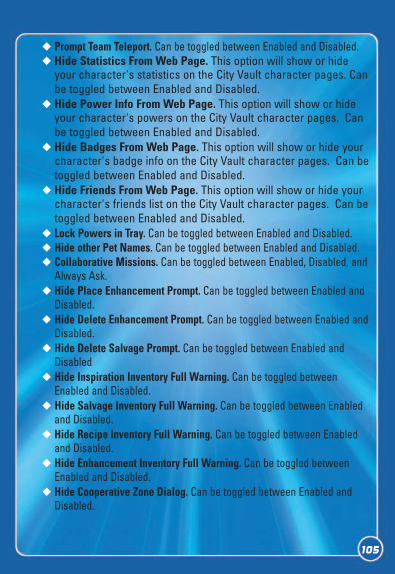
105
+ Prompt Team Teleport. Can be toggled between Enabled and Disabled.+ Hide Statistics From Web Page. This option will show or hide
your character's statistics on the City Vault character pages. Canbe toggled between Enabled and Disabled.
+ Hide Power Info From Web Page. This option will show or hideyour character's powers on the City Vault character pages. Canbe toggled between Enabled and Disabled.
+ Hide Badges From Web Page. This option will show or hide yourcharacter's badge info on the City Vault character pages. Can betoggled between Enabled and Disabled.
+ Hide Friends From Web Page. This option will show or hide yourcharacter's friends list on the City Vault character pages. Can betoggled between Enabled and Disabled.
+ Lock Powers in Tray. Can be toggled between Enabled and Disabled.+ Hide other Pet Names. Can be toggled between Enabled and Disabled.+ Collaborative Missions. Can be toggled between Enabled, Disabled, and
Always Ask.+ Hide Place Enhancement Prompt. Can be toggled between Enabled and
Disabled.+ Hide Delete Enhancement Prompt. Can be toggled between Enabled and
Disabled.+ Hide Delete Salvage Prompt. Can be toggled between Enabled and
Disabled+ Hide Inspiration Inventory Full Warning. Can be toggled between
Enabled and Disabled.+ Hide Salvage Inventory Full Warning. Can be toggled between Enabled
and Disabled.+ Hide Recipe Inventory Full Warning. Can be toggled between Enabled
and Disabled.+ Hide Enhancement Inventory Full Warning. Can be toggled between
Enabled and Disabled.+ Hide Cooperative Zone Dialog. Can be toggled between Enabled and
Disabled.

Status Window Buff Display
+ Hide Auto Powers. Can be toggled between Enabled andDisabled.
+ Disable Blinking. Can be toggled between Enabled and Disabled.+ Icon Stacking. Can be toggled between Default Stacking, No
Stacking, and Numeric.
Group Window Buff Display
+ Hide Auto Powers. Can be toggled between Enabled andDisabled.
+ Disable Blinking. Can be toggled between Enabled and Disabled.+ Icon Stacking. Can be toggled between Default Stacking, No
Stacking, and Numeric.
pet Window Buff Display
+ Hide Auto Powers. Can be toggled between Enabled andDisabled.
+ Disable Blinking. Can be toggled between Enabled and Disabled.+ Icon Stacking. Can be toggled between Default Stacking, No
Stacking, and Numeric.
This tab has the options relating to the controls in the game. TheControlling your character and movement is discussed in detail onpage 18.
control sensitivity
+ Mouse Look.+ Turning.
Both of these options can be adjusted with the slider to customizethe sensitivity of the controls.
controlsControls
106
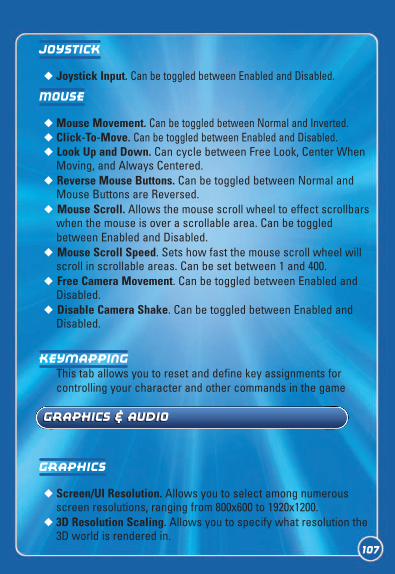
107
Joystick
+ Joystick Input. Can be toggled between Enabled and Disabled.
Mouse
+ Mouse Movement. Can be toggled between Normal and Inverted.+ Click-To-Move. Can be toggled between Enabled and Disabled.+ Look Up and Down. Can cycle between Free Look, Center When
Moving, and Always Centered.+ Reverse Mouse Buttons. Can be toggled between Normal and
Mouse Buttons are Reversed.+ Mouse Scroll. Allows the mouse scroll wheel to effect scrollbars
when the mouse is over a scrollable area. Can be toggledbetween Enabled and Disabled.
+ Mouse Scroll Speed. Sets how fast the mouse scroll wheel willscroll in scrollable areas. Can be set between 1 and 400.
+ Free Camera Movement. Can be toggled between Enabled andDisabled.
+ Disable Camera Shake. Can be toggled between Enabled andDisabled.
KeymappingThis tab allows you to reset and define key assignments forcontrolling your character and other commands in the game
Graphics
+ Screen/UI Resolution. Allows you to select among numerousscreen resolutions, ranging from 800x600 to 1920x1200.
+ 3D Resolution Scaling. Allows you to specify what resolution the3D world is rendered in.
Graphics & AudioGraphics & Audio
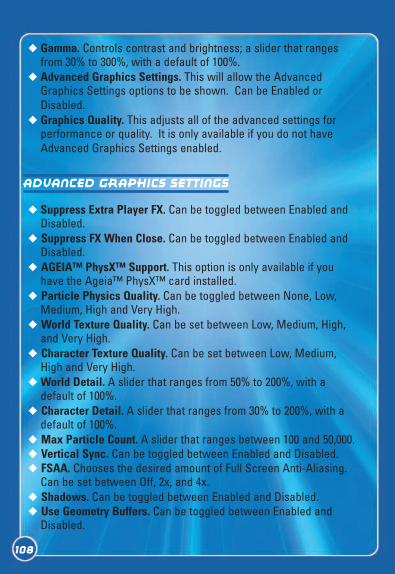
+ Gamma. Controls contrast and brightness; a slider that rangesfrom 30% to 300%, with a default of 100%.
+ Advanced Graphics Settings. This will allow the AdvancedGraphics Settings options to be shown. Can be Enabled orDisabled.
+ Graphics Quality. This adjusts all of the advanced settings forperformance or quality. It is only available if you do not haveAdvanced Graphics Settings enabled.
advanced Graphics settings
+ Suppress Extra Player FX. Can be toggled between Enabled andDisabled.
+ Suppress FX When Close. Can be toggled between Enabled andDisabled.
+ AGEIA™ PhysX™ Support. This option is only available if youhave the Ageia™ PhysX™ card installed.
+ Particle Physics Quality. Can be toggled between None, Low,Medium, High and Very High.
+ World Texture Quality. Can be set between Low, Medium, High,and Very High.
+ Character Texture Quality. Can be set between Low, Medium,High and Very High.
+ World Detail. A slider that ranges from 50% to 200%, with adefault of 100%.
+ Character Detail. A slider that ranges from 30% to 200%, with adefault of 100%.
+ Max Particle Count. A slider that ranges between 100 and 50,000.+ Vertical Sync. Can be toggled between Enabled and Disabled.+ FSAA. Chooses the desired amount of Full Screen Anti-Aliasing.
Can be set between Off, 2x, and 4x. + Shadows. Can be toggled between Enabled and Disabled.+ Use Geometry Buffers. Can be toggled between Enabled and
Disabled.
108
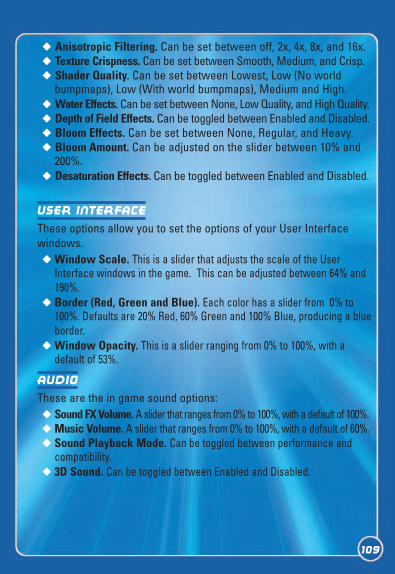
109
+ Anisotropic Filtering. Can be set between off, 2x, 4x, 8x, and 16x.+ Texture Crispness. Can be set between Smooth, Medium, and Crisp.+ Shader Quality. Can be set between Lowest, Low (No world
bumpmaps), Low (With world bumpmaps), Medium and High.+ Water Effects. Can be set between None, Low Quality, and High Quality.+ Depth of Field Effects. Can be toggled between Enabled and Disabled.+ Bloom Effects. Can be set between None, Regular, and Heavy.+ Bloom Amount. Can be adjusted on the slider between 10% and
200%.+ Desaturation Effects. Can be toggled between Enabled and Disabled.
User Interface
These options allow you to set the options of your User Interfacewindows. + Window Scale. This is a slider that adjusts the scale of the User
Interface windows in the game. This can be adjusted between 64% and190%.
+ Border (Red, Green and Blue). Each color has a slider from 0% to100%. Defaults are 20% Red, 60% Green and 100% Blue, producing a blueborder.
+ Window Opacity. This is a slider ranging from 0% to 100%, with adefault of 53%.
Audio
These are the in game sound options:+ Sound FX Volume. A slider that ranges from 0% to 100%, with a default of 100%.+ Music Volume. A slider that ranges from 0% to 100%, with a default of 60%.+ Sound Playback Mode. Can be toggled between performance and
compatibility.+ 3D Sound. Can be toggled between Enabled and Disabled.
110
Chat Bubble Color
These are options to adjust how your text and text bubbles appear inthe game:+ Text (Red, Green, and Blue). Each color has a slider from 0% to 100%.
Defaults are 0% for all which produces black text.+ Background (Red, Green, and Blue). Each color has a slider from 0%
to 100%. Defaults are 100% for all which produces a white chat bubbleabove your character.
111
Paragon CityParagon City
City ZonesCity Zones
After the Rikti war, Paragon City erected impenetrable force wallsbetween the different zones of the city, to make it easier to defend.Citizens can pass through these walls using either the monorail (seebelow) or a few strategically placed tunnels.
There are three distinct kinds of zone in Paragon City:
City Zones are where civilians live and work. They may suffer fromcrime in the streets but, with the help of the city’s Heroes, most people manage to maintain their day-to-day existence. You can passfreely between city zones.
War Zones are co-op zones that both Villains and Heroes haveaccess to. While in War Zones, such as the Rikti War Zone, Villainsand Heroes cannot attack each other.
Hazard Zones are off limits to civilians. They have been closed offand totally given over to the criminal element. Only Heroes of theappropriate Security Level can enter, to attempt to keep some kind ofcheck on criminal activity. (To enter a hazard zone, click on one ofthetwo riot policemen stationed at the entrance. If your level is highenough, you will be able to pass.)
Trial Zones are so dangerous that only the most powerful Heroes canenter, and then only in groups.
PVP Zones are places where you can face off against your fellowheroes or, even better, villains controlled by other, real-life, players!One of the first places you’ll probably visit is Bloody Bay, which is agiant FFA (free-for-all) area where heroes and villains clash in mightybattles. Please see the PVP chapter for more information.
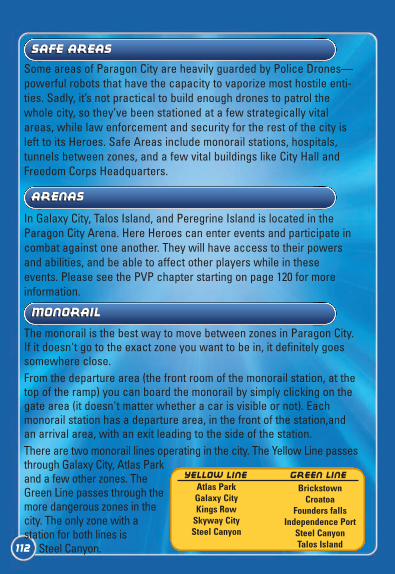
MonorailMonorail
The monorail is the best way to move between zones in Paragon City.If it doesn't go to the exact zone you want to be in, it definitely goessomewhere close. From the departure area (the front room of the monorail station, at thetop of the ramp) you can board the monorail by simply clicking on thegate area (it doesn't matter whether a car is visible or not). Eachmonorail station has a departure area, in the front of the station,andan arrival area, with an exit leading to the side of the station.There are two monorail lines operating in the city. The Yellow Line passesthrough Galaxy City, Atlas Parkand a few other zones. TheGreen Line passes through themore dangerous zones in thecity. The only zone with a station for both lines is
Steel Canyon.
ArenasArenas
Safe AreasSafe Areas
Some areas of Paragon City are heavily guarded by Police Drones—powerful robots that have the capacity to vaporize most hostile enti-ties. Sadly, it’s not practical to build enough drones to patrol thewhole city, so they’ve been stationed at a few strategically vitalareas, while law enforcement and security for the rest of the city isleft to its Heroes. Safe Areas include monorail stations, hospitals,tunnels between zones, and a few vital buildings like City Hall andFreedom Corps Headquarters.
In Galaxy City, Talos Island, and Peregrine Island is located in theParagon City Arena. Here Heroes can enter events and participate incombat against one another. They will have access to their powersand abilities, and be able to affect other players while in these events. Please see the PVP chapter starting on page 120 for moreinformation.
Yellow Line Green LineAtlas ParkGalaxy CityKings Row
Skyway CitySteel Canyon
BrickstownCroatoa
Founders fallsIndependence Port
Steel CanyonTalos Island112
113
Ferry SystemFerry System
The Ferry System is used to get citizens of Paragon City out to theislands that lie just off the coast. The Ferry system can be used toaccess Peregrine Island, which is home to Portal Corporation. Inaddition, there is a Hero-smuggling operation that will take charactersto Striga Isle, an island haven for criminal and pirate types that isoperated by The Council.
To see all the Zones in Paragon City, check out the city map includedin your box. In this section, we’ll take a quick look at the zones inwhich you’ll spend most of your first 10 Security Levels.
Atlas Park
Atlas Park is the center of government for Paragon City, housing theCity Hall at the center of Atlas Plaza. The zone is named in honor ofthe WWII Hero Atlas, who almost single-handedly stopped the Naziinvasion of Paragon City, at the cost of his own life. Today, AtlasPark’s most celebrated resident Hero is Ms. Liberty, the city’s mostrespected trainer of novice Heroes, who holds court in front of CityHall.
In recent years, Atlas Park has seen an alarming rise in gang activity.The Hellions street gang has claimed the zone as their turf. TheClockwork also operate in the back allies and rooftops of the zone,pursuing their inscrutable plans. Heroes of Security Level 1-6 shouldbe able to handle most of the dangers on the streets of Atlas Park.
ZonesZones
Zoning OutZoning out
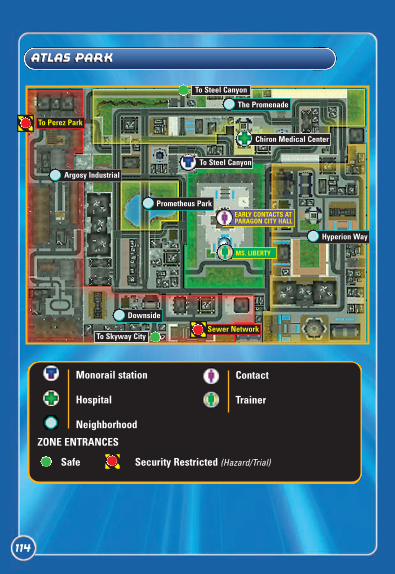
EARLY CONTACTS ATPARAGON CITY HALL
Hyperion Way
The Promenade
Argosy Industrial
Prometheus Park
Downside
To Skyway CitySewer Network
Chiron Medical Center
To Perez Park
To Steel Canyon
To Steel Canyon
MS. LIBERTY
Monorail station
Hospital
Neighborhood
Contact
Trainer
ZONE ENTRANCES
Safe Security Restricted (Hazard/Trial)
Atlas parkAtlas Park
114
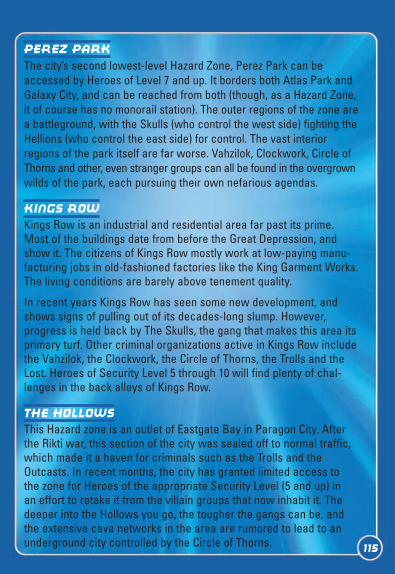
115
Perez Park
The city’s second lowest-level Hazard Zone, Perez Park can beaccessed by Heroes of Level 7 and up. It borders both Atlas Park andGalaxy City, and can be reached from both (though, as a Hazard Zone,it of course has no monorail station). The outer regions of the zone area battleground, with the Skulls (who control the west side) fighting theHellions (who control the east side) for control. The vast interiorregions of the park itself are far worse. Vahzilok, Clockwork, Circle ofThorns and other, even stranger groups can all be found in the overgrownwilds of the park, each pursuing their own nefarious agendas.
kings row
Kings Row is an industrial and residential area far past its prime.Most of the buildings date from before the Great Depression, andshow it. The citizens of Kings Row mostly work at low-paying manu-facturing jobs in old-fashioned factories like the King Garment Works.The living conditions are barely above tenement quality.
In recent years Kings Row has seen some new development, andshows signs of pulling out of its decades-long slump. However,progress is held back by The Skulls, the gang that makes this area itsprimary turf. Other criminal organizations active in Kings Row includethe Vahzilok, the Clockwork, the Circle of Thorns, the Trolls and theLost. Heroes of Security Level 5 through 10 will find plenty of chal-lenges in the back alleys of Kings Row.
The Hollows
This Hazard zone is an outlet of Eastgate Bay in Paragon City. Afterthe Rikti war, this section of the city was sealed off to normal traffic,which made it a haven for criminals such as the Trolls and theOutcasts. In recent months, the city has granted limited access to the zone for Heroes of the appropriate Security Level (5 and up) in an effort to retake it from the villain groups that now inhabit it. Thedeeper into the Hollows you go, the tougher the gangs can be, andthe extensive cave networks in the area are rumored to lead to anunderground city controlled by the Circle of Thorns.
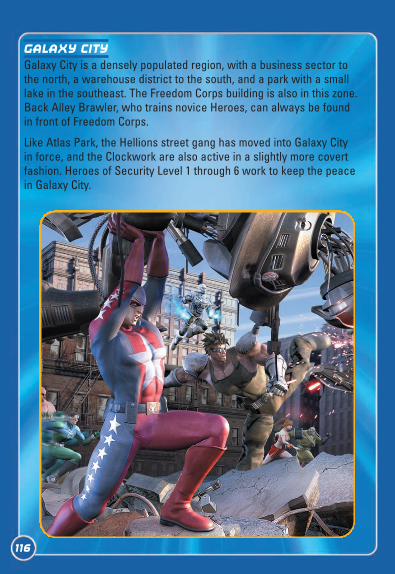
116
Galaxy City
Galaxy City is a densely populated region, with a business sector tothe north, a warehouse district to the south, and a park with a smalllake in the southeast. The Freedom Corps building is also in this zone.Back Alley Brawler, who trains novice Heroes, can always be foundin front of Freedom Corps.
Like Atlas Park, the Hellions street gang has moved into Galaxy Cityin force, and the Clockwork are also active in a slightly more covertfashion. Heroes of Security Level 1 through 6 work to keep the peacein Galaxy City.

BACKSTREETBRAWLER
Monorail station
Hospital
Neighborhood
Contact
Trainer
ZONE ENTRANCES
Safe Security Restricted (Hazard/Trial)
To Perez Park
EARLY CONTACTS ATFREEDOM COURT
To Kings Row
To Kings Row
Orion Beltway
Equinox
Gemini Park
Constellation Row
Nebula District
Cygnus Medical Center
Galaxy CityGalaxy City
117
118
PVP: Old and NewPVP: Old and New
Arena PVPArena PVP
In Galaxy City, Talos Island, and Peregrine Island is located theParagon City Arena. Here Heroes can enter events and participate in combat against one another and villain players. They will haveaccess to their powers and abilities, and be able to affect other players while in these events. This is called “Player vs. Player” orPVP for short.
In PVP events, some powers work slightly differently than they doagainst normal villains. One such power is Brawl, which can knockdown an opponent’s toggle powers upon a successful hit. Check thedescription of your powers to see if they have alternate effects inPVP than in the normal game.
In order to play in the Arena, you first need to enter an Event usingthe Battle Terminals. It doesn’t matter which of the three Arenas youare physically in, as all events are linked together. This way someonein Galaxy City can enter an event with someone who is in TalosIsland. Likewise, the same hero in Galaxy could battle a villain usingthe Arena in Port Oakes (found in City of Villains).
Events are broken down into various game types:
Duel. A one-on-one battle. Duels do not affect your PVP rating.
Team Duel. This is multiple players fighting against an equal amountof players.
Battle Royal. This is multiple players fighting where it’s every man for themselves.
Team Battle Royal. This has multiple teams of players fighting it out. Pentad Challenge. This is a team event, where your team mustbe made up of exactly one Blaster, Controller, Defender, Scrapper,and Tanker.
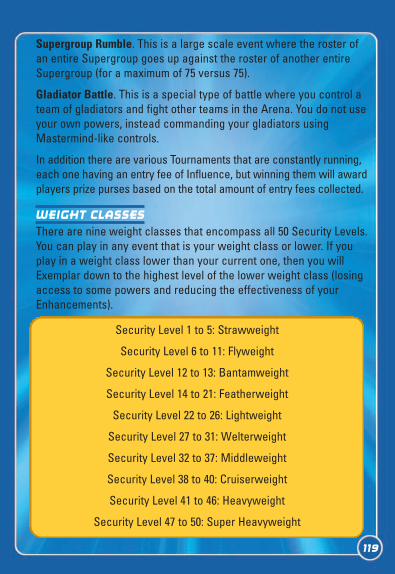
Supergroup Rumble. This is a large scale event where the roster ofan entire Supergroup goes up against the roster of another entireSupergroup (for a maximum of 75 versus 75).
Gladiator Battle. This is a special type of battle where you control ateam of gladiators and fight other teams in the Arena. You do not useyour own powers, instead commanding your gladiators usingMastermind-like controls.
In addition there are various Tournaments that are constantly running,each one having an entry fee of Influence, but winning them will awardplayers prize purses based on the total amount of entry fees collected.
WEIGHT CLASSES
There are nine weight classes that encompass all 50 Security Levels.You can play in any event that is your weight class or lower. If youplay in a weight class lower than your current one, then you willExemplar down to the highest level of the lower weight class (losingaccess to some powers and reducing the effectiveness of yourEnhancements).
119
Security Level 1 to 5: Strawweight
Security Level 6 to 11: Flyweight
Security Level 12 to 13: Bantamweight
Security Level 14 to 21: Featherweight
Security Level 22 to 26: Lightweight
Security Level 27 to 31: Welterweight
Security Level 32 to 37: Middleweight
Security Level 38 to 40: Cruiserweight
Security Level 41 to 46: Heavyweight
Security Level 47 to 50: Super Heavyweight
GROUND RULES
There are several ground rules that can be set by an Event Creatorbefore the event begins. These are:
Tactical Start. All players begin the match with 0 Endurance andno powers active.Max Recovery. All players get a huge Endurance Recovery buff making Endurance nearly infinite. (Disables PVP Rating when enabled)Limit Stealth. Powers Stealth Powers no longer make your char-acter untargetable, but keeps them as hard to see.No Pool Powers. Powers in Power Pools are disabled.No Travel Powers. Jump height and Run speed are limited, and Flyand Teleport powers do not work. You still get the other benefitsfrom those powers though (such as the Defense benefit of Hover).No Observers. Other players are unable to observe your match.
GLADIATOR BATTLES
Gladiator matches are a special type of Arena game. Unlike othermatches, players do not directly fight in these battles. Instead youcontrol a team of gladiators and fight other teams of gladiators con-trolled by other players.
You unlock gladiators by earning gladiator badges as you play yourhero. After you have earned at least one badge you can go to anarena kiosk and create your own team. The gladiators you haveunlocked with be shown. Next to each is a point value. You can create a team of gladiators of 2000 points or less, but you cannothave more than 3 gladiators of the same type. You can change yourteam to try out new strategies or add new gladiators that you haveunlocked.
In the battle your team automatically appears. Your hero will be present to control your team, although you cannot be harmed or useyour own powers. The pet window automatically shows all your
gladiators. Next to each are mastermind-styled controls to give120
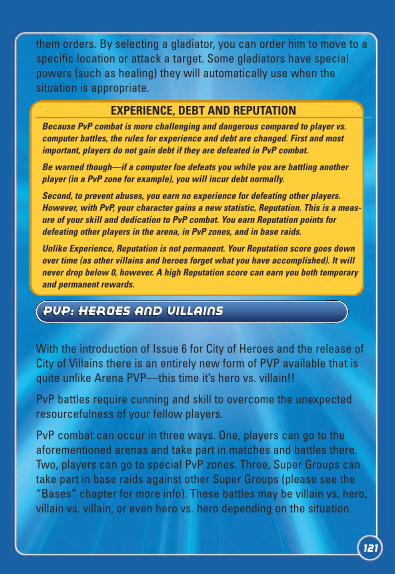
121
them orders. By selecting a gladiator, you can order him to move to a specific location or attack a target. Some gladiators have specialpowers (such as healing) they will automatically use when the situation is appropriate.
EXPERIENCE, DEBT AND REPUTATIONBecause PvP combat is more challenging and dangerous compared to player vs.computer battles, the rules for experience and debt are changed. First and mostimportant, players do not gain debt if they are defeated in PvP combat.
Be warned though—if a computer foe defeats you while you are battling anotherplayer (in a PvP zone for example), you will incur debt normally.
Second, to prevent abuses, you earn no experience for defeating other players.However, with PvP, your character gains a new statistic, Reputation. This is a meas-ure of your skill and dedication to PvP combat. You earn Reputation points fordefeating other players in the arena, in PvP zones, and in base raids.
Unlike Experience, Reputation is not permanent. Your Reputation score goes downover time (as other villains and heroes forget what you have accomplished). It willnever drop below 0, however. A high Reputation score can earn you both temporaryand permanent rewards.
With the introduction of Issue 6 for City of Heroes and the release ofCity of Villains there is an entirely new form of PVP available that isquite unlike Arena PVP—this time it’s hero vs. villain!!
PvP battles require cunning and skill to overcome the unexpectedresourcefulness of your fellow players.
PvP combat can occur in three ways. One, players can go to theaforementioned arenas and take part in matches and battles there.Two, players can go to special PvP zones. Three, Super Groups cantake part in base raids against other Super Groups (please see the“Bases” chapter for more info). These battles may be villain vs. hero,villain vs. villain, or even hero vs. hero depending on the situation.
pvp: heroes and villainsPVP: heroes and villains
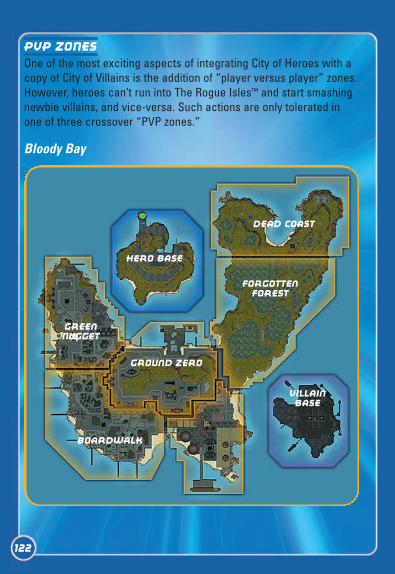
PVP ZONES
One of the most exciting aspects of integrating City of Heroes with acopy of City of Villains is the addition of “player versus player” zones.However, heroes can’t run into The Rogue Isles™ and start smashingnewbie villains, and vice-versa. Such actions are only tolerated inone of three crossover “PVP zones.”
Bloody Bay
Hero Base
GreenNugget
Boardwalk
Ground Zero
forgottenforest
dead coast
VillainBase
122
Long ago, slavers coming to the Americas used the tiny town ofOceanview as a sort of “sorting pen.” In 1817, one group of slaves,perhaps encouraged by spirits of the long-lost Mu founders, rose upin rebellion. A massive battle was waged, and it is said the bay ranred with blood. The island was forever after called “Bloody Bay.” Itsdark past was eventually forgotten by all but those who visited thesacred cemeteries in the Upland Woods, and by the 1900s, BloodyBay prospered.
Then came Shiva, the destroyer of worlds.
In 1989, shards of a potentially world-shattering meteor destroyed inthe 1960s rained down on the island. Besides the damage caused bythe impact and radiation, residents reported a far more sinister phe-nomenon—the dead rose. But these were no mere zombies. Thedead seemed to be infected by some sort of alien life-form. Corpsesrose from the earth surrounded by bluish protoplasm, and attackedany living thing they crossed.
The island was quickly evacuated and abandoned to the horrific“Shivans” by Arachnos™.
Recently, it was discovered that the asteroids that crashed on BloodyBay have valuable properties desired by both Longbow™ andArachnos. Teams from both organizations have established bases onthe island to study the samples, but gathering fragments is incrediblydifficult thanks to the presence of the monstrous Shivans and otherscavengers.
Gameplay
Your goal in Bloody Bay is to collect fragments from each of the sixscattered meteors. As the first researcher to spot the meteor wasIndian, the meteor fragments are numbered in Hindi: Ek, Do, Teen,Char, Panch, and Jay.
123
124
After receiving an Ore Extractor temporary power from the scientistcontact, you can visit each of the meteor shards and extract a sam-ple. Simply target the meteor while standing close to it, and use theOre Extractor. You’ll see a meteor shard appear in a special inventorybeneath your Navigation Bar.
When you have a fragment from all six meteors, you can go to one ofthe many Firebase processing stations scattered around the isle.You’ll know them when you see them—they’re protected by a ring ofautomated turrets that must be defeated before you can override thestation.
Once you’ve done so, process the meteor fragments with the OreConverter inside the Firebase into a “Sample.” Take this to your initialcontact and he’ll reward you with a very special temporary power!
Hero vs. Villain: Beware, because heroes are not the only ones afterthese meteor pieces. Arachnos is also interested in the meteor. Playervillains will also be seeking pieces and may attempt to stop you!
Spoils of War: If you take out an opposing player, his fragments orsample are randomly distributed to your team.
SIREN’S CALL
Randall the Cunning wasn’t a very good pirate. He’d been driven offand repelled at sea over a dozen times, and had never taken a goodprize in his decade-long career in and around the Rogue Isles. But hewas clever. And mean.
When the French cracked down on the pirates of the isles, Randallheaded inland. On the northeastern shores of what would laterbecome Paragon City, the pirate found a small village calledFossburg. Randall hid his ship and pretended to be a captain of the“Colonial Coastal Defenses.” His men were his crew, and the“Captain” said he’d been sent to erect a lighthouse along Fossburg’sdangerous shoals. The locals shrugged, put their backs into it, andcreated a lighthouse exactly where Randall told them to.
Randall had been trained as an engineer and did in fact know whathe was doing. But the lighthouse wasn’t designed to steer ships clearof the rocks—it was designed to lure them onto it from the largercities across the bay.
After many a terrible wreck, the villagers finally caught on to theruse. Randall’s crew was captured and hung. Randall himselfescaped, along with most of his treasure, and was never seen again.
Fossburg was ever after called Siren’s Call, after the sirens of Greekmyth that lured ships to their doom. Its name was officially changedwhen the area was incorporated into Paragon City decades later.
Sunburst and the Aeon Bomb
Nearly a year ago, the War Walls in the northeastern corner of theSiren’s Call were demolished by a massive blast. A relatively newhero known as Sunburst chased a small-time crook out to the docks.The crook stole a small boat and Sunburst pursued. The hero hadoften had trouble controlling his incredible powers, and according towitnesses on the Gazdul oil rig, literally went supernova and explod-ed while trying to stop the thief’s boat.
A tragedy to be sure, but far worse was that Sunburst destroyedSiren’s Call’s War Walls.
Since then, villains from the Rogue Isles have been trickling in. Thereare far worse dangers confronting the good people of Paragon rightnow however, so repairing the War Walls has been given low priority.Or perhaps, as some in the press have theorized, it is all a clever trapto lure in the worst of Lord Recluse™’s minions.
Gameplay
Siren’s Call is all about taking the fight to your opponent! If you’replaying a villain, you’ll succeed by smashing Longbow and playerheroes wherever you can find them. If you’re a hero, you must stop
125
the infiltration of Arachnos and hordes of player villains looking toexploit the hole in the War Walls.
Look for “Hotspots” that move about Siren’s Call. This is where a fightbetween agents of Arachnos and Longbow is currently raging. Defeatyour opponents and you’ll help your side, as well as earning “BountyPoints” for yourself.
In addition, your initial contact will give you the name of a playeropponent to track down. Find this individual and defeat him or her,and you’ll gain a substantial Bounty award.
Bounty Points can be turned in to your initial contact to buy variousdifferent awards, such as Inspirations and enhancements!
Stores: If your side is winning, you’ll find stores where you can pur-chase special powers that can dramatically improve your chances ofdefeating your foes. Get behind and your opponents have this advan-tage instead!
Fleeing Foes: If your target leaves the zone, you will automatically begiven a new bounty target. If you leave the zone, you’ll automaticallyforfeit any bounty that you have earned.
MiniMap Mayhem: Your assigned target will show up on your mini-map, but it only updates periodically. You can use it to home in onyour foe, but you’ll need to look around once you get there. If youthink you’re being hunted, make sure you don’t stay in the sameplace for long!
Warburg
Warburg was home to a Council base during the world’s long ColdWar. Missile silos were erected, secret weapons were developed indeep underground bunkers, and spies lived in the cold gray towersthat dot the island’s surface.
126

The Council was “forcibly evicted” in the late 1960s by Lord Recluse™
and their facilities taken over by Arachnos. Scientists and eventuallya support economy of civilian workers rose on the surface and slowlybegan to build homes and businesses.
The underground labs the Council left behind were rechristened “theWeb,” and most of the old missiles destroyed. One large rocket-firingplatform at the center of the island remained, but even it was hiddenby the false façade of a building.
Until recently.
Marshal Jason Blitz believed Lord Recluse wasn’t acting fast enoughin his bid to take over the world. He found it tragic that the Web haddeveloped so many incredible weapons and none of them were beingused on the hated heroes!
When Blitz learned he was dying of cancer, he decided to speedthings up a bit so that he could live to see the defeat of Paragon City.He murdered Governor Melody Harkness and took over the city witha cadre of troops loyal to him. Soon after, he demolished the falsefaçade on the Warburg Rocket at the center of his city and startedfiring warheads armed with various toxins on Paragon City.
Lord Recluse promised the UN he would rectify the situation, but histroops have so far been stalemated by their rivals. (Or so Recluseclaims.)
Since the Warburg Weapons are being used on American soil,Longbow has taken it upon themselves—with presidentialapproval—to “intervene” in the Rogue Isles and take down MarshalBlitz. They’ve asked for help from Paragon City’s numerous heroes,and they’ve begun arriving in force.
Recluse has sent minimal troops to the area to stop Blitz, but hasinstead asked for help from the numerous super-powered “villains”who dwell on his isles. Most believe Recluse is not only content to let
127
Blitz wreak havoc on Paragon City, but is interested in seeing whichvillains prove themselves in this Darwinian game of survival.
Gameplay
In Warburg, your hero or villain and his companions can not onlystrike a blow against their foes by defeating them in personal com-bat, but also secure a particularly useful asset—a Warburg Rocketstrike!
To launch the rocket, your team must first find Warburg Scientiststrapped in the underground Web and escort them to special bunkerson the surface. Be careful down there, for there are rumors that hor-rible creatures created by Arachnos’ research gone horribly wrongare free and wandering the cramped tunnels in search of prey.
If you can successfully bring a scientist from the Web to one of thebunkers above ground, he’ll give your team a Code Fragment.
Once you have three Code Fragments, you must return to the Web,find one of three arming rooms and arm a Warburg Rocket. (Thereare numerous rockets located in a hidden underground storage facili-ty, so don’t worry if you see someone else launch one first.)
If you successfully arm a rocket, you’re given a Launch Code that’sgood for a very short amount of time. Hurry to the Warburg Rocketitself (located at the eastern tip of the isle) and you can launch therocket into geosynchronous orbit. You’ll be given a temporary powerwhich you can thereafter use to call for your rocket to strike. Standback—you don’t want to be under a rocket when it launches!
Know Your Foe: With stakes this high, it’s open season. It’s a free forall, with everyone fighting everyone who’s not on your team! It’simportant to slow the spread of these dangerous weapons, so heroescan battle heroes or villains, and vice-versa.
128
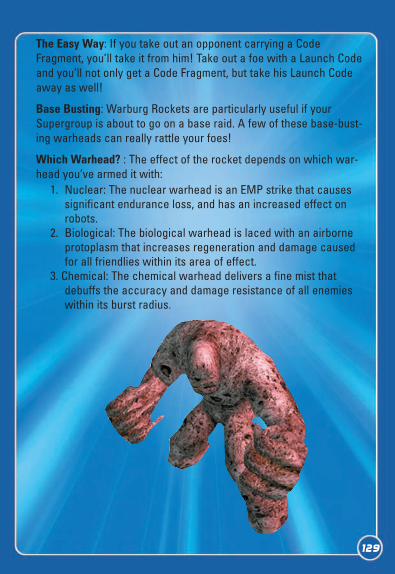
The Easy Way: If you take out an opponent carrying a CodeFragment, you’ll take it from him! Take out a foe with a Launch Codeand you’ll not only get a Code Fragment, but take his Launch Codeaway as well!
Base Busting: Warburg Rockets are particularly useful if yourSupergroup is about to go on a base raid. A few of these base-bust-ing warheads can really rattle your foes!
Which Warhead? : The effect of the rocket depends on which war-head you’ve armed it with:
1. Nuclear: The nuclear warhead is an EMP strike that causes significant endurance loss, and has an increased effect on robots.
2. Biological: The biological warhead is laced with an airborne protoplasm that increases regeneration and damage caused for all friendlies within its area of effect.
3. Chemical: The chemical warhead delivers a fine mist that debuffs the accuracy and damage resistance of all enemies within its burst radius.
129
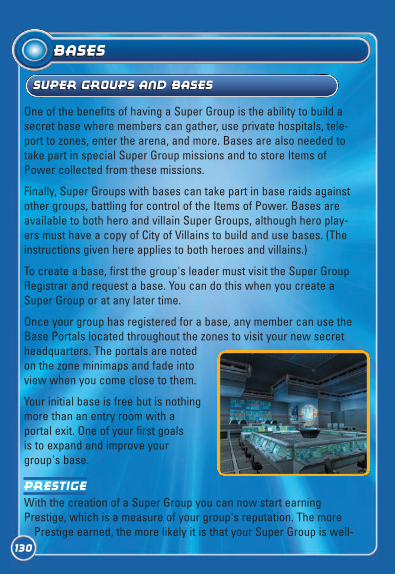
basesbases
One of the benefits of having a Super Group is the ability to build asecret base where members can gather, use private hospitals, tele-port to zones, enter the arena, and more. Bases are also needed totake part in special Super Group missions and to store Items ofPower collected from these missions.
Finally, Super Groups with bases can take part in base raids againstother groups, battling for control of the Items of Power. Bases areavailable to both hero and villain Super Groups, although hero play-ers must have a copy of City of Villains to build and use bases. (Theinstructions given here applies to both heroes and villains.)
To create a base, first the group's leader must visit the Super GroupRegistrar and request a base. You can do this when you create aSuper Group or at any later time.
Once your group has registered for a base, any member can use theBase Portals located throughout the zones to visit your new secretheadquarters. The portals are notedon the zone minimaps and fade intoview when you come close to them.
Your initial base is free but is nothingmore than an entry room with a portal exit. One of your first goals is to expand and improve your group's base.
Prestige
With the creation of a Super Group you can now start earningPrestige, which is a measure of your group's reputation. The more
Prestige earned, the more likely it is that your Super Group is well-
super groups and basesSuper groups and bases
130
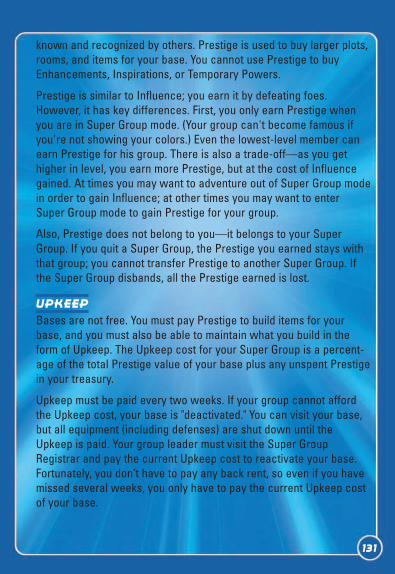
known and recognized by others. Prestige is used to buy larger plots,rooms, and items for your base. You cannot use Prestige to buyEnhancements, Inspirations, or Temporary Powers.
Prestige is similar to Influence; you earn it by defeating foes.However, it has key differences. First, you only earn Prestige whenyou are in Super Group mode. (Your group can't become famous ifyou're not showing your colors.) Even the lowest-level member canearn Prestige for his group. There is also a trade-off—as you gethigher in level, you earn more Prestige, but at the cost of Influencegained. At times you may want to adventure out of Super Group modein order to gain Influence; at other times you may want to enterSuper Group mode to gain Prestige for your group.
Also, Prestige does not belong to you—it belongs to your SuperGroup. If you quit a Super Group, the Prestige you earned stays withthat group; you cannot transfer Prestige to another Super Group. Ifthe Super Group disbands, all the Prestige earned is lost.
Upkeep
Bases are not free. You must pay Prestige to build items for yourbase, and you must also be able to maintain what you build in theform of Upkeep. The Upkeep cost for your Super Group is a percent-age of the total Prestige value of your base plus any unspent Prestigein your treasury.
Upkeep must be paid every two weeks. If your group cannot affordthe Upkeep cost, your base is "deactivated." You can visit your base,but all equipment (including defenses) are shut down until theUpkeep is paid. Your group leader must visit the Super GroupRegistrar and pay the current Upkeep cost to reactivate your base.Fortunately, you don’t have to pay any back rent, so even if you havemissed several weeks, you only have to pay the current Upkeep costof your base.
131
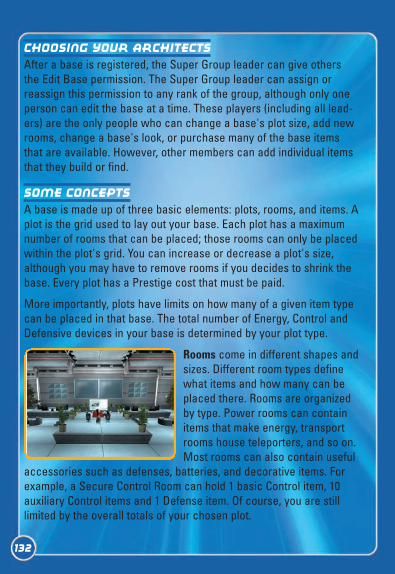
Choosing your Architects
After a base is registered, the Super Group leader can give othersthe Edit Base permission. The Super Group leader can assign orreassign this permission to any rank of the group, although only oneperson can edit the base at a time. These players (including all lead-ers) are the only people who can change a base's plot size, add newrooms, change a base's look, or purchase many of the base itemsthat are available. However, other members can add individual itemsthat they build or find.
Some Concepts
A base is made up of three basic elements: plots, rooms, and items. Aplot is the grid used to lay out your base. Each plot has a maximumnumber of rooms that can be placed; those rooms can only be placedwithin the plot's grid. You can increase or decrease a plot's size,although you may have to remove rooms if you decides to shrink thebase. Every plot has a Prestige cost that must be paid.
More importantly, plots have limits on how many of a given item typecan be placed in that base. The total number of Energy, Control andDefensive devices in your base is determined by your plot type.
Rooms come in different shapes andsizes. Different room types definewhat items and how many can beplaced there. Rooms are organizedby type. Power rooms can containitems that make energy, transportrooms house teleporters, and so on.Most rooms can also contain useful
accessories such as defenses, batteries, and decorative items. Forexample, a Secure Control Room can hold 1 basic Control item, 10auxiliary Control items and 1 Defense item. Of course, you are stilllimited by the overall totals of your chosen plot.
132
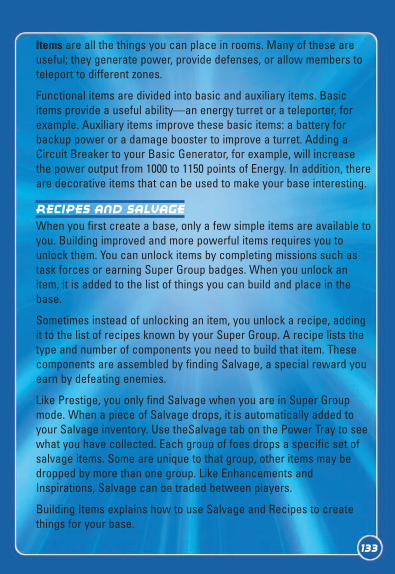
Items are all the things you can place in rooms. Many of these areuseful; they generate power, provide defenses, or allow members toteleport to different zones.
Functional items are divided into basic and auxiliary items. Basicitems provide a useful ability—an energy turret or a teleporter, forexample. Auxiliary items improve these basic items: a battery forbackup power or a damage booster to improve a turret. Adding aCircuit Breaker to your Basic Generator, for example, will increasethe power output from 1000 to 1150 points of Energy. In addition, thereare decorative items that can be used to make your base interesting.
Recipes and Salvage
When you first create a base, only a few simple items are available toyou. Building improved and more powerful items requires you tounlock them. You can unlock items by completing missions such astask forces or earning Super Group badges. When you unlock anitem, it is added to the list of things you can build and place in thebase.
Sometimes instead of unlocking an item, you unlock a recipe, addingit to the list of recipes known by your Super Group. A recipe lists thetype and number of components you need to build that item. Thesecomponents are assembled by finding Salvage, a special reward youearn by defeating enemies.
Like Prestige, you only find Salvage when you are in Super Groupmode. When a piece of Salvage drops, it is automatically added toyour Salvage inventory. Use theSalvage tab on the Power Tray to seewhat you have collected. Each group of foes drops a specific set ofsalvage items. Some are unique to that group, other items may bedropped by more than one group. Like Enhancements andInspirations, Salvage can be traded between players.
Building Items explains how to use Salvage and Recipes to createthings for your base.
133
Energy and Control
Most items must have Energy and Control points provided to thembefore they will operate. Energy is the power needed to make some-thing run; it comes from generators and arcane devices placed inPower rooms, batteries provide emergency power to all items in asingle room for short periods of time. Control represents the equip-ment—computers, software, spells, or whatever—that ensureseverything is functioning properly. The Energy and Control an itemneeds is displayed when it is selected.
If the amounts of Energy and Control you produce are greater thanthe totals needed by all your base items, everything will function nor-mally. If the amounts your base produces are less than your needs,items within your base will be inoperative. Generally, defensive itemsare the last things to be powered down, since these are among themost important things needed during base raids.
Using the Base Editor
Adding to or changing a base is done through the Base Editor. Whena player with Base Edit permission is in the base’s entrance, the
options Edit Plot and Edit Base appearon the screen. (Note, these choices donot appear during a base raid!) Otherplayers can use a limited form of theBase Editor to place items they createfrom Salvage they have gathered.Again, this cannot be done during abase raid.
Basic Controls
When you open the Base Editor, your have a bird's-eye view of thecurrent base layout. Using your character, you can move about thebase and move the camera normally. However, the walls, ceiling, orfloor become invisible if you zoom out past the room's limits. This
134
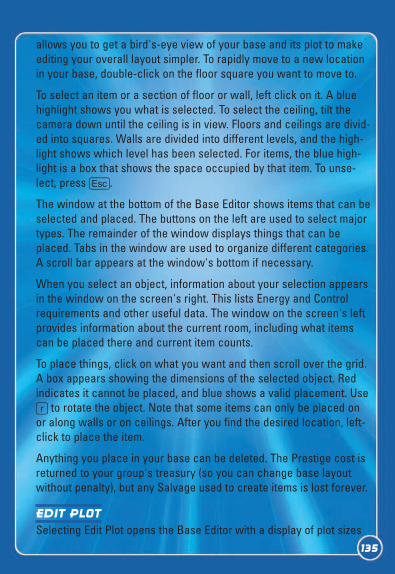
allows you to get a bird's-eye view of your base and its plot to makeediting your overall layout simpler. To rapidly move to a new locationin your base, double-click on the floor square you want to move to.
To select an item or a section of floor or wall, left click on it. A bluehighlight shows you what is selected. To select the ceiling, tilt thecamera down until the ceiling is in view. Floors and ceilings are divid-ed into squares. Walls are divided into different levels, and the high-light shows which level has been selected. For items, the blue high-light is a box that shows the space occupied by that item. To unse-lect, press q.
The window at the bottom of the Base Editor shows items that can beselected and placed. The buttons on the left are used to select majortypes. The remainder of the window displays things that can beplaced. Tabs in the window are used to organize different categories.A scroll bar appears at the window's bottom if necessary.
When you select an object, information about your selection appearsin the window on the screen's right. This lists Energy and Controlrequirements and other useful data. The window on the screen's leftprovides information about the current room, including what itemscan be placed there and current item counts.
To place things, click on what you want and then scroll over the grid.A box appears showing the dimensions of the selected object. Redindicates it cannot be placed, and blue shows a valid placement. User to rotate the object. Note that some items can only be placed onor along walls or on ceilings. After you find the desired location, left-click to place the item.
Anything you place in your base can be deleted. The Prestige cost isreturned to your group's treasury (so you can change base layoutwithout penalty), but any Salvage used to create items is lost forever.
Edit Plot
Selecting Edit Plot opens the Base Editor with a display of plot sizes135
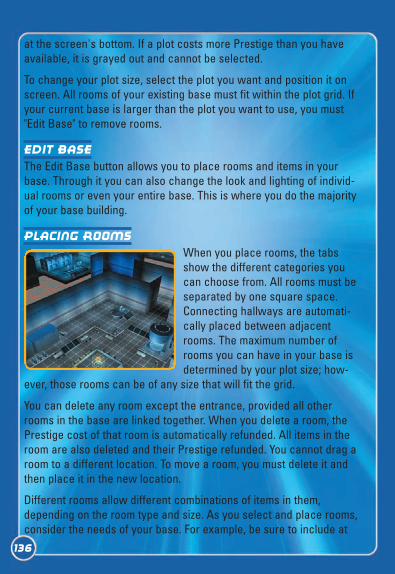
at the screen's bottom. If a plot costs more Prestige than you haveavailable, it is grayed out and cannot be selected.
To change your plot size, select the plot you want and position it onscreen. All rooms of your existing base must fit within the plot grid. Ifyour current base is larger than the plot you want to use, you must"Edit Base" to remove rooms.
Edit Base
The Edit Base button allows you to place rooms and items in yourbase. Through it you can also change the look and lighting of individ-ual rooms or even your entire base. This is where you do the majorityof your base building.
Placing Rooms
When you place rooms, the tabsshow the different categories youcan choose from. All rooms must beseparated by one square space.Connecting hallways are automati-cally placed between adjacentrooms. The maximum number ofrooms you can have in your base isdetermined by your plot size; how-
ever, those rooms can be of any size that will fit the grid.
You can delete any room except the entrance, provided all otherrooms in the base are linked together. When you delete a room, thePrestige cost of that room is automatically refunded. All items in theroom are also deleted and their Prestige refunded. You cannot drag aroom to a different location. To move a room, you must delete it andthen place it in the new location.
Different rooms allow different combinations of items in them,depending on the room type and size. As you select and place rooms,consider the needs of your base. For example, be sure to include at
136
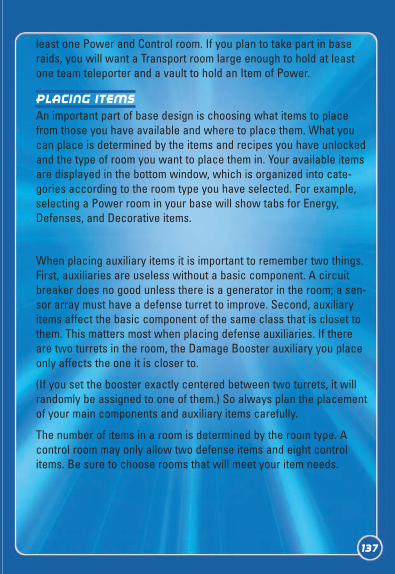
least one Power and Control room. If you plan to take part in baseraids, you will want a Transport room large enough to hold at leastone team teleporter and a vault to hold an Item of Power.
Placing Items
An important part of base design is choosing what items to placefrom those you have available and where to place them. What youcan place is determined by the items and recipes you have unlockedand the type of room you want to place them in. Your available itemsare displayed in the bottom window, which is organized into cate-gories according to the room type you have selected. For example,selecting a Power room in your base will show tabs for Energy,Defenses, and Decorative items.
When placing auxiliary items it is important to remember two things.First, auxiliaries are useless without a basic component. A circuitbreaker does no good unless there is a generator in the room; a sen-sor array must have a defense turret to improve. Second, auxiliaryitems affect the basic component of the same class that is closet tothem. This matters most when placing defense auxiliaries. If thereare two turrets in the room, the Damage Booster auxiliary you placeonly affects the one it is closer to.
(If you set the booster exactly centered between two turrets, it willrandomly be assigned to one of them.) So always plan the placementof your main components and auxiliary items carefully.
The number of items in a room is determined by the room type. Acontrol room may only allow two defense items and eight controlitems. Be sure to choose rooms that will meet your item needs.
137
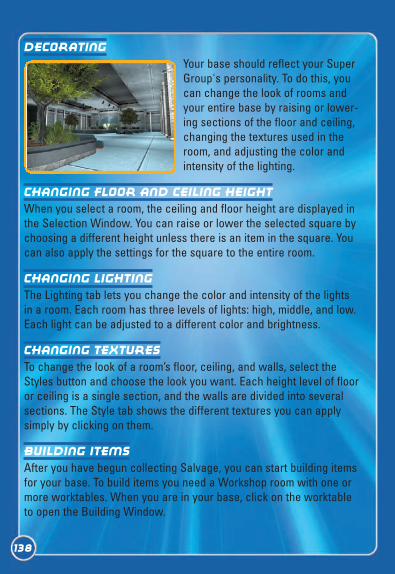
Decorating
Your base should reflect your SuperGroup's personality. To do this, youcan change the look of rooms andyour entire base by raising or lower-ing sections of the floor and ceiling,changing the textures used in theroom, and adjusting the color andintensity of the lighting.
Changing Floor and Ceiling Height
When you select a room, the ceiling and floor height are displayed inthe Selection Window. You can raise or lower the selected square bychoosing a different height unless there is an item in the square. Youcan also apply the settings for the square to the entire room.
Changing Lighting
The Lighting tab lets you change the color and intensity of the lightsin a room. Each room has three levels of lights: high, middle, and low.Each light can be adjusted to a different color and brightness.
Changing Textures
To change the look of a room’s floor, ceiling, and walls, select theStyles button and choose the look you want. Each height level of flooror ceiling is a single section, and the walls are divided into severalsections. The Style tab shows the different textures you can applysimply by clicking on them.
Building Items
After you have begun collecting Salvage, you can start building itemsfor your base. To build items you need a Workshop room with one ormore worktables. When you are in your base, click on the worktableto open the Building Window.
138
Building an item is a two-step process. First you take the Salvage youhave gathered on the streets and turn it into components. Then, withan item recipe, take the right mix of components and create an itemfor your base.
Salvage to Components
The Salvage you collect by defeating foes and completing missions isthe raw material you need to build things, but first you must turnthese scraps into useful components.
Different foes drop different types of Salvage, usually something thatmatches their nature. The Circle of Thorns drops mystical bits whileLongbow Salvage is tech-oriented.
When you have collected the right mix of items from a group, useyour base's workshop to change them into components. Some com-ponents are mystical and require arcane Salvage. Other componentsare technological and require tech Salvage. In addition, eachrequires the appropriate type of worktable: Tech or Arcane. Eachtype has three levels: basic, expert, and advanced. Each level oftable builds a different pair of components.
Once you have the table placed, clicking on it will show the recipesyou can use. The Components tab shows what components you canbuild and what Salvage you need for each. (For simplicity, you canset it to only show the recipes you can use with the Salvage youhave collected.) When you build a component, the Salvage is auto-matically "spent" from your inventory, and the chosen component isadded.
Components to Items
Unlike Salvage, components are assembled pieces and concepts.They are not specific things; tech prototypes can be a variety of innovative pieces of hardware depending on the item being built.Components are either arcane or tech; which you use determines ifthe final result is a magical energy crystal or a turbine generator.
139
Both generate power, but their appearances are different.
The Items tab on your worktable shows the recipes your group hasdiscovered. For convenience, items are grouped by type. Each itemlists the recipe needed to build it and is highlighted if you have theappropriate components on hand. In addition, the Prestige cost is list-ed for each item, which must be paid from the group's total Prestigein order to build the item. Selecting an item to build automaticallyremoves the required components from your inventory and builds the item.
After you exit the Build screen, you must go back to the mainentrance to place the item you built. It will not appear in the normalinventory of the Base Editor; you must use the Place Personal Iteminstead. This is the only time non-Architects can use the Base Editor.The items you built are displayed in the bottom window and can beplaced in the base (all limitations of room type and items per roomapply).
Base Raids
Once your Super Group builds a base, you have the opportunity totake part in base raids. Base raids are PVP battles between SuperGroups, hero or villain. Raids are scheduled events where one groupdefends their base while the other attacks, attempting to seize anItem of Power. The raid lasts until the item is captured or the timelimit is reached.
Items of Power
No base can be raided unless it has at least one Item of Power.These are rare objects that are obtained through special trials avail-able only to Super Groups and at specific times. At all other times,the only way to gain an Item of Power is by making a base raid.
Before capturing an Item of Power, your base must have a vault, anItem of Power base, and six dimensional anchors (which keep theItem of Power from returning to its home dimension). Only then can
140
your group take part in an Item of Power trial or a base raid.
Because they are difficult to obtain, Items of Power give every mem-ber of your group benefits as long as they are in your base. Theserange from increasing Experience earned to additional points ofhealth for your character. Some are so powerful that there is onlyone of that item per server!
Setting Your Raid Time
Once your group brings back an Item of Power, the group leadermust set a raid window. This is a two-hour time slot when othergroups can make a raid against your base. This window is only openon certain days of the week. (Your leader should make careful note ofthe time and days for his group's raid window and inform the rest ofthe group.) If your leader fails to set a raid window, the default time isautomatically set.
Scheduling a Raid
The first step to launching a base raid is to schedule one through theRaid button in the Supergroup window. You can only schedule raids ifyou have been granted that permission and then only against groupswith an equal or greater number of Items of Power. You must give anadvance notice of several days. The Registrar only shows the raidtimes of eligible groups, not the group names. If there is an eligiblegroup, you can schedule a raid simply by selecting the desired time.
Once a raid is scheduled, a notice is sent to both Super Group lead-ers informing them of the time and day of the raid. Both sides canthen arrange their teams for the battle.
Raid Size
A raid can have up to 32 members per side. Only members at the timethe raid was scheduled who choose to be part of the Raid Team cantake part as attackers or defenders. When a raid starts, players whoare not part of a raid are immediately teleported out of the base, backto the last zone they were in.
141
142
Winning a RaidFor attackers to win a raid, they must capture an Item of Power.There are three ways to do this:
• Click on the Item of Power. If any attacker reaches the vault and can click on an Item of Power, they capture that item for their base.
• Destroy the dimensional anchors. If the attackers destroy five of the six dimensional anchors in the base, they can claim one of the defender's Items of Power.
• Set up disruptor pylons. This is a temporary power you can build from Salvage in your base workshop. If the attackers can set up five disruptor pylons (one per room), they can claim an Item of Power.
The defenders can win the raid by:
• Defeating all attackers. If there are no attackers in the base any time after the first 10 minutes, the defenders win and the raid ends.
• The time limit. If the attackers have not captured an Item of Power within 30 minutes, the raid ends and the defenders win.
Destroying and Repairing Base ItemsDuring a raid, attackers can damage or destroy items in a base.Destroyed items cannot be used for the rest of the raid; thus attack-ers may want to destroy base generators or medical equipment inaddition to defenses. (Selected items such as the exit portal andworktable cannot be destroyed.) Damaged items are automaticallyrestored to full health at the end of the raid.
If an item is destroyed, there is a chance it will be automaticallyrepaired at the raid's end. The base's worktable and workshop auxil-iary items determine the chance of repair. Repaired items arerestored to full health.
If a destroyed item is not automatically repaired, it is removed fromthe base. You will have to use your workshop to build a replacement.
143
Inventions & consignment houseInventions & consignment House
Starting with the release of Issue 9: Breakthrough!, players are able toearn Invention Salvage drops. This salvage can be combined and used inRecipes to create technological breakthroughs to evolve your character.
Getting Started
Beginning at level 10, characters can participate in the InventionSystem by undertaking a brief tutorial at the University in Steel Canyon.
How It Works
The Invention System has many facets to it, including InventionSalvage, Recipes, Worktables, new Enhancement Sets, and more.
Invention Salvage – There is a new class of Salvage called“Invention Salvage” that you will receive as you defeat NPC enemiesin the game. You can click “Info” on any enemy and see what thepossible Salvage reward is for defeating them. Invention salvage hastwo classes, Science/Tech and Magic and varies by rarity: Common,Uncommon, and Rare.
Recipes – Recipes are used to make Invention Origin Enhancements,Costume Pieces, or Temporary Powers. These recipes can bedropped as rewards from NPC enemies you fight, bought fromUniversity Worktables, or earned from Trials and Task Forces. LikeSalvage, Recipes vary by rarity: Common, Uncommon, Rare, and VeryRare. To use a Recipe, you need to find the Salvage ingredients onthe Recipe list, have the necessary influence needed to craft theitem, and use a Worktable located in a University.
The invention systemThe Invention System
Worktables – Worktables allow players to invent Enhancements,Costume Pieces or Temporary Powers if they have the appropriateRecipe and required Salvage. These can be found inside Universitiesand can also be purchased for use inside a Supergroup Base.
Enhancement Sets – Uncommon, Rare, and Very Rare recipes canform Enhancement Sets which grant special “set bonuses” whenslotted into a single power. Set Enhancements can only be slottedinto specific powers that fall within the type of powers that set is for.Examples of this include Melee and Ranged attacks, Holds, Pets, andTravel Powers.
Enhancement Set Recipes are found by defeating NPC enemies,selecting them from the Reward Choice tables when completingTrials and Task Forces, or when you complete missions.
Most Set Bonuses are not tied specifically to the power that theInvention Enhancement Set is slotted into. They will always persist,and will boost other powers (i.e. Damage and Accuracy) that yourcharacter has. They can be temporarily disabled if a player exem-plars below the level of when a power was gained. Only Ultra RareSet Bonuses will work when you exemplar.
Inventories – Characters have limited Invention Salvage and RecipeInventories which grow as you gain levels. You must have availableInvention Inventory slots in order to receive more Invention Salvageand Recipe rewards. You can unlock more Inventory slots by earningbadges and you also have access to external storage areas knownas Vaults. (see Vault section)
Universities – Universities have been spread throughout ParagonCity to teach players how to use the new Invention System and buildtheir technological breakthroughs at Worktables. Currently,Universities are located in Steel Canyon, Croatoa and Founder's Falls.
144
145
WENTWORTH'S CONSIGNMENT HOUSEWENTWORTH'S CONSIGNMENT HOUSE
In Atlas Park, King's Row, Steel Canyon, and Talos Island there is aWentworth's Consignment House. This is an “Auction House” thatallows you to buy, sell, and trade anything you can normally trade in thegame, including Invention Salvage, Recipes, and created Enhancementsfrom the Invention System. You can find the Consignment House markedon the Minimap for these zones with a W icon.
How the Consignment House Works
The Consignment House uses a Secret Bid System for Buying andSelling. Buyers can not see what price sellers are selling their itemsfor and Sellers can not see what buyers are willing to pay. This isintentional to make sure that sellers get what they deserve, and buy-ers pay what they feel is appropriate. You can also place Buy Orderswhere if someone puts the exact item you are looking for at your BuyOrder price or less, you will immediately buy it, even if you are notonline. There is a transaction cost (in influence) for listing and sellingat Wentworth's.
Buying and Selling – To buy or sell anything in the ConsignmentHouse, you just need to drag and drop the items in question to or fromyour inventories to your transaction inventory slots. If you are movinga stack of things, you will see a slider asking how much you want tomove, but only Recipes and Salvage can be bought or sold in stacks.
Transaction Inventory – Like Salvage and Recipe Inventory, you havea limited number of Transaction Inventory Slots that grows as thecharacter levels up. These inventory slots can be used to sell an itemor stack of Salvage, buy an item, or store an item.
Vault Reserve – Characters can now store a limited amount ofInvention Salvage at the Vault Reserve. These independent shops areset up near the Wentworth's Consignment House locations and insidePocket D.
The Vault Reserve allows you to access a personal storage locker tostore more Invention Salvage. Base Salvage, Inspirations andEnhancements cannot be stored in the Vault Reserve. Supergroupscan also place a Personal Storage Object in their base that ties indirectly to the Vault Reserve storage, allowing them to access theirVault Reserve storage from their base.
146
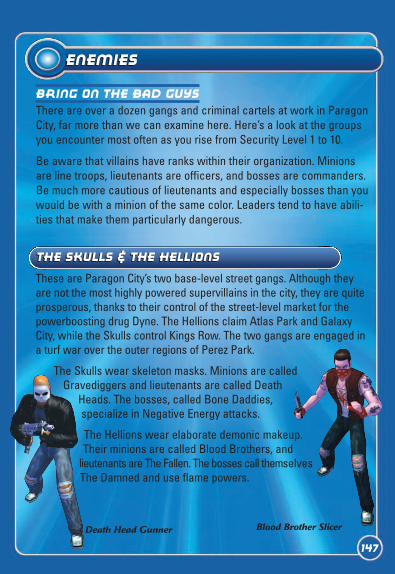
147
EnemiesEnemies
The Skulls & the HellionsThe Skulls & The Hellions
Blood Brother Slicer
These are Paragon City’s two base-level street gangs. Although theyare not the most highly powered supervillains in the city, they are quiteprosperous, thanks to their control of the street-level market for thepowerboosting drug Dyne. The Hellions claim Atlas Park and GalaxyCity, while the Skulls control Kings Row. The two gangs are engaged ina turf war over the outer regions of Perez Park.
The Skulls wear skeleton masks. Minions are calledGravediggers and lieutenants are called Death
Heads. The bosses, called Bone Daddies,specialize in Negative Energy attacks.
The Hellions wear elaborate demonic makeup.Their minions are called Blood Brothers, and
lieutenants are The Fallen. The bosses call themselvesThe Damned and use flame powers.
Death Head Gunner
Bring on the Bad Guys
There are over a dozen gangs and criminal cartels at work in ParagonCity, far more than we can examine here. Here’s a look at the groupsyou encounter most often as you rise from Security Level 1 to 10.
Be aware that villains have ranks within their organization. Minionsare line troops, lieutenants are officers, and bosses are commanders.Be much more cautious of lieutenants and especially bosses than youwould be with a minion of the same color. Leaders tend to have abili-ties that make them particularly dangerous.
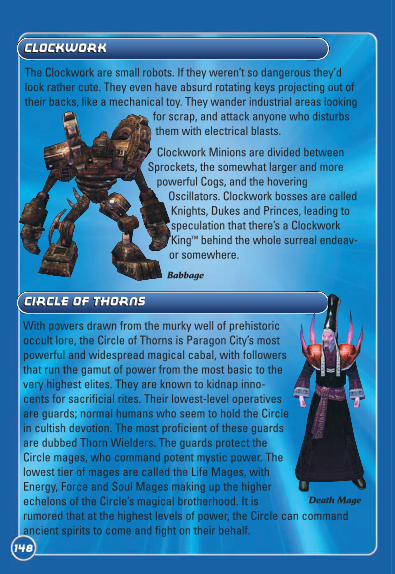
148
Circle of ThornsCircle of thorns
With powers drawn from the murky well of prehistoricoccult lore, the Circle of Thorns is Paragon City’s mostpowerful and widespread magical cabal, with followersthat run the gamut of power from the most basic to thevery highest elites. They are known to kidnap inno-cents for sacrificial rites. Their lowest-level operativesare guards; normal humans who seem to hold the Circlein cultish devotion. The most proficient of these guardsare dubbed Thorn Wielders. The guards protect theCircle mages, who command potent mystic power. Thelowest tier of mages are called the Life Mages, withEnergy, Force and Soul Mages making up the higherechelons of the Circle’s magical brotherhood. It isrumored that at the highest levels of power, the Circle can commandancient spirits to come and fight on their behalf.
Death Mage
clockworkClockwork
The Clockwork are small robots. If they weren’t so dangerous they’dlook rather cute. They even have absurd rotating keys projecting out oftheir backs, like a mechanical toy. They wander industrial areas looking
for scrap, and attack anyone who disturbsthem with electrical blasts.
Clockwork Minions are divided betweenSprockets, the somewhat larger and more
powerful Cogs, and the hoveringOscillators. Clockwork bosses are calledKnights, Dukes and Princes, leading tospeculation that there’s a ClockworkKing™ behind the whole surreal endeav-or somewhere.
Babbage
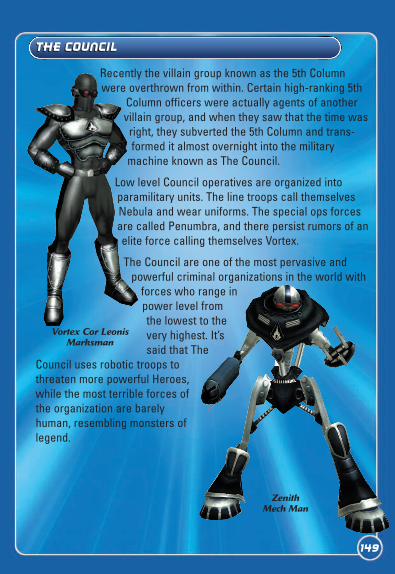
Recently the villain group known as the 5th Columnwere overthrown from within. Certain high-ranking 5th
Column officers were actually agents of anothervillain group, and when they saw that the time wasright, they subverted the 5th Column and trans-formed it almost overnight into the military
machine known as The Council.
Low level Council operatives are organized intoparamilitary units. The line troops call themselvesNebula and wear uniforms. The special ops forcesare called Penumbra, and there persist rumors of anelite force calling themselves Vortex.
The Council are one of the most pervasive andpowerful criminal organizations in the world with
forces who range inpower level fromthe lowest to thevery highest. It’ssaid that The
Council uses robotic troops tothreaten more powerful Heroes,while the most terrible forces ofthe organization are barelyhuman, resembling monsters oflegend.
The CouncilThe Council
ZenithMech Man
149
Vortex Cor LeonisMarksman
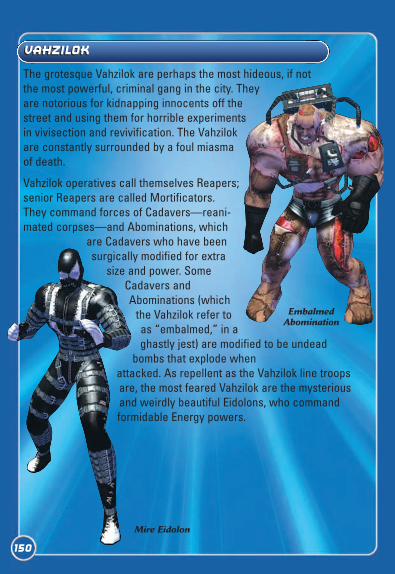
150
VahzilokVahzilok
The grotesque Vahzilok are perhaps the most hideous, if notthe most powerful, criminal gang in the city. Theyare notorious for kidnapping innocents off thestreet and using them for horrible experimentsin vivisection and revivification. The Vahzilokare constantly surrounded by a foul miasmaof death.
Vahzilok operatives call themselves Reapers;senior Reapers are called Mortificators.They command forces of Cadavers—reani-mated corpses—and Abominations, which
are Cadavers who have beensurgically modified for extra
size and power. SomeCadavers andAbominations (which
the Vahzilok refer toas “embalmed,” in aghastly jest) are modified to be undead
bombs that explode when attacked. As repellent as the Vahzilok line troopsare, the most feared Vahzilok are the mysteriousand weirdly beautiful Eidolons, who commandformidable Energy powers.
Mire Eidolon
EmbalmedAbomination

Mission ArchitectMISSION ARCHITECT
Mission Architect allows you to create your own adventures andshare those adventures with every other hero or villain in ParagonCity and the Rogue Isles. While others play your adventure, they gainknowledge, experience and rewards equivalent to outside of the vir-tual world of Architect Entertainment. Once the players are throughwith your story, they have the opportunity to rate the experience from1 - 5 stars. The higher your story is rated by other players, the morerewards you'll earn as well. So, try to come up with the best storiespossible.
Architect Entertainment buildingsare located in Atlas Park, GalaxyCity, Kings Row, Steel Canyon,Skyway City, Faultline, Talos Island,Independence Port, Founders’Falls, Brickstown, Peregrine Island,and the Rikti War Zone.
overviewoverview
151
You can create stories or arcs as we call them at any of the MissionArchitect Computers located in the Main Studio or in the 'no powers'Studio B. There are two types of stories, those you have Locally andthose you've Published. Local Stories are stories you're currentlyworking on or that you don't want to share with the world at large.You can have as many local stories as you want. Published Storiesare stories that all heroes and villains can play. You can publish up tothree stories and share them with others. Each story can have up tofive missions and each mission can have up to 25 goals. When an arcis published others are able to see your arc, play it and rate it. Thebetter rated your arc becomes the more tickets you'll earn.
While working on your story, you can test it as if you were actuallyplaying the missions. You can even have a team of up to eight otherheroes and villains accompany you. While testing no one gains expe-rience, earns tickets or any other type or reward except for 'TestingSpecific' badges.
At any point you can play the stories created by any of the otherplayers by accessing the Mission Browser on the ArchitectComputer. The Browser offers a number of sorting options and filtersto help you get to the stories you want to play. While playing theseplayer-made adventures, you'll earn equivalent experience as youwould outside of Mission Architect. You'll also earn Tickets that youcan take to a Ticket Vendor and redeem for other rewards, includingunlockable content within Architect. When you're through with theadventure you'll be able to rate the story.
152
CREATING STORIESCREATING STORIES
TESTING STORIESTESTING STORIES
PLAYING STORIESPLAYING STORIES
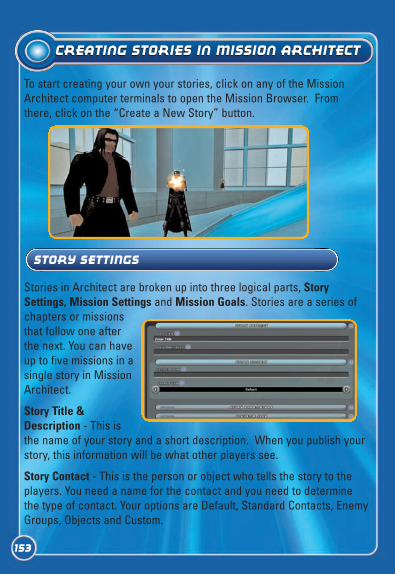
To start creating your own your stories, click on any of the MissionArchitect computer terminals to open the Mission Browser. Fromthere, click on the “Create a New Story” button.
Stories in Architect are broken up into three logical parts, StorySettings, Mission Settings and Mission Goals. Stories are a series ofchapters or missionsthat follow one afterthe next. You can haveup to five missions in asingle story in MissionArchitect.
Story Title &Description - This isthe name of your story and a short description. When you publish yourstory, this information will be what other players see.
Story Contact - This is the person or object who tells the story to theplayers. You need a name for the contact and you need to determinethe type of contact. Your options are Default, Standard Contacts, EnemyGroups, Objects and Custom.
153
Creating Stories in Mission ArchitectCreating Stories in Mission Architect
STORY SETTINGS
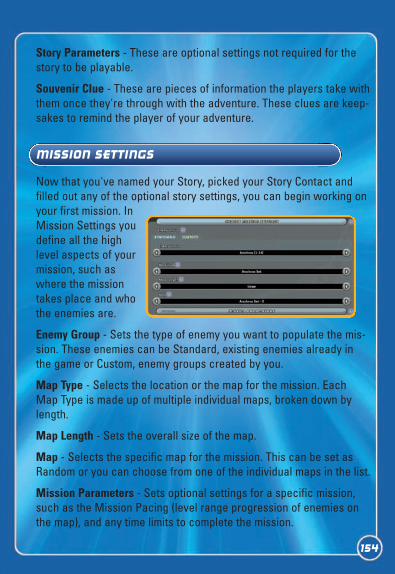
Story Parameters - These are optional settings not required for thestory to be playable.
Souvenir Clue - These are pieces of information the players take withthem once they're through with the adventure. These clues are keep-sakes to remind the player of your adventure.
Now that you've named your Story, picked your Story Contact andfilled out any of the optional story settings, you can begin working onyour first mission. InMission Settings youdefine all the highlevel aspects of yourmission, such aswhere the missiontakes place and whothe enemies are.
Enemy Group - Sets the type of enemy you want to populate the mis-sion. These enemies can be Standard, existing enemies already inthe game or Custom, enemy groups created by you.
Map Type - Selects the location or the map for the mission. EachMap Type is made up of multiple individual maps, broken down bylength.
Map Length - Sets the overall size of the map.
Map - Selects the specific map for the mission. This can be set asRandom or you can choose from one of the individual maps in the list.
Mission Parameters - Sets optional settings for a specific mission,such as the Mission Pacing (level range progression of enemies onthe map), and any time limits to complete the mission.
154
MISSION SETTINGS
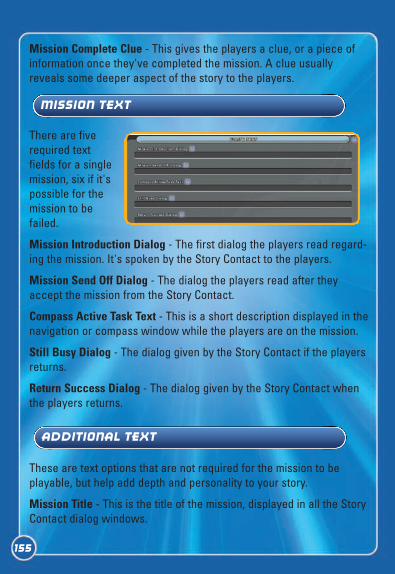
Mission Complete Clue - This gives the players a clue, or a piece ofinformation once they've completed the mission. A clue usuallyreveals some deeper aspect of the story to the players.
There are fiverequired textfields for a singlemission, six if it'spossible for themission to befailed.
Mission Introduction Dialog - The first dialog the players read regard-ing the mission. It's spoken by the Story Contact to the players.
Mission Send Off Dialog - The dialog the players read after theyaccept the mission from the Story Contact.
Compass Active Task Text - This is a short description displayed in thenavigation or compass window while the players are on the mission.
Still Busy Dialog - The dialog given by the Story Contact if the playersreturns.
Return Success Dialog - The dialog given by the Story Contact whenthe players returns.
These are text options that are not required for the mission to beplayable, but help add depth and personality to your story.
Mission Title - This is the title of the mission, displayed in all the StoryContact dialog windows.
155
MISSION TEXT
ADDITIONAL TEXT

Mission Subtitle - This is the subtitle of the mission, displayed direct-ly underneath the Mission Title.
Mission Accept Text - This is the text the players click when theyagree to take the mission from the Story Contact. By default this textis 'Accept'.
Mission Entry Popup - This creates a popup window that appearswhen the players first enter the mission map.
Mission Success Popup - This creates a popup window that appearswhen the players exit a mission they've successfully completed.
Mission Fail Popup - This creates a popup window that appearswhen the players exit a mission they've failed to complete.
Return Fail Dialog - Dialog spoken by the Story Contact when theplayer returns having failed the mission. This only shows up if themission can be failed.
156
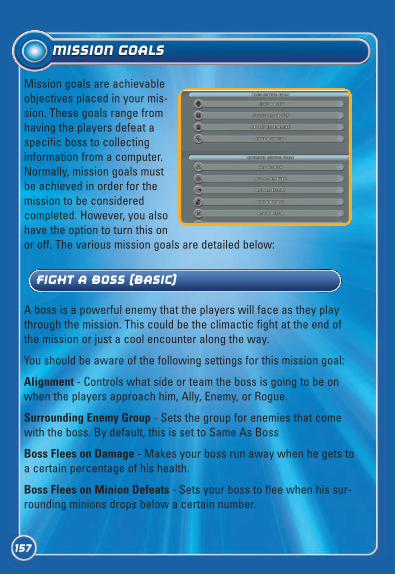
Mission goals are achievableobjectives placed in your mis-sion. These goals range fromhaving the players defeat aspecific boss to collectinginformation from a computer.Normally, mission goals mustbe achieved in order for themission to be consideredcompleted. However, you alsohave the option to turn this onor off. The various mission goals are detailed below:
A boss is a powerful enemy that the players will face as they playthrough the mission. This could be the climactic fight at the end ofthe mission or just a cool encounter along the way.
You should be aware of the following settings for this mission goal:
Alignment - Controls what side or team the boss is going to be onwhen the players approach him, Ally, Enemy, or Rogue.
Surrounding Enemy Group - Sets the group for enemies that comewith the boss. By default, this is set to Same As Boss
Boss Flees on Damage - Makes your boss run away when he gets toa certain percentage of his health.
Boss Flees on Minion Defeats - Sets your boss to flee when his sur-rounding minions drops below a certain number.
157
MISSION GOALSMISSION GOALS
FIGHT A BOSS (BASIC)

Defeat Condition - Sets the defeat condition for the boss, either whenthe boss and all of his surrounding minions and lietenants are defeat-ed, or, when only the boss is defeated.
An Object is an inanimate piece that appears on the mission map thatthe players can interact with. This object emits a sound and a glow toalert the players to its whereabouts, and is useful for finding clues,planting false evidence, or even a prized item to be stolen orretrieved.
You should be aware of the following settings for this mission goal:
Collection Type - This determines the general location of wherethese objects will spawn, Wall or Floor.
Interact Time - Sets the amount of time in seconds the players mustremain next to the object.
Remove Object on Complete - Sets whether or not to remove theobject from the map once it has been interacted with.
Captives are harmless individuals in the mission for the players torescue. Once freed, the Captive immediately flees to the nearest doorfor safety. Of all the mission goals, this is the simplest. It can't befailed and the fleeing captive can't be targeted or defeated in anyway.
158
COLLECT AN OBJECT (BASIC)
Release a Captive (Basic)
This makes it so the players must defeat every enemy in the mission inorder for it to be completed. There are two options for this type ofmission, Defeat All Enemies on the Map, or Defeat All Enemies in theend room.
Add an Ally adds a character on the map who can team up with theplayers and potentially aid them in combat. The Ally can be surround-ed by enemies or they can be by themselves waiting for the players tofind them.
You should be aware of the following settings for this mission goal:
Enemy group difficulty - Sets the difficulty level for the enemies sur-rounding your Ally. Within this setting is an option for Single. Thisremoves all of the surrounding enemies from the ally, leaving themstanding by themselves.
Ally Behavior - Sets how your Ally will behave in the mission.
Combat abilities - Determines how the ally is going to interact withenemies on the map.
159
Defeat All Enemies (Basic)
Add an Ally (Advanced)
Add an Ambush causes a group of potential enemies to come afterthe players on a mission. This mission goal is triggered after the play-ers complete another goal on the mission.
You should be aware of the following settings for this mission goal:
Create Ambush when... Sets the trigger to start the ambush. Thisneeds to be set to an existing mission goal in order for it to work cor-rectly.
Ambush Alignment - Sets the alignment of the ambush when it is cre-ated. You can set it to Enemy, Ally, or Rogue.
A Defendable Object mission goal is an object the players mustdefend from waves of attacks. Before the players can defend theobject, they must first find it and defeat the surrounding enemies.This will cause the wave of enemies to attack. This mission goal isconsidered complete when the players have successfully defeatedall the attacking enemies. Please remember that since this missiongoal can be failed, you will need to make sure you fill out the MissionFailure Dialog spoken by your Story Contact at the end of the mis-sion.
160
An Ambush (Advanced)
Add a Defendable Object (Advanced)
A Destructible Object mission goal is one where the players are sentinto a mission to destroy a specific, physical object. The object willbe guarded by enemies. The detail is considered complete whenyou've successfully destroyed the object and the enemies guardingthe object.
An Escort is a 'friendly' person who the players must rescue and thenlead to safety (exit). Escorts are dangerous because there's a chancethe person can be defeated before the players can get them to theexit. This causes the mission to automatically fail. Escort missionscan also be set up as kidnappings, depending on the flavor text andanimations you use.
You should be aware of the following settings for this mission goal:
Enemy Group Alignment - Sets the alignment of the enemy group,including the person the players are supposed to escort.
Combat Abilities - Sets what the escort does once the players haverescued him. If you set their ability to Fight Aggressive, FightDefensive or Pacifist, there is a chance they can be defeated.
Arrival Behavior - Sets what the escort will do when they reach themission exit.
Betrays on Arrival - This setting means that once the person is takento the mission door, he will turn hostile towards the players. Thisdoesn't prevent the mission from being completed.
161
Add a Destructible Object (Advanced)
Add an Escort (Advanced)

Patrols are enemies that wander the map. This mission goal is goodfor making your map feel more alive as well as fleshing out the storyof your mission. Patrols can't be flagged as required for mission com-plete. They're simply useful to make the mission feel more alive.
Add a Battle has two enemy groups on the map fighting with oneanother. You can set who those enemy groups are as well as somedialog they say to each other and when you approach them.
You should be aware of the following settings for this mission goal:
Multiple Enemy Groups
This mission goal has sets of options for each of the two EnemyGroups.
Battle Alignment This sets the alignment of the two enemy groups in your mission.
162
Add a Patrol (Advanced)
Add a Battle (Advanced)
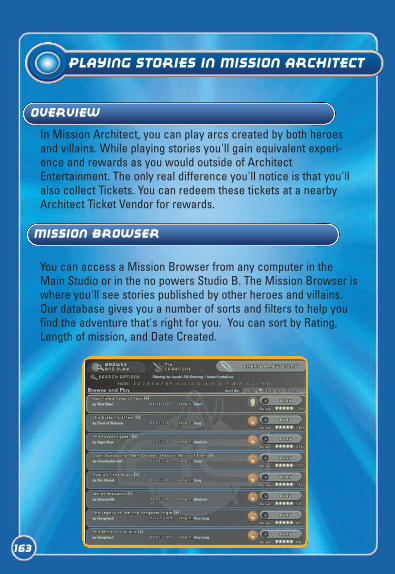
163
In Mission Architect, you can play arcs created by both heroesand villains. While playing stories you'll gain equivalent experi-ence and rewards as you would outside of ArchitectEntertainment. The only real difference you'll notice is that you'llalso collect Tickets. You can redeem these tickets at a nearbyArchitect Ticket Vendor for rewards.
You can access a Mission Browser from any computer in theMain Studio or in the no powers Studio B. The Mission Browser iswhere you'll see stories published by other heroes and villains.Our database gives you a number of sorts and filters to help youfind the adventure that's right for you. You can sort by Rating,Length of mission, and Date Created.
Playing Stories in Mission Architect
Overview
Mission Browser
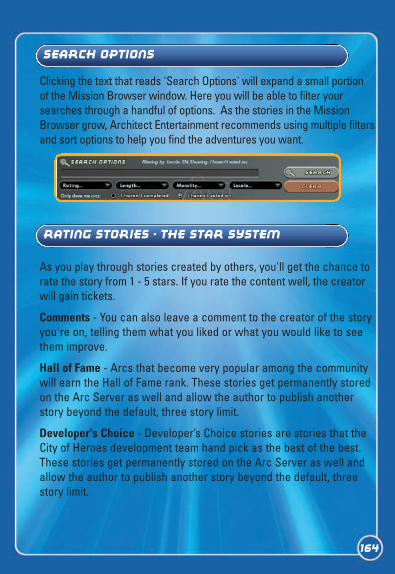
164
Clicking the text that reads 'Search Options' will expand a small portionof the Mission Browser window. Here you will be able to filter yoursearches through a handful of options. As the stories in the MissionBrowser grow, Architect Entertainment recommends using multiple filtersand sort options to help you find the adventures you want.
As you play through stories created by others, you'll get the chance torate the story from 1 - 5 stars. If you rate the content well, the creatorwill gain tickets.
Comments - You can also leave a comment to the creator of the storyyou're on, telling them what you liked or what you would like to seethem improve.
Hall of Fame - Arcs that become very popular among the communitywill earn the Hall of Fame rank. These stories get permanently storedon the Arc Server as well and allow the author to publish anotherstory beyond the default, three story limit.
Developer's Choice - Developer’s Choice stories are stories that theCity of Heroes development team hand pick as the best of the best.These stories get permanently stored on the Arc Server as well andallow the author to publish another story beyond the default, threestory limit.
Search Options
Rating Stories - The Star System
Guest Authors - are individuals specially brought in to tell storieswithin Mission Architect. You can think of these stories as a type ofDeveloper’s Choice.
Inappropriate Stories - Architect Entertainment wants an enjoyableexperience for everyone. To that end, all the stories being createdwithin the system are heavily monitored. If you notice any stories,characters, or situations that are inappropriate, you can flag them forthe Architect Entertainment's Customer Service team to investigate.To flag content, simply hit the Architect Options button in your com-pass window. At the bottom of the window you'll find a big red buttonthat says Report for Content. Hitting this button will open up anotherwindow, allowing you to give more detail regarding the story.
Banned Once - If a story gets flagged repeatedly for inappropriatecontent there is a chance the story will get pulled from the serverbefore customer service investigates it. This unpublishes the story.The next time the creator logs into Architect, he will be notified thatone of his stories was banned. He'll also be able to read any com-plaints left about this story. From here, the creator will have theoption to make some changes to the story and republish it or simplydelete the story altogether.
Banned Twice - If the creator makes changes to the story and repub-lishes it, the story goes back up to the Arc Server as normal.However, the story is being watched. If it continues to get hits for badcontent the story can and will get pulled again. The creator will againbe notified that the story has been pulled. They will also be informedthat from this point, they are not allowed to simply republish the story.Instead, they have to make any changes and submit the story directlyto Customer Service.
165
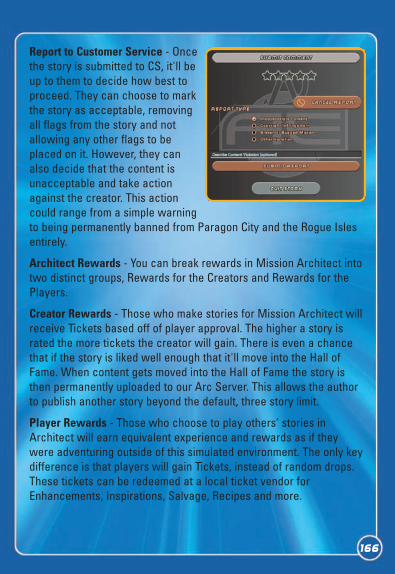
166
Report to Customer Service - Oncethe story is submitted to CS, it'll beup to them to decide how best toproceed. They can choose to markthe story as acceptable, removingall flags from the story and notallowing any other flags to beplaced on it. However, they canalso decide that the content isunacceptable and take actionagainst the creator. This actioncould range from a simple warningto being permanently banned from Paragon City and the Rogue Islesentirely.
Architect Rewards - You can break rewards in Mission Architect intotwo distinct groups, Rewards for the Creators and Rewards for thePlayers.
Creator Rewards - Those who make stories for Mission Architect willreceive Tickets based off of player approval. The higher a story israted the more tickets the creator will gain. There is even a chancethat if the story is liked well enough that it'll move into the Hall ofFame. When content gets moved into the Hall of Fame the story isthen permanently uploaded to our Arc Server. This allows the authorto publish another story beyond the default, three story limit.
Player Rewards - Those who choose to play others’ stories inArchitect will earn equivalent experience and rewards as if theywere adventuring outside of this simulated environment. The only keydifference is that players will gain Tickets, instead of random drops.These tickets can be redeemed at a local ticket vendor forEnhancements, Inspirations, Salvage, Recipes and more.
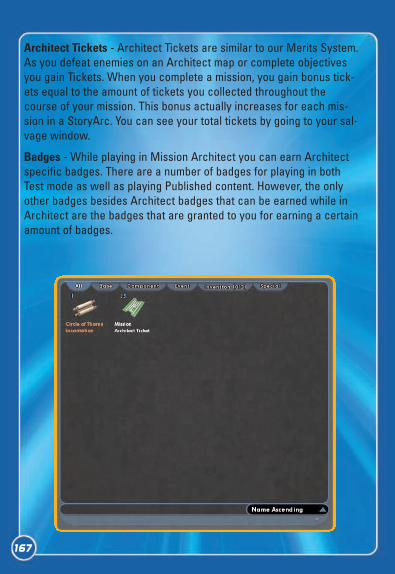
Architect Tickets - Architect Tickets are similar to our Merits System.As you defeat enemies on an Architect map or complete objectivesyou gain Tickets. When you complete a mission, you gain bonus tick-ets equal to the amount of tickets you collected throughout thecourse of your mission. This bonus actually increases for each mis-sion in a StoryArc. You can see your total tickets by going to your sal-vage window.
Badges - While playing in Mission Architect you can earn Architectspecific badges. There are a number of badges for playing in bothTest mode as well as playing Published content. However, the onlyother badges besides Architect badges that can be earned while inArchitect are the badges that are granted to you for earning a certainamount of badges.
167

168
custom characters
Overview - While Mission Architect has the largest database ofheroes and villains in the known dimensions, sometimes it can still notbe enough. That's why Architect allows you to create your own char-acters. You can pick the rank, difficulty, fighting preference, powers,gender, costume, name and description of your custom character.
Creating Custom Characters - You can create a custom character fromthe 'My Creations' tab in the Mission Browser. Just look for the textthat reads My Characters. Select that text then select the button thatsays Create Character. When you hit this button you'll begin theCharacter Creation Process. During this process, you can also set thecharacter's Rank and Fighting Preference.
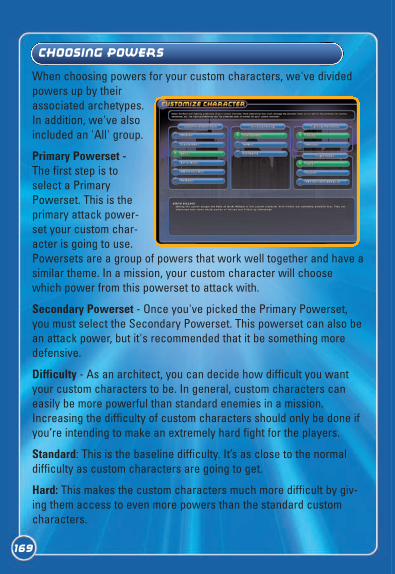
169
When choosing powers for your custom characters, we've dividedpowers up by theirassociated archetypes.In addition, we've alsoincluded an 'All' group.
Primary Powerset -The first step is toselect a PrimaryPowerset. This is theprimary attack power-set your custom char-acter is going to use.Powersets are a group of powers that work well together and have asimilar theme. In a mission, your custom character will choosewhich power from this powerset to attack with.
Secondary Powerset - Once you've picked the Primary Powerset,you must select the Secondary Powerset. This powerset can also bean attack power, but it's recommended that it be something moredefensive.
Difficulty - As an architect, you can decide how difficult you wantyour custom characters to be. In general, custom characters caneasily be more powerful than standard enemies in a mission.Increasing the difficulty of custom characters should only be done ifyou’re intending to make an extremely hard fight for the players.
Standard: This is the baseline difficulty. It’s as close to the normaldifficulty as custom characters are going to get.
Hard: This makes the custom characters much more difficult by giv-ing them access to even more powers than the standard customcharacters.
choosing powers
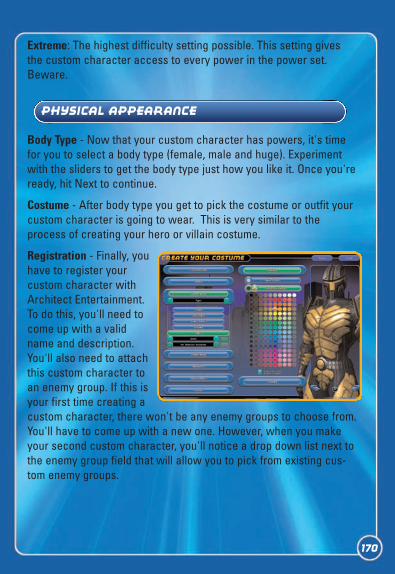
170
Extreme: The highest difficulty setting possible. This setting givesthe custom character access to every power in the power set.Beware.
Body Type - Now that your custom character has powers, it's timefor you to select a body type (female, male and huge). Experimentwith the sliders to get the body type just how you like it. Once you'reready, hit Next to continue.
Costume - After body type you get to pick the costume or outfit yourcustom character is going to wear. This is very similar to theprocess of creating your hero or villain costume.
Registration - Finally, youhave to register yourcustom character withArchitect Entertainment.To do this, you'll need tocome up with a validname and description.You'll also need to attachthis custom character toan enemy group. If this isyour first time creating acustom character, there won't be any enemy groups to choose from.You'll have to come up with a new one. However, when you makeyour second custom character, you'll notice a drop down list next tothe enemy group field that will allow you to pick from existing cus-tom enemy groups.
physical appearance
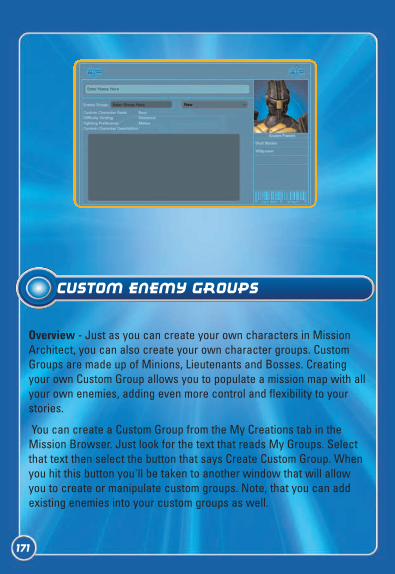
171
Overview - Just as you can create your own characters in MissionArchitect, you can also create your own character groups. CustomGroups are made up of Minions, Lieutenants and Bosses. Creatingyour own Custom Group allows you to populate a mission map with allyour own enemies, adding even more control and flexibility to yourstories.
You can create a Custom Group from the My Creations tab in theMission Browser. Just look for the text that reads My Groups. Selectthat text then select the button that says Create Custom Group. Whenyou hit this button you'll be taken to another window that will allowyou to create or manipulate custom groups. Note, that you can addexisting enemies into your custom groups as well.
Custom Enemy Groups
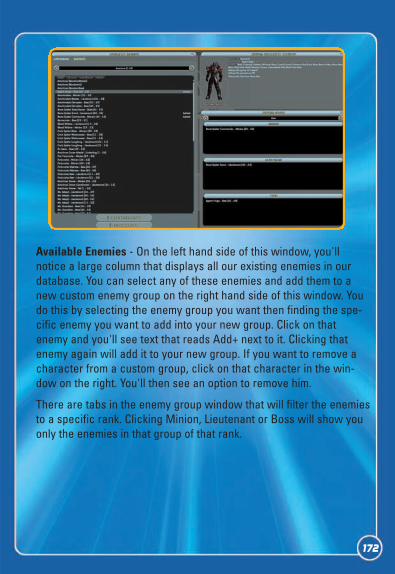
Available Enemies - On the left hand side of this window, you'llnotice a large column that displays all our existing enemies in ourdatabase. You can select any of these enemies and add them to anew custom enemy group on the right hand side of this window. Youdo this by selecting the enemy group you want then finding the spe-cific enemy you want to add into your new group. Click on thatenemy and you'll see text that reads Add+ next to it. Clicking thatenemy again will add it to your new group. If you want to remove acharacter from a custom group, click on that character in the win-dow on the right. You'll then see an option to remove him.
There are tabs in the enemy group window that will filter the enemiesto a specific rank. Clicking Minion, Lieutenant or Boss will show youonly the enemies in that group of that rank.
172
When you select a enemy, you'll notice a preview window on theright will display the enemy and any important information such asname, powers and rank.
Custom Enemies - On the left hand side you should also see anoption for Custom. Selecting this will show you all of your customenemy groups and enemies that you've created. If you want to addor edit existing enemies, you can select the Create Character but-ton or the Edit Character button at the bottom of the window.
Enemy Group Level Coverage - At the bottom of the Custom Groupwindow you'll notice a bar with markings that go from 1 - 50. Thisbar is a visual representation of the level ranges of your enemygroup. It shows you whether or not you have an enemy within thatlevel range. Ideally, you should have multiple minions, lieutenantsand bosses in every level range from 1 - 50.
Thankfully, Custom Characters automatically scale from 1 - 50 soall you have to worry about is having enough variety to keep thegroup interesting. This is not the case with Standard Enemiesalready within our database. These enemies have a very prede-fined level range. To that end, when you add existing enemies toyour Custom Groups, make sure you cover your level ranges fullyfrom 1 - 50.
173
174
CRYPTIC STUDIOS, INC. MANAGEMENT TEAMMichael LewisBruce RogersJack EmmertShannon PosniewskiShayne HerreraCraig Zinkievich
DESIGN DEPARTMENTJack EmmertAl RiveraMatthew MillerThomas FossShane Lacy HensleyBrian GilmoreE.J. NelsonJosh FergusonNellie HughesRandy William MosiondzZeke Sparkes
PROGRAMMING DEPARTMENTBruce RogersShannon PosniewskiMark KalmesMartin SimpsonJimb EsserJered WindsheimerConor DickinsonRaoul van ProoijenJonathan WillsLincoln HamiltonSam ThompsonBen ZeiglerBrett HarrisGarth GillespieDave RichardsonAlex WernerForrester Cole
ART DEPARTMENTShayne HerreraMatt HarveySteve StacyJeremy MattsonIan CastanedaDoug GastonKirk YoungRyan RothRyan ButtsMike ApolisOcala Bellows KuligAvery WongMark DamicoBrian WyserLouise BellNeil MelvilleNick Duguid
SOUND & MUSIC DEPARTMENTMichael HenryJoe Lyford
DESIGN SUPPORT DEPARTMENTGeoff TuffliRob Overmeyer
PRODUCTION DEPARTMENTCraig ZinkievichSerdar Copur
ADMINISTRATIONJamie RobsonAmy La ScolaTracy BohnRick RuizJennifer RakowMinette LicarosGary Catalano
SPECIAL THANKSAmanda McNairSunny WaliaClarinda MerripenChris SuttonChristopher ChamberlainChris LuckenbachDuncan KayDenis Renshaw
™
Michael ParentMatt WoomerAnthony GrandlichJane KalmesJohn YooDavid "Zeb" CookAryn PenningtonOlya Nikitova
ADDITIONAL ART BY:NikitovaLiquid DevelopmentSanta Cruz Games
ADDITIONAL SOUND & MUSIC BY:Kevin Manthei & Kevin Riepl, Kevin Manthei, Music
NCSOFT NORCALBrian Clayton, General Manager / Executive ProducerRoss Borden, Director of Business & Marketing
PRODUCTIONRachael Bristol, ProducerJesse Caceres, ProducerDavid Lewis, ProducerRichard Higbee, Associate ProducerRay Snyder, Production Support
DESIGNMatthew Miller, Sr. Lead DesignerMelissa Bianco, Sr. DesignerSean Fish, Sr. DesignerFloyd Grubb, Sr. DesignerJoe Morrissey, Sr. DesignerBruce Harlick, Sr. DesignerJonathan Courney, DesignerPhilip Zeleski, Designer
PROGRAMMINGAaron Brady, Technical DirectorVince D' Amelio, Sr. EngineerGraham West, Sr. Engineer
Michael Chock, Sr. EngineerCW Bennett, EngineerGarth Gillespie, EngineerAndy Maurer, Associate Engineer
ARTKen Morse, Sr. Art LeadChristopher Bruce, Sr. Animator / SFX ArtistRon Friedman, Sr. AnimatorJay Doherty, Sr. Character ArtistNate Van Dyke, Sr. Concept ArtistCarolina Tello, Concept ArtistRyan Roth, Environment ArtistDon Pham, Associate Environment Artist
OFFICE MANAGEMENTTheresa Bottenhorn, Office Manager / HR Rep
ITJimmy Vales, PC Administrator / Technician
NCSOFT NORTH AMERICA
EXECUTIVEMANAGEMENTTJ Kim, NCsoft CEORobert Garriott, Executive Vice-President, CorporateStrategyChris Chung, President, NCsoft North AmericaChris Mayer, Vice President, Product DevelopmentRichard Garriott, Executive ProducerJae Hwan Kim, NCHQ Liaison
QUALITY ASSURANCE MANAGEMENTMichael Craighead, Director of Quality AssuranceDan Campbell, QA Supervisor
PLAYNC TESTERSTim Johnson, PlayNC LeadJoAnna Frazar, Senior TesterMichael McDonnell, Senior TesterEric Arnold, Senior Tester
HARDWARE COMPATIBILITY LAB TESTERSSteven Tonkin, QA LeadJoe Riley, Senior TesterMichael O'Keefe
175
Dave O'PreskaAlden Loredo
CITY OF HEROES/CITY OF VILLAINS QA TEAMTad Pantaleoni, QA LeadJames Barnes, Senior TesterTomoko IwataBen FurtadoAaron Hunter
QA LEAD TESTERSChris HagerMatt PantaleoniCody RussellStefan Trefil
QA SENIOR TESTERSJeff DailyMichael DuplerBob GreenMelissa McWatersStefan RamirezMichael WilhmPhillip Wood
ADDITIONAL TESTERSKari BoweCasey CarpenterBryan CookDevin DixonAaron GrimaudoMichael HillDavid IgnacioPatrick JohnsonCameron StrahanCarey Williams
MARKETING & SALESLisa Bell, VP of Sales Lisa Mandile, Director North American Sales Mandy VanAckeren, Sales Operations Manager Kellee McKeever, Director International SalesMitch Kampf, Director OEM & Digital Distribution SalesKeri Taylor, National Sales ManagerHoss Fatemi, Creative Services ManagerTrevor Hennington, Creative Services Sr. Character ArtistAndrew Hunter, Creative Services ArtistKaren Reynoso, Traffic & Asset Manager
PUBLIC RELATIONSDavid SwoffordMike CrouchJanna BuresonGina Dionne
COMMUNITY RELATIONSAlex von Minden, Online Community ManagerJill Henderson, Online Community CoordinatorElizabeth Edwards, Online Community ModeratorJames Shattuck, Online Community Moderator
INTERNET OPERATIONSPeter Jarvis, VP/CIORob Cordero, Manager Game OperationsGreg Peterson, Technical Project ManagerGreg WilliamsJoel Comeaux, Game AdministratorRoss EthridgeDavid SeoTom Harrington, Systems Engineering ManagerBrian YorkMark FarverBJ GoldingRuss LavoieDan LepineTJ WalkerRobert Rice, Director Network & Security OperationsTye CasasJonathan PaceJeff MunozGabriel FriedmannJeff Stamp, Desktop Support SupervisorNoah LeeChris GrayMartin Knapick
WEB MANAGEMENTChristian Watson, Web Production DirectorChris SavioSeth ScovilleMichael GravesJames O'NealClark Wimberly
PLAYNC/BILLING TECHNOLOGYErik DeBill, Billing and Tools ManagerStephenie Harris, Billing and Tools Project ManagerMatt Gramlich
176
178
Charlie HillsLoren PeaceJonathan ShelusJonathan TaylorJohn Gehring-Liker, Reporting and Tools LeadCarl PerryRobert WalshBethany Baldwin
DATABASE ADMINISTRATORSKokass AngelesBrian KimGon-soo Moon
NOCMatt Tobin, NOC SupervisorJason LifseyJeff AngusGary HallmarkNick BellamyEric McKinneyJohn BishopJames AshMohamed MoukhtarRobert Chi
CORE TECHNOLOGY GROUPCalan Thurow, Technical DirectorShane Evans, Technical ProducerAlaric Weigle, Associate ProducerDoug Prince, Art DirectorJacob Repp, Integration and ConsultingPhilip Flesher, Launcher/Analytics LeadAaron Otstott, Client LeadAllen Jackson, Server and SDK LeadKen Pfile, DeveloperJiho Choi, DeveloperBrandon Rowlett, DeveloperMike Breitkreutz, DeveloperJeffrey Sass, DeveloperAndrew Gillis, DeveloperJames Hegarty, Developer Intern
FINANCE AND ADMINISTRATIONVictoria Richardson, VP/CFOEmily Blunt, ControllerAJ BurzenCarol CatesJustine HoltJason Rotan
Neal Buckmaster, Operations ManagerMatthew Esber, General Counsel
CUSTOMER SUPPORTJohn Erskine, Director of Studio ServicesChris Freeman, Customer Service ManagerJulie Engleking, RightNow AdministratorAmy Crews Neil, Support Quality Control
GAME SUPPORT MANAGEMENTWill Leverett
CITY OF HEROES/CITY OF VILLAINS CORE SUPPORT TEAMHeather Warner, LeadChris WilburMitch BurtonEvan Blewett
BILLING SUPPORTReneé Lasswell, LeadPatrick Wagner, SeniorLance Schibi, SeniorLeslie Lomeli, SeniorMatt Chernicky, IIMichael AugustineJohn GarciaJohn RabonMargaret SheehanZachary ClarkMichael HandySteve ShortNickolaus DekayDe'Andre Whittley
TECHNICAL SUPPORTTrollis Crider, LeadDonovan Kennedy, SeniorChris AllenChristopher MillerHayden LinderMichael ChirieleisonMichael Lafond
HUMAN RESOURCESLinda Powers, Director of Human ResourcesJean Orrison, Human Resources ManagerWendy JonesNathan Guajardo
FACILITIESJeff Hillhouse, Facilities ManagerMichelle Caddel, Office Manager
ADDITIONAL ART BY:NikitovaLiquid DevelopmentSanta Cruz Games
ADDITIONAL SOUND & MUSIC BY:Kevin Manthei & Kevin Riepl, Kevin Manthei, Music
SPECIAL THANKS TOJeremy GaffneyEm StockTosh ToidaApril BurbaAndrea LandersLance StitesSebastian NienhuisJennifer DornanRaul MondragonSung Jun, AhnSang Hoon, KimHyung Joon, KimYoung Jin, KwonMin Young, YoonSeok Chan, YooKevin SullivanGreg LatsonChris JulianWilliam HilesLori BranhamDigital FrontierRichard WeilTiffany NelsonJesse ScobleDennis LiggioLeah BowersCurtis O'NealChris DoerrOur City of Heroes and City of Villains Fans and Beta Community
Thank you to all of the employees at Cryptic Studios that have contributed the development of City ofHeroes and City of Villains.
179
Limited WarrantyLimited Warranty
The following warranty and support informationapplies only to customers in the United States andCanada, and only to original consumer purchasersof products covered by this warranty.
NCsoft warrants to the original purchaser of theenclosed product (the “Product”) that the mediacontaining the Product will be free from defects inmaterial and workmanship for a period of ninety(90) days from the date of purchase (the“Warranty Period”). NCsoft’s entire liability andyour exclusive remedy under this limited warrantyshall be, at NCsoft’s option, repair or replacement,without charge, of all or the affected portion ofany Product that proves to be defective in materialor workmanship during the Warranty Period.
Exclusions FromWarrantyThis warranty applies only to defects in factorymaterials and factory workmanship. Any conditioncaused by abuse, unreasonable use, mistreatment,neglect, accident, improper operation, destructionor alteration is not a defect covered by this war-ranty. Parts and materials subject to wear and tearin normal usage are not covered by this warranty.
LimitationsThis warranty is in lieu of all other warranties andno other representations or claims of any natureshall be binding on, or obligate NCsoft. Anyimplied warranties applicable to NCsoft products,including warranties of merchantability and fitnessfor a particular purpose, are limited to the ninety(90) day period described above. In no event willNCsoft be liable for any special, incidental, or con-sequential damages resulting from possession,use, or malfunction of NCsoft products. Somestates do not allow limitations as to how long animplied warranty lasts and/or exclusions or limita-tions of incidental or consequential damages. Sothe above limitations and;/or exclusions of liabilitymay not apply to you. This warranty gives you spe-cific rights, and you may also have other rights
that vary from state to state.
Neither NCsoft nor your retail dealer has anyresponsibility for any incidental or consequentialdamages relating to your use of the product,including, without limitation, any damages for lossof data or loss of profit, or for any incidentalexpenses, loss of time, or inconvenience. As somestates do not allow the exclusion or limitation ofincidental or consequential damage, the foregoinglimitation or exclusion may not apply to you.
How to ObtainWarranty ServiceTo obtain warranty service, please send the defec-tive Product, together with a copy of your originalsales receipt, your return address, name and tele-phone number (should contact be necessary) anda brief note describing the defect to NCsoft at thefollowing address: 6801 N. Capital of Texas Hwy,Bldg. 1, Ste. 102, Austin, TX 78731-1780. The defec-tive product must be postmarked within ninety (90)days from the date of purchase. Proof of purchasein the form of a dated receipt must be included toobtain warranty service. The shipping costs forsending the defective product to NCsoft is the soleresponsibility of the Customer. NCsoft will not beliable for any damage that occurs during shipping.
If you have warranty questions, you can also con-tact our Customer Support department via emailat:
CUSTOMER SUPPORTFor customer support, account support, and tech-nical support questions, please visit the Supportsection of the City of Heroes website at:
. At this site you will find a searchable knowledgebase containing useful answers to frequentlyasked questions, solutions to common issues, anddetailed information regarding additional contactmethods if your answer or solution is nowhere tobe found.
180
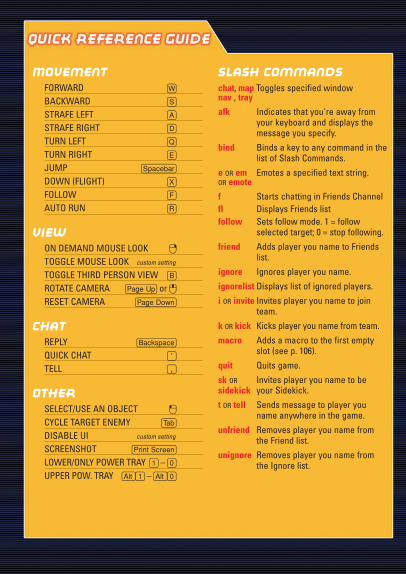
MovementFORWARD W
BACKWARD S
STRAFE LEFT A
STRAFE RIGHT D
TURN LEFT Q
TURN RIGHT E
JUMP zDOWN (FLIGHT) X
FOLLOW F
AUTO RUN R
ViewON DEMAND MOUSE LOOK ?
TOGGLE MOUSE LOOK custom setting
TOGGLE THIRD PERSON VIEW B
ROTATE CAMERA U or >RESET CAMERA Y
ChatREPLY BQUICK CHAT '
TELL ,
OtherSELECT/USE AN OBJECT <
CYCLE TARGET ENEMY tDISABLE UI custom setting
SCREENSHOT GLOWER/ONLY POWER TRAY 1 – 0UPPER POW. TRAY a1 – a0
Slash Commandschat, map Toggles specified windownav , tray
afk Indicates that you're away fromyour keyboard and displays themessage you specify.
bind Binds a key to any command in thelist of Slash Commands.
e OR em Emotes a specified text string.OR emote
f Starts chatting in Friends Channelfl Displays Friends listfollow Sets follow mode. 1 = follow
selected target; 0 = stop following.
friend Adds player you name to Friendslist.
ignore Ignores player you name.
ignorelist Displays list of ignored players.
i OR invite Invites player you name to jointeam.
k OR kick Kicks player you name from team.
macro Adds a macro to the first emptyslot (see p. 106).
quit Quits game.
sk OR Invites player you name to besidekick your Sidekick.
t OR tell Sends message to player youname anywhere in the game.
unfriend Removes player you name fromthe Friend list.
unignore Removes player you name fromthe Ignore list.