Embed Size (px)
Citation preview
http://www.behindthemixer.com | copyright 2012| chris huff Page 2
The Topic List
Parts of the Drum Kit ................................................................................... 3
Methods of Drum Mic'ing ............................................................................ 9
Microphone Placement.............................................................................. 14
Drum microphones .................................................................................... 17
EQ'ing Acoustic Drums ............................................................................... 18
EQ’ing Electronic Drums ............................................................................ 21
Drum Shields and Drum Cages ................................................................... 22
Tips and Tricks ........................................................................................... 23
The Obligatory Introduction (which you’ll want to read, trust me)
The drums can make or break the music. Too soft, then the music loses its punch.
Too loud, then your mix sounds terrible and you’ll hear a world of complaints.
But when you have it just right….sweetness!
There are two things you need to know before reading any further;
1. Your ears are more important in determining the right sound than what
might be found below. For example, if I say “boost at the 250 Hz mark for
this drum” but in your case, it’s a boost at 200 or a cut at 300 that sounds
better, then follow your ears and do what sounds best. Drum sets,
microphones, and rooms are all different so let your ears lead you.
2. You should know the different parts of the drum kit. Yes, a kick drum looks
like a kick drum and nothing else but why does it give the sound that it
does? Therefore, don’t skip the section on the parts of the drum kit.
May this guide help you improve your drum sound and your mix!
-Chris
http://www.behindthemixer.com | copyright 2012| chris huff Page 3
Parts of the Drum Kit:
A surgeon doesn’t learn how to use their tools before first learning about the
human body. Likewise, you should learn a bit about the pieces of the drum kit
before you touch that first microphone or EQ knob. Each kit piece produces
sound in a specific way in both how it’s struck, and in how it produces sound.
Knowing how the kit pieces produce sound, you’ll have a better grasp of how to
mic the pieces and how to EQ them for the right sound.
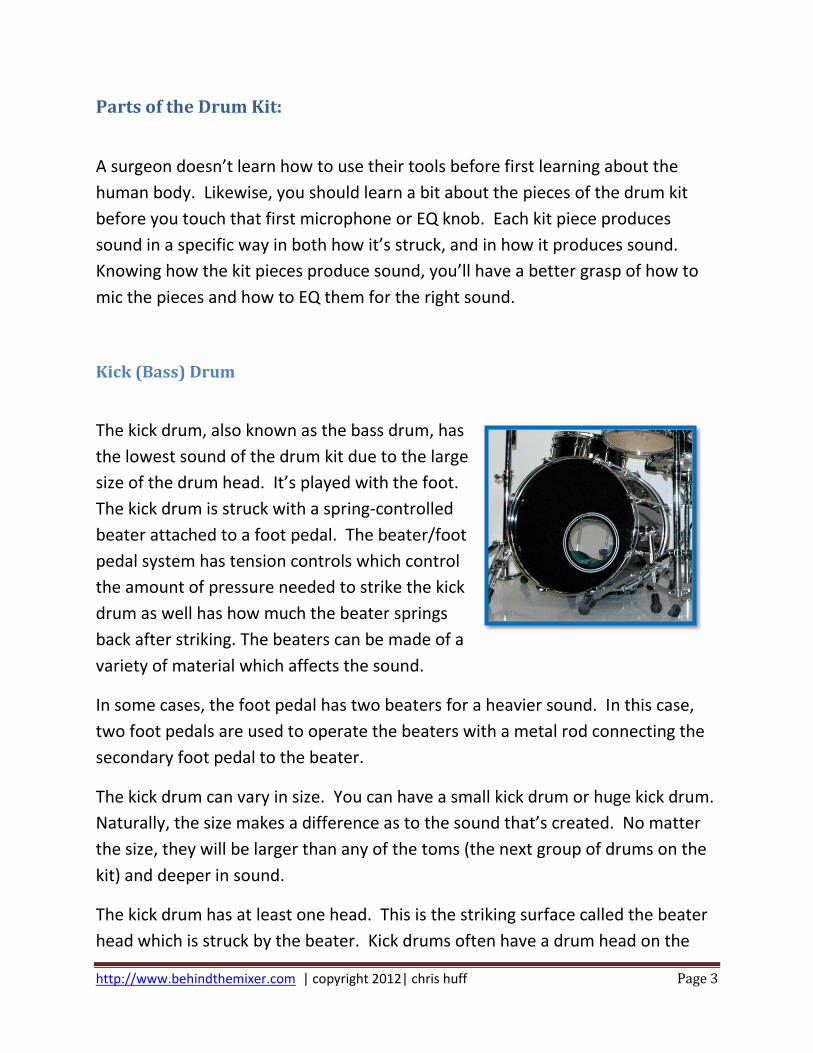
Kick (Bass) Drum
The kick drum, also known as the bass drum, has
the lowest sound of the drum kit due to the large
size of the drum head. It’s played with the foot.
The kick drum is struck with a spring-controlled
beater attached to a foot pedal. The beater/foot
pedal system has tension controls which control
the amount of pressure needed to strike the kick
drum as well has how much the beater springs
back after striking. The beaters can be made of a
variety of material which affects the sound.
In some cases, the foot pedal has two beaters for a heavier sound. In this case,
two foot pedals are used to operate the beaters with a metal rod connecting the
secondary foot pedal to the beater.
The kick drum can vary in size. You can have a small kick drum or huge kick drum.
Naturally, the size makes a difference as to the sound that’s created. No matter
the size, they will be larger than any of the toms (the next group of drums on the
kit) and deeper in sound.
The kick drum has at least one head. This is the striking surface called the beater
head which is struck by the beater. Kick drums often have a drum head on the
http://www.behindthemixer.com | copyright 2012| chris huff Page 4
opposing surface. This head, called the resonance head, can be tuned separately
from the other drum head. This secondary head can have a small hole (port)
which provides the ability to tune the inner cavity as well as a great place to place
a microphone. We won’t go into tuning except to say a drum that’s out of tune
will sound bad. Therefore, if you have a drum kit that sounds out of tune or
generally “not right” then consider bringing in a professional to tune the drum kit.
The kick drum and the snare drum are the key pieces of the drum kit that define
its sound. The kick can set the tempo for the song, though it might not be struck
as often as the snare which can also be used for setting the tempo.
The drum can be mic’d a variety of ways as will be covered soon. Know, for now,
that the drum head is traditionally mic’ed on the opposite side of the beater.
Snare Drum
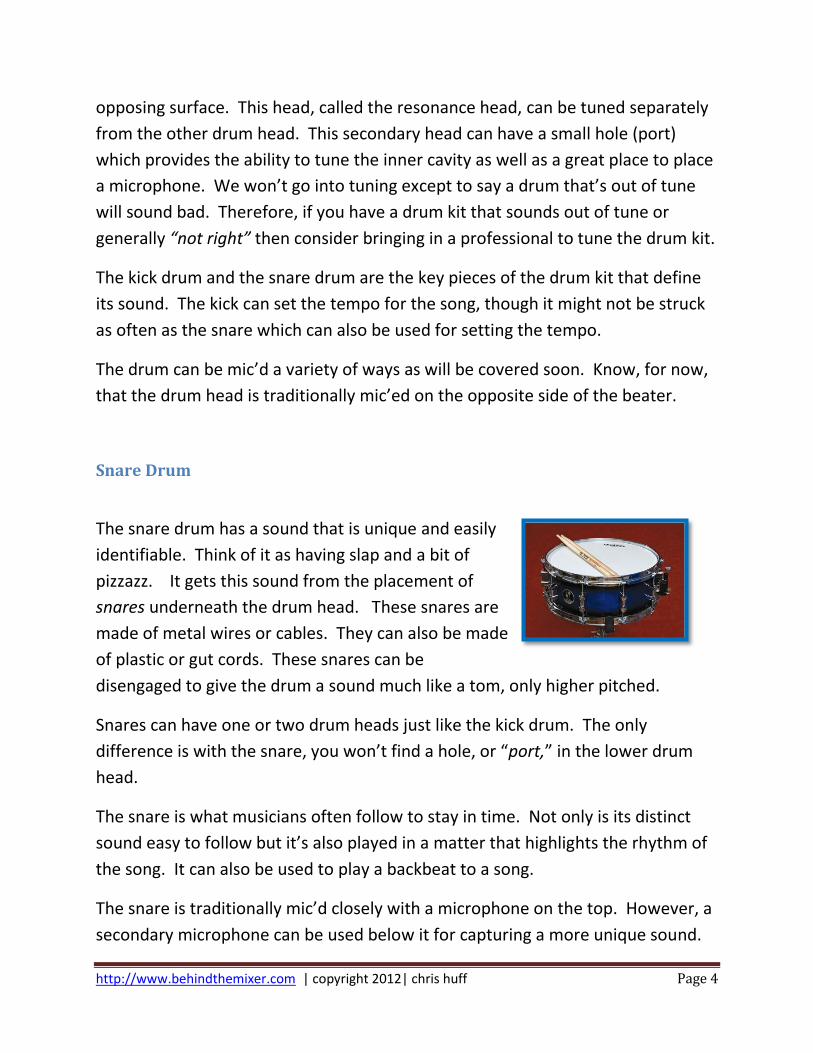
The snare drum has a sound that is unique and easily
identifiable. Think of it as having slap and a bit of
pizzazz. It gets this sound from the placement of
snares underneath the drum head. These snares are
made of metal wires or cables. They can also be made
of plastic or gut cords. These snares can be
disengaged to give the drum a sound much like a tom, only higher pitched.
Snares can have one or two drum heads just like the kick drum. The only
difference is with the snare, you won’t find a hole, or “port,” in the lower drum
head.
The snare is what musicians often follow to stay in time. Not only is its distinct
sound easy to follow but it’s also played in a matter that highlights the rhythm of
the song. It can also be used to play a backbeat to a song.
The snare is traditionally mic’d closely with a microphone on the top. However, a
secondary microphone can be used below it for capturing a more unique sound.
http://www.behindthemixer.com | copyright 2012| chris huff Page 5
Toms
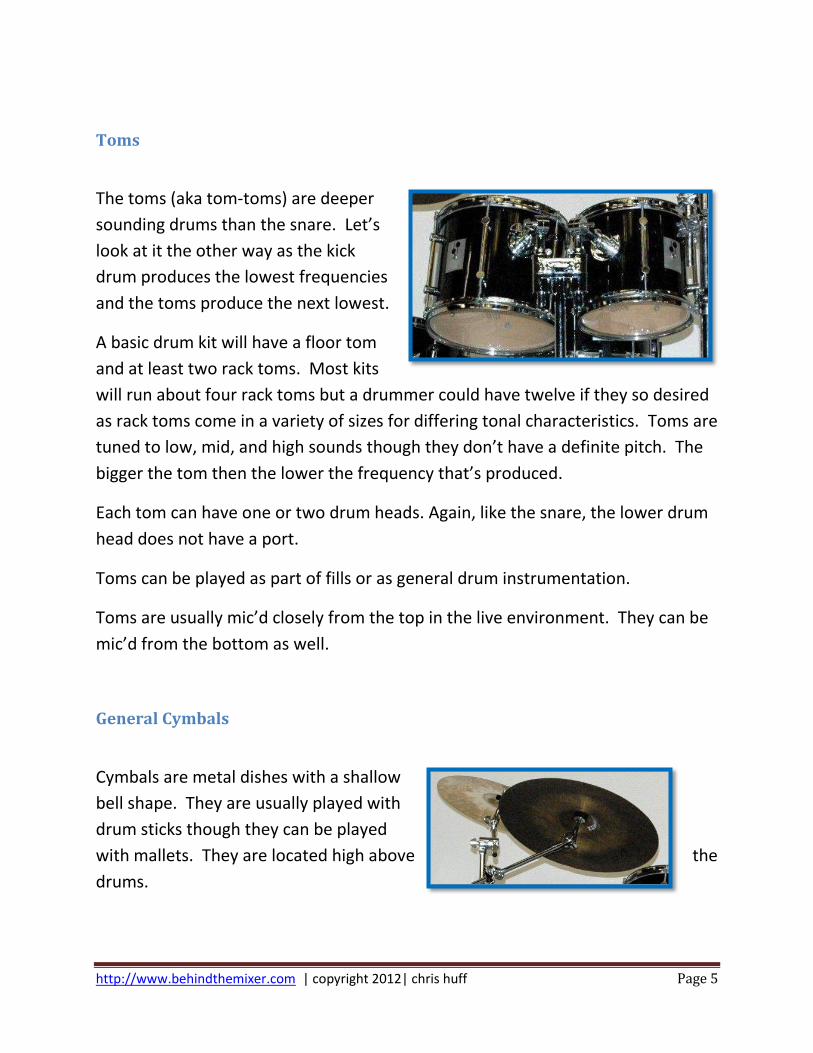
The toms (aka tom-toms) are deeper
sounding drums than the snare. Let’s
look at it the other way as the kick
drum produces the lowest frequencies
and the toms produce the next lowest.
A basic drum kit will have a floor tom
and at least two rack toms. Most kits
will run about four rack toms but a drummer could have twelve if they so desired
as rack toms come in a variety of sizes for differing tonal characteristics. Toms are
tuned to low, mid, and high sounds though they don’t have a definite pitch. The
bigger the tom then the lower the frequency that’s produced.
Each tom can have one or two drum heads. Again, like the snare, the lower drum
head does not have a port.
Toms can be played as part of fills or as general drum instrumentation.
Toms are usually mic’d closely from the top in the live environment. They can be
mic’d from the bottom as well.
General Cymbals
Cymbals are metal dishes with a shallow
bell shape. They are usually played with
drum sticks though they can be played
with mallets. They are located high above the
drums.

http://www.behindthemixer.com | copyright 2012| chris huff Page 6
Cymbals are available in a wide range of sizes. The standard kit usually has three;
the crash, the ride, and the sizzle. The crash is the largest and is used primarily for
accents. The ride is higher pitched and gets its name as its’ sound “rides out the
music” in that it has a lot of sustain after it is struck. The sizzle cymbal is named
so because it has a high-frequency shimmery / sizzle sound – kind of like when
you order fajitas and the plate’s still sizzling. They are used in lighter parts of a
song – the sizzle cymbal, not the fajitas.
The cymbals are mic’d using overhead condenser microphones. The mic’s are
usually placed a few feet above the cymbals but location can vary based on the
need.
Hi-Hat Cymbals
The hi-hats are two cymbals paired together so they face
each other. They are played using a foot pedal for
separating the cymbals and closing them together to make
their unique sound. They can also be played using drum
sticks for another unique sound. Give a drummer a pair of
sticks and they’ll hit anything!
The hi-hats are used in a variety of ways, both as rhythm
instruments as well as an instrument for accents.
These are usually mic’d from above using a condenser microphone and at a
greater distance compared to the tom mic’ing.
Drum Kit at a Glance
The drum kit pieces produce a variety of frequencies. In order from low to high;
kick drum, floor tom, low tom, mid tom, high tom, snare, cymbals, and hi-hat.
http://www.behindthemixer.com | copyright 2012| chris huff Page 7
Types of Drum Sticks
WAIT! DON’T SKIP THIS SECTION! Drum sticks are a part of the drum kit like
anything else but it’s the only place where you can get immediate help in volume
control. Drum sticks are available in a variety of types to meet the desired need
regarding tonal and volume control.
Traditional Sticks
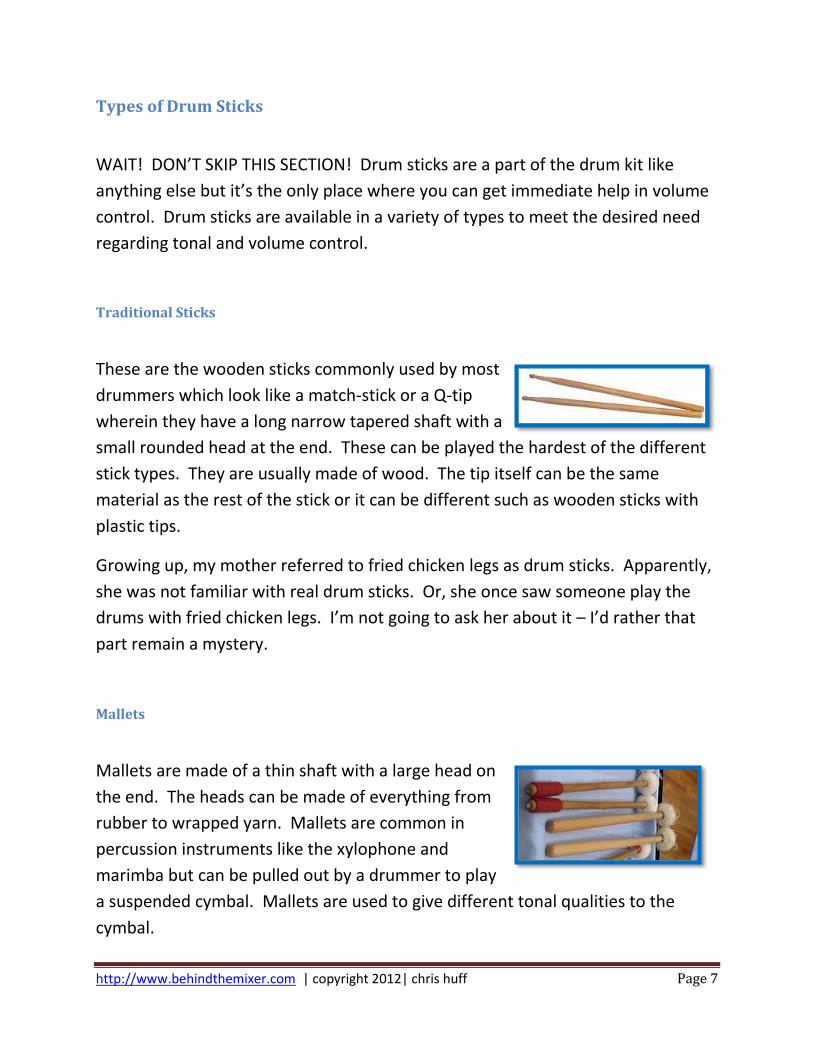
These are the wooden sticks commonly used by most
drummers which look like a match-stick or a Q-tip
wherein they have a long narrow tapered shaft with a
small rounded head at the end. These can be played the hardest of the different
stick types. They are usually made of wood. The tip itself can be the same
material as the rest of the stick or it can be different such as wooden sticks with
plastic tips.
Growing up, my mother referred to fried chicken legs as drum sticks. Apparently,
she was not familiar with real drum sticks. Or, she once saw someone play the
drums with fried chicken legs. I’m not going to ask her about it – I’d rather that
part remain a mystery.
Mallets
Mallets are made of a thin shaft with a large head on
the end. The heads can be made of everything from
rubber to wrapped yarn. Mallets are common in
percussion instruments like the xylophone and
marimba but can be pulled out by a drummer to play
a suspended cymbal. Mallets are used to give different tonal qualities to the
cymbal.
http://www.behindthemixer.com | copyright 2012| chris huff Page 8
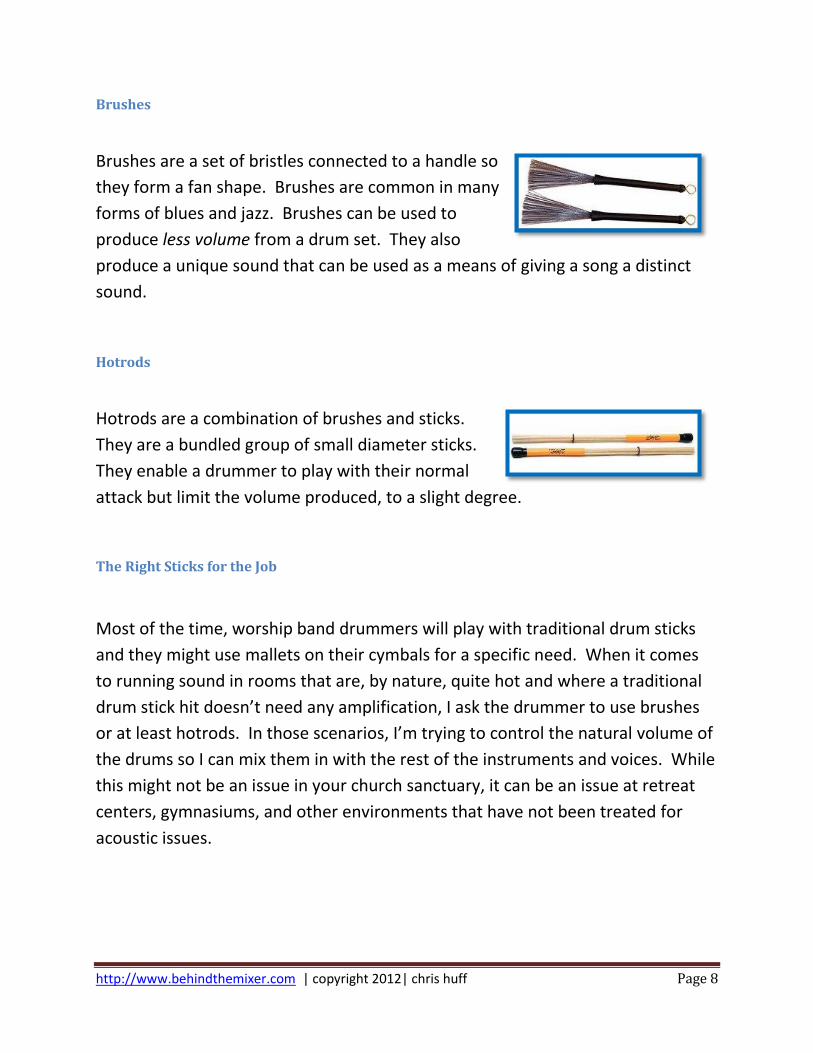
Brushes
Brushes are a set of bristles connected to a handle so
they form a fan shape. Brushes are common in many
forms of blues and jazz. Brushes can be used to
produce less volume from a drum set. They also
produce a unique sound that can be used as a means of giving a song a distinct
sound.
Hotrods
Hotrods are a combination of brushes and sticks.
They are a bundled group of small diameter sticks.
They enable a drummer to play with their normal
attack but limit the volume produced, to a slight degree.
The Right Sticks for the Job
Most of the time, worship band drummers will play with traditional drum sticks
and they might use mallets on their cymbals for a specific need. When it comes
to running sound in rooms that are, by nature, quite hot and where a traditional
drum stick hit doesn’t need any amplification, I ask the drummer to use brushes
or at least hotrods. In those scenarios, I’m trying to control the natural volume of
the drums so I can mix them in with the rest of the instruments and voices. While
this might not be an issue in your church sanctuary, it can be an issue at retreat
centers, gymnasiums, and other environments that have not been treated for
acoustic issues.
http://www.behindthemixer.com | copyright 2012| chris huff Page 9
Methods of Drum Mic'ing
There are four types of mic’ing methods described here. The first three focus on
limited mic’ing techniques. The fourth covers the optimal method for mic’ing a
drum kit.
An unlimited number of microphones and the perfect drum environment aren't
always available in the church performance environment. Therefore, consider
these first three mic'ing techniques that take this into account. Know that each
method has it's pro's and con's and that your style of music and the expectations
of the congregation can drive how you use any particular method or mixing style.
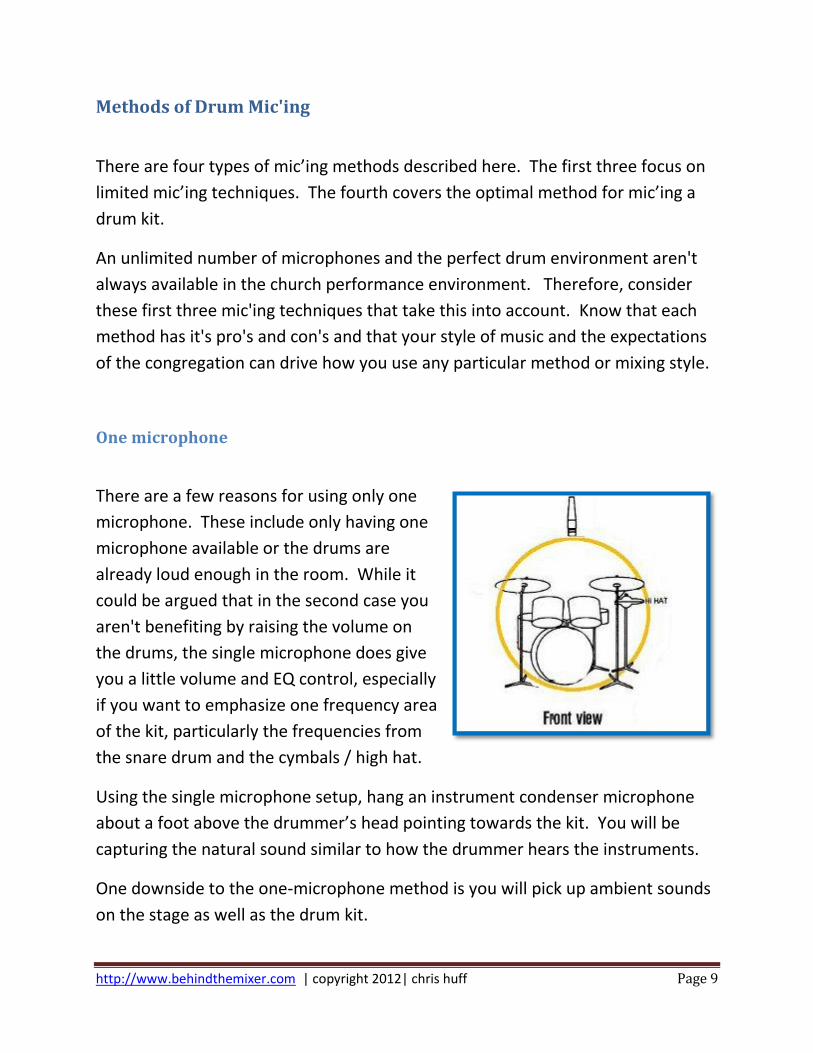
One microphone
There are a few reasons for using only one
microphone. These include only having one
microphone available or the drums are
already loud enough in the room. While it
could be argued that in the second case you
aren't benefiting by raising the volume on
the drums, the single microphone does give
you a little volume and EQ control, especially
if you want to emphasize one frequency area
of the kit, particularly the frequencies from
the snare drum and the cymbals / high hat.
Using the single microphone setup, hang an instrument condenser microphone
about a foot above the drummer’s head pointing towards the kit. You will be
capturing the natural sound similar to how the drummer hears the instruments.
One downside to the one-microphone method is you will pick up ambient sounds
on the stage as well as the drum kit.
http://www.behindthemixer.com | copyright 2012| chris huff Page 10
Regarding the limited amount of EQ’ing, cut the lower frequencies to boost the
cymbals if you so desire. Likewise, boost around the 10 kHz range for more sizzle
in the cymbals. Just remember that EQ’ing is about fitting the instrument into the
overall mix so tweak the EQ accordingly.
Two microphones
Using two microphones on a drum set, you have some choice in what you want to
emphasize in your mix. There are two ways of using a two- microphone method
which give you flexibility in where you place the emphasis.
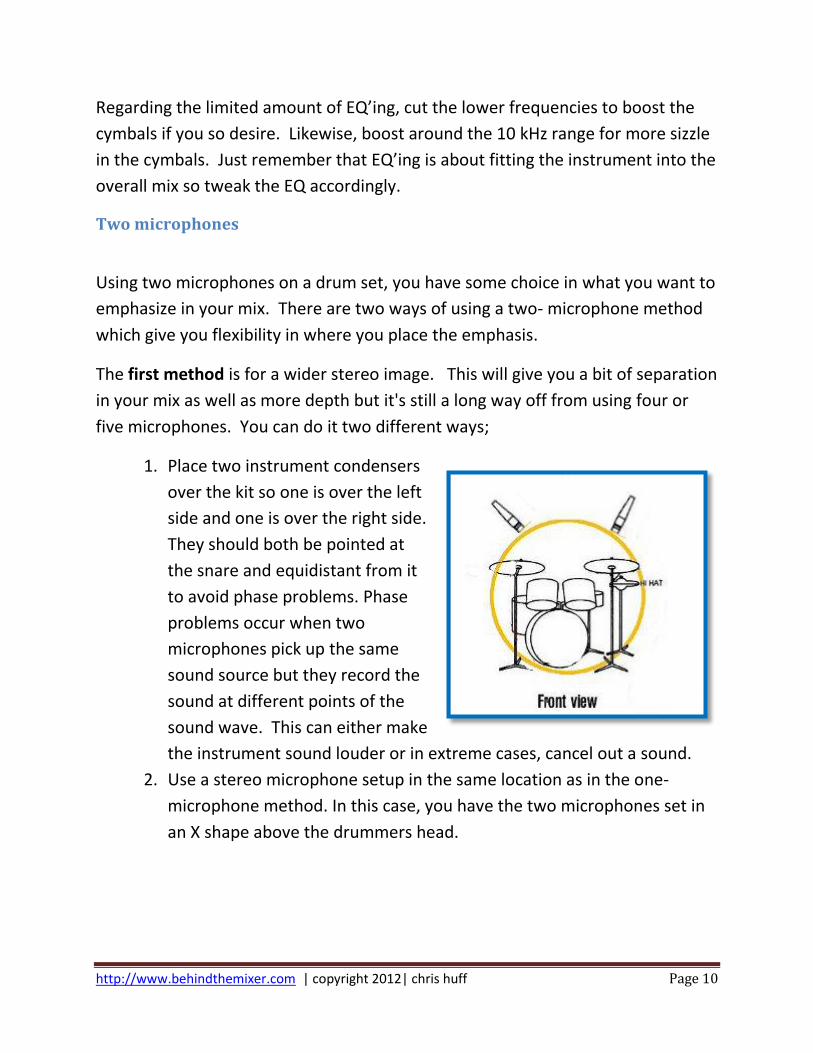
The first method is for a wider stereo image. This will give you a bit of separation
in your mix as well as more depth but it's still a long way off from using four or
five microphones. You can do it two different ways;
1. Place two instrument condensers
over the kit so one is over the left
side and one is over the right side.
They should both be pointed at
the snare and equidistant from it
to avoid phase problems. Phase
problems occur when two
microphones pick up the same
sound source but they record the
sound at different points of the
sound wave. This can either make
the instrument sound louder or in extreme cases, cancel out a sound.
2. Use a stereo microphone setup in the same location as in the one-
microphone method. In this case, you have the two microphones set in
an X shape above the drummers head.
http://www.behindthemixer.com | copyright 2012| chris huff Page 11
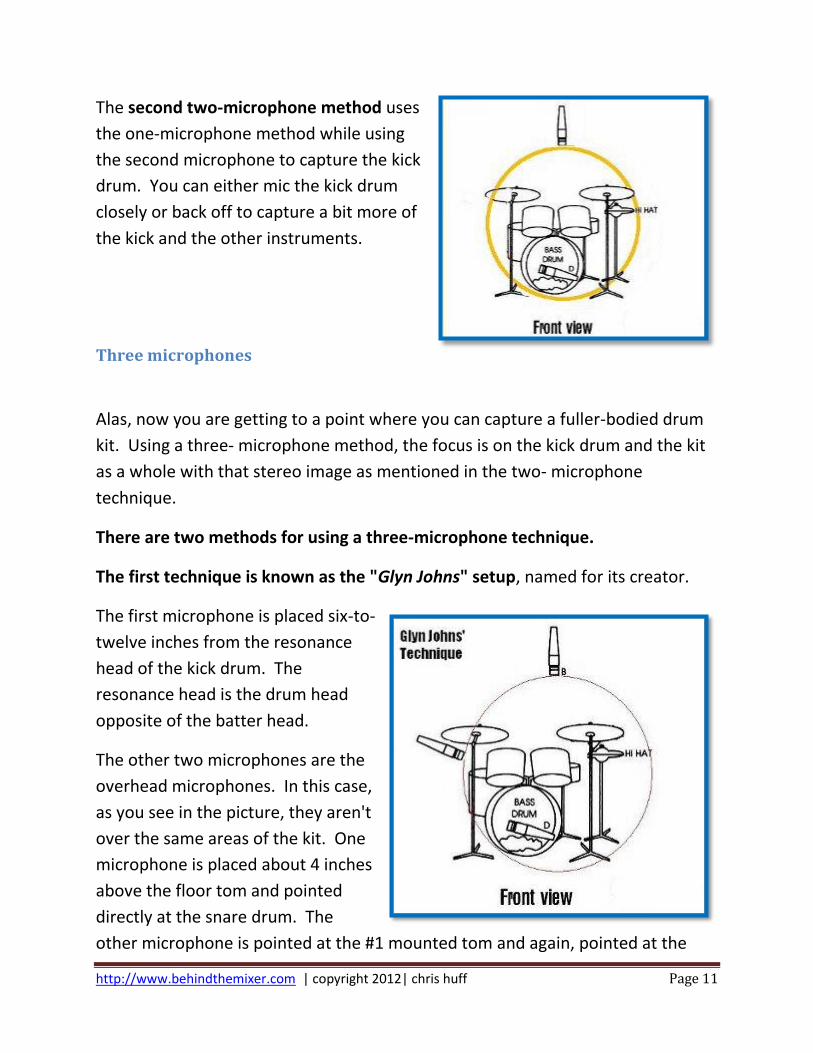
The second two-microphone method uses
the one-microphone method while using
the second microphone to capture the kick
drum. You can either mic the kick drum
closely or back off to capture a bit more of
the kick and the other instruments.
Three microphones
Alas, now you are getting to a point where you can capture a fuller-bodied drum
kit. Using a three- microphone method, the focus is on the kick drum and the kit
as a whole with that stereo image as mentioned in the two- microphone
technique.
There are two methods for using a three-microphone technique.
The first technique is known as the "Glyn Johns" setup, named for its creator.
The first microphone is placed six-to-
twelve inches from the resonance
head of the kick drum. The
resonance head is the drum head
opposite of the batter head.
The other two microphones are the
overhead microphones. In this case,
as you see in the picture, they aren't
over the same areas of the kit. One
microphone is placed about 4 inches
above the floor tom and pointed
directly at the snare drum. The
other microphone is pointed at the #1 mounted tom and again, pointed at the
http://www.behindthemixer.com | copyright 2012| chris huff Page 12
snare drum. A key point to remember is that both of these microphones need to
be pointed at the snare drum and from the same distance away to avoid phase
problems.
Feel free to move the two overhead microphones around in your setup to capture
the sound that's right for you. Just remember to keep them focused on the snare
and have both be the same distance from that snare.
When you mix using this three-microphone method, focus on the two overhead
microphones and bring up the kick drum for presence.
The second method you can use with three microphones involves one
microphone exclusively for the kick, one for the snare, and an overhead. It comes
down to a matter of what sounds you want to emphasize.
Note that in these three methods, most of the volume control needs to be done by the drummer. Whether it's through the use of hotrods or brushes or simply playing lighter, the drummers do have a role in volume control. Also, the use of overhead microphones means you are quite likely to pick up other sounds coming from the stage. Bye, bye sound isolation. However, you can limit that via placement of band members, amp's and amp direction, as well as proper monitor volume and placement.
Standard Full Microphone Setups
The goal of this guide isn't to present every possible mic'ing condition with an
ever increasing number of drum microphones. Therefore, let's look at a more
complete full-on drum mic'ing setup.
http://www.behindthemixer.com | copyright 2012| chris huff Page 13
A standard drum kit consists of one kick drum, one snare, two rack toms, a floor
tom, a hi-hat, and overhead cymbals. Using a larger count microphone setup, you
can go one of two routes.
The first route is a limited close mic'ing technique. In this case, the kick, snare,
and toms each get their own single microphone. Two overhead microphones are
used for the cymbals - one for the cymbals on the right and one for the cymbals
on the left. Unlike the one, two, and three-mic techniques, since you’ve already
mic’d the drums independently, you can bring in the cymbal overheads much
closer to the cymbals.
The second route is a complex mic'ing technique. It's just like the technique
above, except that now you are adding in microphones to the bottom of the
snare, and using two microphones on the kick drum. The kick drum would have
one on the inside of the drum, as long as it has a hole in the resonance head. The
other kick drum mic would be on the outside by the beater.
This complex technique could easily expand to the bottoms of the toms. A drum
kit can easily use 7 microphones and therefore 7 mixer channels. While you could
buy a separate small mixer just for mixing the drums, there comes a point where
you have to question if the level of complexity is necessary for the needs of the
performance.
An additional note on multiple microphones; using a microphone on both the
top and the bottom of a drum will likely cause phase cancellation issues that
affect the sound you hear. Therefore, flip the phase on one of the microphones,
if possible. Opt for the phase setup that results in the most low end sound. If you
use a microphone on the bottom and top of the snare, or front and back of the
kick try flipping the phase on one or the other and see how they fit in with the
rest of the kit. It is usually best to go with the combination that gives you the
most bottom-end because it is more in phase.
http://www.behindthemixer.com | copyright 2012| chris huff Page 14
Running into consistent phase problems? Look at the 3-to 1-Rule that says when using multiple microphones for close mic'ing, set one microphone 3 times the distance of the other microphone from the sound source. For example, if one microphone is 1 ft from the sound source, the second microphone should be at least 3 feet away. 3 feet = 1 foot x 3. A microphone 2 feet from the sound source would mean the other microphone should be at least 6 feet from the sound source.
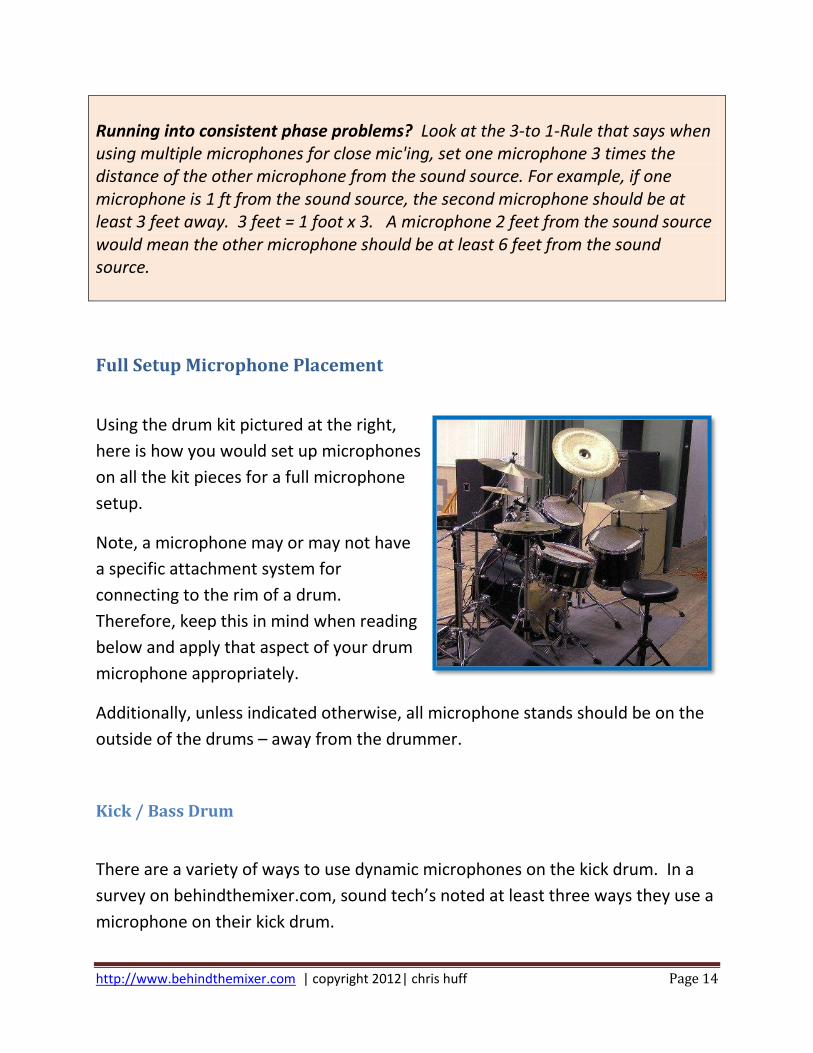
Full Setup Microphone Placement
Using the drum kit pictured at the right,
here is how you would set up microphones
on all the kit pieces for a full microphone
setup.
Note, a microphone may or may not have
a specific attachment system for
connecting to the rim of a drum.
Therefore, keep this in mind when reading
below and apply that aspect of your drum
microphone appropriately.
Additionally, unless indicated otherwise, all microphone stands should be on the
outside of the drums – away from the drummer.
Kick / Bass Drum
There are a variety of ways to use dynamic microphones on the kick drum. In a
survey on behindthemixer.com, sound tech’s noted at least three ways they use a
microphone on their kick drum.
http://www.behindthemixer.com | copyright 2012| chris huff Page 15
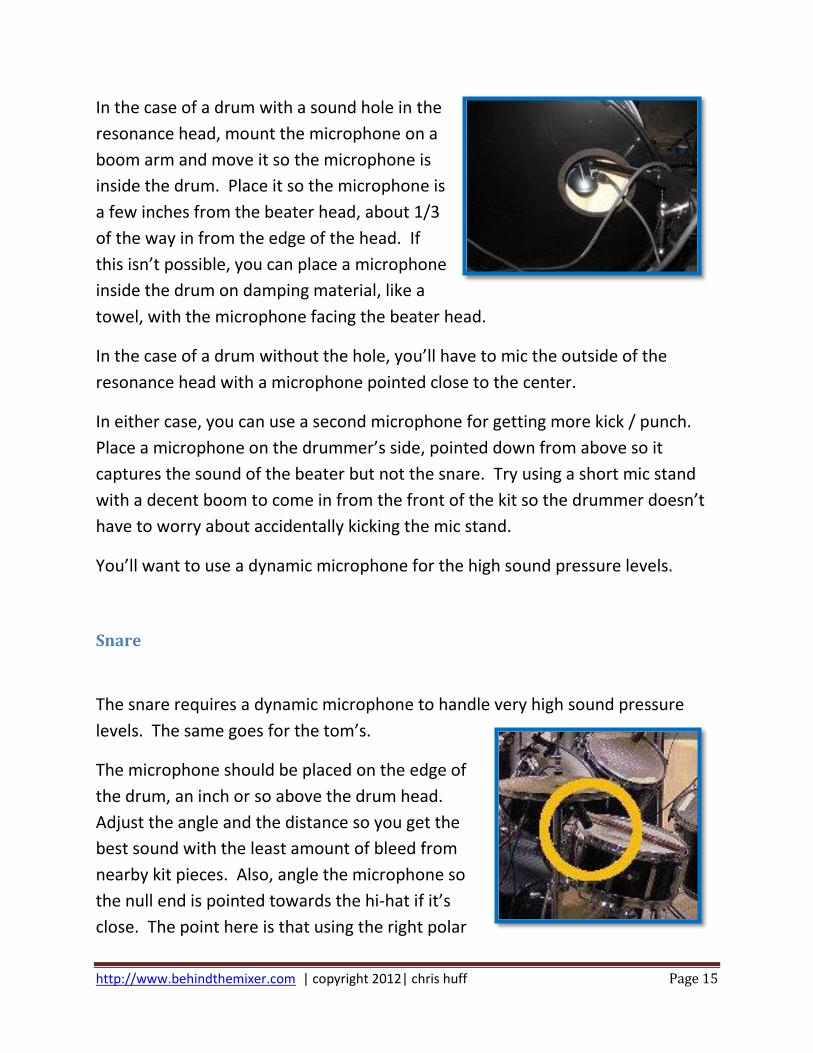
In the case of a drum with a sound hole in the
resonance head, mount the microphone on a
boom arm and move it so the microphone is
inside the drum. Place it so the microphone is
a few inches from the beater head, about 1/3
of the way in from the edge of the head. If
this isn’t possible, you can place a microphone
inside the drum on damping material, like a
towel, with the microphone facing the beater head.
In the case of a drum without the hole, you’ll have to mic the outside of the
resonance head with a microphone pointed close to the center.
In either case, you can use a second microphone for getting more kick / punch.
Place a microphone on the drummer’s side, pointed down from above so it
captures the sound of the beater but not the snare. Try using a short mic stand
with a decent boom to come in from the front of the kit so the drummer doesn’t
have to worry about accidentally kicking the mic stand.
You’ll want to use a dynamic microphone for the high sound pressure levels.
Snare
The snare requires a dynamic microphone to handle very high sound pressure
levels. The same goes for the tom’s.
The microphone should be placed on the edge of
the drum, an inch or so above the drum head.
Adjust the angle and the distance so you get the
best sound with the least amount of bleed from
nearby kit pieces. Also, angle the microphone so
the null end is pointed towards the hi-hat if it’s
close. The point here is that using the right polar
http://www.behindthemixer.com | copyright 2012| chris huff Page 16
pattern and microphone setup, you don’t get any bleed from the brass.
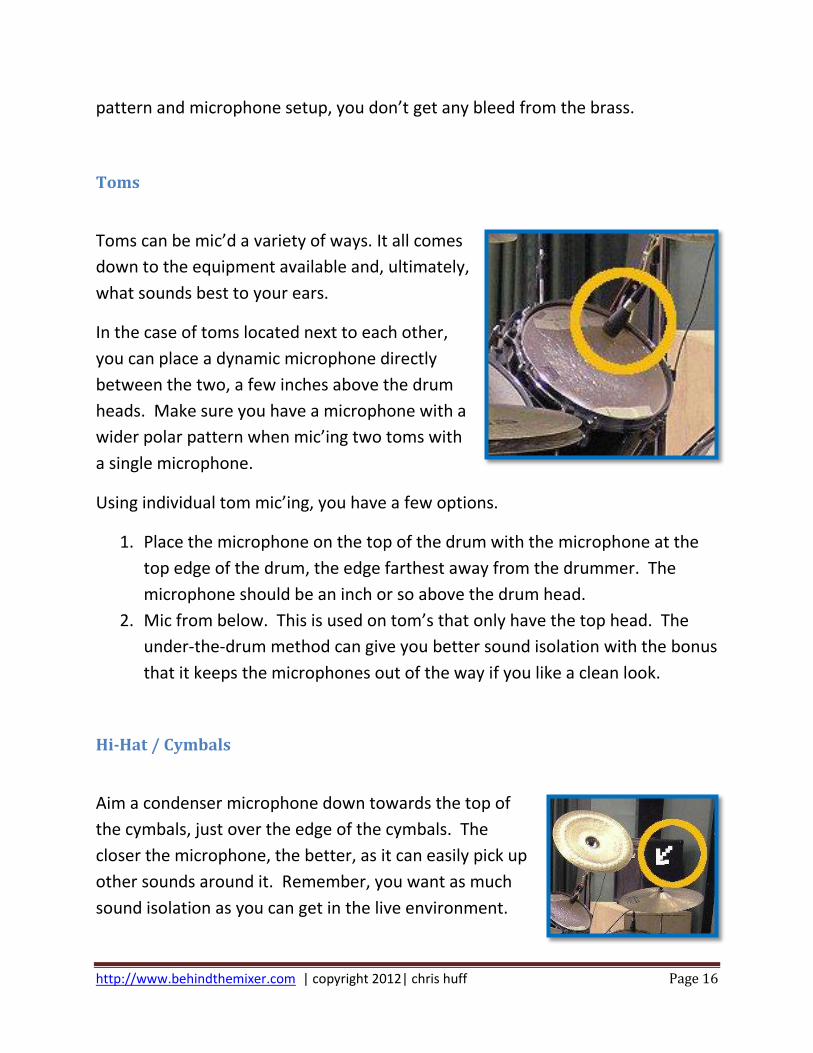
Toms
Toms can be mic’d a variety of ways. It all comes
down to the equipment available and, ultimately,
what sounds best to your ears.
In the case of toms located next to each other,
you can place a dynamic microphone directly
between the two, a few inches above the drum
heads. Make sure you have a microphone with a
wider polar pattern when mic’ing two toms with
a single microphone.
Using individual tom mic’ing, you have a few options.
1. Place the microphone on the top of the drum with the microphone at the
top edge of the drum, the edge farthest away from the drummer. The
microphone should be an inch or so above the drum head.
2. Mic from below. This is used on tom’s that only have the top head. The
under-the-drum method can give you better sound isolation with the bonus
that it keeps the microphones out of the way if you like a clean look.
Hi-Hat / Cymbals
Aim a condenser microphone down towards the top of
the cymbals, just over the edge of the cymbals. The
closer the microphone, the better, as it can easily pick up
other sounds around it. Remember, you want as much
sound isolation as you can get in the live environment.
http://www.behindthemixer.com | copyright 2012| chris huff Page 17
Picking the Right Drum Microphones
There are a wide variety of microphones available for use on a drum kit.
Microphones have their own tonal characteristics and frequency pickup
characteristics as can easily be seen on their frequency response charts. Some
microphones sound great in one room while perhaps not so much in another
room. For a bit of homework, lookup the frequency charts of the below
microphones and discover why each microphone works best for the mentioned
drum need.
Listed below are a variety of microphones that serve as a great starting point.
Talk with the company in which you are considering buying drum mic’s and see if
they have a mic you can demo first.
Additionally, you can buy drum microphones individually or in a kit. You can save
money going the kit route as well as knowing you are getting a good mix of
microphones for the job. In the case of kits, they can have as few as four
microphones and as many as eight or even ten.
Kick Drum:
Shure Beta 52A
AKG D 112
Audio-Technica ATM250DE Microphone
Sennheiser e 902 Instrument Microphone
Snare:
Shure SM57 Instrument / Vocal Microphone
Shure Beta 56 Drum Microphone
Sennheiser e604 Cardioid Instrument Microphone
Toms:
Shure Beta 56 Drum Microphone
Sennheiser e604 Cardioid Instrument Microphone
http://www.behindthemixer.com | copyright 2012| chris huff Page 18
Cymbals / Overheads:
Rode M3
Audio-Technica Artist Elite AE5100 Microphone
AKG C 1000 S Microphone
Audio-Technica PRO 37 Studio Microphone
Kits:
Shure PGDMK6-XLR Drum Mic Kit
Shure DMK57-52 Drum Microphone Kit
Audix FP5 Fusion Drum Microphone Kit
AKG Rythm Pack Drum Microphone Package
Earthworks DK50/R DrumKit System
Audix Studio Elite 8
EQ'ing Acoustic Drums
If you jumped to this section before reading everything before it, please go back
to the beginning and read everything. It’s there for a good reason. You must
understand about microphone choice, microphone placement, and the
characteristics of the drum kit pieces before you can really EQ the drums for their
best sound. Go ahead, I’ll wait…
There are a few ways to set EQ levels for the drums – independently or with the
whole band playing. I find the most success by first getting a good kick drum and
snare sound, then I’ll have the band start playing. Then I can massage the
frequencies of the drums and other instruments and vocals so they form a tight
mix and blend together.
The tips I have included below are for general mixing. I can’t tell you what would
be perfect for your room or your band’s style of music. That’s something only you
can do. What you can learn is how to build a general mix for the drums that gets
you a great starting sound which you can then adjust to meet your specific needs.
http://www.behindthemixer.com | copyright 2012| chris huff Page 19
EQ’ing a drum set is a foundational process with the lowest layer being the kick
drum. Start by setting the kick drum with a nice tight and punchy sound. You
want the low end sound to fill that low bass range with enough of the midrange
frequencies to allow it to cut through in the mix (to have definition). A boost
around 2,500 Hz will help with the punch.
Next, move to the snare. The snare often drives the tempo of a song. It’s a
unique sound that everyone recognizes and drives the tapping of their foot.
Focus on capturing the attack on the snare, around the 5 kHz range. Bring in a bit
of low-mid to give it a little substance – you don’t want it to sound like the
drummer is banging on a trash-can lid.
This leads to the tom’s and the cymbals.
As a child of the 1980’s, I was a huge Phil Collins fan. Anyone who knows the song
“In the Air Tonight” has heard the short drum solo that’s halfway through the
song. It’s not so much a solo as a transition but that’s beside the point. Phil is
playing the tom’s in this transition part and if you ever saw him in concert, you
can thank Rob “Cubby” Colby (his FOH guy) for creating his distinct tom sound.
My point is that the tom’s have a unique sound and quite a bit of that is up to
you, the person mixing those drums. You can focus on the attack, looking again in
that 5 kHz range. Start the tom EQ process with the lowest frequency tom, the
floor tom, and work your way up through to the highest frequency tom. Start
with the floor tom and try boosting at the 140 Hz mark. Once you find the right
sound, then move through the higher toms by boosting at around 20 Hz higher
(160 Hz, 180 Hz, etc) for each tom. The key is first getting that floor tom where it
sounds right. The floor tom is a great accent drum in the kit so make sure it sits
nicely in the mix between the drum and the bass.
Regarding cymbals, you can boost in the 10 kHz range for the hardness of the
cymbals and in the 15 kHz for the brightness. As a warning, don’t overdo it on the
brightness. Remember the drums need to sit in the mix, just like all the other
instruments. Wait for a drum solo if you really want to pop those frequencies but
otherwise, be careful.
http://www.behindthemixer.com | copyright 2012| chris huff Page 20
If you are wishing at this point for me to simply say “set your high to X, your
Midrange to Y and cut frequency A to Z to get a perfect tom sound” well, I’ll be the
first to break it to you – it’s not that simple.
I’ve been doing sound for over 15 years and I can tell you there is no magic
formula for EQ’ing. Mixing is part science and part art. This is where the art
portion comes into play. But there are some general guidelines for EQ’ing the
drums and they are good for giving you a place to start.
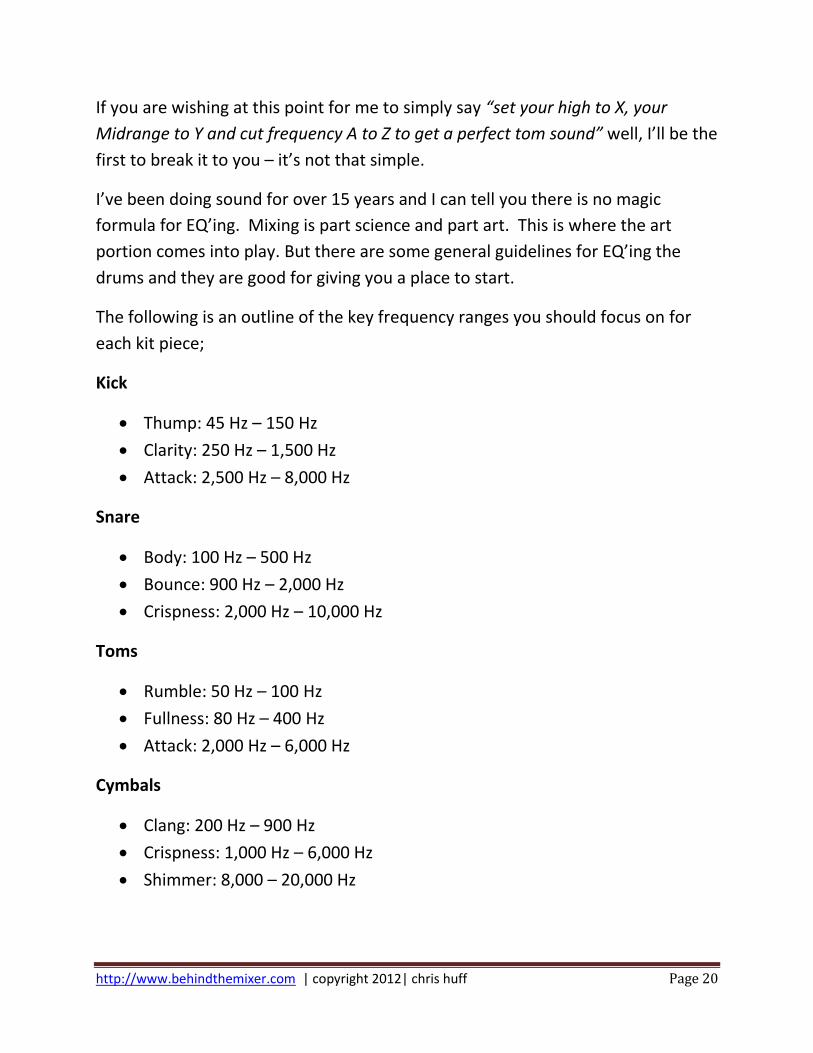
The following is an outline of the key frequency ranges you should focus on for
each kit piece;
Kick
Thump: 45 Hz – 150 Hz
Clarity: 250 Hz – 1,500 Hz
Attack: 2,500 Hz – 8,000 Hz
Snare
Body: 100 Hz – 500 Hz
Bounce: 900 Hz – 2,000 Hz
Crispness: 2,000 Hz – 10,000 Hz
Toms
Rumble: 50 Hz – 100 Hz
Fullness: 80 Hz – 400 Hz
Attack: 2,000 Hz – 6,000 Hz
Cymbals
Clang: 200 Hz – 900 Hz
Crispness: 1,000 Hz – 6,000 Hz
Shimmer: 8,000 – 20,000 Hz
http://www.behindthemixer.com | copyright 2012| chris huff Page 21
Please note that compression and gating are also a means of controlling the drum
mix so that the volume of a particular kit piece stays within a specific range and
you also have control over some of the attack and the release of the sound. This
can vary widely depending on the room and the style of music and therefore is
not included in this guide.
EQ’ing Electronic Drums
Electronic drums can be a blessing and a curse. While they eliminate the stage
volume, the simpler kits only send you one audio signal so you lose the ability of
dynamic mixing. That being said…
Electronic drum kits can have individual kit part outputs or have a single output
sent to the mixing console. In the case of the single output, 95% of your kit
mixing will be done via the brain module on the drum kit. You can set a huge
variety of kit piece properties but once they are set, either your drummer would
have to change a lot between songs or you simply pick a general sound you like
for the room. Oh, that other 5% is what you can do to the general high-end and
low-end frequencies.
Regarding the electronic drums being EQ’ed on the drum kit itself, you have to
work with the drummer. Any time you are trying to fix a sound with the drums,
first ask the drummer to alter the settings for that particular drum piece. Both
you and the drummer should know how to navigate the menu system on the
brain. Otherwise, it can be a nightmare.
Drums with individual sends can be EQ’ed like a drum set with independent
microphones. [And there was celebration in the streets!] Seriously, it’s really nice
to have that level of equipment. You should still set the drum kit for the best
sound using the brain module but once it’s set, you can mix each piece separately.
Back to the drums with a single send. They are a bit tricky. Once you set the
brain module EQ, now you have a bit of room for channel mixing, though only
http://www.behindthemixer.com | copyright 2012| chris huff Page 22
with a couple of frequency controls. Therefore, If you wish to EQ on top of that,
then try the following;
Boost or cut the highs to control the presence of the cymbals in the mix.
Boost or cut the lows so that the kick and toms meets the general needs of
the song.
Use your mid-range to capture the sound of the snare.
Drum Shields and Drum Cages
Drum shields and cages are a huge topic in and of themselves. Therefore, in this
eBook, I’m limiting the topic to the follow statements;
1. Drum volume should first be controlled by the drummer. The drummer can
control this through the amount of energy used in striking the kit and in
their selection of drum sticks (sticks vs. hotrods vs. brushes). When you
have reached a point where additional measures must be taken, move
towards cages and shields as necessary.
2. Drums contribute to a lot of stage volume and can affect the house sound.
Therefore, temper their volume using the right cage / shielding.
Not all cages and shields are equal so do your research before buying anything.
http://www.behindthemixer.com | copyright 2012| chris huff Page 23
Tips and Tricks
Each room is different, each drum kit is different, each microphone is
unique, and each drummer plays differently. Therefore, use your ears in
determining the best placement of microphones and the best means of
EQ’ing the drums so they fit the type of music and the expectations of the
audience.
The drum kit is a place you don’t want to pop up your head when the
drummer is swinging away, therefore, place your microphones and stands
with equal care so they aren’t accidently whacked during play.
Don’t let your microphone stands touch the drum kit in any way. When
they do touch, you will hear a vibrating sound that will drive you crazy.
Only test a new microphone setup or new EQ process with the drummer
who will be playing for the same performance that will use that setup.
Find that the drums are too boomy? Talk with the drummer about adding
tissue paper, paper towels, or other material gaff-taped to the head of the
boomy drum. In the case of the kick drum, a pillow laid against the beater
head will reduce the boominess.
Use microphone choice and placement as a means of modifying the sound
you hear before you use any EQ modifications.
Don’t eat yellow snow.
The longer the boom required for holding up a microphone inside of a kick
drum, the more likely the stand will fall down. Consider using gaff tap to
secure the microphone stand. I’ve also seen a dumbbell weight placed on
the stand. There are kick-mic-specific microphone stands with the added
weight as well.
Big rooms warrant more microphones. Small rooms might be ok with the
one-mic or two-mic technique. Experiment with each if you aren’t sure
which is right for your room.
http://www.behindthemixer.com | copyright 2012| chris huff Page 24
Wrap Up
Getting a great drum sound is about;
Understanding the parts of the drum kit and how they are played
Using the right microphone setup given your environment, your drums,
and the microphones you have available
Using EQ as the last part of the process to sculpt your sound
Properly fitting the sound into the mix
Getting a great drum sound doesn’t happen overnight. It takes practice. It takes
experimentation. And it takes hard work.
I hope you’ve learned a lot from this and I wish you the best,
Chris – behindthemixer.com
Master Church Audio
Do you want to learn the crucial aspects of
church audio?
Do you want to meet the expectations of the
pastor AND the congregation each week?
Pick up a copy of the 300+ page guide to
Audio Essentials for Church Sound.
http://www.behindthemixer.com | copyright 2012| chris huff Page 25
About
Copyright 2012, BehindTheMixer.com
BehindTheMixer.com is dedicated to improving the church audio world through
teaching the fundamentals of audio production, teaching advanced topics, and
supporting the needs of those in the church audio community.
Chris Huff
Image Licensing
Snare: http://www.flickr.com/photos/27429206@N02/4124370796/
Drum sticks: http://www.flickr.com/photos/21025851@N00/2169214584/in/photostream/
Drum brushes: http://www.flickr.com/photos/21025851@N00/2169214368/#/
Drum mallets: http://www.flickr.com/photos/admission-free-japan/4155791690/
Basic Drum Kit: http://www.sxc.hu/photo/671492
Mic'd set: http://www.sxc.hu/photo/349341
Electronic drums: http://www.sxc.hu/photo/265377
Glyn Johns: http://www.wikirecording.org/Image:Glyn_Johns_Mic_Placement.JPG