Embed Size (px)
Citation preview
HSC Major StudyDance Film and Video
Booklet
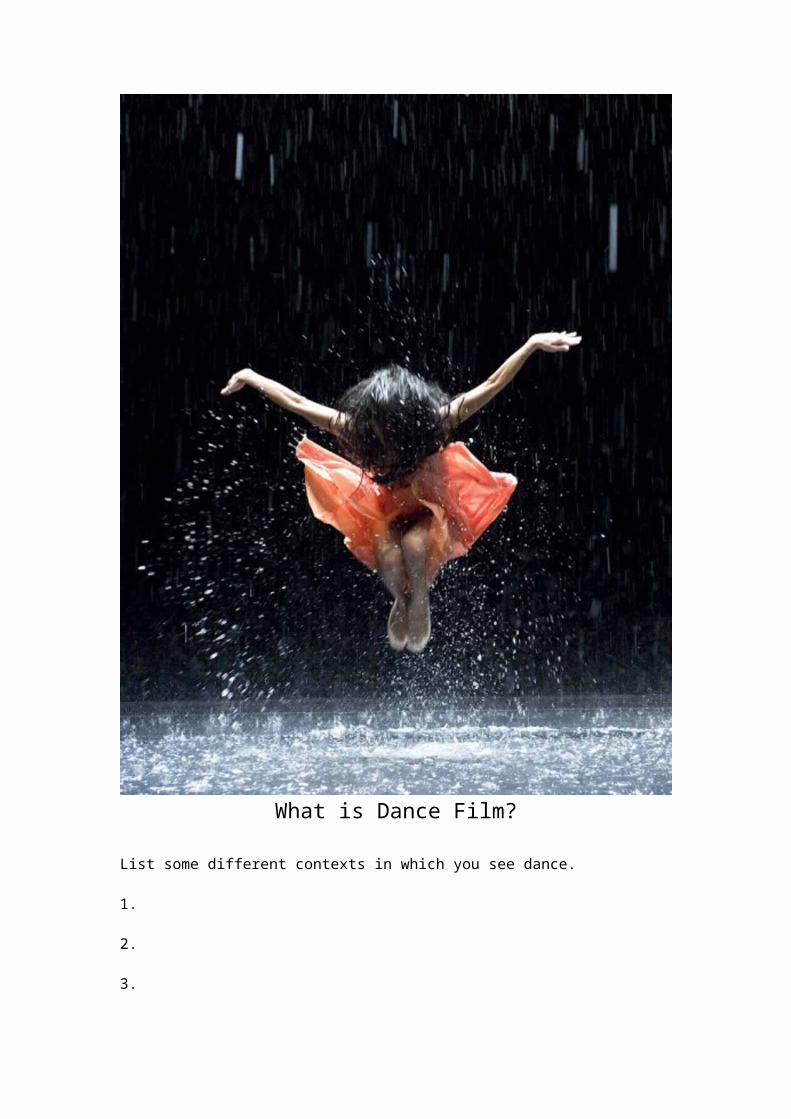
What is Dance Film?
List some different contexts in which you see dance.
1.
2.
3.
4.
5.
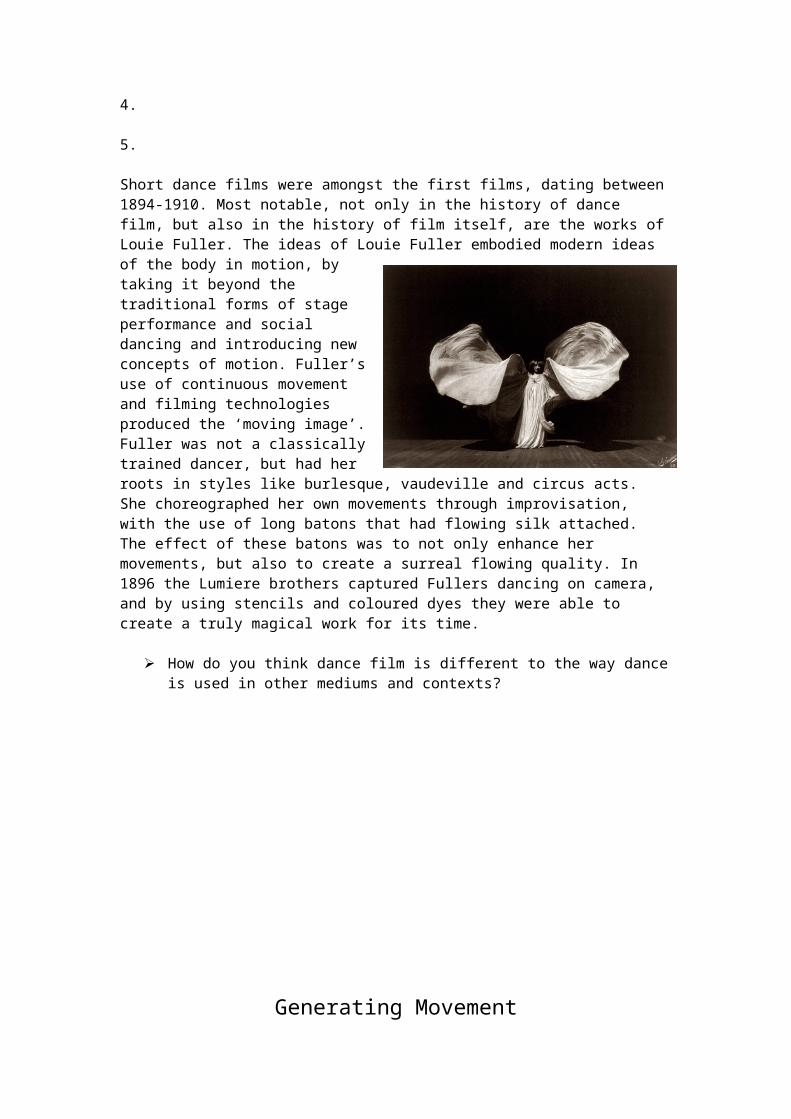
Short dance films were amongst the first films, dating between 1894-1910. Most notable, not only in the history of dance film, but also in the history of film itself, are the works of Louie Fuller. The ideas of Louie Fuller embodied modern ideas of the body in motion, by taking it beyond the traditional forms of stage performance and social dancing and introducing new concepts of motion. Fuller’s use of continuous movement and filming technologies produced the ‘moving image’. Fuller was not a classically trained dancer, but had her roots in styles like burlesque, vaudeville and circus acts. She choreographed her own movements through improvisation, with the use of long batons that had flowing silk attached. The effect of these batons was to not only enhance her movements, but also to create a surreal flowing quality. In 1896 the Lumiere brothers captured Fullers dancing on camera, and by using stencils and coloured dyes they were able to create a truly magical work for its time.
How do you think dance film is different to the way dance is used in other mediums and contexts?
Generating Movement
• stimulus material – conception — intent or motivating factors • generating movement relevant to a concept/intent • abstraction • exploration/improvisation • reflection/evaluation • selection and refinement.
Complete the following extended response and short answer activities below in your journal to help you begin thinking through ideas for your film. Talk your ideas through with others and your dance teachers to see what they think and if you’re on the right track.
Activity ONE:Extended Response (at least 1/2 A4 page):
Explain the stimulus you have used for your Major Study Dance and Technology - Dance Film and explain, using a brainstorm, how you will achieve these ideas to create a choreographic intent
HINT – Be sure to identify the type of stimulus (from year 11 notes e.g. visual, kinaesthetic, ideational, aural, tactile) and explain the stimulus. Explain how this stimulus leads to your intent. Include ideas of where you would like to shoot certain parts of your work, motifs you would like to use, how you want to use dance (doco, stage, film or musical) and how you would like to use your dancers.
Activity TWO:Short answer responses:
How might you use space in your Major Dance and Technology - Film? Why – how will this help you to communicate your intent to audiences?
How might you use time in your Major Dance and Technology - Film? Why – how will this help you to communicate your intent to audiences?
How might you use dynamics in your Major Dance and Technology - Film? Why – how will this help you to communicate your intent to audiences?
HINT – Space – level, geometry of space (direction, dimension, plane), shape, floor pattern, design in space, personal space, active space, performance space. Time – tempo, duration, momentum, regular/irregular, accent, metre, natural rhythms, stillness. Dynamics - release of energy, weight/force.
Using the ideas you have written about for the last two activities, begin to abstract movement and ideas from your intent, improvise movement, and then reflect and refine your movement and ideas. Either record your movement through writing it out or recording it on camera, as this will help you to more effectively reflect on appropriate movement.
Complete the following activity in your journal.
Activity THREE:Extended response:
Explain how you have generated movement relevant to your concept/intent for your Dance Film. Use the headings: improvisation, abstraction, selection/refinement, and evaluation in your response.
HINT – Look in syllabus under Areas of Study (improvisation, abstraction, selection/refinement, evaluation) Be sure to include 16 ways to manipulate a motif in this question e.g. inversion, size, level, retrograde etc.
Organising Movement
Organising the movement as it relates to dance choreography • motif • phrase• motif into phrase
Begin to organise your movement into motif’s and then continue to manipulate this movement into phrases. Remember that for dance film you do not need to choreograph as much movement as you would for composition as you can also use filming and editing techniques to manipulate movement and extend your intent. Be sure to show Mrs Chapman your motifs in order to receive feedback.
Complete the extended response below in your journal.
Activity FOUR:
Extended Response (at least ONE A4 page): How have you organised movement as it relates to your Dance
Film?HINT – Look in syllabus under Areas of Study (motif, phrase and motif into phrase)

Organising the Work
Organising the work (form/structure) • sequencing • transition • repetition • variation and contrast • formal structures • unity • appraisal and evaluation
Complete the short answer questions below to help you think about how you can organise the movement in your film most effectively in order to communicate your intent.
Activity FIVE:
Short answer responses: Identify the formal structure of your Major Dance Film (e.g. binary,
chance, rondo etc) How have you used repetition in your Major Dance Film to enhance
the intent? How have you created variation and contrast to enhance the intent
of your film? How have you created transitions using effects?
Filming
Camera angles and movements combine to create a sequence of images, just as words, word order and punctuation combine to make the meaning of a sentence. You need a straightforward set of key terms to describe them.Describing ShotsWhen describing camera angles, or creating them yourself, you have to think about three important factors— The FRAMING or the LENGTH of shot— The ANGLE of the shot— If there is any MOVEMENT involvedWhen describing different cinematic shots, different terms are used to indicate the amount of subject matter contained within a frame, how far away the camera is from the subject, and the perspective of the viewer. Each different shot has a different purpose and effect. A change between two different shots is called a CUT.
Read through the list of camera angles and movement below and highlight the techniques you plan to use. Make a note in the margin of the page about how the technique will assist in communicating your intent.
Framing or Shot Length1 . Extreme long shotThis can be taken from as much as a quarter of a mile away, and is generally used as a scene-setting, establishing shot. It normally shows an EXTERIOR, eg the outside of a building, or a landscape, and is often used to show scenes of thrilling action eg in a war film or disaster movie. There will be very little detail visible in the shot, it's meant to give a general impression rather than specific information. 2. Long Shot
This is the most difficult to categorise precisely, but is generally one which shows the image as approximately "life" size ie corresponding to the real distance between the audience and the screen in a cinema (the figure of a man would appear as six feet tall). This category includes the FULL SHOT showing the entire human body, with the head near the top of the frame and the feet near the
bottom. While the focus is on characters, plenty of background detail still emerges. 3. Medium ShotContains a figure from the knees/waist up and is normally used for dialogue scenes, or to show some detail of action. Variations on this include the TWO SHOT (containing two figures from the waist up) and the THREE SHOT (contains 3 figures...). NB. Any more than three figures and the shot tends to become a long
shot. Background detail is minimal, probably because location has been established earlier in the scene - the audience already know where they are and now want to focus on dialogue and character interaction. Another variation in this category is the OVER-THE-SHOULDER-SHOT, which positions the camera behind one figure, revealing the other figure, and part of the first figure's back, head and shoulder. 4. Close-Up
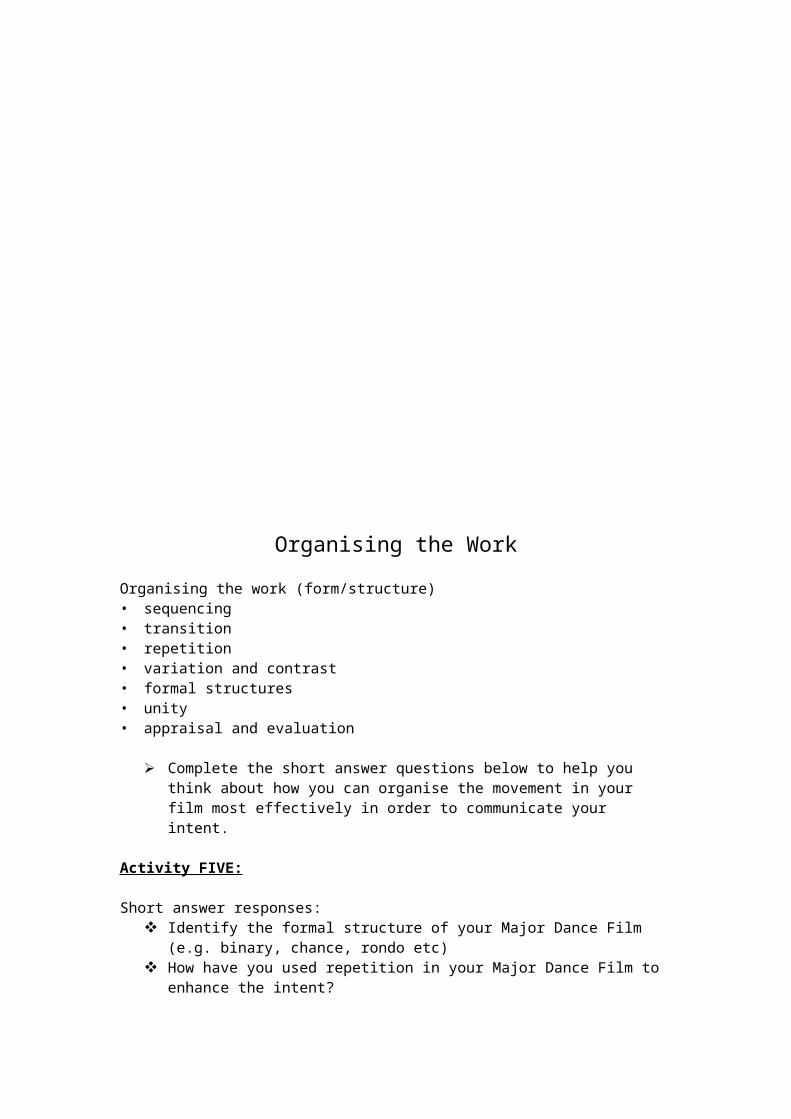
This shows very little background, and concentrates on either a face, or a specific detail of mise en scène. Everything else is just a blur in the background. This shot magnifies the object (think of how big it looks on a cinema screen) and shows the importance of things, be it words written on paper, or the expression on someone's face. The close-up takes us into the mind of a character. In reality, we only let people
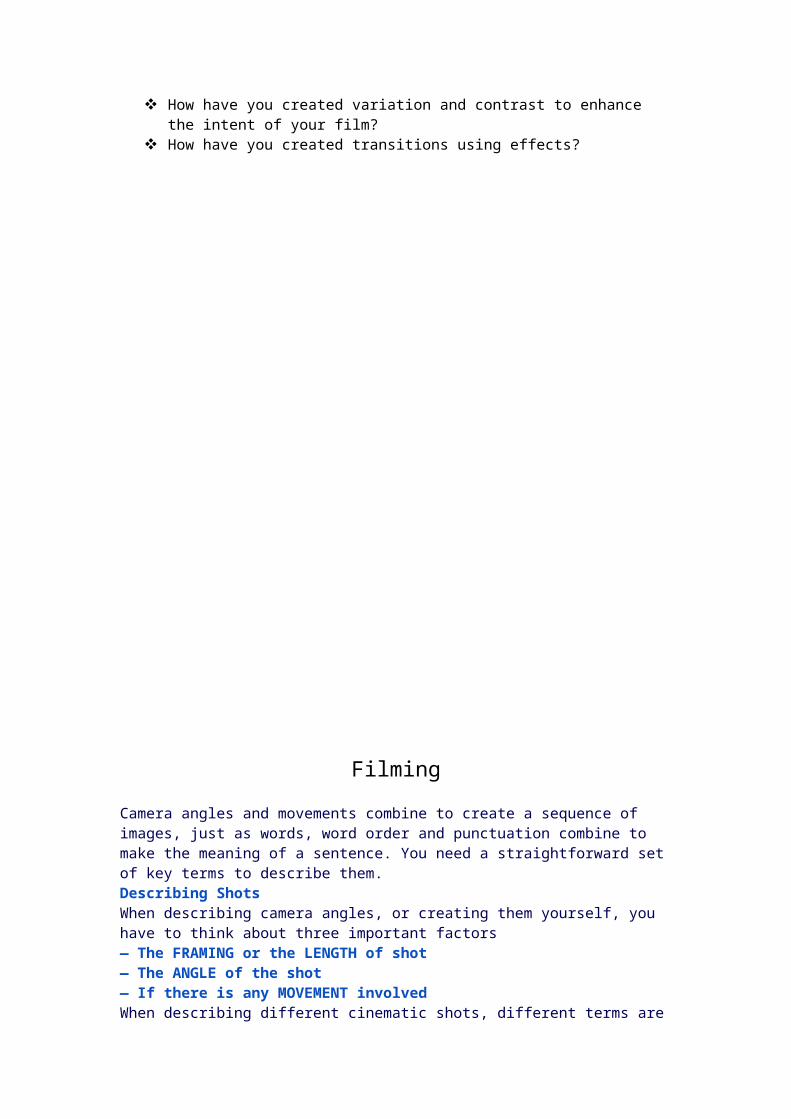
that we really trust get THAT close to our face - mothers, children and lovers, usually - so a close up of a face is a very intimate shot. A film-maker may use this to make us feel extra comfortable or extremely uncomfortable about a character, and usually uses a zoom lens in order to get the required framing. 5. Extreme Close-UpAs its name suggests, an extreme version of the close up, generally magnifying beyond what the human eye would experience in reality. An extreme close-up of a face, for instance, would show only the mouth or eyes, with no background detail whatsoever. This is a very artificial shot, and can be used for dramatic effect. The tight focus required means that extra care must be taken when setting up and lighting the shot - the slightest camera shake or error in focal length is very noticeable.
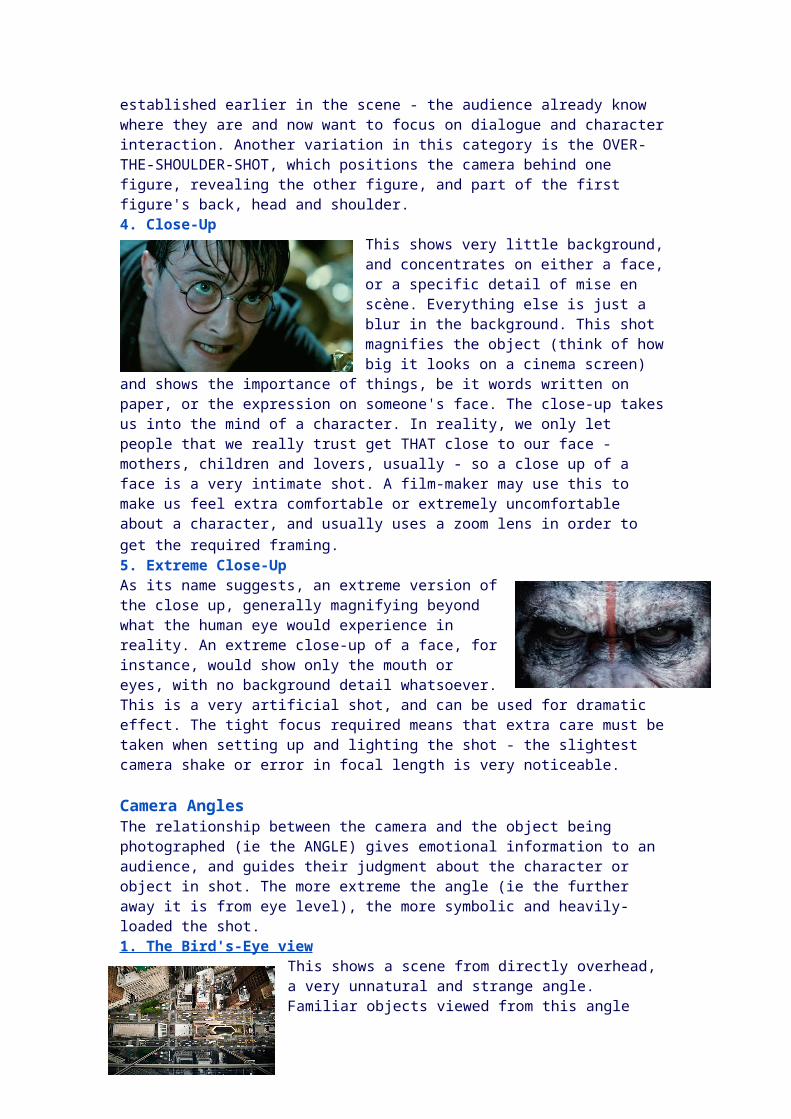
Camera AnglesThe relationship between the camera and the object being photographed (ie the ANGLE) gives emotional information to an audience, and guides their judgment about the character or object in shot. The more extreme the angle (ie the further away it is from eye level), the more symbolic and heavily-loaded the shot.1. The Bird's-Eye view
This shows a scene from directly overhead, a very unnatural and strange angle. Familiar objects viewed from this angle might seem totally unrecognisable at first (umbrellas in a crowd, dancers' legs). This shot does, however, put the audience in a godlike position, looking down on the action. People can be made to look insignificant, ant-like, part of a wider scheme of things.
2. High AngleNot so extreme as a bird's eye view. The camera is elevated above the action using a crane to give a general overview. High angles make the object photographed seem smaller, and less significant (or scary). The object or character often gets swallowed up by their setting - they become part of a wider picture. 3. Eye Level
A fairly neutral shot; the camera is positioned as

though it is a human actually observing a scene, so that the actors' heads are on a level with the focus. The camera will be placed approximately five to six feet from the ground.
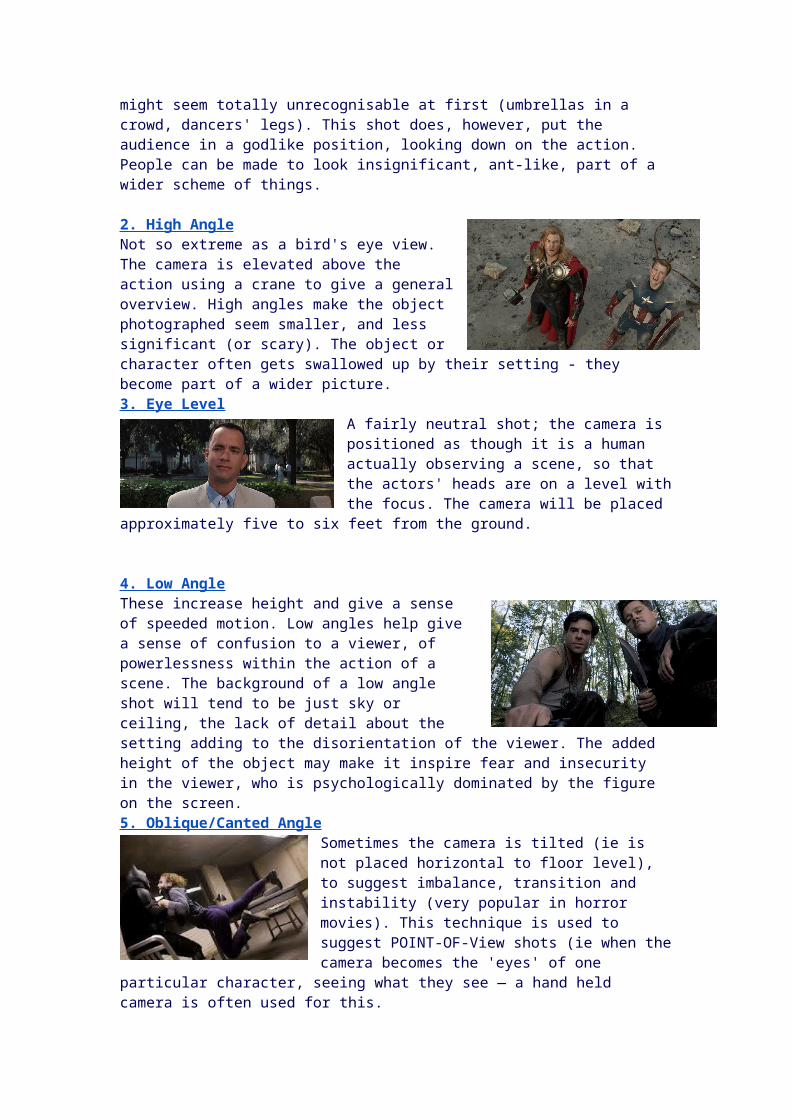
4. Low AngleThese increase height and give a sense of speeded motion. Low angles help give a sense of confusion to a viewer, of powerlessness within the action of a scene. The background of a low angle shot will tend to be just sky or ceiling, the lack of detail about the setting adding to the disorientation of the viewer. The added height of the object may make it inspire fear and insecurity in the viewer, who is psychologically dominated by the figure on the screen.5. Oblique/Canted Angle
Sometimes the camera is tilted (ie is not placed horizontal to floor level), to suggest imbalance, transition and instability (very popular in horror movies). This technique is used to suggest POINT-OF-View shots (ie when the camera becomes the 'eyes' of one particular character, seeing what they see — a hand held camera is often used for this.
Camera MovementA director may choose to move action along by telling the story as a series of cuts, going from one shot to another, or they may decide to move the camera with the action. Moving the camera often takes a great deal of time, and makes the action seem slower, as it takes several second for a moving camera shot to be effective, when the same information may be placed on screen in a series of fast cuts. Not only must the style of movement be chosen, but the method of actually moving the camera must be selected too. There are seven basic methods:1. PansA movement which scans a scene horizontally. The camera is placed on a tripod, which operates as a stationary axis point as the camera is turned, often to follow a moving object which is kept in the middle of the frame.2. TiltsA movement which scans a scene vertically, otherwise similar to a pan.3. Dolly ShotsSometimes called TRUCKING or TRACKING shots. The camera is placed on a moving vehicle and moves alongside the action, generally following a moving figure or object. Complicated dolly shots will involve a track being laid on set for the camera to follow, hence the name. The camera might be mounted on a car, a plane, or even a shopping trolley (good method for independent film-makers looking to save a few dollars). A dolly shot may be a good way of portraying movement, the journey of a character for instance, or for moving from a long shot to a close-up, gradually focusing the audience on a particular object or character.4. Hand-held shotsThe hand-held movie camera first saw widespread use during World War II, when news reporters took their windup Arriflexes and Eyemos into the heat of battle, producing some of the most arresting footage of the twentieth century. After the war, it took a while for commercially produced movies to catch up, and documentary makers led the way, demanding the production of smaller, lighter cameras that could be moved in and out of a scene with speed, producing a "fly-on-the-wall" effect. This aesthetic took a
while to catch on with mainstream Hollywood, as it gives a jerky, ragged effect, totally at odds with the organised smoothness of a dolly shot. The Steadicam (a heavy contraption which is attached a camera to an operator by a harness. The camera is stabilized so it moves independently) was debuted in Marathon Man (1976), bringing a new smoothness to hand held camera movement and has been used to great effect in movies and TV shows ever since. No "walk and talk" sequence would be complete without one. Hand held cameras denote a certain kind of gritty realism, and they can make the audience feel as though they are part of a scene, rather than viewing it from a detached, frozen position.5. Crane ShotsBasically, dolly-shots-in-the-air. A crane (or jib), is a large, heavy piece of equipment, but is a useful way of moving a camera - it can move up, down, left, right, swooping in on action or moving diagonally out of it. The camera operator and camera are counter-balanced by a heavy weight, and trust their safety to a skilled crane/jib operator.6. Zoom LensesA zoom lens contains a mechanism that changes the magnification of an image. On a still camera, this means that the photographer can get a 'close up' shot while still being some distance from the subject. A video zoom lens can change the position of the audience, either very quickly (a smash zoom) or slowly, without moving the camera an inch, thus saving a lot of time and trouble. The drawbacks to zoom use include the fact that while a dolly shot involves a steady movement similar to the focusing change in the human eye, the zoom lens tends to be jerky (unless used very slowly) and to distort an image, making objects appear closer together than they really are. Zoom lenses are also drastically over-used by many directors (including those holding palmcorders), who try to give the impression of movement and excitement in a scene where it does not exist. Use with caution - and a tripod!7. The Aerial ShotAn exciting variation of a crane shot, usually taken from a helicopter. This is often used at the beginning of a film, in order to establish setting and movement. A helicopter is like a particularly flexible sort of crane - it can go anywhere, keep up with anything, move in and out of a scene, and convey real drama and exhilaration — so long as you don't need to get too close to your actors or use location sound with the shots.
Complete the storyboard activity below, using the storyboard template at the back of the booklet.
Activity SIX: Create a storyboard of the list of shots you wish to use for your film.
Be sure to make any notes at the bottom so it is useful to your filming.
HINT – Refer to the Areas of Study in the syllabus and the notes in the booklet about shots and angles. Use the storyboard template at the back of this booklet.
Whilst in the process of your filming, respond to the short answer questions below in your journal to help you reflect on your process. Remember that it’s better to have too much footage than not enough.
Activity SEVEN:
Short answer responses: List three different body parts/objects you have emphasised in your
filming and explain WHY
List the visual and aural elements you have used and WHY (refer to syllabus -3. Choreographic Considerations - visual/aural elements)
How have you used each of focus, zoom, fade, tilt and pan (give one example of each and WHY)?
Activity EIGHT:
Short answer responses: How have you considered angles for your filming and WHY? How will you use the zoom function to enhance your intent? Give
examples How will you use costume to create unity and enhance your intent? Where have you filmed your footage? Why have you chosen this
location?

Editing
Now that you have all of your footage it’s time for you to begin the lengthy process of editing your film. Below is a glossary of editing techniques to ensure you are using the correct terminology. Remember that the focus of your film is the movement so try to avoid using unnecessary techniques.
Film Editing GlossaryCut - A visual transition created in editing in which one shot is instantaneously replaced on screen by another.Cross cutting - Cutting back and forth quickly between two or more lines of action, indicating they are happening simultaneously.Dissolve - A gradual scene transition. The editor overlaps the end of one shot with the beginning of the next one.Establishing shot - A shot, normally taken from a great distance or from a "bird's eye view," that establishes where the action is about to occur.Eyeline match - The matching of eyelines between two or more characters. For example, if Sam looks to the right in shot A, Jean will look to the left in shot B. This establishes a relationship of proximity and continuity.Fade -A visual transition between shots or scenes that appears on screen as a brief interval with no picture. The editor fades one shot to black and then fades in the next. Often used to indicate a change in time and place.Final cut -The finished edit of a film, approved by the director and the producer. This is what the audience sees.Iris - Visible on screen as a circle closing down over or opening up on a shot. Seldom used in contemporary film, but common during the silent era of Hollywood films.Jump cut -A cut that creates a lack of continuity by leaving out parts of the action.Matched cut -A cut joining two shots whose compositional elements match, helping to establish strong continuity of action.Montage -Scenes whose emotional impact and visual design are achieved through the editing together of many brief shots. The shower scene from Psycho is an example of montage editing.Rough cut -The editor's first pass at assembling the shots into a film, before tightening and polishing occurs.Sequence shot -A long take that extends for an entire scene or sequence. It is composed of only one shot with no editing.Shot reverse shot - Usually used for conversation scenes, this technique alternates between over-the-shoulder shots showing each character speaking.Wipe - Visible on screen as a bar travelling across the frame pushing one shot off and pulling the next shot into place. Rarely used in contemporary film, but common in films from the 1930s and 1940s.
Complete the short answer responses in your journal to help you reflect on the editing choices you have made.
Activity NINE:
Short answer responses Explain how you have used editing techniques to enhance your
intent. Explain how your choice of accompaniment enhances your dance
film. How have you edited to create unity between the choreography, filming and accompaniment?
How has the use of editing techniques affected the use of time and dynamics in your choreography? Give at least TWO examples of each.
Finished Work
Complete the extended response to help you reflect on the overall effectiveness of your film in communicating your intent.
Activity TEN:Extended Response (at least ONE A4 page):
How have you achieved unity in your dance film?
HINT – use of music, motifs, dancers, setting, filming techniques, intent to create a succinct and effective film
Remember that the assessment requires you to write a 300-word rationale. Like in your core composition, a rationale is used by the markers to give them a brief idea of what your work is about, which they can then extend on in your interview. Use the following as a guideline when writing your rationale.
Intent Stimulus Form Motif description Use of the elements of dance Filming and editing considerations
Notes From the Marking Centre
Characteristics of better responses:• using concepts that were achievable in movement development and enhanced by
filmic considerations• using motif and movement phrases that were further developed and manipulated by
skilled use of framing, angles and shot selection• having a close relationship between setting, costume, accompaniment and lighting
that enhanced the development of the concept and supported the movement choices
• using editing effectively to assist with the development of the intent• seamlessly sequencing the work, with well-chosen use of editing transitions that
purposefully developed the intent.
Characteristics of weaker responses:• relying on repetition of similar movement or unrelated movement that lacked
purpose in the development of the concept• using filmic considerations that were mechanical in nature• lacking purpose with regard to the development of the intent and seeming instead to
reflect favourite transitions or choices that might enhance the look of the filmusing editing ineffectively to assist with the development of the intent.