Embed Size (px)
Citation preview
1
GetThere User Training
Booking & Managing Online Travel
2
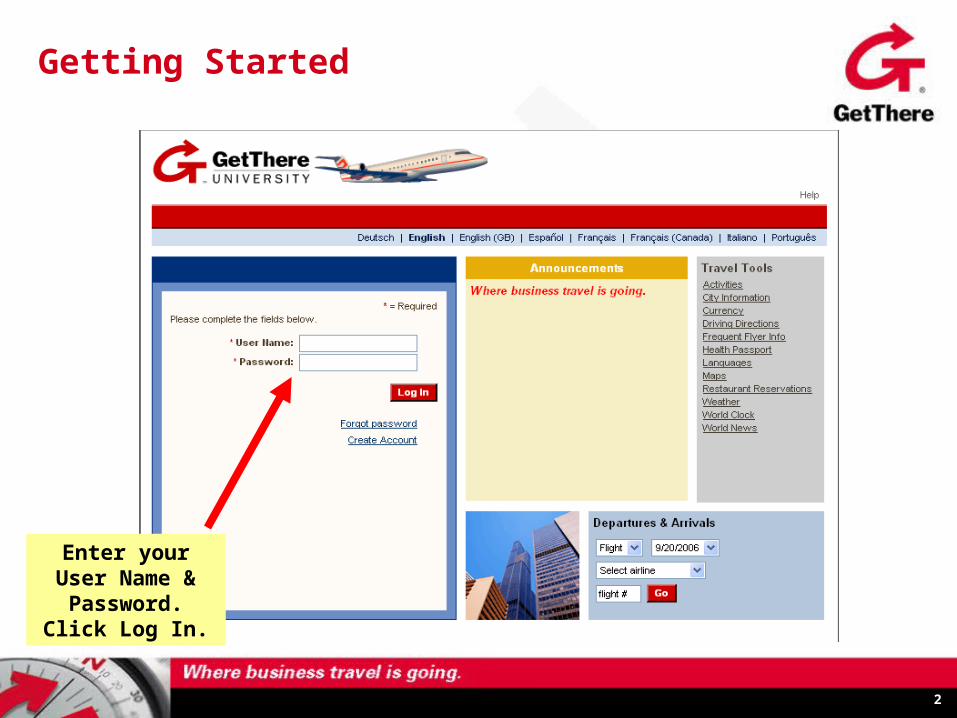
Getting Started
Enter your User Name &
Password. Click Log In.
3
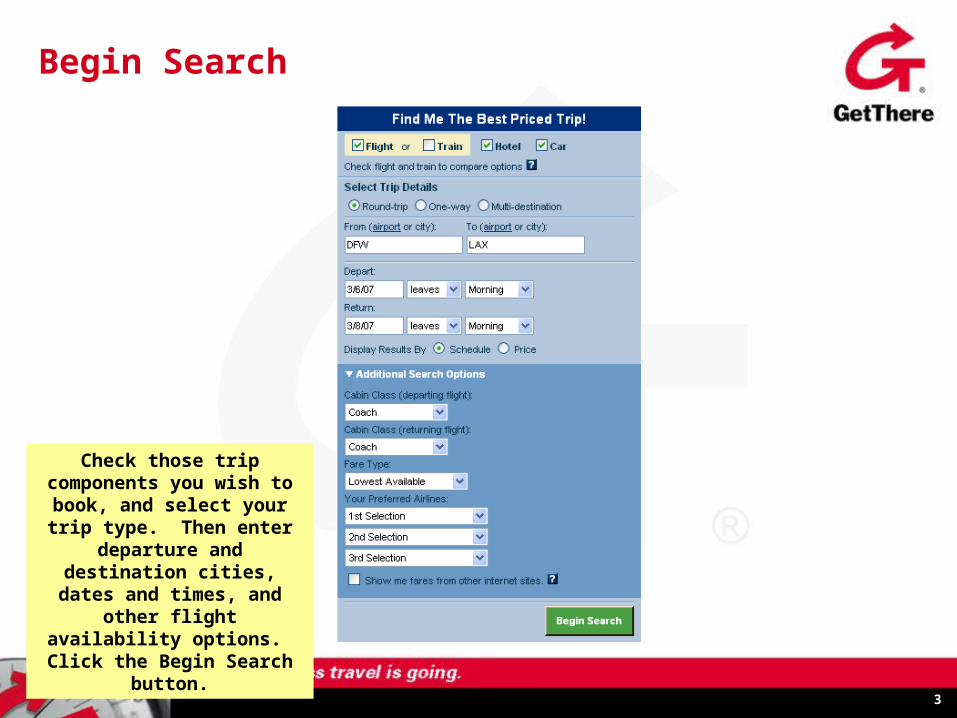
Begin Search
Check those trip components you wish to book, and select
your trip type. Then enter departure and destination
cities, dates and times, and other flight availability
options. Click the Begin Search button.
4
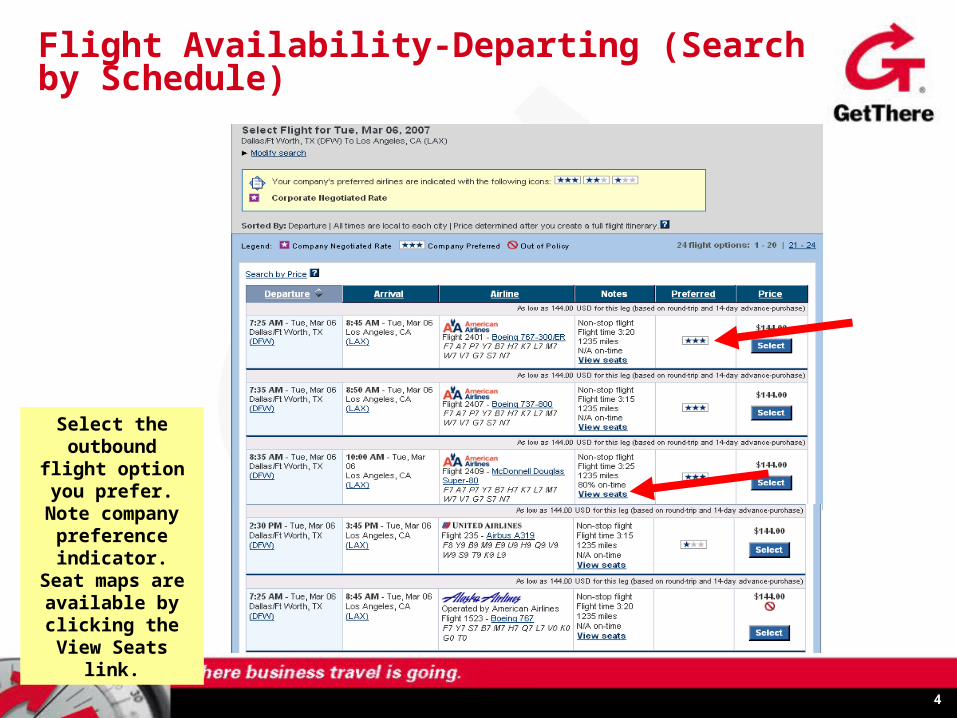
Flight Availability-Departing (Search by Schedule)
Select the outbound flight
option you prefer. Note company
preference indicator. Seat
maps are available by
clicking the View Seats link.
5
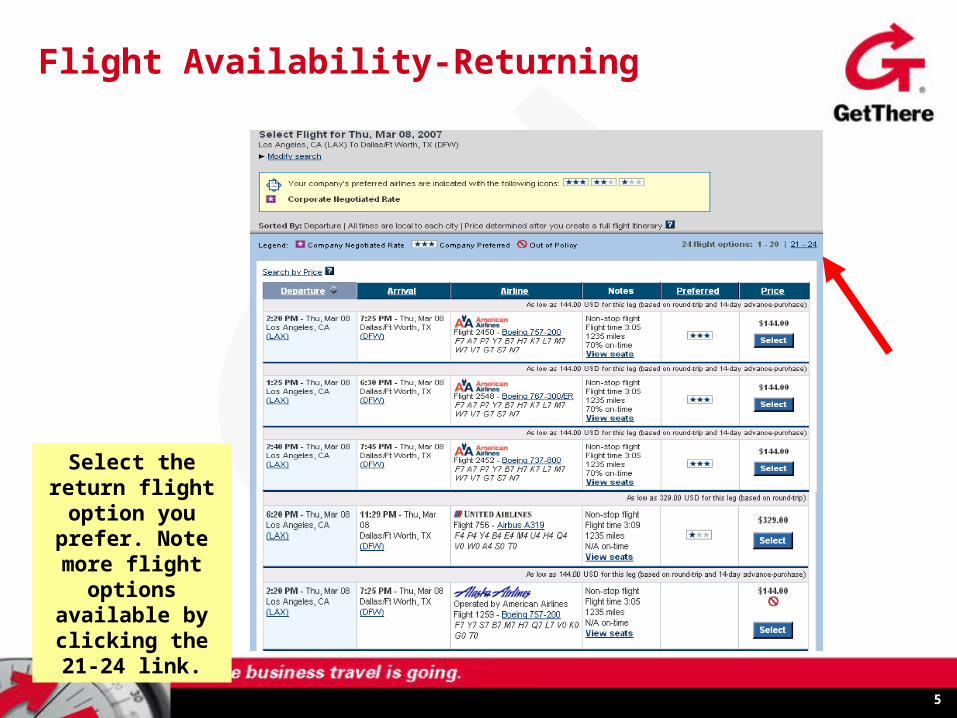
Flight Availability-Returning
Select the return flight option you prefer. Note more
flight options available by
clicking the 21-24 link.
6
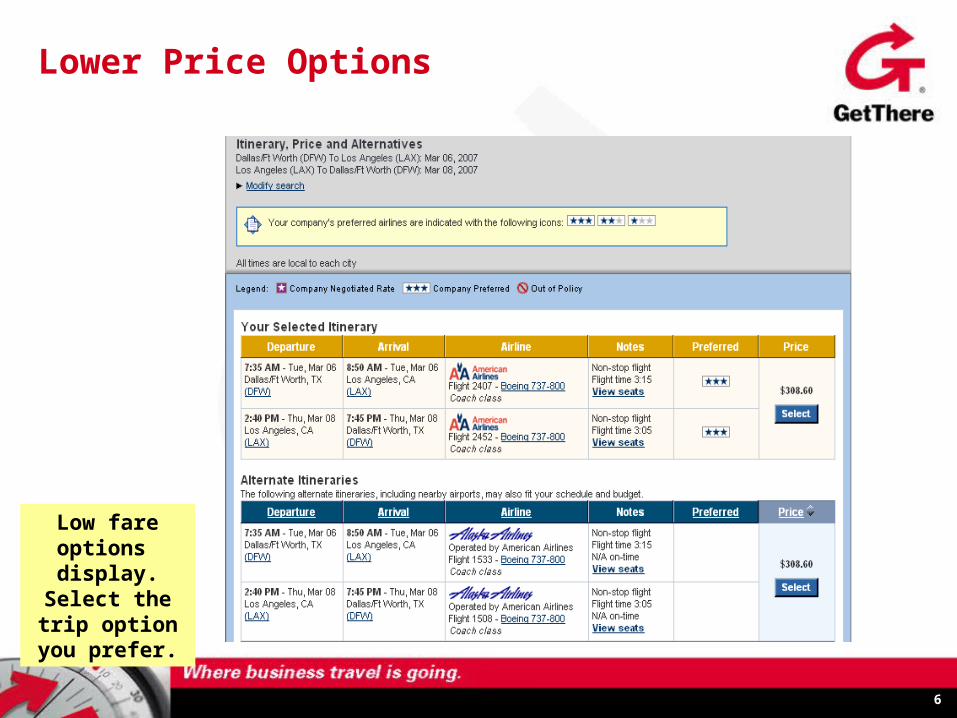
Lower Price Options
Low fare options
display. Select the trip option
you prefer.
7
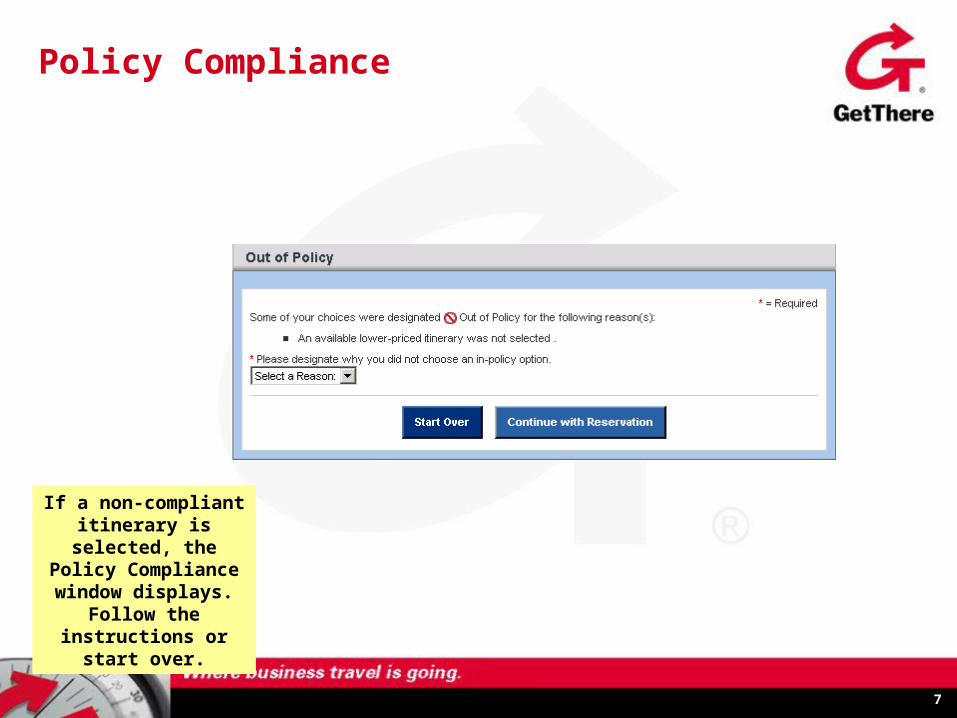
Policy Compliance
If a non-compliant itinerary is selected,
the Policy Compliance window displays.
Follow the instructions or start over.
8
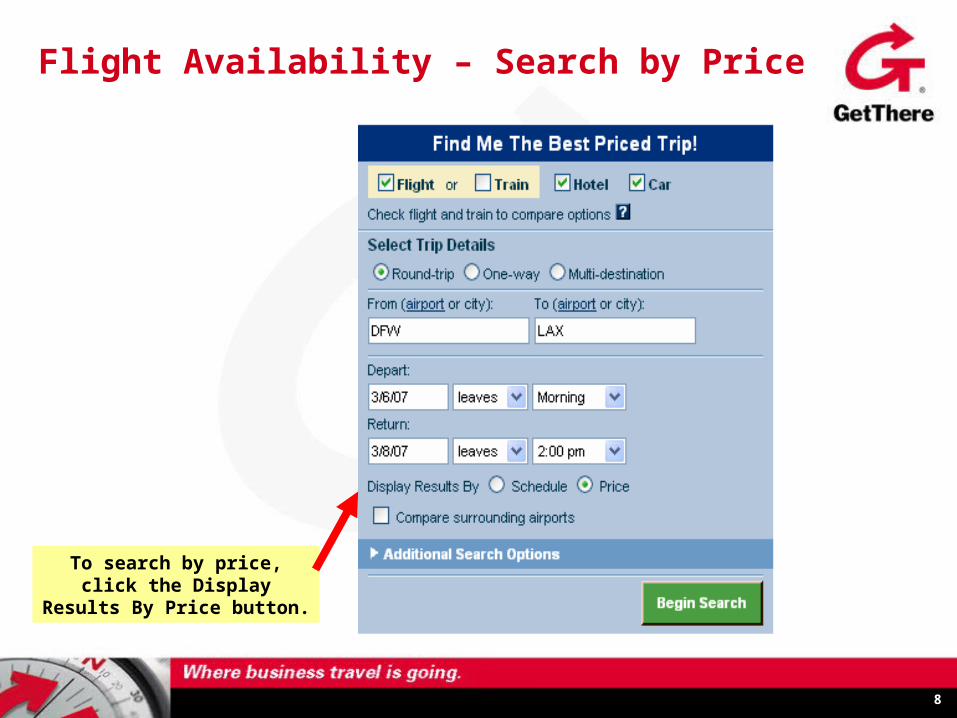
Flight Availability – Search by Price
To search by price, click the Display Results By Price
button.
9
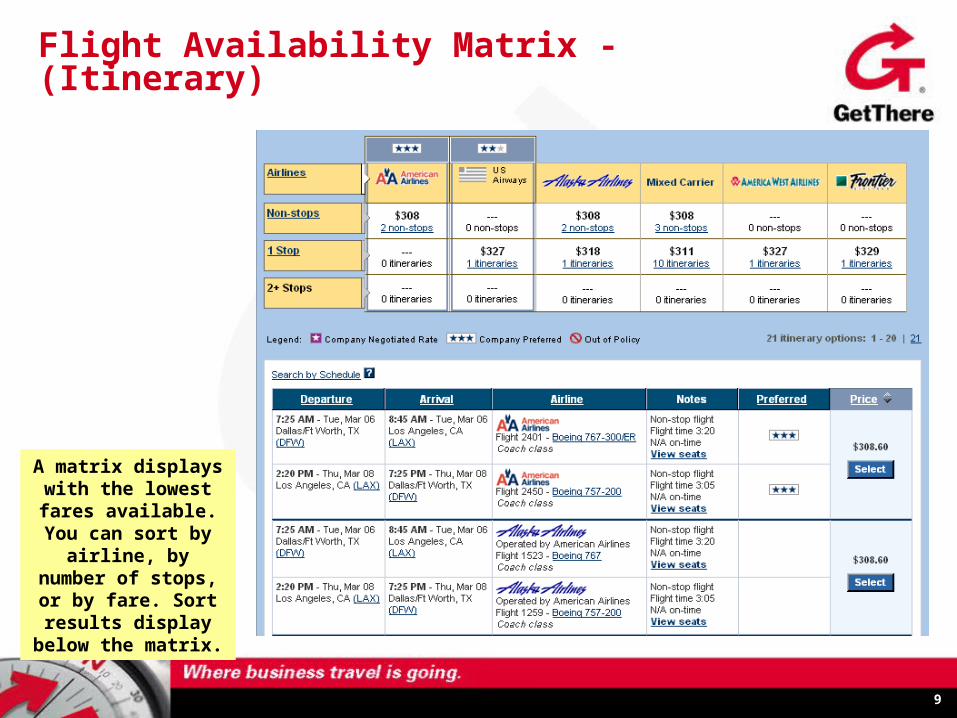
Flight Availability Matrix - (Itinerary)
A matrix displays with the lowest fares
available. You can sort by airline, by
number of stops, or by fare. Sort results display below the
matrix.
10
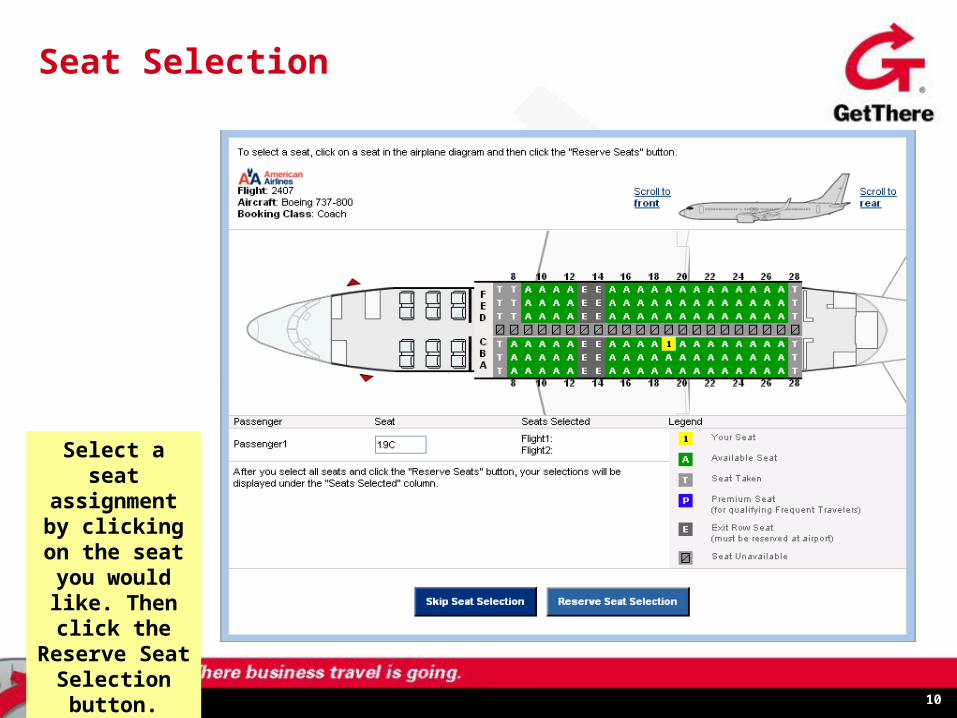
Seat Selection
Select a seat assignment by clicking on the seat you would like. Then click
the Reserve Seat Selection
button.
11
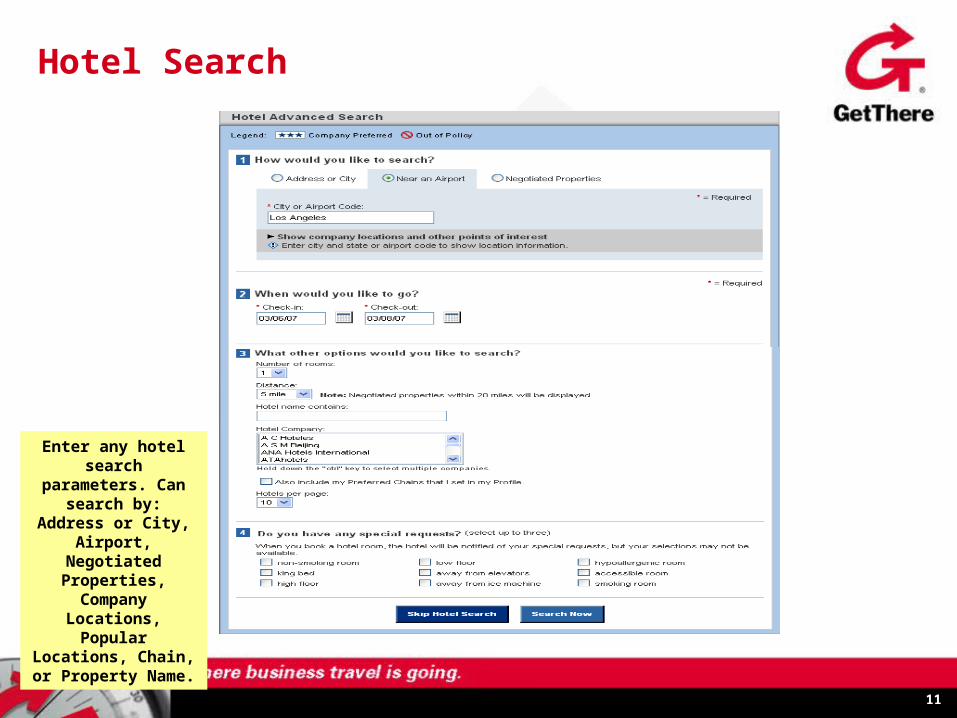
Hotel Search
Enter any hotel search parameters.
Can search by: Address or City,
Airport, Negotiated Properties, Company Locations, Popular
Locations, Chain, or Property Name.
12
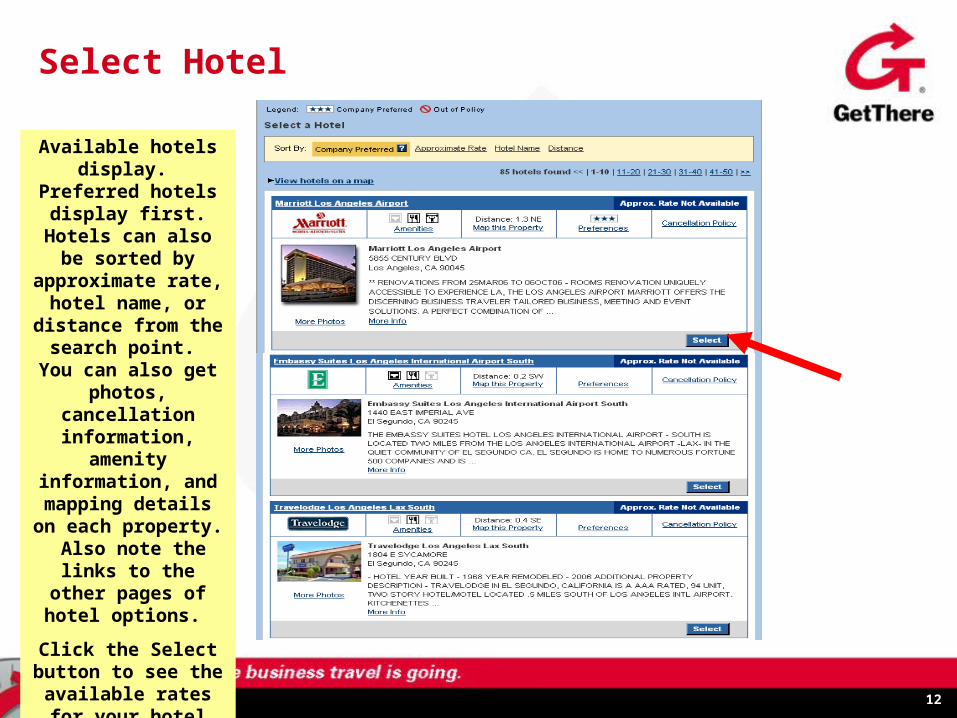
Select Hotel
Available hotels display. Preferred hotels display first. Hotels can also be
sorted by approximate rate,
hotel name, or distance from the search point. You
can also get photos, cancellation
information, amenity information, and
mapping details on each property. Also note the links to the other pages of hotel
options.
Click the Select button to see the available rates for your hotel choice.
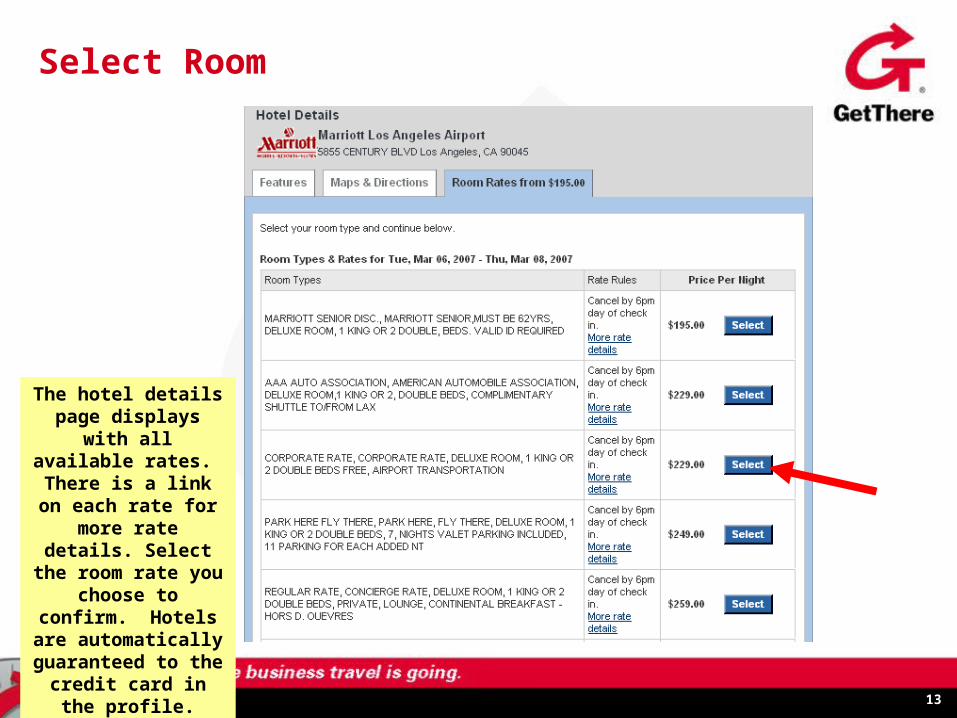
13
Select Room
The hotel details page displays with all
available rates. There is a link on each rate for more rate details. Select the room rate
you choose to confirm. Hotels are
automatically guaranteed to the credit card in the
profile.
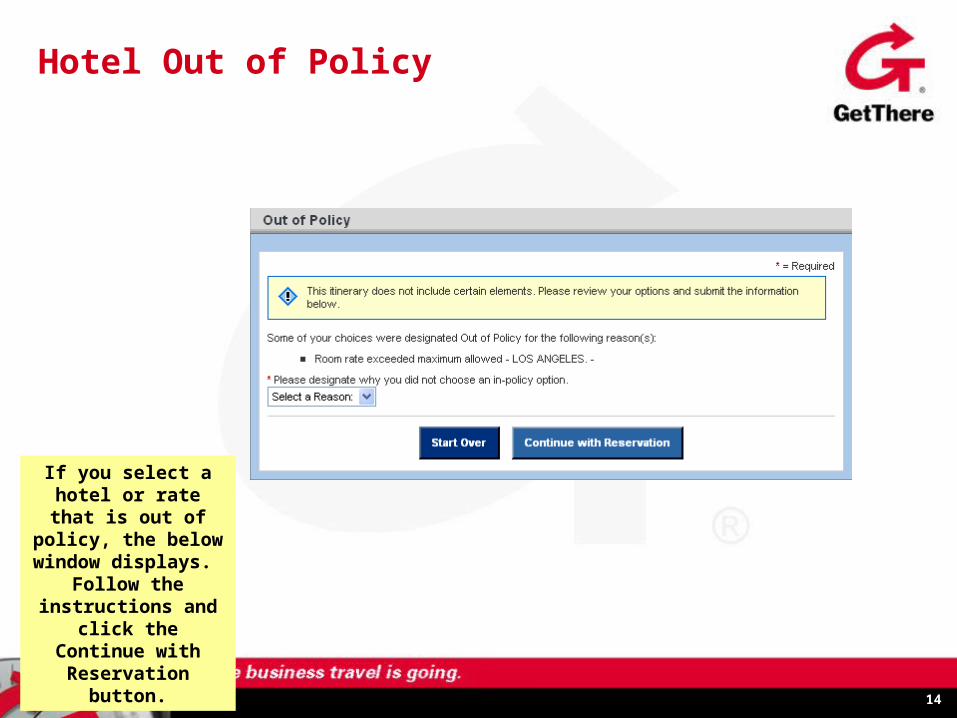
14
Hotel Out of Policy
If you select a hotel or rate that is out of
policy, the below window displays.
Follow the instructions and click
the Continue with Reservation button.
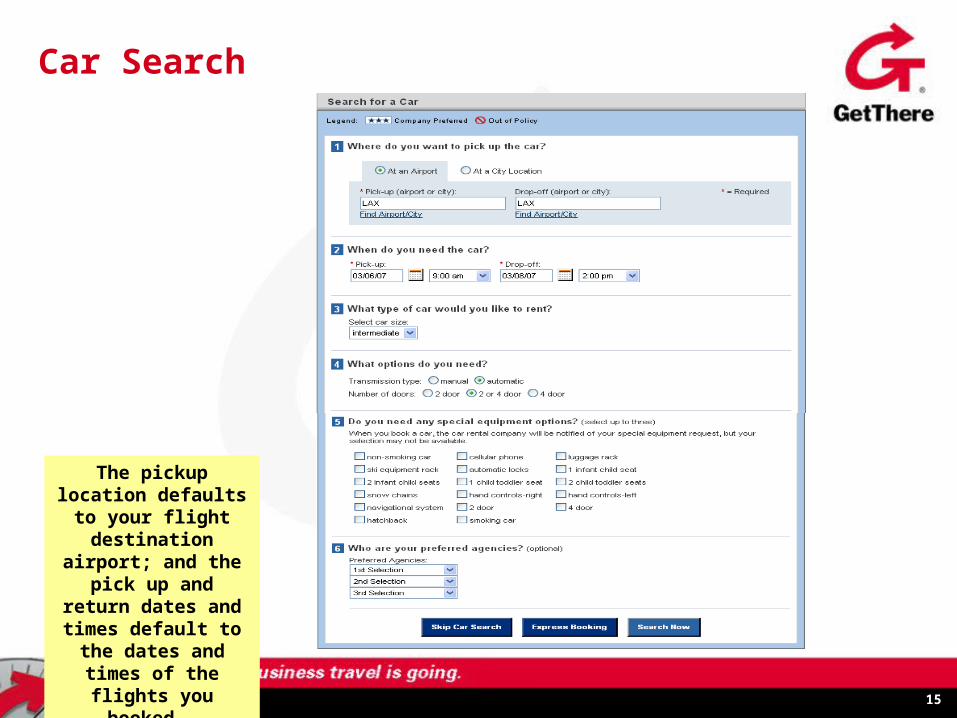
15
Car Search
The pickup location defaults to your flight
destination airport; and the pick up and
return dates and times default to the dates and times of
the flights you booked.

16
Select Car
Select your preferred car
option by clicking on the rate link. Note company
preference indicators.
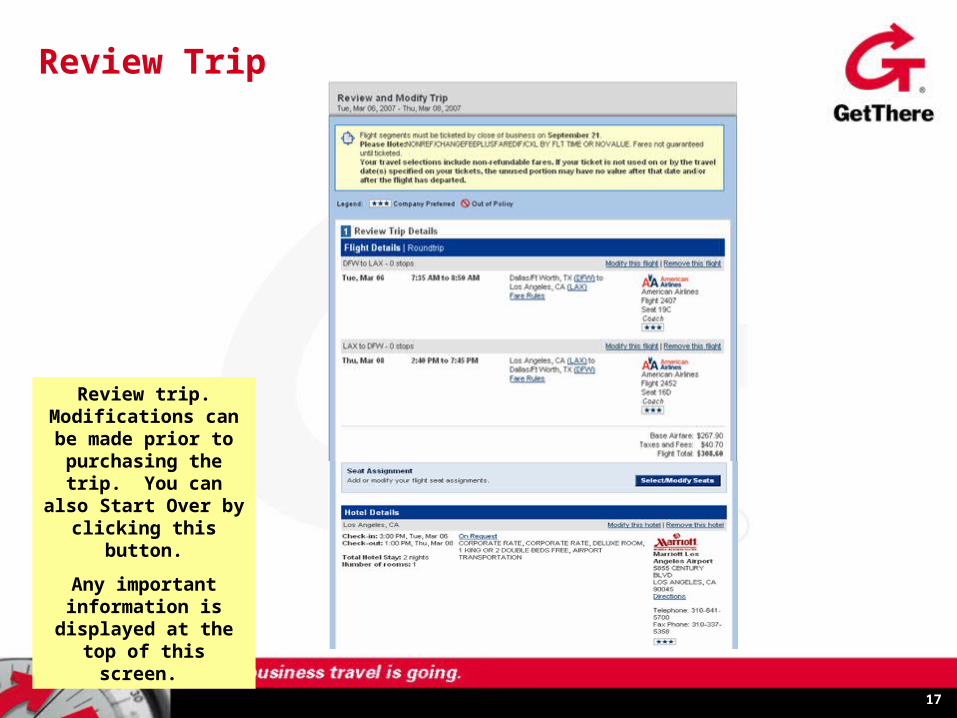
17
Review Trip
Review trip. Modifications can be
made prior to purchasing the trip. You can also Start
Over by clicking this button.
Any important information is
displayed at the top of this screen.
18
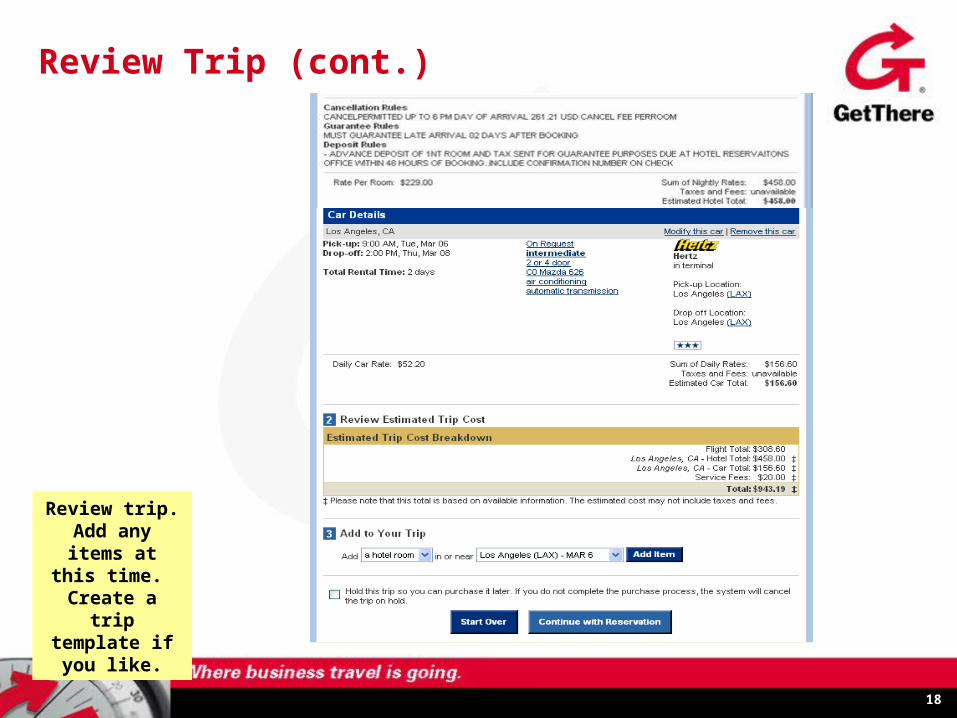
Review Trip (cont.)
Review trip. Add any items at this time. Create a trip
template if you like.
19
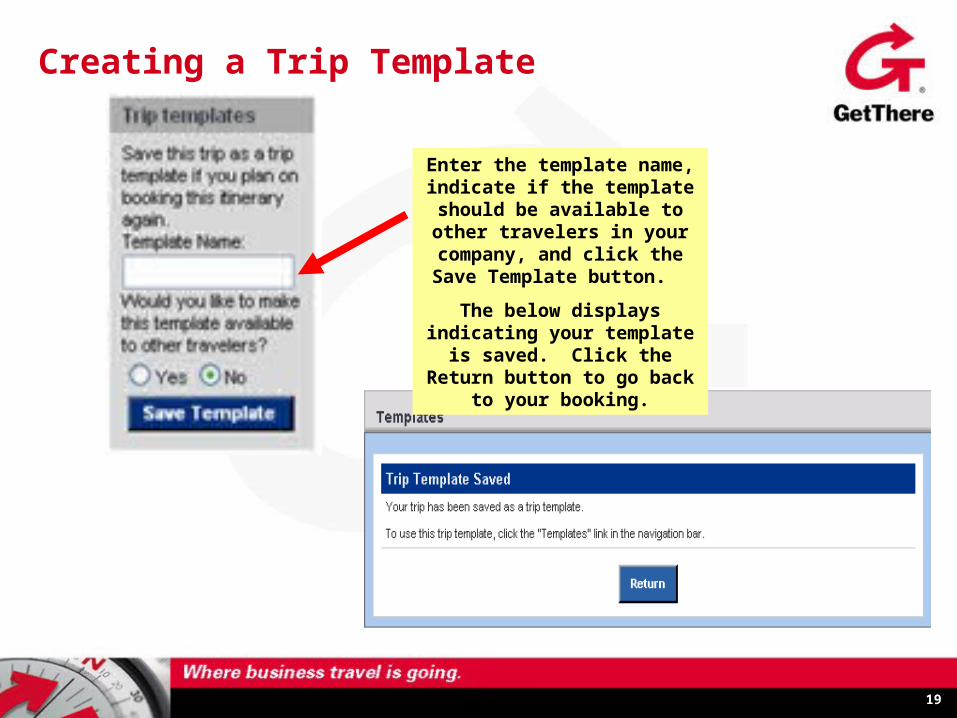
Creating a Trip Template
Enter the template name, indicate if the template should be available to other travelers in your company, and click the
Save Template button.
The below displays indicating your template is saved. Click the Return button to go back
to your booking.
20
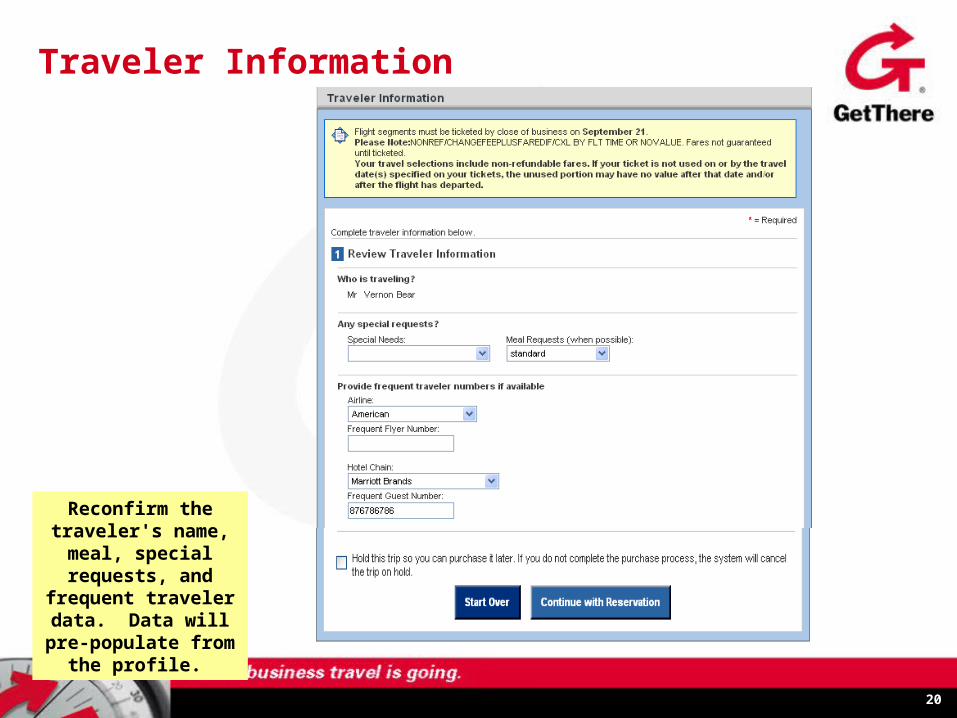
Traveler Information
Reconfirm the traveler's name, meal, special requests, and frequent traveler data.
Data will pre-populate from the
profile.
21
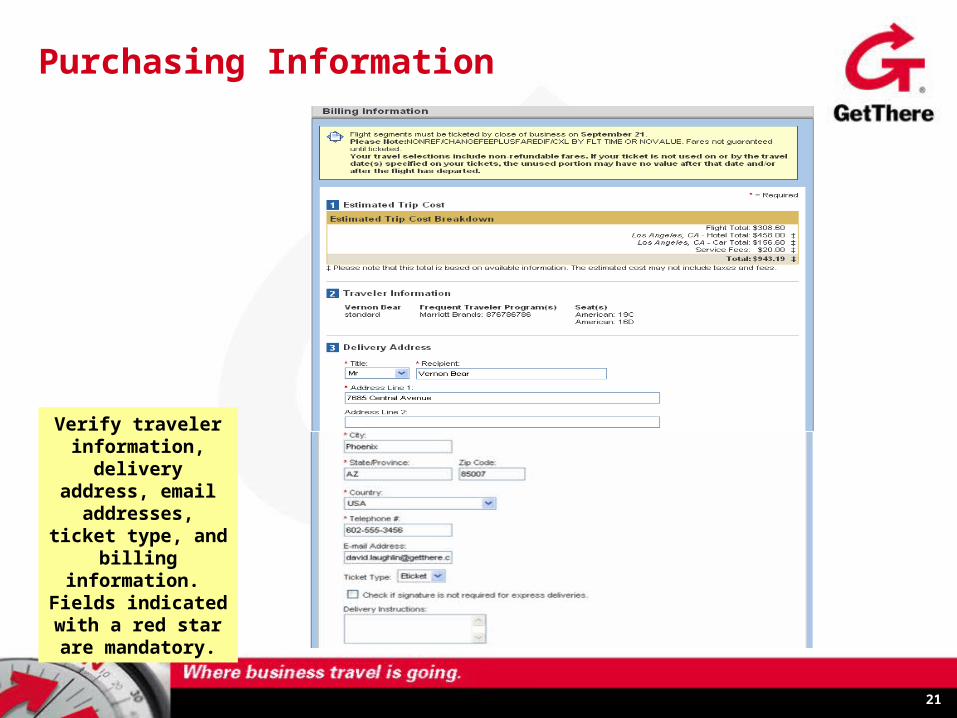
Purchasing Information
Verify traveler information,
delivery address, email addresses, ticket type, and
billing information. Fields indicated
with a red star are mandatory.
22
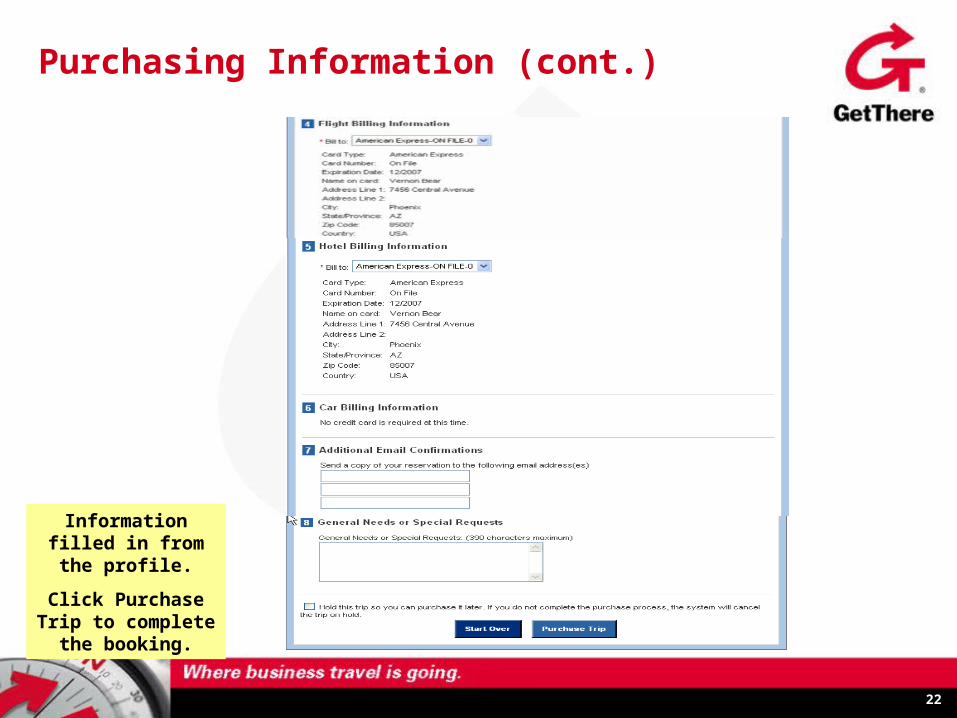
Purchasing Information (cont.)
Information filled in from the profile.
Click Purchase Trip to complete the
booking.
23
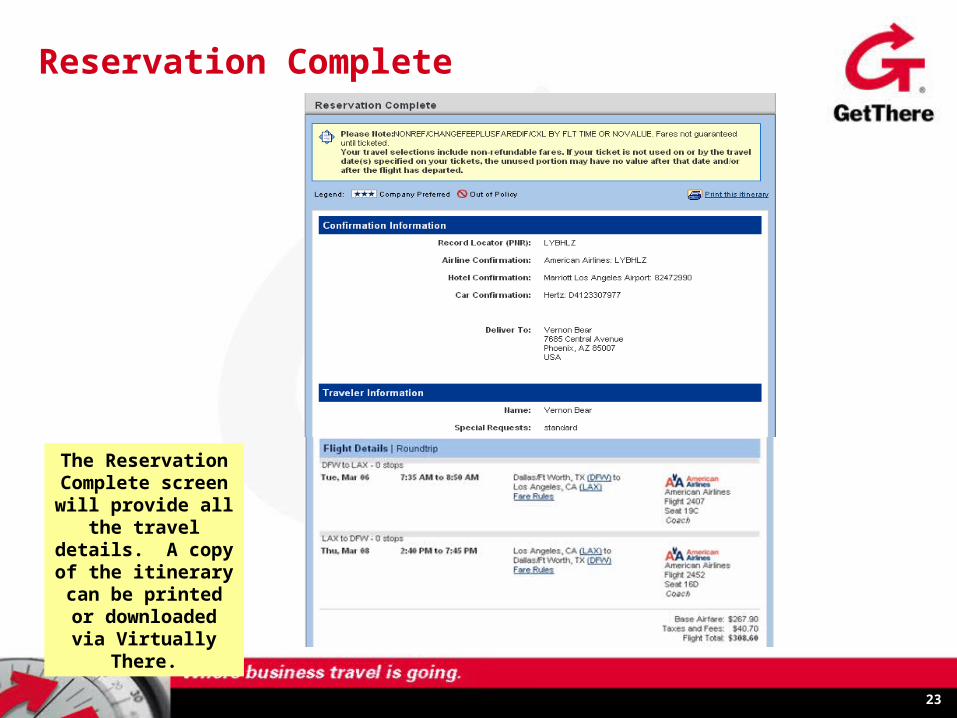
Reservation Complete
The Reservation Complete screen
will provide all the travel details. A
copy of the itinerary can be printed or downloaded via Virtually There.
24
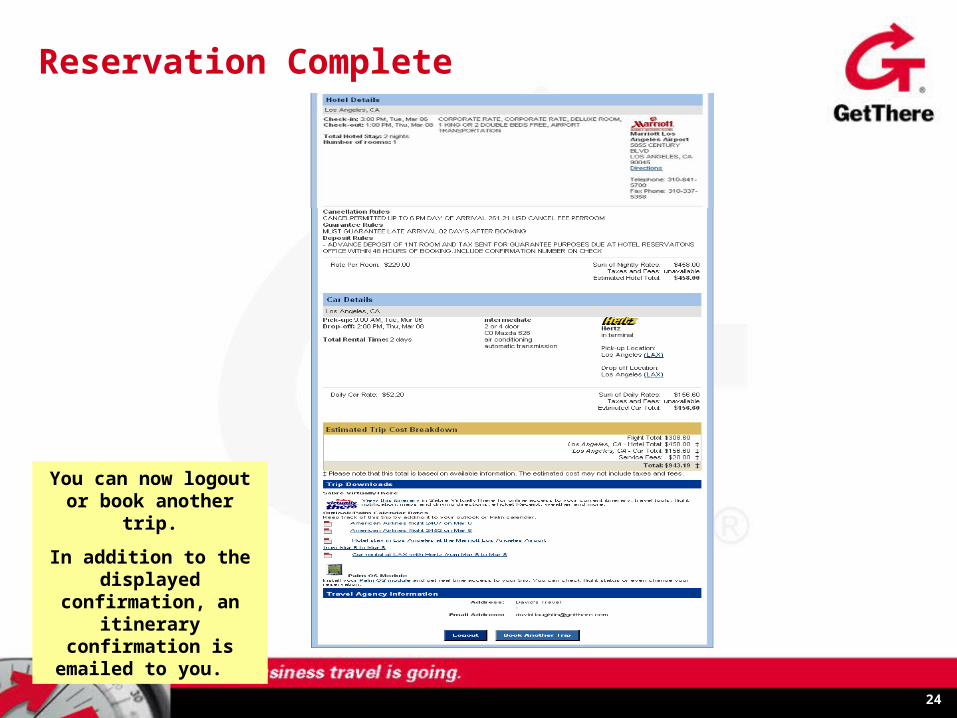
Reservation Complete
You can now logout or book another trip.
In addition to the displayed confirmation,
an itinerary confirmation is emailed
to you.
25
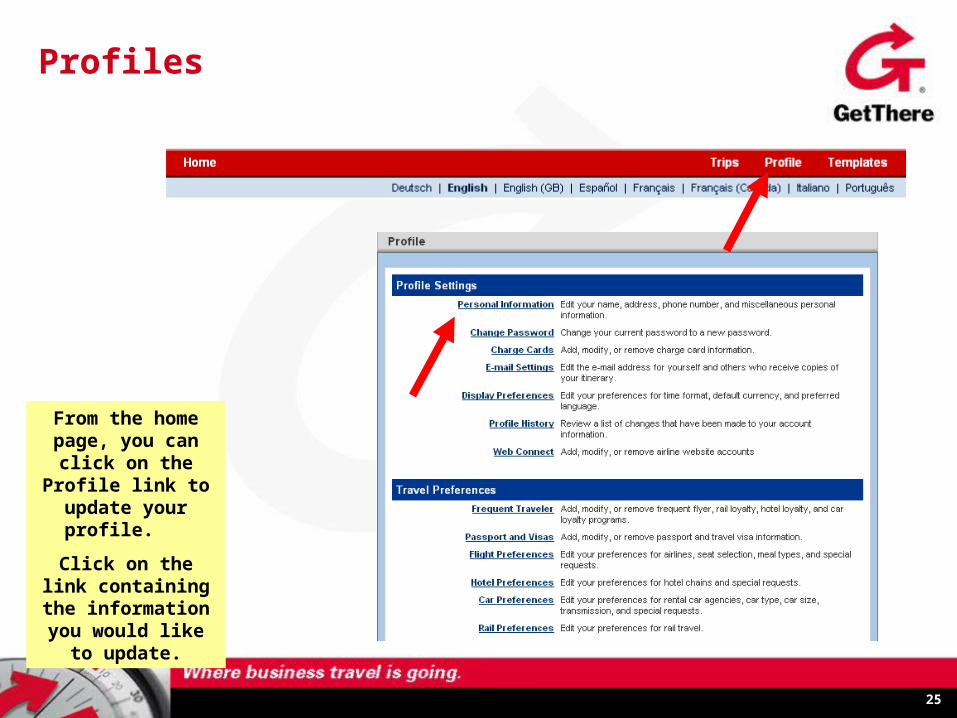
Profiles
From the home page, you can click on the Profile link to update your profile.
Click on the link containing the
information you would like to
update.
26
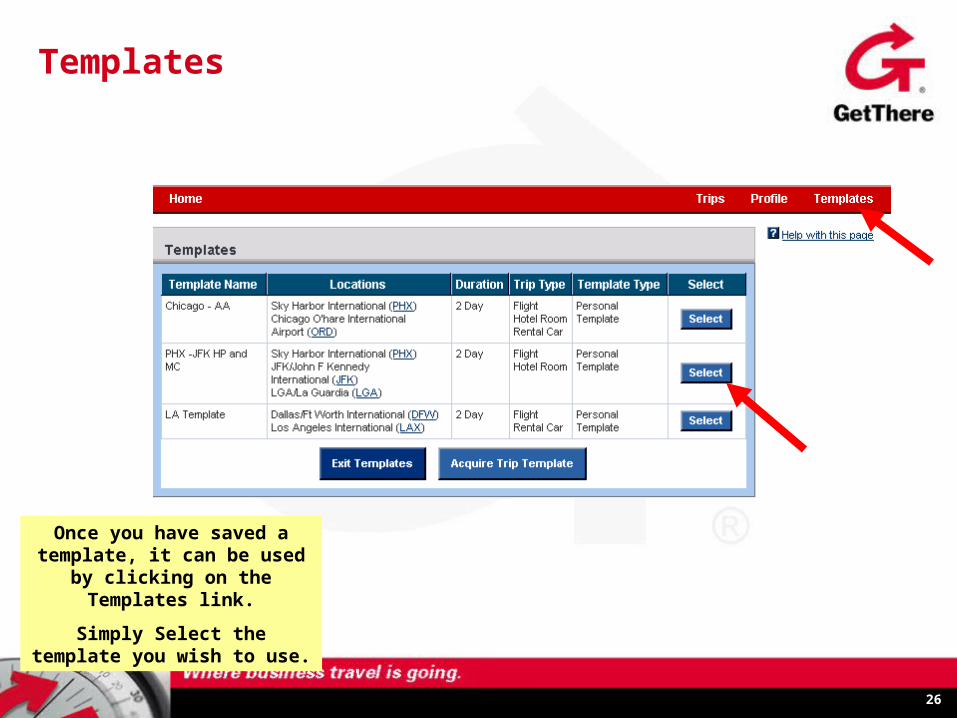
Templates
Once you have saved a template, it can be used by
clicking on the Templates link.
Simply Select the template you wish to use.
27
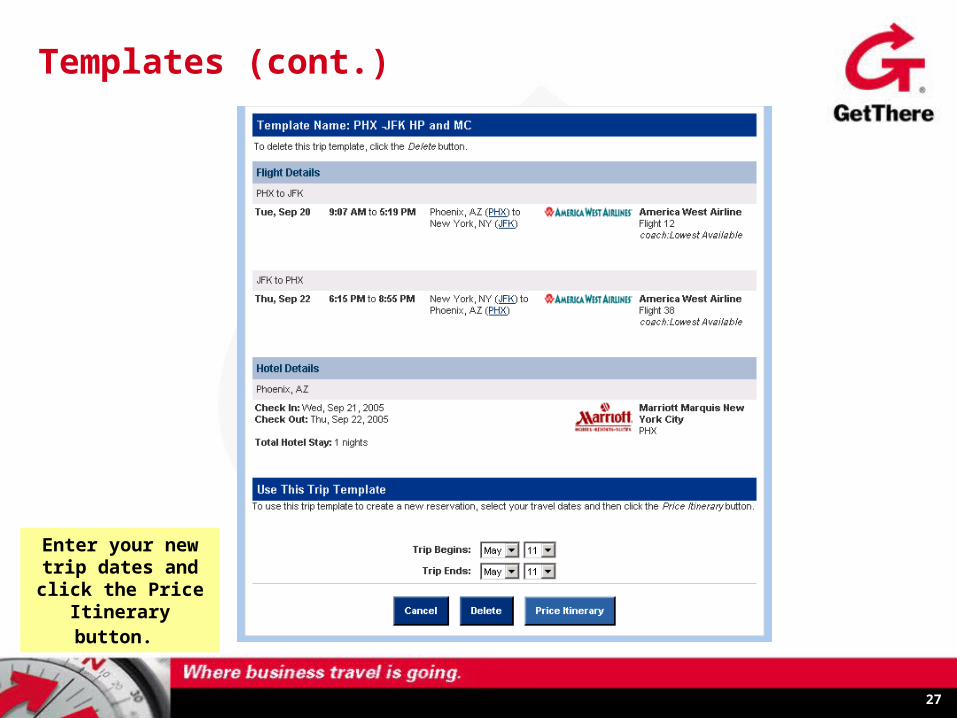
Templates (cont.)
Enter your new trip dates and click the
Price Itinerary button.
28
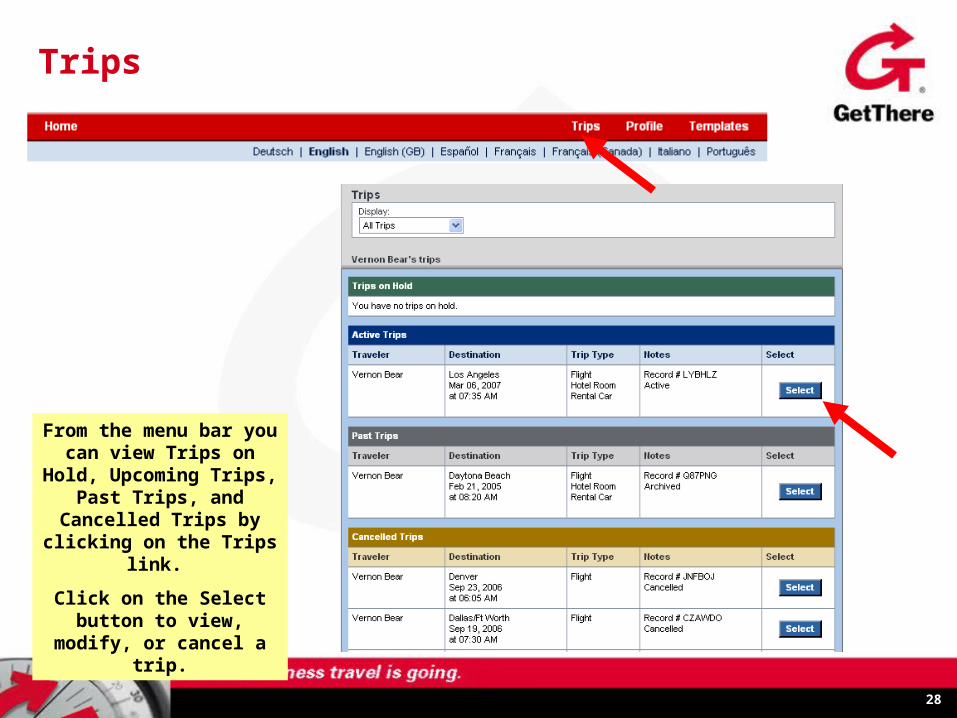
Trips
From the menu bar you can view Trips on Hold, Upcoming Trips, Past
Trips, and Cancelled Trips by clicking on the Trips
link.
Click on the Select button to view, modify, or cancel
a trip.
29
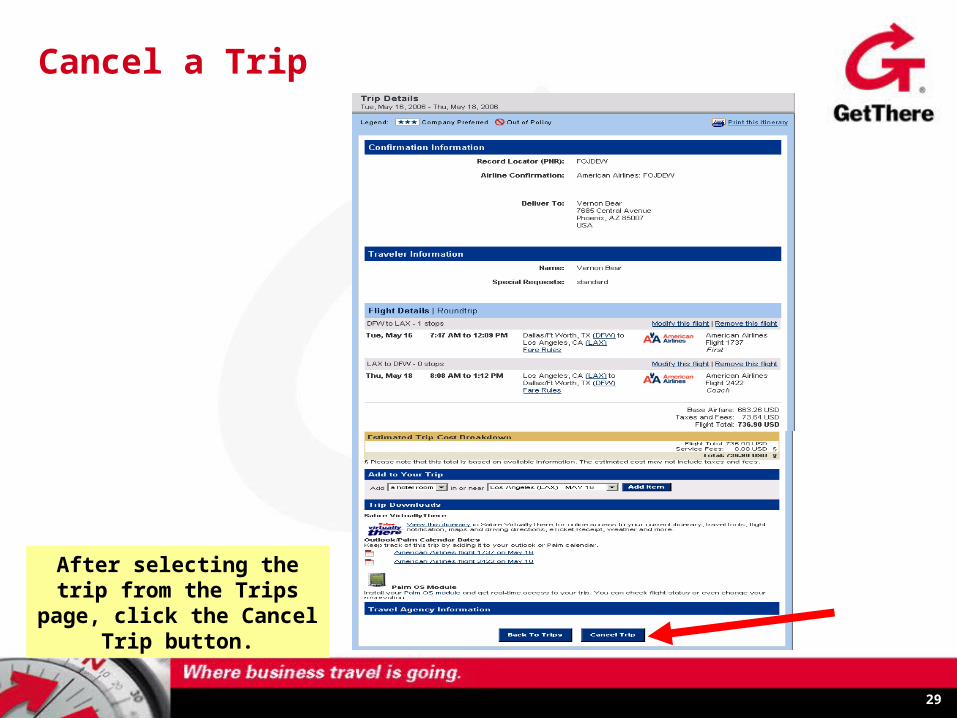
Cancel a Trip
After selecting the trip from the Trips page, click the
Cancel Trip button.
30
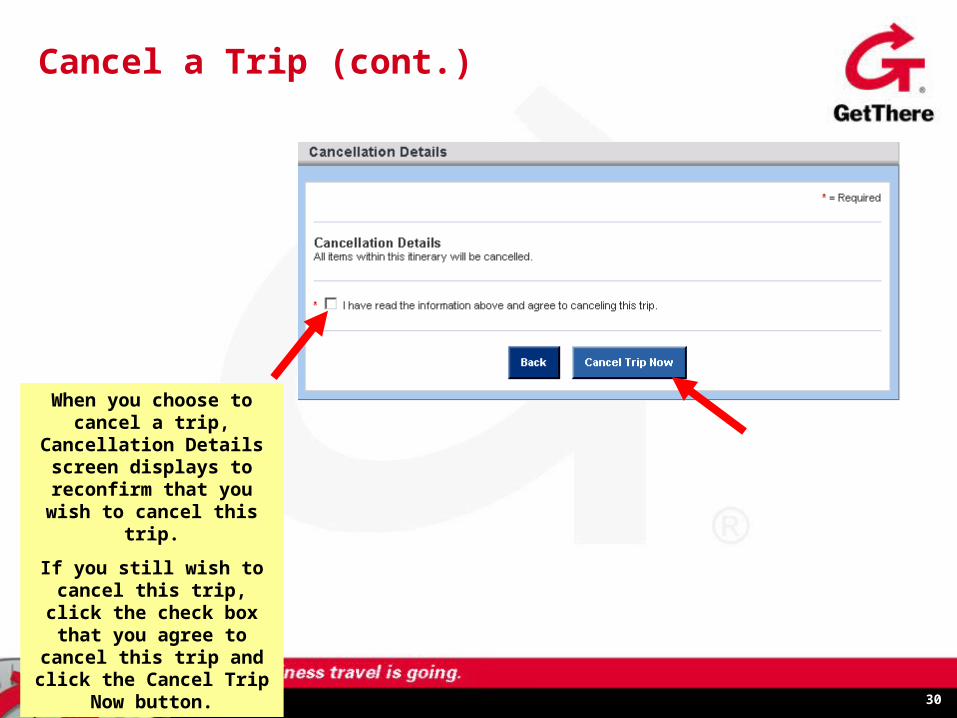
Cancel a Trip (cont.)
When you choose to cancel a trip, Cancellation Details screen displays to reconfirm that you wish to
cancel this trip.
If you still wish to cancel this trip, click the check
box that you agree to cancel this trip and click
the Cancel Trip Now button.
31
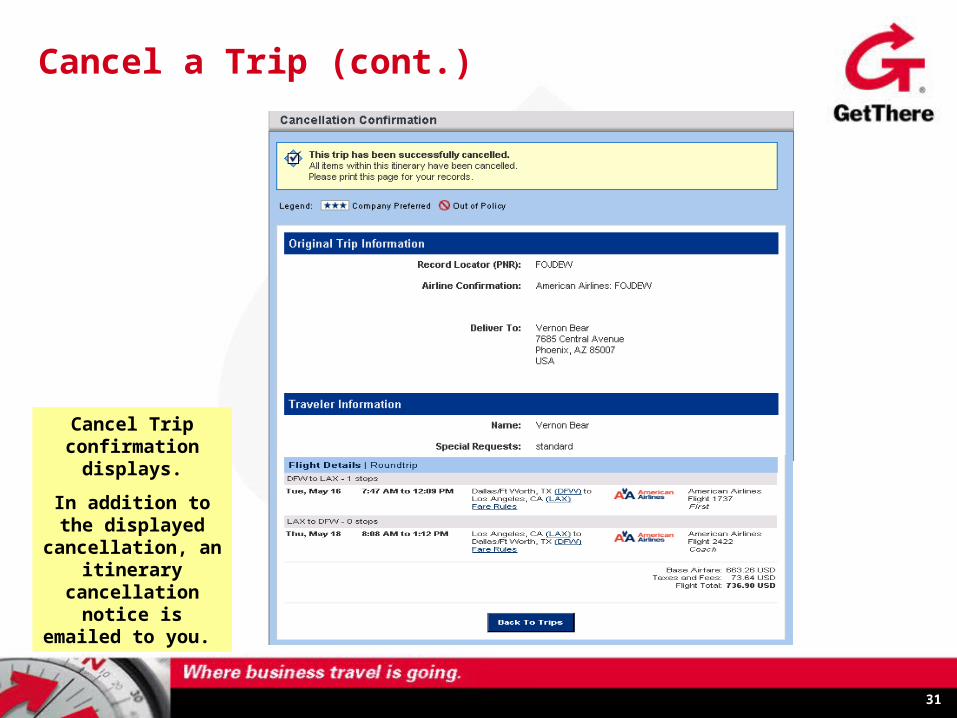
Cancel a Trip (cont.)
Cancel Trip confirmation
displays.
In addition to the displayed
cancellation, an itinerary
cancellation notice is emailed to you.
32
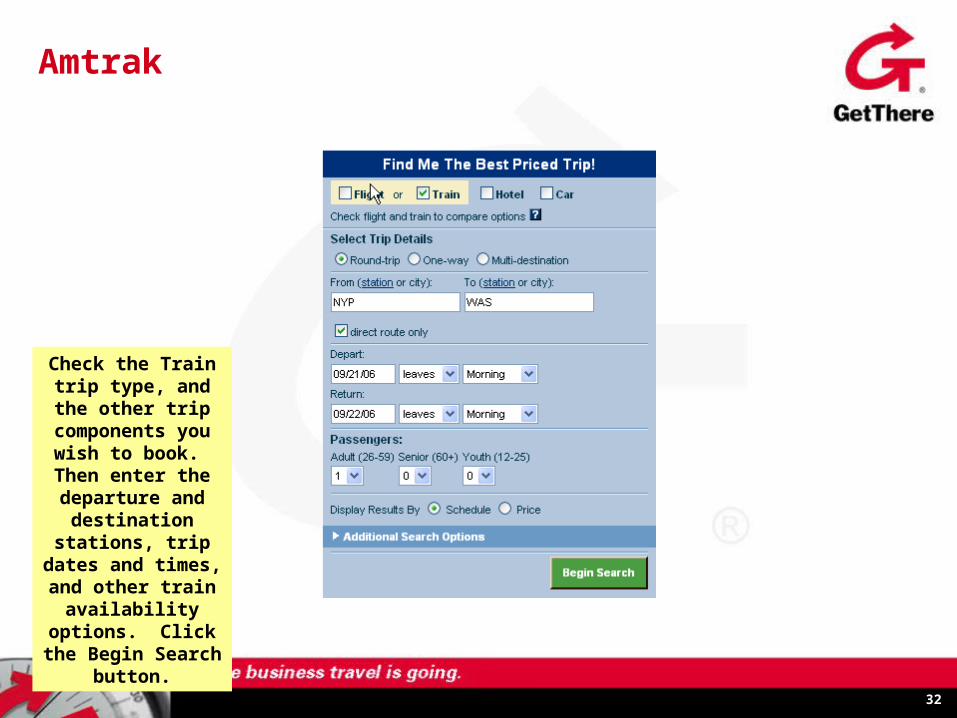
Amtrak
Check the Train trip type, and the other
trip components you wish to book.
Then enter the departure and
destination stations, trip dates
and times, and other train
availability options. Click the Begin Search button.
33
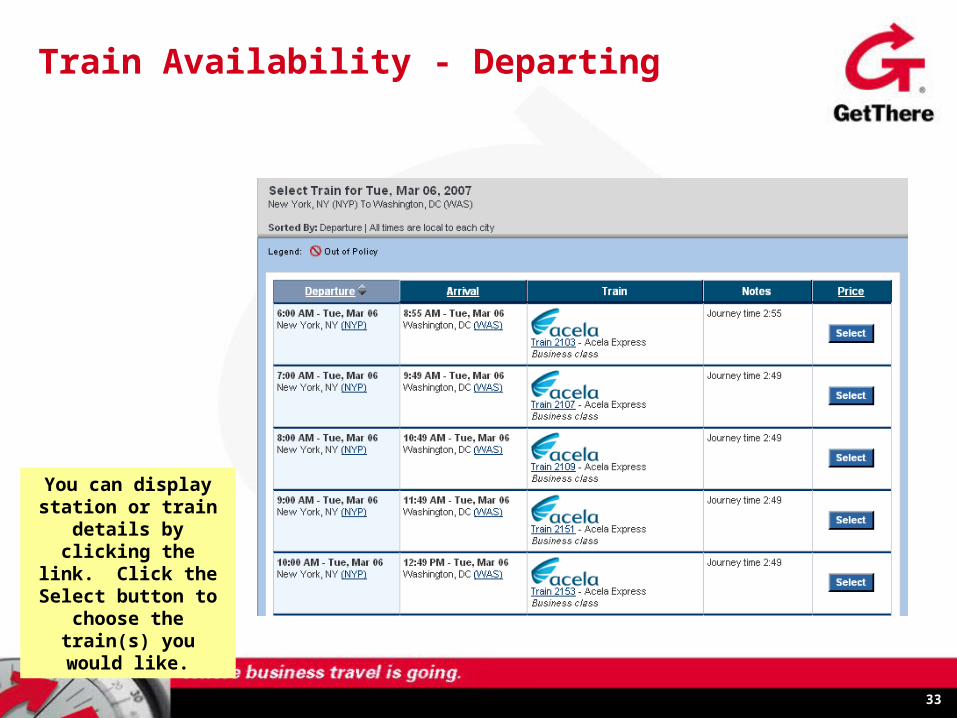
Train Availability - Departing
You can display station or train details by clicking the link.
Click the Select button to choose the
train(s) you would like.
34
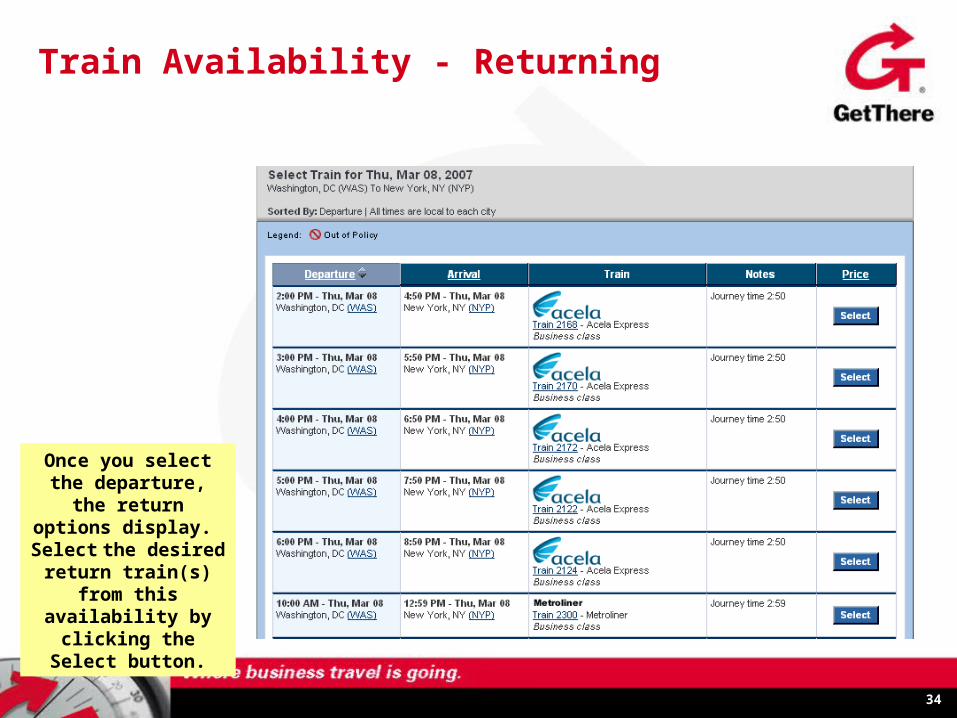
Train Availability - Returning
Once you select the departure, the return
options display. Select the desired return train(s) from this availability by clicking the Select
button.
35
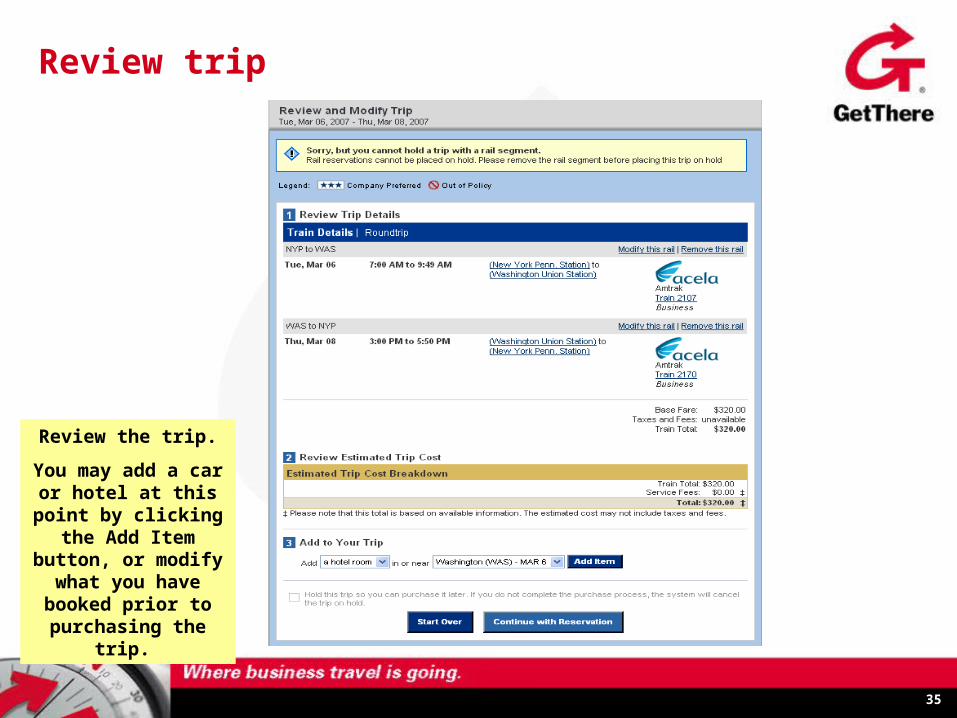
Review trip
Review the trip.
You may add a car or hotel at this point by clicking the Add Item
button, or modify what you have booked prior to
purchasing the trip.
36
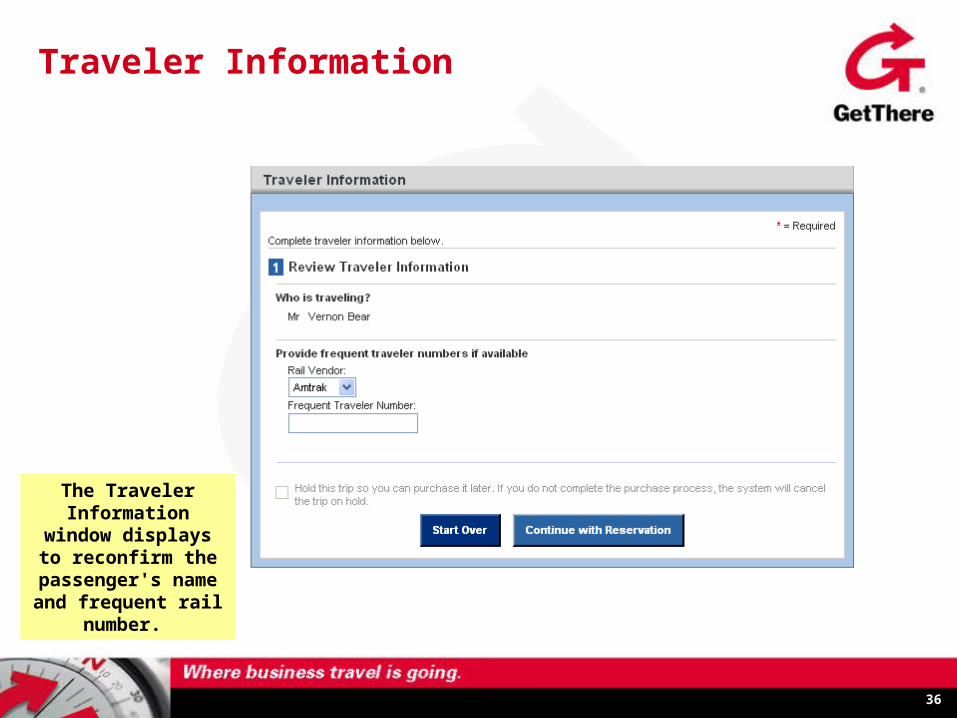
Traveler Information
The Traveler Information window
displays to reconfirm the passenger's name
and frequent rail number.
37
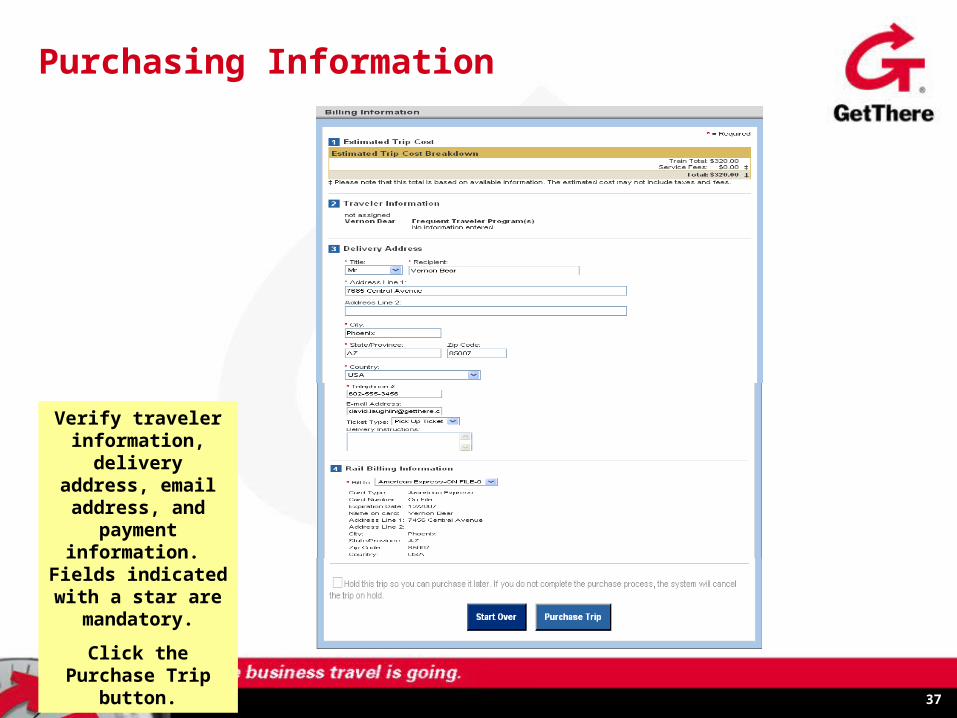
Purchasing Information
Verify traveler information,
delivery address, email address, and
payment information. Fields indicated with a star
are mandatory.
Click the Purchase Trip button.
38
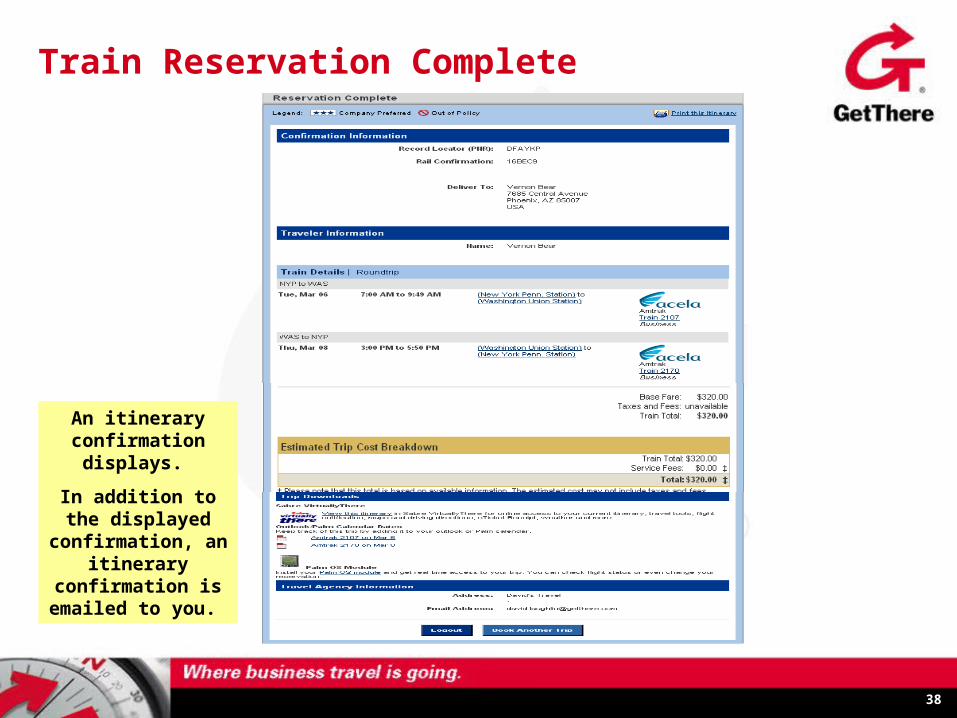
Train Reservation Complete
An itinerary confirmation
displays.
In addition to the displayed
confirmation, an itinerary
confirmation is emailed to you.