Embed Size (px)
Citation preview
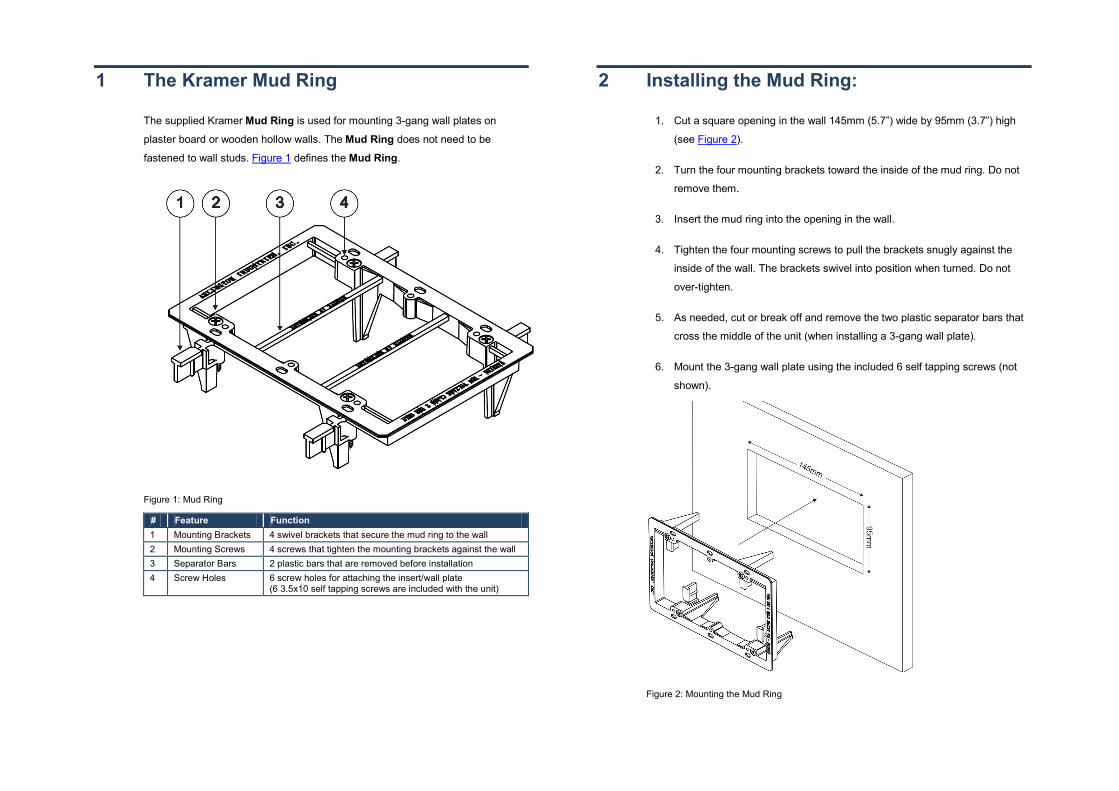
1 The Kramer Mud Ring
The supplied Kramer Mud Ring is used for mounting 3-gang wall plates on
plaster board or wooden hollow walls. The Mud Ring does not need to be
fastened to wall studs. Figure 1 defines the Mud Ring.
Figure 1: Mud Ring
# Feature Function 1 Mounting Brackets 4 swivel brackets that secure the mud ring to the wall 2 Mounting Screws 4 screws that tighten the mounting brackets against the wall 3 Separator Bars 2 plastic bars that are removed before installation 4 Screw Holes 6 screw holes for attaching the insert/wall plate
(6 3.5x10 self tapping screws are included with the unit)
2 Installing the Mud Ring:
1. Cut a square opening in the wall 145mm (5.7”) wide by 95mm (3.7”) high
(see Figure 2).
2. Turn the four mounting brackets toward the inside of the mud ring. Do not
remove them.
3. Insert the mud ring into the opening in the wall.
4. Tighten the four mounting screws to pull the brackets snugly against the
inside of the wall. The brackets swivel into position when turned. Do not
over-tighten.
5. As needed, cut or break off and remove the two plastic separator bars that
cross the middle of the unit (when installing a 3-gang wall plate).
6. Mount the 3-gang wall plate using the included 6 self tapping screws (not
shown).
Figure 2: Mounting the Mud Ring
KRAMER ELECTRONICS LTD.
INSTALLATION INSTRUCTIONS
MODEL:
Mud Ring
For the latest information on our products and a list of Kramer distributors, visit our Web site at www.kramerelectronics.com
E-mail: [email protected]
P/N: 2900-300050 Rev 1
PN: 2900-300050 Rev: 1