Embed Size (px)
Citation preview

1
Unit 9 : Graphical User Interface (GUI)
1. Explain the problem of creating a cross-platform GUI
2. Describe the Java way of creating GUIs
3. Use different GUI components
4. Apply the different layout managers
5. Develop complex GUI with panels
6. Describe the concept of event handling
7. Apply event handling in GUI
8. Apply Java interfaces
9. Develop Java applets

2
Cross-platform GUI A software system that provides the graphical operating
environment with the use of mouse is usually known as a windowing system For PCs, we have the MS Windows. For UNIX machines, we have the X-Windows.
Traditionally, GUI-based applications were written in C, C++, etc. and the s/w libraries for developing these applications are platform specific. Thus, the GUI-based applications are machine dependent
With Java, however, GUI-based applications written are cross-platform because Java is a cross-platform programming language and all its software library (including GUI libraries) are platform independent.

3
Abstract Window Toolkit (AWT) In J2SDK, JFC provides two sets of packages for building GUIs
They are Abstract Window Toolkit (AWT) and Swing. AWT is the 1st generation of GUI-enabling packages since version
1.0. As its name suggested, GUIs built with AWT classes use native window GUI components to construct the GUI objects Thus, it is called a heavy-weight package Hence the appearance of the same GUI-based application varies
on different platforms GUI application built with AWT can be run (and shown properly) on
different platforms without any modification. So building GUIs with AWT fulfils the cross-platform requirements. However, it is undesirable that the GUIs have different
appearances or even different behaviours on different platforms.
4
Swing The Swing classes are implemented based on the AWT. And the
Swing classes themselves handle the appearances of the GUI components instead of relying on the native window system. Thus, it is called a light-weight package Hence the appearances of the Swing GUI components are the
same for all platforms. By this, the core parts of the GUIs (eg. menu bar, buttons, etc.) are
the same for all platforms. But, the decorations for the GUI (eg. title bar, control menu &
window boundaries) are still platform dependent. In addition to providing consistent appearances across platform,
Swing provides more GUI components than AWT does. Hence Swing is the preferred package for building Java GUIs
5
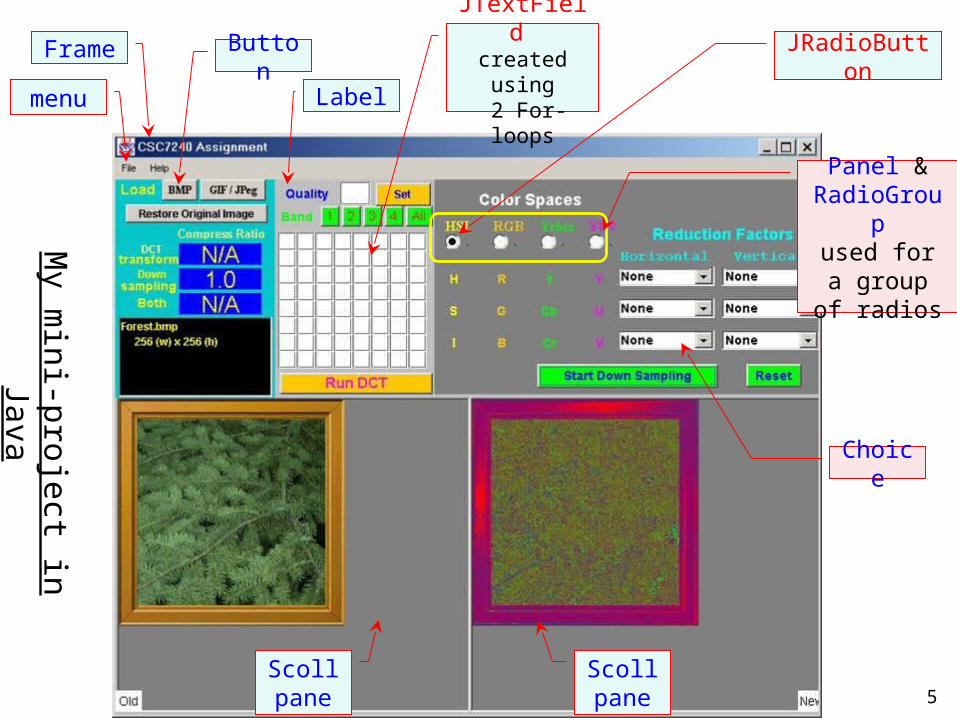
menu
Button
Label
Scollpane
Choice
JTextField created using 2 For-loops
JRadioButton
Scollpane
Frame
Panel & RadioGroupused for a group of radios
My m
ini-project in Java
6
GUI Concepts The key elements of a Java graphical user interface are:
GUI components Layout managers Event Handling
The GUI components are text field, button, etc… They are the screen elements that a user manipulates with them with mouse and keyboard.
The Layout managers govern how the components appear on the screen.
The Event Handling handles the event after user acts on the GUI components.
Java provides a package called java.awt and javax.swing for the GUI programming.

7
Steps to Create Swing GUI Creating GUIs with Java usually involves extending and creating
objects of the classes provided by the software library. Steps in creating a GUI with Swing:
1. Creating a top-level container object (e.g. a standalone window), because most GUI components cannot be shown on screen by themselves.
2. Creating GUI components and adding them to the top-level container object. Whenever the top-level container object is shown on screen, all embedded GUI components are shown on screen as well.
3. Adding the functionalities to the GUI components, i.e. defining how GUI components should respond by writing some methods. This is known as event handling.

8
JFrame The class javax.swing.JFrame is a top-level container class. When a JFrame object is created, it is invisible. Before
showing it, other GUI components are added to it. When the JFrame object is shown on screen, it can be
moved and resized like a usual GUI-based application. Constructors:
public JFrame( )
public JFrame(String title) Methods:
void show( ) void hide( ) void setVisible(boolean visible)
void setSize(int width, int height)
void setDefaultCloseOperation(int action) e.g. EXIT_ON_CLOSE

9
// Resolve class JFrameimport javax.swing.*;
// Definition of class TestJFrame1public class TestJFrame1 {
// Main executive methodpublic static void main(String args[]) {
// Create a JFrame object with a titleJFrame frame = new JFrame("TestJFrame1");
// Set the behaviour of clicking the close button is exit frame.setDefaultCloseOperation(JFrame.EXIT_ON_CLOSE);
// Show the JFrame object on the screenframe.show(); // without it, the frame is still invisible
}}
TestJFrame1.java & TestJFrame2.java TestJFrame1 need <cntl-C> to terminate the program

10
JButton A button is a common GUI component for getting a
response from a user, or enabling the user to perform a particular operation.
In Swing, a JButton object models a GUI button. Constructors:
public JButton( )public JButton(String label)
Method:void setText(String label)
As mentioned previously, many GUI components cannot be shown by themselves. So we need to add the JButton object to the content pane of the JFrame object for display. We can make use of the method getContentPane( ) which returns a Container object.
pp13

11
JLabel A label is used to show some static text that has no
operations. In Swing, a JLabel object models a GUI label. Constructors:
public JLabel( )
public JLabel(String text) Methods:
void setText(String label)
String getText( ) Instead of showing static text, a JLabel object can also
show a small image, using the constructor JLabel(Icon image) or the setIcon(Icon image) method.
pp20

12
JTextField A text field is a single line of textual entry for user to enter
any printable character from keyboard. In Swing, a JTextField object models a GUI text field. Constructors: public JTextField(int numCols)
public JTextField(String text, int numCols)
Methods:
void setText(String text)
String getText( )
void setEditable(boolean editable)
pp33

13
JTextArea A text area provides multiple lines of textual data entry
from keyboard. In Swing, a JTextArea object models a GUI text area. Constructors: public JTextArea(int numRows, int
numCols)
public JTextArea(String text, int numRows, int numCols) Methods:
void setText(String text)
String getText( )
void setEditable(boolean editable) After JTextArea object is created, new lines added is not
shown. We use the JScrollPane object to provide scrolling capability to the JTextArea object.
pp34

14
Canvas A canvas is a GUI component that models a drawing area
for drawing anything (text, lines, figures, etc.). Note that the Swing packages do not provide a Swing
version of canvas. We make use of the one in the AWT packages.
Constructors: public Canvas( ) Note that the preferable size of a Canvas object 0 x 0. You
can use the setSize(width, height) method to set its size. The usual practice of creating a canvas is to write a
subclass of the Canvas class and override the paint( ) method. The paint( ) method is called to construct the appearance of the canvas whenever it is uncovered.
public void paint(java.awt.Graphics g) { … }
pp38
15
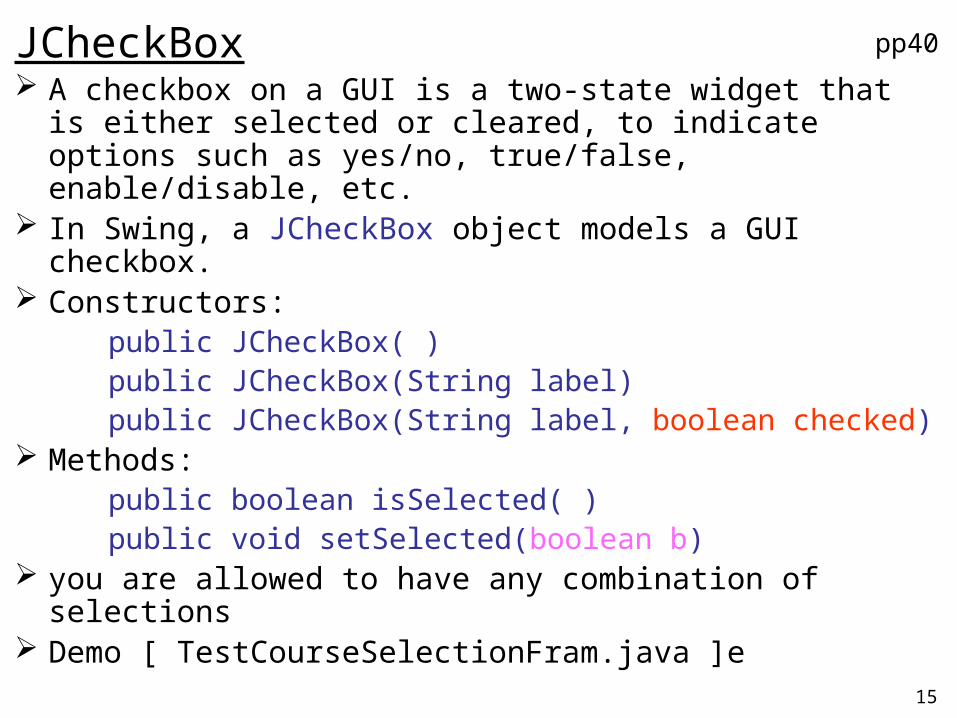
JCheckBox A checkbox on a GUI is a two-state widget that is either
selected or cleared, to indicate options such as yes/no, true/false, enable/disable, etc.
In Swing, a JCheckBox object models a GUI checkbox. Constructors:
public JCheckBox( )public JCheckBox(String label)public JCheckBox(String label, boolean checked)
Methods:public boolean isSelected( )public void setSelected(boolean b)
you are allowed to have any combination of selections Demo [ TestCourseSelectionFram.java ]e
pp40

16
JRadioButton A radio button on a GUI is also a two-state widget that is
either selected or cleared. However it is usually used as a group of radio buttons for mutually exclusive options.
In Swing, a JRadioButton object models a GUI radio button.
Constructors: public JRadioButton( )public JRadioButton(String label)public JRadioButton(String label, boolean selected)
Methods: boolean isSelected( )void setSelected(boolean selected)
To group radio buttons (giving them mutually exclusive behaviour), we create a ButtonGroup object and add those related radio buttons into it, using its add( ) method.
demo [ TestRegionSelectionFrame.java]
pp42

17
JMenuBar, JMenu and JMenuItem For many applications, a (pull-down) menu is provided for
accessing the functionalities of the system. The steps in adding a menu bar to a JFrame object:
1. Create a JMenuBar object and add it to the JFrame, using its setJMenuBar( ) method
2. For each menu on the menu bar, create a JMenu object and add it to the JMenuBar
3. For each menu item in the menu, create a JMenuItem object and add it to the JMenu
The order of adding the JMenu objects and JMenuItem objects are important as it determines the appearance of the whole menu.
To add a line as separator into a menu, use the addSeparator( ) method of the JMenu object.
pp45

18
Layout Managers The content pane of the JFrame (which is actually a Container
object) has a layout manager object for arranging the GUI components added.
The layout manager is an object of a subclass of LayoutManager. Whenever a Container object is created (e.g. the content pane of a
JFrame), a default layout manager is created as well. The layout manager determines the sizes and positions of the GUI
components. So it is important to set a proper layout manager object to a Container object.
Java provides different layout manager objects to allow for different arrangements of the GUI components. The three commonly used ones are FlowLayout, BorderLayout and GridLayout.

19
FlowLayout Manager ( pp26 )
It is the simplest layout manager. All GUI components are arranged from left to right in the Container with their preferred sizes (i.e. the components added will have different sizes).
demo [ TestFrameWithFlowLayout.java ]

20
It is the default layout manager of the content pane of a JFrame object. The Container is divided into 5 regions, namely north, east, west, south and center.
Each region can hold zero or one GUI component. And when a GUI component is added, we need to tell explicitly where to put that component (by using the overridden add( ) method of the Container). The sizes of the components might be different and are subjected to the layout.
demo [ TestFrameWithBorderLayout.java ] demo [ TestFrameWithBorderLayout2.java ] (pp82-9)
North (8)
Center (16)
South (2)
West (4)
East(1)
pp27
(para=31=1+2+4+6+8+16)
BorderLayout Manager

21
The Container is divided into the specified number of rows and columns, and GUI components are added from left to right, top to bottom.
Components added are set to the same size.
(0,0) (0,1) (0,2)
(1,0) (1,1) (1,2)
GridLayout Manager (pp29)
22
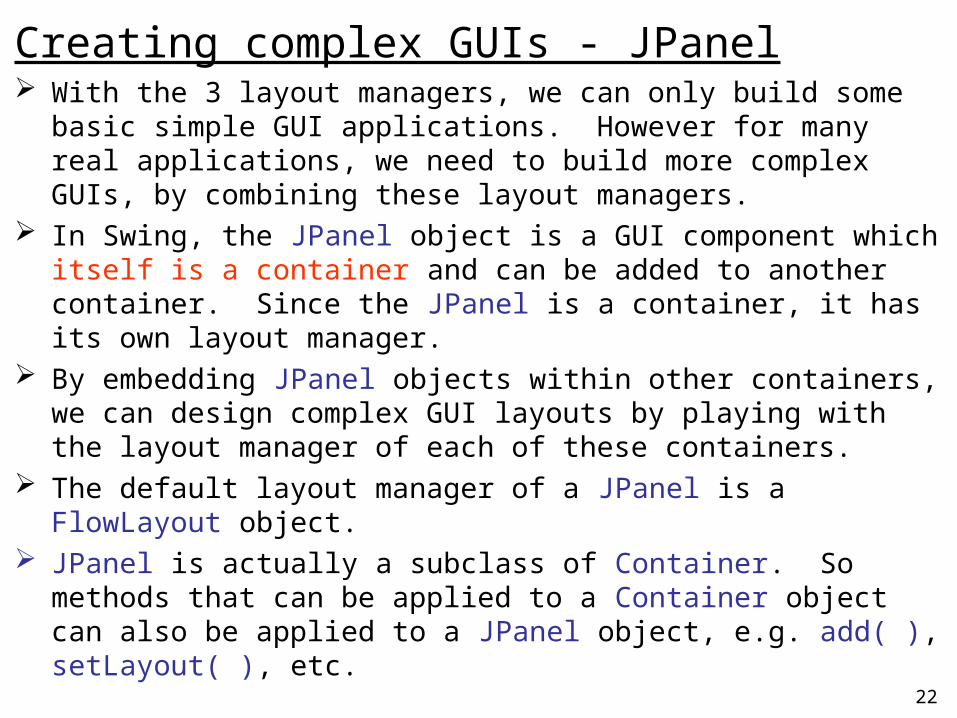
Creating complex GUIs - JPanel With the 3 layout managers, we can only build some basic simple
GUI applications. However for many real applications, we need to build more complex GUIs, by combining these layout managers.
In Swing, the JPanel object is a GUI component which itself is a container and can be added to another container. Since the JPanel is a container, it has its own layout manager.
By embedding JPanel objects within other containers, we can design complex GUI layouts by playing with the layout manager of each of these containers.
The default layout manager of a JPanel is a FlowLayout object. JPanel is actually a subclass of Container. So methods that can be
applied to a Container object can also be applied to a JPanel object, e.g. add( ), setLayout( ), etc.

23
Dialog A dialog is a special type of frame for displaying messages
(which needs user’s immediate attention) or getting user input.
In Swing, some standard dialog boxes can be created from the class JOptionPane.
showing message:
public static void showMessageDialog(…) getting confirmation:
public static int showConfirmDialog(…) getting user input (as String):
public static String showInputDialog(…) User-defined dialog: creating a JDialog object
pp48 + Appendix C(pp89) & D(pp92)

24
Dialog Boxes Separate Dialog windows ParentWindow - owner of dialog box modal - mode where all inputs are directed modeless (non-modal) - inputs can go to other windows

25
Non-modal Allow user to do
something before answering the message
Modal Disallow user to
do anything before answering to the message
Dialog boxes
26
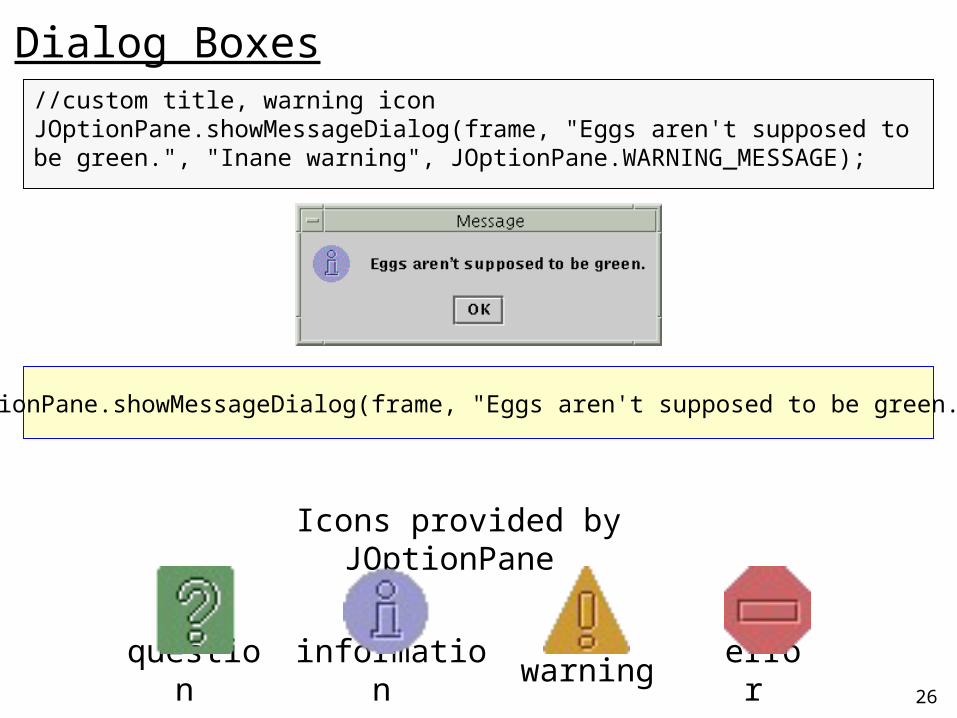
Dialog Boxes
JOptionPane.showMessageDialog(frame, "Eggs aren't supposed to be green.");
Icons provided by JOptionPane
question information warning error
//custom title, warning icon JOptionPane.showMessageDialog(frame, "Eggs aren't supposed to be green.", "Inane warning", JOptionPane.WARNING_MESSAGE);

27
Interface An interface is like a contract between a calling object
and the called object. If the class of the called object implements the interface, it is guaranteed that the calling object can call any method declared by the interface
An interface is similar to an abstract class It defines a type with abstract methods and constants
Their difference interface provides no implementation to be inherited by the subclasses.
all methods must be declared abstract. Hence any class that “implements” the interface must define these abstract methods.
all variable declarations are by default public, static and final. Hence only public class variables can be defined.
pp55 + 98

28
The definition of a Java interface is:
All method declarations are understood to be public abstract.
The definition of a class that implements an interface:
This is multiple-inheritance
[public] interface Interface-name {[class-variable-declaration(s)][abstract-method-declaration(s)]
}
[public] class Class-name [extends Superclass-name][implements Interface-name-list] { // separated by
comma
[variable-declaration(s)][constructor-declaration(s)][method-declaration(s)]
}pp103

29
Event-handling model The GUI examples we have developed earlier perform no action at
all. The actions taken by a user are called events and we need to write codes for event-handling.
Event objects are created when a user interacts with a GUI. Because we haven’t written any program to handle them, these events objects are simply ignored.
In order to handle a particular event, we need to register an event handler/listener object with the respective GUI component.
The scenario of event-handling is hence like this. When user operates on a GUI component (e.g. clicking a button), an event object is created. A particular method of the registered event handler object is called with reference to the event object. Then the method can determine the information about the event and perform operations accordingly.
pp56

30
Implementing event handler Events of GUI are classified into different categories (e.g. action,
focus, mouse, mouse motion, window, etc.), and listener classes (actually interfaces) are defined for each category.
Note that not all event categories are applicable to each type of GUI component. And if a component class supports an event category, it would have defined the method
public void addCategoryListener(CategoryListener listener) for registering the event handler object. The parameter of the above method is an object whose class
implements the CategoryListener interface. Hence that class must have implemented all methods specified by the said interface.
Similarly the following method would also have been defined:
public void removeCategoryListener(CategoryListener listener)

31
Implementing event listener Steps in setting up event handling for a GUI:
1. Identify the category of event to be handle.2. Write an event handler class that implements the
listener interface.3. Create the GUI component and an object from the
event handler class.4. Call the addCategoryListener( ) method of the GUI
component to register the event handler object. eg. most GUI components support the Action category
event. We write a class that implements the ActionListener interface (hence need to define the actionPerformed( ) method). We then register the event handler object with the GUI component by using its addActionListener( ) method.

32
Action events Most GUI components support the Action category event, which
indicates that the GUI components have been operated by user. When this event occurs, an ActionEvent object is created and passed
to the actionPerformed( ) method of the ActionListener object. In the ActionEvent object, there are two pieces of useful information
that tell us what has happened at the event. The first one is the event source which is the GUI component that caused the event. The second is an action command (see next slide).
We can make use of the methods getSource( ) and getActionCommand( ) in the ActionEvent object to retrieve these information.
Different GUI components provide different contents of the action command.
33
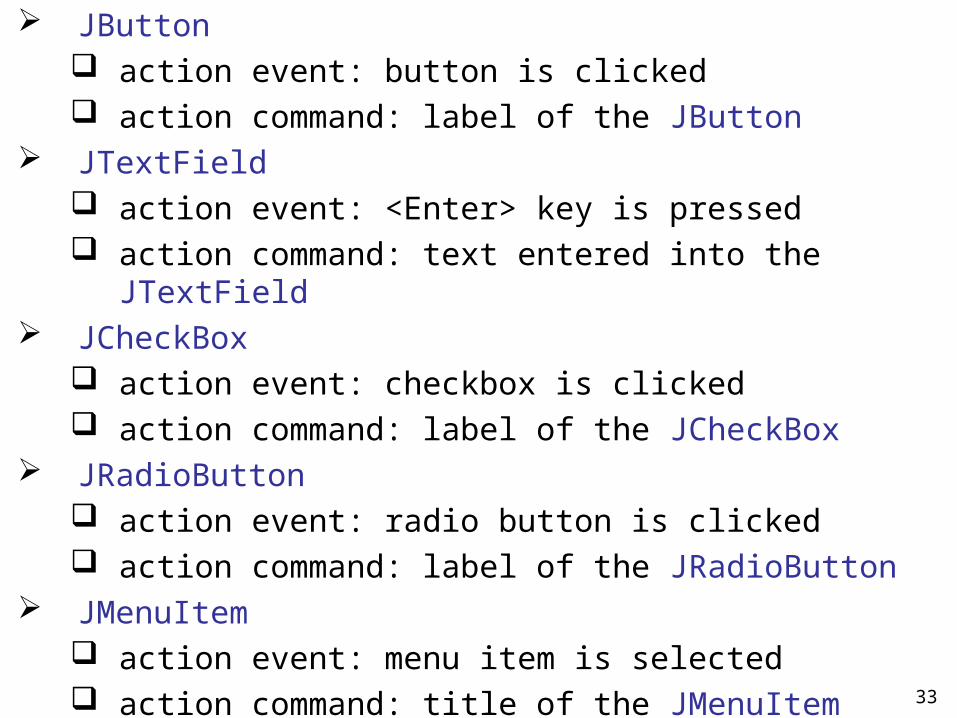
JButton
action event: button is clicked action command: label of the JButton
JTextField action event: <Enter> key is pressed action command: text entered into the JTextField
JCheckBox action event: checkbox is clicked action command: label of the JCheckBox
JRadioButton action event: radio button is clicked action command: label of the JRadioButton
JMenuItem action event: menu item is selected action command: title of the JMenuItem

34
Used for setting command parameters, or for setting some values of values to be remembered by the application for a later action
Mutually exclusive within a button group
Only ONE item can be chosen within a group
Radio Button
35
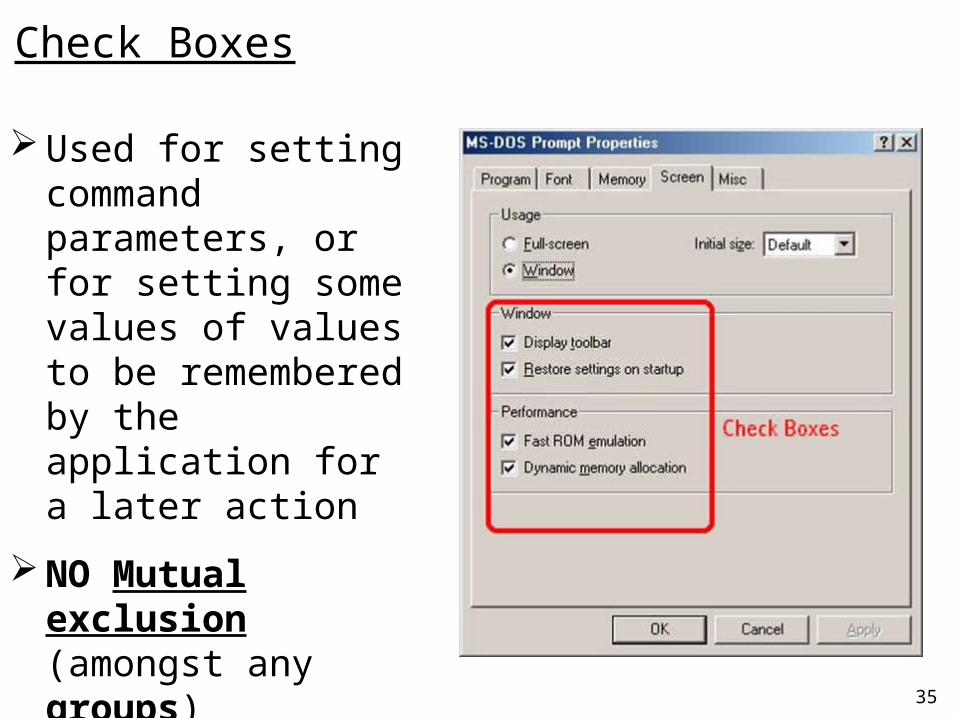
Used for setting command parameters, or for setting some values of values to be remembered by the application for a later action
NO Mutual exclusion (amongst any groups)
Allows to choose many available options
Check Boxes
36
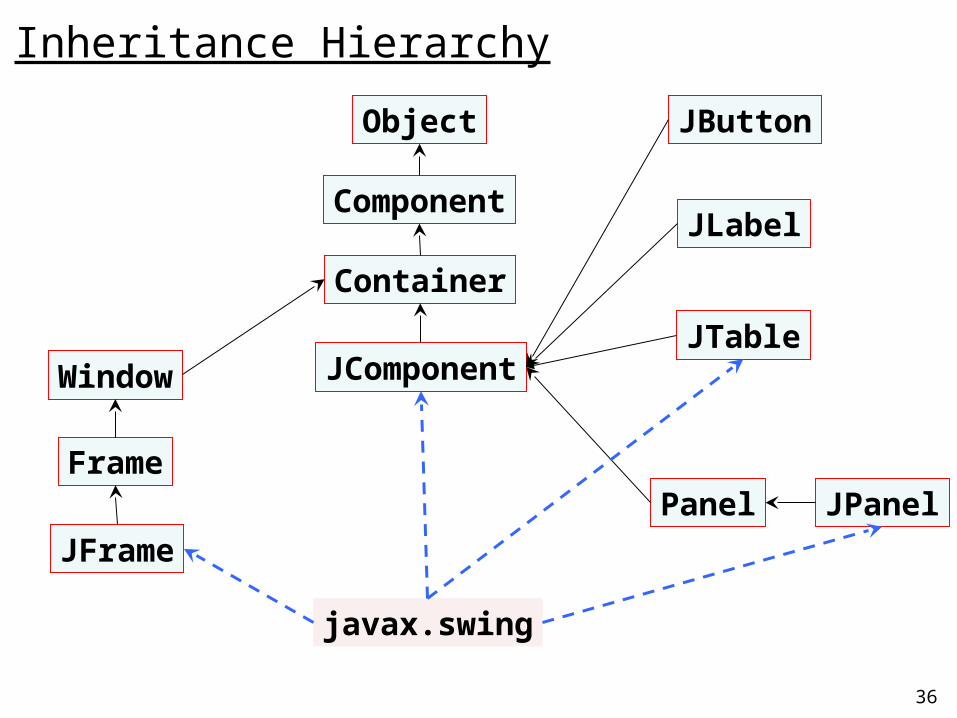
Inheritance Hierarchy
Object
Component
Container
Panel
Window
Frame
JFrame
javax.swing
JComponent
JPanel
JButton
JLabel
JTable

37
Applet Applets are Java classes that can be embedded in a web page (just
like a static image) and executed inside a web browser. If a web page specifies an applet, the browser downloads the class
from the web server and starts a JVM to execute the applet. Advantages of writing software as Java applet:
cross-platform and can be executed on various platforms can be implemented using the same rich standard software
library as usual GUI applications do no installation required; ease s/w deployment as applet classes
are automatically downloaded from web server to clients the JVM used to execute applets has special measures to
prevent the applets from performing operations that violate system security
pp68

38
To deploy a Java applet, we need to take 4 steps:
1. write the applet class (by extending the JApplet class)
2. compile the source to obtain the class file
3. place the class file on the web server
4. specify the class name (and path) in a web page A JApplet object is a JFrame-like container for adding
GUI components. The only difference is there is no pack( ) method for the JApplet class and the size of the applet is specified in the web page instead.
To define an applet in Java:public class Class-name extends JApplet
[implements Listener-interface-list] {
… …… …
}
39
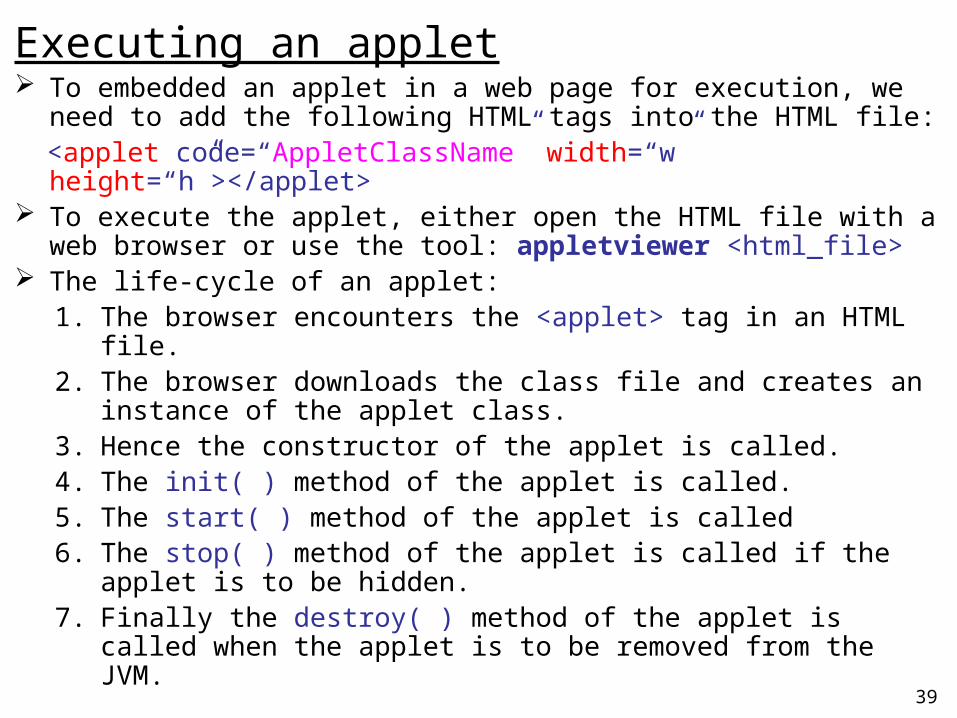
Executing an applet To embedded an applet in a web page for execution, we need to add
the following HTML tags into the HTML file: <applet code=“AppletClassName” width=“w” height=“h”></applet> To execute the applet, either open the HTML file with a web
browser or use the tool: appletviewer <html_file> The life-cycle of an applet:
1. The browser encounters the <applet> tag in an HTML file.2. The browser downloads the class file and creates an instance of
the applet class.3. Hence the constructor of the applet is called.4. The init( ) method of the applet is called.5. The start( ) method of the applet is called6. The stop( ) method of the applet is called if the applet is to be
hidden.7. Finally the destroy( ) method of the applet is called when the
applet is to be removed from the JVM.

40
The Life-Cycle of An Applet (1)
init()
start()
stop()destory()
leaving page
visiting page
discarding page
loading applet
Applet

41
The Life-Cycle of An Applet (2)
start()
stop()
to be garbage collected
init()
ReadyRunnin
g
Runnin
g
Dead
destory()

42
The Applet Methods
Methods of an applet to be called
Circumstances
public void init(){...} invoked when the applet is loaded initially
public void start(){...} invoked when entering the web page that contains the applet
public void stop(){...} invoked when leaving the web page that contains the applet
public void destory(){...} discard the applet; release/free memory

43
Appletviewer vs Internet Brower
Appletviewer will not show hypertext
contents

44
Application vs Applet Application
Full-fledged programs with full access to systems (i.e., trusted)
Invoked by Java Virtual Machine (JVM, java) Should contain a main method, i.e., public static void main(String[])
Applet Programs enabled in web pages with restricted access to
system resource to prevent security breaches to hosts running the applet
Invoked automatically by the web browser Should be a subclass of class java.applet.Applet
Example HelloWorld.java and HelloApplet.java

45
Java Application [ HelloWorld.java]
public class HelloWorld {public static void main (String args[]) {
System.out.println("Hello World");}
}

46
HelloApplet.javaimport java.awt.*;import java.awt.event.*;import javax.swing.*;public class HelloApplet extends JApplet implements ActionListener {
private JButton button = new JButton("Please click me"); // Attributepublic HelloApplet() { // Constructor// Get the content pane for adding componentContainer contentPane = getContentPane();
// Add the JButton object to the content panecontentPane.add(button);
// Register the HelloApplet object to be the Action category// event handler of the JButtonbutton.addActionListener(this);
} public void actionPerformed(ActionEvent e) {
JOptionPane.showMessageDialog(this, "Hello World");}
}
47
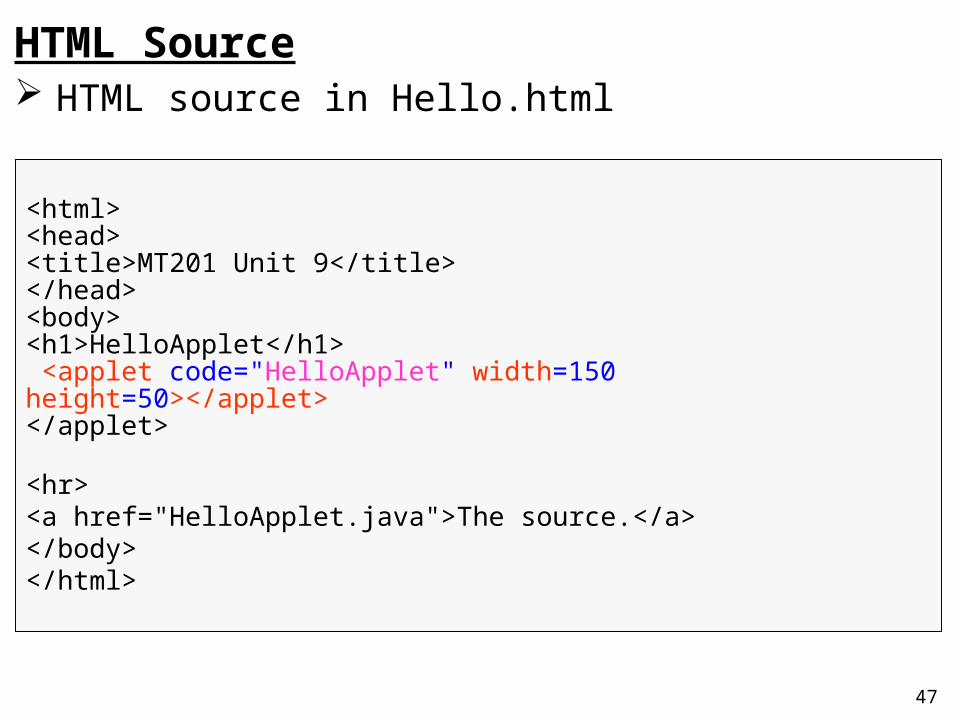
HTML Source HTML source in Hello.html
<html><head><title>MT201 Unit 9</title></head><body><h1>HelloApplet</h1> <applet code="HelloApplet" width=150 height=50></applet></applet>
<hr><a href="HelloApplet.java">The source.</a></body></html>