Embed Size (px)
Citation preview
IT Essentials: PC Hardware and Software v4.1 Chapter 11 – Lab/Student
11.4.5 Lab: Install, Configure, and Partition a Second Hard Drive in Windows XP
Introduction Print and complete this lab. In this lab, you will change the boot order, install a second hard drive, create partitions, and map drive letters to partitions.
Recommended Equipment Computer running Windows XP Professional Unpartitioned IDE hard disk drive IDE cable with a free connection Antistatic wrist strap Tool kit
Step 1
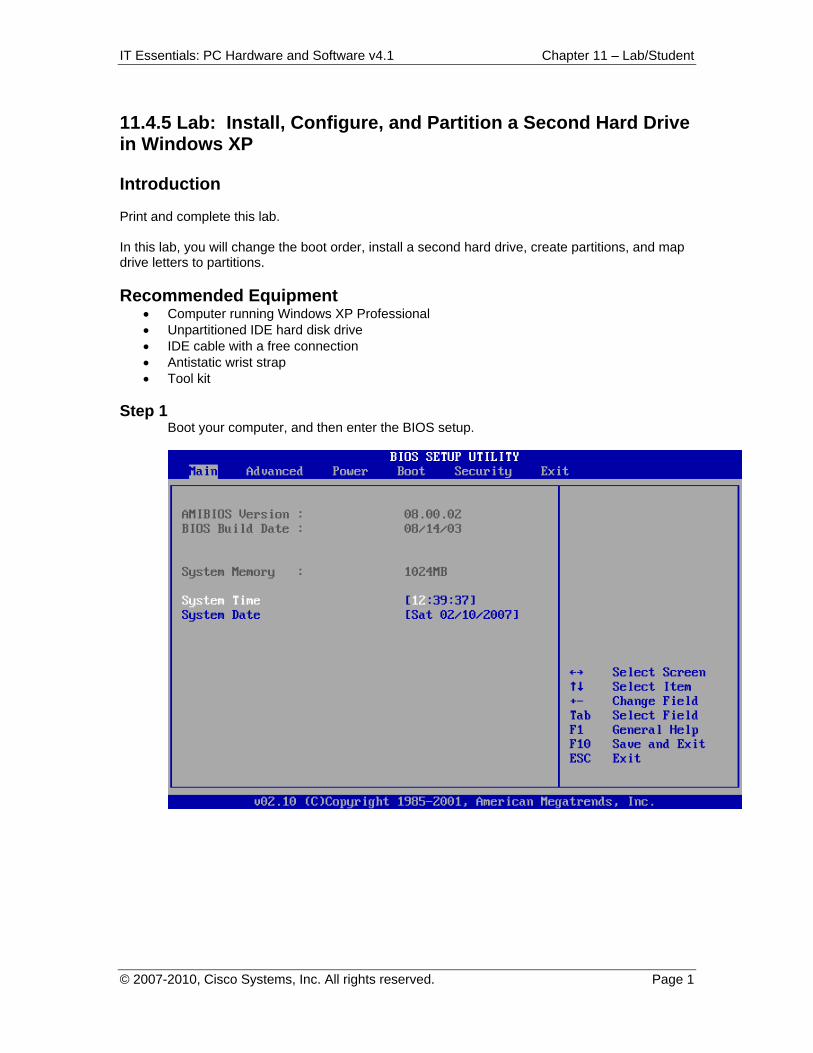
Boot your computer, and then enter the BIOS setup.
© 2007-2010, Cisco Systems, Inc. All rights reserved. Page 1
IT Essentials: PC Hardware and Software v4.1 Chapter 11 – Lab/Student
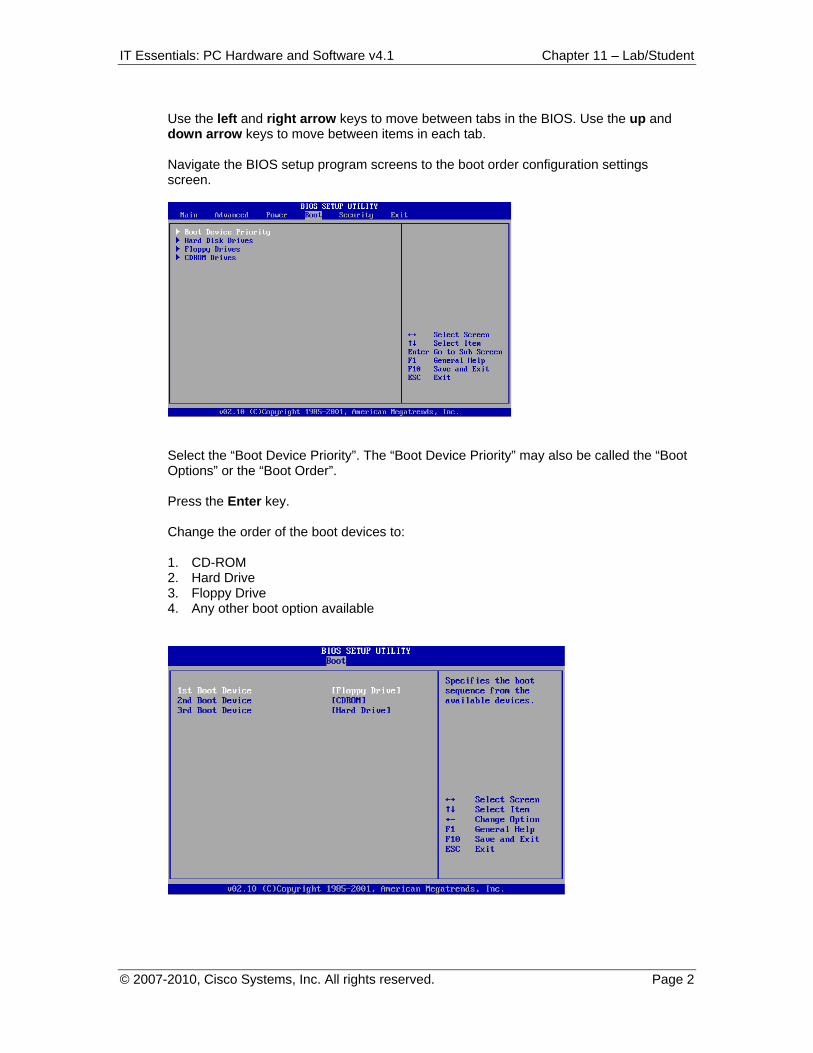
Use the left and right arrow keys to move between tabs in the BIOS. Use the up and down arrow keys to move between items in each tab. Navigate the BIOS setup program screens to the boot order configuration settings screen.
Select the “Boot Device Priority”. The “Boot Device Priority” may also be called the “Boot Options” or the “Boot Order”. Press the Enter key. Change the order of the boot devices to: 1. CD-ROM 2. Hard Drive 3. Floppy Drive 4. Any other boot option available
© 2007-2010, Cisco Systems, Inc. All rights reserved. Page 2

IT Essentials: PC Hardware and Software v4.1 Chapter 11 – Lab/Student
On which screen was the boot device order found? Save the changes to the BIOS and exit the BIOS utility by pressing the F10 key.
Step 2 Confirm the change to the BIOS settings if you are prompted. The computer will restart. Do not log on to Windows. Shut down your computer. If a switch is present on the power supply, set the switch to “0” or “off”. Unplug the computer from the AC outlet. Remove the side panels from the case. Put on the antistatic wrist strap, and then clip it to the case.
Step 3 Many hard drives will have the jumper settings indicated in a diagram on the drive. Follow the diagram to determine where the jumper will be installed.
Move the Master/Slave jumper on the installed hard disk drive to the Master position if it is in any other position. Move the Master/Slave jumper on the second hard disk drive to the Slave position if it is in any other position. Insert the second hard disk drive into the computer and attach it with the proper screws. Plug the middle connector of the IDE cable into the second hard disk drive. Plug a four-pin Molex power connector into the second hard disk drive. Check the jumper settings and cable connections on both hard disk drives to make sure the settings are correct and the cables are secured.
© 2007-2010, Cisco Systems, Inc. All rights reserved. Page 3
IT Essentials: PC Hardware and Software v4.1 Chapter 11 – Lab/Student
Remove the antistatic wrist strap from the case and from your wrist, and then replace the case panels. Plug the power cable into an AC outlet. If a switch is present on the power supply, set the switch to “1” or “on”. Boot your computer.
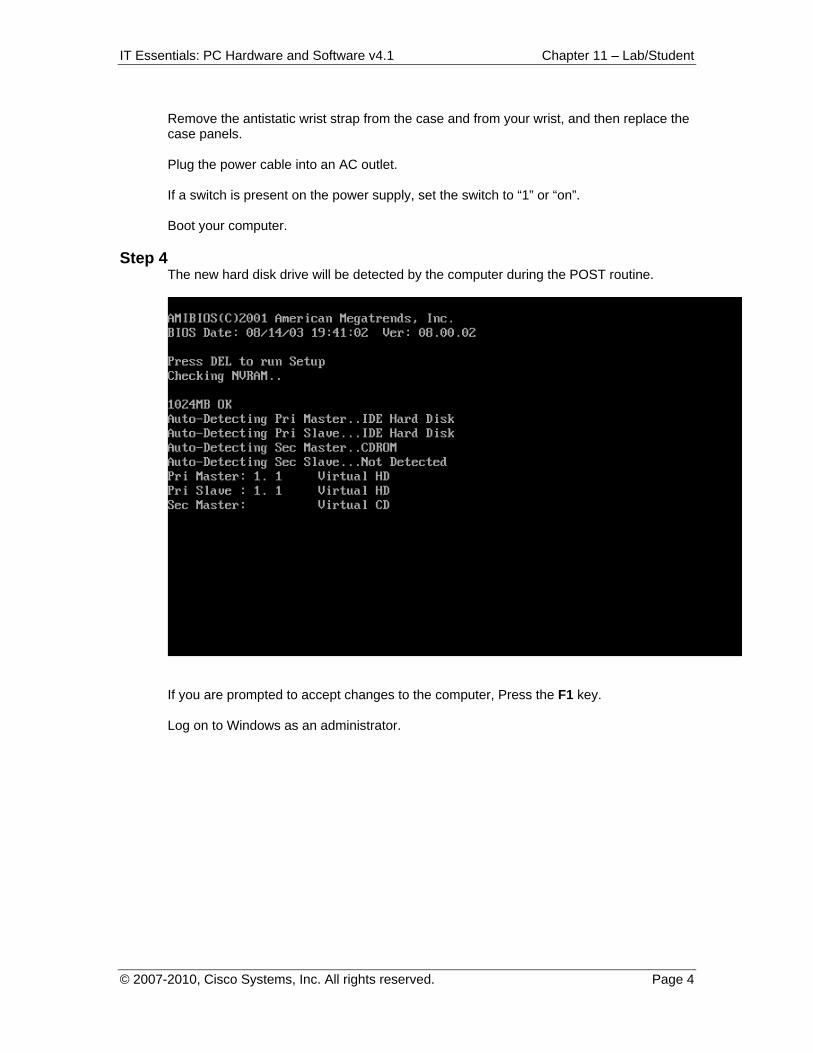
Step 4 The new hard disk drive will be detected by the computer during the POST routine.
If you are prompted to accept changes to the computer, Press the F1 key. Log on to Windows as an administrator.
© 2007-2010, Cisco Systems, Inc. All rights reserved. Page 4
IT Essentials: PC Hardware and Software v4.1 Chapter 11 – Lab/Student
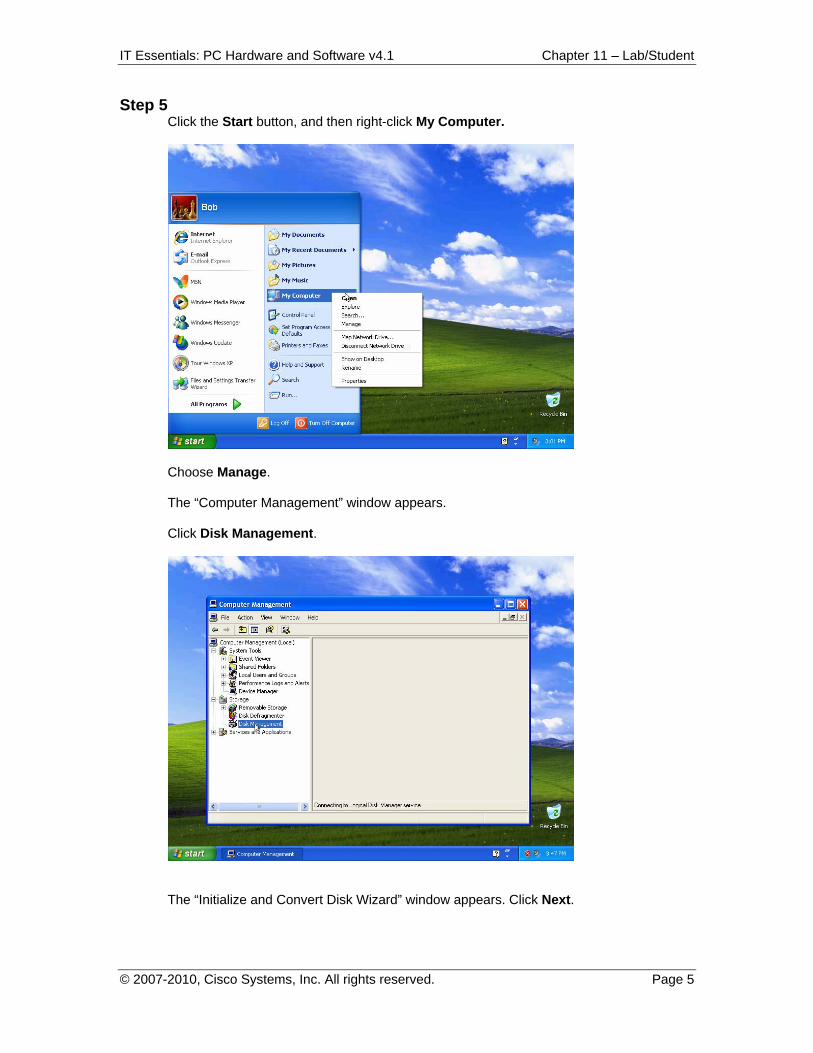
Step 5 Click the Start button, and then right-click My Computer.
Choose Manage. The “Computer Management” window appears. Click Disk Management.
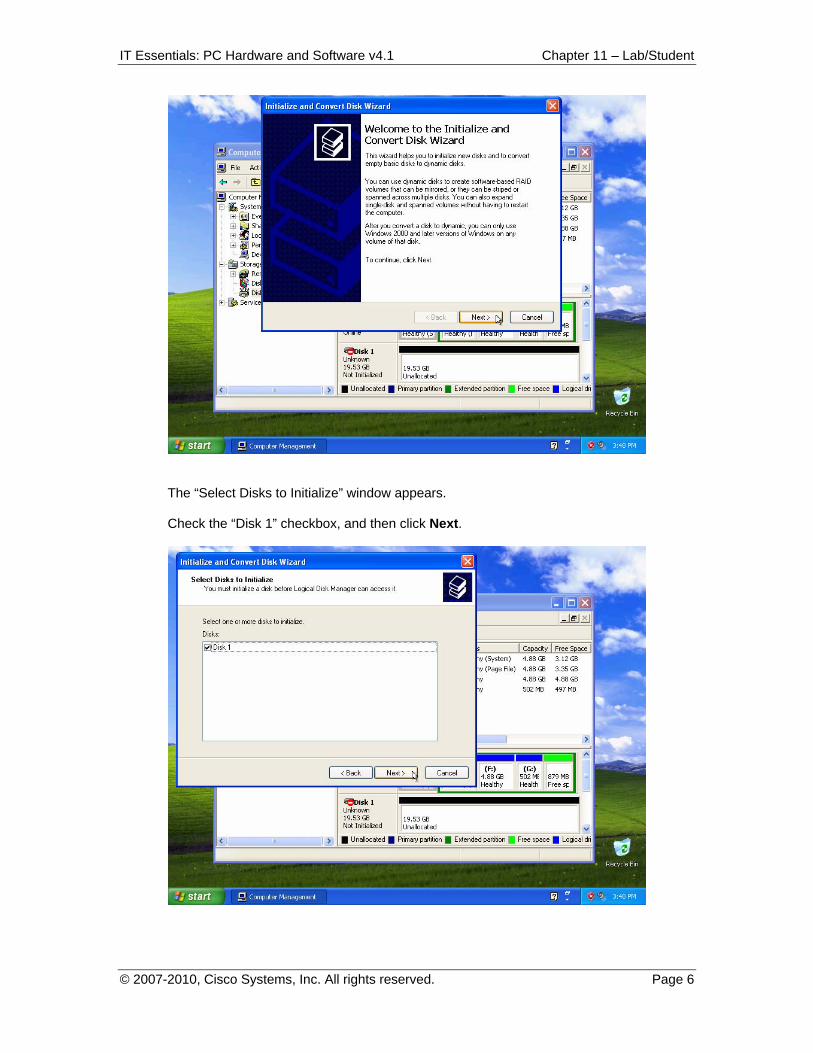
The “Initialize and Convert Disk Wizard” window appears. Click Next.
© 2007-2010, Cisco Systems, Inc. All rights reserved. Page 5
IT Essentials: PC Hardware and Software v4.1 Chapter 11 – Lab/Student
The “Select Disks to Initialize” window appears. Check the “Disk 1” checkbox, and then click Next.
© 2007-2010, Cisco Systems, Inc. All rights reserved. Page 6
IT Essentials: PC Hardware and Software v4.1 Chapter 11 – Lab/Student
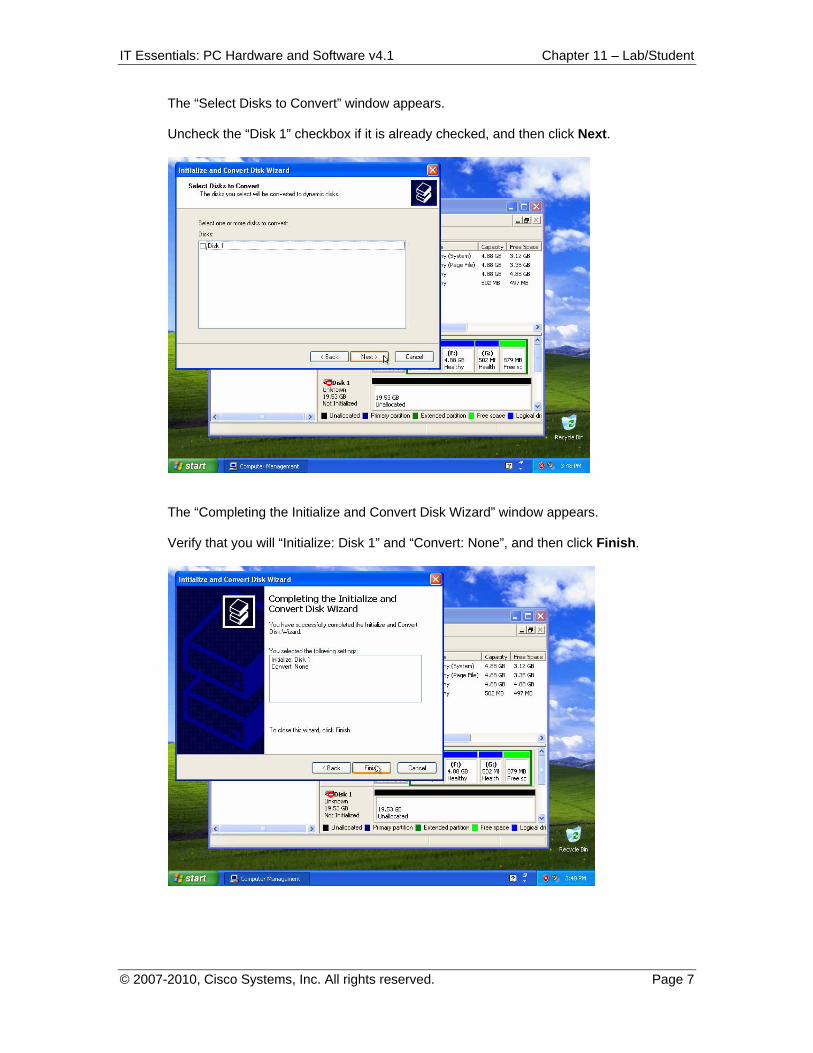
The “Select Disks to Convert” window appears. Uncheck the “Disk 1” checkbox if it is already checked, and then click Next.
The “Completing the Initialize and Convert Disk Wizard” window appears. Verify that you will “Initialize: Disk 1” and “Convert: None”, and then click Finish.
© 2007-2010, Cisco Systems, Inc. All rights reserved. Page 7
IT Essentials: PC Hardware and Software v4.1 Chapter 11 – Lab/Student
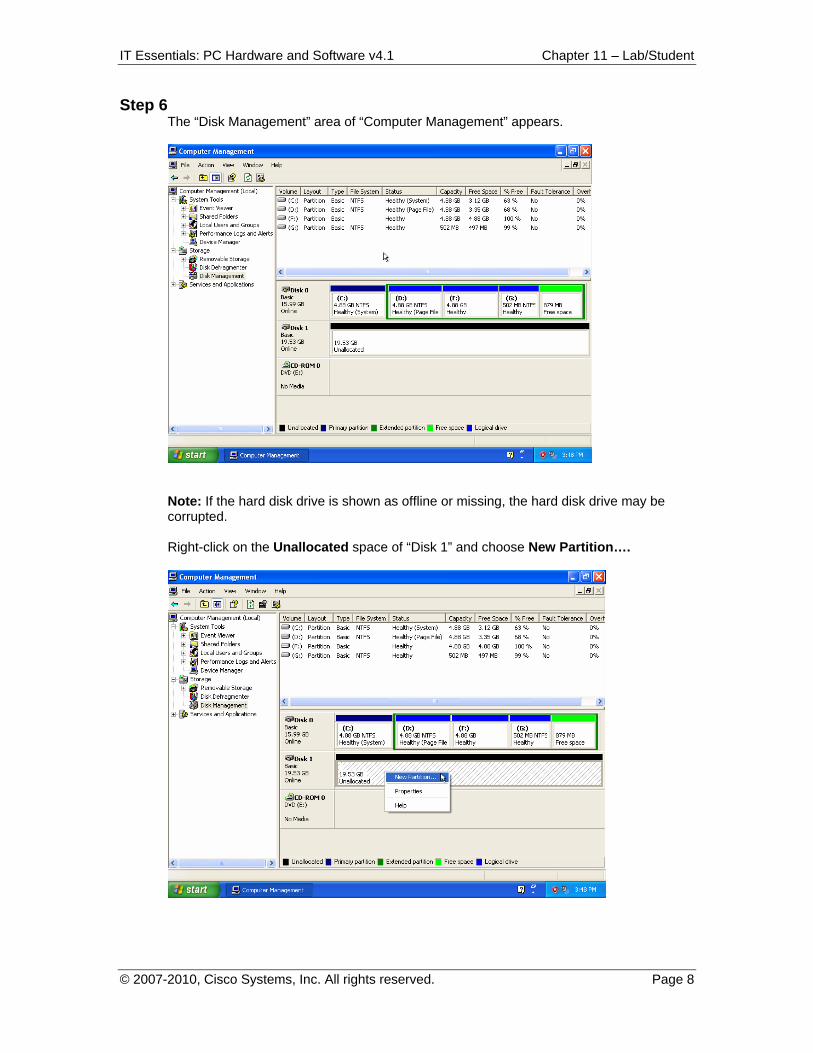
Step 6 The “Disk Management” area of “Computer Management” appears.
Note: If the hard disk drive is shown as offline or missing, the hard disk drive may be corrupted. Right-click on the Unallocated space of “Disk 1” and choose New Partition….
© 2007-2010, Cisco Systems, Inc. All rights reserved. Page 8
IT Essentials: PC Hardware and Software v4.1 Chapter 11 – Lab/Student
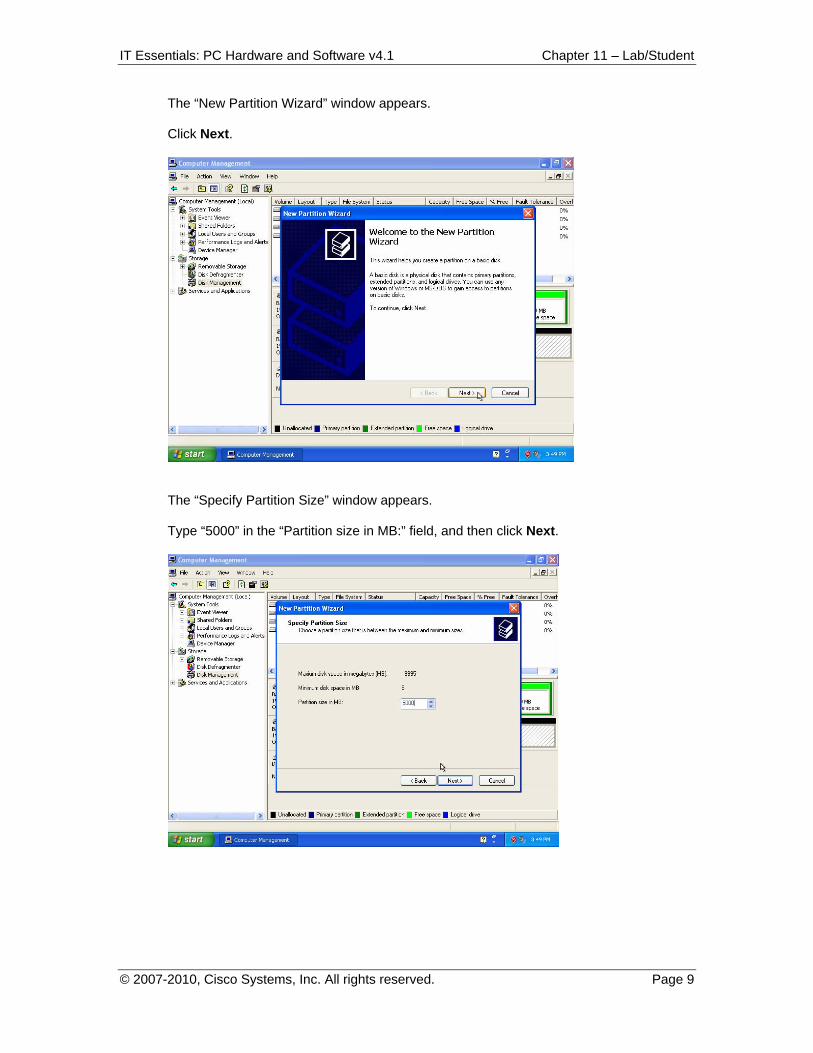
The “New Partition Wizard” window appears. Click Next.
The “Specify Partition Size” window appears. Type “5000” in the “Partition size in MB:” field, and then click Next.
© 2007-2010, Cisco Systems, Inc. All rights reserved. Page 9
IT Essentials: PC Hardware and Software v4.1 Chapter 11 – Lab/Student
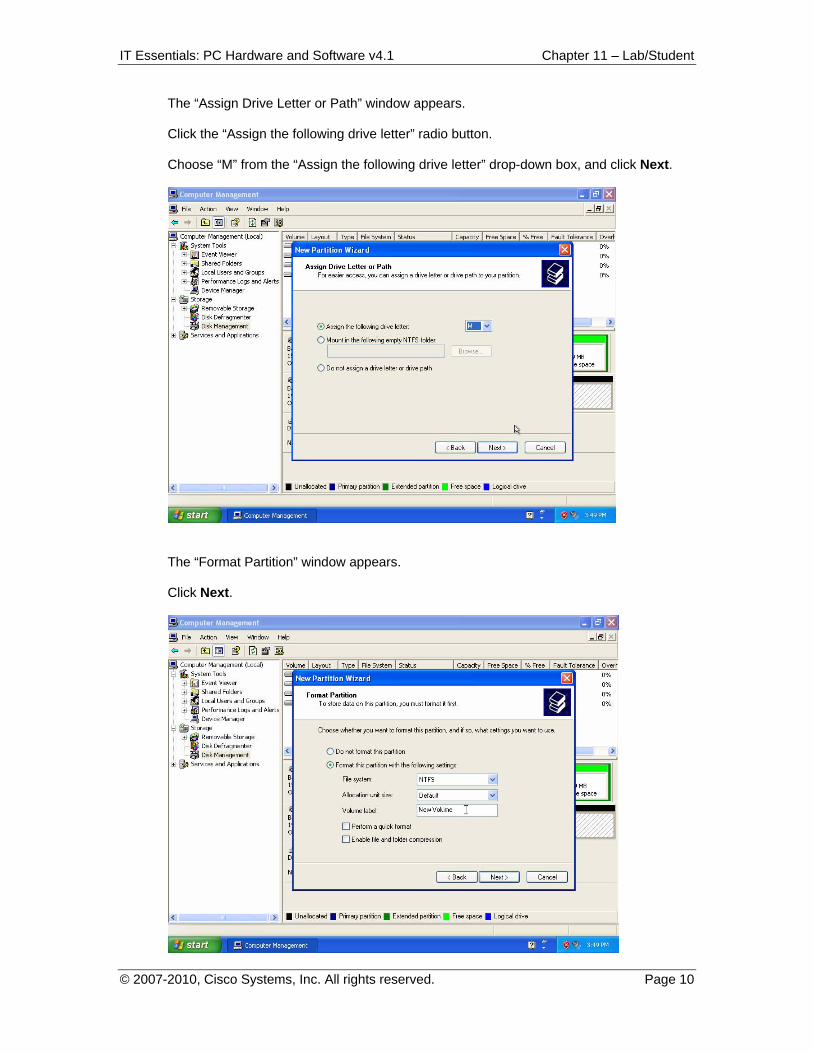
The “Assign Drive Letter or Path” window appears. Click the “Assign the following drive letter” radio button. Choose “M” from the “Assign the following drive letter” drop-down box, and click Next.
The “Format Partition” window appears. Click Next.
© 2007-2010, Cisco Systems, Inc. All rights reserved. Page 10
IT Essentials: PC Hardware and Software v4.1 Chapter 11 – Lab/Student
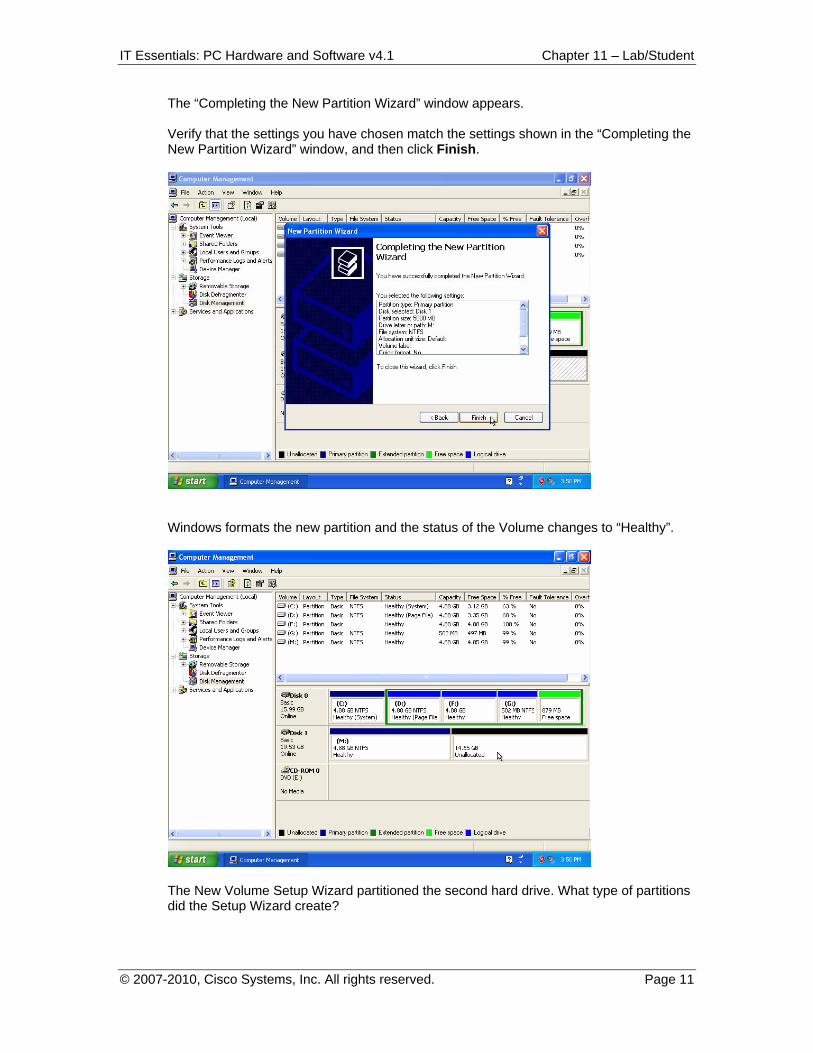
The “Completing the New Partition Wizard” window appears. Verify that the settings you have chosen match the settings shown in the “Completing the New Partition Wizard” window, and then click Finish.
Windows formats the new partition and the status of the Volume changes to “Healthy”.
The New Volume Setup Wizard partitioned the second hard drive. What type of partitions did the Setup Wizard create?
© 2007-2010, Cisco Systems, Inc. All rights reserved. Page 11
IT Essentials: PC Hardware and Software v4.1 Chapter 11 – Lab/Student
© 2007-2010, Cisco Systems, Inc. All rights reserved. Page 12
What other partitions could be created?
Step 7 Create a second partition in the Unallocated space of “Disk 1” with the drive label “N:”.
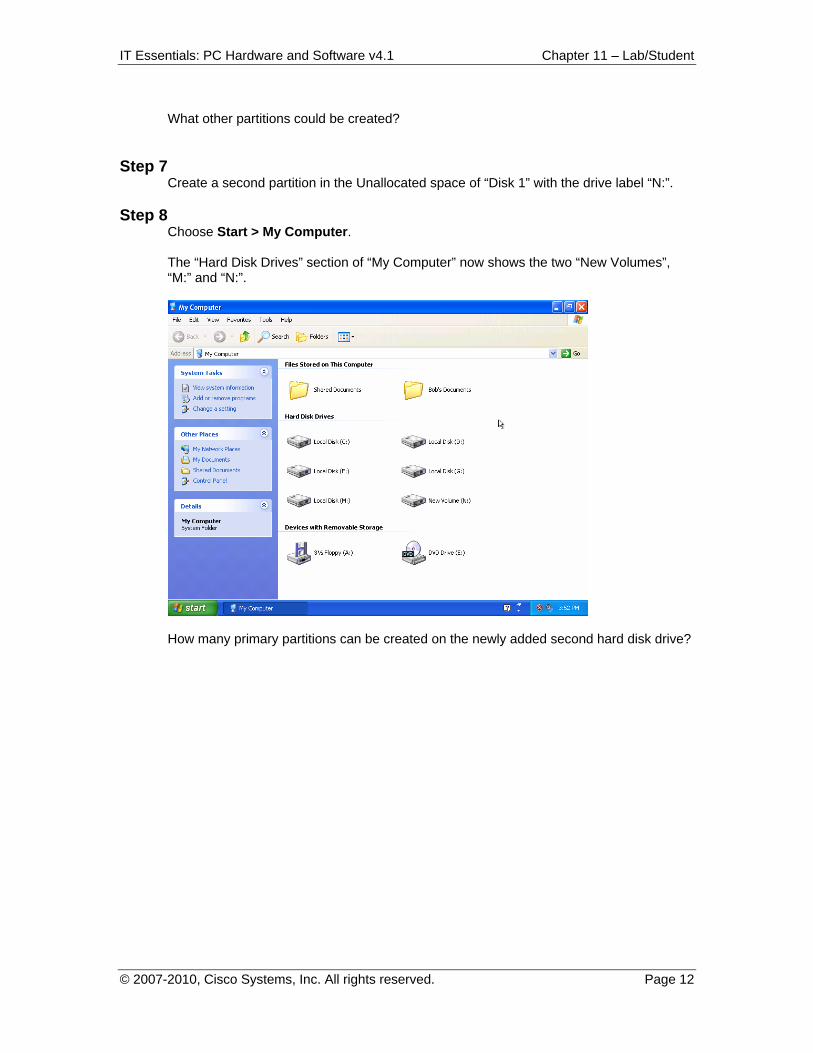
Step 8 Choose Start > My Computer. The “Hard Disk Drives” section of “My Computer” now shows the two “New Volumes”, “M:” and “N:”.
How many primary partitions can be created on the newly added second hard disk drive?