Embed Size (px)
Citation preview
2
The pump (5.15) is pushed onto the water intake pipe(5.11) on the inside of the aquarium, underneath thewater surface. The pump can then hang there withoutfurther securing. However, you may additionally attachthe pump to the aquarium glass. Insert the holderplate (5.16) into one of the rails on the pump to do so.Due to the suction cups, the pump will then be firmlyattached to the aquarium glass. Do not twist the pumpwhen pressing the suction cups, as the bayonet lock ofthe pump head cover (5.17) might loosen. Installing thepump in deeper water will reduce air intake perform-ance while increasing the water flow rate.
The pump (5.15) is connected to the air intake hose(5.19). Stick the air hose (5.19) onto the nozzle on theinner side of the split cone (5.20) to do so. The cone isthen pushed into the intake opening (5.18) of thepump. The hose (5.19) is directed through the hose fix-ture (5.14.2) on the skimmer case (5.5) and fixed abovethe water surface, allowing the pump to draw in air.The air regulator (5.21) is attached to the hose end. Itwill also prevent the hose from slipping out.
Push the outlet hose for clean water (5.8) onto thewater outlet opening (5.6) and direct the outlet hoseover the aquarium edge, allowing the water to flowback into the aquarium.
The skimmer is now ready for operation and can bestarted.
Installation in a filter tank (fig. 2)
The sera marin Protein Skimmer 400 HO can also beinstalled in a cabinet filter. The installation outside thefilter tank (on the aquarium edge) is carried out as de-scribed above. It is then hung onto the edge of the fil-ter tank. You can simply place it aside the tank in casethe filter tank is not high enough. The dispergatorpump is attached inside the filter tank hanging justunderneath the water surface. It is advisable to main-tain a constant water level by means of automatic evap-oration compensation as to prevent the pump runningdry.
Operation
Air is automatically drawn in after switching on thepump. The air is scattered into very fine air bubbles bythe rotating pinwheel (5.15.2). The special constructionof the pump prevents loud noise. The skimmer (5.5) willrun full of saltwater. Accordingly, the water level of theaquarium will sink slightly. Top up the tank accordinglywith saltwater. The pump will now blend water and air.Starting a skimmer for the first time will often lead torelatively strong foam formation: Extremely moistfoam will end up in the flotate cup (5.2) which quicklyruns full of water this way. In that case a temporarilyreduced air intake at the air regulator (5.21) or a verylow water level inside the skimmer will help. Eachaquarium has its own biology and its own protein level.
One day after starting up you should adjust the skim-mer more accurately for the first time: First open theair regulator (5.21) of air intake to the dispergatorpump as wide as possible. As a reaction, you will noticethat the water/foam level within the skimmer (5.5)rises within the next minutes. This level can be furtherraised by turning the flow adjustor (5.4) on the outletof the unit. The level within the skimmer should beapproximately 1 cm (0.4 in.) below the gray edge of theflotate cup. Depending on whether you wish to skimmoist or rather dry foam you can adjust the air regula-tor (5.21) and the flow adjustor (5.4) in combination.However, the air intake should always be as wide openas possible, i.e. you should primarily adjust the foamamount with the flow adjustor (5.4). Fully open theflow adjustor (5.4) before removing the flotate cup(5.2) and switch off the pump if necessary as to preventwater flowing over.
Cleaning
Although the flotate cup (5.2) is equipped with a flotateoutlet (5.2.2) through a hole in the bottom it needs tobe cleaned every few days. In particular, the inner tube(5.2.1) of the flotate cup must be cleaned regularly asto prevent the air bubbles of the rising foam frombursting at the deposits that often contain fat. The flo-tate outlet (5.2.2) in the flotate cup can be used fordirecting the flotate into a larger collection container,e.g. in case of prolonged absence.
Deposits may form on the bottom of the skimmer overtime, which reduce outflow at the bottom and thusaffect the skimmer performance. Therefore, the entireskimmer should be cleaned regularly.
The pump (5.15) and the air intake (5.19, 5.20, 5.21)should be checked monthly. Lime deposits may espe-cially reduce the air intake (5.21). Clean the parts me-chanically in case of lime deposits. Persistent depositscan be removed by soaking the parts to be cleaned insera pH-minus. Do not use any household detergents.Rinse the parts under running water before puttingthem back in place. Depending on the situation, therotor (5.15.1) of the pump can be covered with mucousand then needs to be cleaned. Simply twist the pumphead (5.17) carefully against the pump body, until bothparts separate at the bayonet. The rotor (5.15.1) can betaken out of the pump along with the magnet afteryou have taken off the pump head. The shaft (5.15.2)can be pulled out of the rotor after removing the stick-on rubber bearing (5.15.3).
1
The sera marin Protein Skimmer 400 HO is a high per-formance, energy saving and flexibly usable disperga-tor skimmer for aquariums up to 400 l (106 US gal.). Itcan be used as a hang-on version (fig. 1) as well as in afilter underneath the aquarium (fig. 2) (sump). It istherefore optimally suitable for all aquarists that wishto switch over from freshwater aquariums to saltwateraquariums.
Included items (fig. 3)
3.1 Skimmer with holder and built-in tubing3.2 Dispergator pump NP 1600 with pinwheel3.3 Stick-on tubing on the pressure side (connec-
tion between pump and skimmer)3.4 Flexible outlet hose3.5 Air intake with intake nozzle and air regulator
for the dispergator pump3.6 Flexible flotate outlet hose with adjustor
Skimmer tasks
A skimmer is the heart of saltwater aquarium filtration.It removes protein that is permanently released intothe water by micro organisms, invertebrates and fish.The skimmer removes particles such as floating matterand aerates the aquarium. Protein not removed fromthe water will lead to an increasing amount of harmfulsubstances such as ammonia, nitrite and nitrate (bac-terial breakdown chain beginning with protein).Keeping saltwater organisms in closed systems wouldbe considerably more difficult or, depending on therequirements of the species in question, even impossi-ble.
Function principle (fig. 4)
The dispergator pump of the sera marin ProteinSkimmer draws in the water from the aquarium orfrom the filter chamber (4.1), mixes it with air drawn in(4.3) by the resulting low pressure inside the gyro case(4.2), where it is scattered into tiny air bubbles by thesera pinwheel. The fine air bubbles provide a large sur-face where the protein can settle.
This water/air mixture is pumped into the inner reac-tion chamber of the protein skimmer (4.4). The outletdirected sideways make the mixture rotate, keepingthe air bubbles floating for a longer time and thereforeincreasing the flotate yield (4.5). The protein attachesto the bubbles within this chamber. The bubbles accu-mulate at the water surface and form a solid foamwhile floating there. The narrowing standpipe of thefoam cup directs this foam into the flotate cup whereit is collected (4.6). The purified water flows into thestandpipe at the bottom end of the skimmer and backinto the aquarium or filter tank through the outlethose (4.7) connected to it.
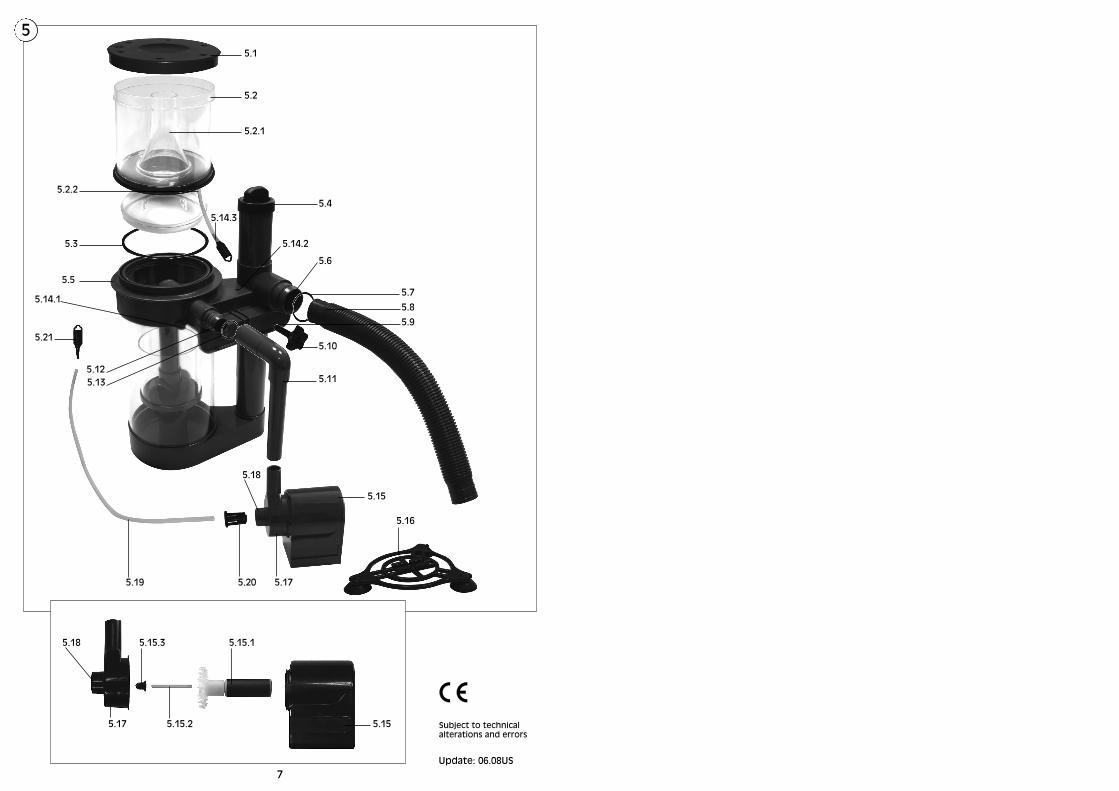
Assembly instruction (fig. 5)
5.1 Cover5.2 Flotate cup5.2.1 Inner tube of flotate cup5.2.2 Flotate outlet opening
with hose and adjustor5.3 O-ring seal5.4 Flow adjustor5.5 Skimmer case5.6 Water outlet opening5.7 O-ring seal 5.8 Outlet hose for clean water5.9 Holder bracket5.10 Locking screw5.11 Water intake pipe 20 mm (0.8 in.) diameter5.12 Water intake nozzle5.13 O-ring seal5.14.1 Hose fixture for flotate outlet5.14.2 Hose fixture for air intake5.14.3 Flotate outlet hose with adjustor5.15 Dispergator pump5.15.1 Rotor5.15.2 Shaft5.15.3 Rubber bearing5.16 Holder plate5.17 Pump head with bayonet lock5.18 Intake opening5.19 Air hose5.20 Intake nozzle5.21 Air regulator
Hang-on installation on the outside of the aquariumglass (fig. 1)
An easily accessible but well protected place on theside or on the back should be selected for this installa-tion mode. The skimmer is hung on the aquarium edgefrom the outside using the holder bracket (5.9) (fig. 1).The locking screw (5.10) within the holder bracket servesonly for securing the skimmer and should be fastenedonly carefully. The water intake pipe (5.11) is pushedonto the water intake nozzle (5.12).
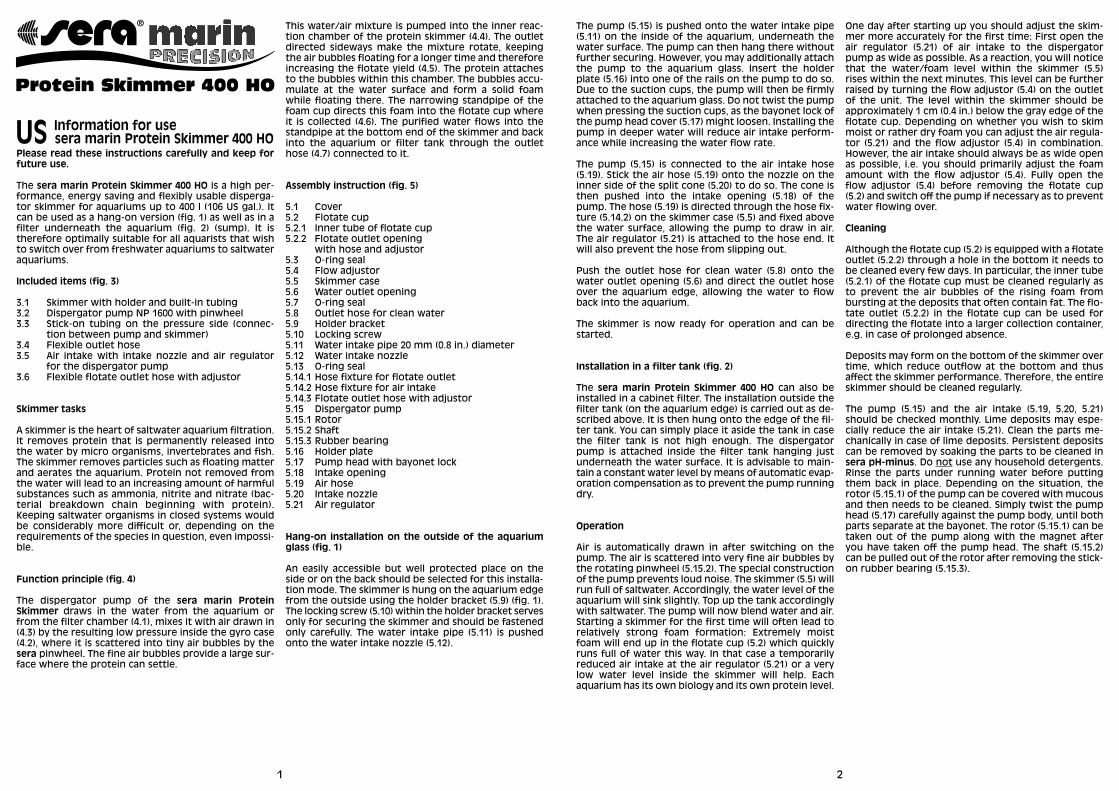
US Information for usesera marin Protein Skimmer 400 HO
Please read these instructions carefully and keep forfuture use.
Protein Skimmer 400 HO
12®

3 4
Spare parts:
Rotor with pinwheelCeramic shaft with rubber bearingsPump NP 1600 (complete) Flotate cup with coverO-ring seal for outlet
Disposal of the unit:
Waste electrical and electronic equipment (WEEE)must not get into domestic waste!If ever the unit cannot be used anymore, the consumeris legally obliged to hand in waste electrical and elec-tronic equipment (WEEE) separately from domesticwaste, e.g. at a collection point of his community/hisdistrict. This ensures that waste electrical and elec-tronic equipment (WEEE) is expertly processed andthat negative effects to the environment are avoided.
Therefore electrical and electronic equipment bears the following symbol:
Warranty:
When following the directions for use, the sera marinProtein Skimmer 400 HO will perform reliably. We areliable for the freedom from faults of our products onlywithin legal regulations beginning with the purchasedate.We are liable for complete flawlessness at delivery.Should usual wear and tear occur by use as intendedby us, this is not considered a defect. Warranty claimsare also excluded in this case. This particularly refers tothe running unit (rotor, shaft, rubber bearings) and thehoses.In every case of a defect we recommend that you con-sult the specialized retailer where you purchased theunit. He will be able to judge whether it is actually awarranty case. In case of sending the unit to us we willunnecessarily have to charge you for occurring costs.Any liability because of contract breach is limited tointent or gross negligence. sera will be liable in case ofslight negligence only in case of injuries to life, bodyand health, in case of essential contractual obligationsand with binding liability according to the product lia-bility code. In that case, the extent of liability is limitedto the replacement of contractually typically foreseea-ble damages.
Technical Data:
Width: 20.7 cm (8.2 in.)Height: 40 cm (15.8 in.)Depth: 18.6 cm (7.3 in.)Volume: approx. 3 l (0.8 US gal.)
Pump: NP 1600220 – 240 V ~ 50 Hz, 20 Wmax. 40°C (104°F)
Hmax: 1.2 m (3.9 ft.)Qmax: 1,400 l/h (369 US gal./h)IPX8: up to 1 m (3.3 ft.) water depth
Troubleshooting:
Problem Possible cause Troubleshooting
Insufficient air intake rate Intake valve (5.21) insufficiently o-pened
Open intake valve (5.21) further
Air hose (5.19) is encrusted withlime or dirty
Clean
Intake nozzle (5.18) on the pump isdirty
Pull off and clean
Pump performance is too low Clean rotor and shaftFoam too moist/too much foam
Water level within the unit is toohigh
Open flow adjustor (5.4) further
Too much air Close intake valve (5.21) further, first try to adjust with the flowadjustor (5.4)
Foam too dry/very viscous foam
Water level within the unit is toolow
Slightly reduce flow rate at the flowadjustor (5.4)
Insufficient pump performance Clean rotor, shaft and intake nozzle
Insufficient foam formation Insufficient amount of air Open intake valve (5.21) furtherFoam formation too strong, verybrownish flotate, very sticky foam
Water strongly polluted Partial water change, feed lesssee: Insufficient foam formation Increase flotate moisture
Foam formation breaks down Feeding fatty food (fish, mussels) Foam formation will begin againafter a few hours
Air intake congested Clean air intake or open further
SAFETY PRECAUTIONS:
Pull all mains plugs before every maintenance meas-ure in the aquarium!
The pump performance will considerably increase incase the air supply is suddenly switched off, the skim-mer can overflow, and large amounts of water may bepumped from the tank!
The sera marin Protein Skimmer 400 HO is an open flowunit. If the water flow back into the aquarium isobstructed or otherwise not possible, large amountsof water can be pumped from the aquarium and causewater damage.
1 m(3.3 ft.)

65
Protein Skimmer 400 HO
12®
1
2
3
3.1
3.6
3.4
3.2
3.3
3.5
4.7
4.3
4.6
4.24.5
4.1
4.4
4
55.1
5.2
5.2.1
5.14.3
5.2.2
5.3
5.4
5.5
5.6
5.7
5.8
5.9
5.10
5.11
5.15
5.16
5.17
5.17
5.20
5.21
5.19
5.18
5.18
5.14.2
5.14.1
5.125.13
5.15
5.15.1
5.15.2
5.15.3
Subject to technical alterations and errors
Update: 06.08US
7
21
Operation
Air is automatically drawn in after switching on thepump. The air is scattered into very fine air bubbles bythe rotating pinwheel (4.13.1). The special constructionof the pump prevents loud noise. The skimmer (4.5) willrun full of saltwater. Accordingly, the water level of theaquarium will sink slightly. Top up the tank accordinglywith saltwater. The pump will now blend water and air.Starting a skimmer for the first time will often lead torelatively strong foam formation: Extremely moistfoam will end up in the flotate cup (4.2) which quicklyruns full of water this way. In that case a temporarilyreduced air intake at the air regulator (4.19) or a verylow water level inside the skimmer will help. Eachaquarium has its own biology and its own protein level.
One day after starting up you should adjust the skim-mer more accurately for the first time: First open theair regulator (4.19) of air intake to the dispergatorpump as wide as possible. As a reaction, you will noticethat the water/foam level within the skimmer (4.5)rises within the next minutes. This level can be furtherraised by turning the flow adjustor (4.4) on the outletof the unit. The level within the skimmer should beapproximately 1 cm (0.4 in.) below the gray edge of theflotate cup. Depending on whether you wish to skimmoist or rather dry foam you can adjust the air regula-tor (4.19) and the flow adjustor (4.4) in combination.However, the air intake should always be as wide openas possible, i.e. you should primarily adjust the foamamount with the flow adjustor (4.4). Fully open theflow adjustor (4.4) before removing the flotate cup(4.2) and switch off the pump if necessary as to preventwater flowing over.
Cleaning
Although the flotate cup (4.2) is equipped with a flotateoutlet (4.2.2) through a hole in the bottom it needs tobe cleaned every few days. In particular, the inner tube(4.2.1) of the flotate cup must be cleaned regularly asto prevent the air bubbles of the rising foam frombursting at the deposits that often contain fat. The flo-tate outlet (4.2.2) in the flotate cup can be used fordirecting the flotate into a larger collection container,e.g. in case of prolonged absence.
Deposits may form on the bottom of the skimmer overtime, which reduce outflow at the bottom and thusaffect the skimmer performance. Therefore, the entireskimmer should be cleaned regularly.
The pump (4.13) and the air intake (4.17, 4.18, 4.19)should be checked monthly. Lime deposits may espe-cially reduce the air intake (4.19). Clean the parts me-chanically in case of lime deposits. Persistent depositscan be removed by soaking the parts to be cleaned insera pH-minus. Do not use any household detergents.Rinse the parts under running water before puttingthem back in place. Depending on the situation, therotor (4.13.1) of the pump can be covered with mucousand then needs to be cleaned. Simply twist the pumphead (4.15) carefully against the pump body, until bothparts separate at the bayonet. The rotor (4.13.1) can betaken out of the pump along with the magnet afteryou have taken off the pump head. The shaft (4.13.2)can be pulled out of the rotor after removing the stick-on rubber bearing (4.13.3).
SAFETY PRECAUTIONS:
Pull all mains plugs before every maintenance meas-ure in the aquarium!
The pump performance will considerably increase incase the air supply is suddenly switched off, the skim-mer can overflow, and large amounts of water may bepumped from the tank!
The sera marin Protein Skimmer 600 S is an open flowunit. If the water flow back into the aquarium isobstructed or otherwise not possible, large amountsof water can be pumped from the aquarium and causewater damage.
The sera marin Protein Skimmer 600 S is a high per-formance, energy saving dispergator skimmer for fil-ters underneath the aquarium (so-called filter sump). Itis easy to operate and suitable for aquariums up to600 liters (159 US gal.).
Included items (fig. 2)
2.1 Skimmer with hose connectors2.2 Dispergator pump NP 1600 with pinwheel2.3 Connecting hose2.4 Flexible outlet hose2.5 Air intake with intake nozzle and air regulator
for the dispergator pump2.6 Flexible flotate outlet hose with adjustor
Skimmer tasks
A skimmer is the heart of saltwater aquarium filtration.It removes protein that is permanently released intothe water by micro organisms, invertebrates and fish.The skimmer removes particles such as floating matterand aerates the aquarium. Protein not removed fromthe water will lead to an increasing amount of harmfulsubstances such as ammonia, nitrite and nitrate (bac-terial breakdown chain beginning with protein).Keeping saltwater organisms in closed systems wouldbe considerably more difficult or, depending on therequirements of the species in question, even impossi-ble.
Function principle (fig. 3)
The dispergator pump of the sera marin ProteinSkimmer draws in the water from the aquarium orfrom the filter chamber (3.1), mixes it with air drawn in(3.3) by the resulting low pressure inside the gyro case(3.2), where it is scattered into tiny air bubbles by thesera pinwheel. The fine air bubbles provide a large sur-face where the protein can settle.
This water/air mixture is pumped into the inner reac-tion chamber of the protein skimmer (3.4). The outletdirected sideways make the mixture rotate, keepingthe air bubbles floating for a longer time and thereforeincreasing the flotate yield (3.5). The protein attachesto the bubbles within this chamber. The bubbles accu-mulate at the water surface and form a solid foamwhile floating there. The narrowing standpipe of thefoam cup directs this foam into the flotate cup whereit is collected (3.6). The purified water flows into thestandpipe at the bottom end of the skimmer and backinto the aquarium or filter tank through the outlethose (3.7) connected to it.
Assembly instruction (fig. 4)
4.1 Cover4.2 Flotate cup4.2.1 Inner tube of flotate cup4.2.2 Flotate outlet opening
with hose and adjustor4.3 O-ring seal4.4 Flow adjustor4.5 Skimmer case4.6 Water outlet opening4.7 O-ring seal 4.8 Outlet hose for clean water4.9 Hose connection4.10 Water intake nozzle4.11 O-ring seal4.12.1 Hose fixture for flotate outlet4.12.2 Hose fixture for air intake4.12.3 Flotate outlet hose with adjustor4.13 Dispergator pump4.13.1 Rotor4.13.2 Shaft4.13.3 Rubber bearing4.14 Holder plate4.15 Pump head with bayonet lock4.16 Intake opening4.17 Air hose4.18 Intake nozzle4.19 Air regulator
Installation in a filter tank (fig. 1)
The sera marin Protein Skimmer 600 S is installed in acabinet filter. To do so, the pump (on the holder plate4.14) is connected to the skimmer by means of theincluded piece of hose before it is placed in the filtersump (fig. 1). The recommended water level in the fil-ter sump is between at least 10 cm (4 in.) and max.20 cm (8 in.). It is advisable to maintain a constant waterlevel by means of automatic evaporation compensa-tion as to prevent the pump running dry.
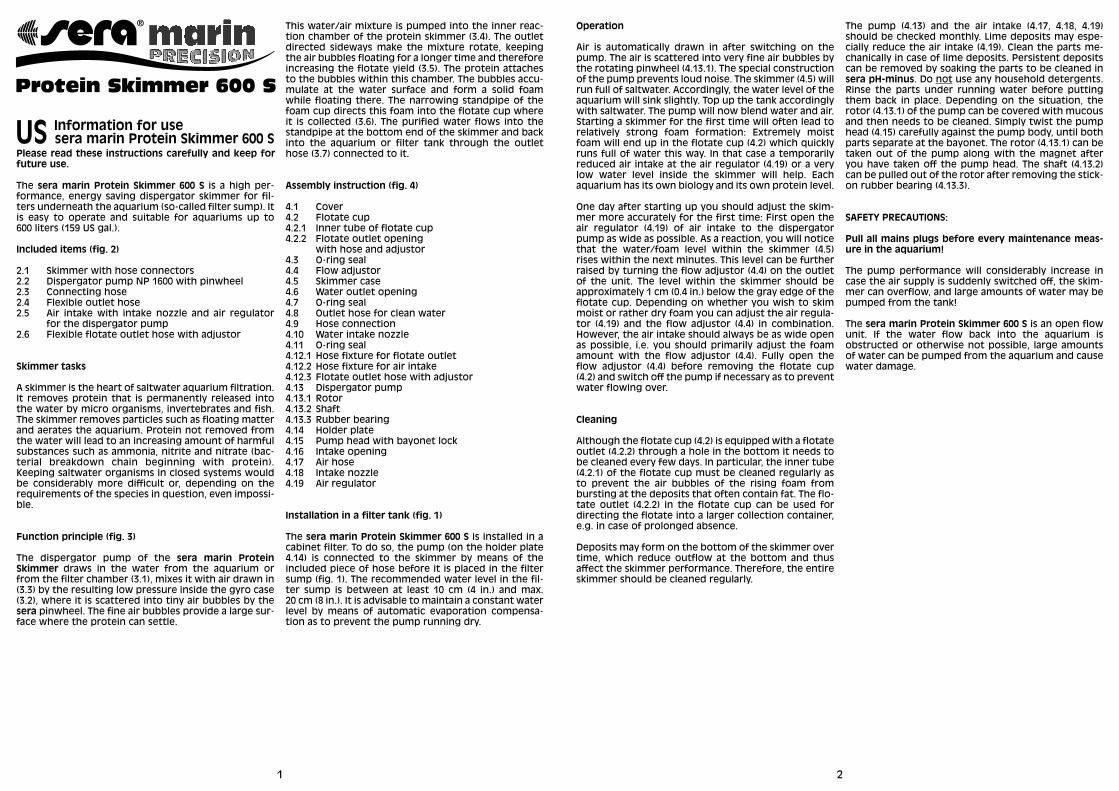
US Information for usesera marin Protein Skimmer 600 S
Please read these instructions carefully and keep forfuture use.
Protein Skimmer 600 S
12®

3 4
Technical Data:
Height: 50.8 cm (20 in.)Width: 16.6 cm (6.5 in.)Depth: 18.6 cm (7.3 in.)Volume: approx. 3.3 l (0.8 US gal.)
Pump: NP 1600220 – 240 V ~ 50 Hz, 20 Wmax. 40°C (104°F)
Hmax: 1.2 m (3.9 ft.)Qmax: 1,400 l/h (369 US gal./h)IPX8: up to 1 m (3.3 ft.) water depth
Troubleshooting: Spare parts:
Rotor with pinwheelCeramic shaft with rubber bearingsPump NP 1600 (complete)Flotate cup with coverO-ring seal for outlet
Disposal of the unit:
Waste electrical and electronic equipment (WEEE)must not get into domestic waste!If ever the unit cannot be used anymore, the consumeris legally obliged to hand in waste electrical and elec-tronic equipment (WEEE) separately from domesticwaste, e.g. at a collection point of his community/hisdistrict. This ensures that waste electrical and elec-tronic equipment (WEEE) is expertly processed andthat negative effects to the environment are avoided.
Therefore electrical and electronic equipment bears the following symbol:
Warranty:
When following the directions for use, the sera marinProtein Skimmer 600 S will perform reliably. We are lia-ble for the freedom from faults of our products onlywithin legal regulations beginning with the purchasedate.We are liable for complete flawlessness at delivery.Should usual wear and tear occur by use as intendedby us, this is not considered a defect. Warranty claimsare also excluded in this case. This particularly refers tothe running unit (rotor, shaft, rubber bearings) and thehoses.In every case of a defect we recommend that you con-sult the specialized retailer where you purchased theunit. He will be able to judge whether it is actually awarranty case. In case of sending the unit to us we willunnecessarily have to charge you for occurring costs.Any liability because of contract breach is limited tointent or gross negligence. sera will be liable in case ofslight negligence only in case of injuries to life, bodyand health, in case of essential contractual obligationsand with binding liability according to the product lia-bility code. In that case, the extent of liability is limitedto the replacement of contractually typically foreseea-ble damages.
Problem Possible cause Troubleshooting
Insufficient air intake rate Intake valve (4.19) insufficiently o-pened
Open intake valve (4.19) further
Air hose (4.17) is encrusted withlime or dirty
Clean
Intake nozzle (4.16) on the pump isdirty
Pull off and clean
Pump performance is too low Clean rotor and shaftFoam too moist/too much foam
Water level within the unit is toohigh
Open flow adjustor (4.4) further
Too much air Close intake valve (4.19) further, first try to adjust with the flowadjustor (4.4)
Foam too dry/very viscous foam
Water level within the unit is toolow
Slightly reduce flow rate at the flowadjustor (4.4)
Insufficient pump performance Clean rotor, shaft and intake nozzle
Insufficient foam formation Insufficient amount of air Open intake valve (4.19) furtherFoam formation too strong, verybrownish flotate, very sticky foam
Water strongly polluted Partial water change, feed lesssee: Insufficient foam formation Increase flotate moisture
Foam formation breaks down Feeding fatty food (fish, mussels) Foam formation will begin againafter a few hours
Air intake congested Clean air intake or open further
1 m(3.3 ft.)

65
1
2.1 2.6
2.4
2.2
2.3
2.5
3.7
3.3
3.6
3.23.5
3.1
3.4
4
4.1
4.2
4.2.1
4.12.34.2.2
4.3
4.4
4.5
4.6
4.7
4.8
4.9
4.13
4.14
4.15
4.15
4.18
4.19
4.17
4.16
4.16
4.12.2
4.12.1
4.10
4.11
4.13
4.13.1
4.13.2
4.13.3
2
Protein Skimmer 600 S
12®
3
Subject to technical alterations and errors
Update: 06.08US