Embed Size (px)
Citation preview
1200/1400 Series as standard iSCSI disk array
en Quick Installation Guide

1200/1400 Series as standard iSCSI disk array Table of Contents | en 3
Bosch Sicherheitssysteme GmbH Quick Installation Guide - | V1 | 2011.02
Table of Contents
1 Introduction 4
2 Setup Instruction 4
3 Setting the IP Address 43.1 Remote Desktop Connection 43.2 Physical Connection 6
4 Disabling the VRM Service 8
5 Standard System Configuration 9
6 Additional Software and Documentation 9
4 en | Introduction 1200/1400 Series as standard iSCSI disk array
- | V1 | 2011.02 Quick Installation Guide Bosch Sicherheitssysteme GmbH
1 IntroductionThe following installation describes how to use the Bosch DLA disk array series (1200/1400 series) as standard iSCSI disk array.The system is pre-installed with the Bosch Video Recording Manager (VRM). Using the system as standard iSCSI disk arrays, you must disable the VRM Service.
2 Setup InstructionAll Bosch DLA Series disk arrays are preconfigured with a default IP address and with defaultiSCSI settings.– IP Address: 10.10.10.10 (1st port) and 10.10.10.11 (2nd port)– Net mask: 255.255.255.0– User: Administrator– Password: WSS4BoschDetailed information, such as data sheets and user manuals, are available on the Bosch web site www.boschsecurity.com under Product Catalog > CCTV > IP Video > Disk Arrays.Default iSCSI settings are optimized for use with VRM. Only an experienced storage administrator should make changes to these settings. Changing the default configuration is only required either if VRM is not used or if the default settings are not appropriate for another Bosch iSCSI application.
3 Setting the IP AddressThe default IP address may be changed by either of two ways.
3.1 Remote Desktop Connection1. Connect the system to your network through port 1 or port 2 and start up the system.
The system comes with the Remote Desktop Connection enabled. Log on to an appropriate Client system either with Windows XP, Windows Vista or Windows 7 installed (Client hardware and software is not part of the shipment) with an IP Address in the same network, e.g. 10.10.10.12 (net mask: 255.255.255.0).
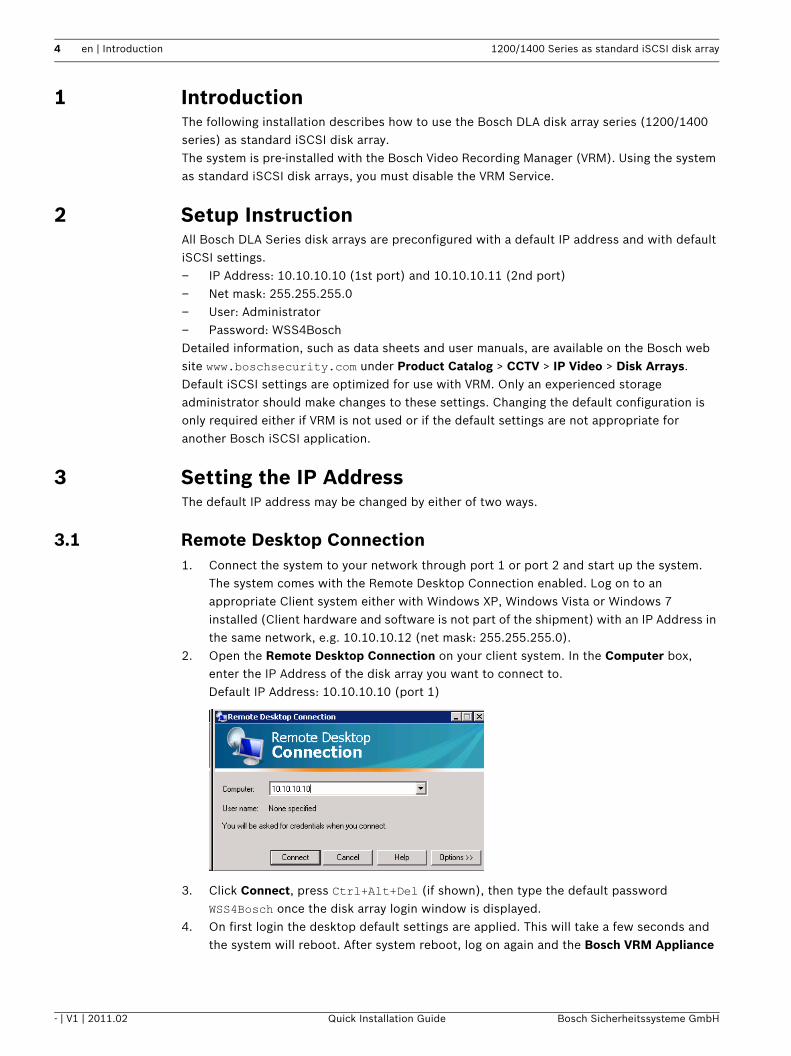
2. Open the Remote Desktop Connection on your client system. In the Computer box, enter the IP Address of the disk array you want to connect to.Default IP Address: 10.10.10.10 (port 1)
3. Click Connect, press Ctrl+Alt+Del (if shown), then type the default password WSS4Bosch once the disk array login window is displayed.
4. On first login the desktop default settings are applied. This will take a few seconds and the system will reboot. After system reboot, log on again and the Bosch VRM Appliance
1200/1400 Series as standard iSCSI disk array Setting the IP Address | en 5
Bosch Sicherheitssysteme GmbH Quick Installation Guide - | V1 | 2011.02
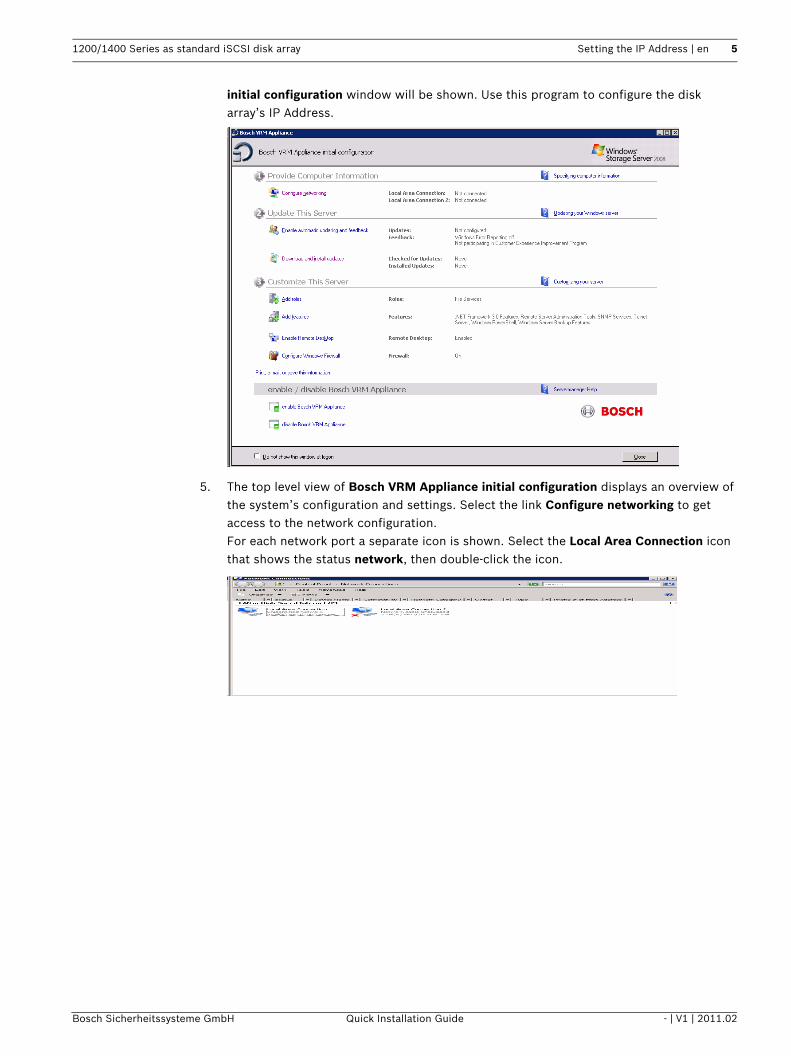
initial configuration window will be shown. Use this program to configure the disk array’s IP Address.
5. The top level view of Bosch VRM Appliance initial configuration displays an overview of the system’s configuration and settings. Select the link Configure networking to get access to the network configuration. For each network port a separate icon is shown. Select the Local Area Connection icon that shows the status network, then double-click the icon.
6 en | Setting the IP Address 1200/1400 Series as standard iSCSI disk array
- | V1 | 2011.02 Quick Installation Guide Bosch Sicherheitssysteme GmbH
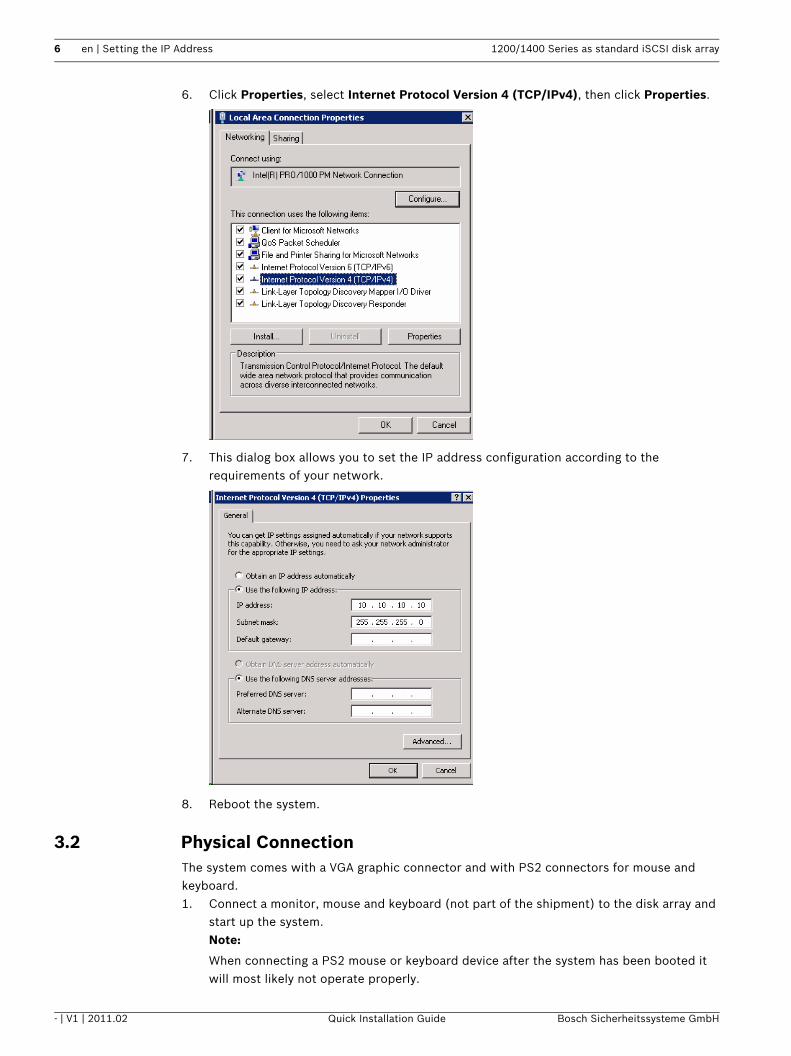
6. Click Properties, select Internet Protocol Version 4 (TCP/IPv4), then click Properties.
7. This dialog box allows you to set the IP address configuration according to the requirements of your network.
8. Reboot the system.
3.2 Physical ConnectionThe system comes with a VGA graphic connector and with PS2 connectors for mouse and keyboard.1. Connect a monitor, mouse and keyboard (not part of the shipment) to the disk array and
start up the system.Note:
When connecting a PS2 mouse or keyboard device after the system has been booted it will most likely not operate properly.
1200/1400 Series as standard iSCSI disk array Setting the IP Address | en 7
Bosch Sicherheitssysteme GmbH Quick Installation Guide - | V1 | 2011.02
2. When the system has started up, press Ctrl+Alt+Del, then type the default password WSS4Bosch once the disk array login window is displayed.
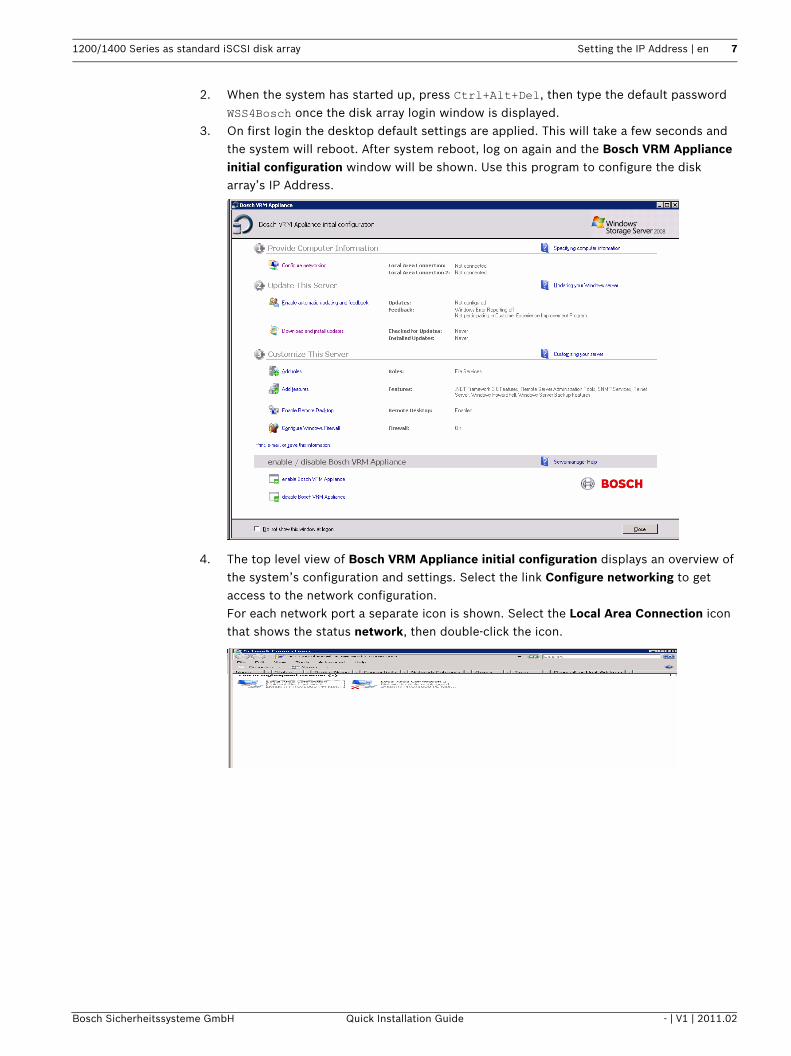
3. On first login the desktop default settings are applied. This will take a few seconds and the system will reboot. After system reboot, log on again and the Bosch VRM Appliance initial configuration window will be shown. Use this program to configure the disk array’s IP Address.
4. The top level view of Bosch VRM Appliance initial configuration displays an overview of the system’s configuration and settings. Select the link Configure networking to get access to the network configuration. For each network port a separate icon is shown. Select the Local Area Connection icon that shows the status network, then double-click the icon.
8 en | Disabling the VRM Service 1200/1400 Series as standard iSCSI disk array
- | V1 | 2011.02 Quick Installation Guide Bosch Sicherheitssysteme GmbH
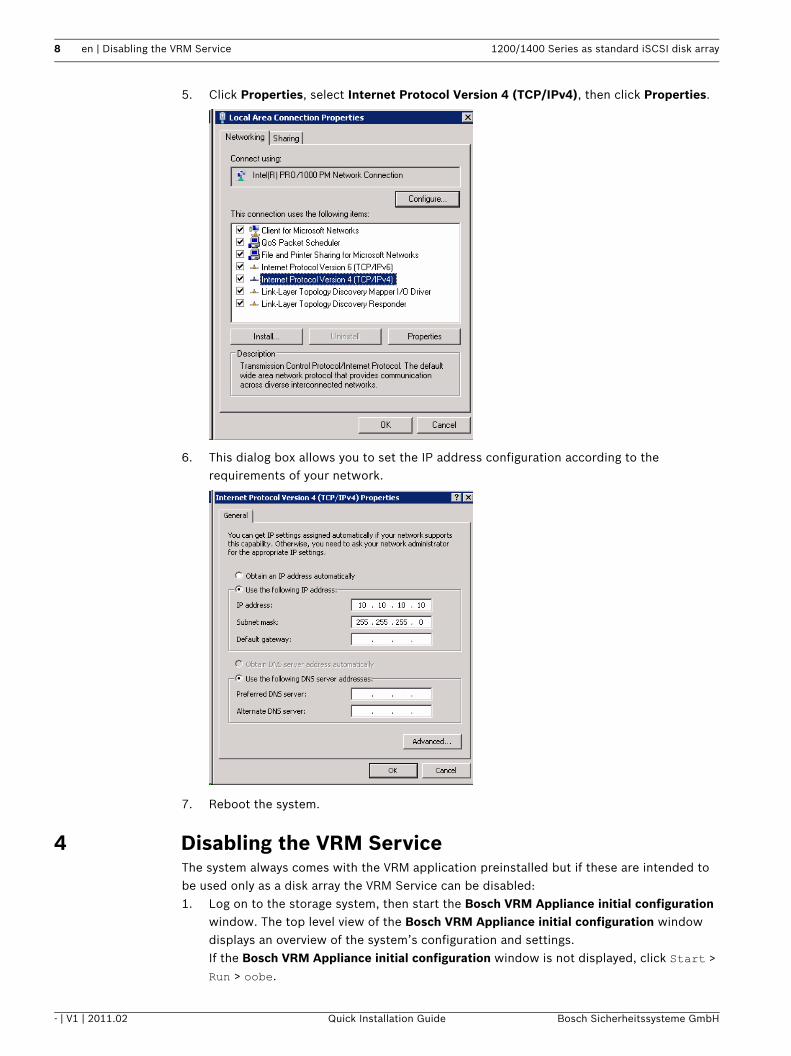
5. Click Properties, select Internet Protocol Version 4 (TCP/IPv4), then click Properties.
6. This dialog box allows you to set the IP address configuration according to the requirements of your network.
7. Reboot the system.
4 Disabling the VRM ServiceThe system always comes with the VRM application preinstalled but if these are intended to be used only as a disk array the VRM Service can be disabled:1. Log on to the storage system, then start the Bosch VRM Appliance initial configuration
window. The top level view of the Bosch VRM Appliance initial configuration window displays an overview of the system’s configuration and settings.If the Bosch VRM Appliance initial configuration window is not displayed, click Start > Run > oobe.
1200/1400 Series as standard iSCSI disk array Standard System Configuration | en 9
Bosch Sicherheitssysteme GmbH Quick Installation Guide - | V1 | 2011.02
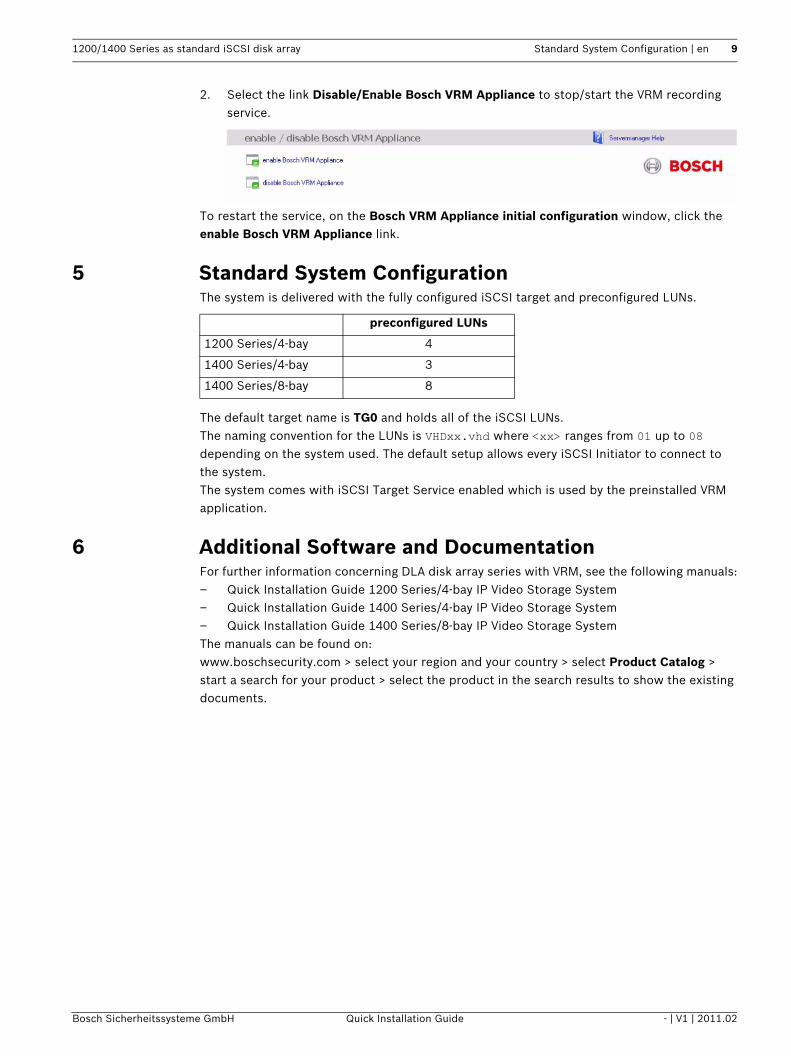
2. Select the link Disable/Enable Bosch VRM Appliance to stop/start the VRM recording service.
To restart the service, on the Bosch VRM Appliance initial configuration window, click the enable Bosch VRM Appliance link.
5 Standard System ConfigurationThe system is delivered with the fully configured iSCSI target and preconfigured LUNs.
The default target name is TG0 and holds all of the iSCSI LUNs.The naming convention for the LUNs is VHDxx.vhd where <xx> ranges from 01 up to 08 depending on the system used. The default setup allows every iSCSI Initiator to connect to the system.The system comes with iSCSI Target Service enabled which is used by the preinstalled VRM application.
6 Additional Software and DocumentationFor further information concerning DLA disk array series with VRM, see the following manuals:– Quick Installation Guide 1200 Series/4-bay IP Video Storage System– Quick Installation Guide 1400 Series/4-bay IP Video Storage System– Quick Installation Guide 1400 Series/8-bay IP Video Storage SystemThe manuals can be found on:www.boschsecurity.com > select your region and your country > select Product Catalog > start a search for your product > select the product in the search results to show the existing documents.
preconfigured LUNs
1200 Series/4-bay 4
1400 Series/4-bay 3
1400 Series/8-bay 8
10 en | Additional Software and Documentation 1200/1400 Series as standard iSCSI disk array
- | V1 | 2011.02 Quick Installation Guide Bosch Sicherheitssysteme GmbH

Bosch Sicherheitssysteme GmbHWerner-von-Siemens-Ring 1085630 GrasbrunnGermanywww.boschsecurity.com© Bosch Sicherheitssysteme GmbH, 2011