Embed Size (px)
Citation preview
Customer Service - If you are missing parts or have any questions about this product please contact
us at 1-800-762-1751
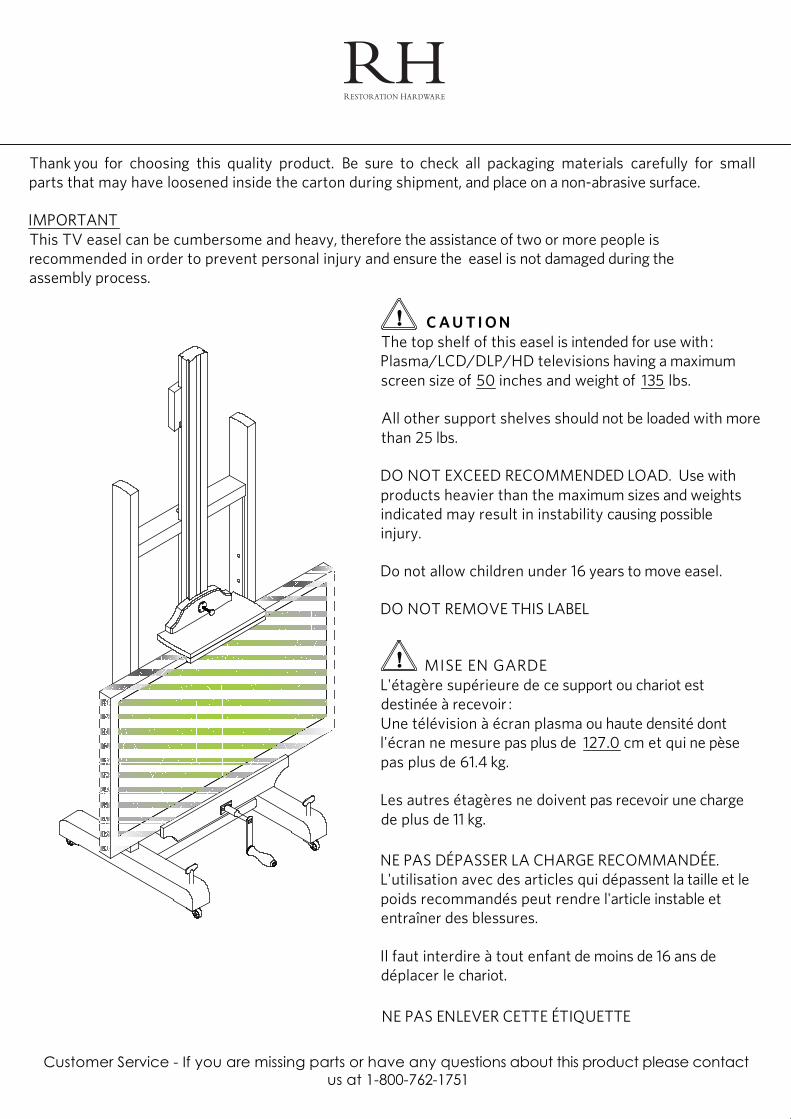
Thank you for choosing this quality product. Be sure to check all packaging materials carefully for smallparts that may have loosened inside the carton during shipment, and place on a non-abrasive surface.
IMPORTANTThis TV easel can be cumbersome and heavy, therefore the assistance of two or more people isrecommended in order to prevent personal injury and ensure the easel is not damaged during theassembly process.
C A U T I O N
The top shelf of this easel is intended for use with :Plasma/LCD/DLP/HD televisions having a maximumscreen size of 50 inches and weight of 135 lbs.
All other support shelves should not be loaded with morethan 25 lbs.
DO NOT EXCEED RECOMMENDED LOAD. Use withproducts heavier than the maximum sizes and weightsindicated may result in instability causing possibleinjury.
Do not allow children under 16 years to move easel.
DO NOT REMOVE THIS LABEL
MISE EN GARDEL'étagère supérieure de ce support ou chariot estdestinée à recevoir :Une télévision à écran plasma ou haute densité dontl'écran ne mesure pas plus de 127.0 cm et qui ne pèsepas plus de 61.4 kg.
Les autres étagères ne doivent pas recevoir une chargede plus de 11 kg.
NE PAS DÉPASSER LA CHARGE RECOMMANDÉE.L'utilisation avec des articles qui dépassent la taille et lepoids recommandés peut rendre l'article instable etentraîner des blessures.
Il faut interdire à tout enfant de moins de 16 ans dedéplacer le chariot.
NE PAS ENLEVER CETTE ÉTIQUETTE
!
!
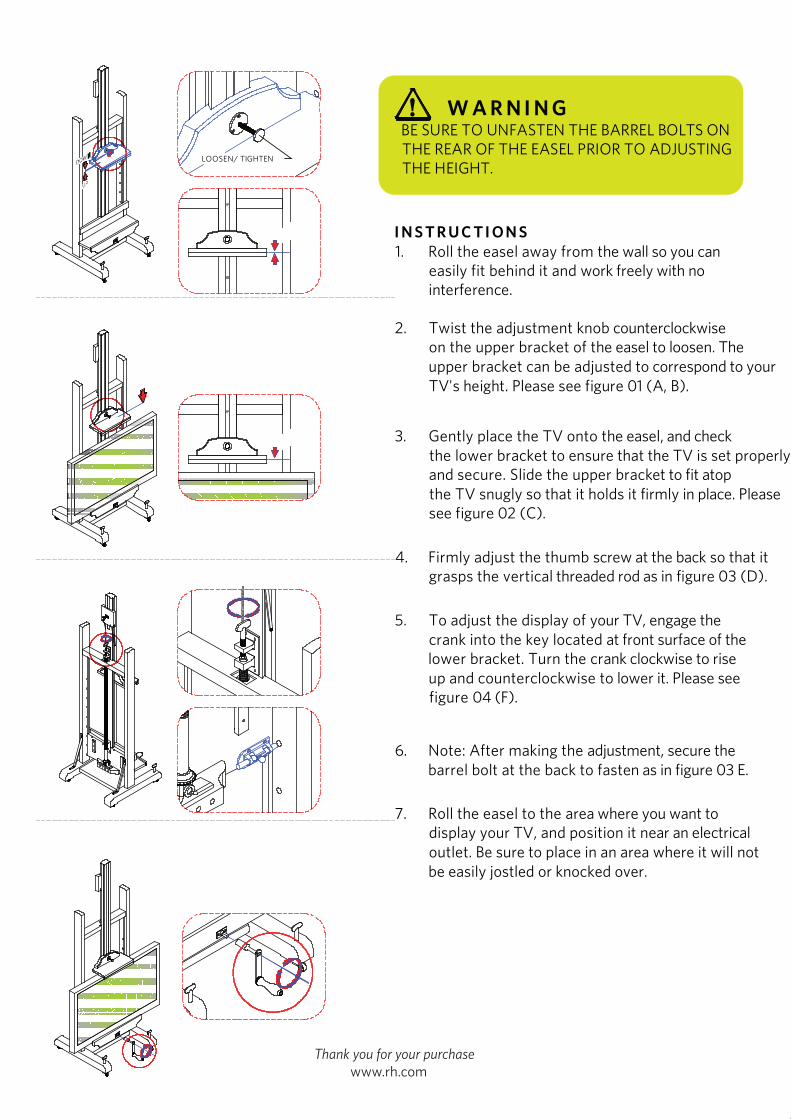
LOOSEN/ TIGHTEN
I N S T R U C T I O N S
1. Roll the easel away from the wall so you caneasily fit behind it and work freely with nointerference.
2. Twist the adjustment knob counterclockwiseon the upper bracket of the easel to loosen. Theupper bracket can be adjusted to correspond to yourTV's height. Please see figure 01 (A, B).
3. Gently place the TV onto the easel, and checkthe lower bracket to ensure that the TV is set properly if the TV is set properly andand secure. Slide the upper bracket to fit atopthe TV snugly so that it holds it firmly in place. Pleasesee figure 02 (C).
4. Firmly adjust the thumb screw at the back so that itgrasps the vertical threaded rod as in figure 03 (D).
5. To adjust the display of your TV, engage thecrank into the key located at front surface of thelower bracket. Turn the crank clockwise to riseup and counterclockwise to lower it. Please seefigure 04 (F).
6. Note: After making the adjustment, secure thebarrel bolt at the back to fasten as in figure 03 E.
7. Roll the easel to the area where you want todisplay your TV, and position it near an electricaloutlet. Be sure to place in an area where it will not
be easily jostled or knocked over.
FIGURE 01
FIGURE 02
FIGURE 03
FIGURE 04
A
B
C
D
F
E
W A R N I N GBE SURE TO UNFASTEN THE BARREL BOLTS ONTHE REAR OF THE EASEL PRIOR TO ADJUSTINGTHE HEIGHT.
!
DOWN
UP
DOWN
Thank you for your purchase
www.rh.com