Embed Size (px)
Citation preview

1 2013 Pottery Making Illustrated Media Kit
editorial eXPerts and contents
media Kit 2013

2 2013 Pottery Making Illustrated Media Kit
Time To Celebrate
Welcome
In 2013, Pottery Making Illustrated celebrates its 15th anniversary. Since the first issue was published in 1998, the magazine has filled a much needed spot in the world of ceramic art by offering studio potters timely information on materials, techniques, supplies and equipment.
Beginning as a quarterly with 3,500 subscribers, we’ve increased the frequency to six times a year, and more than tripled the circulation. Being able to provide more information to more potters more often has been one of our proudest achievements.
Since we began, many things have changed in the world. The once fledgling internet is now a major influence in our lives, and the handheld device revolution will be a major factor for everyone in the next 15 years.
But clay? It maintains its place in our fast-paced digital world as a haven for people, young and old alike, to take refuge in a tactile real world that engages all the senses as no other craft can.
In 2013, PMI readers will spend at least as much, if not more, time and resources on ceramics. Our commitment is to see that Pottery Making Illustrated continues to meet their needs so that their time in the studio continues to be enjoyable.
Bill JonesEditor
Charlie SpahrPublisher
CONTENTS
Our Readers 3
Your Audience 4
Reader Activities 5
Purchasing Activities 6
Editorial Mission 8
2013 Editorial Calendar 9
2013 Advertising Rates 10
Production Specs 11
Ceramic Arts 2014 12
Ceramic Arts Guides 13
Ceramic Arts Daily 14
Contact Information 16
Artist: Lisa Pedolsky

3 2013 Pottery Making Illustrated Media Kit
our readers
47%Very Effective
40%Effective
0.3% Not Very Effective12.6%
Somewhat Effective
Artist: Nick Ramey
Source: Pottery Making Illustrator subscriber survey July 2012.
9% Beginner (learning
fundamentals)
60%Intermediate
(mastered some aspects)
31% Advanced (mastered
most aspects)
Types of readers*
* Individuals can be in more than one category
Professionals (derive income) 49%
Educators/teachers 31%
Enthusiasts 55%
Pmi is a Great tool for learninG
An overwhelming majority of readers feel PMI is effective for learning about ceramic arts-related tools and supplies.
Skill level in making ceramic art

4 2013 Pottery Making Illustrated Media Kit
Your audience
Pottery Making Illustrated primary subscribers + pass-along recipients
Total paid/requested circulation 14,771
Average pass-along recipients/copy 2.97
Total pass-along recipients/issue 43,867
TOTAL MARKET REACH 58,638
From the Publisher’s Statement for the September/October 2012 issue. Pass-along information from the Pottery Making Illustrated subscriber survey July 2012.
Pottery Making Illustrated subscribers save issues for future reference
Pottery Making Illustrated subscribers go through most or all of every issue
Source: Pottery Making Illustrated subscriber survey July 2012.
Front to back 80%
Look at most pages 18%
Look at half the pages 1.2%
Look at less than half the pages 0.7%
Pmi reaches More SubSCriberS
3% Save half the issues
10% Save most
issues3%
Save less than half the issues
84% Save all issues
Pottery Making Illustrated reaches
more than 58,000 subscribers and
pass-along readers. In addition to the
paid monthly circulation and retail
distribution, Pottery Making Illustrated
also offers bonus distribution at
high-profile art conferences including,
NCECA, community centers, workshops
and events.
Artist: Sam Scott

5 2013 Pottery Making Illustrated Media Kit
reader activities
PMI subscribers teach and train others*
*Individuals can be in more than one category
Delivering presentations at exhibitions 31%
Teaching courses 42%
Teaching workshops, seminars 36%
UPGRADE YOUR KILN➊ Save MoneyL&L Kilns last years longer because the hard element holders
protect the brick. Also we protect the electronic controls by
keeping them away from the heat. Everything about the
kiln is built with EXTRA materials and care. We don’t
cost less but you get a lot more for your money.➋ Eminently RepairableAnyone can fix an L&L Kiln with a screwdriver and a
wrench. Our unique hard ceramic element holders make
changing elements something even a novice can do. Servicing an L&L control panel is a dream - it pulls down and stays perpendicular
to the kiln - for easy viewing and working.
➌ Shop!1) Google “L&L Kilns”!2) Call toll free 877.468.5456
and ask for a recommended Distributor.3) See hotkilns.com/distributors for a listing of Authorized L&L Distributors.
Toll Free: 877.468.5456Swedesboro, NJ 08085
L&L Kiln’s patented hard ceramic element holders protect your kiln.
SUMMERSPECIALBuy an L&L Kiln with a Furniture Kit and get a FREE Vent-Sure Down-draft vent
July/Aug 2012
Also in This Issue . . .Sculpting the FigureGo with the FlowSplit Personality
Nesting Bowls
May/June 2012
Also in
This Issue . . .
Coiling with Slabs
Fast-Firing Saggars
Throwing Bowls
Layer by
Layer
“I discovered L&L when I
bought a beautiful used L&L
kiln in the 1980’s that had been
built in the 1960’s. I used it for
years. These kilns keep looking
new for decades because of
the element holders. Now with
the zone control, they fire
absolutely evenly from top to
bottom. All of this excellent
engineering, along with their
reasonable prices, make L&L
the best electric kiln on the
market.”
Lisa Orr has been a
professional potter and student
of ceramics for over 25 years.
She completed an MFA at the
NYSCC at Alfred University in
1992 and later received grants
including a Fulbright and a
MAAA/NEA. Her work is in
numerous public and private
collections including the Fine
Arts Museum of San Francisco
and the San Angelo Museum
of Fine Arts. Currently she
teaches, lectures and shows
nationally.
Lisa Orr discovered L&L
in the 1980’s with a used
kiln built in the 1960’s.
Toll Free: 877.468.5456
L&L Kiln’s
patented
hard
ceramic
element
holders
protect your kiln.
Also in This Issue . . .Sculpting the FigureGo with the FlowSplit Personality
Nesting Bowls
Also in
This Issue . . .
Coiling with Slabs
Fast-Firing Saggars
Throwing Bowls
Layer by
Layer
Jan/Feb 2012
Also in This Issue . . .Making FlamewareBuilding AbstractionsPerfect Desserts
Pouring on the glaze
.5% Read half the issues
.5% Read less than half the issues
90% Read all issues
Pottery Making Illustrated subscribers read all or most of the issues
9% Read most
issues
38%1–10 day/mo.
25%21–31 day/mo.
37%11–20 day/mo.
PMI subscribers enjoy spending time in the studio each month
To Improve their skills, 84% of
Pottery Making Illustrated readers
expect to attend workshops in
the next two years.

6 2013 Pottery Making Illustrated Media Kit
Purchasing activities
Source: The Pottery Making Illustrated subscriber survey July 2012
Pottery Making Illustrated
subscribers expect to maintain
or increase their level of
spending for products and
services over the next two years.
95%Feel that PMI is a unique
medium to learn about techniques & tools
Readers rely on Pottery Making Illustrated
Trend in expenditures for next two yearsIncrease 32%
No Change 48%
Decrease 20%
Pottery Making Illustrated readers take action based on ads in the magazine
how advertiSinG workS For YoU
Discussed a product with others involved in ceramic arts 58%
Saved an advertisement for future reference 56%
Phoned or emailed an advertiser or visited their website 74%
Passed information in an ad onto other potters 46%
Other 1.8%
Artist: Lyla Goldstein
Artist: Courtney Murphy

7 2013 Pottery Making Illustrated Media Kit
Purchasing activities
Artist: Jen Mecca
Ownership of ceramic materials, tools, equipment and supplies
Prepared clay 95%
Raw materials 63%
Prepared glazes 75%
Hand tools 98%
Molds 49%
Clay mixers/pug mills 16%
Kilns 79%
Wheels 81%
Slab Rollers 47%
Extruders 39%
Studio furniture (racks, shelves, tables, etc.) 55%
aUdience buyinG Power
Currently Will Purchased in the likely/possibly within purchasing purchase within past 24 Mos. process next 24 Mos.
Prepared clay 64% 68% 44%
Raw materials 63% 56% 40%
Prepared glazes 62% 52% 48%
Hand tools 71% 49% 42%
Molds 67% 23% 36%
Clay mixers/pug mill 30% 9% 60%
Kilns 63% 10% 36%
Wheels 72% 12% 22%
Slab rollers 56% 8% 41%
Extruders 52% 3% 46%
Studio furniture 56% 20% 50%
Purchasing activities of PMI subscribers
Artist: Jen Mecca

8 2013 Pottery Making Illustrated Media Kit
editorial mission
12 PotteryMaking Illustrated | May/June 2012
tips from the prosClay Molds and Wildflowersby David Scott Smith
As artists, we are con-stantly reflecting on the motivations behind our
ceramics. Where does our work come from, and what makes our work (and us!) so unique and individual?
I have a love for flowers, especially wildflowers, that I can trace back to when I was a young boy. My step-grand-father, Charles Parsons, has always been a great inspiration for me—for 18 years he owned Coldwell Florist in Spokane, Washington, and after ‘retire-ment’ he worked for 15 years as Instructor of Horticulture at Spokane Community College. Floral design, plant propaga-tion, landscaping—these are all areas of Charlie’s expertise. But he also has a great love for plants that flower naturally in the wild, and some of my fond-est memories were chasing wild-flowers with my grandfather.
Wildflowers are usually as delicate as they are beautiful. Sometimes only a few inches tall, their cycles might last a brief couple of days to a week, and each warm spring day welcomes new growth, and new flowers. If you live in the mountains, you can follow blooms with the elevation as the snow recedes; but even the first few weeks of spring on the flatlands are a riot of flowers that will disappear with the heat of summer.
Capturing Delicate TexturesWhen I first started exploring mold-making in the early ’90s, I only worked with plaster. Try making a mold of a wildflower with plaster sometime—it’s a catastrophe. So for years I made molds of easily castable objects and shied away from plants and flowers. However, some years back I started using clay to make molds, which
opened up a whole new arena of possibilities.
We are all familiar with sprig molds, or simple stamps and rollers made with clay. However, there’s no reason why a bisque clay mold can’t be as large as you want (or as large as you can fire in your kiln). I’ve found that clay molds give you the opportu-nity to easily cast textures that are nearly impossible with plaster. I have clay molds of al-ligator skin, insects, tree bark, carpet, lace, braids of hair—and of course wildflowers!
The best part is, once you’ve made the mold, you can use it for just about anything. I’ll use the same mold for slab-built pots, lamps, fountains, tile, etc. And if you keep your molds clean (and never use a ‘release’ agent) they will last almost indefinitely. I remember when I first started using large clay molds I foolishly thought I had
developed the technique, and a professor showed me the work of Bernard Palissy (French ceramist, 1510–1590), not to mention the ceramic work of a dozen ancient cul-tures. People have been using clay molds for thousands of years, and if you buried your bisque molds below the frost line someone could dig them up in a thousand years and use them. In many respects, clay molds are superior to plaster, and certainly easier to make.
Making the MoldI prefer a smooth high-fire clay body for making bisque molds. For small or delicate flowers and leaves I use a slab about ¼-inch thick, but you can use a thicker slab for plants with more relief. First, carefully wipe the slab smooth of any texture; I use a lightly dampened sponge, but you can also use a rubber rib.
Charlie Parsons, the author’s grandfather, collect-ing and admiring wildflowers.
STEP-BY-STEP FORMATProfessional potters sharing their knowledge, techniques and projects in PMI’s unique well-illustrated step-by-step format.
INSTRUCTORS FILEPractical information and lesson plans educators can implement in their curriculum.
TIPS FROM THE PROSFocuses on tested techniques from professional potters who share their secrets.
FEATURE ARTICLES
Easy-to-follow and well-illustrated techniques allow readers to quickly learn new skills. With practical information on tools and supplies, they’re able to make sound decisions about what they need for even greater success.
24 PotteryMaking Illustrated | May/June 2012 PotteryMaking Illustrated | May/June 2012 25
The Process
After the base layer of stencils is secure, apply a layer of slip over the surface.
Drape a ½-inch thick clay slab over a bisque hump mold. Trim the edge and immediately attach a foot ring.
After allowing the clay to set up overnight, attach a coil rim to the platter.
Sgraffito areas of drawing into the surface. Note the crop duster stencil still under the slip.
Tack the first stencil down with water once you’re satis-fied with the placement.
Mask all areas that you want to remain bare with latex and let set for 24 hours under plastic.
When the surface returns to leather hard, peel the protec-tive latex coating off of the corn imagery.
Next remove all layers of stencils and clean up any areas where the slip bled under using a sgraffito tool.
If single firing, apply glaze prior to removing latex from the rim and foot.
Sgraffito in the corn tassels and any other details you would like to add.
Mask out any areas of corn that fall within the dust stencil using latex.
With the dust stencil set, brush under-glaze into the unprotected space.
Apply the canary stencils and more un-derglaze, then remove the bird stencils.
4 5
6 7
8 9
10 11 12
13 14
15 16
INSTRUCTORS FILE
PotteryMaking Illustrated | March/April 2012 41
instructors fileTy Johnson’s Bird Feedersby Annie Chrietzberg
Ty Johnson is a sculptor and a resident artist at the Eye of the Dog Art Center in San Marcos, Texas. His interest in functional sculpture has led him to
make bird feeders with chambers that hold, and then dis-pense bird seed as it’s consumed from a platform that’s usually the open mouth of a quirky clay creature.
Building the SnoutTy starts his clay pieces by making several 3⁄8-inch-thick slabs using a slab roller. He uses a coarse, open white-stoneware clay body with medium grog. After transfer-ring the slab to a ware board, he uses a metal rib held at a 45° angle to the slab and smooths the surface in criss-crossing strokes to both remove the canvas texture and to compress the surface. His intention is to add strength to the slabs and to thin them slightly. The final slabs used to construct the feeders are at least a 1⁄4-inch thick. Once the slabs are prepared, he cuts the shapes freehand.
To begin making a dog-shaped bird feeder, Ty cuts out an elongated, blunt triangle (figure 1), and domes it into the shape of a dog’s snout. This is going to the be the chamber that holds the bird seed, so he gives it a lot of volume. He sets the domed snout on another slab, traces and cuts around it, scores the two pieces, sprays the scored areas, and attaches the pieces (figure 2). Once those are together, he sets the larger semi-circular end (the back of the dog’s snout, toward the eyes) on another slab, and repeats the joining procedure to complete the seed chamber. He leaves an opening only at the nose, which is the filling point. Ty then cuts a half-circle hole
Cut out a blunt triangle from a prepared slab that is about 1/4 inch thick.
1Dome the blunt triangle, and attach it to another slab to make the dog’s snout, which will hold the bird seed.
2
Wild Thing Bird Feeders/ Spot Dog, 14 inches (36 cm) in length, medium grog stoneware, Spectrum high-fire white glaze with added yellow iron oxide, Spectrum high-fire black glaze, Mayco Stroke & Coat red and green color spots, fired to cone 9 electric.
into the back end that will dispense the seed into the back of mouth of the feeder (figure 3).
Next, he adds side slabs, looking something like dog jowls (figure 4), molding them into animated shapes. Now for the dental work, Ty pinches clay into fangs, cuts the ‘root’ of the teeth into penetrating angles, and plunges them into the jaw line to firmly set them (figure 5).
The base is the neck of the dog, and he makes this piece by cutting an 8-inch-diameter circle out of a slab, then
PotteryMaking Illustrated | May/June 2012 33
by Richard Phethean
M aking bowls requires different skills to mak-
ing cylindrical pots, with perhaps the most
significant difference being the switch of em-
phasis from the exterior outline of the form to
the interior surface and shape. Broadly speaking, all forms
develop from a narrower diameter than they have in their
final form, so where a cylinder grows from a cone shape,
a bowl grows from a flowerpot shape. We can of course make bowls with flat bases, but when
making a bowl with a rounded interior form, a second, dis-
tinct refining and finishing process is used at the leather-
hard stage. The process is known as trimming or turning,
and is used to create a ‘foot-ring’ on which the form stands.
Note that the shape of your centered clay needs to vary
according to the width of form you intend to make. In the
diagram on p. 34, the centered dome shape is superim-
posed over the cross sections of three generic forms.Throwing a Small BowlWhen you are making wider, open, or shallow forms, the
speed of the wheel needs to slow more, and slow sooner,
as the form grows, or the centrifugal force can cause the
pot to collapse. To make small bowls for cereal, soup, or
dessert, or for making tea cups and saucers, use around
350–650 grams of clay. Here I’m using 600 grams. The
clay has been centered into a slightly shallower dome,
hollowed down to about 12 mm (½ in.) and opened out
with a curved base.With the wheel turning at medium speed, lubricate the
wall inside and out and place your fingertips at the base of
the inside and outside of the opened ball (figure 1).
Lift the wall upwards into a flowerpot shape (figure 2).
I find the fingertips to be adequate, and more sensitive to
subtle variations in thickness, for throwing small bowl
shapes. Lightly compress the rim with your fingertips.
Slow the wheel for subsequent pulls. Gently flare the
walls outwards and take care not to over-thin the middle
(figure 3). You have reached the final width and height: A ‘V’ shape
rises from a curved interior base, sloping outwards gently
to the rim like the bell of a trumpet. It is always a good
idea to steady and reinforce the rim by briefly using the ‘H’
hold (finger inside, thumb outside, horizontal finger lightly
compressing the rim) (figure 4). Sponge dry the interior then use a rounded rib to form
the shape and finish the inside surface of the bowl (figure
5). Press the rib firmly into the center of the bowl, angled
slightly in the direction of the wheel’s spin, and slide up
into the wall with decreasing pressure to compress the clay
and to unify the curve of the base with the wall to cre-
ate a seamless, continuous shape. Support the wall on the
outside with the fingers of the right hand and form a con-
ThrowingBowls
PotteryMaking Illustrated | July/August 2012 17
by Judith Berk King
I’ve always been fascinated by early interpretations of
the natural world. Explorers and scientists depicted
insects, reptiles, and other creepy crawlies in their
natural habitats, hunting and devouring their prey.
While drawing these creatures, I began to put myself in
their shoes: What would I long to snack on if it were me?
How wonderful it would be to come upon a doughnut as
large as a chair, or to have it rain gumdrops!
A split personality is sometimes hard to deal with: What
to do when half of you wants to draw and paint, and
the other half wants the immense satisfaction of making
things in clay? At some point I had a eureka moment,
and realized that I could have it all by creating images
on a clay ‘canvas’. Through this daydream, a collision of
worlds has developed where Candy Land meets David At-
tenborough’s nature documentaries; where the repellent
encounter the delectable. Now the utilitarian ceramic ob-
ject becomes a canvas for a unique personal fantasy world
of scientific investigation and sumptuous tidbits, where
everyone gets their just desserts.
Making a Platter
My two-dimensional drawings tend
to be very precise, and I prefer white
earthenware to make the platters so the
drawings remain bright and crisp. I’ve
also found that a smoother surface is easier
to draw on using underglaze pencils, so using
a fine grogged clay and smoothing out the areas
where you plan to draw your images prior to drying
and bisque firing works best.
To build the platter, roll a slab of clay, place it on a hump
mold and trim it to a desired shape. Refine the seams and
edges, preserving some irregularities in the form and surface
that add to the character of the finished piece. Add three
feet with holes in them so that the platter can be either dis-
played flat or hung on the wall. Having three feet instead
of four ensures that it won’t wobble, and when hung up the
third foot keeps the platter parallel to the wall. Use a level
on each pair of feet while the platter is still upside down on
the mold to make sure the platter will sit flat when turned
right-side-up. Bisque fire the platter to cone 04.
Prepare the bisqued platter by brushing on a coat of a
diluted underglaze (figure 1) (a light golden underglaze is
used here) and then wiping off as much as possible with
a damp sponge. This accentuates any texture you’ve left
on the platter, giving the final image more depth. Once
thoroughly dry, the surface is ready for an image.
Creating and Preparing an Image
Drawing a detailed image on paper serves both as a pattern
for transfer to the bisqueware and as a reference for the
actual painting (figure 2). I create a drawing in pencil, scan
it into the computer, and then use Photoshop to finish the
work and scale it to the desired size. This step isn’t crucial
but it’s convenient. The design and color scheme can be re-
SPLITSPLITSPLITPersonality
Candy Rain reflects the artist’s daydreams about candy
raining down from the sky and her studio dreams of
combining her love of drawing and of clay.
PotteryMaking Illustrated
by Richard Phethean
M aking bowls requires different skills to mak-
ing cylindrical pots, with perhaps the most
significant difference being the switch of em-
phasis from the exterior outline of the form to
the interior surface and shape. Broadly speaking, all forms
develop from a narrower diameter than they have in their
final form, so where a cylinder grows from a cone shape,
a bowl grows from a flowerpot shape. We can of course make bowls with flat bases, but when
making a bowl with a rounded interior form, a second, dis-
tinct refining and finishing process is used at the leather-
hard stage. The process is known as trimming or turning,
and is used to create a ‘foot-ring’ on which the form stands.
Note that the shape of your centered clay needs to vary
according to the width of form you intend to make. In the
diagram on p. 34, the centered dome shape is superim-
posed over the cross sections of three generic forms.Throwing a Small BowlWhen you are making wider, open, or shallow forms, the
speed of the wheel needs to slow more, and slow sooner,
as the form grows, or the centrifugal force can cause the
pot to collapse. To make small bowls for cereal, soup, or
dessert, or for making tea cups and saucers, use around
350–650 grams of clay. Here I’m using 600 grams. The
clay has been centered into a slightly shallower dome,
hollowed down to about 12 mm (½ in.) and opened out
with a curved base.With the wheel turning at medium speed, lubricate the
wall inside and out and place your fingertips at the base of
the inside and outside of the opened ball (
Lift the wall upwards into a flowerpot shape (
I find the fingertips to be adequate, and more sensitive to
subtle variations in thickness, for throwing small bowl
shapes. Lightly compress the rim with your fingertips.
Slow the wheel for subsequent pulls. Gently flare the
walls outwards and take care not to over-thin the middle
(figure 3). You have reached the final width and height: A ‘V’ shape
rises from a curved interior base, sloping outwards gently
to the rim like the bell of a trumpet. It is always a good
idea to steady and reinforce the rim by briefly using the ‘H’
hold (finger inside, thumb outside, horizontal finger lightly
compressing the rim) (Sponge dry the interior then use a rounded rib to form
the shape and finish the inside surface of the bowl (
5). Press the rib firmly into the center of the bowl, angled
slightly in the direction of the wheel’s spin, and slide up
into the wall with decreasing pressure to compress the clay
and to unify the curve of the base with the wall to cre
ate a seamless, continuous shape. Support the wall on the
outside with the fingers of the right hand and form a con
BowlsBowls
350–650 grams of clay. Here I’m using 600 grams. The
clay has been centered into a slightly shallower dome,
PotteryMaking Illustrated | July/August 2012 17
Making a Platter
My two-dimensional drawings tend
to be very precise, and I prefer white
earthenware to make the platters so the
drawings remain bright and crisp. I’ve
also found that a smoother surface is easier
to draw on using underglaze pencils, so using
a fine grogged clay and smoothing out the areas
where you plan to draw your images prior to drying
and bisque firing works best.
To build the platter, roll a slab of clay, place it on a hump
mold and trim it to a desired shape. Refine the seams and
edges, preserving some irregularities in the form and surface
that add to the character of the finished piece. Add three
feet with holes in them so that the platter can be either dis-
played flat or hung on the wall. Having three feet instead
of four ensures that it won’t wobble, and when hung up the
third foot keeps the platter parallel to the wall. Use a level
on each pair of feet while the platter is still upside down on
the mold to make sure the platter will sit flat when turned
right-side-up. Bisque fire the platter to cone 04.
Prepare the bisqued platter by brushing on a coat of a
diluted underglaze (figure 1) (a light golden underglaze is
used here) and then wiping off as much as possible with
a damp sponge. This accentuates any texture you’ve left
on the platter, giving the final image more depth. Once
thoroughly dry, the surface is ready for an image.
Creating and Preparing an Image
Drawing a detailed image on paper serves both as a pattern
for transfer to the bisqueware and as a reference for the
actual painting (figure 2). I create a drawing in pencil, scan
it into the computer, and then use Photoshop to finish the
work and scale it to the desired size. This step isn’t crucial
but it’s convenient. The design and color scheme can be re-
PotteryMaking Illustrated | July/August 2012 29
A Question of balance by Edith Garcia
A rthur Gonzalez is a phenomenally prolific artist whose career has spanned more than 30 years. For the last five years Gonzalez has focused on retelling the tale of Pinocchio, creating works
that deal with the concept of truth and myth within so-ciety. Currently he is focusing on the writing of Frank Stella, and the notion that the common thread in all art is a displacement of atmosphere, which constitutes a figure/ground relationship or the subject/object relationship.
How did you get started in clay? I was trained as a photorealist painter; however, this pro-cess was too controlling and predictable to me. I needed to explore a more experimental practice. I was searching for another surface to paint onto. I theorized that an amor-phous shaped surface would force me to respond to the edge in a different manner and, as a consequence, I would be making art that was less predictable. After watching the ceramics instructors Robert Brady and Peter Vanden-berge at California State University in Sacramento, where I was studying, I realized that clay would be the perfect
material. Through observation, I learned to sling slabs into unpredictable shapes and then fired them. I would then oil paint on them with imagery that would appear to be responding to the various shapes of the clay canvas.
How would you describe your work?I realize that others classify me as a narrative artist but I actually see myself as a student of the nature of story. When the figure is placed in a context of relationship with other objects, formats, and space, the viewer is trained to subconsciously go into various modes of thinking. As a consequence, a need to relate to the work in a narrative manner is created. I explore this phenomenon. The work often has no true ‘story’; it is however primed for the nature of narrative. Lately, I have come to the realization that I am in league with personal symbolism as well. I now can see the power of the mutant symbol (the com-bination of morphing two or more symbols, creating a hybrid symbol). As a consequence I believe I can create a kind of ‘sentient’ symbol that will point the way to further meaning.
Works by Arthur Gonzalez in the 2009 Contemporary Monsters installation at Northern Clay Center in Minneapolis, show his interest in conveying enigmatic stories through both two dimensional imagery and sculptural figures. Photograph courtesy of the artist and the Northern Clay Center. Edith Garcia’s new book Ceramics and the Human Figure includes an interview with Gonzalez, as well as a description of how he builds his sculptures, which are excerpted here.
Pottery Making Illustrated is unique because it is 100% dedicated to tips, tools and techniques.

9 2013 Pottery Making Illustrated Media Kit
2013 editorial calendar
Issue Topic Reservation Deadline Materials Deadline Description/Bonus Distribution
January/February Texas Potters Features ceramic artists and potters from Texas and the techniques they use.
November 21, 2012 November 28, 2012 •Beginthenewyearshowcasingyourbestproducts and services. This issue features a variety of techniques from active Texas potters.
•Bonusdistribution:NCECA2013,Houston,TX
March/April Handbuilding Theslabroller,extruderandhandtoolsopenupaworldof opportunities for projects and ideas.
January 23, 2013 January 30, 2013 •Thisissuefocusesonhandbuildingtechniquesforbothsculpturalandfunctionalprojects.Lookforavariety of innovative techniques from the pros.
May/June Throwing Usingthewheelputsacreativespinonmakingallkindsofworkfromfunctional to sculptural.
March 27, 2013 April 3, 2013 •Assummerapproacheswe’llfocusonthewheelandthrowing.Proswillofferadviceandprovideinsightsonvarioustechniques.
July/August Mid-Range Alookatavarietyofforming,finishing,andfiringtechniques in the mid-range.
May 22, 2013 May 29, 2013 •Asceramicartistslookformoreopportunities,wepresentaseriesoftechniquesdealingwithmid-rangetemperatures–clay,glaze,decoratingandmore.
September/October Surface Decoration The surface offers as many opportunitiesasforming—one of our hottest topics!
July 24, 2013 July 31, 2013 •We’llexploredifferentaspectsofdecoratingandsomeoftheunusualtechniquesperfectedbytalented ceramic artists.
November/December Functional Step-by-steptechniquesformakingandfinishingprojects in time for the Holidays.
September 25, 2013 October 2, 2013 •Makingfunctionalworkrequirestherightforms,therightclaysandtherightglazes.We’lllookatwaystoimprovetheoddsofsuccessforthestudioartistintentonmakinggifts.

10 2013 Pottery Making Illustrated Media Kit
2013 advertising rates
Advertising ratesSIZES 1x 3x 6x 10x 13x 16x 19xFull page $1,720 1,635 1,465 1,345 1,265 1,170 1,0852/3 page $1,375 1,315 1,170 1,070 1,005 945 8651/2 page Island $1,235 1,155 1,035 960 905 825 7751/2 page $1,095 1,055 945 865 810 755 7001/3 page $ 865 825 740 685 640 590 5601/4 page $ 660 625 560 520 480 450 4251/6 page $ 495 480 435 410 365 350 315
Add color: $695 for full page $590 for 2/3 page, 1/2 island or 1/2 page $415 for 1/3 page, 1/4 page or 1/6 page
For Display Advertising, contact Mona Thiel at (614) 794-5834 or email at [email protected]. For Classified & Business Services advertising, contact Jan Moloney at (614) 794-5843 or email at [email protected].
issUe reserve bY maTerials dUe mail
Jan/Feb Nov. 21, 2012 Nov. 28, 2012 Dec. 18, 2012Mar/Apr Jan. 23, 2013 Jan. 30, 2013 Feb. 19, 2013May/Jun Mar. 27, 2013 Apr. 3, 2013 Apr. 23, 2013Jul/Aug May 22, 2013 May 29, 2013 June 18, 2013Sep/Oct July 24, 2013 July 31, 2013 Aug. 20, 2013Nov/Dec Sept. 25, 2013 Oct. 2, 2013 Oct. 22, 2013
Important dates
Information
eFFecTive daTeJanuary/February 2013 issueFreqUencYBimonthlycover raTesCovers are sold on a non-cancelable 4-color basis for the contract year. Rates for the second and third cover positions are the earned color rate plus 25%. The rate for cover four is the earned color rate plus 35%.
PreFerred PosiTionsPreferred positions are sold on a non-cancelable 4-color basis for the contract year. The rate for special positions is the earned color rate plus 10%.agencY commission & Terms15% of gross billing to recognized agencies on space, color and preferred position charges, provided payment is made within 30 days of the invoice date. Thereafter, gross rates apply, and a late fee of 11/2% monthly is assessed.
websiTe adverTisingSee pages 14 and 15 for details.inserTs and TiP-onsSubject to publisher approval. Stock and copy sample must be submitted to publisher by the first of the month, two months prior to the scheduled issue for publisher approval (for example, January 1 for a March/April issue). Contact the publisher for specifications, quantities, shipping instructions and rates.
Artist: Kip O’Krongly

11 2013 Pottery Making Illustrated Media Kit
Production sPecs
Ad sizes Specifi cations
FILES: A press-quality PDF is preferred (with all fonts embedded). Other fi le formats accepted are JPEG, TIFF, EPS and most major Macintosh page-layout programs.
FONTS: Type 1 fonts are required. TrueType fonts will be replaced with the closest match available.
ART: All placed images, graphics, logos, and fonts must be included.
RESOLUTION: Line art, 1200 dpi; color art, 300 dpi. Low-resolution images will be resampled to appropriate levels as needed.
COLOR: All color images must be set to CMyK output with no ICC or CIE color profi les attached. A hard-copy proof is required in order for color to be considered critical. The publisher cannot be held responsible for the reproduction quality if the proofi ng requirements are not met or if materials are submitted past closing date.
HALFTONES: Black-and-white halftones should be set to gray scale.
Files may be submitted on CD-ROM or FTP.
Please label artwork with the Issue Date, Advertiser Name, File Name.
For proofs and fi le transfer instructions, contact Jan Moloney at [email protected].
Mechanical requirements
Publication specifi cations➤ Publication trim size: 8 1/4 ” x 10 /”➤ Bleed: 1/” all around (full page ads only)➤ Live Matter: Keep 1/4 ” from trim edge (full page ads only)➤ Halftone Screen Requirements: 150-line screen➤ Type of Binding: Saddle stitch
Artists: Linda and Charlie Riggs
2 Facing pages 16 1/2" x 10 /"Full page 8 1/4" x 10 /"Full page (with bleed) 8 1/2” x 11 1/”2/3 page 4 /" x 10"1/2 page island 4 /" x 7 /"1/2 page (vertical) 3 /" x 10"1/2 page (horizontal) 7" x 4 /"1/3 page (vertical) 2 1/4 " x 10"1/3 square 4 /" x 4 /"1/4 page 3 /" x 4 /"1/6 page 2 1/4 " x 4 /"
12 2013 Pottery Making Illustrated Media Kit
ceramic arts 2014
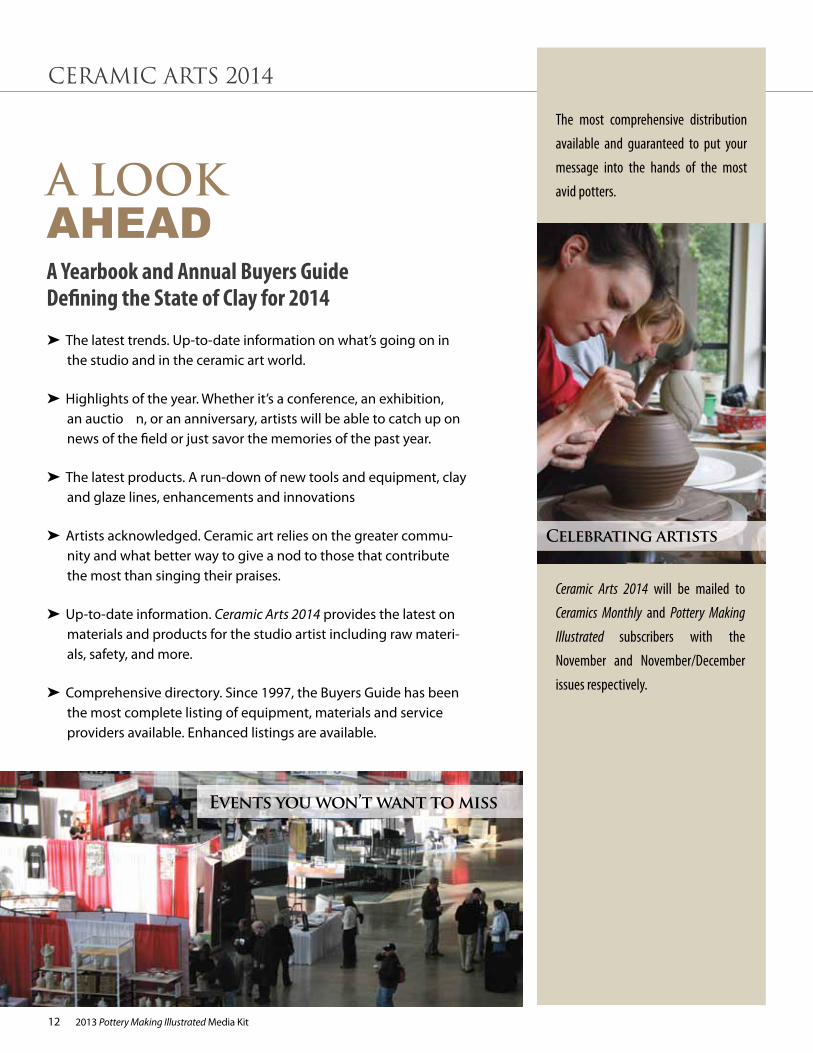
events you won’t want to miss
celebrating artists
Ceramic Arts 2014 will be mailed to
Ceramics Monthly and Pottery Making
Illustrated subscribers with the
November and November/December
issues respectively.
The most comprehensive distribution
available and guaranteed to put your
message into the hands of the most
avid potters.
➤ The latest trends. Up-to-date information on what’s going on in the studio and in the ceramic art world.
➤ Highlights of the year. Whether it’s a conference, an exhibition, an auctio n, or an anniversary, artists will be able to catch up on news of the fi eld or just savor the memories of the past year.
➤ The latest products. A run-down of new tools and equipment, clay and glaze lines, enhancements and innovations
➤ Artists acknowledged. Ceramic art relies on the greater commu-nity and what better way to give a nod to those that contribute the most than singing their praises.
➤ Up-to-date information. Ceramic Arts 2014 provides the latest on materials and products for the studio artist including raw materi-als, safety, and more.
➤ Comprehensive directory. Since 1997, the Buyers Guide has been the most complete listing of equipment, materials and service providers available. Enhanced listings are available.
A Yearbook and Annual Buyers Guide Defi ning the State of Clay for 2014
a looKaHead

13 2013 Pottery Making Illustrated Media Kit
2013 arts guides
CLAY WORKSHOP HANDBOOK advertising ratesSIZES 1x 3x 6x 10x 13x 16x 19xFull Page $1,720 1,635 1,465 1,345 1,265 1,170 1,0852/3 Page $1,375 1,315 1,170 1,070 1,005 945 8651/2 Page Island $1,235 1,155 1,035 960 905 825 7751/2 Page $1,095 1,055 945 865 810 755 7001/3 Page $ 865 825 740 685 640 590 5601/4 Page $ 660 625 560 520 480 450 4251/6 Page $ 495 480 435 410 365 350 315
Add color: $350 for Full page, ⁄ page, ½ island; $240 for ½ page, ⁄ page; $185 for ¼ page, ⁄ pageReserve By: April 10, 2013Materials Due: April 17, 2013 | Mail Date: May 17, 2013
NCECA GUIDE advertising ratesSIZES 1x 3x 6x 10x 13x 16x 19xFull Page $865 820 735 685 630 590 5552/3 Page $695 665 590 545 495 470 4351/2 Page Island $615 580 520 475 450 425 3851/2 Page $555 540 470 435 415 380 3501/3 Page $430 425 370 335 320 300 2851/4 Page $330 315 285 260 245 230 2151/6 Page $255 245 225 210 195 190 160
Add color: $350 for Full page, ⁄ page, ½ island; $240 for ½ page, ⁄ page; $185 for ¼ page, ⁄ pageReserve By: February 6, 2013Materials Due: February 13, 2013 | Posting Date: February 25, 2013
CERAMIC ARTS 2014 advertising ratesSIZES 1x 3x 6x 10x 13x 16x 19xFull Page $2,710 2,580 2,310 2,110 1,980 1,840 1,7102/3 Page $2,165 2,060 1,840 1,680 1,580 1,460 1,3551/2 Page Island $1,930 1,815 1,625 1,490 1,410 1,305 1,2301/2 Page $1,735 1,660 1,460 1,355 1,280 1,195 1,0851/3 Page $1,355 1,305 1,165 1,060 1,005 930 8751/4 Page $1,035 980 875 815 755 710 6551/6 Page $ 785 755 685 625 575 550 485
Add color: $695 for Full page; $590 for ⁄ page, ½ island, ½ page; $415 for ⁄ page, ¼ page , ⁄ pageReserve By: September 6, 2013Materials Due: September 11, 2013 | Mail Date: October 15, 2013
CERAMIC ARTS 2014 YEARBOOKThis comprehensive guide and studio reference is the fi rst place our 26,000+ unduplicated readers turn to for researching equipment and supplies before placing orders. They’ll also keep it on hand as a reference throughout the year.
EDUCATION: BOTH LIVE AND IN PRINT Reaches potters attending educational workshops where they continue their personal growth in ceramics. This is your chance to reach highly motivated individuals expanding their skills.
clay workshop
Brought to you by the publishers of
Knowledge and Techniques for the Studio
2012
H A N D B O O Kclay workshop
M O N T H L Y
HOUSTON, TX | MARCH 20–23, 2013Reach 4000+ conference attendees as they plan their visit to workshops, technical sessions and your booth during this intensive 4-day event. Available electronically prior to the conference and notifi cation posted on Ceramic Arts Daily.
CERAMIC ARTS 2014 YEARBOOK

14 2013 Pottery Making Illustrated Media Kit
ceramic arts dailY
Ceramic Arts Daily puts you in direct contact.
reachThe FasTesT GrowinG Market
➤ Ceramic Arts Daily provides great information in a variety of
formats on a range of topics clay lovers look for.
➤ Ceramic Arts Daily is the go-to website for how-to videos, step-
by-step techniques, and technical discussions.
➤ Ceramic Arts Daily adds new registered users every day.
➤ Ceramic Arts Daily averages 34,000+ unique visitors every week,
many of whom use CAD as their primary ceramics resource.
➤ Ceramic Arts Daily off ers tips, techniques, projects,
demonstrations, reports, and step-by-step instructions.
➤ Ceramic Arts Daily’s full-time staff constantly adds new materials
to build your audience.
➤ Ceramic Arts Daily delivers your message to a growing, actively
engaged, and connected market.
“thank you for your multiple emails.
Your vision, great information and
professional approach is nothing short
of WoW!” —diane h. art teacher

15 2013 Pottery Making Illustrated Media Kit
ceramic arts dailY sPonsorshiPs
“i just wanted to let you know how much i appreciate your website.
i have found such wonderful ideas and so much help.
i have found a mentor in all the information you offer.”
CHooSe anYcombinaTionTo reach our Ceramic Arts Daily audience.
Sponsor one of the fi ve major sections* of the site➤ Free Gifts
➤ Education
➤ Ceramics Monthly
➤ Pottery Making Illustrated
➤ Potters Council
One month $865Three months $1995 (22% savings)Six months $3515 (32% savings)One year $6940 (37% Savings)
* Also includes one sponsored email per month and position on the Home Page.
Sponsor a topic Ceramic Arts Daily has 40 specifi c topics in which content is organized. At least one, and possibly several of these topics, relates directly to your products and provides an excellent context for your advertising message.
You can either have exclusive ownership of a topic or share with two others.
➤ Own It One month $310Three months $850Six months $1540One year $3000
➤ Share ItOne month $130Three months $335Six months $645 One year $1170
Sponsor a “Freemium” One of the most popular features of Ceramic Arts Daily is the monthly “freemium,” a special report prepared by our editors, which we off er free to more than 95,000 registered CAD users. Your sponsorship includes:
1) banner ad headlining the email that promotes the freemium
2) notation on the cover page that “this special report is brought to you with the support of [your company name]”
3) your full-page ad appended to the report, essentially serving as the back cover when a user prints it out for reference.
➤ Cost: $770
Since 2007, Ceramic Arts Daily has grown steadily to attract more than 110,000 unique visitors per month!

w w w. Ce ra m i c A r t s D a i l y. o r g 600 N. Cleveland Ave. | Suite 210 | Westerville, Ohio | 43082
Artist:RichardPhethean
Editor
BILL JONES(614) 895-4219 | [email protected]
Associate Editor
HOLLy GORING(614) 895-4213 | [email protected]
Associate Editor
JESSICA KNAPP(614) 794-5895 | [email protected]
Editorial Assistant
ERIN PFEIFER(614) 794-5867 | [email protected]
Production Editor & Graphic Design
MELISSA BURy(614) 895-4215 | [email protected]
Production Assistant
KEvIN DAvISON(614) 794-5855 | [email protected]
Marketing Manager
STEvE HECKER(614) 794-5809 | [email protected]
Editorial Director
SHERMAN HALL(614) 895-4220 | [email protected]
National Sales Account Manager
MONA THIEL(614) 794-5834 | [email protected]
Advertising Services Representative
JAN MOLONEy(614) 794-5843 | [email protected]
Ceramic Arts Daily video Program ManagerManaging Editor - Ceramic Arts Daily
JENNIFER POELLOT HARNETTy(614) 895-4212 | [email protected]
Audience Development Manager - Ceramic Arts Daily
SANDy MOENING(614) 794-5862 | [email protected]
Webmaster - Ceramic Arts Daily
SCOTT FRESHOUR(614) 794-5871 | [email protected]
Potters Council Senior Manager
CAROLyN DORR(614) 794-5824 | [email protected]
Publisher
CHARLIE SPAHR(614) 794-5876 | [email protected]