Embed Size (px)
Citation preview
8/8/2019 28052 Inst Fabric Screen Printing Kit
http://slidepdf.com/reader/full/28052-inst-fabric-screen-printing-kit 1/16
8/8/2019 28052 Inst Fabric Screen Printing Kit
http://slidepdf.com/reader/full/28052-inst-fabric-screen-printing-kit 2/16
PREPARING YOUR WORK AREA
Clear an area for your project. A card table (or similar
space) will provide enough work area. It is necessary tolocate your work area with easy access to a large sink orlaundry tub with hot and cold water.
If you plan to make a large number of prints, you may wishto set up a “clothesline” that will enable you to hang yourprints with either clothespins or binder clips for drying.
PREPARING YOUR TOOLS
Step A
Two hinges with screws and removable pins are includedsome Speedball® kits. These are easily attached by fir joining the halves together with hinge pins. It is best mount the side of the hinge with two bearings to the baand the side of the hinge with one bearing to the screframe. Then, position the assembled hinges over the “piloholes on top of the frame and base and screw them place. Be sure they are right side up. Speedball® offeheavy duty hinge clamps for bigger screens. Follow this screwing the kickleg to the side of the frame. A “pilot” hohas been provided for this also. Note the kickleg should “free-swinging”.
Step BThe next important step in preparation is to detach tframe from the base and scrub both sides of the screefabric with a nylon brush and dishwasher powder/watsolution.
Let it dry thoroughly after rinsing. For water-based inkuse 1” wide water-resistant masking tape. Lay the tape it is divided equally half on the screen fabric, and half othe screen frame. Turn the frame over and cover tgroove with tape. Be certain that the tape extends beyothe frame and onto the fabric. For solvent-based inks, useal gummed water-soluble tape with several coats polyurethane.
2 Speedball®
Screen Printing Instruction Booklet www.speedballart.com • 1.800.898.72
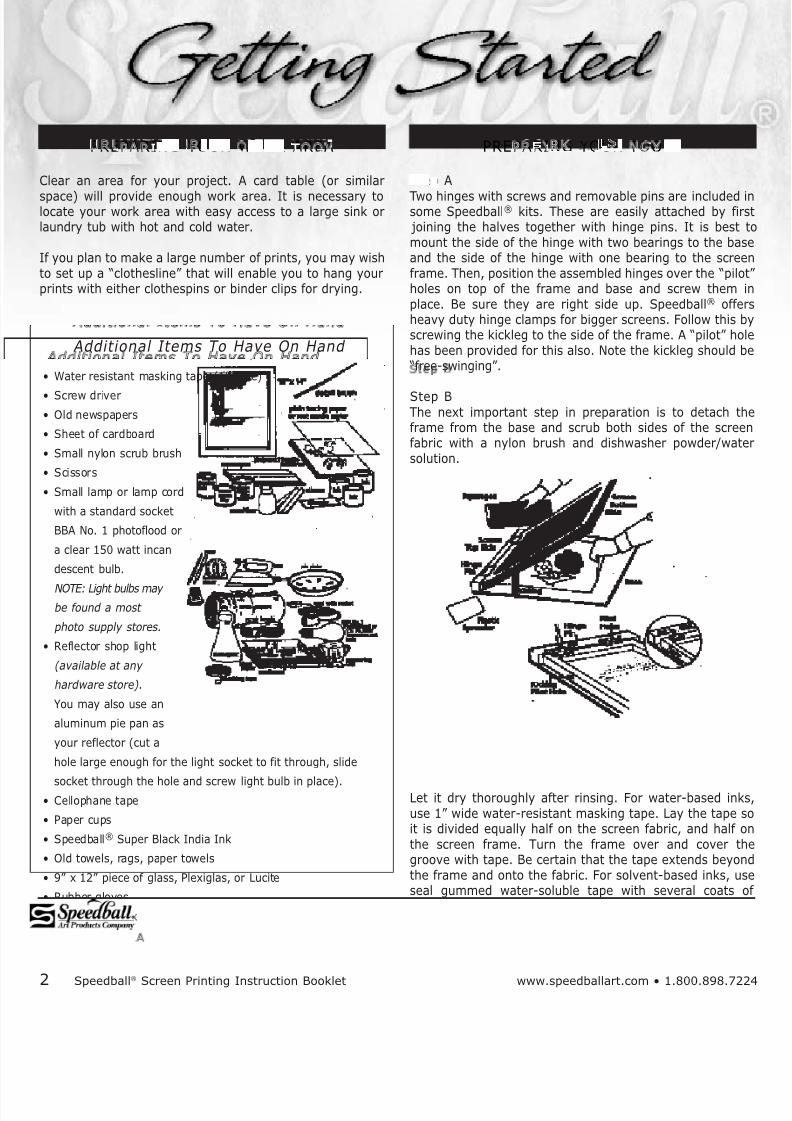
Additional Items To Have On Hand
• Water resistant masking tape (1” wide)
• Screw driver
• Old newspapers
• Sheet of cardboard
• Small nylon scrub brush
• Scissors
• Small lamp or lamp cord
with a standard socket
BBA No. 1 photoflood or
a clear 150 watt incan
descent bulb.
NOTE: Light bulbs may be found a most
photo supply stores.
• Reflector shop light
(available at any
hardware store) .
You may also use an
aluminum pie pan as
your reflector (cut a
hole large enough for the light socket to fit through, slide
socket through the hole and screw light bulb in place).• Cellophane tape
• Paper cups
• Speedball® Super Black India Ink
• Old towels, rags, paper towels
• 9” x 12” piece of glass, Plexiglas, or Lucite
• Rubber gloves
• Apron or smock

8/8/2019 28052 Inst Fabric Screen Printing Kit
http://slidepdf.com/reader/full/28052-inst-fabric-screen-printing-kit 3/16
to the underside of the screen, creating a stencil effect.Once you see how simple this method is, you may wish try variations by creating two or three designs with topaper of various shapes and printing each in a differecolor or hue. Do not overlap cutout pieces on the screenNOTE: Generally ten to fifteen prints can be satisfactorproduced by this method. When a larger number of prinare desired, you should use one or more “permanenmethods.
SCREEN FILLER METHOD
(Direct block-out or “Negative Method”)
Using Screen Filler is another simple means of preparingscreen for printing. The screen filler is used to block othose areas that you do not wish to print. This allows tink to be forced through the screen wherever the ScreeFiller has not been applied.
Step A
On a sheet of plain paper, make up the illustrations or mesage you wish to print with your screen. Place this layo
on a tabletop. Place your screen over this layout and trayour design directly on the screen fabric using a soft lepencil.
Step B
Stir the Screen Filler until it is thoroughly mixed to smooth consistency. Using a paintbrush, paint the screfiller on all areas of your layout that you do not want print. Be certain that the bottomof the screen is elevated (nottouching the table). When allareas to be blocked out arecovered with Screen Filler,
flip the screen over andsmooth out places the fillermay have collected on theopposite side of thescreen. Be careful duringthis smoothing outprocess not to distortyour work.
Step C
Leave the screen to dry in a level position. Make sure noting touches the areas covered with Screen Filler. Thoroudrying is necessary. Overnight drying is recommended assure best results.
Check for pinholes in the blocked-out areas. You can do this holding the screen up to a light. Fill any pinholes with ScreFiller and allow to dry completely. You are now ready to printNOTE: Since Screen Filler is applied to all areas which anot to be printed, this – along with all traditional “direcmethods – is considered to be a “negative” method printing. Your print will be the opposite of that which yocreated in your screen.
www.speedballart.com • 1.800.898.7224 Speedball®
Screen Printing Instruction Booklet
Taping in this way helps to maintain a “tight” screen, andprevents ink from leaking under the screen frame duringprinting and will keep the edges of your prints clean. To getmaximum adhesion of the tape, rub it with a spoon. Whenchoosing your pattern or design make sure to leave a gen-erous border from the taped edges (minimum of 1” fromtaped edge).
Step C
There are a number of ways to prepare a screen to printyour picture or message. While the methods are different,the basic principle is to make a stencil on the screen fabricwhich allows ink to be forced through its “open” areas toproduce a design.
PREPARING SCREENS
PAPER STENCIL METHOD
This is the best method for a beginner. It is the fastest,least expensive, and simplest way to prepare a screen. ThePaper Stencil Method is good for geometric shapes andbasic patterns. It is not intended for complicated designs orlettering. Begin by cutting an illustration from paper. Keepthe paper flat and not wrinkled. For more accurate and
durable cut paper stencils, use freezer wrap (shiny sideup). Designs can be cut with scissors or stencil knife orthey can be torn to create a textured appearance.
Step A
Cut your paper stencil. You may wish to create a design byfolding and cutting your paper as illustrated. For your sten-cil, you can use either the cutout or the paper remaining.
Step B
Position printing paper under the frame. Lay your cutoutson this paper as desired and lower the screen.
Step C
Follow the directions found in section “Making Prints”. Pressdown on the screen frame to ensure complete contact withall cutouts. Make your first print. You will find with the firstpass of the squeegee, the ink will cause the cutouts to stick
8/8/2019 28052 Inst Fabric Screen Printing Kit
http://slidepdf.com/reader/full/28052-inst-fabric-screen-printing-kit 4/16
DRAWING FLUID – SCREEN FILLER METHOD
(Tusche – resist or “positive method”)
Step A
On a sheet of plain paper, make up the illustration or mes-sage you wish to print with your screen. Place this layouton a tabletop. Place your screen over this layout, top sideup. Trace your design directly on the screen fabric with asoft lead pencil.
Step A (Alternative) The preparation of a layout is to help guide the applicationof Drawing Fluid. If you feel such a guide is unnecessary,go directly to Step B.
Step BYou can work on either side of the screen. Remember, how-ever, that your printing will be done from the top (or “ink-fill”) side of the screen.
Be certain that the screen is elevated – not touching thetable. Using a paintbrush, paint the Drawing Fluid over those
areas of your layout that you want to print. Leave the screento dry in a level, flat position. Make sure nothing touches theareas covered with Drawing Fluid.
Step C
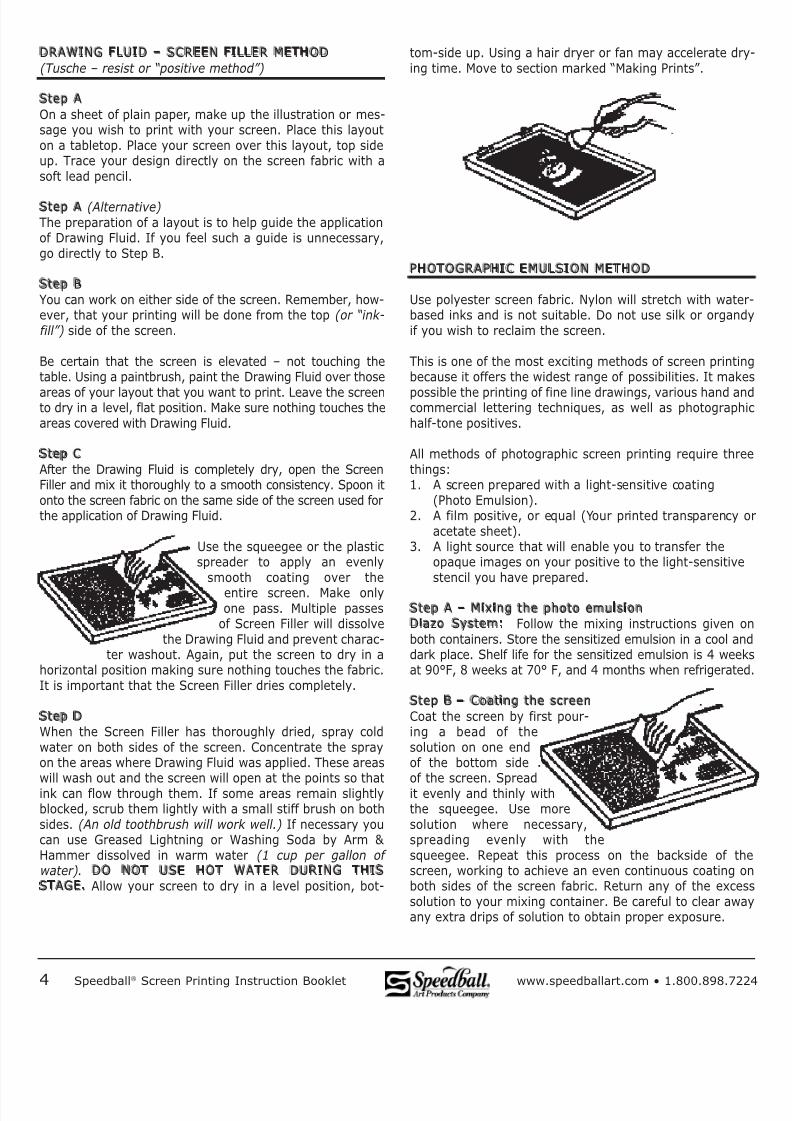
After the Drawing Fluid is completely dry, open the ScreenFiller and mix it thoroughly to a smooth consistency. Spoon itonto the screen fabric on the same side of the screen used forthe application of Drawing Fluid.
Use the squeegee or the plasticspreader to apply an evenly
smooth coating over the
entire screen. Make onlyone pass. Multiple passes
of Screen Filler will dissolvethe Drawing Fluid and prevent charac-
ter washout. Again, put the screen to dry in ahorizontal position making sure nothing touches the fabric.It is important that the Screen Filler dries completely.
Step DWhen the Screen Filler has thoroughly dried, spray coldwater on both sides of the screen. Concentrate the sprayon the areas where Drawing Fluid was applied. These areaswill wash out and the screen will open at the points so thatink can flow through them. If some areas remain slightlyblocked, scrub them lightly with a small stiff brush on bothsides. (An old toothbrush will work well.) If necessary youcan use Greased Lightning or Washing Soda by Arm & Hammer dissolved in warm water (1 cup per gallon of water) . DO NOT USE HOT WATER DURING THISSTAGE. Allow your screen to dry in a level position, bot-
tom-side up. Using a hair dryer or fan may accelerate dring time. Move to section marked “Making Prints”.
PHOTOGRAPHIC EMULSION METHOD
Use polyester screen fabric. Nylon will stretch with watebased inks and is not suitable. Do not use silk or organif you wish to reclaim the screen.
This is one of the most exciting methods of screen printibecause it offers the widest range of possibilities. It mak
possible the printing of fine line drawings, various hand acommercial lettering techniques, as well as photographhalf-tone positives.
All methods of photographic screen printing require thrthings:1. A screen prepared with a light-sensitive coating
(Photo Emulsion).2. A film positive, or equal (Your printed transparency
acetate sheet).3. A light source that will enable you to transfer the
opaque images on your positive to the light-sensitivestencil you have prepared.
Step A – Mixing the photo emulsionDiazo System: Follow the mixing instructions given oboth containers. Store the sensitized emulsion in a cool andark place. Shelf life for the sensitized emulsion is 4 weeat 90°F, 8 weeks at 70° F, and 4 months when refrigerate
Step B – Coating the screen
Coat the screen by first pour-ing a bead of thesolution on one endof the bottom sideof the screen. Spreadit evenly and thinly withthe squeegee. Use moresolution where necessary,spreading evenly with thesqueegee. Repeat this process on the backside of tscreen, working to achieve an even continuous coating oboth sides of the screen fabric. Return any of the excesolution to your mixing container. Be careful to clear awany extra drips of solution to obtain proper exposure.
4 Speedball®
Screen Printing Instruction Booklet www.speedballart.com • 1.800.898.72
8/8/2019 28052 Inst Fabric Screen Printing Kit
http://slidepdf.com/reader/full/28052-inst-fabric-screen-printing-kit 5/16
Step C – Drying the coated screen
In an area AWAY FROM LIGHT AND HEAT, set the screen todry horizontally, bottom side down. This will provide themost even, flat “film” on the underside of the screen. It will,however, require your elevating the four corners of theunderside of the frame during the drying stage with pushpins or other suitable devices. An empty drawer, cupboard,cabinet, closet, or under a cardboard box will work we allowthe screen to dry thoroughly. If more than 300 prints are to
be run, it is best to apply a second coating of the sensitizedPhoto Emulsion to the bottom of the screen after the firstcoat is dry. Remember, work for a smooth even THIN coat-ing. Repeat the process away from heat and light.
Once the sensitized screen is dry, it must remain in a dark-ened area until it is ready to be exposed. A fan in the darkarea will greatly speed up the drying of the emulsion on thescreen.
Step D – Preparing a positive
With Speedball®’s Diazo System, the maximum allowabletime between application of the sensitized emulsion to the
screen and the exposure is four weeks at room tempera-ture, in a completely dark environment.
A “positive” is any opaque image (usually black) , on anytransparent or translucent surface (like acetate) . There aremany ways you may choose to prepare them.
An excellent transparent film for this purpose is preparedacetate (printed directly on the acetate by your printer, orcopying an image onto the acetate via copy machine). Theprinted sheets (positives) have copy and illustrations thatmay be used to create a picture or message. With the plainsheets, you may make artwork on your own with
Speedball®’s Super Black Ink and an artist’s brush, speed-ball Drawing Pens or enamel paint pens. Excellent resultscan also be obtained by using a dry transfer, or pressuresensitive letters and symbols. These can be applied direct-ly onto tracing paper or clear plastic or acetate. The graph-ics must be opaque to light (not see-through). Naturalitems such as leaves may be used between the glass andstencil.
Another way of producing positives is through copymachines that have the capability of reproducing veryopaquely on film or acetate, tracing paper, etc. In order tosatisfactorily produce a positive using a copy machine, thefollowing conditions must be met:1. Black & White line work2. Must be opaque photographic print3. Must have high contrast.
Using a desktop computer, you can download many copright-free images suitable for screen printing from any simple graphic program. You can print that image directly to transparency material (acetate) . You can also macopies on a copier that will accept transparencies.
TIP: To get a bold solid image, try making 2 copies of thsame image on transparencies. Match the designs and tatogether for use as a positive.
Step E – Light source
The BBA No.1 bulb is preferable, particularly for fine grapics because the exposure time is less. To set up your “ligstation” place the screen on top of a piece of black papand center it 12 inches directly below a 150W clear incadescent bulb or a BBA No.1 Photoflood bulb. You can alus a light table with 20W florescent tubes. Either should fitted with a reflector shop light.
Unfiltered black light tubes will cut exposure time consierably. Maybe as little a 3–5 minutes. You need to test faccuracy.
The positive can be placed in contact with the coated (drscreen by either of the above methods.
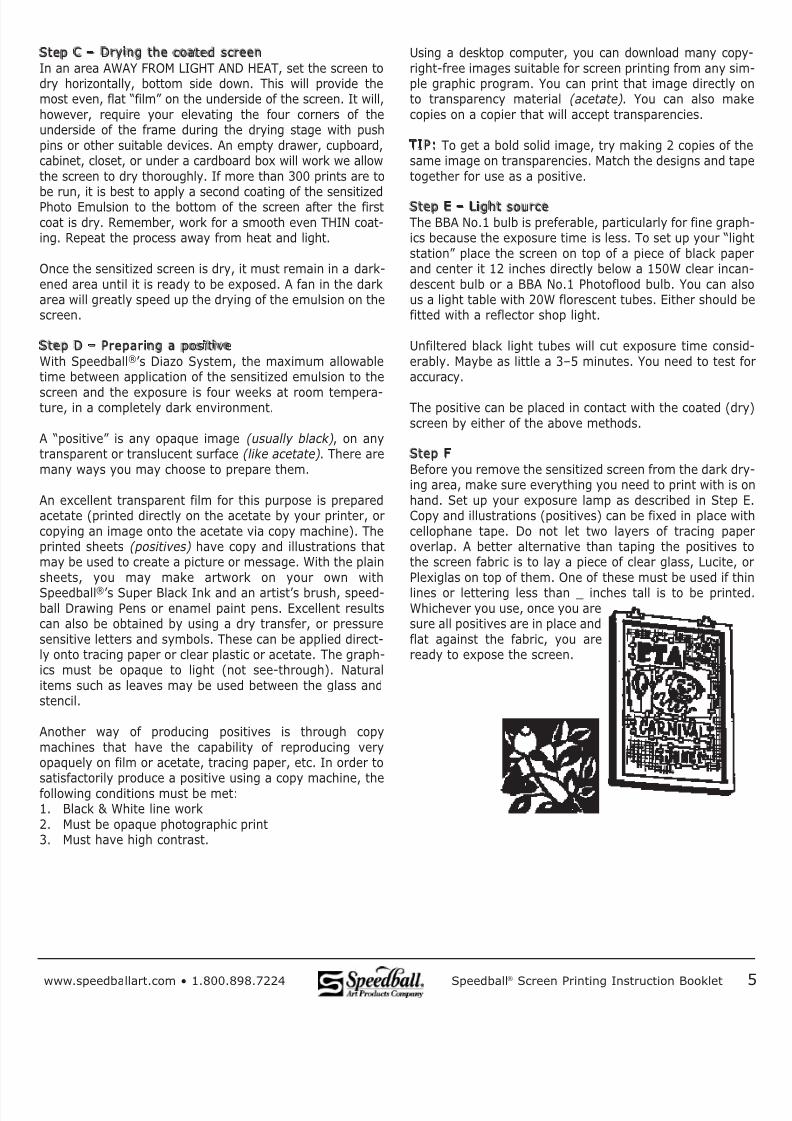
Step F
Before you remove the sensitized screen from the dark dring area, make sure everything you need to print with is hand. Set up your exposure lamp as described in Step Copy and illustrations (positives) can be fixed in place wcellophane tape. Do not let two layers of tracing papoverlap. A better alternative than taping the positives the screen fabric is to lay a piece of clear glass, Lucite, Plexiglas on top of them. One of these must be used if th
lines or lettering less than _ inches tall is to be printeWhichever you use, once you aresure all positives are in place andflat against the fabric, you areready to expose the screen.
www.speedballart.com • 1.800.898.7224 Speedball®
Screen Printing Instruction Booklet
8/8/2019 28052 Inst Fabric Screen Printing Kit
http://slidepdf.com/reader/full/28052-inst-fabric-screen-printing-kit 6/16
NOTE: Photo Emulsion should not be left in the screindefinitely unless a permanent stencil is wanted. It shoube washed out as soon as the run is completed. See Cleaup Instructions.
MAKING PRINTS
Step A – Preparations
Attach your screen frame to the base by interesting thinge pins. For off-contact printing tape a penny or nickto each of the four corners on the underside of the scree
Place a sheet of your printing paper under the screen aposition it as it is to be printed. Allow for margins. Whyou are certain that the paper is in the correct position, the screen gently and mark where each edge of the papshould be placed.
Cut three pieces of card-board about 1” x 2” and usethese for registration guides.Place these next to the linesyou drew on the base so youcan correctly locate eachsheet to be printed.
These guides shouldbe fastened securelywith tape or rubber cement. Good guides are particularimportant if you intend to print more than one color on aprint.
Step B – Selecting Inks for Printing on Paper
Water Soluble Inks
Art prints require porous-surface papers of high quality. Wrecommend 100% rag or heavy paper for best results. F
most other printing applications, construction paper, drawing paper, charcoal paper, pastel paper, most board item(except railroad board) and cover stock (especially good fgreeting cards) will work well. Ink remains water-solubafter drying.
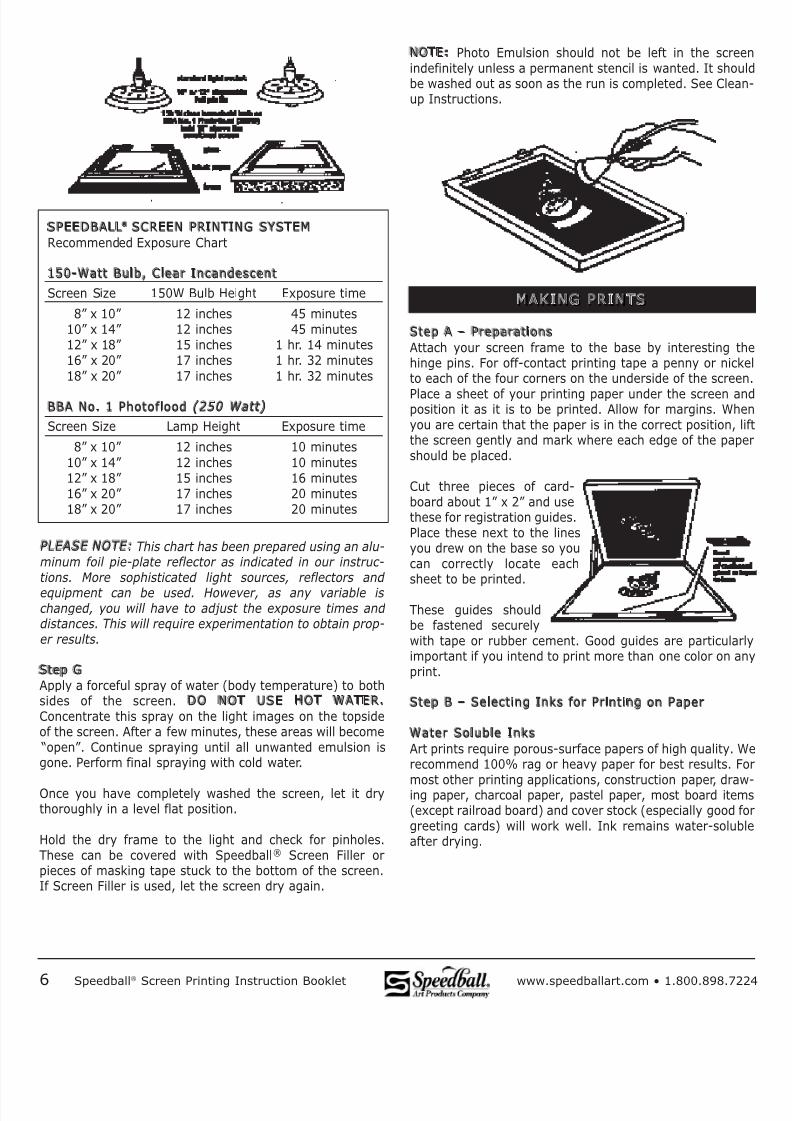
PLEASE NOTE: This chart has been prepared using an alu-minum foil pie-plate reflector as indicated in our instruc-tions. More sophisticated light sources, reflectors and
equipment can be used. However, as any variable is changed, you will have to adjust the exposure times and distances. This will require experimentation to obtain prop-er results.
Step G
Apply a forceful spray of water (body temperature) to bothsides of the screen. DO NOT USE HOT WATER.
Concentrate this spray on the light images on the topsideof the screen. After a few minutes, these areas will become “open”. Continue spraying until all unwanted emulsion isgone. Perform final spraying with cold water.
Once you have completely washed the screen, let it drythoroughly in a level flat position.
Hold the dry frame to the light and check for pinholes.These can be covered with Speedball® Screen Filler orpieces of masking tape stuck to the bottom of the screen.If Screen Filler is used, let the screen dry again.
6 Speedball®
Screen Printing Instruction Booklet www.speedballart.com • 1.800.898.72
SPEEDBALL® SCREEN PRINTING SYSTEM
Recommended Exposure Chart
150-Watt Bulb, Clear Incandescent
Screen Size 150W Bulb Height Exposure time
8” x 10” 12 inches 45 minutes10” x 14” 12 inches 45 minutes12” x 18” 15 inches 1 hr. 14 minutes16” x 20” 17 inches 1 hr. 32 minutes
18” x 20” 17 inches 1 hr. 32 minutes
BBA No. 1 Photoflood (250 Watt)
Screen Size Lamp Height Exposure time
8” x 10” 12 inches 10 minutes
10” x 14” 12 inches 10 minutes12” x 18” 15 inches 16 minutes16” x 20” 17 inches 20 minutes18” x 20” 17 inches 20 minutes
8/8/2019 28052 Inst Fabric Screen Printing Kit
http://slidepdf.com/reader/full/28052-inst-fabric-screen-printing-kit 7/16
Avoid slick coated, high gloss papers or vinyl or plasticcoated papers.
Stir the ink completely until you achieve a “buttery” or “creamy” consistency. If too thick, add one or two drops of water or Speedball® Water Soluble Transparent ExtenderBase. Mix thoroughly. Colors may be intermixed.Speedball® Water Soluble Transparent Extender Base maybe used to make the colors more transparent.
PERMANENT ACRYLIC INKS
Fine art prints require smooth matte finish, medium orheavy weight papers. To overcome buckling caused bywater penetration, after each color run is dry, place a flatweight on stacked prints. This will cause them to dry flatand is especially important for good color registration.
These water-based acrylic inks dry water resistant.
To achieve transparency or economy, Speedball® ExtenderBase (preferred) or Transparent Base may be added. Neveradd more than 10–15% Transparent Base. Do not allow ink
to dry in screen.
For most other printing applications like posters, greetingcards, book covers, etc., 20# weight and thicker coverstock paper is recommended. Avoid slick coated, high glosspapers or vinyl or plastic coated papers.
Stir the ink completely until you achieve a “buttery” or “creamy” consistency. If too thick, add one or two drops of water or Speedball® Acrylic Extender Base Speedball®
Acrylic Transparent Base. Mix thoroughly.
Step B – Alternative
Selecting inks for printing on non-paper surfaces.
WATER SOLUBLE INKS – These can be used on wood ormasonite if first coated with an acrylic emulsion base coatsuch as Speedball® Gesso. To achieve water-resistance,use an acrylic, a spray fixative or a solvent-based varnishas a topcoat.
FABRIC INKS – These can be used on almost any fabric thatcan be subjected to a hot iron (275°-375°F) . Do not use onnon-porous fabrics such as nylon.
ACRYLIC INKS – These inks can also be used on wood,masonite and many coated surfaces. Always pre-testbefore using.
Step C – Printing on Paper
Spoon the ink across the end of the screen nearest to yoWith the screen lifted slightly from the base, apply an evblanket of ink onto the print area. Be sure to use an eassmooth stroke with the squeegee at a slight angle awfrom you. This is the flood stroke. Drop the screen onyour paper. Lift the squeegee over the ridge of the ink amake the print stroke by pulling towards yourself. Keep tsqueegee at a 45° angle with enough pressure to scra
the ink from the screen. Lift the screen from the prinmake the flood stroke, set the kick leg, remove the priand put it to dry on your rack or line. Insert new paperelease the kick leg and repeat the process.
Sharp clear prints can be produced provided you maintaan adequate quantity of ink on the screen, and use tflood stroke but sparingly. For more detailed images avothe flood stroke, and maintain adequate and even pressuon the squeegee during print stroke.
Step D – Clean upAfter you have made your prints, remove any remaining i
in the screen. This ink can be saved if you wish. Detach tframe from the base (don’t lose the hinge pins). SEE SETION ON CLEAN-UP.
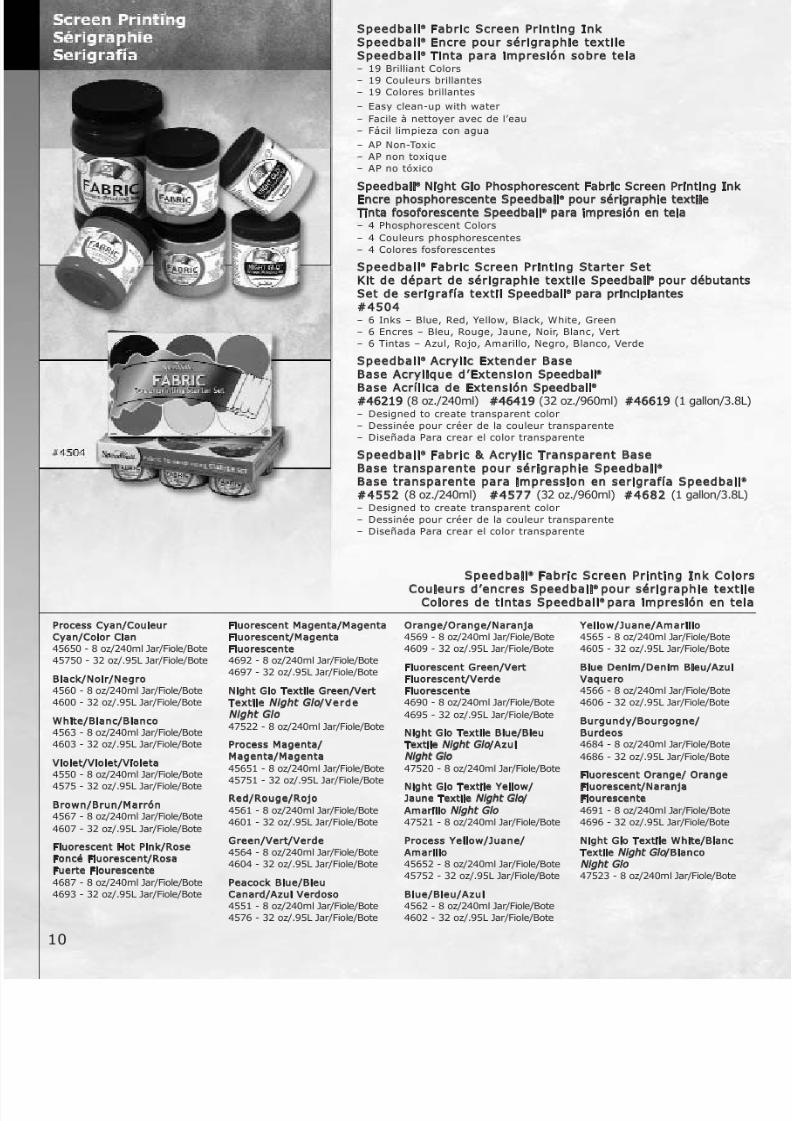
PRINTING WITH FABRIC INKS
For the most part, screen printing on fabric is the same printing on paper. Use only fabrics that can be subjected temperatures of at least 275°-375° F. Do not use on noporous fabrics such as nylon. Pre-test all fabrics. Fabriwith sizing must be washed prior to printing. This wassure proper adhesion of the fabric ink to the fabric.
Five Important Notes:
1. The screen frame is usually detached from the baseand used alone. Usually two (2) people should work onthe printing process – one holding the screen frametightly against the fabric, and the other doing the printin
2. On articles like T-shirts, a piece of foamboard,cardboard or paper must be put inside each garment act as a barrier.
3. To improve the lubricity (slipperiness) of the ink, youmay add the Transparent Base. To slow drying or toprevent screen clogging, add the Retarder Base(1-2 tbs. to 8 oz. of ink).
www.speedballart.com • 1.800.898.7224 Speedball®
Screen Printing Instruction Booklet
8/8/2019 28052 Inst Fabric Screen Printing Kit
http://slidepdf.com/reader/full/28052-inst-fabric-screen-printing-kit 8/16
SCREEN CLEAN-UP
An organized work area will make clean up easy. Here athe Recommended procedures:
WATER SOLUBLE INKSUse warm water and a soft brush. These inks will remawater-soluble even after thorough drying.
FABRIC and ACRYLIC INKSWash IMMEDIATELY after the last print is pulled.Use warm water and a soft brush.
Should ink dry in the screen, spray with Windex, or a similar window cleaner. Rub with a lint-free cloth. When ink removed, was with a mix of warm water and dishwashdetergent using a soft brush. Rinse with warm water.
Drawing FluidWash with cool water.
Screen Filler
Speed CleanTM is preferable for removing screen filler.One (1) cup of Arm & Hammer’s Washing Soda dissolvin (1) gallon of water is also suitable.Instructions are:A. Apply to both sides with a paintbrush. Scrub withnylon bristle brush.B. Apply again to both sides. Let stand in a horizontal potion for three to five minutes.C. Scrub with a nylon bristle brush while spraying withforceful stream of hot water.
4. Wash-up of screens and tools must be doneimmediately after use. If they are allowed to dry onyour screen or tools, they are difficult or impossibleto remove.
5. After the fabric ink dries on the fabric, set a householdiron at the highest dry heat (no steam) that will notscorch the fabric and with a cloth or paper between theiron and printed material, iron on each side for 3–5minutes. This will make them withstand repeated washings.
IMPORTANT: PRE-TEST SAMPLES PRIOR TO ALLPRODUCTION RUNS. If inadequate wash fastness occurs,the print needs to be heat set longer.
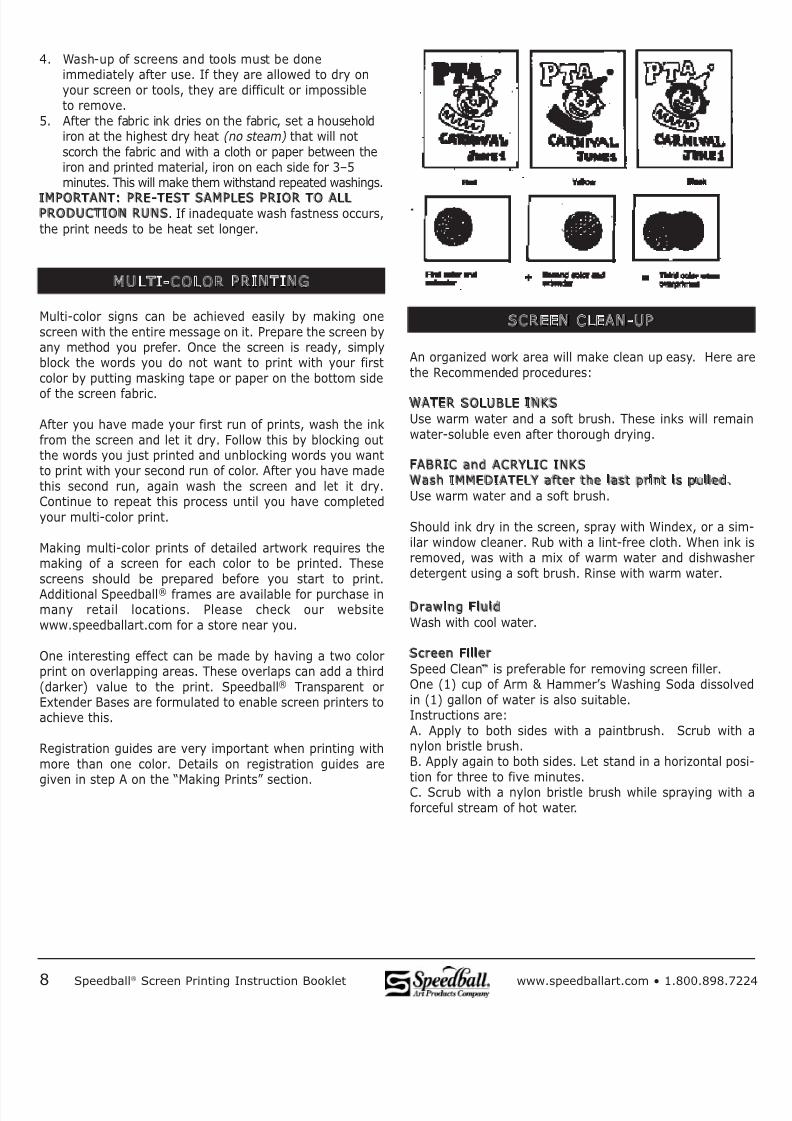
MULTI-COLOR PRINTING
Multi-color signs can be achieved easily by making onescreen with the entire message on it. Prepare the screen byany method you prefer. Once the screen is ready, simplyblock the words you do not want to print with your firstcolor by putting masking tape or paper on the bottom side
of the screen fabric.
After you have made your first run of prints, wash the inkfrom the screen and let it dry. Follow this by blocking outthe words you just printed and unblocking words you wantto print with your second run of color. After you have madethis second run, again wash the screen and let it dry.Continue to repeat this process until you have completedyour multi-color print.
Making multi-color prints of detailed artwork requires themaking of a screen for each color to be printed. Thesescreens should be prepared before you start to print.
Additional Speedball® frames are available for purchase inmany retail locations. Please check our websitewww.speedballart.com for a store near you.
One interesting effect can be made by having a two colorprint on overlapping areas. These overlaps can add a third(darker) value to the print. Speedball® Transparent orExtender Bases are formulated to enable screen printers toachieve this.
Registration guides are very important when printing withmore than one color. Details on registration guides are
given in step A on the “Making Prints” section.
8 Speedball®
Screen Printing Instruction Booklet www.speedballart.com • 1.800.898.72
8/8/2019 28052 Inst Fabric Screen Printing Kit
http://slidepdf.com/reader/full/28052-inst-fabric-screen-printing-kit 9/16
www.speedballart.com • 1.800.898.7224 Speedball®
Screen Printing Instruction Booklet
Photo Emulsion
PHOTO EMULSION SHOULD BE WASHED OUT OF YOURSCREEN AS SOON AS YOUR PRINT RUN IS COMPLETED –UNLESS YOU WANT A PERMANENT STENCIL.
ADULT SUPERVISION IS RECOMMENDED FOR THISPROCEDURE. WEAR RUBBER GLOVES AND SMOCK.Photo Emulsion Remover Method:
Be certain all the ink has been removed from the screen
fabric. Apply SPEEDBALL Photo Emulsion Remover liberal-ly to both sides of the stencil using a paintbrush.Immediately scrub both sides of the stencil with a dry nylonbristle brush. Again, apply SPEEDBALL Photo EmulsionRemover liberally to both sides of the stencil. Keep thescreen in a horizontal position for three (3) minutes. Scrubboth sides with the nylon bristle brush and flush with a hardspray of hot water. Once you have started removing PhotoEmulsion you must not let the screen dry until completelyclean.
TROUBLESHOOTING
Drawing Fluid, Screen Filler or Photo Emulsion willnot adhere to screen.
Possible scenarios:1. Screen fabric may be dirty.2. Screen may have been used with solvent-based
materials or the sizing may not have completelywashed out of the screen fabric.Solution: Scrub with a soft bristle brush and adishwasher powder/water solution. Rinse well.
Photo Emulsion will not wash out to create a stencil.
Possible scenarios:1. Artwork not prepared with a visually or photo
graphically opaque material.2. Heat, as well as light, will set the photo emulsion.
There must not be any heat build-up (above 150° F) onthe stencil during exposure.
3. More than 12 hours (at 70° F) exposed before thesensitized screen was exposed.
4. The sensitized screen was exposed to too muchlight or heat before exposure to artwork.
5. Overexposure. The instructions list exposure times andheights for a “disposable foil pie tin” reflector. Moreefficient reflectors will require a higher bulb height
and/or less exposure time.6. Artwork did not make proper contact with screen.7. Incomplete washout.
Too much Photo Emulsion washed out of screen aftexposure.
Possible scenarios:1. Improper mixing of emulsion and sensitizer.2. Underexposure.3. Tracing paper or film not sufficiently transparent.4. Washout temperature was too high (should be
lukewarm, or at body temperature).5. Screen not dry before coating.
6. Screen not dry before exposure.
Some small details on Photo Emulsion screen did nwash out completely.
Possible scenarios:1. See relevant “Possible scenarios” under “Photo
Emulsion will not wash out to create a stencil”.2. Failure to use a black, non-reflective background
under the screen during exposure.Solution: Using a more intense light source, such as a BBNo. 1 Photoflood, will reduce the require exposure time aresultant light bounce-back. This will improve detwashout.
Inks drying in screen.Solutions:
1. Use the flood stroke technique given in theinstructions.
2. Keep squeegees sharpened.3. For the Acrylic Screen Inks and Fabric Inks, mix with
5–10% Retarder Base.4. Use a couple of humidifiers or vaporizers in the
printing area.
Textile ink prints not opaque enough.Solutions:
1. Use a coarser screen fabric.2. Make multiple passes.3. Use a rounded squeegee.4. Use a soft base under the fabric to be printed.5. Use a hair dryer to flush dry the print immediate
after printing and then reprint overtop in exact regist
8/8/2019 28052 Inst Fabric Screen Printing Kit
http://slidepdf.com/reader/full/28052-inst-fabric-screen-printing-kit 10/16
8/8/2019 28052 Inst Fabric Screen Printing Kit
http://slidepdf.com/reader/full/28052-inst-fabric-screen-printing-kit 11/16
8/8/2019 28052 Inst Fabric Screen Printing Kit
http://slidepdf.com/reader/full/28052-inst-fabric-screen-printing-kit 12/16
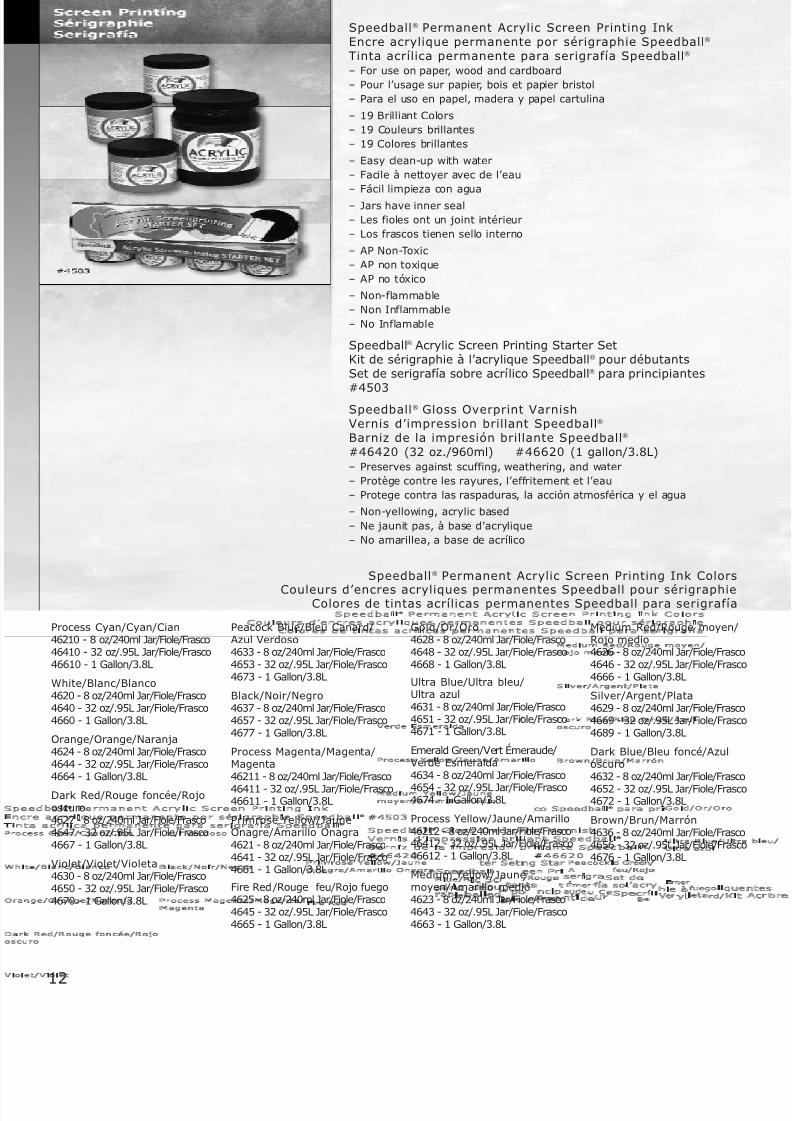
Speedball® Permanent Acrylic Screen Printing InkEncre acrylique permanente por sérigraphie Speedball®
Tinta acrílica permanente para serigrafía Speedball®
– For use on paper, wood and cardboard
– Pour l’usage sur papier, bois et papier bristol
– Para el uso en papel, madera y papel cartulina
– 19 Brilliant Colors
– 19 Couleurs brillantes
– 19 Colores brillantes
– Easy clean-up with water
– Facile à nettoyer avec de l’eau
– Fácil limpieza con agua
– Jars have inner seal
– Les fioles ont un joint intérieur
– Los frascos tienen sello interno
– AP Non-Toxic
– AP non toxique
– AP no tóxico
– Non-flammable
– Non Inflammable
– No Inflamable
Speedball® Acrylic Screen Printing Starter SetKit de sérigraphie à l’acrylique Speedball® pour débutantsSet de serigrafía sobre acrí lico Speedball® para principiantes
#4503Speedball® Gloss Overprint VarnishVernis d’impression brillant Speedball®
Barniz de la impresión brillante Speedball®
#46420 (32 oz./960ml) #46620 (1 gallon/3.8L)– Preserves against scuffing, weathering, and water
– Protège contre les rayures, l’effritement et l’eau
– Protege contra las raspaduras, la acción atmosférica y el agua
– Non-yellowing, acrylic based
– Ne jaunit pas, à base d’acrylique
– No amarillea, a base de acrílico
Process Cyan/Cyan/Cian46210 - 8 oz/240ml Jar/Fiole/Frasco46410 - 32 oz/.95L Jar/Fiole/Frasco46610 - 1 Gallon/3.8L
White/Blanc/Blanco4620 - 8 oz/240ml Jar/Fiole/Frasco4640 - 32 oz/.95L Jar/Fiole/Frasco4660 - 1 Gallon/3.8L
Orange/Orange/Naranja4624 - 8 oz/240ml Jar/Fiole/Frasco4644 - 32 oz/.95L Jar/Fiole/Frasco4664 - 1 Gallon/3.8L
Dark Red/Rouge foncée/Rojooscuro4627 - 8 oz/240ml Jar/Fiole/Frasco4647 - 32 oz/.95L Jar/Fiole/Frasco4667 - 1 Gallon/3.8L
Violet/Violet /Violeta4630 - 8 oz/240ml Jar/Fiole/Frasco4650 - 32 oz/.95L Jar/Fiole/Frasco4670 - 1 Gallon/3.8L
Peacock Blue/Bleu Canard/Azul Verdoso4633 - 8 oz/240ml Jar/Fiole/Frasco4653 - 32 oz/.95L Jar/Fiole/Frasco4673 - 1 Gallon/3.8L
Black/Noir/Negro4637 - 8 oz/240ml Jar/Fiole/Frasco4657 - 32 oz/.95L Jar/Fiole/Frasco4677 - 1 Gallon/3.8L
Process Magenta/Magenta/Magenta46211 - 8 oz/240ml Jar/Fiole/Frasco
46411 - 32 oz/.95L Jar/Fiole/Frasco46611 - 1 Gallon/3.8L
Primrose Yellow/JauneOnagre/Amarillo Onagra4621 - 8 oz/240ml Jar/Fiole/Frasco4641 - 32 oz/.95L Jar/Fiole/Frasco4661 - 1 Gallon/3.8L
Fire Red /Rouge feu/Rojo fuego4625 - 8 oz/240ml Jar/Fiole/Frasco4645 - 32 oz/.95L Jar/Fiole/Frasco4665 - 1 Gallon/3.8L
Gold/Or/Oro4628 - 8 oz/240ml Jar/Fiole/Frasco4648 - 32 oz/.95L Jar/Fiole/Frasco4668 - 1 Gallon/3.8L
Ultra Blue/Ultra bleu/Ultra azul4631 - 8 oz/240ml Jar/Fiole/Frasco4651 - 32 oz/.95L Jar/Fiole/Frasco4671 - 1 Gallon/3.8L
Emerald Green/Vert Émeraude /Verde Esmeralda4634 - 8 oz/240ml Jar/Fiole/Frasco
4654 - 32 oz/.95L Jar/Fiole/Frasco4674 - 1 Gallon/3.8L
Process Yellow/Jaune/Amarillo46212 - 8 oz/240ml Jar/Fiole/Frasco46412 - 32 oz/.95L Jar/Fiole/Frasco46612 - 1 Gallon/3.8L
Medium Yellow/Jaunemoyen/Amarillo medio4623 - 8 oz/240ml Jar/Fiole/Frasco4643 - 32 oz/.95L Jar/Fiole/Frasco4663 - 1 Gallon/3.8L
Medium Red/Rouge moyen/Rojo medio4626 - 8 oz/240ml Jar/Fiole/Frasco4646 - 32 oz/.95L Jar/Fiole/Frasc4666 - 1 Gallon/3.8L
Silver/Argent/Plata4629 - 8 oz/240ml Jar/Fiole/Frasco4669 - 32 oz/.95L Jar/Fiole/Frasc4689 - 1 Gallon/3.8L
Dark Blue/Bleu foncé/Azuloscuro4632 - 8 oz/240ml Jar/Fiole/Frasco
4652 - 32 oz/.95L Jar/Fiole/Frasc4672 - 1 Gallon/3.8L
Brown/Brun/Marrón4636 - 8 oz/240ml Jar/Fiole/Frasco4656 - 32 oz/.95L Jar/Fiole/Frasc4676 - 1 Gallon/3.8L
Speedball® Permanent Acrylic Screen Printing Ink Colors
Couleurs d’encres acryliques permanentes Speedball pour sérigraphieColores de tintas acrílicas permanentes Speedball para serigrafía
12
8/8/2019 28052 Inst Fabric Screen Printing Kit
http://slidepdf.com/reader/full/28052-inst-fabric-screen-printing-kit 13/16
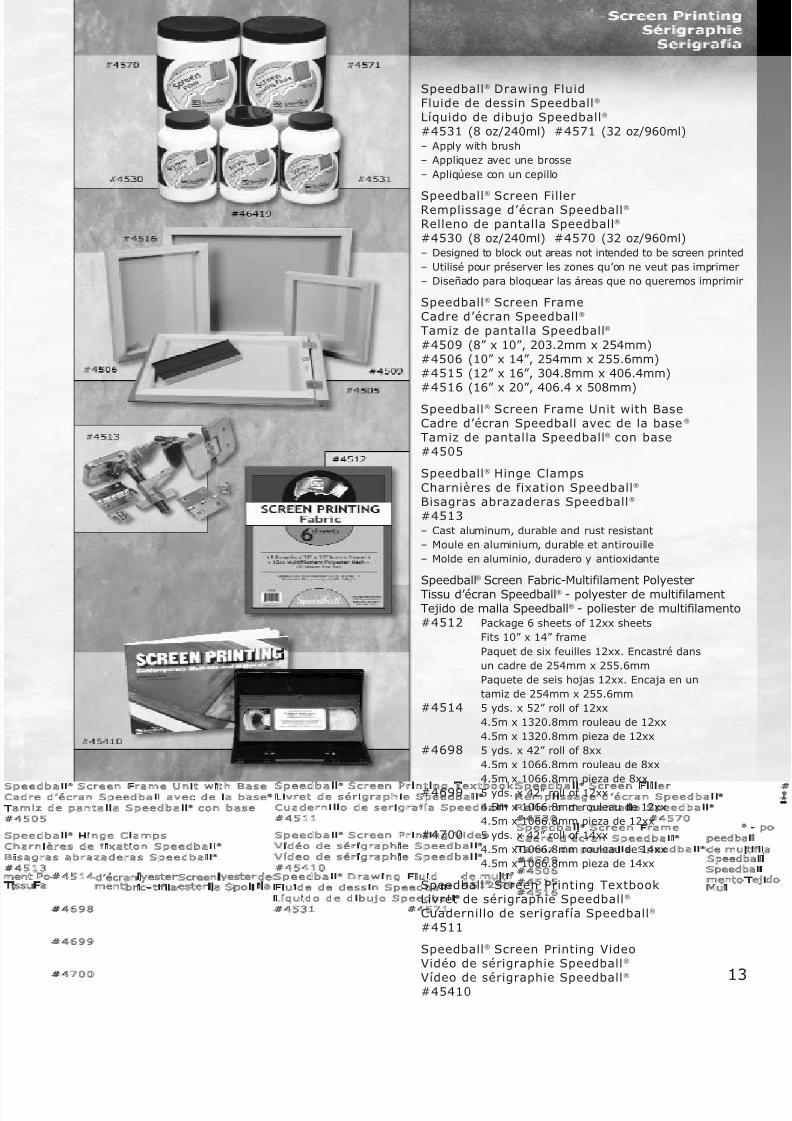
Speedball® Drawing FluidFluide de dessin Speedball®
Líquido de dibujo Speedball®
#4531 (8 oz/240ml) #4571 (32 oz/960ml)– Apply with brush
– Appliquez avec une brosse
– Apliqúese con un cepillo
Speedball® Screen FillerRemplissage d’écran Speedball®
Relleno de pantalla Speedball®
#4530 (8 oz/240ml) #4570 (32 oz/960ml)– Designed to block out areas not intended to be screen printed
– Utilisé pour préserver les zones qu’on ne veut pas imprimer
– Diseñado para bloquear las áreas que no queremos imprimir
Speedball® Screen FrameCadre d’écran Speedball®
Tamiz de pantalla Speedball®
#4509 (8” x 10”, 203.2mm x 254mm)#4506 (10” x 14”, 254mm x 255.6mm)#4515 (12” x 16”, 304.8mm x 406.4mm)
#4516 (16” x 20”, 406.4 x 508mm)Speedball® Screen Frame Unit with BaseCadre d’écran Speedball avec de la base®
Tamiz de pantalla Speedball® con base#4505
Speedball® Hinge ClampsCharnières de fixation Speedball®
Bisagras abrazaderas Speedball®
#4513– Cast aluminum, durable and rust resistant
– Moule en aluminium, durable et antirouille
– Molde en aluminio, duradero y antioxidante
Speedball® Screen Fabric-Multifilament PolyesterTissu d’écran Speedball® - polyester de multifilamentTejido de malla Speedball® - poliester de multif ilamento#4512 Package 6 sheets of 12xx sheets
Fits 10” x 14” frame
Paquet de six feuilles 12xx. Encastré dans
un cadre de 254mm x 255.6mm
Paquete de seis hojas 12xx. Encaja en un
tamiz de 254mm x 255.6mm
#4514 5 yds. x 52” roll of 12xx
4.5m x 1320.8mm rouleau de 12xx
4.5m x 1320.8mm pieza de 12xx
#4698 5 yds. x 42” roll of 8xx
4.5m x 1066.8mm rouleau de 8xx
4.5m x 1066.8mm pieza de 8xx
#4699 5 yds. x 42” roll of 12xx
4.5m x 1066.8mm rouleau de 12xx
4.5m x 1066.8mm pieza de 12xx
#4700 5 yds. x 42” roll of 14xx
4.5m x 1066.8mm rouleau de 14xx
4.5m x 1066.8mm pieza de 14xx
Speedball® Screen Printing TextbookLivret de sérigraphie Speedball®
Cuadernillo de serigrafía Speedball®
#4511
Speedball® Screen Printing VideoVidéo de sérigraphie Speedball®
Vídeo de sérigraphie Speedball®
#45410 13
8/8/2019 28052 Inst Fabric Screen Printing Kit
http://slidepdf.com/reader/full/28052-inst-fabric-screen-printing-kit 14/16
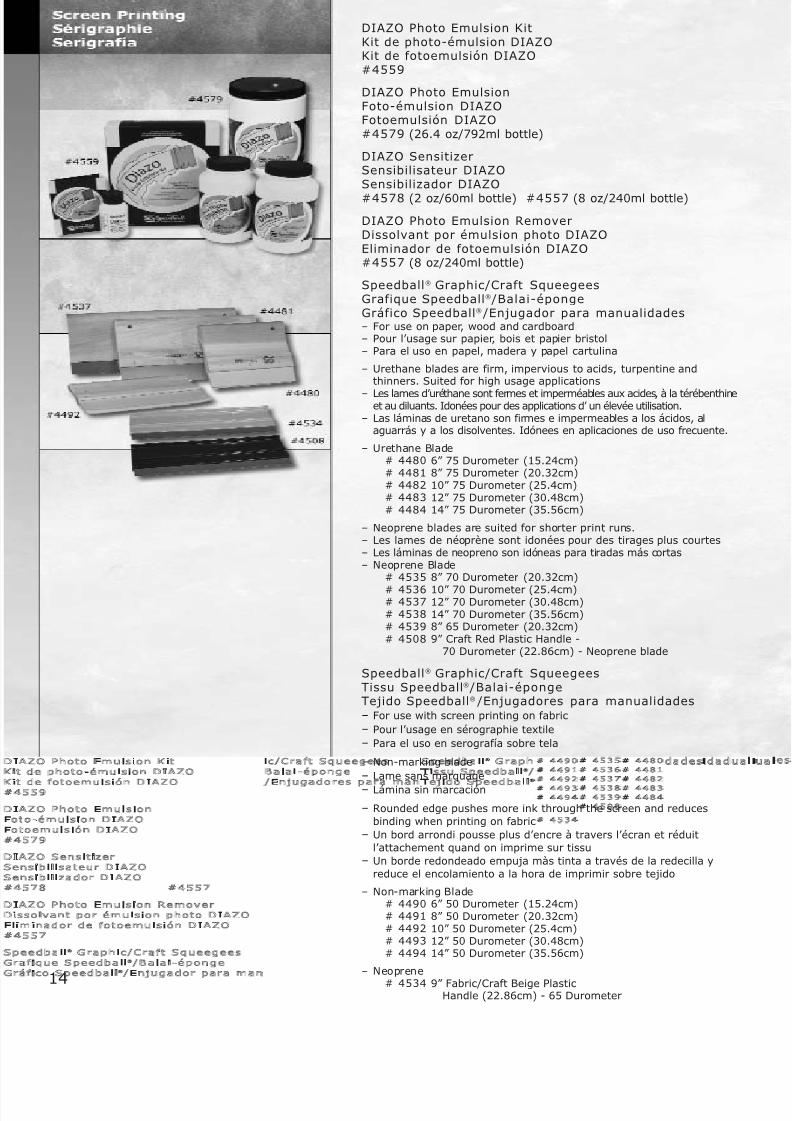
DIAZO Photo Emulsion KitKit de photo-émulsion DIAZOKit de fotoemulsión DIAZO#4559
DIAZO Photo EmulsionFoto-émulsion DIAZOFotoemulsión DIAZO#4579 (26.4 oz/792ml bottle)
DIAZO SensitizerSensibilisateur DIAZOSensibilizador DIAZO
#4578 (2 oz/60ml bottle) #4557 (8 oz/240ml bottle)
DIAZO Photo Emulsion RemoverDissolvant por émulsion photo DIAZOEliminador de fotoemulsión DIAZO#4557 (8 oz/240ml bottle)
Speedball® Graphic/Craft SqueegeesGrafique Speedball® /Balai-épongeGráfico Speedball® /Enjugador para manualidades– For use on paper, wood and cardboard– Pour l’usage sur papier, bois et papier bristol– Para el uso en papel, madera y papel cartulina
– Urethane blades are firm, impervious to acids, turpentine andthinners. Suited for high usage applications
– Les lames d’uréthane sont fermes et imperméables aux acides, à la térébenthineet au diluants. Idonées pour des applications d’ un élevée utilisation.
– Las láminas de uretano son firmes e impermeables a los ácidos, alaguarrás y a los disolventes. Idónees en aplicaciones de uso frecuente.
– Urethane Blade# 4480 6” 75 Durometer (15.24cm)# 4481 8” 75 Durometer (20.32cm)# 4482 10” 75 Durometer (25.4cm)# 4483 12” 75 Durometer (30.48cm)# 4484 14” 75 Durometer (35.56cm)
– Neoprene blades are suited for shorter print runs.– Les lames de néoprène sont idonées pour des tirages plus courtes– Les láminas de neopreno son idóneas para tiradas más cortas– Neoprene Blade
# 4535 8” 70 Durometer (20.32cm)
# 4536 10” 70 Durometer (25.4cm)# 4537 12” 70 Durometer (30.48cm)# 4538 14” 70 Durometer (35.56cm)# 4539 8” 65 Durometer (20.32cm)# 4508 9” Craft Red Plastic Handle -
70 Durometer (22.86cm) - Neoprene blade
Speedball® Graphic/Craft SqueegeesTissu Speedball® /Balai-épongeTejido Speedball® /Enjugadores para manualidades– For use with screen printing on fabric
– Pour l’usage en sérographie textile
– Para el uso en serografía sobre tela
– Non-marking blade
– Lame sans marquage
– Lámina sin marcación
– Rounded edge pushes more ink through the screen and reducesbinding when printing on fabric
– Un bord arrondi pousse plus d’encre à travers l’écran et réduitl’attachement quand on imprime sur tissu
– Un borde redondeado empuja màs tinta a través de la redecilla yreduce el encolamiento a la hora de imprimir sobre tejido
– Non-marking Blade# 4490 6” 50 Durometer (15.24cm)# 4491 8” 50 Durometer (20.32cm)# 4492 10” 50 Durometer (25.4cm)# 4493 12” 50 Durometer (30.48cm)# 4494 14” 50 Durometer (35.56cm)
– Neoprene
# 4534 9” Fabric/Craft Beige PlasticHandle (22.86cm) - 65 Durometer14
8/8/2019 28052 Inst Fabric Screen Printing Kit
http://slidepdf.com/reader/full/28052-inst-fabric-screen-printing-kit 15/16
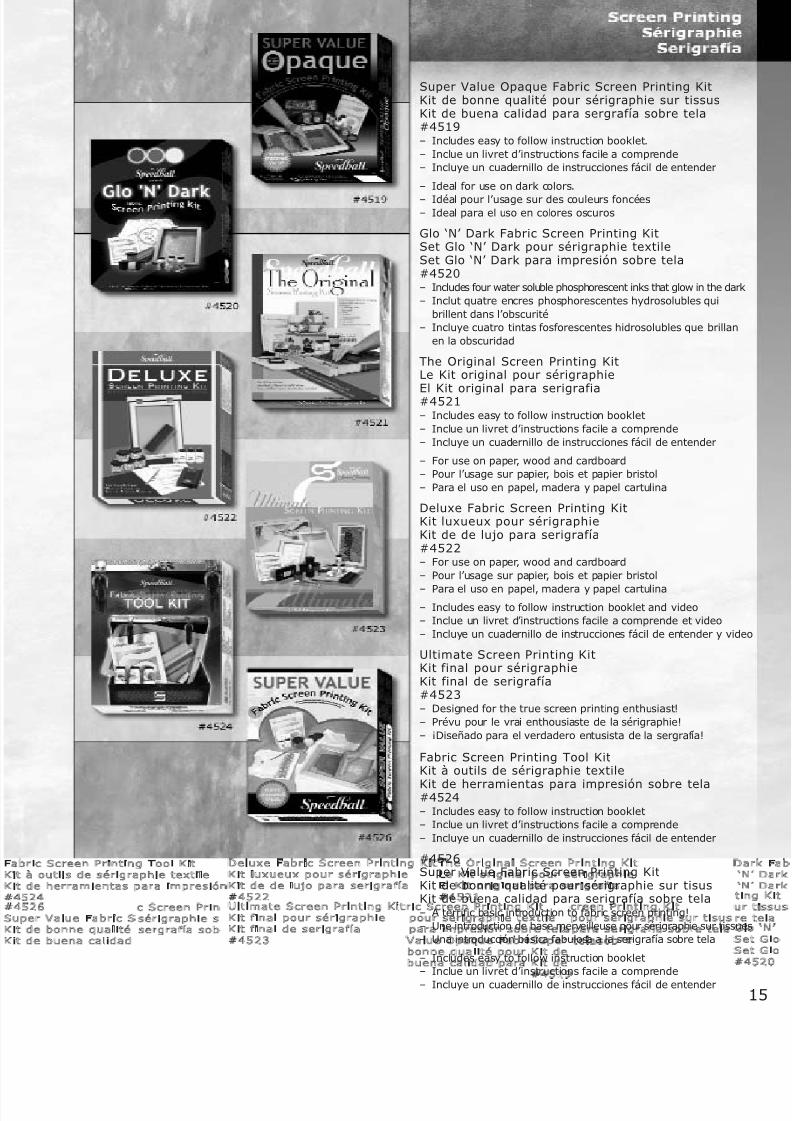
Super Value Opaque Fabric Screen Printing KitKit de bonne qualité pour sérigraphie sur tissusKit de buena calidad para sergrafía sobre tela#4519– Includes easy to follow instruction booklet.
– Inclue un livret d’instructions facile a comprende– Incluye un cuadernillo de instrucciones fácil de entender
– Ideal for use on dark colors.
– Idéal pour l’usage sur des couleurs foncées– Ideal para el uso en colores oscuros
Glo ‘N’ Dark Fabric Screen Printing KitSet Glo ‘N’ Dark pour sérigraphie textileSet Glo ‘N’ Dark para impresión sobre tela#4520– Includes four water soluble phosphorescent inks that glow in the dark
– Inclut quatre encres phosphorescentes hydrosolubles qui
brillent dans l’obscurité– Incluye cuatro tintas fosforescentes hidrosolubles que brillan
en la obscuridad
The Original Screen Printing KitLe Kit original pour sérigraphie
El Kit original para serigrafia#4521– Includes easy to follow instruction booklet
– Inclue un livret d’instructions facile a comprende
– Incluye un cuadernillo de instrucciones fácil de entender
– For use on paper, wood and cardboard– Pour l’usage sur papier, bois et papier bristol
– Para el uso en papel, madera y papel cartulina
Deluxe Fabric Screen Printing KitKit luxueux pour sérigraphieKit de de lujo para serigrafía#4522– For use on paper, wood and cardboard
– Pour l’usage sur papier, bois et papier bristol
– Para el uso en papel, madera y papel cartulina– Includes easy to follow instruction booklet and video– Inclue un livret d’instructions facile a comprende et video
– Incluye un cuadernillo de instrucciones fácil de entender y vid
Ultimate Screen Printing KitKit final pour sérigraphieKit final de serigrafía#4523– Designed for the true screen printing enthusiast!
– Prévu pour le vrai enthousiaste de la sérigraphie!
– ¡Diseñado para el verdadero entusista de la sergrafía!
Fabric Screen Printing Tool KitKit à outils de sérigraphie textile
Kit de herramientas para impresión sobre tela#4524– Includes easy to follow instruction booklet– Inclue un livret d’instructions facile a comprende
– Incluye un cuadernillo de instrucciones fácil de entender
#4526Super Value Fabric Screen Printing KitKit de bonne qualité pour sérigraphie sur tisusKit de buena calidad para serigrafía sobre tela– A terrific basic introduction to fabric screen printing!
– Une introduction de base merveilleuse pour sérigraphie sur tissu– Una introducción básica fabulosa a la serigrafía sobre tela
– Includes easy to follow instruction booklet– Inclue un livret d’instructions facile a comprende
– Incluye un cuadernillo de instrucciones fácil de entender
8/8/2019 28052 Inst Fabric Screen Printing Kit
http://slidepdf.com/reader/full/28052-inst-fabric-screen-printing-kit 16/16