Embed Size (px)
Citation preview
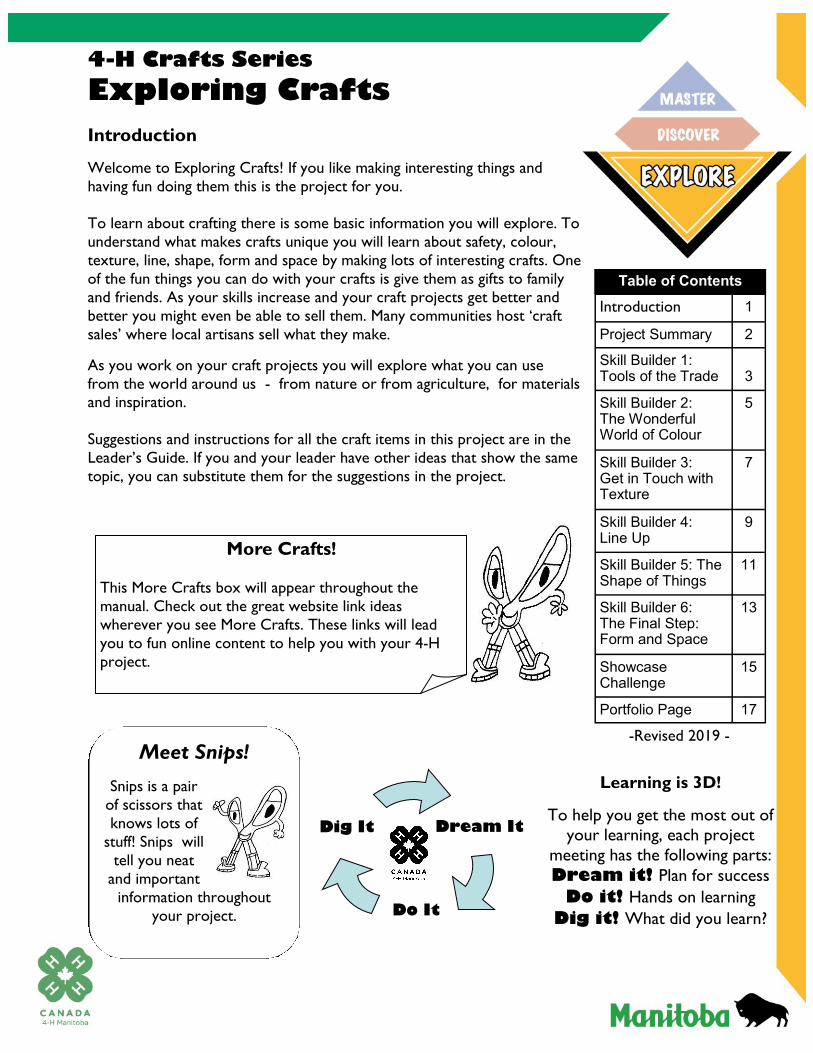
Table of Contents
Introduction 1
Project Summary 2
Skill Builder 1: Tools of the Trade
3
Skill Builder 2: The Wonderful World of Colour
5
Skill Builder 3: Get in Touch with Texture
7
Skill Builder 4: Line Up
9
Skill Builder 5: The Shape of Things
11
Skill Builder 6: The Final Step: Form and Space
13
Showcase Challenge
15
Portfolio Page 17
4-H Crafts Series
Exploring Crafts
Introduction
Welcome to Exploring Crafts! If you like making interesting things and
having fun doing them this is the project for you.
To learn about crafting there is some basic information you will explore. To
understand what makes crafts unique you will learn about safety, colour,
texture, line, shape, form and space by making lots of interesting crafts. One
of the fun things you can do with your crafts is give them as gifts to family
and friends. As your skills increase and your craft projects get better and
better you might even be able to sell them. Many communities host ‘craft
sales’ where local artisans sell what they make.
As you work on your craft projects you will explore what you can use
from the world around us - from nature or from agriculture, for materials and inspiration.
Suggestions and instructions for all the craft items in this project are in the
Leader’s Guide. If you and your leader have other ideas that show the same
topic, you can substitute them for the suggestions in the project.
Learning is 3D!
To help you get the most out of
your learning, each project
meeting has the following parts:
Dream it! Plan for success
Do it! Hands on learning
Dig it! What did you learn?
Meet Snips!
Snips is a pair
of scissors that
knows lots of
stuff! Snips will
tell you neat
and important
information throughout
your project.
More Crafts!
This More Crafts box will appear throughout the
manual. Check out the great website link ideas
wherever you see More Crafts. These links will lead
you to fun online content to help you with your 4-H
project.
-Revised 2019 -
Do It
Dig It
Dream It
Each section or Skill Builder (or Builder) in this project has activities that will help
your project group learn to do by doing while learning new skills and having fun!
What Skills Will You Learn?
To complete this project, you must:
Complete the activities in each Builder OR a similar activity that focuses on
the same skills, as you and your leader may plan other activities.
Plan and complete the Showcase Challenge.
Complete the Portfolio Page.
Participate in your club’s Achievement (See the inside back cover for more
information about 4-H Achievements).
Members will be able to... Activities Page
Skill
Builder
1
Tools of the Trade
Identify tools used in making crafts
Use tools safely
Create a craft using at least 2 tools
Draw 4 tools
What does it say?
Create a craft
3
4
4
Skill
Builder
2
The Wonderful World of Colour
Name the 3 primary colours
Demonstrate how colours mix
Create a craft using colour
Catch a Rainbow
Create a craft
6
6
Skill
Builder
3
Get in Touch with Texture
Explain what texture is
Identify different textures
Create a craft using texture
Texture Collection
Texture Walk
Create a craft
7
8
8
Skill
Builder
4
Line Up
Explain why line is an important element of
design
Create a craft using line
Line Sampler
Create a craft
9
10
Skill
Builder
5
The Shape of Things
Name 4 regular shapes
Explain what irregular shapes are
Create a craft using shape
Shape Collage
Create a craft
11
12
Skill
Builder
6
The Final Step - Form and Space
Demonstrate how to use colour, texture,
line, shape, form and space by creating a final
craft
Putting it all together
Create a craft
13
14
When you successfully complete your builders, you will showcase what you have learned.
Showcase
&
Portfolio
Explain success in using the skills listed above Showcase Challenge
My Portfolio Page
15
17
2
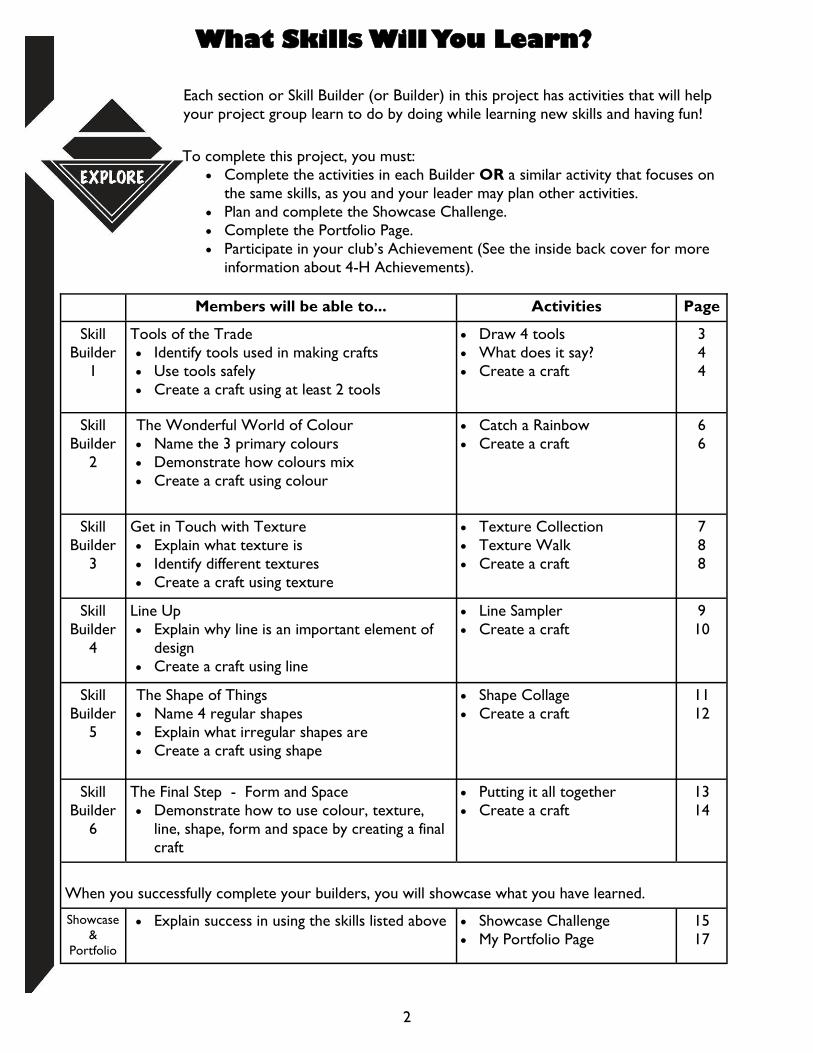
Skill Builder 1: Tools of the Trade
SKILLS CHECKLIST
Identify tools used in making crafts
Use tools safely
Make a craft using at least 2 tools
3
Important words
Watch for these
important words
throughout this
builder:
Safety, Tools, Scissors, Glue
Dream it!
Draw 4 Tools
To begin any project and be successful you need to plan. In Dream it! you will learn about some of
the possible tools you might use to make a craft. Brainstorm with your group to see how many tools
you can think of that you might use in making a craft item. How many did you name? Draw or list 4
tools that you came up with and on the line beneath, name one safety caution for each of the tools.
Snips Says….
In making crafts we can use a large variety of tools and each
one may have a hazard attached to it’s use. We need to
know what tools are used and what the potential hazard is so
we can avoid getting hurt when we are making crafts.

4
Dig it!
What’s next?
In the next skill builder we will explore colour; learning about primary colours
and how they mix to form other colours.
What Does It Say?
Look at the items that your leader has assembled for you. Read the labels and
see if you can find a safety caution listed on the label. Copy the safety caution on
to the lines below and tell us what product it is referring to.
Do it!
Choose one of the following crafts (or another idea)
that uses at least two of the tools discussed in this
builder.
Fun foam door hanger - make one for your room
Pizza for the birds - winter food for our
feathered friends Boxes from old greeting cards - maybe you can use these for small gifts for family and friends
The item(s) I made in this builder _____________________________________________
Be careful using hot glue
guns - there are 2 glue
temperatures. The ‘hot’
glue can cause severe
burns if you get some on
your skin. The ‘cool’ hot
glue can still hurt if it falls
on your skin but the glue
temperature is not as hot as the ’hot’ glue.
Think about this builder
and the activities you did …
Review the Skills Checklist on
page 3. What skills have you
developed? Do you need more
practice?
Record it . . .
Discuss what you have
learned with your leader
so that the information
can be recorded on your
Portfolio Page.
Apply it . . .
Discuss how you
could explain how to
stay safe when using
craft supplies?
Skill Builder 2: The Wonderful World of Colour
SKILLS CHECKLIST
Name the 3 primary colours
Demonstrate how colours mix
Create a craft using colour
Dream it!
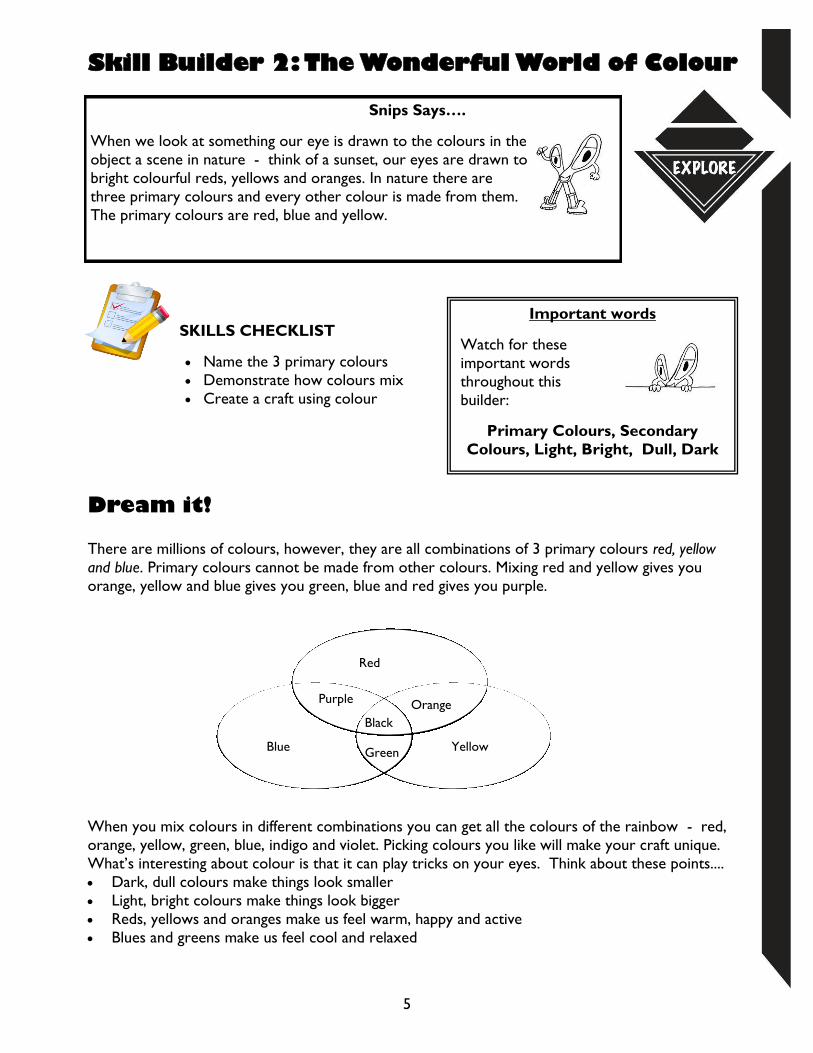
There are millions of colours, however, they are all combinations of 3 primary colours red, yellow
and blue. Primary colours cannot be made from other colours. Mixing red and yellow gives you
orange, yellow and blue gives you green, blue and red gives you purple.
When you mix colours in different combinations you can get all the colours of the rainbow - red,
orange, yellow, green, blue, indigo and violet. Picking colours you like will make your craft unique.
What’s interesting about colour is that it can play tricks on your eyes. Think about these points....
Dark, dull colours make things look smaller
Light, bright colours make things look bigger
Reds, yellows and oranges make us feel warm, happy and active
Blues and greens make us feel cool and relaxed
Purple
Black
Green
Orange
Red
Blue Yellow
Snips Says….
When we look at something our eye is drawn to the colours in the
object a scene in nature - think of a sunset, our eyes are drawn to
bright colourful reds, yellows and oranges. In nature there are
three primary colours and every other colour is made from them.
The primary colours are red, blue and yellow.
Important words
Watch for these
important words
throughout this
builder:
Primary Colours, Secondary
Colours, Light, Bright, Dull, Dark
5
Choose one of he following crafts (or another idea) to learn more about colour Bath salts - layered in a fancy bottle these make a great gift
Sun catcher - add these to a sunny location and see how they reflect colour
Berry ink, fruit printing, potato printing - use products grown in Manitoba for this craft
More Crafts!
Check out this site of illusions to see how colour affects what
we see http://www.grand-illusions.com/opticalillusions/square/
What’s next?
In the next builder we will explore texture and how it can add to the ‘feel‘ of the
crafts you make.
Snips Says….
If you plan to use the 4-H clover logo
in your project , make sure it is the
correct one - in Canada the
registered 4-H logo is the
one with Canada across the
bottom. To download the images see
http://www.4-H-canada.ca/
6
Dig it!
Review what you learned about mixing colours - and fill in the following blanks
What colours do you mix to get
Orange
Green
Purple
How do you remember the colours of the rainbow? One rhyme to help you remember is Roy
G Biv - Red, Orange, Yellow, Green, Blue Indigo Violet. Do you know another rhyme?
Catch a Rainbow To see what happens when colours mix together, try one of the following
activities:
try the experiment at http://www.kidzone.ws/science/rainbow.htm
experiment with mixing paints - instructions are in the Leader’s Guide
Do it!
How could your knowledge about
colour in this builder be used to
help you in other situations?
The item(s) I made in this builder _________________________________
+
+
+
Skill Builder 3: Get in Touch with Texture
SKILLS CHECKLIST
Explain what texture is
Identify different textures
Create a craft using texture
Dream it!
Texture is the way something feels when you touch it. When light is reflected from a surface the way
it is reflected is affected by the texture or feel of the surface. Some things are soft, some are rough,
some smooth to the touch. When light is reflected from a surface it can be shiny or dull.
When making crafts you want to use textures that look like they belong together. Coarse or heavy
yarns and bold, big prints look good on a bulky burlap fabric but on a fine woven cotton they would
not look as good. Finer threads and more delicate patterns would be more suitable.
Texture Collection Look around to see what you can find that shows different textures. Attach a small sample, draw or
describe each item that will show the texture in the spaces below.
Shiny
Dull
Rough
Smooth
Soft
Snips Says….
The way something feels is very important to us. Think of
relaxing in a comfortable chair - we want the chair to feel
smooth and soft. Think of your favourite stuffed animal toy -
does it feel soft and smooth and cuddly? If it felt rough and prickly
would you want to cuddle with it? Texture is another element of
design we need to think about when we are making a craft project.
Important words
Watch for these
important words
throughout this builder:
Texture, Tactile, Visual,
Light, Reflection
7
Do it!
Choose one of the following crafts (or another idea) to learn more about texture.
Seed wreath or pictures - try and use many different seeds grown in Manitoba
Sand pictures
Beaded necklaces - try using beads with texture or ones that look like they have texture
Topiary trees - using pine cones, seeds, dried fruits, shells, pebbles.
Dig it!
What’s next?
You will be looking at line in the next builder. Do you know how many types of
lines there are?
Fun Fact Farmers in Manitoba
grow over 25 different
grain and oilseed crops.
If you decide to make a
seed wreath or picture
or a topiary tree from
seeds, try using as many
as you can.
8
Texture Discovery Walk
Working in pairs, one partner will be blindfolded and the other will be the
guide. The guide will lead the partner around the room to experience as many
different textures as possible. The blindfolded partner should try and name the
texture and guess what the object is. Switch around so everyone has a turn
and remember, the idea of this discovery walk is to experience touch only.
Ideas for objects to encounter on your discovery walk include water, glass, fab-
rics, metal, wood, plastic, rugs, plants, skin, feathers.
Have the guide place the person’s hand on whatever is to be touched, Try to see how different textures feel on different parts of the hand - palm, fingertips,
back or try touching the face with some of the textures.
1. Is your craft item ready to use? • Yes • No
(i.e. If you made a picture, is it ready to hang up? If you made a necklace, is it ready to wear? Is
your item totally finished?)
2. Is your item made with quality in mind? • Yes • No
(i.e. Are there any glue gun “strings” hanging? Is it well made? Is your item a quality item?)
3. If you were going to give yourself a mark for your work during the year what would it be:
• Excellent (I am a hard worker and do more than expected; my work is quality)
• Pretty Good (I work hard and complete what is necessary; my work is quality)
• O.K. (My stuff is O.K. but I know I could do better if I would make more of an effort)
The Finishing Touch Test
• It Will Do (I am really not happy with what I’ve
done, I’m not sure I want to do this again)
4. If there was any thing that you would change in your
work on this craft, what would it be and why?
________________________________________
________________________________________
5. Do you feel it is important to complete a task and
have pride in a job well done? � Yes � No Why?_______________________________________ ____________________________________________
The item(s) I made in this builder _________________________________________________
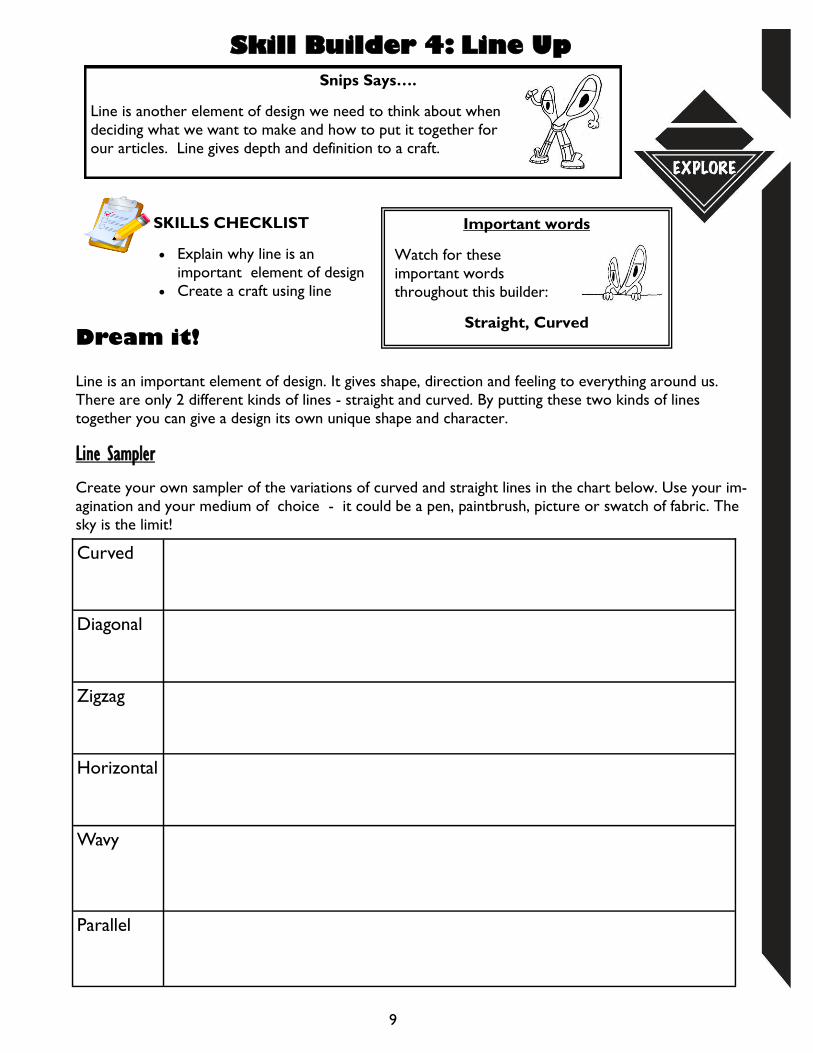
Skill Builder 4: Line Up
SKILLS CHECKLIST
Explain why line is an
important element of design
Create a craft using line
Dream it!
Line is an important element of design. It gives shape, direction and feeling to everything around us.
There are only 2 different kinds of lines - straight and curved. By putting these two kinds of lines
together you can give a design its own unique shape and character.
Line Sampler
Create your own sampler of the variations of curved and straight lines in the chart below. Use your im-
agination and your medium of choice - it could be a pen, paintbrush, picture or swatch of fabric. The
sky is the limit!
Curved
Diagonal
Zigzag
Horizontal
Wavy
Parallel
9
Important words
Watch for these
important words
throughout this builder:
Straight, Curved
Snips Says….
Line is another element of design we need to think about when
deciding what we want to make and how to put it together for
our articles. Line gives depth and definition to a craft.
Dig it!
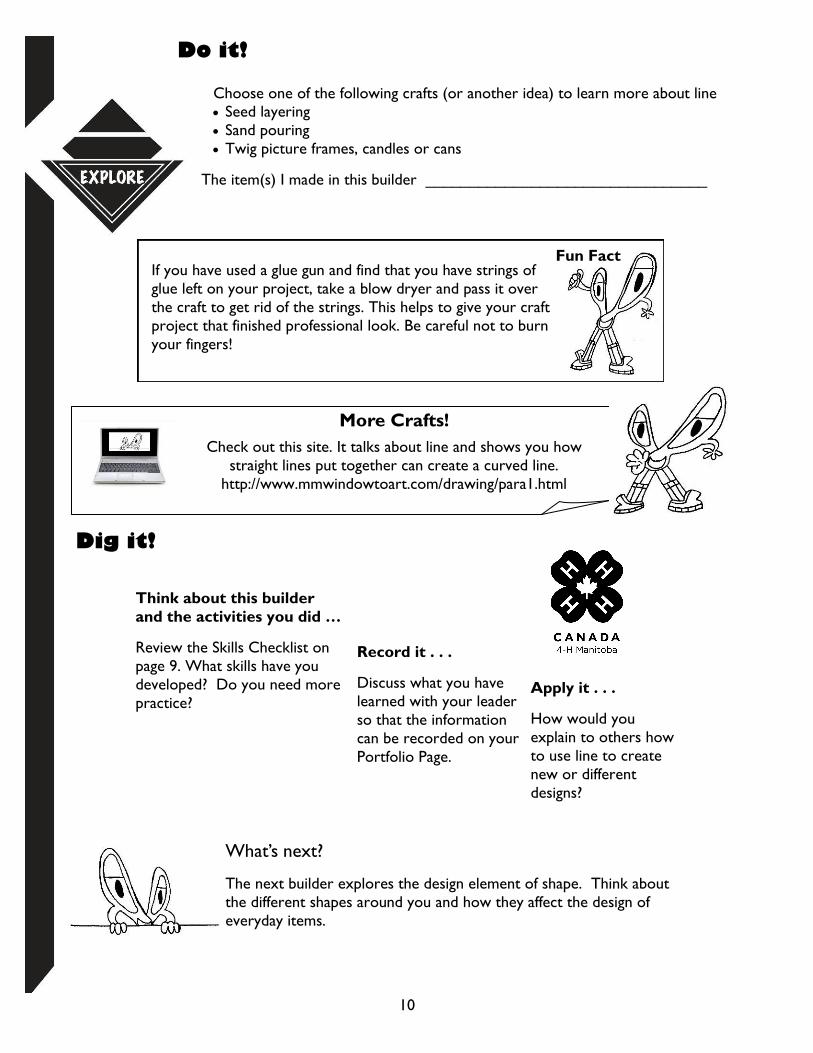
Do it!
Choose one of the following crafts (or another idea) to learn more about line Seed layering
Sand pouring
Twig picture frames, candles or cans
The item(s) I made in this builder ________________________________
More Crafts!
Check out this site. It talks about line and shows you how
straight lines put together can create a curved line.
http://www.mmwindowtoart.com/drawing/para1.html
If you have used a glue gun and find that you have strings of
glue left on your project, take a blow dryer and pass it over
the craft to get rid of the strings. This helps to give your craft
project that finished professional look. Be careful not to burn
your fingers!
Fun Fact
What’s next?
The next builder explores the design element of shape. Think about
the different shapes around you and how they affect the design of
everyday items.
10
Think about this builder
and the activities you did …
Review the Skills Checklist on
page 9. What skills have you
developed? Do you need more
practice?
Record it . . .
Discuss what you have
learned with your leader
so that the information
can be recorded on your
Portfolio Page.
Apply it . . .
How would you
explain to others how
to use line to create
new or different
designs?
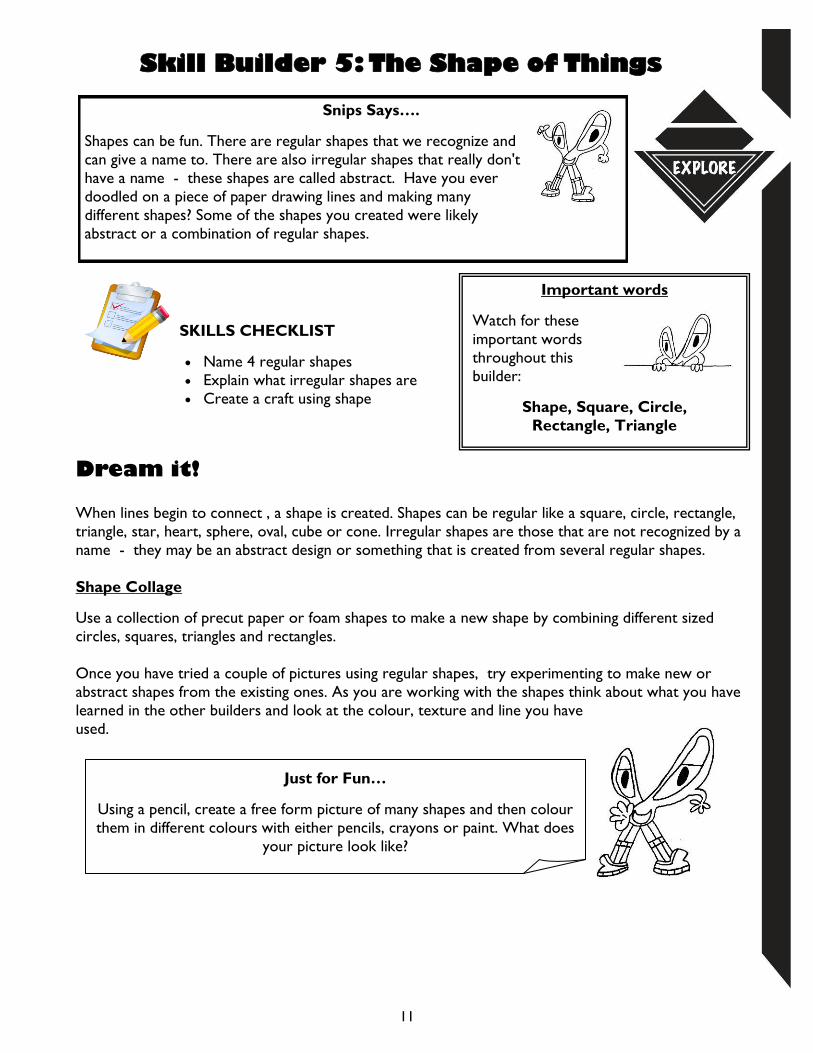
Skill Builder 5: The Shape of Things
SKILLS CHECKLIST
Name 4 regular shapes
Explain what irregular shapes are
Create a craft using shape
Important words
Watch for these
important words
throughout this
builder:
Shape, Square, Circle,
Rectangle, Triangle
Snips Says….
Shapes can be fun. There are regular shapes that we recognize and
can give a name to. There are also irregular shapes that really don't
have a name - these shapes are called abstract. Have you ever
doodled on a piece of paper drawing lines and making many
different shapes? Some of the shapes you created were likely
abstract or a combination of regular shapes.
Dream it!
When lines begin to connect , a shape is created. Shapes can be regular like a square, circle, rectangle,
triangle, star, heart, sphere, oval, cube or cone. Irregular shapes are those that are not recognized by a
name - they may be an abstract design or something that is created from several regular shapes.
Shape Collage
Use a collection of precut paper or foam shapes to make a new shape by combining different sized
circles, squares, triangles and rectangles.
Once you have tried a couple of pictures using regular shapes, try experimenting to make new or
abstract shapes from the existing ones. As you are working with the shapes think about what you have
learned in the other builders and look at the colour, texture and line you have
used.
Just for Fun…
Using a pencil, create a free form picture of many shapes and then colour
them in different colours with either pencils, crayons or paint. What does
your picture look like?
11
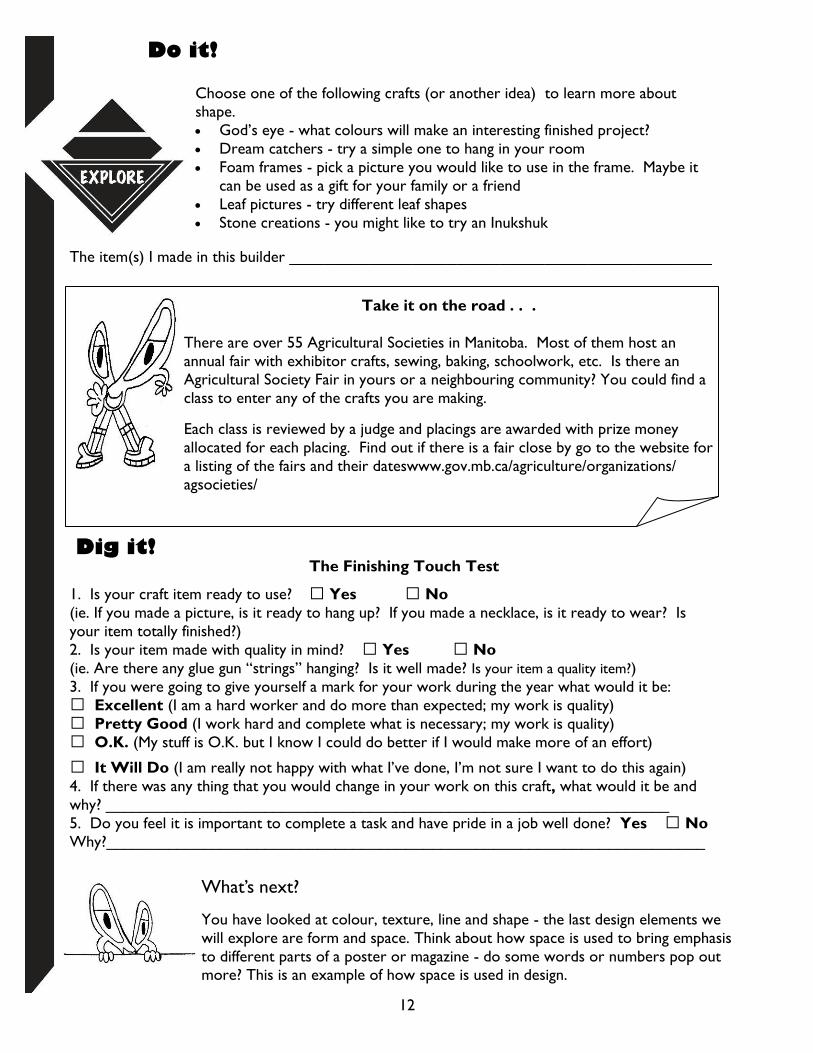
Take it on the road . . .
There are over 55 Agricultural Societies in Manitoba. Most of them host an
annual fair with exhibitor crafts, sewing, baking, schoolwork, etc. Is there an Agricultural Society Fair in yours or a neighbouring community? You could find a
class to enter any of the crafts you are making.
Each class is reviewed by a judge and placings are awarded with prize money
allocated for each placing. Find out if there is a fair close by go to the website for
a listing of the fairs and their dateswww.gov.mb.ca/agriculture/organizations/
agsocieties/
Dig it!
Do it!
Choose one of the following crafts (or another idea) to learn more about shape.
God’s eye - what colours will make an interesting finished project?
Dream catchers - try a simple one to hang in your room
Foam frames - pick a picture you would like to use in the frame. Maybe it
can be used as a gift for your family or a friend
Leaf pictures - try different leaf shapes
Stone creations - you might like to try an Inukshuk
What’s next?
You have looked at colour, texture, line and shape - the last design elements we
will explore are form and space. Think about how space is used to bring emphasis
to different parts of a poster or magazine - do some words or numbers pop out more? This is an example of how space is used in design.
12
1. Is your craft item ready to use? • Yes • No
(ie. If you made a picture, is it ready to hang up? If you made a necklace, is it ready to wear? Is
your item totally finished?)
2. Is your item made with quality in mind? • Yes • No
(ie. Are there any glue gun “strings” hanging? Is it well made? Is your item a quality item?)
3. If you were going to give yourself a mark for your work during the year what would it be:
• Excellent (I am a hard worker and do more than expected; my work is quality)
• Pretty Good (I work hard and complete what is necessary; my work is quality)
• O.K. (My stuff is O.K. but I know I could do better if I would make more of an effort)
The Finishing Touch Test
• It Will Do (I am really not happy with what I’ve done, I’m not sure I want to do this again)
4. If there was any thing that you would change in your work on this craft, what would it be and
why? ________________________________________________________________
5. Do you feel it is important to complete a task and have pride in a job well done? Yes • No
Why?____________________________________________________________________
The item(s) I made in this builder ________________________________________________
Skill Builder 6: The Final Step -
Form and Space
SKILLS CHECKLIST
Demonstrate how to use colour,
texture, line, shape, form and space
by creating a final craft
Dream it!
Space is endless - borders or outlines limit it. Our eye also limits space because we can only see so
far ahead or to the side without moving.
Space around a design is just as important as the design itself. Some shapes look good together while
others do not look very good together. Curved lines look better with curved shapes and spaces.
Straight or angular shapes are usually best put together with other angular shapes and spaces.
Sometimes size will affect how well the design looks together.
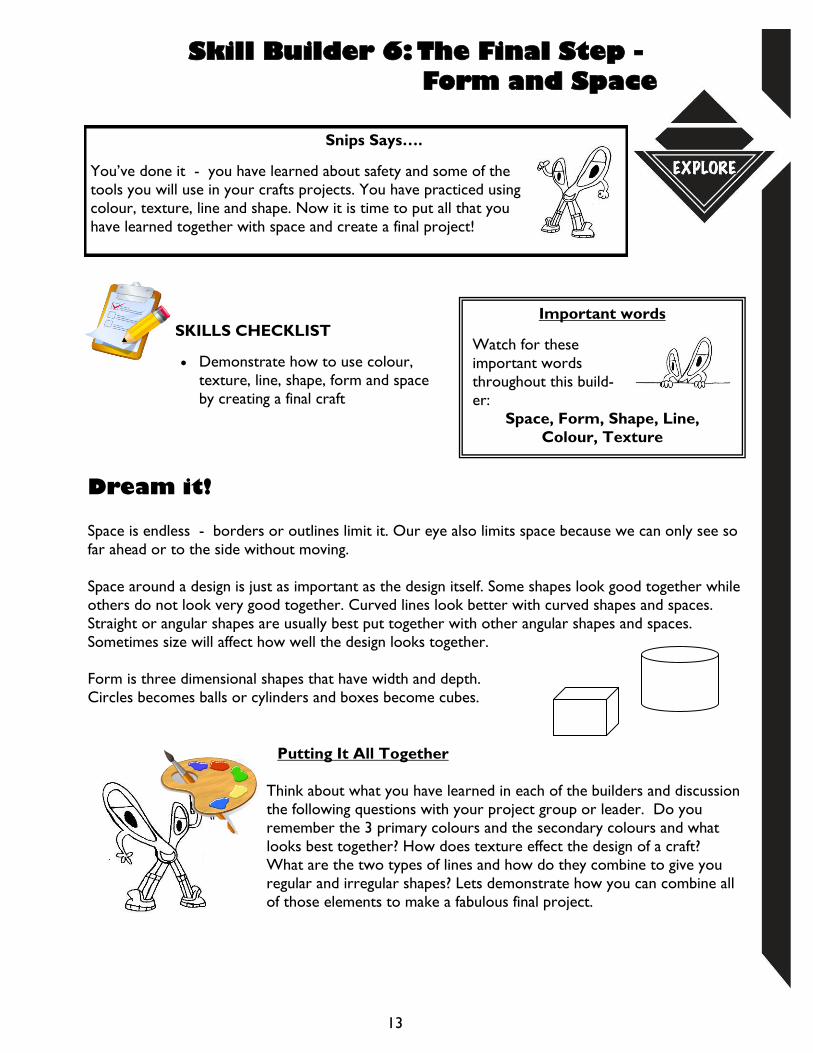
Form is three dimensional shapes that have width and depth.
Circles becomes balls or cylinders and boxes become cubes.
Putting It All Together
Think about what you have learned in each of the builders and discussion
the following questions with your project group or leader. Do you
remember the 3 primary colours and the secondary colours and what
looks best together? How does texture effect the design of a craft?
What are the two types of lines and how do they combine to give you
regular and irregular shapes? Lets demonstrate how you can combine all
of those elements to make a fabulous final project.
Snips Says….
You’ve done it - you have learned about safety and some of the
tools you will use in your crafts projects. You have practiced using
colour, texture, line and shape. Now it is time to put all that you
have learned together with space and create a final project!
Important words
Watch for these
important words
throughout this build-
er:
Space, Form, Shape, Line,
Colour, Texture
13
Dig it!
What’s next? Now that you have finished all the builders in this project it is time to think
about and plan for the Showcase Challenge. Make sure to complete the Portfolio
Page. There will be space for you to write down some thoughts and reflections
on the project (what you liked and didn’t like, etc.). Be sure to refer to Page 2 to
review what you need to do to complete this Exploring Crafts project.
Do it!
Choose one of the following items, (or another idea) that demonstrates all the
elements of design:
Shadow box - do you have a collection of things you would like to
display together - shells, small stones, baby items, trading cards, or other
items that would fit into a show box?
Experiment with polymer clay - try making beads, an animal, a person or
some other item.
Make a kite - the sky’s the limit!
Make a game - Tic Tac Toe, Ring Toss, Juggling Balls are just some ideas.
14
More Crafts!
Check out these web sites. You might find ideas for
your final project.
http://www.canadianliving.com/crafts/kids_crafts/ http://www.sculpey.com
http://www.hgtv.com
Picture this . . . insert a photo of the craft(s) you made, or describe in the space provided.
In this picture, I want you to notice ________________________________________________
If I was to change one thing about this craft, it would be _________________________________
Showcase Challenge Bringing it all together!
Now that you have finished this project, it is time to think about how you will
share your experiences and knowledge with others. You may put your new skills
to work by helping at a community event or at your club Achievement or teaching
others about your topic. The goal of the Showcase Challenge is to help highlight your new skills and help you understand how you can use them. It can be an op-
portunity to receive feedback from others on your project. So go back through
your manual and find some highlights of your learning (what you are proud of) and
think about how you will “showcase” it.
Demonstrate something you made
or learned about
Make a poster or display
Make a pamphlet Make a computer presentation (e.g.
PowerPoint)
Give a speech Write a report
Use your new skills to help with the
Club Achievement plans
Or come up with your own idea. It is
up to you and your leader!
Dream It!
Here are some Showcase Challenge Suggestions:
15
My Showcase Challenge Plan
My showcase idea: ________________________________________________________
______________________________________________________________________
What materials and resources do I need? _______________________________________
______________________________________________________________________
Who do I need to help me? _________________________________________________
______________________________________________________________________
When do I need to have things done by? _______________________________________
______________________________________________________________________
Do It!
Insert or attach your finished product or a photo of you sharing your skills in
your Showcase Challenge.
Dig It!
Now that you have showcased your project skills:
How did your Showcase Challenge go?
What would you do differently next time?
How will you use your new skills in the future? (in different situations?)
16
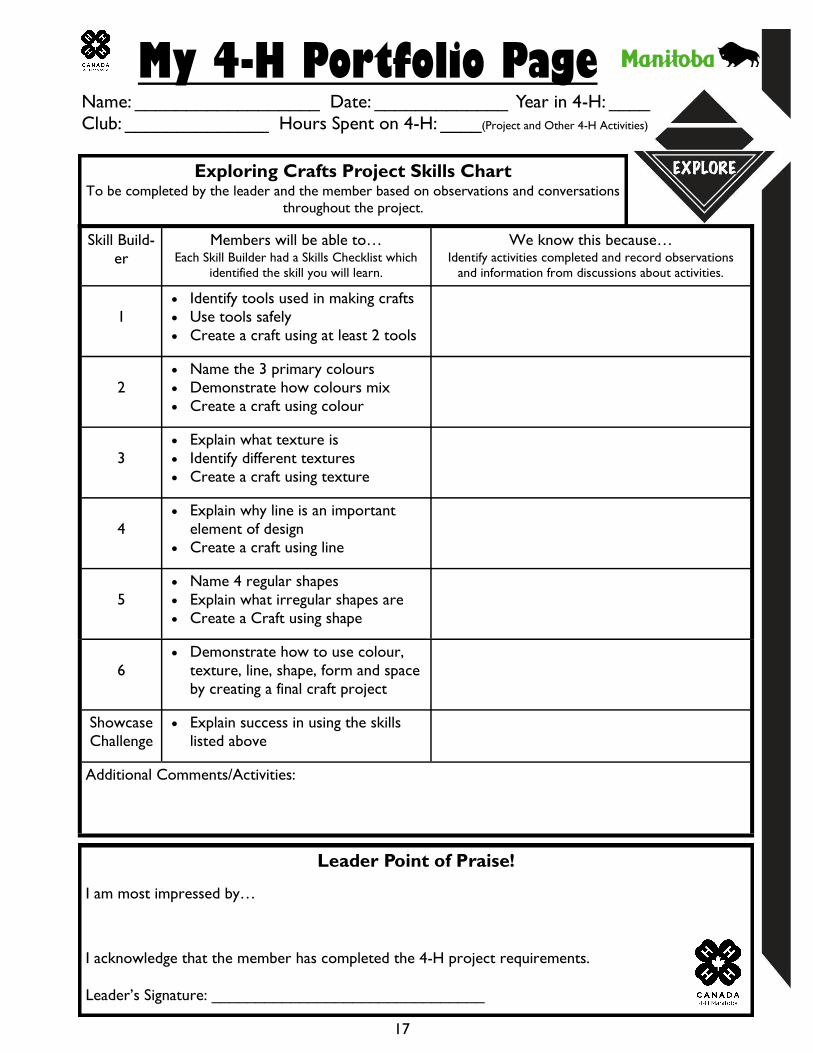
Name: __________________ Date: _____________ Year in 4-H: ____
Club: ______________ Hours Spent on 4-H: ____(Project and Other 4-H Activities)
My 4-H Portfolio Page
Skill Build-
er
Members will be able to… Each Skill Builder had a Skills Checklist which
identified the skill you will learn.
We know this because… Identify activities completed and record observations
and information from discussions about activities.
1
Identify tools used in making crafts
Use tools safely
Create a craft using at least 2 tools
2
Name the 3 primary colours
Demonstrate how colours mix
Create a craft using colour
3
Explain what texture is
Identify different textures
Create a craft using texture
4
Explain why line is an important
element of design
Create a craft using line
5
Name 4 regular shapes
Explain what irregular shapes are
Create a Craft using shape
6
Demonstrate how to use colour,
texture, line, shape, form and space
by creating a final craft project
Showcase
Challenge
Explain success in using the skills
listed above
Additional Comments/Activities:
Leader Point of Praise!
I am most impressed by…
I acknowledge that the member has completed the 4-H project requirements.
Leader’s Signature: _______________________________
Exploring Crafts Project Skills Chart To be completed by the leader and the member based on observations and conversations
throughout the project.
17
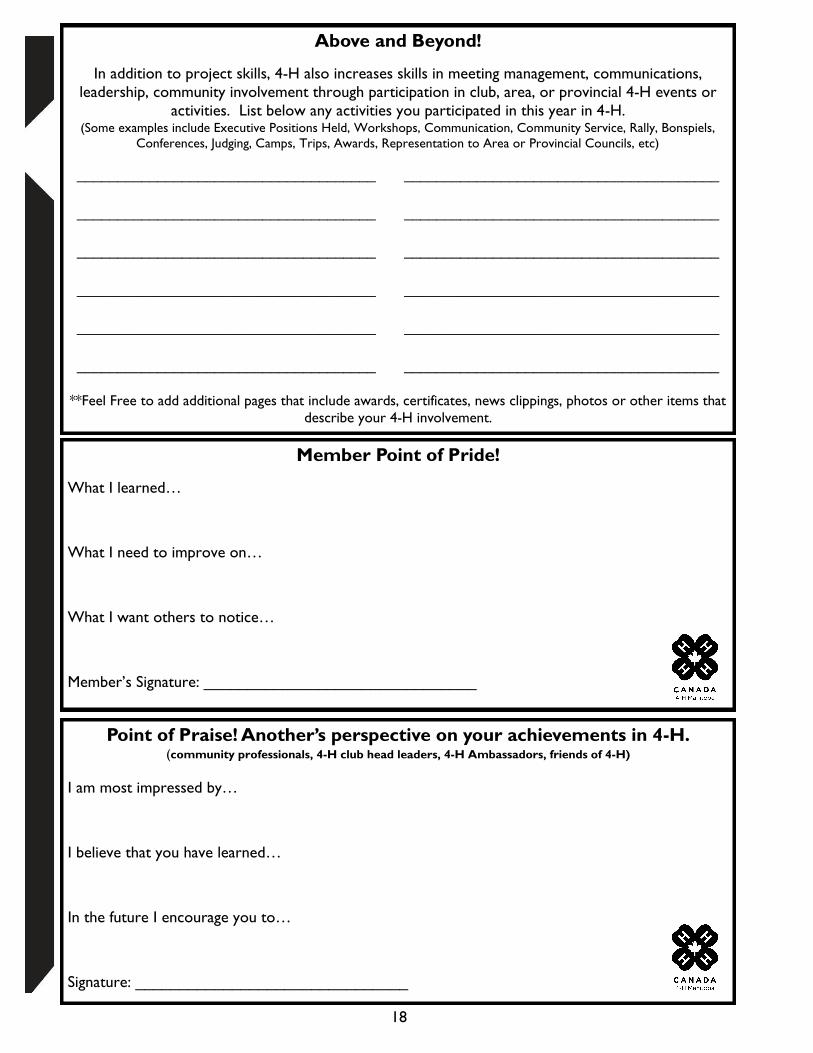
Member Point of Pride!
What I learned…
What I need to improve on…
What I want others to notice…
Member’s Signature: _______________________________
Point of Praise! Another’s perspective on your achievements in 4-H. (community professionals, 4-H club head leaders, 4-H Ambassadors, friends of 4-H)
I am most impressed by…
I believe that you have learned…
In the future I encourage you to…
Signature: _______________________________
Above and Beyond!
In addition to project skills, 4-H also increases skills in meeting management, communications,
leadership, community involvement through participation in club, area, or provincial 4-H events or
activities. List below any activities you participated in this year in 4-H. (Some examples include Executive Positions Held, Workshops, Communication, Community Service, Rally, Bonspiels,
Conferences, Judging, Camps, Trips, Awards, Representation to Area or Provincial Councils, etc)
_____________________________________ _______________________________________
_____________________________________ _______________________________________
_____________________________________ _______________________________________
_____________________________________ _______________________________________
_____________________________________ _______________________________________
_____________________________________ _______________________________________
**Feel Free to add additional pages that include awards, certificates, news clippings, photos or other items that
describe your 4-H involvement.
18
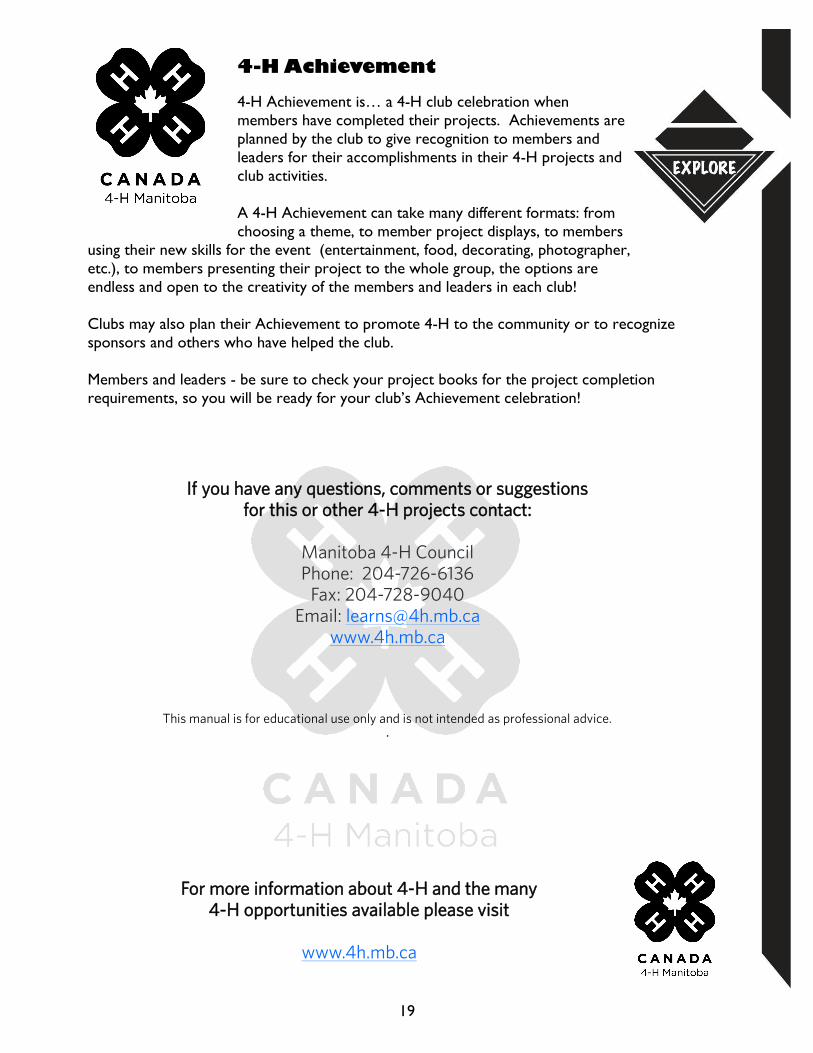
4-H Achievement
4-H Achievement is… a 4-H club celebration when
members have completed their projects. Achievements are
planned by the club to give recognition to members and
leaders for their accomplishments in their 4-H projects and
club activities.
A 4-H Achievement can take many different formats: from
choosing a theme, to member project displays, to members
using their new skills for the event (entertainment, food, decorating, photographer,
etc.), to members presenting their project to the whole group, the options are
endless and open to the creativity of the members and leaders in each club!
Clubs may also plan their Achievement to promote 4-H to the community or to recognize
sponsors and others who have helped the club.
Members and leaders - be sure to check your project books for the project completion
requirements, so you will be ready for your club’s Achievement celebration!
For more information about 4-H and the many 4-H opportunities available please visit
www.4h.mb.ca
If you have any questions, comments or suggestions for this or other 4-H projects contact:
Manitoba 4-H Council Phone: 204-726-6136
Fax: 204-728-9040 Email: [email protected]
www.4h.mb.ca
This manual is for educational use only and is not intended as professional advice. .
19
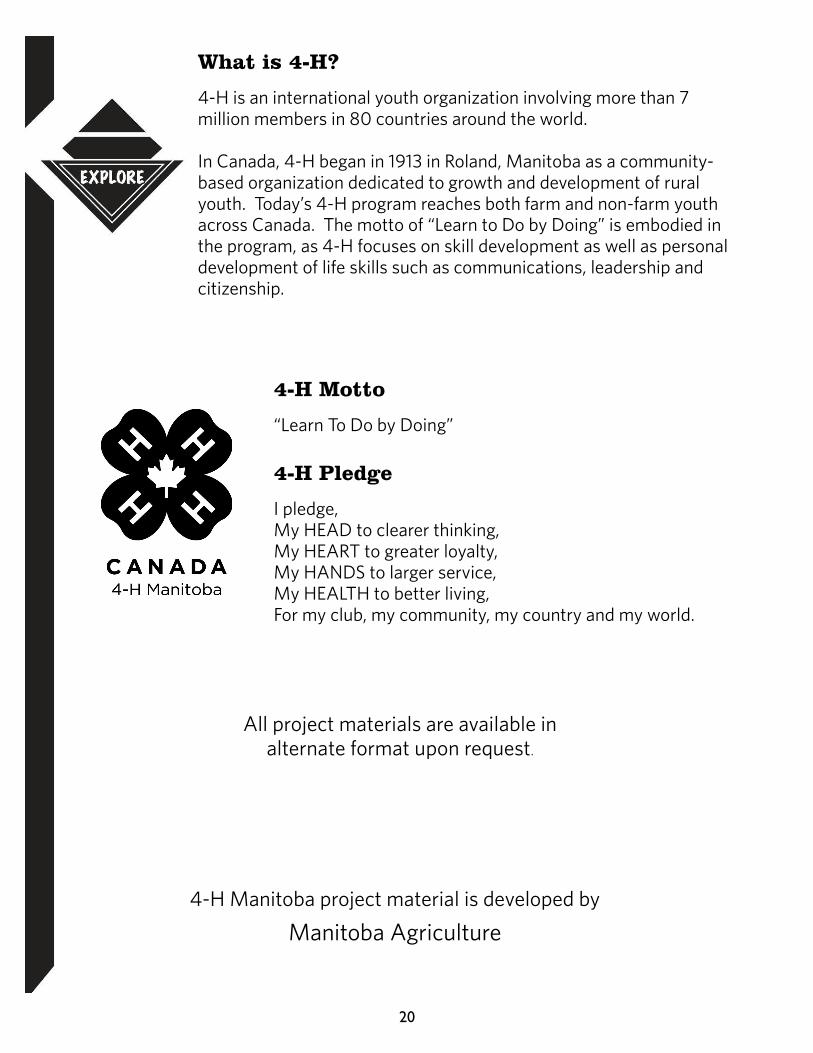
4-H Motto
“Learn To Do by Doing”
4-H Pledge
I pledge, My HEAD to clearer thinking, My HEART to greater loyalty, My HANDS to larger service, My HEALTH to better living, For my club, my community, my country and my world.
What is 4-H?
4-H is an international youth organization involving more than 7 million members in 80 countries around the world. In Canada, 4-H began in 1913 in Roland, Manitoba as a community-based organization dedicated to growth and development of rural youth. Today’s 4-H program reaches both farm and non-farm youth across Canada. The motto of “Learn to Do by Doing” is embodied in the program, as 4-H focuses on skill development as well as personal development of life skills such as communications, leadership and citizenship.
4-H Manitoba project material is developed by
Manitoba Agriculture
20
All project materials are available in alternate format upon request.