Embed Size (px)
Citation preview
Welcome 4-H Leaders!
Welcome to the “Discovering Breads” project. There is lots of information, fun facts, and activities to help your members learn. This project covers the basics of bread: it’s history, ingredients, and easy ways to prepare it. This project also looks at when bread is safe to eat and when it should be discarded. The last builder will help members explore two ways to make money baking bread - the bakery and the farmer’s market/bake sale. This guide provides you with project meeting plans (Skill Builders) that include, a skills list, background information, activity suggestions, and ways to know if your members have learned the skills identified. In short, all the information and tools necessary to make this project a rewarding one for you and your members.
The Leader Guide is written with the expectation that the project leader(s) will have a working knowledge about baking homemade bread. If not, you may need to do some pre-work / research on the activities, or recruit assistance for certain sections. Be sure to try out activities, demonstrations or hands on work ahead of time to ensure you have an understanding of each Skill Builder - this also allows for any adjustments should an activity not work for you or if any equipment or supplies are unavailable.
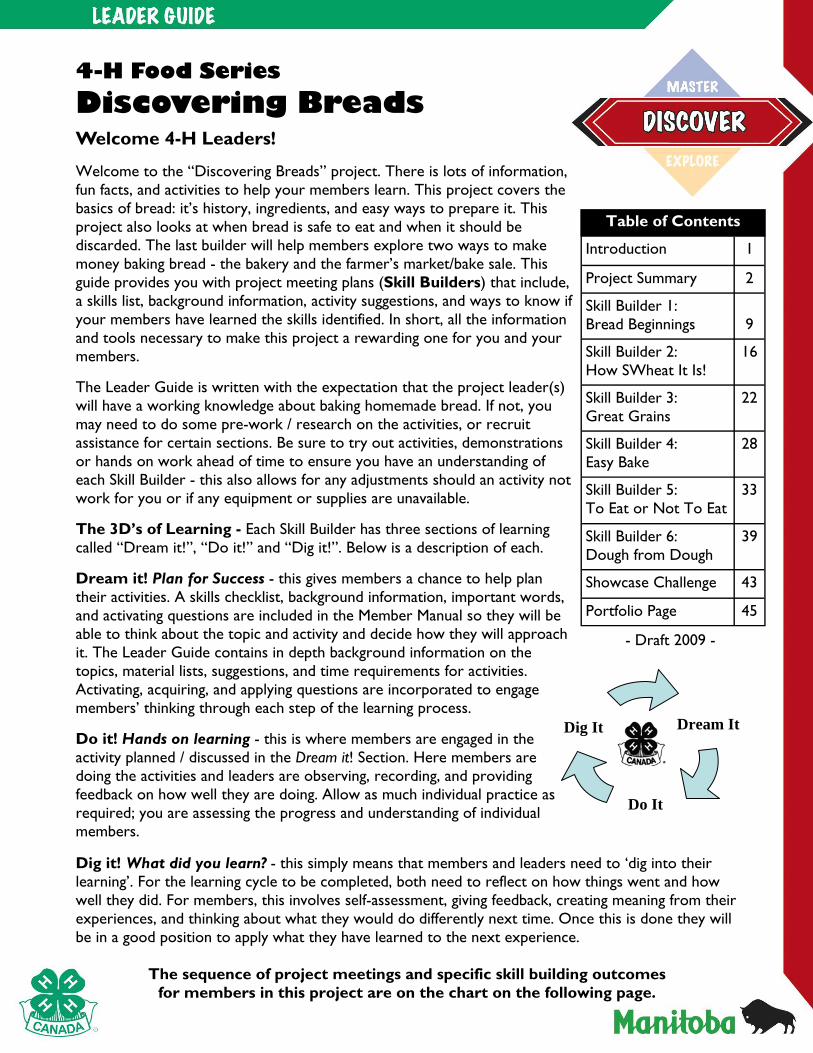
The 3D’s of Learning - Each Skill Builder has three sections of learning called “Dream it!”, “Do it!” and “Dig it!”. Below is a description of each.
Dream it! Plan for Success - this gives members a chance to help plan their activities. A skills checklist, background information, important words, and activating questions are included in the Member Manual so they will be able to think about the topic and activity and decide how they will approach it. The Leader Guide contains in depth background information on the topics, material lists, suggestions, and time requirements for activities. Activating, acquiring, and applying questions are incorporated to engage members’ thinking through each step of the learning process.
Do it! Hands on learning - this is where members are engaged in the activity planned / discussed in the Dream it! Section. Here members are doing the activities and leaders are observing, recording, and providing feedback on how well they are doing. Allow as much individual practice as required; you are assessing the progress and understanding of individual members.
Dig it! What did you learn? - this simply means that members and leaders need to ‘dig into their learning’. For the learning cycle to be completed, both need to reflect on how things went and how well they did. For members, this involves self-assessment, giving feedback, creating meaning from their experiences, and thinking about what they would do differently next time. Once this is done they will be in a good position to apply what they have learned to the next experience.
The sequence of project meetings and specific skill building outcomes
for members in this project are on the chart on the following page.
4-H Food Series
Discovering Breads
Do It
Dig It
Dream It
Table of Contents
Introduction 1
Project Summary 2
Skill Builder 1: Bread Beginnings
9
Skill Builder 2: How SWheat It Is!
16
Skill Builder 3: Great Grains
22
Skill Builder 4: Easy Bake
28
Skill Builder 5: To Eat or Not To Eat
33
Skill Builder 6: Dough from Dough
39
Showcase Challenge 43
Portfolio Page 45
- Draft 2009 -
2
Each section, Skill Builder (or Builder) in this project has activities that will help your project group learn to do by doing while learning new skills and having fun!
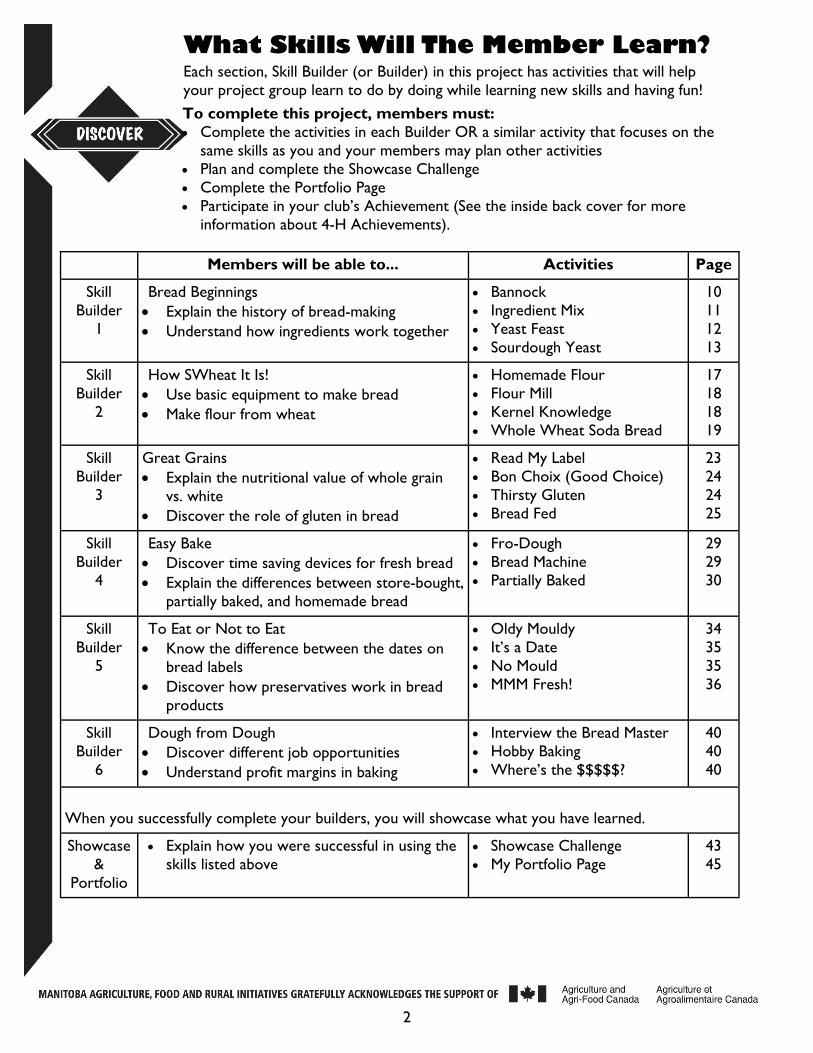
What Skills Will The Member Learn?
To complete this project, members must: Complete the activities in each Builder OR a similar activity that focuses on the
same skills as you and your members may plan other activities Plan and complete the Showcase Challenge Complete the Portfolio Page Participate in your club’s Achievement (See the inside back cover for more
information about 4-H Achievements).
Members will be able to... Activities Page
Skill Builder
1
Bread Beginnings Explain the history of bread-making Understand how ingredients work together
Bannock Ingredient Mix Yeast Feast Sourdough Yeast
10 11 12 13
Skill Builder
2
How SWheat It Is! Use basic equipment to make bread Make flour from wheat
Homemade Flour Flour Mill Kernel Knowledge Whole Wheat Soda Bread
17 18 18 19
Skill Builder
3
Great Grains Explain the nutritional value of whole grain
vs. white Discover the role of gluten in bread
Read My Label Bon Choix (Good Choice) Thirsty Gluten Bread Fed
23 24 24 25
Skill Builder
4
Easy Bake Discover time saving devices for fresh bread Explain the differences between store-bought,
partially baked, and homemade bread
Fro-Dough Bread Machine Partially Baked
29 29 30
Skill Builder
5
To Eat or Not to Eat Know the difference between the dates on
bread labels Discover how preservatives work in bread
products
Oldy Mouldy It’s a Date No Mould MMM Fresh!
34 35 35 36
Skill Builder
6
Dough from Dough Discover different job opportunities Understand profit margins in baking
Interview the Bread Master Hobby Baking Where’s the $$$$$?
40 40 40
When you successfully complete your builders, you will showcase what you have learned.
Showcase &
Portfolio
Explain how you were successful in using the skills listed above
Showcase Challenge My Portfolio Page
43 45
4-H Project Series Skill Development Levels Each project topic series contains three levels of skill development: explore, discover, and master. Explore - each project series has one project outlining the fundamentals. All members will be expected to complete the Explore level project before moving into the Builder level of projects. It introduces the basic skills and terms needed by members for subsequent projects in that series. Discover - each project series has several project options and members are encouraged to take as many as they would like. At this level, members practice topic specific techniques and gain theme related skills through specialized builders. Master - multiple project options encourage members to specialize in a topic. They may branch out and take advantage of community options such as cooking for a canteen or participating in a food drive. The Leader’s role is look for opportunities for their members to have more authentic experiences by: working with other mentors, partnering with outside agencies, participating in exchanges, entering competitions, etc. Projects at this level may include the “Partner-a-Project” whereby pre-approved courses will allow members to advance their skills, while applying their learning to the 4-H program.
Showcase Challenge and My Portfolio Page At the end of the members’ section are the “Showcase Challenge” and “My Portfolio Page”. The Showcase Challenge page gets members to think about their accomplishments and explain or demonstrate how they were successful. There are a number of suggestions along with planning information to help them decide how they will best “showcase” their learning to friends, family, community members and/or fellow 4-H members.
3
Record keeping is an important part of every 4-H project. “My Portfolio Page” is a graphic organizer used to keep track of members’ 4-H experiences. As each member learns skills, the evidence of learning (through participation and completion of the various activities) is recorded on the page. When the Portfolio Page has been completed and confirmed by the leader, then it becomes a record of the member’s completion of the project and participation in other 4-H activities beyond the project. 4-H leader assessment of members will happen throughout the project as you assess the progress and understanding of individual members. You need to observe the members doing the skill and record what you see and hear. Your feedback should be positive and descriptive (not just “well done”). Share that feedback with members frequently so they can put your suggestions into action. How you choose to observe and record is up to you. Some methods are to create checklists, videos and notes while encouraging discussions, peer observations and questions. Recognize that members may improve over the course of a builder and that records should be updated to reflect when they demonstrated their best learning. You are discussing how well members are meeting the skills checklists that are at the beginning of each of the project books, in each Builder and on the Portfolio Page. Projects promote technical, communication, meeting management, and leadership skills, as well as community involvement and real-world experiences. In addition to the specific skills members are to learn in each builder, the following general learning goals for members are important: Following instructions - Working with others - Using supplies safely - Using the key words - Improving with practice - Respecting timelines.
4-H LEADER TIPS FOR SUCCESS!
To complete, members must complete all the activities referred to on the “Project Completion Requirements” page OR alternate idea for an activity that would teach the same skill or an age appropriate variation. If activity substitutions are used, be sure to have the member make note in their manuals.
Depending on time available at each meeting, group size and abilities of group members, you may wish to break the Builders into more than one project meeting.
The internet has lots of interesting websites and educational activities. You may choose to use a search engine to explore the options available. We do not endorse any website or the safety or functionality of any products they may sell. Information/products will be used at your own discretion.
Safety is a number one priority. Care has been taken to create safe, age appropriate activities throughout this manual. As leaders, it is important for you to emphasize safety rules and manage or adapt activities in a manner that will safely match your members abilities. Ensure members have a good understanding of safe working and handling practices when using tools, that they use the appropriate safety equipment when necessary, and that appropriate supervision is provided. A quality experience needs to be a safe experience.
The multiple intelligences theory teaches us that people learn in at least 8 different ways. All individuals will be stronger in some ways of “intelligences” and weaker in others. It follows that the more ways we teach, the more members we will reach. Throughout this project, you will find a mix of writing, reading, hands-on work, artwork, self-evaluation, group discussion and performance. Teaching projects using a broad blend will help increase the learning potential of all members.
Projects are designed to teach many skills – such as how to make flour. However, the 4-H member is always more important than the subject matter. Stress cooperation in the activities where possible to develop teamwork and cooperation skills – valuable skills that will assist them in a number of settings. Ensure the work is completed in a manner that members feel good about themselves and their efforts. This can be done by assigning appropriate tasks or roles based on member’s individual abilities. Modelling and expecting supportive behaviour - that is, no “put-downs” – amongst members, or by other adults, also contributes to a positive experience. Remember, you are teaching the student not the subject.
There will be opportunity for experimentation and applying skills that members have learnt throughout this project. Experimenting can be frustrating, but learning through trial and error is an important life skill. Explain to members that it is alright to either go onto the next builder or do the builder again if they need the practice. Help the members work through their challenges until they are satisfied with the quality of their work. Creating inventive 4-H members will be very rewarding.
Celebrating success is an important but sometimes overlooked part of our lives. We encourage you to use the final section to empower the members by celebrating all they have learned in a fun manner. Anything that you do to add to the spirit of fun and the sense of accomplishment of each member will likely be remembered as the high-light of their 4-H year.
Have fun and thanks for your belief in young people!
4
Food is an integral part of our lifestyle. We eat whether we’re hungry or not, tired, bored, happy, sad, sick, or healthy. Food is consumed sitting, standing, or lying down. We eat alone, in groups, inside, outside, anytime of the day or night. Today, we forage in supermarkets for food with the world as our marketplace. We demand freshness, quality, quantity, convenience, and healthy safe food from farmers and food processors. With all the choices in the supermarket it is more important than ever to learn to prepare and cook simple, inexpensive, tasty healthy meals and snacks. We are constantly being challenged by the media to purchase instant, high fat, high sugar, low nutrition fast food. Preparing your own food isn’t just better for your body, it’s easier on your budget and it provides you with the opportunity to socialize by sharing food with friends and family. And just like learning to ride a bike or speak another language, learning to cook is more effective if we can start early in life and have fun at it! Guidelines for Food Safety Because we eat most of our food at home we learn most of our food preparation habits at home including the guidelines for food storage, meal preparation and cooking food. If improper food safety techniques are learned and practised, people can get sick. As a leader, it is important to teach the proper methods of keeping food safe before, after and during meal preparation to young people to ensure they are kept safe from potentially dangerous foodborne illnesses. Smart food safety begins at home! Food safety at the grocery store! Thinking about food safety begins at the grocery store. It is important – to keep cold food cold and hot food hot while transporting it to your house. Arrange your shopping trip to get food home quickly and into the refrigerator. For transporting food use: coolers, ice packs and thermos containers. Don’t allow raw meat juices to come in contact with other foods, raw or cooked. What about The Danger Zone? The most important factor for safe handling of foods and preventing foodborne illnesses are the result of poor temperature control. Following the simple rule “Keep hot foods hot and cold foods cold” and out of The Danger Zone (4oC to 60oC or 40oF to 140oF) can prevent many foodborne illnesses. Foods that could give you food poisoning should be kept below 4 degrees Celsius or, for hot food, above 60 degrees Celsius (140oF). Low temperatures prevent food poisoning bacteria, which may be present in the food, from multiplying to dangerous levels. High temperatures will kill bacteria and viruses. Because bacteria can grow to unsafe levels between 4 degrees Celsius and 60 degrees Celsius (40oF -140oF) we call it the Temperature Danger Zone. When you get foods home refrigerate and freeze foods immediately. Keep foods in the refrigerator at the temperature of 4oC (40oF) or below. Don’t overload the refrigerator; allow space for the air to circulate. If necessary, remove foods such as soft drinks to make room for potentially hazardous foods. Is it safe to eat foods, which have been in the Danger Zone?
Less than 2 hours - Refrigerate immediately Between 2 hours and 4 hours - Use immediately More than 4 hours - Throw out When in doubt, throw out!!!!
What are the four simple rules for food safety? Clean - Clean hands, utensils and surfaces often to keep everything clean and free bacteria Separate - Keeps foods separate to avoid cross contamination Cook - Cook foods to proper temperatures Chill - Refrigerate and freeze perishable foods promptly
5
Tips for Food Safety
Attention to food safety guidelines can add to the educational benefits of the 4-H Foods Project while aiding in the prevention of foodborne illness. Hand-washing is one of the best ways to prevent the spread of foodborne illness. Have the members wash their hands for at least 20 seconds with soap and warm
water before, during and after food preparation. Members with long hair should keep it tied back. Cover wounds or cuts properly and use rubber gloves for food preparation. Tasting is an important part of the cooking experience, but can potentially spread
germs. Have members use spoons, wooden sticks or tongue depressors for tasting but stress that they should only be use once.
Do not let the members use their fingers. Practice safe food handling: cook, chill, separate and clean all the time. Talk about the importance of not coughing or sneezing near food Teach members to cough or sneeze into their sleeves or into a tissue followed by proper
hand-washing before returning to the food Guidelines for Kitchen Safety
Demonstrate safe cutting techniques (peel away from your hand, keep fingers away from sharp blades, etc) and proper handling of other potentially dangerous blades.
Practice safe handling techniques of all utensils and appliances (hot stoves, blenders, knives, etc). Talk about the importance of preventing choking, by chewing foods well, sitting straight and not
talking with food in their mouth. Have a First Aid kit available at all times.
Rules for the Kitchen
Establish a list of rules for staying safe in the kitchen. Some examples might be:
No running or horseplay in the kitchen Wash hands Keep fingers out of the food Read recipes all the way through before starting
Have the members agree to and take ownership of the rules by adding their own rules to the list as appropriate. Make a poster with the rules on it so the members can read them at all times. Review the rules once the members arrive to each session – have members take turns reading the rules out loud.
Tips for preparing for recipes:
Purchase non-perishable ingredients in bulk at the beginning of your 4-H project. Purchase perishable items in quantities as listed in activities/recipes before each cooking session. Review the recipe with the members and introduce any new cooking terms, foods and utensils they
will be using. Give each member and group a copy of the recipe, if using one other than printed in the manuals.
Have the members or yourself assemble the equipment and ingredients required on trays or on the table.
Feel free to use your own recipes if you think they are appropriate. Also contact commodity groups for recipes using their food products; Flax Council of Canada, Pulse Canada, Manitoba Pork Council, Canola Council or Canada, etc.
6
Check out http://kidshealth.org/kid/recipes/index.html for recipes for diabetics, lactose intolerant, vegetarian, and people with celiac disease.
Have members identify and clarify any allergies they may have. If serious food allergies are reported, ensure that these foods are avoided at all meetings. Make certain that all members, leaders, and parent helpers know the treatment for allergic reactions.
FOOD ALLERGIES:
What is a food allergy?
A food allergy is an immune system response to a food ingredient that the body mistakenly believes to be harmful. Once the immune system decides that a particular food is harmful, it creates antibodies to it. The next time the individual eats that food, the immune system releases massive amounts of chemicals, including histamine, in order to protect the body. These chemicals trigger different allergic reactions.
What are common signs of an allergic reaction?
Tingling sensation in the mouth Swelling of the tongue and throat Difficulty breathing Hives (small or large red itchy welts) Vomiting and diarrhea Abdominal cramps
What is anaphylaxis?
Anaphylaxis is a severe reaction to a food that has rapid onset and may cause death without emergency treatment. Common signs of anaphylaxis
Sudden development of hives Swelling of mouth and throat Runny eyes and nose Dizziness Drop in blood pressure
Anaphylaxis is an emergency and must be treated immediately. Each member should have a specific emergency plan with the doses of medication to be given, and the telephone numbers of the ambulance and medical services to be called. Leaders should be trained to recognize symptoms and to administer an injection of the epinephrine and immediately call for an emergency service for transport to the nearest emergency facility.
What is the best way to avoid food allergy reactions?
Strict avoidance of the allergy causing food ingredient is the only way to avoid a reaction Read ingredient labels for all foods is the key to maintaining control. If a product does not contain an ingredient list, allergic individuals should not eat the food If unfamiliar with the terms or ingredients contact the food manufactures.
What are the most common food allergens?
Peanuts Eggs Milk Tree nuts
Wheat Sesame seeds Seafood Sulfites
7
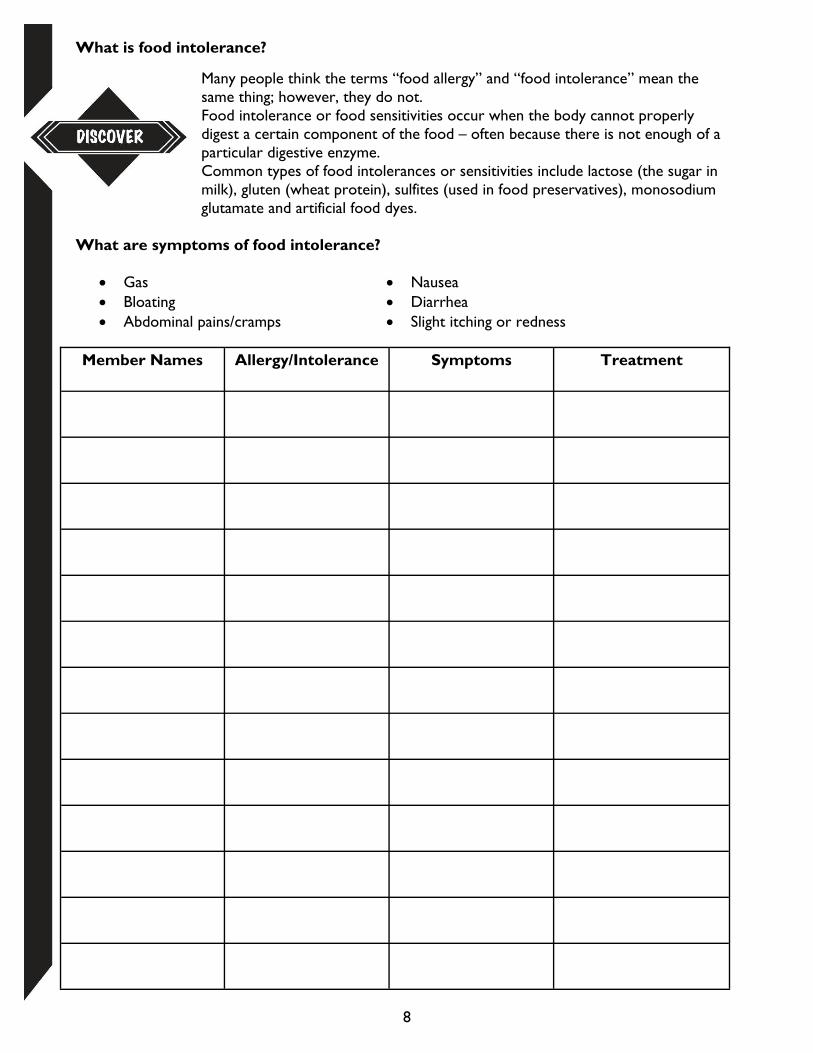
What is food intolerance?
Many people think the terms “food allergy” and “food intolerance” mean the same thing; however, they do not. Food intolerance or food sensitivities occur when the body cannot properly digest a certain component of the food – often because there is not enough of a particular digestive enzyme. Common types of food intolerances or sensitivities include lactose (the sugar in milk), gluten (wheat protein), sulfites (used in food preservatives), monosodium glutamate and artificial food dyes.
What are symptoms of food intolerance?
Gas Bloating Abdominal pains/cramps
Nausea Diarrhea Slight itching or redness
Member Names Allergy/Intolerance Symptoms Treatment
8
Skills Checklist
Explain the history of bread-making Understand how ingredients work together
9
Skill Builder 1: Bread Beginnings
Dream it! Background for Leaders
Bread has been one of the principal forms of food for humans from earliest times. In the Stone Age, people ground up barley and wheat with a stone, added water, and then baked it on a rock beside the fire. This created a flat, solid cake. The Egyptians discovered leavened bread and loaves and rolls have been found in ancient Egyptian tombs. Bread is mentioned in the Bible and the ancient Greeks and Romans even argued over whether white or brown bread was best. In Medieval England, the King kept the price of bread regulated so that the average family could afford it. It took 7 years for apprentice English bread makers to learn the secrets of their craft. In the 1880’s, new milling technology could make white flour more affordable, enabling all members of society to choose between white and whole wheat flour and bread. Every language has a word for bread, and although some may be flat or thick, some may be round or square, and some may be based from corn, rye, flax, wheat, or other grains, they are all the “staff of life”. In other words, an easy food to make that can provide basic nutrition to the hungry. Important Words
Help members define the following words and listen for them using these words in their discussions. To increase the members’ understanding try providing a synonym members know or describe examples. The more personalized the examples the better.
Age Considerations
10-12 Thinking Ahead
What will you discuss with members? Gather observations and think of examples that will help support your discussion.
Preparing for Success
Linking back to the Skills Checklist, help members identify how they will know they have been successful in learning from this builder. Discuss what success in these activities might look like, sound like, or feel like.
Yeast Any of various unicellular fungi of the genus Saccharomyces, which reproduce by budding. Capable of fermenting carbohydrates.
Gluten The tough, viscid, nitrogenous substance remaining when the flour of wheat or other grain is washed to remove the starch.
Flour The finely ground and bolted meal of wheat, as that used in baking.
Possible Answer
Do it!
Bannock
Time Required: 20 minutes
Equipment/Supplies
Instructions
Ingredients 2 c. (500 mL) flour 2 tsp. (10 mL) baking
powder 2 tsp. (10 mL) sugar 1 tsp. (5 mL) salt 2 tbsp. (30 mL) lard 1/2 cup (125 mL) milk 1/2 cup (125 mL) water
10
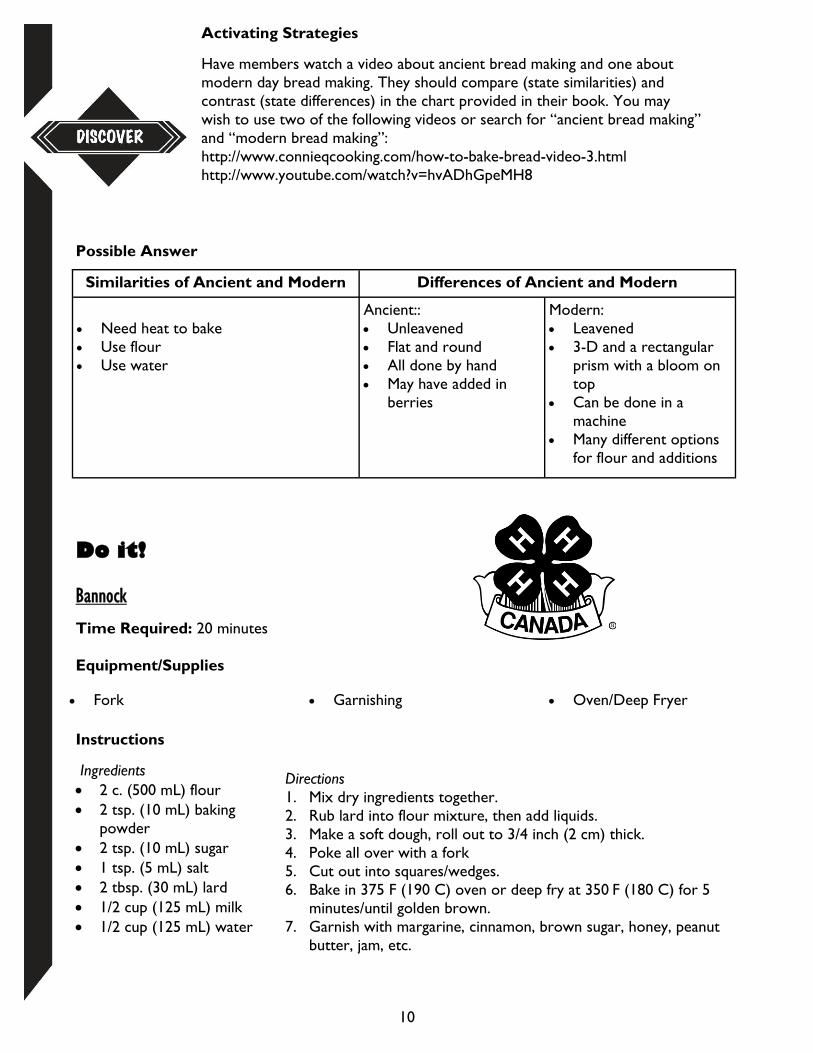
Activating Strategies
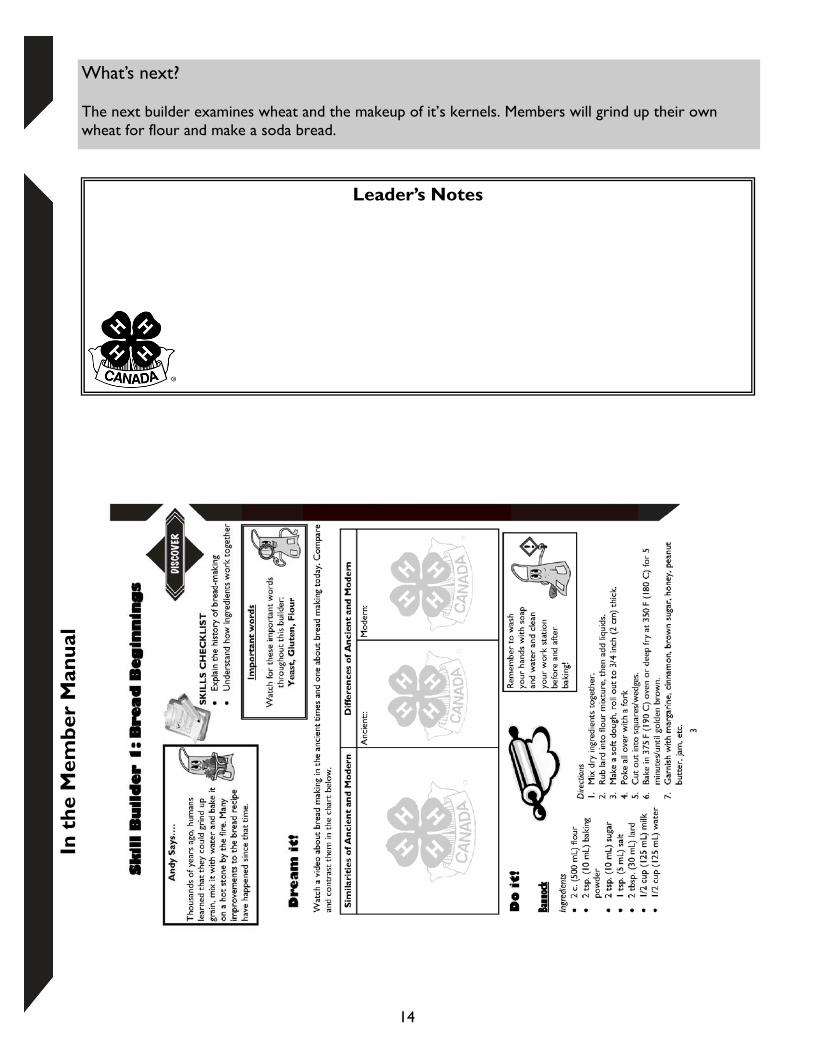
Have members watch a video about ancient bread making and one about modern day bread making. They should compare (state similarities) and contrast (state differences) in the chart provided in their book. You may wish to use two of the following videos or search for “ancient bread making” and “modern bread making”: http://www.connieqcooking.com/how-to-bake-bread-video-3.html http://www.youtube.com/watch?v=hvADhGpeMH8
Similarities of Ancient and Modern Differences of Ancient and Modern
Need heat to bake Use flour Use water
Ancient:: Unleavened Flat and round All done by hand May have added in
berries
Modern: Leavened 3-D and a rectangular
prism with a bloom on top
Can be done in a machine
Many different options for flour and additions
Directions 1. Mix dry ingredients together. 2. Rub lard into flour mixture, then add liquids. 3. Make a soft dough, roll out to 3/4 inch (2 cm) thick. 4. Poke all over with a fork 5. Cut out into squares/wedges. 6. Bake in 375 F (190 C) oven or deep fry at 350 F (180 C) for 5
minutes/until golden brown. 7. Garnish with margarine, cinnamon, brown sugar, honey, peanut
butter, jam, etc.
Fork Garnishing Oven/Deep Fryer
11
Ingredient Mix
Time Required: 10 minutes
Materials:
Pencil, pen You may wish to have examples of each ingredient
Instructions:
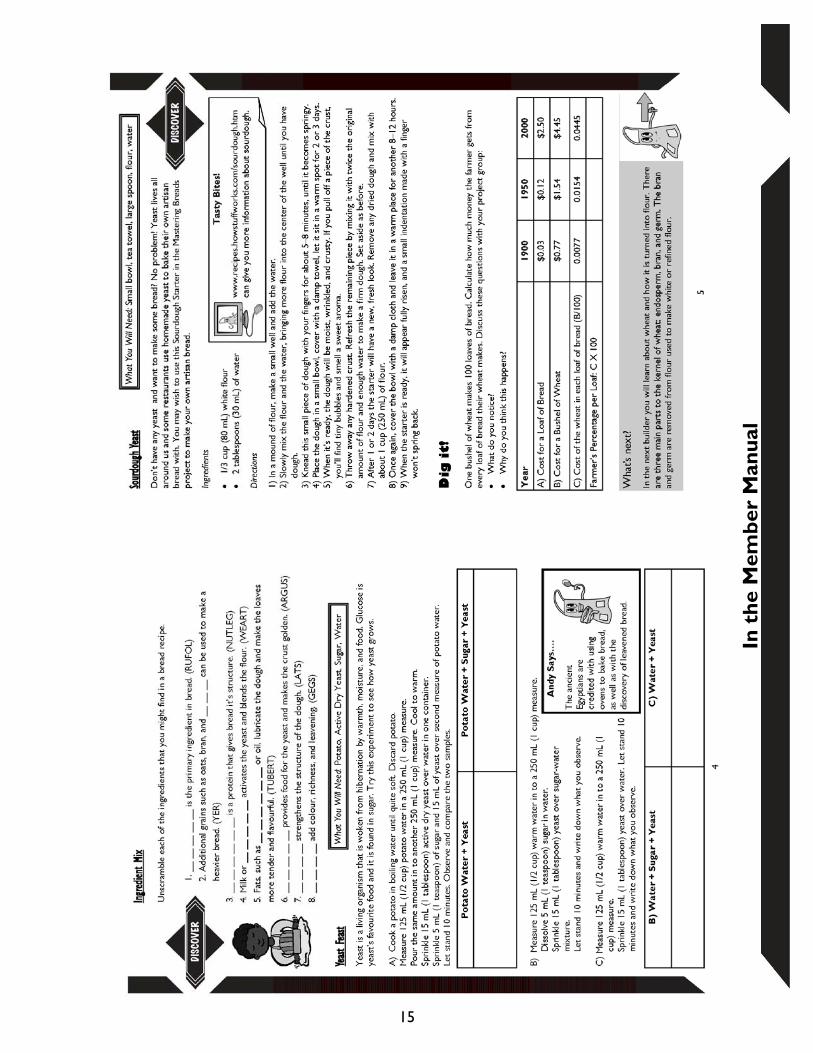
Have the members unscramble the word at the end of each sentence and fill in the blank in the sentence with the correctly spelled ingredient.
Background Information:
Yeast is a single-celled plant that makes bread rise. There is traditional active dry, quick-rise and bread machine yeast. Heat and humidity affect yeast action. When the weather is warm and humid, yeast action speeds up; in cold weather, it slows down. · Traditional yeast is started by sprinkling yeast over warm water which sugar has been added to. · Quick rise yeast is added directly to the flour and added to warm liquids. · Bread machine yeast is finer and added directly with dry ingredients to the lukewarm ingredients. Old or improperly stored yeast will not work as well as fresh yeast. Use yeast before the “best before” date on the package. Store large quantities of yeast in the refrigerator in a jar with a tight lid. Use the yeast within 4 months after opening the jar or before the date on the label, whichever comes first.
Flour is the primary ingredient in bread. All purpose flour contains enough gluten to produce well formed loaves. Breads made with additional grains such as oats, bran, wheat germ, rye or whole grain tend to be shorter and heavier because these grains absorb liquid but produce little or no gluten. Flour should be stored in an airtight container because flour reacts to changes in weather absorbing moisture in humid conditions and losing it in drier weather and higher altitudes.
Gluten is a protein that is isolated from the starch of the wheat. It is the gluten that is developed to create the structure of the bread. Liquids should be room temperature (about 70°F - 80°F or 21°C - 27°C) which allows yeast to activate and grow. Milk gives bread loaves good volume, makes the crust golden and produces a cream-coloured crumb. Water rehydrates and activities the yeast and blends the flour to make a sticky elastic dough. Milk and other liquids may replace some or all of the water. Sugar and other sweeteners provide food for the yeast, add height and flavour to the bread and give the crust a golden colour. Sweeteners vary in intensity and browning ability so substituting one type of sweetening agent for another may affect how your loaf turns out. Salt controls the yeast action, strengthens the gluten structure of the dough and adds flavour. Eggs add colour, richness and leavening.
12
Answers:
1. FLOUR is the primary ingredient in bread. (RUFOL) 2. Additional grains such as oats, bran, and RYE can be used to make a heavier
bread. (YER)
3. GLUTEN is a protein that gives bread it’s structure. (NUTLEG)
4. Milk or WATER activates the yeast and blends the flour. (WEART)
5. Fats, such as BUTTER or oil, lubricate the dough and make the loaves more
tender and flavourful. (TUBERT)
6. SUGAR provides food for the yeast and makes the crust golden. (ARGUS)
7. SALT strengthens the structure of the dough. (LATS)
8. EGGS add colour, richness, and leavening. (GEGS)
Yeast Feast
Time Required: 25 minutes Equipment/Supplies for each person experimenting
Potato Active Dry Yeast - 60 mL (4 tablespoons) Sugar - 10 mL (2 teaspoons) Water - 500 mL (2 cups) Measuring Cups/Spoons Stove Pots Safety Consideration:
When dealing with boiling water, make sure members are careful not to spill it. The stove may also be a source of consideration as it may cause burns if touched. Instructions
A) Cook a potato in boiling water until quite soft. Discard potato. Measure 125 mL (1/2 cup) potato water in a 250 mL (1 cup) measure. Pour the same amount in to another 250 mL (1 cup) measure. Cool to warm. Sprinkle 15 mL (1 tablespoon) active dry yeast over water in one container. Sprinkle 5 mL (1 teaspoon) of sugar and 15 mL of yeast over second measure of potato water. Let stand 10 minutes. Observe and compare the two samples.
B) Measure 125 mL (1/2 cup) warm water in to a 250 mL (1 cup) measure.
Dissolve 5 mL (1 teaspoon) sugar in water. Sprinkle 15 mL (1 tablespoon) yeast over sugar-water mixture. Let stand 10 minutes and write down what you observe.
C) Measure 125 mL (1/2 cup) warm water in to a 250 mL (1 cup) measure.
Sprinkle 15 mL (1 tablespoon) yeast over water. Let stand 10 minutes and write down what you observe.
Yeast grows best in a warm, moist environment!
Sourdough Yeast
Time Required: 6 days - you may wish to have some prepared to each step to show the members. Equipment/Supplies:
Resources:
www.exploratorium.edu/cooking/bread/recipe-sourdough.html www.recipes.howstuffworks.com/sourdough.htm Instructions
Ingredients
Directions
1) In a mound of flour, make a small well and add the water. 2) Slowly mix the flour and the water, bringing more flour into the center of the well until you have
dough. 3) Knead this small piece of dough with your fingers for about 5–8 minutes, until it becomes springy. 4) Place the dough in a small bowl, cover it with a damp towel, and let it sit in a warm spot for 2 or 3
days. 5) When it’s ready, the dough will be moist, wrinkled, and crusty. If you pull off a piece of the crust,
you’ll find tiny bubbles and smell a sweet aroma. 6) Throw away any hardened crust. Refresh the remaining piece by mixing it with twice the original
amount of flour and enough water to make a firm dough. Set aside as before. 7) After 1 or 2 days the starter will have a new, fresh look. Remove any dried dough and mix with
about 1 cup (250 mL) of flour. 8) Once again, cover the bowl with a damp cloth and leave it in a warm place for another 8–12 hours. 9) When the starter is ready, it will appear fully risen, and a small indentation made with a finger
won’t spring back.
Dig it! Time Required: 15 minutes
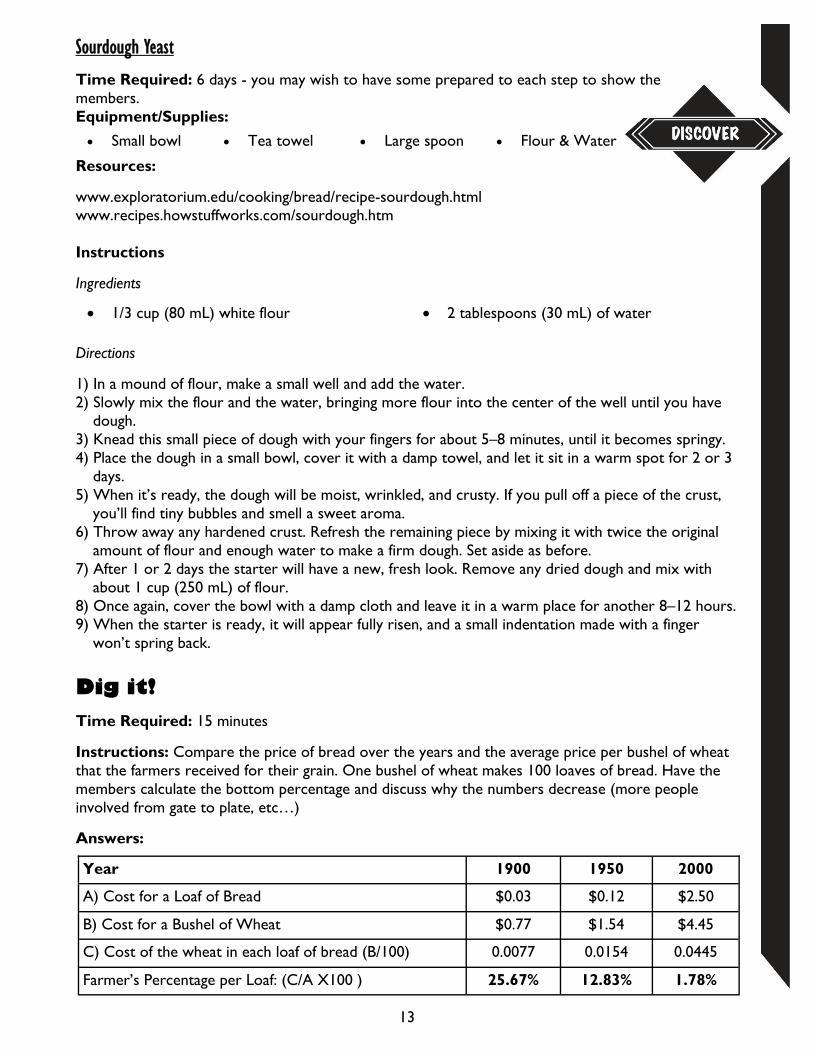
Instructions: Compare the price of bread over the years and the average price per bushel of wheat that the farmers received for their grain. One bushel of wheat makes 100 loaves of bread. Have the members calculate the bottom percentage and discuss why the numbers decrease (more people involved from gate to plate, etc…)
Answers:
Year 1900 1950 2000
A) Cost for a Loaf of Bread $0.03 $0.12 $2.50
B) Cost for a Bushel of Wheat $0.77 $1.54 $4.45
Farmer’s Percentage per Loaf: (C/A X100 ) 25.67% 12.83% 1.78%
C) Cost of the wheat in each loaf of bread (B/100) 0.0077 0.0154 0.0445
Small bowl Tea towel Large spoon Flour & Water
1/3 cup (80 mL) white flour 2 tablespoons (30 mL) of water
13
In t
he
Mem
ber
Man
ual
Leader’s Notes
What’s next?
The next builder examines wheat and the makeup of it’s kernels. Members will grind up their own wheat for flour and make a soda bread.
14
In t
he
Mem
ber
Man
ual
15

Skills Checklist
Use basic equipment to make bread Make flour from wheat
16
Skill Builder 2: How SWheat It Is!
Dream it! Background for Leaders
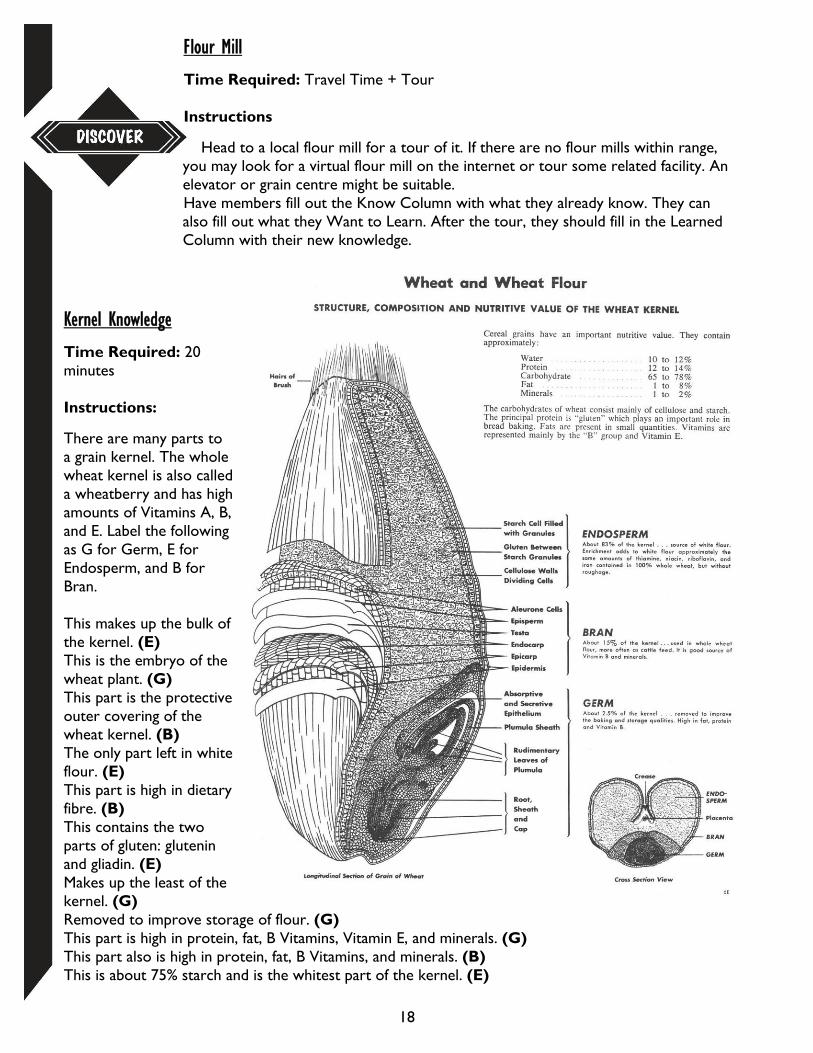
More foods are made with wheat than any other grain. Wheat kernels are the seeds of the wheat plant, and they are the part of the plant that is milled into flour. Since cereal grains are in the grass family, wheat kernels can be thought of as a type of grass seed. In fact, when a field of wheat starts to grow, it looks like lawn grass. Wheat kernels have three main parts: the endosperm, the germ, and the bran. While whole wheat flour contains all three parts of the kernel, white flour is milled from the endosperm. Whole wheat flour is considered a whole grain product because it contains the entire wheat kernel. The endosperm makes up the bulk of the kernel. It is the whitest part, partly because it contains mostly starch - typically 70–75 percent starch. The starch is embedded in chunks of protein. Two important proteins in the endosperm of wheat kernels are the gluten-forming proteins, glutenin and gliadin. When flour is mixed with water, glutenin and gliadin form strands of gluten, important in the structure of baked goods. In fact, wheat is the only common cereal grain that contains sufficient glutenin and gliadin for the formation of good-quality gluten for bread making. The germ is the embryo of the wheat plant. Given the right conditions, the germ sprouts - germinates - and grows into a new plant (Figure 5.2). Wheat germ is high in protein, fat, B vitamins, vitamin E, and minerals. These nutrients are important to the germ as it sprouts. While germ protein does not form gluten, from a nutritional standpoint it is of a high quality. The bran is the protective outer covering of the wheat kernel. It is usually darker in color than the endosperm, although white wheat, which has a light bran color, is also available. In either case, the bran is relatively high in dietary fibre. In fact, the bran is about 42 percent dietary fibre. It also contains a good amount of protein, fat, B vitamins, and minerals. As with wheat germ, the bran proteins do not form gluten; in fact, wheat germ and bran actually interfere with gluten development. Important Words
Help members define the following words and look for members using this vocabulary in their discussions. Ask for sentences that "show you know." When members construct novel sentences they confirm their understanding of a new word. Have members use as many terms per sentence to show that connections are useful. Members can also create impromptu speeches using these terms.
Kneading To work into a uniform mixture by pressing, folding, and stretching.
Endosperm The majority of the kernel of grain. Contains starch and is the whitest part of the grain.
Bran The outer layers of the grain of cereals used as a source of dietary fibre.
Germ The embryo of the kernel of grain. It sprouts and grows a new plant.
Age Considerations
10-12 Thinking Ahead
What will you discuss with members? Gather observations and think of examples that will help support your discussion.
17
Preparing for Success
Linking back to the Skills Checklist, help members identify how they will know they have been successful in learning from this builder. Discuss what success in these activities might look like, sound like, or feel like.
Activating Strategies
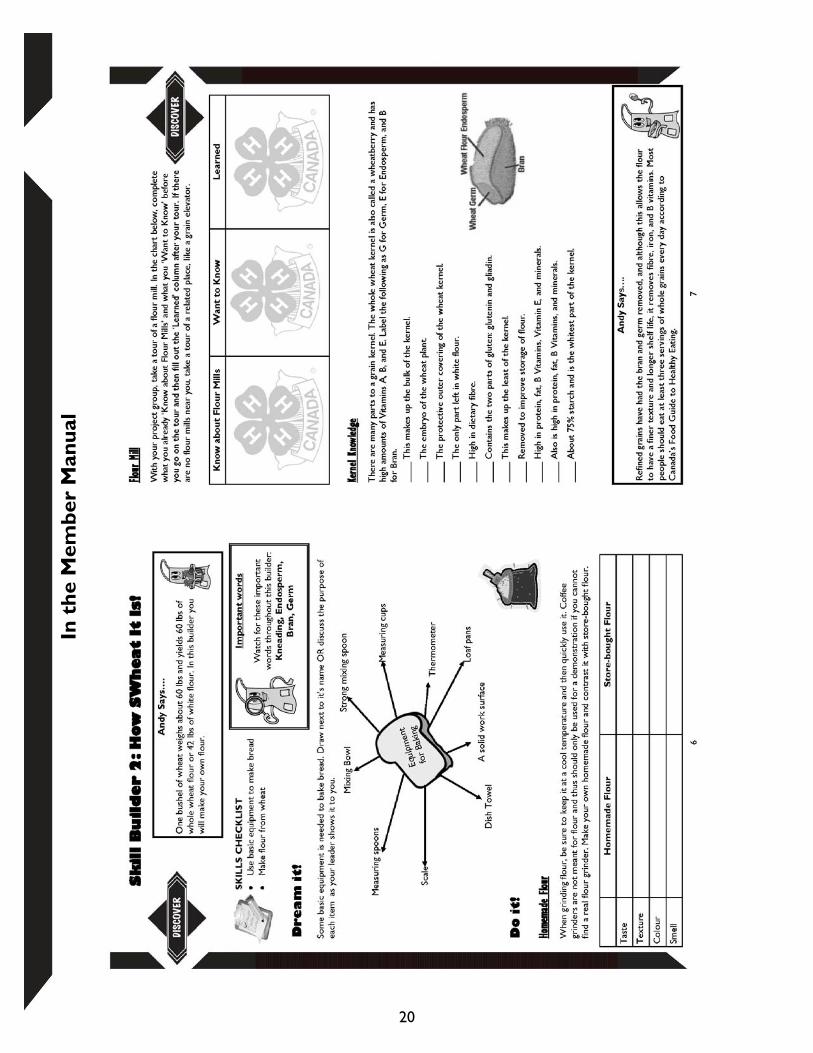
Have all the necessary equipment for making bread ready to show to the members. As each is shown, have the members draw a picture of the item beside it’s name. You may wish to include Mixing Bowl (stainless steal, plastic or ceramic) Strong mixing spoon Measuring cups Measuring spoons Thermometer (to check temperature of the water) Scale (for weighing ingredients) Something to cover the dough when it is rising like a large plastic bag or dish towel. A solid work surface like a table or countertop. A table top is usually a better height for kneading. Loaf pans or baking sheets Resources:
http://www.grainsessential.ca/english/kids/history_1.html#history
Do it!
Homemade Flour
Time Required: Dependent upon grinder
Equipment/Supplies:
Information:
When grinding flour, make sure to keep it at a cool temperature and then use it within 24 hours. Coffee grinders are not meant for flour and thus should only be used for a demonstration if you cannot find a real flour grinder. Nutrition and taste rapidly deteriorate as flour ages. Many people may be shocked at the taste of bread made with fresh flour.
Instructions
Grind up your own flour and compare it with store bought flour. Members should examine taste, texture, colour, and smell. You may wish to discuss any other observations of differences that the members have.
Hand Mill or Electric Flour Mill (attaches to Food Processor)
If you need to buy a mill, visit the Bosch Kitchen Centre in Winnipeg or their website: http://blackskitchenmagic.com/
18
Flour Mill
Time Required: Travel Time + Tour Instructions
Head to a local flour mill for a tour of it. If there are no flour mills within range, you may look for a virtual flour mill on the internet or tour some related facility. An elevator or grain centre might be suitable. Have members fill out the Know Column with what they already know. They can also fill out what they Want to Learn. After the tour, they should fill in the Learned Column with their new knowledge.
Kernel Knowledge
Time Required: 20 minutes Instructions:
There are many parts to a grain kernel. The whole wheat kernel is also called a wheatberry and has high amounts of Vitamins A, B, and E. Label the following as G for Germ, E for Endosperm, and B for Bran. This makes up the bulk of the kernel. (E) This is the embryo of the wheat plant. (G) This part is the protective outer covering of the wheat kernel. (B) The only part left in white flour. (E) This part is high in dietary fibre. (B) This contains the two parts of gluten: glutenin and gliadin. (E) Makes up the least of the kernel. (G) Removed to improve storage of flour. (G) This part is high in protein, fat, B Vitamins, Vitamin E, and minerals. (G) This part also is high in protein, fat, B Vitamins, and minerals. (B) This is about 75% starch and is the whitest part of the kernel. (E)
Whole Wheat Soda Bread
Time Required: 1 hour Instructions:
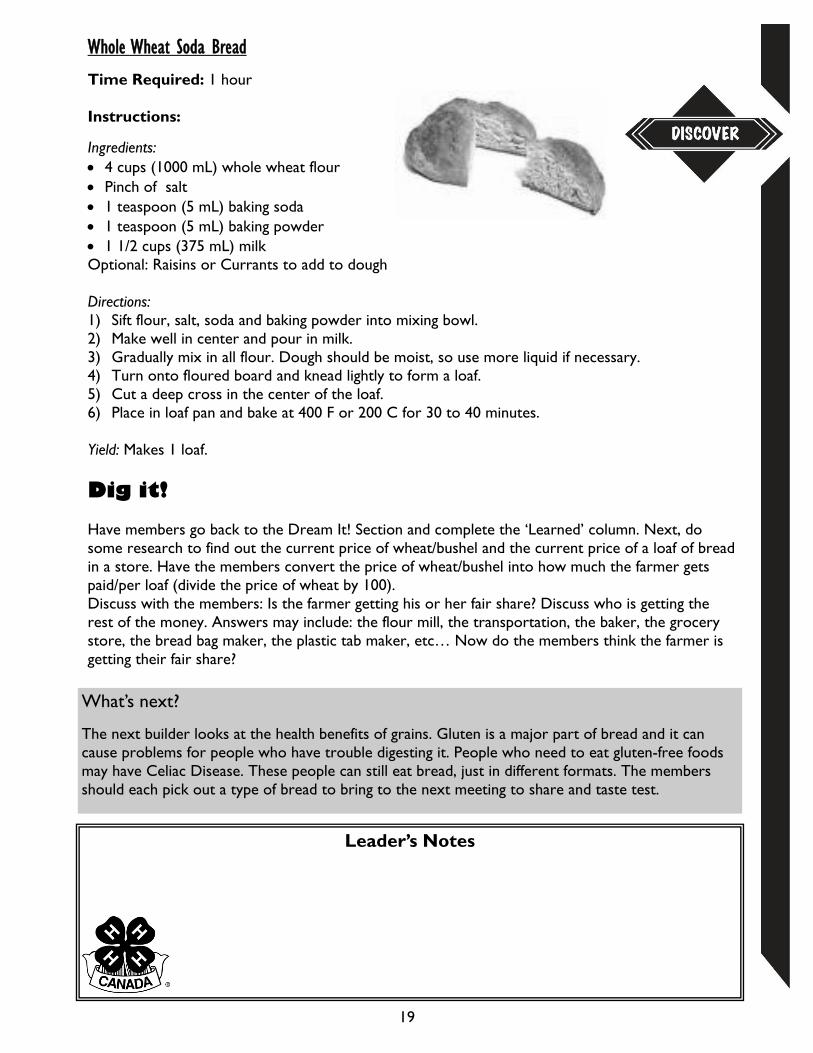
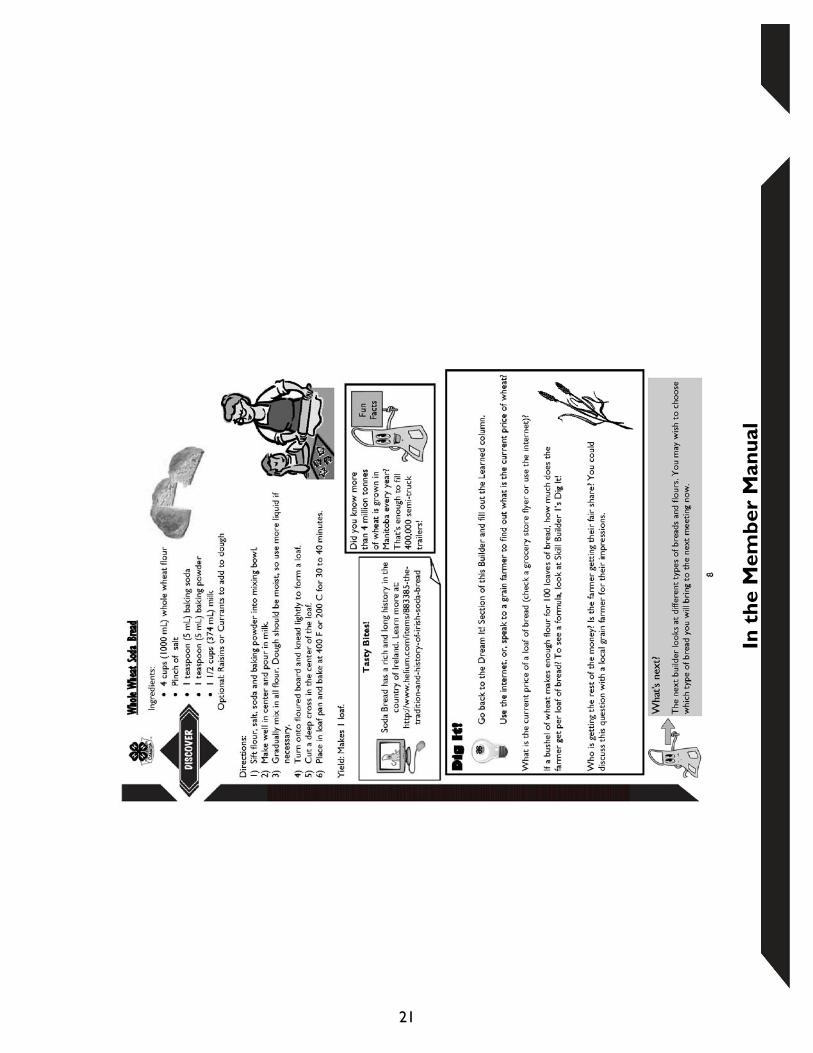
Ingredients: 4 cups (1000 mL) whole wheat flour Pinch of salt 1 teaspoon (5 mL) baking soda 1 teaspoon (5 mL) baking powder 1 1/2 cups (375 mL) milk Optional: Raisins or Currants to add to dough Directions: 1) Sift flour, salt, soda and baking powder into mixing bowl. 2) Make well in center and pour in milk. 3) Gradually mix in all flour. Dough should be moist, so use more liquid if necessary. 4) Turn onto floured board and knead lightly to form a loaf. 5) Cut a deep cross in the center of the loaf. 6) Place in loaf pan and bake at 400 F or 200 C for 30 to 40 minutes. Yield: Makes 1 loaf.
Leader’s Notes
19
Dig it! Have members go back to the Dream It! Section and complete the ‘Learned’ column. Next, do some research to find out the current price of wheat/bushel and the current price of a loaf of bread in a store. Have the members convert the price of wheat/bushel into how much the farmer gets paid/per loaf (divide the price of wheat by 100). Discuss with the members: Is the farmer getting his or her fair share? Discuss who is getting the rest of the money. Answers may include: the flour mill, the transportation, the baker, the grocery store, the bread bag maker, the plastic tab maker, etc… Now do the members think the farmer is getting their fair share?
What’s next?
The next builder looks at the health benefits of grains. Gluten is a major part of bread and it can cause problems for people who have trouble digesting it. People who need to eat gluten-free foods may have Celiac Disease. These people can still eat bread, just in different formats. The members should each pick out a type of bread to bring to the next meeting to share and taste test.
In t
he
Mem
ber
Man
ual
20
In t
he
Mem
ber
Man
ual
21
Skills Checklist Explain the nutritional value of whole grain vs. white Discover the role of gluten in bread
22
Skill Builder 3: Great Grains
Dream it! Background for Leaders
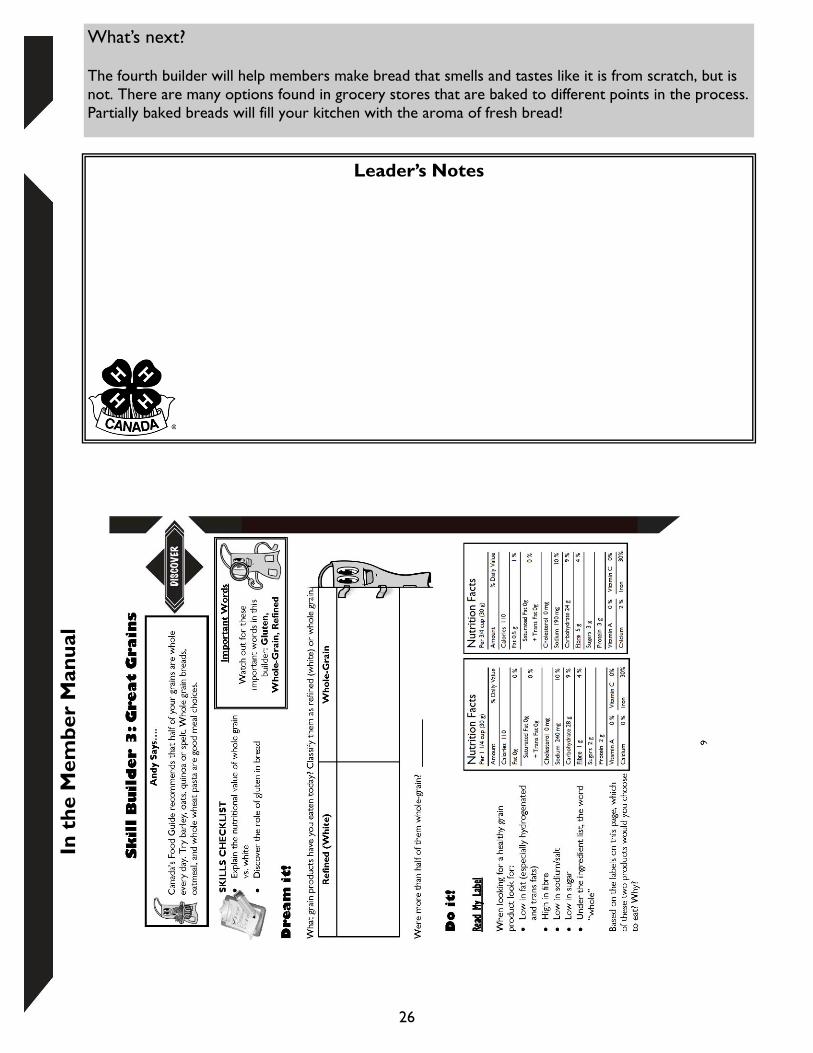
Canada’s Food Guide to Healthy Eating suggests that a healthy plate of food is 1/4 grains. Snacks should also feature a grain and at least half of the grain products eaten each day should be whole grain. Barley, brown rice, oats, quinoa, couscous, wild rice, oatmeal, whole wheat pasta, rye, corn, bulgur, and whole wheat are great options to keep in mind. Look at the ingredient list to make sure you have selected whole grain foods. Molasses may be used to trick your eyes by dying foods darker. Cookies, cakes, pastries, and pies should be reserved for special occasions only. Important Words
Help members define the following words and look for members using this vocabulary in their discussions. Have members describe the words in terms of their experiences to solidify.
Age Considerations
10-12 Thinking Ahead
What will you discuss with members? Gather observations and think of examples that will help support your discussion.
Preparing for Success
Linking back to the Skills Checklist, help members identify how they will know they have been successful in learning from this builder. Discuss what success in these activities might look like, sound like, or feel like.
Activating Strategies
Discuss what the members have eaten today in terms of grain products. Make sure they include everything (cookies, muffins, buns, bread, cereal, bagels, tortillas, croissants, etc…)
Have the members sort their grains in terms of whole grain and white. Whole grains should make up at least half of the grain products a person eats. Canada’s Food Guide recommends 6-7 servings of grains a day for those over 9. A serving is
about 1/2 cup.
Gluten The tough, viscid, nitrogenous substance remaining when the flour of wheat or other grain is washed to remove the starch.
Whole-Grain Unprocessed grain containing the germ and bran.
Refined (White) Flour in which the bran and germ are removed, leaving only the endosperm.

Do it!
Read My Label
Time Required: 15 minutes Information:
Nutrition facts tables are useful for Comparing products easily Determining the nutritional value of foods Helping you choose a product with more or less of a particular nutrient. When looking for a healthy grain product, one should choose those that are Low in fat (especially hydrogenated and trans fats) High in fibre Low in sodium/salt Low in sugar To make sure a grain product is whole, one must check the ingredient list and look for the word “whole”. Additives, such as molasses, may be used to dye products and fool consumers. Instructions
Have members look at the two labels and decide which product they think is a better choice. They should write their reasons in the space beside the label. Members may notice: Although the same weight, A will appear bigger than B Both have the same calories A has less fat than B Neither has saturated or trans fats! Neither has cholesterol A has more sodium than B A has more carbs than B A has less fibre than B A has less sugar than B A has less Calcium than B Both are a good source of
Iron
23
A B
24
Bon Choix (Good Choice)
Time Required: 15 minutes
Information:
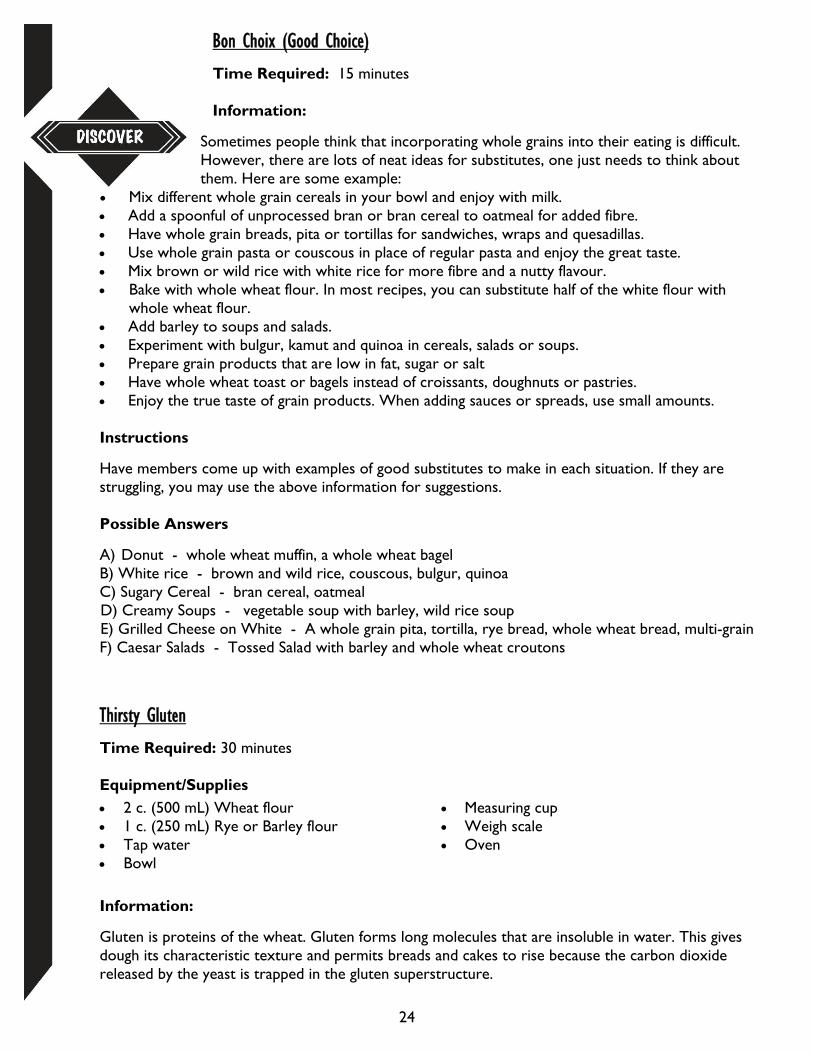
Sometimes people think that incorporating whole grains into their eating is difficult. However, there are lots of neat ideas for substitutes, one just needs to think about them. Here are some example:
Mix different whole grain cereals in your bowl and enjoy with milk. Add a spoonful of unprocessed bran or bran cereal to oatmeal for added fibre. Have whole grain breads, pita or tortillas for sandwiches, wraps and quesadillas. Use whole grain pasta or couscous in place of regular pasta and enjoy the great taste. Mix brown or wild rice with white rice for more fibre and a nutty flavour. Bake with whole wheat flour. In most recipes, you can substitute half of the white flour with
whole wheat flour. Add barley to soups and salads. Experiment with bulgur, kamut and quinoa in cereals, salads or soups. Prepare grain products that are low in fat, sugar or salt Have whole wheat toast or bagels instead of croissants, doughnuts or pastries. Enjoy the true taste of grain products. When adding sauces or spreads, use small amounts. Instructions
Have members come up with examples of good substitutes to make in each situation. If they are struggling, you may use the above information for suggestions. Possible Answers
A) Donut - whole wheat muffin, a whole wheat bagel B) White rice - brown and wild rice, couscous, bulgur, quinoa C) Sugary Cereal - bran cereal, oatmeal D) Creamy Soups - vegetable soup with barley, wild rice soup E) Grilled Cheese on White - A whole grain pita, tortilla, rye bread, whole wheat bread, multi-grain F) Caesar Salads - Tossed Salad with barley and whole wheat croutons
Thirsty Gluten
Time Required: 30 minutes
Equipment/Supplies
Information:
Gluten is proteins of the wheat. Gluten forms long molecules that are insoluble in water. This gives dough its characteristic texture and permits breads and cakes to rise because the carbon dioxide released by the yeast is trapped in the gluten superstructure.
2 c. (500 mL) Wheat flour 1 c. (250 mL) Rye or Barley flour Tap water Bowl
Measuring cup Weigh scale Oven
25
Dig it! Discuss the trouble shooting chart and any flaws that were in the loaves of bread the members sampled today. They should circle any problems that they found in the loaves.
Instructions:
Gluten Experiment A: 1) Have the members form about 1 cup of flour into a dough with a little water. 2) Weigh the balls of dough. 3) Knead the dough under a squirt of tap water. 4) The white starch will run off with the water and should be collected while
the dough stays together. Note: If any pieces of the dough break off and fall into the container collecting the starch
water, just add them back into the dough. 5) Continue to knead and wash with water until the water runs clear. This happens when all the
starch is washed out and pure gluten is left. 6) Squish the ball together to get rid of all the water and let the ball sit for 10 minutes to allow
more water to ooze out. 7) Pulling the dough at this point will elongate the lump until it bursts. The elongation before
bursting indicates the baking quality of the flour. 8) Weigh the balls of gluten and then bake it in an oven for 20 minutes at 220 C (425 F). 9) Let the balls cool and then weight them again. 10) Have the members break open their balls of dough and discuss what they notice inside. 11) The members have a chart to fill out in their book. Gluten Experiment B: 1) Mix enough water with the 1 cup of wheat flour to make a smooth dough-like clay. 2) Have the members record the amount of water necessary. 3) Use the same amount of water with the 1 cup of Rye or Barley flour and try to form dough. 4) The members should record their observations in their book. The wheat flour should soak up a lot water because it has a high gluten content (i.e. lots of thirsty proteins). The rye or barley flour will stay sticky and wet because there is not enough gluten to soak up the water. Not all wheat flours are the same. Hard wheats contain the most gluten and will create a bread that rises the most. Low protein or soft wheats, which are found in cake flour, contain the least amount of gluten and therefore rise the least. All purpose flour is a mixture and produces a medium sized loaf of bread.
Bread Fed
Time Required: 15 minutes
Equipment/Supplies
Several different types of breads: Whole Wheat, Pumpernickel, Multi-Grain, Rye, White Instructions:
Have the members try the different types of bread and decide which are their favourites. Before they devour the bread, have them look for any flaws in the loaves of bread as described in the Dig It! Chart.
In t
he
Mem
ber
Man
ual
What’s next?
The fourth builder will help members make bread that smells and tastes like it is from scratch, but is not. There are many options found in grocery stores that are baked to different points in the process. Partially baked breads will fill your kitchen with the aroma of fresh bread!
Leader’s Notes
26

In t
he
Mem
ber
Man
ual
27
28
Skill Builder 4: Easy Bake
Dream it! Background for Leaders
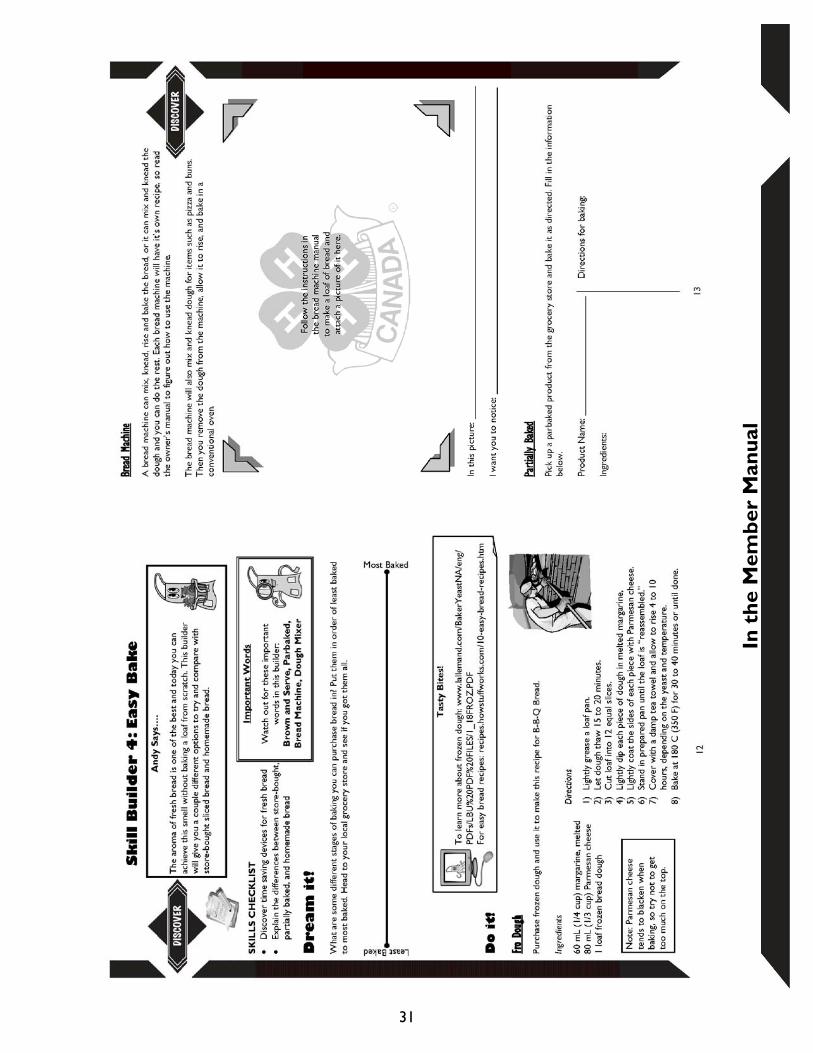
Today’s technology allows many different bread products to be produced. Some are completely uncooked (like frozen dough) and others only need a quick browning before serving. Parbaked bread is produced in a large plant bakery by partial baking with special time and temperature profiles. The partially baked bread in reheated/rebaked to produce the freshly baked bread at home or at the point of sale. A major advantage of parbaked bread is its flexibility, because the time to produce freshly baked bread from parbaked bread is short. A major problem is the critical time and temperature control required for the second bake. Once bread has been baked it has an open structure that can dry out very quickly. Even under optimal conditions some parbaked breads firm rapidly after the second bake and have to be consumed almost immediately. Three different types of parbaked bread are available that differ in how the preformed parbaked bread structure is stabilized. Brown and serve products have the first bake carried out in a factory at a low temperature without forming much of a crust and almost no colour. Brown and serve items require only a brief period of browning in the oven at home before being ready to serve. Dough mixers can be used for mixing and kneading bread dough rather than doing it by hand. This can save time and energy (and your batch of bread if you have run out of time or energy). A bread machine can also be used for mixing and kneading dough. Once the dough has gone through the mixing and kneading stages, you can take it out of the machine, let it rise and then shape it into loaves, pizza crust, buns etc., or leave it in the machine and let it become a loaf of bread.
Important Words
Help members define the following words and look for members using this vocabulary in their discussions. A few strategies you can use include; Teach synonyms by providing a synonym members know. Also, teach antonyms. Not all words have antonyms, but thinking about opposites requires the
members to evaluate the critical attributes of the words in question. Provide non-examples. Similar to using antonyms, providing non-examples requires students to
evaluate a word's attributes. Invite students to explain why it is not an example.
Age Considerations
10-12
Brown and Serve Requiring only a brief period of browning, before being ready to serve.
Parbaked Partially baked bread that is reheated/rebaked to produce fresh bread.
Bread Machine A machine that only requires you to add the ingredients to create fresh homemade bread.
Dough Mixer A machine that mixes the dough ingredients together for you.
Skills Checklist
Discover time saving devices for fresh bread Explain the differences between store-bought, partially
baked, and homemade bread
Thinking Ahead
What will you discuss with members? Gather observations and think of examples that will help support your discussion.
Preparing for Success
Linking back to the Skills Checklist, help members identify how they will know they have been successful in learning from this builder. Discuss what success in these activities might look like, sound like, or feel like.
Activating Strategies Have the members think about different stages of baking that they can buy bread in. This should range from unbaked (completely raw) to baked (fully finished). If the members need more ideas, they may wish to inquire at the grocery store.
Do it!
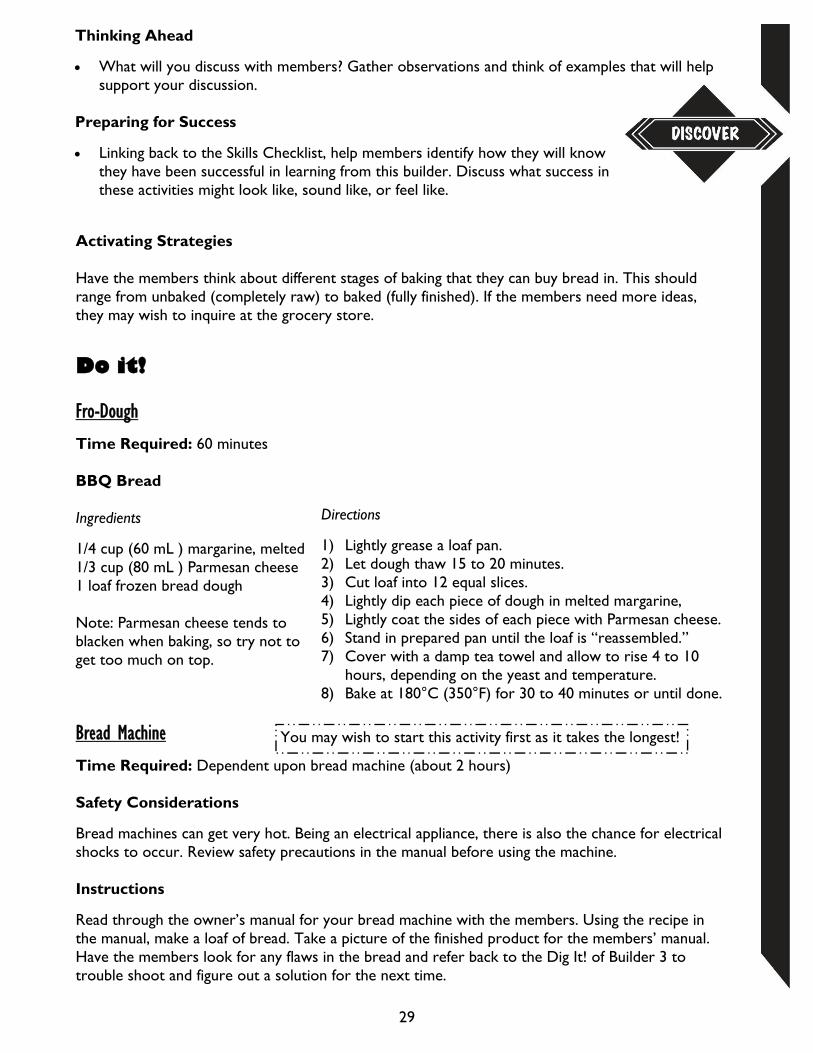
Fro-Dough
Time Required: 60 minutes BBQ Bread Ingredients
1/4 cup (60 mL ) margarine, melted 1/3 cup (80 mL ) Parmesan cheese 1 loaf frozen bread dough Note: Parmesan cheese tends to blacken when baking, so try not to get too much on top.
Bread Machine
Time Required: Dependent upon bread machine (about 2 hours) Safety Considerations
Bread machines can get very hot. Being an electrical appliance, there is also the chance for electrical shocks to occur. Review safety precautions in the manual before using the machine. Instructions
Read through the owner’s manual for your bread machine with the members. Using the recipe in the manual, make a loaf of bread. Take a picture of the finished product for the members’ manual. Have the members look for any flaws in the bread and refer back to the Dig It! of Builder 3 to trouble shoot and figure out a solution for the next time.
29
Directions
1) Lightly grease a loaf pan. 2) Let dough thaw 15 to 20 minutes. 3) Cut loaf into 12 equal slices. 4) Lightly dip each piece of dough in melted margarine, 5) Lightly coat the sides of each piece with Parmesan cheese. 6) Stand in prepared pan until the loaf is “reassembled.” 7) Cover with a damp tea towel and allow to rise 4 to 10
hours, depending on the yeast and temperature. 8) Bake at 180°C (350°F) for 30 to 40 minutes or until done.
You may wish to start this activity first as it takes the longest!
30
Partially Baked
Time Required: Depends upon product Equipment/Supplies
A parbaked product An oven
Instructions
Have the members bake a parbaked product. In their books they are to write down the name of the product, the ingredients, and the directions.
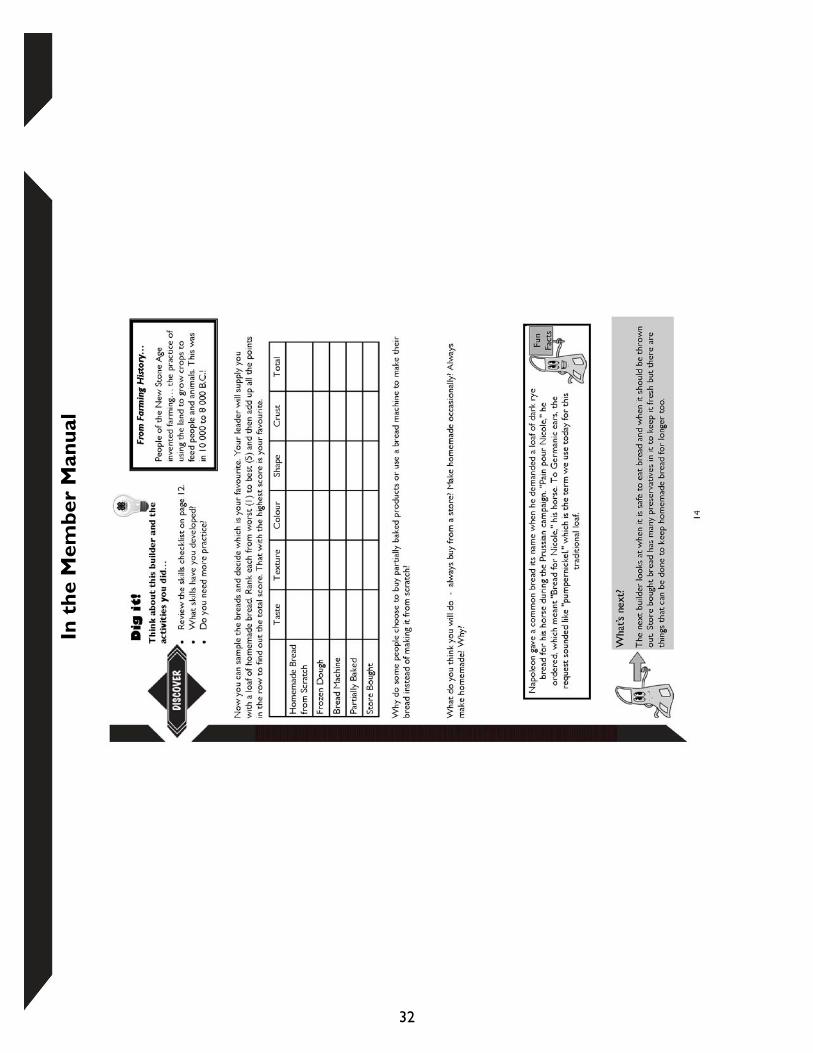
Dig it! Have the members rank a loaf of bread made from scratch, a frozen dough product, a bread machine product, a parbaked product, and a store bought product in terms of taste, texture, colour, shape, and crust. You may want to have a loaf made up from scratch for them to use to compare and a loaf of sliced bread from the store.
What’s next?
Some people think that mouldy bread is still safe to eat if you pick out the mouldy parts. This is untrue and the fifth builder examines the different dates that you may find on a product label and what they can tell us about the quality of the food. There are ways to preserve bread for a longer time and these too will be covered.
Leader’s Notes
In t
he
Mem
ber
Man
ual
31
In t
he
Mem
ber
Man
ual
32
Skills Checklist
Know the difference between dates on bread labels Discover how preservatives work in bread products
33
Skill Builder 5: To Eat or Not to Eat
Dream it! Background for Leaders
Eating mouldy bread can cause food borne illness that can make you very sick. Bread that has visible mould should be thrown out as the mould will be throughout the entire loaf, even if it cannot be seen everywhere. A tasty, healthy bread begins with the best ingredients. Store dry goods, such as flours, cereals, rice and pasta, in dry airtight containers away from heat and light. Keep whole grain flour and wheat germ in a cool dark place or the refrigerator to prevent them from going rancid. Stores put preservatives in their bread to increase its’ shelf life. Putting loaves in the fridge or freezer will also slow the development of mould. Warm, moist air is where mould grows best. When creating homemade bread, a little lemon juice or ascorbic acid can be added. These additions also help the bread to rise and give it a nicer crumb. Important Words
Help members define the following words and listen for them using these words in their discussions. To increase the members’ understanding try providing a synonym members know or provide examples. The more personalized the examples the better. Age Considerations
10-12 Thinking Ahead
What will you discuss with members? Gather observations and think of examples that will help support your discussion.
Preparing for Success
Linking back to the Skills Checklist, help members identify how they will know they have been successful in learning from this builder. Discuss what success in these activities might look like, sound like, or feel like.
Mould A growth of minute fungi forming on vegetable or animal matter, commonly as a downy or furry coating, and associated with decay or dampness.
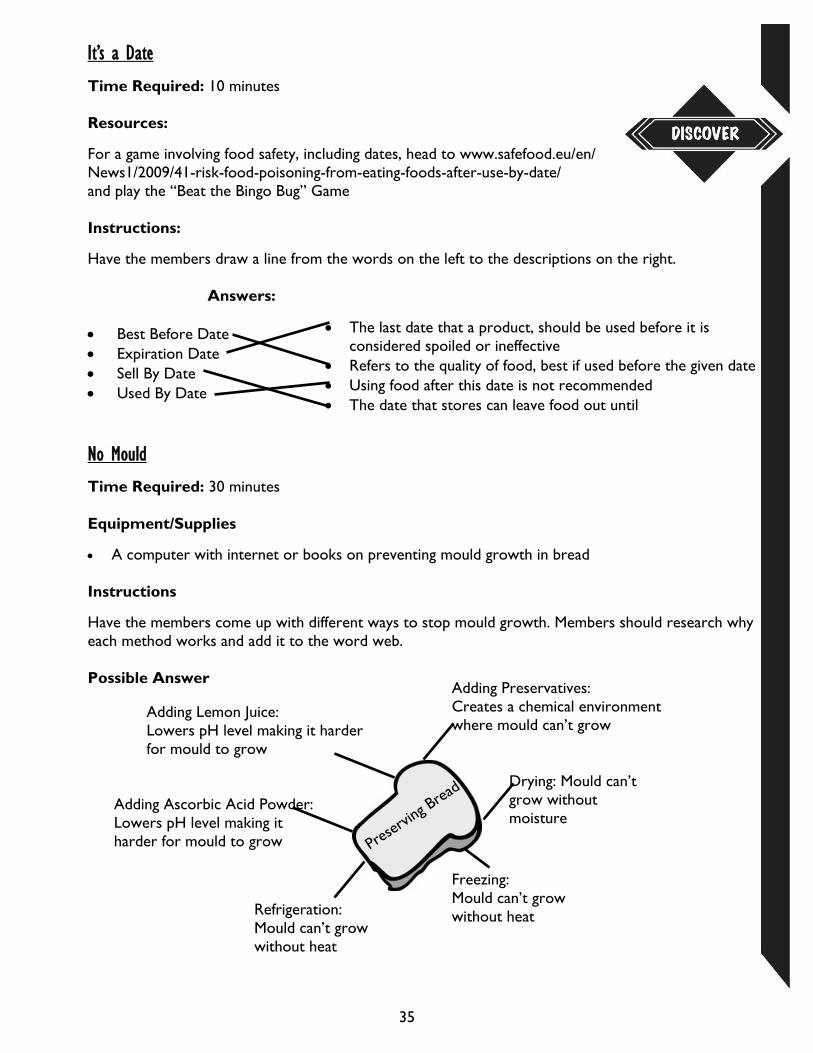
Expiration Date The last date that a product, as food, should be used before it is considered spoiled or ineffective, usually specified on the label or package.
Best Before Date Refers to the quality of food, best if used before the given date.
Used By Date Using food after this date is not recommended.
Sell By Date The date that stores can leave food out until.
Activating Strategies
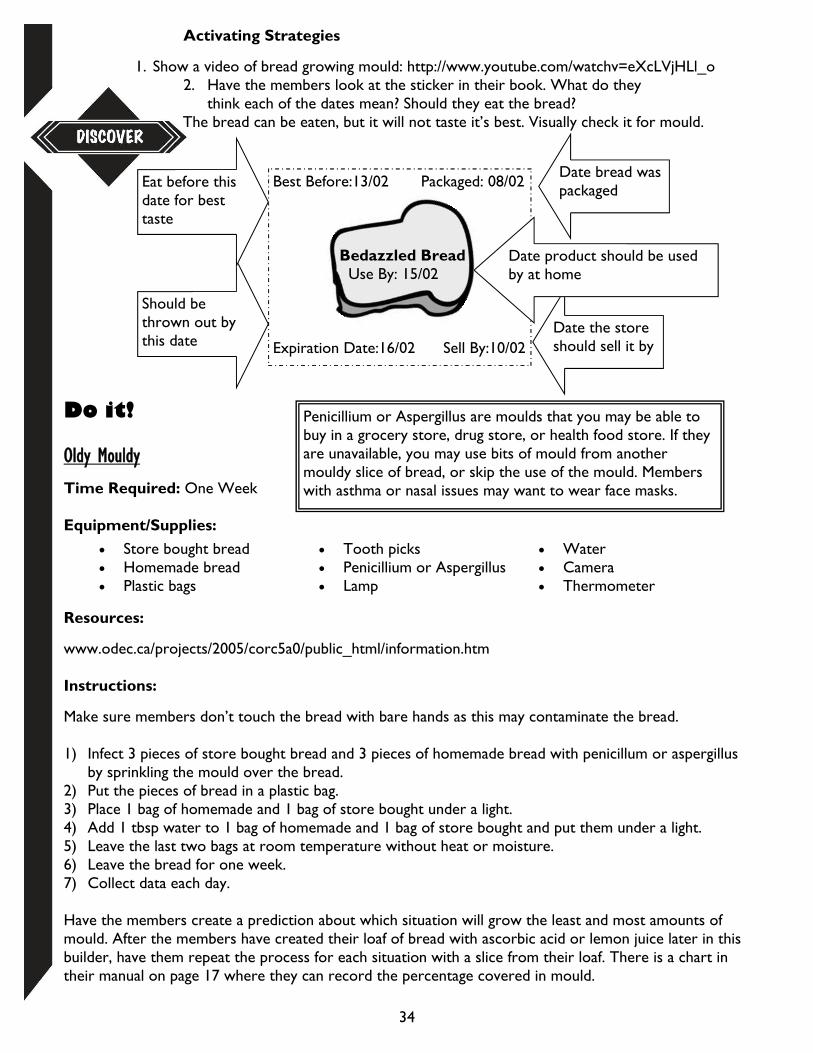
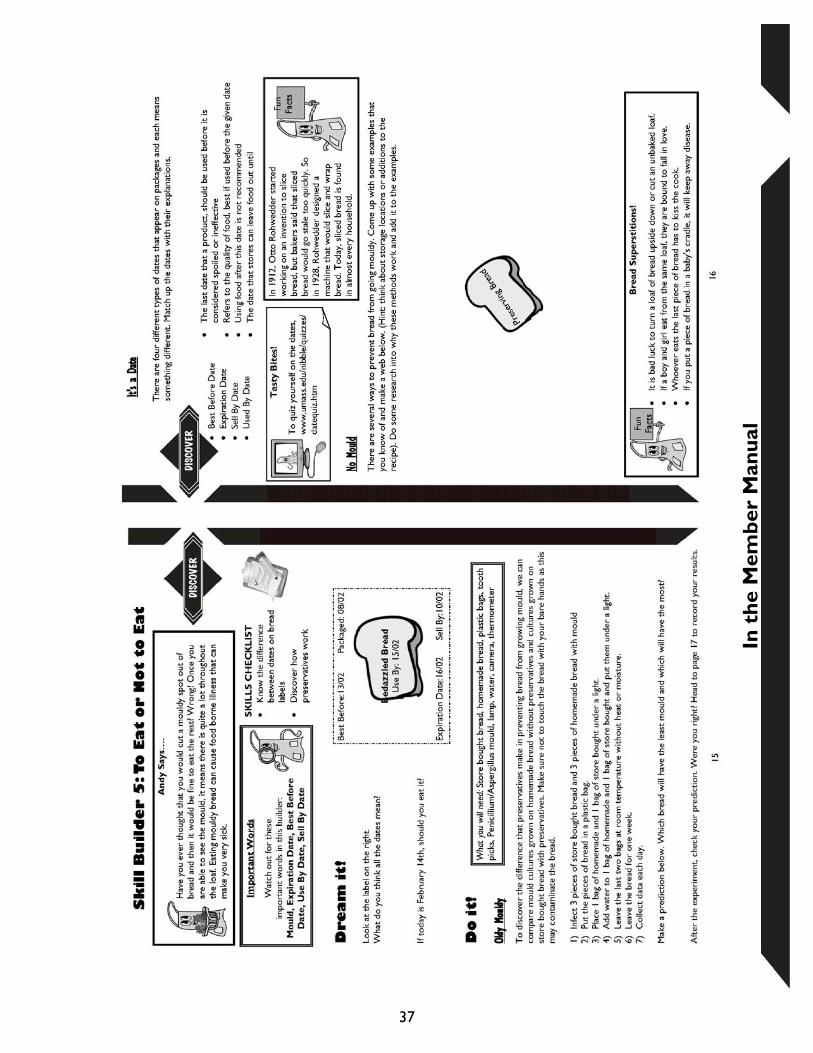
1. Show a video of bread growing mould: http://www.youtube.com/watchv=eXcLVjHLl_o 2. Have the members look at the sticker in their book. What do they
think each of the dates mean? Should they eat the bread? The bread can be eaten, but it will not taste it’s best. Visually check it for mould.
Do it!
Oldy Mouldy
Time Required: One Week Equipment/Supplies:
Resources:
www.odec.ca/projects/2005/corc5a0/public_html/information.htm Instructions:
Make sure members don’t touch the bread with bare hands as this may contaminate the bread. 1) Infect 3 pieces of store bought bread and 3 pieces of homemade bread with penicillum or aspergillus
by sprinkling the mould over the bread. 2) Put the pieces of bread in a plastic bag. 3) Place 1 bag of homemade and 1 bag of store bought under a light. 4) Add 1 tbsp water to 1 bag of homemade and 1 bag of store bought and put them under a light. 5) Leave the last two bags at room temperature without heat or moisture. 6) Leave the bread for one week. 7) Collect data each day. Have the members create a prediction about which situation will grow the least and most amounts of mould. After the members have created their loaf of bread with ascorbic acid or lemon juice later in this builder, have them repeat the process for each situation with a slice from their loaf. There is a chart in their manual on page 17 where they can record the percentage covered in mould.
Best Before:13/02 Packaged: 08/02 Bedazzled Bread
Use By: 15/02
Expiration Date:16/02 Sell By:10/02
Should be thrown out by this date
Date bread was packaged
Date the store should sell it by
Date product should be used by at home
Store bought bread Homemade bread Plastic bags
Tooth picks Penicillium or Aspergillus Lamp
Water Camera Thermometer
34
Eat before this date for best taste
Penicillium or Aspergillus are moulds that you may be able to buy in a grocery store, drug store, or health food store. If they are unavailable, you may use bits of mould from another mouldy slice of bread, or skip the use of the mould. Members with asthma or nasal issues may want to wear face masks.
35
It’s a Date
Time Required: 10 minutes Resources:
For a game involving food safety, including dates, head to www.safefood.eu/en/News1/2009/41-risk-food-poisoning-from-eating-foods-after-use-by-date/ and play the “Beat the Bingo Bug” Game Instructions:
Have the members draw a line from the words on the left to the descriptions on the right. Answers:
Best Before Date Expiration Date Sell By Date Used By Date
No Mould
Time Required: 30 minutes
Equipment/Supplies
A computer with internet or books on preventing mould growth in bread Instructions
Have the members come up with different ways to stop mould growth. Members should research why each method works and add it to the word web. Possible Answer
The last date that a product, should be used before it is considered spoiled or ineffective
Refers to the quality of food, best if used before the given date Using food after this date is not recommended The date that stores can leave food out until
Preserv
ing Brea
d
Adding Lemon Juice: Lowers pH level making it harder for mould to grow
Adding Preservatives: Creates a chemical environment where mould can’t grow
Refrigeration: Mould can’t grow without heat
Freezing: Mould can’t grow without heat
Drying: Mould can’t grow without moisture
Adding Ascorbic Acid Powder: Lowers pH level making it harder for mould to grow
MMM Fresh!
Time Required: Depends on type of bread chosen to make Instructions
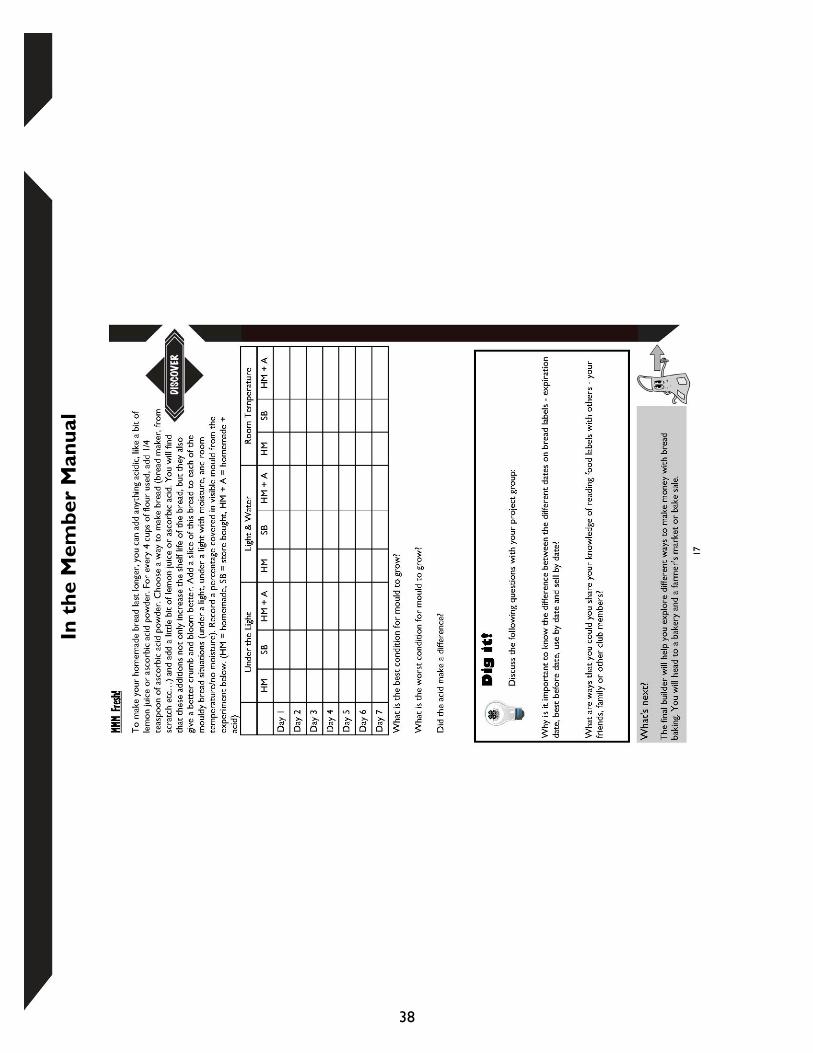
Have the member decide how they would like to make the bread for this activity. They can use any of the methods in Builder 4. Add a little bit of lemon juice to the regular recipe, or for every 4 cups of flour used, add 1/4 teaspoon of ascorbic acid powder (available at drug stores & grocery stores). After the loaf is baked, have the members taste test the bread and use untouched slices in each category of the experiment (room temperature, heat, heat & moisture). Every day, have the members look for the percentage of bread covered by the mould. At the end, discuss which situation had the most and least mould growth. Did the addition to this loaf of bread make a difference?
Dig it! Discuss the following questions with the members: Why is it important to know the difference between the different dates on bread labels - expiration date, best before date, use by date and sell by date? What are ways that you could you share your knowledge of reading food labels with others - your friends, family or other club members?
36
What’s next?
The final builder looks at ways to make money by selling bread. The members will tour a bakery and a farmer's market or a bake sale. You may want to begin setting these tours up.
Leader’s Notes
In t
he
Mem
ber
Man
ual
37
In t
he
Mem
ber
Man
ual
38
Skills Checklist
Discover different job opportunities Calculate profit margins in baking
39
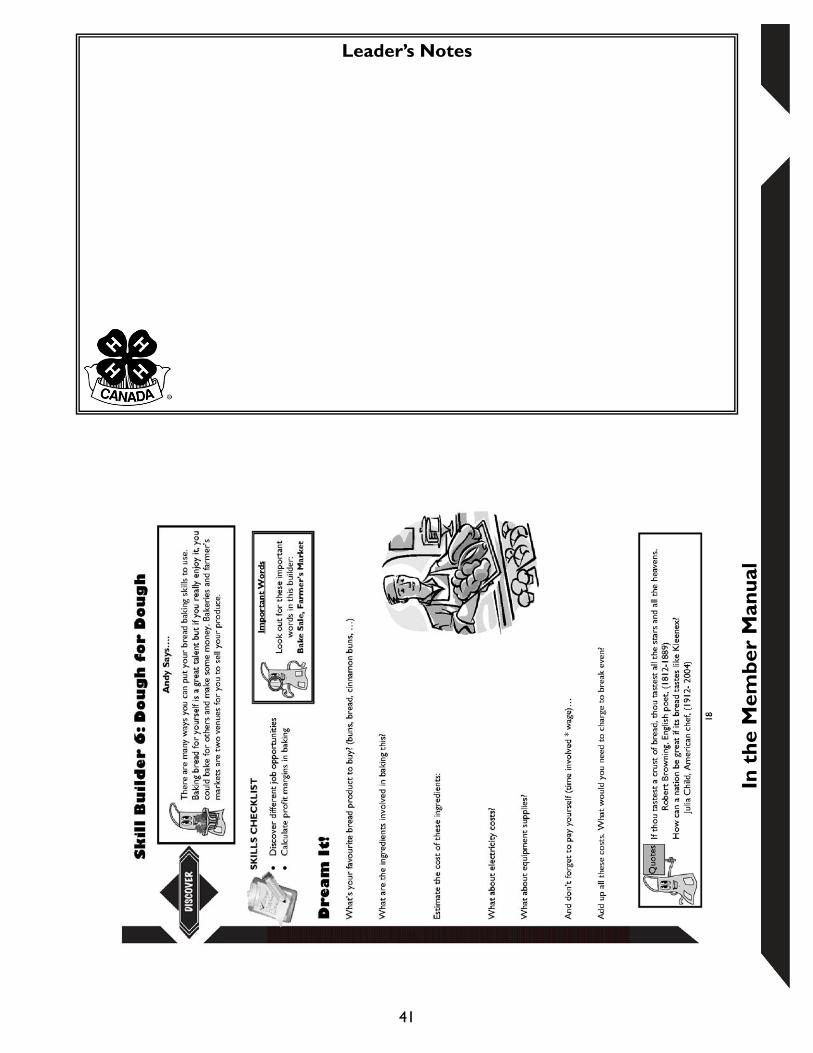
Skill Builder 6: Dough from Dough
Dream it! Background for Leaders
It is possible to make a living off of selling bread. Bakeries tend to begin baking early in the morning, but provide a steady income. Those who bake for farmer’s markets or bake sales, bake more for the love of baking than the money. Their income varies depending on how many customers come out and how much they are wanting to buy. Important Words
Some examples of how to use the “important words” to increase the members understanding are: Ask members to form a mental image of the new word. Get members to use a dictionary and show them the range of information it provides. Have members describe (rather than define) the new word in terms of their experiences.
Age Considerations
10-12 Thinking Ahead
What will you discuss with members? Gather observations and think of examples that will help support your discussion.
Preparing for Success
Linking back to the Skills Checklist, help members identify how they will know they have been successful in learning from this builder. Discuss what success in these activities might look like, sound like, or feel like.
Activating Strategies
Have the members grab a calculator and a pencil/pen. They should each choose their favourite bread product to buy (French bread, croissants, cinnamon buns, etc…) and then figure out approximately how much it costs to produce it. First, they should figure out the ingredients, then research how much it costs to buy all the ingredients. They should factor in heating costs and equipment supplies, as well as their own pay. Have the members add up all the costs and then see what they would need to charge to break even (get all the money back that they spent in making the product). If they think this price is too high, how could they make it lower? (e.g. buy ingredients in bulk, buy second-hand equipment, lower their wage…)
Bake Sale A sale of homemade, donated baked goods, as by a church or club to raise money.
Farmer's Market An open-air marketplace for farm products.
40
Do it!
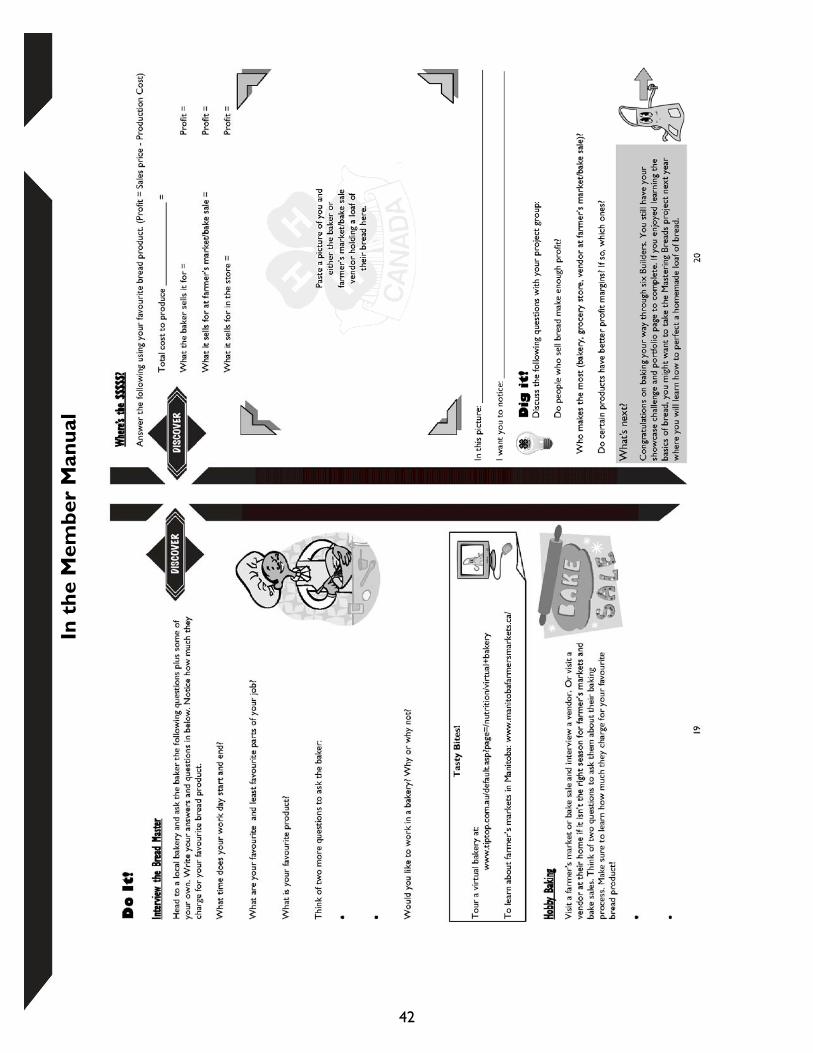
Interview the Bread Master
Time Required: A couple hours Instructions:
Visit a bakery on a day off school or before classes to see how bread is made in the bakery. There are questions in the member’s manual to ask the baker and they should make up some of their own. The members should see how much the baker charges for their favourite bread product and write that down under “Where’s the $$$$$?” on page 20. The members may choose to take a picture with either the baker or the vendor at the farmer’s market/bake sale and a loaf of their bread.
Hobby Baking
Time Required: 2 - 3 hours Instructions:
Visit a farmer’s market/bake sale or if there are not going to be any, visit a vendor at their home. Members will need to ask two questions and see how much the vendors charge for their favourite bread products. The members may choose to take a picture with the vendor and a loaf of their bread to place in their manual.
Where’s the $$$$$?
Time Required: 10 minutes Instructions:
Have the members take their estimated cost from the Dream It! Section and fill it in for their favourite product. They should fill in what the baker is selling it for, what the vendor at the farmer’s market/bake sale sells it for, and what it sells for in the grocery store. To calculate the profits, members should take the price that each place sells it for and subtract the cost of production. Have the members place the picture in their manual of them with either the baker or farmer’s market/bake sale vendor and a loaf of bread in their book.
Dig it! Have the members consider whether or not they think bread bakers make enough profit. Which venue makes the most money on their favorite items (bakery, grocery store, farmer’s market, bake sale)? Have the members compare their profit margins to other members who chose different favourite products. Do different products have different profit margins?
What’s next?
Congratulations on leading the members through six builders and helping them discover bread. The Showcase Challenge and Portfolio Page are the sections that the members still need to complete. If you are looking for more bread projects, give the Mastering Breads project a try. It focuses on creating a perfect loaf of bread from scratch.
In t
he
Mem
ber
Man
ual
Leader’s Notes
41
In t
he
Mem
ber
Man
ual
42
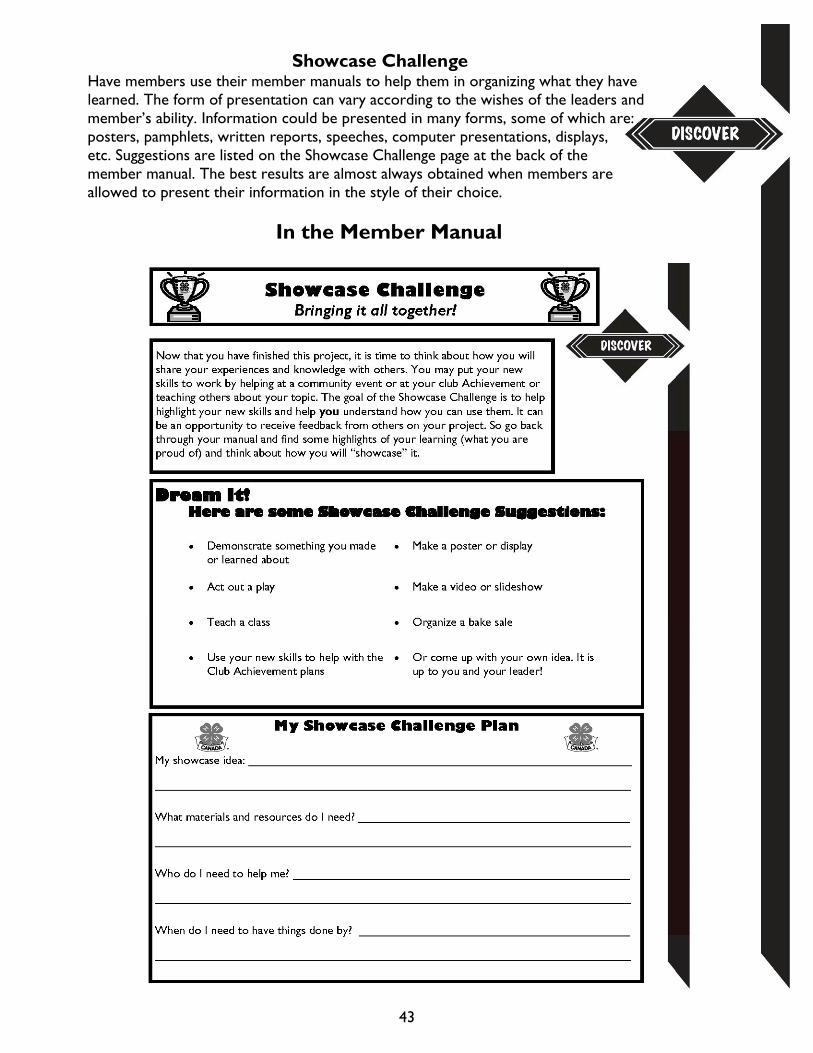
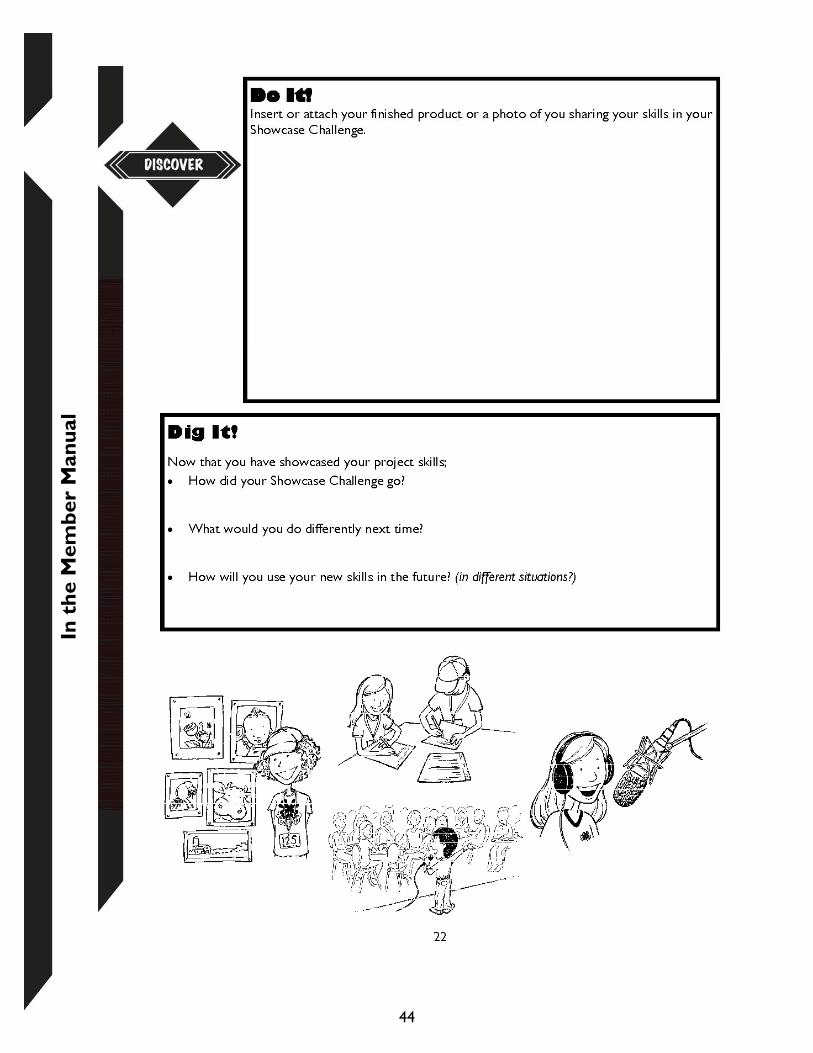
Showcase Challenge Have members use their member manuals to help them in organizing what they have learned. The form of presentation can vary according to the wishes of the leaders and member’s ability. Information could be presented in many forms, some of which are: posters, pamphlets, written reports, speeches, computer presentations, displays, etc. Suggestions are listed on the Showcase Challenge page at the back of the member manual. The best results are almost always obtained when members are allowed to present their information in the style of their choice.
In the Member Manual
43
In t
he
Mem
ber
Man
ual
44
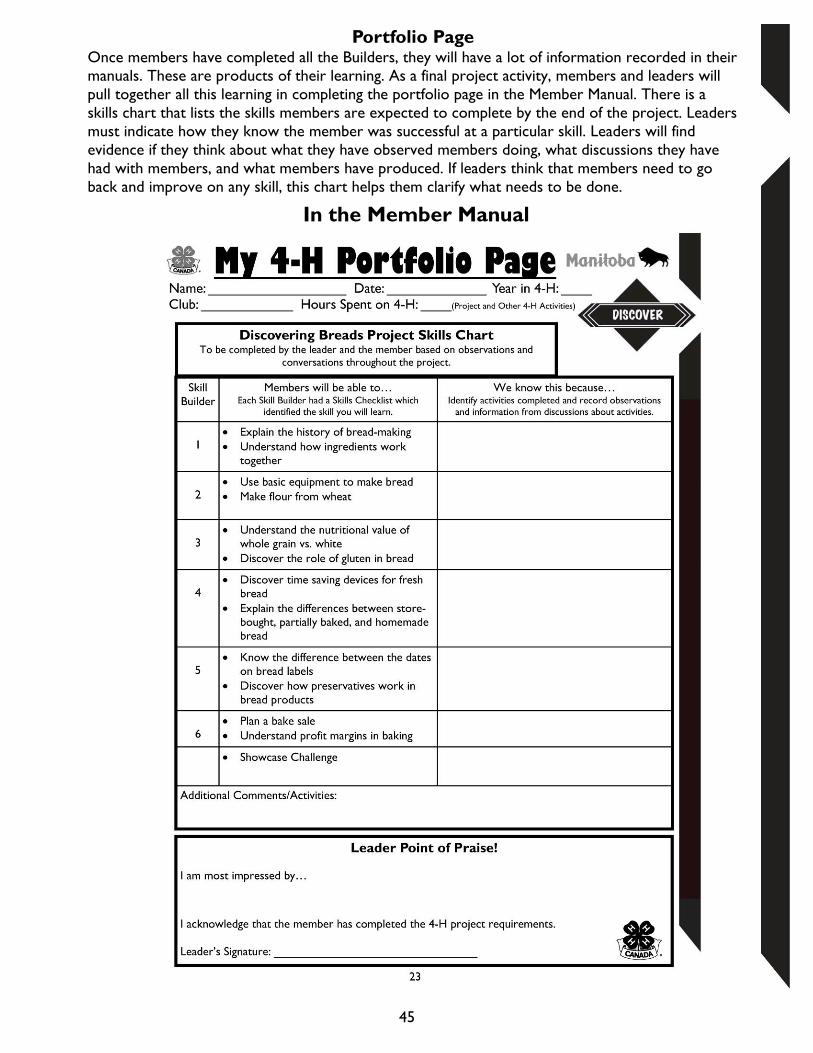
Portfolio Page Once members have completed all the Builders, they will have a lot of information recorded in their manuals. These are products of their learning. As a final project activity, members and leaders will pull together all this learning in completing the portfolio page in the Member Manual. There is a skills chart that lists the skills members are expected to complete by the end of the project. Leaders must indicate how they know the member was successful at a particular skill. Leaders will find evidence if they think about what they have observed members doing, what discussions they have had with members, and what members have produced. If leaders think that members need to go back and improve on any skill, this chart helps them clarify what needs to be done.
In the Member Manual
45

In t
he
Mem
ber
Man
ual
46

4-H Achievement
4-H Achievement is… a 4-H club celebration when members have completed their projects. Achievements are planned by the club to give recognition to members and leaders for their accomplishments in their 4-H projects and club activities.
A 4-H Achievement can take many different formats: from choosing a theme, to member project displays, to members using their new skills for the event (entertainment, food, decorating, photographer, etc.), to members presenting their project to the whole group, the options are endless and open to the creativity of the members and leaders in each club! Clubs may also plan their Achievement to promote 4-H to the community or to recognize sponsors and others who have helped the club. Members and leaders - be sure to check your project books for the project completion requirements, so you will be ready for your club’s Achievement celebration!
For more information about 4-H and the many 4-H opportunities available please visit
http://www.gov.mb.ca/agriculture/4-h/
If you have any questions, comments or suggestions for this or other 4-H projects contact:
Manitoba 4-H Projects
Manitoba Agriculture Food and Rural Initiatives 1129 Queens Avenue
Brandon, MB R7A 1L9
Email: [email protected]
Phone: 204-726-6613 Fax: 204-726-6260
This manual is for educational use only and is not intended as professional advice.
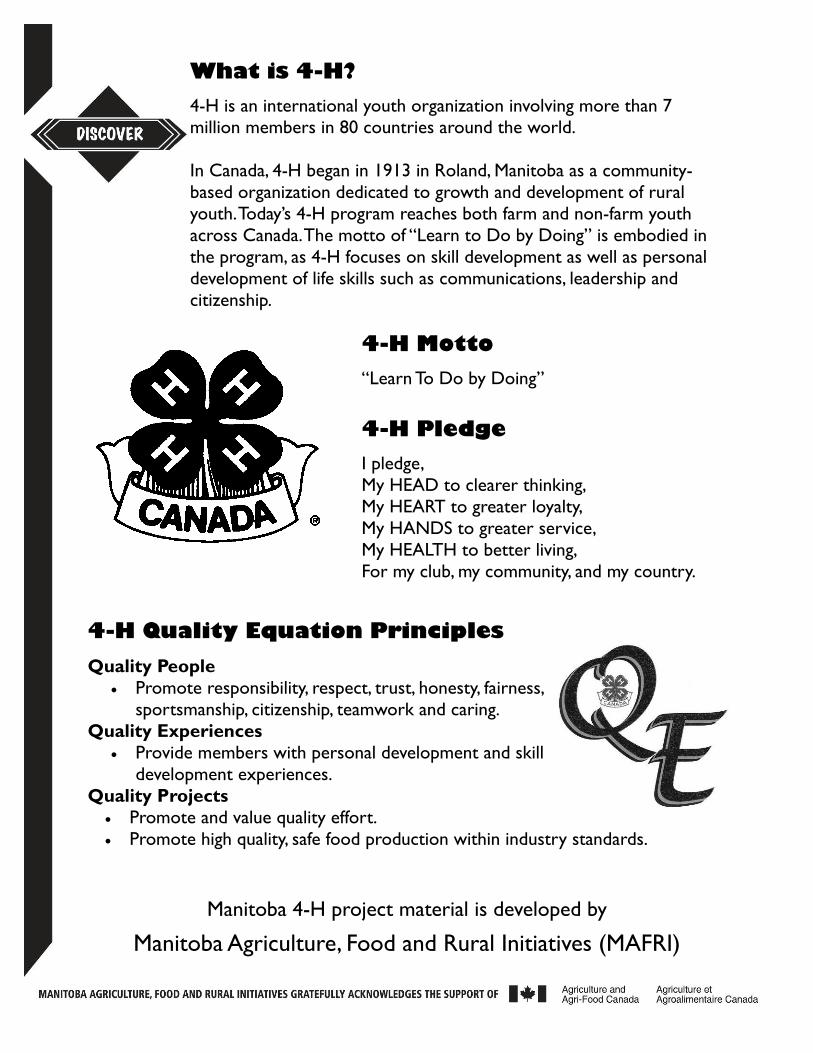
4-H Motto
“Learn To Do by Doing” 4-H Pledge
I pledge, My HEAD to clearer thinking, My HEART to greater loyalty, My HANDS to greater service, My HEALTH to better living, For my club, my community, and my country.
What is 4-H?
4-H is an international youth organization involving more than 7 million members in 80 countries around the world. In Canada, 4-H began in 1913 in Roland, Manitoba as a community-based organization dedicated to growth and development of rural youth. Today’s 4-H program reaches both farm and non-farm youth across Canada. The motto of “Learn to Do by Doing” is embodied in the program, as 4-H focuses on skill development as well as personal development of life skills such as communications, leadership and citizenship.
Manitoba 4-H project material is developed by
Manitoba Agriculture, Food and Rural Initiatives (MAFRI)
4-H Quality Equation Principles
Quality People Promote responsibility, respect, trust, honesty, fairness,
sportsmanship, citizenship, teamwork and caring. Quality Experiences
Provide members with personal development and skill development experiences.
Quality Projects Promote and value quality effort. Promote high quality, safe food production within industry standards.