Embed Size (px)
Citation preview
USER GUIDE
69-2062EFS-03
RTH221 Programmable Thermostat
1. OPERATION1.1 Controls
1.2 Display Screen
1 When Cool On is flashing, this means the compressor protection is engaged (see section 1.7).
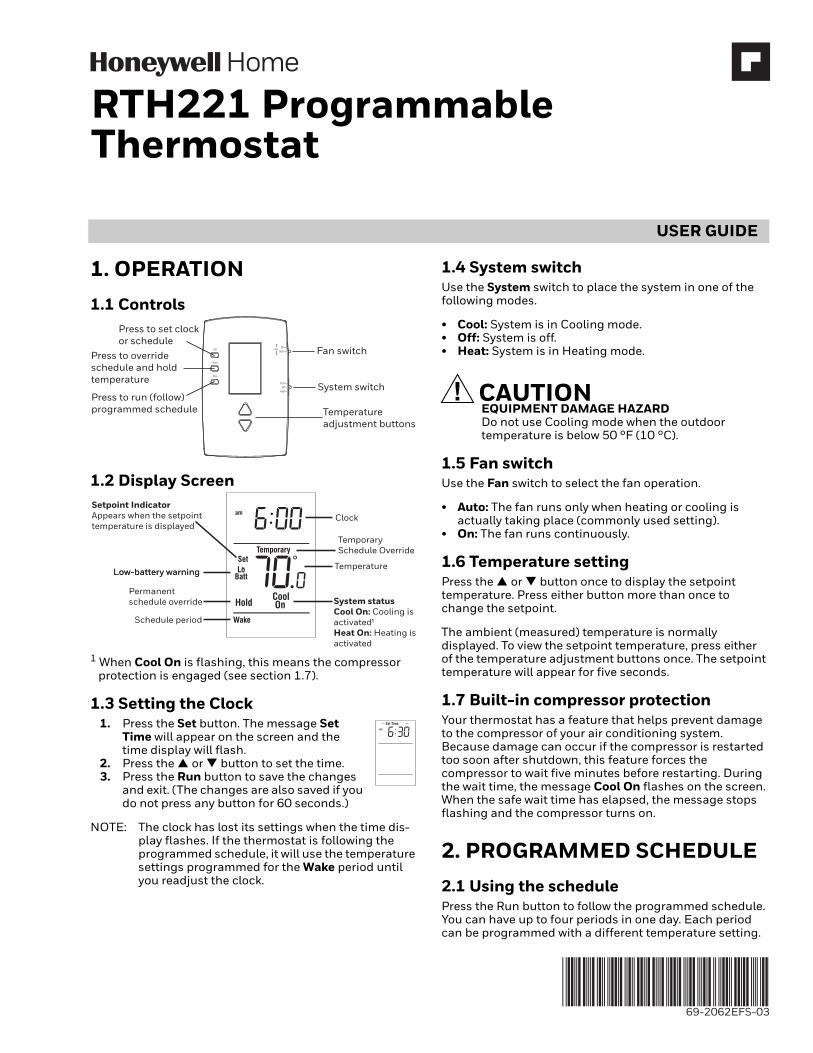
1.3 Setting the Clock1. Press the Set button. The message Set
Time will appear on the screen and the time display will flash.
2. Press the or button to set the time.3. Press the Run button to save the changes
and exit. (The changes are also saved if you do not press any button for 60 seconds.)
NOTE: The clock has lost its settings when the time dis-play flashes. If the thermostat is following the programmed schedule, it will use the temperature settings programmed for the Wake period until you readjust the clock.
1.4 System switchUse the System switch to place the system in one of the following modes.
• Cool: System is in Cooling mode.• Off: System is off.• Heat: System is in Heating mode.
CAUTIONEQUIPMENT DAMAGE HAZARDDo not use Cooling mode when the outdoor temperature is below 50 °F (10 °C).
1.5 Fan switchUse the Fan switch to select the fan operation.
• Auto: The fan runs only when heating or cooling is actually taking place (commonly used setting).
• On: The fan runs continuously.
1.6 Temperature settingPress the or button once to display the setpoint temperature. Press either button more than once to change the setpoint.
The ambient (measured) temperature is normally displayed. To view the setpoint temperature, press either of the temperature adjustment buttons once. The setpoint temperature will appear for five seconds.
1.7 Built-in compressor protectionYour thermostat has a feature that helps prevent damage to the compressor of your air conditioning system. Because damage can occur if the compressor is restarted too soon after shutdown, this feature forces the compressor to wait five minutes before restarting. During the wait time, the message Cool On flashes on the screen. When the safe wait time has elapsed, the message stops flashing and the compressor turns on.
2. PROGRAMMED SCHEDULE2.1 Using the schedulePress the Run button to follow the programmed schedule. You can have up to four periods in one day. Each period can be programmed with a different temperature setting.
Fan switch
System switch
Temperature adjustment buttons
Press to run (follow)programmed schedule
Press to override schedule and hold temperature
Press to set clock or schedule
Low-battery warning
Permanent schedule override
Schedule period
Low-battery warning
Setpoint IndicatorAppears when the setpointtemperature is displayed
Temperature
Clock
Temporary Schedule Override
System statusCool On: Cooling isactivated¹Heat On: Heating isactivated

RTH221 PROGRAMMABLE THERMOSTAT
69-2062EFS—03 2
To program a period, you need to set its start time and its two temperature settings (one when the thermostat is in cooling mode and another one when it is in heating mode). The same period and settings are repeated every day.
For maximum energy savings without sacrificing comfort, you can program the schedule such that the temperature is at an economical level when you sleep or are away during the day and at a comfortable level when you are awake and at home.
2.2 Factory settings
2.3 Modifying the schedule1. Press the Set button twice until the
message Set Schedule appears. The start time of the first period (Wake) will flash.
2. Press the or button to set the time.
3. Press the Set button. The tempera-ture setting for that period will flash.
4. To program the temperature settings for the cooling mode, place the System switch in Cool. To program the temperature settings for the heating mode, place the switch in Heat.
5. Press the or button to set the temperature.6. Press the Set button. The start time of the next
period will flash.
NOTE: To skip a period, press the Hold button for four seconds while that period is displayed. When a period is skipped, dashes appear instead of the time and temperature display for the period. Only the Wake period cannot be skipped.
7. Repeat steps 2 through 6 for each of the remaining periods.
8. Once all adjustments are made, press the Run but-ton to save them and exit. (The changes are also saved if you do not press any button for 60 seconds.)
2.4 Temporary override of scheduleTo temporarily ignore the programmed schedule, press or until the desired temperature is displayed. The word Temporary will appear on the screen and the period display will flash to indicate that the current period has been overridden. The new temperature will be used until the next period begins.
NOTE: Pressing or once will display the setpoint temperature. To change the setpoint temperature, press either button more than once.
Press the Run button if you wish to cancel the temporary setting before the beginning of the next period.
2.5 Permanent override of scheduleTo permanently ignore the programmed schedule, press or until the desired temperature is displayed. Then, press the Hold button to maintain the new temperature indefinitely. The word Hold will appear on the screen.
Press the Run button if you wish to cancel the override and resume the programmed schedule. The word Hold will disappear and the thermostat will be set to the temperature programmed for the current period.
3. BATTERY REPLACEMENTSet the System switch to Off before removing the batteries. Otherwise, the heating/cooling system could remain activated even when batteries are removed.
Install two fresh AAA batteries when Lo Batt (low batteries) flashes on the screen. The icon appears for 60 days before the batteries are depleted. Replace batteries once a year, or when you will be away for more than a month.
Most settings are stored in non-volatile (permanent) memory. Only the clock must be set if the thermostat was without batteries.
4. IN CASE OF DIFFICULTYScreen is blank.Ensure two fresh AAA alkaline batteries are correctly
installed.
Temperature settings cannot be changed.• The System switch is off.• You are setting the temperatures outside their
allowable ranges:— Heat: 40 °F to 90 °F (4.5 °C to 32 °C).— Cool: 50 °F to 99 °F (10 °C to 37 °C).
Cool On is flashing.The compressor protection delay has been activated.
Cooling will not be activated until the delay ends (maxi-mum of five minutes).
HI appears on the screen.The ambient (measured) temperature is above 122 °F (50
°C).
LO appears on the screen.The ambient (measured) temperature is below 32 °F (0
°C).
E1 appears on the screen.The temperature sensor circuit is opened. Replace the
thermostat.
E2 appears on the screen.The temperature sensor circuit is shorted. Replace the
thermostat.
Wake Morning temperature
Leave Daytime temperature
Return Evening temperature
Sleep Night temperature
Period Start time Heat CoolWake 6:00 a.m. 70 °F (21 °C) 75 °F (24 °C)
Leave 8:00 a.m. 62 °F (16.5 °C) 83 °F (28.5 °C)
Return 6:00 p.m. 70 °F (21 °C) 75 °F (24 °C)
Sleep 10:00 p.m. 62 °F (16.5 °C) 78 °F (25.5 °C)

RTH221 PROGRAMMABLE THERMOSTAT
© 2020 Resideo Technologies, Inc. All rights reserved.The Honeywell Home trademark is used under license from Honeywell International, Inc. This product is manufactured by Resideo Technologies, Inc. and its affiliates.
www.resideo.com
Resideo Technologies, Inc.1985 Douglas Drive North, Golden Valley, MN 554221-800-468-150269-2062EFS—03 M.S. Rev. 09-21 | Printed in United States
5. TECHNICAL DATAPower Supply2 AAA batteries
Maximum Load1 A @ 24 VAC per output
Temperature RangesHeat: 40 °F to 90 °F (4.5 °C to 32 °C)Cool: 50 °F to 99 °F (10 °C to 37 °C)
Operating Ambient Temperature32 °F to 122 °F (0 °C to 50 °C)
Shipping Temperature-40 °F to 130 °F (-40 °C to 55 °C)
Operating Relative Humidity5% to 90% (non-condensing)
Physical Dimensions (H x W x D)4.7” x 2.9” x 1.1” (120 mm x 74 mm x 28 mm)
WARRANTYResideo warrants this product, excluding battery, to be free from defects in workmanship or materials, under normal use and service, for a period of one (1) year from the date of first purchase by the original purchaser. If at any time during the warranty period the product is determined to be defective due to workmanship or materials, Resideo shall repair or replace it (at Resideo’s option).
If the product is defective,(i) return it, with a bill of sale or other dated proof of purchase, to the place from which you purchased it; or(ii) call Resideo Customer Care at 1-800-468-1502. Customer Care will make the determination whether the product should be returned to the following address:
Resideo Return Goods, 1985 Douglas Dr. N., Golden Valley, MN 55422, or whether a replacement product can be sent to you.
This warranty does not cover removal or reinstallation costs. This warranty shall not apply if it is shown by Resideo that the defect was caused by damage which occurred while the product was in the possession of a consumer.
Resideo’s sole responsibility shall be to repair or replace the product within the terms stated above. RESIDEO SHALL NOT BE LIABLE FOR ANY LOSS OR DAMAGE OF ANY KIND, INCLUDING ANY INCIDENTAL OR CONSEQUENTIAL DAMAGES RESULTING, DIRECTLY OR INDIRECTLY, FROM ANY BREACH OF ANY WARRANTY, EXPRESS OR IMPLIED, OR ANY OTHER FAILURE OF THIS PRODUCT.
Some states do not allow the exclusion or limitation of incidental or consequential damages, so this limitation may not apply to you.
THIS WARRANTY IS THE ONLY EXPRESS WARRANTY RESIDEO MAKES ON THIS PRODUCT. THE DURATION OF ANY IMPLIED WARRANTIES, INCLUDING THE WARRANTIES OF MERCHANTABILITY AND FITNESS FOR A PARTICULAR PURPOSE, IS HEREBY LIMITED TO THE ONE YEAR DURATION OF THIS WARRANTY. Some states do not allow limitations on how long an implied warranty lasts, so the above limitation may not apply to you.
This warranty gives you specific legal rights, and you may have other rights which vary from state to state. If you have any questions concerning this warranty, please write Resideo Customer Care, 1985 Douglas Dr, Golden Valley, MN 55422 or call 1-800-468-1502.
CUSTOMER ASSISTANCEIf you have any questions regarding your thermostat, please go to http://honeywellhome.com or call Customer Care toll-free at 1-800-468-1502.

GUIDE DE L’UTILISATEUR
69-2062EFS-03
RTH221 Thermostat programmable
1. FONCTIONNEMENT1.1 Contrôles
1.2 Affichage
1 Lorsque Cool On clignote, cela signifie que la protection du compresseur est activée (voir la section 1.7).
1.3 Réglage de l’horloge1. Appuyer sur le bouton Set. La mention
Set Time apparaîtra à l’écran et l’heure clignotera.
2. Appuyer sur le bouton ou pour régler l’heure.
3. Appuyer sur le bouton Run pour enregistrer les modifications et quitter. (Les modifications sont aussi enregistrées si vous n’appuyez sur aucun bouton pendant 60 secondes.)
REMARQUE : Lorsque l’affichage de l’heure clignote, cela signifie que l'horloge est déréglée. Si le thermostat suit l’horaire programmé, il utilisera la température programmée pour
la période de réveil (Wake) des jours de la semaine jusqu'à ce que vous rajustiez l'horloge.
1.4 Bouton-sélecteur du systèmeUtiliser le bouton-sélecteur System pour placer le système dans l’un des modes suivants :
• Cool : Le système est en mode Climatisation.• Off : Le système est arrêté.• Heat : Le système est en mode Chauffage.
MISE EN GARDERISQUE DE DOMMAGE MATÉRIELNe pas utiliser le mode Refroidissement lorsque la température extérieure est inférieure à 10 °C (50 °F).
1.5 Bouton-sélecteur du ventilateurUtiliser le bouton-sélecteur Fan pour choisir le mode de fonctionnement du ventilateur.
• Auto : Le ventilateur fonctionne uniquement lorsque le chauffage ou la climatisation est en marche (réglage habituel).
• On : Le ventilateur fonctionne sans arrêt.
1.6 Réglage de la températureAppuyer une fois sur le bouton ou pour afficher la température de consigne. Appuyer sur le bouton plus d’une fois pour modifier la température de consigne. La température ambiante (mesurée) est normalement affichée. Pour voir la température de consigne, appuyer une fois sur l’un des boutons de réglage de la température. La température de consigne apparaîtra pendant cinq secondes.
1.7 Protection intégrée du compresseurVotre thermostat est muni d’une fonction servant à éviter des dommages au compresseur de votre système de climatisation.
Puisque le compresseur risque d’être endommagé s’il démarre trop tôt après son arrêt, cette fonction oblige le compresseur à attendre cinq minutes avant de redémarrer. Pendant cette attente, la mention Cool On clignote à l’écran.
Bouton-sélecteur du ventilateur
Bouton-sélecteur du système
Réglage de la température
Utilisation de l’horaire
Dérogation permanente à l’horaire
Réglage de l’horlogeet de l’horaire
Dérogation permanente à l’horaire
Période de l’horaire
Avertissement de piles faibles
Indication de la consigneApparaît lorsque la températurede consigne est affichée
Température
Horloge
Dérogation temporaire à l’horaire
État du systèmeCool On : La climatisationest activée¹Heat On : Le chauffageest activé

RTH221 THERMOSTAT PROGRAMMABLE
5 69-2062EFS—03
2. HORAIRE PROGRAMMÉ2.1 Utilisation de l’horaireAppuyer sur le bouton Run pour utiliser l’horaire. Vous pouvez programmer pour avoir jusqu'à quatre périodes par jour. Chaque période peut avoir un réglage de température différente.
Pour programmer une période, vous devez régler l’heure du début ainsi que les deux réglages de température (une consigne est utilisée lorsque le thermostat est en mode climatisation et l’autre lorsqu’il est en mode chauffage). Les mêmes périodes et réglages sont utilisés chaque jour.
Pour réaliser des économies maximales tout en gardant le confort, vous pouvez programmer l’horaire de sorte que la température soit à un niveau économique quand vous dormez ou êtes absent durant la journée et à un niveau confortable quand vous êtes à la maison et réveillé.
2.2 Préréglages à l’usine
2.3 Modification de l’horaire1. Appuyer sur le bouton Set deux fois
jusqu’à que la mention Set Schedule soit affichée. L’heure du début de la première période (Wake) clignotera.
2. Appuyer sur le bouton ou pour régler l’heure.
3. Appuyer sur le bouton Set. Le réglage de la température pour la période en question clignotera.
4. Pour régler les températures pour le mode Refroidissement, placer le bouton-sélecteur System à Cool. Pour régler les températures pour le mode Chauffage, placer le bouton-sélecteur System à Heat.
5. Appuyer sur le bouton ou pour régler la température.
6. Appuyer sur le bouton Set. L’heure du début de la prochaine période clignotera.
7. Pour sauter une période, appuyer sur le bouton Hold pendant quatre secondes lorsque la période est affichée. Lorsqu’une période est sautée, des tirets sont affichés à la place de l’heure et de la température. Seule la période Wake (réveil) ne peut être sautée.
8. Répéter les étapes 2 à 6 pour chacune des périodes restantes.
9. Une fois toutes les modifications faites, appuyer sur le bouton Run pour les enregistrer et quitter. (Les modifications sont aussi enregistrées si vous n’appuyez sur aucun bouton pendant 60 secondes.)
2.4 Dérogation temporaire à l’horairePour ignorer temporairement l’horaire, appuyer sur le bouton ou jusqu’à ce que la température désirée soit affichée. La mention Temporary s’affichera et la période en cours clignotera pour indiquer sa dérogation. La nouvelle température sera utilisée jusqu’au début de la période suivante.
REMARQUE : Pour afficher la température de consigne, appuyer une fois sur le bouton ou . Pour modifier la température de consigne, appuyer plus d’une fois sur l’un des boutons. Appuyer sur le bouton Run si vous désirez annuler la dérogation temporaire avant le début de la période suivante.
2.5 Dérogation permanente à l’horairePour ignorer l’horaire de façon permanente, appuyer sur le bouton ou jusqu’à ce que la température désirée soit affichée. Ensuite, appuyer sur le bouton Hold pour garder la nouvelle température jusqu’à ce que vous la changiez de nouveau. La mention Hold s’affichera. Appuyer sur le bouton Run si vous désirez annuler la dérogation et reprendre l’horaire. La mention Hold disparaîtra et le thermostat sera réglé à la température programmée pour la période en cours.
3. REMPLACEMENT DES PILESPlacer le bouton-sélecteur System à Off avant d’enlever les piles. Sinon, le système de chauffage/climatisation pourrait être mis sous tension même si les piles ont été enlevées.
Installer deux piles AAA neuves lorsque Lo Batt (piles faibles) clignote. L’icône reste affichée pendant 60 jours, jusqu’à l’épuisement des piles. Remplacer les piles une fois par année, ou lorsque vous êtes absent pendant plus d’un mois.
La plupart des réglages sont enregistrés dans la mémoire non volatile (permanente). Seul l'horloge doit être réglé de nouveau si le thermostat est resté sans alimentation.
4. EN CAS DE DIFFICULTÉRien n’apparaît à l’écran :S’assurer que deux piles AAA neuves sont bien installées.
La température ne peut être modifiée :• Le bouton-sélecteur System est placé à Off.
Wake(réveil)
Température durant la matinée
Leave(départ)
Température durant la journée
Return(retour)
Température durant la soirée
Sleep(coucher)
Température durant la nuit
Période Début Chauffage ClimatisationWake(réveil)
6 h 21 °C (70 °F) 24 °C (75 °F)
Leave(départ)
8 h 16,5 °C (62 °F) 28,5 °C (83 °F)
Return(retour)
18 h 21 °C (70 °F) 24 °C (75 °F)
Sleep(coucher)
22 h 16,5 °C (62 °F) 25,5 °C (78 °F)

RTH221 THERMOSTAT PROGRAMMABLE
© 2020 Resideo Technologies, Inc. Tous droits réservés. La marque de commerce Honeywell Home est utilisée avec l’autorisation d’Honeywell International, Inc. Ce produit est fabriqué par Resideo Technologies, Inc. et ses sociétés affiliées.
www.resideo.com
Resideo Technologies, Inc.1985 Douglas Drive North, Golden Valley, MN 554221-800-468-150269-2062EFS—03 M.S. Rev. 09-21 | Imprimé aux États-Unis
• Vous tentez de régler la température en dehors de la marge permise :— Chauffage : 4,5 °C à 32 °C (40 °F à 90 °F)— Refroidissement : 10 °C à 37 °C (50 °F à 99 °F)
Cool On clignote à l’écran : Le délai de protection du compresseur est en cours. La climatisation ne peut être activée avant la fin du délai (maximum de cinq minutes).
HI est affiché : La température ambiante (mesurée) est supérieure à 50 °C (122 °F).
LO est affiché : La température ambiante (mesurée) est inférieure à 0 °C (32 °F).
E1 est affiché : Le circuit de la sonde de température est ouvert. Remplacer le thermostat.
E2 est affiché : La sonde de température est court-circuitée. Remplacer le thermostat.
5. FICHE TECHNIQUEAlimentation : 2 piles AAA
Charge maximale : 1 A @ 24 V c.a. par sortie
Gammes de température :Chauffage : 4,5 °C à 32 °C (40 °F à 90 °F)Refroidissement : 10 °C à 37 °C (50 °F à 99 °F)
Température de fonctionnement : 0 °C à 50 °C (32 °F à 122 °F)
Température d’expédition : -40 °C à 55 °C (-40 °F à 130 °F)
Humidité relative : 5 % à 90 % (sans condensation)
Dimensions (H x L x P) : 120 mm x 74 mm x 28 mm (4,7 po x 2,9 po x 1,1 po)
GARANTIEResideo garantit ce produit, à l’exception des piles, contre tout défaut de pièce ou de main-d’oeuvre, durant une période pour un (1) an à partir de la date d’achat par le consommateur d’origine si le produit est utilisé et entretenu convenablement. En cas de défaillance ou de mauvais fonctionnement pendant la période de garantie, Resideo remplacera ou réparera le produit, à sa discrétion.
Si le produit est défectueux(i) renvoyez-le avec la facture ou une autre preuve d’achat date au lieu d’achat; ou(ii) appelez le service à la clientèle de Resideo en
composant le 1-800-468-1502. Le service à la clientèle déterminera si le produit doit être retourné à l’adresse suivante : Resideo Return Goods, 1985 Douglas Dr. N., Golden Valley, MN 55422, ou si un produit de remplacement peut vous être expédié.
La présente garantie ne couvre pas les frais de retrait ou de réinstallation. La présente garantie ne s’applique pas s’il est démontré par Resideo que la défaillance ou le mauvais fonctionnement sont dus à un endommagement du produit alors que le consommateur l’avait en sa possession.
La responsabilité exclusive de Resideo se limite à réparer ou à remplacer le produit conformément aux modalités susmentionnées. RESIDEO N’EST EN AUCUN CAS RESPONSABLE DES PERTES OU DOMMAGES, Y COMPRIS LES DOMMAGES INDIRECTS OU ACCESSOIRES DÉCOULANT DIRECTEMENT OU INDIRECTEMENT D’UNE VIOLATION QUELCONQUE D’UNE GARANTIE, EXPRESSE OU TACITE, APPLICABLE AU PRÉSENT PRODUIT, OU TOUTE AUTRE DÉFAILLANCE DU PRÉSENT PRODUIT. Certaines provinces ne permettent pas l’exclusion ou la restriction des dommages indirects ou accessoires et, par conséquent, la présente restriction peut ne pas s’appliquer.
CETTE GARANTIE EST LA SEULE GARANTIE EXPRESSE FAITE PAR RESIDEO POUR CE PRODUIT. LA DURÉE DE TOUTE GARANTIE IMPLICITE, INCLUANT LES GARANTIES DE QUALITÉ MARCHANDE OU D’ADAPTATION À UNE UTILISATION PARTICULIÈRE, EST LIMITÉE PAR LES PRÉSENTES À LA PÉRIODE D’UN AN DE LA PRÉSENTE GARANTIE. Certaines provinces ne permettent pas de limiter la durée des garanties tacites et, par conséquent, la présente limitation peut ne pas s’appliquer.
La présente garantie donne au consommateur des droits spécifiques et certains autres droits qui peuvent varier d’une province à l’autre.
Pour toute question concernant la présente garantie, prière d’écrire aux Services à la clientèle de Resideo à l’adresse suivante : Resideo Customer Relations, 1985 Douglas Dr, Golden Valley, MN 55422 ou composer le 1-800-468-1502.
SERVICE À LA CLIENTÈLEPour obtenir de l’aide sur ce produit, veuillez consulter le site http://honeywellhome.com ou vous adresser aux Services à la clientèle en composant le 1 800 468-1502. Pour gagner du temps, veuillez prendre en note le numéro de modèle et le numéro de code de date du thermostat avant d’appeler.

GUÍA DEL USUARIO
69-2062EFS-03
RTH221 Termostato programable
1. FUNCIONAMIENTO1.1 Controles
1.2 Pantalla
1 Cuando Cool On parpadea, la protección del compresor está activada (ver la sección 1.7).
1.3 Ajuste del reloj1. Presionar el botón Set. En la pantalla
aparecerá Set Time y la hora parpadeará.2. Presionar el botón o para ajustar la
hora.3. Presionar el botón Run para salvaguardar
las modificaciones y salir. (Las modificaciones se salvaguardan también si no se presiona ningún botón durante 60 segundos).
NOTA: cuando la pantalla de la hora parpadea indica que el reloj no está en hora. Si el termostato sigue el horario programado, usará el ajuste de temperatura programado para el período de despertar (Wake) hasta que el reloj se ponga en hora.
1.4 Botón selector del sistemaUtilizar el botón selector System para poner el termostato en uno de los modos siguientes:
• Cool: el sistema a está en modo Enfriamiento.• Off: el sistema está apagado.• Heat: el sistema a está en modo Calefacción.
PRECAUCIÓNPELIGRO DE DAÑAR EL EQUIPONo se debe hacer funcionar el sistema de refrigeración cuando la temperatura exterior sea inferior a 10 ºC (50 ºF).
1.5 Botón selector del ventiladorUtilizar el botón selector Fan para elegir el modo de funcionamiento del ventilador.
• Auto: el ventilador funciona únicamente cuando la calefacción o el enfriamiento están en marcha (ajuste más común).
• On: el ventilador funciona continuamente.
1.6 Ajuste de la temperaturaPresionar una vez los botones o para visualizar la temperatura del punto de ajuste. Presionar cualquier botón más de una vez para cambiar el valor del punto de ajuste.
Se indica normalmente la temperatura ambiente (medida). Para ver la temperatura del punto de ajuste, presionar una vez uno de los botones de ajuste de temperatura. La temperatura del punto de ajuste aparecerá durante 5 segundos.
1.7 Protección del compresor incorporadaEl termostato tiene una función que protege el compresor del acondicionador de aire. El compresor puede dañarse si vuelve a encenderse inmediatamente después de apagarse. Esta función lo fuerza a esperar 5 minutos antes de volver a entrar en funcionamiento. Durante este tiempo, en la pantalla parpadeará el mensaje Cool On. Una vez transcurridos los 5 minutos de seguridad, el mensaje dejará de parpadear y se encenderá el compresor.
Botón selector del ventilador
Botón selector del sistema
Botones de ajuste de la temperatura
Presionar para ejecutar (seguir) el horario programado
Presionar para cancelarel horario y mantener la temperatura
Ajuste del relojo del horario
Cancelaciónpermanente del horario
Período programado
Advertencia de pilas débiles
Indicador del punto de ajusteAparece cuando se visualiza latemperatura del punto de ajuste
Temperatura
Reloj
Cancelacióntemporal del horario
Estado del sistemaCool On: el enfriamientoestá activado¹Heat On: la calefacciónestá activada

RTH221 TERMOSTATO PROGRAMABLE
69-2062EFS—03 8
2. HORARIO PROGRAMADO2.1 Uso del horarioPresionar el botón Run para ejecutar el horario. Se pueden programar hasta cuatro períodos por día y cada uno se puede programar con un diferente ajuste de temperatura.
Para programar un período, debe fijarse la hora del comienzo y sus dos ajustes de temperatura (uno para cuando el termostato esté en modo Enfriamiento y el otro para cuando esté en modo Calefacción). Los mismos períodos y ajustes se repiten cada día.
Para obtener una economía máxima conservando el confort, se puede programar el horario de manera que la temperatura esté en el nivel de Economía durante la noche o cuando los moradores están ausentes y en un nivel confortable cuando están despiertos y en casa.
2.2 Ajustes de fábrica
2.3 Modificación del horario1. Presionar el botón Set (2 veces)
hasta que aparezca Set Schedule. Parpadeará la hora de inicio del primer período (Wake).
2. Presionar el botón o para ajustar la hora.
3. Presionar el botón Set. Parpadeará el ajuste de la temperatura para el período en cuestión.
4. Para programar la temperatura para el modo Enfriamiento, colocar el botón selector de sistema en Cool. Para programar la temperatura para el modo Calefacción, colocar el botón selector de sistema en Heat.
5. Presionar el botón o para programar la temperatura.
6. Presionar el botón Set. Parpadeará la hora de inicio del próximo período.
NOTA: para saltar un período, presionar el botón Hold durante cuatro segundos cuando el período aparezca en pantalla. Cuando se salta un período, aparecen guiones en lugar de la hora y la temperatura. El período Wake es el único que no puede saltarse.
7. Repetir las etapas 2 a 6 para cada uno de los períodos restantes.
8. Una vez hechas todas las modificaciones, presionar el botón Run para salvaguardarlas y salir. (Las modificaciones también se salvaguardan si no se oprime ningún botón durante 60 segundos).
2.4 Cancelación temporal del horarioPara ignorar temporalmente el horario, presionar el botón o hasta que la temperatura deseada aparezca en pantalla. Aparecerá la palabra Temporary y la pantalla de período parpadeará para indicar que el período en curso ha sido anulado. La nueva temperatura se utilizará hasta el principio del período siguiente.
NOTA: para visualizar la temperatura del punto de ajuste, presionar una vez el botón o . Para modificar la temperatura del punto de ajuste, presionar cualquiera de los dos botones más de una vez. Presionar el botón Run si se desea anular la cancelación temporal antes del inicio del período siguiente.
2.5 Cancelación permanente del horarioPara ignorar el horario programado de manera permanente, presionar el botón o hasta que se visualice la temperatura deseada. Presionar luego el botón Hold para conservar la nueva temperatura de manera indefinda. Aparecerá la palabra Hold en la pantalla. Presionar el botón Run si se desea anular la cancelación y retomar el horario programado. El mensaje Hold desaparecerá y el termostato se ajustará a la temperatura programada para el período en curso.
3. REEMPLAZO DE LAS PILASColocar el botón selector System en Off antes de retirar las pilas. De lo contrario, el sistema de calefacción / enfriamiento podría permanecer activado aun si se han retirado las pilas.
Instalar dos pilas AAA nuevas cuando Lo Batt (pilas débiles) parpadee. El icono aparecerá durante 60 días, hasta que la pilas se hayan agotado. Reemplazar la pilas una vez por año o durante una ausencia de más de un mes.
La mayoría de los ajustes están salvaguardados en la memoria (permanente) no volátil. Sólo el reloj debe ajustarse si el termostato quedó sin alimentación eléctrica o sin pilas.
4. EN CASO DE PROBLEMASNo aparece nada en la pantalla.Verificar que las dos pilas AAA cargadas estén bien insta-
ladas.
Wake(despertar)
Temperatura a la mañana
Leave(salida)
Temperatura en el día
Return(regreso)
Temperatura a la tarde
Sleep(dormir)
Temperatura durante la noche
Périodo Comienzo Calefacción EnfriamientoWake(despertar)
6 h 21 °C (70 °F) 24 °C (75 °F)
Leave(salida)
8 h 16,5 °C (62 °F) 28,5 °C (83 °F)
Return(regreso)
18 h 21 °C (70 °F) 24 °C (75 °F)
Sleep(dormir)
22 h 16,5 °C (62 °F) 25,5 °C (78 °F)

RTH221 TERMOSTATO PROGRAMABLE
© 2020 Resideo Technologies, Inc. Todos los derechos reservados. La marca comercial Honeywell Home se utiliza bajo licencia de Honeywell International, Inc. Este producto es fabricado por Resideo Technologies, Inc. y sus afiliados.
www.resideo.com
Resideo Technologies, Inc.1985 Douglas Drive North, Golden Valley, MN 554221-800-468-150269-2062EFS—03 M.S. Rev. 09-21 | Impreso en EE. UU.
No puede modificarse la temperatura.• El botón selector System está apagado (Off)• Se está tratando de ajustar la temperatura fuera del
margen permitido:— • Calefacción: 4,5 °C a 32 °C (40 °F a 90 °F).— • Enfriamiento: 10 °C a 37 °C (50 °F a 99 °F).
Cool On parpadea en la pantalla.El lapso de protección del compresor está en curso y hay
que esperar que termine (máximo de 5 minutos).
HI aparece en la pantalla. La temperatura ambiente (medida) es superior a 50 °C
(122 °F).
LO aparece en la pantalla.La temperatura ambiente (medida) es inferior a 0 °C (32
°F).
E1 aparece en la pantalla.El circuito de la sonda de temperatura está abierto.
Reemplazar el termostato.
E2 aparece en la pantalla. El circuito de la sonda de temperatura está en corto cir-
cuito. Reemplazar el termostato.
5. ESPECIFICACIONESTÉCNICASAlimentación: 2 pilas AAA
Carga máxima: 1 A a 24 V C.A. por salida
Gamas de temperaturaCalefacción: 4,5 °C a 32 °C (40 °F a 90 °F)Enfriamiento: 10 °C a 37 °C (50 °F a 99 °F)
Temperatura ambiente de funcionamiento0 °C a 50 °C (32 °F a 122 °F)
Temperatura de expedición-40 °C a 55 °C (-40 °F a 130 °F)
Humedad relativa de funcionamiento5% a 90% (sin condensación)
Dimensiones (alto x largo x ancho)120 mm x 74 mm x 28 mm (4,7” x 2,9” x 1,1”)
GARANTÍAResideo garantiza que este producto, excluyendo la batería, no tiene defectos en la mano de obra ni en los materiales en condiciones de uso y servicio normales durante un período de uno (1) año desde la fecha de compra por parte del comprador original. Si en cualquier momento, durante el período de vigencia de la garantía, se determina que el producto está defectuoso debido a la mano de obra o los materiales, Resideo lo reparará o reemplazará (a elección de Resideo).
Si el producto está defectuoso(i) devuélvalo, con una factura de venta o cualquier otro comprobante de compra con fecha, al lugar donde lo compró; o(ii) llame al Servicio de atención al cliente de Resideo al 1-800-468-1502. En el Servicio de atención al cliente determinarán si el producto debe ser devuelto a la siguiente dirección: Resideo Return Goods, 1985 Douglas Dr. N., Golden Valley, MN 55422, o si se le puede enviar un producto de reemplazo.
Esta garantía no cubre los gastos de remoción ni de reinstalación. Esta garantía no se aplicará si Resideo demuestra que el defecto fue causado por daños que se produjeron mientras el producto estuvo en posesión de un consumidor.
La única responsabilidad de Resideo será la de reparar o reemplazar el producto según los términos mencionados anteriormente. RESIDEO NO SERÁ RESPONSABLE POR LA PÉRDIDA O EL DAÑO DE NINGÚN TIPO, INCLUYENDO LOS DAÑOS ACCIDENTALES O RESULTANTES DERIVADOS DIRECTA O INDIRECTAMENTE DEL INCUMPLIMIENTO DE LAS GARANTÍAS, EXPRESAS O IMPLÍCITAS, O DE OTRAS FALLAS DE ESTE PRODUCTO. Algunos estados no permiten la exclusión o limitación de los daños accidentales o resultantes, por lo que esta limitación podría no aplicarse en su caso.
ESTA GARANTÍA ES LA ÚNICA GARANTÍA EXPRESA QUE RESIDEO OTORGA SOBRE ESTE PRODUCTO. LA DURACIÓN DE CUALQUIERA DE LAS GARANTÍAS IMPLÍCITAS, INCLUIDAS LAS GARANTÍAS DE COMERCIABILIDAD E IDONEIDAD PARA UN FIN DETERMINADO, QUEDA, POR EL PRESENTE, LIMITADA A LA DURACIÓN DE UNO AÑO DE ESTA GARANTÍA. Algunos estados no permiten limitaciones en relación a la duración de una garantía implícita, de manera que la limitación anterior puede no aplicarse en su caso.
Esta garantía le otorga derechos legales específicos, pero es posible que usted goce de otros derechos que varían de un estado a otro. Si tiene preguntas acerca de esta garantía, escriba a Resideo Customer Relations, 1985 Douglas Dr. Golden Valley, MN 55422 o llame al 1-800-468-1502.
ASISTENCIA AL CLIENTEPara obtener asistencia relacionada con este producto, recomendamos visitar el sitio http://honeywellhome.com o comunicarse con el servicio de asistencia al cliente llamando sin cargo al 1-800-468-1502.