Embed Size (px)
Citation preview

Owners Guide
Model 74-250(C) Digital Weather Receiver with NWR-SAME decoding,
thermometer and Digital clock with 2 alarms

2
PRODUCT INFORMATION The 74-250 N.W.R./ S.A.M.E. (National Weather Radio/Specific Area Message Encoding) Weather/All Hazard Monitor provides you with constant monitoring of your local National Weather Service broadcast for messages warning you of hazardous conditions. The NWR/SAME decoding allows you to hear only messages concerning the area concerning you. You now have a choice as to what information will be brought to you. No more will you be awakened to hear of a problem many miles from your home that will not affect you. A clock with alarm is also featured. The 74-250 NWR/SAME Weather/All Hazard Monitor is the latest advance in Weather monitoring technology providing you with the information you need for your greatest safety from the effects of weather and other external hazards.
FEATURES: • VHF Weather Monitor with seven different National Weather
Service channels in the 162 MHz FM band – Provides 24-hour-a-day National Weather Service information from seven different channels for maximum reception possible (in areas where available)
• Alert monitor system receives NWR/SAME codes transmitted by National Weather Service stations warning of dangerous weather conditions and other general hazards. The SAME codes designate which counties or parts of counties are affected by the individual message. When the alert feature is activated, the receiver remains in a standby mode. As SAME coded messages are received, the receiver automatically activates to warn you of dangerous weather conditions.

3
• High Performance Receiver – Receives weather broadcasts up to 50 miles from transmitter.
• Dot Matrix LCD display for viewing alert type and monitor status.
• Clock displays time and date and has 2 alarms and snooze functions.
• Powered from two AA batteries (optional). • Flexible Antenna – Provides maximum range reception-up to
50 miles. • Fully Variable Digital Volume Control – Adjusts audio
output. • Compact, Ultra Modern Styling – Small enough to take along. • Earphone Jack – Allows private listening or remote speaker
location. • Charge jack- allows for charging Ni-Cd or Ni- Mh batteries
(optional).
CONTROLS: Mode – This is a push button that switches the display from time, date and temperature display to alarm display. Also is used to change the active county. Set – This button allows setting of various functions.

4
Snooze/Function – This is a push button that switches between time, date and temperature display and alert message area. By pressing and holding this button you can switch between alert with siren voice and alert message, alert message only, turn the weather alert off or listen to the weather broadcast. UP/Down – These buttons allow for
changing volume and changing settings. Earphone jack – This jack allows for attaching an earphone for private listening. Charge Jack - This jack allows for
charging optional NI-Cd (Nickel Cadmium) or Ni-Mh (nickel metal hydride) batteries. NWR-SAME: In 1994, the National Oceanic and Atmospheric Administration (NOAA) began broadcasting coded emergency signals that identify the specific geographic area (such as a county) affected by an emergency. Until that time such specific emergency weather information was sent in other ways to broadcast stations and others then relayed to the public. NOAA transmits the coded weather emergency signals using a technique called SAME (Specific Area Message Encoding). The

5
Midland 74-250 7-channel weather/ all hazards monitor is designed to receive these SAME transmissions. Your Midland 74-250 can be programmed with up to 9 predefined county/channels that will define which notices broadcast by your local NOAA weather station will cause the radio to alert you. This includes warnings, watches and statements of weather and other area emergencies, about 40 different types. Also included in the SAME message is the amount of time for which the message is effective. The 74-250 will continue to display the alert until its time expires. In the upper left of the display will be the time the alert was received. You don’t need to wait for the 74-250 to give you an alert. Just find the NWR station broadcasting to your area from the 7 available channels. You can listen at any time, day or night to the latest weather information from the National Weather Service. See quick use guide What is a FIPS Code? The NWR divides the United States and territories by state and county (or parish) and assigns a six digit code number called a FIPS (Federal Information Processing System) code or also known as a NWR/SAME county code. The first digit identifies subdivision. The next two identify the state or territory, and the last three identify the county. For example the code for Clay county Missouri is 029047. The“047” indicates the county, the “29” indicates the state, and the “0” indicates the subdivision of the county. In this case and most cases the code will have a zero for the first digit, indicating that no subdivision is in use. The NWS plans to introduce subdivisions of some counties in the future, assigning digits 1 through 9 to the parts resulting in codes like 529047.

6
Acquiring FIPS codes for the desired Area: The FIPS codes can be found by calling the NWS toll free number 1-888-NWS-SAME (1-888-697-7263) Please be sure you are dialing the correct number Automated instructions will guide you to the numbers you need. The FIPS codes and much more information can be found by way of the Internet at www.nws.noaa.gov/nwr/indexnw.htm Note: You might want to obtain the codes for other counties close to you or those you might frequently travel through. The counties still must be within the coverage area of your NWS broadcast. This is what to expect when you call the NWS number. You will be prompted to enter your state. We suggest spelling the entire state to expedite the process. Next you will be prompted to enter the county. Again spell the entire county. We suggest you locate several counties surrounding you especially the county in the direction most of the storms will be coming from. When you have entered the county, the system will ask you to confirm what you entered is correct. Be ready to write the number. The system tells you the number fairly quick but you have the option to have it read back to you so you can get the whole number. Remember the number will be six digits long usually beginning with a zero.
INITIAL SETUP To Install Batteries: 1. Hold the radio face down. Press the latch so it swings away
from the cover.
7
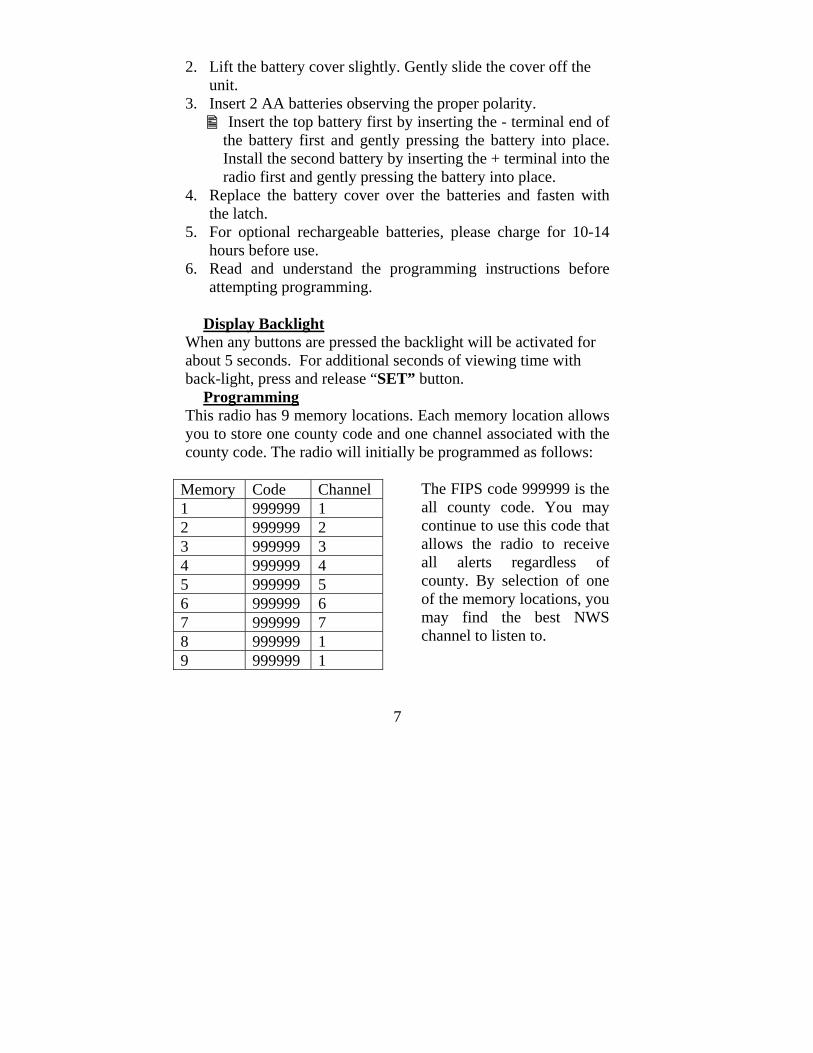
2. Lift the battery cover slightly. Gently slide the cover off the unit.
3. Insert 2 AA batteries observing the proper polarity. Insert the top battery first by inserting the - terminal end of the battery first and gently pressing the battery into place. Install the second battery by inserting the + terminal into the radio first and gently pressing the battery into place.
4. Replace the battery cover over the batteries and fasten with the latch.
5. For optional rechargeable batteries, please charge for 10-14 hours before use.
6. Read and understand the programming instructions before attempting programming.
Display Backlight
When any buttons are pressed the backlight will be activated for about 5 seconds. For additional seconds of viewing time with back-light, press and release “SET” button.
Programming This radio has 9 memory locations. Each memory location allows you to store one county code and one channel associated with the county code. The radio will initially be programmed as follows:
Memory Code Channel 1 999999 1 2 999999 2 3 999999 3 4 999999 4 5 999999 5 6 999999 6 7 999999 7 8 999999 1 9 999999 1
The FIPS code 999999 is the all county code. You may continue to use this code that allows the radio to receive all alerts regardless of county. By selection of one of the memory locations, you may find the best NWS channel to listen to.

8
When you have finished with entering the county code and the channel associated with it, the radio will automatically revert back to the last county the radio was on. This means that when you finish with programming a county/channel you must be sure of the memory location you programmed. If you programmed county 2 and the radio was on county 1, when you are finished programming the radio it will be on location 1. You must cause the radio to switch to the county you just stored in a memory other than 1. Below are detailed instructions on programming the radio.
Before programming the radio, we suggest turning off the NOAA receiver. To temporally deactivate the receiver, press and hold the SNOOZE/FUNC button until you do not see the NOAA or any of the speaker icons associated with it. The display should look like this... or like this…
Alert display Clock display
Use this mode also when monitoring for alerts is not required. Battery life will be much greater.
Enter the county code and NWS channel into memory
When you receive this radio it is programmed with the “all county” code 999999. You may continue to use this code which allows the radio to receive all alerts regardless of the county.
Your 74-250 is supplied with a booklet that lists most of the NWS frequencies and the major cities they are in. Find the desired city and the frequency associated with it and refer to the list at the bottom of this section and program as desired. Do not enter the frequency (162.xxx) as a county code.

9
• From the clock display: 1. Press and release the “FUNC/SNOOZE” once to change from
clock to alert display. • You will see on the display in most cases “NO
MESSAGE” scrolling across the screen. This message will depend on if you have received any alerts recently. Above the message you will see on the right center of the display “COUNTY” followed by a number (1-9) (as described earlier). This number is the county/channel location presently in use.
2. Press and hold “SET” button until you see six digits on the display. The number next to the word “COUNTY” will flash.
The six numbers are the county (fips) code. Refer to the instructions above on how to acquire the FIPS code
2. Press the “UP” button to select the county code/memory location you desire (1-9). This number will flash indicating you are able to change that digit. There are nine county code/channel memory locations available. Each location can have a different county code and channel if desired.
4. Press and release the set button. The first digit of the county code will flash indicating you are able to change that digit.
Each press of the “SET” button will allow you to change each digit with the “UP/DOWN” buttons on the side of the radio. The digits will flash indicating you can change that digit
5. Press and release the “UP/DOWN” buttons to change the digit.
6. Press and release the “SET” button to move to the next digit.

10
7. After setting the 6th-digit of the county code, press “SET” once, the number will flash next to CH.
8. Press and release the “UP/DOWN” button to select the channel (1-7).
9. Press and release “SET” one time to end programming. When no buttons have been pressed for 10 seconds, the current setting is stored and the display switches to alert display mode automatically. If after 30 seconds there has been no buttons pressed the radio will switch to clock mode.
Channel Frequency
(MHz) 1 162.400 2 162.425 3 162.450 4 162.475 5 162.500 6 162.525 7 162.550
Setting the “County” to listen to.
After setting the county or counties desired you now must select one to listen to.
• From the Weather message display: 1. Press and hold the “MODE” button until you see the 6 digit
county code on the display. The number next to the word COUNTY will flash. Press the “UP/DOWN” buttons to select the county location number desired.

11
2. Press and release the “MODE” button to restore the radio to alert mode.
Setting how your Radio alerts you NOTE: The National Weather Radio service operates Weather Broadcast systems covering a large area of the United States. Some areas are not included. Check the directory enclosed for weather broadcast availability. Your 74-250 can receive broadcasts from the Weather Stations up to 50 miles. Hills and certain terrain can reduce reception. If your city is listed as having a Weather Service Station but you do not receive it please call your local Weather Service to confirm they are broadcasting (Sometimes these stations are shut down for maintenance). Setting the Clock and Temperature units • From the clock display:
Press and release FUNC/SNOOZE first if in alert mode. 1. Press and hold the “SET” button, the hours will flash. 2. Press and release the “UP or Down” button to set the hours. 3. Press and release the “SET” button the minutes will flash. 4. Press and release the “UP or Down” button to set the minutes. 5. Press and release the “SET” button a HR12 or HR24 will be
displayed depending on previous setting. The HR12 indicates the 12-hour format. The HR24 indicates military 24-hour format.
6. Press and release the “UP or Down” button to select the desired format.
7. Press and release the “SET” button, the F or C will flash next to the temperature.

12
F is for Fahrenheit and C is for Celsius. 8. Press and release the “UP or Down” button to select F or C. 9. Press and release the “SET” button to store your selection and
return to clock mode. The day of the week will be correct when you set the Date.
When no buttons have been pressed for 10 seconds, the current setting is confirmed and the radio switches to alert display mode automatically. If after 30 seconds there has been no buttons pressed the radio will revert to clock mode.
Setting the Date From the Clock display 1. Press and release the “MODE” button, the Date will be
displayed. 2. Press and hold the “SET” button, the Year will flash. 3. Press and release the “UP/DOWN” button, to select the Year. 4. Press and release the “SET” button, the Month will flash. 5. Press and release the “UP/DOWN” button to select the Month. 6. Press and release the “SET” button, the Day will flash. 7. Press and release the “UP/DOWN” button, to select the Day. 8. Press and release the “SET” button, to return to the Date
display. Setting the Alarms
There are two alarms available. They are identified with a number one and a number two inside of a bell that is displayed next to the temperature.
• From the clock display: 1. Press and release the “MODE” button (usually twice) until
you see the bell icon on the display with a 1. This is displayed in the upper center of the display. The time is followed by AL.
The bell icon with the number is the alarm you will be setting.

13
1. Press and hold the “SET” button until the hour is flashing. Press the “UP or DOWN” buttons to set the hour.
2. Press and release the “SET” button, the minutes will flash. Press and release the “UP or DOWN” buttons to change the minutes.
3. Press and release the “SET” button when setting is complete.
To set the second alarm press “MODE” button to cause the bell icon with a 2 to be displayed and repeat the steps above. Turning On or Off the Alarms It is possible to turn on or off one or both of the alarms. • From the clock display: 1. Press and release the “MODE” button (two or three times depending on which alarm you want to turn off) to see the bell icon on the display flashing with the number inside. The number will be the alarm you are turning off. 2. Press and hold the “SET” button until the hours flash. 3. Press and release the “SNOOZE/FUNC” button. The display
will flash OFF. 4. Press “SET” to set the alarm to the off position. 5. To turn the alarm (s) back on follow the steps under Setting
the Alarms. Turning on the Alarm (s) • From the clock display: 1. Press and release the “MODE” button (two or three times
depending on which alarm you want to turn on) until you see the bell icon on the display with the number of the alarm you

14
want. You will see on the display OFF. 2. Press and hold the “SET” button until the OFF flashes. 3. Press and release the “SNOOZE/FUNC” button to cause the
alarm time to be displayed. The hours will flash indicating you can set as desired. Follow the instructions above to set the alarm.
LISTENING TO WEATHER BROADCASTS These icons indicate the receiving mode. To change modes, press and hold the SNOOZE/FUNC button until the desired mode is displayed. 1. This icon indicates that weather alerts will only display and
not sound. 2. This icon indicates the weather receive is in voice mode. 3. This icon indicates normal alert monitoring mode.
When no icons are displayed, the radio is off. Only time and temperature are active. You can extend your battery life if this mode is used when you do not require weather alerts.
With icon 2 and 3 displayed the broadcast is heard and the radio is in alert mode. When an alert is received the LED on the top of the radio flashes Red and the alert type will scroll across the display.
With icon 1 and 3 displayed the speaker is muted. When an alert is received the siren or voice will not be heard. The LED on top of the radio will flash Red and the alert type will scroll across the display.
With only icon 3 displayed the speaker is muted. When an alert is received, the siren is heard then the speaker is un-muted and the broadcast will be heard for 5 minutes, the alert type will scroll across the display. If you do not desire

15
to listen to the broadcast for the 5 minutes press and release the “Snooze/Func” button to mute the speaker.
USING THE ALERT FUNCTION: When your 74-250 receives alert, an audible alert tone is heard (depending on settings) and the display will scroll showing the nature of the alert, watch, warning, statement, and the time the alert was received. The audio will be turned on (depending on settings) to allow you to hear the broadcast. The LED on top of the radio will flash red indicating the radio has received an alert. The alert duration can be between 15 minutes and 6 hours. This duration is determined by the NWS.
NWR Alert Descriptions This table contains the NWR descriptions of all the types of alerts that your 74-250 will display. The display text and type of alert sound are shown for each type of alert
What You See Alert Sound Tornado Watch Fast siren
Tornado Warning Very fast siren Severe Thunderstorm Watch Fast siren
Sever Thunderstorm Warning Very fast siren Flash Flood Watch Fast siren
Flash Flood Warning Very fast siren Flood Watch Fast siren
Flood Warning Very fast siren Winter Storm Watch Fast siren
Winter Storm Warning Very fast siren Blizzard Warning Very fast siren High Wind Watch Fast siren

16
High Wind Warning Very fast siren Hurricane Warning Very fast siren Hurricane Watch Fast siren
Coastal Flood Watch Fast siren Coastal Flood Warning Very fast siren
Special Marine Warning Very fast siren Avalanche Watch Fast siren
Avalanche Warning Very fast siren Volcano Watch Fast siren
Vlocano Warning Very fast siren Immediate Evacuation Warning Very fast siren
Shelter in Place Warning Very fast siren Civil Danger Watch Fast siren
Civil Danger Warning Very fast siren Radiological Hazard Watch Fast siren
Radiological Hazard Warning Very fast siren Hazardous Material Watch Fast siren
Hazardous Material Warning Very fast siren Law Enforcement Warning Very fast siren
Fire Warning Very fast siren Tune Tv (unknown watch) Fast siren
Tune Tv (unknown warning) Very fast siren Local Area Emergency Very fast siren
Severe Weather Statement Beeps Special Weather Statement Beeps
Flash Flood Statement Beeps Hurricane Statement Beeps
The SAME message the NWR sends contains information, which tells the radio the time period for which the alert is valid. The time can be set from 15 minutes up to 6 hours and what type of

17
the alert is issued. When the designated time has passed the display message and LED will be reset to their normal state.
Reviewing Overlapping Alerts The 74-250 radio can store up to five different alerts (with overlapping effective times) in its memory. If the radio receives a new alert while a previous alert is still in effect, the radio automatically displays the alert description and sounds the alert for the new alert message. To scroll backward and forward through the radio’s memory and review all the effective alerts, press the “UP /DOWN” Buttons. Each alert will be displayed with the time it was received.
When a Test or Demo Alert Occurs NWR sends a weekly test and occasional demonstration signals to let everyone with weather monitor receivers verify the operation of their equipment. To find out the test schedule of for your area, contact the local NOAA or NWS office. Look for the number under US Government, Department of Commerce. The following alert descriptions are for testing only.
What You See What You Hear Required Weekly Test Beeps
Required Monthly Test Beeps System Demo Beeps
National Periodic Test No sound As the NWS adds new alert capabilities your radio is set to receive them and alert you automatically with no modifications.

18
TROUBLESHOOTING
Problem Suggestion(s)
No power. Check that the batteries are installed correctly and the batteries are good.
No sound. Check VOLUME setting No weather broadcast when you press Snooze/Func button
Ensure that the county has the correct channel.
Ensure that the radio is set to the NOAA weather channel in use in your area. Contact NOAA to ensure they are presently broadcasting.
One or more FIPS codes are stored in memory but the radio responds to alerts for areas other than those for the codes stored.
Ensure that the correct ‘County’ (FIPS and channel setting) selected.
The radio is not responding properly to NWS weather alert broadcasts
Ensure that you have programmed the correct FIPS code(s) into the radio’s memory.

19
NOTES AND MAINTENANCE
1. The typical weather (162MHz) reception distance will
range from 25-50 miles depending on your location and conditions of weather, terrain, etc. Also, some Weather Stations operate at much higher power levels than others and have their transmitting towers on the top of high buildings or hills. If reception in your area is not good, check with your local dealer for assistance and ask about typical reception range in your area. Also try different locations to find a place of good reception.
2. If Weather Stations cannot be heard on any channel,
contact your local National Weather Service office to verify that the station is on the air and also verify the CHANNEL (Frequency) and location of the weather station.
3. All National Weather Service stations periodically
transmit an Alert test signal. Some broadcast only once a week and others more often. You can always find out when the test signal is broadcast by calling the U.S. Weather Service's phone number for your local NOAA station.
4. Mobile home reception is difficult due to the metallic
structure preventing reception. Put your 74-250 near a window.

20
FCC Compliance Information
Midland NWR-SAME Weather Monitor Model 74-250
This device complies with part 15 of the FCC Rules. Operation is subject to the following two conditions: This device may not cause harmful interference. This device must accept any interference received including interference that may cause undesired operation. For compliance information contact: Midland Radio Corporation 1120 Clay St. North Kansas City, MO 64116 Tel: (816) 241-8500

21
SPECIFICATIONS
Specifications are nominal and subject to change. GENERAL Frequency Range (162.40, 162.425, 162.45, 162.475, 162.50, 162.525, 162.55MHz) Number of WX Channels …………….7 Input Voltage .........................................3 Volts DC Dimensions ….. 73mm W x 105mm H x 30mm D (2 7/8 x 4 1/8 x 1 1/4 in.) Battery life (alkaline): 6 to12 days monitoring, up to 6 months in clock mode. Battery life (Ni-cad): 2 to 4 days monitoring, up to 2 months in clock mode. RECEIVER 20 dB Quieting Sensitivity…………...…..0.5 uV FIPS Code Sensitivity @5kHz Dev..…….0.5uV Channel Selectivity ………..................±25kHz, 30dB Speaker Impedance ……………......…..4 ohms Power Output @10%THD........................150 mW max.

22
SERVICE: If it ever becomes necessary to return your 74-250 for service:
1.Pack the unit in its original box and packing. Pack the original box in a suitable shipping carton along with the following. Improper packing may result in damage during shipment. 2.Include a full description of any problems and a daytime telephone number. 3. For warranty service include a photocopy of the bill of sale or
other proof of purchase showing the date of sale. 4.Include a money order for $7.50 to cover shipping and handling (this may not be required in some states).
You do not need to return accessory items (AC/DC Adapter, Owners Guide) unless they maybe directly related to the problem.
A flat rate of $45.00 will apply to repairs not covered by warranty or units that are over one year old. Send only cashiers check, money order or Master Card or Visa card number.
Midland Radio Corporation 1120 Clay St.
North Kansas City, Mo. 64116 Tele. 816-241-8500

23
ONE YEAR LIMITED WARRANTY Midland Radio Corporation will repair or replace, at its option without charge, your 74-250 weather alert radio which fails due to a defect in material or workmanship within one year following the initial consumer purchase.
This warranty does not include any antennas, prior service attempts, liquid damage, abuse or misuse. Performance of any obligation under this warranty may be obtained by returning the warranted product, freight prepaid, along with a copy of the original sales receipt, to Midland Radio Corporation, Warranty Service Department, 1120 Clay St. North Kansas City, Missouri 64116, or to the place of purchase (if a participating dealer). Warranty information may be obtained by writing Midland Consumer Radio, Warranty Service Department.
This warranty gives you specific legal rights, and you may also have other rights, which vary, from state to state.
Note: The above warranty applies only to merchandise purchased in the United States of America or any of the territories or possessions thereof, or from a U.S. Military exchange. For warranty coverage on merchandise purchased elsewhere ask your dealer.
Midland Radio Corporation URL: www.midlandradio.com 1120 Clay St. North Kansas City, Mo. 64116 Tel: (816) 241-8500 E-mail: [email protected] Printed in China

24
FIPS codes Use this space to record the FIPS codes and weather radio channels you have programmed into your 74-250-weather monitor. Co. Code Channel Location 1 2 3 4 5 6 7 8 9