Embed Size (px)
Citation preview
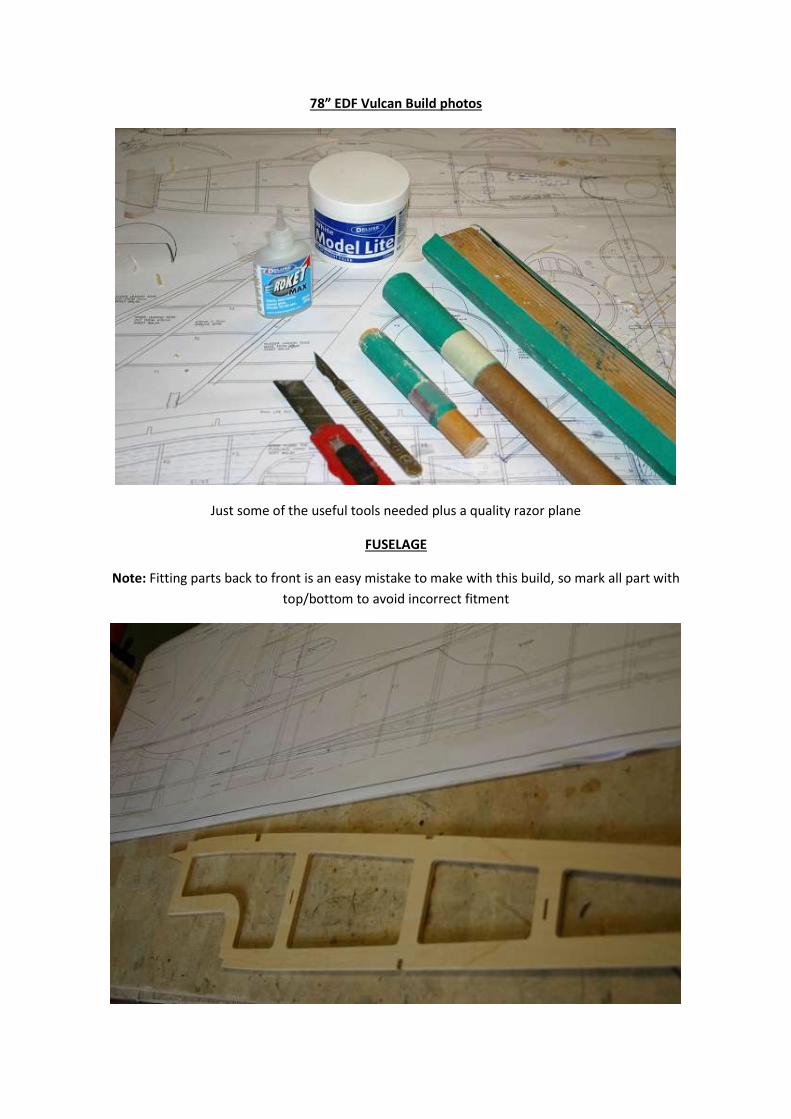
78” EDF Vulcan Build photos
Just some of the useful tools needed plus a quality razor plane
FUSELAGE
Note: Fitting parts back to front is an easy mistake to make with this build, so mark all part with
top/bottom to avoid incorrect fitment
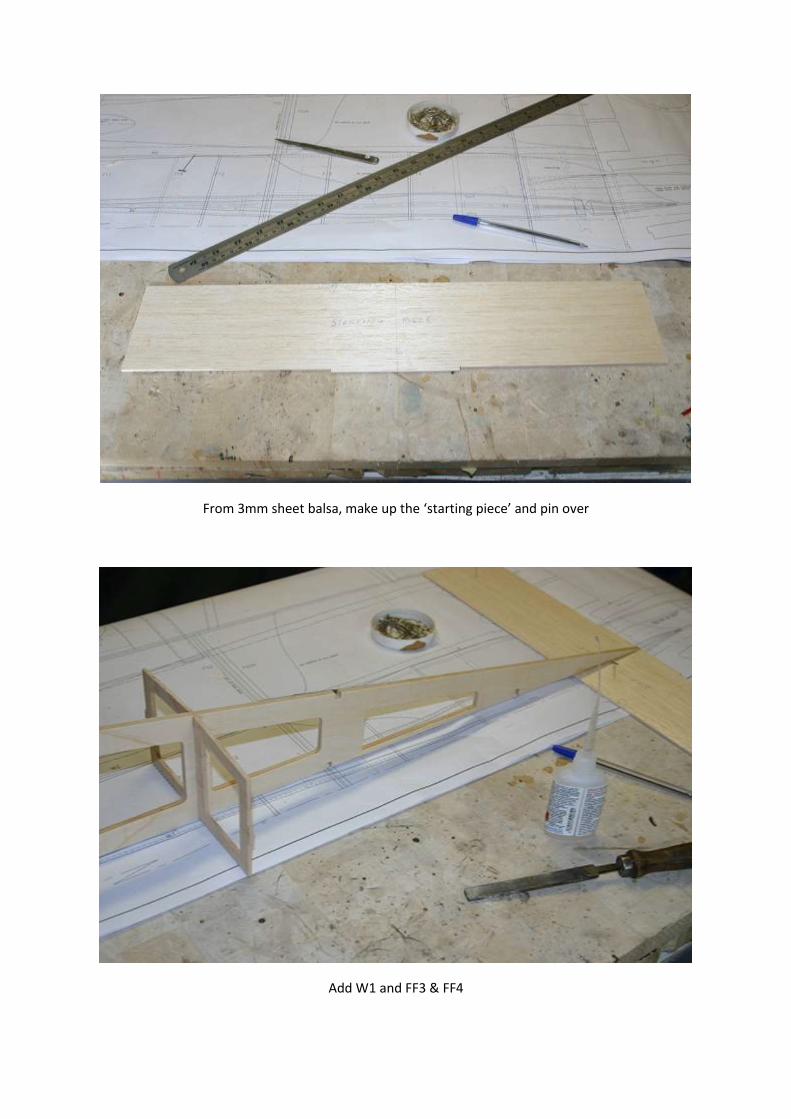
From 3mm sheet balsa, make up the ‘starting piece’ and pin over
Add W1 and FF3 & FF4

Add W2
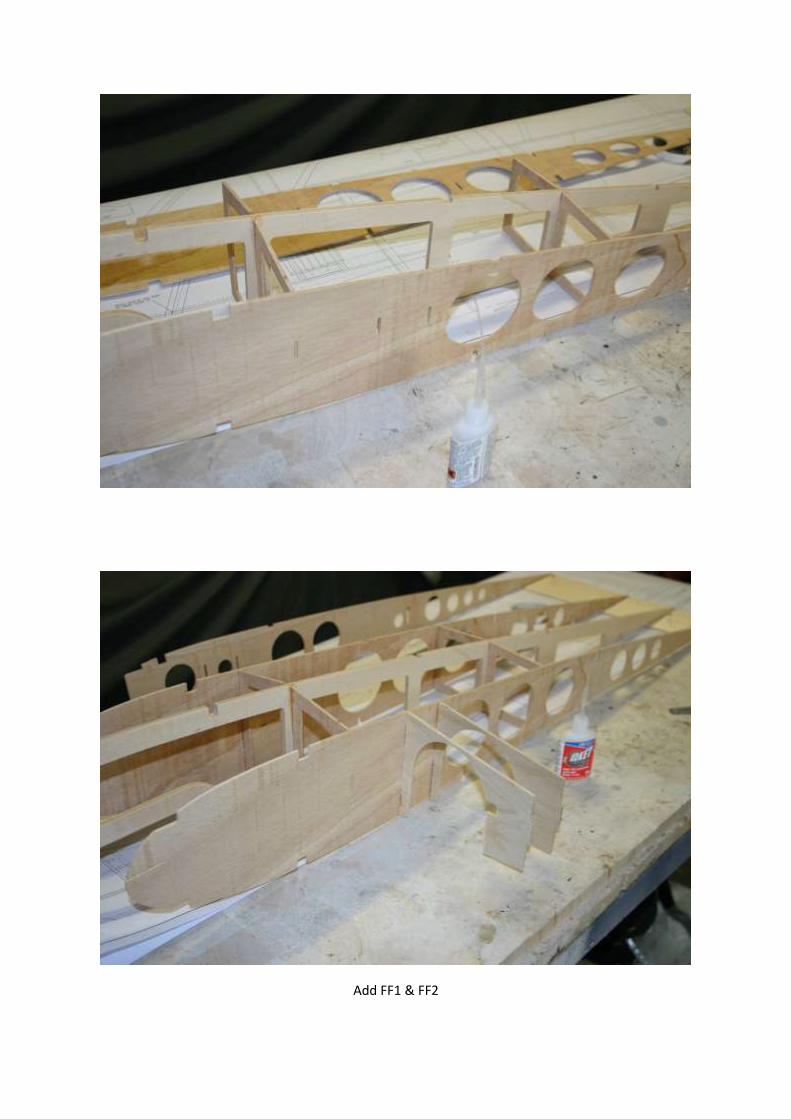
Add FF1 & FF2
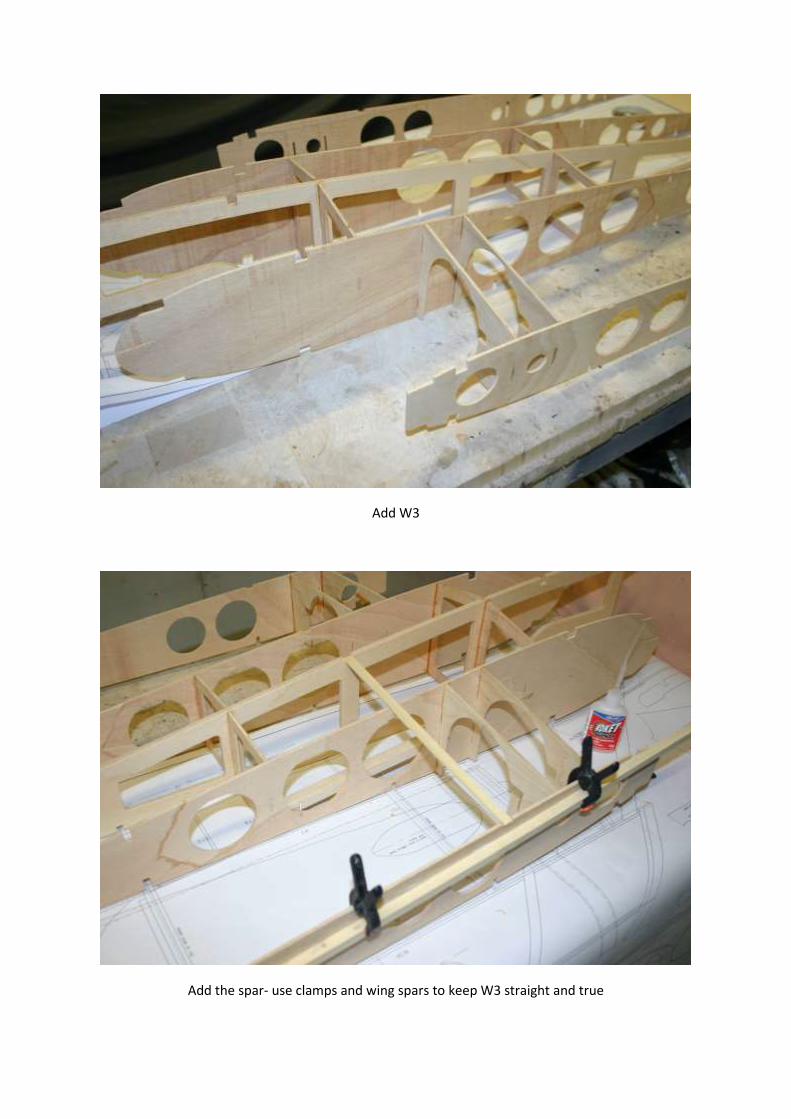
Add W3
Add the spar- use clamps and wing spars to keep W3 straight and true
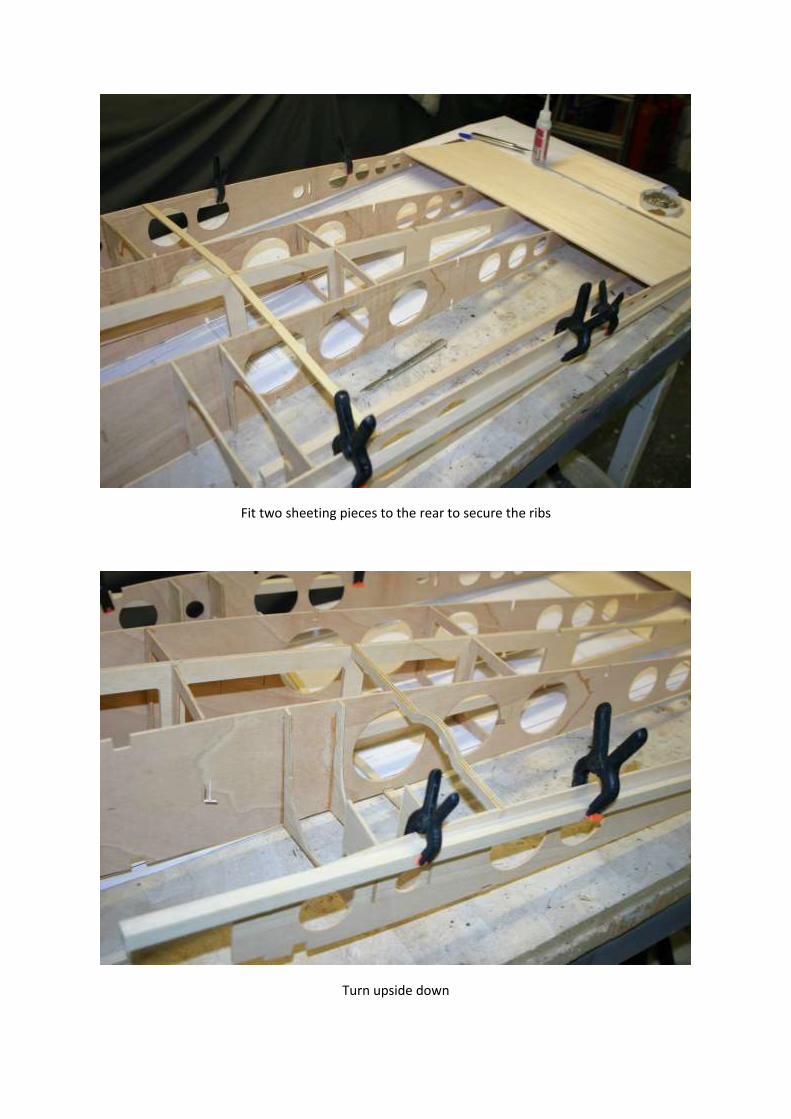
Fit two sheeting pieces to the rear to secure the ribs
Turn upside down
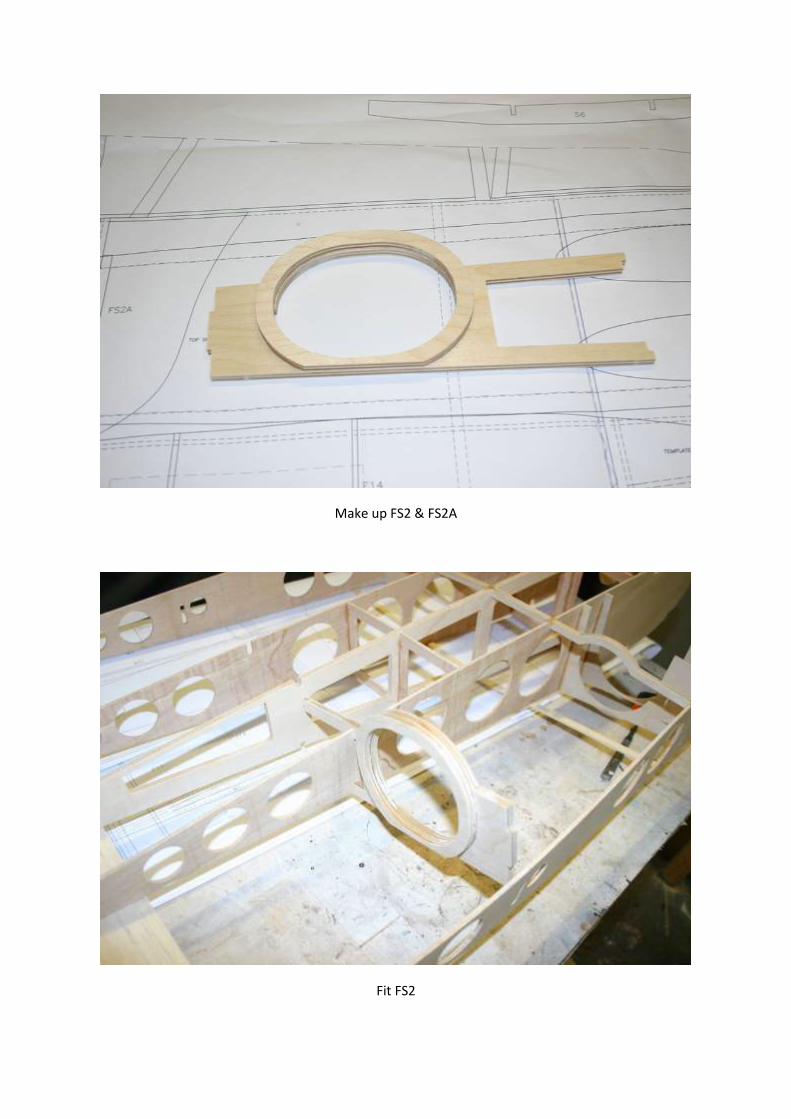
Make up FS2 & FS2A
Fit FS2
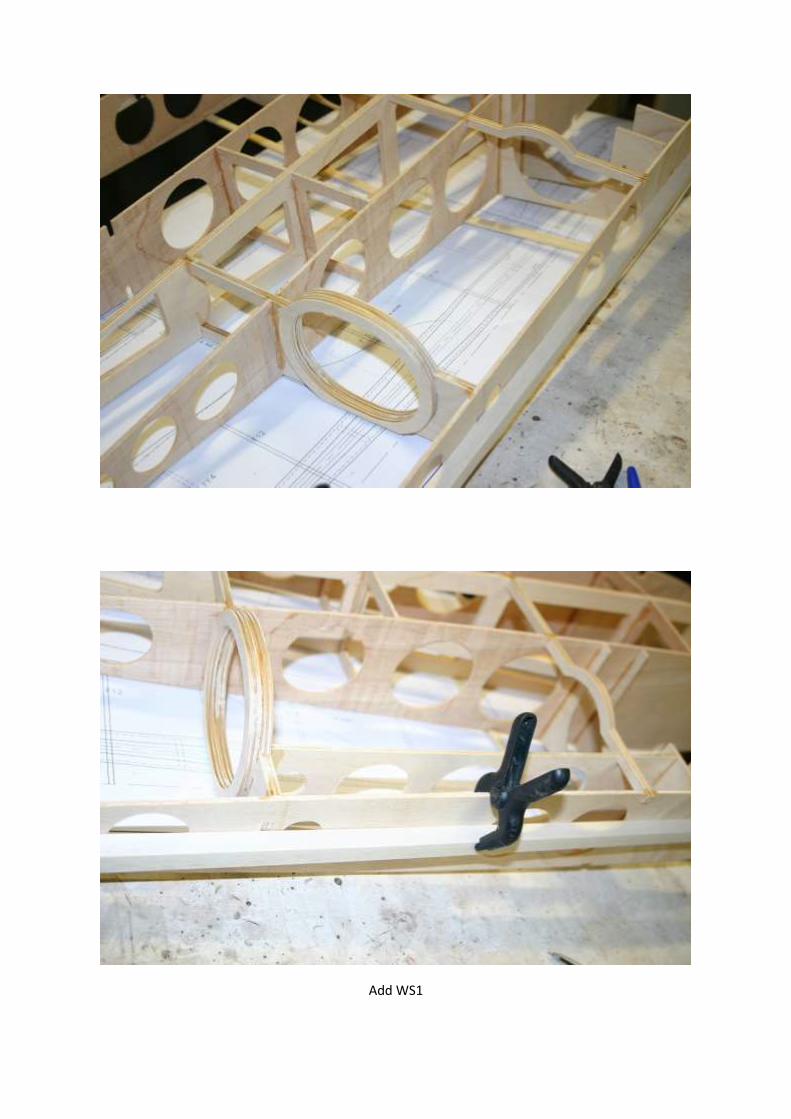
Add WS1

Add WS3
Add the front spars
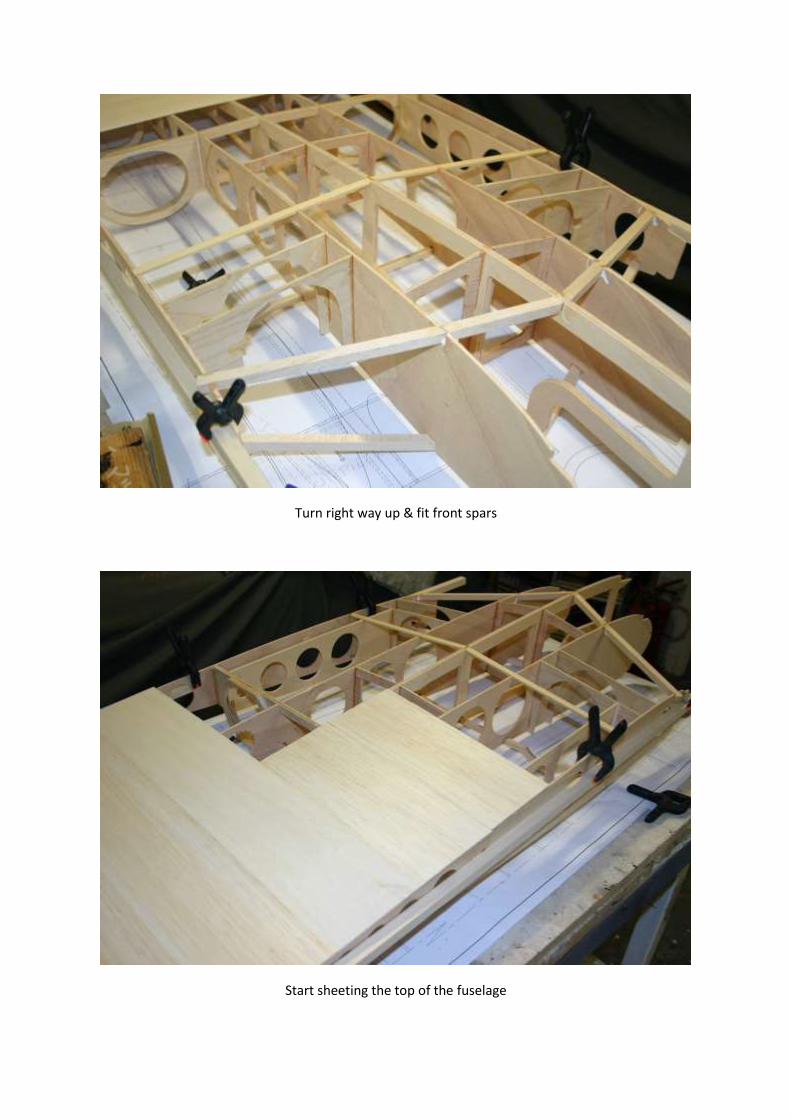
Turn right way up & fit front spars
Start sheeting the top of the fuselage

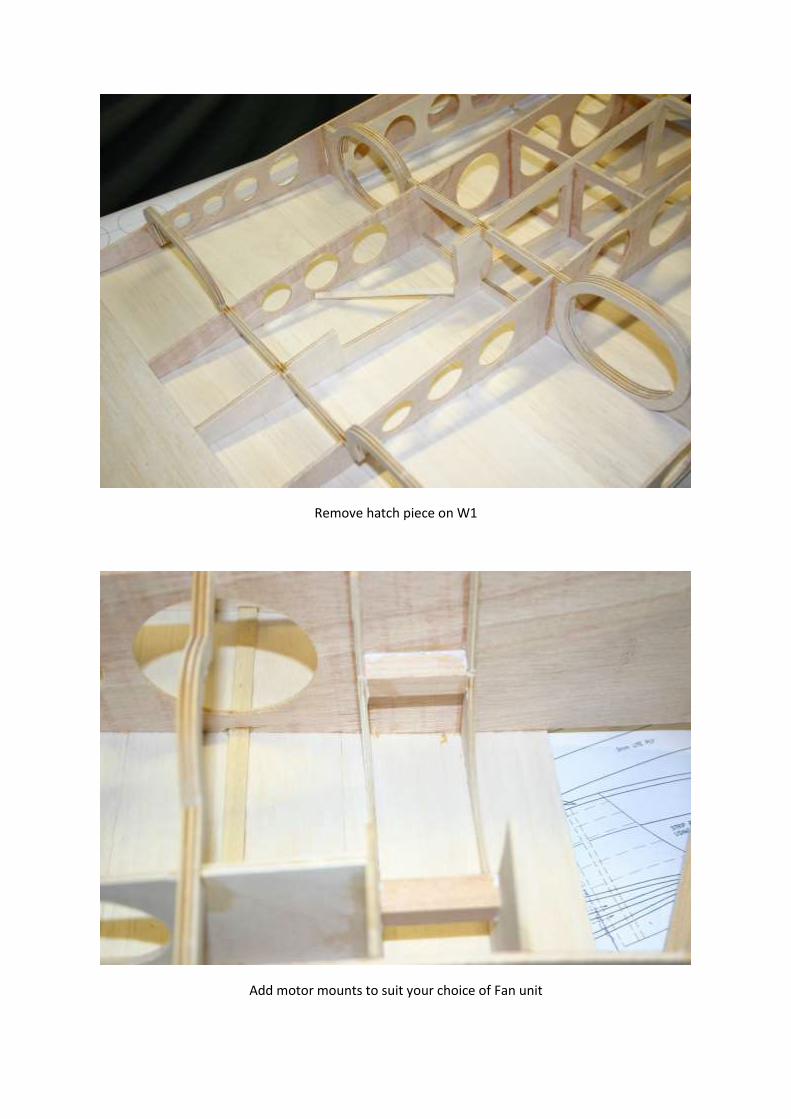
Remove hatch piece on W1
Add motor mounts to suit your choice of Fan unit

From scrap 6mm lite ply, make up and fit the battery support tray to suit your choice of batteries
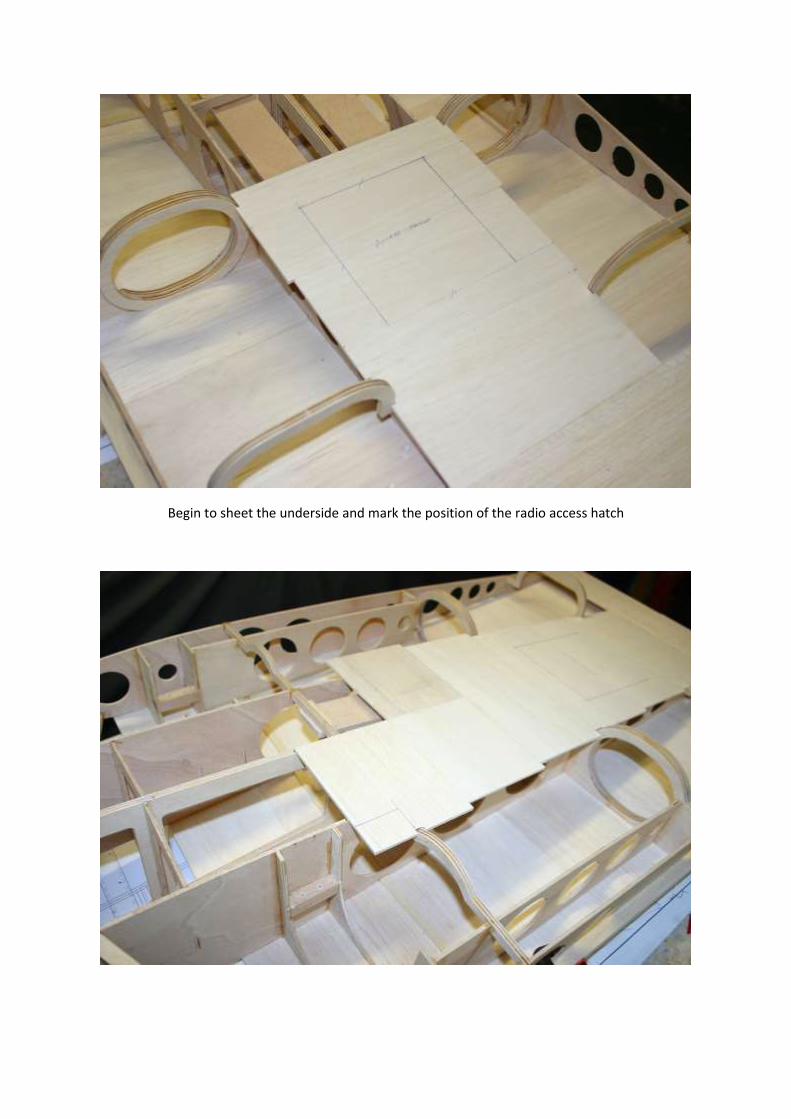
Begin to sheet the underside and mark the position of the radio access hatch

Add EX1 at the correct angle

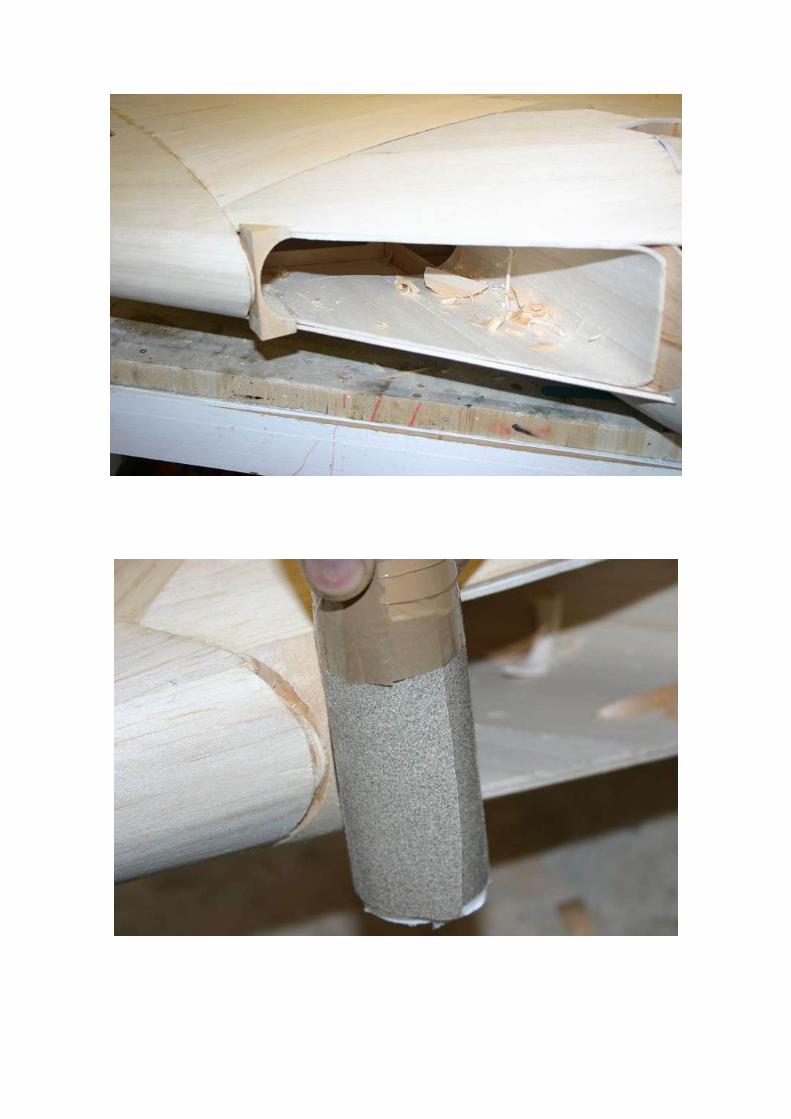
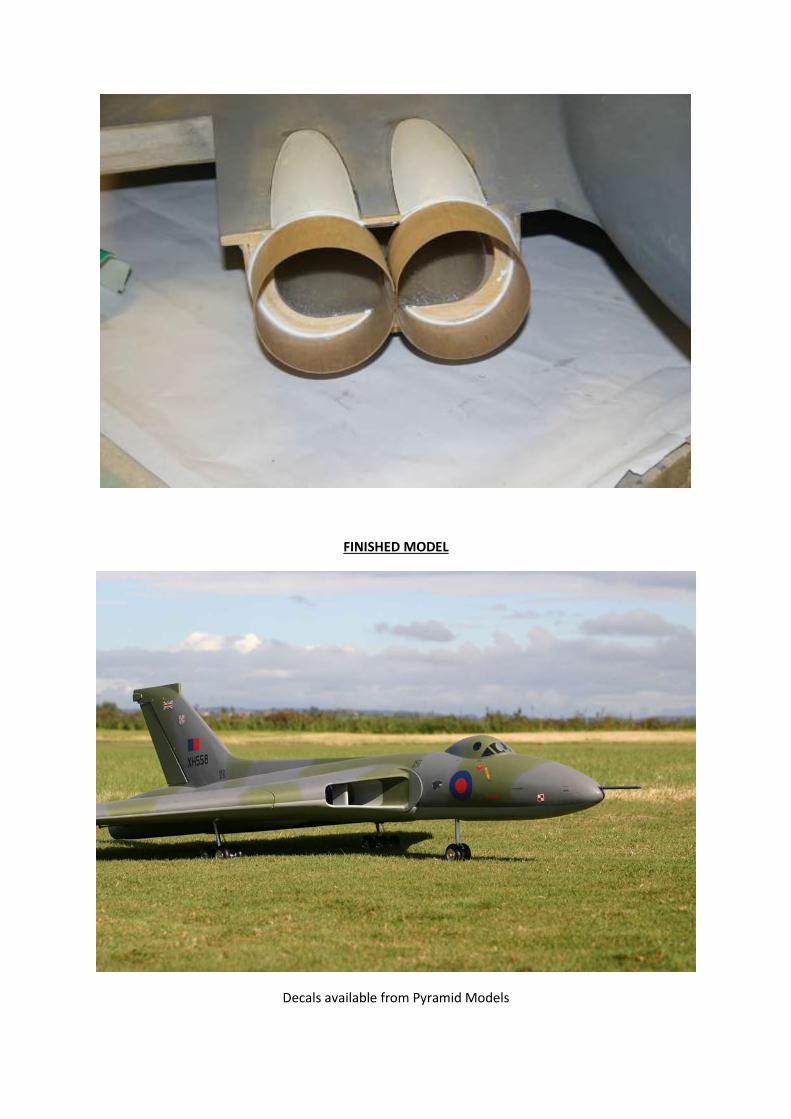
Add the fan units and make up the thrust tube
Continue sheeting
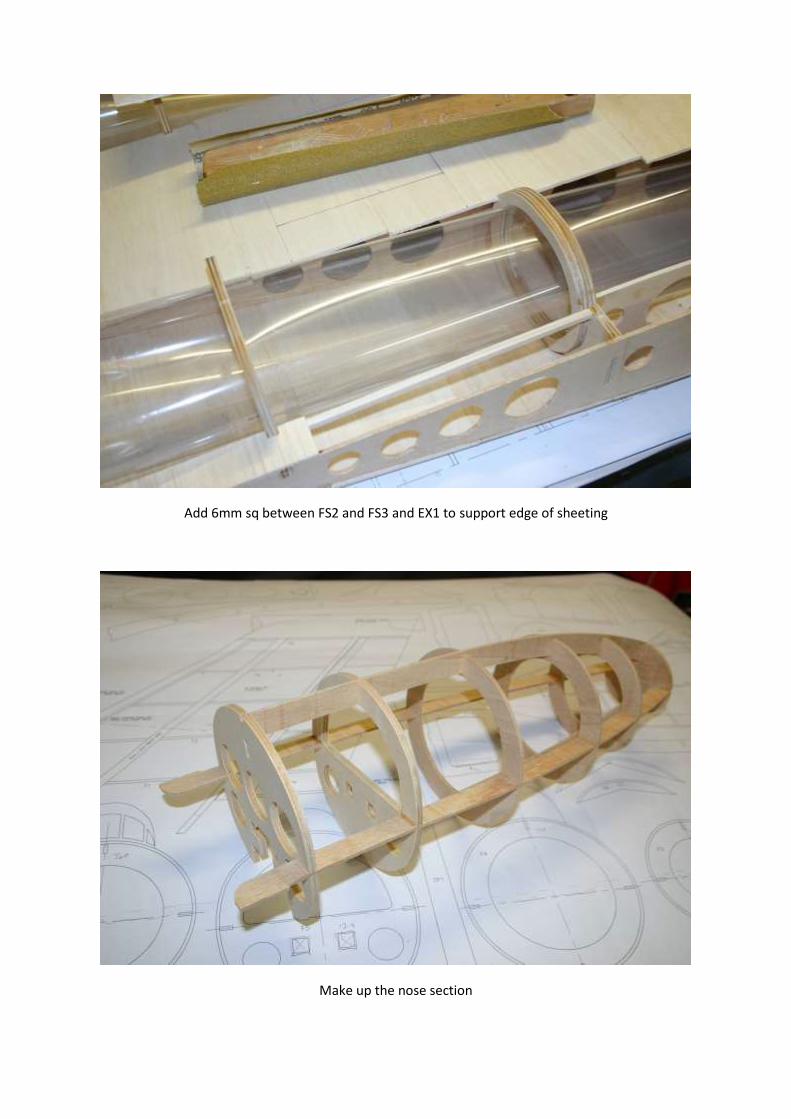
Add 6mm sq between FS2 and FS3 and EX1 to support edge of sheeting
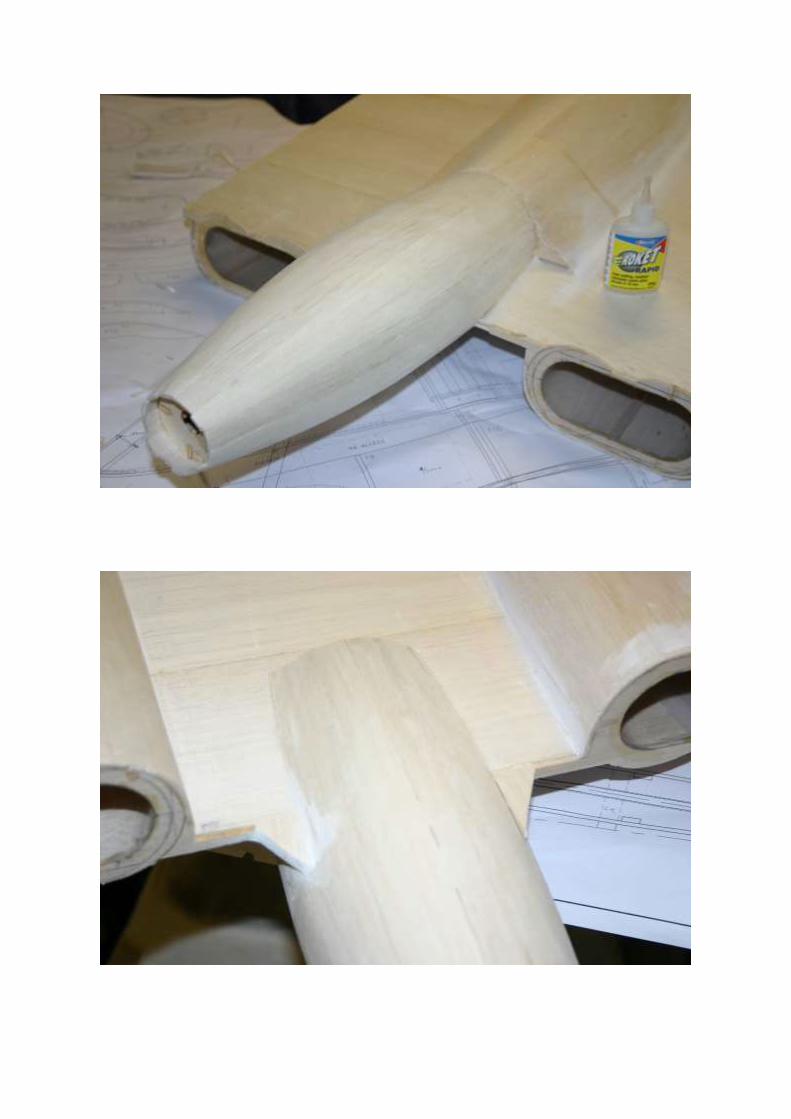
Make up the nose section
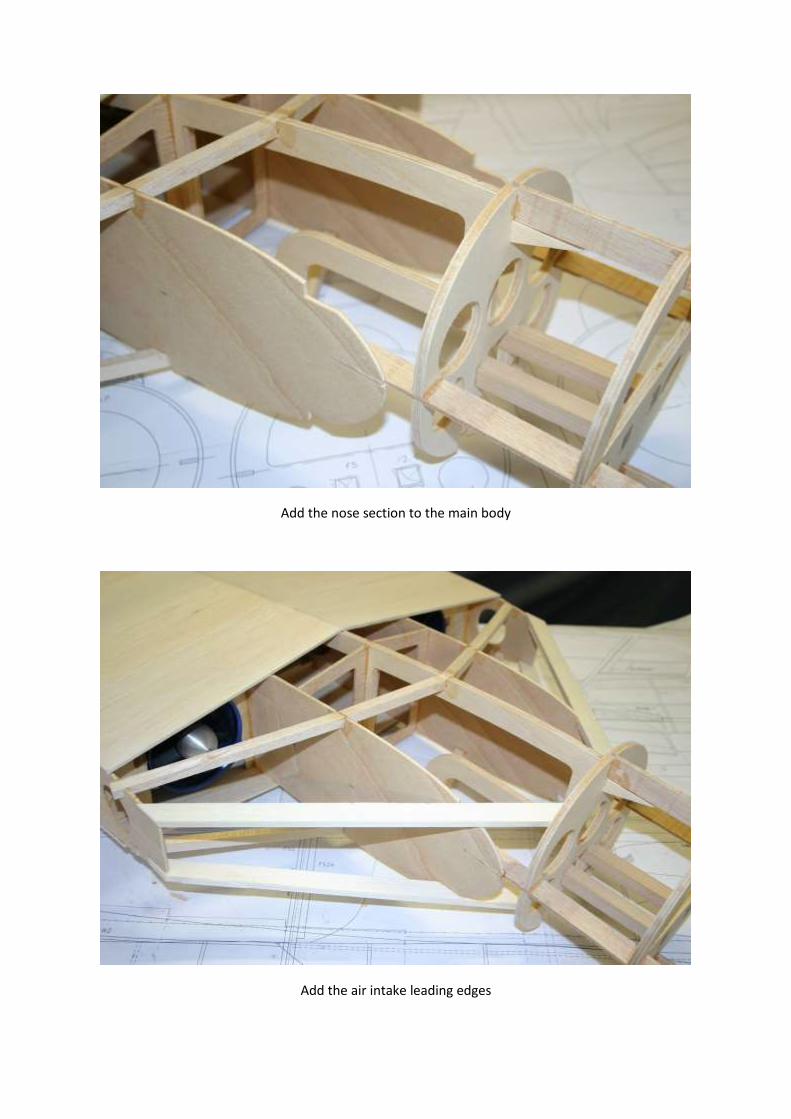
Add the nose section to the main body
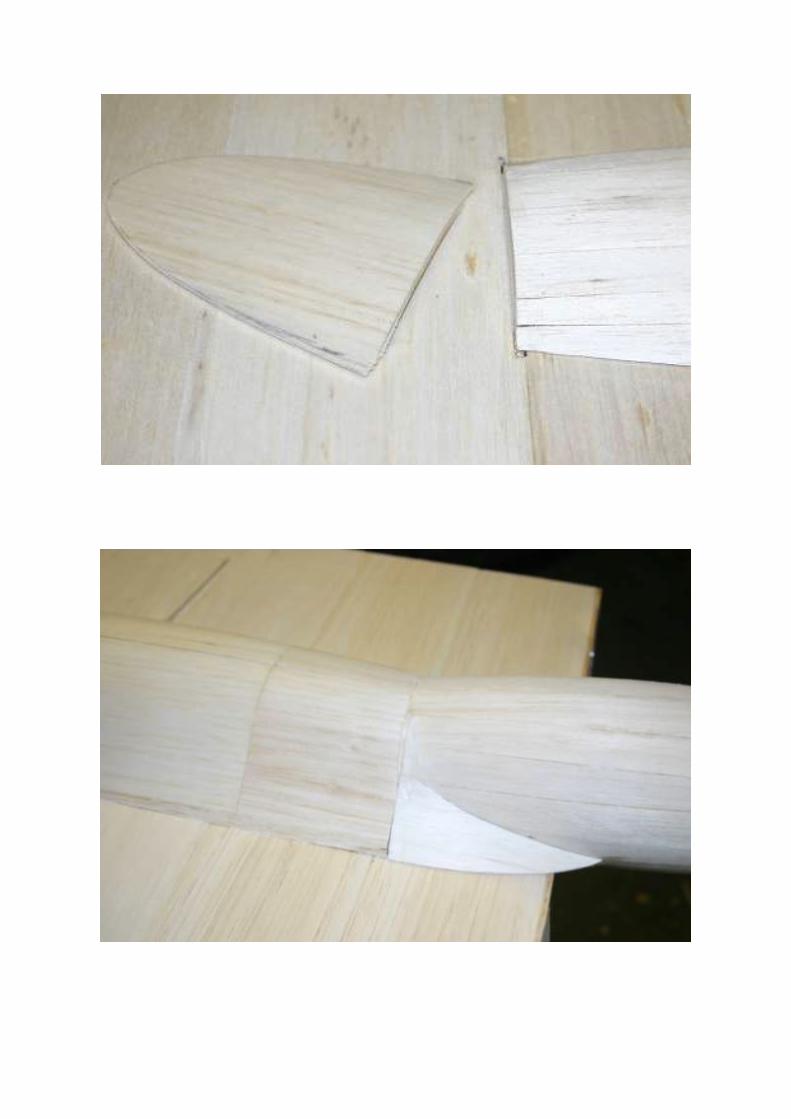
Add the air intake leading edges
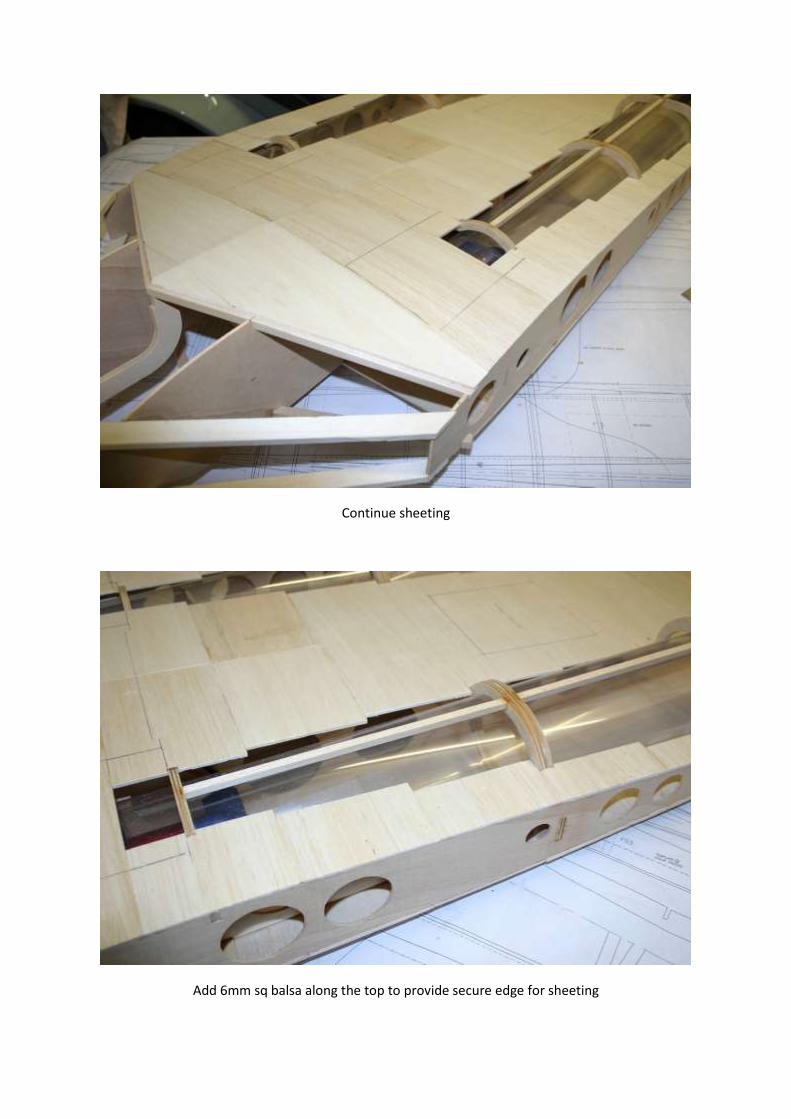
Continue sheeting
Add 6mm sq balsa along the top to provide secure edge for sheeting
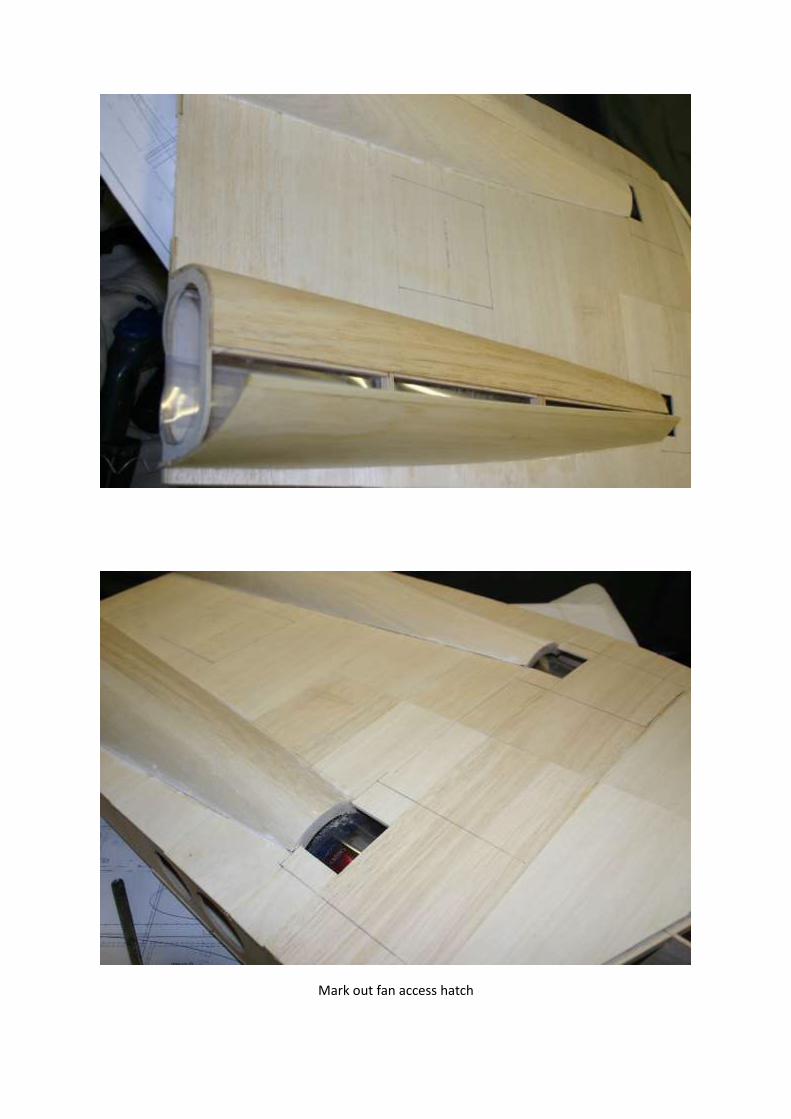
Mark out fan access hatch
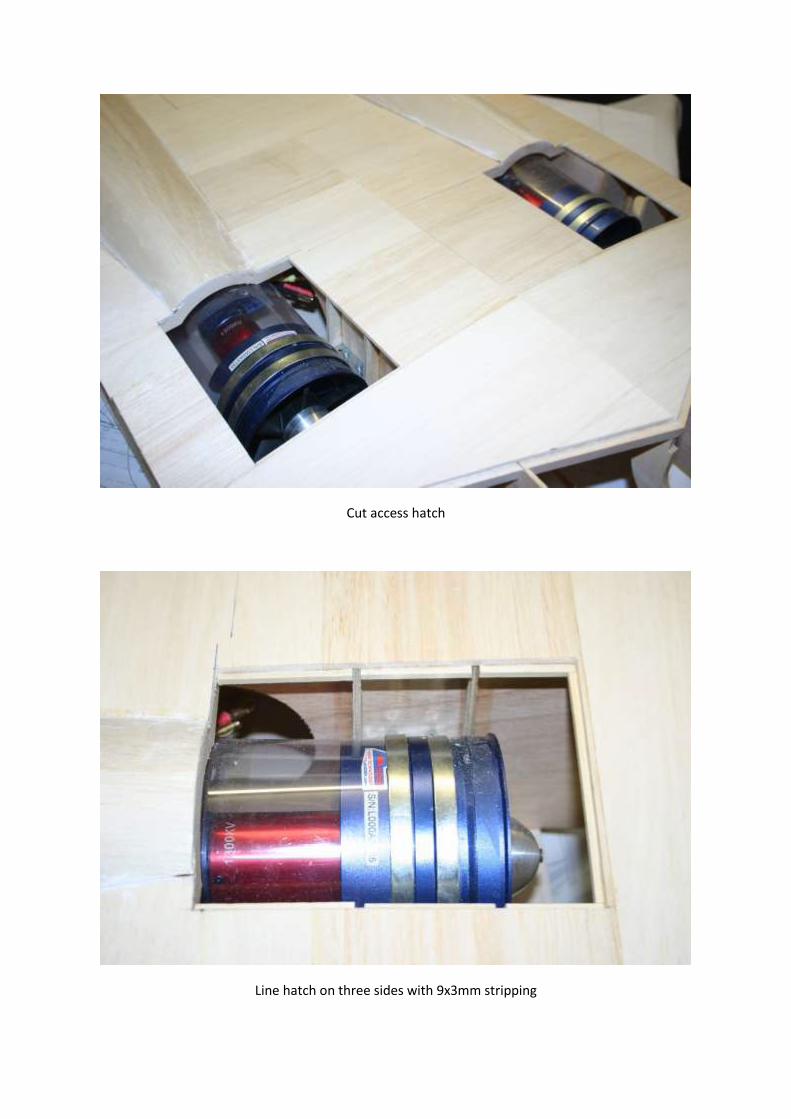
Cut access hatch
Line hatch on three sides with 9x3mm stripping
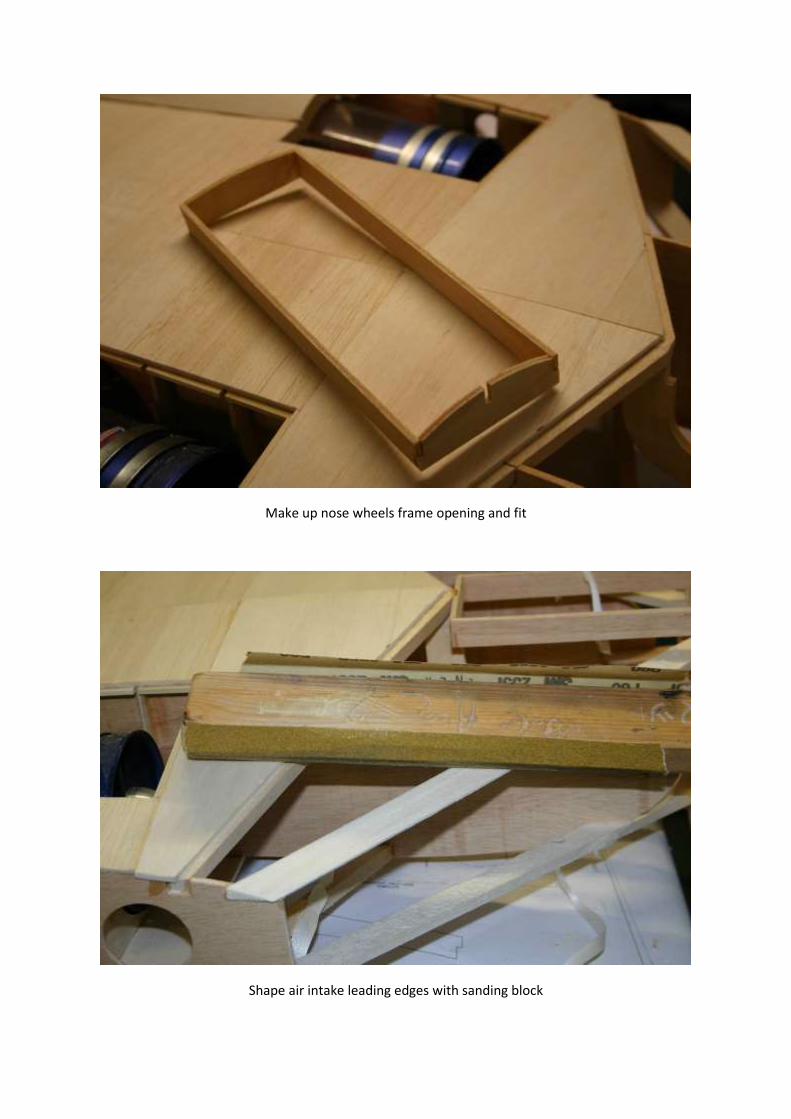
Make up nose wheels frame opening and fit
Shape air intake leading edges with sanding block
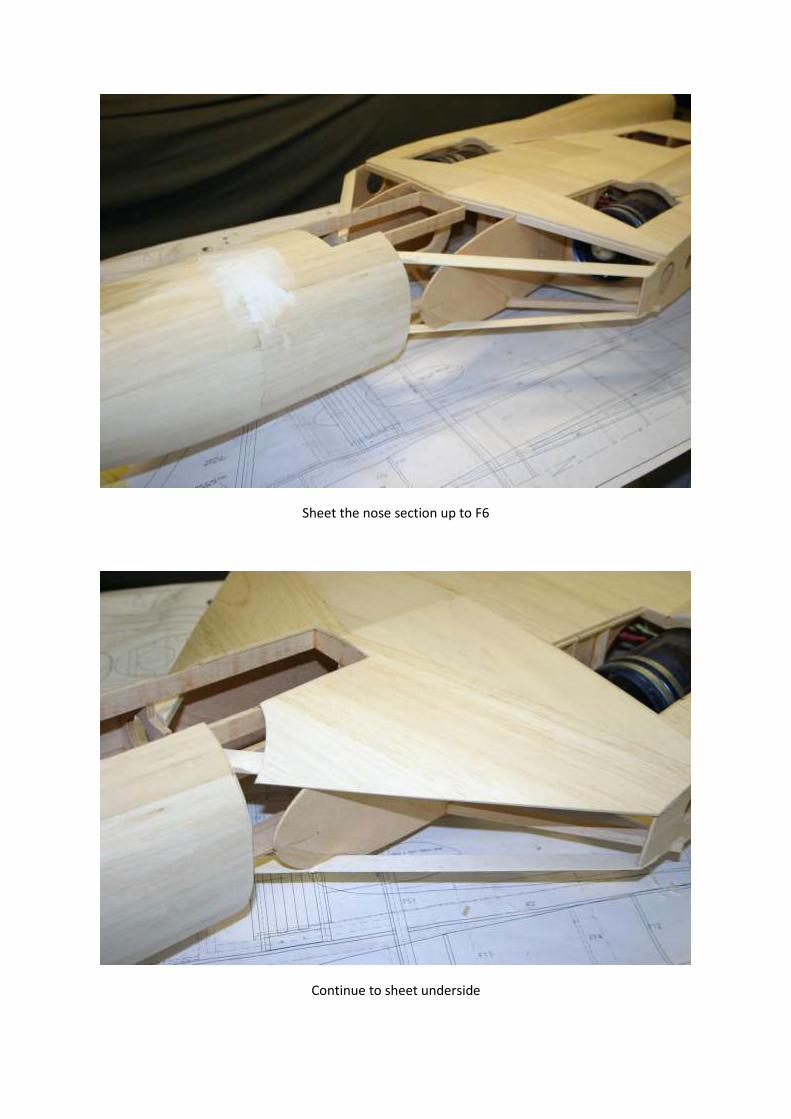
Sheet the nose section up to F6
Continue to sheet underside
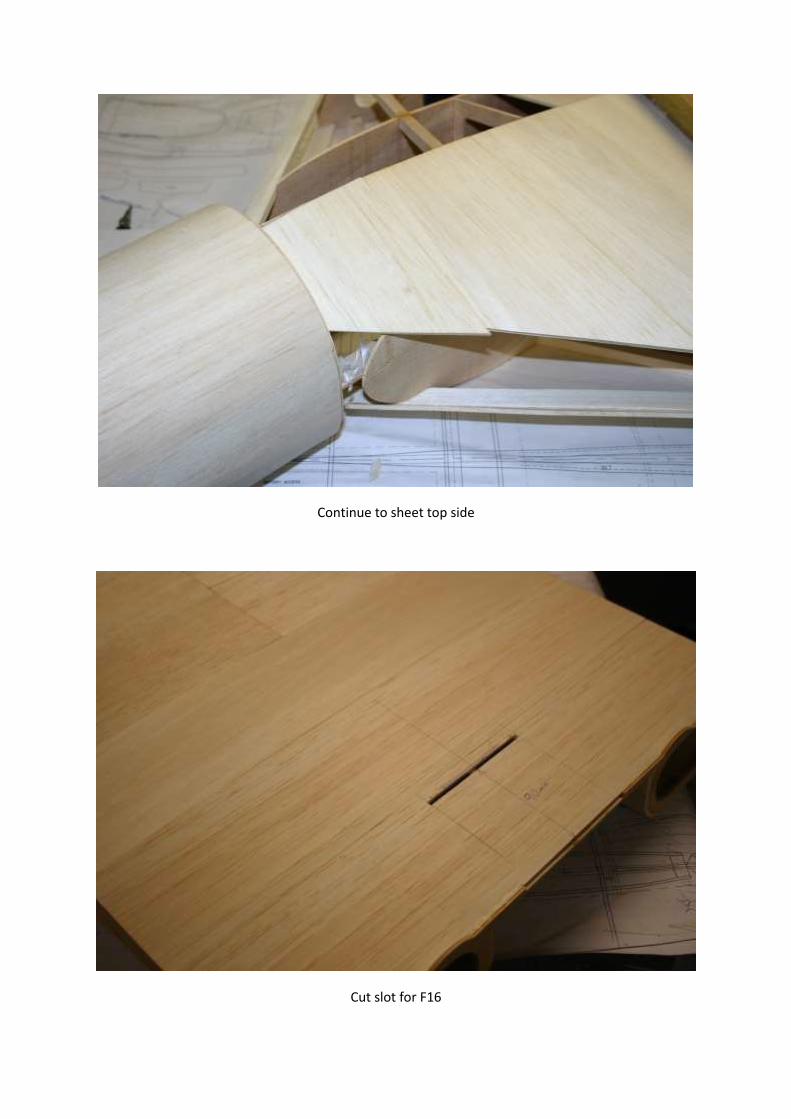
Continue to sheet top side
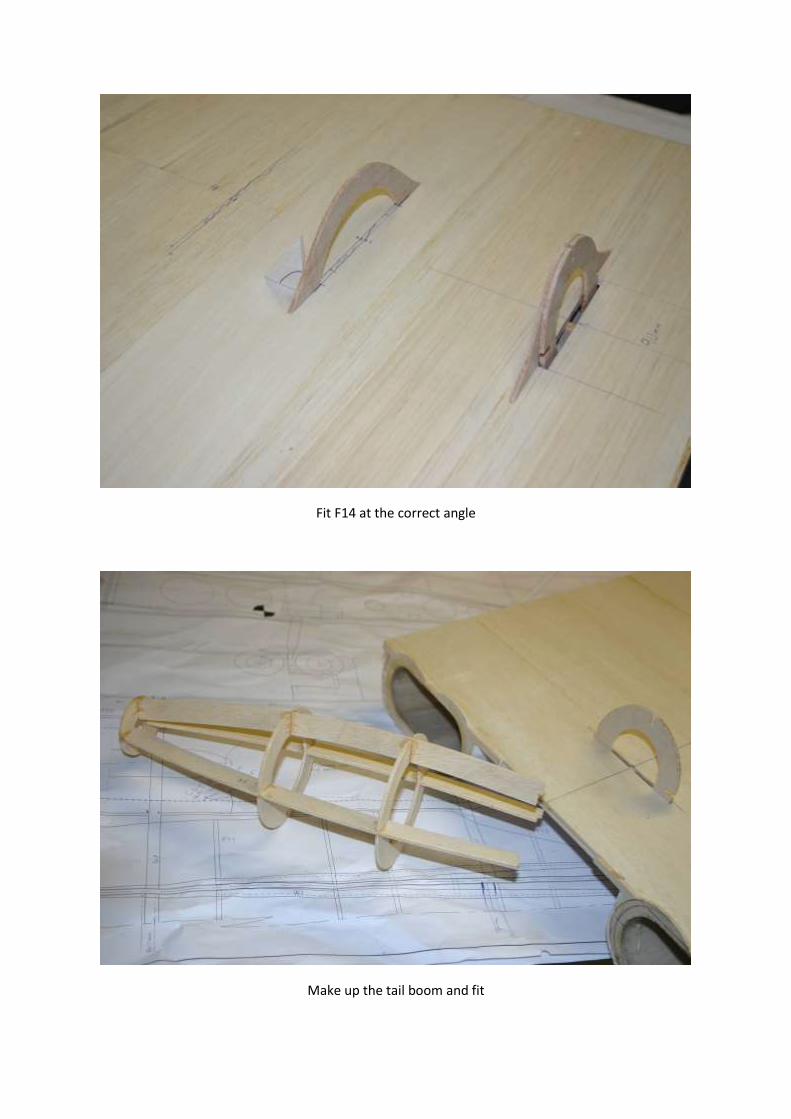
Cut slot for F16

Fit F16 at the correct angle
Mark out formers F7 to F14
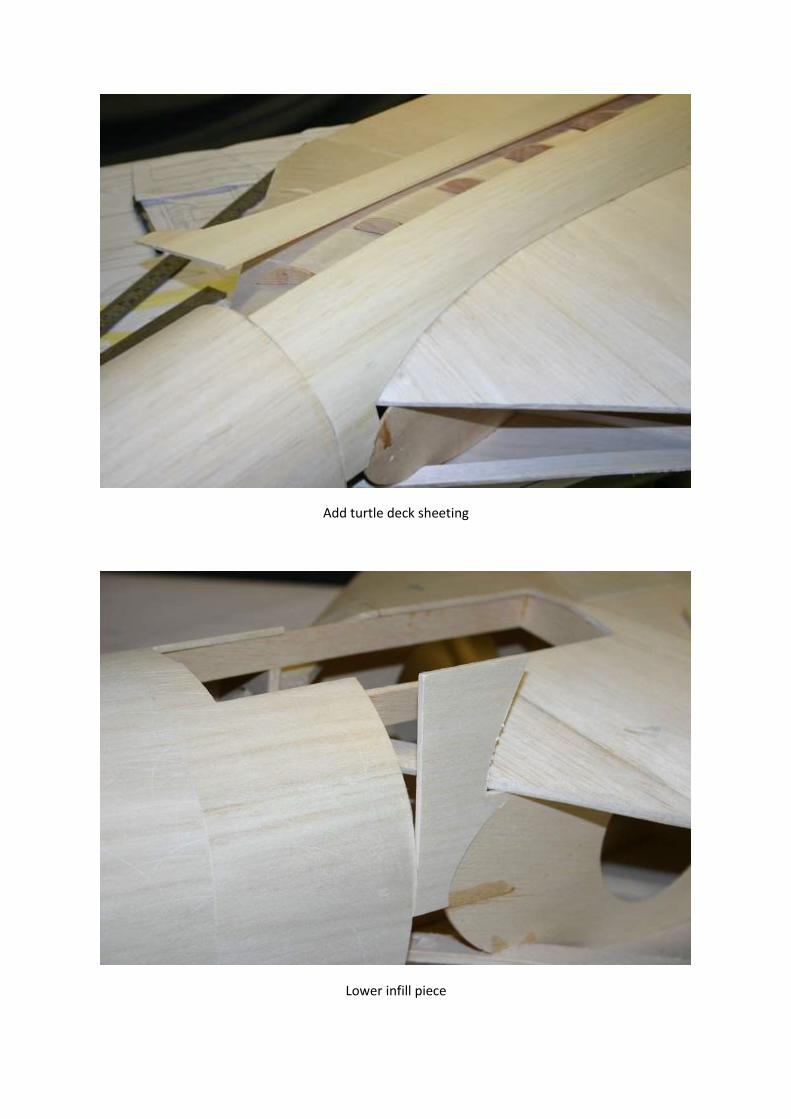
Fit F14 at the correct angle
Make up the tail boom and fit

Add the top 4.5mm sq stringer
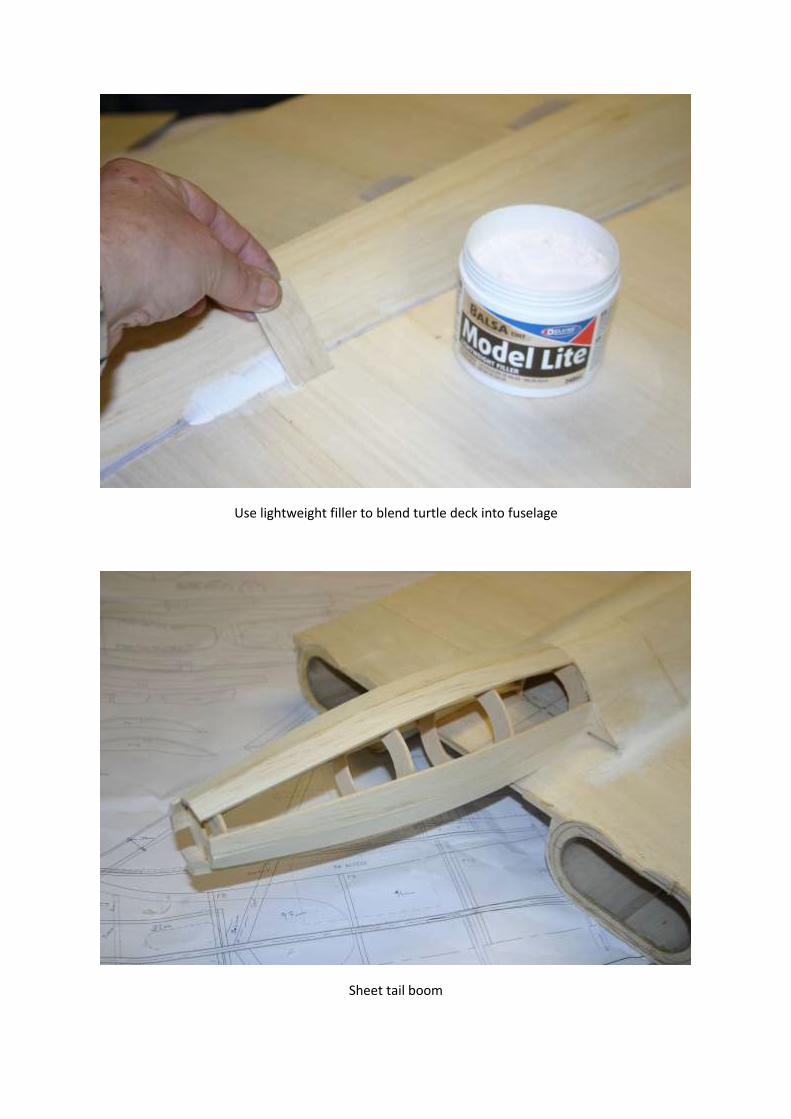
Add turtle deck sheeting
Lower infill piece
Use lightweight filler to blend turtle deck into fuselage
Sheet tail boom
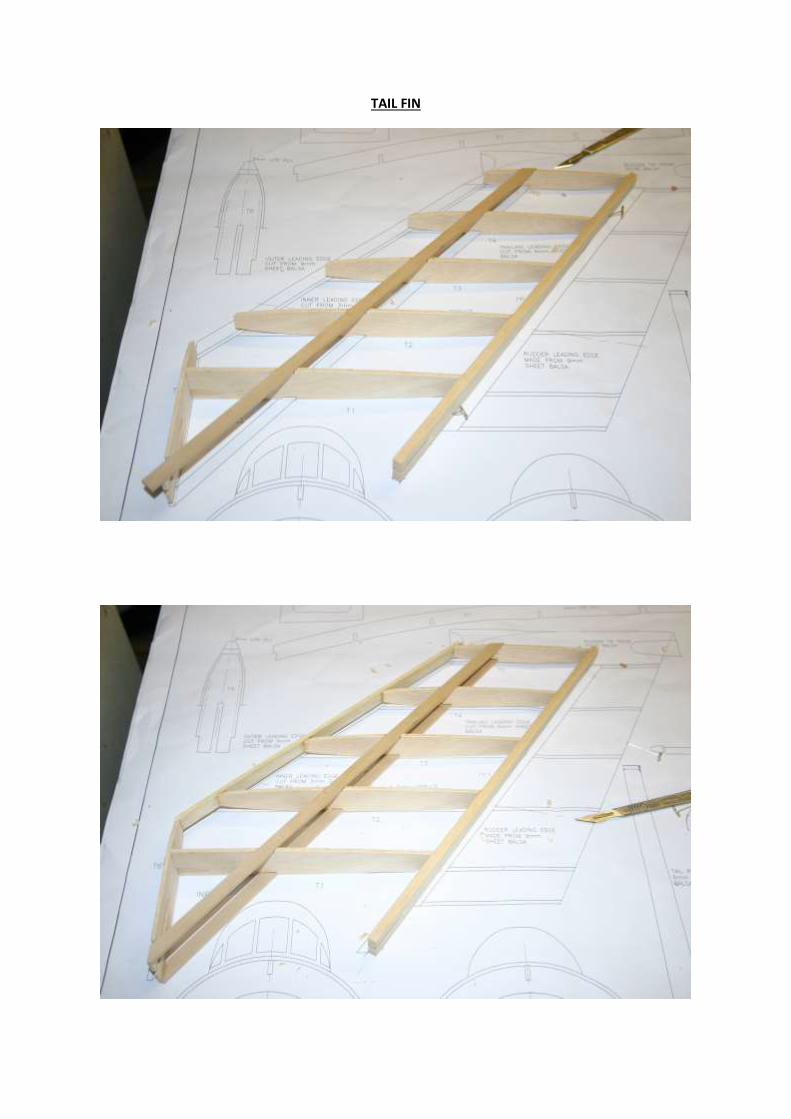
TAIL FIN
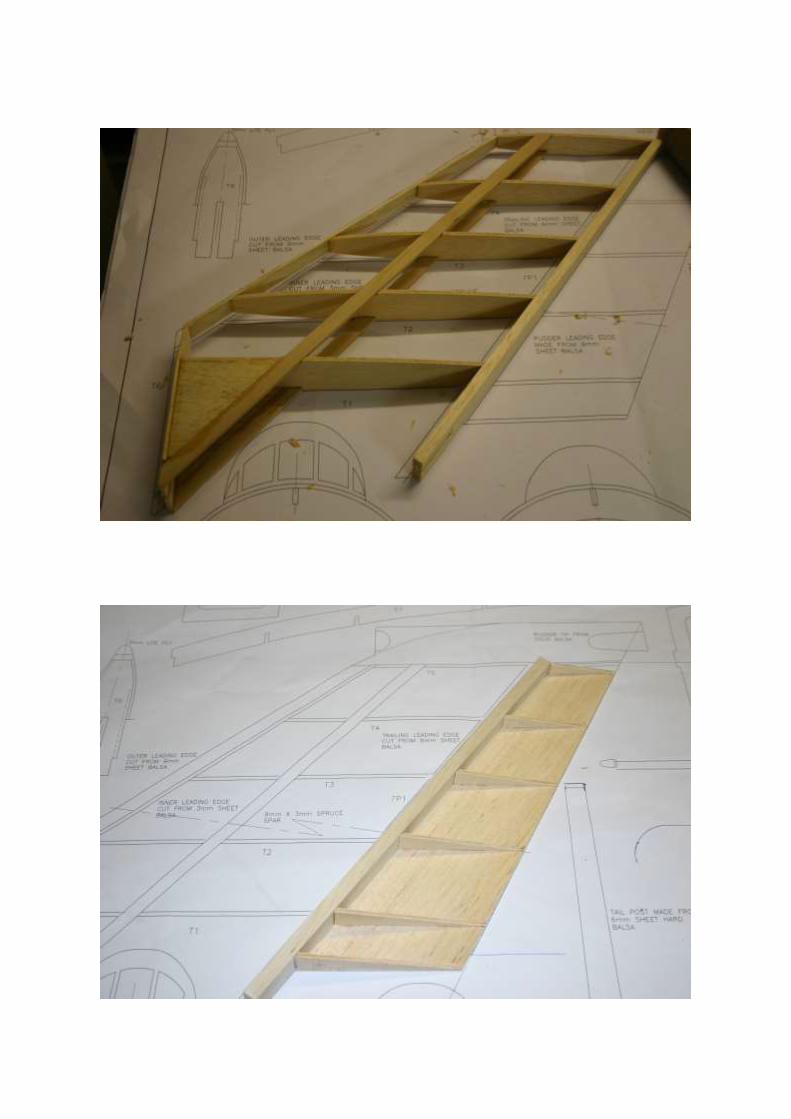
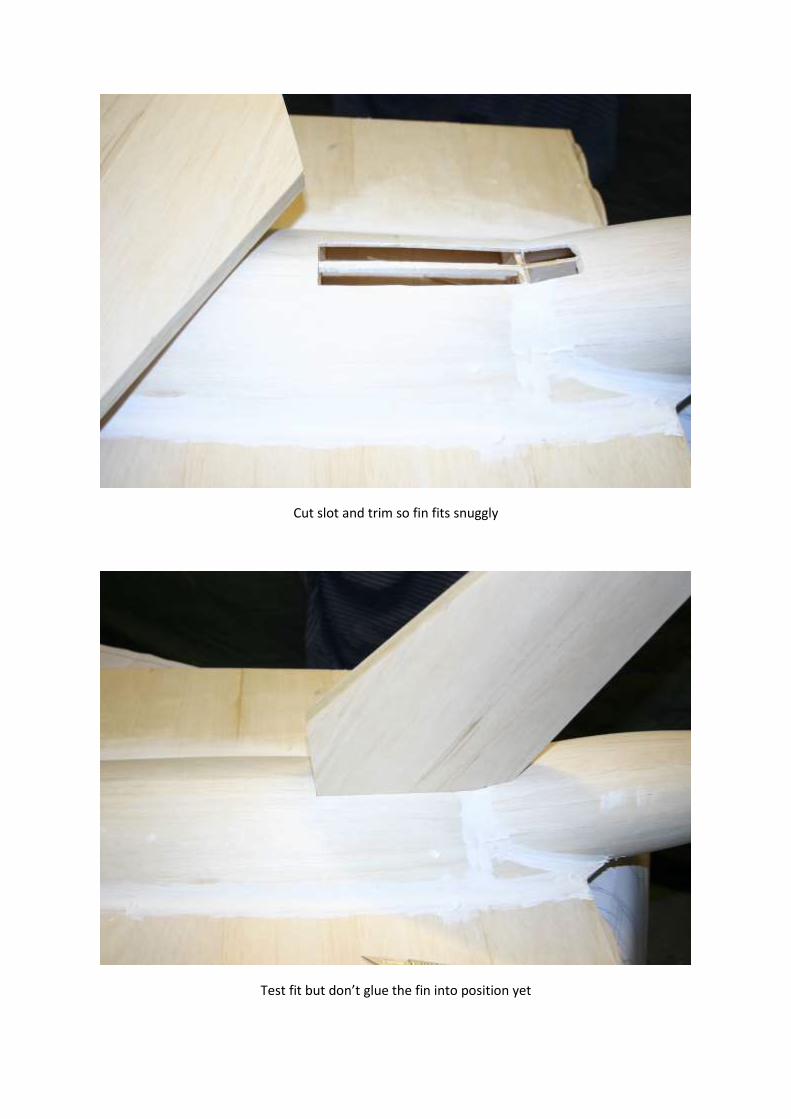
Cut slot and trim so fin fits snuggly
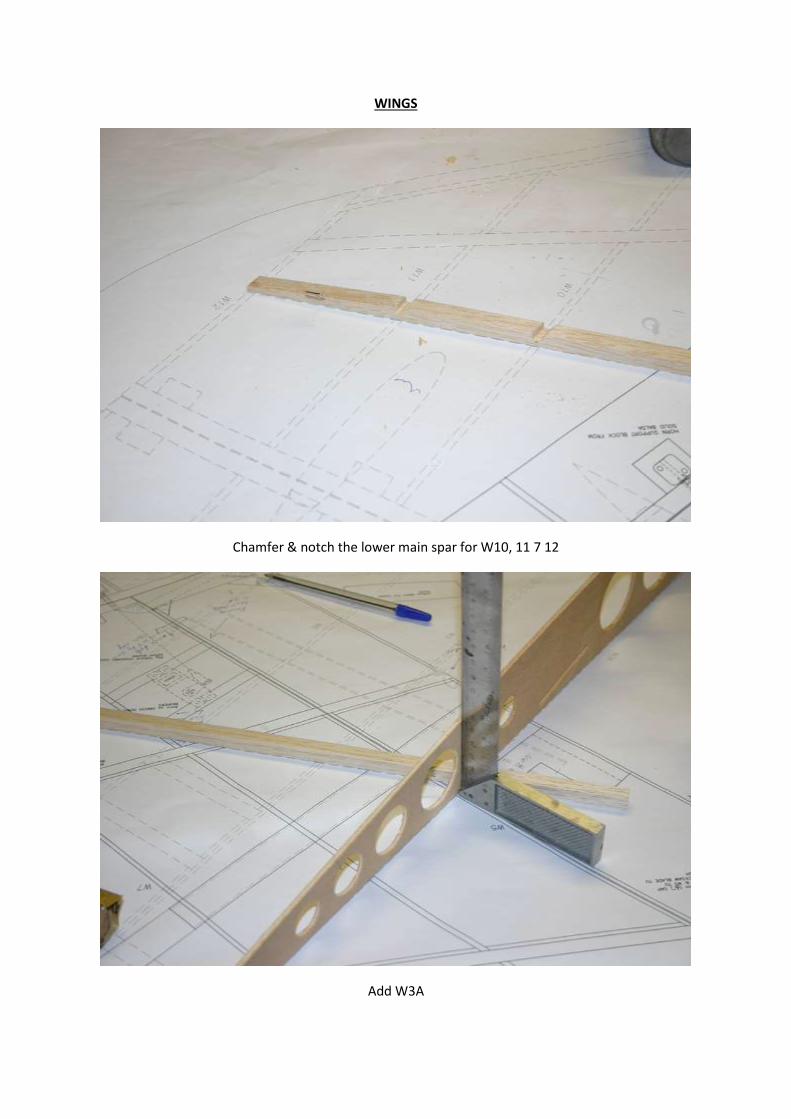
Test fit but don’t glue the fin into position yet
WINGS
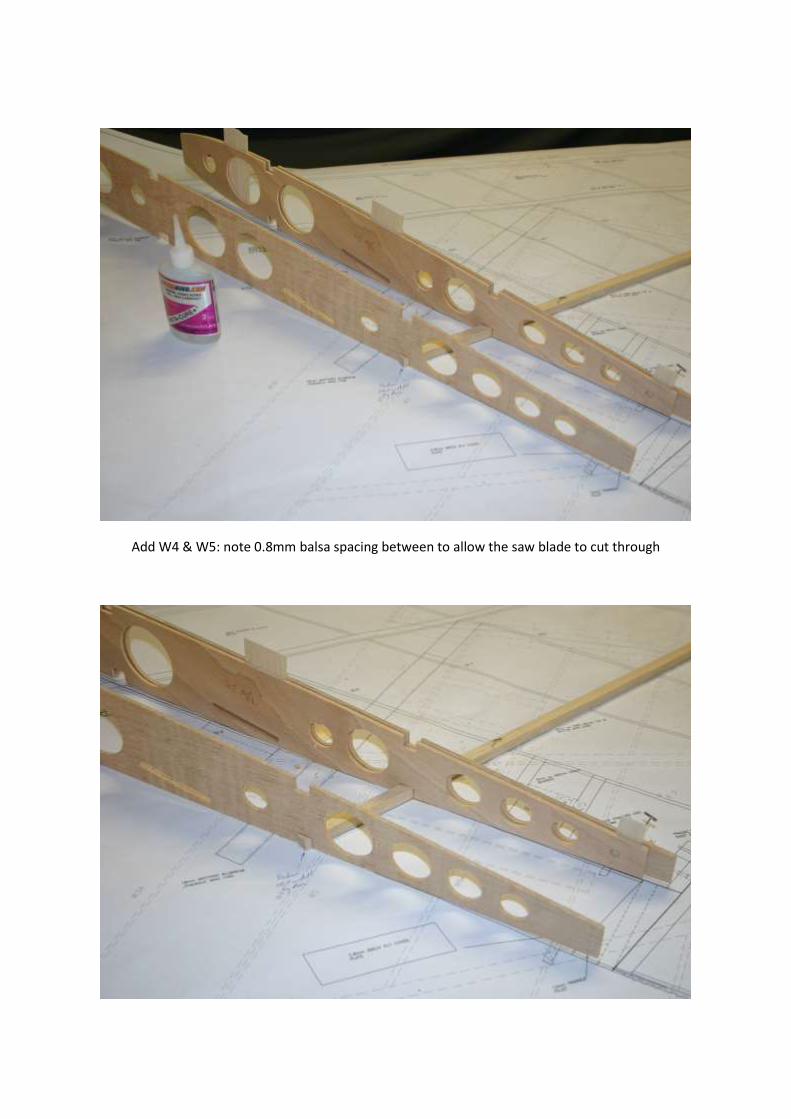
Chamfer & notch the lower main spar for W10, 11 7 12
Add W3A
Add W4 & W5: note 0.8mm balsa spacing between to allow the saw blade to cut through
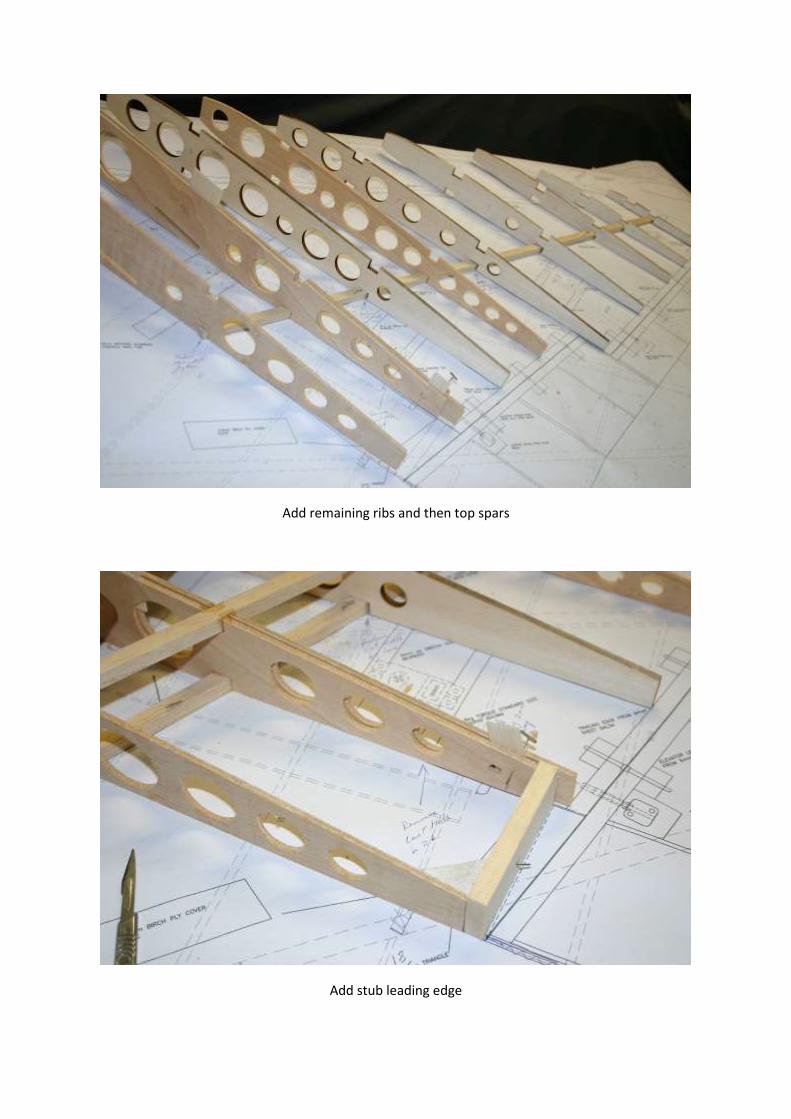
Add remaining ribs and then top spars
Add stub leading edge
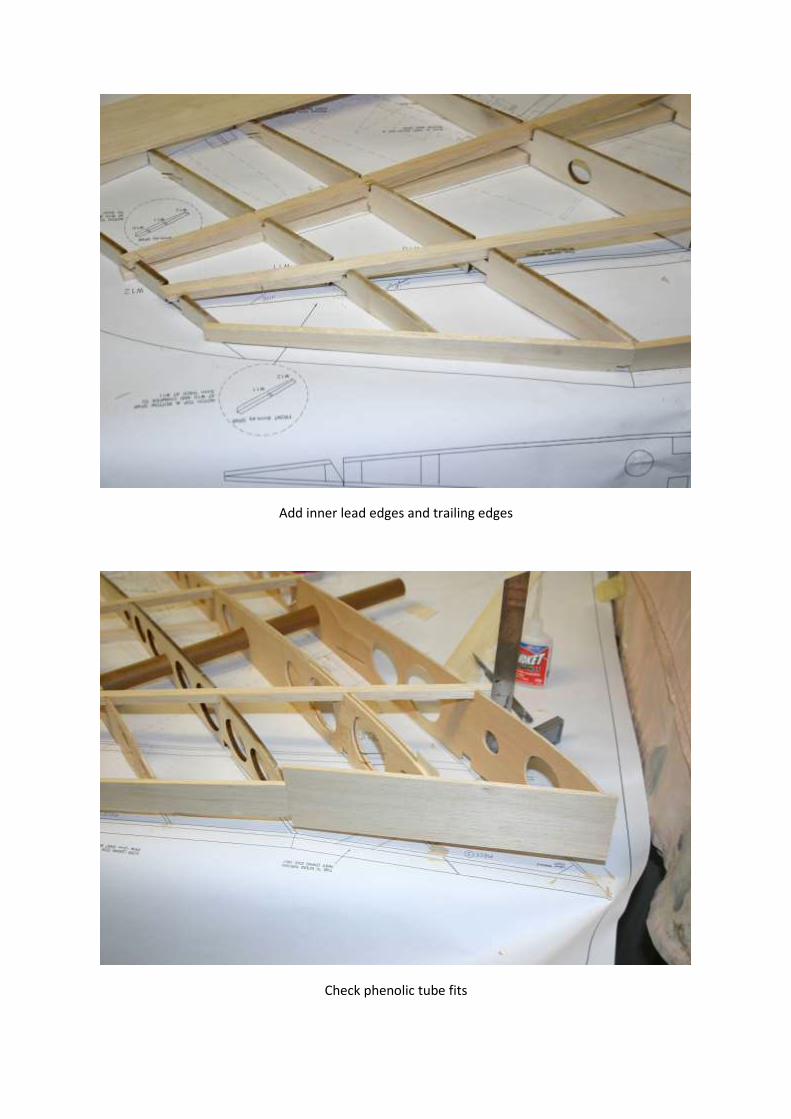
Add inner lead edges and trailing edges
Check phenolic tube fits

Add the lower forward spar

Add the retract mount and trim flush the face of W3A
Trim and test fit the from tube spar
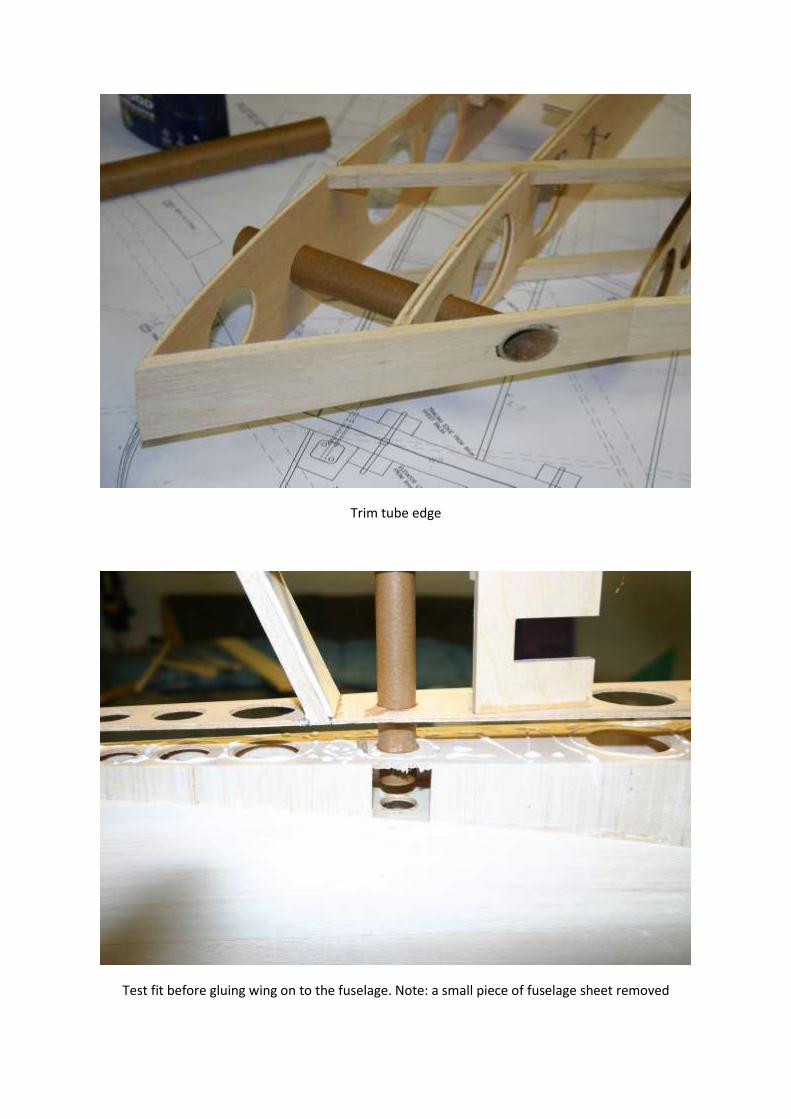
Trim tube edge
Test fit before gluing wing on to the fuselage. Note: a small piece of fuselage sheet removed
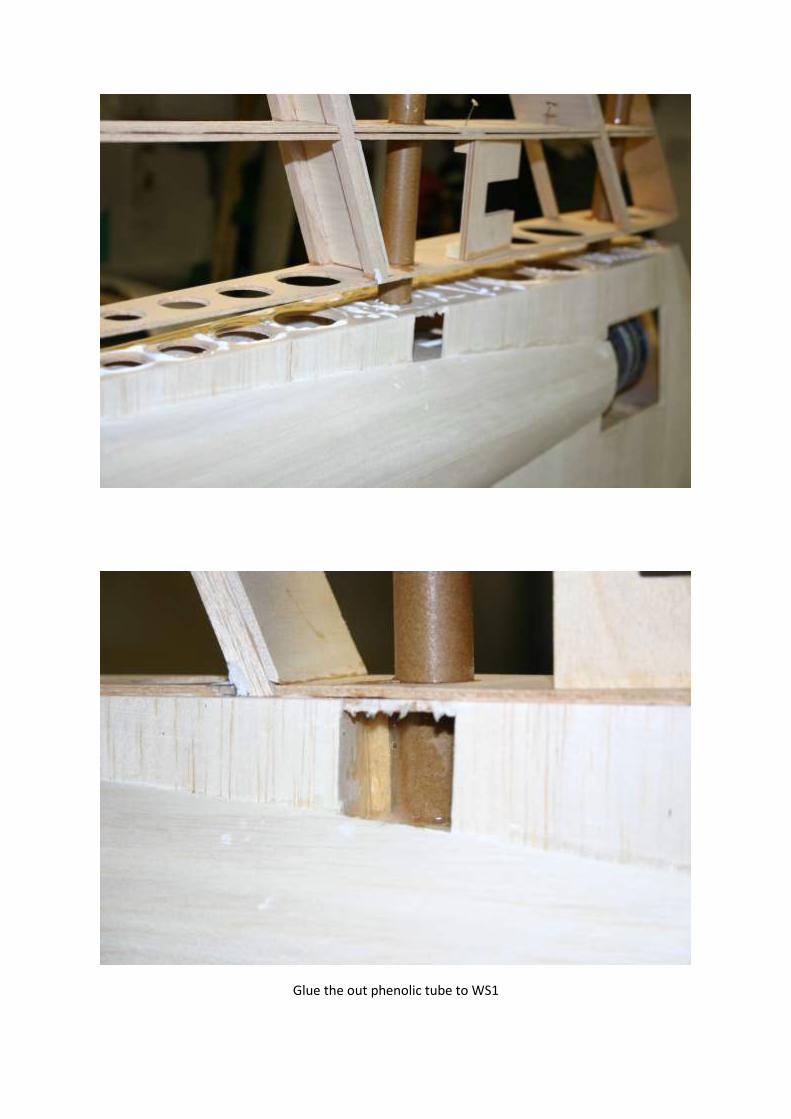
Glue the out phenolic tube to WS1
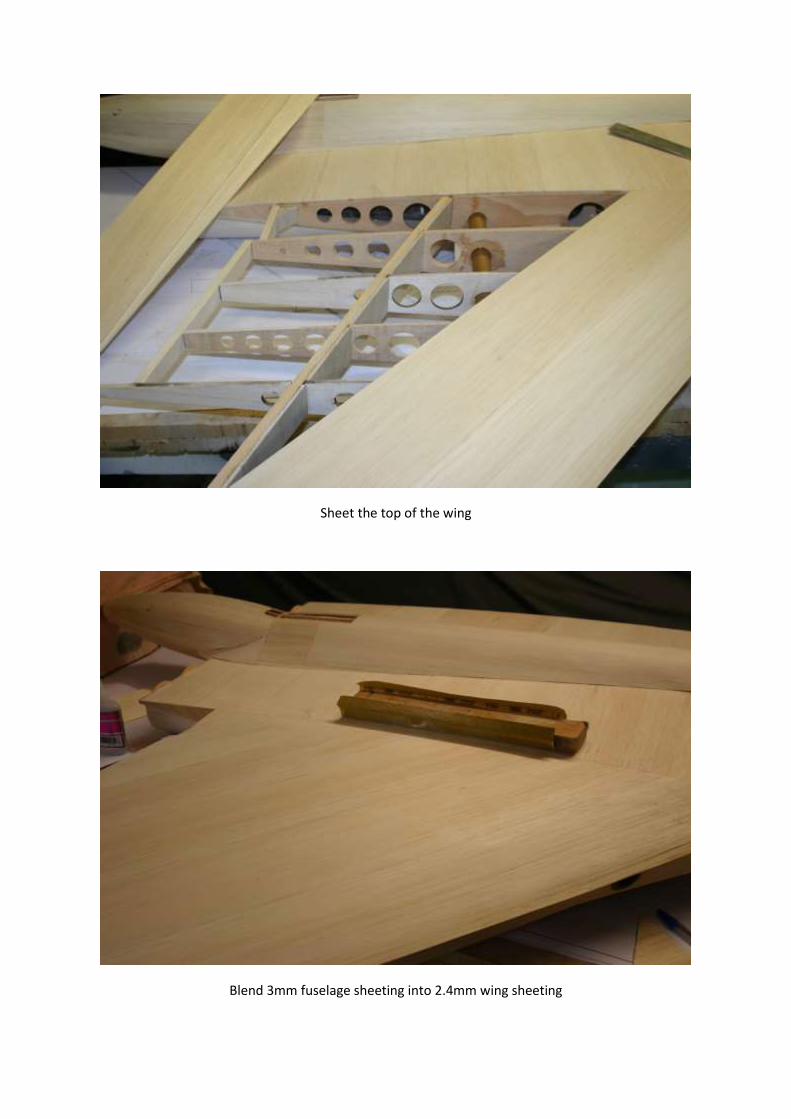
Sheet the top of the wing
Blend 3mm fuselage sheeting into 2.4mm wing sheeting
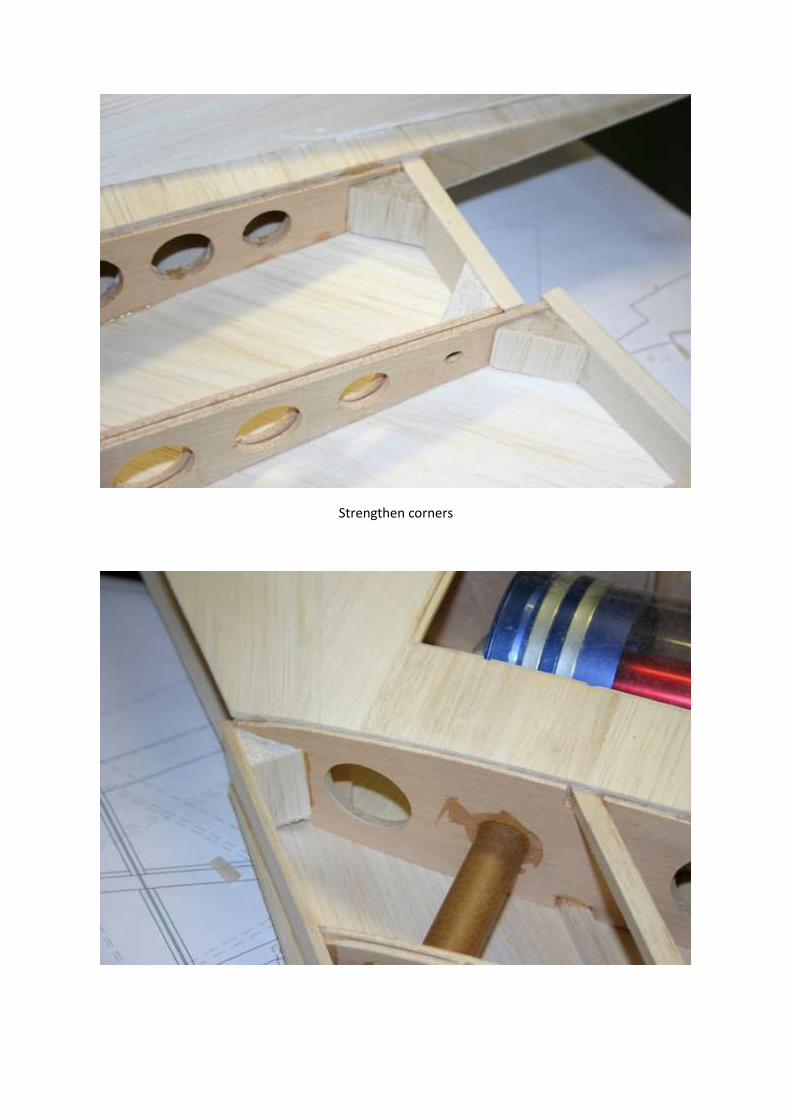
Strengthen corners
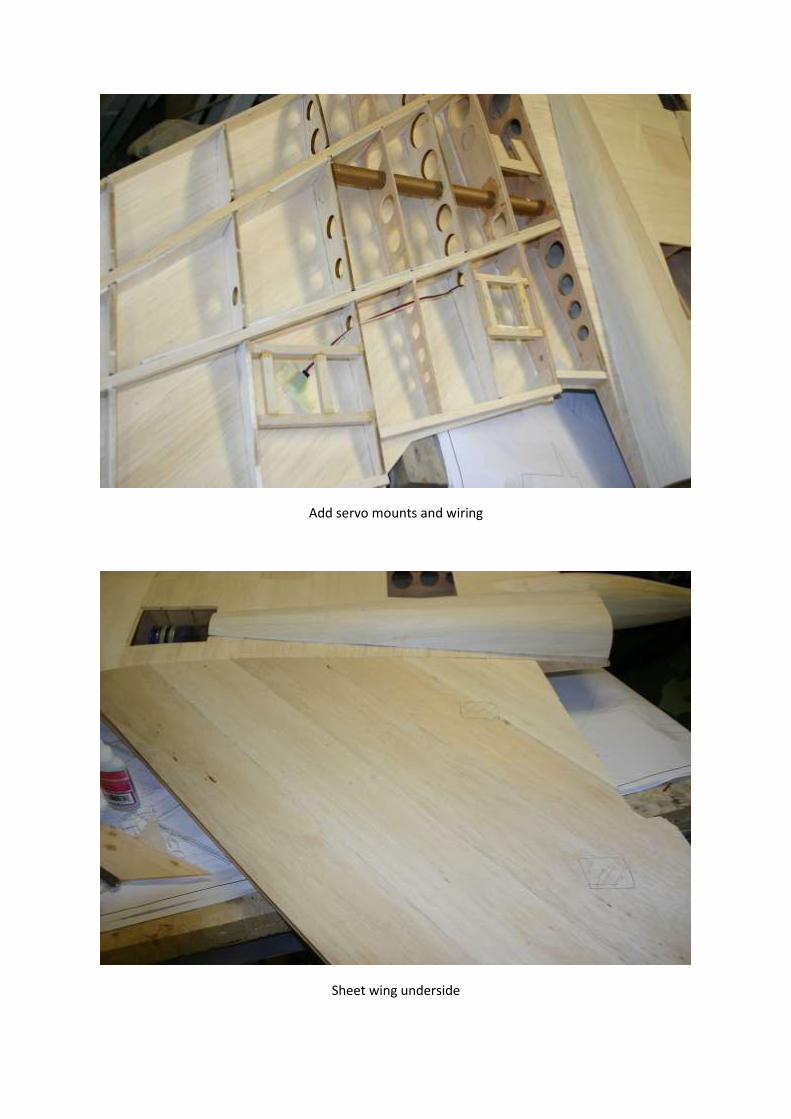
Add servo mounts and wiring
Sheet wing underside
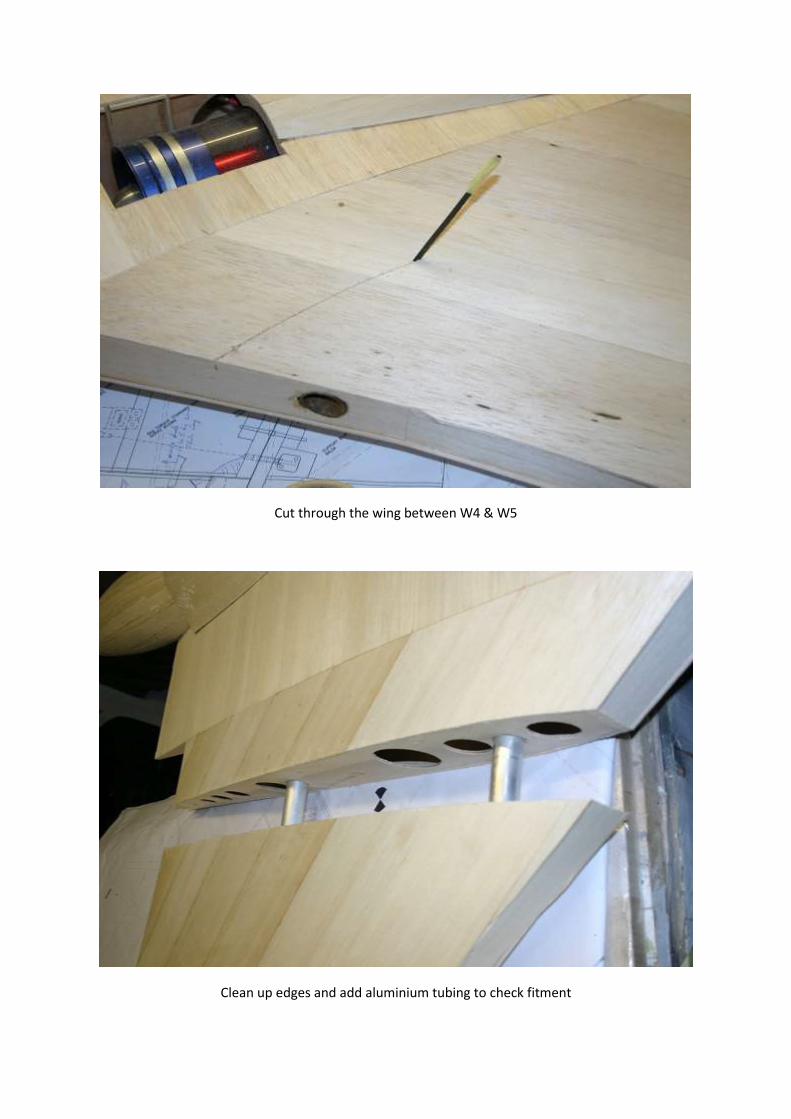
Cut through the wing between W4 & W5
Clean up edges and add aluminium tubing to check fitment

Add outer leading edges and wing tip block
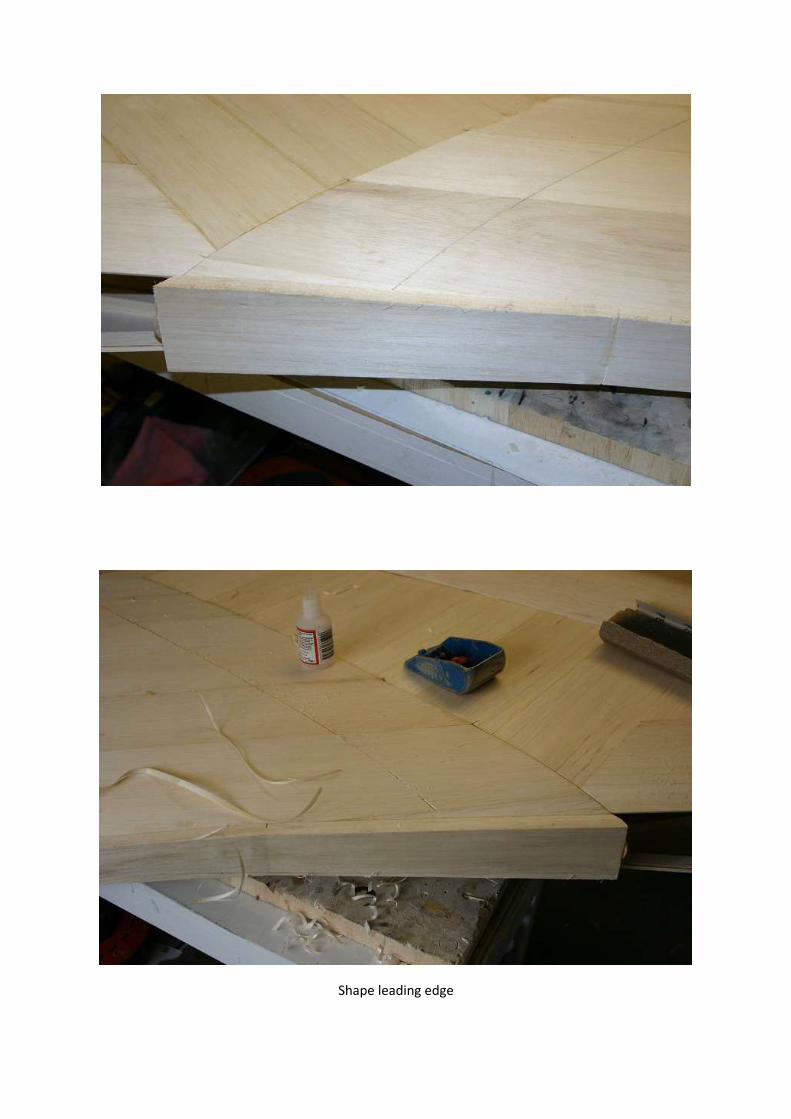
Shape leading edge
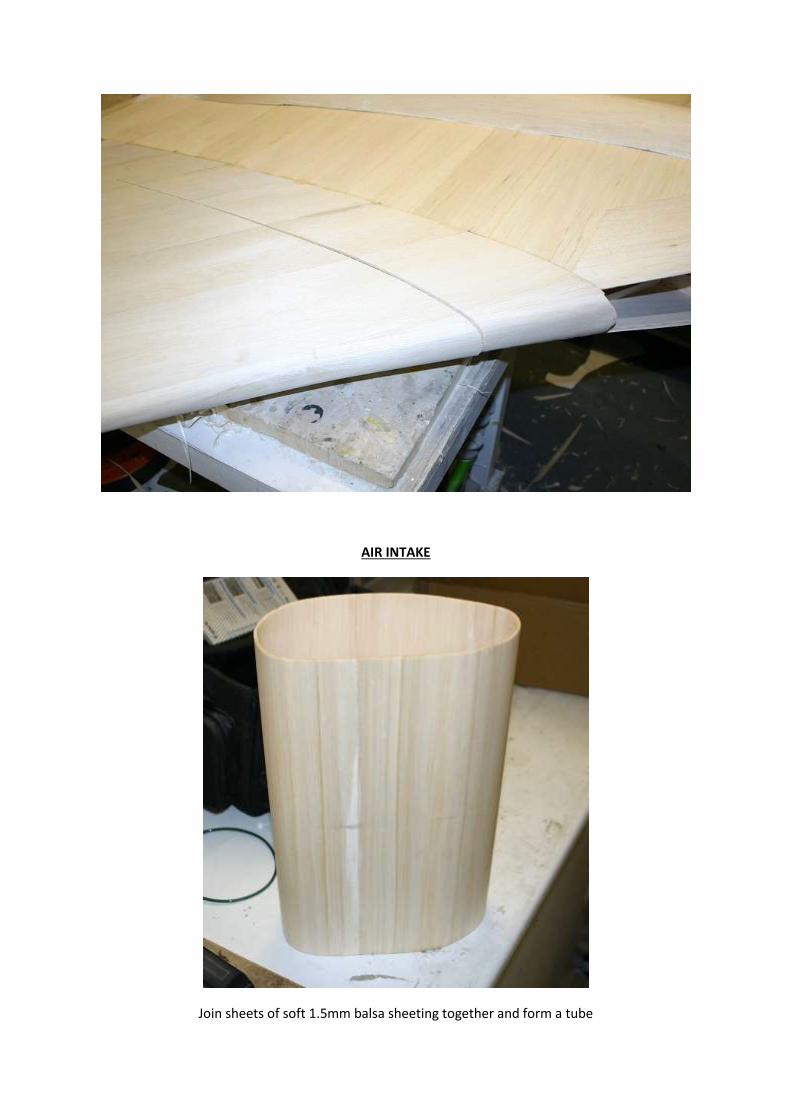
AIR INTAKE
Join sheets of soft 1.5mm balsa sheeting together and form a tube

Wet the outside of the tube then ‘squash’ in to place.


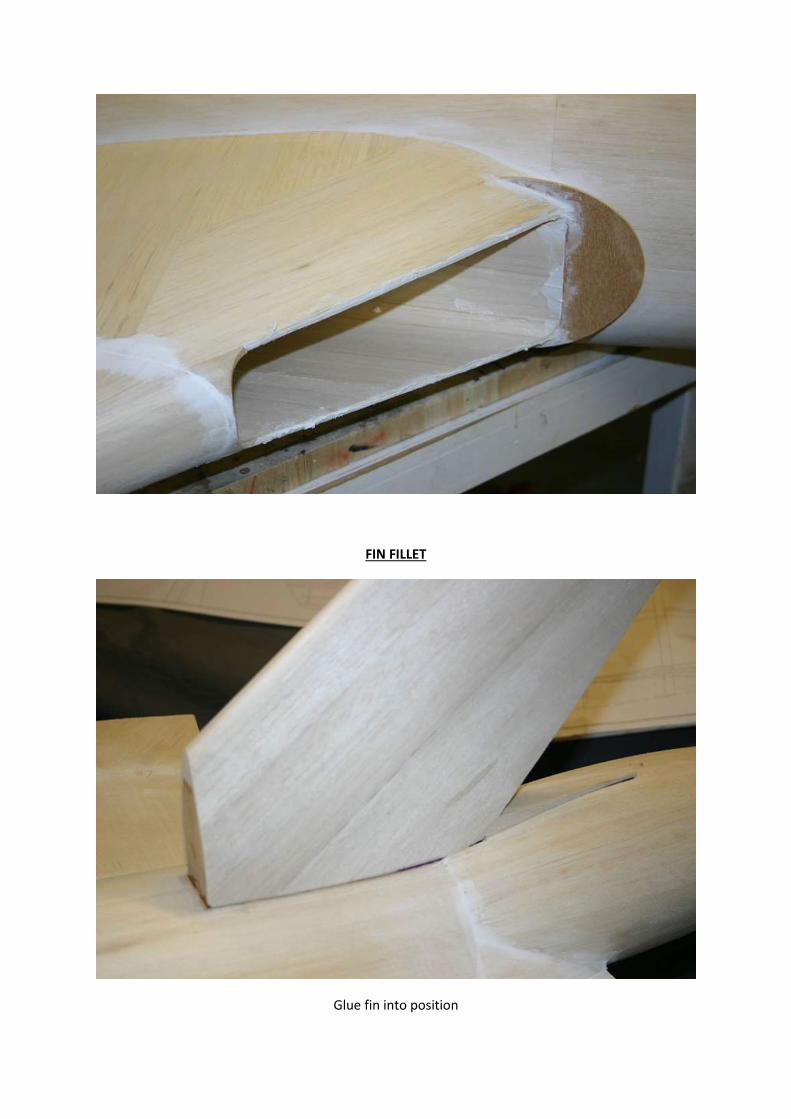
FIN FILLET
Glue fin into position
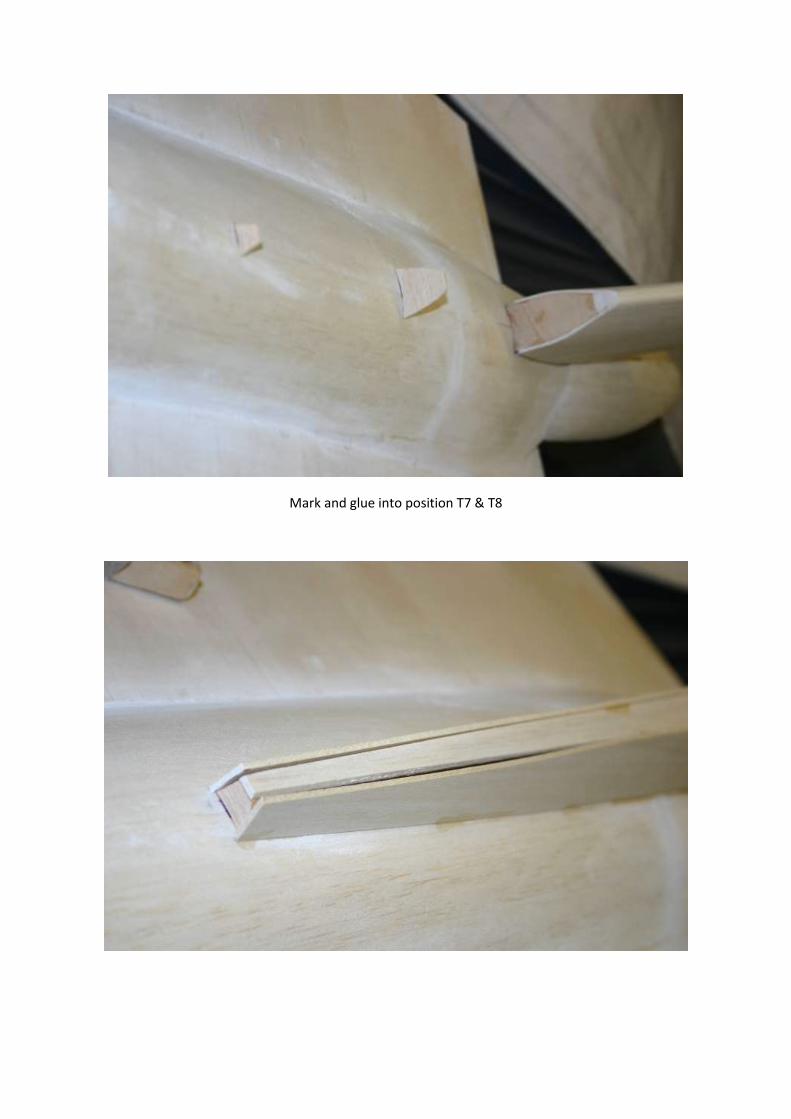
Mark and glue into position T7 & T8
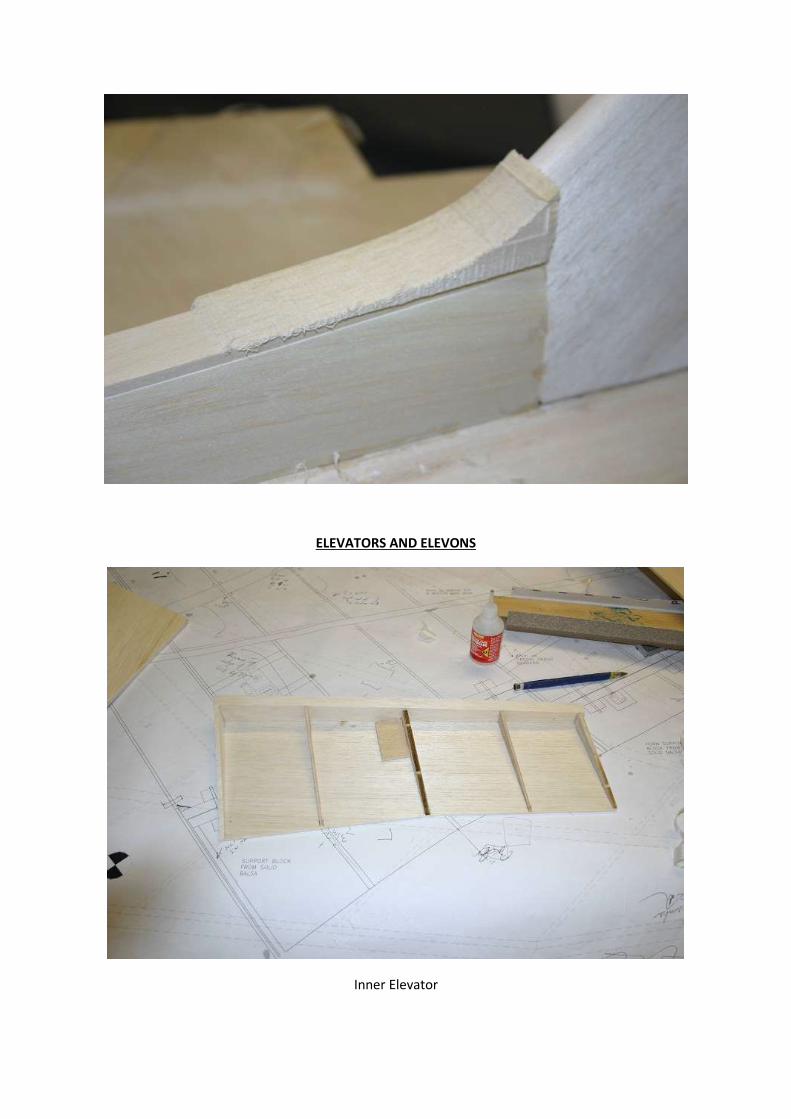
ELEVATORS AND ELEVONS
Inner Elevator
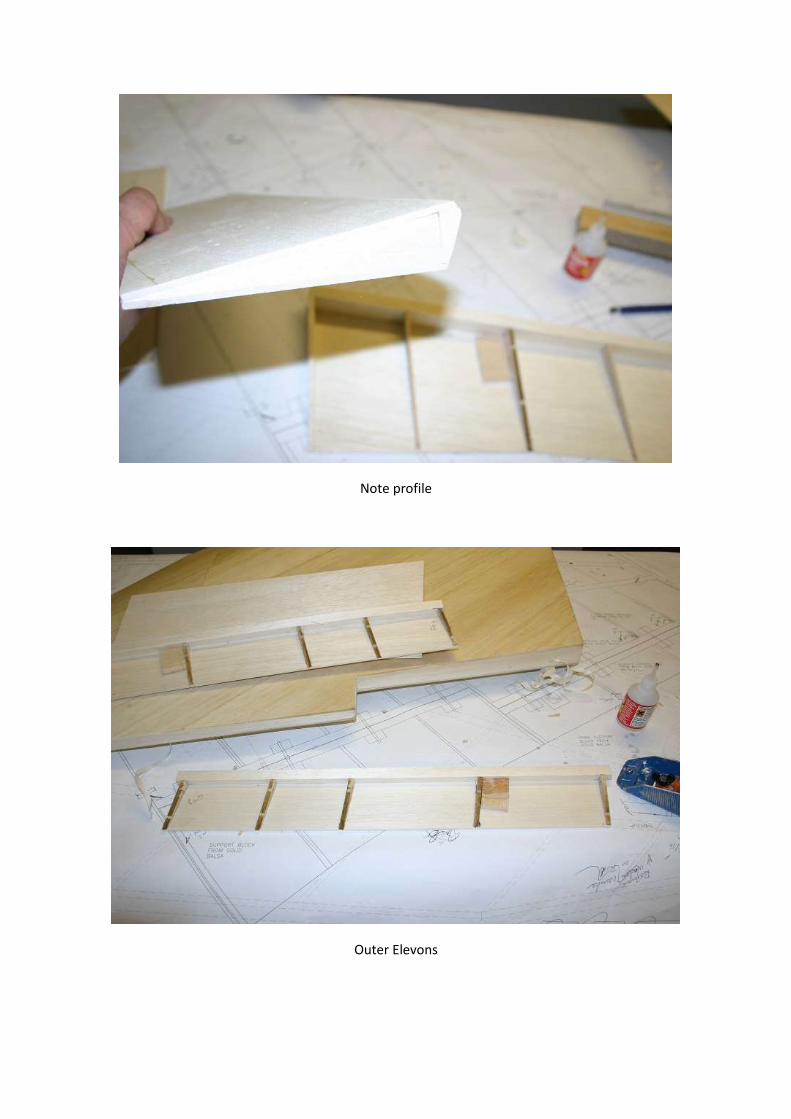
Note profile
Outer Elevons
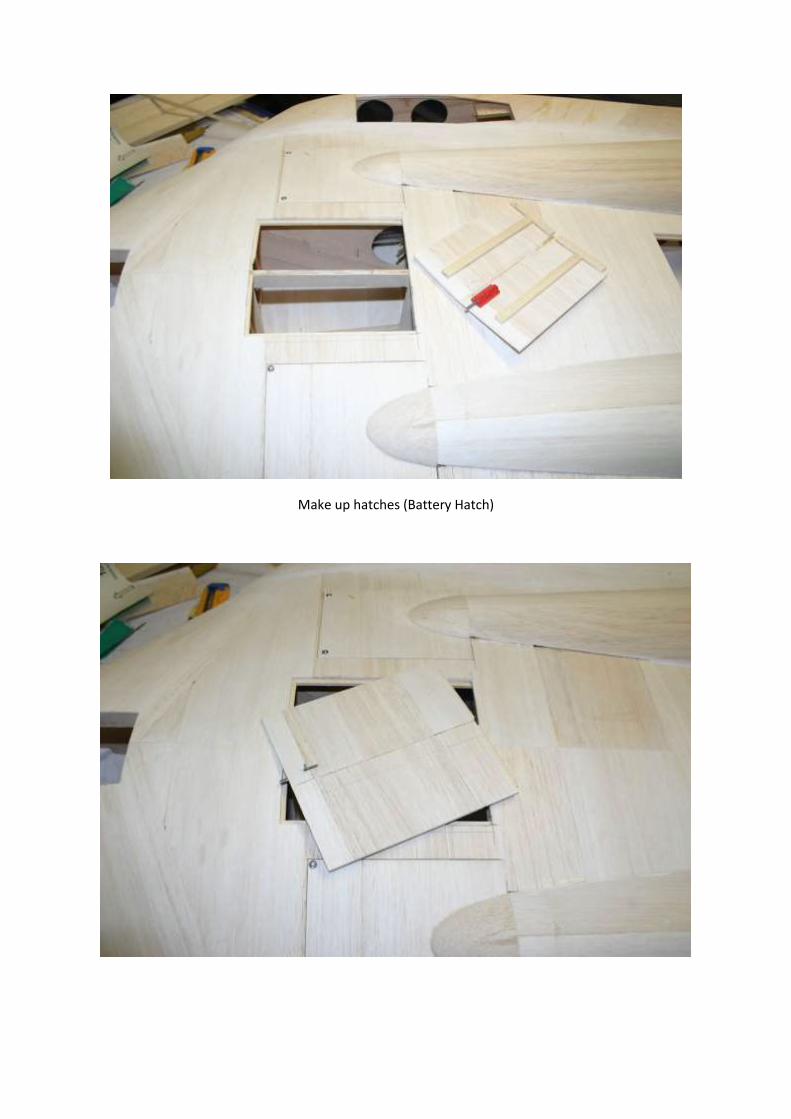
Make up hatches (Battery Hatch)
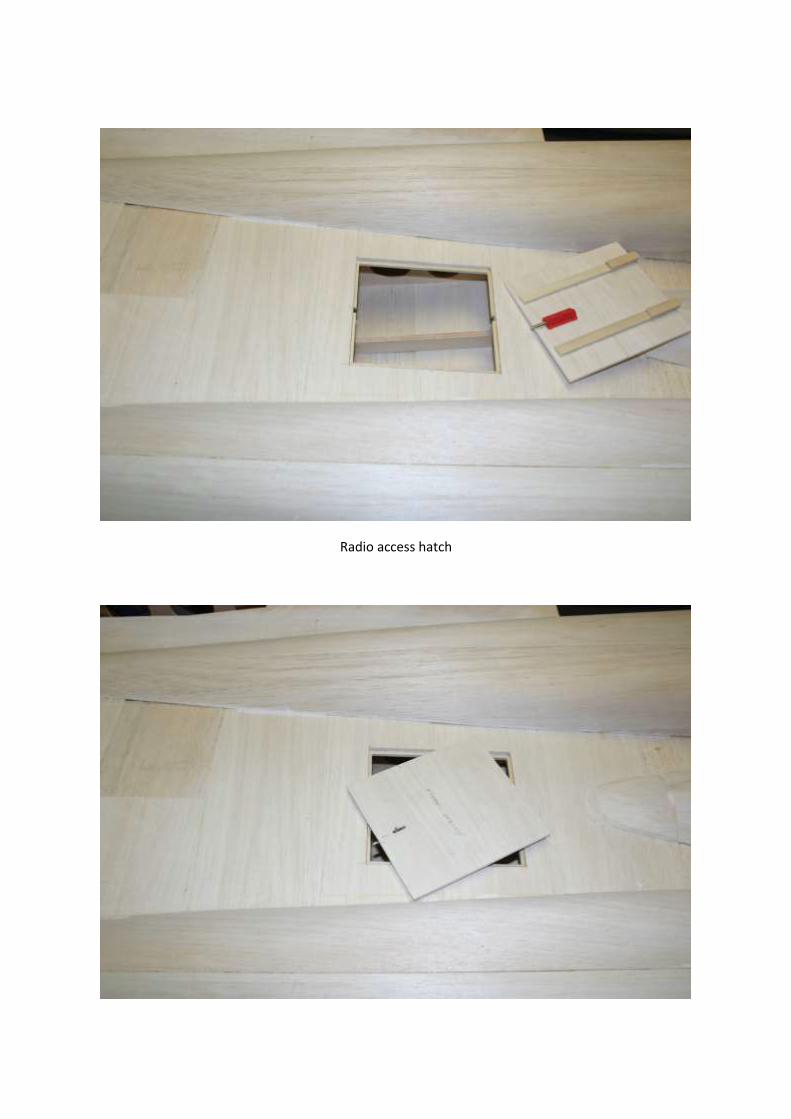
Radio access hatch
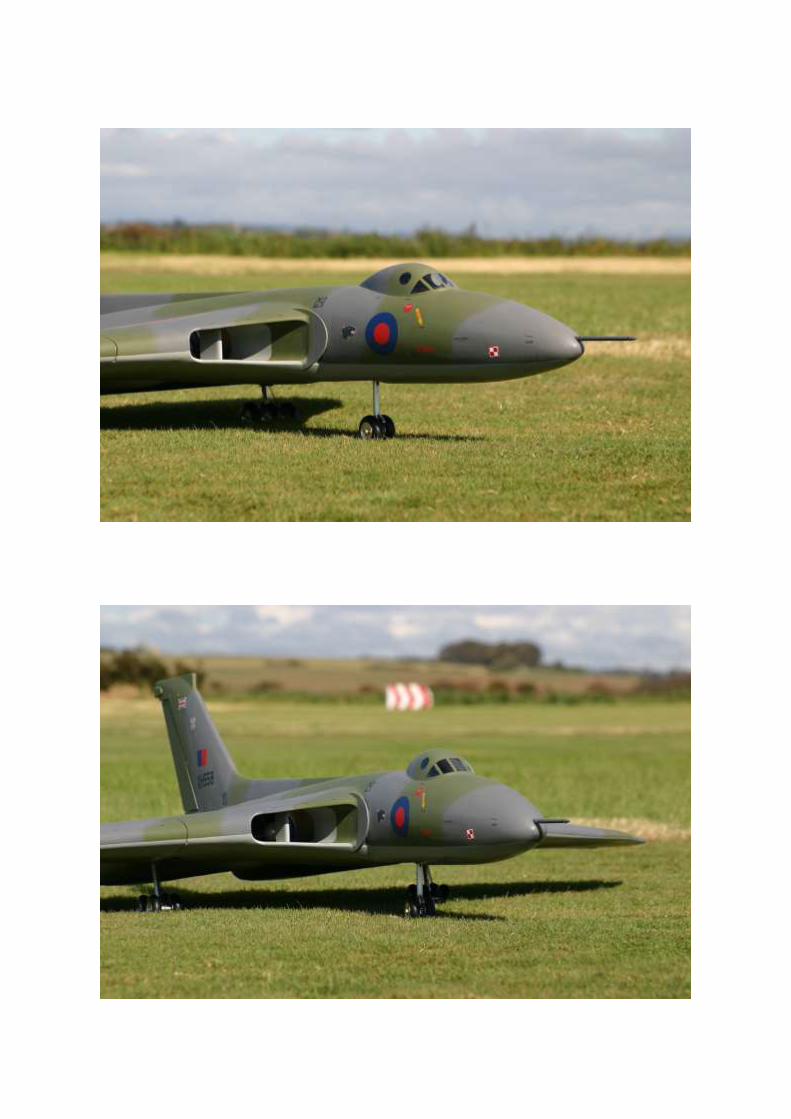
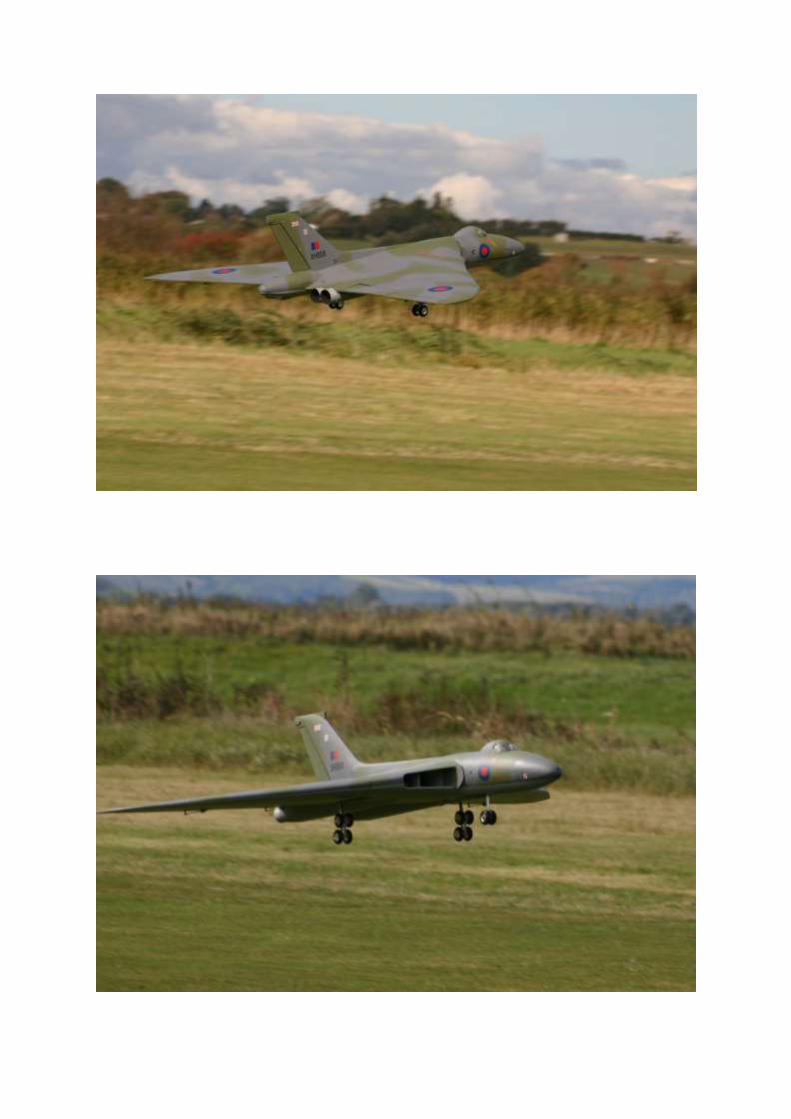
FINISHED MODEL
Decals available from Pyramid Models


![VULCAN HIGH SPEED DEEP FAT FRYER (ELECTRIC) › vulcan-website...Vulcan catering equipment (ptY)ltD [ 2 ] VULCAN HIGH SPEED DEEP FAT FRYER (ELECTRIC) GENERAL DATA: MANUFACTURER: Vulcan](https://img.pdfslide.net/doc/110x75/60c05ae5c355355f26327394/vulcan-high-speed-deep-fat-fryer-electric-a-vulcan-website-vulcan-catering.jpg)