Embed Size (px)
Citation preview

9000U Quick GuideMarketing & RMA Department
07.01.2009
XELTEK
04/19/23
Agenda
System Setup
Running the program - Hardware Setup
Running the program – Software steup
Quick Start – Programming EEPROM Chip
Standalone Mode
Reference
04/19/23
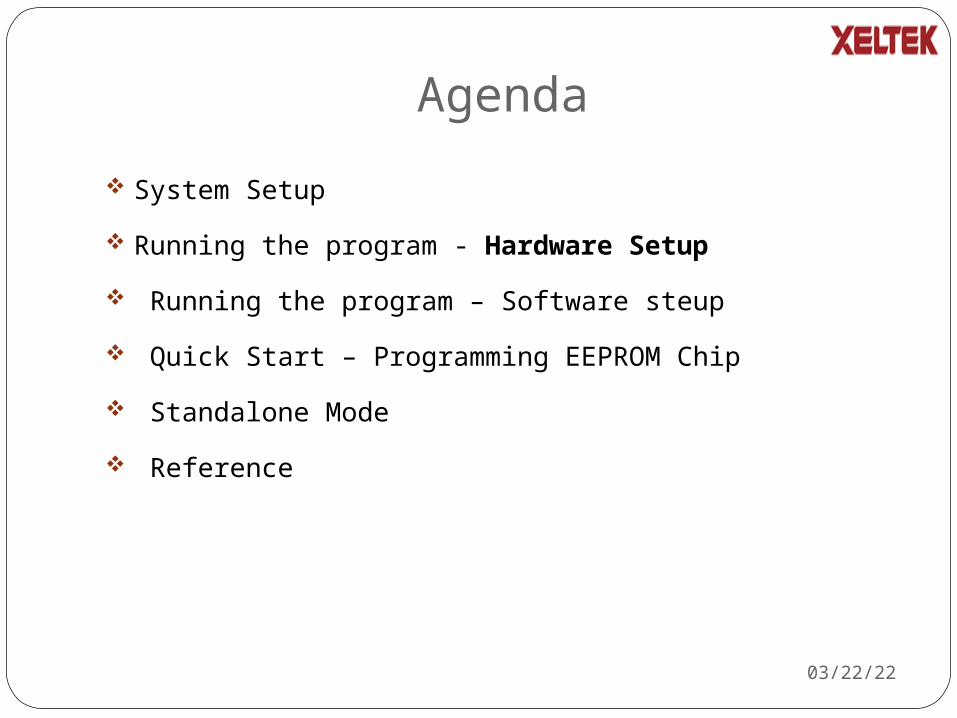
System SetupInsert the CD into a CD-ROM drive and the setup program will start automatically, if not, please run SETUP.EXE in the root path. Each model has its own software, please do not mismatch. Also, you can download the new version of software from www. Xeltek.com
04/19/23
System Setup
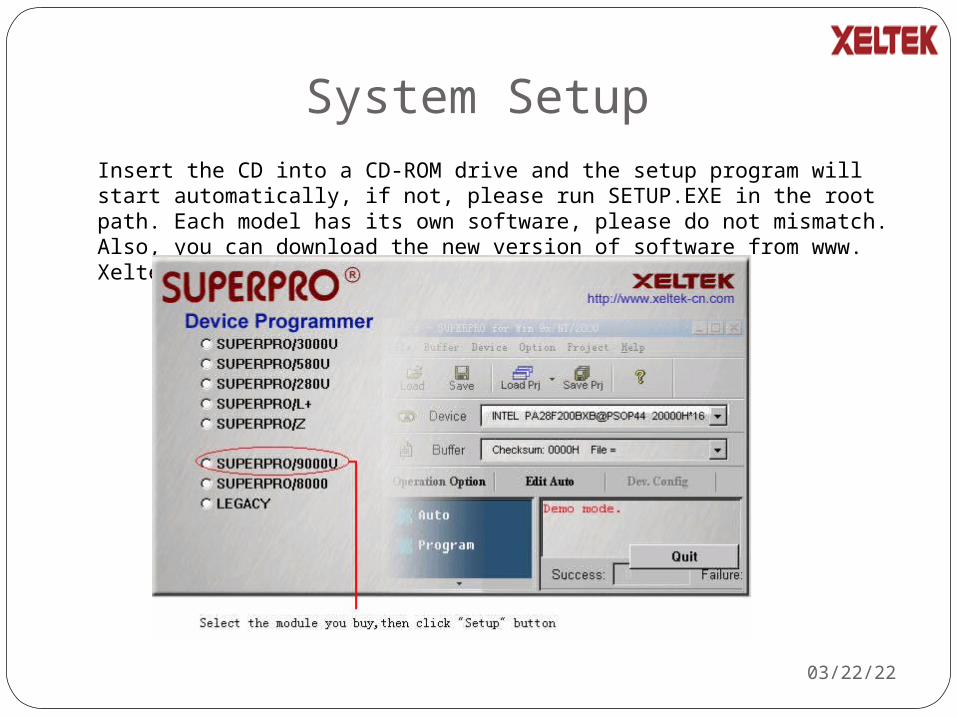
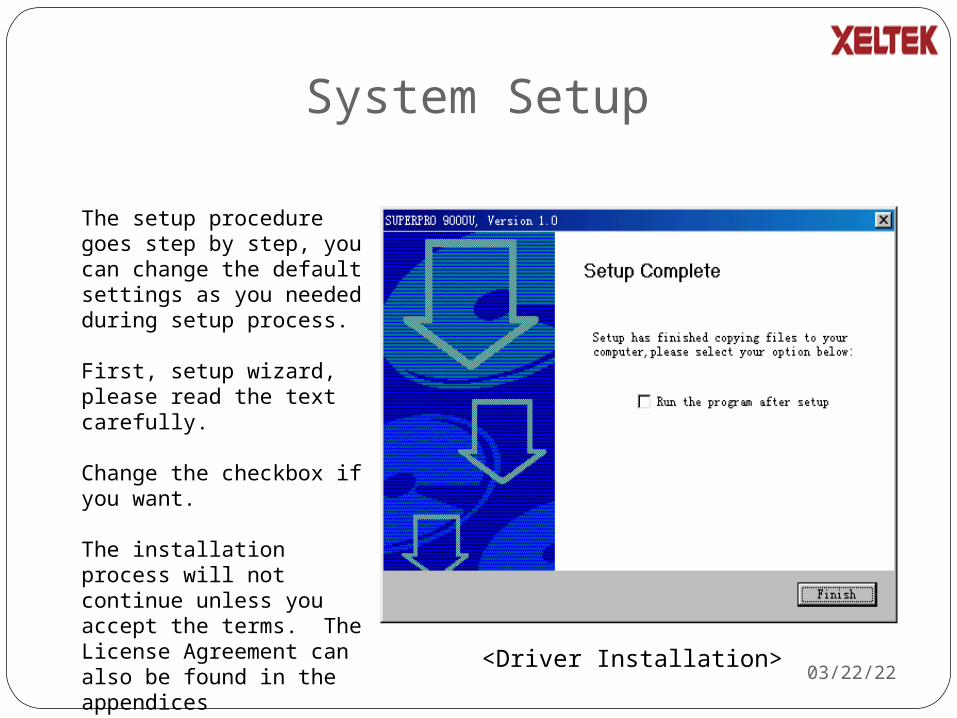
The setup procedure goes step by step, you can change the default settings as you needed during setup process.
First, setup wizard, please read the text carefully.
Change the checkbox if you want.
The installation process will not continue unless you accept the terms. The License Agreement can also be found in the appendices
Click “Finish” button to finish the setup.
<Driver Installation>04/19/23
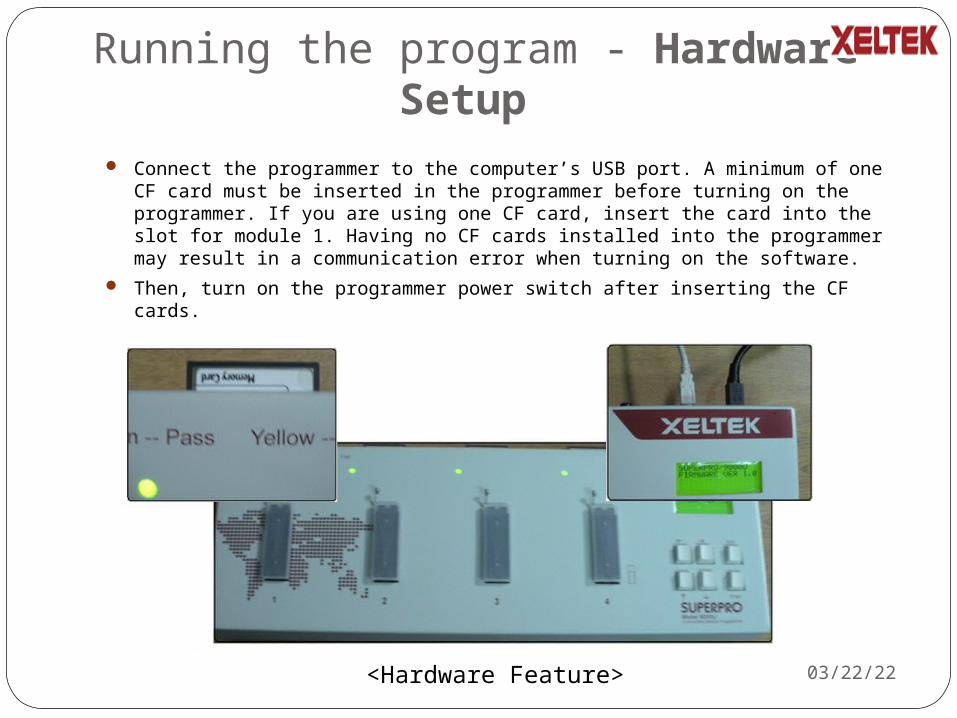
Running the program - Hardware Setup
Connect the programmer to the computer’s USB port. A minimum of one CF card must be inserted in the programmer before turning on the programmer. If you are using one CF card, insert the card into the slot for module 1. Having no CF cards installed into the programmer may result in a communication error when turning on the software.
Then, turn on the programmer power switch after inserting the CF cards.
<Hardware Feature> 04/19/23

Running the program Double click on the software icon located on your desktop to run the software. As the program starts, it will communicate with the programmer immediately and begin initialization. If communication error occur, please try the following:
·Click on the Retry button.·Shutdown software and turn off programmer. Afterwards, turn on the programmer and wait for a few secondsthan turn on the software
<Initialization> <Communication error>
04/19/23
Quick Start – Programming EEPROM Chip
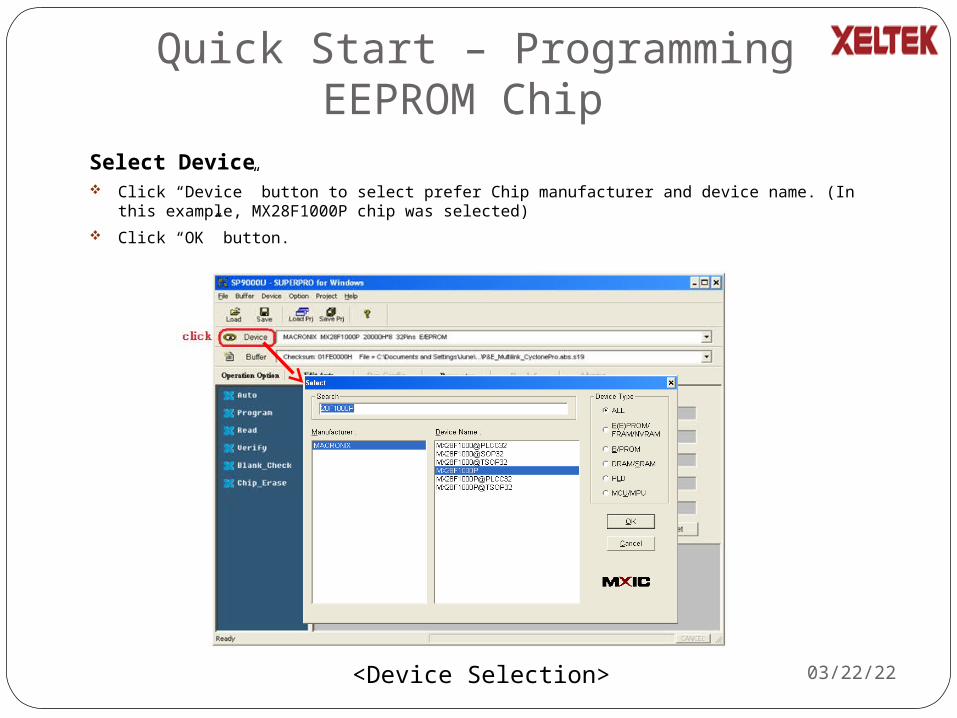
Select Device Click “Device” button to select prefer Chip manufacturer and device name. (In this example,
MX28F1000P chip was selected)
Click “OK” button.
<Device Selection> 04/19/23

Quick Start – Programming EEPROM Chip
Enable insertion test and ID check Click “Operation Option” button to enable “Insertion Test” and “ID check.” To program a new chip, click “Blank_Check” first. If it fails, click “Erase” first then “Blank_Check”. And,
Click “Buffer” button.
<Operation Option>
04/19/23
Quick Start – Programming EEPROM Chip
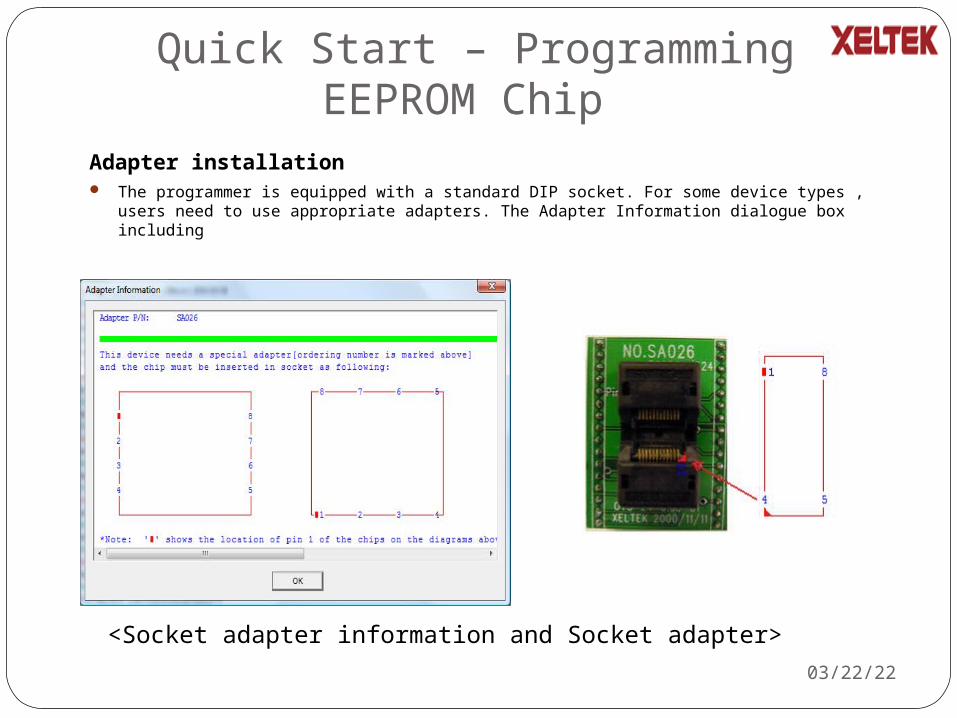
Adapter installation The programmer is equipped with a standard DIP socket. For some device types , users need to
use appropriate adapters. The Adapter Information dialogue box including
<Socket adapter information and Socket adapter>
04/19/23
Quick Start – Programming EEPROM Chip
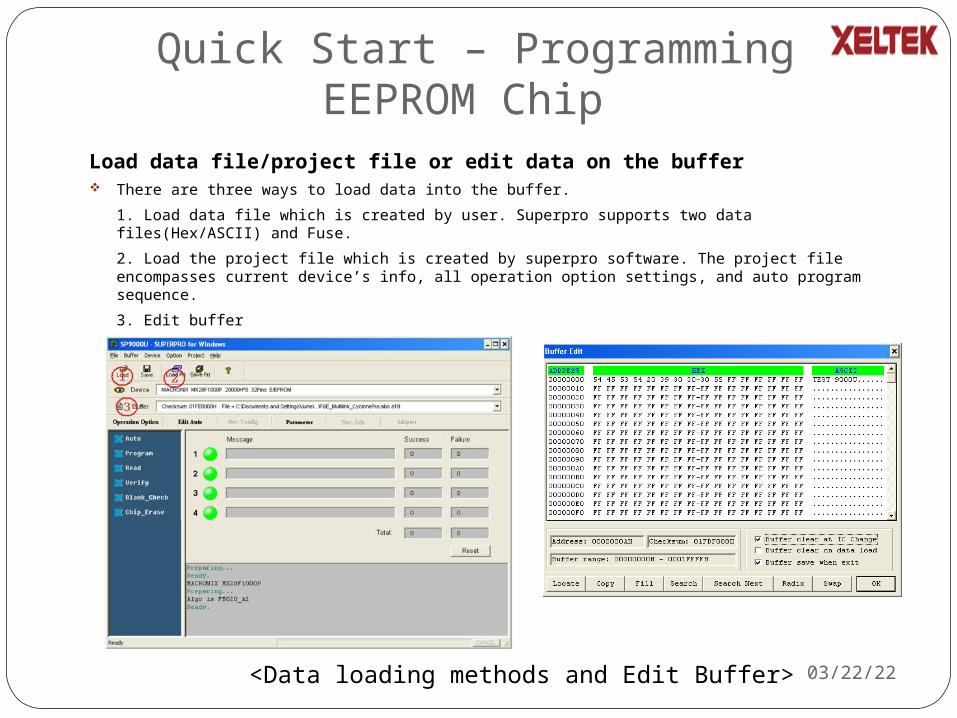
Load data file/project file or edit data on the buffer There are three ways to load data into the buffer.
1. Load data file which is created by user. Superpro supports two data files(Hex/ASCII) and Fuse.
2. Load the project file which is created by superpro software. The project file encompasses current device’s info, all operation option settings, and auto program sequence.
3. Edit buffer
<Data loading methods and Edit Buffer> 04/19/23
Quick Start – Programming EEPROM Chip
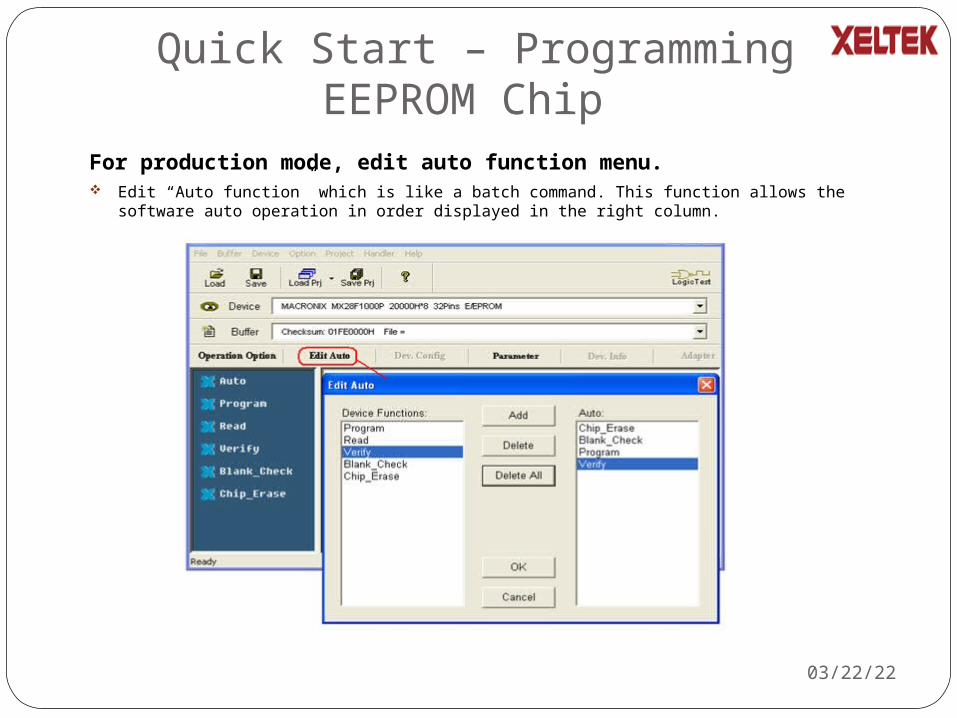
For production mode, edit auto function menu. Edit “Auto function” which is like a batch command. This function allows the software auto
operation in order displayed in the right column.
04/19/23
Quick Start – Programming EEPROM Chip
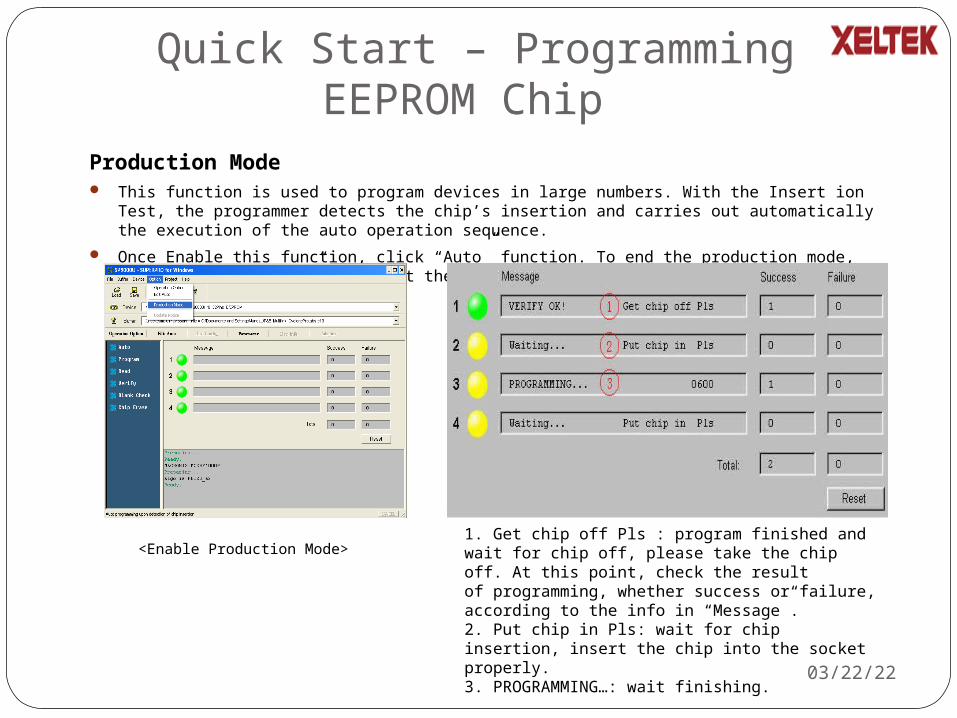
Production Mode This function is used to program devices in large numbers. With the Insert ion Test, the
programmer detects the chip’s insertion and carries out automatically the execution of the auto operation sequence.
Once Enable this function, click “Auto” function. To end the production mode, please click “cancel” button at the left bottom corner.
<Enable Production Mode>1. Get chip off Pls : program finished and wait for chip off, please take the chip off. At this point, check the resultof programming, whether success or failure, according to the info in “Message”.2. Put chip in Pls: wait for chip insertion, insert the chip into the socket properly.3. PROGRAMMING…: wait finishing. 04/19/23
Quick Start – Programming EEPROM Chip
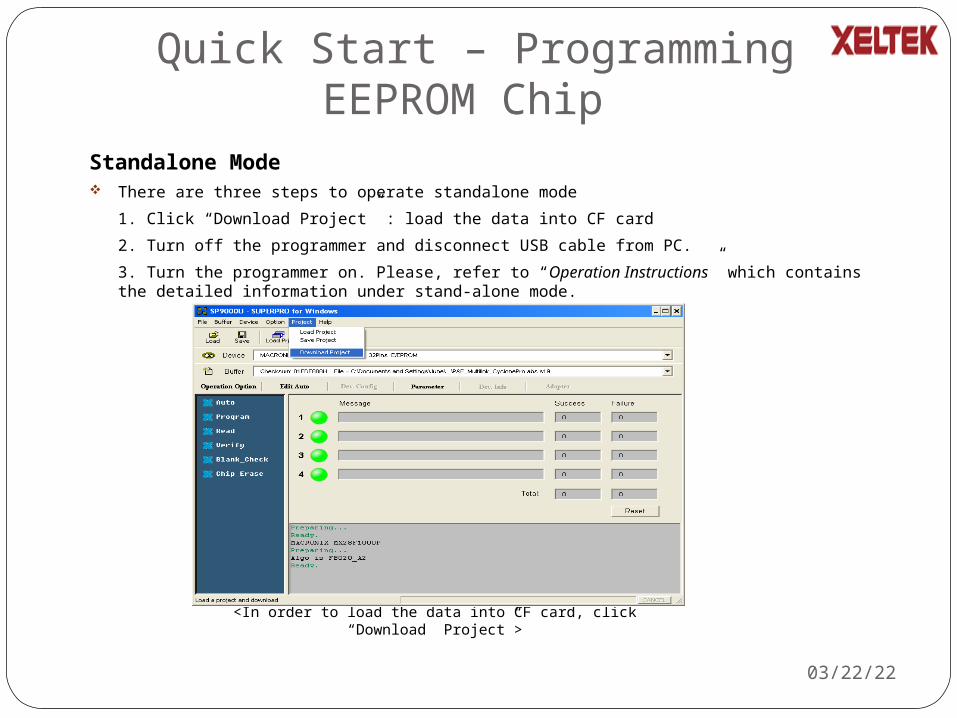
Standalone Mode There are three steps to operate standalone mode
1. Click “Download Project” : load the data into CF card
2. Turn off the programmer and disconnect USB cable from PC.
3. Turn the programmer on. Please, refer to “Operation Instructions” which contains the detailed information under stand-alone mode.
<In order to load the data into CF card, click “Download Project”>
04/19/23

ReferenceSuperpro User’s Guide and model 9000U
04/19/23