Embed Size (px)
Citation preview

R. G. Sparber November 5, 2017 Page 1 of 6
A Garmin GPS Suction Cup Stand
Converted to Magnetic, Version 1.1
By R. G. Sparber Protected by Creative Commons.
1
My Garmin GPS is supported by
this stand. The idea is that I flip the
lever up, press the suction cup
against a smooth clean surface, and
push the lever down. This action
pulls up on the suction cup and
holds it in place.
Well, it works fine for a few hours
but always cuts loose. I certainly do
not need this kind of distraction
while trying to deal with rush hour
traffic.
In my case, my smooth clean surface is a disk that is glued down on my dashboard.
The disk was supplied by Garmin.
The lever action on this stand reminded me of my
magnetic base that supports my Dial Test
Indicator. As the knob is turned, it turns on and off
the magnet.
The raising and lowering of the center of the
suction cut can be used to raise and lower a
magnet. This won't turn the magnetic field off, but
it will greatly reduce the force needed to lift off
the stand.
1 This work is licensed under the Creative Commons Attribution 4.0 International License. To view a copy of this
license, visit http://creativecommons.org/licenses/by/4.0/ or send a letter to Creative Commons, PO Box 1866,
Mountain View, CA 94042, USA.
R. G. Sparber November 5, 2017 Page 2 of 6
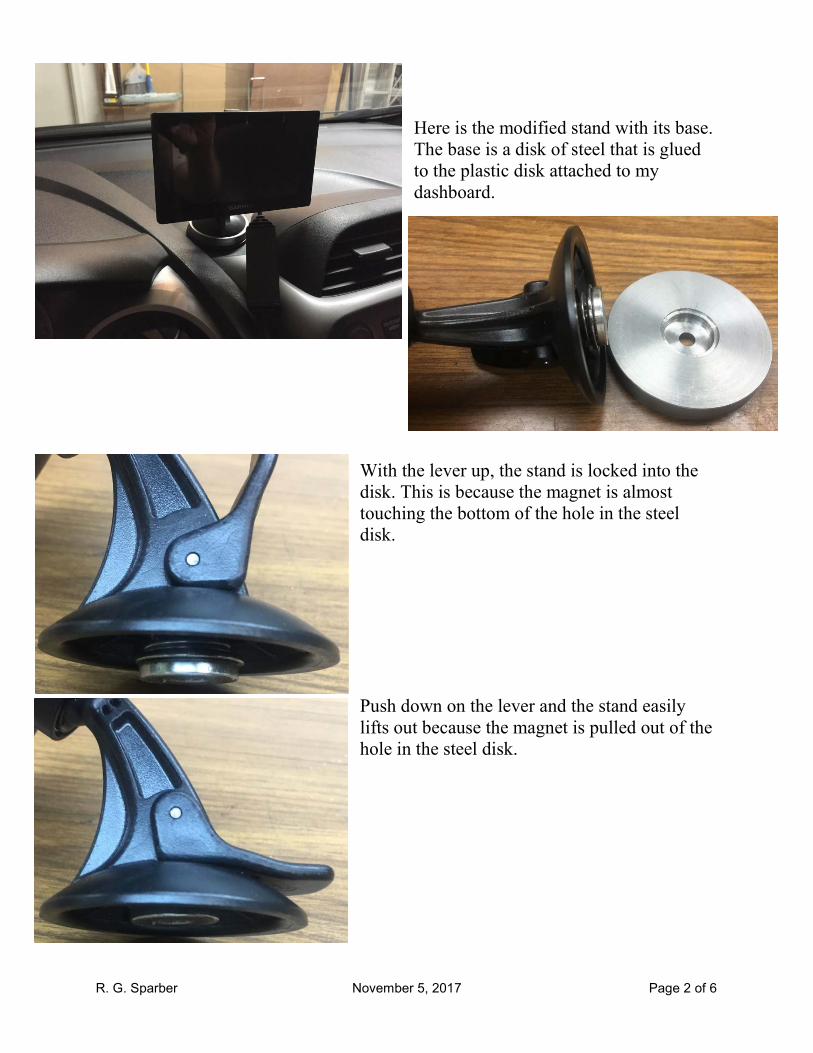
Here is the modified stand with its base.
The base is a disk of steel that is glued
to the plastic disk attached to my
dashboard.
With the lever up, the stand is locked into the
disk. This is because the magnet is almost
touching the bottom of the hole in the steel
disk.
Push down on the lever and the stand easily
lifts out because the magnet is pulled out of the
hole in the steel disk.

R. G. Sparber November 5, 2017 Page 3 of 6
Nothing special about the
disk. It is cut from mild steel
and counterbored on my lathe
using a boring bar. I did break
the edge with a file.

R. G. Sparber November 5, 2017 Page 4 of 6
The modification to the stand begins by pulling
off the suction cup. It is a form fit around the
aluminum piston.
Next, raise the lever.
Then the steel pin is pushed out.
Out should drop this aluminum piston with its spring. Put the spring in
a safe place.
Chuck the piston in the lathe. There is a round lip under the
face that is sufficient to hold the part. Be sure the underside of
the disk is in full contact with the jaws. When running, it
should not wobble.
R. G. Sparber November 5, 2017 Page 5 of 6
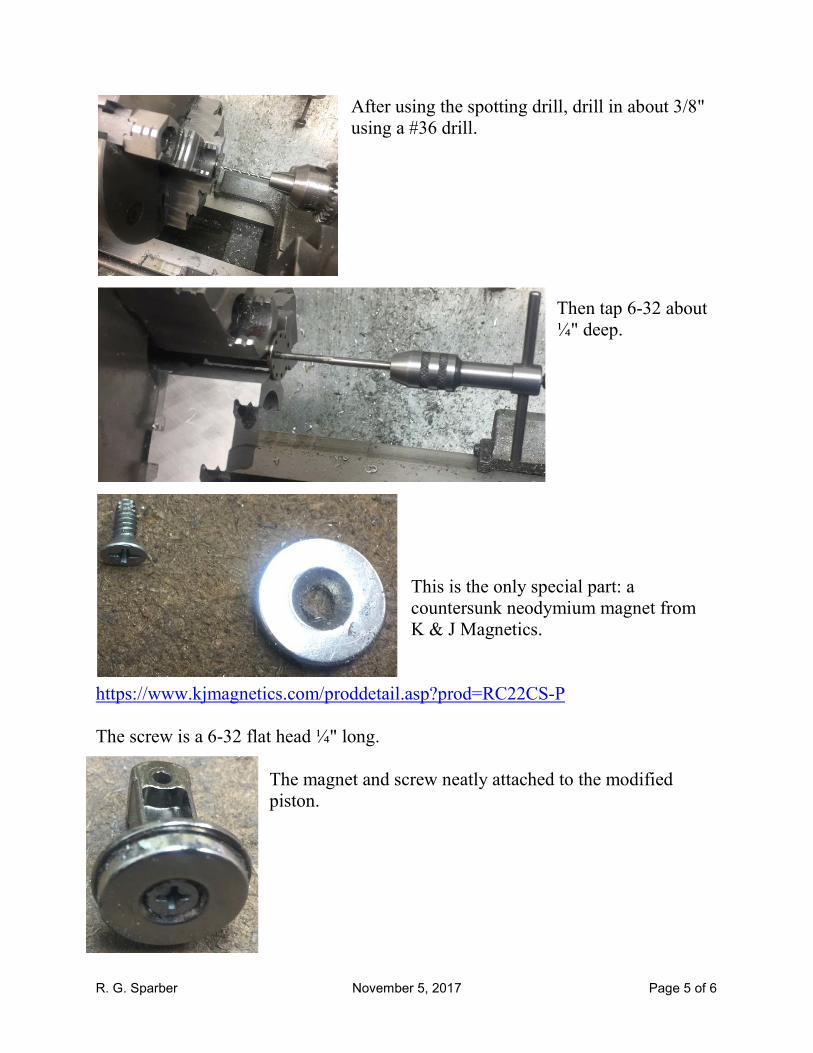
After using the spotting drill, drill in about 3/8"
using a #36 drill.
Then tap 6-32 about
¼" deep.
This is the only special part: a
countersunk neodymium magnet from
K & J Magnetics.
https://www.kjmagnetics.com/proddetail.asp?prod=RC22CS-P
The screw is a 6-32 flat head ¼" long.
The magnet and screw neatly attached to the modified
piston.
R. G. Sparber November 5, 2017 Page 6 of 6
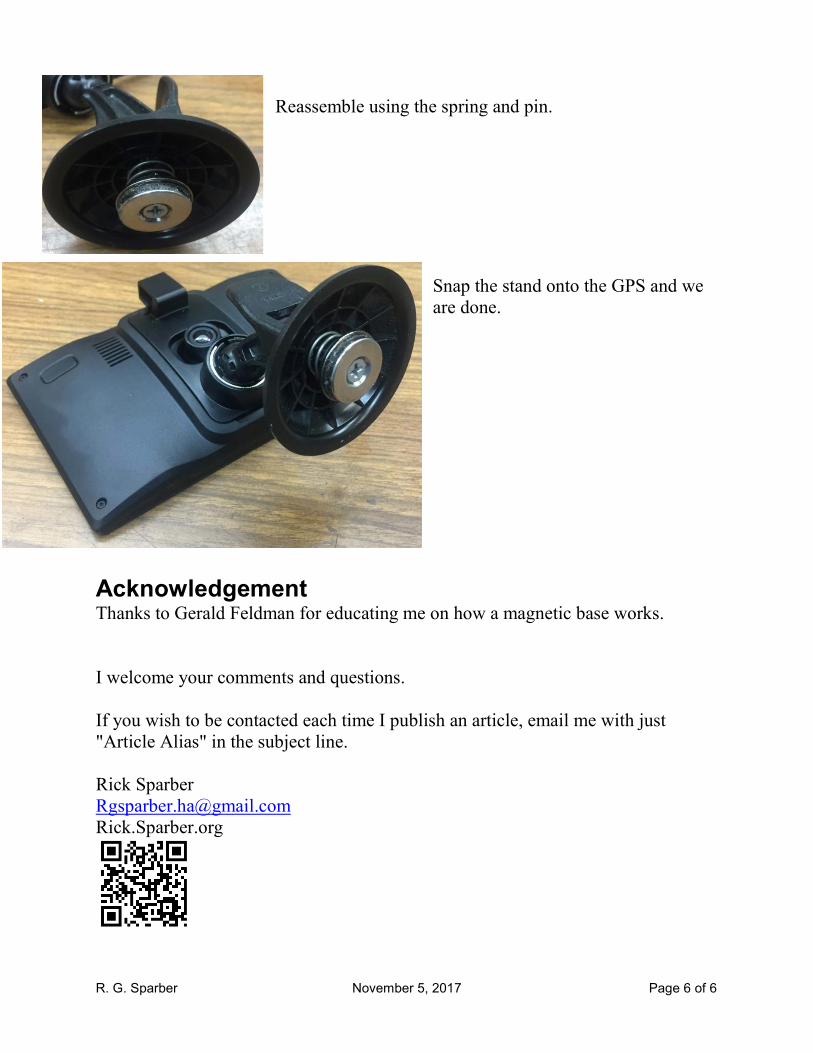
Reassemble using the spring and pin.
Snap the stand onto the GPS and we
are done.
Acknowledgement Thanks to Gerald Feldman for educating me on how a magnetic base works.
I welcome your comments and questions.
If you wish to be contacted each time I publish an article, email me with just
"Article Alias" in the subject line.
Rick Sparber
Rick.Sparber.org