Embed Size (px)
Citation preview
A GUIDE TO
ROOFING/RE-ROOFING THE RIGHT WAY FOR SHINGLE ROOFS IN HIGH WIND AND HAIL-PRONE AREAS
Roofing the Right Way
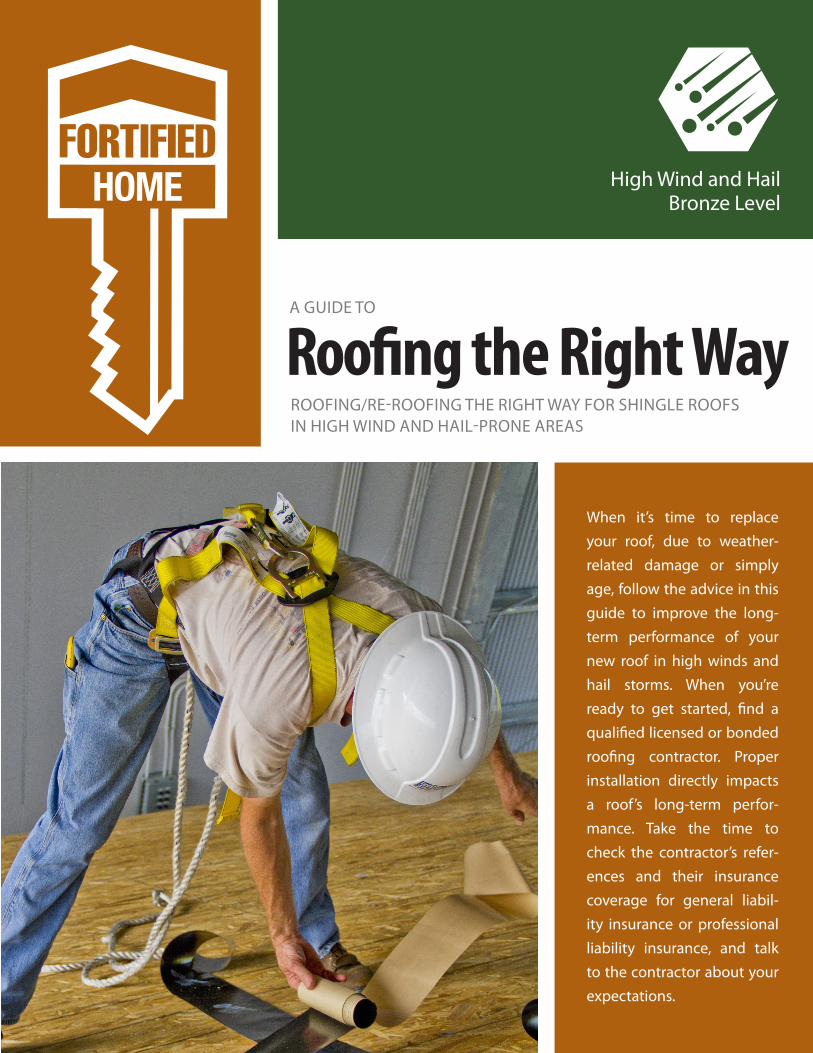
When it’s time to replace your roof, due to weather- related damage or simply age, follow the advice in this guide to improve the long-term performance of your new roof in high winds and hail storms. When you’re ready to get started, find a qualified licensed or bonded roofing contractor. Proper installation directly impacts a roof’s long-term perfor-mance. Take the time to check the contractor’s refer-ences and their insurance coverage for general liabil-ity insurance or professional liability insurance, and talk to the contractor about your expectations.
High Wind and HailBronze Level
Remove tree branches that overhang the roof1. Remove branches that overhang the roof and
trim branches back away from the roof to prevent damage.
Remove existing roof cover2. Remove the existing roof cover and
underlying building paper or underlayment to expose the roof deck. This allows access to strengthen the connections between the roof deck and roof structure. It also provides a solid, smooth surface needed to help ensure the new roof cover achieves its full strength.
Inspect for damage3. Look at the roof deck for rotting, delaminating,
warping or other signs it may be structurally unsound. If any of these signs exist, replace dam-aged sections with similar materials of the same thickness.
Re-nail the roof deck4. Install additional fasteners as needed to provide
a more wind-resistant connection of the roof deck to the roof framing. Details on re-nailing are provided later in this guide
Anchor gable end outlookers5. Outlookers are roof framing members that are
sometimes used to support the roof overhang at the gable end of a house. They start at the sec-ond truss or rafter back from the gable end wall and extend out over the gable end wall framing to support the edge of the roof. Improve the anchorage by connecting outlookers to the roof framing with metal brackets or straps.
Seal the roof deck against water intrusion6. This will help keep water out of the house if the
roof cover blows off. Large amounts of wind-driv-en rain can pour into the attic through unsealed gaps between pieces of roof sheathing. Options for sealing the roof deck are provided later in this guide. Additional information may be found at disastersafety.org in the FORTIFIED Home: High Wind & Hail Technical Requirements.
Install flashing7. Proper flashing is important to the performance
of your roof. Flashing is necessary at all penetra-tions, including pipes and vents that create open-ings in the roof deck; where the roof intersects with vertical surfaces, such as walls of an upper story or chimneys; in valleys; and at any location where the roof changes slope. At eaves and gable rakes, the flashing is called a drip edge. Valley areas without flashing are especially vulnerable to leakage. Installation of a 36 in. wide self adhered polymer-modified bitumen membrane underlayment or metal flashing centered on the valley is critical. At intersections of the roof with vertical surfaces, such as walls and chimneys, the flashing should extend up the vertical surface, be covered with wall cladding and lapped in shingle fashion. A corrosion-resistant drip edge should be provided at eaves and gables of shingle roofs. The overlap between sections of drip edge metal should be at least 3 in. and drip edges should ex-tend ½ in. below the sheathing and extend back on the roof a minimum of 2 in. Drip edge should be fastened to the roof deck at 12 in. on center.
Apply roof cover8. Apply an approved high-wind and impact-resis-
tant roof cover. Follow the manufacturer’s instal-lation instructions for high-wind areas or local code requirements, if they are more restrictive.
Apply roof vents9. All roof vents should be properly installed and
attached to the roof deck in accordance with the manufacturer’s recommendations and building code ventilation requirements. Vents that have passed Florida Building Code Test Standard TAS 100 (A) are tested for both high winds and water intrusion.
STEPS TO RE-ROOFING THE RIGHT WAY
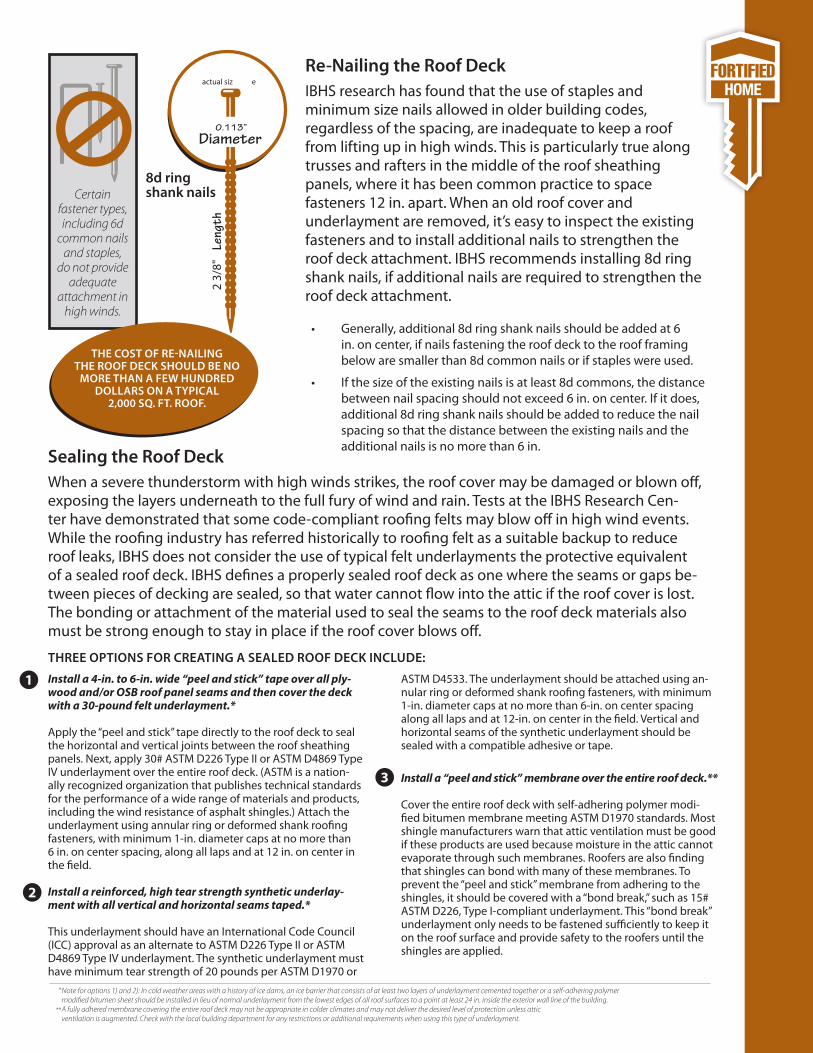
Re-Nailing the Roof DeckIBHS research has found that the use of staples and minimum size nails allowed in older building codes, regardless of the spacing, are inadequate to keep a roof from lifting up in high winds. This is particularly true along trusses and rafters in the middle of the roof sheathing panels, where it has been common practice to space fasteners 12 in. apart. When an old roof cover and underlayment are removed, it’s easy to inspect the existing fasteners and to install additional nails to strengthen the roof deck attachment. IBHS recommends installing 8d ring shank nails, if additional nails are required to strengthen the roof deck attachment.
• Generally, additional 8d ring shank nails should be added at 6 in. on center, if nails fastening the roof deck to the roof framing below are smaller than 8d common nails or if staples were used.
• If the size of the existing nails is at least 8d commons, the distance between nail spacing should not exceed 6 in. on center. If it does, additional 8d ring shank nails should be added to reduce the nail spacing so that the distance between the existing nails and the additional nails is no more than 6 in.
8d ring shank nails
0.113”Diameter
Length
2 3/
8"
actual siz e
THE COST OF RE-NAILING THE ROOF DECK SHOULD BE NO
MORE THAN A FEW HUNDRED DOLLARS ON A TYPICAL
2,000 SQ. FT. ROOF.
Sealing the Roof DeckWhen a severe thunderstorm with high winds strikes, the roof cover may be damaged or blown off, exposing the layers underneath to the full fury of wind and rain. Tests at the IBHS Research Cen-ter have demonstrated that some code-compliant roofing felts may blow off in high wind events. While the roofing industry has referred historically to roofing felt as a suitable backup to reduce roof leaks, IBHS does not consider the use of typical felt underlayments the protective equivalent of a sealed roof deck. IBHS defines a properly sealed roof deck as one where the seams or gaps be-tween pieces of decking are sealed, so that water cannot flow into the attic if the roof cover is lost. The bonding or attachment of the material used to seal the seams to the roof deck materials also must be strong enough to stay in place if the roof cover blows off.
Certain fastener types, including 6d
common nails and staples,
do not provide adequate
attachment in high winds.
Install a 4-in. to 6-in. wide “peel and stick” tape over all ply-wood and/or OSB roof panel seams and then cover the deck with a 30-pound felt underlayment.*
Apply the “peel and stick” tape directly to the roof deck to seal the horizontal and vertical joints between the roof sheathing panels. Next, apply 30# ASTM D226 Type II or ASTM D4869 Type IV underlayment over the entire roof deck. (ASTM is a nation-ally recognized organization that publishes technical standards for the performance of a wide range of materials and products, including the wind resistance of asphalt shingles.) Attach the underlayment using annular ring or deformed shank roofing fasteners, with minimum 1-in. diameter caps at no more than 6 in. on center spacing, along all laps and at 12 in. on center in the field.
Install a reinforced, high tear strength synthetic underlay-ment with all vertical and horizontal seams taped.* This underlayment should have an International Code Council (ICC) approval as an alternate to ASTM D226 Type II or ASTM D4869 Type IV underlayment. The synthetic underlayment must have minimum tear strength of 20 pounds per ASTM D1970 or
ASTM D4533. The underlayment should be attached using an-nular ring or deformed shank roofing fasteners, with minimum 1-in. diameter caps at no more than 6-in. on center spacing along all laps and at 12-in. on center in the field. Vertical and horizontal seams of the synthetic underlayment should be sealed with a compatible adhesive or tape.
Install a “peel and stick” membrane over the entire roof deck.** Cover the entire roof deck with self-adhering polymer modi-fied bitumen membrane meeting ASTM D1970 standards. Most shingle manufacturers warn that attic ventilation must be good if these products are used because moisture in the attic cannot evaporate through such membranes. Roofers are also finding that shingles can bond with many of these membranes. To prevent the “peel and stick” membrane from adhering to the shingles, it should be covered with a “bond break,” such as 15# ASTM D226, Type I-compliant underlayment. This “bond break” underlayment only needs to be fastened sufficiently to keep it on the roof surface and provide safety to the roofers until the shingles are applied.
THREE OPTIONS FOR CREATING A SEALED ROOF DECK INCLUDE:
Note for options 1) and 2): In cold weather areas with a history of ice dams, an ice barrier that consists of at least two layers of underlayment cemented together or a self-adhering polymer modified bitumen sheet should be installed in lieu of normal underlayment from the lowest edges of all roof surfaces to a point at least 24 in. inside the exterior wall line of the building.A fully adhered membrane covering the entire roof deck may not be appropriate in colder climates and may not deliver the desired level of protection unless attic ventilation is augmented. Check with the local building department for any restrictions or additional requirements when using this type of underlayment.
*
**
3
2
1
Choosing and Installing High-Wind and Impact-Rated Shingles
SELECTING ASPHALT SHINGLESFor optimal protection from high wind and hail, choose shingles that meet both ASTM standards for high wind and UL impact resistant standards*. Note: If you live in a wildfire-prone area, make sure the high-wind and impact-resistant shingles also include a UL or ASTM Class A fire rating. Asphalt shingles, along with tile and metal roof coverings, are widely available with a Class A fire rating.
SHINGLE WIND TESTING STANDARDS:Make sure your roofing professional uses shingles that match or exceed the testing standard and/or classification for the design wind speed in your area*. The ASTM shingle testing standards and classification system - not the advertised warranty period and warranty wind speed for the shingles - will determine which shingles are best suited for the wind speeds in your area.
INSTALLING SHINGLES: Shingles should be installed in accordance with the manufacturer’s instructions for high-wind installation, using the number of nails in the locations required by the manufacturer for high-wind fastening. In areas where the local building code requires more fasteners than are required by the manufacturer, fasteners must comply with the local building code. *For convenience, a table that matches wind speed with the appropriate ASTM wind rating and UL impact rating is available at disastersafety.org/disastersafety.org/ASTM-UL.
Hiring a ContractorQuality installation is a core part of the roofing equa-tion. IBHS and the National Roofing Contractors As-sociation (NRCA) recommend these steps for choosing the right roofing professional:• Check for a permanent place of business, telephone number,
tax I.D. number and, where required, a business license.
• Request verification of professional liability insurance.
• Look for a company with a proven track record. Ask for and check client references and request a list of completed projects.
• Verify whether the contractor is properly licensed or bonded.
• Insist on a written proposal. The proposal should include com-plete descriptions of the work and specifications, including ap-proximate start and completion dates and payment procedures.
• Research if the contractor is a member of any regional or na-tional industry associations, such as NRCA.
• Call your local Better Business Bureau to check for any com-plaints that have been filed.
• Have the contractor explain his project supervision and quality control procedures.
• Carefully read and make sure you understand any roofing war-ranty offered. Watch for provisions that would void the war-ranty.
• Remember, price is only one criteria for selecting a roofing con-tractor. Professionalism and quality workmanship also should weigh heavily on your decision.
While this guide focuses on a few critical elements of correctly re-roofing a shingle roof in
high wind and hail prone regions, information about re-roofing for all roof types of roofing materials as well as the topics listed below is
available at www.DisasterSafety.org:
• Hiring a Roofing Professional
• Re-nailing the Roof Deck
• Strengthening Existing Connections
• Sealing the Roof Deck
• Choosing and Installing a High-Wind and Hail-Resistant Roof Covering
Further instruction on properly re-roofing is available
at DisasterSafety.org
FORTIFIED HomeTM is a program of the Insurance Institute for Business & Home Safety