Embed Size (px)
Citation preview
A How-To: Infusing Beer witha Dogfish Head Randall 3.0

Chapter
1A Perfectly Crafted Beer Infusion
This concept goes over how to achieve a well-rounded beer infusion.
Achieving particular flavor profiles can vary with the type of beer used witheach infusion. What kinds of beers should you to use to achieve, or evenenhance what you want? Finding recipe ideas and the ingredients used toachieve those results can assist a curious drinker (or brewer) in delivering aunique and custom libation.
Providing a “recipe” for an infusion is not exactly done with measurements,however, is done with the concept of learning and understandingcomplementary flavors. For example, most beer drinkers know that a Mexicanstyle pilsner/lager pairs well with lime, so infusing that type of beer with limewill produce a crisp, citrusy, refreshing beverage. The Mexican style beerand lime infusion can be taken a step further by adding a chopped up spicypepper, and maybe even some smoked wood-chips into your Randall 3.0infusing chamber to create an even more complex flavor profile. That's thebeauty of the Randall 3.0: you experiment in drastically changing the flavorprofile of any beer by adding random ingredients to try something new anddifferent. And, if that experiment isn't to your liking, you can empty it out andtry something else without affecting the original batch of beer.
Perhaps you're interested in trying out a fall/winter holiday flavored beer? Tryadding some cinnamon sticks, cranberries and cloves into the mix! Achievinga delicious infusion is all about finding fun ingredients that complement eachother, as well as understanding how the ingreidents pair with the differenttypes of beer, resulting in changing and (hopefully) enhancing the overallflavor of the beer. For the best results, allow 10-20 minutes for the addedingredients to hydrate with the beer prior to serving; this will ensure youexperience the full flavor you are trying to achieve.

Chapter
2How to Install a Dogfish Randall 3.0 to a Tap
Randall 3.0 has two chambers. The first chamber (at the inlet) is the infusingchamber, which gets filled with hops, spices, fruit, etc. The second chamber(at the outlet) is the defoaming chamber. Foam generated by the interaction ofbeer and infusing ingredients settles out in the second chamber, allowing youto dispense the perfect pint.
The second chamber also has an outer chamber for holding ice. This keeps thebeer cold and carbonated between pours.
Randall 3.0 also features an adjustable Perlick dispensing faucet. The faucetis needed to balance the draught dispensing system back-pressure, minimizingfoaming. This is particularly useful on long-draw (high-pressure) draughtsystems or when dispensing beers made with significant quantities of wheat.
This task leads you through the required steps to install a Dogfish Randall 3.0to an existing tap system.
Items Included in Randall Kit:
• Assembled Randall• Hose assembly• Perlick tap faucet• Pouch containing faucet wrench, washers and tap handle• Extra o-ring kit• Adhesive putty• Laminated Dogfish “Randall 3.0 Users Guide”
1. Attach the included tap faucet to the outlet shank (located on the side withthe defoaming chamber) and tighten the faucet counter-clockwise usingthe included faucet wrench.Once attached, turn the flow control lever on the tap faucet down and turnthe tap faucet off.-stillshot of attaching the tap faucet
Figure 1: Attaching Perlick Tap
| How to Install a Dogfish Randall 3.0 to a Tap | 6
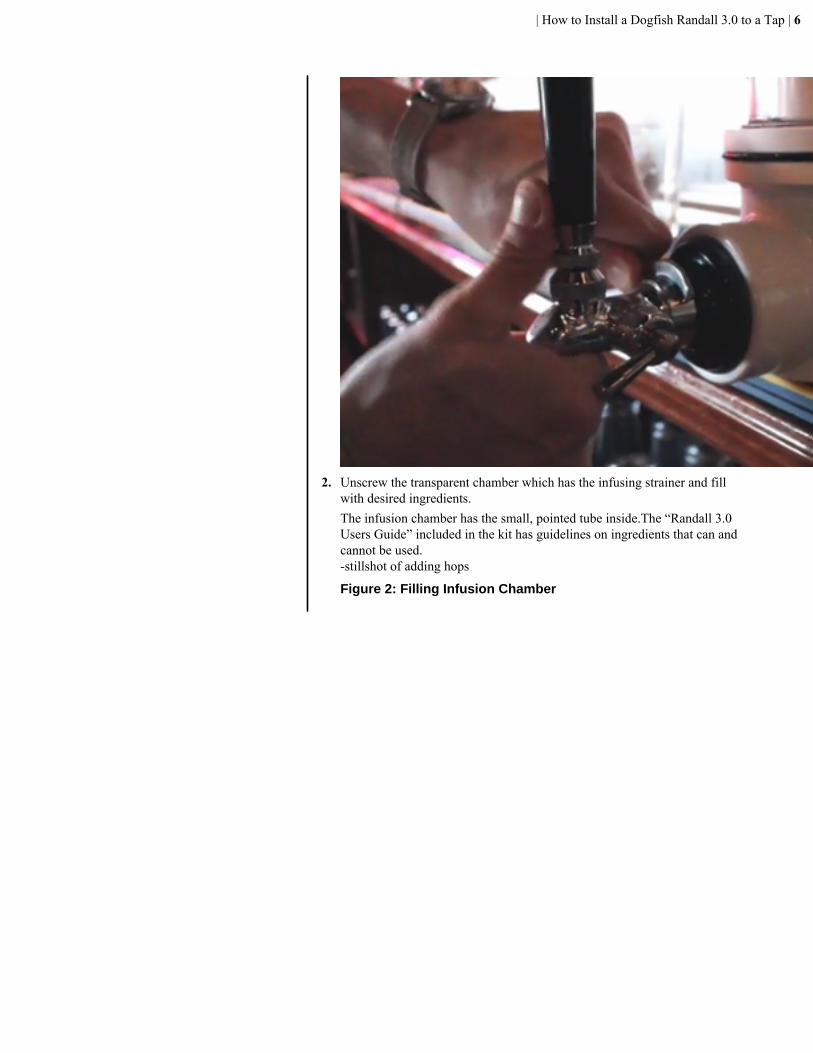
2. Unscrew the transparent chamber which has the infusing strainer and fillwith desired ingredients.The infusion chamber has the small, pointed tube inside.The “Randall 3.0Users Guide” included in the kit has guidelines on ingredients that can andcannot be used.-stillshot of adding hops
Figure 2: Filling Infusion Chamber
| How to Install a Dogfish Randall 3.0 to a Tap | 7
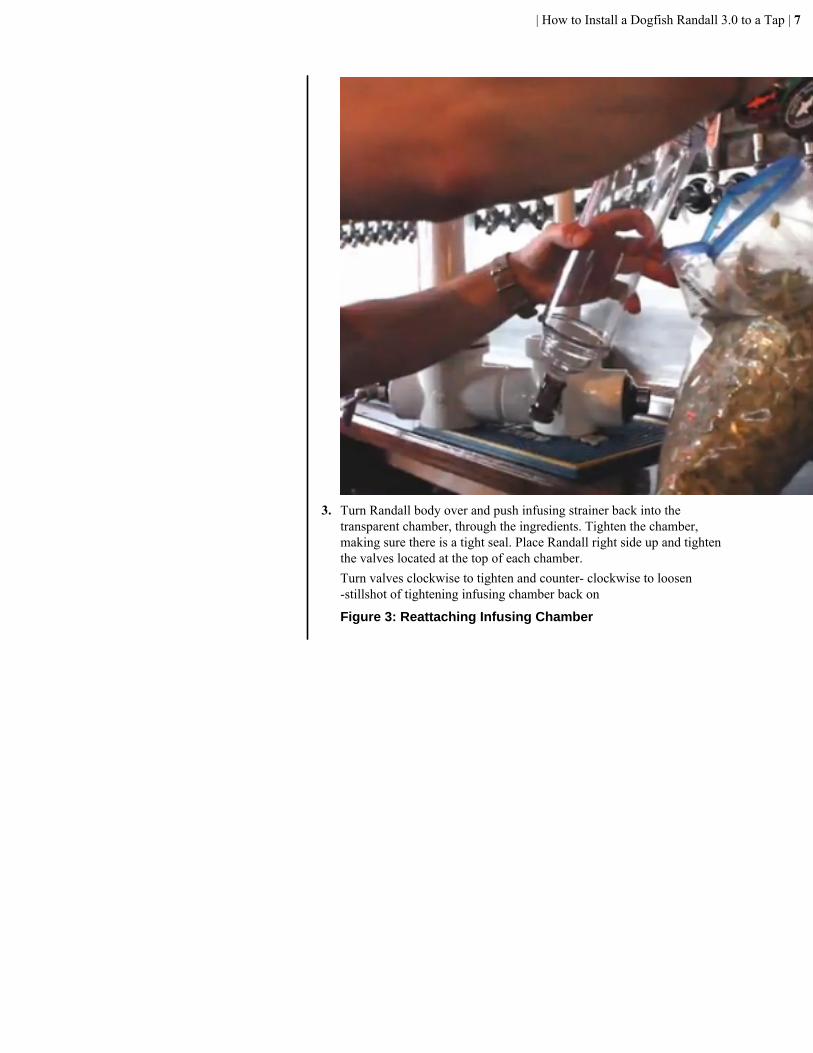
3. Turn Randall body over and push infusing strainer back into thetransparent chamber, through the ingredients. Tighten the chamber,making sure there is a tight seal. Place Randall right side up and tightenthe valves located at the top of each chamber.Turn valves clockwise to tighten and counter- clockwise to loosen-stillshot of tightening infusing chamber back on
Figure 3: Reattaching Infusing Chamber
| How to Install a Dogfish Randall 3.0 to a Tap | 8
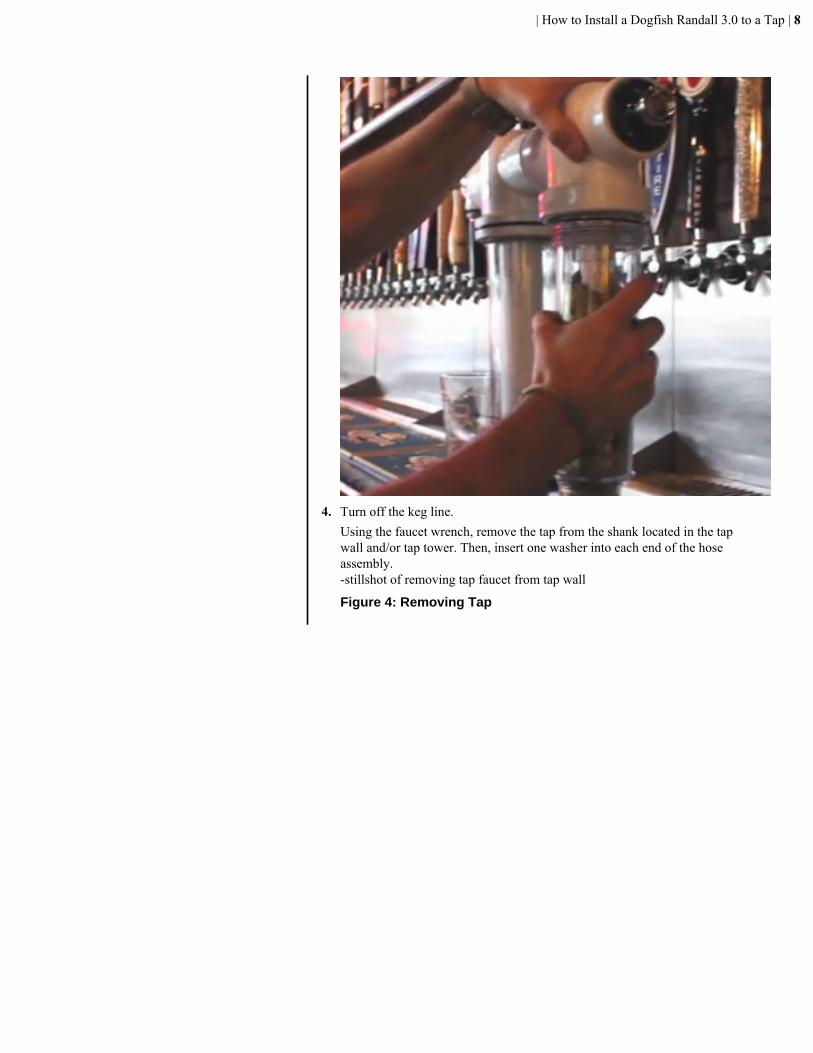
4. Turn off the keg line.Using the faucet wrench, remove the tap from the shank located in the tapwall and/or tap tower. Then, insert one washer into each end of the hoseassembly.-stillshot of removing tap faucet from tap wall
Figure 4: Removing Tap

| How to Install a Dogfish Randall 3.0 to a Tap | 9
-stillshot of inserting washer into one end of hose
Figure 5: Inserting Washer into Hose
| How to Install a Dogfish Randall 3.0 to a Tap | 10
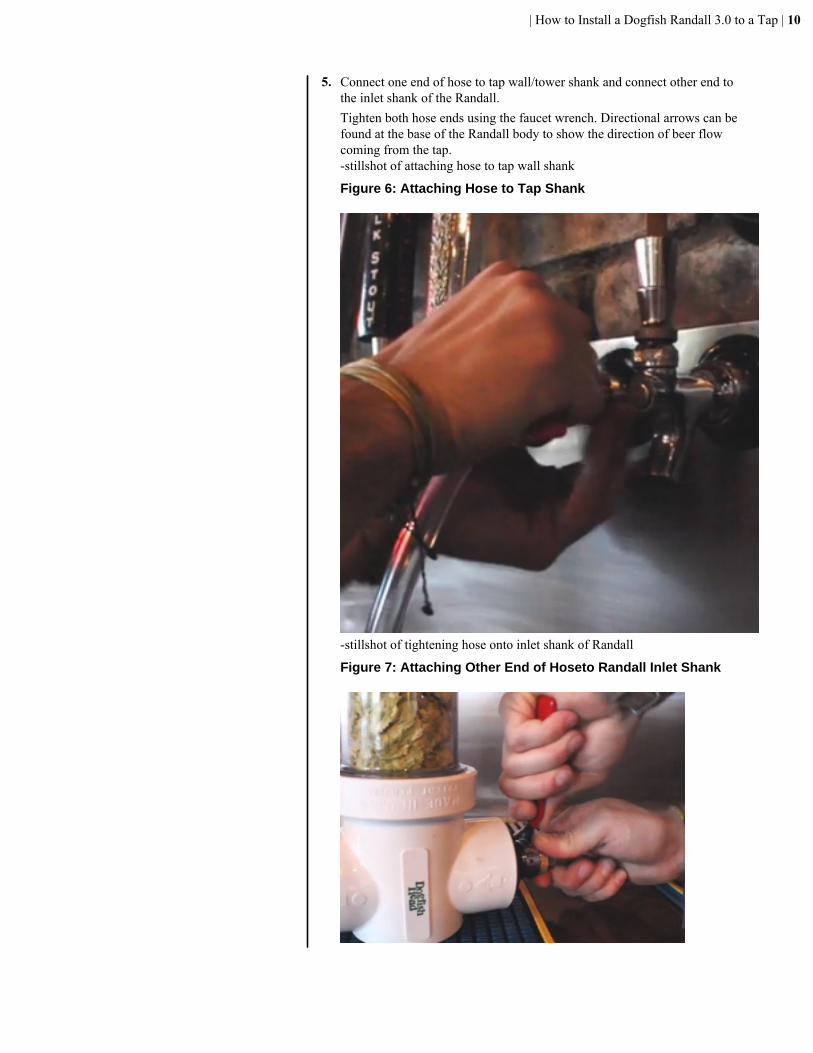
5. Connect one end of hose to tap wall/tower shank and connect other end tothe inlet shank of the Randall.Tighten both hose ends using the faucet wrench. Directional arrows can befound at the base of the Randall body to show the direction of beer flowcoming from the tap.-stillshot of attaching hose to tap wall shank
Figure 6: Attaching Hose to Tap Shank
-stillshot of tightening hose onto inlet shank of Randall
Figure 7: Attaching Other End of Hoseto Randall Inlet Shank
| How to Install a Dogfish Randall 3.0 to a Tap | 11
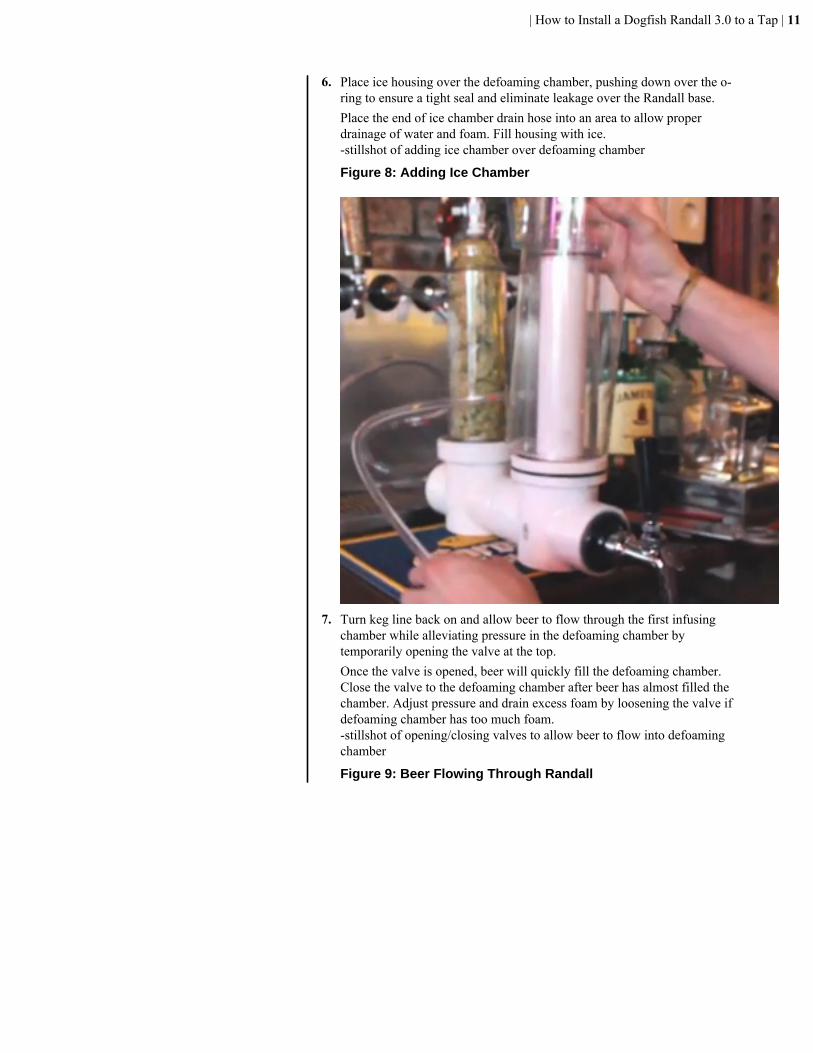
6. Place ice housing over the defoaming chamber, pushing down over the o-ring to ensure a tight seal and eliminate leakage over the Randall base.Place the end of ice chamber drain hose into an area to allow properdrainage of water and foam. Fill housing with ice.-stillshot of adding ice chamber over defoaming chamber
Figure 8: Adding Ice Chamber
7. Turn keg line back on and allow beer to flow through the first infusingchamber while alleviating pressure in the defoaming chamber bytemporarily opening the valve at the top.Once the valve is opened, beer will quickly fill the defoaming chamber.Close the valve to the defoaming chamber after beer has almost filled thechamber. Adjust pressure and drain excess foam by loosening the valve ifdefoaming chamber has too much foam.-stillshot of opening/closing valves to allow beer to flow into defoamingchamber
Figure 9: Beer Flowing Through Randall
| How to Install a Dogfish Randall 3.0 to a Tap | 12
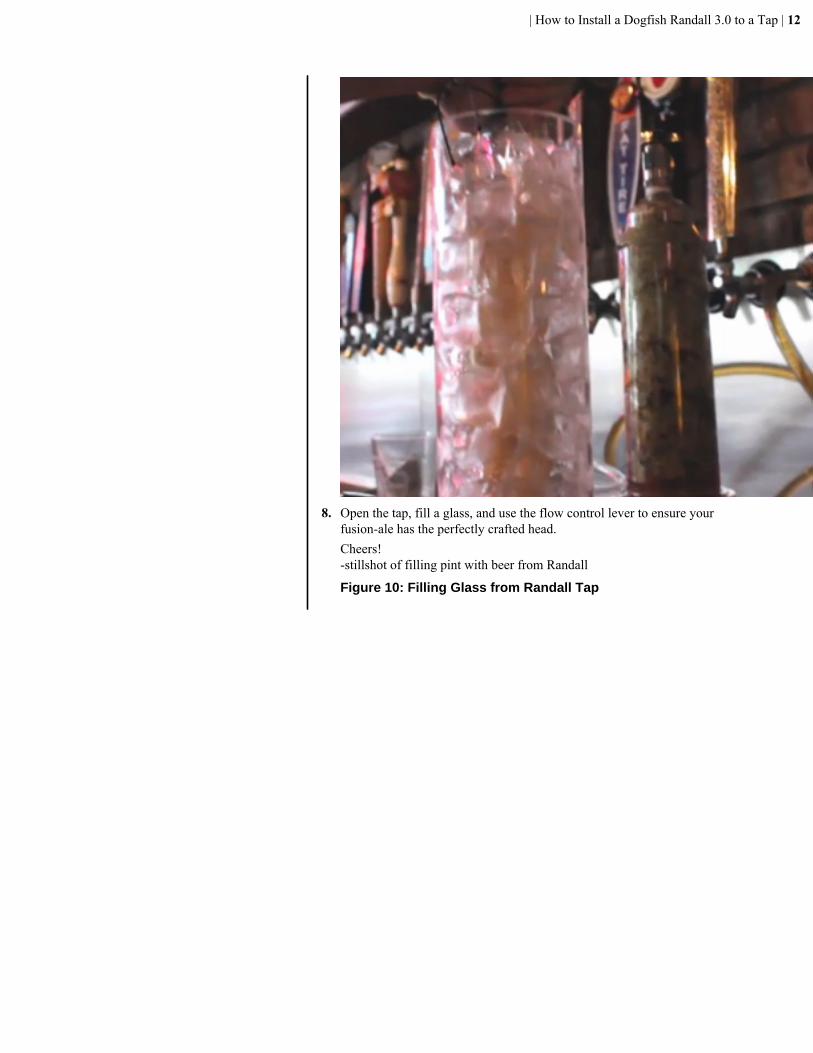
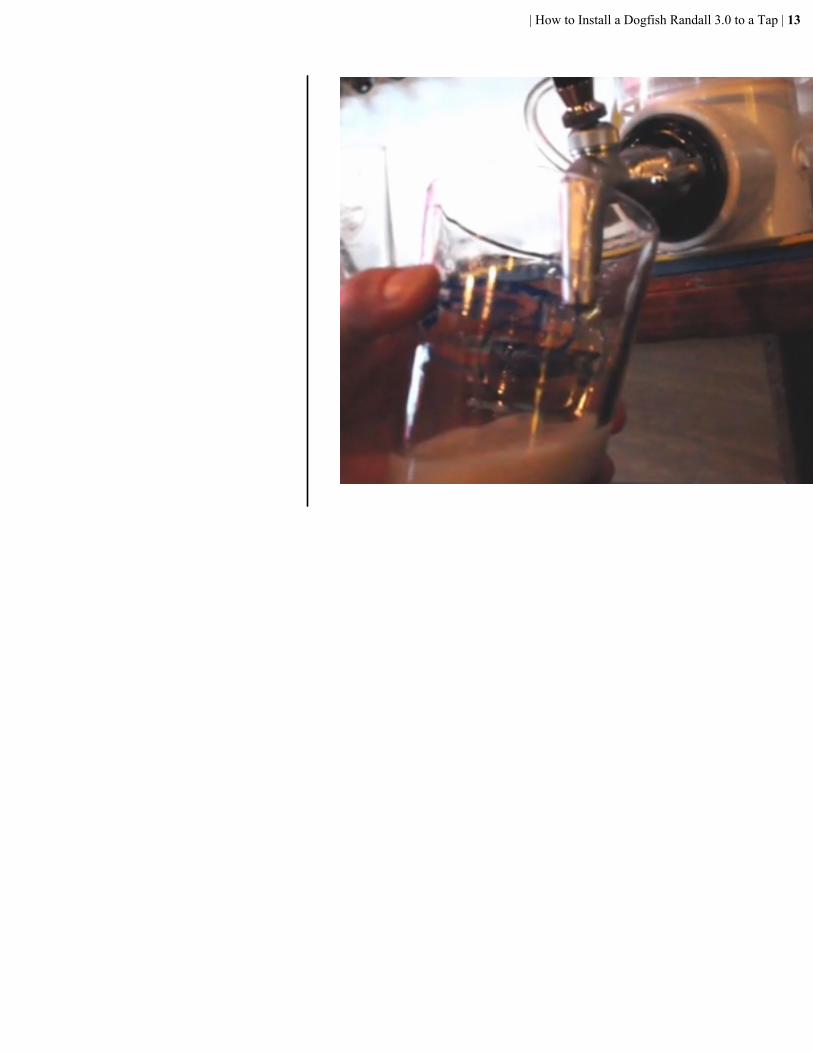
8. Open the tap, fill a glass, and use the flow control lever to ensure yourfusion-ale has the perfectly crafted head.Cheers!-stillshot of filling pint with beer from Randall
Figure 10: Filling Glass from Randall Tap
| How to Install a Dogfish Randall 3.0 to a Tap | 13

Chapter
3How to Clean your Dogfish Randall 3.0
Before cleaning your Randall 3.0, there are some important factors toconsider. First and foremost, it is IMPORTANT to clean and sanitize yourRandall 3.0 before and after each use. Make sure to empty, rinse, flush drainand drip-dry Randall 3.0 immediately after each use.
Randall 3.0 is not dishwasher safe, so don’t try taking the easy way out or youwill permanently damage your product.
Do not store a wet or beer soaked Randall 3.0.
Also, make sure to always follow the directions provided with the cleaningand sanitizing chemicals you choose: ignoring these things can and will causepermanent damage, and you wouldn’t want to ruin your experiment, wouldyou?
The following instructions are for when you’ve already used your Randall3.0 to make some type of beer delicacy. But, you can also follow this guide toclean and sanitize your Randall 3.0 before you venture into new territories ofinfusing foreign ingredients into your beer.
1. Turn off keg lineAfter the keg line has been turned off and the hose assembly has beendisconnected from the tap-line, disassemble the main components of theRandall. Remove the ice chamber and unscrew both transparent chambers(leaving both valves attached). Discard of any remnants left behind ineither chamber. Detach the Perlick faucet and hose assembly from theRandall using the included faucet wrench.
2. Clean RandallClean Randall 3.0 with brewery, beer-line or glassware cleaner, and warmwater (120 degrees farenheit maximum). Clean all components of theRandall: transparent chambers, main body, hose assembly and tap.Examples of brewery/beer-line cleaners:
• Micro-Matic CFP-1 Clean Flo Powder• Five Star Chemicals “PBW” Powdered Brewery Wash• National Chemicals “BLC” Beer Line Cleanser• Beer Clean “Glass Cleaner”• “Oxyclean”
3. Sanitize RandallSanitize all Randall 3.0 components with brewery or glassware sanitizer.Examples of brewery/beer-line sanitizers:
• Five Star Chemicals “Saniclean” final rinse acid• Five Star Chemicals “Star San” Sanitizer• Beer Clean “Last Rinse Sanitizer”

| How to Clean your Dogfish Randall 3.0 | 16
• “Iodophor”4. Dry Randall
Drain and drip-dry Randall 3.0 after cleansing and sanitizing has beencompleted.Randall 3.0 is ready to use (or store away)!
Chapter
4How to Infuse Vanilla and Espresso Beans for a StoutlyGood Time
Providing a “recipe” for an infusion is not exactly done with measurements,however, is done with the concept of learning and understandingcomplementary flavors. For example, most beer drinkers know that a Mexicanstyle pilsner/lager pairs well with lime, so infusing that type of beer with limewill produce a crisp, citrusy, refreshing beverage. The Mexican style beerand lime infusion can be taken a step further by adding a chopped up spicypepper, and maybe even some smoked wood-chips to create an even morecomplex flavor profile. Achieving particular flavor profiles can vary withthe type of beer used with each infusion. What kinds of beers should you touse to achieve, or even enhance what you want? Finding recipe ideas andthe ingredients used to achieve those results can assist a curious drinker (orserver) in delivering a unique and custom libation. To achieve a vanilla andespresso bean flavor in a stout, the concept is quite simple: get some vanillabeans, and whole espresso beans (any type depending on what level of coffeestrength you’re looking to get) and add them into the infusion chamber of theRandall 3.0. In my opinion, this particular combination goes well with milkstouts because they’re creamy from the lactose and are a little on the sweeterside, which balances the strong espresso beans.
For a vanilla and espresso bean infused stout do the following:
1. Pick your stout!Select a nice and balanced stout to infuse your ingredients with.Note: If you’re lost on what kind of stout you want to use, simply look up"stou"t on Wikipedia for a basic idea of the different types and narrow itdown that way.
2. Make sure your Randall 3.0 is clean and sanitized.After ensuring your Randall 3.0 has been cleaned and sanitized, follow the“How to Install a Dogfish Randall 3.0 to a Tap” instruction guide to attachyour Randall 3.0 to the tap line of the selected stout.
3. Add your ingredients.Once you reach Step 2 of the installation guide, that is when you willadd in a balanced combination of vanilla and espresso beans into thetransparent infusion chamber.Note: If you want more vanilla flavor, add more vanilla beans and less ofthe espresso beans, or vice versa
4. Continue through the rest of the installation guide.Follow the rest of the steps of the installation guide. Then, you’re ready tobegin your vanilla and espresso bean infusion!