Embed Size (px)
Citation preview

next slide 1
Using Digipan
A presentation on using Digipan software to pass messages and hold QSOs with other operators.
Part of a continuing program of training presented by Hernando County Amateur Radio Emergency Services.

next slide 2
Using Digipan
With so many programs that operate Phase Shift Keying (PSK), one might ask why use Digipan? One obvious reason is that it has been around for quite a while and is a very stable program which is important when you want software that you must depend on. The next benefit to Digipan is that this program will work on new PCs and older equipment with limited memory and it is well suited for sending text under less than desirable conditions. The program (version 2.0) can display more than one conversation at a time which can be very useful when there is a need to monitor a number of incoming signals.
It is known to work on an old 233 Mhz Laptop with 64 megabytes of memory running under Windows 98 SE. The recommended system for use is a computer with a 266 Mhz processing speed with Windows 95 or greater.
.

next slide 3
Using Digipan
Digipan can also operate under the Linux operating system. This has been verified using Ubuntu Linux version 8.04 using the Wine Emulator version 1.0. (Transmit and Waterfall settings must be set using the native sound controls as they do not function inside of Digipan when used under Linux.)
PSK can be used on HF, VHF, and UHF frequencies, modulated with AM, FM, or SSB, and it is implemented with very little hardware other than a radio, a method to connect the radio to a computer, and the software to send and receive with.
A more in depth discussion on this will follow later under the topic of Hardware Considerations.

next slide 4
PSK SignalsA Short explanation of PSK
Phaseshift keying (PSK) is a digital modulation scheme that conveys data by changing, or modulating, the phase of a reference signal (the carrier wave). There are three major classes of digital modulation techniques used for transmission of digitally represented data:
* Amplitudeshift keying (ASK) on off keying such as that used to send Morse code. * Frequencyshift keying (FSK) varies frequency to represent ones and zeros. An example would be its use in a telephone modem. * Phaseshift keying (PSK) – varies the carrier wave signal to represent ones and zeros. There are several versions of PSK and a portion of those will be discussed shortly.
( A benefit to using PSK is the ability for a signal to be sent at lower power levels than phone (voice) to go the same distance and it is much less susceptible to interference from close stations. Multiple conversations or text data can be sent on very close frequencies at the same time without loss of information. )

next slide 5
PSK Signals All shift keyed signals convey data by changing some part of a base signal in response to a data signal. In the case of PSK, the phase of the carrier wave is changed to represent the data signal. There are two basic ways of using the phase of a signal: * By viewing the phase itself as carrying the information, in which case the demodulator must have a reference, or clock signal to compare the received signal's phase against; or * By viewing the change in the phase as carrying information — differential schemes, some of which do not need a reference carrier (to a certain extent).
Digipan can use three variants of PSK which are well adapted to amateur radio use.
Binary Phase Shift Keying (BPSK) is a modulation technique that has proven to be very effective for use on the amateur radio bands. One form of this, known as PSK31, uses a small bandwidth of 31 Hertz to convey information. The coding, called Varicode, is similar to ASCII used in radio teletype (RTTY) excepting that loss of data synchronization is much less likely to occur with BPSK.

next slide 6
PSK Signals Another form of BPSK is PSK63 which uses an increased bandwidth of 63 Hertz to increase the speed of data sent. The third type is Quadrature phaseshift keying (QPSK). Sometimes this is known as quaternary PSK, quadriphase PSK, 4PSK, or 4QAM. QPSK uses four phases which are used to encode two bits per symbol, doubling the speed of data sent using the same band width as PSK31. This also reduces the bit error rate (BER) — sometimes misperceived as twice the bit error rate of BPSK.
A BPSK signal as shown on a constellation diagram.A BPSK signal as shown on a constellation diagram.
A QPSK signal as shown on a constellation diagram.
As you can see QPSK can send more information in the same amount of time, over the use of BPSK, although it does not seem to be used in preference over BPSK.

next slide 7
PSK Signals PSK31, PSK63, and QPSK are all available for you to use, with the Digipan software.
As of the year 2010, PSK31 seems to be the preferred method of sending text data digitally.
It does not matter which mode you choose for sending data as long as there is someone on the other end to receive it. There are enough subtle differences audibly as well as visually that you can usually tell what mode is being sent and can quickly change the mode that Digipan is in by the click of your mouse button.
This concludes the brief explanation of PSK.
The next discussion will focus on what hardware is required for use to connect a computer to your radio.

next slide 8
Hardware Considerations Computer: In order to get signals into and out of your computer a sound card and a communications port of some type are required. It also needs to meet the requirements of the software, which in this case is 266 Mhz speed and Windows version 95 or greater.
On older PCs, connection is not a big issue as most contain a sound card with line in (base line audio), line out (base line audio, also suitable for headphones or amplified speakers), and a microphone jack as well as an RS232 port for communications.
These older computers will work directly through either a “home brew” or a commercially purchased interface, which connect between the computer and the radio. (Interfaces will be discussed more in depth, after we finish with the computer topic).
(home brew means built or assembled at home, usually using junked parts from other equipment but may also apply to electronics assembled from kits)

next slide 9
Hardware ConsiderationsComputer: continued With newer computers there may be a sound card with a built in microphone (no jack to connect to) and built in speakers (also with no jack). The only communications port may be USB (Universal Serial Bus). It is still possible to connect this type of computer to your radio.
The first “down and dirty” method of connection is for you to be the interface. Hold your radio microphone close enough to the PC speaker that you get a modulation signal on your radio when it is keyed. You would key the radio, manually, whenever you press the transmit button in Digipan. Reception would be from the radio speaker to the PCs microphone. It is not an elegant method and can be illegal if non amateur information (such as Windows “you've got mail!”) goes out over the air, but it does work. (If you use this method, shut off Windows alerts in the sounds section of your computers control panel.) The second option is to use an interface that connects only to the USB port and includes a built in sound card (which will shut off your built in sound card until the interface is removed). One type of this interface is the Signal Link USB Computer Radio Interface and a link is provided in the references, at the end of this presentation.

next slide 10
Hardware Considerations Computer: continued Whether your computer is new or not so new, there are three things that need to be connected.
1) The sound out from the PC connects to the microphone input of the radio.
2) The sound out from the radio connects to the line in of the PC. (it may instead, connect to the microphone jack but some changes to the interface may be needed)
3)There needs to be a method to key the radio to transmit.
In the next slides, the Interface which provides the connections, between the radio and the computer, will be discussed.

next slide 11
Hardware Considerations Interface: Note: There are many individuals that prefer kit building, or scratch building, over buying a piece of equipment and they are to be commended. There is a good amount of satisfaction that comes from doing it yourself. However, recent changes to local electronic stores have made it more difficult to obtain parts deemed necessary to construct an interface from local vendors, without excessive cost. Any person wishing to home brew an interface should be aware that the sound input and isolation transformers discussed here will have to be mail ordered. There are references at the end of this presentation for links and sources of information.
Even with commercial interfaces there may be a certain amount of soldering involved.
With that being said, let us take a look at several interfaces and how connection can be made between the radio and computer.

next slide 12
Hardware Considerations Interface: continued A very simple interface, without isolation, can be built from the images on this slide. Please remember that the use of radio and computer equipment without isolation can be dangerous or in some cases, lethal. Proceed with caution.
This type of interface can be used between a battery powered hand held radio and a battery operated notebook computer. The only additional parts would be the proper connections for the computer and the radio. This type of interface should NOT be used with equipment connected to AC (mains) voltages.
The images used here are modified from a web page provided by Ernest Mills, WM2U and dedicated to PSK and interfacing. You can find more information on this and other interfaces at:
http://www.qsl.net/wm2u/psk31.html

next slide 13
Hardware Considerations Interface: continued
This interface, includes complete isolation between the radio and computer equipment which can be connected to either mains power (AC) or batteries. You may notice that the computer provides power for the relay (K1) for the push to talk circuit.
The image used here is from a web page provided by Ernest Mills, WM2U and dedicated to PSK and interfacing. You can find more information on this and other interfaces at:
http://www.qsl.net/wm2u/psk31.html
Note: There is no information given in these slides for adjustments for sound levels or special instructions for assembly. The images are to be considered for reference only. If you wish to build a particular interface, please go to the referenced web page for more complete information.

next slide 14
Hardware Considerations Interface: continuedThis final home built interface, also has complete isolation and includes an integrated circuit to provide some signal conditioning for the incoming signal.
The author built this interface by James Mitrenga, N9ART and it works well for many digital modes. If you use this interface with a computer microphone input, you may need to omit R11 or reduce its value to get enough output to drive your radios RF amplifier.
The image used here is from http://www.qsl.net/wm2u/psk31.html

next slide 15
Hardware Considerations Interface: continued
At this point we will take a look at a couple of commercial units which are available for purchase. As stated previously, the cost on many of these is less than you can build one for.
Here you can see the Signal link USB interface which contains a built in sound card so connection to the computer is easy. Several cable assemblies are available for connection to many radios. Jumper wires are used to make internal connections. For a few radios there are plug and play jumper modules which do away with the need to set jumper wires.
More information can be found at: http://www.tigertronics.com

next slide 16
Hardware Considerations Interface: continued
This is the SCI6, an inexpensive kit interface which is assembled on a pre printed circuit board. You must supply the mike plug for your radio. The other connections to the interface are made through RCA jacks which are available from a wide variety of sources.
For more information see: http://www.unifiedmicro.com/sci6.htm

next slide 17
Hardware Considerations Interface: continued
Rigblaster from West Mountain Radio offers a good selection of interfaces. This one is a plug and play which plugs into the USB, for power and push to talk connection, and stereo plugs to connect to the sound card.
For more information see: http://www.westmountainradio.com

next slide 18
Hardware Considerations Interface: continued
Above is the Rigblaster Pro which claims to operate virtually all sound card digital modes. There are a great many radio cables for it and instructions for making your own if desired.
For more information see http://www.westmountainradio.com

next slide 19
Hardware Considerations The Radio:
It has been previously mentioned that PSK signals will travel on AM, FM, and SSB carrier waves and it will work on HF, VHF, and UHF frequencies. While some local groups and experimenters use the higher frequencies for operation, you will find the greatest amount of amateur contacts on HF.
Any radio that you choose for operation will require the same three interface connections: 1) Sound input or microphone 2) Sound output or speaker connection 3) Push to talk connection (some operators use the VOX circuit of the radio)
You do not need much RF amplification and most users of PSK will tell you that lower power is better. A typical radio is built for a duty cycle of less than 100 percent so cutting back on your output can help to extend the life of your radio. Five Watts is fine for local HF SSB operation and Thirty Watts on HF SSB will send your signal into Europe from the Southern US.

next slide 20
Hardware Considerations Radio: continued
Emcomm users may find good use of running PSK on VHF or UHF as the radios used for these frequencies are commonly used for emergency events and can quickly be changed from phone operation to digital operation for passing messages. Remember to follow your band plan for digital operations such as 144.900 Mhz through 145.20 Mhz for 2 meter operation in the US.
This concludes the section on Hardware considerations.
In the following section on Digipan the topic will follow installation and setup of the program and putting Digipan to use for regular communication and messaging.

next slide 21
Using Digipan Installation of the program:
There are two versions of Digipan currently available, the first one being version 1.7 which does not have multiple channel reception and is suitable for slower (really slow) computers.
(as previously mentioned, the author has been using version 2.0 on a 233 Mhz notebook with 64 MB of memory with out any issues so version 1.7 would be used only if you have issues running version 2.0)
The other 2.0 version contains multiple channel decoding and an excerpt from the web site says a mouth full:
“All stations on the waterfall are simultaneously decoded, and the callsign and text of each station is continuously shown on a separate multichannel display. CQ calls are instantly highlighted in color, and color alerts for any other two strings of text are also available. Since the callsign and text of each station is already known, instead of clicking on a signal to identify and contact a station, just clicking on the text or callsign of the desired station will transfer it to the active Receive area for a contact.”
Both versions are available from the download page at: http://www.digipan.net/

next slide 22
Using Digipan Installation of the program:
Digipan 2.0 works best on a 266 MHz or faster Pentium processor and requires Windows 95 or greater. Instructions are on the site for downloading and as of August, 2010 there is one .EXE file for version 2.0 or Zipped program files for both versions to choose from.
( a ZIP file is an archived folder containing the program which is reduced in size to save transmission time)
For Windows XP and above you just download the file and click on it to open. On older versions of Windows you may need WinZip or some other archiving program to open the zip file with.
WinZip is available from: http://www.winzip.com
From the Digipan website:
“Before installing any new version of DigiPan, or reinstalling an older one, first quit any running version of DigiPan, locate digipan.ini in the Windows directory (folder), delete digipan.ini, and then install DigiPan. After any reinstallation, you will have to reconfigure your personal data and any custom macros.”

next slide 23
Using Digipan Installation of the program:
As the program is installing the recommendation is to take all of the default installation points until you get to Select additional tasks. At this point put a check in the box for creating a desktop icon which will make starting the program easier.
After clicking the next button the program will finish installation. If the program does not start automatically click on the desktop icon for Digipan to start up so that the preliminary configuration information can be entered.Note: The images used in this presentation are from version 2.0 of the Digipan software. Version 1.7 should be similar.

next slide 24
Using Digipan Configuration of the program:
The first time you start Digipan you should see the personal data window. If not click on configure from the top menu bar and select Personal Data from the drop down menu.
In this window you will enter your FCC licensed call sign, your name, and and your location (QTH) which will usually be entered in a format of City, State. It is optional to put a check in the box to Use Cw ID. Once you do this you can edit the CW message but DE <Your Call> SK is all you should need for ID purposes. The ID speed can be set slow (20 WPM) or fast (50WPM). Once completed click on OK.
Note: ID is normally sent at the beginning of a transmission and should be done at the end of it using the format <other station call> DE <your call>. Cw ID is not on a timer and you must press a button to send it out over the air, so its usefulness for ID becomes optional.

next slide 25
Using Digipan Configuration of the program: continued
This is the main screen for Digipan 2.0. Below the blue title bar is the menu bar, the function bar and the QSO log bar. On the center left is the receive window, and on the right you find the multichannel receive window (which is not available on version 1.7). Under the receive screens is the transmit text entry window. The black window is the waterfall spectrum screen where incoming signals are displayed.
The bottom bar contains status, time, date, and signal information.

next slide 26
Using Digipan Configuration of the program: continued
The next items to configure are the serial port connection and PTT drive, waterfall drive, and transmitter drive. Now is the time to make connections between the interface and computer if you have not already done so. First we will set the serial port and PTT drive. Click on configure and select serial port from the drop down menu.
You should leave the PTT connection to your radio disconnected until configuration is complete so that there is no accidental keying of the radio.

next slide 27
Using Digipan Configuration of the program: PTT settings
It is necessary to physically connect to an unused serial port and then select that same serial port in DigiPan. If you have only one serial port than it is most likely Com1. A quick look at the Ports (Com & LPT) in Windows Device Manager may be of some help here. USB serial is set the same way.
Some interfaces use just one of the serial pins, RTS (pin7 on a DB9 connector) or DTR (pin4 on a DB9 connector). Other interfaces may use both pins. There should be information on this available in the paper work associated with your interface.
Note: If you are in doubt, connect everything on the interface except PTT to your radio, load Digipan, set RTS as PTT, click on OK and press the T/R button. You should see some indication that the interface is transmitting (light, audible relay click, etc.). If nothing occurs try DTR as PTT and finally try both RTS and DTR together.
(There is more information in Digipan's help file. )

next slide 28
Using Digipan Configuration of the program: PTT settings
The check box for Use Icom CIV should only be used IF you have an Icom radio that has a CIV remote control port and you have the special cable to connect it to the computer. This check box allows special commands to be passed to the Icom radio from the computer.

next slide 29
Using Digipan Configuration of the program: Receive settings
The next setup will be for Digipan's receive levels. If you are capable of HF operation, tune to 20 meters and 14070 Htz. This seems to be the most active frequency for PSK during the day. If you are not able to tune to this frequency, any frequency where you can hear a CW (Morse code) signal will work for setting the receive level and waterfall display (although the incoming data will not be decodeable by Digipan). You should see blue show up on the black waterfall display and if signals are present there will be vertical blue lines with yellow streaks moving down the display.
In Digipan click on mode in the menu bar and put a check next to BPSK31. Next, click on configure and select Waterfall drive.

next slide 30
Using Digipan Configuration of the program: Receive settings
This is the Waterfall drive window (for XP) where the receive level for the program is set. Set the radio for normal phone operating levels and adjust the programs volume level until the waterfall screen looks similar to the screen below. “If you are using Windows 95, to get to the Recording Control window, select Options/ Properties/. Adjust volume for recording and press OK. Be sure either Microphone or Line level controls are checked for display.” (from Digipan Help)
Notice that the microphone volume is being adjusted in this image. There is no line in on the PC running this program, so the microphone jack is used instead. This can be an option for you if receive levels are too low using the LINE IN jack. There is more information available from Digipan's help file under Receiving PSK31.
next slide 31
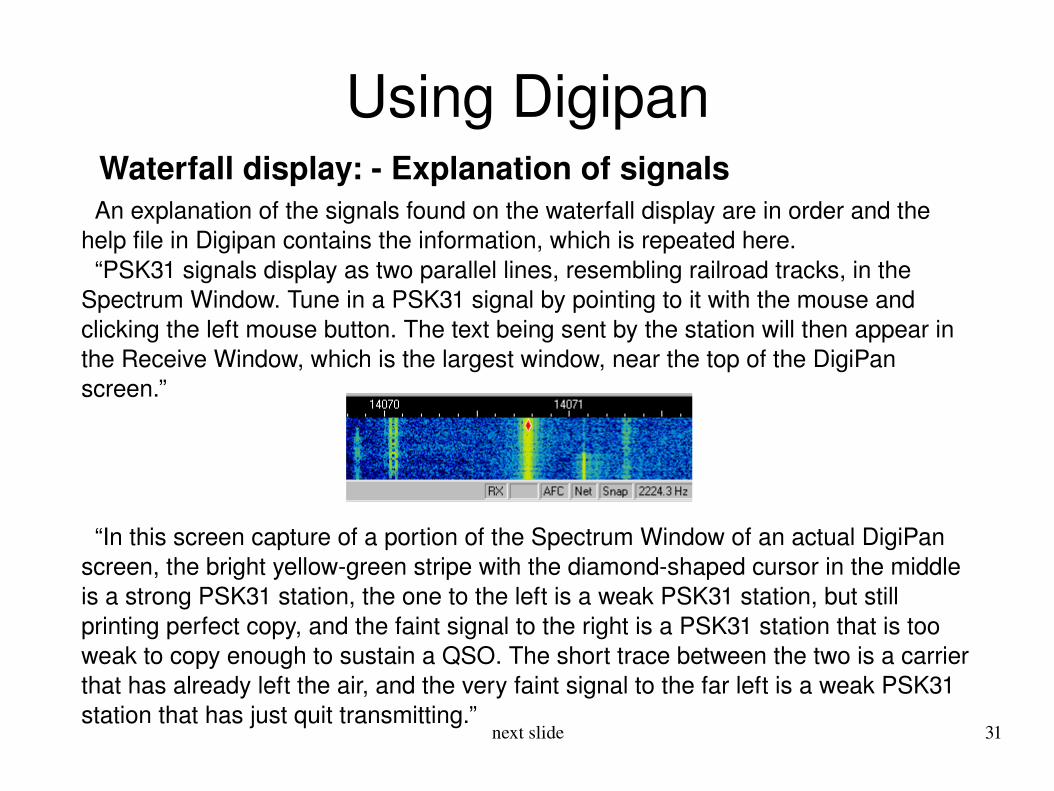
Using Digipan Waterfall display: Explanation of signals
An explanation of the signals found on the waterfall display are in order and the help file in Digipan contains the information, which is repeated here. “PSK31 signals display as two parallel lines, resembling railroad tracks, in the Spectrum Window. Tune in a PSK31 signal by pointing to it with the mouse and clicking the left mouse button. The text being sent by the station will then appear in the Receive Window, which is the largest window, near the top of the DigiPan screen.”
“In this screen capture of a portion of the Spectrum Window of an actual DigiPan screen, the bright yellowgreen stripe with the diamondshaped cursor in the middle is a strong PSK31 station, the one to the left is a weak PSK31 station, but still printing perfect copy, and the faint signal to the right is a PSK31 station that is too weak to copy enough to sustain a QSO. The short trace between the two is a carrier that has already left the air, and the very faint signal to the far left is a weak PSK31 station that has just quit transmitting.”

next slide 32
Using Digipan Configuration of the program: Transmit settings
There are two adjustments that should be made to transmit properly using PSK. One is the adjustment to the audio output from the computer and the other is the RF output at the transmitter.
You may want to turn off the Windows sounds which will keep the error beeps, audible clicks, and the ever popular “You've got mail!” from going out over the air waves. This is done from Windows control panel (image to left is from XP) and selecting “sounds and audio devices”. The second tab is sound. Make sure you save your current sound scheme under a name of your choosing. Then select No Sounds under sound schemes and press Apply and then OK. This will turn off the Window's sounds. (Other versions of Windows will be similar)

next slide 33
Using Digipan Configuration of the program: Transmit settings
In Digipan, press the T/R button to transmit. Click on configure and select transmitter drive which will bring up the screen to select volume for output to the radio.
“When you are transmitting, and not typing or sending text, the Transmit Volume should be increased until the RF output power of the transceiver just stops increasing, and then reduced until the power falls to half of the amount when it just stopped increasing. This should result in maximum undistorted output power under PSK31 operation. However, some transceivers cannot handle the duty cycle of PSK31 without overheating. In this case, quickly reduce the power until the transceiver is running at the recommended power output for continuousduty operation.” (from Digipan help)
Windows XPTransmitter drive screen
Note:Make sure that your PTT is connected to the radio

next slide 34
Using Digipan Configuration of the program: Transmit settings
When you are communicating with another operator you may receive an IMD report. IMD stands for InterModulation Distortion which is a figure of merit of the received signal in decibels. This figure is taken from the Un modulated signal at the beginning or end of a transmission, when no data is being sent. (pure PSK tone while the carrier is still being transmitted) 30db is a good report and the lower the figure is the more distortion, with 10db being a worst case figure. The averages of a few IMD reports can give you a pretty good idea if you are sending out a good signal or if you need to cut back on your output volume level (which equates to the modulation level). If you receive reports of 26 to 30 db your distortion is low and your signal is in good shape. If the averages of your received IMD reports is 25db or below, chances are good that you are over modulating the PSK signal and in need of cutting back on the transmit drive signal. There is much more information on IMD in the digipan help file. If you have a second reciever it is possible to monitor your own signals for IMD. Search the index under status bar and under mode.

next slide 35
Using Digipan PSK Frequencies:
These are the suggested frequencies for PSK communication:
160 meters 1.838 MHz 80 meters 3.580 MHz40 meters 7.035 MHz 30 meters 10.140 MHz20 meters 14.070 MHz17 meters 18.100 MHz 15 meters 21.080 MHz 10 meters 28.120 MHz 6 meters 50.290 MHz2 meters 144.144 MHz70 centimeters 432.2 MHz33 centimeters 909 MHz

next slide 36
Using Digipan Getting on the air: Macros
When you communicate using PSK, most transmissions will be similar to CW or RTTY in that you will be using Q signals and Pro signs as well as normal text for communication. Some of this has been automated in Digipan to make it easier to communicate and you can write and save Macros to function buttons to save typing.
(A macro is a combination of text and special commands which will be “played back” on the press of one, or a combination of buttons)

next slide 37
Using Digipan Getting on the air: Macros
One such macro is the CQ button which has the pre defined macro:
<TX>CQ CQ CQ DE <MYCALL> <MYCALL> <MYCALL> pse K <RXANDCLEAR>
When you press the CQ button it will turn on the transmitter and send out “CQ CQ CQ DE KC4MTS KC4MTS KC4MTS pse K” and then it will turn off the transmitter (go into receive) and clear the receive screens automatically. CQ means literally “seek you”, DE is a prosign meaning from, KC4MTS is the authors callsign, pse is a abreiviation meaning “please”, and K is a prosign meaning “any station go ahead.
( What ever is entered into Call in the configure – personal data section of Digipan will be used for <MY CALL>)

next slide 38
Using Digipan Getting on the air: Macros
Digipan has twenty four buttons for macros which can be selected from the keyboard or from the function bar on the screen. Pressing the carot button to the right of the function buttons will toggle the regular and “control +” function bar. All of the macros can be edited by right clicking on the desired macro button.
“To add a CW ID to the default signoff macro, Right click on “signoff”, add <CWID> to the end of the macro, so that it reads “73 <CALL> DE <MYCALL> SK<CWID>” and select OK. <CWID> can also be assigned to a separate function key, as can <TIME> and <DATE>, but DigiPan's log also logs the time and date automatically. If you use CW ID, keep in mind that while it is executing, the other station is printing only garbage. For that reason, you might want to use CW ID only at the end of your signoff macro.” (modified from Digipan help)

next slide 39
Using Digipan Getting on the air: Macros
The labels for the buttons can be changed by typing in the box “Label for F#:” or “Label for CtrlF#:”.
(There is more information on macro programming in the Digipan help file.)
One very useful Macro is the File Button. When you press File it will allow you to load a text file into the transmit screen and will be sent when you press the T/R button. In this manner you can prepare ahead of time, a formal Radiogram, long winded brag files, anything else that can be sent in text form and send it when you are ready.
Note: Macros do not work inside of a text file; They must be entered into one of the function buttons.
next slide 40
Using Digipan Getting on the air: Macros
If you wish to make a macro for later use, it can be created in one of the 24 function buttons then saved by pressing configure and select save macros. This will save the entire set so you can change all of the macros at one time, for a special use, and save it with a unique name. When you decide to use it, you would click on configure and select load macros. Be sure to save the existing macros as default.mac so you can call them up again.
The next slides are on the topic of Prosigns.

next slide 41
Using Digipan Getting on the air: Prosigns
Prosigns, short for procedural signs, are used quite often when operating CW, RTTY, and Digital modes such as PSK.
CQ Calling any station AR over, end of message (sometimes written as + )AS – wait (as in 10 seconds); please stand byBK – Break (break for text; break for signature); invite receiving station to transmitBT – a separation in a message (sometimes written as = )CL – closing station; turning off the equipment; going off the air (clear)CT – commence transmission; start of a messageK go, invite any station to transmitKN go only, invite a specific station to transmit (sometimes written as “(“ )R all received OKSK end of contact (sent before call)SN – UnderstoodSOS – used only for life threatening EMERGENCY, it means “Save Our Souls”
next slide 42
Using Digipan Getting on the air: Q signals
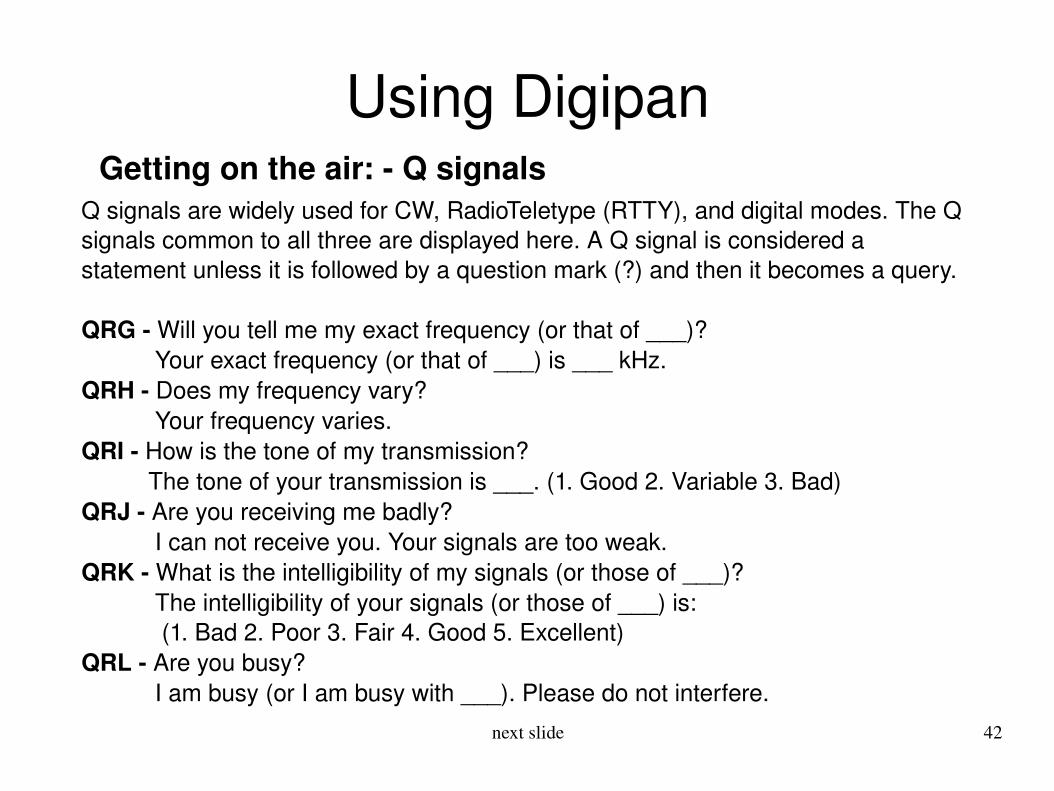
Q signals are widely used for CW, RadioTeletype (RTTY), and digital modes. The Q signals common to all three are displayed here. A Q signal is considered a statement unless it is followed by a question mark (?) and then it becomes a query.
QRG Will you tell me my exact frequency (or that of ___)? Your exact frequency (or that of ___) is ___ kHz.QRH Does my frequency vary? Your frequency varies.QRI How is the tone of my transmission? The tone of your transmission is ___. (1. Good 2. Variable 3. Bad)QRJ Are you receiving me badly? I can not receive you. Your signals are too weak.QRK What is the intelligibility of my signals (or those of ___)? The intelligibility of your signals (or those of ___) is: (1. Bad 2. Poor 3. Fair 4. Good 5. Excellent)QRL Are you busy? I am busy (or I am busy with ___). Please do not interfere.

next slide 43
Using Digipan Getting on the air: Q signals
QRM Is my transmission being interfered with? Your transmission is being interfered with ___. (1. Nil 2. Slightly 3. Moderately 4. Severely 5. Extremely)QRN Are you troubled by static? I am troubled by static . (15 as under QRM)QRO Shall I increase power? Increase power.QRP Shall I decrease power? Decrease power.QRQ Shall I send faster? Send faster ___. (WPM)QRS Shall I send more slowly? Send more slowly ___. (WPM)QRT Shall I stop sending? Stop sending.

next slide 44
Using Digipan Getting on the air: Q signals
QRU Have you anything for me? I have nothing for you.QRV Are you ready? I am ready.QRX When will you call me again? I will call you again at ___ hours (on ___ kHz).QRY What is my turn? Your turn is numbered ___.QRZ Who is calling me? You are being called by ___ (on ___ kHz).QSA What is the strength of my signals (or those of ___)? The strength of you signals (or those of ___) is ___. (1. Scarcely perceptible 2. Weak 3. Fairly good 4. Good 5. Very good)QSB Are my signals fading? Your signals are fading.

next slide 45
Using Digipan Getting on the air: Q signals
QSD Is my keying defective? Your keying is defective?QSG Shall I send ___ messages at a time? Send ___ messages at a time.QSK Can you hear me in between your signals and if so, can I break in on your transmission? I can hear you between my signals; break in on my transmission.QSL Can you acknowledge receipt? I am acknowledging receipt.QSM Shall I repeat the last message I sent you, or some previous message? Repeat the last message you sent me [or message(s) number(s) ___].QSN Did you hear me (or ___) on ___ kHz? I did hear you (or ___) on ___ kHz.QSO Can you communicate with ___ direct or by relay? I can communicate with ___ direct (or by relay through ___).QSP Will you relay to ___? I will relay to ___.

next slide 46
Using Digipan Getting on the air: Q signals
QST General call preceding a message addressed to all amateurs and ARRL members. This is in effect, "CQ ARRL".QSU Shall I send or reply on this frequency (or on ___ kHz)? Send a series of Vs on this frequency (or on ___ kHz).QSW Will you send on this frequency (or on ___ kHz)? I am going to send on this frequency (or on ___ kHz).QSX Will you listen to ___ on ___ kHz? I am listening to ___ on ___ kHz.QSX Will you listen to ___ on ___ kHz? I am listening to ___ on ___ kHz.QSY Shall I change to to transmission on another frequency? Change transmission to another frequency (or ___ kHz).QSZ Shall I send each word or group more than once? Send each word or group twice (or ___ times).QTA Shall I cancel message number ___? Cancel message number ___.

next slide 47
Using Digipan Getting on the air: Q signals
QTB Do you agree with my counting of words? I do not agree with your counting of words. I will repeat the first letter or digit of each word or group.QTC How many messages have you to send? I have ___ messages for you (or for ___).QTH What is your location? My location is ___.QTR What is the correct time? The correct time is ___.
There are more Q signals but this list covers the greater amount used for amateur radio.
Next we will look at common abbreviations used when communicating.

next slide 48
Using Digipan Getting on the air: Abbreviations
Abbreviations are quite common for digital modes. Here is a list of common ones.
AA All after AB All before ABT About ADR Address AGN Again AM Amplitude Modulation ANT Antenna BCI Broadcast Interference BCL Broadcast Listener BK Break, Break in BN All between; Been BUG SemiAutomatic key B4 – Before
C – YesCFM Confirm; I confirm CK CheckCLCLD – CalledCLG – CallingCQ Calling any station CW Continuous waveDLD – DeliveredDLVD – DeliveredDR – DearDX – DistanceES And

next slide 49
Using Digipan Getting on the air: Abbreviations
FB Fine Business, excellent FM Frequency Modulation GA Go ahead GM Good morning GN Good night GND Ground GUD Good HI The telegraph laugh; HighHR Here; Hear HV Have HW How LID A poor operator MA Millamperes MILS – Millamperes
MSG Message; Prefix to radiogram N No NCS Net Control StationND Nothing DoingNIL Nothing; I have nothing for youNM No moreNR Number NW Now; I resume transmission OB Old boy OC Old chap OM Old manOP OperatorOPR OperatorOT Old timer; Old top

next slide 50
Using Digipan Getting on the air: Abbreviations
SED SaidSIG Signature; SignalSINE Operator's personal initials or nicknameSKED – ScheduleSRI SorrySSB Single Side BandSVC Service; Prefix to service messageT ZeroTFC TrafficTMW Tomorrow TKS Thanks TNX Thanks
PBL – PreamblePSE – PleasePWR – PowerPX – PressR Received as transmitted; AreRCD – ReceivedRCVR – ReceiverREF Refer to; Referring to; ReferenceRFI Radio frequency interferenceRIG Station equipmentRTTY Radio teletypeRX Receiver SASE – Selfaddressed, stamped envelope

next slide 51
Using Digipan Getting on the air: Abbreviations
WDS WordsWKD Worked WKG WorkingWL Well; WillWUD WouldWX WeatherXCVR TransceiverXMTR TransmitterXTAL CrystalXYL WifeYL Young lady73 Best Regards88 Love and kisses
There may be more abbreviations in use but these cover the more common ones. When communicating during an emergency event it is recommended to not use any abbreviations.
TT ThatTU Thank youTVI Television interferenceTX TransmitterTXT TextUR Your; You'reURS YoursVFO Variable Frequency OscillatorVY VeryWA Word afterWB Word beforeWD Word

next slide 52
Using Digipan Getting on the air: Conversing
In order to help you get comfortable using PSK digital modes there is a scenario with narration that we will cover. It is typical of what you will find on a first contact.
First Contact Scenario
You get your PC and Radio turned on and tuned up, load Digipan on the PC, and the interface is hooked up and ready to go. On the waterfall screen you can see some activity and the multi channel receive window is filling up with conversations.
You move the mouse to the waterfall screen and click on one of the brighter yellow lines running down the screen and the left receive screen starts to fill up with an on going QSO.

next slide 53
Using Digipan Getting on the air: Conversing
A typical QSO (contact) is on the left screen which is the incoming signal we selected in the waterfall screen. You can also select it by clicking on the appropriate line in the multi channel window.
You double click on KA4BMA in the receive window which places the call sign into the QSO bar and then wait for the ongoing QSO to end.
When the present conversation ends you click on Call3 which transmits:KA4BMA KA4BMA KA4BMA DE KC4MTS KC4MTS (and switches back to receive)(Now you wait for a few seconds to give the other station some time to do a callsign look up or to reply. Not all stations use a lookup and some do not even keep a log.)

next slide 54
Using Digipan Getting on the air: Conversing
(the other station replies...)KC4MTS DE KA4BMA Hello Alan, You are a very close station. Glad to have the QSO. Your RST is 599 and I am getting an IMD of 18db so you may want to cut back on output a little bit. Name on this end is Mark Mark and I am also in Hernando County. Rig hr is a kenwood TS430 hooked to a 2 ghz Dell. Software is multipsk. How copy? KC4MTS DE KA4BMA KN (most of this is readable but QSO means contact, RST is short for readability, strength, tone and is a signal quality report, IMD is short for InterModulation Distortion and for PSK this is the more important signal report, hr is short for here, DE means from and KN means “go you only” ) (kc4mts replies)KA4BMA DE KC4MTS tnx for QSO Mark! I have cut back on output so pse ck me on next tx. I am over in spring hill running a kenwood ts120s at about 40 watts and I am using Digipan on a dell 2400. Your IMD is 28 and RST is 599. I just started using PSK so be gentle HI. I am still trying to work out what I can do with digital modes but it is fun BTU KA4BMA DE KC4MTS KN

next slide 55
Using Digipan Getting on the air: Conversing
(tnx, pse, ck, and tx are abbreviations for thanks, please, check, and transmission. BTU is short for back to you. You may notice that both operators are not capitalizing all prosigns and abbreviations. This is part of a casual conversation and is common on PSK. If you are sending formal traffic it is good practice to capitalize where appropriate. Q signals and prosigns are normally capitalized and abbreviations are optional, both for use and for capitalization) (in the previous transmission KC4MTS pressed a couple of macro buttons. The first one was Call which sent KA4BMA DE KC4MTS and at the end of transmission he pressed BTU which sent BTU KA4BMA DE KC4MTS KN. The rest of the information was sent by typing in on the keyboard.) (KA4BMA replies)KC4MTS DE KA4BMA Yr IMD is now 26db so you are in pretty good shape. I cannot QSO long as I have to get onto HF for the midday traffic net. Beside radio what do you do for fun? BTU KC4MTS DE KA4BMA KN (no need for further explanation on this transmission)

next slide 56
Using Digipan Getting on the air: Conversing
KA4BMA DE KC4MTS for fun? I play with home brewing, electronics, programming, computers, playing bagpipes. Jack of all trades and master of none. You said you were going on midday? Can you take a piece of traffic for me? I will miss the net today BTU KA4BMA DE KC4MTS KN (the conversation just got more formal as Alan KC4MTS is requesting that Mark KA4BMA take some traffic)KC4MTS DE KA4BMA Ready to copy BTU KC4MTS DE KA4BMA KN
(Mark is now ready to receive the traffic which is listed on the next slide.)
next slide 57
Using Digipan Getting on the air: Conversing
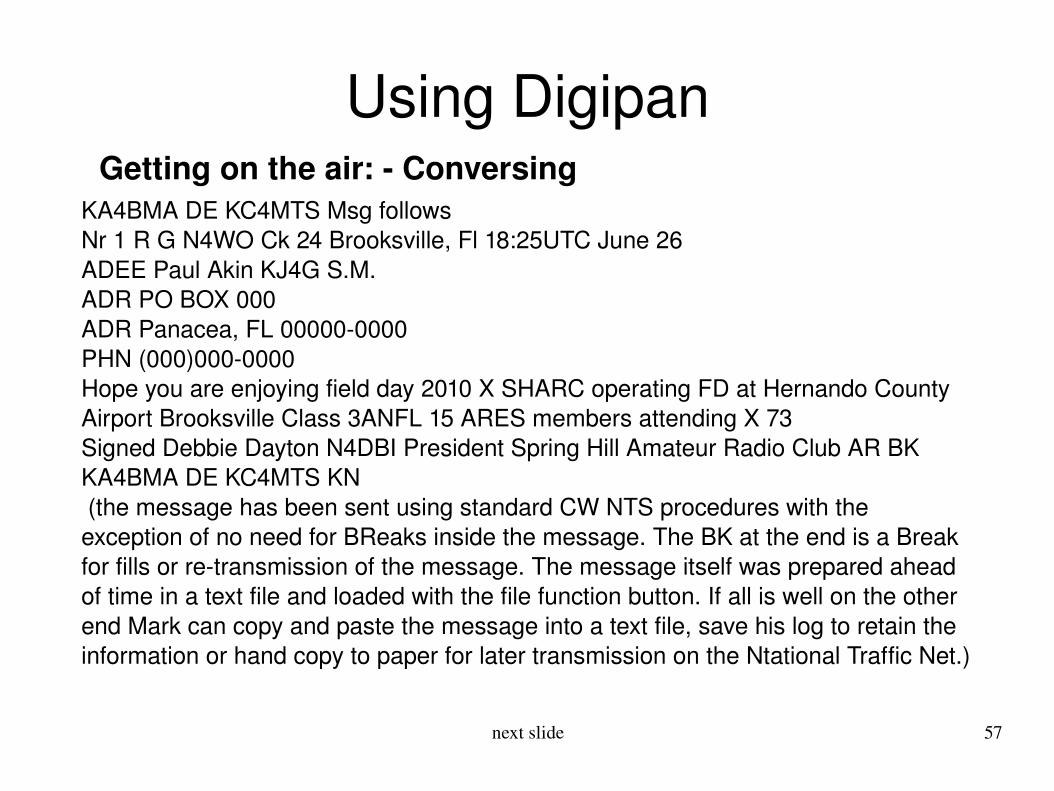
KA4BMA DE KC4MTS Msg followsNr 1 R G N4WO Ck 24 Brooksville, Fl 18:25UTC June 26ADEE Paul Akin KJ4G S.M.ADR PO BOX 000ADR Panacea, FL 000000000PHN (000)0000000Hope you are enjoying field day 2010 X SHARC operating FD at Hernando County Airport Brooksville Class 3ANFL 15 ARES members attending X 73Signed Debbie Dayton N4DBI President Spring Hill Amateur Radio Club AR BK KA4BMA DE KC4MTS KN (the message has been sent using standard CW NTS procedures with the exception of no need for BReaks inside the message. The BK at the end is a Break for fills or retransmission of the message. The message itself was prepared ahead of time in a text file and loaded with the file function button. If all is well on the other end Mark can copy and paste the message into a text file, save his log to retain the information or hand copy to paper for later transmission on the Ntational Traffic Net.)

next slide 58
Using Digipan Getting on the air: Conversing
KC4MTS DE KA4BMA RCVD YR NR 1, No fills. Will get it out on NTS today. Bagpipes Hmmm, unusual instrument. Do you wear dresses too HI? Just kidding. I am like you... too many hobbies and no money for them HI. Well, I had best clear and get ready for the net. Good QSO and God Bless. 73. KC4MTS DE KA4BMA SK
(Mark has received the message and needs no repeat of information, continued on with the previous conversation, and is getting ready to close his station)
KA4BMA DE KC4MTS Good talk and tnx for taking the message. I will be on again tomorrow this time to rag chew. See you then 73.KA4BMA DE KC4MTS SK
(This concludes the scenario and you will find that parts of it are common to working with most digital modes.)
This concludes the presentation. What follows is the acknowledgments and links.

next slide 59
Using Digipan Acknowledgments:
Author: Alan McGrew [email protected] please email me with corrections.
To my wife Carmen who has put up with me once again to knock out another powerpoint presentation.
To the ARRL for providing a central point for amateur representation and being a repository of information on the radio arts.
To the guys and girls in H.C. ARES that still have to read and learn this stuff and to all other groups who may have to do the same.
To Spring Hill Amateur Radio Club. Good Folks, Good Meetings, Good Times!

next slide 60
Using Digipan Links: Interfaces
USB interface with built in sound card http://www.tigertronics.comInexpensive sound card interface http://www.unifiedmicro.com/sci6.htmRigblaster brand of interfaces http://www.westmountainradio.com
Source of PSK information http://www.qsl.net/wm2u/psk31.html http://google.com is a good search engine. Some key words to use are PSK, BPSK, sound card interface, PSK digital software, digipan, multipsk, and I am sure that you can think of some other ones.
73 DE KC4MTS SK