Embed Size (px)
Citation preview

A
Published by Macmillan/McGraw-Hill, of McGraw-Hill Education, a division of The McGraw-Hill Companies, Inc.,
Two Penn Plaza, New York, New York 10121.
Copyright © by Macmillan/McGraw-Hill. All rights reserved. No part of this publication may be reproduced
or distributed in any form or by any means, or stored in a database or retrieval system, without the prior written consent
of The McGraw-Hill Companies, Inc., including, but not limited to, network storage or transmission, or broadcast for
distance learning.
Printed in the United States of America
1 2 3 4 5 6 7 8 9 079 09 08 07 06
All photographs are by Macmillan/McGraw-Hill (MMH) except as noted below.
Cover Photos: (bkgd) David Keith Jones/Images of Africa Photobank/Alamy; (sky) Digital Vision/PunchStock;
(inset) Joseph Van Os/The Image Bank/Getty Images.
Science Content Standards for California Public Schools reproduced by permission, California Department of Education, CDE
Press, 1430 N Street, Suite 3207, Sacramento, CA 95814.
LIFE SCIENCE
Chapter 1 Plant Life Cycles . . . . . . . . . . . . . . . . . . . . . . . . . . . . . . . . . . . . . . 1
Chapter 2 Life Cycles of Animals . . . . . . . . . . . . . . . . . . . . . . . . . . . . . . . . 21
EARTH SCIENCE
Chapter 3 Earth’s Materials . . . . . . . . . . . . . . . . . . . . . . . . . . . . . . . . . . . . . 41
Chapter 4 Earth’s Past . . . . . . . . . . . . . . . . . . . . . . . . . . . . . . . . . . . . . . . . . 57
Chapter 5 Earth’s Resources . . . . . . . . . . . . . . . . . . . . . . . . . . . . . . . . . . . 73
PHYSICAL SCIENCE
Chapter 6 Objects in Motion . . . . . . . . . . . . . . . . . . . . . . . . . . . . . . . . . . .89
Chapter 7 Forces at Work . . . . . . . . . . . . . . . . . . . . . . . . . . . . . . . . . . . . . 109
Everyday Science Activities . . . . . . . . . . . . . . . . . . . . . . . . . . . . . . . . . . . . . 129
Learning Labs . . . . . . . . . . . . . . . . . . . . . . . . . . . . . . . . . . . . . . . . . . . . . . . . . 145
iii
Contents
Activity Lab Book
California science standards are noted at the top of activity pages. For the text of the standards, please refer to the Reference section of the California Science Student Edition.
© M
acm
illa
n/M
cG
raw
-Hill

ExploreDate Name
How are leaves alike
and different?
What to Do
Observe. Use a hand lens to
observe leaves.
Communicate. Draw pictures of what you see in
the box below. What questions do you have?
• hand lens
• leaves
You need
California Standard2 IE 4.c.
Chapter 1 • Plant Life Cycles Use with Lesson 1Activity Lab Book Plants and Their Parts 1
Explore
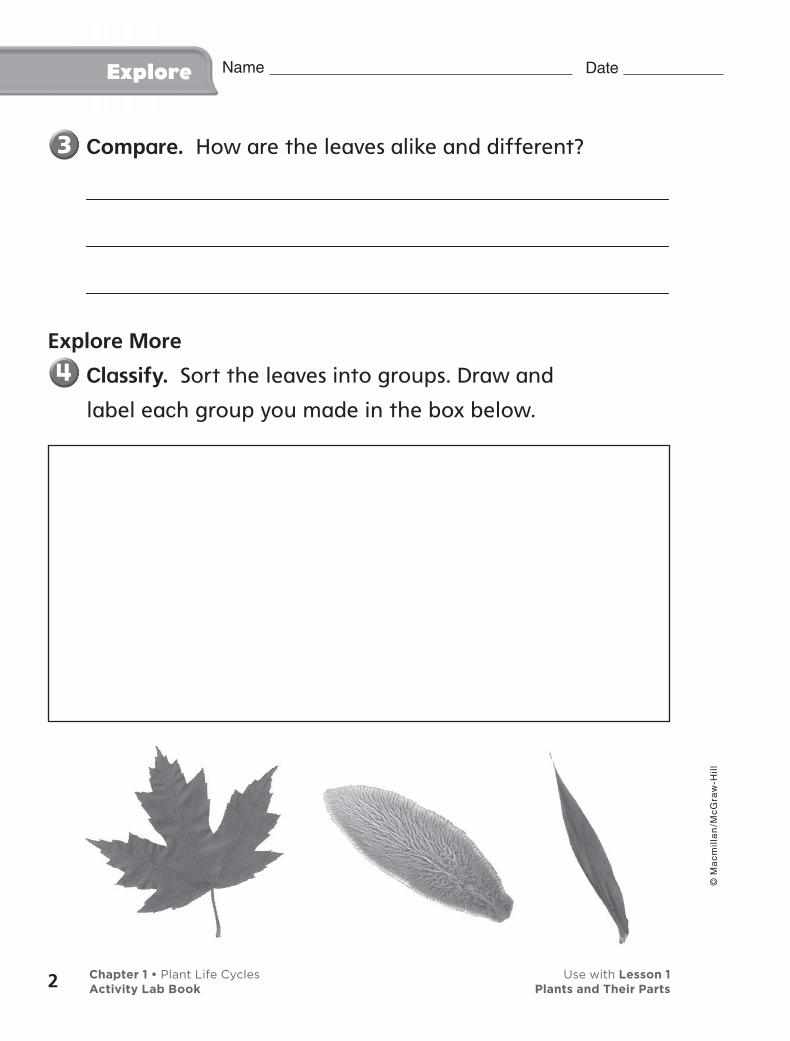
Compare. How are the leaves alike and different?
Explore More
Classify. Sort the leaves into groups. Draw and
label each group you made in the box below.
Date Name
Chapter 1 • Plant Life Cycles Use with Lesson 1Activity Lab Book Plants and Their Parts2
© M
ac
mil
lan
/Mc
Gra
w-H
ill
Which leaf do you have?
In this activity, you will discuss and compare six different leaves.
What to Do
Write four words that tell about your leaf.
Find a classmate with the same kind of leaf as
yours. How did you find people with the same kind
of leaf as yours?
Find a classmate with a different kind of leaf than
the one you have. How is your leaf different from
your classmate’s leaf?
Date Name AlternativeExplore
• leaves
You need
Chapter 1 • Plant Life Cycles Use with Lesson 1Activity Lab Book Plants and Their Parts
© M
ac
mil
lan
/Mc
Gra
w-H
ill
3
Date Name Quick Lab
What are the parts of plants?
What to Do
Separate your plant from the soil.
Look for the roots.
Observe. Look at the different
parts of the plant. What parts can
you see?
Communicate. Draw a picture of the plant on a
separate piece of paper. Label the parts that
you see.
What Did You Find Out?
Infer. Why are there no fruits or seeds?
Predict. Where do you think the fruit and seeds
will be?
• plants with flowers
• hand lens
You need
Chapter 1 • Plant Life Cycles Use with Lesson 1Activity Lab Book Plants and Their Parts4
© M
ac
mil
lan
/Mc
Gra
w-H
ill
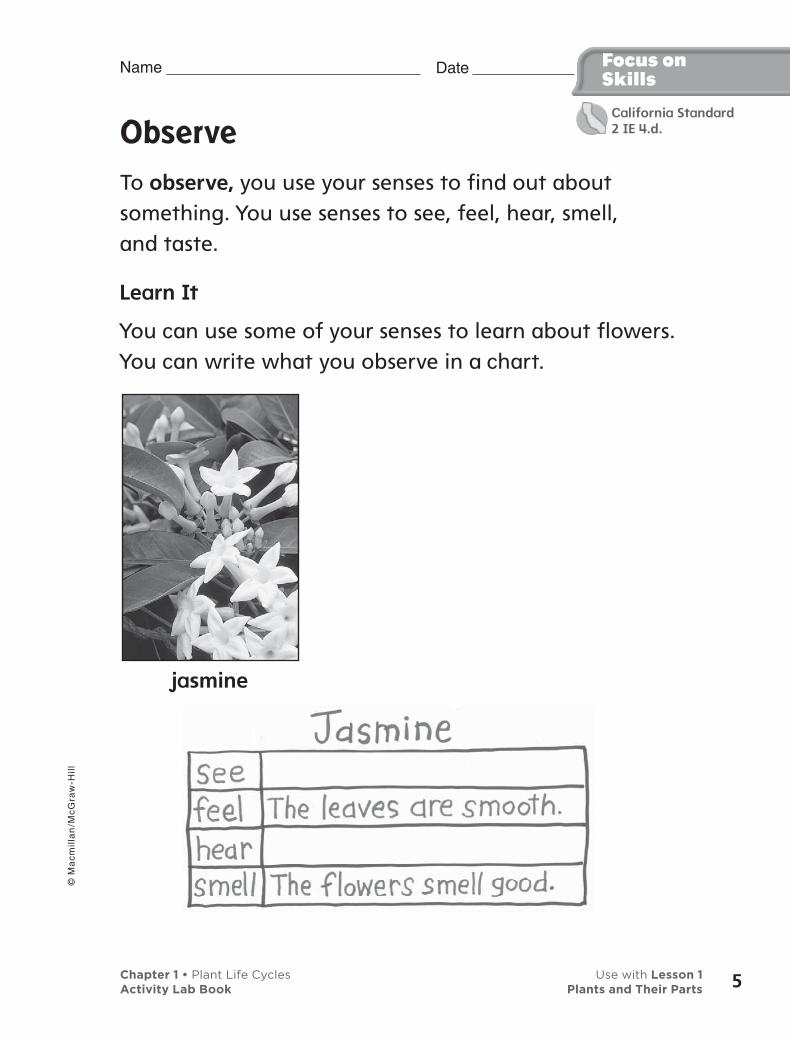
jasmine
Date Name
Observe
To observe, you use your senses to find out about something. You use senses to see, feel, hear, smell, and taste.
Learn It
You can use some of your senses to learn about flowers.You can write what you observe in a chart.
Focus onSkills
California Standard2 IE 4.d.
Chapter 1 • Plant Life Cycles Use with Lesson 1Activity Lab Book Plants and Their Parts
© M
ac
mil
lan
/Mc
Gra
w-H
ill
5

Date Name
Try It
Find a flower to observe or look at the pictures below.
What color is your flower? Which sense did you use
to find out?
How do you think the leaves feel?
Write About It. Find another flower and compare.
Focus onSkills
Chapter 1 • Plant Life Cycles Use with Lesson 1Activity Lab Book Plants and Their Parts
© M
ac
mil
lan
/Mc
Gra
w-H
ill
6
Date Name Explore
What are the parts
of a seed?
What to Do
Observe. Look at the dry lima bean.
What does it feel like?
Observe. Look at the wet lima bean. What do you
see? What questions do you have about the seeds?
• dry lima bean
• wet lima bean
• hand lens
You need
California Standard2 IE 4.f.
Chapter 1 • Plant Life Cycles Use with Lesson 2Activity Lab Book Flowers and Fruits
© M
ac
mil
lan
/Mc
Gra
w-H
ill
7
Explore Date Name Date Name
Use your fingernail to open the wet lima bean. Use
a hand lens to look inside. Draw a picture of what
you see in the box below.
Communicate. How did the water change the
bean?
Explore More
Predict. Do other kinds
of beans look the same
inside? Try it.
Chapter 1 • Plant Life Cycles Use with Lesson 2Activity Lab Book Flowers and Fruits8
© M
ac
mil
lan
/Mc
Gra
w-H
ill
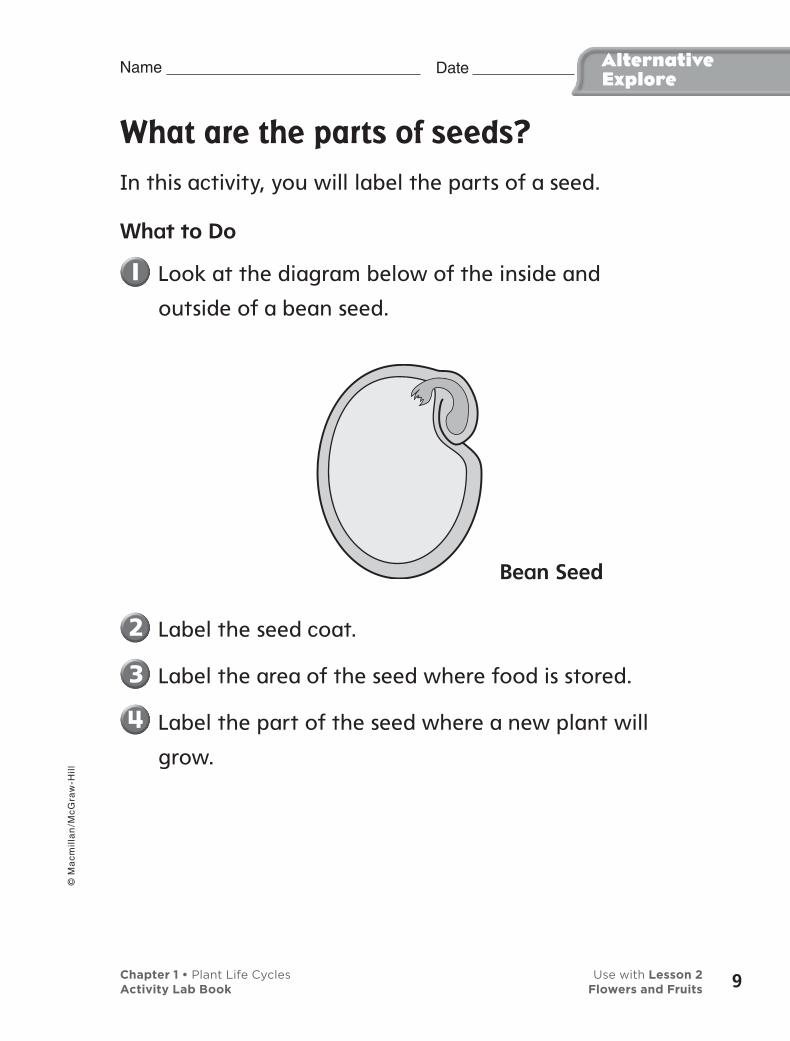
What are the parts of seeds?
In this activity, you will label the parts of a seed.
What to Do
Look at the diagram below of the inside and
outside of a bean seed.
Date Name AlternativeExplore
Label the seed coat.
Label the area of the seed where food is stored.
Label the part of the seed where a new plant will
grow.
Bean Seed
Chapter 1 • Plant Life Cycles Use with Lesson 2Activity Lab Book Flowers and Fruits
© M
ac
mil
lan
/Mc
Gra
w-H
ill
9

Date Name Quick Lab
What plants grow from seeds?
What to Do
Observe. Choose three different
seeds. Use your senses to study them
closely. Write your observations in the
chart below.
What Do You See?
What Do You Feel?
What Do You Smell?
Seed #1Seed #2Seed #3
Compare. Look at the pictures of the plants and
compare them with the seeds. Can you match the
picture of the plant with its seed? Explain.
• packets of seeds
You need
Chapter 1 • Plant Life Cycles Use with Lesson 2Activity Lab Book Flowers and Fruits10
© M
ac
mil
lan
/Mc
Gra
w-H
ill
Date Name Explore
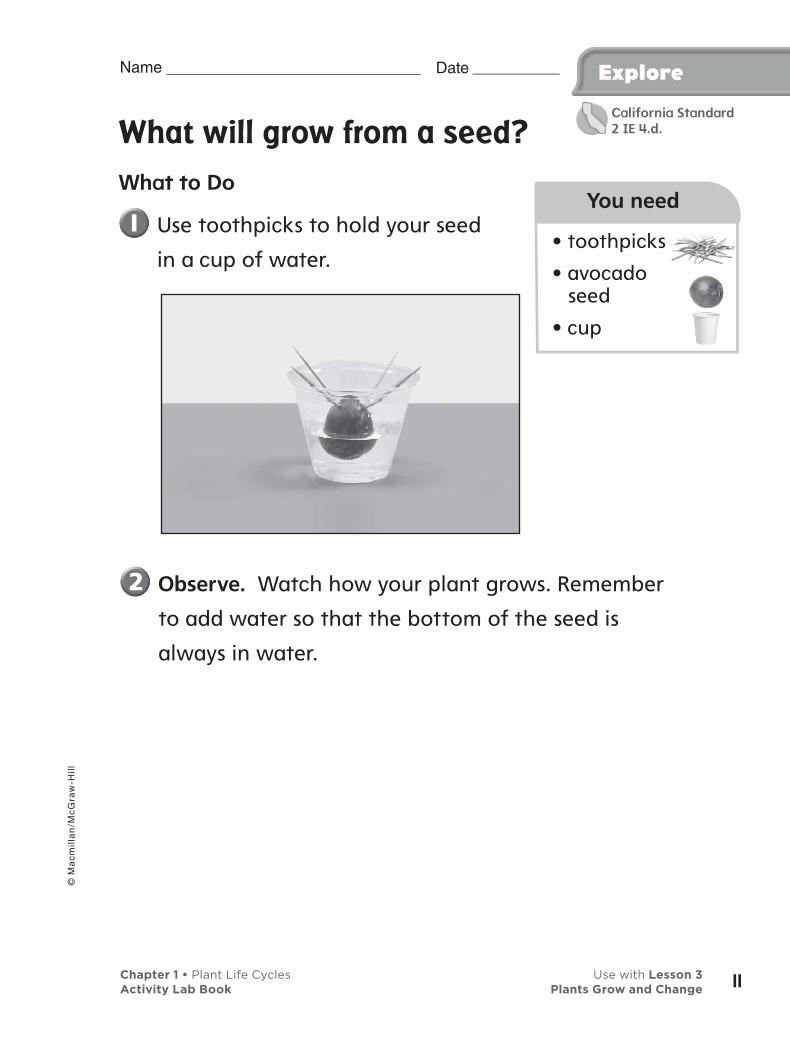
What will grow from a seed?
What to Do
Use toothpicks to hold your seed
in a cup of water.
Observe. Watch how your plant grows. Remember
to add water so that the bottom of the seed is
always in water.
• toothpicks
• avocado seed
• cup
You need
California Standard2 IE 4.d.
Chapter 1 • Plant Life Cycles Use with Lesson 3Activity Lab Book Plants Grow and Change
© M
ac
mil
lan
/Mc
Gra
w-H
ill
11
Explore Date Name
Draw pictures of your plant as it grows in the box
below. What plant part grew first? What other
parts did your seed grow?
Explore More
Predict. How will your plant change as it grows?
Chapter 1 • Plant Life Cycles Use with Lesson 3Activity Lab Book Plants Grow and Change
© M
ac
mil
lan
/Mc
Gra
w-H
ill
12
Date Name
How are young and adult plants alike?
What to Do
Compare. Look at the picture of a
young apple tree and the picture of
an older apple tree.
How are the young apple tree
and the older apple tree alike?
How are they different?
Observe. Look at the apple that has been cut in
half. Use a hand lens. What do you think these
seeds will grow to look like?
AlternativeExplore
• pictures of a young apple tree and an older apple tree
• 1 apple, cut in half
• hand lens
You need
Chapter 1 • Plant Life Cycles Use with Lesson 3Activity Lab Book Plants Grow and Change
© M
ac
mil
lan
/Mc
Gra
w-H
ill
13
Date Name Quick Lab
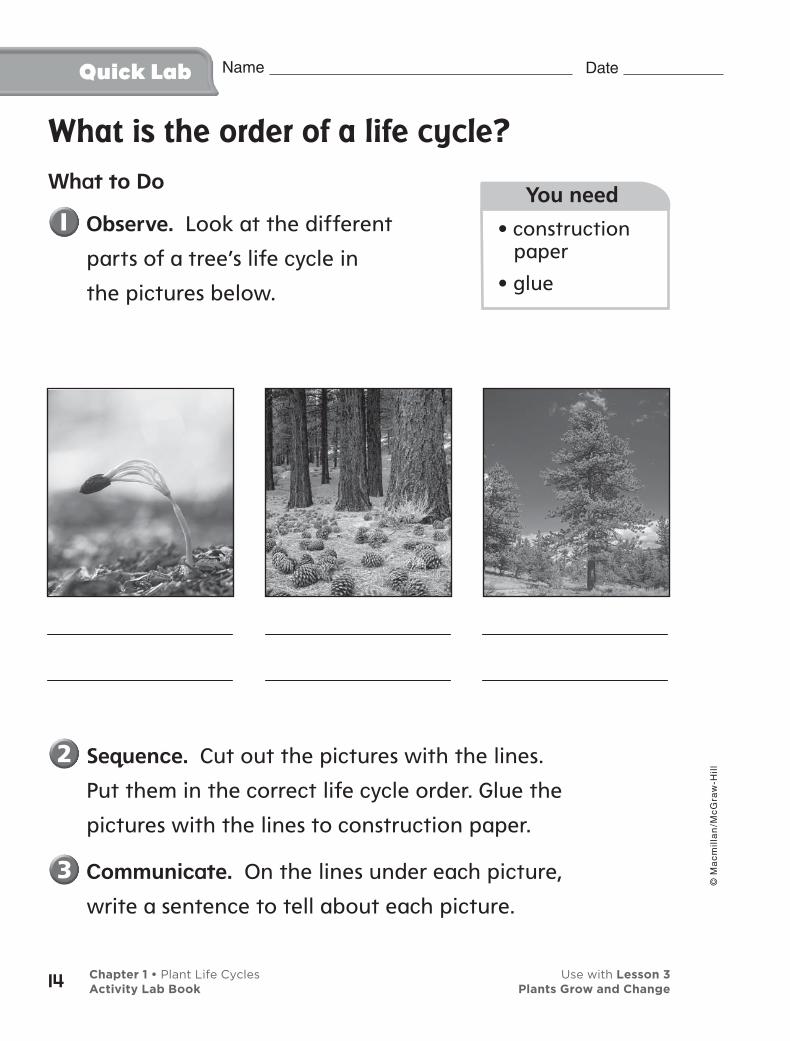
What is the order of a life cycle?
What to Do
Observe. Look at the different
parts of a tree’s life cycle in
the pictures below.
Sequence. Cut out the pictures with the lines.
Put them in the correct life cycle order. Glue the
pictures with the lines to construction paper.
Communicate. On the lines under each picture,
write a sentence to tell about each picture.
• construction paper
• glue
You need
Chapter 1 • Plant Life Cycles Use with Lesson 3Activity Lab Book Plants Grow and Change14
© M
ac
mil
lan
/Mc
Gra
w-H
ill
Date Name
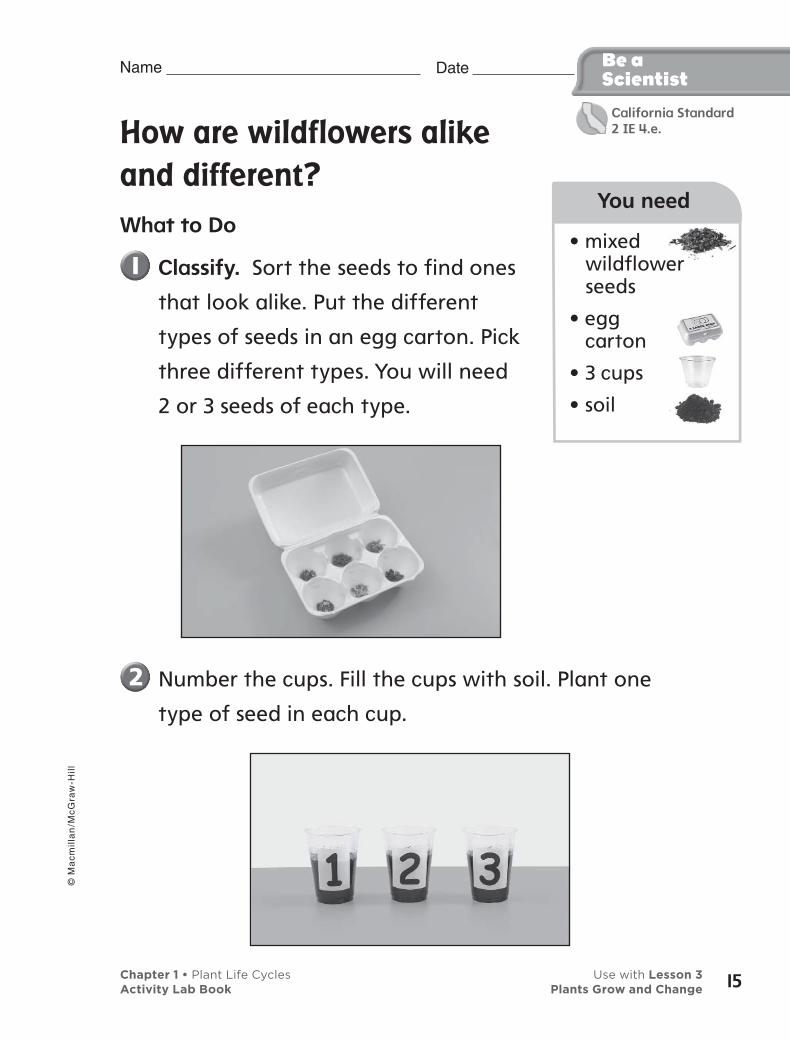
How are wildflowers alike
and different?
What to Do
Classify. Sort the seeds to find ones
that look alike. Put the different
types of seeds in an egg carton. Pick
three different types. You will need
2 or 3 seeds of each type.
Number the cups. Fill the cups with soil. Plant one
type of seed in each cup.
• mixed wildflower seeds
• egg carton
• 3 cups
• soil
You need
Be aScientist
California Standard2 IE 4.e.
Chapter 1 • Plant Life Cycles Use with Lesson 3Activity Lab Book Plants Grow and Change
© M
ac
mil
lan
/Mc
Gra
w-H
ill
15
Date Name
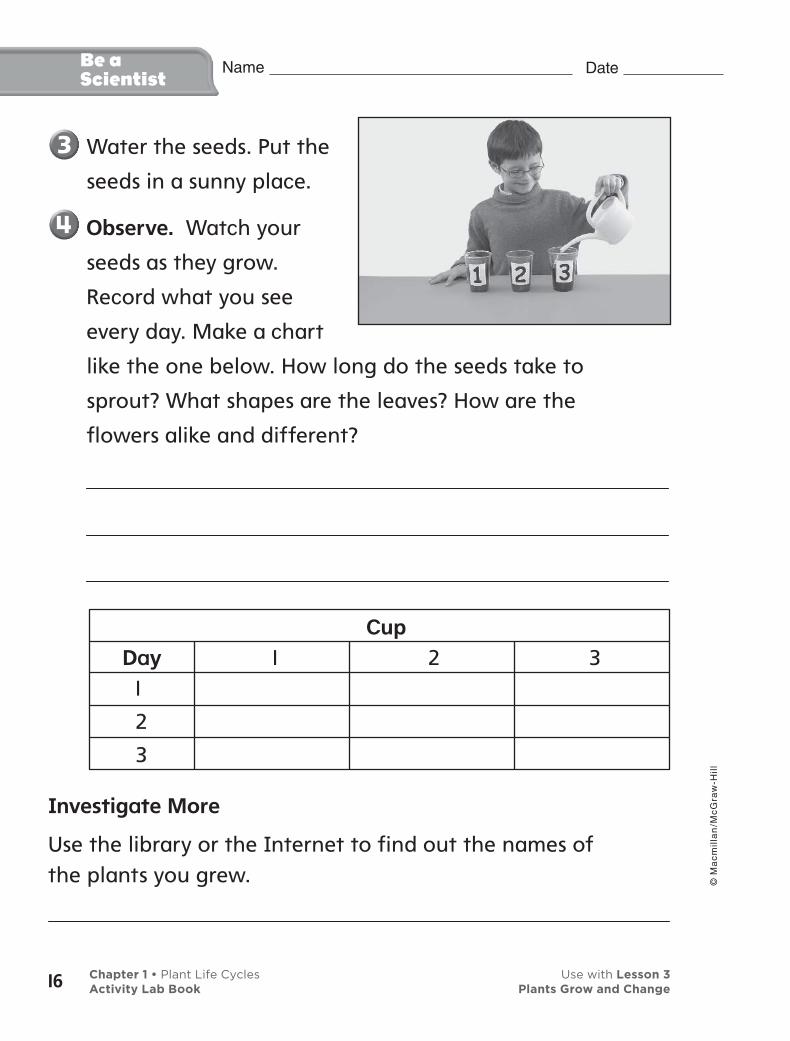
Water the seeds. Put the
seeds in a sunny place.
Observe. Watch your
seeds as they grow.
Record what you see
every day. Make a chart
like the one below. How long do the seeds take to
sprout? What shapes are the leaves? How are the
flowers alike and different?
Investigate More
Use the library or the Internet to find out the names of the plants you grew.
CupDay 1 2 3
1
2
3
Be aScientist
Chapter 1 • Plant Life Cycles Use with Lesson 3Activity Lab Book Plants Grow and Change16
© M
ac
mil
lan
/Mc
Gra
w-H
ill
Date Name Explore
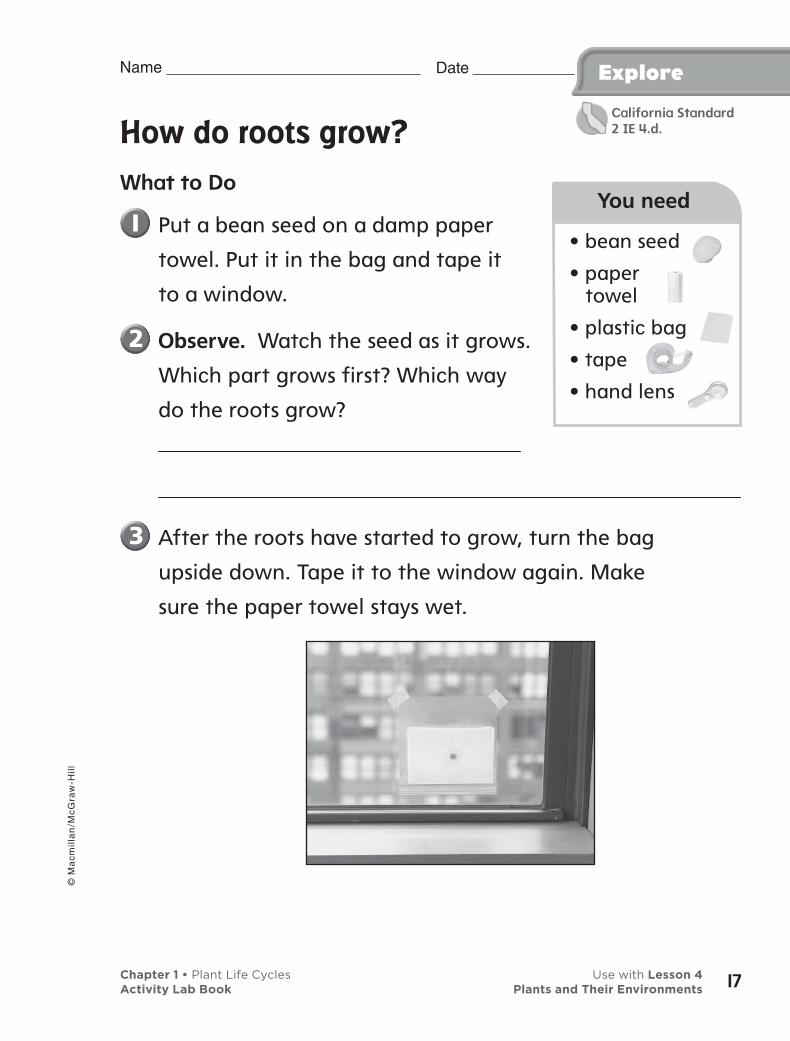
How do roots grow?
What to Do
Put a bean seed on a damp paper
towel. Put it in the bag and tape it
to a window.
Observe. Watch the seed as it grows.
Which part grows first? Which way
do the roots grow?
After the roots have started to grow, turn the bag
upside down. Tape it to the window again. Make
sure the paper towel stays wet.
• bean seed
• paper towel
• plastic bag
• tape
• hand lens
You need
California Standard2 IE 4.d.
Chapter 1 • Plant Life Cycles Use with Lesson 4Activity Lab Book Plants and Their Environments
© M
ac
mil
lan
/Mc
Gra
w-H
ill
17

Explore Date Name
Explore More
Communicate. Draw what happened to the roots
in the box below.
Chapter 1 • Plant Life Cycles Use with Lesson 4Activity Lab Book Plants and Their Environments18
© M
ac
mil
lan
/Mc
Gra
w-H
ill

Date Name
• 4 bean seeds
• plastic bag
• moist paper towel
You need
What makes seeds grow down?
What to Do
Observe the roots that grow from bean seeds.
Place 4 beans in a plastic bag. Turn
the beans in different directions. Put
a moist paper towel in the bag with
the beans.
Look at the bean seeds every day until the roots
begin to grow.
Discuss how the beans change each day.
What Did You Find Out?
How did the roots of each seed grow?
How do you think the roots know which way is down?
Why do roots grow down?
AlternativeExplore
Chapter 1 • Plant Life Cycles Use with Lesson 4Activity Lab Book Plants and Their Environments
© M
ac
mil
lan
/Mc
Gra
w-H
ill
19
Quick Lab Date Name
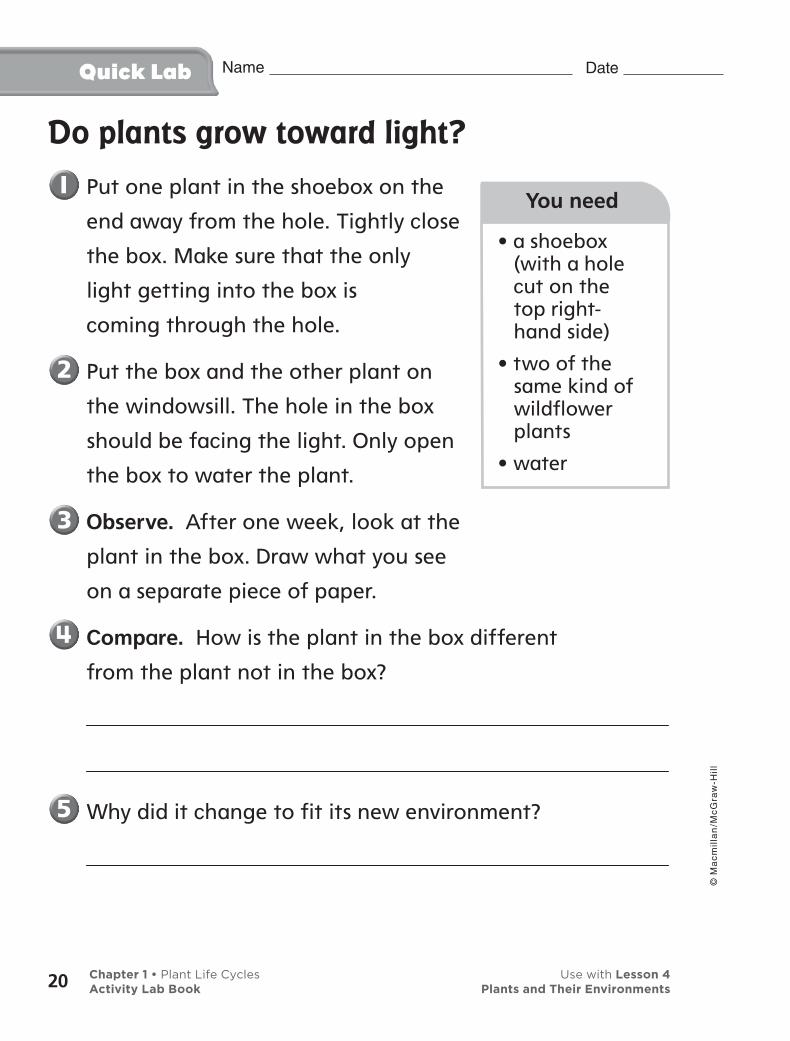
Do plants grow toward light?
Put one plant in the shoebox on the
end away from the hole. Tightly close
the box. Make sure that the only
light getting into the box is
coming through the hole.
Put the box and the other plant on
the windowsill. The hole in the box
should be facing the light. Only open
the box to water the plant.
Observe. After one week, look at the
plant in the box. Draw what you see
on a separate piece of paper.
Compare. How is the plant in the box different
from the plant not in the box?
Why did it change to fit its new environment?
• a shoebox (with a hole cut on the top right-hand side)
• two of the same kind of wildflower plants
• water
You need
Chapter 1 • Plant Life Cycles Use with Lesson 4Activity Lab Book Plants and Their Environments20
© M
ac
mil
lan
/Mc
Gra
w-H
ill

Date Name Name Explore
How can we put animals into groups?
What to Do
Classify. Make a list of ten animals. Put your
animals into groups. What groups did you use?
Sea Turtle
Seagull
Dolphin
Sea Otter
LobsterChapter 2 • Life Cycles of Animals Use with Lesson 1Activity Lab Book Kinds of Animals
© M
ac
mil
lan
/Mc
Gra
w-H
ill
21
California Standard2 IE 4.c.

Explore
Talk about your animal groups with a partner. What
groups did your partner use?
Compare. How are your groups and your partner’s
groups alike? How are they different?
Explore More
Infer. Why do you think scientists put animals into
groups?
Date Name
Chapter 2 • Life Cycles of Animals Use with Lesson 1Activity Lab Book Kinds of Animals
© M
ac
mil
lan
/Mc
Gra
w-H
ill
22
Date Name AlternativeExplore
What labels could I give my
groups of animals?
In this activity, you will group animals that are alike.
What to Do
Look at the list of animals that your teacher has
written. Think about how each animal moves. What
do they look like? Where do they live?
How can you decide how to name each group?
What Did You Find Out?
Compare the way that you named the groups with
other pairs of classmates. How are your names the
same? How are they different?
Chapter 2 • Life Cycles of Animals Use with Lesson 1Activity Lab Book Kinds of Animals
© M
ac
mil
lan
/Mc
Gra
w-H
ill
23
Quick Lab
You need
Date Name
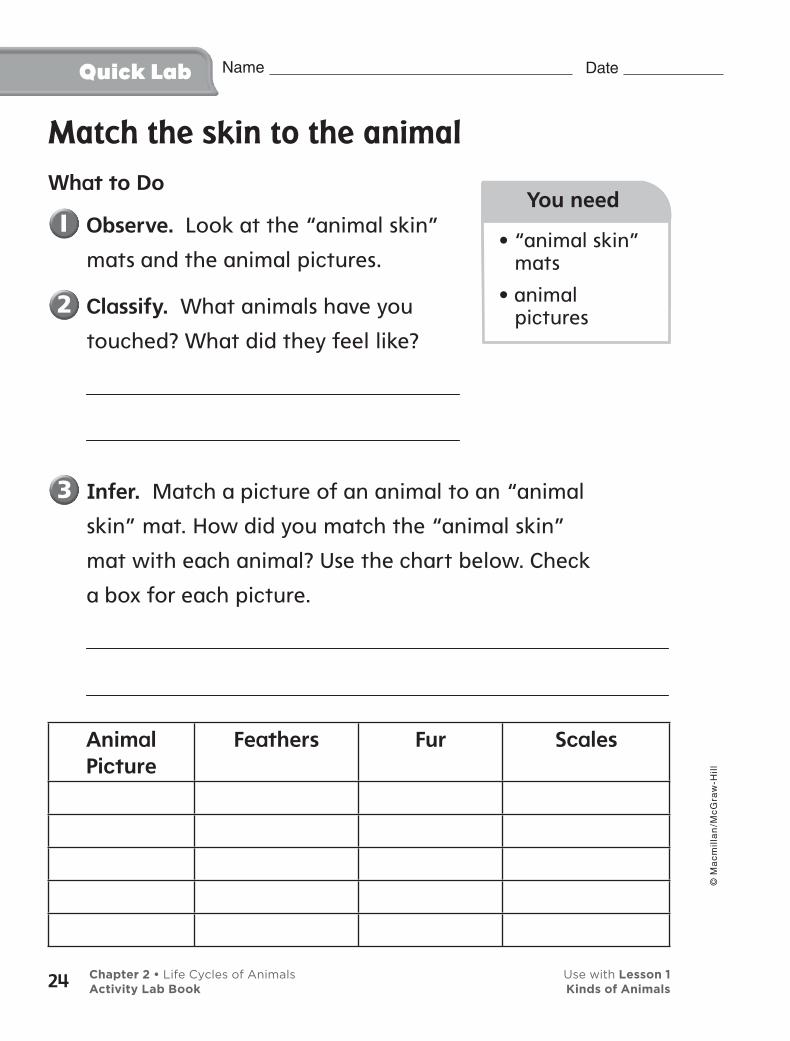
Match the skin to the animal
What to Do
Observe. Look at the “animal skin”
mats and the animal pictures.
Classify. What animals have you
touched? What did they feel like?
• “animal skin” mats
• animal pictures
You need
Quick Lab
Infer. Match a picture of an animal to an “animal
skin” mat. How did you match the “animal skin”
mat with each animal? Use the chart below. Check
a box for each picture.
AnimalPicture
Feathers Fur Scales
Chapter 2 • Life Cycles of Animals Use with Lesson 1Activity Lab Book Kinds of Animals
© M
ac
mil
lan
/Mc
Gra
w-H
ill
24

Date Name
Communicate
To communicate you share your ideas with others.
Learn It
You can use a chart to communicate what you learned.
Try It
Use a chart like the one above to classify the animals below. Add other animals to your chart. Then share your chart with a partner.
Focus onSkills
California Standard2 IE 4.c.
lamb penguin iguana snake guinea pig parrot
Chapter 2 • Life Cycles of Animals Use with Lesson 1Activity Lab Book Kinds of Animals
© M
ac
mil
lan
/Mc
Gra
w-H
ill
25
Date Name Focus onSkills
How are mammals and birds alike? How are they
different?
What are some ways you can classify the animals?
Write About It. How is your chart different from
your partner’s?
Chapter 2 • Life Cycles of Animals Use with Lesson 1Activity Lab Book Kinds of Animals
© M
ac
mil
lan
/Mc
Gra
w-H
ill
26

Date Name Explore
How are babies and adults
alike and different?
What to Do
What do babies look like? How do they act?
What do adults look like? How do they act?
California Standard2 IE 4.c.
Chapter 2 • Life Cycles of Animals Use with Lesson 2Activity Lab Book Mammals
© M
ac
mil
lan
/Mc
Gra
w-H
ill
27
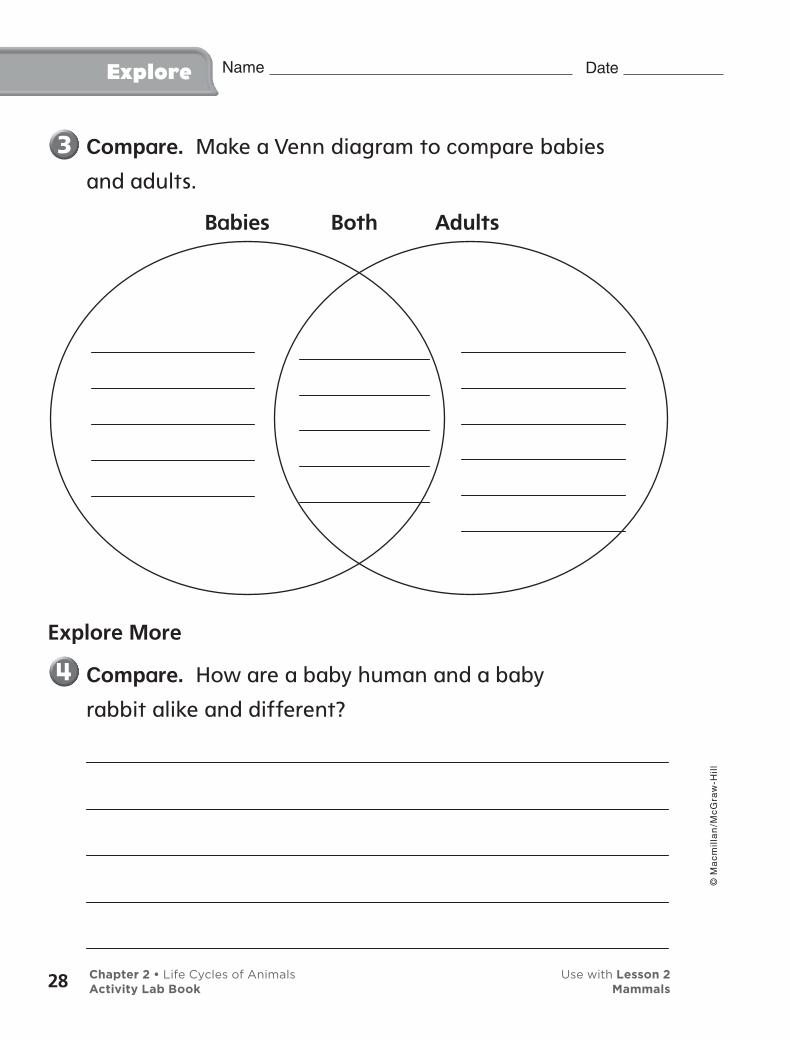
Explore Date Name
Compare. Make a Venn diagram to compare babies
and adults.
Explore More
Compare. How are a baby human and a baby
rabbit alike and different?
Babies AdultsBoth
Chapter 2 • Life Cycles of Animals Use with Lesson 2Activity Lab Book Mammals
© M
ac
mil
lan
/Mc
Gra
w-H
ill
28
• photos of baby and adult elephant
You need
Date Name AlternativeExplore
How are baby and adult
mammals alike and
different?
In this activity, you will compare baby and adult mammals.
What to Do
Observe. Look at the pictures that your teacher has
on display.
How do you know this is a baby elephant?
What Did You Find Out?
How does the adult elephant take care of the baby?
Who takes care of the adult?
Chapter 2 • Life Cycles of Animals Use with Lesson 2Activity Lab Book Mammals
© M
ac
mil
lan
/Mc
Gra
w-H
ill
29
Date Name
Can you match the adult
with its offspring?
What to Do
Infer. Work with a partner. Match
each picture of an adult animal with
the picture of its offspring.
Record Data. What animal pairs did you find?
List them below.
What Did You Find Out?
Compare. Name the parts of the offspring that is
like its parent.
• pictures of adult animals and their offspring
You need
Quick Lab
Chapter 2 • Life Cycles of Animals Use with Lesson 2Activity Lab Book Mammals
© M
ac
mil
lan
/Mc
Gra
w-H
ill
30

Date Name Explore
How do birds keep their
eggs safe?
What to Do
Communicate. Discuss with a
partner what eggs need to stay safe.
Build a nest for an egg.
• twigs
• chenille sticks
• string
You need
California Standard2 IE 4.a.
Chapter 2 • Life Cycles of Animals Use with Lesson 3Activity Lab Book Animals from Eggs
© M
ac
mil
lan
/Mc
Gra
w-H
ill
31
Explore Date Name
How did you make things stay in place without
using tape?
Explore More
Communicate. Look at pictures of real nests. What
do animals use to keep their eggs safe?
Chapter 2 • Life Cycles of Animals Use with Lesson 3Activity Lab Book Animals from Eggs
© M
ac
mil
lan
/Mc
Gra
w-H
ill
32
• photos of bird nests
You need
Date Name AlternativeExplore
How does a bird’s nest help to
keep the bird’s eggs safe?
In this activity, you will discuss how nests help birds keep their eggs safe.
What to Do
Observe. Look at the different bird nests your
teacher has displayed. What are some things they
are made of?
Where might you find a bird nest?
How does a nest help protect baby birds? Write two
sentences.
Chapter 2 • Life Cycles of Animals Use with Lesson 3Activity Lab Book Animals from Eggs
© M
ac
mil
lan
/Mc
Gra
w-H
ill
33
• index cards
• colored pencils
• life cycle photo cards
You need
Date Name
Four stages of a butterfly’s life
What to Do
Make a Model. Look closely at your
life cycle card. Make a sketch
showing a butterfly at that
stage. Make sure you also draw a
background.
Walk around your classroom and
look at the life cycle cards that other classmates
have. Try to make a group of four people so that
each person has one card that shows a different
stage in the life cycle. When you have made your
group, sit down together.
What Did You Find Out?
Communicate. Write the four stages of a butterfly’s
life cycle below.
Quick Lab
Chapter 2 • Life Cycles of Animals Use with Lesson 3Activity Lab Book Animals from Eggs
© M
ac
mil
lan
/Mc
Gra
w-H
ill
34
Date Name Be aScientist
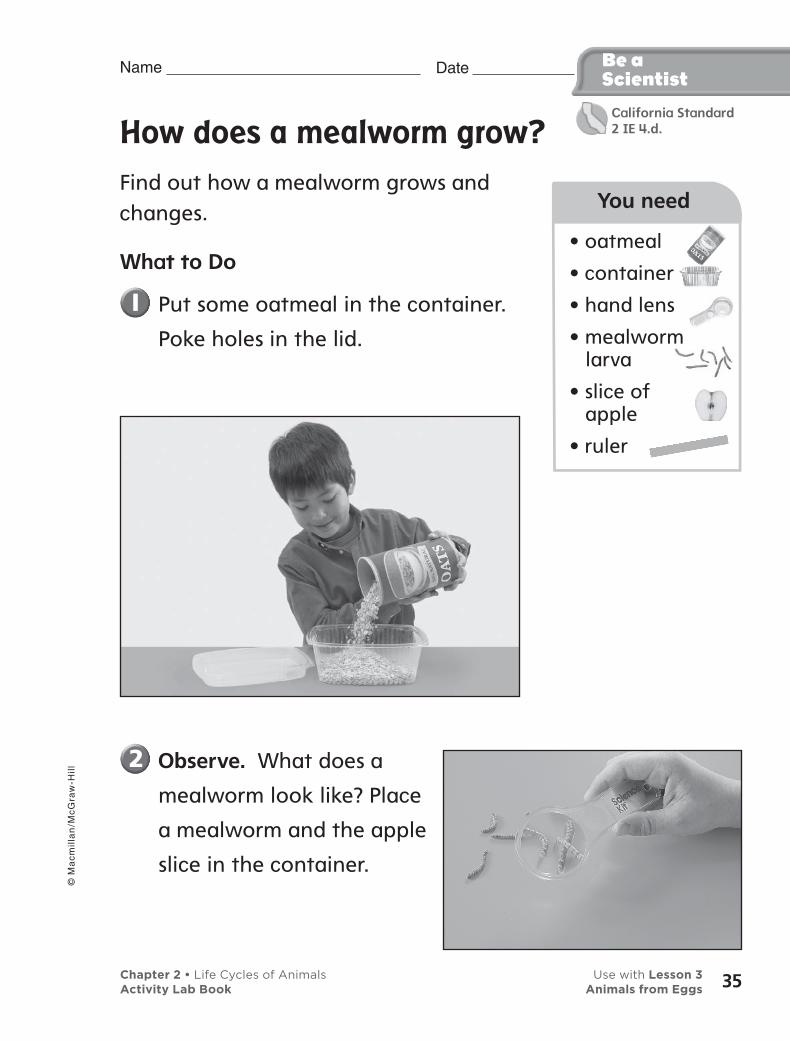
How does a mealworm grow?
Find out how a mealworm grows and changes.
What to Do
Put some oatmeal in the container.
Poke holes in the lid.
• oatmeal
• container
• hand lens
• mealworm larva
• slice of apple
• ruler
You need
Observe. What does a
mealworm look like? Place
a mealworm and the apple
slice in the container.
California Standard2 IE 4.d.
Chapter 2 • Life Cycles of Animals Use with Lesson 3Activity Lab Book Animals from Eggs
© M
ac
mil
lan
/Mc
Gra
w-H
ill
35

Date Name Be aScientist
Record Data. Measure your mealworm every two
days. Remember to be gentle with the mealworm.
Write about how the animal changed in the chart
below.
Predict. How long do you think your mealworm will
grow? How do you think it will change?
Investigate More
Compare. Observe another mealworm. How are they alike and different?
Day Measurement How It Changed
Begin 2
4 6
8
10 12
Chapter 2 • Life Cycles of Animals Use with Lesson 3Activity Lab Book Animals from Eggs
© M
ac
mil
lan
/Mc
Gra
w-H
ill
36
Date Name Explore
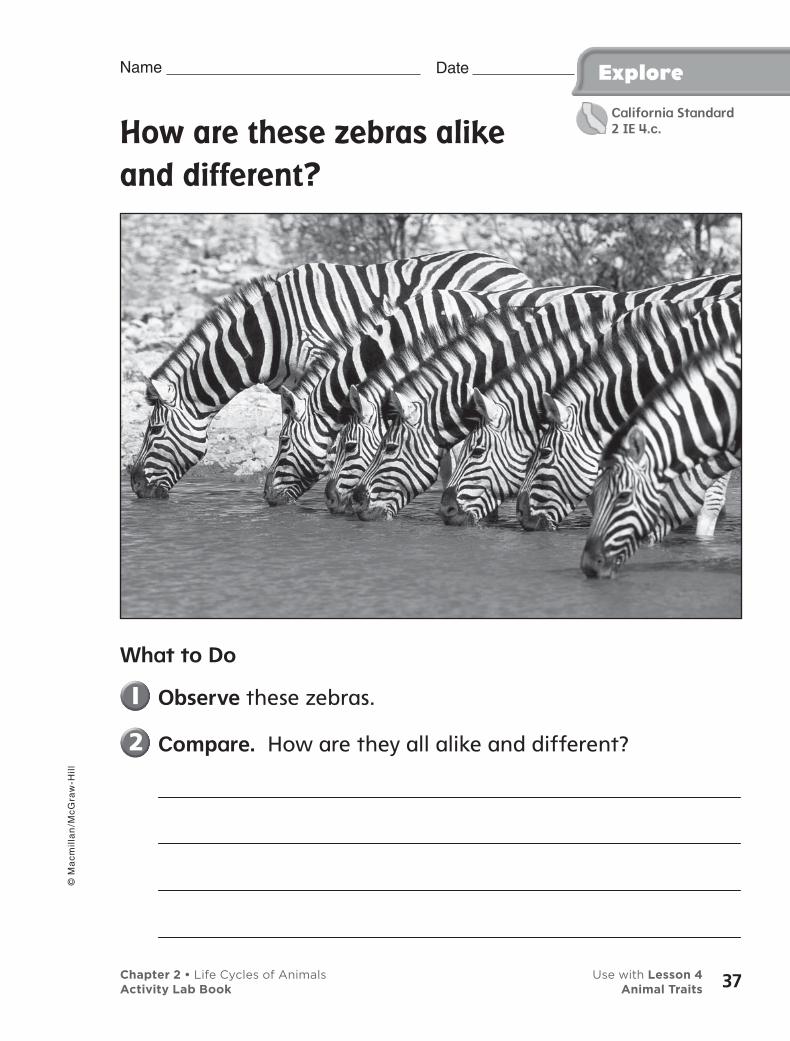
How are these zebras alike
and different?
What to Do
Observe these zebras.
Compare. How are they all alike and different?
California Standard2 IE 4.c.
Chapter 2 • Life Cycles of Animals Use with Lesson 4Activity Lab Book Animal Traits
© M
ac
mil
lan
/Mc
Gra
w-H
ill
37
Explore Date Name
How do you think stripes help zebras stay safe?
Explore More
Compare. Find pictures of another kind of animal
with a pattern. Observe how the patterns are alike
and different.
Chapter 2 • Life Cycles of Animals Use with Lesson 4Activity Lab Book Animal Traits
© M
ac
mil
lan
/Mc
Gra
w-H
ill
38

• photos of animals that blend into their environment
You need
Date Name AlternativeExplore
How do animals stay safe?
In this activity, you will find out how animal traits help animals stay safe.
Observe. Work with a partner.
Observe the animal photos.
What are some animals that are
hard to see in the snow? What traits
make them hard to see.
What are some animals that are hard to see on a
tree branch? What traits make them hard to see?
What Did You Find Out?
Choose an animal from the photos. What is another
way the animal stays safe?
Chapter 2 • Life Cycles of Animals Use with Lesson 4Activity Lab Book Animal Traits
© M
ac
mil
lan
/Mc
Gra
w-H
ill
39
• index cards
• colored pencils
• world map
• pictures of gray whales and right whales
You need
Date Name
Same animal, different populations
What to Do
Observe. Your teacher will show you
pictures of gray whales and right
whales. You will draw one of the
whales on an index card. Use the
colored pencils.
Classify. If you have a right whale,
stick your index card on the map in
the Atlantic Ocean. If you have a
gray whale, stick your index card on
the map in the Pacific Ocean.
What Did You Find Out?
Observe. Look at all the index cards on the map. How many whale populations are on the map?
Compare. Compare the whales in each population. Do all gray whales look exactly alike? How are they different?
Quick Lab
Chapter 2 • Life Cycles of Animals Use with Lesson 4Activity Lab Book Animal Traits
© M
ac
mil
lan
/Mc
Gra
w-H
ill
40

Explore
How can we sort rocks?
What to Do
Observe. Look at your rocks under
a hand lens. Describe what you see.
How are they alike? How are they
different?
Date Name
• rocks
• hand lens
You need
41Chapter 3 • Earth’s Materials Use with Lesson 1Activity Lab Book Rocks
California Standard2 IE 4.c.

Explore
Classify. Put your rocks into groups. Write your
groups in a chart. Record how many rocks are in
each group.
Explore More
Communicate. Share your chart with a partner.
Discuss how you put the rocks into groups. What
other ways can you classify rocks?
Date Name
Groups of Rocks
Group 1 Group 2 Group 3
42
© M
ac
mil
lan
/Mc
Gra
w-H
ill
Chapter 3 • Earth’s Materials Use with Lesson 1Activity Lab Book Rocks
Which rocks look alike?
In this activity, you will discover how to group rocks that are alike.
What to Do
Look at the rocks on the picture
cards.
Put the rocks that look alike together. Label each
group with a word that tells how they are alike.
What Did You Find Out?
What can you find out about a rock by just
touching it?
Name three ways you could group rocks that are
alike?
AlternativeExplore
• rocks
• photo sorting cards numbers 24–30
You need
Date Name ©
Ma
cm
illa
n/M
cG
raw
-Hil
l
43Chapter 3 • Earth’s Materials Use with Lesson 1Activity Lab Book Rocks
Quick Lab
What can scratch it?
What to Do
Classify. Scratch each rock with
your fingernail. Put all the rocks you
marked with your fingernail in a
group. Label the group “Not Very
Hard.”
Observe. Scratch the unmarked rocks with a penny.
Put all the rocks marked by the penny in a new
group. Label the group “Harder.”
What Did You Find Out?
What might be able to scratch the rocks that
haven’t been marked? Could a diamond scratch
them? How do you know?
• rocks
• pennies
You need
Date Name
44
© M
ac
mil
lan
/Mc
Gra
w-H
ill
Chapter 3 • Earth’s Materials Use with Lesson 1Activity Lab Book Rocks
Focus onSkills
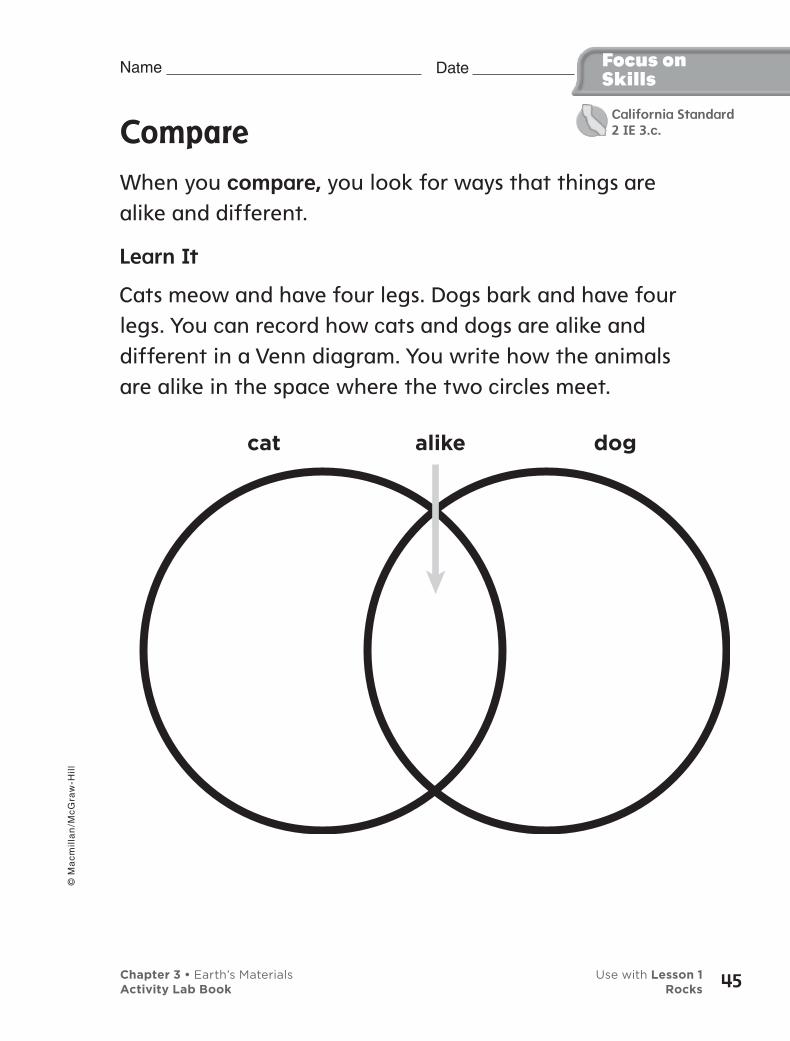
Compare
When you compare, you look for ways that things are alike and different.
Learn It
Cats meow and have four legs. Dogs bark and have four legs. You can record how cats and dogs are alike and different in a Venn diagram. You write how the animals are alike in the space where the two circles meet.
cat alike dog
Date Name ©
Ma
cm
illa
n/M
cG
raw
-Hil
l
45Chapter 3 • Earth’s Materials Use with Lesson 1Activity Lab Book Rocks
California Standard2 IE 3.c.
Focus onSkills
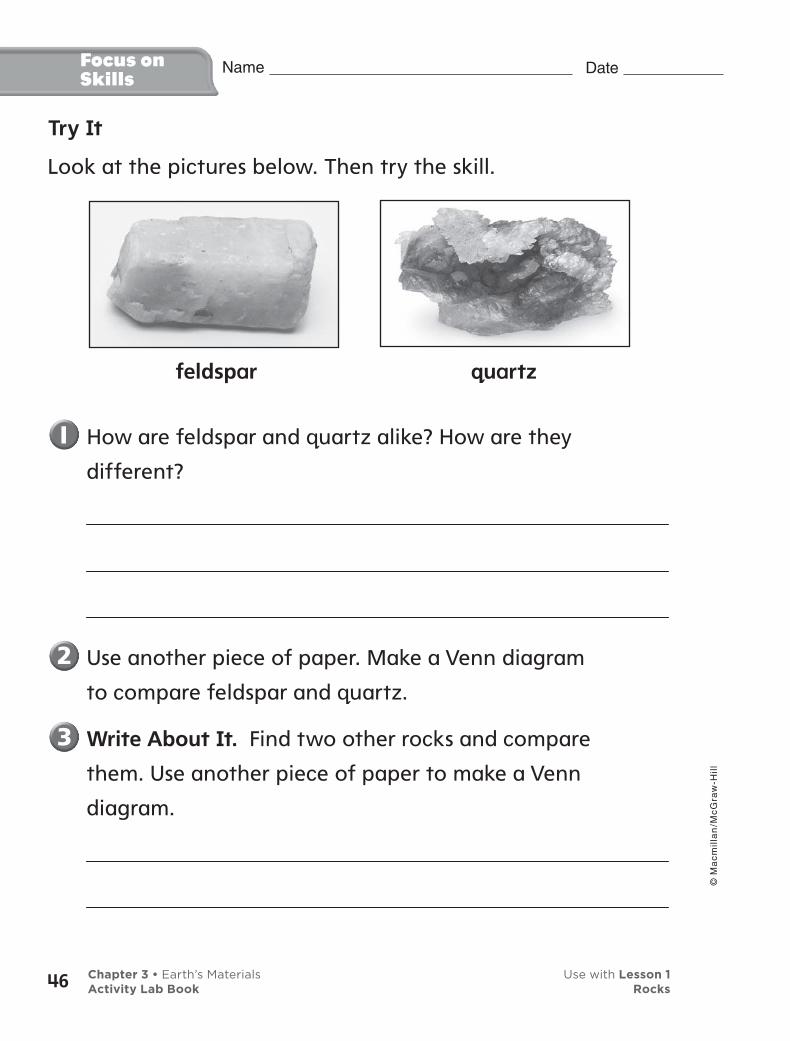
Try It
Look at the pictures below. Then try the skill.
How are feldspar and quartz alike? How are they
different?
Use another piece of paper. Make a Venn diagram
to compare feldspar and quartz.
Write About It. Find two other rocks and compare
them. Use another piece of paper to make a Venn
diagram.
feldspar quartz
Date Name
46
© M
ac
mil
lan
/Mc
Gra
w-H
ill
Chapter 3 • Earth’s Materials Use with Lesson 1Activity Lab Book Rocks

How can you change rocks?
What to Do
Observe. Look at rocks under a
hand lens. Describe what you see.
Put the rocks in a jar of water. Shake the jar for two
minutes.
Explore
• rocks
• hand lens
• jar of water
You need
Date Name ©
Ma
cm
illa
n/M
cG
raw
-Hil
l
47Chapter 3 • Earth’s Materials Use with Lesson 2Activity Lab Book Rocks Change
California Standard2 IE 4.f.
Explore
Explore More
Communicate. Look at the rocks under a hand lens.
How did the rocks change?
Date Name
48
© M
ac
mil
lan
/Mc
Gra
w-H
ill
Chapter 3 • Earth’s Materials Use with Lesson 2Activity Lab Book Rocks Change
What can change rocks?
In this activity, you will observe how a rock can change.
What to Do
Look carefully at the medium-sized
rock. Is it rough or smooth? Wrap a
towel around the rock.
Watch while your teacher hits the rock with a
hammer.
Open the towel to look at the rock now.
What Did You Find Out?
How did the rock change?
What forces in nature might change a rock like the
hammer did?
AlternativeExplore
• medium-sized rock
• towel
• hammer
You need
Date Name ©
Ma
cm
illa
n/M
cG
raw
-Hil
l
49Chapter 3 • Earth’s Materials Use with Lesson 2Activity Lab Book Rocks Change
Quick Lab
How can vinegar change limestone?
What to Do
Experiment. Put a small piece of
limestone in a cup. Pour enough
vinegar to cover the limestone.
Be sure to wear goggles!
Observe. Watch carefully. What do
you see? What is happening to the
limestone?
What Did You Find Out?
Predict. How could you test a rock to see if it
contains the mineral calcite?
• vinegar
• limestone
• small clear plastic cup
• goggles
• rubber gloves
You need
Date Name
50
© M
ac
mil
lan
/Mc
Gra
w-H
ill
Chapter 3 • Earth’s Materials Use with Lesson 2Activity Lab Book Rocks Change

Explore
What is in soil?
What to Do
Put some soil in a strainer. Gently
shake it over a plate.• soil
• strainer
• paper plates
• hand lens
You need
Date Name
Observe. Look at the soil on the plate.
Use a hand lens. Draw what you see.
© M
ac
mil
lan
/Mc
Gra
w-H
ill
51Chapter 3 • Earth’s Materials Use with Lesson 3Activity Lab Book Soil
California Standard2 IE 4.f.
Explore
Pour the soil in the strainer on to another plate.
Observe the soil. Draw what you see.
Explore More
Draw a Conclusion. What is in this soil?
Date Name
52
© M
ac
mil
lan
/Mc
Gra
w-H
ill
Chapter 3 • Earth’s Materials Use with Lesson 3Activity Lab Book Soil
AlternativeExplore
How are these soils alike and different?
In this activity, you will discover how soils are alike and different.
What to Do
Study the photos of soils. Look at
each soil.
Describe the first soil. What do you
think it is made of?
Compare all the soil photographs.
What Did You Find Out?
How are the soils alike? How are the soils different?
• photo sorting cards 21–23, showing different kinds of soil
You need
Date Name
53
© M
ac
mil
lan
/Mc
Gra
w-H
ill
Chapter 3 • Earth’s Materials Use with Lesson 3Activity Lab Book Soil
Date Name Quick Lab
How much water can it hold?
What to Do
Experiment. Fill one flower pot
halfway with sandy soil. Have a
partner hold the pot over the empty
bucket. Then pour one half cup of
water into the flower pot.
Observe. Pour the water that is in
the bucket back into the measuring
cup. How much water is in the
measuring cup?
What Did You Find Out?
Compare. Repeat this experiment with the other
two soils. Why do you think the soils absorbed
different amounts of water?
• 3 kinds of soil (sandy, clay, topsoil)
• 3 flower pots with holes in the bottom
• bucket
• measuring cup
You need
Chapter 3 • Earth’s Materials Use with Lesson 3Activity Lab Book Soil54
© M
ac
mil
lan
/Mc
Gra
w-H
ill
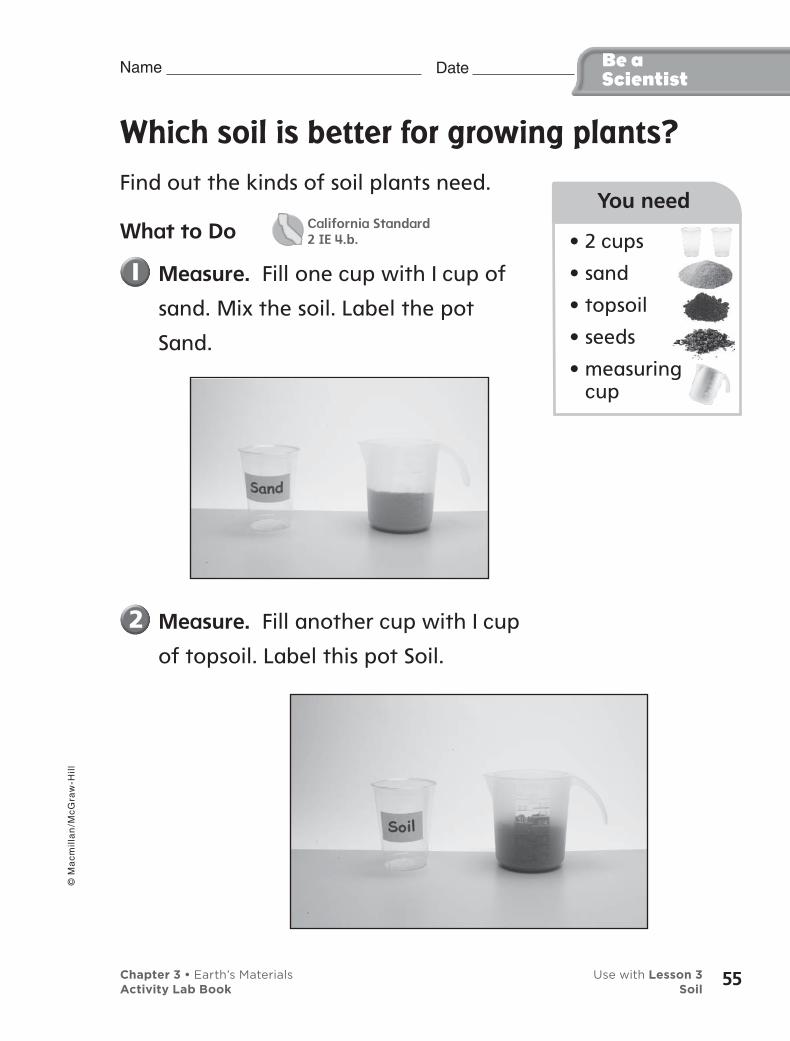
Date Name
Which soil is better for growing plants?
Find out the kinds of soil plants need.
What to Do
Measure. Fill one cup with 1 cup of
sand. Mix the soil. Label the pot
Sand.
Be aScientist
Measure. Fill another cup with 1 cup
of topsoil. Label this pot Soil.
• 2 cups
• sand
• topsoil
• seeds
• measuring cup
You need
© M
ac
mil
lan
/Mc
Gra
w-H
ill
55Chapter 3 • Earth’s Materials Use with Lesson 3Activity Lab Book Soil
California Standard2 IE 4.b.
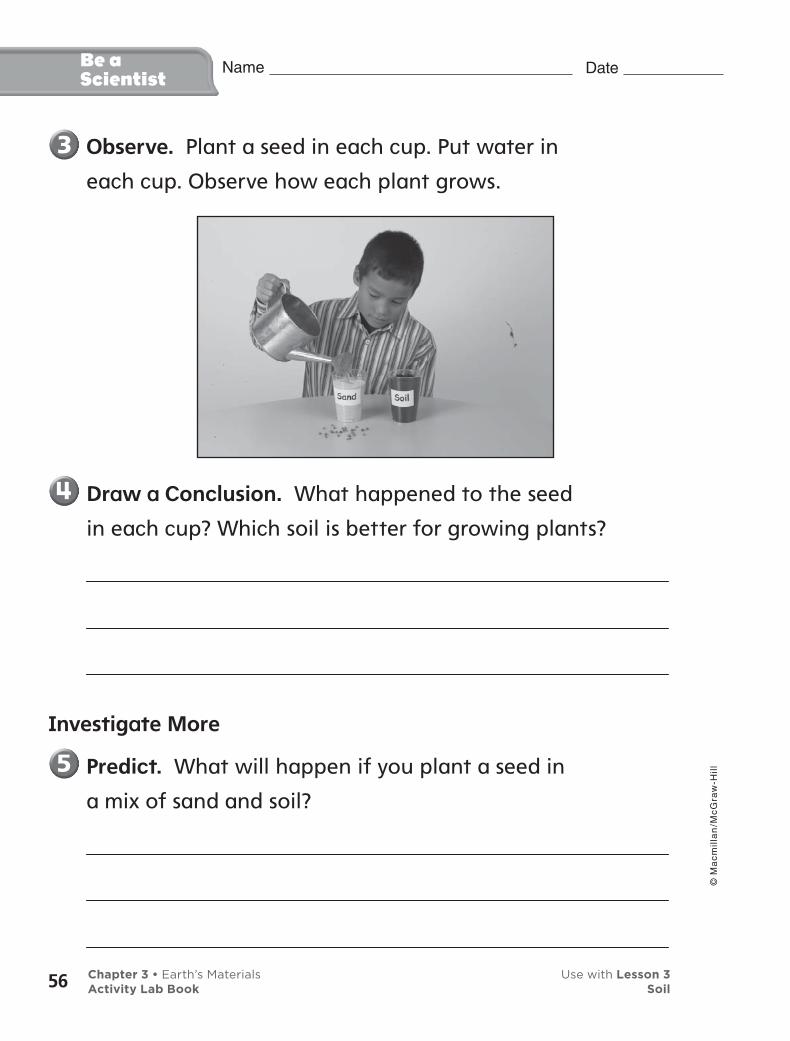
Observe. Plant a seed in each cup. Put water in
each cup. Observe how each plant grows.
Be aScientist
Draw a Conclusion. What happened to the seed
in each cup? Which soil is better for growing plants?
Investigate More
Predict. What will happen if you plant a seed in
a mix of sand and soil?
Date Name
Chapter 3 • Earth’s Materials Use with Lesson 3Activity Lab Book Soil56
© M
ac
mil
lan
/Mc
Gra
w-H
ill
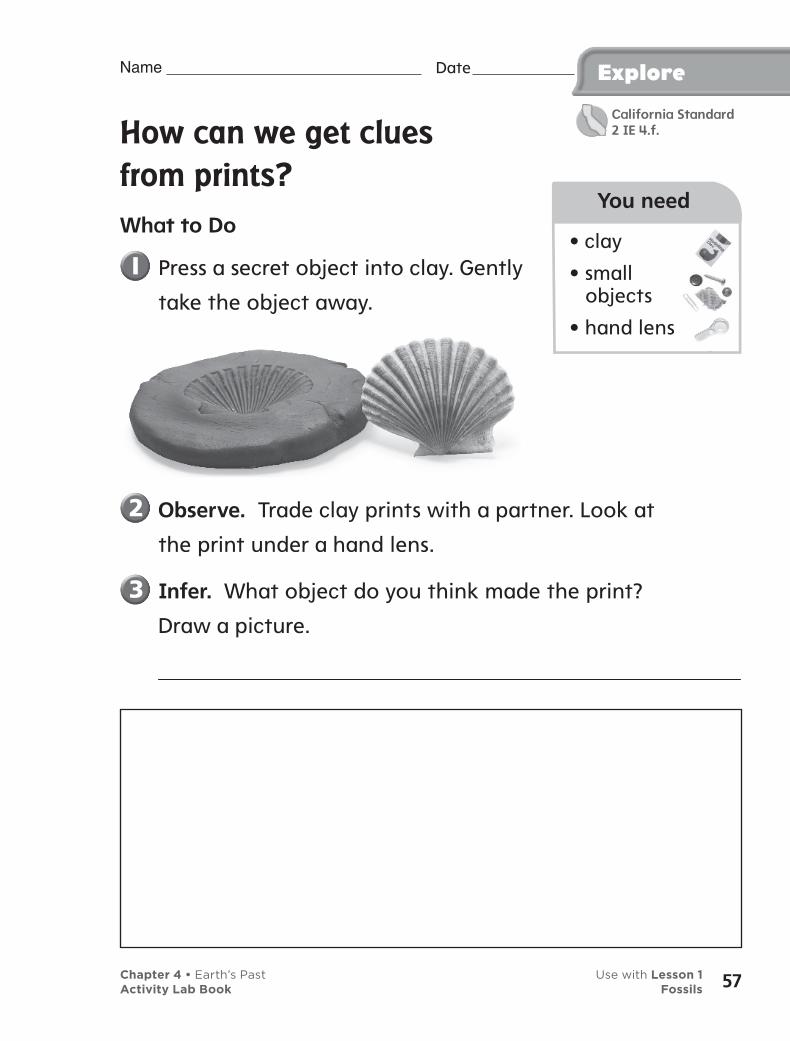
Explore
How can we get clues
from prints?
What to Do
Press a secret object into clay. Gently
take the object away.
Date Name
• clay
• small objects
• hand lens
You need
Observe. Trade clay prints with a partner. Look at
the print under a hand lens.
Infer. What object do you think made the print?
Draw a picture.
Chapter 4 • Earth’s Past Use with Lesson 1Activity Lab Book Fossils 57
California Standard2 IE 4.f.
Explore
Explore More
Communicate. What clues did you use to figure
out what made the print?
Date Name
Chapter 4 • Earth’s Past Use with Lesson 1Activity Lab Book Fossils58
© M
ac
mil
lan
/Mc
Gra
w-H
ill
What made each fossil?
What to Do
Compare Look at all of the fossil
photographs. Match each print with
the animal or object that could have
made the print.
What Did You Find Out?
How can you tell an animal print
from the print of an object?
How are the animal prints different from one
another?
AlternativeExplore
• photo sorting cards 33–40
• photographs of animals and objects that make prints
You need
Date Name
Chapter 4 • Earth’s Past Use with Lesson 1Activity Lab Book Fossils
© M
ac
mil
lan
/Mc
Gra
w-H
ill
59
Date Name Quick Lab
How can animals become fossils?
Make a Model. Pour a thin layer
of sand in each glass. Make sure each
glass has a different color sand.
Stack the glasses on top of one
another. You should see four layers of
sand on top of each other.
Observe. This is a model of how sedimentary rock is
made. Over time, layers of rock form on top of each
other. Draw a picture of what you see.
• 4 different colors of sand
• 4 clear plastic glasses
You need
Infer. How can this model help us understand
how an animal could become a fossil?
Chapter 4 • Earth’s Past Use with Lesson 1Activity Lab Book Fossils60
© M
ac
mil
lan
/Mc
Gra
w-H
ill
Date Name Focus on Skills
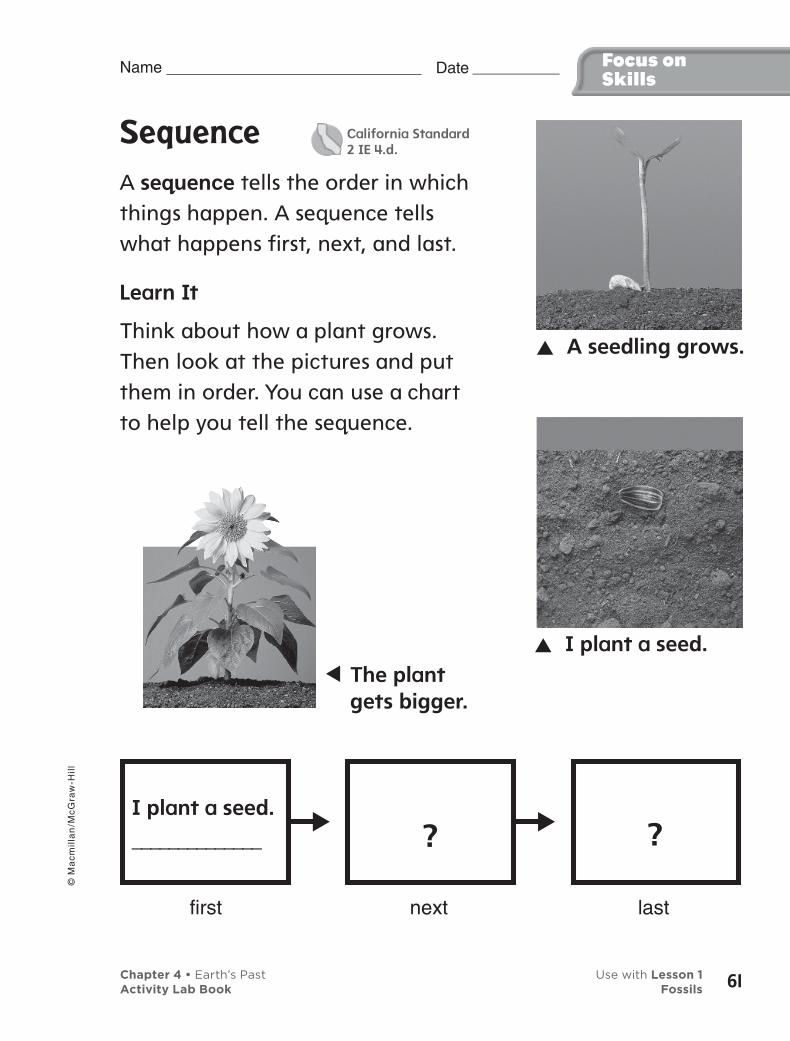
Sequence
A sequence tells the order in which things happen. A sequence tells what happens first, next, and last.
Learn It
Think about how a plant grows. Then look at the pictures and put them in order. You can use a chart to help you tell the sequence.
first next last
I plant a seed.
______________ ? ?
▲ A seedling grows.
▲ I plant a seed.
▲ The plant gets bigger.
Chapter 4 • Earth’s Past Use with Lesson 1Activity Lab Book Fossils
© M
ac
mil
lan
/Mc
Gra
w-H
ill
61
California Standard2 IE 4.d.
Date Name Focus onSkills
Try It
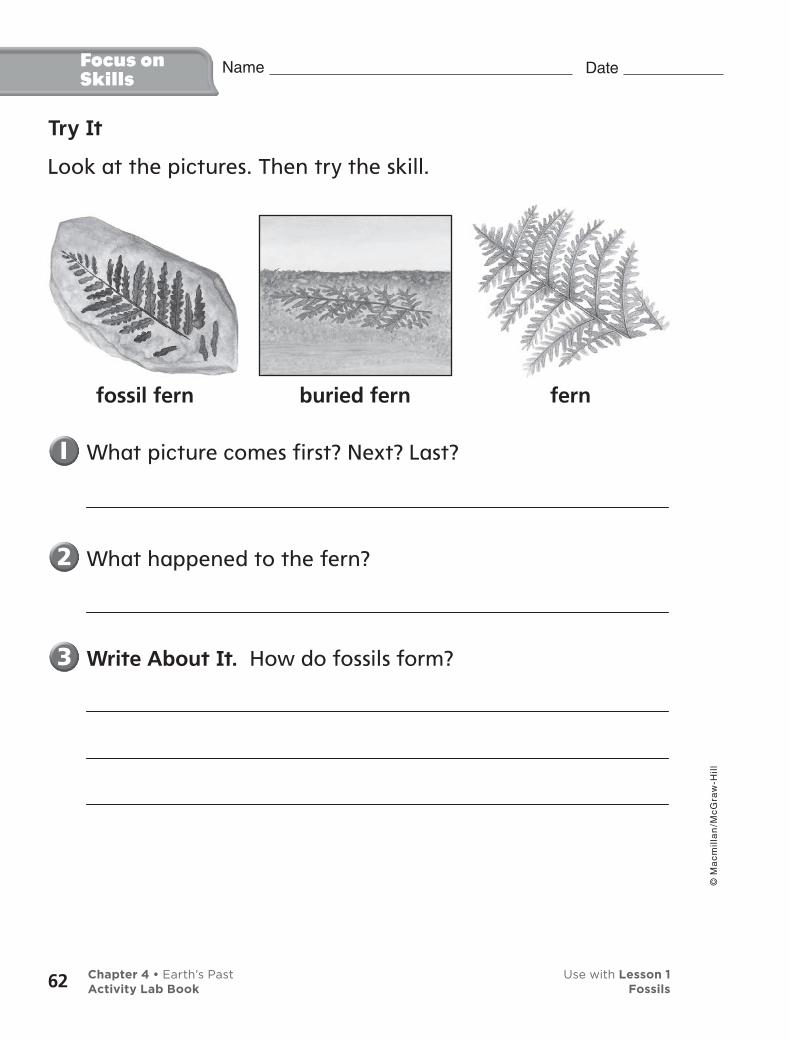
Look at the pictures. Then try the skill.
What picture comes first? Next? Last?
What happened to the fern?
Write About It. How do fossils form?
fossil fern buried fern fern
Chapter 4 • Earth’s Past Use with Lesson 1Activity Lab Book Fossils62
© M
ac
mil
lan
/Mc
Gra
w-H
ill
Date Name
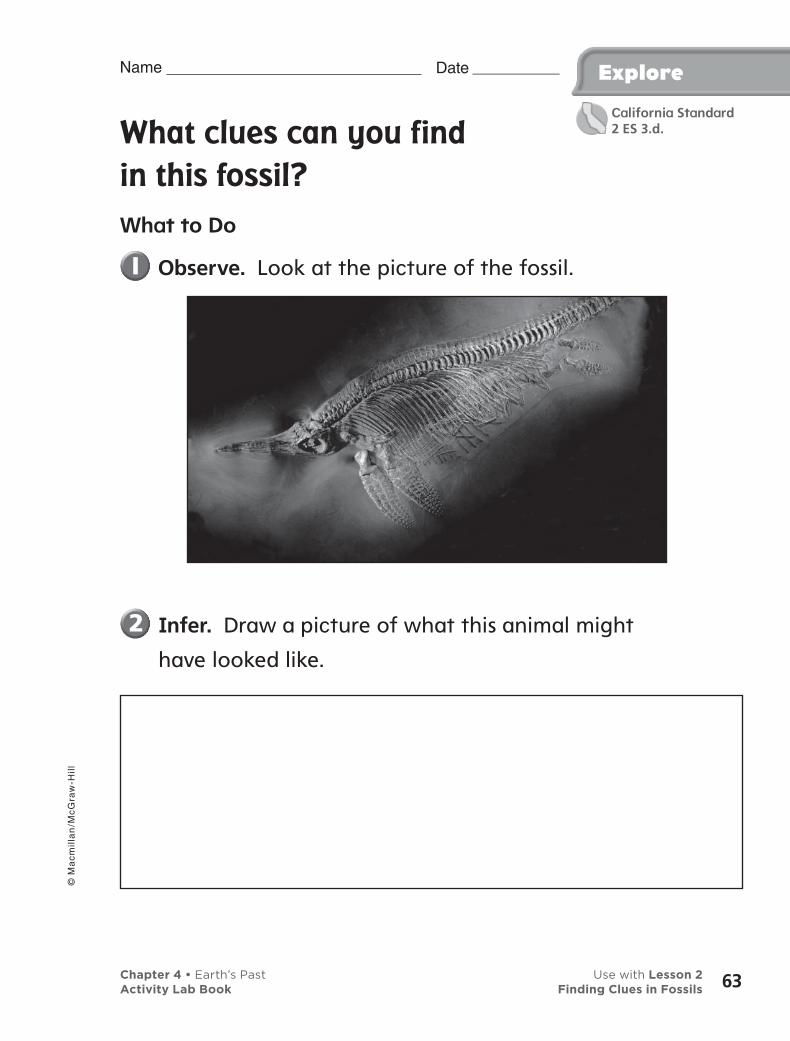
What clues can you find
in this fossil?
What to Do
Observe. Look at the picture of the fossil.
Explore
Infer. Draw a picture of what this animal might
have looked like.
Chapter 4 • Earth’s Past Use with Lesson 2Activity Lab Book Finding Clues in Fossils
© M
ac
mil
lan
/Mc
Gra
w-H
ill
63
California Standard2 ES 3.d.

Explore
Explore More
Infer. Look at the feet. How do you think this
animal moved? Why?
Date Name
Chapter 4 • Earth’s Past Use with Lesson 2Activity Lab Book Finding Clues in Fossils64
© M
ac
mil
lan
/Mc
Gra
w-H
ill
• photograph of animal fossil
• crayons
• paper
You need
What clues do you see?
In this activity, you will discover how fossils give clues about what an animal might have looked like.
What to Do
Observe. Look carefully at the fossil
photograph. What clues does the
fossil give about what the animal
looked like when it was alive?
What Did You Find Out?
Draw a picture of what you think the animal might
have looked like. Discuss your drawing with a
partner.
AlternativeExplore
Date Name
Chapter 4 • Earth’s Past Use with Lesson 2Activity Lab Book Finding Clues in Fossils
© M
ac
mil
lan
/Mc
Gra
w-H
ill
65

Quick Lab
Can you put a skeleton
back together?
What to Do
Infer. Work with your group to put
the skeleton pieces together. Tape the
bones in the places where you think
they belong.
Compare. Look at your skeleton next
to the picture of the whole skeleton.
How is your group’s skeleton like the
actual skeleton? How is it different?
What Did You Find Out?
What could have made your job easier?
How did your group act like scientists?
• animal skeleton cut-outs
• picture of skeleton put together
• tape
You need
Date Name
Chapter 4 • Earth’s Past Use with Lesson 2Activity Lab Book Finding Clues in Fossils66
© M
ac
mil
lan
/Mc
Gra
w-H
ill
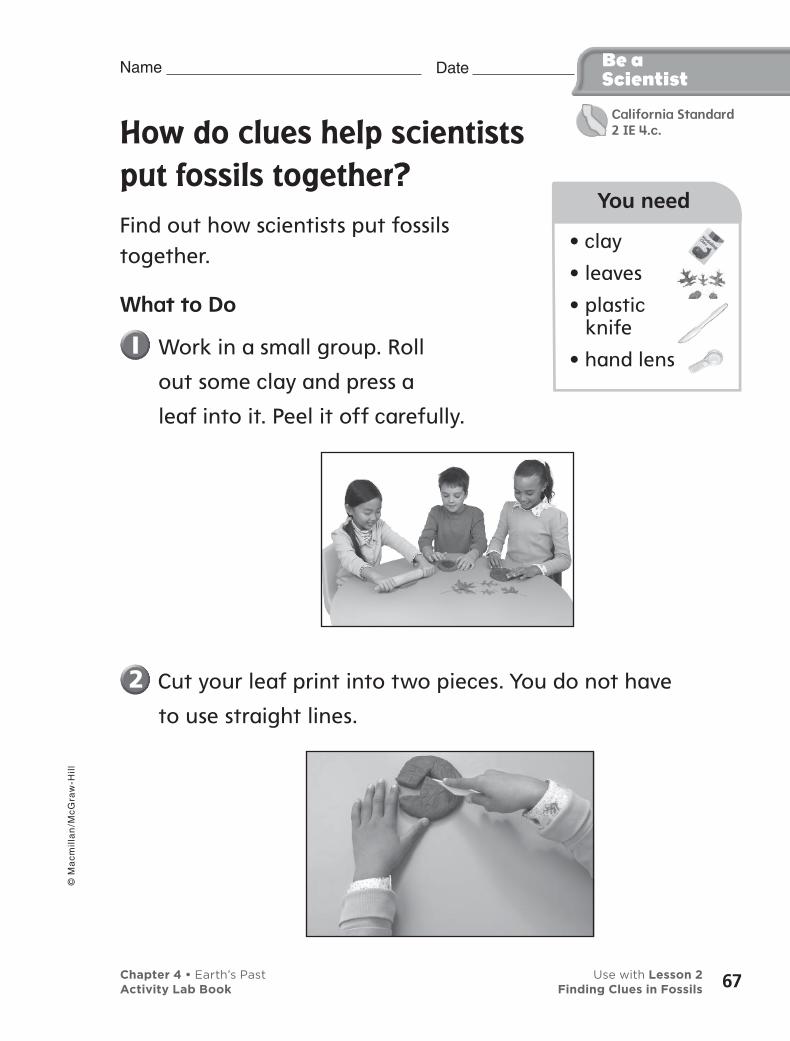
How do clues help scientists
put fossils together?
Find out how scientists put fossils together.
What to Do
Work in a small group. Roll
out some clay and press a
leaf into it. Peel it off carefully.
Be a Scientist
• clay
• leaves
• plastic knife
• hand lens
You need
Cut your leaf print into two pieces. You do not have
to use straight lines.
Date Name
Chapter 4 • Earth’s Past Use with Lesson 2Activity Lab Book Finding Clues in Fossils
© M
ac
mil
lan
/Mc
Gra
w-H
ill
67
California Standard2 IE 4.c.
Date Name Be aScientist
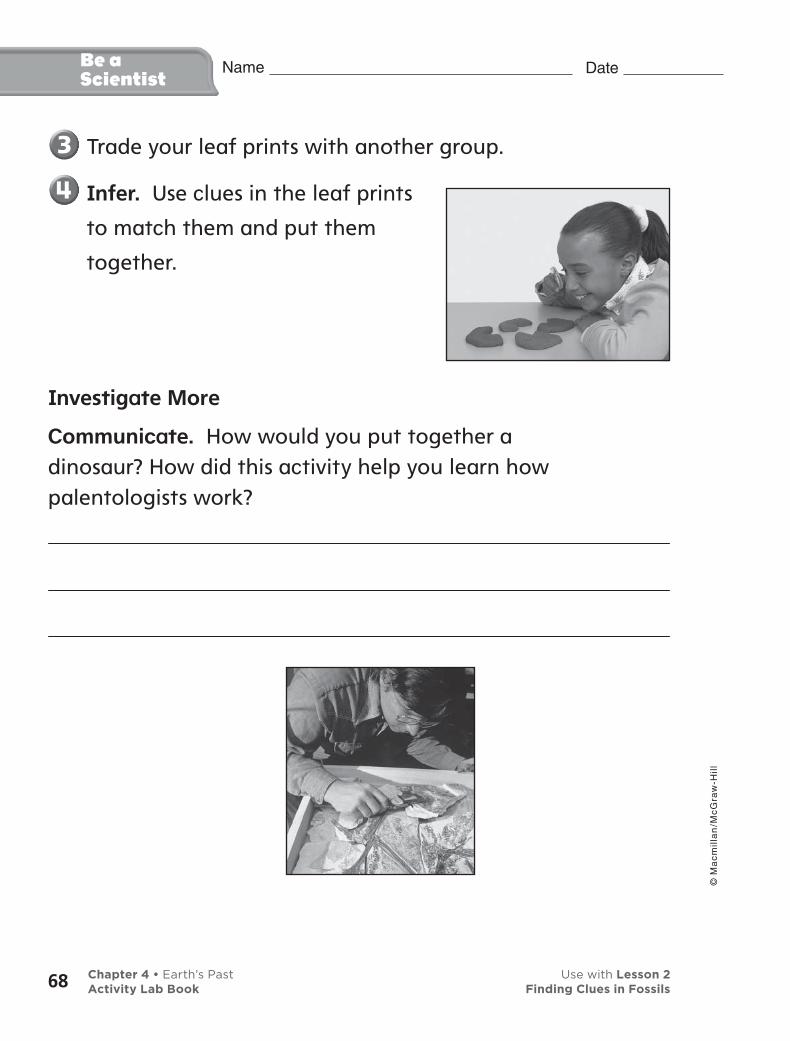
Trade your leaf prints with another group.
Infer. Use clues in the leaf prints
to match them and put them
together.
Investigate More
Communicate. How would you put together a dinosaur? How did this activity help you learn how palentologists work?
Chapter 4 • Earth’s Past Use with Lesson 2Activity Lab Book Finding Clues in Fossils68
© M
ac
mil
lan
/Mc
Gra
w-H
ill
Date Name Explore
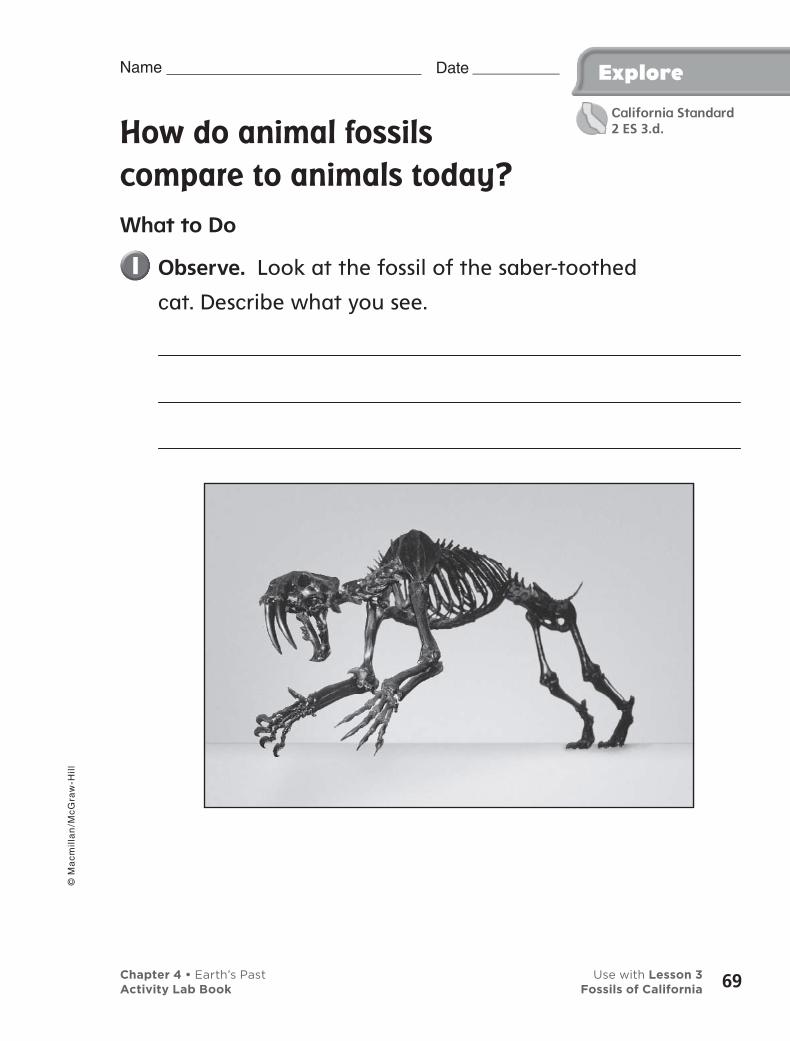
How do animal fossils
compare to animals today?
What to Do
Observe. Look at the fossil of the saber-toothed
cat. Describe what you see.
Chapter 4 • Earth’s Past Use with Lesson 3Activity Lab Book Fossils of California
© M
ac
mil
lan
/Mc
Gra
w-H
ill
69
California Standard2 ES 3.d.
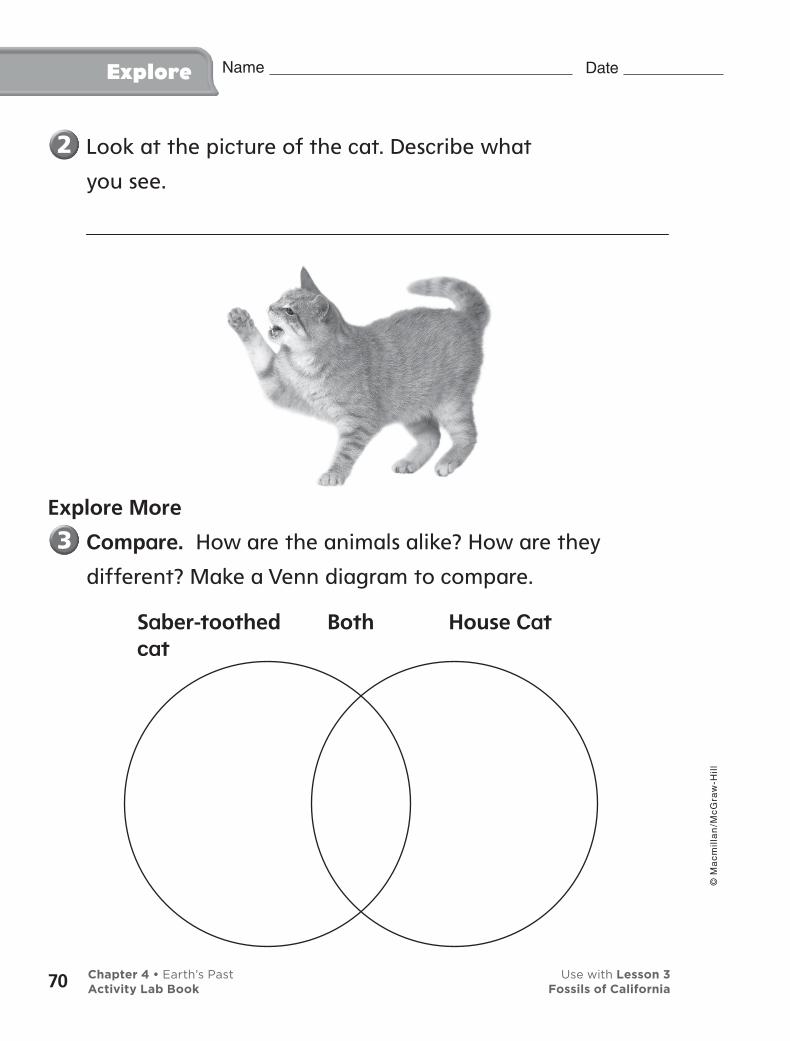
Explore
Look at the picture of the cat. Describe what
you see.
Explore More
Compare. How are the animals alike? How are they
different? Make a Venn diagram to compare.
Date Name
Saber-toothed cat
House CatBoth
Chapter 4 • Earth’s Past Use with Lesson 3Activity Lab Book Fossils of California70
© M
ac
mil
lan
/Mc
Gra
w-H
ill
Which animals could be related?
What to Do
Observe. Look at the fossil photos.
Compare. To which animals do these
fossils look as if they are related?
Compare. Look for similarities between the fossil
and the animal. How could you tell which animals
seemed to go together?
What Did You Find Out?
Make your own rule to classify the animals. Tell
about it.
AlternativeExplore
• photo sorting cards 31, 32, 36–40
You need
Date Name
Chapter 4 • Earth’s Past Use with Lesson 3Activity Lab Book Fossils of California
© M
ac
mil
lan
/Mc
Gra
w-H
ill
71
Quick Lab Date Name
What fossils can you dig up?
What to Do
Make a Model. Your teacher will give
your group a box filled with plastic
bones covered by sand. Watch your
teacher as she divides the box into
four parts. Use the string to divide
your box. These parts will help you
keep track of where you find
each fossil.
Observe. Dig carefully in the box to look for
fossils. Use the plastic spoons and paint brushes as
tools. Make a sketch on another piece of paper of
each fossil that you find. Label each fossil with its
location.
What Did You Find Out?
Draw a Conclusion. How was the activity like what
paleontologists do? How was it different?
• box filled with sand
• toy plastic bones
• plastic spoons
• small paint brushes
• string
You need
Chapter 4 • Earth’s Past Use with Lesson 3Activity Lab Book Fossils of California72
© M
ac
mil
lan
/Mc
Gra
w-H
ill
ExploreDate Name
What ways do you use water?
What to Do
Record Data. How many times do you use water
during the day?
How many times did you drink water?
What other ways did you use water?
Make a tally chart.
How I Use Water
Drink water
Wash hands
Water plants
Chapter 5 • Earth’s Resources Use with Lesson 1Activity Lab Book Natural Resources
© M
ac
mil
lan
/Mc
Gra
w-H
ill
73
California Standard2 IE 4.e.
Explore Date Name
Use your tally chart to make a bar graph. Show how
many times you used water.
Explore More
Communicate. What ways do you use water at
home?
0
1
2
3
4
5
6
7
8
9
10
Chapter 5 • Earth’s Resources Use with Lesson 1Activity Lab Book Natural Resources74
© M
ac
mil
lan
/Mc
Gra
w-H
ill
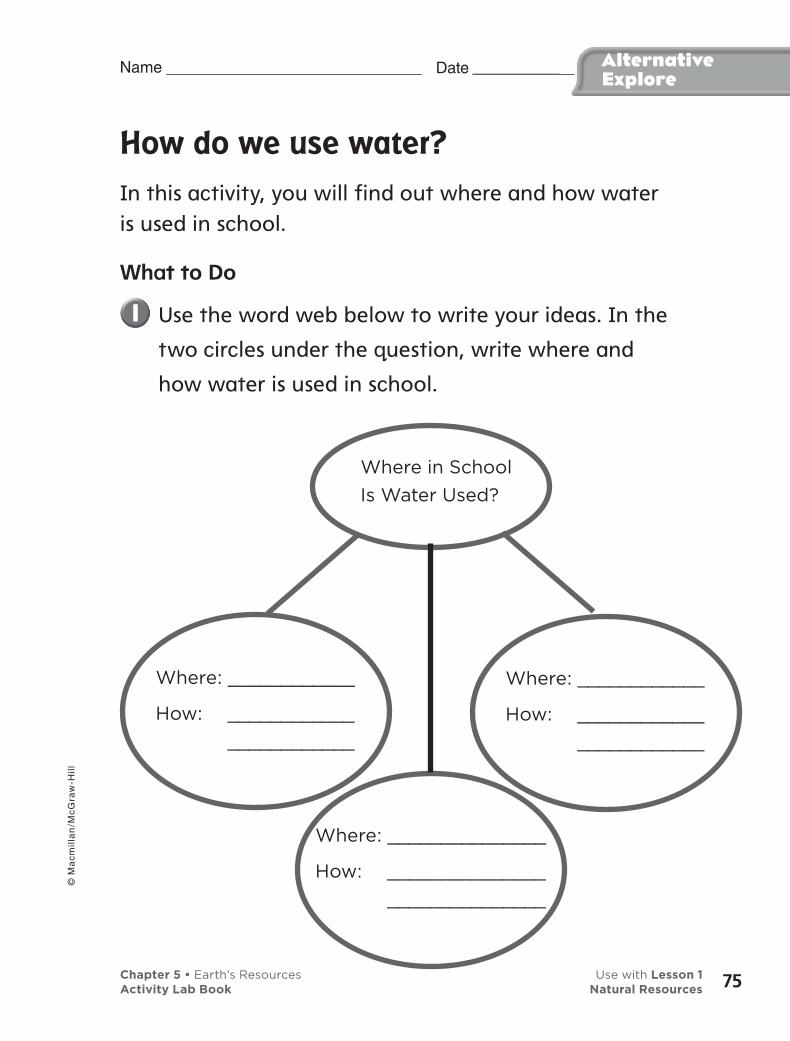
Date Name AlternativeExplore
How do we use water?
In this activity, you will find out where and how water is used in school.
What to Do
Use the word web below to write your ideas. In the
two circles under the question, write where and
how water is used in school.
Where: ____________
How: ____________
____________
Where: _______________
How: _______________
_______________
Where: ____________
How: ____________
____________
Where in School
Is Water Used?
Chapter 5 • Earth’s Resources Use with Lesson 1Activity Lab Book Natural Resources
© M
ac
mil
lan
/Mc
Gra
w-H
ill
75
Date Name Quick Lab
What resources do we write with?
What to Do
Fold a piece of paper in half. On one
side of the paper, use the pencil to
write your name. On the other side of
the paper, use the charcoal stick to
write your name.
What Did You Find Out?
Compare. How is the writing for each name different?
Why do you think an artist might use charcoal instead
of a pencil?
Compare. Repeat the exercise, but this time dip the
pencil and the charcoal in water before you write. Talk
about how the water changed the way the pencil and
the charcoal wrote.
• pencil
• charcoal stick
• cup of water
You need
Chapter 5 • Earth’s Resources Use with Lesson 1Activity Lab Book Natural Resources76
© M
ac
mil
lan
/Mc
Gra
w-H
ill
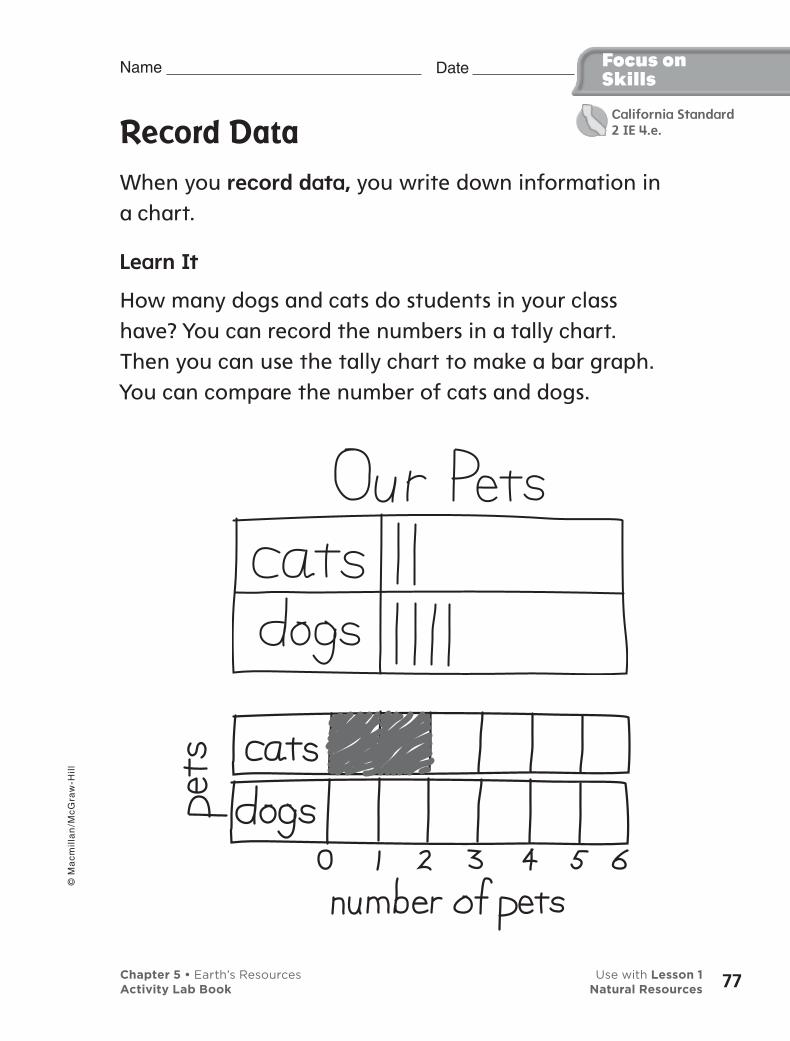
Date Name
Record Data
When you record data, you write down information in a chart.
Learn It
How many dogs and cats do students in your class have? You can record the numbers in a tally chart. Then you can use the tally chart to make a bar graph. You can compare the number of cats and dogs.
Focus onSkills
Chapter 5 • Earth’s Resources Use with Lesson 1Activity Lab Book Natural Resources
© M
ac
mil
lan
/Mc
Gra
w-H
ill
77
California Standard2 IE 4.e.

Date Name
Try It
Look around your classroom. Find objects made out of plants. Find objects made out of minerals. Record what you find in the tally chart below. Then use a separate piece of paper to make a bar graph.
Focus onSkills
How many objects made out of plants did you find?
How many objects made out of minerals did
you find?
Write About It. Why is a bar graph useful?
Objects in Classroom
Objects made out of plants
Objects made out of minerals
Chapter 5 • Earth’s Resources Use with Lesson 1Activity Lab Book Natural Resources78
© M
ac
mil
lan
/Mc
Gra
w-H
ill
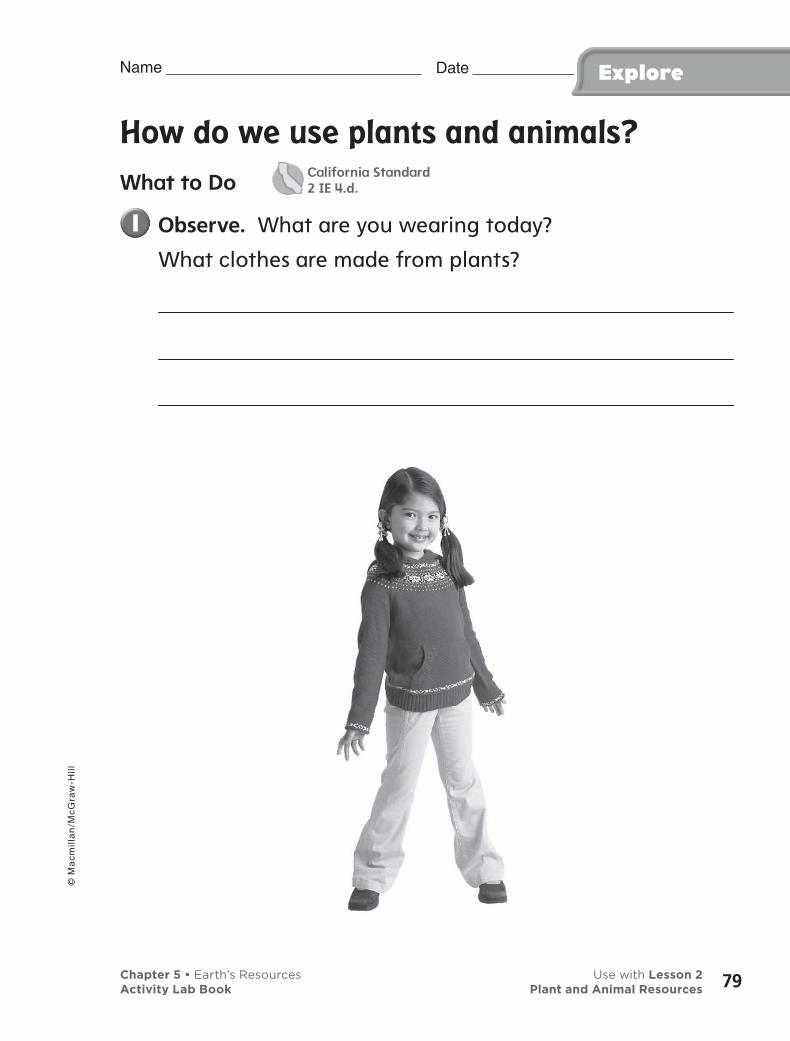
Date Name Explore
How do we use plants and animals?
What to Do
Observe. What are you wearing today?
What clothes are made from plants?
Chapter 5 • Earth’s Resources Use with Lesson 2Activity Lab Book Plant and Animal Resources
© M
ac
mil
lan
/Mc
Gra
w-H
ill
79
California Standard2 IE 4.d.
Date Name Explore
Look at your shoes. What parts are made from
animals? What parts are made from plants?
Explore More
Observe. Look around the room. What things are
made from plants?
What things are made from animals?
How do you know?
Chapter 5 • Earth’s Resources Use with Lesson 2Activity Lab Book Plant and Animal Resources80
© M
ac
mil
lan
/Mc
Gra
w-H
ill
Date Name AlternativeExplore
• clothing catalogs
You need
What are these clothes made of?
In this activity, you will discuss some ways people use natural resources.
What to Do
What are some natural resources that
were used to make the items that you
are wearing today?
Work with your partners. Look at the clothes and
shoes in the catalog. What natural resources are
they made from? Make a list.
What Did You Find Out?
Share your list with another group. How are your
lists similar? How are they different?
Chapter 5 • Earth’s Resources Use with Lesson 2Activity Lab Book Plant and Animal Resources
© M
ac
mil
lan
/Mc
Gra
w-H
ill
81
Date Name Quick Lab
Make yogurt cheese
What to Do
Put a piece of cheesecloth inside the
colander. Put the colander over the
large bowl.
Put one quart of plain yogurt into the
colander. Let the extra liquid
drain into the bowl. What do you see
in the bowl?
Cover the colander and put it in the refrigerator
overnight.
What Did You Find Out?
Record Data. Uncover the colander. What changes
do you see in the yogurt?
• colander
• large bowl
• cheesecloth
• plain yogurt
• plastic spoons
You need
Chapter 5 • Earth’s Resources Use with Lesson 2Activity Lab Book Plant and Animal Resources82
© M
ac
mil
lan
/Mc
Gra
w-H
ill
Date Name
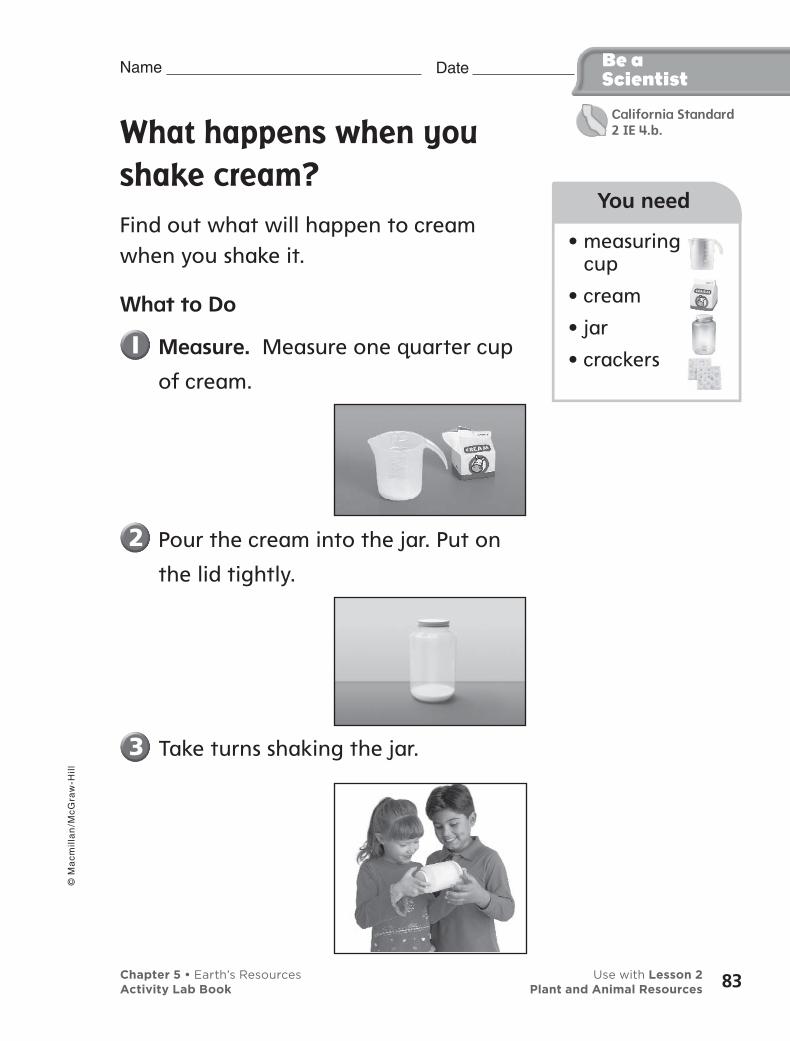
What happens when you
shake cream?
Find out what will happen to cream when you shake it.
What to Do
Measure. Measure one quarter cup
of cream.
Pour the cream into the jar. Put on
the lid tightly.
Take turns shaking the jar.
Be aScientist
• measuring cup
• cream
• jar
• crackers
You need
Chapter 5 • Earth’s Resources Use with Lesson 2Activity Lab Book Plant and Animal Resources
© M
ac
mil
lan
/Mc
Gra
w-H
ill
83
California Standard2 IE 4.b.
Date Name
Observe. What happened to the cream? How did it
change?
Draw a Conclusion. How do we use cream? Discuss
your answers with a partner.
Investigate More
Communicate. How do people use chickens? What other animals are important to people? Why?
Be aScientist
Chapter 5 • Earth’s Resources Use with Lesson 2Activity Lab Book Plant and Animal Resources84
© M
ac
mil
lan
/Mc
Gra
w-H
ill
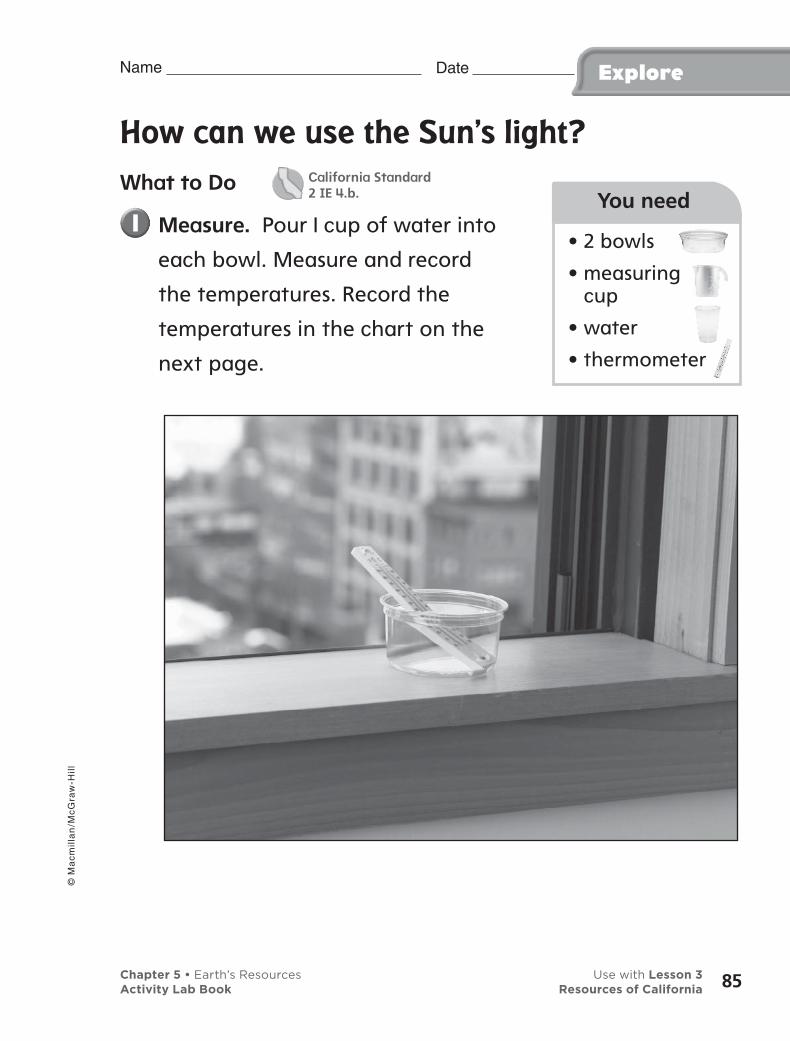
Date Name Explore
How can we use the Sun’s light?
What to Do
Measure. Pour 1 cup of water into
each bowl. Measure and record
the temperatures. Record the
temperatures in the chart on the
next page.
• 2 bowls
• measuring cup
• water
• thermometer
You need
Chapter 5 • Earth’s Resources Use with Lesson 3Activity Lab Book Resources of California 85
© M
ac
mil
lan
/Mc
Gra
w-H
ill
California Standard2 IE 4.b.

Date Name Explore
Record Data. Put one bowl in a sunny place. Put
the other in a dark place. Measure the temperatures
at the end of the day. Record the temperatures in
the chart below.
Communicate. What happened to the water?
Explore More
Draw a Conclusion. How do we use the Sun’s light?
Starting Temperature Temperature Later
Bowl in sunny place
Bowl in dark place
Chapter 5 • Earth’s Resources Use with Lesson 3Activity Lab Book Resources of California86
© M
ac
mil
lan
/Mc
Gra
w-H
ill

Date Name AlternativeExplore
• crayons
You need
How do we use the Sun?
In this activity, you will discuss how people use the Sun.
What to Do
Think about how the Sun is used for food, energy, and fun. Write the ways people use the Sun on the rays of the Sun below. In the center of the Sun, draw a picture of one way people use the Sun.
Chapter 5 • Earth’s Resources Use with Lesson 3Activity Lab Book Resources of California
© M
ac
mil
lan
/Mc
Gra
w-H
ill
87
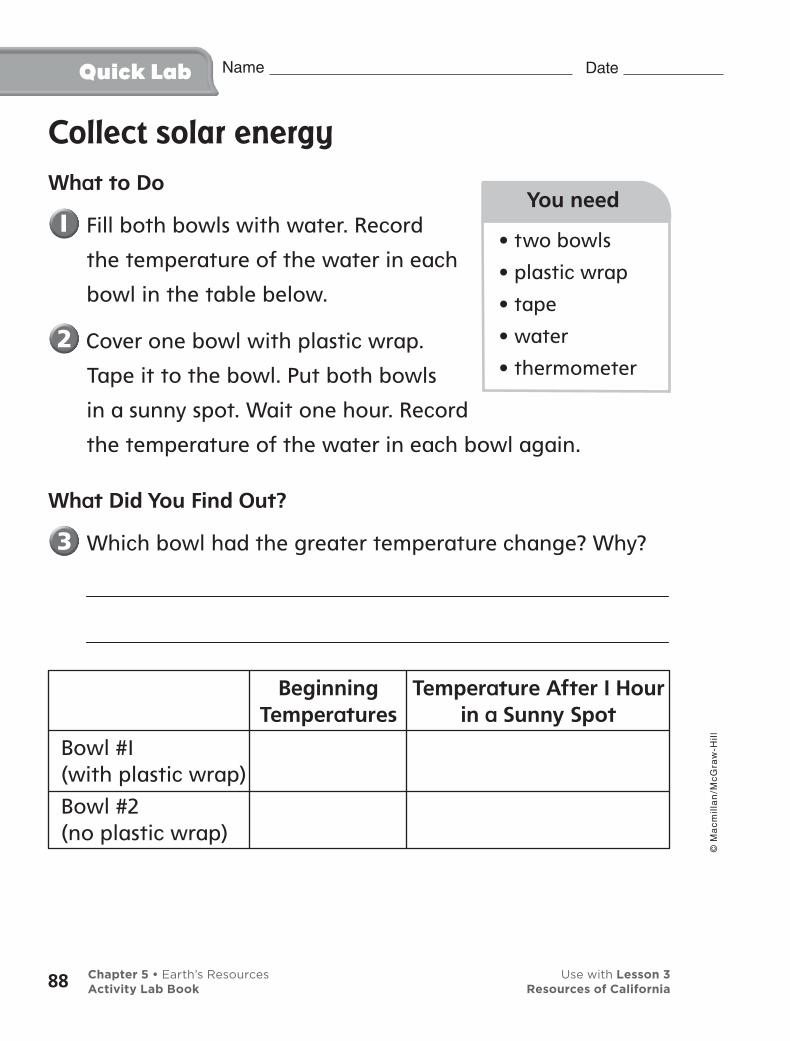
Date Name Quick Lab
Collect solar energy
What to Do
Fill both bowls with water. Record
the temperature of the water in each
bowl in the table below.
Cover one bowl with plastic wrap.
Tape it to the bowl. Put both bowls
in a sunny spot. Wait one hour. Record
the temperature of the water in each bowl again.
What Did You Find Out?
Which bowl had the greater temperature change? Why?
• two bowls
• plastic wrap
• tape
• water
• thermometer
You need
Beginning Temperature After 1 Hour Temperatures in a Sunny Spot
Bowl #1 (with plastic wrap) Bowl #2 (no plastic wrap)
Chapter 5 • Earth’s Resources Use with Lesson 3Activity Lab Book Resources of California88
© M
ac
mil
lan
/Mc
Gra
w-H
ill
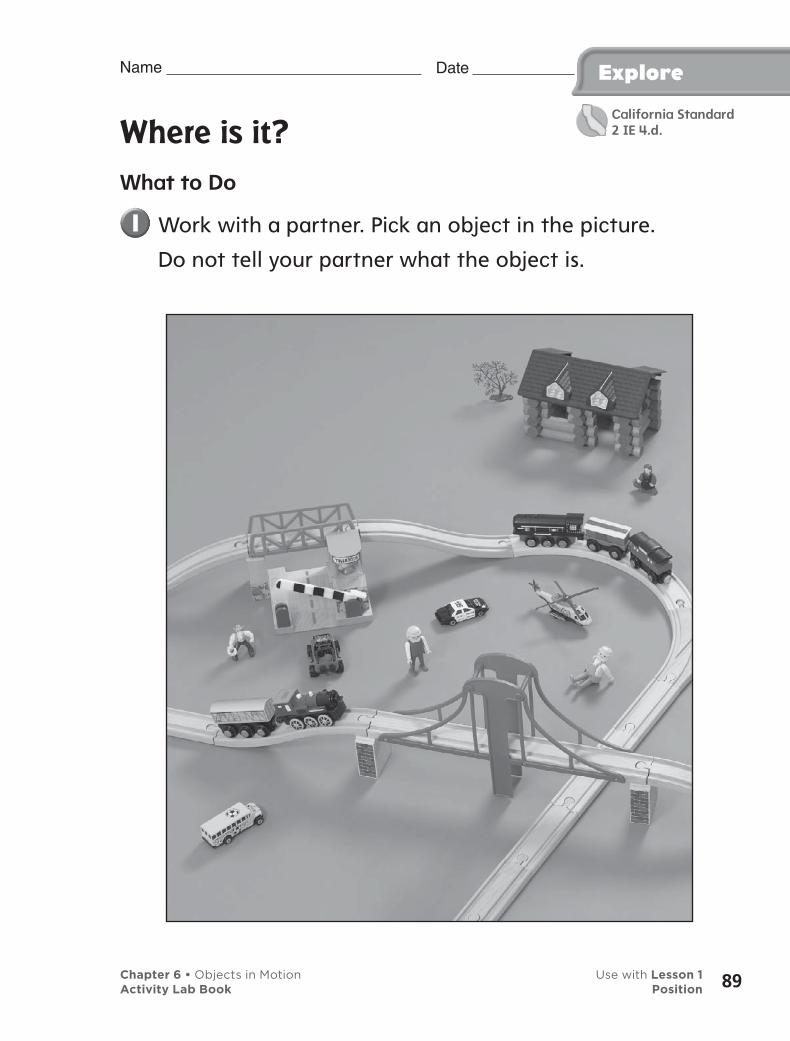
ExploreDate Name
Where is it?
What to Do
Work with a partner. Pick an object in the picture.
Do not tell your partner what the object is.
California Standard2 IE 4.d.
Chapter 6 • Objects in Motion Use with Lesson 1Activity Lab Book Position 89

Explore Date Name
Communicate. Describe where your object is.
Give clues to your partner. Your partner will find
the object.
Switch with your partner and try again.
Explore More
Communicate. Write directions to find an object in
your classroom. Then switch with a partner.
Chapter 6 • Objects in Motion Use with Lesson 1Activity Lab Book Position90
© M
ac
mil
lan
/Mc
Gra
w-H
ill
Date Name
I Spy!
In this activity, you will choose an object and describe its position without telling what the object is.
What to Do
Work with a partner. Choose an object that you see
nearby. Write two sentences to tell where it is. Use
position words.
Show your partner your sentence. Do not tell your
partner what the object is. Ask your partner to
guess the object that you chose. When your partner
finds the object, it is your turn to find an object.
What Did You Find Out?
What position words helped you to guess an object?
AlternativeExplore
Chapter 6 • Objects in Motion Use with Lesson 1Activity Lab Book Position
© M
ac
mil
lan
/Mc
Gra
w-H
ill
91
Date Name Quick Lab
Scavenger hunt
What to Do
Get a clue card from your teacher.
With your partner follow the
directions on the clue card to find
the mystery object.
Write the name of the mystery object on the index
card. Measure the object and write its length on the
card. Your teacher will give you a star sticker and
a new clue card if you have the right object and
measurement.
Repeat this activity until you have found and
measured five mystery objects.
What Did You Find Out?
Communicate. How did your results compare with
your classmates?
• index cards
• ruler
• pencil
You need
Chapter 6 • Objects in Motion Use with Lesson 1Activity Lab Book Position92
© M
ac
mil
lan
/Mc
Gra
w-H
ill
Date Name
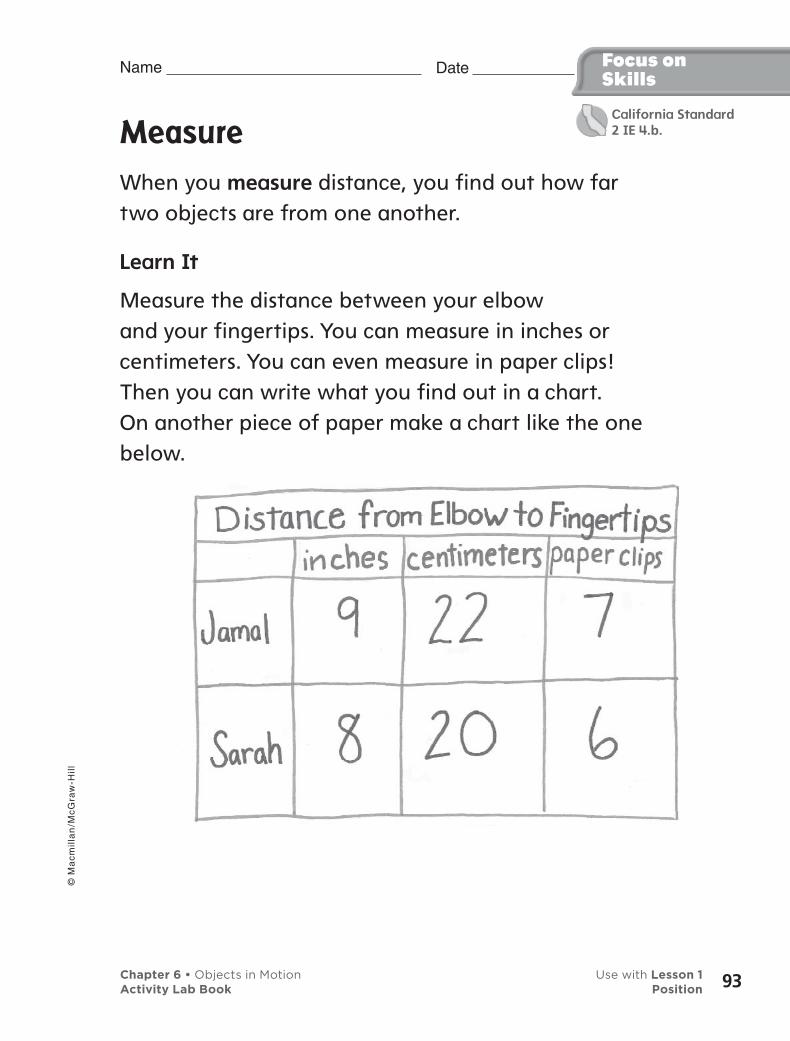
Measure
When you measure distance, you find out how far two objects are from one another.
Learn It
Measure the distance between your elbow and your fingertips. You can measure in inches or centimeters. You can even measure in paper clips! Then you can write what you find out in a chart.On another piece of paper make a chart like the one below.
Focus onSkills
California Standard2 IE 4.b.
Chapter 6 • Objects in Motion Use with Lesson 1Activity Lab Book Position
© M
ac
mil
lan
/Mc
Gra
w-H
ill
93
Date Name
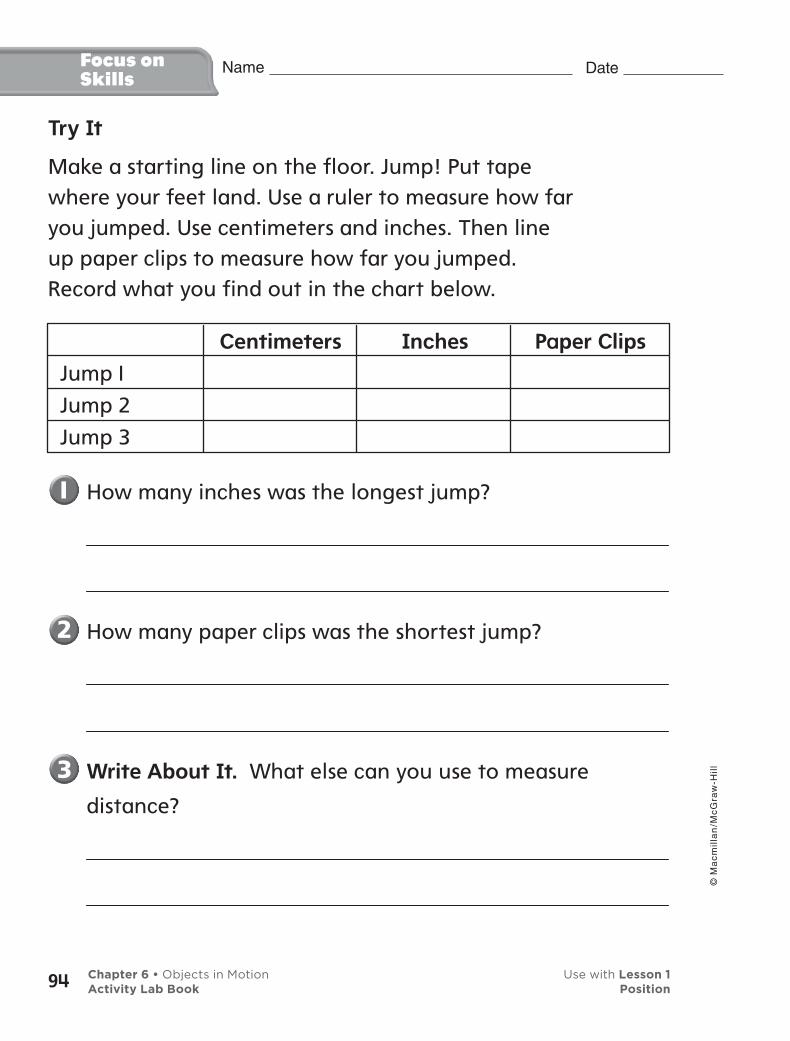
Try It
Make a starting line on the floor. Jump! Put tape where your feet land. Use a ruler to measure how far you jumped. Use centimeters and inches. Then line up paper clips to measure how far you jumped. Record what you find out in the chart below.
Focus onSkills
How many inches was the longest jump?
How many paper clips was the shortest jump?
Write About It. What else can you use to measure
distance?
Centimeters Inches Paper Clips
Jump 1Jump 2Jump 3
Chapter 6 • Objects in Motion Use with Lesson 1Activity Lab Book Position94
© M
ac
mil
lan
/Mc
Gra
w-H
ill
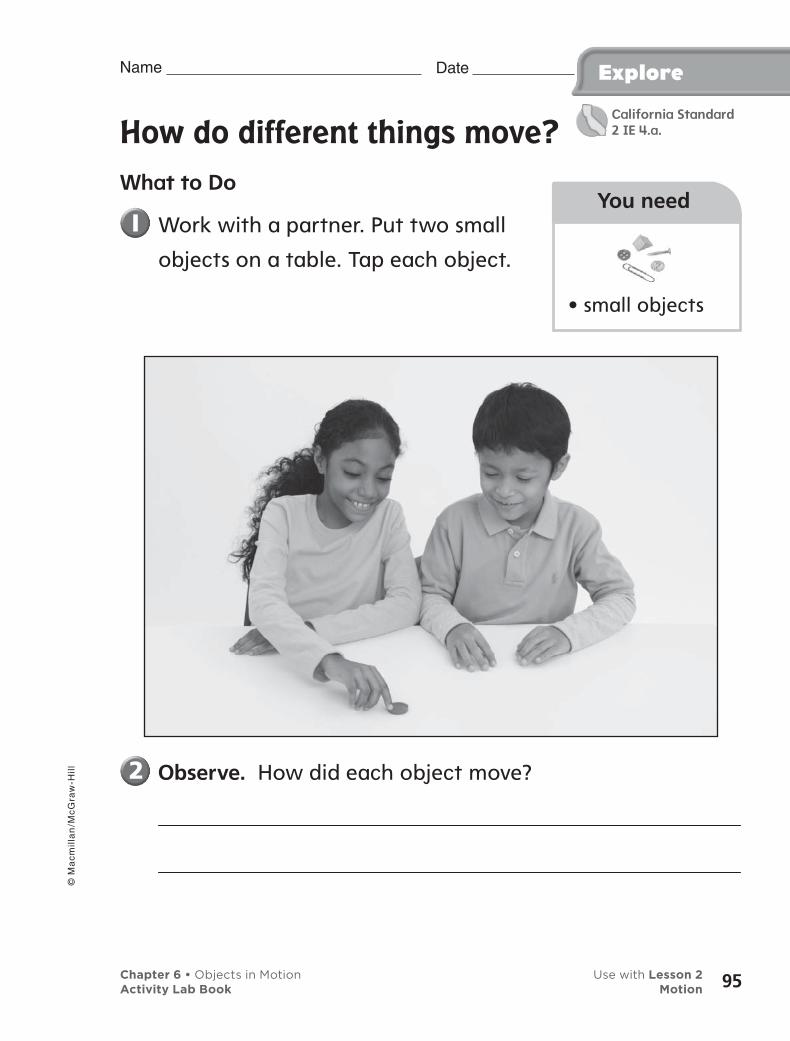
Date Name Explore
How do different things move?
What to Do
Work with a partner. Put two small
objects on a table. Tap each object.
Observe. How did each object move?
• small objects
You need
California Standard2 IE 4.a.
Chapter 6 • Objects in Motion Use with Lesson 2Activity Lab Book Motion
© M
ac
mil
lan
/Mc
Gra
w-H
ill
95
Explore Date Name
Explore More
Predict. Try moving other objects. Which object
do you think will travel the farthest? Why do you
think so?
Chapter 6 • Objects in Motion Use with Lesson 2Activity Lab Book Motion96
© M
ac
mil
lan
/Mc
Gra
w-H
ill
Date Name
Out of the window
In this activity, you will observe an object from outside and tell how the object is moving.
What to Do
Look outside the classroom window for moving
objects.
Communicate. How does the object move?
What Did You Find Out?
Do you think your object can move in a different
way? How?
AlternativeExplore
Chapter 6 • Objects in Motion Use with Lesson 2Activity Lab Book Motion
© M
ac
mil
lan
/Mc
Gra
w-H
ill
97
Date Name
Crazy races
What to Do
Predict. What are some ways that
you can move across the room
besides walking or running? Which is
the fastest? The slowest?
Record Data. Take turns acting out a movement.
Use the stopwatch to time how long it takes
someone to move across the room. Record the time
on the chart below.
• stopwatch
You need
Kind of Movement How Long Does It Take?
1. 2.
3.
4.
5.
Quick Lab
Chapter 6 • Objects in Motion Use with Lesson 2Activity Lab Book Motion98
© M
ac
mil
lan
/Mc
Gra
w-H
ill

Date Name
• masking tape
• ruler
• wind-up toys
• stopwatch
You need
Which toy moves fastest?
You can compare the speeds of objects.
What to Do
Measure. Put tape on the floor to
make a starting line. Then put tape
20 centimeters away to make a
finish line.
Step 1
Be aScientist
Wind up a toy. When you let go of the toy at the
starting line, have your partner start the stopwatch.
When the toy crosses the finish line, stop the watch.
Record how long it took for the toy to finish. Use
the chart on the next page.
California Standard2 IE 4.a.
Chapter 6 • Objects in Motion Use with Lesson 2Activity Lab Book Motion
© M
ac
mil
lan
/Mc
Gra
w-H
ill
99
Date Name
Wind up another toy and repeat the steps. Record
the time on the chart.
Compare. Which toy was faster? If you did not
have a stopwatch to measure the time, how could
you find out which toy was faster?
Investigate More
If the finish line were farther away, would the same
toy win? How could you check your answer?
Be aScientist
Time
First Toy
Second Toy
Chapter 6 • Objects in Motion Use with Lesson 2Activity Lab Book Motion100
© M
ac
mil
lan
/Mc
Gra
w-H
ill
Date Name
• toy car
• masking tape
• ruler
You need
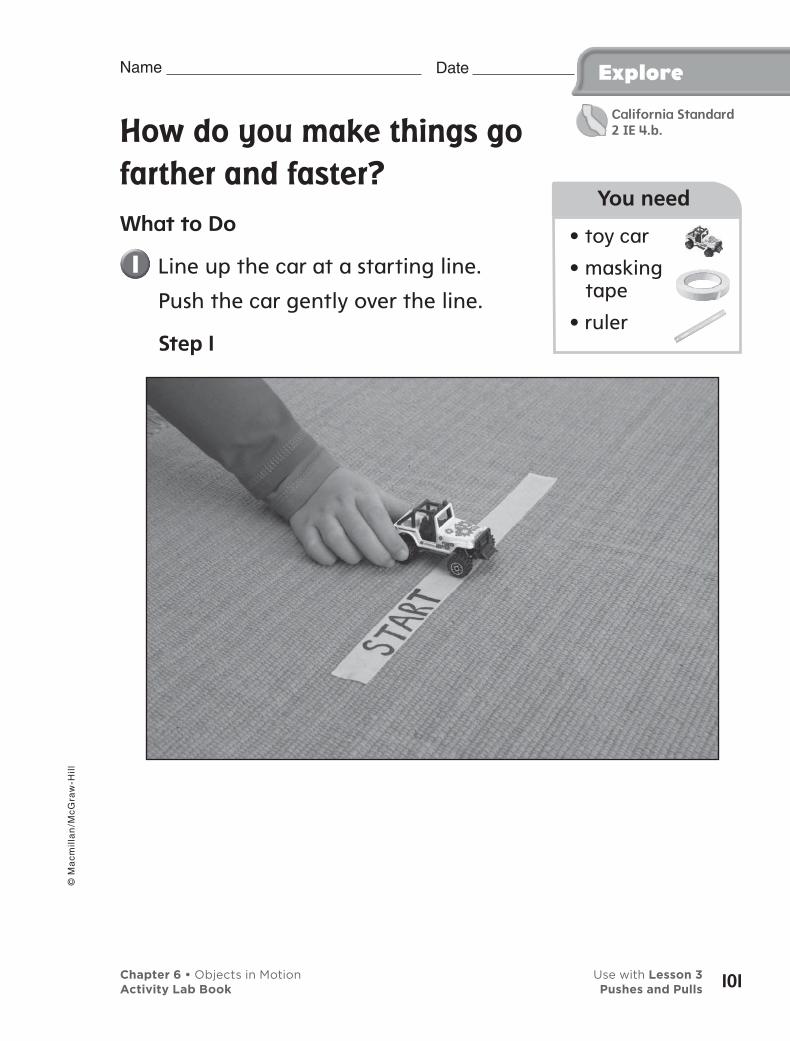
Explore
How do you make things go
farther and faster?
What to Do
Line up the car at a starting line.
Push the car gently over the line.
Step 1
California Standard2 IE 4.b.
Chapter 6 • Objects in Motion Use with Lesson 3Activity Lab Book Pushes and Pulls
© M
ac
mil
lan
/Mc
Gra
w-H
ill
101

Date Name Explore
Measure. How far did it go?
Step 2
Do the activity again, but this time push the car
harder. Observe what happens.
Explore More
Predict. What do you think would happen if you
pulled the car toward you? Would it go as far?
Chapter 6 • Objects in Motion Use with Lesson 3Activity Lab Book Pushes and Pulls102
© M
ac
mil
lan
/Mc
Gra
w-H
ill
Date Name
• objects of different weights
You need
Heavy lifter
In this activity, you will compare lifting different objects.
What to Do
Predict Which object do you think
will be the easiest to lift? Why?
Work in a group. Lift each object. Make a list of
the objects you lifted. Put them in order from the
easiest to lift to the hardest to lift.
What Did You Find Out?
What was the difference between lifting a light
object and a heavy object?
AlternativeExplore
Chapter 6 • Objects in Motion Use with Lesson 3Activity Lab Book Pushes and Pulls
© M
ac
mil
lan
/Mc
Gra
w-H
ill
103

Date Name
Elastic strength
What to Do
Be Careful! Put on safety goggles
for this Quick Lab.
Measure. Measure and record the
length of each rubber band in the
table below. Then observe as two
classmates slowly pull on the ends
of a rubber band.
Record Data. Measure how long the rubber band
can be stretched. Record the data in the table
below. Repeat with two other rubber bands.
Quick Lab
• measuring tape
• rubber bands of different sizes
• garden gloves
• safety goggles
You need
Compare. Which rubber band stretched the
longest?
Length Without Stretching Length With Stretching
Rubber band 1
Rubber band 2
Rubber band 3
Rubber band 4
Chapter 6 • Objects in Motion Use with Lesson 3Activity Lab Book Pushes and Pulls104
© M
ac
mil
lan
/Mc
Gra
w-H
ill

Date Name
• cardboard
• books
• toy car
• ruler
• sandpaper
You need
Explore
How can you slow
something down?
What to Do
Make a ramp out of books and
cardboard.
Step 1
Measure. Put the car at the top of the ramp and let
go. Do not push it. Measure how far the car went.
California Standard2 IE 4.b.
Chapter 6 • Objects in Motion Use with Lesson 4Activity Lab Book Changing Motion
© M
ac
mil
lan
/Mc
Gra
w-H
ill
105
Date Name Explore
Compare. Tape sandpaper to the cardboard.
Repeat the activity. Which ramp slowed the car
down more?
Explore More
Predict. What do you think would happen if you
put cloth on the ramp?
Chapter 6 • Objects in Motion Use with Lesson 4Activity Lab Book Changing Motion106
© M
ac
mil
lan
/Mc
Gra
w-H
ill

Date Name
• ping pong ball
• stopwatch
• carpet pieces
You need
What has the most friction?
In this activity, you will learn which surface will slow down a ball the most.
What to Do
Work with a partner. Gently roll a
ping pong ball on a bare floor. Have
your partner time how long the ball rolls.
Gently roll the same ping pong ball on a floor that
has a thin rug. Try to use the same force to roll
the ball that you used before. Have your partner
time how long the ball rolls.
Repeat the step using a thick rug on the floor.
What Did You Find Out?
What kind of floor has the most friction? Which
kind has the least friction? Explain how you know.
AlternativeExplore
Chapter 6 • Objects in Motion Use with Lesson 4Activity Lab Book Changing Motion
© M
ac
mil
lan
/Mc
Gra
w-H
ill
107

108
Date Name
Forced through a maze
What to Do
Experiment. Use the pencil to push
the cube along the maze that your
teacher has given you.
Observe. How did you change the
force to make the cube move
through the maze?
Experiment. Use the pencil to push the ball along
the maze.
What Did You Find Out?
Compare. How was moving the cube different
from moving the ball? Which took less force?
Quick Lab
• maze
• plastic cube
• rubber ball
• pencil
• paper
You need
Chapter 6 • Objects in Motion Use with Lesson 4Activity Lab Book Changing Motion
Date Name
• rocks
You need
• tape
• 2 pencils
• book
• goggles
You need
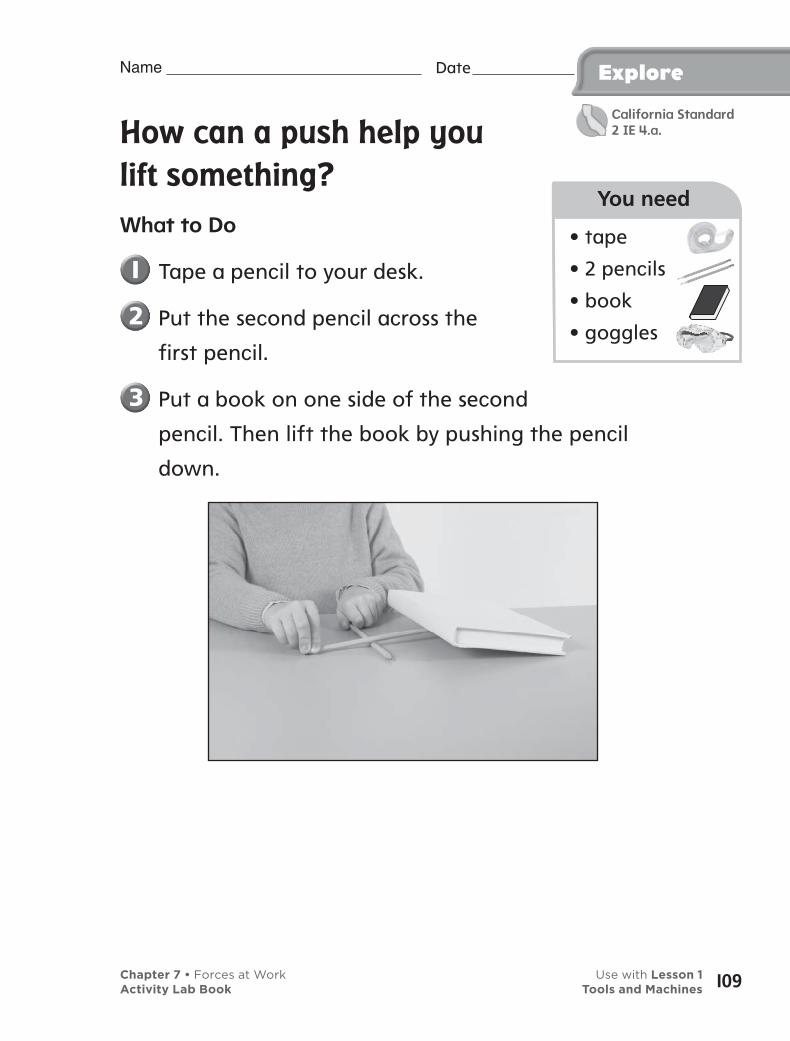
Explore
How can a push help you
lift something?
What to Do
Tape a pencil to your desk.
Put the second pencil across the
first pencil.
Put a book on one side of the second
pencil. Then lift the book by pushing the pencil
down.
Chapter 7 • Forces at Work Use with Lesson 1Activity Lab Book Tools and Machines 109
California Standard2 IE 4.a.

Date Name Explore
Explore More
Predict. What would happen if you moved the
book closer to the taped pencil? Try it.
Chapter 7 • Forces at Work Use with Lesson 1Activity Lab Book Tools and Machines110
© M
ac
mil
lan
/Mc
Gra
w-H
ill
Date Name
Making a pencil lever
In this activity, you will make a lever.
What to Do
Balance a ruler across the pencil.
Try to make both ends of the ruler
the same height away from the table.
Place a penny on each end of the ruler.
What happened?
Now add one penny to one end of the ruler.
What happens?
What would happen if you placed a nickel on one
end and a penny on the other end? Why?
• 12-inch ruler
• pencil
• 3 pennies
You need
AlternativeExplore
111Chapter 7 • Forces at Work Use with Lesson 1Activity Lab Book Tools and Machines
Date Name Quick Lab
How does an inclined
plane make work easier?
What to Do
Predict. How could you move a
tennis ball without throwing or
pushing it? Write your ideas below.
Experiment. Work with a partner. Use the books to
build an inclined plane.
Compare. How are all the inclined planes in the
classroom different? What does the steepness of a
ramp do to a rolling ball?
Measure. Roll a ball down the plane. Put tape
where the ball stops. Use the ruler to measure how
far the ball has rolled. Record your data.
• tape
• books
• tennis ball
• ruler
You need
112 Chapter 7 • Forces at Work Use with Lesson 1Activity Lab Book Tools and Machines
113
Focus onSkills
Date Name
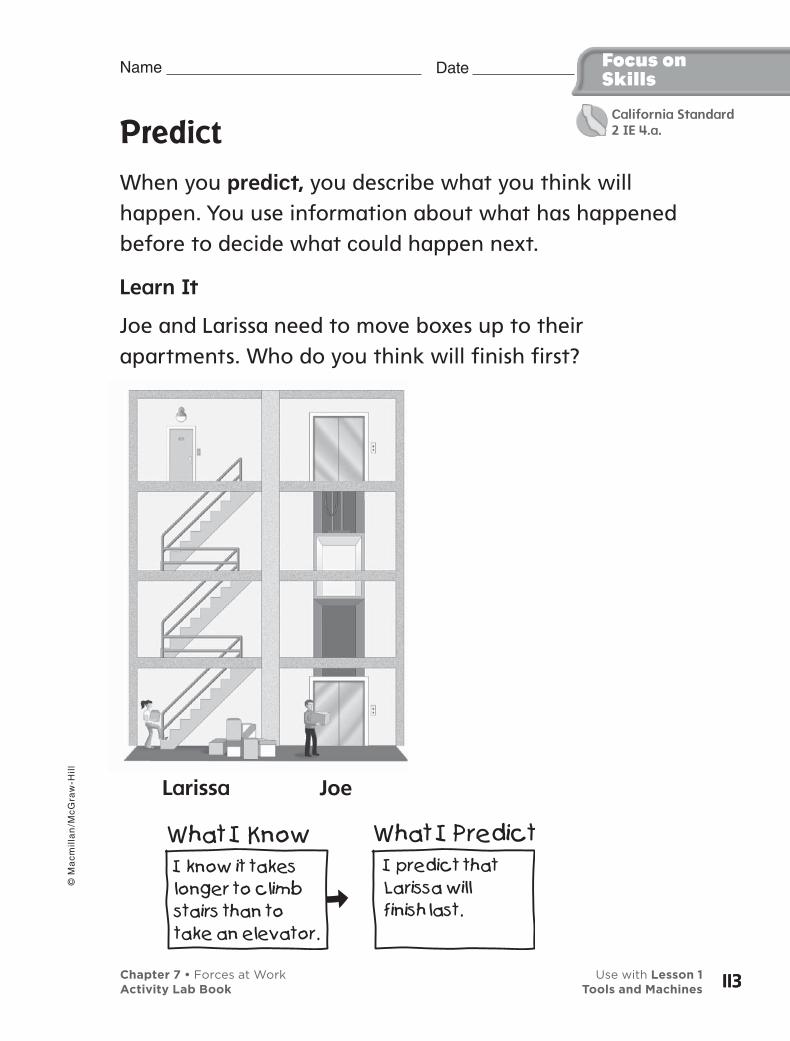
Predict
When you predict, you describe what you think will happen. You use information about what has happened before to decide what could happen next.
Learn It
Joe and Larissa need to move boxes up to their apartments. Who do you think will finish first?
Larissa Joe
Chapter 7 • Forces at Work Use with Lesson 1Activity Lab Book Tools and Machines 113
© M
ac
mil
lan
/Mc
Gra
w-H
ill
California Standard2 IE 4.a.
Focus onSkills
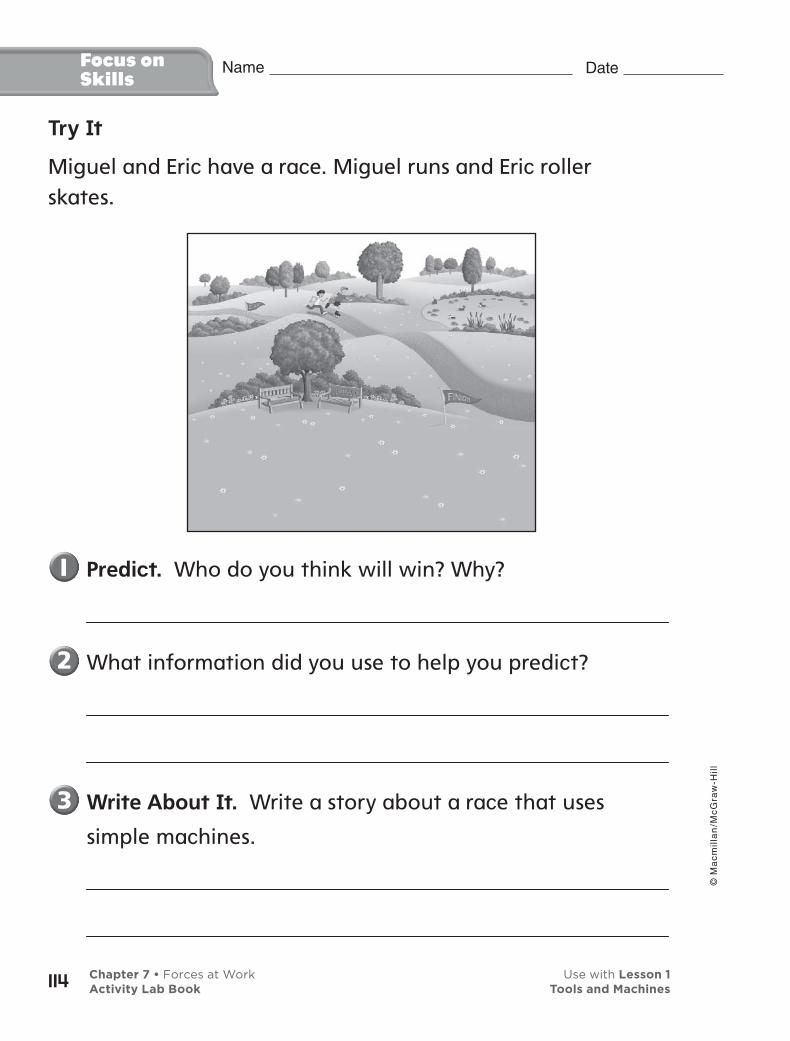
Try It
Miguel and Eric have a race. Miguel runs and Eric roller skates.
Date Name
Predict. Who do you think will win? Why?
What information did you use to help you predict?
Write About It. Write a story about a race that uses
simple machines.
Chapter 7 • Forces at Work Use with Lesson 1Activity Lab Book Tools and Machines114
© M
ac
mil
lan
/Mc
Gra
w-H
ill
• newspaper
• 2 lemons
• 1 grape
You need
Explore
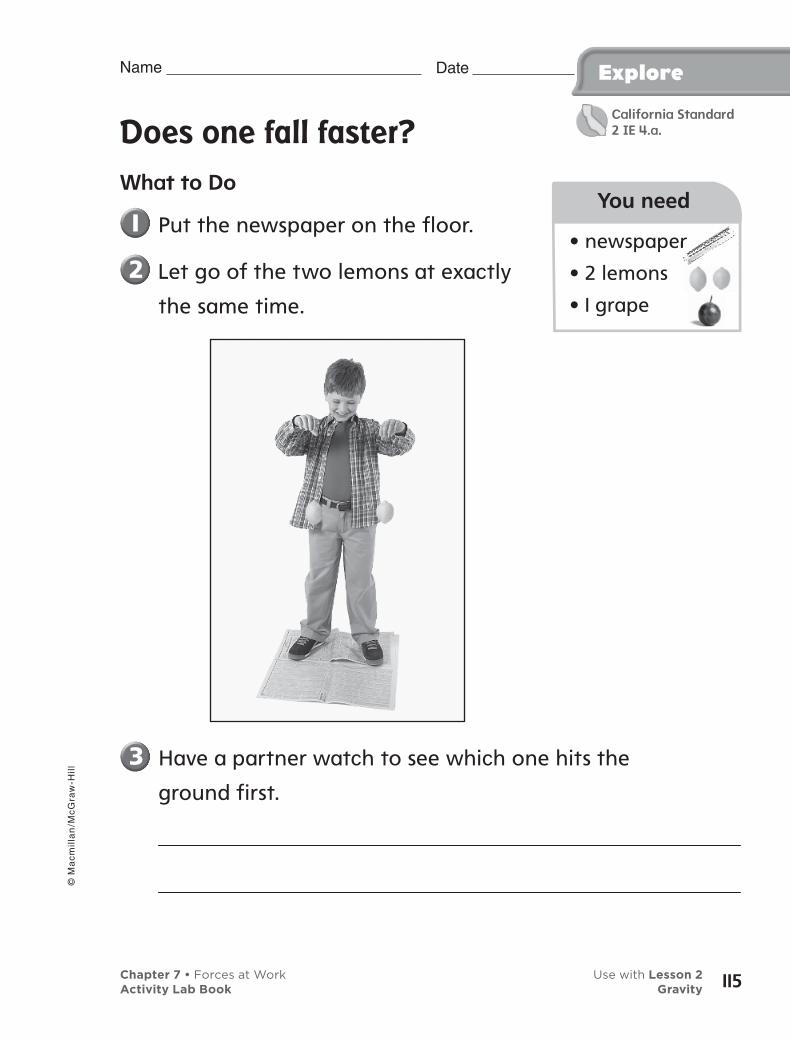
Does one fall faster?
What to Do
Put the newspaper on the floor.
Let go of the two lemons at exactly
the same time.
Have a partner watch to see which one hits the
ground first.
Date Name
Chapter 7 • Forces at Work Use with Lesson 2Activity Lab Book Gravity
© M
ac
mil
lan
/Mc
Gra
w-H
ill
115
California Standard2 IE 4.a.
Date Name Explore
Predict. What will happen if you let go of a grape
and a lemon at the same time?
Explore More
Try this activity with an object that is heavier than a
lemon. Which one falls first?
Chapter 7 • Forces at Work Use with Lesson 2Activity Lab Book Gravity116
© M
ac
mil
lan
/Mc
Gra
w-H
ill

Date Name
How far do the cars go?
In this activity, you will measure how far toy cars of different weights will roll down a ramp.
What to Do
Stack books on the floor. Then place
one end of the cardboard on the
edge of the top book to make a ramp.
Take the toy car that feels the heaviest.
Hold it at the top of the hill and let go. Place a
piece of tape on the floor where the car stops
rolling. Measure the distance from the top of the
hill to the tape.
Repeat the steps with the lighter weight toy car.
What Did You Find Out?
Which toy car traveled the farthest?
How did the car’s weight affect the distance
it traveled?
AlternativeExplore
• books
• cardboard
• 2 toy cars (different weights)
• tape
• ruler
You need
117Chapter 7 • Forces at Work Use with Lesson 2Activity Lab Book Gravity
Date Name Quick Lab
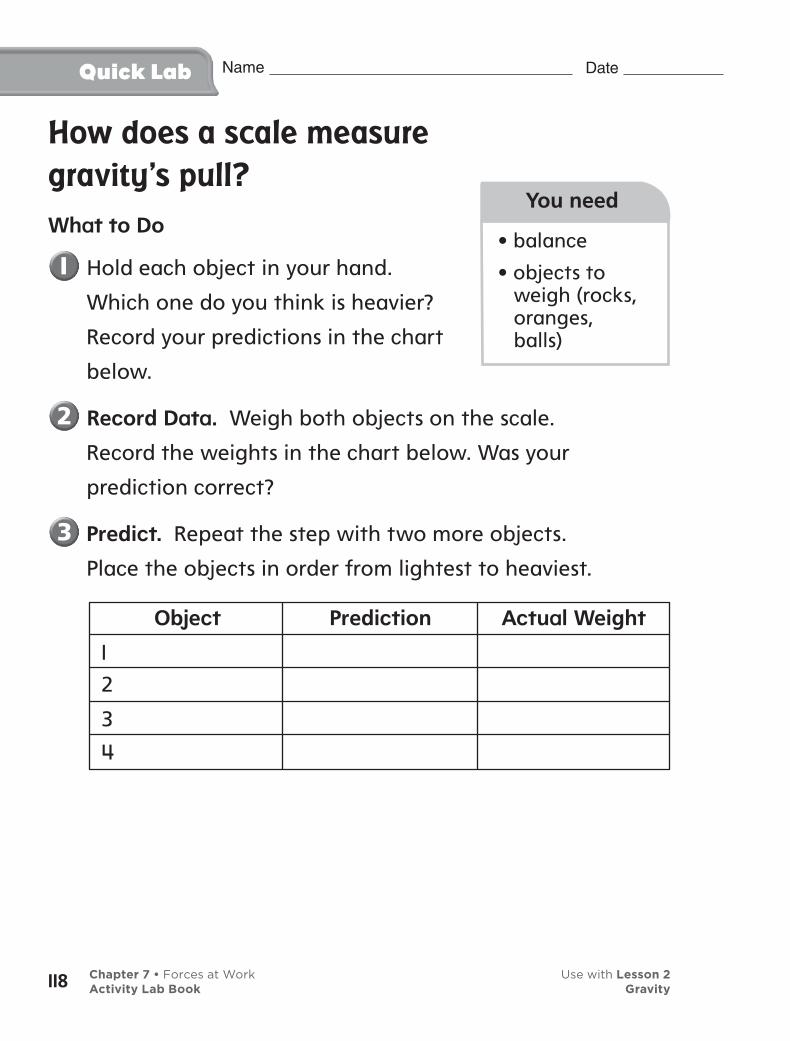
How does a scale measure
gravity’s pull?
What to Do
Hold each object in your hand.
Which one do you think is heavier?
Record your predictions in the chart
below.
Record Data. Weigh both objects on the scale.
Record the weights in the chart below. Was your
prediction correct?
Predict. Repeat the step with two more objects.
Place the objects in order from lightest to heaviest.
• balance
• objects to weigh (rocks, oranges, balls)
You need
118
Object Prediction Actual Weight
1 2
3
4
Chapter 7 • Forces at Work Use with Lesson 2Activity Lab Book Gravity
Date Name
• string
• pencil
• paper bag
• small objects
• magnet
You need
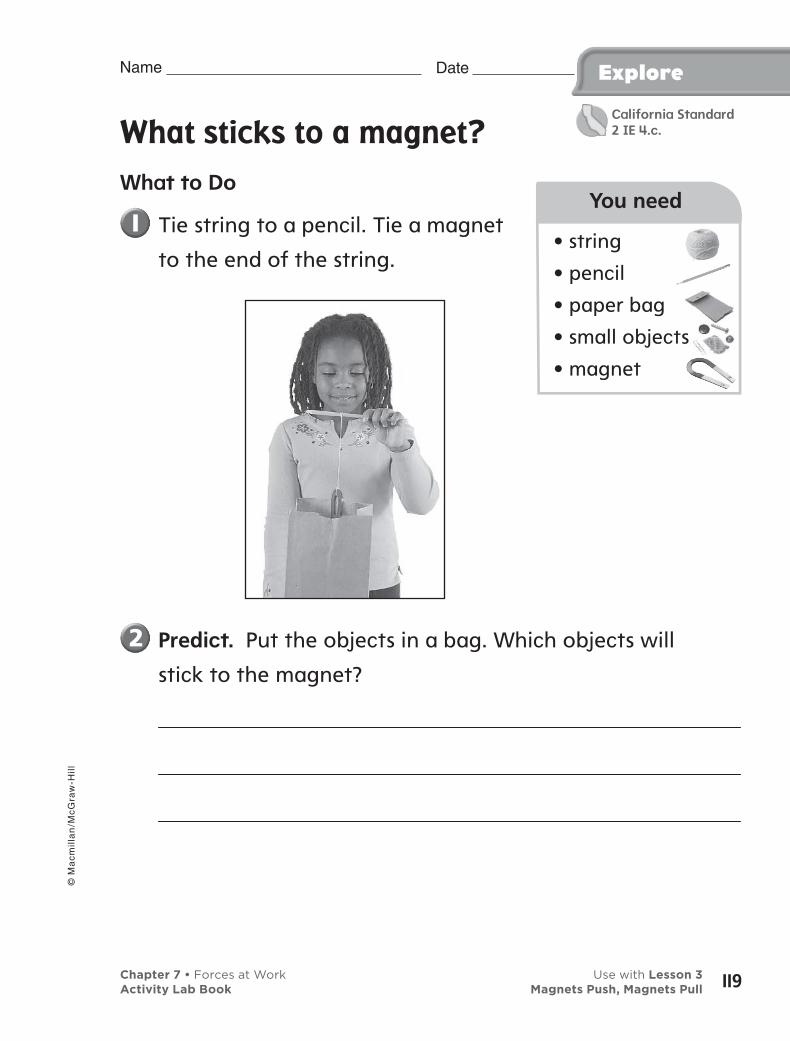
Explore
What sticks to a magnet?
What to Do
Tie string to a pencil. Tie a magnet
to the end of the string.
Predict. Put the objects in a bag. Which objects will
stick to the magnet?
Chapter 7 • Forces at Work Use with Lesson 3Activity Lab Book Magnets Push, Magnets Pull 119
© M
ac
mil
lan
/Mc
Gra
w-H
ill
California Standard2 IE 4.c.

Explore
Use the magnet to pull out objects from the bag.
Explore More
Classify. How are the things that stick to the
magnet alike?
Date Name
Chapter 7 • Forces at Work Use with Lesson 3Activity Lab Book Magnets Push, Magnets Pull
© M
ac
mil
lan
/Mc
Gra
w-H
ill
120

Sort for recycling
In this activity, you will learn more about the properties of magnets by sorting trash for recycling.
What to Do
Work with a partner. Gather several
pieces of metal and aluminum trash.
Test each object to see if it can be
pulled by a magnet.
Sort the objects that can be pulled by the magnet
in one group. Put the ones that cannot be pulled by
a magnet in another group.
What Did You Find Out?
Which objects can not be pulled by a magnet?
AlternativeExplore
• empty soda cans
• scraps of aluminum foil
• metal jar lids and bottle caps
• magnet
You need
Date Name
121Chapter 7 • Forces at Work Use with Lesson 3Activity Lab Book Magnets Push, Magnets Pull
Quick Lab
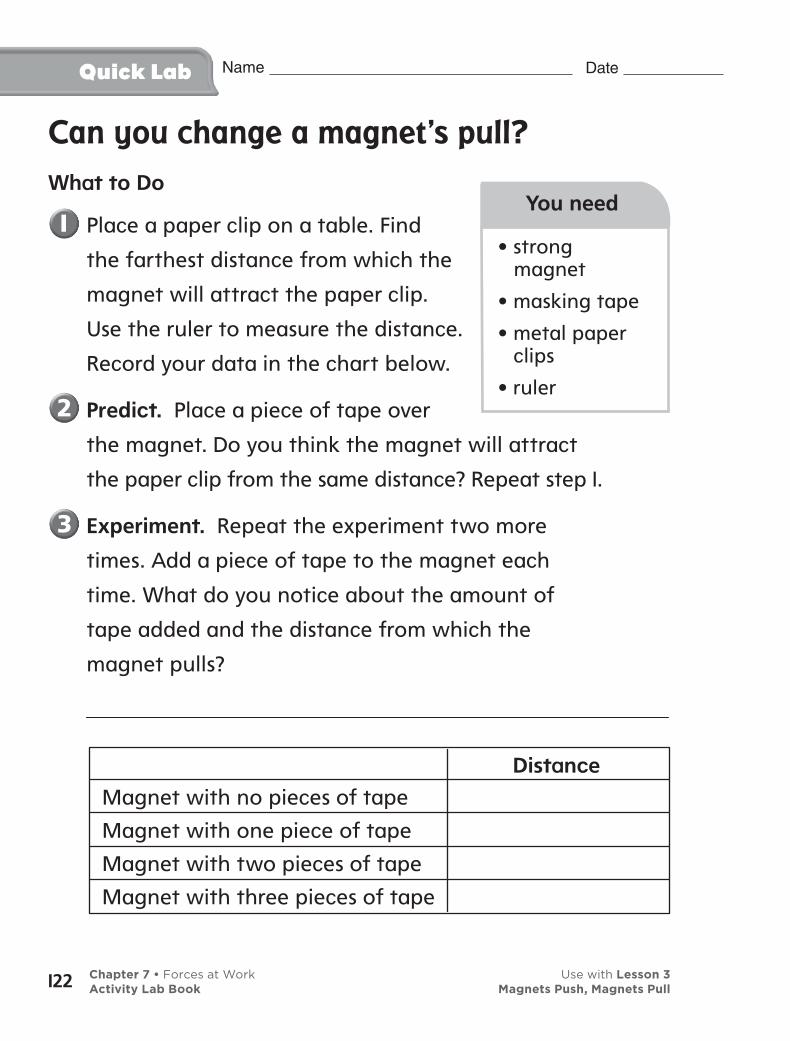
Can you change a magnet’s pull?
What to Do
Place a paper clip on a table. Find
the farthest distance from which the
magnet will attract the paper clip.
Use the ruler to measure the distance.
Record your data in the chart below.
Predict. Place a piece of tape over
the magnet. Do you think the magnet will attract
the paper clip from the same distance? Repeat step 1.
Experiment. Repeat the experiment two more
times. Add a piece of tape to the magnet each
time. What do you notice about the amount of
tape added and the distance from which the
magnet pulls?
Distance
Magnet with no pieces of tape
Magnet with one piece of tape
Magnet with two pieces of tape
Magnet with three pieces of tape
• strong magnet
• masking tape
• metal paper clips
• ruler
You need
Date Name
122 Chapter 7 • Forces at Work Use with Lesson 3Activity Lab Book Magnets Push, Magnets Pull

• paper clips
• magnets
You need
Be aScientist
How can you compare the
strength of different
magnets?
Find out how many paper clips the magnet can attract.
What to Do
Hang a paper clip from a magnet. Keep adding
more clips in a line until no more will stick.
Date Name
Record Data. Write how many paper clips can hang
from the magnet in the chart on the next page.
Chapter 7 • Forces at Work Use with Lesson 3Activity Lab Book Magnets Push, Magnets Pull
© M
ac
mil
lan
/Mc
Gra
w-H
ill
123
California Standard2 IE 4.e.
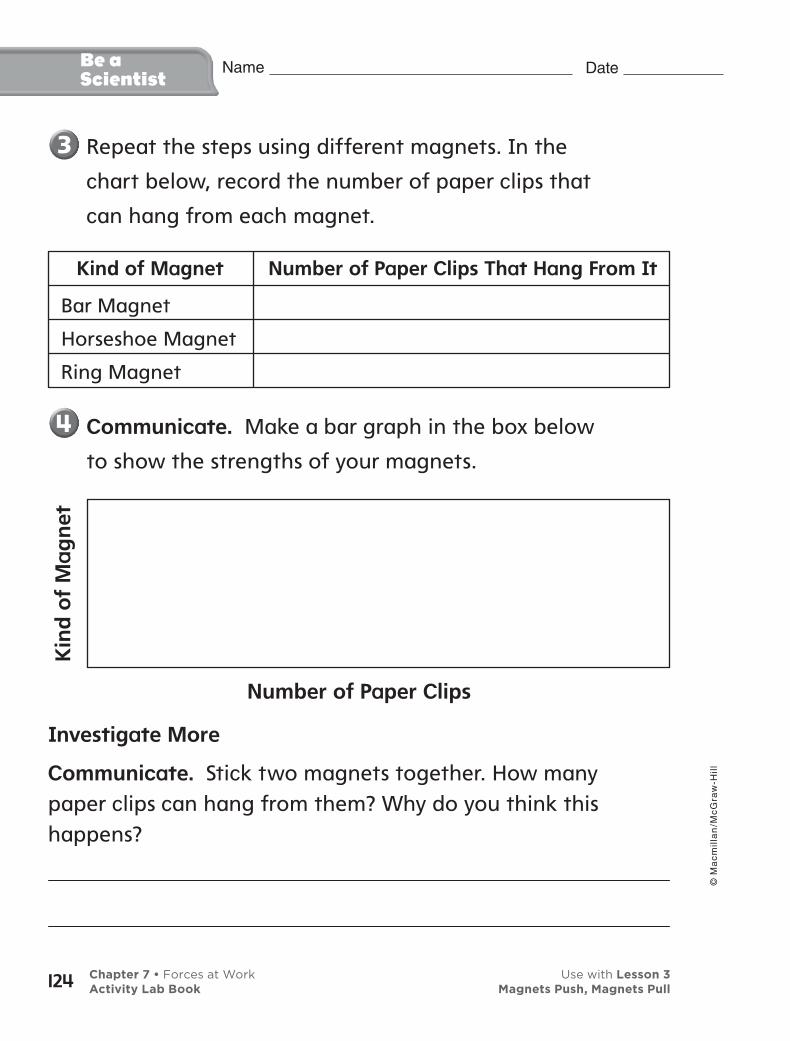
Be aScientist
Repeat the steps using different magnets. In the
chart below, record the number of paper clips that
can hang from each magnet.
Communicate. Make a bar graph in the box below
to show the strengths of your magnets.
Investigate More
Communicate. Stick two magnets together. How many paper clips can hang from them? Why do you think this happens?
Kind of Magnet Number of Paper Clips That Hang From It
Bar Magnet
Horseshoe Magnet
Ring Magnet
Date Name K
ind
of
Mag
net
Number of Paper Clips
Chapter 7 • Forces at Work Use with Lesson 3Activity Lab Book Magnets Push, Magnets Pull124
© M
ac
mil
lan
/Mc
Gra
w-H
ill

• string
• paper clip
• paper cup
• goggles
You need
Date Explore
How is sound made?
What to Do
Work with two partners. Tie string to
a paper clip. Make a hole in the cup.
Pull the string through the hole.
Name
Hold the cup and string with one partner. The third
partner snaps the string.
Chapter 7 • Forces at Work Use with Lesson 4Activity Lab Book Sound
© M
ac
mil
lan
/Mc
Gra
w-H
ill
125
California Standard2 IE 4.d.

Explore
Observe. What happened to the string? How did
you make sound?
Explore More
Predict. Change the length of the string. Predict
what will happen. How does the sound change?
Date Name
Chapter 7 • Forces at Work Use with Lesson 4Activity Lab Book Sound126
© M
ac
mil
lan
/Mc
Gra
w-H
ill
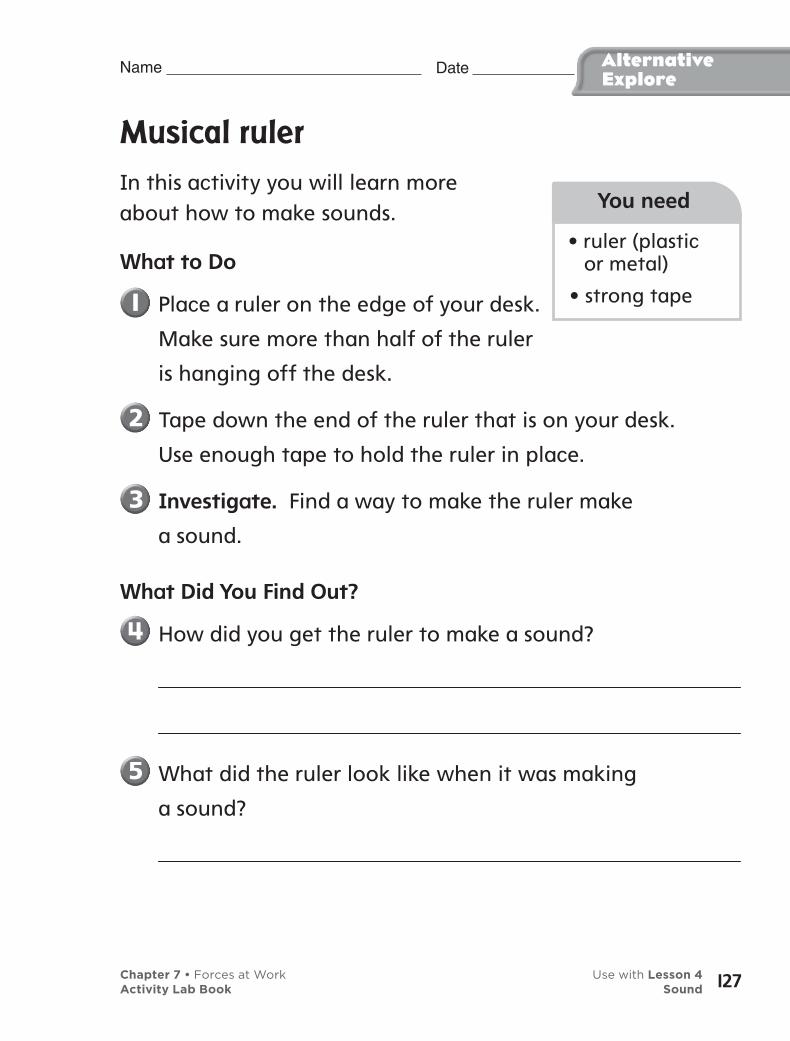
AlternativeExplore
Musical ruler
In this activity you will learn more about how to make sounds.
What to Do
Place a ruler on the edge of your desk.
Make sure more than half of the ruler
is hanging off the desk.
Tape down the end of the ruler that is on your desk.
Use enough tape to hold the ruler in place.
Investigate. Find a way to make the ruler make
a sound.
What Did You Find Out?
How did you get the ruler to make a sound?
What did the ruler look like when it was making
a sound?
• ruler (plastic or metal)
• strong tape
You need
Date Name
127Chapter 7 • Forces at Work Use with Lesson 4Activity Lab Book Sound
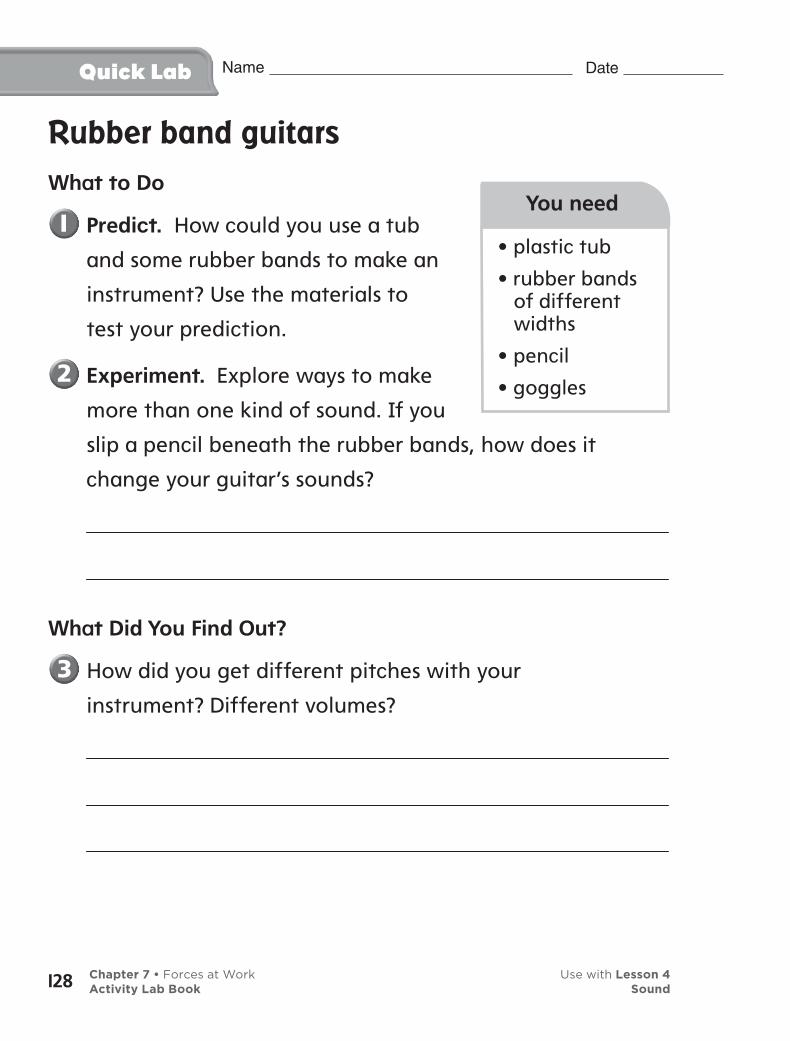
Quick Lab
Rubber band guitars
What to Do
Predict. How could you use a tub
and some rubber bands to make an
instrument? Use the materials to
test your prediction.
Experiment. Explore ways to make
more than one kind of sound. If you
slip a pencil beneath the rubber bands, how does it
change your guitar’s sounds?
What Did You Find Out?
How did you get different pitches with your
instrument? Different volumes?
• plastic tub
• rubber bands of different widths
• pencil
• goggles
Date Name
128
You need
Chapter 7 • Forces at Work Use with Lesson 4Activity Lab Book Sound
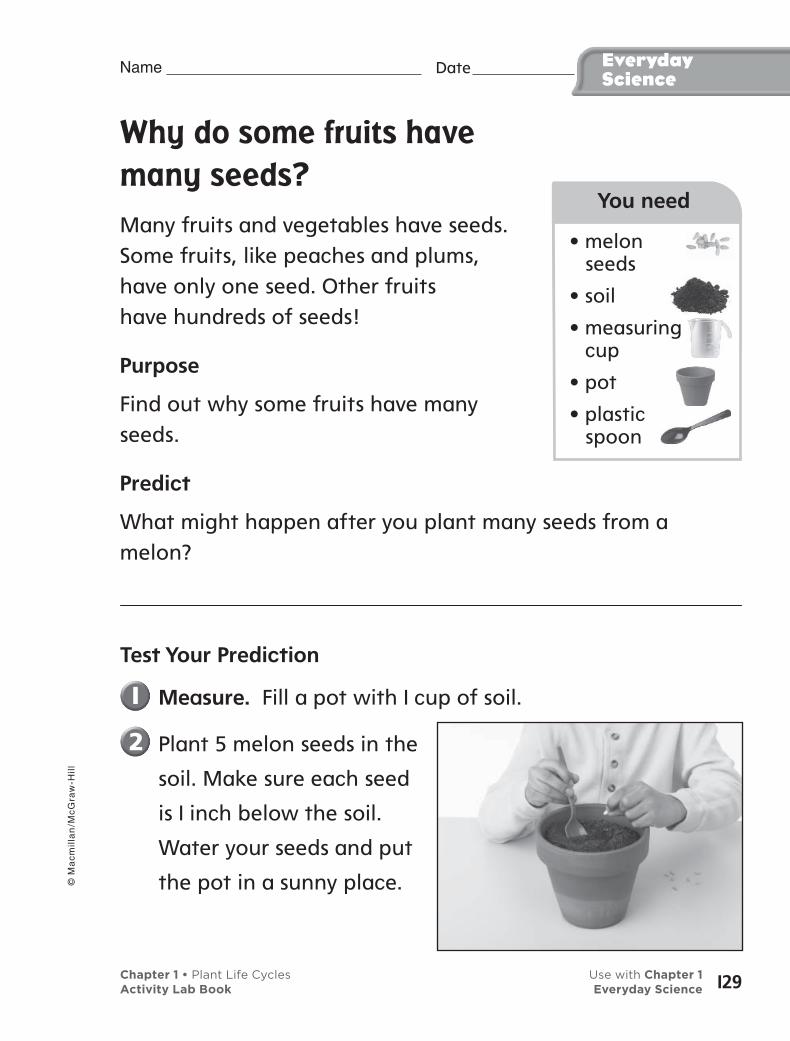
• feldspar
You need
• melon seeds
• soil
• measuring cup
• pot
• plastic spoon
You need
Date Name EverydayScience
Why do some fruits have
many seeds?
Many fruits and vegetables have seeds. Some fruits, like peaches and plums, have only one seed. Other fruits have hundreds of seeds!
Purpose
Find out why some fruits have many seeds.
Predict
What might happen after you plant many seeds from a melon?
Test Your Prediction
Measure. Fill a pot with 1 cup of soil.
Plant 5 melon seeds in the
soil. Make sure each seed
is 1 inch below the soil.
Water your seeds and put
the pot in a sunny place.
Chapter 1 • Plant Life Cycles Use with Chapter 1Activity Lab Book Everyday Science
© M
ac
mil
lan
/Mc
Gra
w-H
ill
129
Date Name EverydayScience
Record how your seeds grow.
Draw Conclusions
Why do you think some fruits have many seeds?
Critical Thinking
How do plants keep their seeds safe?
Why do you think some animals lay many eggs?
Chapter 1 • Plant Life Cycles Use with Chapter 1Activity Lab Book Everyday Science
© M
ac
mil
lan
/Mc
Gra
w-H
ill
130

• white paper
• 20 white circles
• 20 brown circles
• stopwatch
You need
Date Name EverydayScience
How can color help animals hide?
Many animals blend into their environment to stay safe. Some toads are brown so they can hide in dirt and mud. The wings of some moths look just like tree bark.
Purpose
Find out why some animals grow different color fur or feathers in the winter.
Predict
What color fur will be harder to see in a snowy place?
Test Your Prediction
Fold the white paper. Spread out the circles on one
half of the paper.
Fold over the other half of
the paper to hide the circles.
Your partner will uncover the
circles for ten seconds. Pick
up as many circles as you can.
Chapter 2 • Life Cycles of Animals Use with Chapter 2Activity Lab Book Everyday Science
© M
ac
mil
lan
/Mc
Gra
w-H
ill
131

Date Name EverydayScience
Record Data. How many circles of each color did
you pick up? Switch roles with your partner and try
it again.
Draw Conclusions
How did color help you pick up circles?
Predict. What will happen if you do the activity on
brown paper?
Critical Thinking
Why do you think many desert animals are brown?
How could you find an animal that blends into its
environment?
Chapter 2 • Life Cycles of Animals Use with Lesson 4Activity Lab Book Everyday Science
© M
ac
mil
lan
/Mc
Gra
w-H
ill
132
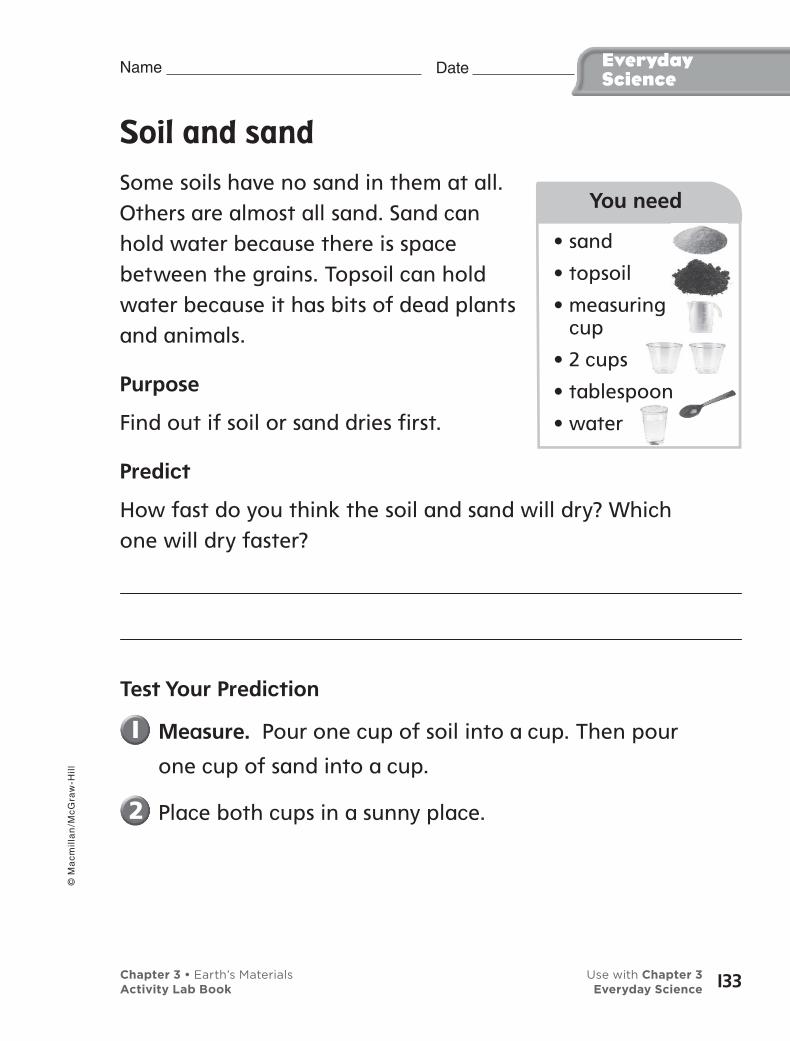
• sand
• topsoil
• measuring cup
• 2 cups
• tablespoon
• water
You need
Date Name EverydayScience
Soil and sand
Some soils have no sand in them at all. Others are almost all sand. Sand can hold water because there is space between the grains. Topsoil can hold water because it has bits of dead plants and animals.
Purpose
Find out if soil or sand dries first.
Predict
How fast do you think the soil and sand will dry? Which one will dry faster?
Test Your Prediction
Measure. Pour one cup of soil into a cup. Then pour
one cup of sand into a cup.
Place both cups in a sunny place.
Chapter 3 • Earth’s Materials Use with Chapter 3Activity Lab Book Everyday Science
© M
ac
mil
lan
/Mc
Gra
w-H
ill
133

Date Name EverydayScience
Add three tablespoons of water to each cup.
Touch the top of the soil and the sand after a few
hours.
Draw Conclusions
Which stayed more damp, the soil or sand?
Why do you think most plants grow better in soil
than sand?
Critical Thinking
Wind can blow sand away easily. How do you think
plants stay in the sand?
Why do you think soils are different colors?
Chapter 3 • Earth’s Materials Use with Chapter 3Activity Lab Book Everyday Science
© M
ac
mil
lan
/Mc
Gra
w-H
ill
134
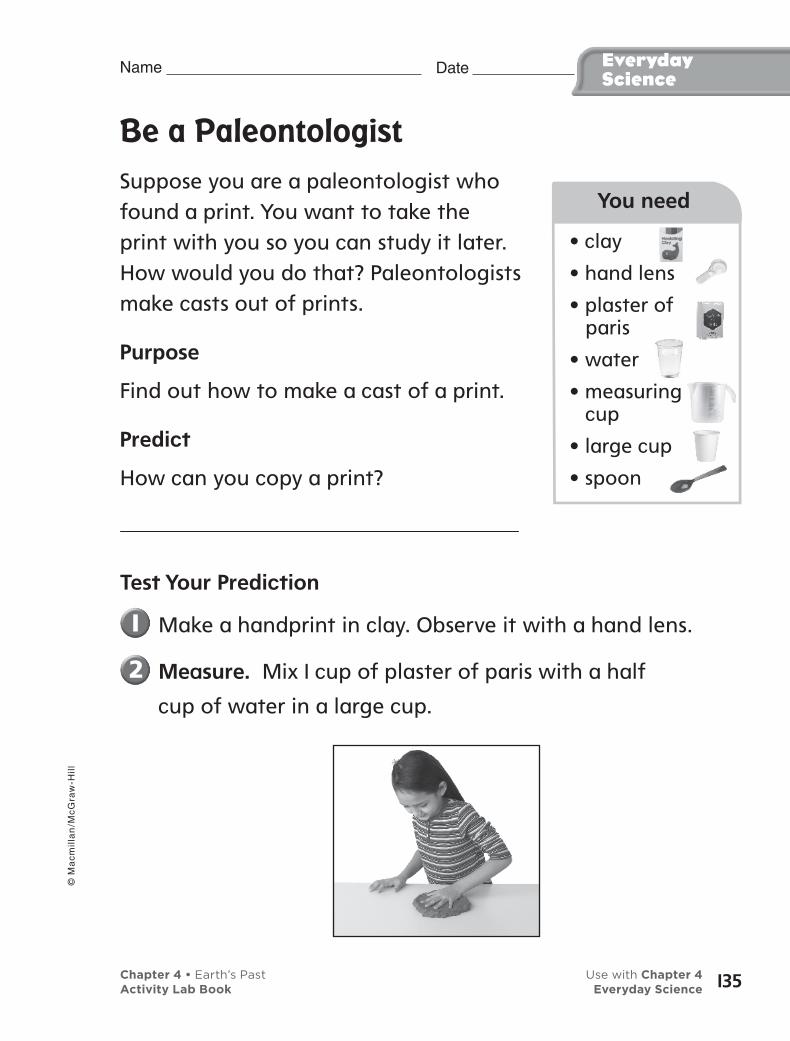
• clay
• hand lens
• plaster of paris
• water
• measuring cup
• large cup
• spoon
You need
Date Name EverydayScience
Be a Paleontologist
Suppose you are a paleontologist who found a print. You want to take the print with you so you can study it later. How would you do that? Paleontologists make casts out of prints.
Purpose
Find out how to make a cast of a print.
Predict
How can you copy a print?
Test Your Prediction
Make a handprint in clay. Observe it with a hand lens.
Measure. Mix 1 cup of plaster of paris with a half
cup of water in a large cup.
Chapter 4 • Earth’s Past Use with Chapter 4Activity Lab Book Everyday Science
© M
ac
mil
lan
/Mc
Gra
w-H
ill
135
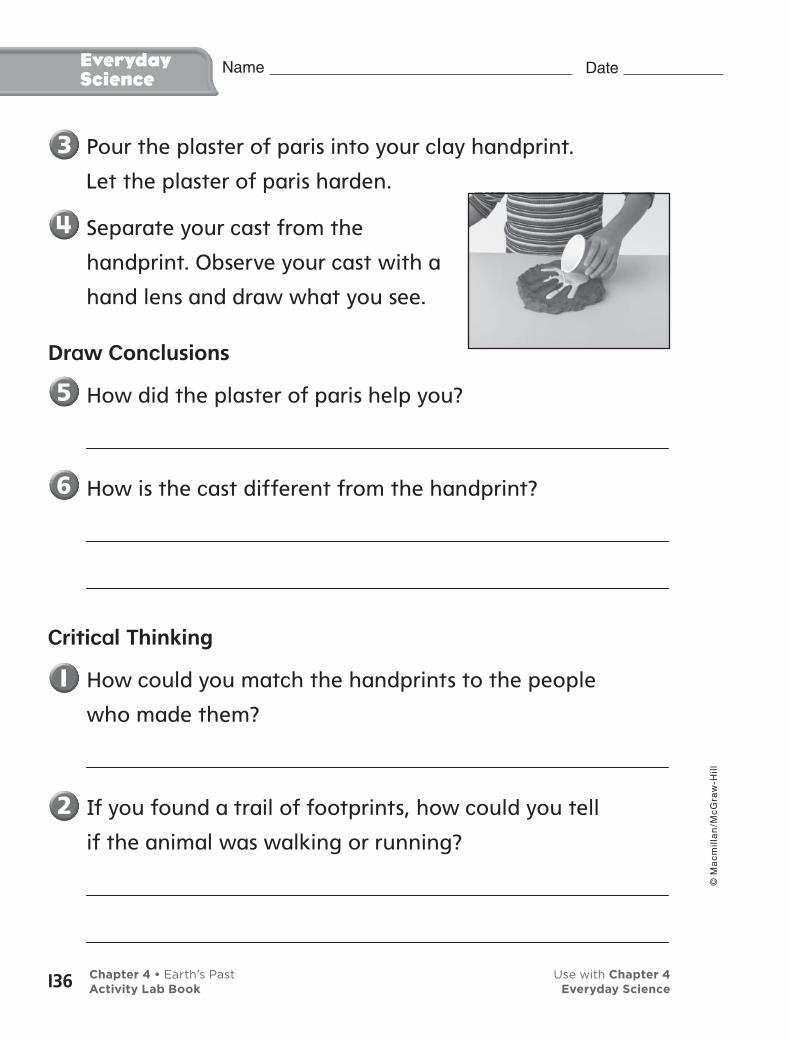
Date Name EverydayScience
Pour the plaster of paris into your clay handprint.
Let the plaster of paris harden.
Separate your cast from the
handprint. Observe your cast with a
hand lens and draw what you see.
Draw Conclusions
How did the plaster of paris help you?
How is the cast different from the handprint?
Critical Thinking
How could you match the handprints to the people
who made them?
If you found a trail of footprints, how could you tell
if the animal was walking or running?
Chapter 4 • Earth’s Past Use with Chapter 4Activity Lab Book Everyday Science
© M
ac
mil
lan
/Mc
Gra
w-H
ill
136
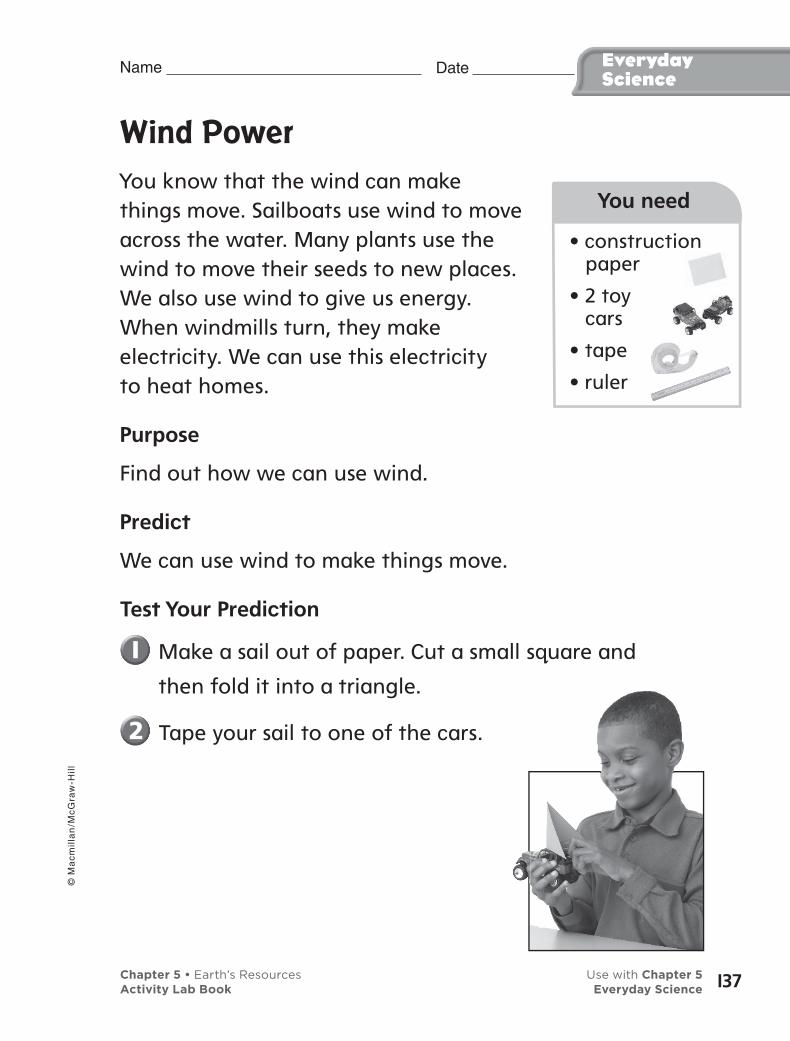
• construction paper
• 2 toy cars
• tape
• ruler
You need
Date Name EverydayScience
Wind Power
You know that the wind can make things move. Sailboats use wind to move across the water. Many plants use the wind to move their seeds to new places. We also use wind to give us energy. When windmills turn, they make electricity. We can use this electricity to heat homes.
Purpose
Find out how we can use wind.
Predict
We can use wind to make things move.
Test Your Prediction
Make a sail out of paper. Cut a small square and
then fold it into a triangle.
Tape your sail to one of the cars.
Chapter 5 • Earth’s Resources Use with Chapter 5Activity Lab Book Everyday Science
© M
ac
mil
lan
/Mc
Gra
w-H
ill
137

Date Name EverydayScience
Measure. Make a starting line and make a finish
line that is 20 centimeters away.
Line up both cars at a starting line. Work with a
partner and blow on the cars.
Draw Conclusions
Which car crossed the finish line first? Why?
What do you think would happen if the sail was
bigger?
Critical Thinking
Why is wind power useful? How can we use wind?
Which do you think is a better natural resource,
wind or coal? Why?
Chapter 5 • Earth’s Resources Use with Chapter 5Activity Lab Book Everyday Science
© M
ac
mil
lan
/Mc
Gra
w-H
ill
138
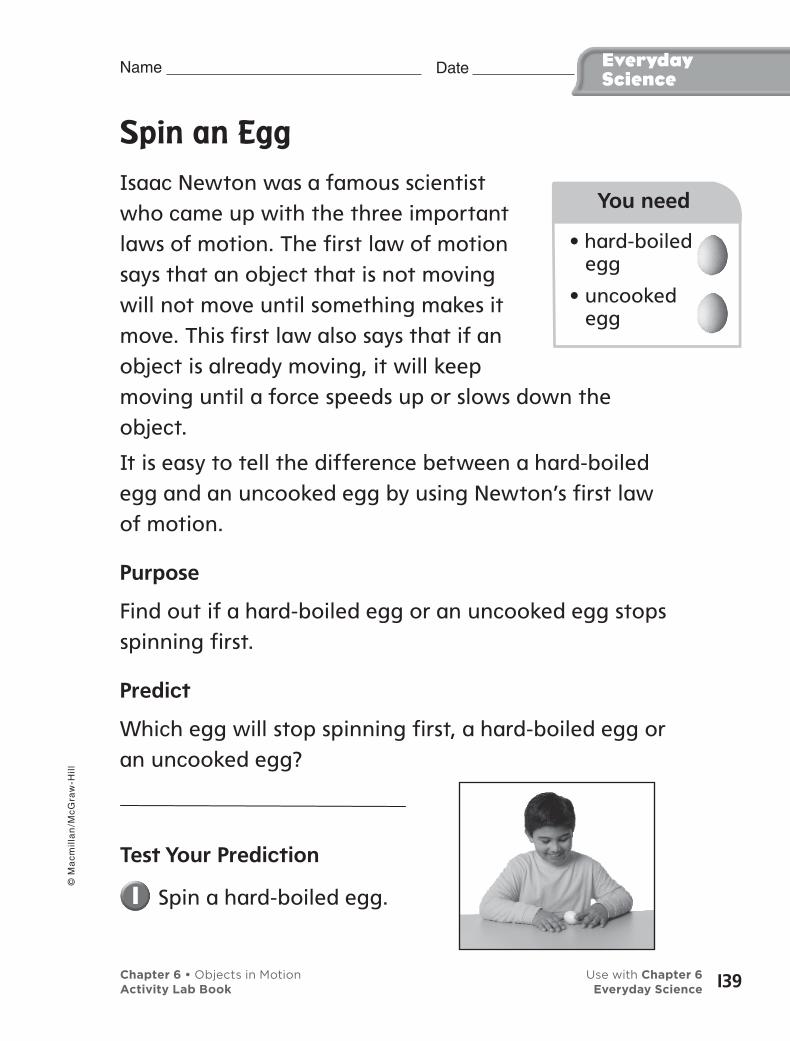
• hard-boiled egg
• uncooked egg
You need
Date Name EverydayScience
Spin an Egg
Isaac Newton was a famous scientist who came up with the three important laws of motion. The first law of motion says that an object that is not moving will not move until something makes it move. This first law also says that if an object is already moving, it will keep moving until a force speeds up or slows down the object.
It is easy to tell the difference between a hard-boiled egg and an uncooked egg by using Newton’s first law of motion.
Purpose
Find out if a hard-boiled egg or an uncooked egg stops spinning first.
Predict
Which egg will stop spinning first, a hard-boiled egg or an uncooked egg?
Test Your Prediction
Spin a hard-boiled egg.
Chapter 6 • Objects in Motion Use with Chapter 6Activity Lab Book Everyday Science
© M
ac
mil
lan
/Mc
Gra
w-H
ill
139

Date Name EverydayScience
Stop the spinning egg for a second and then let go.
Spin an uncooked egg.
Stop the spinning egg for a second and then let go.
Observe. Look at both eggs after you let go of each.
Draw Conclusions
Which egg stopped spinning first? Why?
What do you need to do to stop an egg from
spinning?
Critical Thinking
How would you stop a soccer ball from moving?
Why do you think a ball will not stop moving in the
middle of the air?
Chapter 6 • Objects in Motion Use with Chapter 6Activity Lab Book Everyday Science
© M
ac
mil
lan
/Mc
Gra
w-H
ill
140
• penny
• sheet of paper
You need
Date Name EverydayScience
The Force of Gravity
Isaac Newton was a scientist who discovered the force of gravity in 1687. The story goes that one day he was sitting under an apple tree and an apple fell out of the tree and hit him on his head. He wondered why the apple fell down and not up. He explained this by the force of gravity. Even though you can not see it, gravity pulls all things toward the center of Earth. Some things fall faster than others.
Purpose
Find out what happens when you drop a penny and a sheet of paper at the same time.
Predict
Will the paper and penny land on the floor at the same time?
Test Your Prediction
Hold a sheet of paper in one hand and a penny in
the other.
Chapter 7 • Forces at Work Use with Chapter 7Activity Lab Book Everyday Science
© M
ac
mil
lan
/Mc
Gra
w-H
ill
141

Date Name EverydayScience
Hold each item at the same height and
drop them at the same time.
Observe. Look carefully as each item
falls to the ground.
Draw Conclusions
Which fell to the ground first, the penny
or the sheet of paper? Why?
Critical Thinking
Which do you think would fall first, a feather or a
pencil? Why?
How could you find out if heavier things fall faster
than lighter things?
Chapter 7 • Forces at Work Use with Chapter 7Activity Lab Book Everyday Science
© M
ac
mil
lan
/Mc
Gra
w-H
ill
142
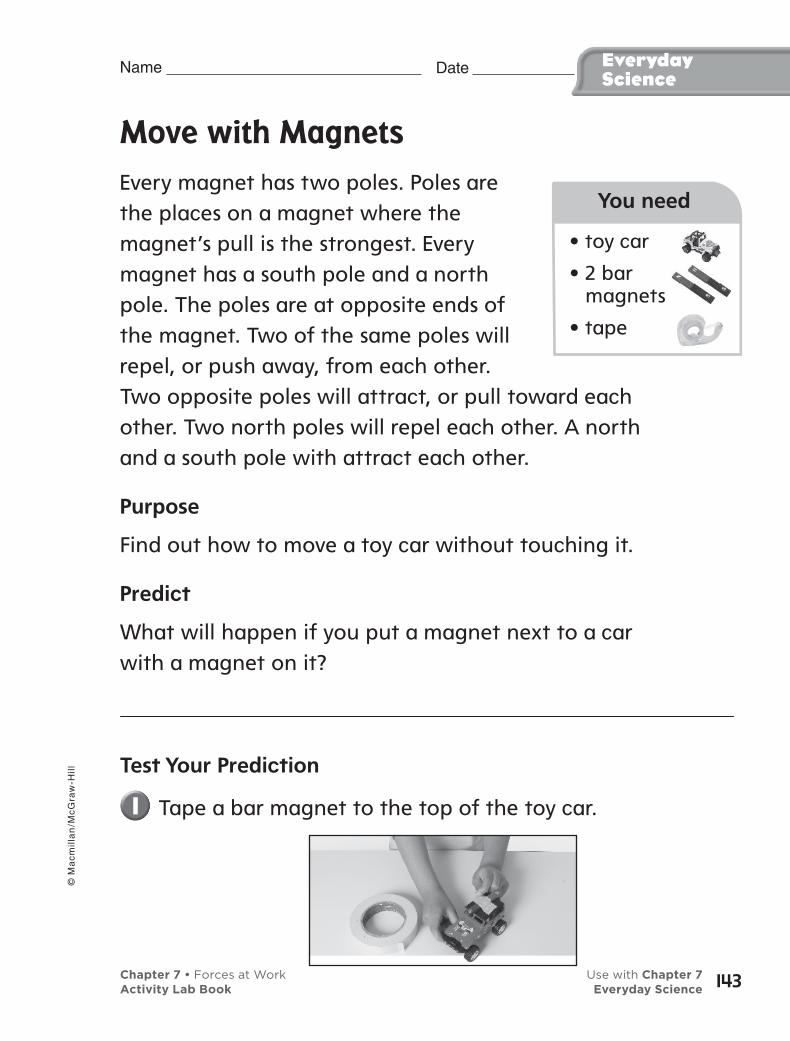
Date Name EverydayScience
Move with Magnets
Every magnet has two poles. Poles are the places on a magnet where the magnet’s pull is the strongest. Every magnet has a south pole and a north pole. The poles are at opposite ends of the magnet. Two of the same poles will repel, or push away, from each other. Two opposite poles will attract, or pull toward each other. Two north poles will repel each other. A north and a south pole with attract each other.
Purpose
Find out how to move a toy car without touching it.
Predict
What will happen if you put a magnet next to a car with a magnet on it?
Test Your Prediction
Tape a bar magnet to the top of the toy car.
• toy car
• 2 bar magnets
• tape
You need
Chapter 7 • Forces at Work Use with Chapter 7Activity Lab Book Everyday Science
© M
ac
mil
lan
/Mc
Gra
w-H
ill
143
Date Name EverydayScience
Use a second bar magnet to push the car.
Draw Conclusions
How can you move a toy car without touching it?
What poles did you put near each other to push the car?
Critical Thinking
What ways can we use magnets?
What else does a magnet attract?
Chapter 7 • Forces at Work Use with Chapter 7Activity Lab Book Everyday Science
© M
ac
mil
lan
/Mc
Gra
w-H
ill
144
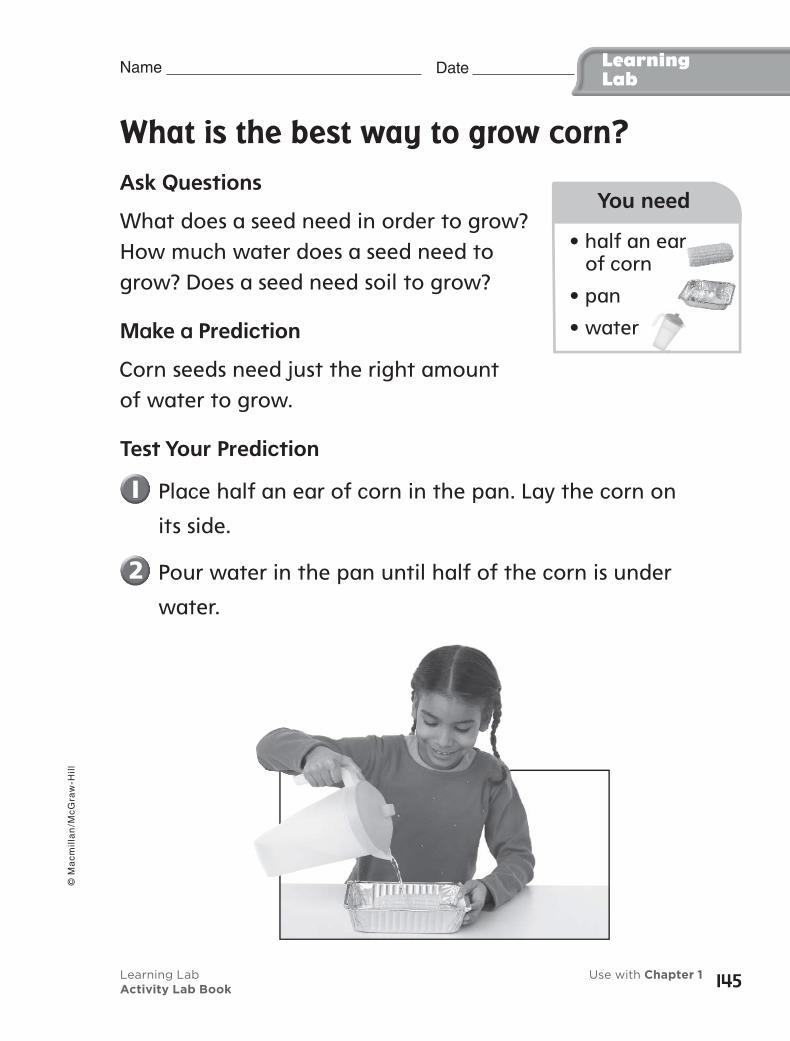
• half an ear of corn
• pan
• water
You need
Date Name LearningLab
What is the best way to grow corn?
Ask Questions
What does a seed need in order to grow? How much water does a seed need to grow? Does a seed need soil to grow?
Make a Prediction
Corn seeds need just the right amount of water to grow.
Test Your Prediction
Place half an ear of corn in the pan. Lay the corn on
its side.
Pour water in the pan until half of the corn is under
water.
Learning Lab Use with Chapter 1Activity Lab Book
© M
ac
mil
lan
/Mc
Gra
w-H
ill
145
Date Name LearningLab
Predict. How many seeds will sprout? Where will
they sprout?
Change the water every two days. Make sure you
keep the water at the same level. Do not let the
corn roll over.
Observe. Watch your ear of corn grow for a few
weeks. Record how your corn changes.
Communicate Your Results
What happened to your corn? Discuss your results with a partner.
• How did your predictions compare with your results?
• Can seeds have too much or too little water to grow?
Day Change
12
Learning Lab Use with Chapter 1Activity Lab Book
© M
ac
mil
lan
/Mc
Gra
w-H
ill
146
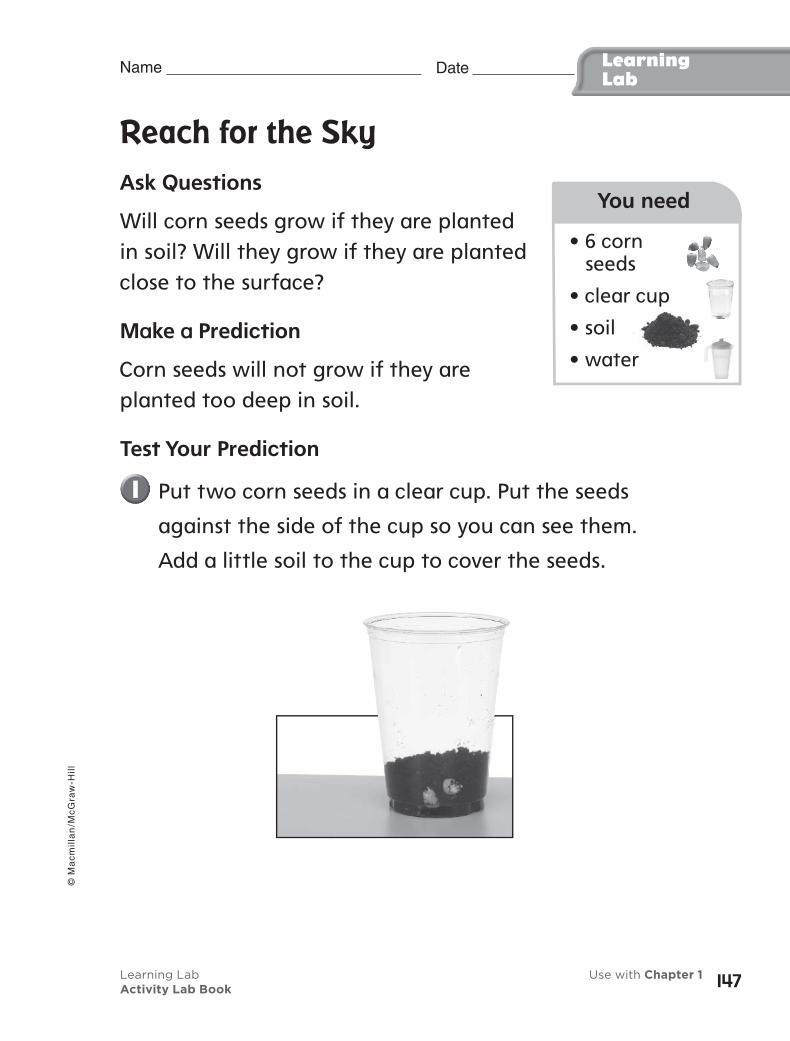
• 6 corn seeds
• clear cup
• soil
• water
You need
Date Name LearningLab
Reach for the Sky
Ask Questions
Will corn seeds grow if they are plantedin soil? Will they grow if they are planted close to the surface?
Make a Prediction
Corn seeds will not grow if they are planted too deep in soil.
Test Your Prediction
Put two corn seeds in a clear cup. Put the seeds
against the side of the cup so you can see them.
Add a little soil to the cup to cover the seeds.
Learning Lab Use with Chapter 1Activity Lab Book
© M
ac
mil
lan
/Mc
Gra
w-H
ill
147
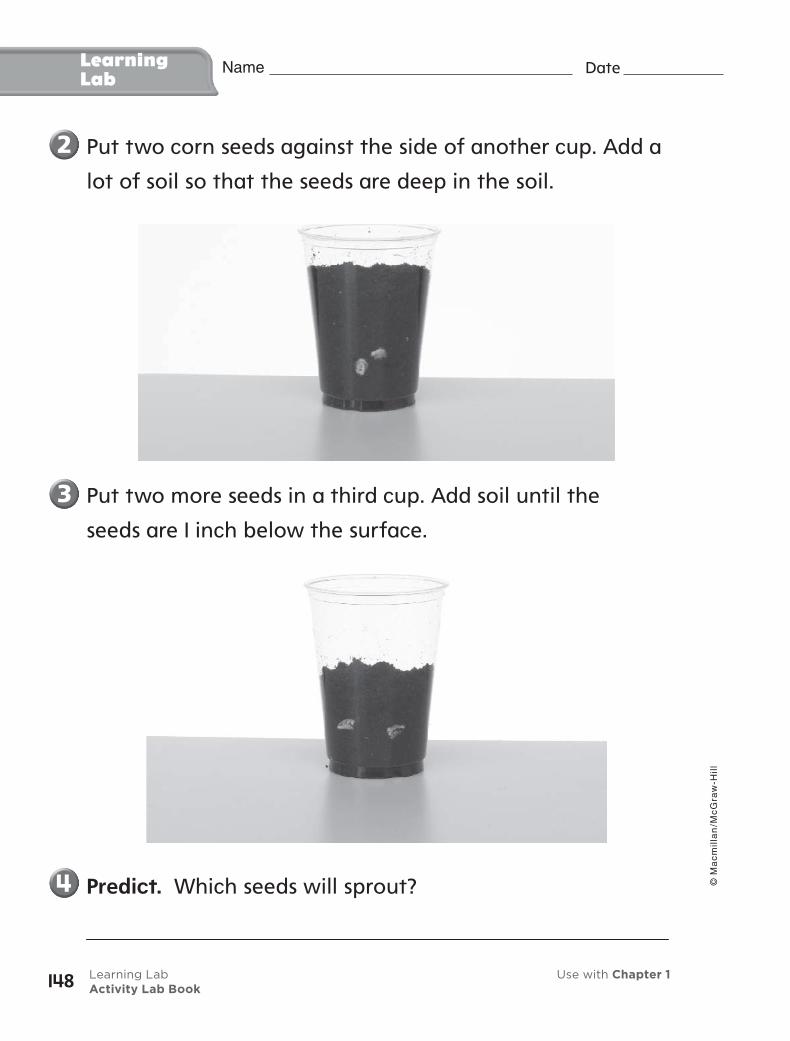
Date Name LearningLab
Put two corn seeds against the side of another cup. Add a
lot of soil so that the seeds are deep in the soil.
Predict. Which seeds will sprout?
Put two more seeds in a third cup. Add soil until the
seeds are 1 inch below the surface.
Learning Lab Use with Chapter 1Activity Lab Book
© M
ac
mil
lan
/Mc
Gra
w-H
ill
148
Date Name LearningLab
Record Data. Keep the soil moist and record how
your seeds change.
Week How Did the Seeds Change?
12
Communicate Your Results
Discuss with a group what happened to your seeds.
• Which seeds sprouted?
• Which seeds grow the fastest?
• Which seeds started and then stopped sprouting?
Learning Lab Use with Chapter 1Activity Lab Book
© M
ac
mil
lan
/Mc
Gra
w-H
ill
149

Date Name LearningLab
Corny Experiments
What helps plants grow? What keeps plants from growing? Here are some questions that you may want to explore:
• Does corn grow in sand? Does corn grow in clay?
• Does temperature change how seeds sprout? Would your seeds sprout in the refrigerator?
Learning Lab Use with Chapter 1Activity Lab Book
© M
ac
mil
lan
/Mc
Gra
w-H
ill
150
• soil
• spoon
• plate
• hand lens
You need
Date Name LearningLab
How do we use natural resources?
Soil Sleuth
Ask Questions
Most plants need soil to grow. People and animals also need soil because they eat plants. What is in soil? How many different things can you find in soil?Are all soils alike?
Make a Prediction
What kinds of things do you think are in soil?
Test Your Prediction
Use a spoon to put a little soil on your plate.
Learning Lab Use with Chapter 5Activity Lab Book
© M
ac
mil
lan
/Mc
Gra
w-H
ill
151

Date Name LearningLab
Use a hand lens and observe your soil.
Classify. Find objects that look alike. Put them into
different groups.
Learning Lab Use with Chapter 5 Activity Lab Book
© M
ac
mil
lan
/Mc
Gra
w-H
ill
152
Date Name LearningLab
Record Data. Write and draw the objects you find
in the chart below.
Communicate Your Results
What did you find in soil? Discuss your results with a partner.
• How did your predictions compare with your results?
• What did your partner find in his or her soil?
• How do you think the objects in soil got there?
Plants Animals Rocks
Learning Lab Use with Chapter 5Activity Lab Book
© M
ac
mil
lan
/Mc
Gra
w-H
ill
153
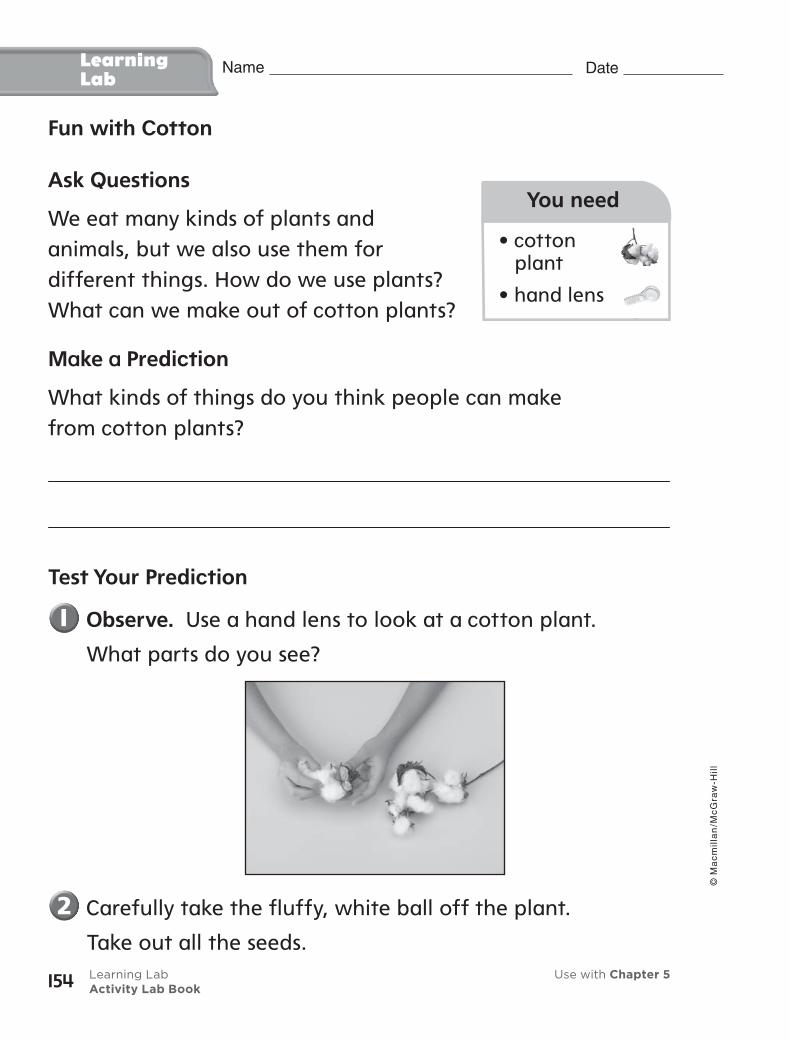
• cotton plant
• hand lens
You need
Date Name LearningLab
Fun with Cotton
Ask Questions
We eat many kinds of plants and animals, but we also use them for different things. How do we use plants? What can we make out of cotton plants?
Make a Prediction
What kinds of things do you think people can make from cotton plants?
Test Your Prediction
Observe. Use a hand lens to look at a cotton plant.
What parts do you see?
Carefully take the fluffy, white ball off the plant.
Take out all the seeds.Learning Lab Use with Chapter 5Activity Lab Book
© M
ac
mil
lan
/Mc
Gra
w-H
ill
154
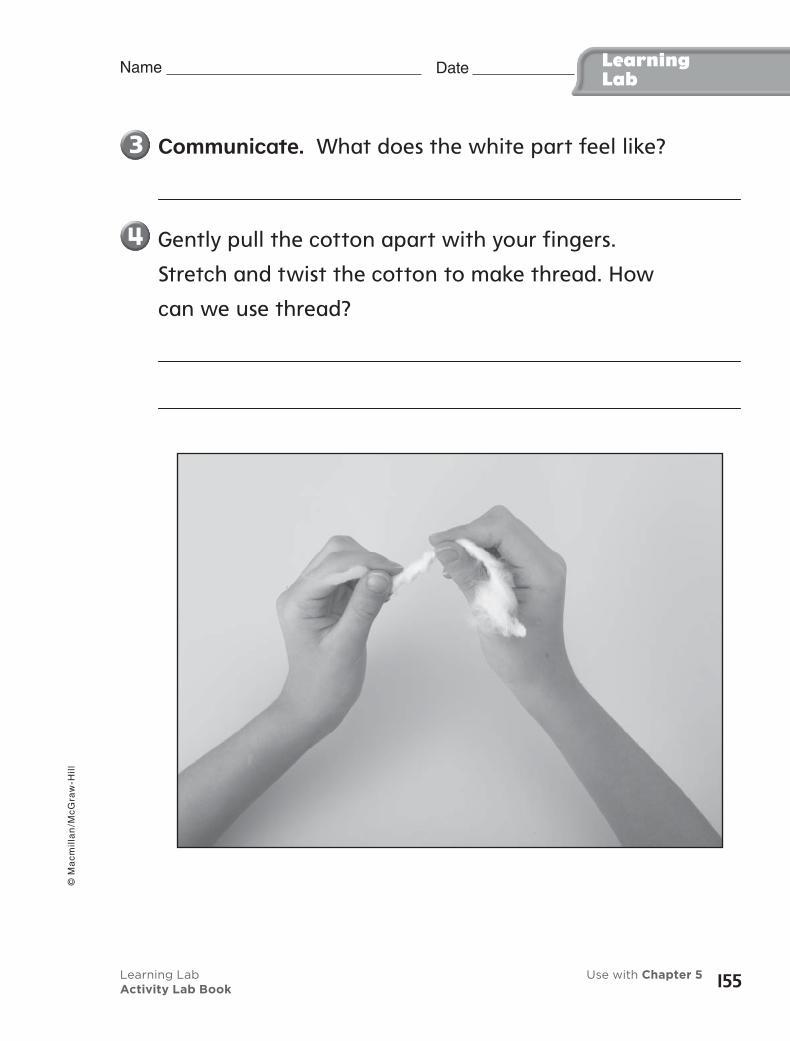
Date Name LearningLab
Communicate. What does the white part feel like?
Gently pull the cotton apart with your fingers.
Stretch and twist the cotton to make thread. How
can we use thread?
Learning Lab Use with Chapter 5Activity Lab Book
© M
ac
mil
lan
/Mc
Gra
w-H
ill
155

Date Name LearningLab
Communicate Your Results
Discuss what you learned with a partner.
• How do we use thread?
• What other plants do we use everyday?
• How can we use animals to make thread?
More Natural Resources
We use many things from nature. Here are some questions you may want to explore:
• How can we use the Sun to heat water?
• How can we use wind to cool water?
• How can we use water to move things?
Learning Lab Use with Chapter 5Activity Lab Book
© M
ac
mil
lan
/Mc
Gra
w-H
ill
156
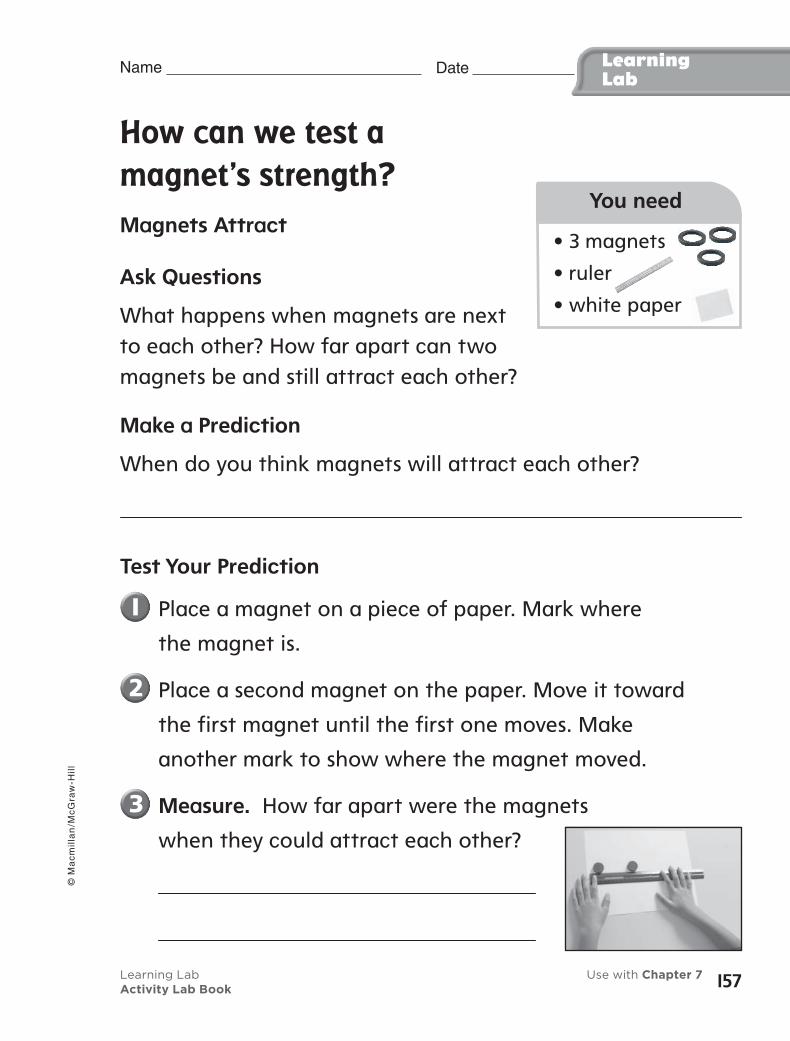
• 3 magnets
• ruler
• white paper
You need
Date Name LearningLab
How can we test a
magnet’s strength?
Magnets Attract
Ask Questions
What happens when magnets are next to each other? How far apart can two magnets be and still attract each other?
Make a Prediction
When do you think magnets will attract each other?
Test Your Prediction
Place a magnet on a piece of paper. Mark where
the magnet is.
Place a second magnet on the paper. Move it toward
the first magnet until the first one moves. Make
another mark to show where the magnet moved.
Measure. How far apart were the magnets
when they could attract each other?
Learning Lab Use with Chapter 7Activity Lab Book
© M
ac
mil
lan
/Mc
Gra
w-H
ill
157
Date Name LearningLab
Now use two magnets to move the first magnet.
How far apart were the magnets when they could
attract each other?
Communicate Your Results
Discuss your results with a partner.
• How did your predictions compare to your results?
• Are two magnets stronger than one magnet? How do you
know?
Learning Lab Use with Chapter 7Activity Lab Book
© M
ac
mil
lan
/Mc
Gra
w-H
ill
158
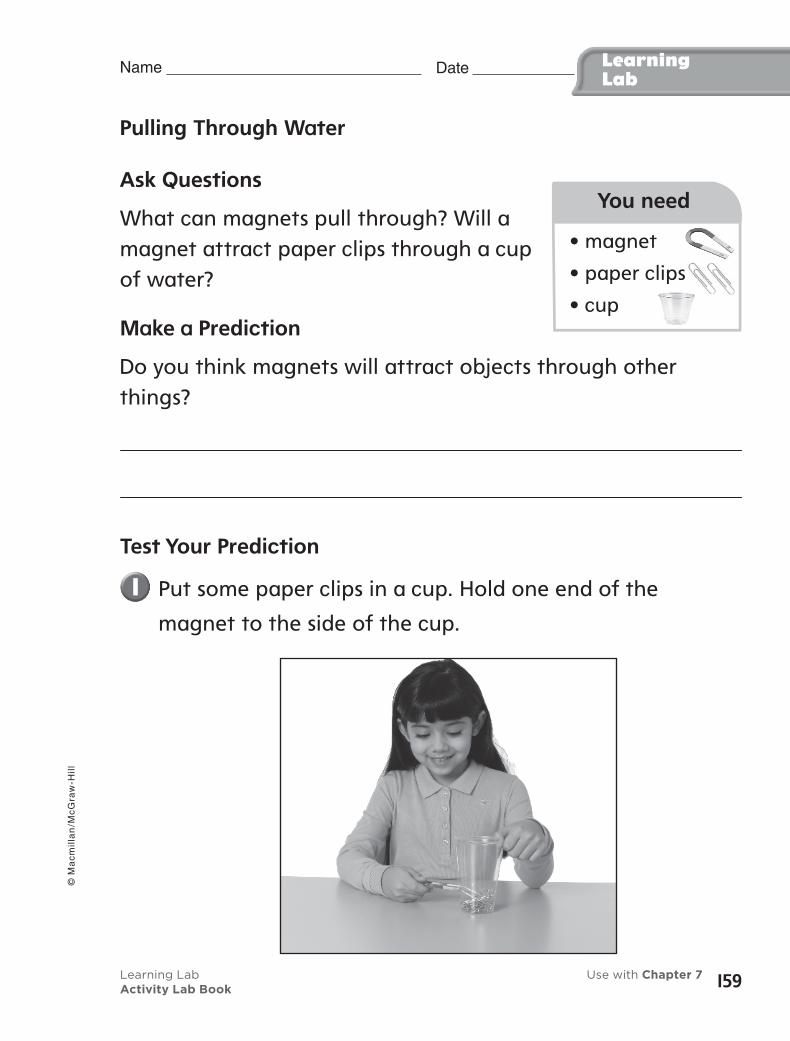
• magnet
• paper clips
• cup
You need
Date Name LearningLab
Pulling Through Water
Ask Questions
What can magnets pull through? Will a magnet attract paper clips through a cup of water?
Make a Prediction
Do you think magnets will attract objects through other things?
Test Your Prediction
Put some paper clips in a cup. Hold one end of the
magnet to the side of the cup.
Learning Lab Use with Chapter 7Activity Lab Book
© M
ac
mil
lan
/Mc
Gra
w-H
ill
159
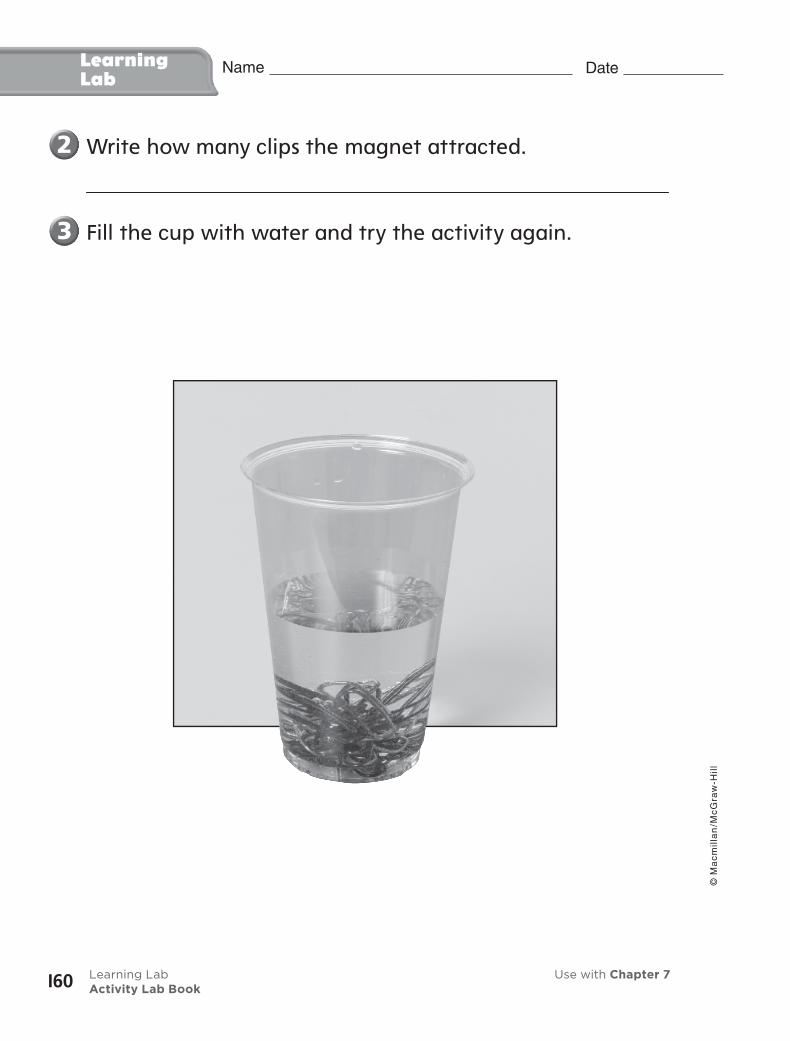
Date Name LearningLab
Write how many clips the magnet attracted.
Fill the cup with water and try the activity again.
Learning Lab Use with Chapter 7Activity Lab Book
© M
ac
mil
lan
/Mc
Gra
w-H
ill
160
Date Name LearningLab
Record Data. Fill in the chart to share your results.
Communicate Your Results
Discuss your results with a partner.
• When did the magnet attract more paper clips?
• What can magnets pull through?
Number of Paper Clips
CupCup with Water
Learning Lab Use with Chapter 7Activity Lab Book
© M
ac
mil
lan
/Mc
Gra
w-H
ill
161
Date Name LearningLab
Strength Test
What else can magnets do? Here are some questions that you may want to explore:
• Where on a magnet is the pull the strongest?
• How many pieces of paper can a magnet pull through?
Learning Lab Use with Chapter 7Activity Lab Book
© M
ac
mil
lan
/Mc
Gra
w-H
ill
162