Embed Size (px)
Citation preview

MANUALE DI ISTRUZIONIINSTRUCTION MANUALMANUEL D’INSTRUCTIONS
MANUAL DE INSTRUCCIONESBEDIENUNGSANLEITUNGMANUAL DE INSTRUÇÕES
REGISTRA IL TUO PRODOTTO REGISTER YOUR PRODUCT
ENREGISTREZ VOTRE PRODUITREGISTRA TU PRODUCTO GERÄTREGISTRIERUNG
REGISTE O SEU PRODUTO www.polti.com
SV205
A5 COPERTINA VT SV205 - M0S10997 - 1Q01:FEV 1000-950.qxd 12/01/2016 14.59 Pagina 1
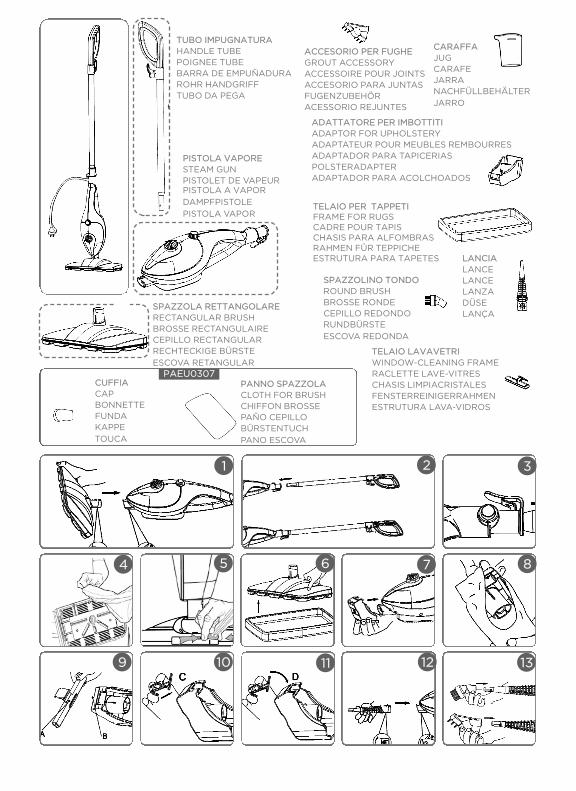
ACCESORIO PER FUGHEGROUT ACCESSORYACCESSOIRE POUR JOINTSACCESORIO PARA JUNTASFUGENZUBEHÖRACESSORIO REJUNTES
CARAFFAJUGCARAFEJARRANACHFÜLLBEHÄLTER
JARRO
TELAIO PER TAPPETIFRAME FOR RUGSCADRE POUR TAPISCHASIS PARA ALFOMBRASRAHMEN FÜR TEPPICHEESTRUTURA PARA TAPETES
TUBO IMPUGNATURAHANDLE TUBEPOIGNEE TUBEBARRA DE EMPUÑADURA ROHR HANDGRIFFTUBO DA PEGA
PISTOLA VAPORESTEAM GUNPISTOLET DE VAPEURPISTOLA A VAPOR
DAMPFPISTOLE
PISTOLA VAPOR
SPAZZOLA RETTANGOLARERECTANGULAR BRUSHBROSSE RECTANGULAIRE CEPILLO RECTANGULARRECHTECKIGE BÜRSTE
ESCOVA RETANGULAR
SPAZZOLINO TONDOROUND BRUSHBROSSE RONDECEPILLO REDONDORUNDBÜRSTE
ESCOVA REDONDA
CUFFIACAPBONNETTEFUNDAKAPPE
TOUCA
TELAIO LAVAVETRIWINDOW-CLEANING FRAME RACLETTE LAVE-VITRESCHASIS LIMPIACRISTALESFENSTERREINIGERRAHMENESTRUTURA LAVA-VIDROS
LANCIALANCELANCELANZADÜSELANÇA
PANNO SPAZZOLACLOTH FOR BRUSHCHIFFON BROSSEPAÑO CEPILLOBÜRSTENTUCH
PANO ESCOVA
ADATTATORE PER IMBOTTITIADAPTOR FOR UPHOLSTERYADAPTATEUR POUR MEUBLES REMBOURRESADAPTADOR PARA TAPICERIASPOLSTERADAPTERADAPTADOR PARA ACOLCHOADOS
PAEU0307
1311 12109
4 76 8
1
5
2 3
A5 COPERTINA VT SV205 - M0S10997 - 1Q01:FEV 1000-950.qxd 12/01/2016 14.59 Pagina 2

WELCOME TO THE WORLD OF VAPORETTO
THE ALL-IN-ONE CLEANING SYSTEM THAT CLEANS DOMESTIC SURFACES IN ONE GO, ELI-MINATING MITES, GERMS AND BACTERIA WITHOUT THE USE OF CHEMICAL DETERGENTS.
ACCESSORIES FOR ALL NEEDS
On our web site www.polti.com and in goodappliance shops you will find a wide range ofaccessories to increase the performance andthe practical applications of your appliances
to make home cleaning even easier.
To check the compatibility of an accessorywith your appliance, search the code
PAEUXXXX listed next to each accessory onpage 2.
If the accessory code you wish to buy is notlisted in this manual, please contact our Cu-stomer Service team for more information.
REGISTER YOUR PRODUCT
Visit our website www.polti.com or call ourCustomer Services department to register
your product. You can benefit from a special welcome
offer and keep up to date on all the latestPolti news, as well as buy accessories and
consumables.To register your product, in addition to
your personal information, you must enterthe serial number (SN) which you will findon the silver label, located on the box and
underneath the appliance.To save time and have your serial numberto hand, write it in the space provided on
the back cover of this manual.
| 13 |
EN
GL
ISH
A5 VT SV205 - M0S10997 - 1P01 - PRELIMINARE_vers7:FEV 1000-950.qxd 13/02/2015 14.17 Pagina 13

EN
GL
ISH
| 14 |
SAFETY WARNINGS
IMPORTANT PRECAUTIONS FOR USE
WARNING! BEFORE USING THE APPLIANCE, CAREFULLYREAD ALL THE INSTRUCTIONS AND WARNINGS IN THISMANUAL, AND ON THE APPLIANCE ITSELF.
Polti S.p.A. declines all liability for any accident deriving fromany improper use of this appliance. Correct use of the product is only as detailed in this instructionmanual. Any use which does not comply with these instructions will in-validate the warranty.
SAFETY SYMBOLS:
WARNING: High temperature. Risk of scalding! If shown on the product, do not touch as parts may bevery hot.
WARNING: Steam.Risk of scalding!
This appliance reaches very high temperatures. Incorrect use of thedevice can cause scalding.
• Never disassemble or carry out maintenance on the applianceapart from that indicated in this manual. In the event of a faultor malfunction, do not try and repair the appliance yourself. Inthe event of a heavy knock, fall, damage or fall into water, theappliance may not longer be safe to use. Incorrect use or alack of respect for the instructions herein may lead to seriousaccidents. Always contact Authorised Service Centres.
• This appliance can be used by children over 8 years old, by peo-ple with reduced physical, sensory or mental abilities or by inex-
A5 VT SV205 - M0S10997 - 1P01 - PRELIMINARE_vers7:FEV 1000-950.qxd 13/02/2015 14.17 Pagina 14
| 15 |
perienced persons only where they are instructed in advance onits safe use and only if informed of the dangers related to theproduct. Children must not play with the appliance. The cleaningand maintenance of the appliance may not be done by childrenwithout the supervision of an adult. Keep the appliance and thepower cable out of the reach of children under 8 years of agewhen the appliance is on or during the cooling phase.
• Keep all the parts of the packaging out of the reach of chil-dren; they are not toys. Keep the plastic bag out of the reachof children: danger of suffocation.
• This appliance is destined exclusively for indoor domestic use.In order to reduce the risk of accidents, including: fires, elec-trocution, personal injury and scalding, both during use andduring preparation, maintenance and storage, always takethe fundamental precautions listed in this manual.
RISKS CONNECTED TO THE POWER SUPPLY – ELECTROCU-TION
• The earthing system and highly sensitive residual-current cir-cuit breaker, complete with magnetothermic cut-out for yourdomestic system, guarantee safe use of electrical appliances. Therefore, for your own safety, check that the electrical sy-stem to which the appliance is connected complies with cur-rent laws.
• Do not connect the appliance to the mains if the voltage doesnot correspond with that of the domestic electrical circuit in use.
• Do not overload the sockets with adaptors and/or transfor-mers. Only connect the product to a single socket with cur-rent that is compatible with the supplied plug.
• Do not use electrical extension leads that are unsuitable forthe power rating or which are not compliant with law. Theymay overheat and possibly lead to short circuiting, fire, poweroutage or damage to the equipment. Only use extension leadswhich are certified, suitable for the power rating, supporting
EN
GL
ISH
A5 VT SV205 - M0S10997 - 1P01 - PRELIMINARE_vers7:FEV 1000-950.qxd 13/02/2015 14.17 Pagina 15
| 16 |
EN
GL
ISH
16A or power above 2220W, and earthed. • To remove the plug from the socket, do not pull the power ca-
ble, but hold the plug itself to avoid damage to the plug andthe cable.
• Always unplug the appliance if it is not in use and before anypreparation, maintenance or cleaning operation.
• The appliance must not be left unattended if plugged in tothe mains.
• Fully unwind the cable from the cable winder before connec-ting the appliance to the mains and before use. Always usethe product with the cable completely unwound.
• Do not pull or jerk the cable or expose it to tensions (twisting,crushing or stretching). Keep the cable away from hot and/orsharp surfaces and elements. Avoid crushing the cables indoors and windows. Do not pull the cable tight around cor-ners. Avoid treading on the cable. Do not pass over the cablewith the appliance. Do not wind the power cable around theappliance, especially if the appliance is hot.
• Do not substitute the plug on the power cable.• If the power cable is damaged, it must be replaced by the manu-
facturer, its service agent or similarly qualified persons in orderto avoid all possible hazards. Do not use the product if thepower cable is damaged.
• Do not touch or use the appliance barefoot and/or with wetbody or feet.
• Do not use the appliance near containers full of water, e.g.sinks, baths and swimming pools.
• Do not immerse the appliance, including the power cable andplug, in water or other liquids.
• Steam must not be directed towards equipment containingelectric or electronic components.
A5 VT SV205 - M0S10997 - 1P01 - PRELIMINARE_vers7:FEV 1000-950.qxd 13/02/2015 14.17 Pagina 16
| 17 |
EN
GL
ISH
RISKS DURING USE OF THE PRODUCT – INJURIES/SCALDING
• The product should not be used in areas where there is a dan-ger of explosions or in the presence of toxic substances.
• Do not pour toxic substances, acids, solvents, detergents,corrosive substances and/or explosives or perfumes into thetank.
• Only pour water or the water mix indicated in the Chapter“WHICH WATER TO USE” into the tank.
• Do not direct the steam jet onto toxic substances, acids, sol-vents, detergents or corrosive substances. The handling andremoval of dangerous substances must be carried out accor-ding to the indications of the manufacturers of these substan-ces.
• Do not direct the steam jet onto explosive powders or liquids,hydrocarbons, open flames and or extremely hot objects.
• Re-wind the cable when the appliance is not in use.• Do not position the product near sources of heat such as fire-
places, stoves and ovens.• Do not obstruct the openings and grills on the product. • Do not direct the steam jet on any part of the body of people
or animals.• Do not direct the steam jet on clothes while they are being
worn.• Cloths and rags and fabrics which have been subjected to a
deep steam reach very high temperatures, above 100°C. Waita few minutes and check that they have cooled before hand-ling them. Therefore, avoid contact with the skin if they havejust been steamed.
A5 VT SV205 - M0S10997 - 1P01 - PRELIMINARE_vers7:FEV 1000-950.qxd 13/02/2015 14.17 Pagina 17
| 18 |
EN
GL
ISH
CORRECT USE OF THE PRODUCTThis appliance is intended for home use as asteam cleaner as described and in accordan-ce with the instructions provided in this ma-nual. Please read these instructions carefullyand keep them. If this manual is lost, it can beconsulted and/or downloaded from the web-site www.polti.com.
The appliance only functions correctly withthe tank inserted, and complete with all itsparts.
Correct use of the product is only as detailed inthis instruction manual. Any other use may da-mage the appliance and invalidate the warranty.
INFORMATION FOR USERS Pursuant to European Directive 2012/19/EU,
regarding electric and electronic appliances,
this appliance must not be disposed of with
domestic waste, but sent to an official collec-
tion facility. This appliance complies with EU
Directive 2011/65/EU
The crossed-out bin symbol on theappliance indicates that, at the endof its useful lifespan, the productmust be disposed of separately from
other waste. Therefore, at the end of its life,the user must handover the appliance to anappropriate collection centre for electric andelectronic waste. Proper separate waste col-lection to facilitate the subsequent recycling,treatment and environmentally compatibledisposal of the appliance helps to prevent ne-gative effects on the environment and humanhealth, and promotes recycling of the mate-rials the product is made of. Unlawful disposalby the owner involves the application of theadministrative sanctions envisaged by currentlegislation.
Before leaving our factory all our products arerigorously tested. This is the reason why yourVAPORETTO may contain some residual wa-ter in the boiler.
WHICH WATER TO USEThis appliance has been designed to work
with widely available demineralised water.
Never use tap water, distilled water, rain wateror water containing additives (e.g. starch, per-fumes), or water produced by other domesticappliances. Do not use chemical substances or deter-gents.
IMPORTANTVaporetto SV205 is a practical appliance with5 cleaning settings, ideal for floors, rugs,glass, upholstery and tile grouting. It can beused in two ways: Steam Broom and SteamGun.
1. PREPARATION 1.1 Remove the appliance from the packaging,checking that the product is whole and thatall the parts are there. 1.2 Turn the water tank cap anti-clockwise toopen it, and fill the tank with demineralisedwater using the jug.1.3 Close the cap.1.4 The appliance is ready in Steam Gun mode.
This operation must always be carried outwith the power cable disconnected from themains.
2. PREPARATION FOR STEAMBROOM USE 2.1 Connect the portable appliance to the bru-sh, matching the pin on the brush with the ho-le on the portable appliance (1).2.2 Position the cloth under the brush (4) andfasten by pulling the cord (5).2.3 Make sure that the ignition/steam-adjust-ment dial is in the “OFF” position.2.4 Connect the handle tube to the couplinghole (2), making sure that the pin on thehandle tube matches with the hole on theportable appliance (3).To remove the handle tube, just press the pinon the tube and pull it. By inserting the tube, an internal micro-switchis activated, which will start steam emission.2.5 Plug the power lead into a suitable socketwith an earth connection.
Do not add other substances or additives tothe tank.
A5 VT SV205 - M0S10997 - 1P01 - PRELIMINARE_vers7:FEV 1000-950.qxd 13/02/2015 14.17 Pagina 18
| 19 |
EN
GL
ISH
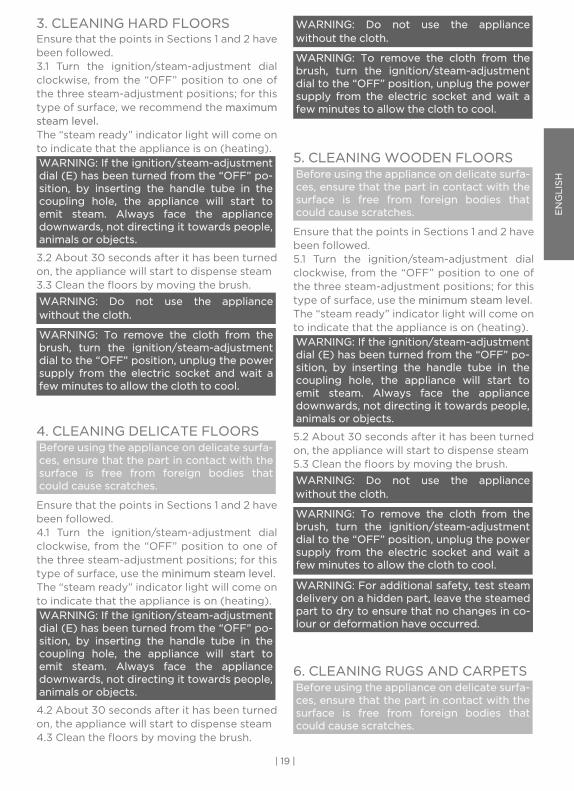
3. CLEANING HARD FLOORS Ensure that the points in Sections 1 and 2 havebeen followed. 3.1 Turn the ignition/steam-adjustment dialclockwise, from the “OFF” position to one ofthe three steam-adjustment positions; for thistype of surface, we recommend the maximumsteam level.The “steam ready” indicator light will come onto indicate that the appliance is on (heating).
3.2 About 30 seconds after it has been turnedon, the appliance will start to dispense steam3.3 Clean the floors by moving the brush.
4. CLEANING DELICATE FLOORS
Ensure that the points in Sections 1 and 2 havebeen followed. 4.1 Turn the ignition/steam-adjustment dialclockwise, from the “OFF” position to one ofthe three steam-adjustment positions; for thistype of surface, use the minimum steam level.The “steam ready” indicator light will come onto indicate that the appliance is on (heating).
4.2 About 30 seconds after it has been turnedon, the appliance will start to dispense steam4.3 Clean the floors by moving the brush.
5. CLEANING WOODEN FLOORS
Ensure that the points in Sections 1 and 2 havebeen followed. 5.1 Turn the ignition/steam-adjustment dialclockwise, from the “OFF” position to one ofthe three steam-adjustment positions; for thistype of surface, use the minimum steam level.The “steam ready” indicator light will come onto indicate that the appliance is on (heating).
5.2 About 30 seconds after it has been turnedon, the appliance will start to dispense steam5.3 Clean the floors by moving the brush.
6. CLEANING RUGS AND CARPETSBefore using the appliance on delicate surfa-ces, ensure that the part in contact with thesurface is free from foreign bodies thatcould cause scratches.
WARNING: To remove the cloth from thebrush, turn the ignition/steam-adjustmentdial to the “OFF” position, unplug the powersupply from the electric socket and wait afew minutes to allow the cloth to cool.
WARNING: Do not use the appliancewithout the cloth.
WARNING: If the ignition/steam-adjustmentdial (E) has been turned from the “OFF” po-sition, by inserting the handle tube in thecoupling hole, the appliance will start toemit steam. Always face the appliancedownwards, not directing it towards people,animals or objects.
Before using the appliance on delicate surfa-ces, ensure that the part in contact with thesurface is free from foreign bodies thatcould cause scratches.
WARNING: To remove the cloth from thebrush, turn the ignition/steam-adjustmentdial to the “OFF” position, unplug the powersupply from the electric socket and wait afew minutes to allow the cloth to cool.
WARNING: Do not use the appliancewithout the cloth.
WARNING: If the ignition/steam-adjustmentdial (E) has been turned from the “OFF” po-sition, by inserting the handle tube in thecoupling hole, the appliance will start toemit steam. Always face the appliancedownwards, not directing it towards people,animals or objects.
WARNING: For additional safety, test steamdelivery on a hidden part, leave the steamedpart to dry to ensure that no changes in co-lour or deformation have occurred.
A5 VT SV205 - M0S10997 - 1P01 - PRELIMINARE_vers7:FEV 1000-950.qxd 13/02/2015 14.17 Pagina 19
| 20 |
EN
GL
ISH
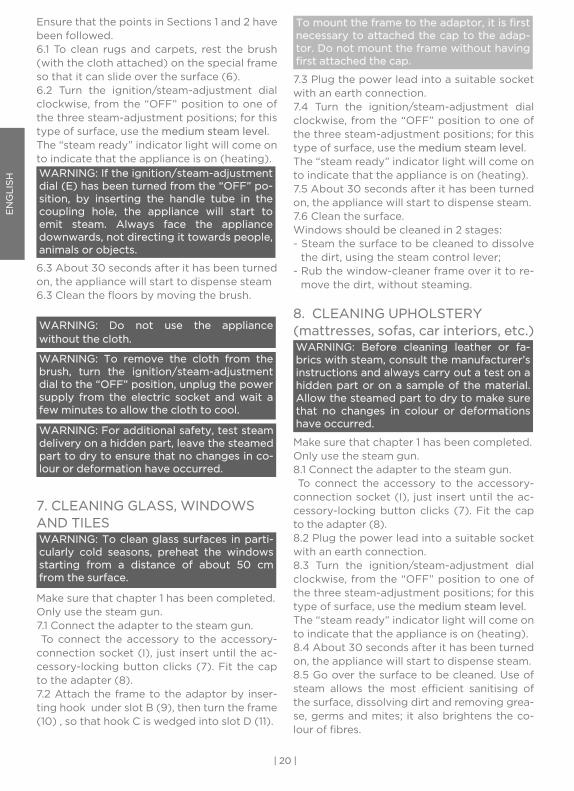
Ensure that the points in Sections 1 and 2 havebeen followed. 6.1 To clean rugs and carpets, rest the brush(with the cloth attached) on the special frameso that it can slide over the surface (6). 6.2 Turn the ignition/steam-adjustment dialclockwise, from the “OFF” position to one ofthe three steam-adjustment positions; for thistype of surface, use the medium steam level.The “steam ready” indicator light will come onto indicate that the appliance is on (heating).
6.3 About 30 seconds after it has been turnedon, the appliance will start to dispense steam6.3 Clean the floors by moving the brush.
7. CLEANING GLASS, WINDOWSAND TILES
Make sure that chapter 1 has been completed. Only use the steam gun.7.1 Connect the adapter to the steam gun.To connect the accessory to the accessory-
connection socket (I), just insert until the ac-cessory-locking button clicks (7). Fit the capto the adapter (8).7.2 Attach the frame to the adaptor by inser-ting hook under slot B (9), then turn the frame(10) , so that hook C is wedged into slot D (11).
7.3 Plug the power lead into a suitable socketwith an earth connection. 7.4 Turn the ignition/steam-adjustment dialclockwise, from the “OFF” position to one ofthe three steam-adjustment positions; for thistype of surface, use the medium steam level.The “steam ready” indicator light will come onto indicate that the appliance is on (heating).7.5 About 30 seconds after it has been turnedon, the appliance will start to dispense steam.7.6 Clean the surface. Windows should be cleaned in 2 stages:- Steam the surface to be cleaned to dissolve
the dirt, using the steam control lever; - Rub the window-cleaner frame over it to re-
move the dirt, without steaming.
8. CLEANING UPHOLSTERY(mattresses, sofas, car interiors, etc.)
Make sure that chapter 1 has been completed. Only use the steam gun.8.1 Connect the adapter to the steam gun. To connect the accessory to the accessory-
connection socket (I), just insert until the ac-cessory-locking button clicks (7). Fit the capto the adapter (8).8.2 Plug the power lead into a suitable socketwith an earth connection. 8.3 Turn the ignition/steam-adjustment dialclockwise, from the “OFF” position to one ofthe three steam-adjustment positions; for thistype of surface, use the medium steam level. The “steam ready” indicator light will come onto indicate that the appliance is on (heating).8.4 About 30 seconds after it has been turnedon, the appliance will start to dispense steam.8.5 Go over the surface to be cleaned. Use ofsteam allows the most efficient sanitising ofthe surface, dissolving dirt and removing grea-se, germs and mites; it also brightens the co-lour of fibres.
WARNING: Before cleaning leather or fa-brics with steam, consult the manufacturer’sinstructions and always carry out a test on ahidden part or on a sample of the material.Allow the steamed part to dry to make surethat no changes in colour or deformationshave occurred.
To mount the frame to the adaptor, it is firstnecessary to attached the cap to the adap-tor. Do not mount the frame without havingfirst attached the cap.
WARNING: To clean glass surfaces in parti-cularly cold seasons, preheat the windowsstarting from a distance of about 50 cmfrom the surface.
WARNING: For additional safety, test steamdelivery on a hidden part, leave the steamedpart to dry to ensure that no changes in co-lour or deformation have occurred.
WARNING: To remove the cloth from thebrush, turn the ignition/steam-adjustmentdial to the “OFF” position, unplug the powersupply from the electric socket and wait afew minutes to allow the cloth to cool.
WARNING: Do not use the appliancewithout the cloth.
WARNING: If the ignition/steam-adjustmentdial (E) has been turned from the “OFF” po-sition, by inserting the handle tube in thecoupling hole, the appliance will start toemit steam. Always face the appliancedownwards, not directing it towards people,animals or objects.
A5 VT SV205 - M0S10997 - 1P01 - PRELIMINARE_vers7:FEV 1000-950.qxd 13/02/2015 14.17 Pagina 20
| 21 |
EN
GL
ISH
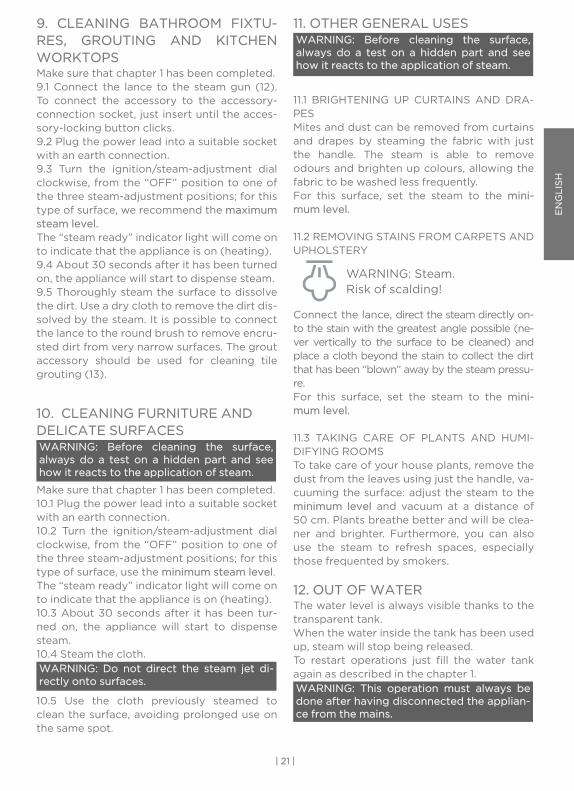
9. CLEANING BATHROOM FIXTU-RES, GROUTING AND KITCHENWORKTOPS Make sure that chapter 1 has been completed.9.1 Connect the lance to the steam gun (12).To connect the accessory to the accessory-connection socket, just insert until the acces-sory-locking button clicks.9.2 Plug the power lead into a suitable socketwith an earth connection. 9.3 Turn the ignition/steam-adjustment dialclockwise, from the “OFF” position to one ofthe three steam-adjustment positions; for thistype of surface, we recommend the maximumsteam level.The “steam ready” indicator light will come onto indicate that the appliance is on (heating).9.4 About 30 seconds after it has been turnedon, the appliance will start to dispense steam.9.5 Thoroughly steam the surface to dissolvethe dirt. Use a dry cloth to remove the dirt dis-solved by the steam. It is possible to connectthe lance to the round brush to remove encru-sted dirt from very narrow surfaces. The groutaccessory should be used for cleaning tilegrouting (13).
10. CLEANING FURNITURE ANDDELICATE SURFACES
Make sure that chapter 1 has been completed.10.1 Plug the power lead into a suitable socketwith an earth connection. 10.2 Turn the ignition/steam-adjustment dialclockwise, from the “OFF” position to one ofthe three steam-adjustment positions; for thistype of surface, use the minimum steam level.The “steam ready” indicator light will come onto indicate that the appliance is on (heating).10.3 About 30 seconds after it has been tur-ned on, the appliance will start to dispensesteam.10.4 Steam the cloth.
10.5 Use the cloth previously steamed toclean the surface, avoiding prolonged use onthe same spot.
11. OTHER GENERAL USES
11.1 BRIGHTENING UP CURTAINS AND DRA-PESMites and dust can be removed from curtainsand drapes by steaming the fabric with justthe handle. The steam is able to removeodours and brighten up colours, allowing thefabric to be washed less frequently. For this surface, set the steam to the mini-mum level.
11.2 REMOVING STAINS FROM CARPETS ANDUPHOLSTERY
Connect the lance, direct the steam directly on-to the stain with the greatest angle possible (ne-ver vertically to the surface to be cleaned) andplace a cloth beyond the stain to collect the dirtthat has been “blown” away by the steam pressu-re. For this surface, set the steam to the mini-mum level.
11.3 TAKING CARE OF PLANTS AND HUMI-DIFYING ROOMSTo take care of your house plants, remove thedust from the leaves using just the handle, va-cuuming the surface: adjust the steam to theminimum level and vacuum at a distance of50 cm. Plants breathe better and will be clea-ner and brighter. Furthermore, you can alsouse the steam to refresh spaces, especiallythose frequented by smokers.
12. OUT OF WATERThe water level is always visible thanks to thetransparent tank.When the water inside the tank has been usedup, steam will stop being released.To restart operations just fill the water tankagain as described in the chapter 1.
WARNING: This operation must always bedone after having disconnected the applian-ce from the mains.
WARNING: Steam. Risk of scalding!
WARNING: Before cleaning the surface,always do a test on a hidden part and seehow it reacts to the application of steam.
WARNING: Do not direct the steam jet di-rectly onto surfaces.
WARNING: Before cleaning the surface,always do a test on a hidden part and seehow it reacts to the application of steam.
A5 VT SV205 - M0S10997 - 1P01 - PRELIMINARE_vers7:FEV 1000-950.qxd 13/02/2015 14.17 Pagina 21
| 22 |
EN
GL
ISH
13. GENERAL MAINTENANCEEnsure that the appliance is switched off anddisconnected from the mains.To clean the outside of the appliance, only usea damp cloth and tap water.All accessories can be cleaned using runningwater, ensuring they are completely dry befo-re the next use.Do not use detergents of any type.The cloths provided can be washed by fol-lowing the instructions included on the label.
14. STORAGE14.1 Turn off the appliance and disconnectfrom the mains electricity.14.2 Completely empty the water tank toavoid water leaks.14.3 Before detaching the cloth from the bru-sh, wait a few minutes to allow it to cool.14.4 Wind the power cable around the specialcable rewinds.
WARNING: Do not keep the appliance con-nected to the power supply with the cablewound up.
Before using the appliance again, rememberto unwind the power cable completely. Theupper cable winder rotates 180° in order towind up the power cable quickly.
A5 VT SV205 - M0S10997 - 1P01 - PRELIMINARE_vers7:FEV 1000-950.qxd 13/02/2015 14.17 Pagina 22

| 23 |
EN
GL
ISH
15. TROUBLESHOOTING
PROBLEM CAUSE SOLUTION
The appliance does notturn on
No power
Power/adjustment dial inthe OFF position.
Check that the appliance has beendisconnected from the mains, asindicated in Section 2.
Turn the power/adjustment dial toone of the three steam-adjustmentsettings.
Does not dispense steam
Boiler out of water
Appliance turned off.
Disconnect the appliance from themains, fill the water tank and waitabout 30 seconds.
Switch on the appliance by turningthe power/adjustment dial to oneof the three steam-adjustment set-tings.
Steam is weak or intermit-tent.
Steam adjustment dialset to the minimum.
Increase the steam by turning thepower/adjustment dial to a highersetting.
The product leaves toomuch water on the floor
Steam adjustment dialset to the maximum.
Reduce the quantity of steam tothe minimum. If necessary, mo-mentarily stop the disbursementof steam, while continuing to rubthe surface.
Floor marked/dirty Dirty clothClean the floor again, changing thecloth.
If problems persist or are not listed above, please contact a Polti Authorised Service Centre(www.polti.com for the updated list) or contact Customer Services.
A5 VT SV205 - M0S10997 - 1P01 - PRELIMINARE_vers7:FEV 1000-950.qxd 13/02/2015 14.17 Pagina 23
| 24 |
EN
GL
ISH
WARRANTY
This appliance is for domestic use only and isguaranteed for two years from the date ofpurchase against any defects present at thetime the goods are handed over; the date ofpurchase must be proven via a proof of pur-chase document valid for tax purposes and is-sued by the seller.For repairs, the appliance must be accompa-nied by proof of purchase.This warranty does not affect the consumerrights deriving from European Directive99/44/EC as regards some aspects of saleand warranty of consumer goods, rights whi-ch the consumer should uphold with respectto the seller.This warranty is valid in the countries whichadhere to European Directive 99/44/EC. Forother countries, local regulations on warran-ties apply.
WHAT THE WARRANTY COVERSDuring the warranty, Polti guarantees free re-pair of a product with a manufacturing or fac-tory defect and, therefore, the client is not lia-ble to pay for any work or materials.In case of irreparable defects, Polti may repla-ce the product free of charge.
To avail of the warranty, the customer shouldvisit one of the Polti Authorised Service Cen-tres with proof of purchase from the seller va-lid for tax purposes and bearing the date ofpurchase of the product. Without proof ofpurchase and the relative date of purchase,the work will be charged for. Store the proofof purchase document safely for the wholeduration of the warranty.
WHAT THE WARRANTY DOES NOT COVER• Any fault or damage not deriving from a
manufacturing defect.• Any fault due to improper use or use other
than that indicated in the instruction book-let, an integral part of the product salescontract.
• Any defect resulting from force majeure (fi-res, short circuits) or caused by third par-ties (tampering).
• Damage caused by the use of non-originalPolti parts, and repairs or modificationsperformed by staff or service centres notauthorised by Polti.
• Damage caused by the customer. • Parts (filter, brush, hose, etc.) damaged by
use (consumable goods) or normal wearand tear.
• Any damage caused by limescale. • Defects resulting from lack of mainte-
nance/cleaning according to the manufac-turer’s instructions.
• Assembly of non-original Polti accessoriesor those that have been modified or whichare not suitable for the appliance.
Inappropriate use and/or use not compliantwith the instructions for use and any otherwarnings or indications contained in this ma-nual invalidates the warranty.
Polti takes no responsibility for any direct orindirect damage to people, objects or animalscaused by non-compliance with the instruc-tions indicated in this instruction booklet, re-garding warnings for use and product mainte-nance.
To see the up-to-date list of the Polti Authori-sed Service Centres, visit the websitewww.polti.com.
A5 VT SV205 - M0S10997 - 1P01 - PRELIMINARE_vers7:FEV 1000-950.qxd 13/02/2015 14.17 Pagina 24

www.polti.com
A5 COPERTINA VT SV205 - M0S10997 - 1Q01:FEV 1000-950.qxd 12/01/2016 14.59 Pagina 3

POLTI S.p.A, - Via Ferloni, 8322070 Bulgarograsso (CO) - Italy
www.polti.com
Follow us:
SN:
│▬│▬ │▬│▬ │▬│▬ │▬│▬ │▬│▬ │▬│▬ │▬│▬ │▬│▬ │▬│▬ │
REGISTRA IL TUO PRODOTTO REGISTER YOUR PRODUCTENREGISTREZ VOTRE PRODUITREGISTRA TU PRODUCTO GERÄTREGISTRIERUNGREGISTE O SEU PRODUTO
ITALIA SERVIZIO CLIENTI 848 800 806
FRANCE SERVICE CLIENTS 04 786 642 12
ESPAÑA SERVICIO AL CLIENTE 902 351 227
PORTUGAL SERVIÇO AO CLIENTE 707 780 274
UK CUSTOMER CARE 0845 177 6584
DEUTSCHLAND KUNDENDIENST 03222 109 472 9
OTHER COUNTRIES, PLEASE VISIT WWW.POLTI.COM
CALL CENTER
VT
20
5 -
M0
S10
99
7 -
1Q
01
A5 COPERTINA VT SV205 - M0S10997 - 1Q01:FEV 1000-950.qxd 12/01/2016 14.59 Pagina 4