Embed Size (px)
Citation preview
Plumber Cast Iron
1Skills Exploration 10–12
Cast Iron
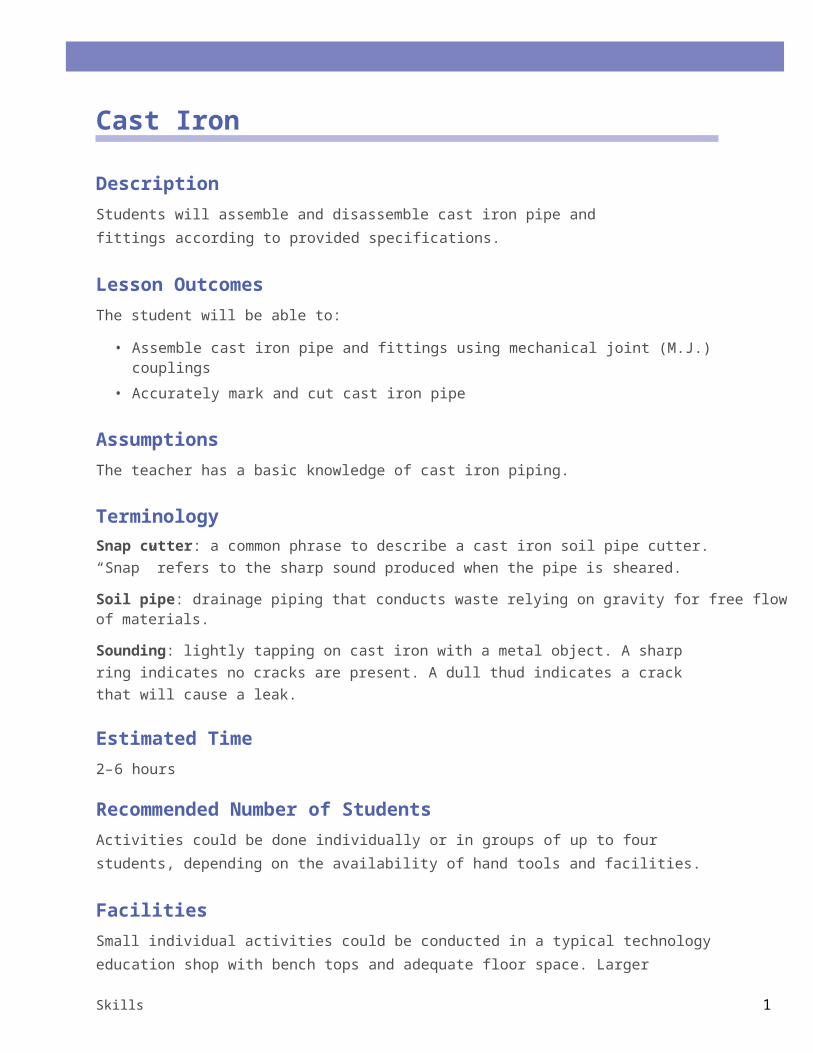
DescriptionStudents will assemble and disassemble cast iron pipe and fittings according to provided specifications.
Lesson OutcomesThe student will be able to:
• Assemble cast iron pipe and fittings using mechanical joint (M.J.) couplings• Accurately mark and cut cast iron pipe
AssumptionsThe teacher has a basic knowledge of cast iron piping.
TerminologySnap cutter: a common phrase to describe a cast iron soil pipe cutter. “Snap” refers to the sharp sound produced when the pipe is sheared.
Soil pipe: drainage piping that conducts waste relying on gravity for free flow of materials.
Sounding: lightly tapping on cast iron with a metal object. A sharp ring indicates no cracks are present. A dull thud indicates a crack that will cause a leak.
Estimated Time2–6 hours
Recommended Number of StudentsActivities could be done individually or in groups of up to four students, depending on the availability of hand tools and facilities.
FacilitiesSmall individual activities could be conducted in a typical technology education shop with bench tops and adequate floor space. Larger activities would require a vertical surface for securing pipe.

Cast Iron Plumber
2 Skills Exploration 10–12
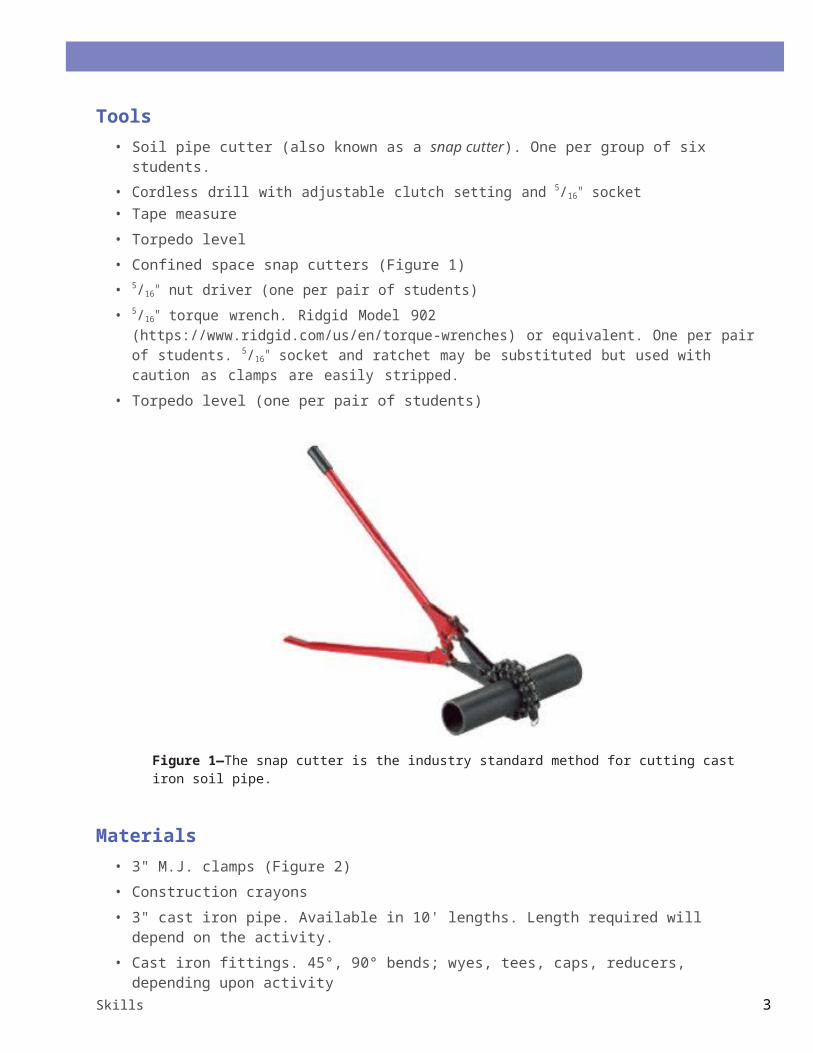
Tools• Soil pipe cutter (also known as a snap cutter). One per group of six students.• Cordless drill with adjustable clutch setting and 5/16" socket• Tape measure• Torpedo level• Confined space snap cutters (Figure 1)• 5/16" nut driver (one per pair of students)• 5/16" torque wrench. Ridgid Model 902 (https://www.ridgid.com/us/en/torque-wrenches) or
equivalent. One per pair of students. 5/16" socket and ratchet may be substituted but used with caution as clamps are easily stripped.
• Torpedo level (one per pair of students)
Figure 1—The snap cutter is the industry standard method for cutting cast iron soil pipe.
Materials• 3" M.J. clamps (Figure 2)• Construction crayons• 3" cast iron pipe. Available in 10' lengths. Length required will depend on the activity.• Cast iron fittings. 45°, 90° bends; wyes, tees, caps, reducers, depending upon activity
Plumber Cast Iron
3Skills Exploration 10–12
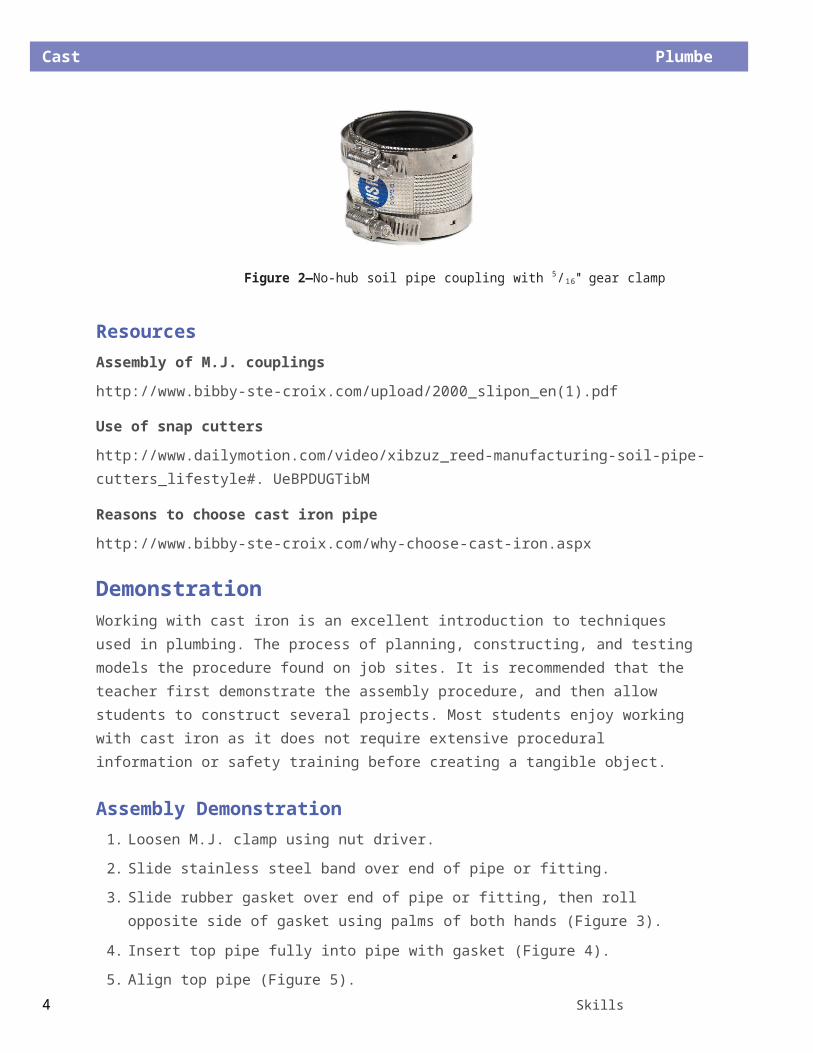
Figure 2—No-hub soil pipe coupling with 5/16" gear clamp
ResourcesAssembly of M.J. couplings
http://www.bibby-ste-croix.com/upload/2000_slipon_en(1).pdf
Use of snap cutters
http://www.dailymotion.com/video/xibzuz_reed-manufacturing-soil-pipe-cutters_lifestyle#. UeBPDUGTibM
Reasons to choose cast iron pipe
http://www.bibby-ste-croix.com/why-choose-cast-iron.aspx
DemonstrationWorking with cast iron is an excellent introduction to techniques used in plumbing. The process of planning, constructing, and testing models the procedure found on job sites. It is recommended that the teacher first demonstrate the assembly procedure, and then allowstudents to construct several projects. Most students enjoy working with cast iron as it does not require extensive procedural information or safety training before creating a tangible object.
Assembly Demonstration1. Loosen M.J. clamp using nut driver.
2. Slide stainless steel band over end of pipe or fitting.
3. Slide rubber gasket over end of pipe or fitting, then roll opposite side of gasket using palms of both hands (Figure 3).
4. Insert top pipe fully into pipe with gasket (Figure 4).
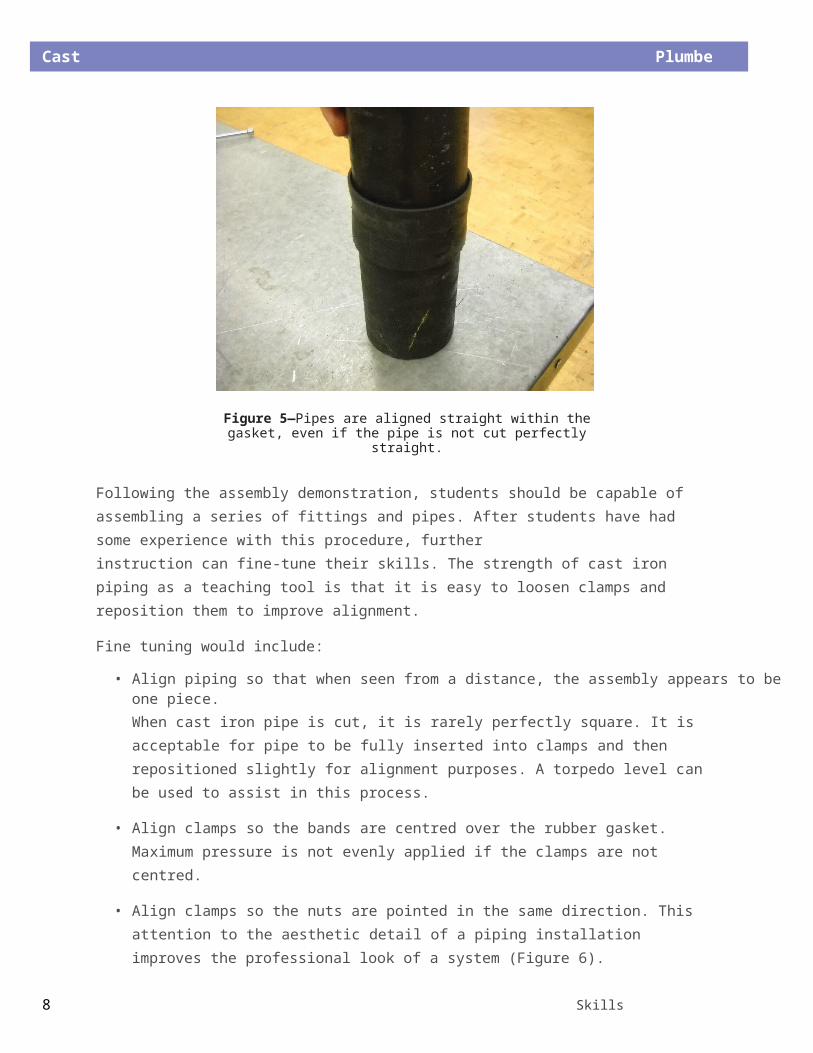
5. Align top pipe (Figure 5).
6. Slide stainless steel band over rubber gasket.
7. Align band so that it is centred over rubber gasket.
8. Tighten bands using the nut driver.
Cast Iron Plumber
4 Skills Exploration 10–12
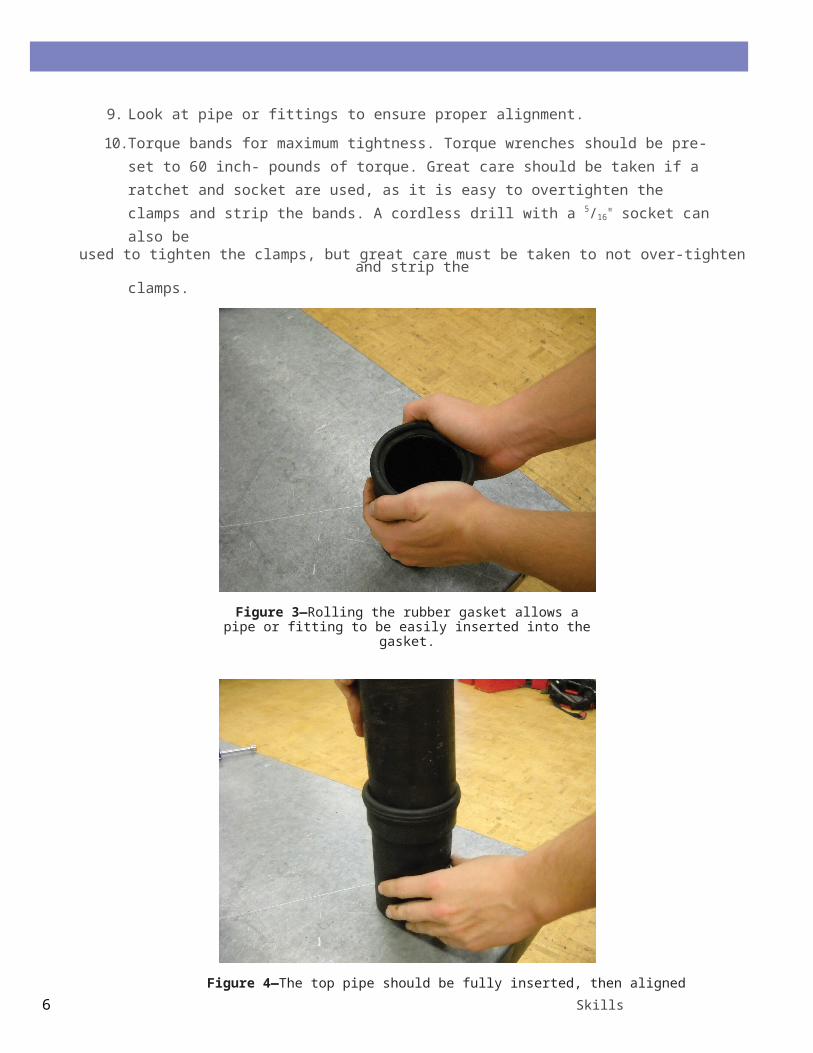
9. Look at pipe or fittings to ensure proper alignment.
10. Torque bands for maximum tightness. Torque wrenches should be pre-set to 60 inch- pounds of torque. Great care should be taken if a ratchet and socket are used, as it is easy to overtighten the clamps and strip the bands. A cordless drill with a 5/16" socket can also beused to tighten the clamps, but great care must be taken to not over-tighten and strip theclamps.
Figure 3—Rolling the rubber gasket allows a pipe or fitting to be easily inserted into the gasket.
Figure 4—The top pipe should be fully inserted, then aligned straight.

Plumber Cast Iron
5Skills Exploration 10–12
Figure 5—Pipes are aligned straight within the gasket, even if the pipe is not cut perfectly straight.
Following the assembly demonstration, students should be capable of assembling a series of fittings and pipes. After students have had some experience with this procedure, furtherinstruction can fine-tune their skills. The strength of cast iron piping as a teaching tool is that it is easy to loosen clamps and reposition them to improve alignment.
Fine tuning would include:
• Align piping so that when seen from a distance, the assembly appears to be one piece.When cast iron pipe is cut, it is rarely perfectly square. It is acceptable for pipe to be fully inserted into clamps and then repositioned slightly for alignment purposes. A torpedo level can be used to assist in this process.
• Align clamps so the bands are centred over the rubber gasket. Maximum pressure is not evenly applied if the clamps are not centred.
• Align clamps so the nuts are pointed in the same direction. This attention to the aesthetic detail of a piping installation improves the professional look of a system (Figure 6).
• Once clamps have been in place for several minutes, clamps can be re-torqued as the pressure around the rubber gasket equalizes.
Cast Iron Plumber
6 Skills Exploration 10–12
Figure 6—An example of a poorly installed clamp. The stainless steel band will not generate enough pressure to create a watertight seal.
Cutting DemonstrationOnce students have begun to find success in assembling fittings, it is suggested they begin to experience the challenge of accurately cutting cast iron. As this can be troublesome forbeginners, it is suggested that students work in pairs. The industry standard at the time of this writing is the “snap” cutter. However, the Ridgid press snap soil pipe cutter is also becoming more widely used (Figure 7).
Figure 7—The Ridgid press snap soil cutter is a user-friendly method of cutting cast iron pipe.

Plumber Cast Iron
7Skills Exploration 10–12
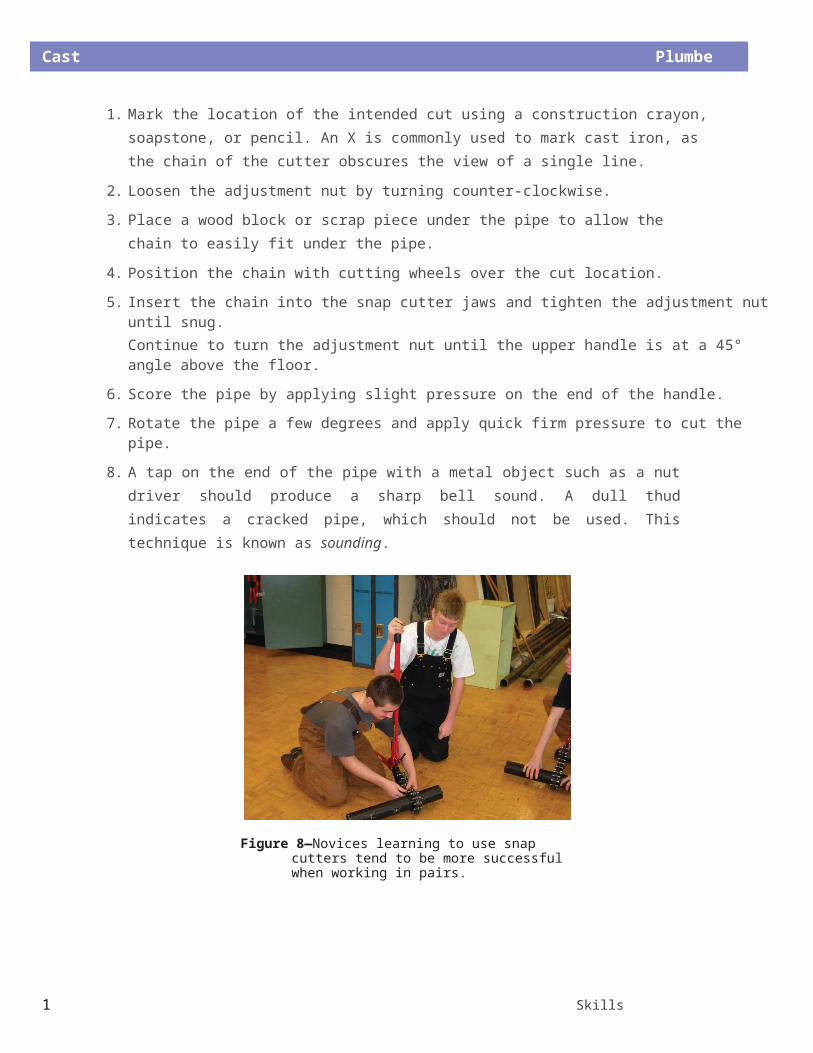
1. Mark the location of the intended cut using a construction crayon, soapstone, or pencil. An X is commonly used to mark cast iron, as the chain of the cutter obscures the view of a single line.
2. Loosen the adjustment nut by turning counter-clockwise.
3. Place a wood block or scrap piece under the pipe to allow the chain to easily fit under the pipe.
4. Position the chain with cutting wheels over the cut location.
5. Insert the chain into the snap cutter jaws and tighten the adjustment nut until snug.Continue to turn the adjustment nut until the upper handle is at a 45° angle above the floor.
6. Score the pipe by applying slight pressure on the end of the handle.
7. Rotate the pipe a few degrees and apply quick firm pressure to cut the pipe.
8. A tap on the end of the pipe with a metal object such as a nut driver should produce a sharp bell sound. A dull thud indicates a cracked pipe, which should not be used. This technique is known as sounding.
Figure 8—Novices learning to use snap cutters tend to be more successful when working in pairs.
Cast Iron Plumber
8 Skills Exploration 10–12
Activity 1: Cast Iron TowerHave students cut and assemble six pieces of cast iron piping cut 6" long. The teacher should check the accuracy of cuts, alignment of clamps, and alignment of pipe. As discussed above, the first step is to have students experience the apparent simplicity of assembling cast iron. As students begin to experience success, the teacher can introduce finer points of assembly.
Figure 9—Poor practices generate a tower that is unstable.
Figure 10—A well-constructed tower demonstrates attention to detail and a professional attitude.

Plumber Cast Iron
9Skills Exploration 10–12
Activity 2: Free-standing SculptureHave students assemble several fittings and short pieces of pipe into a free-standing sculpture. Small groups of students could work together to design, create, and construct a unique artifact (Figures 11 and 12). Providing a minimal amount of procedural information to students will allow them to gain experience through a hands-on approach to learning. The low risk of working with cast iron is an excellent vehicle for this “learning by doing” model.
Figure 11—Teamwork skills can be fostered in co-operative projects.
Figure 12—A sculpture activity with few limitations allows students to demonstrate their creativity.

10 Skills Exploration 10–12
Cast Iron Plumber
Activity 3: Summative ActivityAssemble cast iron pipe and fittings to run from a lower location to an upper location. See the cast iron tree diagram below.
Figure 13—Cast iron tree
Notes• Horizontal piping to be supported and graded at ¼" per foot.• Vertical piping to be supported by strap iron.
Depending on the facility and available resources, projects could range from very simple to extremely complex. The following guidelines are recommended:
• Piping should be capped at the lower end and able to hold water at its upper level for a minimum of 15 minutes without leakage. This models a water test required by a plumbing inspector. The teacher should expect leaks and have a procedure for removing water when needed. Wet/dry Shopvacs or a mop and bucket should be kept close to student work areas.Note: Use a reducing fitting and hose bib at the lowest point to allow for drainage once the project is complete.
• The horizontal section should be graded at �¼" per linear foot of pipe. Riser clamps, strap iron, or even wooden blocks with wedges would suffice to keep the pipe from moving.

Plumber Cast Iron
11Skills Exploration 10–12
Figure 14—Wooden wedges and strap iron grade this cast iron in a shop environment.
• The vertical section must be supported using strap iron or riser clamps. If piping extends above 5', great care must be taken with regard to safety. Working on ladders with the riskof heavy piping falling increases the possibility of an accident. The teacher should consider the age and ability of students before constructing a tall structure.
Figure 15—Strap iron is used in industry to support vertical piping.
12 Skills Exploration 10–12
Cast Iron Plumber
Figure 16—Vertical piping can also be supported by a riser clamp.
Evaluation Guidelines• Quality of M.J. clamp assembly:
– Clamps should be assembled such that the band is centred over the rubber gasket.– Nuts of bands should be aligned and should point in the same direction for ease
of access when assembling and disassembling.• Vertical piping should be plumb (straight up and down, verified with a level).• Horizontal piping should be graded at ¼" per foot.• Piping should be supported securely so it is not easily moved.• Alignment of fittings:
– Fittings and pipe should be fully inserted into clamps, but aligned straight.
Related Discussion• Ability to hold water if water test is conducted• Fire/smoke rating of cast iron versus plastic products• Environmental concerns re: recycling of cast iron versus non-recycling of plastic products• Weight of cast iron• Sound suppression