Embed Size (px)
Citation preview
SUSE Enterprise Storage 5.5 (SES 5 & SES 5.5)
Administration Guide
Administration GuideSUSE Enterprise Storage 5.5 (SES 5 & SES 5.5)by Tomáš Bažant, Jana Haláčková, and Sven Seeberg
Publication Date: 07/04/2021
SUSE LLC1800 South Novell PlaceProvo, UT 84606USA
https://documentation.suse.com
Copyright © 2021 SUSE LLC
Copyright © 2016, RedHat, Inc, and contributors.
The text of and illustrations in this document are licensed under a Creative Commons Attribution-
Share Alike 4.0 International ("CC-BY-SA"). An explanation of CC-BY-SA is available at http://
creativecommons.org/licenses/by-sa/4.0/legalcode . In accordance with CC-BY-SA, if you distribute this
document or an adaptation of it, you must provide the URL for the original version.
Red Hat, Red Hat Enterprise Linux, the Shadowman logo, JBoss, MetaMatrix, Fedora, the Innity Logo,
and RHCE are trademarks of Red Hat, Inc., registered in the United States and other countries. Linux® is
the registered trademark of Linus Torvalds in the United States and other countries. Java® is a registered
trademark of Oracle and/or its aliates. XFS® is a trademark of Silicon Graphics International Corp. or
its subsidiaries in the United States and/or other countries. All other trademarks are the property of their
respective owners.

For SUSE trademarks, see http://www.suse.com/company/legal/ . All other third-party trademarks are the
property of their respective owners. Trademark symbols (®, ™ etc.) denote trademarks of SUSE and its
aliates. Asterisks (*) denote third-party trademarks.
All information found in this book has been compiled with utmost attention to detail. However, this does
not guarantee complete accuracy. Neither SUSE LLC, its aliates, the authors nor the translators shall be
held liable for possible errors or the consequences thereof.
Contents
About This Guide xiv1 Available Documentation xiv
2 Feedback xv
3 Documentation Conventions xv
4 About the Making of This Manual xvi
5 Ceph Contributors xvi
I CLUSTER MANAGEMENT 1
1 Salt Cluster Administration 21.1 Adding New Cluster Nodes 2
1.2 Adding New Roles to Nodes 5
1.3 Removing and Reinstalling Cluster Nodes 5
1.4 Redeploying Monitor Nodes 8
1.5 Adding an OSD Disk to a Node 9
1.6 Removing an OSD 10
Removing Multiple OSDs 10 • Removing Broken OSDs Forcefully 11
1.7 Replacing an OSD Disk 11
Manual Configuration 13 • Automated Configuration 14
1.8 Recovering a Reinstalled OSD Node 15
1.9 Automated Installation via Salt 16
1.10 Updating the Cluster Nodes 17
1.11 Halting or Rebooting Cluster 19
iv Administration Guide
1.12 Adjusting ceph.conf with Custom Settings 20
Overriding the Defaults 21 • Including Configuration Files 23
1.13 Enabling AppArmor Profiles 23
II OPERATING A CLUSTER 25
2 Introduction 26
3 Operating Ceph Services 27
3.1 Operating Ceph Cluster Related Services using systemd 27
Starting, Stopping, and Restarting Services using Targets 27 • Starting,
Stopping, and Restarting Individual Services 28 • Identifying Individual
Services 28 • Service Status 29
3.2 Restarting Ceph Services using DeepSea 29
Restarting All Services 29 • Restarting Specific Services 30
3.3 Shutdown and Restart of the Whole Ceph Cluster 31
4 Determining Cluster State 33
4.1 Checking a Cluster's Status 33
4.2 Checking Cluster Health 34
4.3 Watching a Cluster 42
4.4 Checking a Cluster's Usage Stats 44
4.5 Checking OSD Status 46
4.6 Checking for Full OSDs 46
4.7 Checking Monitor Status 47
4.8 Checking Placement Group States 48
4.9 Using the Admin Socket 48
5 Monitoring and Alerting 50
5.1 Configuration File 50
v Administration Guide
5.2 Custom Alerts 62
Templates 64 • Inspecting Alerts at Runtime 64
6 Authentication with cephx 65
6.1 Authentication Architecture 65
6.2 Key Management 67
Background Information 68 • Managing Users 70 • Keyring
Management 75 • Command Line Usage 77
7 Stored Data Management 79
7.1 Devices 80
Device Classes 80
7.2 Buckets 87
7.3 Rule Sets 90
Iterating Through the Node Tree 92 • firstn and indep 94
7.4 CRUSH Map Manipulation 95
Editing a CRUSH Map 95 • Add/Move an OSD 96 • Dierence between
ceph osd reweight and ceph osd crush reweight 97 • Remove
an OSD 98 • Add a Bucket 98 • Move a Bucket 98 • Remove a
Bucket 99
7.5 Scrubbing 99
8 Managing Storage Pools 102
8.1 Associate Pools with an Application 102
8.2 Operating Pools 103
List Pools 103 • Create a Pool 103 • Set Pool Quotas 105 • Delete
a Pool 105 • Rename a Pool 106 • Show Pool Statistics 106 • Get
Pool Values 107 • Set Pool Values 107 • Set the Number of Object
Replicas 110 • Increasing the Number of Placement Groups 111
8.3 Pool Migration 113
Limitations 113 • Migrate Using Cache Tier 113 • Migrating RBD
Images 115
vi Administration Guide
8.4 Pool Snapshots 116
Make a Snapshot of a Pool 116 • List Snapshots of a Pool 117 • Remove a
Snapshot of a Pool 117
8.5 Data Compression 117
Enable Compression 117 • Pool Compression Options 118 • Global
Compression Options 119
9 RADOS Block Device 121
9.1 Block Device Commands 121
Creating a Block Device Image in a Replicated Pool 121 • Creating a
Block Device Image in an Erasure Coded Pool 122 • Listing Block Device
Images 122 • Retrieving Image Information 123 • Resizing a Block Device
Image 123 • Removing a Block Device Image 123
9.2 Mounting and Unmounting 123
rbdmap: Map RBD Devices at Boot Time 126 • Increasing the Size of RBD
Device 127
9.3 Snapshots 127
Cephx Notes 128 • Snapshot Basics 128 • Layering 130
9.4 Mirroring 134
rbd-mirror Daemon 135 • Pool Configuration 135 • Image
Configuration 137 • Mirror Status 140
9.5 Advanced Features 140
10 Erasure Coded Pools 143
10.1 Prerequisite for Erasure Coded Pools 143
10.2 Creating a Sample Erasure Coded Pool 143
10.3 Erasure Code Profiles 144
10.4 Erasure Coded Pools with RADOS Block Device 147
11 Cache Tiering 148
11.1 Tiered Storage Terminology 148
vii Administration Guide
11.2 Points to Consider 149
11.3 When to Use Cache Tiering 149
11.4 Cache Modes 150
11.5 Erasure Coded Pool and Cache Tiering 150
11.6 Setting Up an Example Tiered Storage 151
11.7 Configuring a Cache Tier 153
Hit Set 153 • Cache Sizing 155 • Cache Age 157 • Examples 157
12 Ceph Cluster Configuration 158
12.1 Runtime Configuration 158
12.2 Ceph OSD and BlueStore 159
Automatic Cache Sizing 159
III ACCESSING CLUSTER DATA 160
13 Ceph Object Gateway 16113.1 Object Gateway Restrictions and Naming Limitations 161
Bucket Limitations 161 • Stored Object Limitations 161 • HTTP Header
Limitations 162
13.2 Deploying the Object Gateway 162
13.3 Operating the Object Gateway Service 162
13.4 Configuration Parameters 163
Additional Notes 172
13.5 Managing Object Gateway Access 172
Accessing Object Gateway 172 • Managing S3 and Swift Accounts 174
13.6 Enabling HTTPS/SSL for Object Gateways 178
Create a Self-Signed Certificate 178 • Simple HTTPS
Configuration 179 • Advanced HTTPS Configuration 180
13.7 Sync Modules 180
Synchronizing Zones 181 • Storing Metadata in Elasticsearch 182
viii Administration Guide
13.8 LDAP Authentication 185
Authentication Mechanism 185 • Requirements 186 • Configure
Object Gateway to Use LDAP Authentication 186 • Using a Custom Search
Filter to Limit User Access 187 • Generating an Access Token for LDAP
authentication 188
13.9 Bucket Index Sharding 189
Bucket Index Resharding 189 • Bucket Index Sharding for New Buckets 192
13.10 Integrating OpenStack Keystone 193
Configuring OpenStack 193 • Configuring the Ceph Object Gateway 194
13.11 Multisite Object Gateways 197
Terminology 197 • Example Cluster Setup 198 • System
Keys 198 • Naming Conventions 199 • Default Pools 199 • Creating
a Realm 200 • Deleting the Default Zonegroup 200 • Creating a Master
Zonegroup 200 • Creating a Master Zone 201 • Creating a Secondary
Zone 205 • Adding Object Gateway to the Second Cluster 208 • Failover
and Disaster Recovery 212
13.12 Load Balancing the Object Gateway Servers with HAProxy 213
14 Ceph iSCSI Gateway 215
14.1 Connecting to lrbd-managed Targets 215
Linux (open-iscsi) 215 • Microsoft Windows (Microsoft iSCSI
initiator) 219 • VMware 226
14.2 Conclusion 232
15 Clustered File System 233
15.1 Mounting CephFS 233
Client Preparation 233 • Create a Secret File 233 • Mount CephFS 234
15.2 Unmounting CephFS 235
15.3 CephFS in /etc/fstab 236
ix Administration Guide
15.4 Multiple Active MDS Daemons (Active-Active MDS) 236
When to Use Active-Active MDS 236 • Increasing the MDS Active Cluster
Size 236 • Decreasing the Number of Ranks 237 • Manually Pinning
Directory Trees to a Rank 239
15.5 Managing Failover 239
Configuring Standby Daemons 239 • Examples 241
16 NFS Ganesha: Export Ceph Data via NFS 242
16.1 Installation 242
16.2 Configuration 242
Export Section 243 • RGW Section 245 • Changing Default NFS Ganesha
Ports 245
16.3 Custom NFS Ganesha Roles 246
Dierent Object Gateway Users for NFS Ganesha 246 • Separating CephFS
and Object Gateway FSAL 248 • Supported Operations 249
16.4 Starting or Restarting NFS Ganesha 250
16.5 Setting the Log Level 250
16.6 Verifying the Exported NFS Share 251
16.7 Mounting the Exported NFS Share 251
16.8 Additional Resources 251
IV MANAGING CLUSTER WITH GUI TOOLS 252
17 openATTIC 25317.1 openATTIC Deployment and Configuration 253
Enabling Secure Access to openATTIC using SSL 253 • Deploying
openATTIC 254 • openATTIC Initial Setup 255 • DeepSea Integration in
openATTIC 255 • Object Gateway Management 256 • iSCSI Gateway
Management 256
17.2 openATTIC Web User Interface 256
17.3 Dashboard 258
x Administration Guide
17.4 Ceph Related Tasks 260
Common Web UI Features 260 • Listing OSD Nodes 260 • Managing
RADOS Block Devices (RBDs) 261 • Managing Pools 264 • Listing
Nodes 266 • Managing NFS Ganesha 267 • Managing iSCSI
Gateways 271 • Viewing the Cluster CRUSH Map 273 • Managing Object
Gateway Users and Buckets 274
V INTEGRATION WITH VIRTUALIZATION TOOLS 281
18 Using libvirt with Ceph 28218.1 Configuring Ceph 282
18.2 Preparing the VM Manager 283
18.3 Creating a VM 284
18.4 Configuring the VM 284
18.5 Summary 287
19 Ceph as a Back-end for QEMU KVM Instance 288
19.1 Installation 288
19.2 Usage 288
19.3 Creating Images with QEMU 288
19.4 Resizing Images with QEMU 289
19.5 Retrieving Image Info with QEMU 289
19.6 Running QEMU with RBD 290
19.7 Enabling Discard/TRIM 290
19.8 QEMU Cache Options 291
VI FAQS, TIPS AND TROUBLESHOOTING 292
20 Hints and Tips 29320.1 Identifying Orphaned Partitions 293
xi Administration Guide
20.2 Adjusting Scrubbing 293
20.3 Stopping OSDs without Rebalancing 294
20.4 Time Synchronization of Nodes 294
20.5 Checking for Unbalanced Data Writing 296
20.6 Btrfs Sub-volume for /var/lib/ceph 297
Requirements for new Installation 297 • Requirements for Existing
Installation 298 • Automatic Setup 298 • Manual Setup 299
20.7 Increasing File Descriptors 299
20.8 How to Use Existing Partitions for OSDs Including OSD Journals 300
20.9 Integration with Virtualization Software 301
Storing KVM Disks in Ceph Cluster 301 • Storing libvirt Disks in Ceph
Cluster 301 • Storing Xen Disks in Ceph Cluster 301
20.10 Firewall Settings for Ceph 302
20.11 Testing Network Performance 304
20.12 Replacing Storage Disk 305
21 Frequently Asked Questions 306
21.1 How Does the Number of Placement Groups Aect the ClusterPerformance? 306
21.2 Can I Use SSDs and Hard Disks on the Same Cluster? 306
21.3 What are the Trade-os of Using a Journal on SSD? 307
21.4 What Happens When a Disk Fails? 308
21.5 What Happens When a Journal Disk Fails? 308
22 Troubleshooting 309
22.1 Reporting Software Problems 309
22.2 Sending Large Objects with rados Fails with Full OSD 309
22.3 Corrupted XFS File system 310
xii Administration Guide
22.4 'Too Many PGs per OSD' Status Message 310
22.5 'nn pg stuck inactive' Status Message 311
22.6 OSD Weight is 0 311
22.7 OSD is Down 312
22.8 Finding Slow OSDs 312
22.9 Fixing Clock Skew Warnings 313
22.10 Poor Cluster Performance Caused by Network Problems 313
22.11 /var Running Out of Space 315
22.12 Too Many PGs Per OSD 316
Glossary 318
A DeepSea Stage 1 Custom Example 320
B Default Alerts for SUSE Enterprise Storage 321
C Example Procedure of Manual Ceph Installation 325
D Documentation Updates 328
D.1 The Latest Documentation Update 328
D.2 October, 2018 (Documentation Maintenance Update) 329
D.3 November 2017 (Documentation Maintenance Update) 332
D.4 October, 2017 (Release of SUSE Enterprise Storage 5.5) 333
xiii Administration Guide
About This Guide
SUSE Enterprise Storage 5.5 is an extension to SUSE Linux Enterprise Server 12 SP3. It combinesthe capabilities of the Ceph (http://ceph.com/ ) storage project with the enterprise engineeringand support of SUSE. SUSE Enterprise Storage 5.5 provides IT organizations with the abilityto deploy a distributed storage architecture that can support a number of use cases usingcommodity hardware platforms.
This guide helps you understand the concept of the SUSE Enterprise Storage 5.5 with the mainfocus on managing and administrating the Ceph infrastructure. It also demonstrates how to useCeph with other related solutions, such as OpenStack or KVM.
Many chapters in this manual contain links to additional documentation resources. These includeadditional documentation that is available on the system as well as documentation availableon the Internet.
For an overview of the documentation available for your product and the latest documentationupdates, refer to https://documentation.suse.com .
1 Available DocumentationThe following manuals are available for this product:
Administration Guide
The guide describes various administration tasks that are typically performed after theinstallation. The guide also introduces steps to integrate Ceph with virtualization solutionssuch as libvirt , Xen, or KVM, and ways to access objects stored in the cluster via iSCSIand RADOS gateways.
Book “Deployment Guide”
Guides you through the installation steps of the Ceph cluster and all services related toCeph. The guide also illustrates a basic Ceph cluster structure and provides you with relatedterminology.
HTML versions of the product manuals can be found in the installed system under /usr/share/doc/manual . Find the latest documentation updates at https://documentation.suse.com whereyou can download the manuals for your product in multiple formats.
xiv Available Documentation SES 5.5 (SES 5 & SES …
2 FeedbackSeveral feedback channels are available:
Bugs and Enhancement Requests
For services and support options available for your product, refer to http://www.suse.com/
support/ .To report bugs for a product component, log in to the Novell Customer Center from http://
www.suse.com/support/ and select My Support Service Request.
User Comments
We want to hear your comments and suggestions for this manual and the otherdocumentation included with this product. If you have questions, suggestions, orcorrections, contact [email protected], or you can also click the Report DocumentationBug link beside each chapter or section heading.
For feedback on the documentation of this product, you can also send a mail to [email protected] . Make sure to include the document title, the product version, and thepublication date of the documentation. To report errors or suggest enhancements, providea concise description of the problem and refer to the respective section number and page(or URL).
3 Documentation ConventionsThe following typographical conventions are used in this manual:
/etc/passwd : directory names and le names
placeholder : replace placeholder with the actual value
PATH : the environment variable PATH
ls , --help : commands, options, and parameters
user : users or groups
Alt , Alt – F1 : a key to press or a key combination; keys are shown in uppercase as ona keyboard
xv Feedback SES 5.5 (SES 5 & SES …
File, File Save As: menu items, buttons
Dancing Penguins (Chapter Penguins, ↑Another Manual): This is a reference to a chapter inanother manual.
4 About the Making of This ManualThis book is written in GeekoDoc, a subset of DocBook (see http://www.docbook.org ). TheXML source les were validated by xmllint , processed by xsltproc , and converted into XSL-FO using a customized version of Norman Walsh's stylesheets. The nal PDF can be formattedthrough FOP from Apache or through XEP from RenderX. The authoring and publishing toolsused to produce this manual are available in the package daps . The DocBook Authoring andPublishing Suite (DAPS) is developed as open source software. For more information, see http://
daps.sf.net/ .
5 Ceph ContributorsThe Ceph project and its documentation is a result of hundreds of contributors and organizations.See https://ceph.com/contributors/ for more details.
xvi About the Making of This Manual SES 5.5 (SES 5 & SES …
I Cluster Management
1 Salt Cluster Administration 2
1 Salt Cluster Administration
After you deploy a Ceph cluster, you will probably need to perform several modications toit occasionally. These include adding or removing new nodes, disks, or services. This chapterdescribes how you can achieve these administration tasks.
1.1 Adding New Cluster NodesThe procedure of adding new nodes to the cluster is almost identical to the initial cluster nodedeployment described in Book “Deployment Guide”, Chapter 4 “Deploying with DeepSea/Salt”:
Tip: Prevent RebalancingWhen adding an OSD to the existing cluster, bear in mind that the cluster will berebalancing for some time afterward. To minimize the rebalancing periods, add all OSDsyou intend to add at the same time.
Additional way is to set the osd crush initial weight = 0 option in the ceph.confle before adding the OSDs:
1. Add osd crush initial weight = 0 to /srv/salt/ceph/configuration/files/ceph.conf.d/global.conf .
2. Create the new conguration:
root@master # salt MASTER state.apply ceph.configuration.create
Or:
root@master # salt-call state.apply ceph.configuration.create
3. Apply the new conguration:
root@master # salt TARGET state.apply ceph.configuration
2 Adding New Cluster Nodes SES 5.5 (SES 5 & SES …
NoteIf this is not a new node, but you want to proceed as if it were, ensure youremove the /etc/ceph/destroyedOSDs.yml le from the node. Otherwise,any devices from the rst attempt will be restored with their previous OSDID and reweight.
Run the following commands:
root@master # salt-run state.orch ceph.stage.1root@master # salt-run state.orch ceph.stage.2root@master # salt 'node*' state.apply ceph.osd
4. After the new OSDs are added, adjust their weights as required with the ceph osdreweight command in small increments. This allows the cluster to rebalance andbecome healthy between increasing increments so it does not overwhelm the clusterand clients accessing the cluster.
1. Install SUSE Linux Enterprise Server 12 SP3 on the new node and congure its networksetting so that it resolves the Salt master host name correctly. Verify that it has a properconnection to both public and cluster networks, and that time synchronization is correctlycongured. Then install the salt-minion package:
root@minion > zypper in salt-minion
If the Salt master's host name is dierent from salt , edit /etc/salt/minion and addthe following:
master: DNS_name_of_your_salt_master
If you performed any changes to the conguration les mentioned above, restart thesalt.minion service:
root@minion > systemctl restart salt-minion.service
2. On the Salt master, accept the salt key of the new node:
root@master # salt-key --accept NEW_NODE_KEY
3 Adding New Cluster Nodes SES 5.5 (SES 5 & SES …
3. Verify that /srv/pillar/ceph/deepsea_minions.sls targets the new Salt minion and/or set the proper DeepSea grain. Refer to Book “Deployment Guide”, Chapter 4 “Deploying with
DeepSea/Salt”, Section 4.2.2.1 “Matching the Minion Name” of Book “Deployment Guide”, Chapter 4
“Deploying with DeepSea/Salt”, Section 4.3 “Cluster Deployment”, Running Deployment Stages formore details.
4. Run the preparation stage. It synchronizes modules and grains so that the new minion canprovide all the information DeepSea expects.
root@master # salt-run state.orch ceph.stage.0
Important: Possible Restart of DeepSea Stage 0If the Salt master rebooted after its kernel update, you need to restart DeepSeaStage 0.
5. Run the discovery stage. It will write new le entries in the /srv/pillar/ceph/
proposals directory, where you can edit relevant .yml les:
root@master # salt-run state.orch ceph.stage.1
6. Optionally, change /srv/pillar/ceph/proposals/policy.cfg if the newly added hostdoes not match the existing naming scheme. For details, refer to Book “Deployment Guide”,
Chapter 4 “Deploying with DeepSea/Salt”, Section 4.5.1 “The policy.cfg File”.
7. Run the conguration stage. It reads everything under /srv/pillar/ceph and updatesthe pillar accordingly:
root@master # salt-run state.orch ceph.stage.2
Pillar stores data which you can access with the following command:
root@master # salt target pillar.items
8. The conguration and deployment stages include newly added nodes:
root@master # salt-run state.orch ceph.stage.3root@master # salt-run state.orch ceph.stage.4
4 Adding New Cluster Nodes SES 5.5 (SES 5 & SES …
1.2 Adding New Roles to NodesYou can deploy all types of supported roles with DeepSea. See Book “Deployment Guide”, Chapter 4
“Deploying with DeepSea/Salt”, Section 4.5.1.2 “Role Assignment” for more information on supportedrole types and examples of matching them.
To add a new service to an existing node, follow these steps:
1. Adapt /srv/pillar/ceph/proposals/policy.cfg to match the existing host with a newrole. For more details, refer to Book “Deployment Guide”, Chapter 4 “Deploying with DeepSea/
Salt”, Section 4.5.1 “The policy.cfg File”. For example, if you need to run an Object Gatewayon a MON node, the line is similar to:
role-rgw/xx/x/example.mon-1.sls
2. Run Stage 2 to update the pillar:
root@master # salt-run state.orch ceph.stage.2
3. Run Stage 3 to deploy core services, or Stage 4 to deploy optional services. Running bothstages does not hurt.
1.3 Removing and Reinstalling Cluster Nodes
Tip: Removing a Cluster Node TemporarilyThe Salt master expects all minions to be present in the cluster and responsive. If a minionbreaks and is not responsive any more, it causes problems to the Salt infrastructure,mainly to DeepSea and openATTIC.
Before you x the minion, delete its key from the Salt master temporarily:
root@master # salt-key -d MINION_HOST_NAME
After the minions is xed, add its key to the Salt master again:
root@master # salt-key -a MINION_HOST_NAME
5 Adding New Roles to Nodes SES 5.5 (SES 5 & SES …

To remove a role from a cluster, edit /srv/pillar/ceph/proposals/policy.cfg and removethe corresponding line(s). Then run Stages 2 and 5 as described in Book “Deployment Guide”,
Chapter 4 “Deploying with DeepSea/Salt”, Section 4.3 “Cluster Deployment”.
Note: Removing OSDs from ClusterIn case you need to remove a particular OSD node from your cluster, ensure that yourcluster has more free disk space than the disk you intend to remove. Bear in mind thatremoving an OSD results in rebalancing of the whole cluster.
Before running stage.5 to do the actual removal, always check which OSD's are going tobe removed by DeepSea:
root@master # salt-run rescinded.ids
When a role is removed from a minion, the objective is to undo all changes related to that role.For most of the roles, the task is simple, but there may be problems with package dependencies.If a package is uninstalled, its dependencies are not.
Removed OSDs appear as blank drives. The related tasks overwrite the beginning of the lesystems and remove backup partitions in addition to wiping the partition tables.
Note: Preserving Partitions Created by Other MethodsDisk drives previously congured by other methods, such as ceph-deploy , may stillcontain partitions. DeepSea will not automatically destroy these. The administrator mustreclaim these drives manually.
EXAMPLE 1.1: REMOVING A SALT MINION FROM THE CLUSTER
If your storage minions are named, for example, 'data1.ceph', 'data2.ceph' ... 'data6.ceph',and the related lines in your policy.cfg are similar to the following:
[...]# Hardware Profileprofile-default/cluster/data*.slsprofile-default/stack/default/ceph/minions/data*.yml[...]
Then to remove the Salt minion 'data2.ceph', change the lines to the following:
[...]
6 Removing and Reinstalling Cluster Nodes SES 5.5 (SES 5 & SES …
# Hardware Profileprofile-default/cluster/data[1,3-6]*.slsprofile-default/stack/default/ceph/minions/data[1,3-6]*.yml[...]
Then run stage.2, check which OSD's are going to be removed, and nish by runningstage.5:
root@master # salt-run state.orch ceph.stage.2root@master # salt-run rescinded.idsroot@master # salt-run state.orch ceph.stage.5
EXAMPLE 1.2: MIGRATING NODES
Assume the following situation: during the fresh cluster installation, you (theadministrator) allocated one of the storage nodes as a stand-alone Object Gateway whilewaiting for the gateway's hardware to arrive. Now the permanent hardware has arrivedfor the gateway and you can nally assign the intended role to the backup storage nodeand have the gateway role removed.
After running Stages 0 and 1 (see Book “Deployment Guide”, Chapter 4 “Deploying with DeepSea/
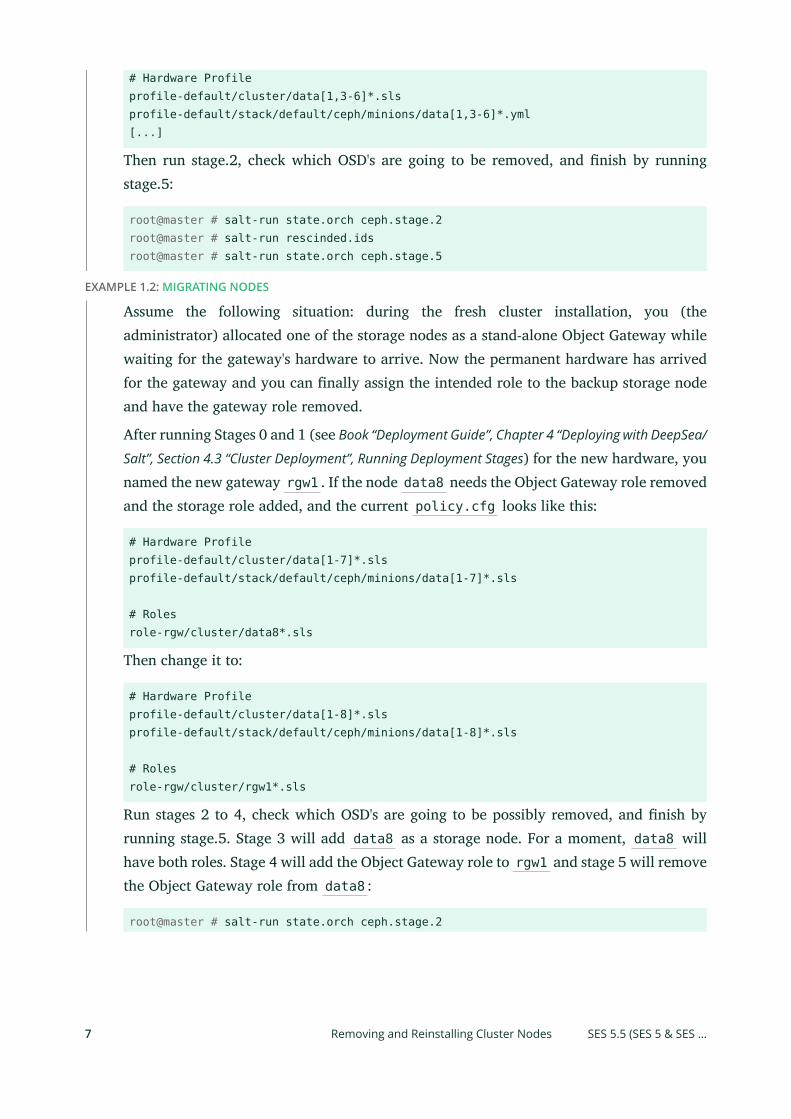
Salt”, Section 4.3 “Cluster Deployment”, Running Deployment Stages) for the new hardware, younamed the new gateway rgw1 . If the node data8 needs the Object Gateway role removedand the storage role added, and the current policy.cfg looks like this:
# Hardware Profileprofile-default/cluster/data[1-7]*.slsprofile-default/stack/default/ceph/minions/data[1-7]*.sls
# Rolesrole-rgw/cluster/data8*.sls
Then change it to:
# Hardware Profileprofile-default/cluster/data[1-8]*.slsprofile-default/stack/default/ceph/minions/data[1-8]*.sls
# Rolesrole-rgw/cluster/rgw1*.sls
Run stages 2 to 4, check which OSD's are going to be possibly removed, and nish byrunning stage.5. Stage 3 will add data8 as a storage node. For a moment, data8 willhave both roles. Stage 4 will add the Object Gateway role to rgw1 and stage 5 will removethe Object Gateway role from data8 :
root@master # salt-run state.orch ceph.stage.2
7 Removing and Reinstalling Cluster Nodes SES 5.5 (SES 5 & SES …
root@master # salt-run state.orch ceph.stage.3root@master # salt-run state.orch ceph.stage.4root@master # salt-run rescinded.idsroot@master # salt-run state.orch ceph.stage.5
1.4 Redeploying Monitor NodesWhen one or more of your monitor nodes fail and are not responding, you need to remove thefailed monitors from the cluster and possibly then re-add them back in the cluster.
Important: The Minimum is Three Monitor NodesThe number of monitor nodes must not be less than three. If a monitor node fails, and asa result your cluster has only two monitor nodes only, you need to temporarily assign themonitor role to other cluster nodes before you redeploy the failed monitor nodes. Afteryou redeploy the failed monitor nodes, you can uninstall the temporary monitor roles.
For more information on adding new nodes/roles to the Ceph cluster, see Section 1.1,
“Adding New Cluster Nodes” and Section 1.2, “Adding New Roles to Nodes”.
For more information on removing cluster nodes, refer to Section 1.3, “Removing and
Reinstalling Cluster Nodes”.
There are two basic degrees of a Ceph node failure:
The Salt minion host is broken either physically or on the OS level, and does not respondto the salt 'minion_name' test.ping call. In such case you need to redeploy the servercompletely by following the relevant instructions in Book “Deployment Guide”, Chapter 4
“Deploying with DeepSea/Salt”, Section 4.3 “Cluster Deployment”.
The monitor related services failed and refuse to recover, but the host responds to the salt'minion_name' test.ping call. In such case, follow these steps:
1. Edit /srv/pillar/ceph/proposals/policy.cfg on the Salt master, and remove orupdate the lines that correspond to the failed monitor nodes so that they now point to theworking monitor nodes. For example:
[...]# MON
8 Redeploying Monitor Nodes SES 5.5 (SES 5 & SES …
#role-mon/cluster/ses-example-failed1.sls#role-mon/cluster/ses-example-failed2.slsrole-mon/cluster/ses-example-new1.slsrole-mon/cluster/ses-example-new2.sls[...]
2. Run DeepSea Stages 2 to 5 to apply the changes:
root@master # deepsea stage run ceph.stage.2root@master # deepsea stage run ceph.stage.3root@master # deepsea stage run ceph.stage.4root@master # deepsea stage run ceph.stage.5
1.5 Adding an OSD Disk to a NodeTo add a disk to an existing OSD node, verify that any partition on the disk was removedand wiped. Refer to Step 12 in Book “Deployment Guide”, Chapter 4 “Deploying with DeepSea/Salt”,
Section 4.3 “Cluster Deployment” for more details. After the disk is empty, add the disk to the YAMLle of the node. The path to the le is /srv/pillar/ceph/proposals/profile-default/stack/default/ceph/minions/node_name.yml . After saving the le, run DeepSea stages 2and 3:
root@master # salt-run state.orch ceph.stage.2root@master # salt-run state.orch ceph.stage.3
Tip: Updated Profiles AutomaticallyInstead of manually editing the YAML le, DeepSea can create new proles. To letDeepSea create new proles, the existing proles need to be moved:
root@master # old /srv/pillar/ceph/proposals/profile-default/root@master # salt-run state.orch ceph.stage.1root@master # salt-run state.orch ceph.stage.2root@master # salt-run state.orch ceph.stage.3
We recommend verifying the suggested proposals before deploying the changes. Referto Book “Deployment Guide”, Chapter 4 “Deploying with DeepSea/Salt”, Section 4.5.1.4 “Profile
Assignment” for more details on viewing proposals.
9 Adding an OSD Disk to a Node SES 5.5 (SES 5 & SES …
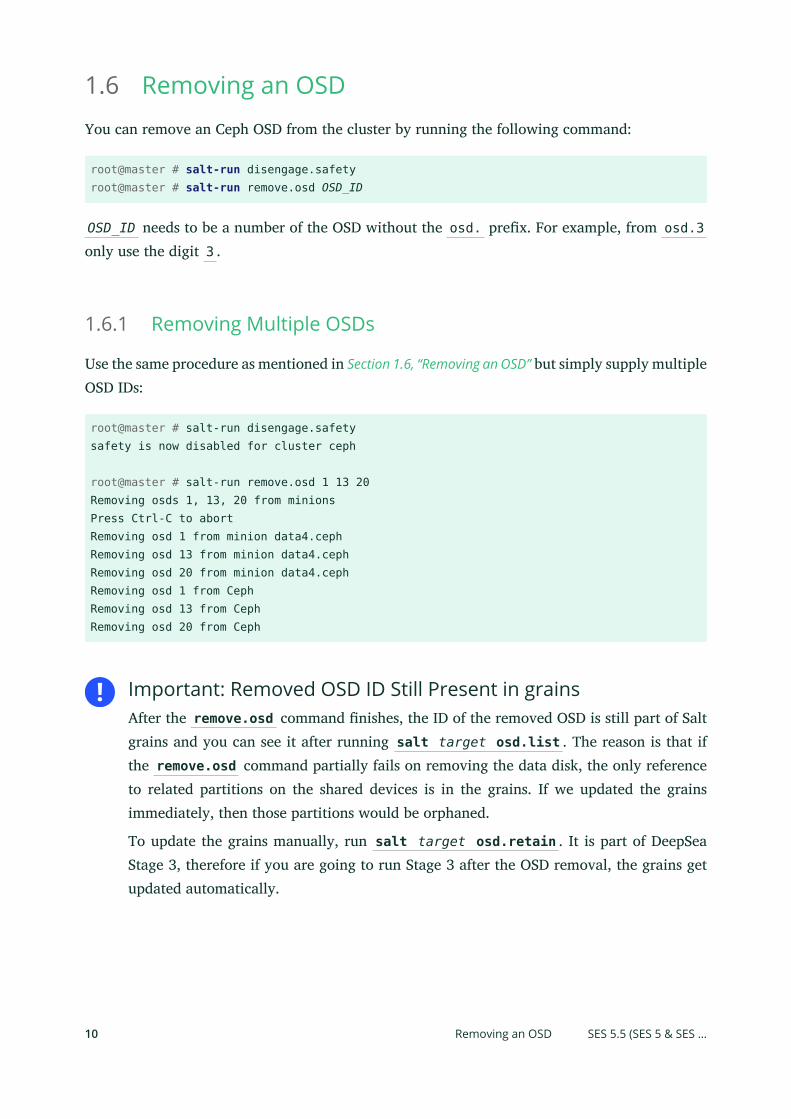
1.6 Removing an OSDYou can remove an Ceph OSD from the cluster by running the following command:
root@master # salt-run disengage.safetyroot@master # salt-run remove.osd OSD_ID
OSD_ID needs to be a number of the OSD without the osd. prex. For example, from osd.3only use the digit 3 .
1.6.1 Removing Multiple OSDs
Use the same procedure as mentioned in Section 1.6, “Removing an OSD” but simply supply multipleOSD IDs:
root@master # salt-run disengage.safetysafety is now disabled for cluster ceph
root@master # salt-run remove.osd 1 13 20Removing osds 1, 13, 20 from minionsPress Ctrl-C to abortRemoving osd 1 from minion data4.cephRemoving osd 13 from minion data4.cephRemoving osd 20 from minion data4.cephRemoving osd 1 from CephRemoving osd 13 from CephRemoving osd 20 from Ceph
Important: Removed OSD ID Still Present in grainsAfter the remove.osd command nishes, the ID of the removed OSD is still part of Saltgrains and you can see it after running salt target osd.list . The reason is that ifthe remove.osd command partially fails on removing the data disk, the only referenceto related partitions on the shared devices is in the grains. If we updated the grainsimmediately, then those partitions would be orphaned.
To update the grains manually, run salt target osd.retain . It is part of DeepSeaStage 3, therefore if you are going to run Stage 3 after the OSD removal, the grains getupdated automatically.
10 Removing an OSD SES 5.5 (SES 5 & SES …
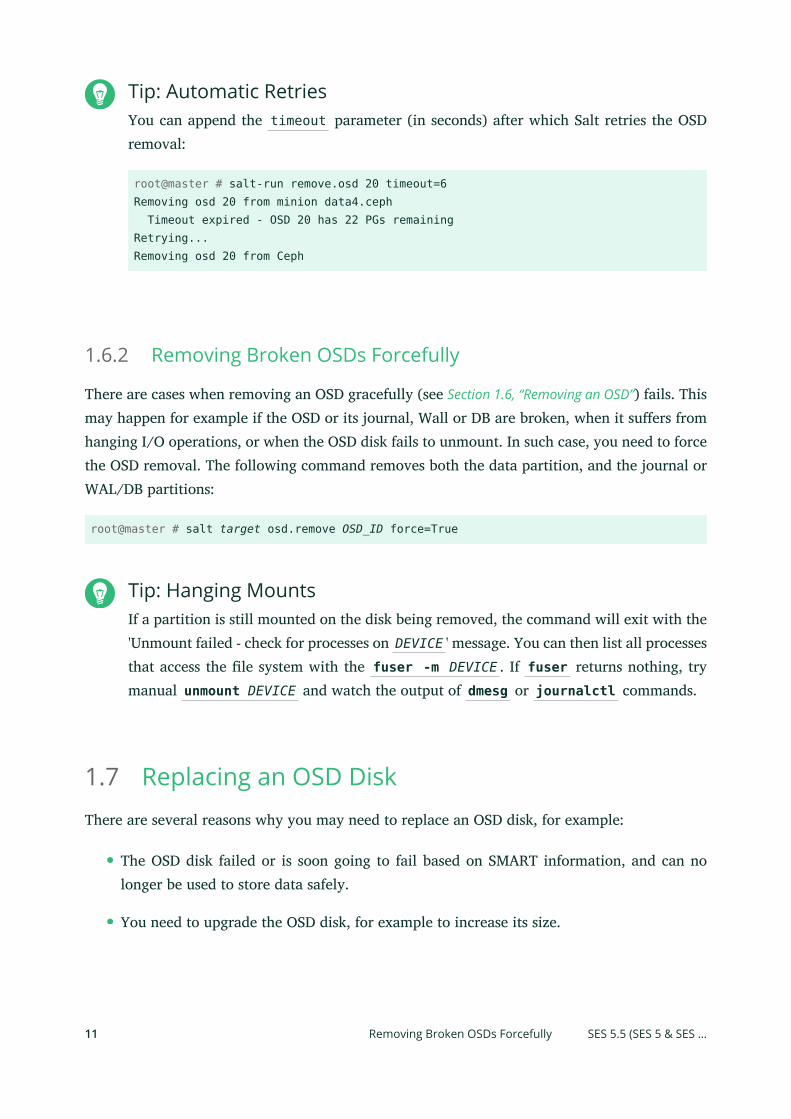
Tip: Automatic RetriesYou can append the timeout parameter (in seconds) after which Salt retries the OSDremoval:
root@master # salt-run remove.osd 20 timeout=6Removing osd 20 from minion data4.ceph Timeout expired - OSD 20 has 22 PGs remainingRetrying...Removing osd 20 from Ceph
1.6.2 Removing Broken OSDs Forcefully
There are cases when removing an OSD gracefully (see Section 1.6, “Removing an OSD”) fails. Thismay happen for example if the OSD or its journal, Wall or DB are broken, when it suers fromhanging I/O operations, or when the OSD disk fails to unmount. In such case, you need to forcethe OSD removal. The following command removes both the data partition, and the journal orWAL/DB partitions:
root@master # salt target osd.remove OSD_ID force=True
Tip: Hanging MountsIf a partition is still mounted on the disk being removed, the command will exit with the'Unmount failed - check for processes on DEVICE ' message. You can then list all processesthat access the le system with the fuser -m DEVICE . If fuser returns nothing, trymanual unmount DEVICE and watch the output of dmesg or journalctl commands.
1.7 Replacing an OSD DiskThere are several reasons why you may need to replace an OSD disk, for example:
The OSD disk failed or is soon going to fail based on SMART information, and can nolonger be used to store data safely.
You need to upgrade the OSD disk, for example to increase its size.
11 Removing Broken OSDs Forcefully SES 5.5 (SES 5 & SES …
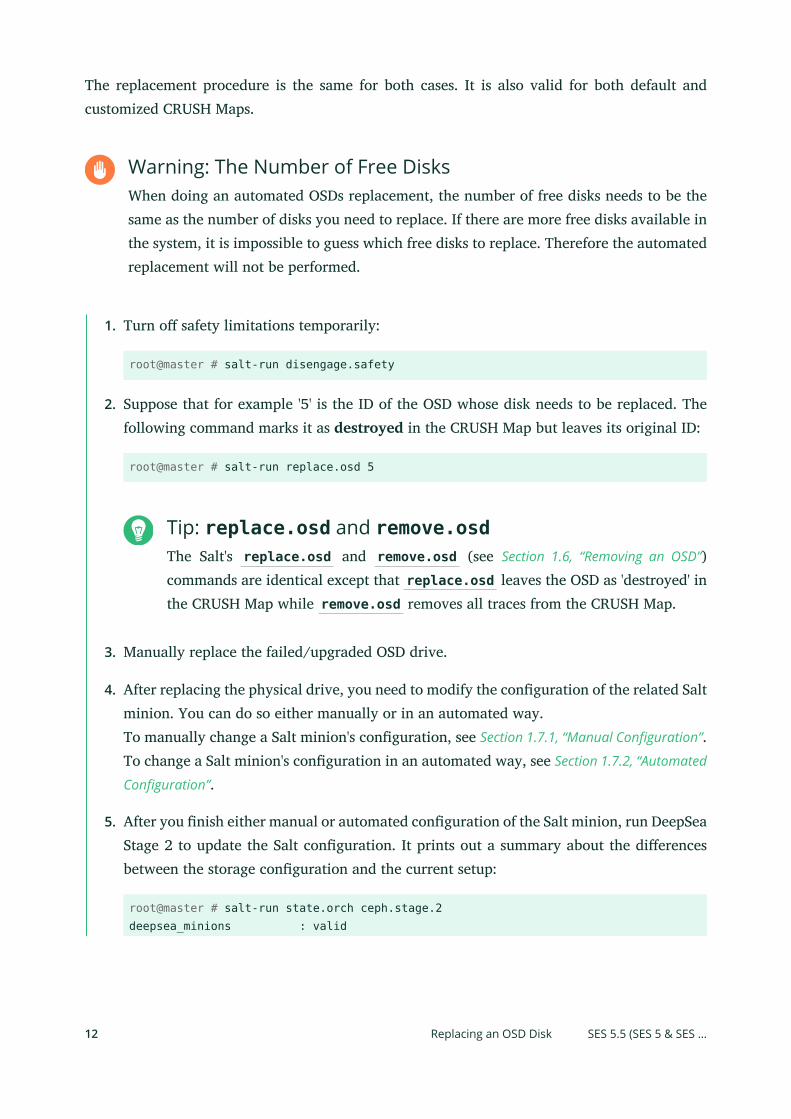
The replacement procedure is the same for both cases. It is also valid for both default andcustomized CRUSH Maps.
Warning: The Number of Free DisksWhen doing an automated OSDs replacement, the number of free disks needs to be thesame as the number of disks you need to replace. If there are more free disks available inthe system, it is impossible to guess which free disks to replace. Therefore the automatedreplacement will not be performed.
1. Turn o safety limitations temporarily:
root@master # salt-run disengage.safety
2. Suppose that for example '5' is the ID of the OSD whose disk needs to be replaced. Thefollowing command marks it as destroyed in the CRUSH Map but leaves its original ID:
root@master # salt-run replace.osd 5
Tip: replace.osd and remove.osdThe Salt's replace.osd and remove.osd (see Section 1.6, “Removing an OSD”)commands are identical except that replace.osd leaves the OSD as 'destroyed' inthe CRUSH Map while remove.osd removes all traces from the CRUSH Map.
3. Manually replace the failed/upgraded OSD drive.
4. After replacing the physical drive, you need to modify the conguration of the related Saltminion. You can do so either manually or in an automated way.To manually change a Salt minion's conguration, see Section 1.7.1, “Manual Configuration”.To change a Salt minion's conguration in an automated way, see Section 1.7.2, “Automated
Configuration”.
5. After you nish either manual or automated conguration of the Salt minion, run DeepSeaStage 2 to update the Salt conguration. It prints out a summary about the dierencesbetween the storage conguration and the current setup:
root@master # salt-run state.orch ceph.stage.2deepsea_minions : valid
12 Replacing an OSD Disk SES 5.5 (SES 5 & SES …
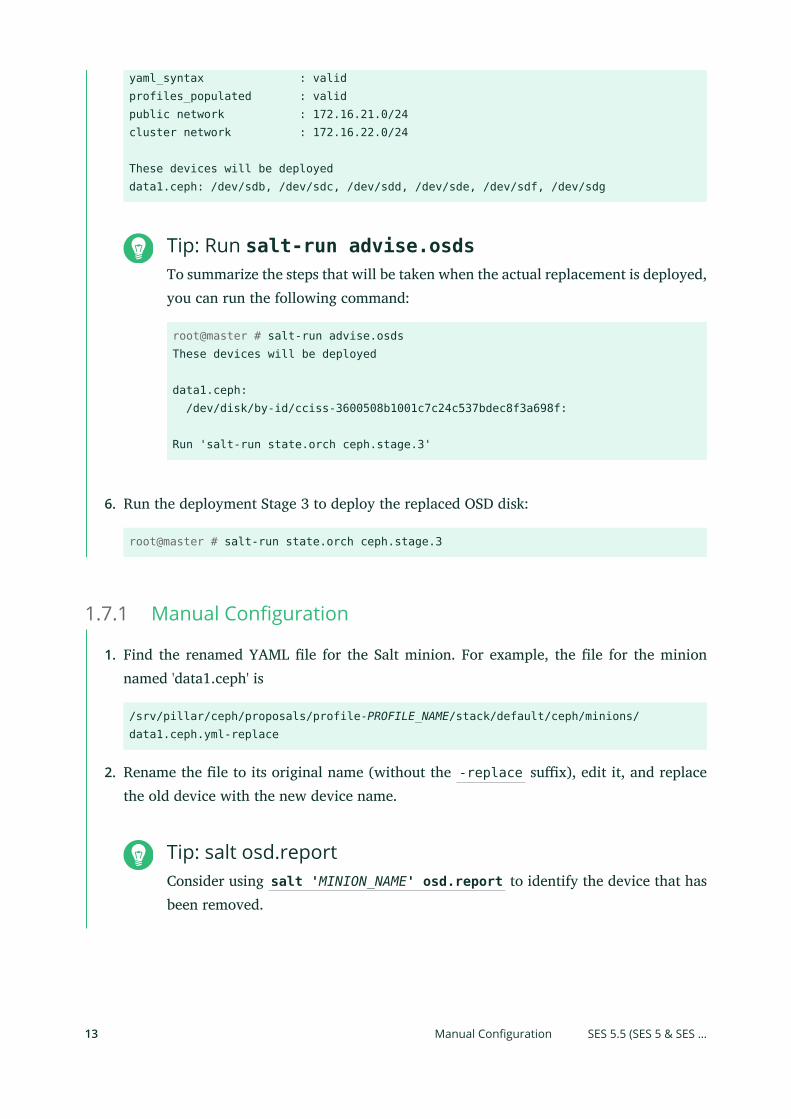
yaml_syntax : validprofiles_populated : validpublic network : 172.16.21.0/24cluster network : 172.16.22.0/24
These devices will be deployeddata1.ceph: /dev/sdb, /dev/sdc, /dev/sdd, /dev/sde, /dev/sdf, /dev/sdg
Tip: Run salt-run advise.osdsTo summarize the steps that will be taken when the actual replacement is deployed,you can run the following command:
root@master # salt-run advise.osdsThese devices will be deployed
data1.ceph: /dev/disk/by-id/cciss-3600508b1001c7c24c537bdec8f3a698f:
Run 'salt-run state.orch ceph.stage.3'
6. Run the deployment Stage 3 to deploy the replaced OSD disk:
root@master # salt-run state.orch ceph.stage.3
1.7.1 Manual Configuration
1. Find the renamed YAML le for the Salt minion. For example, the le for the minionnamed 'data1.ceph' is
/srv/pillar/ceph/proposals/profile-PROFILE_NAME/stack/default/ceph/minions/data1.ceph.yml-replace
2. Rename the le to its original name (without the -replace sux), edit it, and replacethe old device with the new device name.
Tip: salt osd.reportConsider using salt 'MINION_NAME' osd.report to identify the device that hasbeen removed.
13 Manual Configuration SES 5.5 (SES 5 & SES …
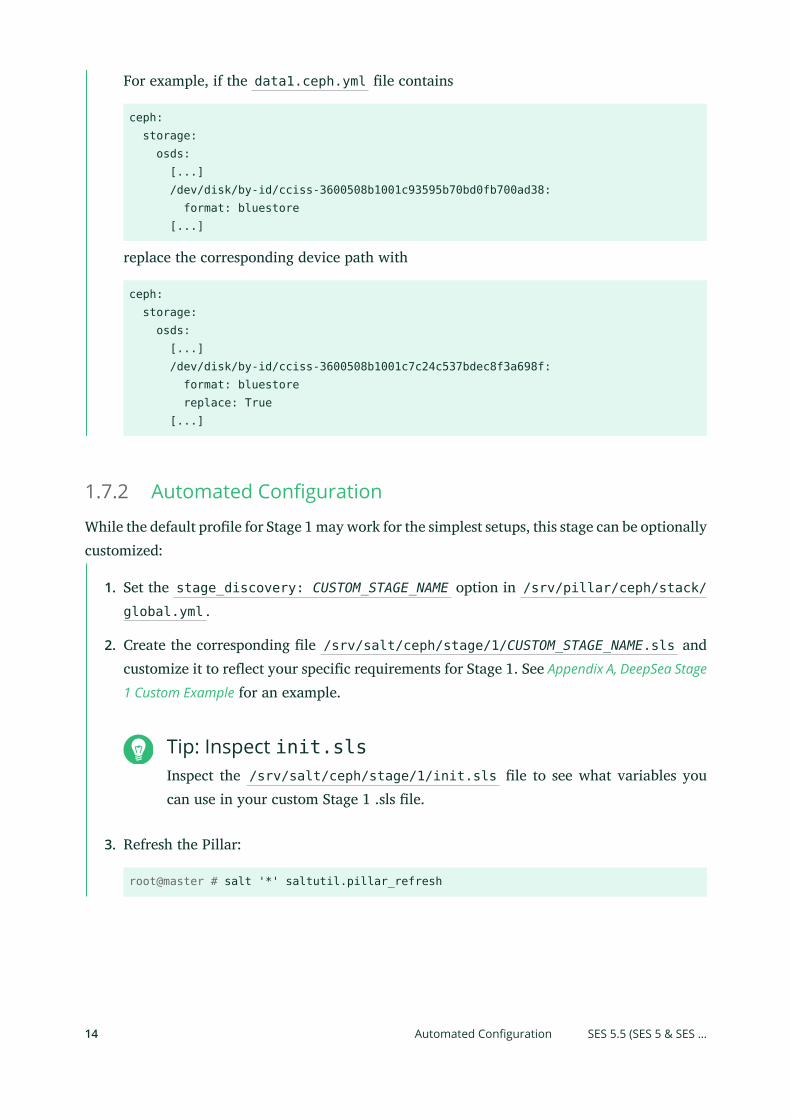
For example, if the data1.ceph.yml le contains
ceph: storage: osds: [...] /dev/disk/by-id/cciss-3600508b1001c93595b70bd0fb700ad38: format: bluestore [...]
replace the corresponding device path with
ceph: storage: osds: [...] /dev/disk/by-id/cciss-3600508b1001c7c24c537bdec8f3a698f: format: bluestore replace: True [...]
1.7.2 Automated Configuration
While the default prole for Stage 1 may work for the simplest setups, this stage can be optionallycustomized:
1. Set the stage_discovery: CUSTOM_STAGE_NAME option in /srv/pillar/ceph/stack/global.yml .
2. Create the corresponding le /srv/salt/ceph/stage/1/CUSTOM_STAGE_NAME.sls andcustomize it to reect your specic requirements for Stage 1. See Appendix A, DeepSea Stage
1 Custom Example for an example.
Tip: Inspect init.slsInspect the /srv/salt/ceph/stage/1/init.sls le to see what variables youcan use in your custom Stage 1 .sls le.
3. Refresh the Pillar:
root@master # salt '*' saltutil.pillar_refresh
14 Automated Configuration SES 5.5 (SES 5 & SES …
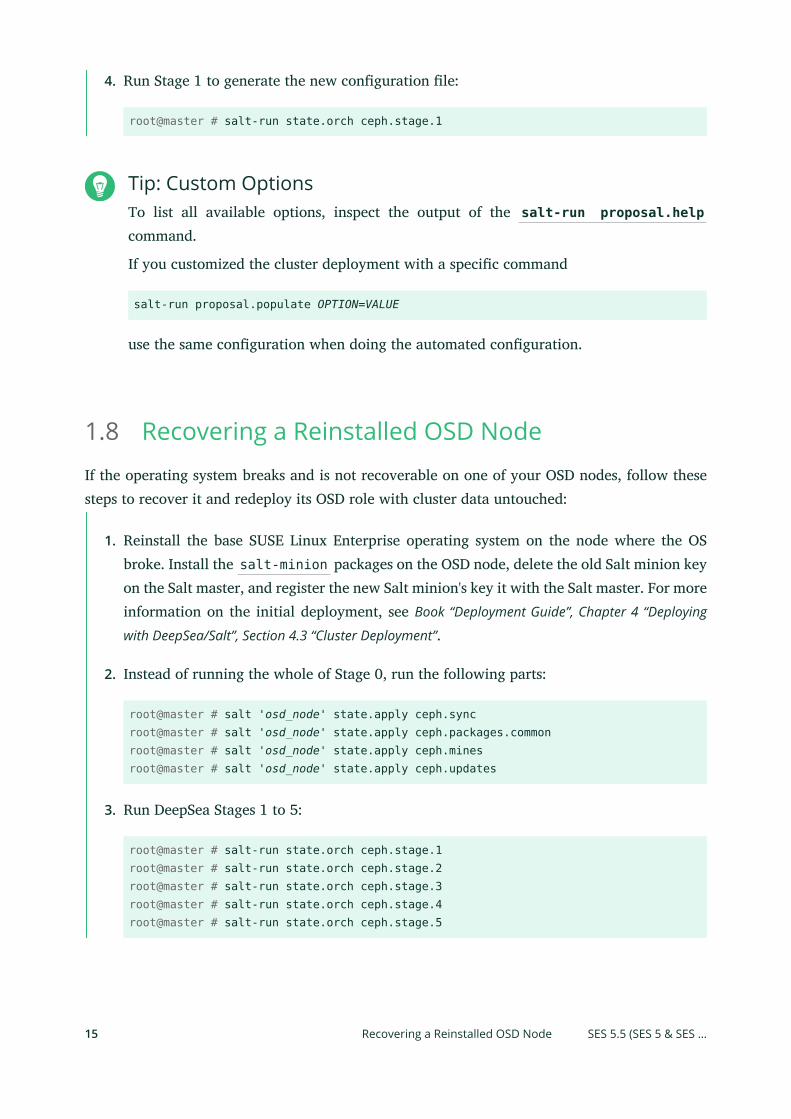
4. Run Stage 1 to generate the new conguration le:
root@master # salt-run state.orch ceph.stage.1
Tip: Custom OptionsTo list all available options, inspect the output of the salt-run proposal.helpcommand.
If you customized the cluster deployment with a specic command
salt-run proposal.populate OPTION=VALUE
use the same conguration when doing the automated conguration.
1.8 Recovering a Reinstalled OSD NodeIf the operating system breaks and is not recoverable on one of your OSD nodes, follow thesesteps to recover it and redeploy its OSD role with cluster data untouched:
1. Reinstall the base SUSE Linux Enterprise operating system on the node where the OSbroke. Install the salt-minion packages on the OSD node, delete the old Salt minion keyon the Salt master, and register the new Salt minion's key it with the Salt master. For moreinformation on the initial deployment, see Book “Deployment Guide”, Chapter 4 “Deploying
with DeepSea/Salt”, Section 4.3 “Cluster Deployment”.
2. Instead of running the whole of Stage 0, run the following parts:
root@master # salt 'osd_node' state.apply ceph.syncroot@master # salt 'osd_node' state.apply ceph.packages.commonroot@master # salt 'osd_node' state.apply ceph.minesroot@master # salt 'osd_node' state.apply ceph.updates
3. Run DeepSea Stages 1 to 5:
root@master # salt-run state.orch ceph.stage.1root@master # salt-run state.orch ceph.stage.2root@master # salt-run state.orch ceph.stage.3root@master # salt-run state.orch ceph.stage.4root@master # salt-run state.orch ceph.stage.5
15 Recovering a Reinstalled OSD Node SES 5.5 (SES 5 & SES …
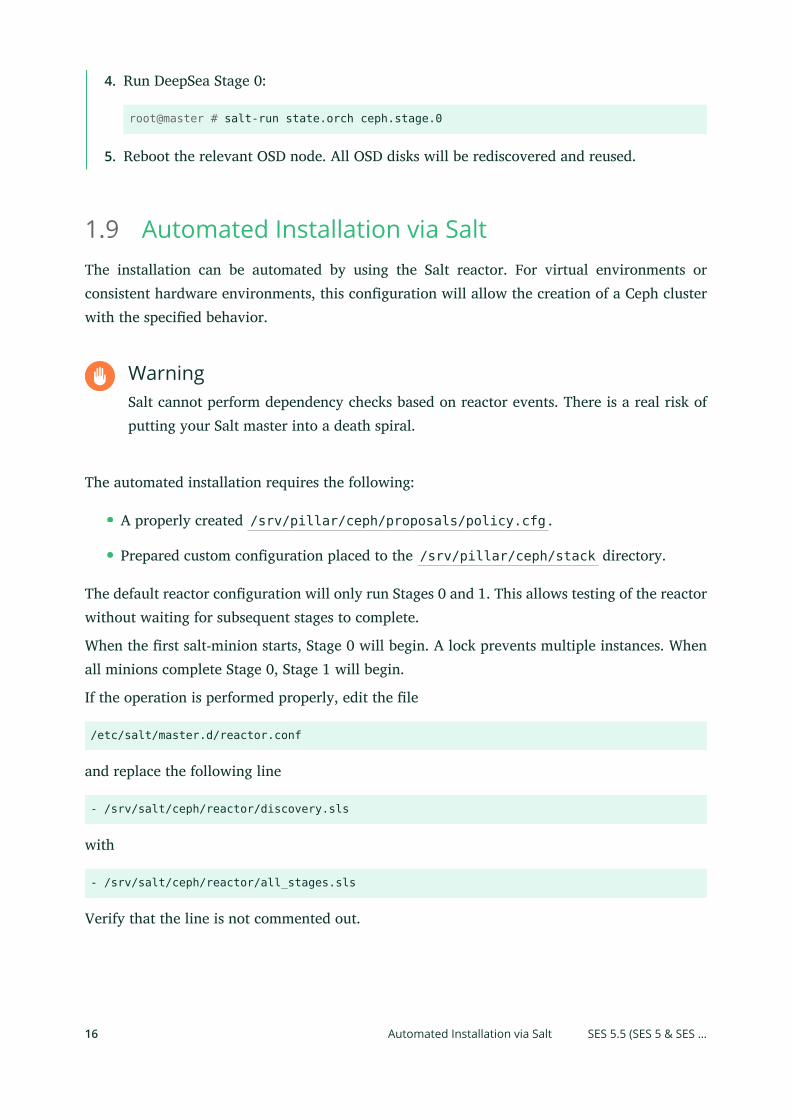
4. Run DeepSea Stage 0:
root@master # salt-run state.orch ceph.stage.0
5. Reboot the relevant OSD node. All OSD disks will be rediscovered and reused.
1.9 Automated Installation via SaltThe installation can be automated by using the Salt reactor. For virtual environments orconsistent hardware environments, this conguration will allow the creation of a Ceph clusterwith the specied behavior.
WarningSalt cannot perform dependency checks based on reactor events. There is a real risk ofputting your Salt master into a death spiral.
The automated installation requires the following:
A properly created /srv/pillar/ceph/proposals/policy.cfg .
Prepared custom conguration placed to the /srv/pillar/ceph/stack directory.
The default reactor conguration will only run Stages 0 and 1. This allows testing of the reactorwithout waiting for subsequent stages to complete.
When the rst salt-minion starts, Stage 0 will begin. A lock prevents multiple instances. Whenall minions complete Stage 0, Stage 1 will begin.
If the operation is performed properly, edit the le
/etc/salt/master.d/reactor.conf
and replace the following line
- /srv/salt/ceph/reactor/discovery.sls
with
- /srv/salt/ceph/reactor/all_stages.sls
Verify that the line is not commented out.
16 Automated Installation via Salt SES 5.5 (SES 5 & SES …
1.10 Updating the Cluster NodesKeep the Ceph cluster nodes up-to-date by applying rolling updates regularly.
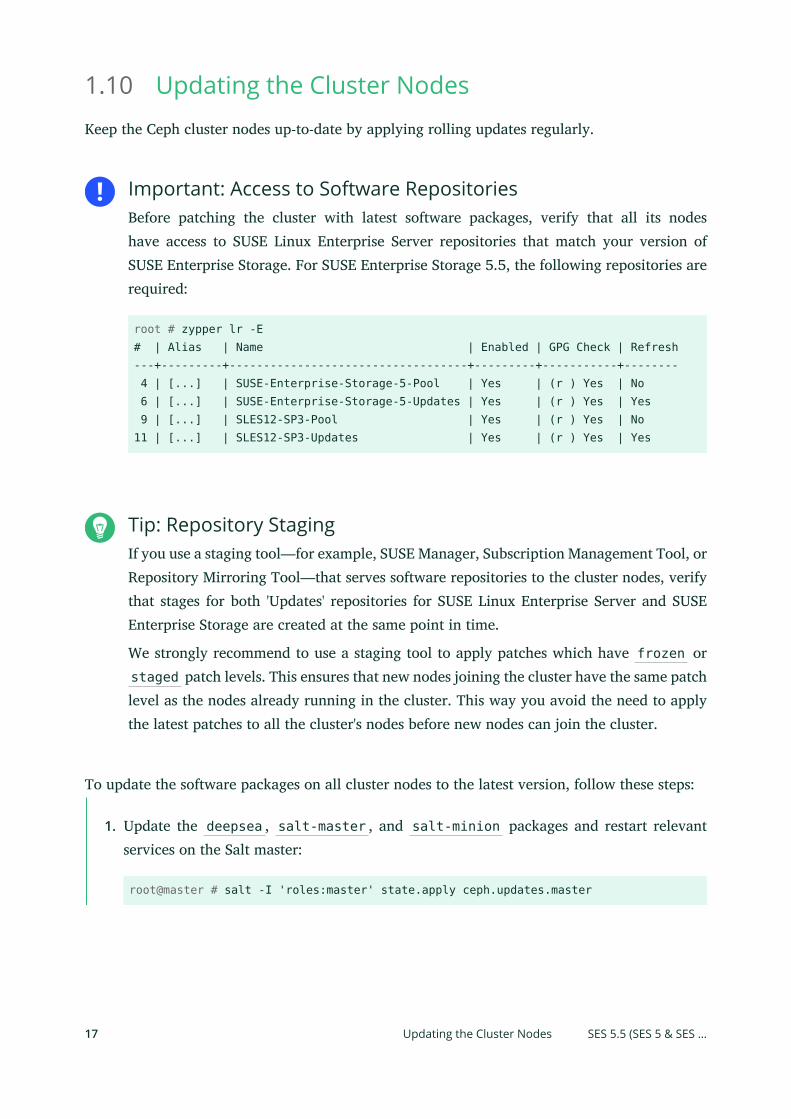
Important: Access to Software RepositoriesBefore patching the cluster with latest software packages, verify that all its nodeshave access to SUSE Linux Enterprise Server repositories that match your version ofSUSE Enterprise Storage. For SUSE Enterprise Storage 5.5, the following repositories arerequired:
root # zypper lr -E# | Alias | Name | Enabled | GPG Check | Refresh---+---------+-----------------------------------+---------+-----------+-------- 4 | [...] | SUSE-Enterprise-Storage-5-Pool | Yes | (r ) Yes | No 6 | [...] | SUSE-Enterprise-Storage-5-Updates | Yes | (r ) Yes | Yes 9 | [...] | SLES12-SP3-Pool | Yes | (r ) Yes | No11 | [...] | SLES12-SP3-Updates | Yes | (r ) Yes | Yes
Tip: Repository StagingIf you use a staging tool—for example, SUSE Manager, Subscription Management Tool, orRepository Mirroring Tool—that serves software repositories to the cluster nodes, verifythat stages for both 'Updates' repositories for SUSE Linux Enterprise Server and SUSEEnterprise Storage are created at the same point in time.
We strongly recommend to use a staging tool to apply patches which have frozen orstaged patch levels. This ensures that new nodes joining the cluster have the same patchlevel as the nodes already running in the cluster. This way you avoid the need to applythe latest patches to all the cluster's nodes before new nodes can join the cluster.
To update the software packages on all cluster nodes to the latest version, follow these steps:
1. Update the deepsea , salt-master , and salt-minion packages and restart relevantservices on the Salt master:
root@master # salt -I 'roles:master' state.apply ceph.updates.master
17 Updating the Cluster Nodes SES 5.5 (SES 5 & SES …
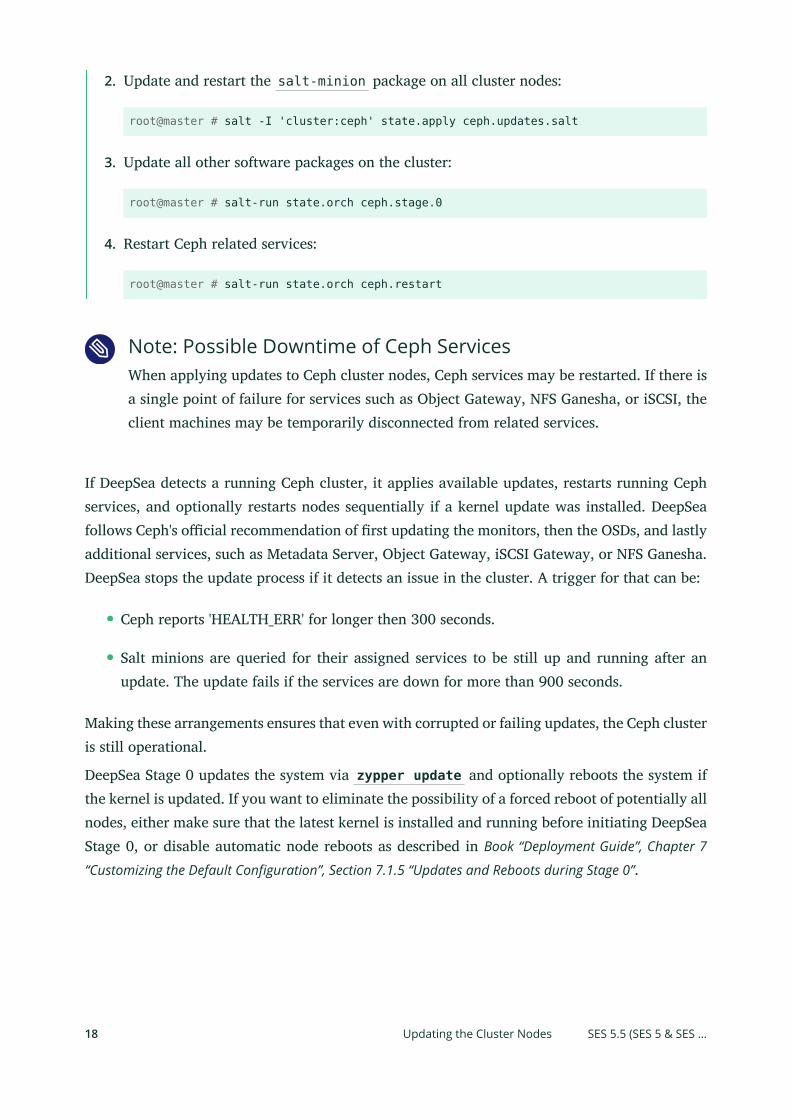
2. Update and restart the salt-minion package on all cluster nodes:
root@master # salt -I 'cluster:ceph' state.apply ceph.updates.salt
3. Update all other software packages on the cluster:
root@master # salt-run state.orch ceph.stage.0
4. Restart Ceph related services:
root@master # salt-run state.orch ceph.restart
Note: Possible Downtime of Ceph ServicesWhen applying updates to Ceph cluster nodes, Ceph services may be restarted. If there isa single point of failure for services such as Object Gateway, NFS Ganesha, or iSCSI, theclient machines may be temporarily disconnected from related services.
If DeepSea detects a running Ceph cluster, it applies available updates, restarts running Cephservices, and optionally restarts nodes sequentially if a kernel update was installed. DeepSeafollows Ceph's ocial recommendation of rst updating the monitors, then the OSDs, and lastlyadditional services, such as Metadata Server, Object Gateway, iSCSI Gateway, or NFS Ganesha.DeepSea stops the update process if it detects an issue in the cluster. A trigger for that can be:
Ceph reports 'HEALTH_ERR' for longer then 300 seconds.
Salt minions are queried for their assigned services to be still up and running after anupdate. The update fails if the services are down for more than 900 seconds.
Making these arrangements ensures that even with corrupted or failing updates, the Ceph clusteris still operational.
DeepSea Stage 0 updates the system via zypper update and optionally reboots the system ifthe kernel is updated. If you want to eliminate the possibility of a forced reboot of potentially allnodes, either make sure that the latest kernel is installed and running before initiating DeepSeaStage 0, or disable automatic node reboots as described in Book “Deployment Guide”, Chapter 7
“Customizing the Default Configuration”, Section 7.1.5 “Updates and Reboots during Stage 0”.
18 Updating the Cluster Nodes SES 5.5 (SES 5 & SES …
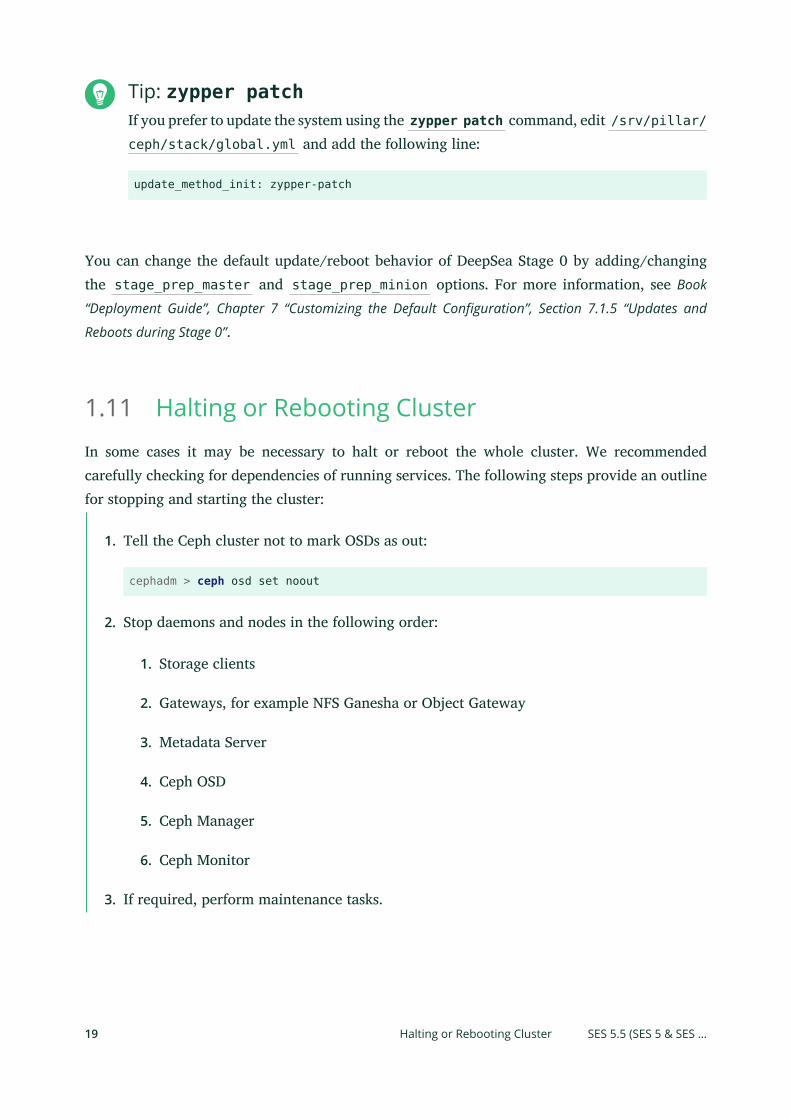
Tip: zypper patchIf you prefer to update the system using the zypper patch command, edit /srv/pillar/ceph/stack/global.yml and add the following line:
update_method_init: zypper-patch
You can change the default update/reboot behavior of DeepSea Stage 0 by adding/changingthe stage_prep_master and stage_prep_minion options. For more information, see Book
“Deployment Guide”, Chapter 7 “Customizing the Default Configuration”, Section 7.1.5 “Updates and
Reboots during Stage 0”.
1.11 Halting or Rebooting ClusterIn some cases it may be necessary to halt or reboot the whole cluster. We recommendedcarefully checking for dependencies of running services. The following steps provide an outlinefor stopping and starting the cluster:
1. Tell the Ceph cluster not to mark OSDs as out:
cephadm > ceph osd set noout
2. Stop daemons and nodes in the following order:
1. Storage clients
2. Gateways, for example NFS Ganesha or Object Gateway
3. Metadata Server
4. Ceph OSD
5. Ceph Manager
6. Ceph Monitor
3. If required, perform maintenance tasks.
19 Halting or Rebooting Cluster SES 5.5 (SES 5 & SES …
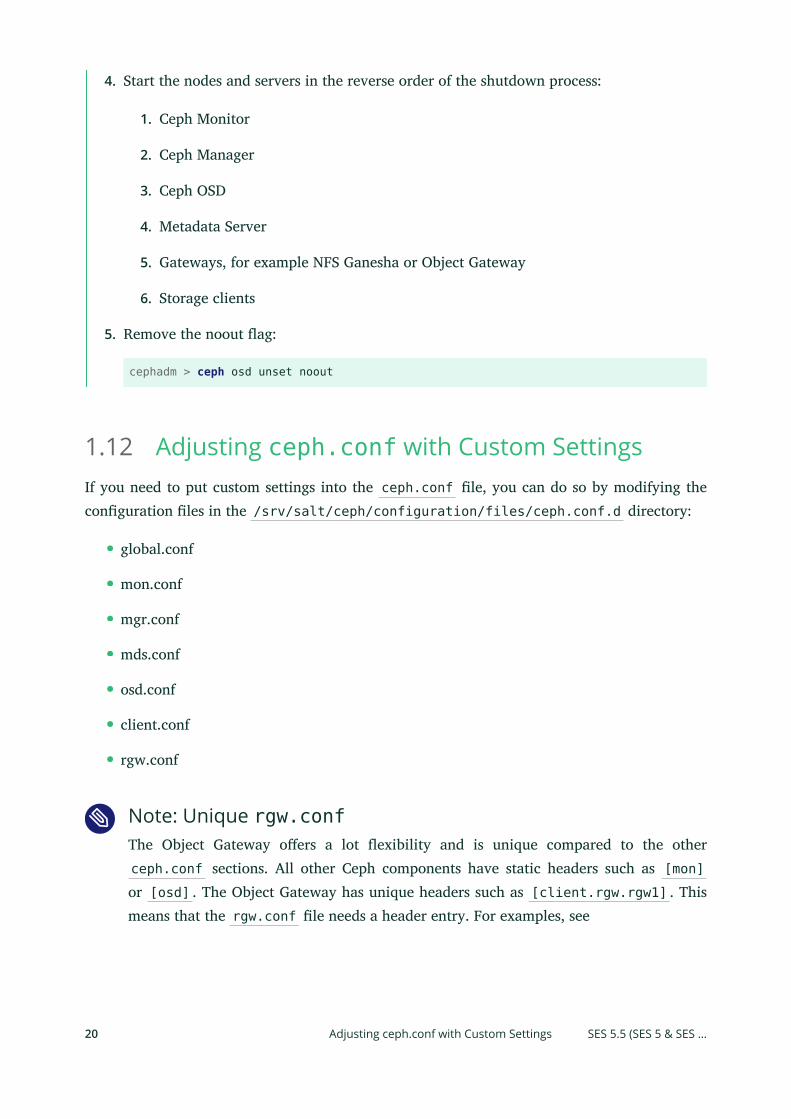
4. Start the nodes and servers in the reverse order of the shutdown process:
1. Ceph Monitor
2. Ceph Manager
3. Ceph OSD
4. Metadata Server
5. Gateways, for example NFS Ganesha or Object Gateway
6. Storage clients
5. Remove the noout ag:
cephadm > ceph osd unset noout
1.12 Adjusting ceph.conf with Custom SettingsIf you need to put custom settings into the ceph.conf le, you can do so by modifying theconguration les in the /srv/salt/ceph/configuration/files/ceph.conf.d directory:
global.conf
mon.conf
mgr.conf
mds.conf
osd.conf
client.conf
rgw.conf
Note: Unique rgw.confThe Object Gateway oers a lot exibility and is unique compared to the otherceph.conf sections. All other Ceph components have static headers such as [mon]or [osd] . The Object Gateway has unique headers such as [client.rgw.rgw1] . Thismeans that the rgw.conf le needs a header entry. For examples, see
20 Adjusting ceph.conf with Custom Settings SES 5.5 (SES 5 & SES …
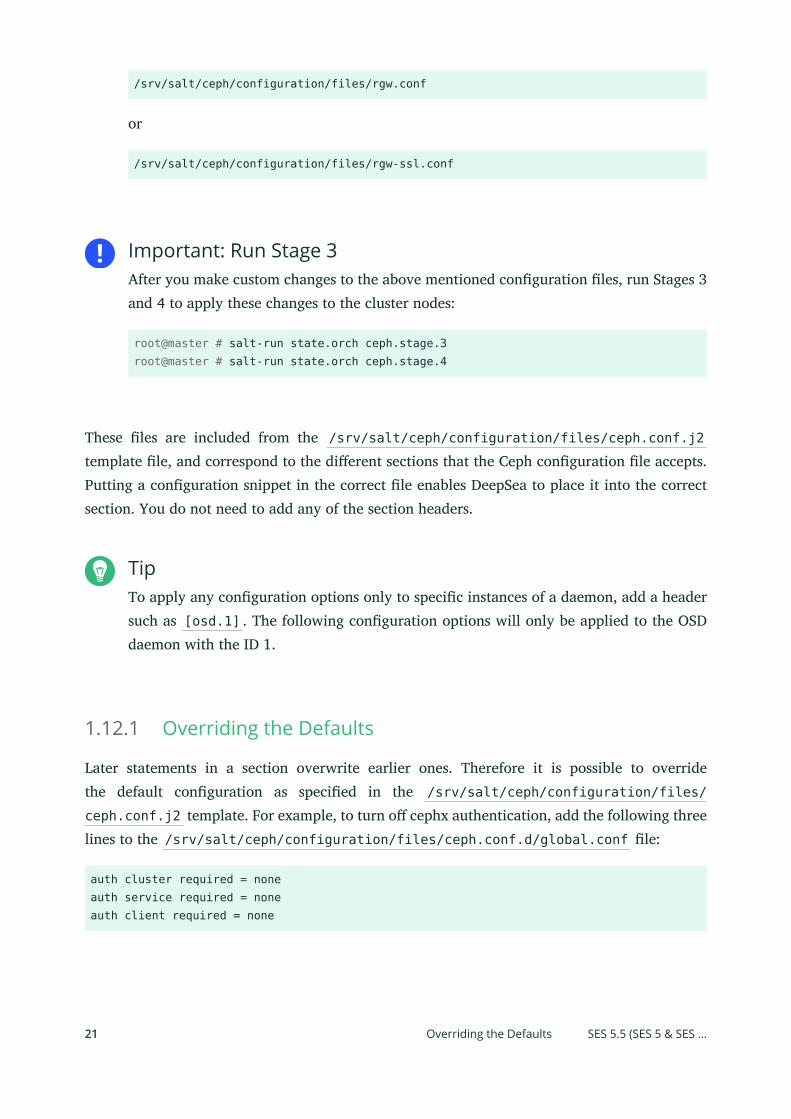
/srv/salt/ceph/configuration/files/rgw.conf
or
/srv/salt/ceph/configuration/files/rgw-ssl.conf
Important: Run Stage 3After you make custom changes to the above mentioned conguration les, run Stages 3and 4 to apply these changes to the cluster nodes:
root@master # salt-run state.orch ceph.stage.3root@master # salt-run state.orch ceph.stage.4
These les are included from the /srv/salt/ceph/configuration/files/ceph.conf.j2template le, and correspond to the dierent sections that the Ceph conguration le accepts.Putting a conguration snippet in the correct le enables DeepSea to place it into the correctsection. You do not need to add any of the section headers.
TipTo apply any conguration options only to specic instances of a daemon, add a headersuch as [osd.1] . The following conguration options will only be applied to the OSDdaemon with the ID 1.
1.12.1 Overriding the Defaults
Later statements in a section overwrite earlier ones. Therefore it is possible to overridethe default conguration as specied in the /srv/salt/ceph/configuration/files/
ceph.conf.j2 template. For example, to turn o cephx authentication, add the following threelines to the /srv/salt/ceph/configuration/files/ceph.conf.d/global.conf le:
auth cluster required = noneauth service required = noneauth client required = none
21 Overriding the Defaults SES 5.5 (SES 5 & SES …
When redening the default values, Ceph related tools such as rados may issue warnings thatspecic values from the ceph.conf.j2 were redened in global.conf . These warnings arecaused by one parameter assigned twice in the resulting ceph.conf .
As a workaround for this specic case, follow these steps:
1. Change the current directory to /srv/salt/ceph/configuration/create :
root@master # cd /srv/salt/ceph/configuration/create
2. Copy default.sls to custom.sls :
root@master # cp default.sls custom.sls
3. Edit custom.sls and change ceph.conf.j2 to custom-ceph.conf.j2 .
4. Change current directory to /srv/salt/ceph/configuration/files :
root@master # cd /srv/salt/ceph/configuration/files
5. Copy ceph.conf.j2 to custom-ceph.conf.j2 :
root@master # cp ceph.conf.j2 custom-ceph.conf.j2
6. Edit custom-ceph.conf.j2 and delete the following line:
{% include "ceph/configuration/files/rbd.conf" %}
Edit global.yml and add the following line:
configuration_create: custom
7. Refresh the pillar:
root@master # salt target saltutil.pillar_refresh
8. Run Stage 3:
root@master # salt-run state.orch ceph.stage.3
Now you should have only one entry for each value denition. To re-create the conguration,run:
root@master # salt-run state.orch ceph.configuration.create
22 Overriding the Defaults SES 5.5 (SES 5 & SES …
and then verify the contents of /srv/salt/ceph/configuration/cache/ceph.conf .
1.12.2 Including Configuration Files
If you need to apply a lot of custom congurations, use the following include statements withinthe custom conguration les to make le management easier. Following is an example of theosd.conf le:
[osd.1]{% include "ceph/configuration/files/ceph.conf.d/osd1.conf" ignore missing %}[osd.2]{% include "ceph/configuration/files/ceph.conf.d/osd2.conf" ignore missing %}[osd.3]{% include "ceph/configuration/files/ceph.conf.d/osd3.conf" ignore missing %}[osd.4]{% include "ceph/configuration/files/ceph.conf.d/osd4.conf" ignore missing %}
In the previous example, the osd1.conf , osd2.conf , osd3.conf , and osd4.conf lescontain the conguration options specic to the related OSD.
Tip: Runtime ConfigurationChanges made to Ceph conguration les take eect after the related Ceph daemonsrestart. See Section 12.1, “Runtime Configuration” for more information on changing the Cephruntime conguration.
1.13 Enabling AppArmor ProfilesAppArmor is a security solution that connes programs by a specic prole. Formore details, refer to https://documentation.suse.com/sles/12-SP5/single-html/SLES-security/
#part-apparmor .
DeepSea provides three states for AppArmor proles: 'enforce', 'complain', and 'disable'. Toactivate a particular AppArmor state, run:
salt -I "deepsea_minions:*" state.apply ceph.apparmor.default-STATE
To put the AppArmor proles in an 'enforce' state:
root@master # salt -I "deepsea_minions:*" state.apply ceph.apparmor.default-enforce
23 Including Configuration Files SES 5.5 (SES 5 & SES …
To put the AppArmor proles in a 'complain' status:
root@master # salt -I "deepsea_minions:*" state.apply ceph.apparmor.default-complain
To disable the AppArmor proles:
root@master # salt -I "deepsea_minions:*" state.apply ceph.apparmor.default-disable
Tip: Enabling the AppArmor ServiceEach of these three calls veries if AppArmor is installed and installs it if not, andstarts and enables the related systemd service. DeepSea will warn you if AppArmor wasinstalled and started/enabled in another way and therefore runs without DeepSea proles.
24 Enabling AppArmor Profiles SES 5.5 (SES 5 & SES …
II Operating a Cluster
2 Introduction 26
3 Operating Ceph Services 27
4 Determining Cluster State 33
5 Monitoring and Alerting 50
6 Authentication with cephx 65
7 Stored Data Management 79
8 Managing Storage Pools 102
9 RADOS Block Device 121
10 Erasure Coded Pools 143
11 Cache Tiering 148
12 Ceph Cluster Configuration 158
2 Introduction
In this part of the manual you will learn how to start or stop Ceph services, monitor a cluster'sstate, use and modify CRUSH Maps, or manage storage pools.
It also includes advanced topics, for example how to manage users and authentication in general,how to manage pool and RADOS device snapshots, how to set up erasure coded pools, or howto increase the cluster performance with cache tiering.
26 SES 5.5 (SES 5 & SES …
3 Operating Ceph Services
You can operate Ceph services either using systemd , or using DeepSea.
3.1 Operating Ceph Cluster Related Services usingsystemdUse the systemctl command to operate all Ceph related services. The operation takes placeon the node you are currently logged in to. You need to have root privileges to be able tooperate on Ceph services.
3.1.1 Starting, Stopping, and Restarting Services using Targets
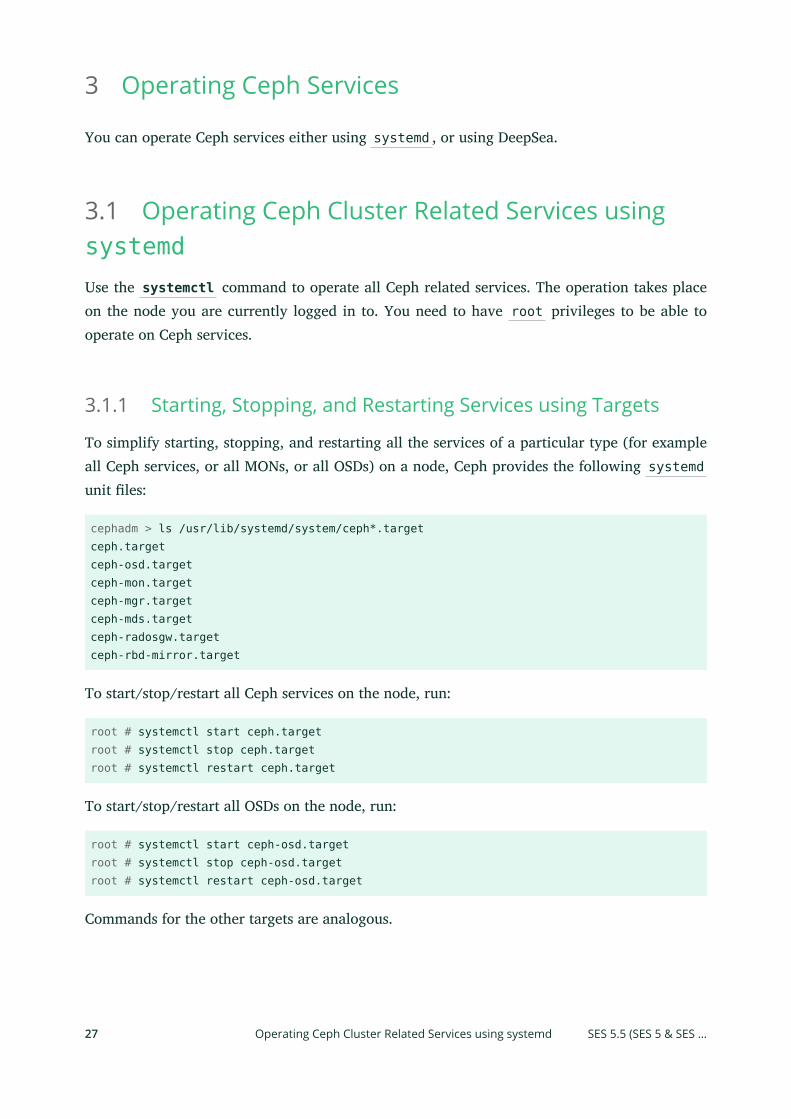
To simplify starting, stopping, and restarting all the services of a particular type (for exampleall Ceph services, or all MONs, or all OSDs) on a node, Ceph provides the following systemdunit les:
cephadm > ls /usr/lib/systemd/system/ceph*.targetceph.targetceph-osd.targetceph-mon.targetceph-mgr.targetceph-mds.targetceph-radosgw.targetceph-rbd-mirror.target
To start/stop/restart all Ceph services on the node, run:
root # systemctl start ceph.targetroot # systemctl stop ceph.targetroot # systemctl restart ceph.target
To start/stop/restart all OSDs on the node, run:
root # systemctl start ceph-osd.targetroot # systemctl stop ceph-osd.targetroot # systemctl restart ceph-osd.target
Commands for the other targets are analogous.
27 Operating Ceph Cluster Related Services using systemd SES 5.5 (SES 5 & SES …
3.1.2 Starting, Stopping, and Restarting Individual Services
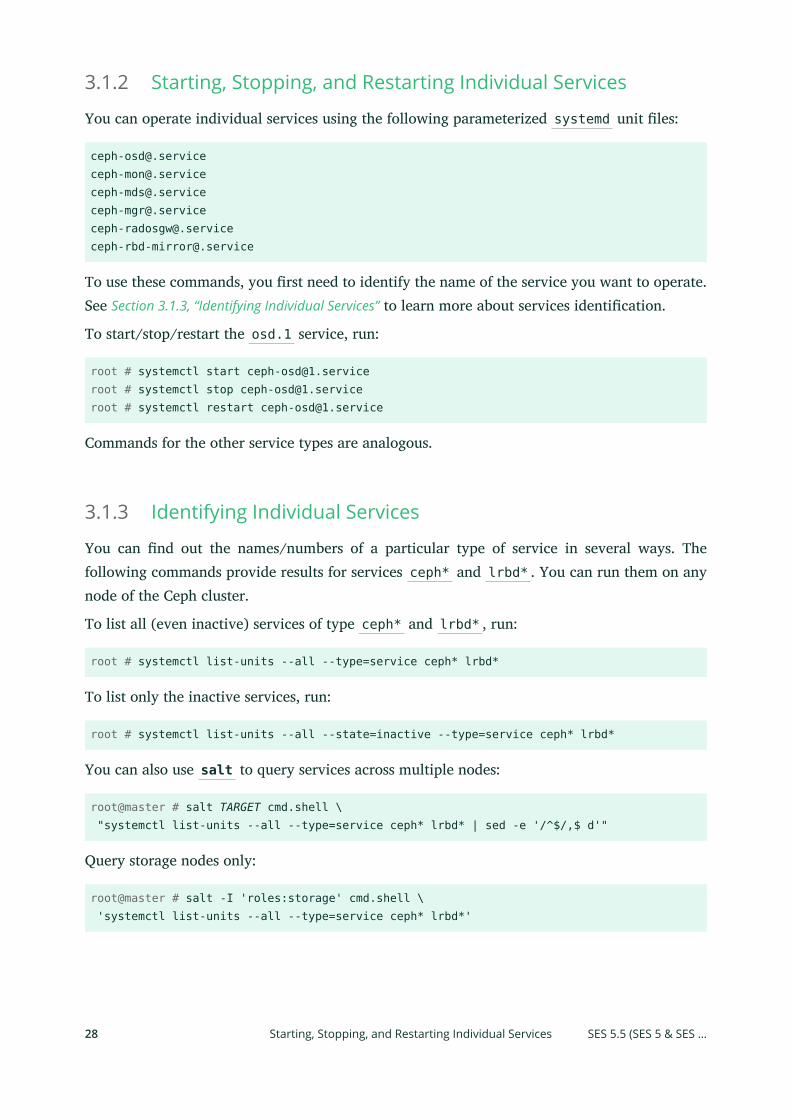
You can operate individual services using the following parameterized systemd unit les:
[email protected]@[email protected]@[email protected]@.service
To use these commands, you rst need to identify the name of the service you want to operate.See Section 3.1.3, “Identifying Individual Services” to learn more about services identication.
To start/stop/restart the osd.1 service, run:
root # systemctl start [email protected] # systemctl stop [email protected] # systemctl restart [email protected]
Commands for the other service types are analogous.
3.1.3 Identifying Individual Services
You can nd out the names/numbers of a particular type of service in several ways. Thefollowing commands provide results for services ceph* and lrbd* . You can run them on anynode of the Ceph cluster.
To list all (even inactive) services of type ceph* and lrbd* , run:
root # systemctl list-units --all --type=service ceph* lrbd*
To list only the inactive services, run:
root # systemctl list-units --all --state=inactive --type=service ceph* lrbd*
You can also use salt to query services across multiple nodes:
root@master # salt TARGET cmd.shell \ "systemctl list-units --all --type=service ceph* lrbd* | sed -e '/^$/,$ d'"
Query storage nodes only:
root@master # salt -I 'roles:storage' cmd.shell \ 'systemctl list-units --all --type=service ceph* lrbd*'
28 Starting, Stopping, and Restarting Individual Services SES 5.5 (SES 5 & SES …
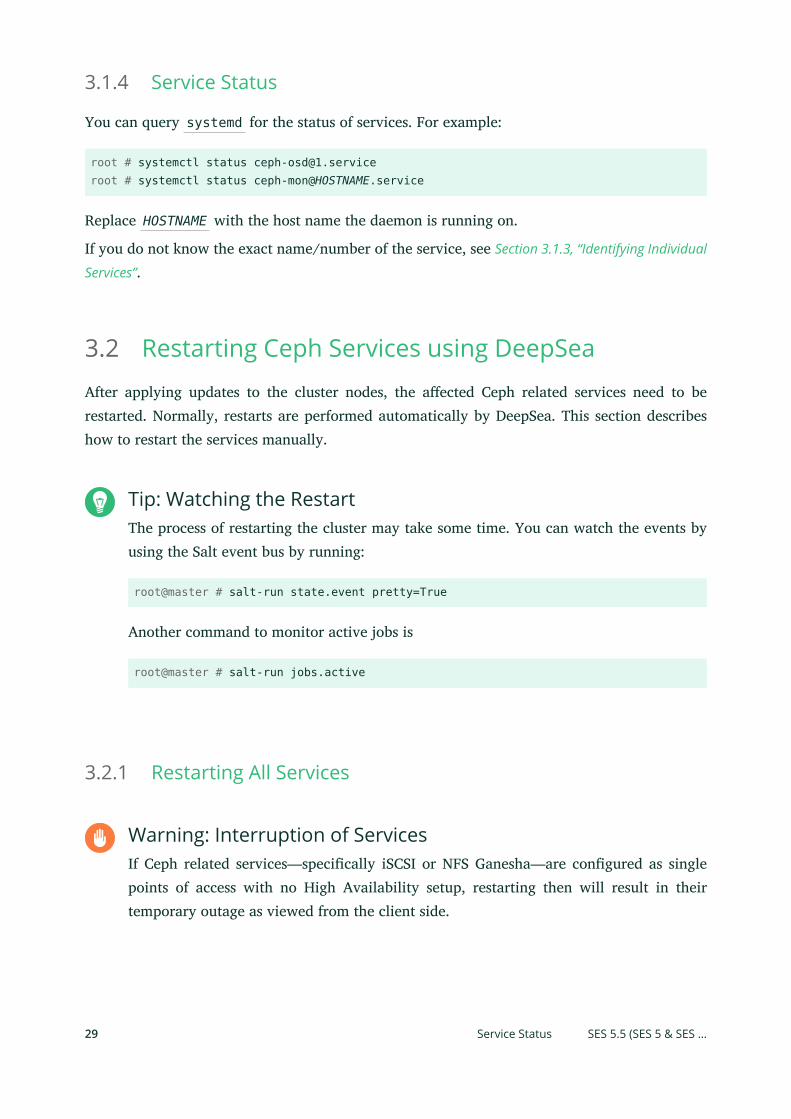
3.1.4 Service Status
You can query systemd for the status of services. For example:
root # systemctl status [email protected] # systemctl status [email protected]
Replace HOSTNAME with the host name the daemon is running on.
If you do not know the exact name/number of the service, see Section 3.1.3, “Identifying Individual
Services”.
3.2 Restarting Ceph Services using DeepSeaAfter applying updates to the cluster nodes, the aected Ceph related services need to berestarted. Normally, restarts are performed automatically by DeepSea. This section describeshow to restart the services manually.
Tip: Watching the RestartThe process of restarting the cluster may take some time. You can watch the events byusing the Salt event bus by running:
root@master # salt-run state.event pretty=True
Another command to monitor active jobs is
root@master # salt-run jobs.active
3.2.1 Restarting All Services
Warning: Interruption of ServicesIf Ceph related services—specically iSCSI or NFS Ganesha—are congured as singlepoints of access with no High Availability setup, restarting then will result in theirtemporary outage as viewed from the client side.
29 Service Status SES 5.5 (SES 5 & SES …
Tip: Samba not Managed by DeepSeaBecause DeepSea and openATTIC do not currently support Samba deployments, you needto manage Samba related services manually. For more details, see Book “Deployment Guide”,
Chapter 13 “Exporting Ceph Data via Samba”.
To restart all services on the cluster, run the following command:
root@master # salt-run state.orch ceph.restart
All roles you have congured restart in the following order: Ceph Monitor, Ceph Manager, CephOSD, Metadata Server, Object Gateway, iSCSI Gateway, NFS Ganesha. To keep the downtime lowand to nd potential issues as early as possible, nodes are restarted sequentially. For example,only one monitoring node is restarted at a time.
The command waits for the cluster to recover if the cluster is in a degraded, unhealthy state.
3.2.2 Restarting Specific Services
To restart a specic service on the cluster, run:
root@master # salt-run state.orch ceph.restart.service_name
For example, to restart all Object Gateways, run:
root@master # salt-run state.orch ceph.restart.rgw
You can use the following targets:
root@master # salt-run state.orch ceph.restart.mon
root@master # salt-run state.orch ceph.restart.mgr
root@master # salt-run state.orch ceph.restart.osd
root@master # salt-run state.orch ceph.restart.mds
root@master # salt-run state.orch ceph.restart.rgw
root@master # salt-run state.orch ceph.restart.igw
root@master # salt-run state.orch ceph.restart.ganesha
30 Restarting Specific Services SES 5.5 (SES 5 & SES …
3.3 Shutdown and Restart of the Whole Ceph ClusterShutting down and restarting the cluster may be necessary in the case of a planned power outage.To stop all Ceph related services and restart without issue, follow the steps below.
PROCEDURE 3.1: SHUTTING DOWN THE WHOLE CEPH CLUSTER
1. Shut down or disconnect any clients accessing the cluster.
2. To prevent CRUSH from automatically rebalancing the cluster, set the cluster to noout :
root@master # ceph osd set noout
3. Disable safety measures:
root@master # salt-run disengage.safety
4. Stop all Ceph services in the following order:
a. Stop NFS Ganesha:
root@master # salt -C 'I@roles:ganesha and I@cluster:ceph' ceph.terminate.ganesha
b. Stop Object Gateways:
root@master # salt -C 'I@roles:rgw and I@cluster:ceph' ceph.terminate.rgw
c. Stop Metadata Servers:
root@master # salt -C 'I@roles:mds and I@cluster:ceph' ceph.terminate.mds
d. Stop iSCSI Gateways:
root@master # salt -C 'I@roles:igw and I@cluster:ceph' ceph.terminate.igw
e. Stop Ceph OSDs:
root@master # salt -C 'I@roles:storage and I@cluster:ceph' ceph.terminate.storage
f. Stop Ceph Managers:
root@master # salt -C 'I@roles:mgr and I@cluster:ceph' ceph.terminate.mgr
31 Shutdown and Restart of the Whole Ceph Cluster SES 5.5 (SES 5 & SES …
g. Stop Ceph Monitors:
root@master # salt -C 'I@roles:mon and I@cluster:ceph' ceph.terminate.mon
5. Power o all cluster nodes:
root@master # salt -C 'G@deepsea:*' cmd.run "shutdown -h"
PROCEDURE 3.2: STARTING THE WHOLE CEPH CLUSTER
1. Power on the Admin Node.
2. Power on the Ceph Monitor nodes.
3. Power on the Ceph OSD nodes.
4. Unset the previously set noout ag:
root@master # ceph osd unset noout
5. Power on all congured gateways.
6. Power on or connect cluster clients.
32 Shutdown and Restart of the Whole Ceph Cluster SES 5.5 (SES 5 & SES …
4 Determining Cluster State
When you have a running cluster, you may use the ceph tool to monitor it. Determining thecluster state typically involves checking the status of Ceph OSDs, Ceph Monitors, placementgroups and Metadata Servers.
Tip: Interactive ModeTo run the ceph tool in an interactive mode, type ceph at the command line with noarguments. The interactive mode is more convenient if you are going to enter more cephcommands in a row. For example:
cephadm > cephceph> healthceph> statusceph> quorum_statusceph> mon_status
4.1 Checking a Cluster's StatusTo check a cluster's status, execute the following:
cephadm > ceph status
or
cephadm > ceph -s
In interactive mode, type status and press Enter .
ceph> status
Ceph will print the cluster status. For example, a tiny Ceph cluster consisting of one monitorand two OSDs may print the following:
cluster b370a29d-9287-4ca3-ab57-3d824f65e339 health HEALTH_OK monmap e1: 1 mons at {ceph1=10.0.0.8:6789/0}, election epoch 2, quorum 0 ceph1 osdmap e63: 2 osds: 2 up, 2 in pgmap v41332: 952 pgs, 20 pools, 17130 MB data, 2199 objects 115 GB used, 167 GB / 297 GB avail
33 Checking a Cluster's Status SES 5.5 (SES 5 & SES …
1 active+clean+scrubbing+deep 951 active+clean
4.2 Checking Cluster HealthAfter you start your cluster and before you start reading and/or writing data, check your cluster'shealth:
cephadm > ceph healthHEALTH_WARN 10 pgs degraded; 100 pgs stuck unclean; 1 mons down, quorum 0,2 \node-1,node-2,node-3
TipIf you specied non-default locations for your conguration or keyring, you may specifytheir locations:
cephadm > ceph -c /path/to/conf -k /path/to/keyring health
The Ceph cluster returns one of the following health codes:
OSD_DOWN
One or more OSDs are marked down. The OSD daemon may have been stopped, or peerOSDs may be unable to reach the OSD over the network. Common causes include a stoppedor crashed daemon, a down host, or a network outage.Verify the host is healthy, the daemon is started, and network is functioning. If the daemonhas crashed, the daemon log le ( /var/log/ceph/ceph-osd.* ) may contain debugginginformation.
OSD_ crush type _DOWN, for example OSD_HOST_DOWN
All the OSDs within a particular CRUSH subtree are marked down, for example all OSDson a host.
OSD_ORPHAN
An OSD is referenced in the CRUSH map hierarchy but does not exist. The OSD can beremoved from the CRUSH hierarchy with:
cephadm > ceph osd crush rm osd.ID
34 Checking Cluster Health SES 5.5 (SES 5 & SES …

OSD_OUT_OF_ORDER_FULL
The usage thresholds for backllfull (defaults to 0.90), nearfull (defaults to 0.85), full(defaults to 0.95), and/or failsafe_full are not ascending. In particular, we expect backllfull< nearfull, nearfull < full, and full < failsafe_full.To read the current values, run:
cephadm > ceph health detailHEALTH_ERR 1 full osd(s); 1 backfillfull osd(s); 1 nearfull osd(s)osd.3 is full at 97%osd.4 is backfill full at 91%osd.2 is near full at 87%
The thresholds can be adjusted with the following commands:
cephadm > ceph osd set-backfillfull-ratio ratiocephadm > ceph osd set-nearfull-ratio ratiocephadm > ceph osd set-full-ratio ratio
OSD_FULL
One or more OSDs has exceeded the full threshold and is preventing the cluster fromservicing writes. Usage by pool can be checked with:
cephadm > ceph df
The currently dened full ratio can be seen with:
cephadm > ceph osd dump | grep full_ratio
A short-term workaround to restore write availability is to raise the full threshold by asmall amount:
cephadm > ceph osd set-full-ratio ratio
Add new storage to the cluster by deploying more OSDs, or delete existing data in orderto free up space.
OSD_BACKFILLFULL
One or more OSDs has exceeded the backllfull threshold, which prevents data from beingallowed to rebalance to this device. This is an early warning that rebalancing may not beable to complete and that the cluster is approaching full. Usage by pool can be checkedwith:
cephadm > ceph df
35 Checking Cluster Health SES 5.5 (SES 5 & SES …
OSD_NEARFULL
One or more OSDs has exceeded the nearfull threshold. This is an early warning that thecluster is approaching full. Usage by pool can be checked with:
cephadm > ceph df
OSDMAP_FLAGS
One or more cluster ags of interest has been set. With the exception of full, these agscan be set or cleared with:
cephadm > ceph osd set flagcephadm > ceph osd unset flag
These ags include:
full
The cluster is agged as full and cannot service writes.
pauserd, pausewr
Paused reads or writes.
noup
OSDs are not allowed to start.
nodown
OSD failure reports are being ignored, such that the monitors will not mark OSDsdown.
noin
OSDs that were previously marked out will not be marked back in when they start.
noout
Down OSDs will not automatically be marked out after the congured interval.
nobackfill, norecover, norebalance
Recovery or data rebalancing is suspended.
noscrub, nodeep_scrub
Scrubbing (see Section 7.5, “Scrubbing”) is disabled.
notieragent
Cache tiering activity is suspended.
OSD_FLAGS
36 Checking Cluster Health SES 5.5 (SES 5 & SES …
One or more OSDs has a per-OSD ag of interest set. These ags include:
noup
OSD is not allowed to start.
nodown
Failure reports for this OSD will be ignored.
noin
If this OSD was previously marked out automatically after a failure, it will not bemarked in when it starts.
noout
If this OSD is down, it will not be automatically marked out after the conguredinterval.
Per-OSD ags can be set and cleared with:
cephadm > ceph osd add-flag osd-IDcephadm > ceph osd rm-flag osd-ID
OLD_CRUSH_TUNABLES
The CRUSH Map is using very old settings and should be updated. The oldest tunablesthat can be used (that is the oldest client version that can connect to the cluster) withouttriggering this health warning is determined by the mon_crush_min_required_versionconguration option.
OLD_CRUSH_STRAW_CALC_VERSION
The CRUSH Map is using an older, non-optimal method for calculating intermediate weightvalues for straw buckets. The CRUSH Map should be updated to use the newer method( straw_calc_version=1).
CACHE_POOL_NO_HIT_SET
One or more cache pools is not congured with a hit set to track usage, which preventsthe tiering agent from identifying cold objects to ush and evict from the cache. Hit setscan be congured on the cache pool with:
cephadm > ceph osd pool set poolname hit_set_type typecephadm > ceph osd pool set poolname hit_set_period period-in-secondscephadm > ceph osd pool set poolname hit_set_count number-of-hitsetscephadm > ceph osd pool set poolname hit_set_fpp target-false-positive-rate
For more information on cache tiering, see Chapter 11, Cache Tiering.
37 Checking Cluster Health SES 5.5 (SES 5 & SES …
OSD_NO_SORTBITWISE
No pre-luminous v12 OSDs are running but the sortbitwise ag has not been set. Youneed to set the sortbitwise ag before luminous v12 or newer OSDs can start:
cephadm > ceph osd set sortbitwise
POOL_FULL
One or more pools has reached its quota and is no longer allowing writes. You can setpool quotas and usage with:
cephadm > ceph df detail
You can either raise the pool quota with
cephadm > ceph osd pool set-quota poolname max_objects num-objectscephadm > ceph osd pool set-quota poolname max_bytes num-bytes
or delete some existing data to reduce usage.
PG_AVAILABILITY
Data availability is reduced, meaning that the cluster is unable to service potential reador write requests for some data in the cluster. Specically, one or more PGs is in a statethat does not allow IO requests to be serviced. Problematic PG states include peering,stale, incomplete, and the lack of active (if those conditions do not clear quickly). Detailedinformation about which PGs are aected is available from:
cephadm > ceph health detail
In most cases the root cause is that one or more OSDs is currently down. The state ofspecic problematic PGs can be queried with:
cephadm > ceph tell pgid query
PG_DEGRADED
Data redundancy is reduced for some data, meaning the cluster does not have the desirednumber of replicas for all data (for replicated pools) or erasure code fragments (for erasurecoded pools). Specically, one or more PGs have either the degraded or undersized agset (there are not enough instances of that placement group in the cluster), or have nothad the clean ag set for some time. Detailed information about which PGs are aectedis available from:
cephadm > ceph health detail
38 Checking Cluster Health SES 5.5 (SES 5 & SES …
In most cases the root cause is that one or more OSDs is currently down. The state ofspecic problematic PGs can be queried with:
cephadm > ceph tell pgid query
PG_DEGRADED_FULL
Data redundancy may be reduced or at risk for some data because of a lack of free space inthe cluster. Specically, one or more PGs has the backll_toofull or recovery_toofull ag set,meaning that the cluster is unable to migrate or recover data because one or more OSDsis above the backllfull threshold.
PG_DAMAGED
Data scrubbing (see Section 7.5, “Scrubbing”) has discovered some problems with dataconsistency in the cluster. Specically, one or more PGs has the inconsistent orsnaptrim_error ag is set, indicating an earlier scrub operation found a problem, or that therepair ag is set, meaning a repair for such an inconsistency is currently in progress.
OSD_SCRUB_ERRORS
Recent OSD scrubs have uncovered inconsistencies.
CACHE_POOL_NEAR_FULL
A cache tier pool is nearly full. Full in this context is determined by the target_max_bytes andtarget_max_objects properties on the cache pool. When the pool reaches the target threshold,write requests to the pool may block while data is ushed and evicted from the cache,a state that normally leads to very high latencies and poor performance. The cache pooltarget size can be adjusted with:
cephadm > ceph osd pool set cache-pool-name target_max_bytes bytescephadm > ceph osd pool set cache-pool-name target_max_objects objects
Normal cache ush and evict activity may also be throttled because of reduced availabilityor performance of the base tier, or overall cluster load.Find more information about cache tiering in Chapter 11, Cache Tiering.
TOO_FEW_PGS
The number of PGs in use is below the congurable threshold ofmon_pg_warn_min_per_osd PGs per OSD. This can lead to suboptimal distribution andbalance of data across the OSDs in the cluster reduce overall performance.See Placement Groups (http://docs.ceph.com/docs/master/rados/operations/placement-
groups/) for details on calculating an appropriate number of placement groups for yourpool.
39 Checking Cluster Health SES 5.5 (SES 5 & SES …
TOO_MANY_PGS
The number of PGs in use is above the congurable threshold ofmon_pg_warn_max_per_osd PGs per OSD. This can lead to higher memory usage for OSDdaemons, slower peering after cluster state changes (for example OSD restarts, additions,or removals), and higher load on the Ceph Managers and Ceph Monitors.While the pg_num value for existing pools cannot be reduced. The pgp_num value can.This eectively collocates some PGs on the same sets of OSDs, mitigating some of thenegative impacts described above. The pgp_num value can be adjusted with:
cephadm > ceph osd pool set pool pgp_num value
SMALLER_PGP_NUM
One or more pools has a pgp_num value less than pg_num . This is normally an indicationthat the PG count was increased without also increasing the placement behavior. This isnormally resolved by setting pgp_num to match pg_num , triggering the data migration,with:
cephadm > ceph osd pool set pool pgp_num pg_num_value
MANY_OBJECTS_PER_PG
One or more pools have an average number of objects per PG that is signicantlyhigher than the overall cluster average. The specic threshold is controlled by themon_pg_warn_max_object_skew conguration value. This is usually an indication thatthe pool(s) containing most of the data in the cluster have too few PGs, and/or thatother pools that do not contain as much data have too many PGs. The threshold can beraised to silence the health warning by adjusting the mon_pg_warn_max_object_skewconguration option on the monitors.
POOL_APP_NOT_ENABLED
A pool exists that contains one or more objects but has not been tagged for use by aparticular application. Resolve this warning by labeling the pool for use by an application.For example, if the pool is used by RBD:
cephadm > rbd pool init pool_name
If the pool is being used by a custom application 'foo', you can also label it using the low-level command:
cephadm > ceph osd pool application enable foo
POOL_FULL
40 Checking Cluster Health SES 5.5 (SES 5 & SES …
One or more pools have reached (or is very close to reaching) its quota. The thresholdto trigger this error condition is controlled by the mon_pool_quota_crit_thresholdconguration option. Pool quotas can be adjusted up or down (or removed) with:
cephadm > ceph osd pool set-quota pool max_bytes bytescephadm > ceph osd pool set-quota pool max_objects objects
Setting the quota value to 0 will disable the quota.
POOL_NEAR_FULL
One or more pools are approaching their quota. The threshold to trigger this warningcondition is controlled by the mon_pool_quota_warn_threshold conguration option.Pool quotas can be adjusted up or down (or removed) with:
cephadm > ceph osd osd pool set-quota pool max_bytes bytescephadm > ceph osd osd pool set-quota pool max_objects objects
Setting the quota value to 0 will disable the quota.
OBJECT_MISPLACED
One or more objects in the cluster are not stored on the node where the cluster wants it.This is an indication that data migration caused by a recent cluster change has not yetcompleted. Misplaced data is not a dangerous condition in itself. Data consistency is neverat risk, and old copies of objects are never removed until the desired number of new copies(in the desired locations) are present.
OBJECT_UNFOUND
One or more objects in the cluster cannot be found. Specically, the OSDs know that anew or updated copy of an object should exist, but a copy of that version of the object hasnot been found on OSDs that are currently online. Read or write requests to the 'unfound'objects will be blocked. Ideally, a down OSD can be brought back online that has the morerecent copy of the unfound object. Candidate OSDs can be identied from the peering statefor the PG(s) responsible for the unfound object:
cephadm > ceph tell pgid query
REQUEST_SLOW
One or more OSD requests is taking a long time to process. This can be an indication ofextreme load, a slow storage device, or a software bug. You can query the request queueon the OSD(s) in question with the following command executed from the OSD host:
cephadm > ceph daemon osd.id ops
41 Checking Cluster Health SES 5.5 (SES 5 & SES …
You can see a summary of the slowest recent requests:
cephadm > ceph daemon osd.id dump_historic_ops
You can nd the location of an OSD with:
cephadm > ceph osd find osd.id
REQUEST_STUCK
One or more OSD requests have been blocked for a longer time, for example 4096 seconds.This is an indication that either the cluster has been unhealthy for an extended periodof time (for example not enough running OSDs or inactive PGs) or there is some internalproblem with the OSD.
PG_NOT_SCRUBBED
One or more PGs have not been scrubbed (see Section 7.5, “Scrubbing”) recently. PGs arenormally scrubbed every mon_scrub_interval seconds, and this warning triggers whenmon_warn_not_scrubbed such intervals have elapsed without a scrub. PGs will not scrubif they are not agged as clean, which may happen if they are misplaced or degraded(see PG_AVAILABILITY and PG_DEGRADED above). You can manually initiate a scrub ofa clean PG with:
cephadm > ceph pg scrub pgid
PG_NOT_DEEP_SCRUBBED
One or more PGs has not been deep scrubbed (see Section 7.5, “Scrubbing”) recently. PGsare normally scrubbed every osd_deep_mon_scrub_interval seconds, and this warningtriggers when mon_warn_not_deep_scrubbed seconds have elapsed without a scrub.PGs will not (deep)scrub if they are not agged as clean, which may happen if theyare misplaced or degraded (see PG_AVAILABILITY and PG_DEGRADED above). You canmanually initiate a scrub of a clean PG with:
cephadm > ceph pg deep-scrub pgid
4.3 Watching a ClusterYou can nd the immediate state of the cluster using ceph -s . For example, a tiny Ceph clusterconsisting of one monitor, and two OSDs may print the following when a workload is running:
cephadm > ceph -scluster:
42 Watching a Cluster SES 5.5 (SES 5 & SES …

id: ea4cf6ce-80c6-3583-bb5e-95fa303c893f health: HEALTH_WARN too many PGs per OSD (408 > max 300)
services: mon: 3 daemons, quorum ses5min1,ses5min3,ses5min2 mgr: ses5min1(active), standbys: ses5min3, ses5min2 mds: cephfs-1/1/1 up {0=ses5min3=up:active} osd: 4 osds: 4 up, 4 in rgw: 1 daemon active
data: pools: 8 pools, 544 pgs objects: 253 objects, 3821 bytes usage: 6252 MB used, 13823 MB / 20075 MB avail pgs: 544 active+clean
The output provides the following information:
Cluster ID
Cluster health status
The monitor map epoch and the status of the monitor quorum
The OSD map epoch and the status of OSDs
The status of Ceph Managers.
The status of Object Gateways.
The placement group map version
The number of placement groups and pools
The notional amount of data stored and the number of objects stored; and,
The total amount of data stored.
Tip: How Ceph Calculates Data UsageThe used value reects the actual amount of raw storage used. The xxx GB / xxx GBvalue means the amount available (the lesser number) of the overall storage capacity ofthe cluster. The notional number reects the size of the stored data before it is replicated,cloned or snapshot. Therefore, the amount of data actually stored typically exceeds thenotional amount stored, because Ceph creates replicas of the data and may also usestorage capacity for cloning and snapshotting.
43 Watching a Cluster SES 5.5 (SES 5 & SES …
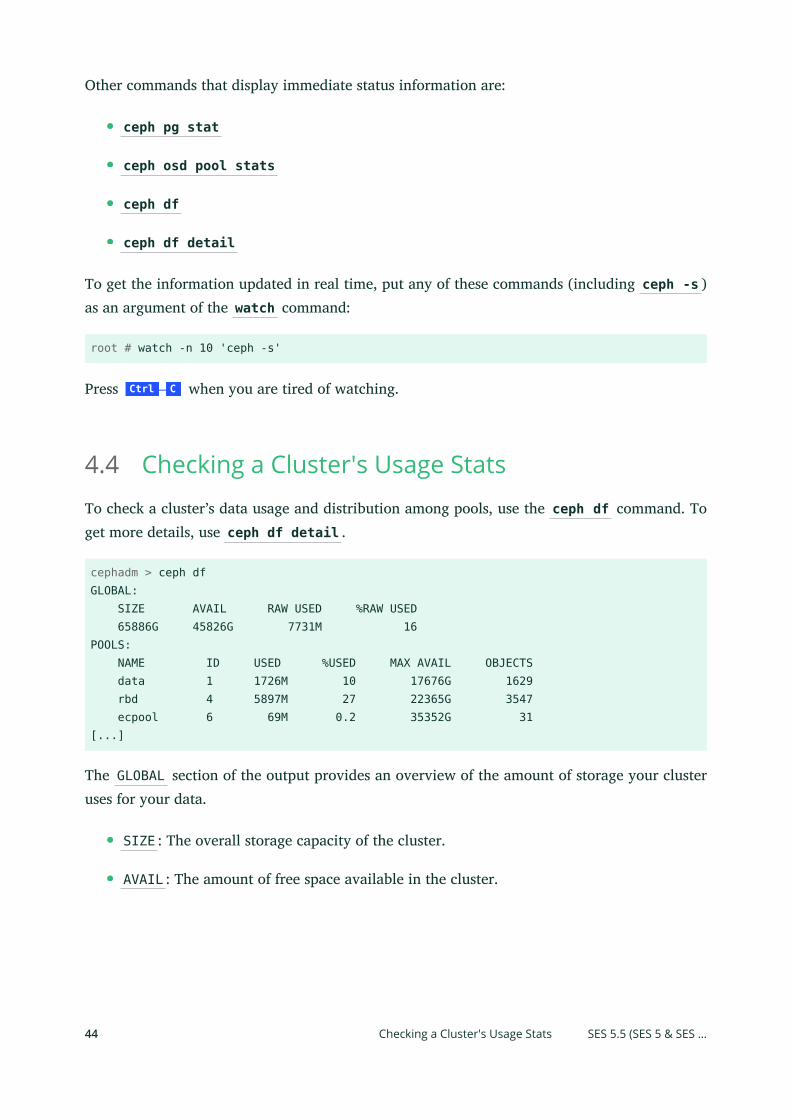
Other commands that display immediate status information are:
ceph pg stat
ceph osd pool stats
ceph df
ceph df detail
To get the information updated in real time, put any of these commands (including ceph -s )as an argument of the watch command:
root # watch -n 10 'ceph -s'
Press Ctrl – C when you are tired of watching.
4.4 Checking a Cluster's Usage StatsTo check a cluster’s data usage and distribution among pools, use the ceph df command. Toget more details, use ceph df detail .
cephadm > ceph dfGLOBAL: SIZE AVAIL RAW USED %RAW USED 65886G 45826G 7731M 16POOLS: NAME ID USED %USED MAX AVAIL OBJECTS data 1 1726M 10 17676G 1629 rbd 4 5897M 27 22365G 3547 ecpool 6 69M 0.2 35352G 31[...]
The GLOBAL section of the output provides an overview of the amount of storage your clusteruses for your data.
SIZE : The overall storage capacity of the cluster.
AVAIL : The amount of free space available in the cluster.
44 Checking a Cluster's Usage Stats SES 5.5 (SES 5 & SES …
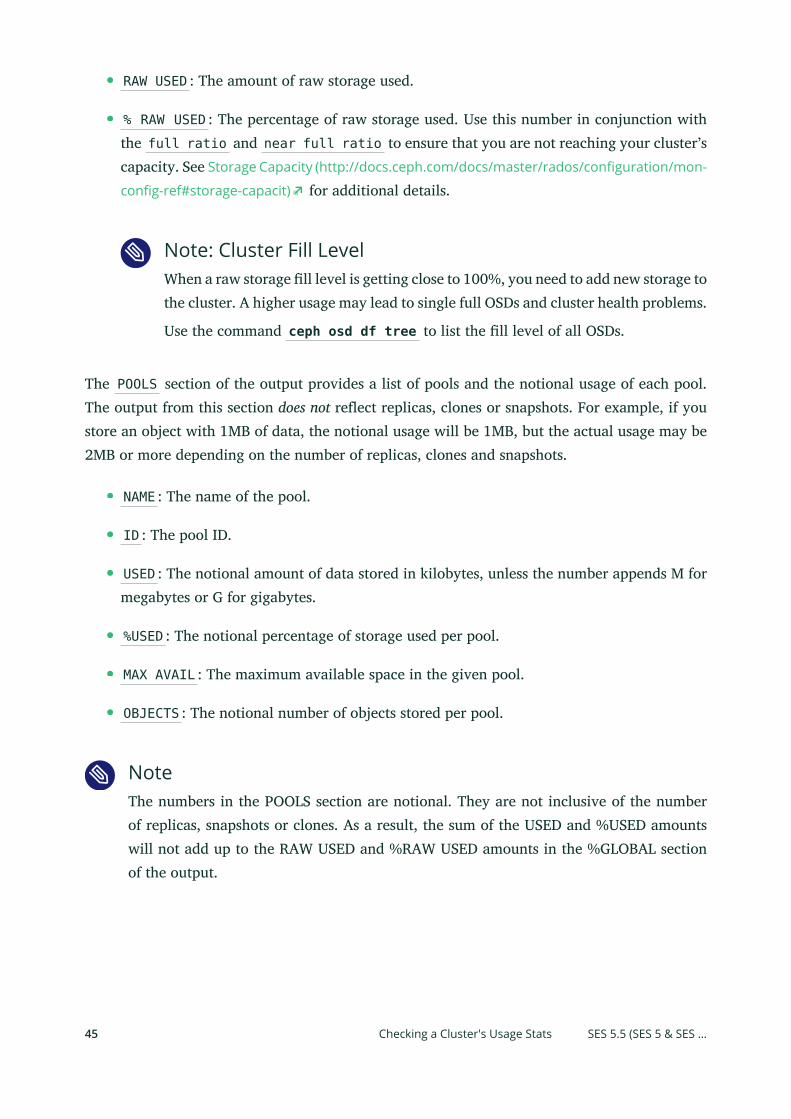
RAW USED : The amount of raw storage used.
% RAW USED : The percentage of raw storage used. Use this number in conjunction withthe full ratio and near full ratio to ensure that you are not reaching your cluster’scapacity. See Storage Capacity (http://docs.ceph.com/docs/master/rados/configuration/mon-
config-ref#storage-capacit) for additional details.
Note: Cluster Fill LevelWhen a raw storage ll level is getting close to 100%, you need to add new storage tothe cluster. A higher usage may lead to single full OSDs and cluster health problems.
Use the command ceph osd df tree to list the ll level of all OSDs.
The POOLS section of the output provides a list of pools and the notional usage of each pool.The output from this section does not reect replicas, clones or snapshots. For example, if youstore an object with 1MB of data, the notional usage will be 1MB, but the actual usage may be2MB or more depending on the number of replicas, clones and snapshots.
NAME : The name of the pool.
ID : The pool ID.
USED : The notional amount of data stored in kilobytes, unless the number appends M formegabytes or G for gigabytes.
%USED : The notional percentage of storage used per pool.
MAX AVAIL : The maximum available space in the given pool.
OBJECTS : The notional number of objects stored per pool.
NoteThe numbers in the POOLS section are notional. They are not inclusive of the numberof replicas, snapshots or clones. As a result, the sum of the USED and %USED amountswill not add up to the RAW USED and %RAW USED amounts in the %GLOBAL sectionof the output.
45 Checking a Cluster's Usage Stats SES 5.5 (SES 5 & SES …

4.5 Checking OSD StatusYou can check OSDs to ensure they are up and on by executing:
cephadm > ceph osd stat
or
cephadm > ceph osd dump
You can also view OSDs according to their position in the CRUSH map.
cephadm > ceph osd tree
Ceph will print a CRUSH tree with a host, its OSDs, whether they are up and their weight.
# id weight type name up/down reweight-1 3 pool default-3 3 rack mainrack-2 3 host osd-host0 1 osd.0 up 11 1 osd.1 up 12 1 osd.2 up 1
4.6 Checking for Full OSDsCeph prevents you from writing to a full OSD so that you do not lose data. In an operationalcluster, you should receive a warning when your cluster is getting near its full ratio. The monosd full ratio defaults to 0.95, or 95% of capacity before it stops clients from writing data.The mon osd nearfull ratio defaults to 0.85, or 85% of capacity, when it generates a healthwarning.
Full OSD nodes will be reported by ceph health :
cephadm > ceph health HEALTH_WARN 1 nearfull osds osd.2 is near full at 85%
or
cephadm > ceph health HEALTH_ERR 1 nearfull osds, 1 full osds osd.2 is near full at 85% osd.3 is full at 97%
46 Checking OSD Status SES 5.5 (SES 5 & SES …
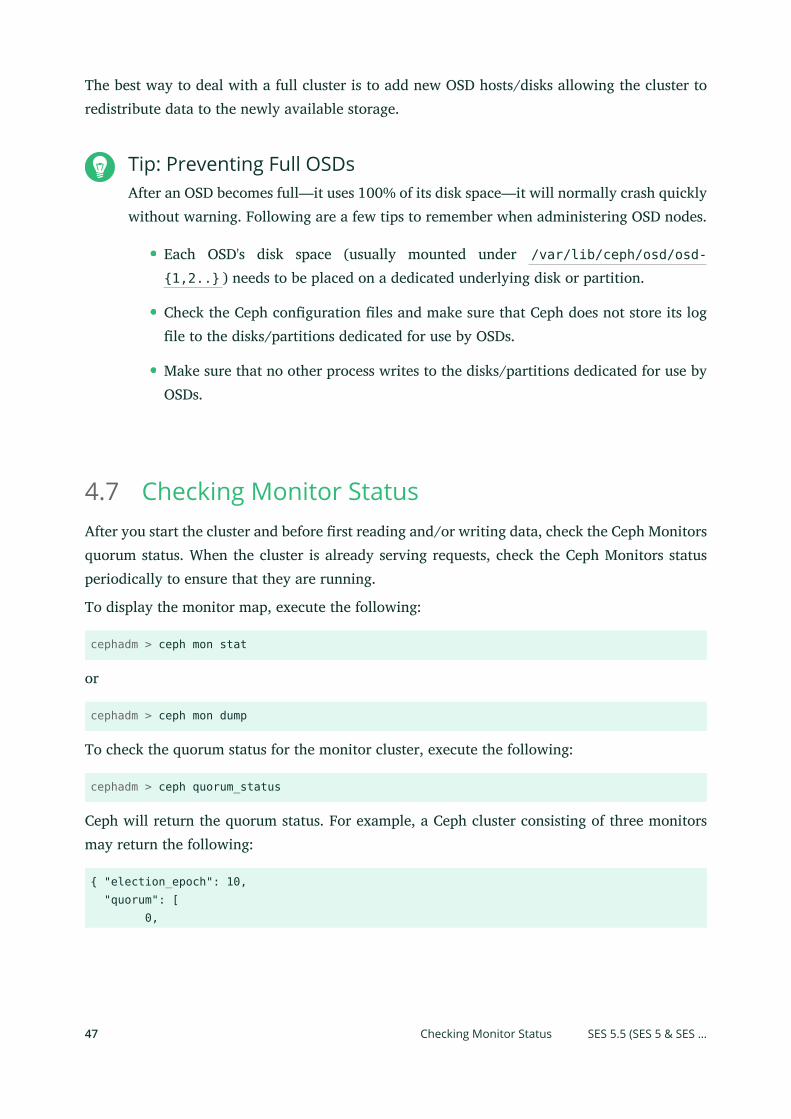
The best way to deal with a full cluster is to add new OSD hosts/disks allowing the cluster toredistribute data to the newly available storage.
Tip: Preventing Full OSDsAfter an OSD becomes full—it uses 100% of its disk space—it will normally crash quicklywithout warning. Following are a few tips to remember when administering OSD nodes.
Each OSD's disk space (usually mounted under /var/lib/ceph/osd/osd-
{1,2..} ) needs to be placed on a dedicated underlying disk or partition.
Check the Ceph conguration les and make sure that Ceph does not store its logle to the disks/partitions dedicated for use by OSDs.
Make sure that no other process writes to the disks/partitions dedicated for use byOSDs.
4.7 Checking Monitor StatusAfter you start the cluster and before rst reading and/or writing data, check the Ceph Monitorsquorum status. When the cluster is already serving requests, check the Ceph Monitors statusperiodically to ensure that they are running.
To display the monitor map, execute the following:
cephadm > ceph mon stat
or
cephadm > ceph mon dump
To check the quorum status for the monitor cluster, execute the following:
cephadm > ceph quorum_status
Ceph will return the quorum status. For example, a Ceph cluster consisting of three monitorsmay return the following:
{ "election_epoch": 10, "quorum": [ 0,
47 Checking Monitor Status SES 5.5 (SES 5 & SES …
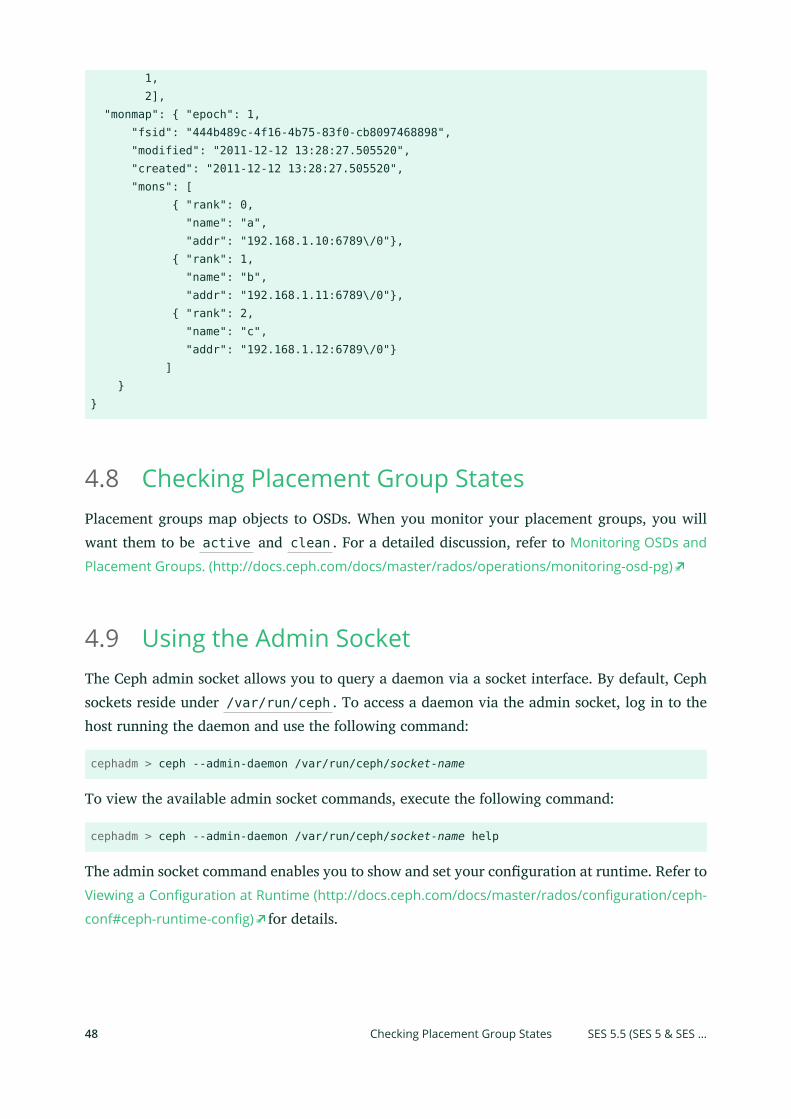
1, 2], "monmap": { "epoch": 1, "fsid": "444b489c-4f16-4b75-83f0-cb8097468898", "modified": "2011-12-12 13:28:27.505520", "created": "2011-12-12 13:28:27.505520", "mons": [ { "rank": 0, "name": "a", "addr": "192.168.1.10:6789\/0"}, { "rank": 1, "name": "b", "addr": "192.168.1.11:6789\/0"}, { "rank": 2, "name": "c", "addr": "192.168.1.12:6789\/0"} ] }}
4.8 Checking Placement Group StatesPlacement groups map objects to OSDs. When you monitor your placement groups, you willwant them to be active and clean . For a detailed discussion, refer to Monitoring OSDs and
Placement Groups. (http://docs.ceph.com/docs/master/rados/operations/monitoring-osd-pg)
4.9 Using the Admin SocketThe Ceph admin socket allows you to query a daemon via a socket interface. By default, Cephsockets reside under /var/run/ceph . To access a daemon via the admin socket, log in to thehost running the daemon and use the following command:
cephadm > ceph --admin-daemon /var/run/ceph/socket-name
To view the available admin socket commands, execute the following command:
cephadm > ceph --admin-daemon /var/run/ceph/socket-name help
The admin socket command enables you to show and set your conguration at runtime. Refer toViewing a Configuration at Runtime (http://docs.ceph.com/docs/master/rados/configuration/ceph-
conf#ceph-runtime-config) for details.
48 Checking Placement Group States SES 5.5 (SES 5 & SES …
Additionally, you can set conguration values at runtime directly (the admin socket bypassesthe monitor, unlike ceph tell daemon-type . id injectargs, which relies on the monitor butdoes not require you to log in directly to the host in question).
49 Using the Admin Socket SES 5.5 (SES 5 & SES …
5 Monitoring and Alerting
By default, DeepSea deploys a monitoring and alerting stack on the Salt master. It consists ofthe following components:
Prometheus monitoring and alerting toolkit.
Grafana visualization and alerting software.
The prometheus-ceph_exporter service running on the Salt master.
The prometheus-node_exporter service running on all Salt minions.
The Prometheus conguration and scrape targets (exporting daemons) are setup automaticallyby DeepSea. DeepSea also deploys a list of default alerts, for example health error , 10% OSDsdown , or pgs inactive .
The Alertmanager handles alerts sent by the Prometheus server. It takes care of de-duplicating,grouping, and routing them to the correct receiver. It also takes care of silencing of alerts.Alertmanager is congured via the command line ags and a conguration le that denesinhibition rules, notication routing and notication receivers.
5.1 Configuration FileAlertmanager's conguration is dierent for each deployment. Therefore, DeepSea doesnot ship any related defaults. You need to provide your own alertmanager.yml
conguration le. The alertmanager package by default installs a conguration le/etc/prometheus/alertmanager.yml which can serve as an example conguration. Ifyou prefer to have your Alertmanager conguration managed by DeepSea, add thefollowing key to your pillar, for example to the /srv/pillar/ceph/stack/ceph/minions/YOUR_SALT_MASTER_MINION_ID.sls le:
For a complete example of Alertmanager's conguration le, see Appendix B, Default Alerts for
SUSE Enterprise Storage.
monitoring: alertmanager_config: /path/to/your/alertmanager/config.yml
50 Configuration File SES 5.5 (SES 5 & SES …
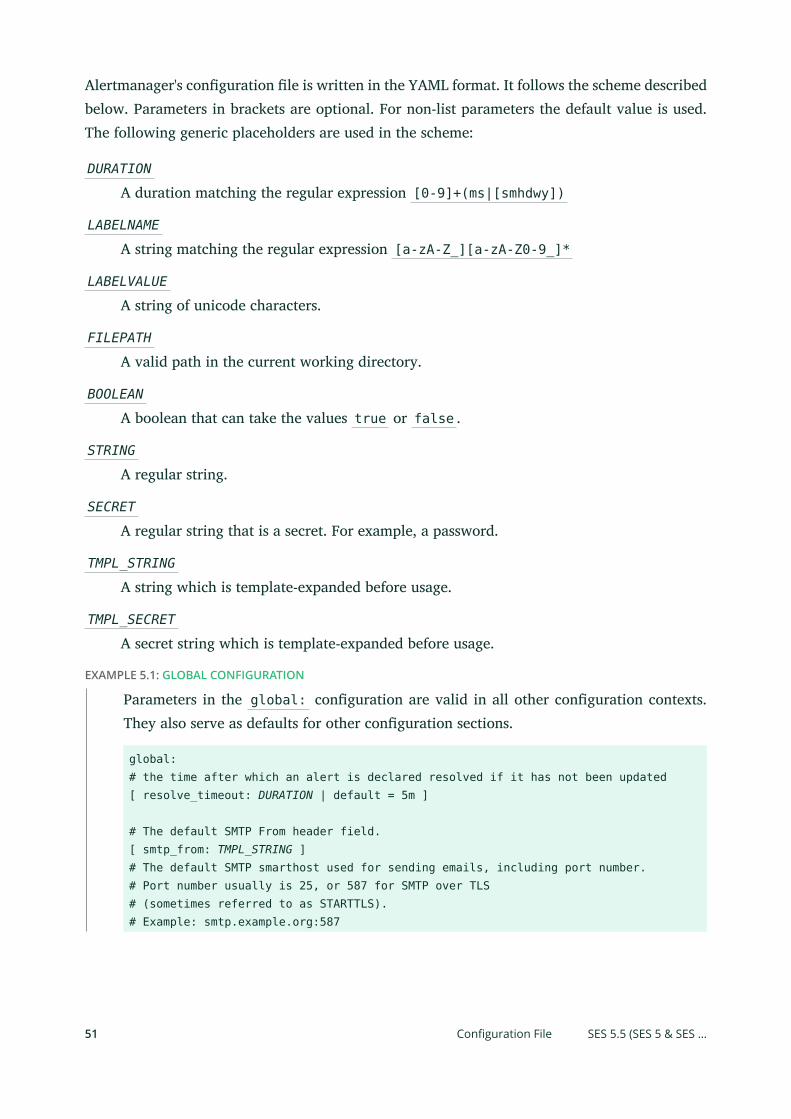
Alertmanager's conguration le is written in the YAML format. It follows the scheme describedbelow. Parameters in brackets are optional. For non-list parameters the default value is used.The following generic placeholders are used in the scheme:
DURATION
A duration matching the regular expression [0-9]+(ms|[smhdwy])
LABELNAME
A string matching the regular expression [a-zA-Z_][a-zA-Z0-9_]*
LABELVALUE
A string of unicode characters.
FILEPATH
A valid path in the current working directory.
BOOLEAN
A boolean that can take the values true or false .
STRING
A regular string.
SECRET
A regular string that is a secret. For example, a password.
TMPL_STRING
A string which is template-expanded before usage.
TMPL_SECRET
A secret string which is template-expanded before usage.
EXAMPLE 5.1: GLOBAL CONFIGURATION
Parameters in the global: conguration are valid in all other conguration contexts.They also serve as defaults for other conguration sections.
global:# the time after which an alert is declared resolved if it has not been updated[ resolve_timeout: DURATION | default = 5m ]
# The default SMTP From header field.[ smtp_from: TMPL_STRING ]# The default SMTP smarthost used for sending emails, including port number.# Port number usually is 25, or 587 for SMTP over TLS# (sometimes referred to as STARTTLS).# Example: smtp.example.org:587
51 Configuration File SES 5.5 (SES 5 & SES …
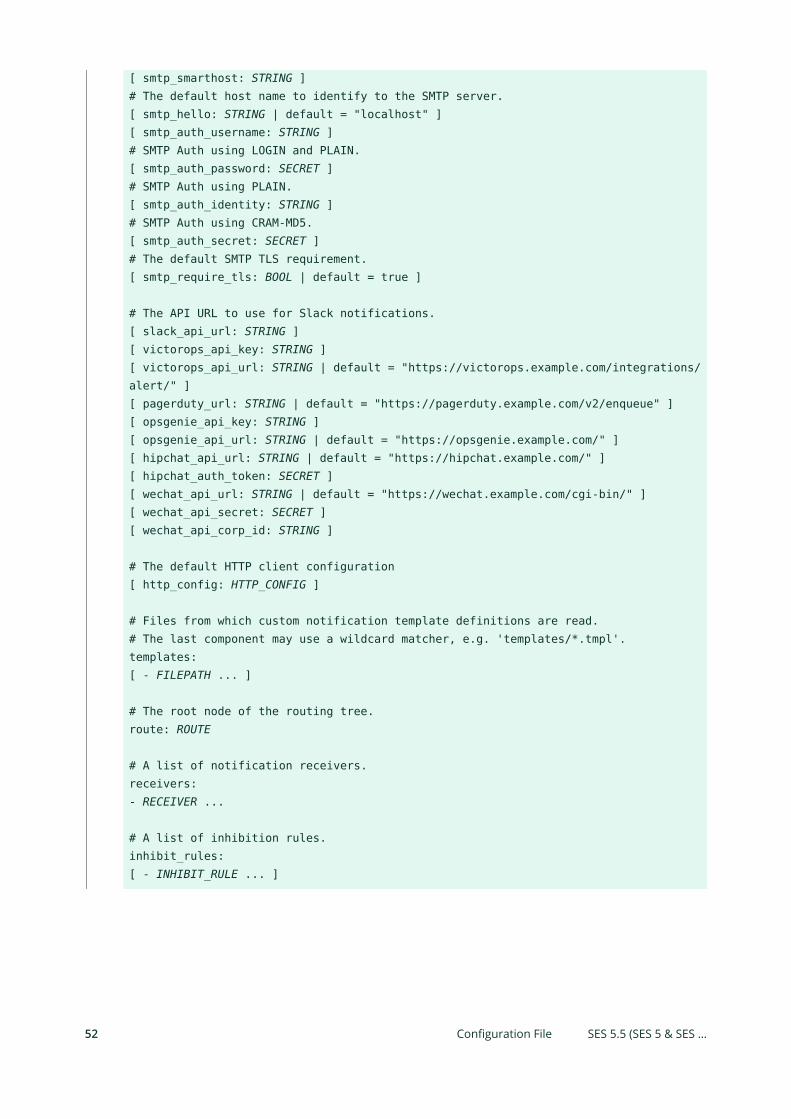
[ smtp_smarthost: STRING ]# The default host name to identify to the SMTP server.[ smtp_hello: STRING | default = "localhost" ][ smtp_auth_username: STRING ]# SMTP Auth using LOGIN and PLAIN.[ smtp_auth_password: SECRET ]# SMTP Auth using PLAIN.[ smtp_auth_identity: STRING ]# SMTP Auth using CRAM-MD5.[ smtp_auth_secret: SECRET ]# The default SMTP TLS requirement.[ smtp_require_tls: BOOL | default = true ]
# The API URL to use for Slack notifications.[ slack_api_url: STRING ][ victorops_api_key: STRING ][ victorops_api_url: STRING | default = "https://victorops.example.com/integrations/alert/" ][ pagerduty_url: STRING | default = "https://pagerduty.example.com/v2/enqueue" ][ opsgenie_api_key: STRING ][ opsgenie_api_url: STRING | default = "https://opsgenie.example.com/" ][ hipchat_api_url: STRING | default = "https://hipchat.example.com/" ][ hipchat_auth_token: SECRET ][ wechat_api_url: STRING | default = "https://wechat.example.com/cgi-bin/" ][ wechat_api_secret: SECRET ][ wechat_api_corp_id: STRING ]
# The default HTTP client configuration[ http_config: HTTP_CONFIG ]
# Files from which custom notification template definitions are read.# The last component may use a wildcard matcher, e.g. 'templates/*.tmpl'.templates:[ - FILEPATH ... ]
# The root node of the routing tree.route: ROUTE
# A list of notification receivers.receivers:- RECEIVER ...
# A list of inhibition rules.inhibit_rules:[ - INHIBIT_RULE ... ]
52 Configuration File SES 5.5 (SES 5 & SES …

EXAMPLE 5.2: ROUTE
A ROUTE block denes a node in a routing tree. Unspecied parameters are inherited fromits parent node. Every alert enters the routing tree at the congured top-level route, whichneeds to match all alerts, then traversing the child nodes. If the continue option is setto false , the traversing stops after the rst matched child. Setting the option to trueon a matched node, the alert continues to match against subsequent siblings. If an alertdoes not match any children of a node, the alert is handled based on the congurationparameters of the current node.
[ receiver: STRING ][ group_by: '[' LABELNAME, ... ']' ]
# If an alert should continue matching subsequent sibling nodes.[ continue: BOOLEAN | default = false ]
# A set of equality matchers an alert has to fulfill to match a node.match: [ LABELNAME: LABELVALUE, ... ]
# A set of regex-matchers an alert has to fulfill to match a node.match_re: [ LABELNAME: REGEX, ... ]
# Time to wait before sending a notification for a group of alerts.[ group_wait: DURATION | default = 30s ]
# Time to wait before sending a notification about new alerts# added to a group of alerts for which an initial notification has# already been sent.[ group_interval: DURATION | default = 5m ]
# Time to wait before re-sending a notification[ repeat_interval: DURATION | default = 4h ]
# Possible child routes.routes: [ - ROUTE ... ]
EXAMPLE 5.3: INHIBIT_RULE
An inhibition rule mutes a target alert that matches a set of matchers when a source alertexists that matches another set of matchers. Both alerts need to share the same label valuesfor the label names in the equal list.
53 Configuration File SES 5.5 (SES 5 & SES …
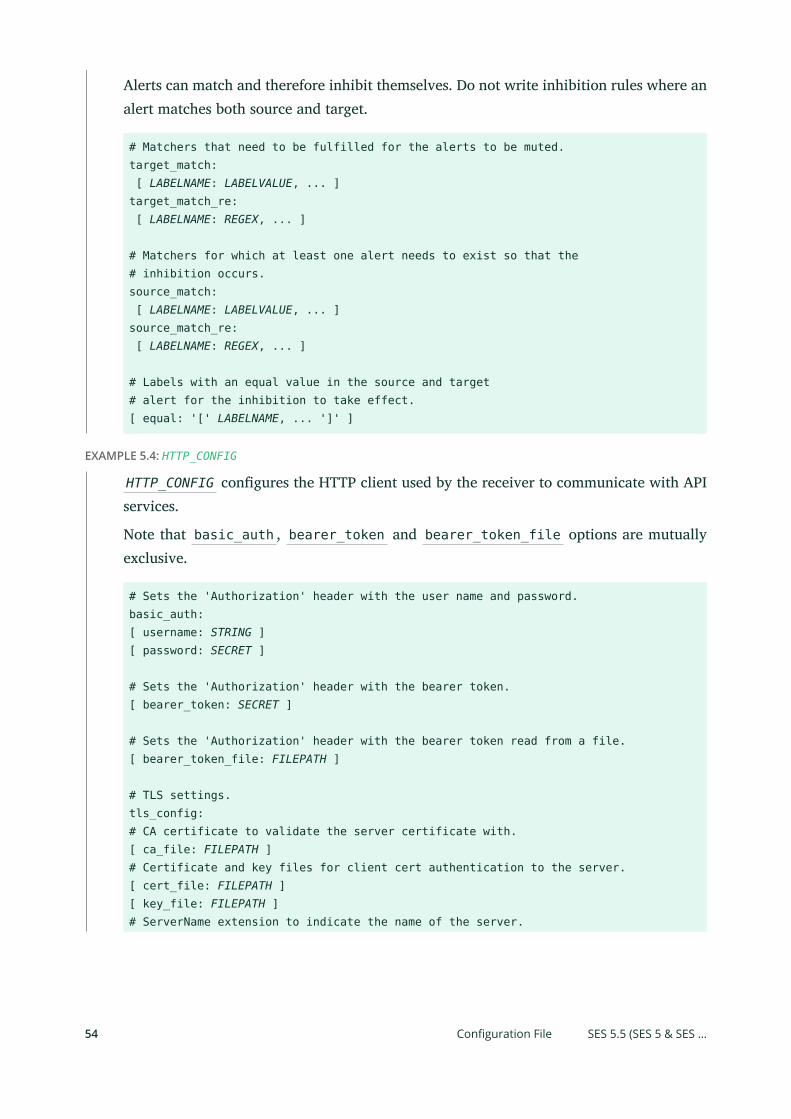
Alerts can match and therefore inhibit themselves. Do not write inhibition rules where analert matches both source and target.
# Matchers that need to be fulfilled for the alerts to be muted.target_match: [ LABELNAME: LABELVALUE, ... ]target_match_re: [ LABELNAME: REGEX, ... ]
# Matchers for which at least one alert needs to exist so that the# inhibition occurs.source_match: [ LABELNAME: LABELVALUE, ... ]source_match_re: [ LABELNAME: REGEX, ... ]
# Labels with an equal value in the source and target# alert for the inhibition to take effect.[ equal: '[' LABELNAME, ... ']' ]
EXAMPLE 5.4: HTTP_CONFIG
HTTP_CONFIG congures the HTTP client used by the receiver to communicate with APIservices.
Note that basic_auth , bearer_token and bearer_token_file options are mutuallyexclusive.
# Sets the 'Authorization' header with the user name and password.basic_auth:[ username: STRING ][ password: SECRET ]
# Sets the 'Authorization' header with the bearer token.[ bearer_token: SECRET ]
# Sets the 'Authorization' header with the bearer token read from a file.[ bearer_token_file: FILEPATH ]
# TLS settings.tls_config:# CA certificate to validate the server certificate with.[ ca_file: FILEPATH ]# Certificate and key files for client cert authentication to the server.[ cert_file: FILEPATH ][ key_file: FILEPATH ]# ServerName extension to indicate the name of the server.
54 Configuration File SES 5.5 (SES 5 & SES …
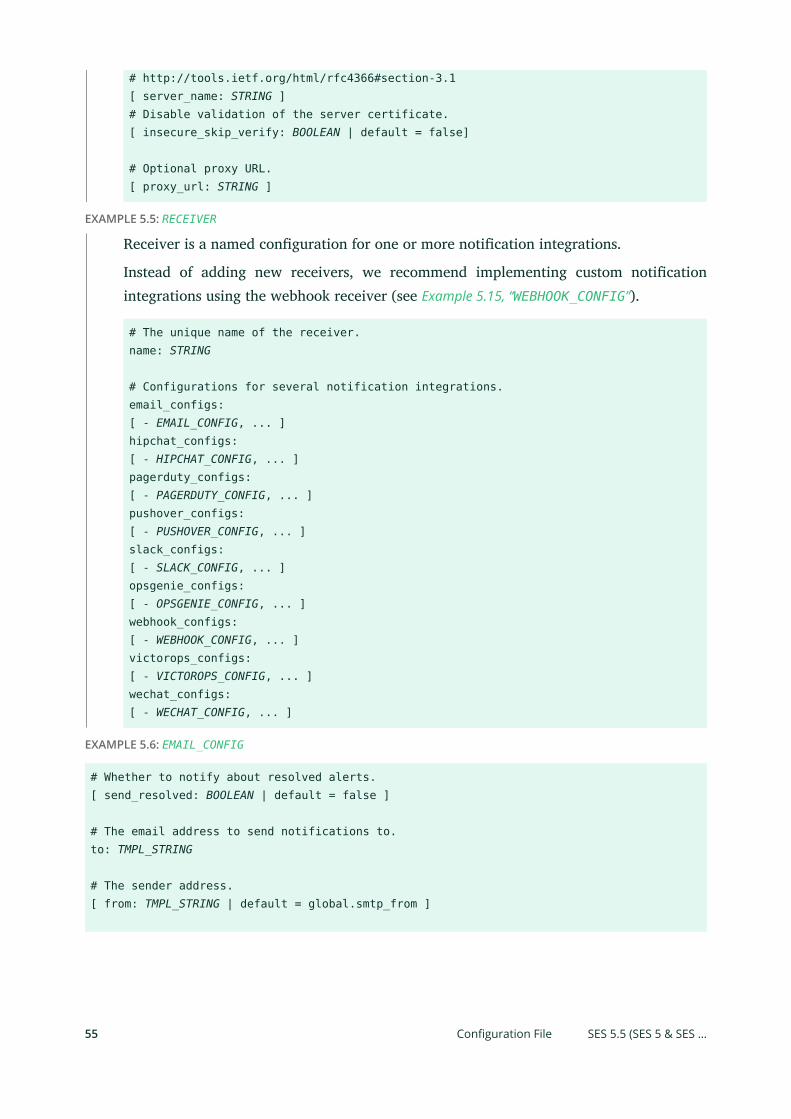
# http://tools.ietf.org/html/rfc4366#section-3.1[ server_name: STRING ]# Disable validation of the server certificate.[ insecure_skip_verify: BOOLEAN | default = false]
# Optional proxy URL.[ proxy_url: STRING ]
EXAMPLE 5.5: RECEIVER
Receiver is a named conguration for one or more notication integrations.
Instead of adding new receivers, we recommend implementing custom noticationintegrations using the webhook receiver (see Example 5.15, “WEBHOOK_CONFIG”).
# The unique name of the receiver.name: STRING
# Configurations for several notification integrations.email_configs:[ - EMAIL_CONFIG, ... ]hipchat_configs:[ - HIPCHAT_CONFIG, ... ]pagerduty_configs:[ - PAGERDUTY_CONFIG, ... ]pushover_configs:[ - PUSHOVER_CONFIG, ... ]slack_configs:[ - SLACK_CONFIG, ... ]opsgenie_configs:[ - OPSGENIE_CONFIG, ... ]webhook_configs:[ - WEBHOOK_CONFIG, ... ]victorops_configs:[ - VICTOROPS_CONFIG, ... ]wechat_configs:[ - WECHAT_CONFIG, ... ]
EXAMPLE 5.6: EMAIL_CONFIG
# Whether to notify about resolved alerts.[ send_resolved: BOOLEAN | default = false ]
# The email address to send notifications to.to: TMPL_STRING
# The sender address.[ from: TMPL_STRING | default = global.smtp_from ]
55 Configuration File SES 5.5 (SES 5 & SES …
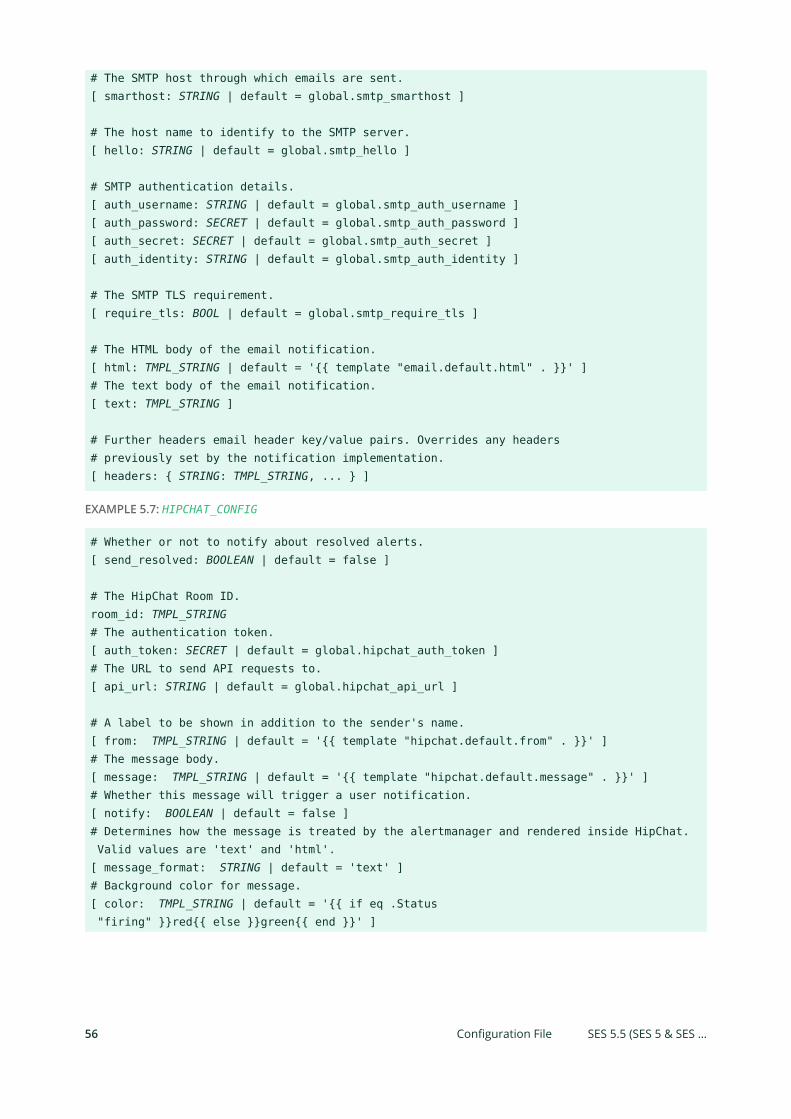
# The SMTP host through which emails are sent.[ smarthost: STRING | default = global.smtp_smarthost ]
# The host name to identify to the SMTP server.[ hello: STRING | default = global.smtp_hello ]
# SMTP authentication details.[ auth_username: STRING | default = global.smtp_auth_username ][ auth_password: SECRET | default = global.smtp_auth_password ][ auth_secret: SECRET | default = global.smtp_auth_secret ][ auth_identity: STRING | default = global.smtp_auth_identity ]
# The SMTP TLS requirement.[ require_tls: BOOL | default = global.smtp_require_tls ]
# The HTML body of the email notification.[ html: TMPL_STRING | default = '{{ template "email.default.html" . }}' ]# The text body of the email notification.[ text: TMPL_STRING ]
# Further headers email header key/value pairs. Overrides any headers# previously set by the notification implementation.[ headers: { STRING: TMPL_STRING, ... } ]
EXAMPLE 5.7: HIPCHAT_CONFIG
# Whether or not to notify about resolved alerts.[ send_resolved: BOOLEAN | default = false ]
# The HipChat Room ID.room_id: TMPL_STRING# The authentication token.[ auth_token: SECRET | default = global.hipchat_auth_token ]# The URL to send API requests to.[ api_url: STRING | default = global.hipchat_api_url ]
# A label to be shown in addition to the sender's name.[ from: TMPL_STRING | default = '{{ template "hipchat.default.from" . }}' ]# The message body.[ message: TMPL_STRING | default = '{{ template "hipchat.default.message" . }}' ]# Whether this message will trigger a user notification.[ notify: BOOLEAN | default = false ]# Determines how the message is treated by the alertmanager and rendered inside HipChat. Valid values are 'text' and 'html'.[ message_format: STRING | default = 'text' ]# Background color for message.[ color: TMPL_STRING | default = '{{ if eq .Status "firing" }}red{{ else }}green{{ end }}' ]
56 Configuration File SES 5.5 (SES 5 & SES …
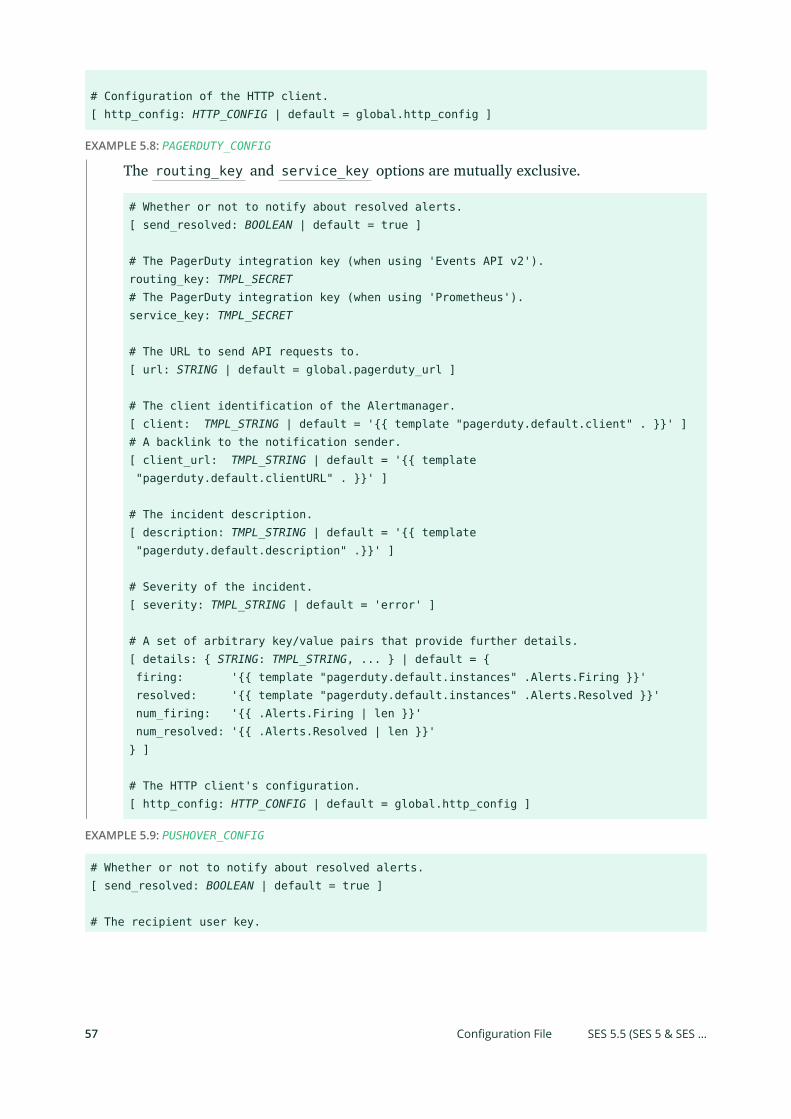
# Configuration of the HTTP client.[ http_config: HTTP_CONFIG | default = global.http_config ]
EXAMPLE 5.8: PAGERDUTY_CONFIG
The routing_key and service_key options are mutually exclusive.
# Whether or not to notify about resolved alerts.[ send_resolved: BOOLEAN | default = true ]
# The PagerDuty integration key (when using 'Events API v2').routing_key: TMPL_SECRET# The PagerDuty integration key (when using 'Prometheus').service_key: TMPL_SECRET
# The URL to send API requests to.[ url: STRING | default = global.pagerduty_url ]
# The client identification of the Alertmanager.[ client: TMPL_STRING | default = '{{ template "pagerduty.default.client" . }}' ]# A backlink to the notification sender.[ client_url: TMPL_STRING | default = '{{ template "pagerduty.default.clientURL" . }}' ]
# The incident description.[ description: TMPL_STRING | default = '{{ template "pagerduty.default.description" .}}' ]
# Severity of the incident.[ severity: TMPL_STRING | default = 'error' ]
# A set of arbitrary key/value pairs that provide further details.[ details: { STRING: TMPL_STRING, ... } | default = { firing: '{{ template "pagerduty.default.instances" .Alerts.Firing }}' resolved: '{{ template "pagerduty.default.instances" .Alerts.Resolved }}' num_firing: '{{ .Alerts.Firing | len }}' num_resolved: '{{ .Alerts.Resolved | len }}'} ]
# The HTTP client's configuration.[ http_config: HTTP_CONFIG | default = global.http_config ]
EXAMPLE 5.9: PUSHOVER_CONFIG
# Whether or not to notify about resolved alerts.[ send_resolved: BOOLEAN | default = true ]
# The recipient user key.
57 Configuration File SES 5.5 (SES 5 & SES …

user_key: SECRET
# Registered application’s API token.token: SECRET
# Notification title.[ title: TMPL_STRING | default = '{{ template "pushover.default.title" . }}' ]
# Notification message.[ message: TMPL_STRING | default = '{{ template "pushover.default.message" . }}' ]
# A supplementary URL displayed together with the message.[ url: TMPL_STRING | default = '{{ template "pushover.default.url" . }}' ]
# Priority.[ priority: TMPL_STRING | default = '{{ if eq .Status "firing" }}2{{ else }}0{{ end }}' ]
# How often the Pushover servers will send the same notification (at least 30 seconds).[ retry: DURATION | default = 1m ]
# How long your notification will continue to be retried (unless the user# acknowledges the notification).[ expire: DURATION | default = 1h ]
# Configuration of the HTTP client.[ http_config: HTTP_CONFIG | default = global.http_config ]
EXAMPLE 5.10: SLACK_CONFIG
# Whether or not to notify about resolved alerts.[ send_resolved: BOOLEAN | default = false ]
# The Slack webhook URL.[ api_url: SECRET | default = global.slack_api_url ]
# The channel or user to send notifications to.channel: TMPL_STRING
# API request data as defined by the Slack webhook API.[ icon_emoji: TMPL_STRING ][ icon_url: TMPL_STRING ][ link_names: BOOLEAN | default = false ][ username: TMPL_STRING | default = '{{ template "slack.default.username" . }}' ]# The following parameters define the attachment.actions:[ ACTION_CONFIG ... ][ color: TMPL_STRING | default = '{{ if eq .Status "firing" }}danger{{ else }}good{{ end }}' ]
58 Configuration File SES 5.5 (SES 5 & SES …
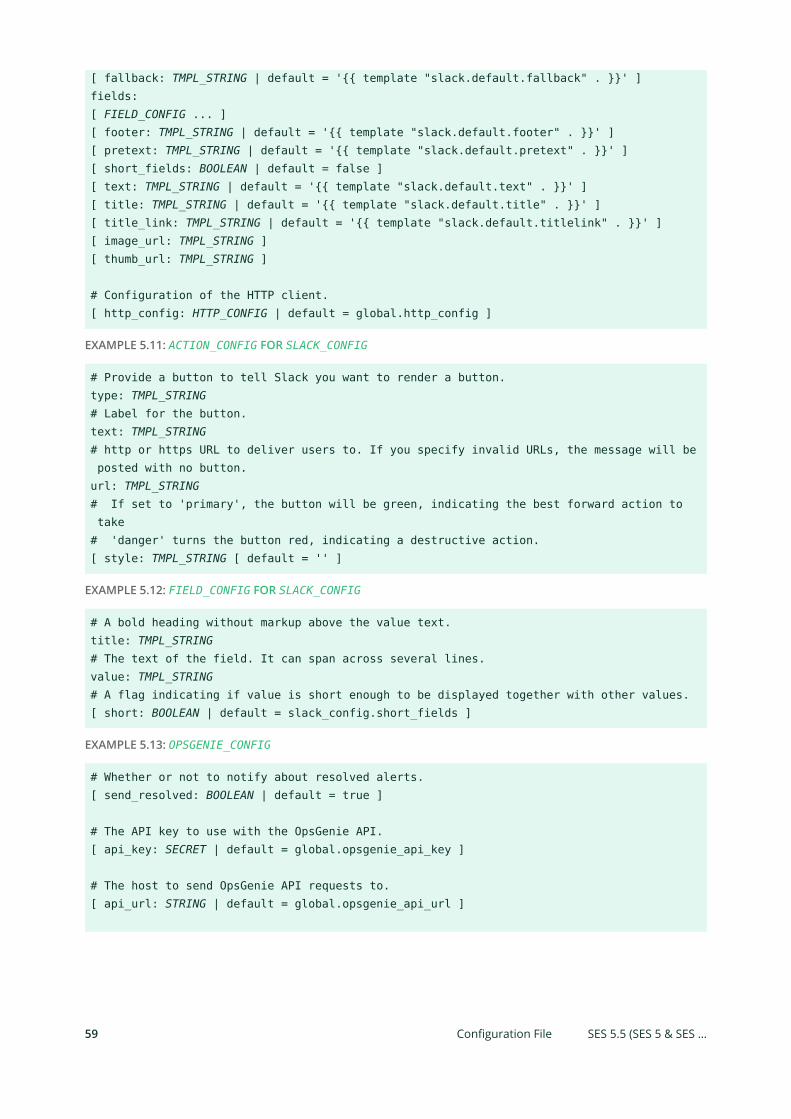
[ fallback: TMPL_STRING | default = '{{ template "slack.default.fallback" . }}' ]fields:[ FIELD_CONFIG ... ][ footer: TMPL_STRING | default = '{{ template "slack.default.footer" . }}' ][ pretext: TMPL_STRING | default = '{{ template "slack.default.pretext" . }}' ][ short_fields: BOOLEAN | default = false ][ text: TMPL_STRING | default = '{{ template "slack.default.text" . }}' ][ title: TMPL_STRING | default = '{{ template "slack.default.title" . }}' ][ title_link: TMPL_STRING | default = '{{ template "slack.default.titlelink" . }}' ][ image_url: TMPL_STRING ][ thumb_url: TMPL_STRING ]
# Configuration of the HTTP client.[ http_config: HTTP_CONFIG | default = global.http_config ]
EXAMPLE 5.11: ACTION_CONFIG FOR SLACK_CONFIG
# Provide a button to tell Slack you want to render a button.type: TMPL_STRING# Label for the button.text: TMPL_STRING# http or https URL to deliver users to. If you specify invalid URLs, the message will be posted with no button.url: TMPL_STRING# If set to 'primary', the button will be green, indicating the best forward action to take# 'danger' turns the button red, indicating a destructive action.[ style: TMPL_STRING [ default = '' ]
EXAMPLE 5.12: FIELD_CONFIG FOR SLACK_CONFIG
# A bold heading without markup above the value text.title: TMPL_STRING# The text of the field. It can span across several lines.value: TMPL_STRING# A flag indicating if value is short enough to be displayed together with other values.[ short: BOOLEAN | default = slack_config.short_fields ]
EXAMPLE 5.13: OPSGENIE_CONFIG
# Whether or not to notify about resolved alerts.[ send_resolved: BOOLEAN | default = true ]
# The API key to use with the OpsGenie API.[ api_key: SECRET | default = global.opsgenie_api_key ]
# The host to send OpsGenie API requests to.[ api_url: STRING | default = global.opsgenie_api_url ]
59 Configuration File SES 5.5 (SES 5 & SES …
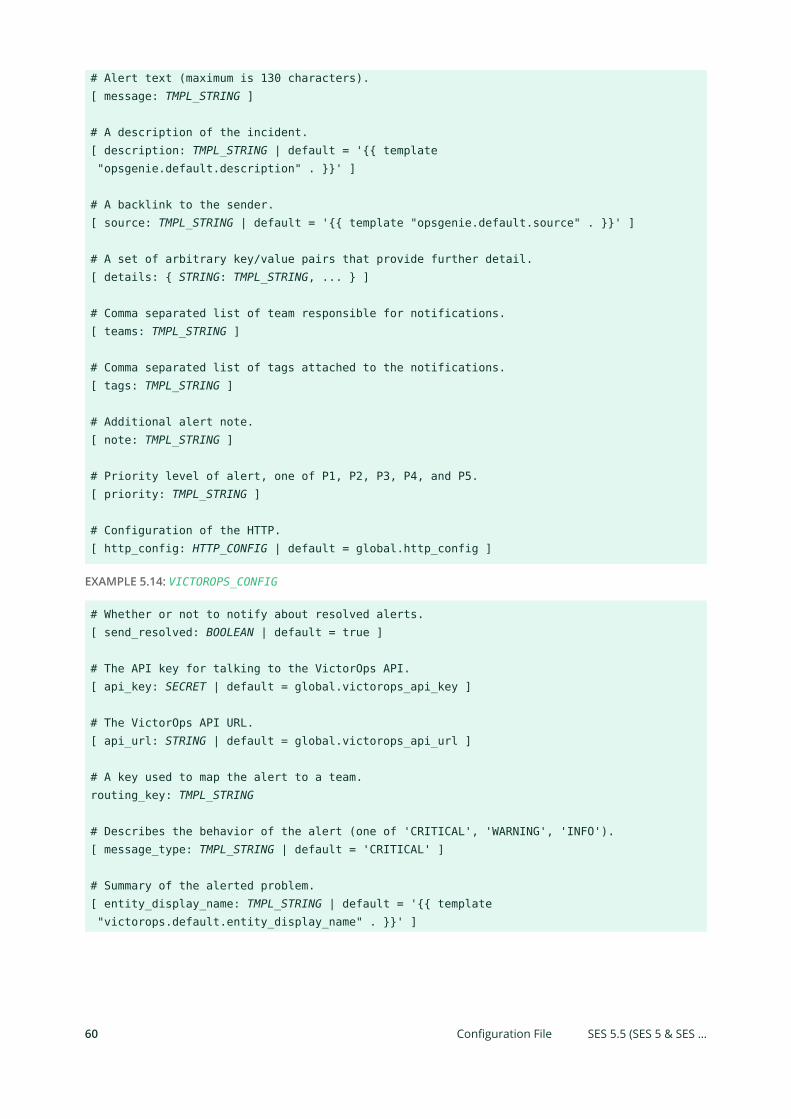
# Alert text (maximum is 130 characters).[ message: TMPL_STRING ]
# A description of the incident.[ description: TMPL_STRING | default = '{{ template "opsgenie.default.description" . }}' ]
# A backlink to the sender.[ source: TMPL_STRING | default = '{{ template "opsgenie.default.source" . }}' ]
# A set of arbitrary key/value pairs that provide further detail.[ details: { STRING: TMPL_STRING, ... } ]
# Comma separated list of team responsible for notifications.[ teams: TMPL_STRING ]
# Comma separated list of tags attached to the notifications.[ tags: TMPL_STRING ]
# Additional alert note.[ note: TMPL_STRING ]
# Priority level of alert, one of P1, P2, P3, P4, and P5.[ priority: TMPL_STRING ]
# Configuration of the HTTP.[ http_config: HTTP_CONFIG | default = global.http_config ]
EXAMPLE 5.14: VICTOROPS_CONFIG
# Whether or not to notify about resolved alerts.[ send_resolved: BOOLEAN | default = true ]
# The API key for talking to the VictorOps API.[ api_key: SECRET | default = global.victorops_api_key ]
# The VictorOps API URL.[ api_url: STRING | default = global.victorops_api_url ]
# A key used to map the alert to a team.routing_key: TMPL_STRING
# Describes the behavior of the alert (one of 'CRITICAL', 'WARNING', 'INFO').[ message_type: TMPL_STRING | default = 'CRITICAL' ]
# Summary of the alerted problem.[ entity_display_name: TMPL_STRING | default = '{{ template "victorops.default.entity_display_name" . }}' ]
60 Configuration File SES 5.5 (SES 5 & SES …
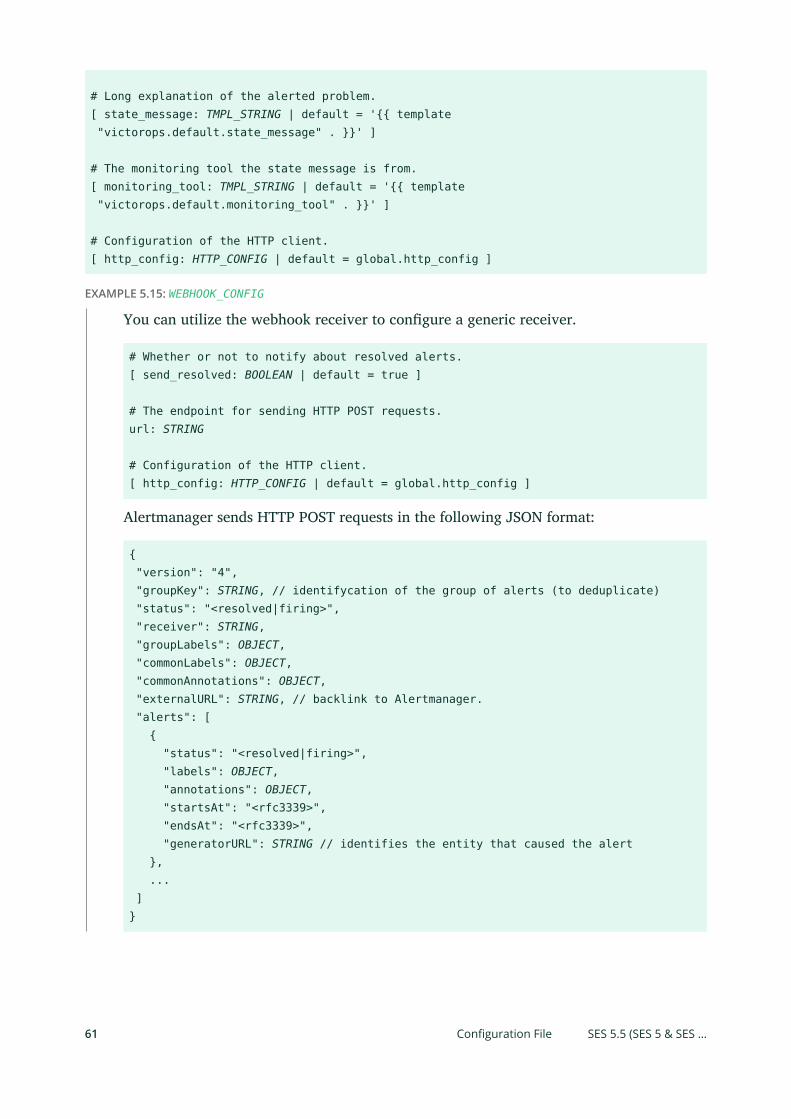
# Long explanation of the alerted problem.[ state_message: TMPL_STRING | default = '{{ template "victorops.default.state_message" . }}' ]
# The monitoring tool the state message is from.[ monitoring_tool: TMPL_STRING | default = '{{ template "victorops.default.monitoring_tool" . }}' ]
# Configuration of the HTTP client.[ http_config: HTTP_CONFIG | default = global.http_config ]
EXAMPLE 5.15: WEBHOOK_CONFIG
You can utilize the webhook receiver to congure a generic receiver.
# Whether or not to notify about resolved alerts.[ send_resolved: BOOLEAN | default = true ]
# The endpoint for sending HTTP POST requests.url: STRING
# Configuration of the HTTP client.[ http_config: HTTP_CONFIG | default = global.http_config ]
Alertmanager sends HTTP POST requests in the following JSON format:
{ "version": "4", "groupKey": STRING, // identifycation of the group of alerts (to deduplicate) "status": "<resolved|firing>", "receiver": STRING, "groupLabels": OBJECT, "commonLabels": OBJECT, "commonAnnotations": OBJECT, "externalURL": STRING, // backlink to Alertmanager. "alerts": [ { "status": "<resolved|firing>", "labels": OBJECT, "annotations": OBJECT, "startsAt": "<rfc3339>", "endsAt": "<rfc3339>", "generatorURL": STRING // identifies the entity that caused the alert }, ... ]}
61 Configuration File SES 5.5 (SES 5 & SES …
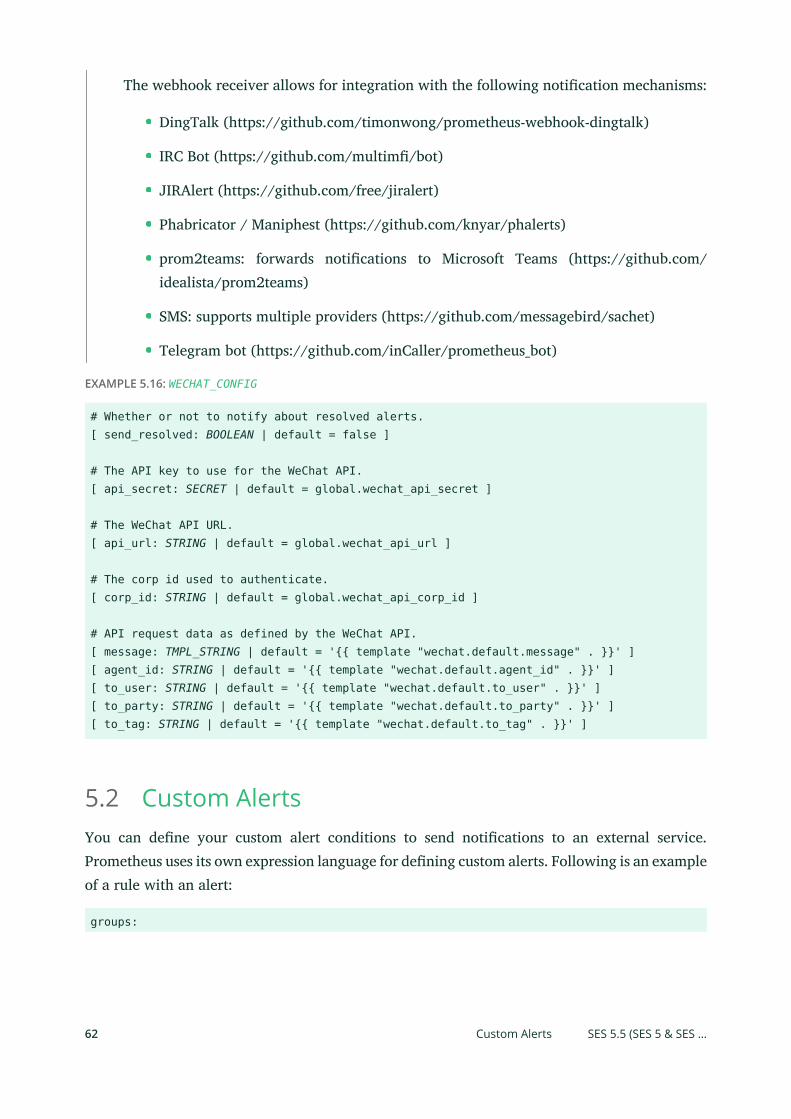
The webhook receiver allows for integration with the following notication mechanisms:
DingTalk (https://github.com/timonwong/prometheus-webhook-dingtalk)
IRC Bot (https://github.com/multim/bot)
JIRAlert (https://github.com/free/jiralert)
Phabricator / Maniphest (https://github.com/knyar/phalerts)
prom2teams: forwards notications to Microsoft Teams (https://github.com/idealista/prom2teams)
SMS: supports multiple providers (https://github.com/messagebird/sachet)
Telegram bot (https://github.com/inCaller/prometheus_bot)
EXAMPLE 5.16: WECHAT_CONFIG
# Whether or not to notify about resolved alerts.[ send_resolved: BOOLEAN | default = false ]
# The API key to use for the WeChat API.[ api_secret: SECRET | default = global.wechat_api_secret ]
# The WeChat API URL.[ api_url: STRING | default = global.wechat_api_url ]
# The corp id used to authenticate.[ corp_id: STRING | default = global.wechat_api_corp_id ]
# API request data as defined by the WeChat API.[ message: TMPL_STRING | default = '{{ template "wechat.default.message" . }}' ][ agent_id: STRING | default = '{{ template "wechat.default.agent_id" . }}' ][ to_user: STRING | default = '{{ template "wechat.default.to_user" . }}' ][ to_party: STRING | default = '{{ template "wechat.default.to_party" . }}' ][ to_tag: STRING | default = '{{ template "wechat.default.to_tag" . }}' ]
5.2 Custom AlertsYou can dene your custom alert conditions to send notications to an external service.Prometheus uses its own expression language for dening custom alerts. Following is an exampleof a rule with an alert:
groups:
62 Custom Alerts SES 5.5 (SES 5 & SES …
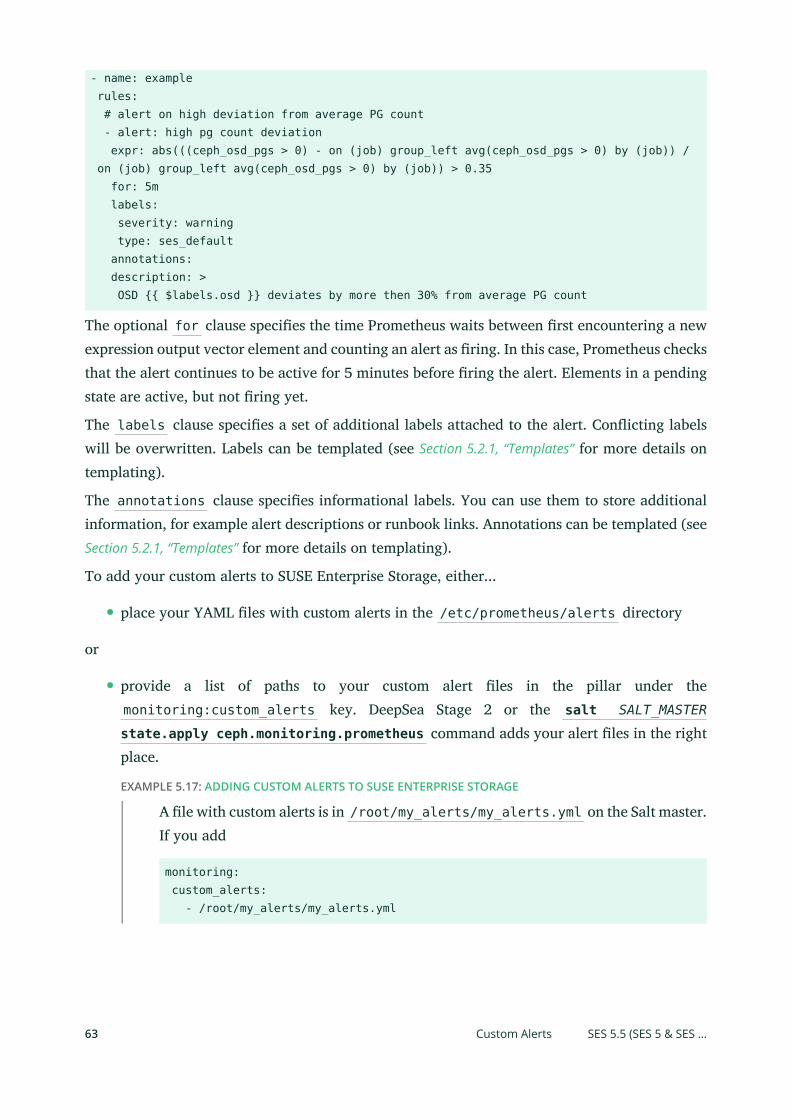
- name: example rules: # alert on high deviation from average PG count - alert: high pg count deviation expr: abs(((ceph_osd_pgs > 0) - on (job) group_left avg(ceph_osd_pgs > 0) by (job)) / on (job) group_left avg(ceph_osd_pgs > 0) by (job)) > 0.35 for: 5m labels: severity: warning type: ses_default annotations: description: > OSD {{ $labels.osd }} deviates by more then 30% from average PG count
The optional for clause species the time Prometheus waits between rst encountering a newexpression output vector element and counting an alert as ring. In this case, Prometheus checksthat the alert continues to be active for 5 minutes before ring the alert. Elements in a pendingstate are active, but not ring yet.
The labels clause species a set of additional labels attached to the alert. Conicting labelswill be overwritten. Labels can be templated (see Section 5.2.1, “Templates” for more details ontemplating).
The annotations clause species informational labels. You can use them to store additionalinformation, for example alert descriptions or runbook links. Annotations can be templated (seeSection 5.2.1, “Templates” for more details on templating).
To add your custom alerts to SUSE Enterprise Storage, either...
place your YAML les with custom alerts in the /etc/prometheus/alerts directory
or
provide a list of paths to your custom alert les in the pillar under themonitoring:custom_alerts key. DeepSea Stage 2 or the salt SALT_MASTER
state.apply ceph.monitoring.prometheus command adds your alert les in the rightplace.
EXAMPLE 5.17: ADDING CUSTOM ALERTS TO SUSE ENTERPRISE STORAGE
A le with custom alerts is in /root/my_alerts/my_alerts.yml on the Salt master.If you add
monitoring: custom_alerts: - /root/my_alerts/my_alerts.yml
63 Custom Alerts SES 5.5 (SES 5 & SES …
to the /srv/pillar/ceph/cluster/YOUR_SALT_MASTER_MINION_ID.sls le,DeepSea creates the /etc/prometheus/alerts/my_alerts.yml le and restartsPrometheus.
5.2.1 Templates
You can use templates for label and annotation values. The $labels variable includes the labelkey and value pairs of an alert instance, while $value holds the evaluated value of an alertinstance.
The following example inserts a ring element label and value:
{{ $labels.LABELNAME }}{{ $value }}
5.2.2 Inspecting Alerts at Runtime
If you need to verify which alerts are active, you have several options:
Navigate to the Alerts tab of Prometheus. It shows you the exact label sets for which denedalerts are active. Prometheus also stores synthetic time series for pending and ring alerts.They have the following form:
ALERTS{alertname="ALERT_NAME", alertstate="pending|firing", ADDITIONAL_ALERT_LABELS}
The sample value is 1 if the alert is active (pending or ring). The series is marked stalewhen the alert is inactive.
In the Prometheus web interface at the URL address http:// PROMETHEUS_HOST_IP :9090/alerts, inspect alerts and their state ( INACTIVE , PENDING or FIRING ).
In the Alertmanager web interface at the URL address http://: PROMETHEUS_HOST_IP 9093/#/alerts, inspect alerts and silence them if desired.
64 Templates SES 5.5 (SES 5 & SES …
6 Authentication with cephx
To identify clients and protect against man-in-the-middle attacks, Ceph provides its cephxauthentication system. Clients in this context are either human users—such as the admin user—or Ceph-related services/daemons, for example OSDs, monitors, or Object Gateways.
NoteThe cephx protocol does not address data encryption in transport, such as TLS/SSL.
6.1 Authentication Architecturecephx uses shared secret keys for authentication, meaning both the client and Ceph Monitorshave a copy of the client’s secret key. The authentication protocol enables both parties to proveto each other that they have a copy of the key without actually revealing it. This provides mutualauthentication, which means the cluster is sure the user possesses the secret key, and the useris sure that the cluster has a copy of the secret key as well.
A key scalability feature of Ceph is to avoid a centralized interface to the Ceph object store.This means that Ceph clients can interact with OSDs directly. To protect data, Ceph provides itscephx authentication system, which authenticates Ceph clients.
Each monitor can authenticate clients and distribute keys, so there is no single point of failureor bottleneck when using cephx . The monitor returns an authentication data structure thatcontains a session key for use in obtaining Ceph services. This session key is itself encryptedwith the client’s permanent secret key, so that only the client can request services from the Cephmonitors. The client then uses the session key to request its desired services from the monitor,and the monitor provides the client with a ticket that will authenticate the client to the OSDsthat actually handle data. Ceph monitors and OSDs share a secret, so the client can use the ticketprovided by the monitor with any OSD or metadata server in the cluster. cephx tickets expire,so an attacker cannot use an expired ticket or session key obtained wrongfully.
To use cephx , an administrator must setup clients/users rst. In the following diagram, theclient.admin user invokes ceph auth get-or-create-key from the command line togenerate a user name and secret key. Ceph’s auth subsystem generates the user name and key,stores a copy with the monitor(s) and transmits the user’s secret back to the client.adminuser. This means that the client and the monitor share a secret key.
65 Authentication Architecture SES 5.5 (SES 5 & SES …
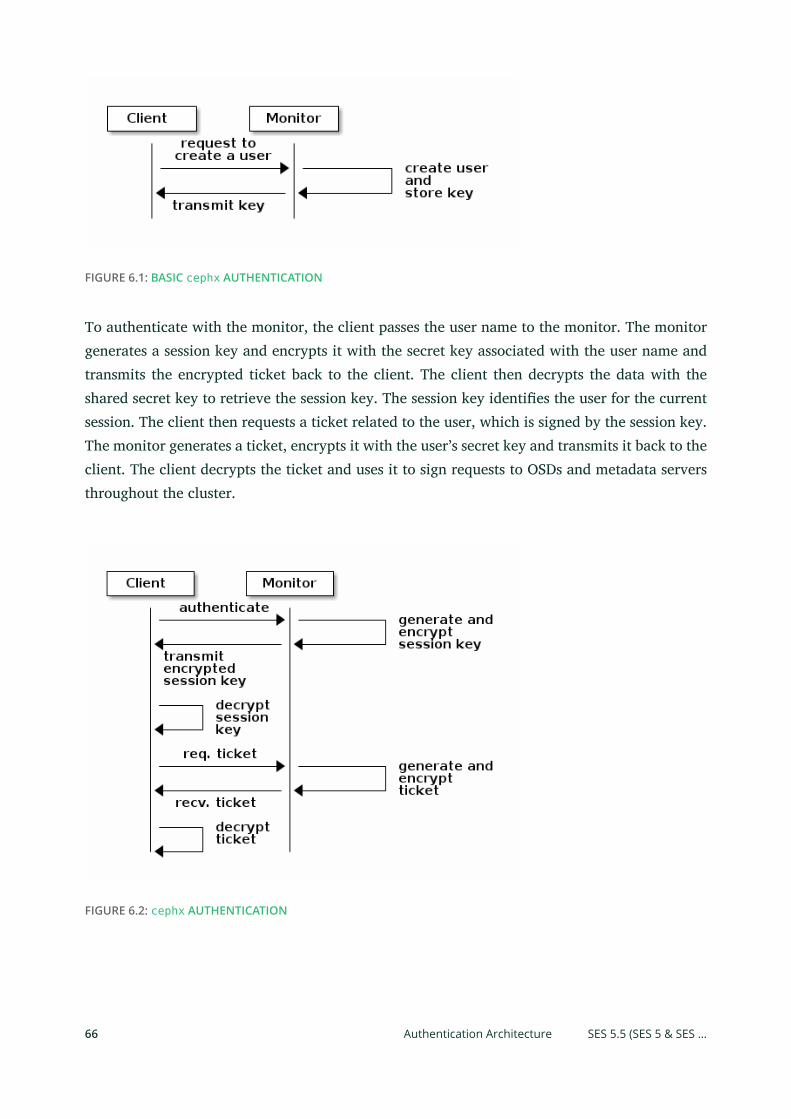
FIGURE 6.1: BASIC cephx AUTHENTICATION
To authenticate with the monitor, the client passes the user name to the monitor. The monitorgenerates a session key and encrypts it with the secret key associated with the user name andtransmits the encrypted ticket back to the client. The client then decrypts the data with theshared secret key to retrieve the session key. The session key identies the user for the currentsession. The client then requests a ticket related to the user, which is signed by the session key.The monitor generates a ticket, encrypts it with the user’s secret key and transmits it back to theclient. The client decrypts the ticket and uses it to sign requests to OSDs and metadata serversthroughout the cluster.
FIGURE 6.2: cephx AUTHENTICATION
66 Authentication Architecture SES 5.5 (SES 5 & SES …
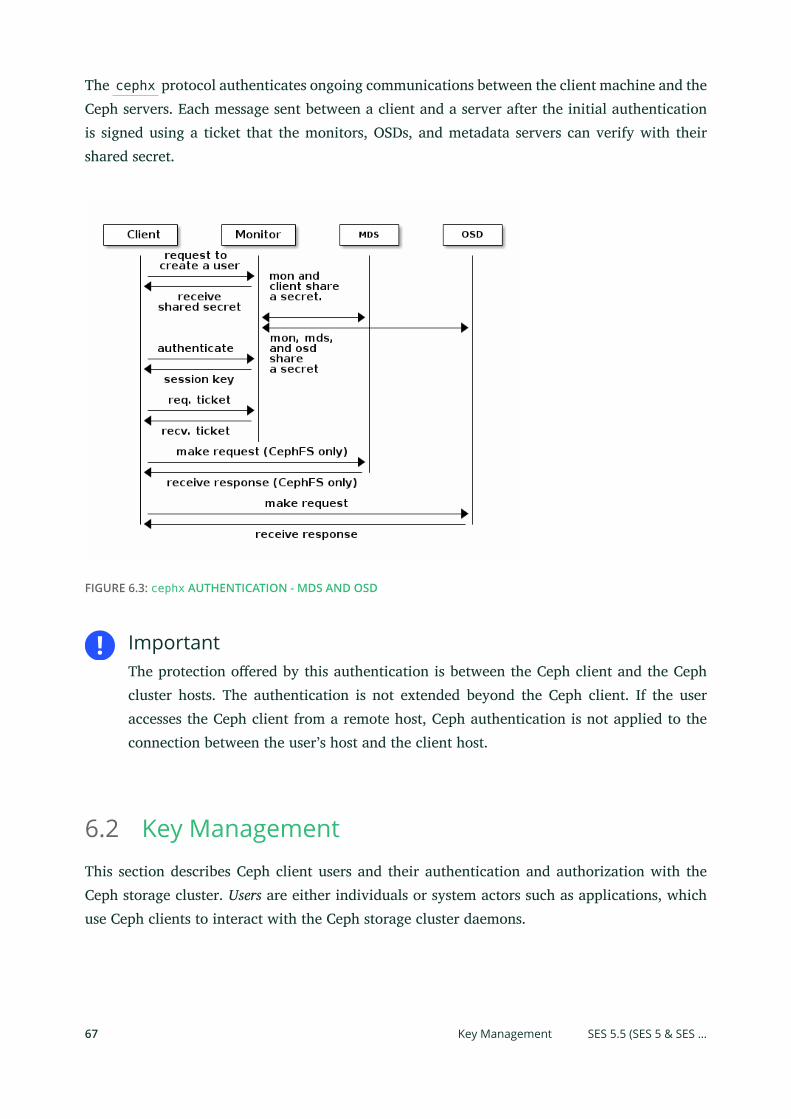
The cephx protocol authenticates ongoing communications between the client machine and theCeph servers. Each message sent between a client and a server after the initial authenticationis signed using a ticket that the monitors, OSDs, and metadata servers can verify with theirshared secret.
FIGURE 6.3: cephx AUTHENTICATION - MDS AND OSD
ImportantThe protection oered by this authentication is between the Ceph client and the Cephcluster hosts. The authentication is not extended beyond the Ceph client. If the useraccesses the Ceph client from a remote host, Ceph authentication is not applied to theconnection between the user’s host and the client host.
6.2 Key ManagementThis section describes Ceph client users and their authentication and authorization with theCeph storage cluster. Users are either individuals or system actors such as applications, whichuse Ceph clients to interact with the Ceph storage cluster daemons.
67 Key Management SES 5.5 (SES 5 & SES …
When Ceph runs with authentication and authorization enabled (enabled by default), you mustspecify a user name and a keyring containing the secret key of the specied user (usually via thecommand line). If you do not specify a user name, Ceph will use client.admin as the defaultuser name. If you do not specify a keyring, Ceph will look for a keyring via the keyring settingin the Ceph conguration le. For example, if you execute the ceph health command withoutspecifying a user name or keyring, Ceph interprets the command like this:
cephadm > ceph -n client.admin --keyring=/etc/ceph/ceph.client.admin.keyring health
Alternatively, you may use the CEPH_ARGS environment variable to avoid re-entering the username and secret.
6.2.1 Background Information
Regardless of the type of Ceph client (for example, block device, object storage, le system,native API), Ceph stores all data as objects within pools. Ceph users need to have access to poolsin order to read and write data. Additionally, Ceph users must have execute permissions to useCeph's administrative commands. The following concepts will help you understand Ceph usermanagement.
6.2.1.1 User
A user is either an individual or a system actor such as an application. Creating users allows youto control who (or what) can access your Ceph storage cluster, its pools, and the data withinpools.
Ceph uses types of users. For the purposes of user management, the type will always be client .Ceph identies users in period (.) delimited form, consisting of the user type and the userID. For example, TYPE.ID , client.admin , or client.user1 . The reason for user typing isthat Ceph monitors, OSDs, and metadata servers also use the cephx protocol, but they are notclients. Distinguishing the user type helps to distinguish between client users and other users,streamlining access control, user monitoring, and traceability.
68 Background Information SES 5.5 (SES 5 & SES …
NoteA Ceph storage cluster user is not the same as a Ceph object storage user or a Ceph lesystem user. The Ceph Object Gateway uses a Ceph storage cluster user to communicatebetween the gateway daemon and the storage cluster, but the gateway has its own usermanagement functionality for end users. The Ceph le system uses POSIX semantics. Theuser space associated with it is not the same as a Ceph storage cluster user.
6.2.1.2 Authorization and Capabilities
Ceph uses the term 'capabilities' (caps) to describe authorizing an authenticated user to exercisethe functionality of the monitors, OSDs, and metadata servers. Capabilities can also restrictaccess to data within a pool or pool namespace. A Ceph administrative user sets a user'scapabilities when creating or updating a user.
Capability syntax follows the form:
daemon-type 'allow capability' [...]
Following is a list of capabilities for each service type:
Monitor capabilities
include r , w , x and allow profile cap .
mon 'allow rwx'mon 'allow profile osd'
OSD capabilities
include r , w , x , class-read , class-write and profile osd . Additionally, OSDcapabilities also allow for pool and namespace settings.
osd 'allow capability' [pool=poolname] [namespace=namespace-name]
MDS capability
simply requires allow , or blank.
mds 'allow'
The following entries describe each capability:
allow
Precedes access settings for a daemon. Implies rw for MDS only.
69 Background Information SES 5.5 (SES 5 & SES …
r
Gives the user read access. Required with monitors to retrieve the CRUSH map.
w
Gives the user write access to objects.
x
Gives the user the capability to call class methods (both read and write) and to conductauth operations on monitors.
class-read
Gives the user the capability to call class read methods. Subset of x .
class-write
Gives the user the capability to call class write methods. Subset of x .
*
Gives the user read, write, and execute permissions for a particular daemon/pool, and theability to execute admin commands.
profile osd
Gives a user permissions to connect as an OSD to other OSDs or monitors. Conferred onOSDs to enable OSDs to handle replication heartbeat trac and status reporting.
profile mds
Gives a user permissions to connect as an MDS to other MDSs or monitors.
profile bootstrap-osd
Gives a user permissions to bootstrap an OSD. Delegated to deployment tools so that theyhave permissions to add keys when bootstrapping an OSD.
profile bootstrap-mds
Gives a user permissions to bootstrap a metadata server. Delegated to deployment tools sothey have permissions to add keys when bootstrapping a metadata server.
6.2.2 Managing Users
User management functionality provides Ceph cluster administrators with the ability to create,update, and delete users directly in the Ceph cluster.
When you create or delete users in the Ceph cluster, you may need to distribute keys to clientsso that they can be added to keyrings. See Section 6.2.3, “Keyring Management” for details.
70 Managing Users SES 5.5 (SES 5 & SES …
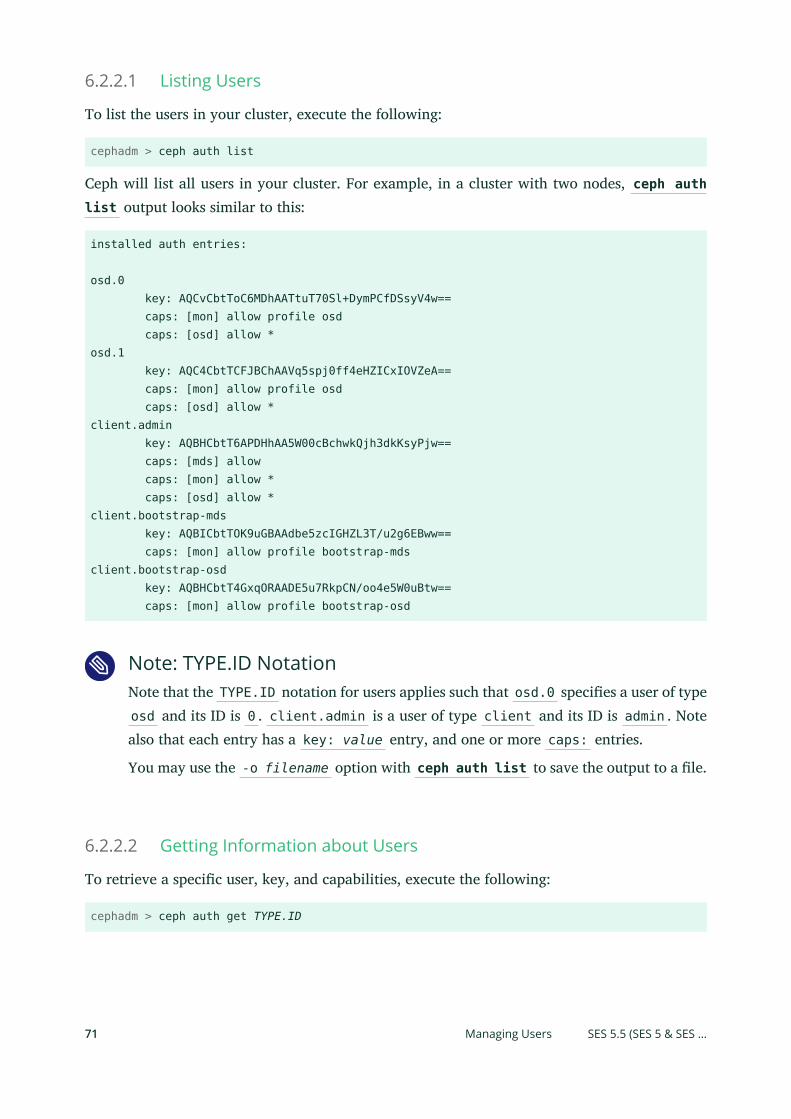
6.2.2.1 Listing Users
To list the users in your cluster, execute the following:
cephadm > ceph auth list
Ceph will list all users in your cluster. For example, in a cluster with two nodes, ceph authlist output looks similar to this:
installed auth entries:
osd.0 key: AQCvCbtToC6MDhAATtuT70Sl+DymPCfDSsyV4w== caps: [mon] allow profile osd caps: [osd] allow *osd.1 key: AQC4CbtTCFJBChAAVq5spj0ff4eHZICxIOVZeA== caps: [mon] allow profile osd caps: [osd] allow *client.admin key: AQBHCbtT6APDHhAA5W00cBchwkQjh3dkKsyPjw== caps: [mds] allow caps: [mon] allow * caps: [osd] allow *client.bootstrap-mds key: AQBICbtTOK9uGBAAdbe5zcIGHZL3T/u2g6EBww== caps: [mon] allow profile bootstrap-mdsclient.bootstrap-osd key: AQBHCbtT4GxqORAADE5u7RkpCN/oo4e5W0uBtw== caps: [mon] allow profile bootstrap-osd
Note: TYPE.ID NotationNote that the TYPE.ID notation for users applies such that osd.0 species a user of typeosd and its ID is 0 . client.admin is a user of type client and its ID is admin . Notealso that each entry has a key: value entry, and one or more caps: entries.
You may use the -o filename option with ceph auth list to save the output to a le.
6.2.2.2 Getting Information about Users
To retrieve a specic user, key, and capabilities, execute the following:
cephadm > ceph auth get TYPE.ID
71 Managing Users SES 5.5 (SES 5 & SES …
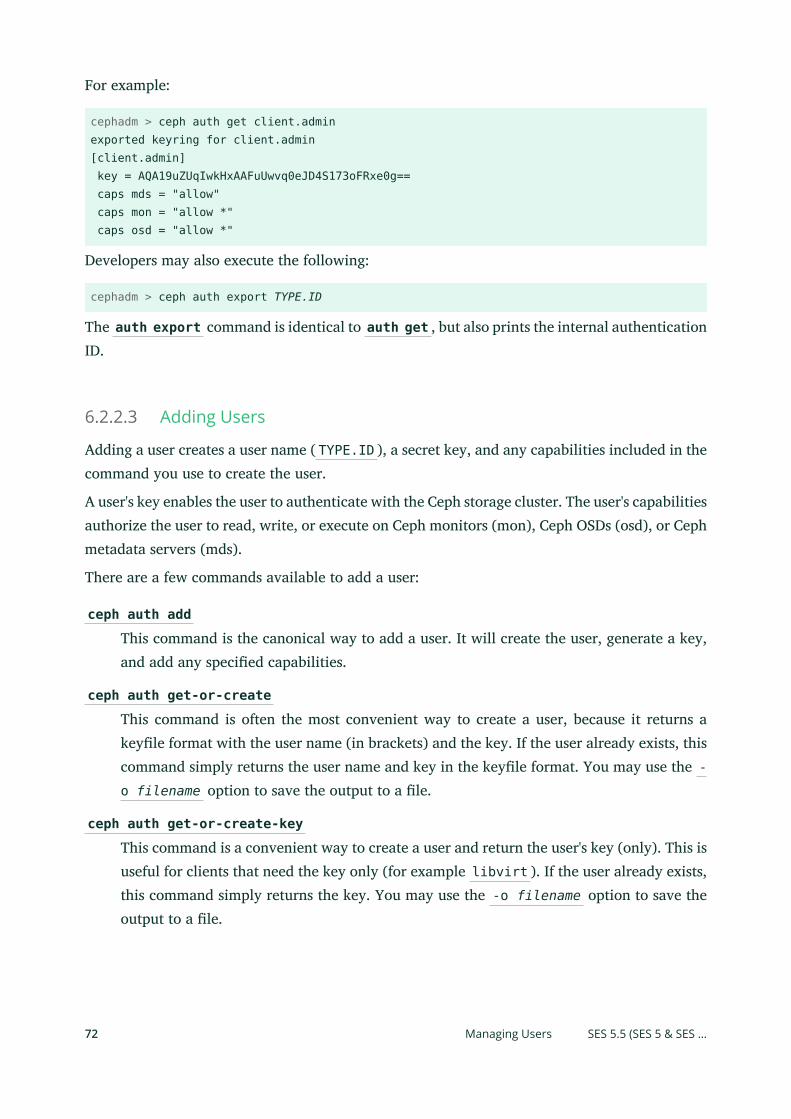
For example:
cephadm > ceph auth get client.adminexported keyring for client.admin[client.admin] key = AQA19uZUqIwkHxAAFuUwvq0eJD4S173oFRxe0g== caps mds = "allow" caps mon = "allow *" caps osd = "allow *"
Developers may also execute the following:
cephadm > ceph auth export TYPE.ID
The auth export command is identical to auth get , but also prints the internal authenticationID.
6.2.2.3 Adding Users
Adding a user creates a user name ( TYPE.ID ), a secret key, and any capabilities included in thecommand you use to create the user.
A user's key enables the user to authenticate with the Ceph storage cluster. The user's capabilitiesauthorize the user to read, write, or execute on Ceph monitors (mon), Ceph OSDs (osd), or Cephmetadata servers (mds).
There are a few commands available to add a user:
ceph auth add
This command is the canonical way to add a user. It will create the user, generate a key,and add any specied capabilities.
ceph auth get-or-create
This command is often the most convenient way to create a user, because it returns akeyle format with the user name (in brackets) and the key. If the user already exists, thiscommand simply returns the user name and key in the keyle format. You may use the -o filename option to save the output to a le.
ceph auth get-or-create-key
This command is a convenient way to create a user and return the user's key (only). This isuseful for clients that need the key only (for example libvirt ). If the user already exists,this command simply returns the key. You may use the -o filename option to save theoutput to a le.
72 Managing Users SES 5.5 (SES 5 & SES …
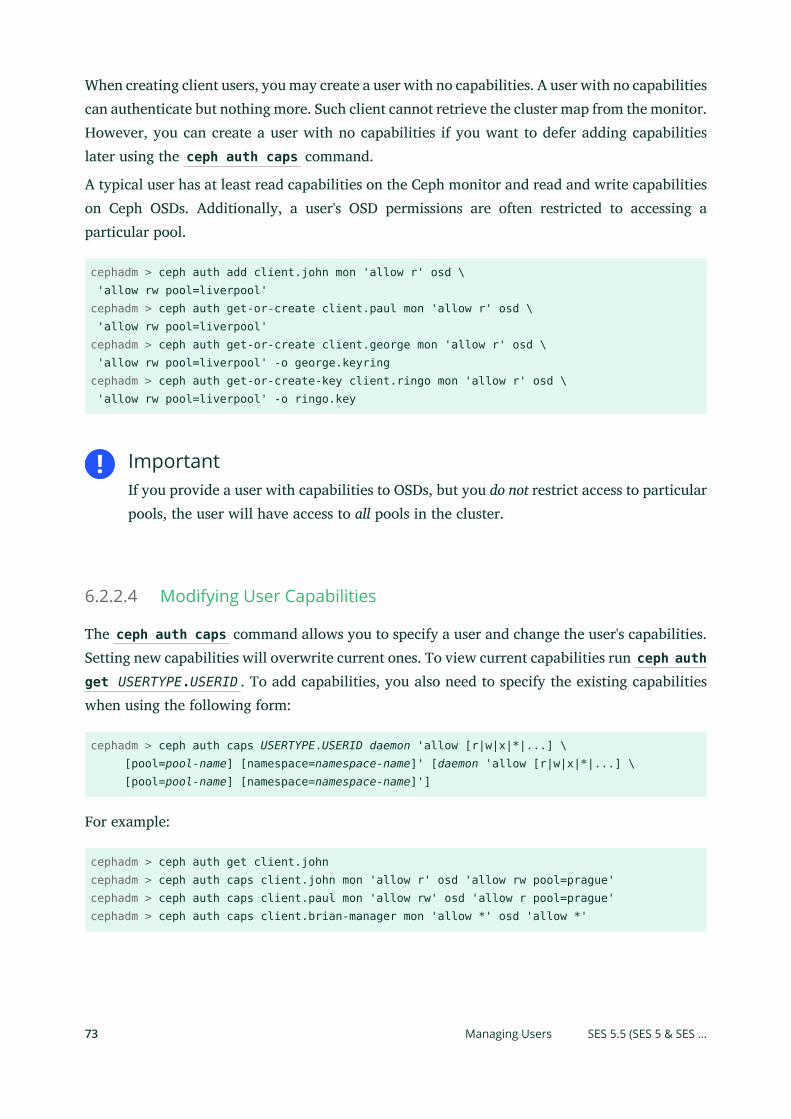
When creating client users, you may create a user with no capabilities. A user with no capabilitiescan authenticate but nothing more. Such client cannot retrieve the cluster map from the monitor.However, you can create a user with no capabilities if you want to defer adding capabilitieslater using the ceph auth caps command.
A typical user has at least read capabilities on the Ceph monitor and read and write capabilitieson Ceph OSDs. Additionally, a user's OSD permissions are often restricted to accessing aparticular pool.
cephadm > ceph auth add client.john mon 'allow r' osd \ 'allow rw pool=liverpool'cephadm > ceph auth get-or-create client.paul mon 'allow r' osd \ 'allow rw pool=liverpool'cephadm > ceph auth get-or-create client.george mon 'allow r' osd \ 'allow rw pool=liverpool' -o george.keyringcephadm > ceph auth get-or-create-key client.ringo mon 'allow r' osd \ 'allow rw pool=liverpool' -o ringo.key
ImportantIf you provide a user with capabilities to OSDs, but you do not restrict access to particularpools, the user will have access to all pools in the cluster.
6.2.2.4 Modifying User Capabilities
The ceph auth caps command allows you to specify a user and change the user's capabilities.Setting new capabilities will overwrite current ones. To view current capabilities run ceph authget USERTYPE.USERID . To add capabilities, you also need to specify the existing capabilitieswhen using the following form:
cephadm > ceph auth caps USERTYPE.USERID daemon 'allow [r|w|x|*|...] \ [pool=pool-name] [namespace=namespace-name]' [daemon 'allow [r|w|x|*|...] \ [pool=pool-name] [namespace=namespace-name]']
For example:
cephadm > ceph auth get client.johncephadm > ceph auth caps client.john mon 'allow r' osd 'allow rw pool=prague'cephadm > ceph auth caps client.paul mon 'allow rw' osd 'allow r pool=prague'cephadm > ceph auth caps client.brian-manager mon 'allow *' osd 'allow *'
73 Managing Users SES 5.5 (SES 5 & SES …
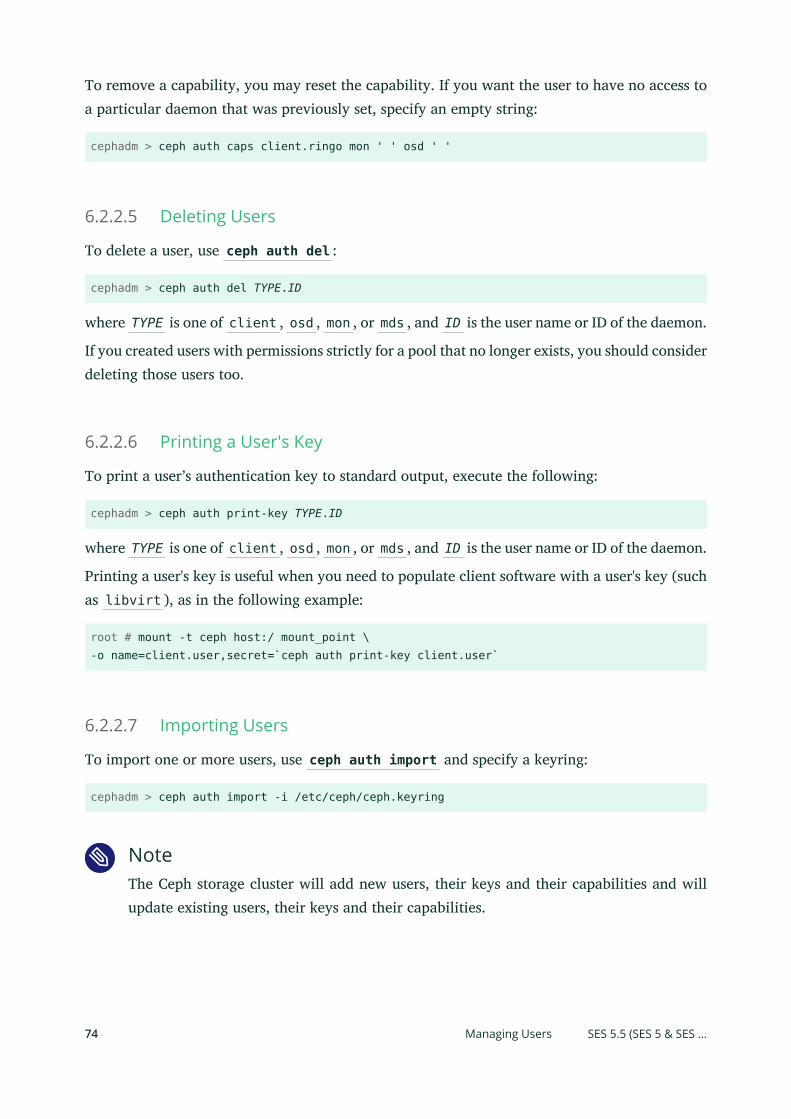
To remove a capability, you may reset the capability. If you want the user to have no access toa particular daemon that was previously set, specify an empty string:
cephadm > ceph auth caps client.ringo mon ' ' osd ' '
6.2.2.5 Deleting Users
To delete a user, use ceph auth del :
cephadm > ceph auth del TYPE.ID
where TYPE is one of client , osd , mon , or mds , and ID is the user name or ID of the daemon.
If you created users with permissions strictly for a pool that no longer exists, you should considerdeleting those users too.
6.2.2.6 Printing a User's Key
To print a user’s authentication key to standard output, execute the following:
cephadm > ceph auth print-key TYPE.ID
where TYPE is one of client , osd , mon , or mds , and ID is the user name or ID of the daemon.
Printing a user's key is useful when you need to populate client software with a user's key (suchas libvirt ), as in the following example:
root # mount -t ceph host:/ mount_point \-o name=client.user,secret=`ceph auth print-key client.user`
6.2.2.7 Importing Users
To import one or more users, use ceph auth import and specify a keyring:
cephadm > ceph auth import -i /etc/ceph/ceph.keyring
NoteThe Ceph storage cluster will add new users, their keys and their capabilities and willupdate existing users, their keys and their capabilities.
74 Managing Users SES 5.5 (SES 5 & SES …
6.2.3 Keyring Management
When you access Ceph via a Ceph client, the client will look for a local keyring. Ceph presetsthe keyring setting with the following four keyring names by default so you do not need to setthem in your Ceph conguration le unless you want to override the defaults:
/etc/ceph/cluster.name.keyring/etc/ceph/cluster.keyring/etc/ceph/keyring/etc/ceph/keyring.bin
The cluster metavariable is your Ceph cluster name as dened by the name of the Cephconguration le. ceph.conf means that the cluster name is ceph , thus ceph.keyring .The name metavariable is the user type and user ID, for example client.admin , thusceph.client.admin.keyring .
After you create a user (for example client.ringo ), you must get the key and add it to akeyring on a Ceph client so that the user can access the Ceph storage cluster.
Section 6.2, “Key Management” details how to list, get, add, modify and delete users directly in theCeph storage cluster. However, Ceph also provides the ceph-authtool utility to allow you tomanage keyrings from a Ceph client.
6.2.3.1 Creating a Keyring
When you use the procedures in Section 6.2, “Key Management” to create users, you need to provideuser keys to the Ceph client(s) so that the client can retrieve the key for the specied user andauthenticate with the Ceph storage cluster. Ceph clients access keyrings to look up a user nameand retrieve the user's key:
cephadm > ceph-authtool --create-keyring /path/to/keyring
When creating a keyring with multiple users, we recommend using the cluster name (for examplecluster .keyring) for the keyring le name and saving it in the /etc/ceph directory so thatthe keyring conguration default setting will pick up the le name without requiring you tospecify it in the local copy of your Ceph conguration le. For example, create ceph.keyringby executing the following:
cephadm > ceph-authtool -C /etc/ceph/ceph.keyring
When creating a keyring with a single user, we recommend using the cluster name, theuser type and the user name and saving it in the /etc/ceph directory. For example,ceph.client.admin.keyring for the client.admin user.
75 Keyring Management SES 5.5 (SES 5 & SES …
6.2.3.2 Adding a User to a Keyring
When you add a user to the Ceph storage cluster (see Section 6.2.2.3, “Adding Users”), you canretrieve the user, key and capabilities, and save the user to a keyring.
If you only want to use one user per keyring, the ceph auth get command with the -ooption will save the output in the keyring le format. For example, to create a keyring for theclient.admin user, execute the following:
cephadm > ceph auth get client.admin -o /etc/ceph/ceph.client.admin.keyring
When you want to import users to a keyring, you can use ceph-authtool to specify thedestination keyring and the source keyring:
cephadm > ceph-authtool /etc/ceph/ceph.keyring \ --import-keyring /etc/ceph/ceph.client.admin.keyring
ImportantIf your keyring is compromised, delete your key from the /etc/ceph directory andrecreate a new key using the same instructions from Section 6.2.3.1, “Creating a Keyring”.
6.2.3.3 Creating a User
Ceph provides the ceph auth add command to create a user directly in the Ceph storagecluster. However, you can also create a user, keys and capabilities directly on a Ceph clientkeyring. Then, you can import the user to the Ceph storage cluster:
cephadm > ceph-authtool -n client.ringo --cap osd 'allow rwx' \ --cap mon 'allow rwx' /etc/ceph/ceph.keyring
You can also create a keyring and add a new user to the keyring simultaneously:
cephadm > ceph-authtool -C /etc/ceph/ceph.keyring -n client.ringo \ --cap osd 'allow rwx' --cap mon 'allow rwx' --gen-key
In the previous scenarios, the new user client.ringo is only in the keyring. To add the newuser to the Ceph storage cluster, you must still add the new user to the cluster:
cephadm > ceph auth add client.ringo -i /etc/ceph/ceph.keyring
76 Keyring Management SES 5.5 (SES 5 & SES …
6.2.3.4 Modifying Users
To modify the capabilities of a user record in a keyring, specify the keyring and the user followedby the capabilities:
cephadm > ceph-authtool /etc/ceph/ceph.keyring -n client.ringo \ --cap osd 'allow rwx' --cap mon 'allow rwx'
To update the modied user within the Ceph cluster environment, you must import the changesfrom the keyring to the user entry in the Ceph cluster:
cephadm > ceph auth import -i /etc/ceph/ceph.keyring
See Section 6.2.2.7, “Importing Users” for details on updating a Ceph storage cluster user from akeyring.
6.2.4 Command Line Usage
The ceph command supports the following options related to the user name and secretmanipulation:
--id or --user
Ceph identies users with a type and an ID ( TYPE . ID , such as client.admin orclient.user1 ). The id , name and -n options enable you to specify the ID portion ofthe user name (for example admin or user1 ). You can specify the user with the --id andomit the type. For example, to specify user client.foo enter the following:
cephadm > ceph --id foo --keyring /path/to/keyring healthcephadm > ceph --user foo --keyring /path/to/keyring health
--name or -n
Ceph identies users with a type and an ID ( TYPE . ID , such as client.admin orclient.user1 ). The --name and -n options enable you to specify the fully qualieduser name. You must specify the user type (typically client ) with the user ID:
cephadm > ceph --name client.foo --keyring /path/to/keyring healthcephadm > ceph -n client.foo --keyring /path/to/keyring health
--keyring
77 Command Line Usage SES 5.5 (SES 5 & SES …

The path to the keyring containing one or more user name and secret. The --secretoption provides the same functionality, but it does not work with Object Gateway, whichuses --secret for another purpose. You may retrieve a keyring with ceph auth get-or-create and store it locally. This is a preferred approach, because you can switch usernames without switching the keyring path:
cephadm > rbd map --id foo --keyring /path/to/keyring mypool/myimage
78 Command Line Usage SES 5.5 (SES 5 & SES …
7 Stored Data Management
The CRUSH algorithm determines how to store and retrieve data by computing data storagelocations. CRUSH empowers Ceph clients to communicate with OSDs directly rather thanthrough a centralized server or broker. With an algorithmically determined method of storingand retrieving data, Ceph avoids a single point of failure, a performance bottleneck, and aphysical limit to its scalability.
CRUSH requires a map of your cluster, and uses the CRUSH Map to pseudo-randomly store andretrieve data in OSDs with a uniform distribution of data across the cluster.
CRUSH maps contain a list of OSDs, a list of 'buckets' for aggregating the devices into physicallocations, and a list of rules that tell CRUSH how it should replicate data in a Ceph cluster’spools. By reecting the underlying physical organization of the installation, CRUSH can model—and thereby address—potential sources of correlated device failures. Typical sources includephysical proximity, a shared power source, and a shared network. By encoding this informationinto the cluster map, CRUSH placement policies can separate object replicas across dierentfailure domains while still maintaining the desired distribution. For example, to address thepossibility of concurrent failures, it may be desirable to ensure that data replicas are on devicesusing dierent shelves, racks, power supplies, controllers, and/or physical locations.
After you deploy a Ceph cluster, a default CRUSH Map is generated. It is ne for your Cephsandbox environment. However, when you deploy a large-scale data cluster, you should givesignicant consideration to developing a custom CRUSH Map, because it will help you manageyour Ceph cluster, improve performance and ensure data safety.
For example, if an OSD goes down, a CRUSH Map can help you locate the physical data center,room, row and rack of the host with the failed OSD in the event you need to use on-site supportor replace hardware.
Similarly, CRUSH may help you identify faults more quickly. For example, if all OSDs in aparticular rack go down simultaneously, the fault may lie with a network switch or power tothe rack or the network switch rather than the OSDs themselves.
A custom CRUSH Map can also help you identify the physical locations where Ceph storesredundant copies of data when the placement group(s) associated with a failed host are in adegraded state.
There are three main sections to a CRUSH Map.
79 SES 5.5 (SES 5 & SES …
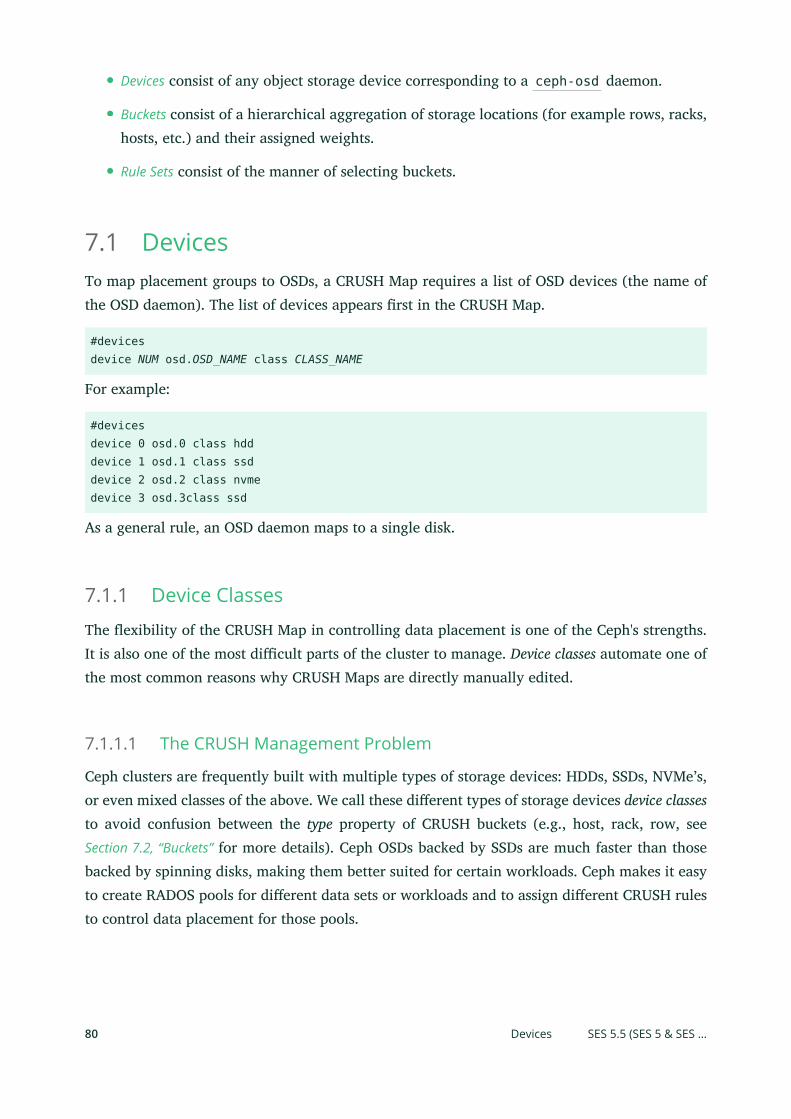
Devices consist of any object storage device corresponding to a ceph-osd daemon.
Buckets consist of a hierarchical aggregation of storage locations (for example rows, racks,hosts, etc.) and their assigned weights.
Rule Sets consist of the manner of selecting buckets.
7.1 DevicesTo map placement groups to OSDs, a CRUSH Map requires a list of OSD devices (the name ofthe OSD daemon). The list of devices appears rst in the CRUSH Map.
#devicesdevice NUM osd.OSD_NAME class CLASS_NAME
For example:
#devicesdevice 0 osd.0 class hdddevice 1 osd.1 class ssddevice 2 osd.2 class nvmedevice 3 osd.3class ssd
As a general rule, an OSD daemon maps to a single disk.
7.1.1 Device Classes
The exibility of the CRUSH Map in controlling data placement is one of the Ceph's strengths.It is also one of the most dicult parts of the cluster to manage. Device classes automate one ofthe most common reasons why CRUSH Maps are directly manually edited.
7.1.1.1 The CRUSH Management Problem
Ceph clusters are frequently built with multiple types of storage devices: HDDs, SSDs, NVMe’s,or even mixed classes of the above. We call these dierent types of storage devices device classesto avoid confusion between the type property of CRUSH buckets (e.g., host, rack, row, seeSection 7.2, “Buckets” for more details). Ceph OSDs backed by SSDs are much faster than thosebacked by spinning disks, making them better suited for certain workloads. Ceph makes it easyto create RADOS pools for dierent data sets or workloads and to assign dierent CRUSH rulesto control data placement for those pools.
80 Devices SES 5.5 (SES 5 & SES …
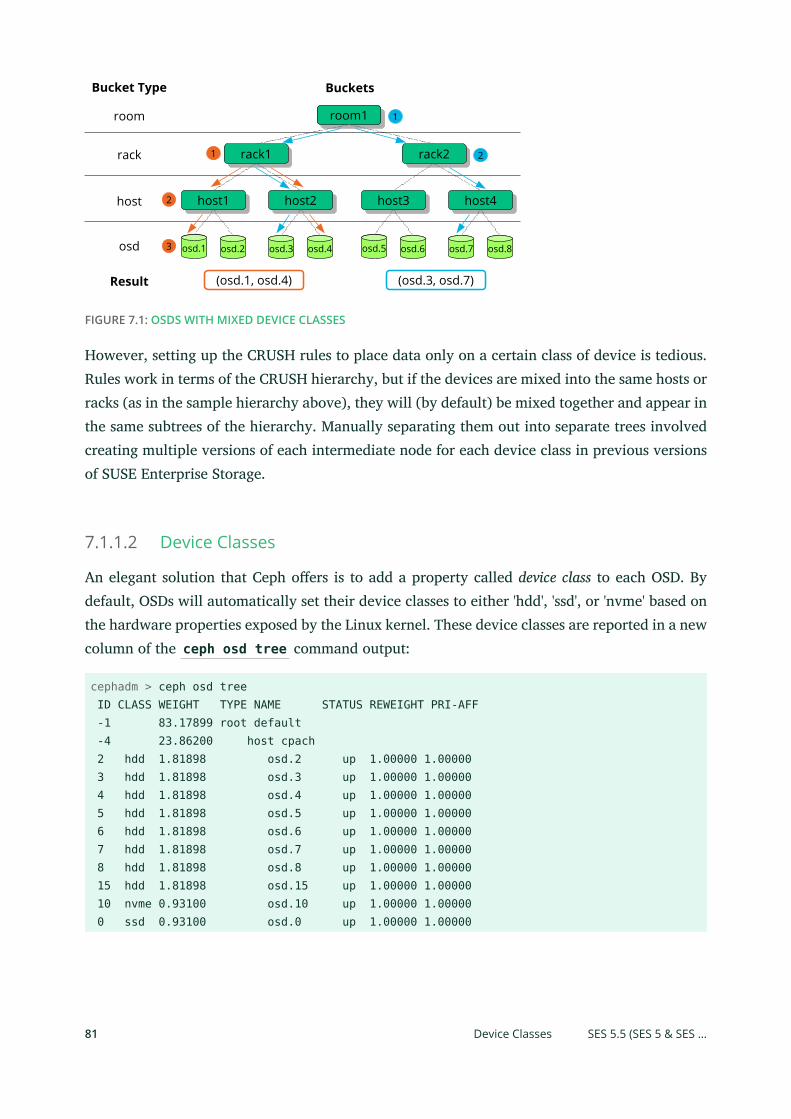
room1room1
rack1rack1 rack2rack2
host1host1 host2host2 host3host3 host4host4
osd.1 osd.2 osd.3 osd.4 osd.5 osd.6 osd.7 osd.8
1
2
Bucket Type
room
rack
host
osd 3
2
1
Buckets
(osd.1, osd.4) (osd.3, osd.7)Result
FIGURE 7.1: OSDS WITH MIXED DEVICE CLASSES
However, setting up the CRUSH rules to place data only on a certain class of device is tedious.Rules work in terms of the CRUSH hierarchy, but if the devices are mixed into the same hosts orracks (as in the sample hierarchy above), they will (by default) be mixed together and appear inthe same subtrees of the hierarchy. Manually separating them out into separate trees involvedcreating multiple versions of each intermediate node for each device class in previous versionsof SUSE Enterprise Storage.
7.1.1.2 Device Classes
An elegant solution that Ceph oers is to add a property called device class to each OSD. Bydefault, OSDs will automatically set their device classes to either 'hdd', 'ssd', or 'nvme' based onthe hardware properties exposed by the Linux kernel. These device classes are reported in a newcolumn of the ceph osd tree command output:
cephadm > ceph osd tree ID CLASS WEIGHT TYPE NAME STATUS REWEIGHT PRI-AFF -1 83.17899 root default -4 23.86200 host cpach 2 hdd 1.81898 osd.2 up 1.00000 1.00000 3 hdd 1.81898 osd.3 up 1.00000 1.00000 4 hdd 1.81898 osd.4 up 1.00000 1.00000 5 hdd 1.81898 osd.5 up 1.00000 1.00000 6 hdd 1.81898 osd.6 up 1.00000 1.00000 7 hdd 1.81898 osd.7 up 1.00000 1.00000 8 hdd 1.81898 osd.8 up 1.00000 1.00000 15 hdd 1.81898 osd.15 up 1.00000 1.00000 10 nvme 0.93100 osd.10 up 1.00000 1.00000 0 ssd 0.93100 osd.0 up 1.00000 1.00000
81 Device Classes SES 5.5 (SES 5 & SES …
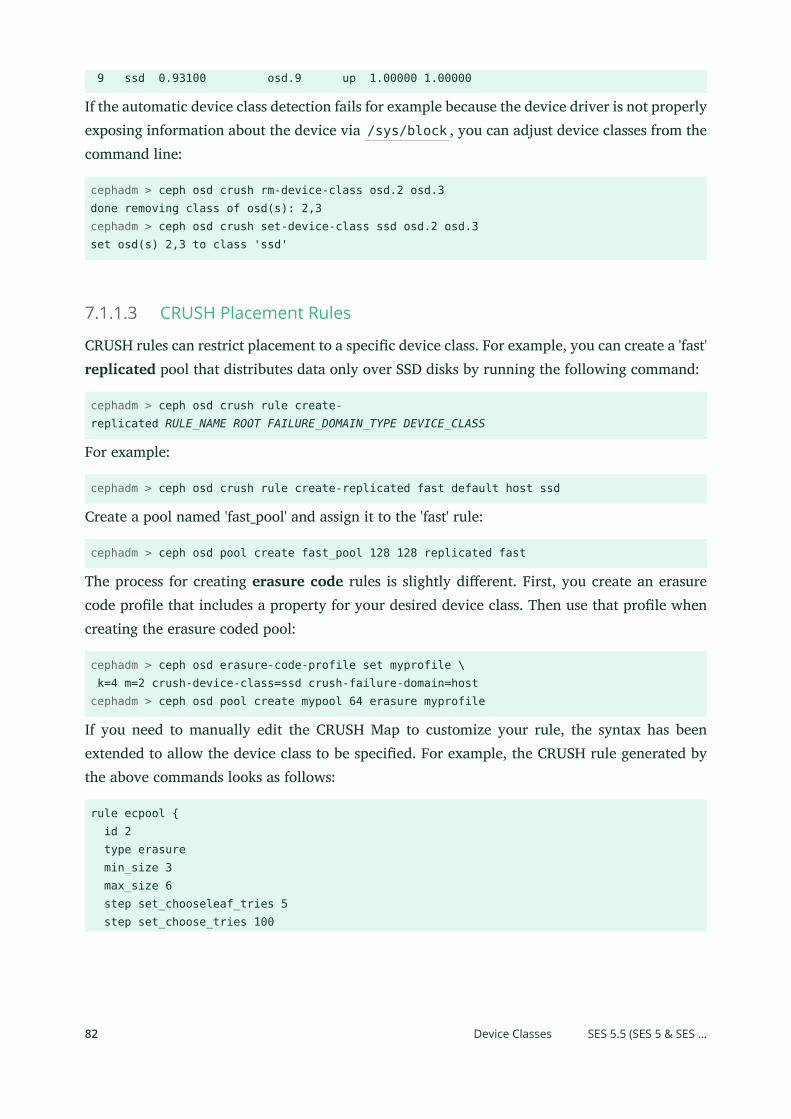
9 ssd 0.93100 osd.9 up 1.00000 1.00000
If the automatic device class detection fails for example because the device driver is not properlyexposing information about the device via /sys/block , you can adjust device classes from thecommand line:
cephadm > ceph osd crush rm-device-class osd.2 osd.3done removing class of osd(s): 2,3cephadm > ceph osd crush set-device-class ssd osd.2 osd.3set osd(s) 2,3 to class 'ssd'
7.1.1.3 CRUSH Placement Rules
CRUSH rules can restrict placement to a specic device class. For example, you can create a 'fast'replicated pool that distributes data only over SSD disks by running the following command:
cephadm > ceph osd crush rule create-replicated RULE_NAME ROOT FAILURE_DOMAIN_TYPE DEVICE_CLASS
For example:
cephadm > ceph osd crush rule create-replicated fast default host ssd
Create a pool named 'fast_pool' and assign it to the 'fast' rule:
cephadm > ceph osd pool create fast_pool 128 128 replicated fast
The process for creating erasure code rules is slightly dierent. First, you create an erasurecode prole that includes a property for your desired device class. Then use that prole whencreating the erasure coded pool:
cephadm > ceph osd erasure-code-profile set myprofile \ k=4 m=2 crush-device-class=ssd crush-failure-domain=hostcephadm > ceph osd pool create mypool 64 erasure myprofile
If you need to manually edit the CRUSH Map to customize your rule, the syntax has beenextended to allow the device class to be specied. For example, the CRUSH rule generated bythe above commands looks as follows:
rule ecpool { id 2 type erasure min_size 3 max_size 6 step set_chooseleaf_tries 5 step set_choose_tries 100
82 Device Classes SES 5.5 (SES 5 & SES …
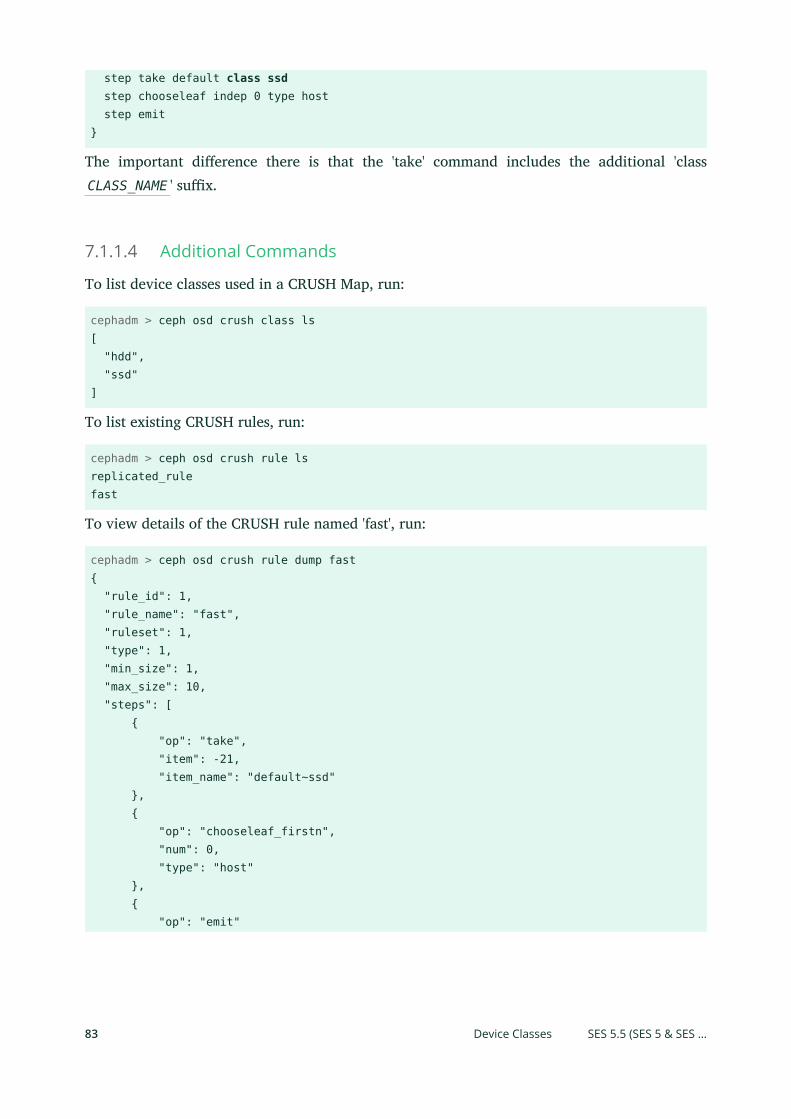
step take default class ssd step chooseleaf indep 0 type host step emit}
The important dierence there is that the 'take' command includes the additional 'classCLASS_NAME ' sux.
7.1.1.4 Additional Commands
To list device classes used in a CRUSH Map, run:
cephadm > ceph osd crush class ls[ "hdd", "ssd"]
To list existing CRUSH rules, run:
cephadm > ceph osd crush rule lsreplicated_rulefast
To view details of the CRUSH rule named 'fast', run:
cephadm > ceph osd crush rule dump fast{ "rule_id": 1, "rule_name": "fast", "ruleset": 1, "type": 1, "min_size": 1, "max_size": 10, "steps": [ { "op": "take", "item": -21, "item_name": "default~ssd" }, { "op": "chooseleaf_firstn", "num": 0, "type": "host" }, { "op": "emit"
83 Device Classes SES 5.5 (SES 5 & SES …
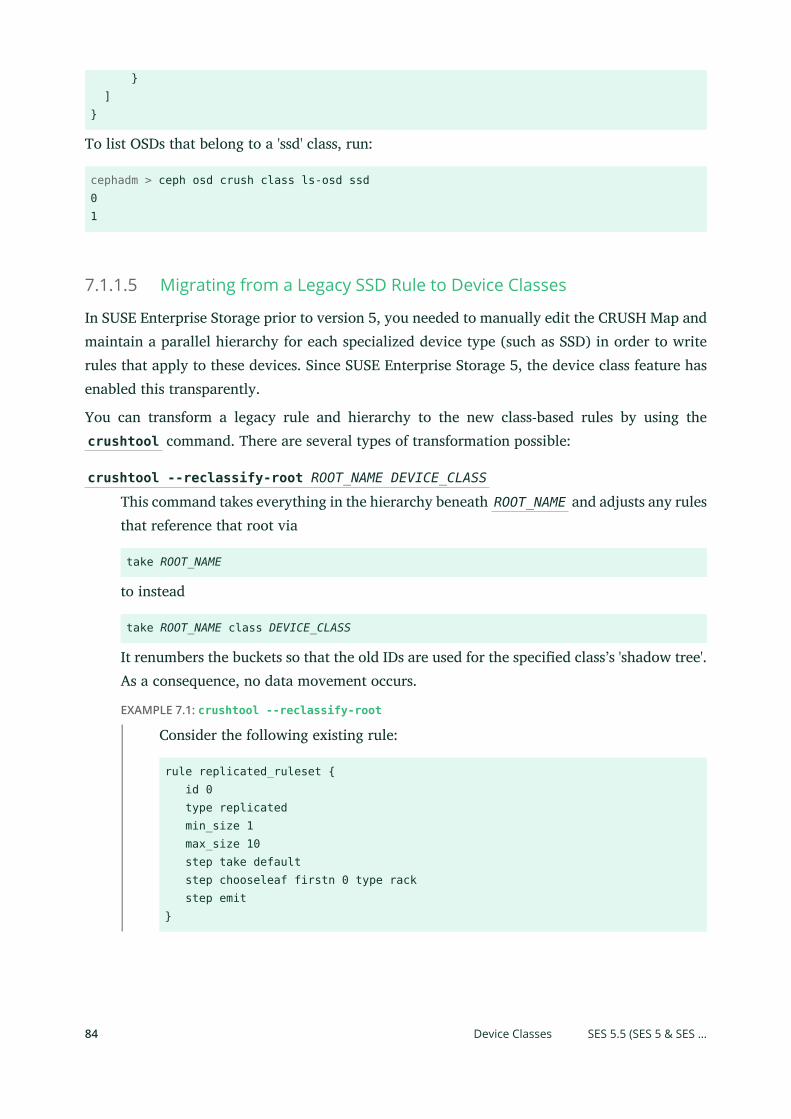
} ]}
To list OSDs that belong to a 'ssd' class, run:
cephadm > ceph osd crush class ls-osd ssd01
7.1.1.5 Migrating from a Legacy SSD Rule to Device Classes
In SUSE Enterprise Storage prior to version 5, you needed to manually edit the CRUSH Map andmaintain a parallel hierarchy for each specialized device type (such as SSD) in order to writerules that apply to these devices. Since SUSE Enterprise Storage 5, the device class feature hasenabled this transparently.
You can transform a legacy rule and hierarchy to the new class-based rules by using thecrushtool command. There are several types of transformation possible:
crushtool --reclassify-root ROOT_NAME DEVICE_CLASS
This command takes everything in the hierarchy beneath ROOT_NAME and adjusts any rulesthat reference that root via
take ROOT_NAME
to instead
take ROOT_NAME class DEVICE_CLASS
It renumbers the buckets so that the old IDs are used for the specied class’s 'shadow tree'.As a consequence, no data movement occurs.
EXAMPLE 7.1: crushtool --reclassify-root
Consider the following existing rule:
rule replicated_ruleset { id 0 type replicated min_size 1 max_size 10 step take default step chooseleaf firstn 0 type rack step emit}
84 Device Classes SES 5.5 (SES 5 & SES …
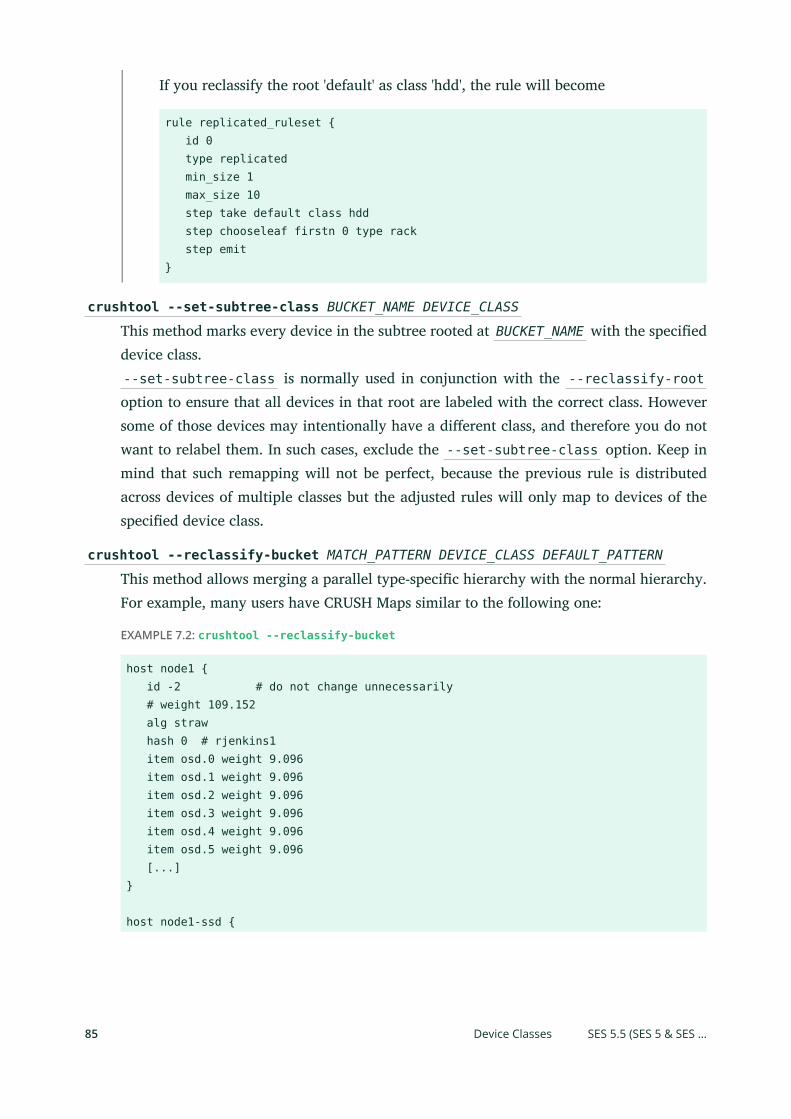
If you reclassify the root 'default' as class 'hdd', the rule will become
rule replicated_ruleset { id 0 type replicated min_size 1 max_size 10 step take default class hdd step chooseleaf firstn 0 type rack step emit}
crushtool --set-subtree-class BUCKET_NAME DEVICE_CLASS
This method marks every device in the subtree rooted at BUCKET_NAME with the specieddevice class.--set-subtree-class is normally used in conjunction with the --reclassify-rootoption to ensure that all devices in that root are labeled with the correct class. Howeversome of those devices may intentionally have a dierent class, and therefore you do notwant to relabel them. In such cases, exclude the --set-subtree-class option. Keep inmind that such remapping will not be perfect, because the previous rule is distributedacross devices of multiple classes but the adjusted rules will only map to devices of thespecied device class.
crushtool --reclassify-bucket MATCH_PATTERN DEVICE_CLASS DEFAULT_PATTERN
This method allows merging a parallel type-specic hierarchy with the normal hierarchy.For example, many users have CRUSH Maps similar to the following one:
EXAMPLE 7.2: crushtool --reclassify-bucket
host node1 { id -2 # do not change unnecessarily # weight 109.152 alg straw hash 0 # rjenkins1 item osd.0 weight 9.096 item osd.1 weight 9.096 item osd.2 weight 9.096 item osd.3 weight 9.096 item osd.4 weight 9.096 item osd.5 weight 9.096 [...]}
host node1-ssd {
85 Device Classes SES 5.5 (SES 5 & SES …

id -10 # do not change unnecessarily # weight 2.000 alg straw hash 0 # rjenkins1 item osd.80 weight 2.000 [...]}
root default { id -1 # do not change unnecessarily alg straw hash 0 # rjenkins1 item node1 weight 110.967 [...]}
root ssd { id -18 # do not change unnecessarily # weight 16.000 alg straw hash 0 # rjenkins1 item node1-ssd weight 2.000 [...]}
This function reclassies each bucket that matches a given pattern. The pattern can looklike %suffix or prefix% . In the above example, you would use the pattern %-ssd .For each matched bucket, the remaining portion of the name that matches the '%' wildcard species the base bucket. All devices in the matched bucket are labeled with thespecied device class and then moved to the base bucket. If the base bucket does not exist(for example if 'node12-ssd' exists but 'node12' does not), then it is created and linkedunderneath the specied default parent bucket. The old bucket IDs are preserved for thenew shadow buckets to prevent data movement. Rules with the take steps that referencethe old buckets are adjusted.
crushtool --reclassify-bucket BUCKET_NAME DEVICE_CLASS BASE_BUCKET
You can use the --reclassify-bucket option without a wild card to map a single bucket.For example, in the previous example, we want the 'ssd' bucket to be mapped to the defaultbucket.The nal command to convert the map comprised of the above fragments would be asfollows:
cephadm > ceph osd getcrushmap -o original
86 Device Classes SES 5.5 (SES 5 & SES …
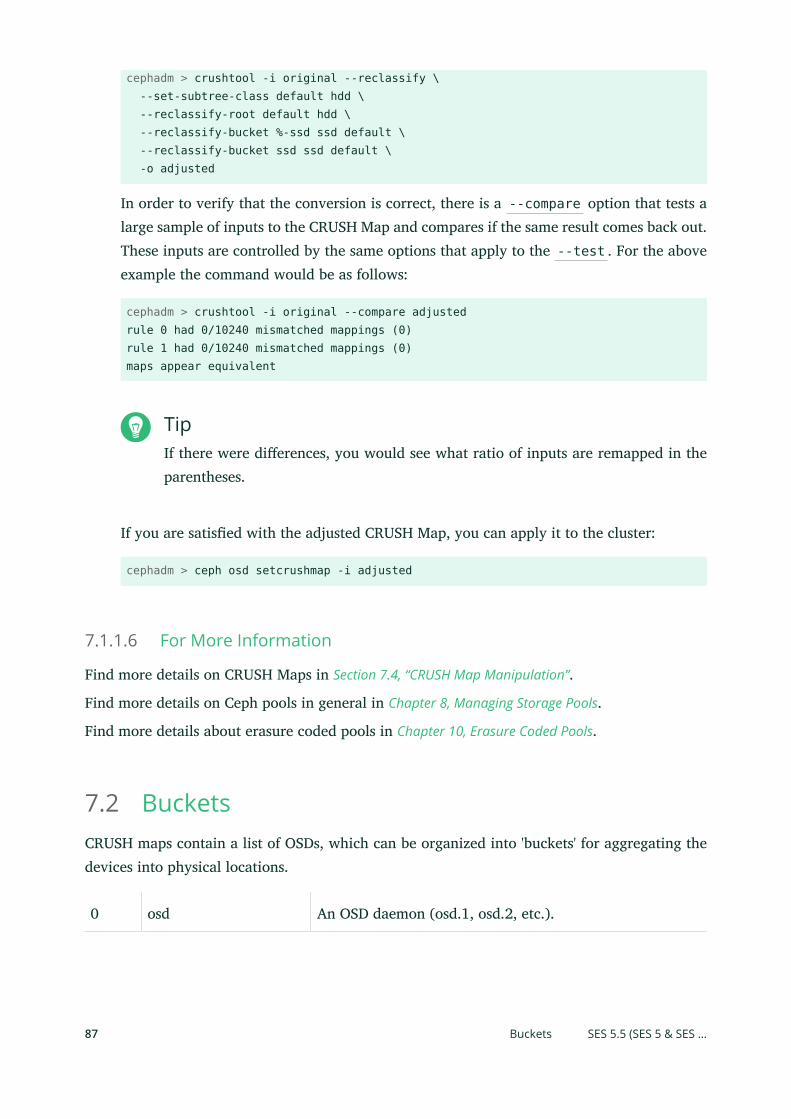
cephadm > crushtool -i original --reclassify \ --set-subtree-class default hdd \ --reclassify-root default hdd \ --reclassify-bucket %-ssd ssd default \ --reclassify-bucket ssd ssd default \ -o adjusted
In order to verify that the conversion is correct, there is a --compare option that tests alarge sample of inputs to the CRUSH Map and compares if the same result comes back out.These inputs are controlled by the same options that apply to the --test . For the aboveexample the command would be as follows:
cephadm > crushtool -i original --compare adjustedrule 0 had 0/10240 mismatched mappings (0)rule 1 had 0/10240 mismatched mappings (0)maps appear equivalent
TipIf there were dierences, you would see what ratio of inputs are remapped in theparentheses.
If you are satised with the adjusted CRUSH Map, you can apply it to the cluster:
cephadm > ceph osd setcrushmap -i adjusted
7.1.1.6 For More Information
Find more details on CRUSH Maps in Section 7.4, “CRUSH Map Manipulation”.
Find more details on Ceph pools in general in Chapter 8, Managing Storage Pools.
Find more details about erasure coded pools in Chapter 10, Erasure Coded Pools.
7.2 BucketsCRUSH maps contain a list of OSDs, which can be organized into 'buckets' for aggregating thedevices into physical locations.
0 osd An OSD daemon (osd.1, osd.2, etc.).
87 Buckets SES 5.5 (SES 5 & SES …
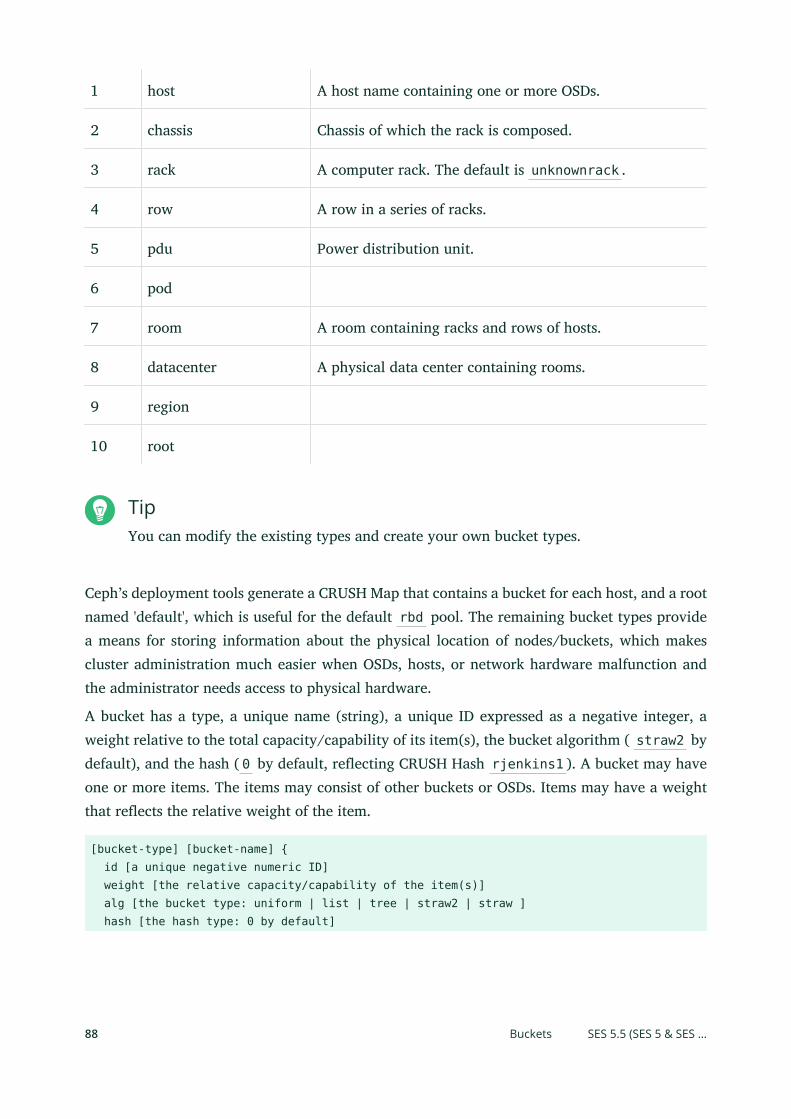
1 host A host name containing one or more OSDs.
2 chassis Chassis of which the rack is composed.
3 rack A computer rack. The default is unknownrack .
4 row A row in a series of racks.
5 pdu Power distribution unit.
6 pod
7 room A room containing racks and rows of hosts.
8 datacenter A physical data center containing rooms.
9 region
10 root
TipYou can modify the existing types and create your own bucket types.
Ceph’s deployment tools generate a CRUSH Map that contains a bucket for each host, and a rootnamed 'default', which is useful for the default rbd pool. The remaining bucket types providea means for storing information about the physical location of nodes/buckets, which makescluster administration much easier when OSDs, hosts, or network hardware malfunction andthe administrator needs access to physical hardware.
A bucket has a type, a unique name (string), a unique ID expressed as a negative integer, aweight relative to the total capacity/capability of its item(s), the bucket algorithm ( straw2 bydefault), and the hash ( 0 by default, reecting CRUSH Hash rjenkins1 ). A bucket may haveone or more items. The items may consist of other buckets or OSDs. Items may have a weightthat reects the relative weight of the item.
[bucket-type] [bucket-name] { id [a unique negative numeric ID] weight [the relative capacity/capability of the item(s)] alg [the bucket type: uniform | list | tree | straw2 | straw ] hash [the hash type: 0 by default]
88 Buckets SES 5.5 (SES 5 & SES …
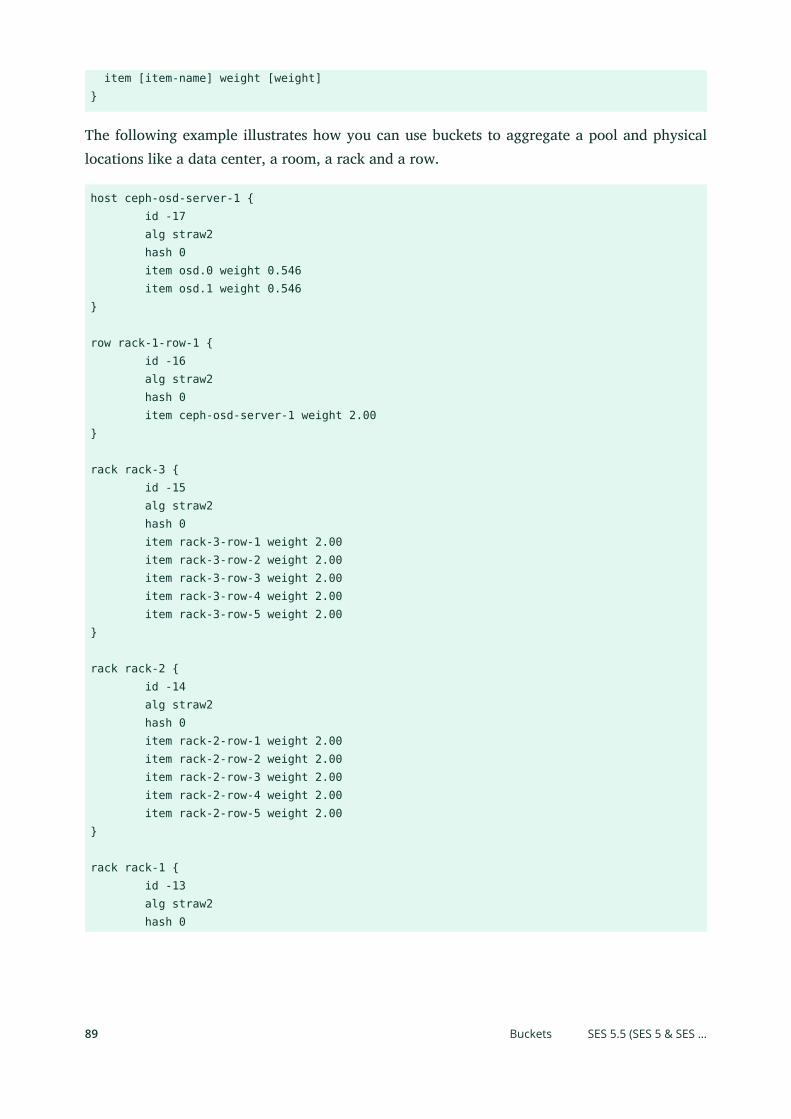
item [item-name] weight [weight]}
The following example illustrates how you can use buckets to aggregate a pool and physicallocations like a data center, a room, a rack and a row.
host ceph-osd-server-1 { id -17 alg straw2 hash 0 item osd.0 weight 0.546 item osd.1 weight 0.546}
row rack-1-row-1 { id -16 alg straw2 hash 0 item ceph-osd-server-1 weight 2.00}
rack rack-3 { id -15 alg straw2 hash 0 item rack-3-row-1 weight 2.00 item rack-3-row-2 weight 2.00 item rack-3-row-3 weight 2.00 item rack-3-row-4 weight 2.00 item rack-3-row-5 weight 2.00}
rack rack-2 { id -14 alg straw2 hash 0 item rack-2-row-1 weight 2.00 item rack-2-row-2 weight 2.00 item rack-2-row-3 weight 2.00 item rack-2-row-4 weight 2.00 item rack-2-row-5 weight 2.00}
rack rack-1 { id -13 alg straw2 hash 0
89 Buckets SES 5.5 (SES 5 & SES …
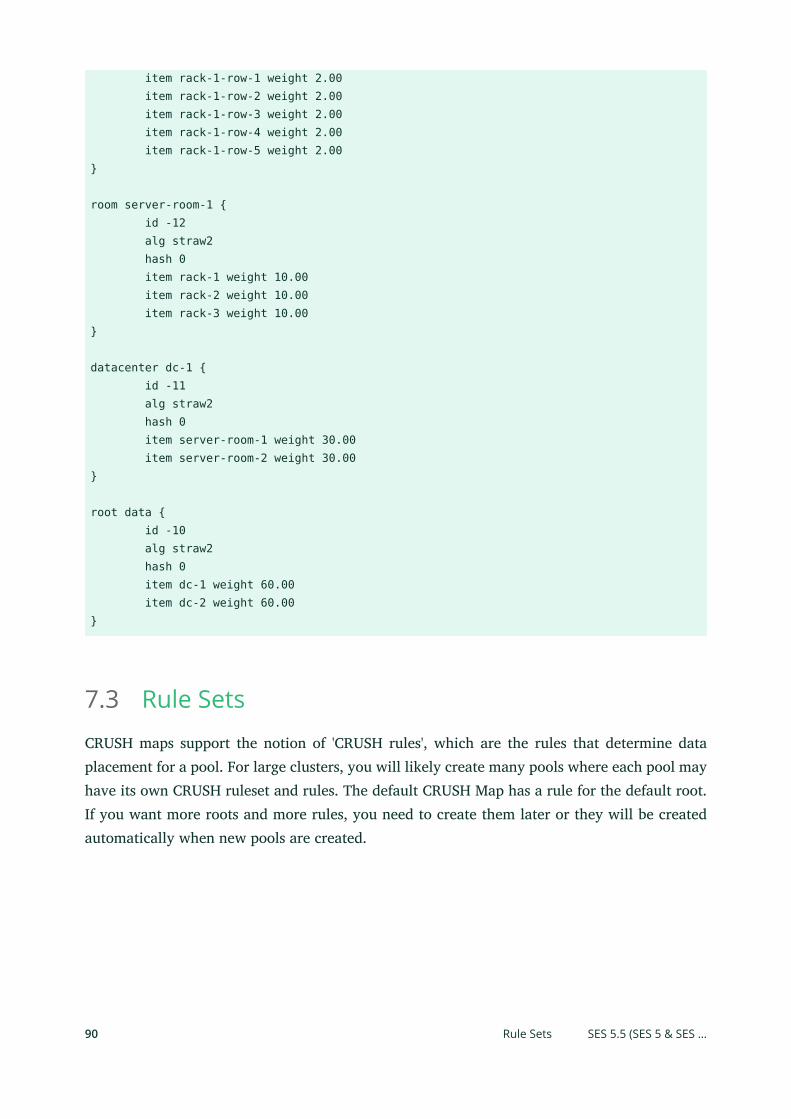
item rack-1-row-1 weight 2.00 item rack-1-row-2 weight 2.00 item rack-1-row-3 weight 2.00 item rack-1-row-4 weight 2.00 item rack-1-row-5 weight 2.00}
room server-room-1 { id -12 alg straw2 hash 0 item rack-1 weight 10.00 item rack-2 weight 10.00 item rack-3 weight 10.00}
datacenter dc-1 { id -11 alg straw2 hash 0 item server-room-1 weight 30.00 item server-room-2 weight 30.00}
root data { id -10 alg straw2 hash 0 item dc-1 weight 60.00 item dc-2 weight 60.00}
7.3 Rule SetsCRUSH maps support the notion of 'CRUSH rules', which are the rules that determine dataplacement for a pool. For large clusters, you will likely create many pools where each pool mayhave its own CRUSH ruleset and rules. The default CRUSH Map has a rule for the default root.If you want more roots and more rules, you need to create them later or they will be createdautomatically when new pools are created.
90 Rule Sets SES 5.5 (SES 5 & SES …
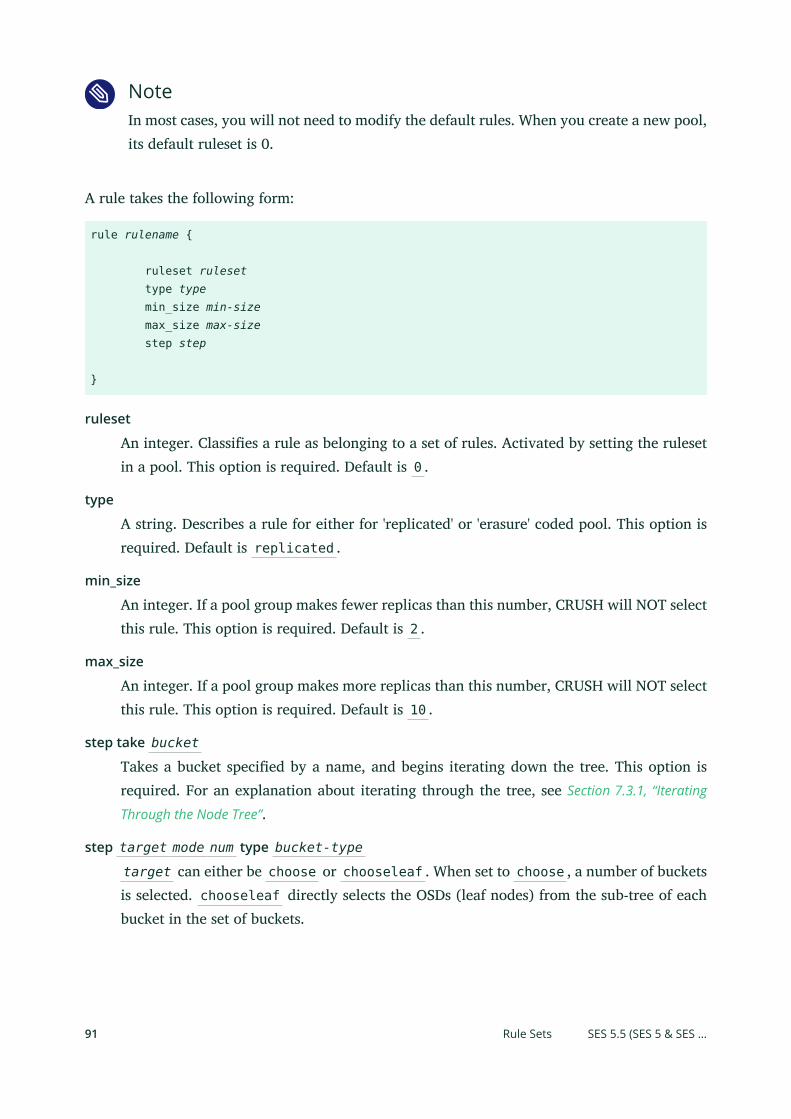
NoteIn most cases, you will not need to modify the default rules. When you create a new pool,its default ruleset is 0.
A rule takes the following form:
rule rulename {
ruleset ruleset type type min_size min-size max_size max-size step step
}
ruleset
An integer. Classies a rule as belonging to a set of rules. Activated by setting the rulesetin a pool. This option is required. Default is 0 .
type
A string. Describes a rule for either for 'replicated' or 'erasure' coded pool. This option isrequired. Default is replicated .
min_size
An integer. If a pool group makes fewer replicas than this number, CRUSH will NOT selectthis rule. This option is required. Default is 2 .
max_size
An integer. If a pool group makes more replicas than this number, CRUSH will NOT selectthis rule. This option is required. Default is 10 .
step take bucket
Takes a bucket specied by a name, and begins iterating down the tree. This option isrequired. For an explanation about iterating through the tree, see Section 7.3.1, “Iterating
Through the Node Tree”.
step target mode num type bucket-type
target can either be choose or chooseleaf . When set to choose , a number of bucketsis selected. chooseleaf directly selects the OSDs (leaf nodes) from the sub-tree of eachbucket in the set of buckets.
91 Rule Sets SES 5.5 (SES 5 & SES …

mode can either be firstn or indep . See Section 7.3.2, “firstn and indep”.Selects the number of buckets of the given type. Where N is the number of optionsavailable, if num > 0 && < N, choose that many buckets; if num < 0, it means N - num ;and, if num == 0, choose N buckets (all available). Follows step take or step choose .
step emit
Outputs the current value and empties the stack. Typically used at the end of a rule, butmay also be used to form dierent trees in the same rule. Follows step choose .
7.3.1 Iterating Through the Node Tree
The structure dened with the buckets can be viewed as a node tree. Buckets are nodes andOSDs are leafs in this tree.
Rules in the CRUSH Map dene how OSDs are selected from this tree. A rule starts with anode and then iterates down the tree to return a set of OSDs. It is not possible to dene whichbranch needs to be selected. Instead the CRUSH algorithm assures that the set of OSDs fulllsthe replication requirements and evenly distributes the data.
With step take bucket the iteration through the node tree begins at the given bucket (notbucket type). If OSDs from all branches in the tree are to be returned, the bucket must be theroot bucket. Otherwise the following steps are only iterating through a sub-tree.
After step take one or more step choose entries follow in the rule denition. Each stepchoose chooses a dened number of nodes (or branches) from the previously selected uppernode.
In the end the selected OSDs are returned with step emit .
step chooseleaf is a convenience function that directly selects OSDs from branches of thegiven bucket.
Figure 7.2, “Example Tree” provides an example of how step is used to iterate through a tree. Theorange arrows and numbers correspond to example1a and example1b , while blue correspondsto example2 in the following rule denitions.
92 Iterating Through the Node Tree SES 5.5 (SES 5 & SES …

room1room1
rack1rack1 rack2rack2
host1host1 host2host2 host3host3 host4host4
osd.1 osd.2 osd.3 osd.4 osd.5 osd.6 osd.7 osd.8
1
2
Bucket Type
room
rack
host
osd 3
2
1
Buckets
(osd.1, osd.4) (osd.3, osd.7)Result
FIGURE 7.2: EXAMPLE TREE
# orange arrowsrule example1a { ruleset 0 type replicated min_size 2 max_size 10 # orange (1) step take rack1 # orange (2) step choose firstn 0 host # orange (3) step choose firstn 1 osd step emit}
rule example1b { ruleset 0 type replicated min_size 2 max_size 10 # orange (1) step take rack1 # orange (2) + (3) step chooseleaf firstn 0 host step emit}
93 Iterating Through the Node Tree SES 5.5 (SES 5 & SES …
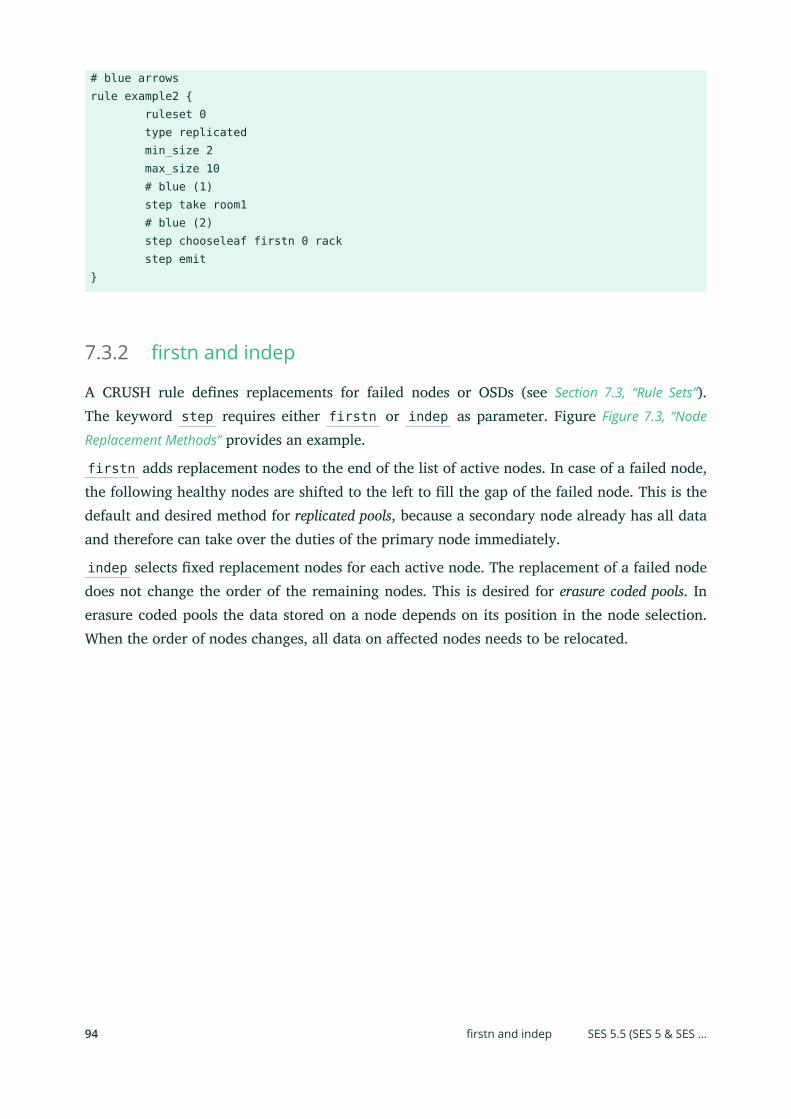
# blue arrowsrule example2 { ruleset 0 type replicated min_size 2 max_size 10 # blue (1) step take room1 # blue (2) step chooseleaf firstn 0 rack step emit}
7.3.2 firstn and indep
A CRUSH rule denes replacements for failed nodes or OSDs (see Section 7.3, “Rule Sets”).The keyword step requires either firstn or indep as parameter. Figure Figure 7.3, “Node
Replacement Methods” provides an example.
firstn adds replacement nodes to the end of the list of active nodes. In case of a failed node,the following healthy nodes are shifted to the left to ll the gap of the failed node. This is thedefault and desired method for replicated pools, because a secondary node already has all dataand therefore can take over the duties of the primary node immediately.
indep selects xed replacement nodes for each active node. The replacement of a failed nodedoes not change the order of the remaining nodes. This is desired for erasure coded pools. Inerasure coded pools the data stored on a node depends on its position in the node selection.When the order of nodes changes, all data on aected nodes needs to be relocated.
94 firstn and indep SES 5.5 (SES 5 & SES …
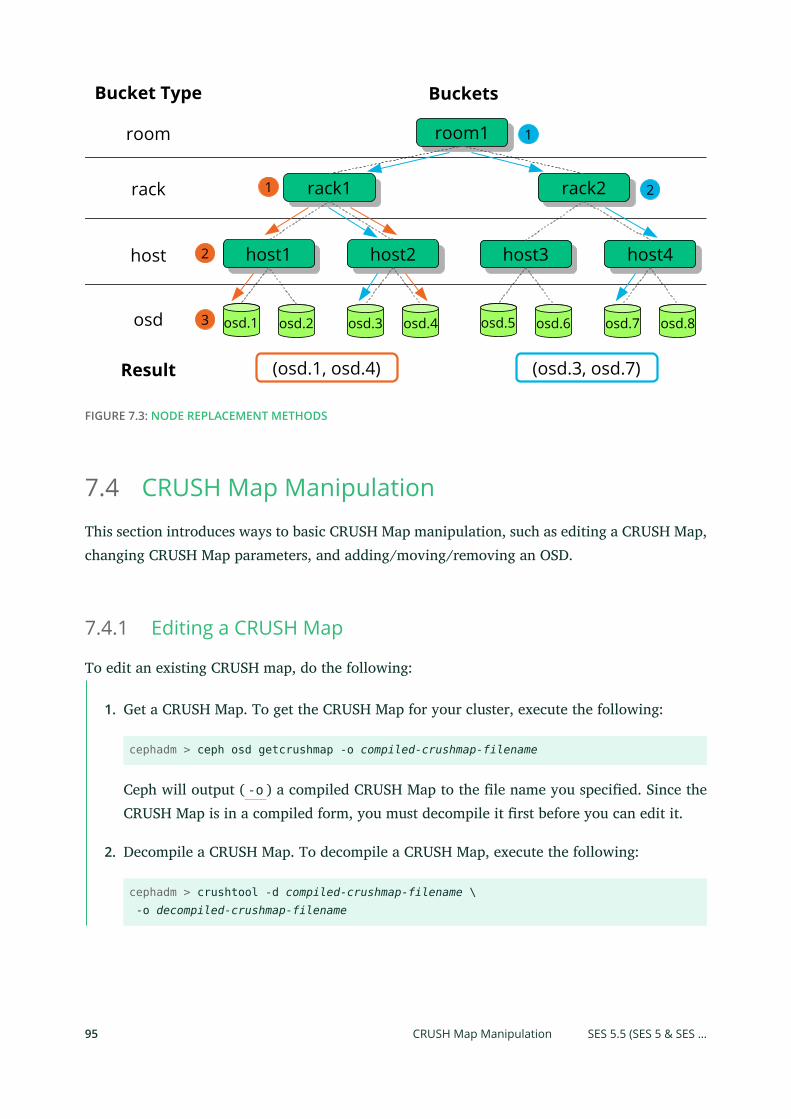
room1room1
rack1rack1 rack2rack2
host1host1 host2host2 host3host3 host4host4
osd.1 osd.2 osd.3 osd.4 osd.5 osd.6 osd.7 osd.8
1
2
Bucket Type
room
rack
host
osd 3
2
1
Buckets
(osd.1, osd.4) (osd.3, osd.7)Result
FIGURE 7.3: NODE REPLACEMENT METHODS
7.4 CRUSH Map ManipulationThis section introduces ways to basic CRUSH Map manipulation, such as editing a CRUSH Map,changing CRUSH Map parameters, and adding/moving/removing an OSD.
7.4.1 Editing a CRUSH Map
To edit an existing CRUSH map, do the following:
1. Get a CRUSH Map. To get the CRUSH Map for your cluster, execute the following:
cephadm > ceph osd getcrushmap -o compiled-crushmap-filename
Ceph will output ( -o ) a compiled CRUSH Map to the le name you specied. Since theCRUSH Map is in a compiled form, you must decompile it rst before you can edit it.
2. Decompile a CRUSH Map. To decompile a CRUSH Map, execute the following:
cephadm > crushtool -d compiled-crushmap-filename \ -o decompiled-crushmap-filename
95 CRUSH Map Manipulation SES 5.5 (SES 5 & SES …
Ceph will decompile ( -d ) the compiled CRUSH Mapand output ( -o ) it to the le nameyou specied.
3. Edit at least one of Devices, Buckets and Rules parameters.
4. Compile a CRUSH Map. To compile a CRUSH Map, execute the following:
cephadm > crushtool -c decompiled-crush-map-filename \ -o compiled-crush-map-filename
Ceph will store a compiled CRUSH Mapto the le name you specied.
5. Set a CRUSH Map. To set the CRUSH Map for your cluster, execute the following:
cephadm > ceph osd setcrushmap -i compiled-crushmap-filename
Ceph will input the compiled CRUSH Map of the le name you specied as the CRUSHMap for the cluster.
Tip: Use Versioning SystemUse a versioning system—such as git or svn—for the exported and modied CRUSH Maples. It makes a possible rollback simple.
Tip: Test the New CRUSH MapTest the new adjusted CRUSH Map using the crushtool --test command, and compareto the state before applying the new CRUSH Map. You may nd the following commandswitches useful: --show-statistics , --show-mappings , --show-bad-mappings , --show-utilization , --show-utilization-all , --show-choose-tries
7.4.2 Add/Move an OSD
To add or move an OSD in the CRUSH Map of a running cluster, execute the following:
cephadm > ceph osd crush set id_or_name weight root=pool-namebucket-type=bucket-name ...
id
96 Add/Move an OSD SES 5.5 (SES 5 & SES …
An integer. The numeric ID of the OSD. This option is required.
name
A string. The full name of the OSD. This option is required.
weight
A double. The CRUSH weight for the OSD. This option is required.
root
A key/value pair. By default, the CRUSH hierarchy contains the pool default as its root.This option is required.
bucket-type
Key/value pairs. You may specify the OSD’s location in the CRUSH hierarchy.
The following example adds osd.0 to the hierarchy, or moves the OSD from a previous location.
cephadm > ceph osd crush set osd.0 1.0 root=data datacenter=dc1 room=room1 \row=foo rack=bar host=foo-bar-1
7.4.3 Dierence between ceph osd reweight and ceph osdcrush reweight
There are two similar commands that change the 'weight' of an Ceph OSD. Context of their usageis dierent and may cause confusion.
7.4.3.1 ceph osd reweight
Usage:
cephadm > ceph osd reweight OSD_NAME NEW_WEIGHT
ceph osd reweight sets an override weight on the Ceph OSD. This value is in the range 0 to1, and forces CRUSH to re-place of the data that would otherwise live on this drive. It does notchange the weights assigned to the buckets above the OSD, and is a corrective measure in casethe normal CRUSH distribution is not working out quite right. For example, if one of your OSDsis at 90% and the others are at 40%, you could reduce this weight to try and compensate for it.
97
Dierence between ceph osd reweight and ceph osd crush reweight SES 5.5 (SES 5 & SES
…
Note: OSD Weight is TemporaryNote that ceph osd reweight is not a persistent setting. When an OSD gets markedout, its weight will be set to 0 and when it gets marked in again, the weight will bechanged to 1.
7.4.3.2 ceph osd crush reweight
Usage:
cephadm > ceph osd crush reweight OSD_NAME NEW_WEIGHT
ceph osd crush reweight sets the CRUSH weight of the OSD. This weight is an arbitraryvalue—generally the size of the disk in TB—and controls how much data the system tries toallocate to the OSD.
7.4.4 Remove an OSD
To remove an OSD from the CRUSH Map of a running cluster, execute the following:
cephadm > ceph osd crush remove OSD_NAME
7.4.5 Add a Bucket
To add a bucket in the CRUSH Map of a running cluster, execute the ceph osd crush add-bucket command:
cephadm > ceph osd crush add-bucket BUCKET_NAME BUCKET_TYPE
7.4.6 Move a Bucket
To move a bucket to a dierent location or position in the CRUSH Map hierarchy, execute thefollowing:
cephadm > ceph osd crush move BUCKET_NAME BUCKET_TYPE=BUCKET_NAME [...]
98 Remove an OSD SES 5.5 (SES 5 & SES …
For example:
cephadm > ceph osd crush move bucket1 datacenter=dc1 room=room1 row=foo rack=bar host=foo-bar-1
7.4.7 Remove a Bucket
To remove a bucket from the CRUSH Map hierarchy, execute the following:
cephadm > ceph osd crush remove BUCKET_NAME
Note: Empty Bucket OnlyA bucket must be empty before removing it from the CRUSH hierarchy.
7.5 ScrubbingIn addition to making multiple copies of objects, Ceph insures data integrity by scrubbingplacement groups (nd more information about placement groups in Book “Deployment Guide”,
Chapter 1 “SUSE Enterprise Storage 5.5 and Ceph”, Section 1.4.2 “Placement Group”). Ceph scrubbingis analogous to running fsck on the object storage layer. For each placement group, Cephgenerates a catalog of all objects and compares each primary object and its replicas to ensure thatno objects are missing or mismatched. Daily light scrubbing checks the object size and attributes,while weekly deep scrubbing reads the data and uses checksums to ensure data integrity.
Scrubbing is important for maintaining data integrity, but it can reduce performance. You canadjust the following settings to increase or decrease scrubbing operations:
osd max scrubs
The maximum number of simultaneous scrub operations for a Ceph OSD. Default is 1.
osd scrub begin hour , osd scrub end hour
The hours of day (0 to 24) that dene a time window when the scrubbing can happen. Bydefault begins at 0 and ends at 24.
99 Remove a Bucket SES 5.5 (SES 5 & SES …
ImportantIf the placement group’s scrub interval exceeds the osd scrub max intervalsetting, the scrub will happen no matter what time window you dene for scrubbing.
osd scrub during recovery
Allows scrubs during recovery. Setting this to 'false' will disable scheduling new scrubswhile there is an active recovery. Already running scrubs will continue. This option isuseful for reducing load on busy clusters. Default is 'true'.
osd scrub thread timeout
The maximum time in seconds before a scrub thread times out. Default is 60.
osd scrub finalize thread timeout
The maximum time in seconds before a scrub nalize thread time out. Default is 60*10.
osd scrub load threshold
The normalized maximum load. Ceph will not scrub when the system load (as denedby the ratio of getloadavg() / number of online cpus ) is higher than this number.Default is 0.5.
osd scrub min interval
The minimal interval in seconds for scrubbing Ceph OSD when the Ceph cluster load islow. Default is 60*60*24 (once a day).
osd scrub max interval
The maximum interval in seconds for scrubbing Ceph OSD irrespective of cluster load.7*60*60*24 (once a week).
osd scrub chunk min
The minimal number of object store chunks to scrub during single operation. Ceph blockswrites to a single chunk during scrub. Default is 5.
osd scrub chunk max
The maximum number of object store chunks to scrub during single operation. Defaultis 25.
osd scrub sleep
Time to sleep before scrubbing next group of chunks. Increasing this value slows down thewhole scrub operation while client operations are less impacted. Default is 0.
100 Scrubbing SES 5.5 (SES 5 & SES …
osd deep scrub interval
The interval for 'deep' scrubbing (fully reading all data). The osd scrub load thresholdoption does not aect this setting. Default is 60*60*24*7 (once a week).
osd scrub interval randomize ratio
Add a random delay to the osd scrub min interval value when scheduling the nextscrub job for a placement group. The delay is a random value smaller than the result ofosd scrub min interval * osd scrub interval randomized ratio . Therefore, thedefault setting practically randomly spreads the scrubs out in the allowed time window of[1, 1.5] * osd scrub min interval . Default is 0.5
osd deep scrub stride
Read size when doing a deep scrub. Default is 524288 (512 kB).
101 Scrubbing SES 5.5 (SES 5 & SES …
8 Managing Storage Pools
Ceph stores data within pools. Pools are logical groups for storing objects. When you rst deploya cluster without creating a pool, Ceph uses the default pools for storing data. The followingimportant highlights relate to Ceph pools:
Resilience: You can set how many OSDs, buckets, or leaves are allowed to fail without losingdata. For replicated pools, it is the desired number of copies/replicas of an object. Newpools are created with a default count of replicas set to 3. For erasure coded pools, it is thenumber of coding chunks (that is m=2 in the erasure code prole).
Placement Groups: are internal data structures for storing data in a pool across OSDs. Theway Ceph stores data into PGs is dened in a CRUSH Map. You can set the number ofplacement groups for a pool at its creation. A typical conguration uses approximately100 placement groups per OSD to provide optimal balancing without using up too manycomputing resources. When setting up multiple pools, be careful to ensure you set areasonable number of placement groups for both the pool and the cluster as a whole. ACeph PGs per Pool Calculator (https://ceph.com/pgcalc/) can help you.
CRUSH Rules: When you store data in a pool, objects and its replicas (or chunks in case oferasure coded pools) are placed according to the CRUSH ruleset mapped to the pool. Youcan create a custom CRUSH rule for your pool.
Snapshots: When you create snapshots with ceph osd pool mksnap , you eectively takea snapshot of a particular pool.
To organize data into pools, you can list, create, and remove pools. You can also view the usagestatistics for each pool.
8.1 Associate Pools with an ApplicationBefore using pools, you need to associate them with an application. Pools that will be used withCephFS, or pools that are automatically created by Object Gateway are automatically associated.
For other cases, you can manually associate a free-form application name with a pool:
cephadm > ceph osd pool application enable pool_name application_name
102 Associate Pools with an Application SES 5.5 (SES 5 & SES …
Tip: Default Application NamesCephFS uses the application name cephfs , RADOS Block Device uses rbd , and ObjectGateway uses rgw .
A pool can be associated with multiple applications, and each application can have its ownmetadata. You can display the application metadata for a given pool using the followingcommand:
cephadm > ceph osd pool application get pool_name
8.2 Operating PoolsThis section introduces practical information to perform basic tasks with pools. You can nd outhow to list, create, and delete pools, as well as show pool statistics or manage snapshots of a pool.
8.2.1 List Pools
To list your cluster’s pools, execute:
cephadm > ceph osd pool ls
8.2.2 Create a Pool
A pool can either be 'replicated' to recover from lost OSDs by keeping multiple copies of theobjects or 'erasure' to get a kind of generalized RAID5/6 capability. The replicated pools requiremore raw storage, while erasure coded pools require less raw storage. Default is 'replicated'.
To create a replicated pool, execute:
cephadm > ceph osd pool create pool_name pg_num pgp_num replicated crush_ruleset_name \expected_num_objects
To create an erasure coded pool, execute:
cephadm > ceph osd pool create pool_name pg_num pgp_num erasure erasure_code_profile \ crush_ruleset_name expected_num_objects
103 Operating Pools SES 5.5 (SES 5 & SES …
The ceph osd pool create can fail if you exceed the limit of placement groups per OSD. Thelimit is set with the option mon_max_pg_per_osd .
pool_name
The name of the pool. It must be unique. This option is required.
pg_num
The total number of placement groups for the pool. This option is required. Default valueis 8.
pgp_num
The total number of placement groups for placement purposes. This should be equal tothe total number of placement groups, except for placement group splitting scenarios. Thisoption is required. Default value is 8.
crush_ruleset_name
The name of the crush ruleset for this pool. If the specied ruleset does not exist, thecreation of replicated pool will fail with -ENOENT. For replicated pools it is the rulesetspecied by the osd pool default crush replicated ruleset conguration variable.This ruleset must exist. For erasure pools it is 'erasure-code' if the default erasure codeprole is used or POOL_NAME otherwise. This ruleset will be created implicitly if it doesnot exist already.
erasure_code_profile=profile
For erasure coded pools only. Use the erasure code prole. It must be an existing proleas dened by osd erasure-code-profile set .When you create a pool, set the number of placement groups to a reasonable value.Consider the total number of placement groups per OSD too. Placement groups arecomputationally expensive, so performance will degrade when you have many pools withmany placement groups (for example 50 pools with 100 placement groups each).See Placement Groups (http://docs.ceph.com/docs/master/rados/operations/placement-
groups/) for details on calculating an appropriate number of placement groups for yourpool.
expected_num_objects
The expected number of objects for this pool. By setting this value (together with a negativefilestore merge threshold ), the PG folder splitting happens at the pool creation time.This avoids the latency impact with a runtime folder splitting.
104 Create a Pool SES 5.5 (SES 5 & SES …
8.2.3 Set Pool Quotas
You can set pool quotas for the maximum number of bytes and/or the maximum number ofobjects per pool.
cephadm > ceph osd pool set-quota pool-name max_objects obj-count max_bytes bytes
For example:
cephadm > ceph osd pool set-quota data max_objects 10000
To remove a quota, set its value to 0.
8.2.4 Delete a Pool
Warning: Pool Deletion is Not ReversiblePools may contain important data. Deleting a pool causes all data in the pool to disappear,and there is no way to recover it.
Because inadvertent pool deletion is a real danger, Ceph implements two mechanisms thatprevent pools from being deleted. Both mechanisms must be disabled before a pool can bedeleted.
The rst mechanism is the NODELETE ag. Each pool has this ag, and its default value is 'false'.To nd out the value of this ag on a pool, run the following command:
cephadm > ceph osd pool get pool_name nodelete
If it outputs nodelete: true , it is not possible to delete the pool until you change the agusing the following command:
cephadm > ceph osd pool set pool_name nodelete false
The second mechanism is the cluster-wide conguration parameter mon allow pool delete ,which defaults to 'false'. This means that, by default, it is not possible to delete a pool. The errormessage displayed is:
Error EPERM: pool deletion is disabled; you must first set the
105 Set Pool Quotas SES 5.5 (SES 5 & SES …
mon_allow_pool_delete config option to true before you can destroy a pool
To delete the pool in spite of this safety setting, you can temporarily set mon allow pooldelete to 'true', delete the pool, and then return the parameter to 'false':
cephadm > ceph tell mon.* injectargs --mon-allow-pool-delete=truecephadm > ceph osd pool delete pool_name pool_name --yes-i-really-really-mean-itcephadm > ceph tell mon.* injectargs --mon-allow-pool-delete=false
The injectargs command displays the following message:
injectargs:mon_allow_pool_delete = 'true' (not observed, change may require restart)
This is merely conrming that the command was executed successfully. It is not an error.
If you created your own rulesets and rules for a pool you created, you should consider removingthem when you no longer need your pool.
8.2.5 Rename a Pool
To rename a pool, execute:
cephadm > ceph osd pool rename current-pool-name new-pool-name
If you rename a pool and you have per-pool capabilities for an authenticated user, you mustupdate the user’s capabilities with the new pool name.
8.2.6 Show Pool Statistics
To show a pool’s usage statistics, execute:
cephadm > rados dfpool name category KB objects lones degraded unfound rd rd KB wr wr KBcold-storage - 228 1 0 0 0 0 0 1 228data - 1 4 0 0 0 0 0 4 4hot-storage - 1 2 0 0 0 15 10 5 231metadata - 0 0 0 0 0 0 0 0 0pool1 - 0 0 0 0 0 0 0 0 0rbd - 0 0 0 0 0 0 0 0 0total used 266268 7total avail 27966296total space 28232564
106 Rename a Pool SES 5.5 (SES 5 & SES …
8.2.7 Get Pool Values
To get a value from a pool, execute:
cephadm > ceph osd pool get pool-name key
You can get values for keys listed in Section 8.2.8, “Set Pool Values” plus the following keys:
pg_num
The number of placement groups for the pool.
pgp_num
The eective number of placement groups to use when calculating data placement. Validrange is equal to or less than pg_num .
Tip: All Pool's ValuesTo list all values related to a specic pool, run:
cephadm > ceph osd pool get POOL_NAME all
8.2.8 Set Pool Values
To set a value to a pool, execute:
cephadm > ceph osd pool set pool-name key value
You may set values for the following keys:
size
Sets the number of replicas for objects in the pool. See Section 8.2.9, “Set the Number of Object
Replicas” for further details. Replicated pools only.
min_size
Sets the minimum number of replicas required for I/O. See Section 8.2.9, “Set the Number of
Object Replicas” for further details. Replicated pools only.
crash_replay_interval
The number of seconds to allow clients to replay acknowledged, but uncommitted requests.
pg_num
107 Get Pool Values SES 5.5 (SES 5 & SES …
The number of placement groups for the pool. If you add new OSDs to the cluster, verifythe value for placement groups on all pools targeted for the new OSDs, for details refer toSection 8.2.10, “Increasing the Number of Placement Groups”.
pgp_num
The eective number of placement groups to use when calculating data placement.
crush_ruleset
The ruleset to use for mapping object placement in the cluster.
hashpspool
Set (1) or unset (0) the HASHPSPOOL ag on a given pool. Enabling this ag changesthe algorithm to better distribute PGs to OSDs. After enabling this ag on a pool whoseHASHPSPOOL ag was set to the default 0, the cluster starts backlling to have a correctplacement of all PGs again. Be aware that this can create quite substantial I/O load on acluster, therefore do not enable the ag from 0 to 1 on a highly loaded production clusters.
nodelete
Prevents the pool from being removed.
nopgchange
Prevents the pool's pg_num and pgp_num from being changed.
nosizechange
Prevents the pool's size from being changed.
write_fadvise_dontneed
Set/Unset the WRITE_FADVISE_DONTNEED ag on a given pool.
noscrub,nodeep-scrub
Disables (deep)-scrubbing of the data for the specic pool to resolve temporary high I/O load.
hit_set_type
Enables hit set tracking for cache pools. See Bloom Filter (http://en.wikipedia.org/wiki/
Bloom_filter) for additional information. This option can have the following values:bloom , explicit_hash , explicit_object . Default is bloom , other values are fortesting only.
hit_set_count
The number of hit sets to store for cache pools. The higher the number, the more RAMconsumed by the ceph-osd daemon. Default is 0 .
108 Set Pool Values SES 5.5 (SES 5 & SES …

hit_set_period
The duration of a hit set period in seconds for cache pools. The higher the number, themore RAM consumed by the ceph-osd daemon.
hit_set_fpp
The false positive probability for the bloom hit set type. See Bloom Filter (http://
en.wikipedia.org/wiki/Bloom_filter) for additional information. Valid range is 0.0 - 1.0Default is 0.05
use_gmt_hitset
Force OSDs to use GMT (Greenwich Mean Time) time stamps when creating a hit set forcache tiering. This ensures that nodes in dierent time zones return the same result. Defaultis 1 . This value should not be changed.
cache_target_dirty_ratio
The percentage of the cache pool containing modied (dirty) objects before the cachetiering agent will ush them to the backing storage pool. Default is 0.4 .
cache_target_dirty_high_ratio
The percentage of the cache pool containing modied (dirty) objects before the cachetiering agent will ush them to the backing storage pool with a higher speed. Default is0.6 .
cache_target_full_ratio
The percentage of the cache pool containing unmodied (clean) objects before the cachetiering agent will evict them from the cache pool. Default is 0.8 .
target_max_bytes
Ceph will begin ushing or evicting objects when the max_bytes threshold is triggered.
target_max_objects
Ceph will begin ushing or evicting objects when the max_objects threshold is triggered.
hit_set_grade_decay_rate
Temperature decay rate between two successive hit_set s. Default is 20 .
hit_set_search_last_n
Count at most N appearances in hit_set s for temperature calculation. Default is 1 .
cache_min_flush_age
The time (in seconds) before the cache tiering agent will ush an object from the cachepool to the storage pool.
109 Set Pool Values SES 5.5 (SES 5 & SES …
cache_min_evict_age
The time (in seconds) before the cache tiering agent will evict an object from the cachepool.
fast_read
If this ag is enabled on erasure coding pools, then the read request issues sub-reads toall shards, and waits until it receives enough shards to decode to serve the client. In thecase of jerasure and isa erasure plug-ins, when the rst K replies return, then the client’srequest is served immediately using the data decoded from these replies. This approachcause more CPU load and less disk/network load. Currently, this ag is only supported forerasure coding pools. Default is 0 .
scrub_min_interval
The minimum interval in seconds for pool scrubbing when the cluster load is low. Thedefault 0 means that the osd_scrub_min_interval value from the Ceph congurationle is used.
scrub_max_interval
The maximum interval in seconds for pool scrubbing, regardless of the cluster load. Thedefault 0 means that the osd_scrub_max_interval value from the Ceph congurationle is used.
deep_scrub_interval
The interval in seconds for the pool deep scrubbing. The default 0 means that theosd_deep_scrub value from the Ceph conguration le is used.
8.2.9 Set the Number of Object Replicas
To set the number of object replicas on a replicated pool, execute the following:
cephadm > ceph osd pool set poolname size num-replicas
The num-replicas includes the object itself. For example if you want the object and two copiesof the object for a total of three instances of the object, specify 3.
Warning: Do not Set Less than 3 ReplicasIf you set the num-replicas to 2, there will be only one copy of your data. If you lose oneobject instance, you need to trust that the other copy has not been corrupted for examplesince the last scrubbing during recovery (refer to Section 7.5, “Scrubbing” for details).
110 Set the Number of Object Replicas SES 5.5 (SES 5 & SES …
Setting a pool to one replica means that there is exactly one instance of the data object inthe pool. If the OSD fails, you lose the data. A possible usage for a pool with one replicais storing temporary data for a short time.
Tip: Setting More than 3 ReplicasSetting 4 replicas for a pool increases the reliability by 25%.
In case of two data centers, you need to set at least 4 replicas for a pool to have twocopies in each data center so that in case one data center is lost, still two copies exist andyou can still lose one disk without loosing data.
NoteAn object might accept I/Os in degraded mode with fewer than pool size replicas.To set a minimum number of required replicas for I/O, you should use the min_sizesetting. For example:
cephadm > ceph osd pool set data min_size 2
This ensures that no object in the data pool will receive I/O with fewer than min_sizereplicas.
Tip: Get the Number of Object ReplicasTo get the number of object replicas, execute the following:
cephadm > ceph osd dump | grep 'replicated size'
Ceph will list the pools, with the replicated size attribute highlighted. By default,Ceph creates two replicas of an object (a total of three copies, or a size of 3).
8.2.10 Increasing the Number of Placement Groups
When creating a new pool, you specify the number of placement groups for the pool (seeSection 8.2.2, “Create a Pool” ). After adding more OSDs to the cluster, you usually need to increasethe number of placement groups as well for performance and data durability reasons. For each
111 Increasing the Number of Placement Groups SES 5.5 (SES 5 & SES …
placement group, OSD and monitor nodes need memory, network and CPU at all times and evenmore during recovery. From which follows that minimizing the number of placement groupssaves signicant amounts of resources. On the other hand - too small number of placementgroups causes unequal data distribution among OSDs.
Warning: Too High Value of pg_numWhen changing the pg_num value for a pool, it may happen that the new number ofplacement groups exceeds the allowed limit. For example
cephadm > ceph osd pool set rbd pg_num 4096 Error E2BIG: specified pg_num 3500 is too large (creating 4096 new PGs \ on ~64 OSDs exceeds per-OSD max of 32)
The limit prevents extreme placement group splitting, and is derived from themon_osd_max_split_count value.
Important: Reducing the Number of Placement Groups notPossibleWhile increasing the number of placement groups on a pool is possible at any time,reducing is not possible.
To determine the right new number of placement groups for a resized cluster is a complex task.One approach is to continuously grow the number of placement groups up to the state when thecluster performance is satisfactory. To determine the new incremented number of placementgroups, you need to get the value of the mon_osd_max_split_count parameter (default is 32),and add it to the current number of placement groups. To give you a basic idea, take a lookat the following script:
cephadm > max_inc=`ceph daemon mon.a config get mon_osd_max_split_count 2>&1 \ | tr -d '\n ' | sed 's/.*"\([[:digit:]]\+\)".*/\1/'`cephadm > pg_num=`ceph osd pool get POOL_NAME pg_num | cut -f2 -d: | tr -d ' '`cephadm > echo "current pg_num value: $pg_num, max increment: $max_inc"cephadm > next_pg_num="$(($pg_num+$max_inc))"cephadm > echo "allowed increment of pg_num: $next_pg_num"
After nding out the next number of placement groups, increase it with
cephadm > ceph osd pool set POOL_NAME pg_num NEXT_PG_NUM
112 Increasing the Number of Placement Groups SES 5.5 (SES 5 & SES …
8.3 Pool MigrationWhen creating a pool (see Section 8.2.2, “Create a Pool”) you need to specify its initial parameters,such as the pool type or the number of placement groups. If you later decide to change any ofthese parameters—for example when converting a replicated pool into an erasure coded one,or decreasing the number of placement groups—, you need to migrate the pool data to anotherone whose parameters suit your deployment.
This section describes two migration methods—a cache tier method for general pool datamigration, and a method using rbd migrate sub-commands to migrate RBD images to a newpool. Each method has its specics and limitations.
8.3.1 Limitations
You can use the cache tier method to migrate from a replicated pool to either an EC poolor another replicated pool. Migrating from an EC pool is not supported.
You cannot migrate RBD images and CephFS exports from a replicated pool to an EC pool.The reason is that EC pools do not support omap , while RBD and CephFS use omap tostore its metadata. For example, the header object of the RBD will fail to be ushed. Butyou can migrate data to EC pool, leaving metadata in replicated pool.
The rbd migration method allows migrating images with minimal client downtime. Youonly need to stop the client before the prepare step and start it afterward. Note that onlya librbd client that supports this feature (Ceph Nautilus or newer) will be able to openthe image just after the prepare step, while older librbd clients or the krbd clients willnot be able to open the image until the commit step is executed.
8.3.2 Migrate Using Cache Tier
The principle is simple—include the pool that you need to migrate into a cache tier in reverseorder. Find more details on cache tiers in Chapter 11, Cache Tiering. The following examplemigrates a replicated pool named 'testpool' to an erasure coded pool:
PROCEDURE 8.1: MIGRATING REPLICATED TO ERASURE CODED POOL
1. Create a new erasure coded pool named 'newpool'. Refer to Section 8.2.2, “Create a Pool” fordetailed explanation of pool creation parameters.
113 Pool Migration SES 5.5 (SES 5 & SES …

cephadm > ceph osd pool create newpool PG_NUM PGP_NUM erasure default
Verify that the used client keyring provides at least the same capabilities for 'newpool' asit does for 'testpool'.Now you have two pools: the original replicated 'testpool' lled with data, and the newempty erasure coded 'newpool':
FIGURE 8.1: POOLS BEFORE MIGRATION
2. Setup the cache tier and congure the replicated pool 'testpool' as a cache pool. The -force-nonempty option allows adding a cache tier even if the pool already has data:
cephadm > ceph tell mon.* injectargs \ '--mon_debug_unsafe_allow_tier_with_nonempty_snaps=1'cephadm > ceph osd tier add newpool testpool --force-nonemptycephadm > ceph osd tier cache-mode testpool proxy
FIGURE 8.2: CACHE TIER SETUP
3. Force the cache pool to move all objects to the new pool:
cephadm > rados -p testpool cache-flush-evict-all
FIGURE 8.3: DATA FLUSHING
114 Migrate Using Cache Tier SES 5.5 (SES 5 & SES …
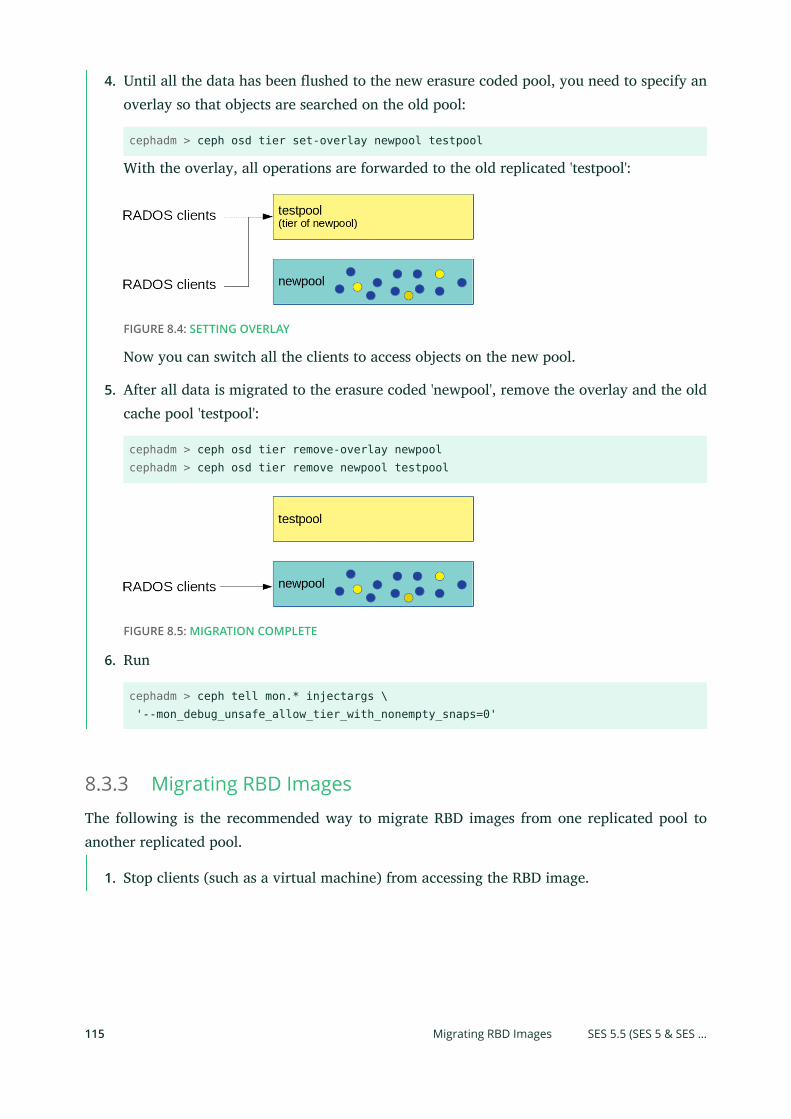
4. Until all the data has been ushed to the new erasure coded pool, you need to specify anoverlay so that objects are searched on the old pool:
cephadm > ceph osd tier set-overlay newpool testpool
With the overlay, all operations are forwarded to the old replicated 'testpool':
FIGURE 8.4: SETTING OVERLAY
Now you can switch all the clients to access objects on the new pool.
5. After all data is migrated to the erasure coded 'newpool', remove the overlay and the oldcache pool 'testpool':
cephadm > ceph osd tier remove-overlay newpoolcephadm > ceph osd tier remove newpool testpool
FIGURE 8.5: MIGRATION COMPLETE
6. Run
cephadm > ceph tell mon.* injectargs \ '--mon_debug_unsafe_allow_tier_with_nonempty_snaps=0'
8.3.3 Migrating RBD Images
The following is the recommended way to migrate RBD images from one replicated pool toanother replicated pool.
1. Stop clients (such as a virtual machine) from accessing the RBD image.
115 Migrating RBD Images SES 5.5 (SES 5 & SES …
2. Create a new image in the target pool, with the parent set to the source image:
cephadm > rbd migration prepare SRC_POOL/IMAGE TARGET_POOL/IMAGE
Tip: Migrate Only Data to an EC PoolIf you need to migrate only the image data to a new EC pool and leave the metadatain the original replicated pool, run the following command instead:
cephadm > rbd migration prepare SRC_POOL/IMAGE \ --data-pool TARGET_POOL/IMAGE
3. Let clients access the image in the target pool.
4. Migrate data to the target pool:
cephadm > rbd migration execute SRC_POOL/IMAGE
5. Remove the old image:
cephadm > rbd migration commit SRC_POOL/IMAGE
8.4 Pool SnapshotsPool snapshots are snapshots of the state of the whole Ceph pool. With pool snapshots, youcan retain the history of the pool's state. Creating pool snapshots consumes storage spaceproportional to the pool size. Always check the related storage for enough disk space beforecreating a snapshot of a pool.
8.4.1 Make a Snapshot of a Pool
To make a snapshot of a pool, run:
cephadm > ceph osd pool mksnap POOL-NAME SNAP-NAME
For example:
cephadm > ceph osd pool mksnap pool1 snap1created pool pool1 snap snap1
116 Pool Snapshots SES 5.5 (SES 5 & SES …
8.4.2 List Snapshots of a Pool
To list existing snapshots of a pool, run:
cephadm > rados lssnap -p POOL_NAME
For example:
cephadm > rados lssnap -p pool11 snap1 2018.12.13 09:36:202 snap2 2018.12.13 09:46:032 snaps
8.4.3 Remove a Snapshot of a Pool
To remove a snapshot of a pool, run:
cephadm > ceph osd pool rmsnap POOL-NAME SNAP-NAME
8.5 Data CompressionBlueStore (nd more details in Book “Deployment Guide”, Chapter 1 “SUSE Enterprise Storage 5.5
and Ceph”, Section 1.5 “BlueStore”) provides on-the-y data compression to save disk space. Thecompression ratio depends on the data stored in the system. Note that compression / de-compression requires additional CPU power.
You can congure data compression globally (see Section 8.5.3, “Global Compression Options”), andthen override specic compression settings for each individual pool.
You can enable or disable pool data compression, or change the compression algorithm andmode at any time, regardless of whether the pool contains data or not.
No compression will be applied to existing data after enabling the pool compression.
After disabling the compression of a pool, all its data will be decompressed.
8.5.1 Enable Compression
To enable data compression for a pool named POOL_NAME , run the following command:
cephadm > ceph osd pool set POOL_NAME compression_algorithm COMPRESSION_ALGORITHM
117 List Snapshots of a Pool SES 5.5 (SES 5 & SES …
cephadm > ceph osd pool set POOL_NAME compression_mode COMPRESSION_MODE
Tip: Disabling Pool CompressionTo disable data compression for a pool, use 'none' as the compression algorithm:
cephadm > ceph osd pool set POOL_NAME compression_algorithm none
8.5.2 Pool Compression Options
A full list of compression settings:
compression_algorithm
Possible values are none , zstd , snappy . Default is snappy .Which compression algorithm to use depends on the specic use case. Severalrecommendations follow:
Use the default snappy as long as you do not have a good reason to change it.
zstd oers a good compression ratio, but causes high CPU overhead whencompressing small amounts of data.
Run a benchmark of these algorithms on a sample of your actual data while keepingan eye on the CPU and memory usage of your cluster.
compression_mode
Possible values are none , aggressive , passive , force . Default is none .
none : compress never
passive : compress if hinted COMPRESSIBLE
aggressive : compress unless hinted INCOMPRESSIBLE
force : compress always
compression_required_ratio
Value: Double, Ratio = SIZE_COMPRESSED / SIZE_ORIGINAL. Default is 0.875 , whichmeans that if the compression does not reduce the occupied space by at least 12,5%, theobject will not be compressed.
118 Pool Compression Options SES 5.5 (SES 5 & SES …
Objects above this ratio will not be stored compressed because of the low net gain.
compression_max_blob_size
Value: Unsigned Integer, size in bytes. Default: 0Maximum size of objects that are compressed.
compression_min_blob_size
Value: Unsigned Integer, size in bytes. Default: 0Minimum size of objects that are compressed.
8.5.3 Global Compression Options
The following conguration options can be set in the Ceph conguration and apply to all OSDsand not only a single pool. The pool specic conguration listed in Section 8.5.2, “Pool Compression
Options” take precedence.
bluestore_compression_algorithm
See compression_algorithm.
bluestore_compression_mode
See compression_mode
bluestore_compression_required_ratio
See compression_required_ratio
bluestore_compression_min_blob_size
Value: Unsigned Integer, size in bytes. Default: 0Minimum size of objects that are compressed. The setting is ignoredby default in favor of bluestore_compression_min_blob_size_hdd andbluestore_compression_min_blob_size_ssd . It takes precedence when set to a non-zero value.
bluestore_compression_max_blob_size
Value: Unsigned Integer, size in bytes. Default: 0Maximum size of objects that are compressed before they willbe split into smaller chunks. The setting is ignored bydefault in favor of bluestore_compression_max_blob_size_hdd andbluestore_compression_max_blob_size_ssd . It takes precedence when set to a non-zero value.
119 Global Compression Options SES 5.5 (SES 5 & SES …
bluestore_compression_min_blob_size_ssd
Value: Unsigned Integer, size in bytes. Default: 8KMinimum size of objects that are compressed and stored on solid-state drive.
bluestore_compression_max_blob_size_ssd
Value: Unsigned Integer, size in bytes. Default: 64KMaximum size of objects that are compressed and stored on solid-state drive before theywill be split into smaller chunks.
bluestore_compression_min_blob_size_hdd
Value: Unsigned Integer, size in bytes. Default: 128KMinimum size of objects that are compressed and stored on hard disks.
bluestore_compression_max_blob_size_hdd
Value: Unsigned Integer, size in bytes. Default: 512KMaximum size of objects that are compressed and stored on hard disks before they willbe split into smaller chunks.
120 Global Compression Options SES 5.5 (SES 5 & SES …
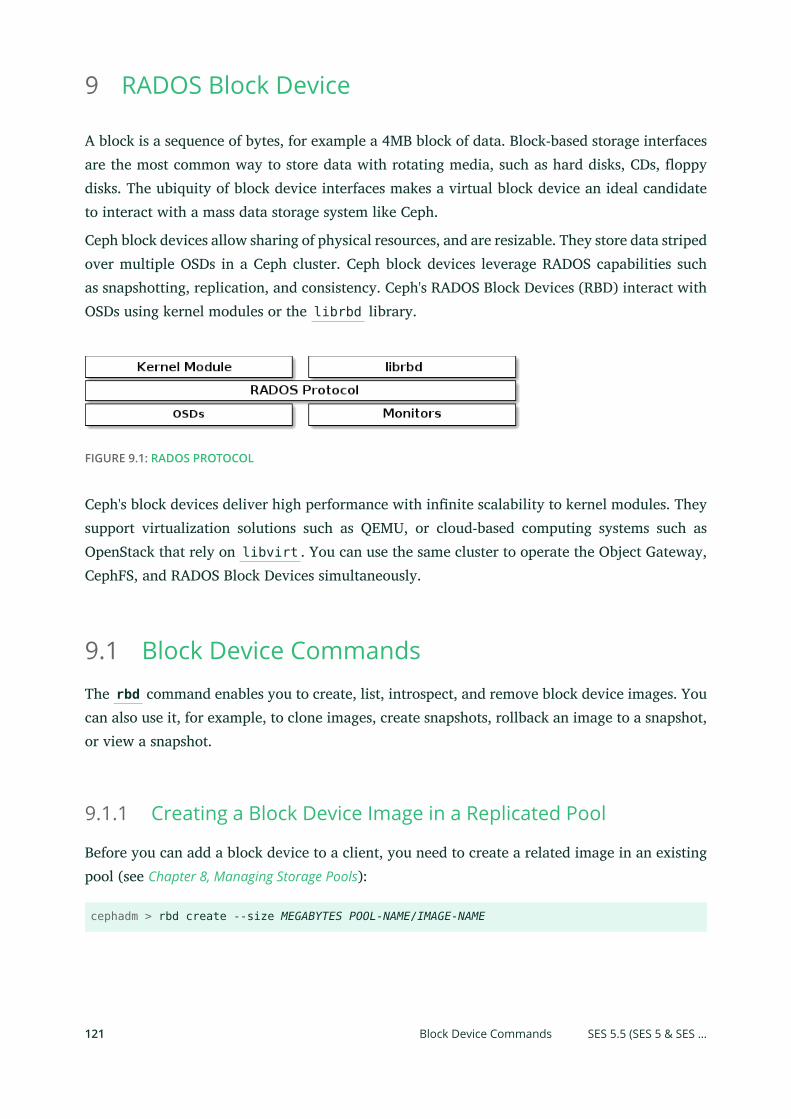
9 RADOS Block Device
A block is a sequence of bytes, for example a 4MB block of data. Block-based storage interfacesare the most common way to store data with rotating media, such as hard disks, CDs, oppydisks. The ubiquity of block device interfaces makes a virtual block device an ideal candidateto interact with a mass data storage system like Ceph.
Ceph block devices allow sharing of physical resources, and are resizable. They store data stripedover multiple OSDs in a Ceph cluster. Ceph block devices leverage RADOS capabilities suchas snapshotting, replication, and consistency. Ceph's RADOS Block Devices (RBD) interact withOSDs using kernel modules or the librbd library.
FIGURE 9.1: RADOS PROTOCOL
Ceph's block devices deliver high performance with innite scalability to kernel modules. Theysupport virtualization solutions such as QEMU, or cloud-based computing systems such asOpenStack that rely on libvirt . You can use the same cluster to operate the Object Gateway,CephFS, and RADOS Block Devices simultaneously.
9.1 Block Device CommandsThe rbd command enables you to create, list, introspect, and remove block device images. Youcan also use it, for example, to clone images, create snapshots, rollback an image to a snapshot,or view a snapshot.
9.1.1 Creating a Block Device Image in a Replicated Pool
Before you can add a block device to a client, you need to create a related image in an existingpool (see Chapter 8, Managing Storage Pools):
cephadm > rbd create --size MEGABYTES POOL-NAME/IMAGE-NAME
121 Block Device Commands SES 5.5 (SES 5 & SES …
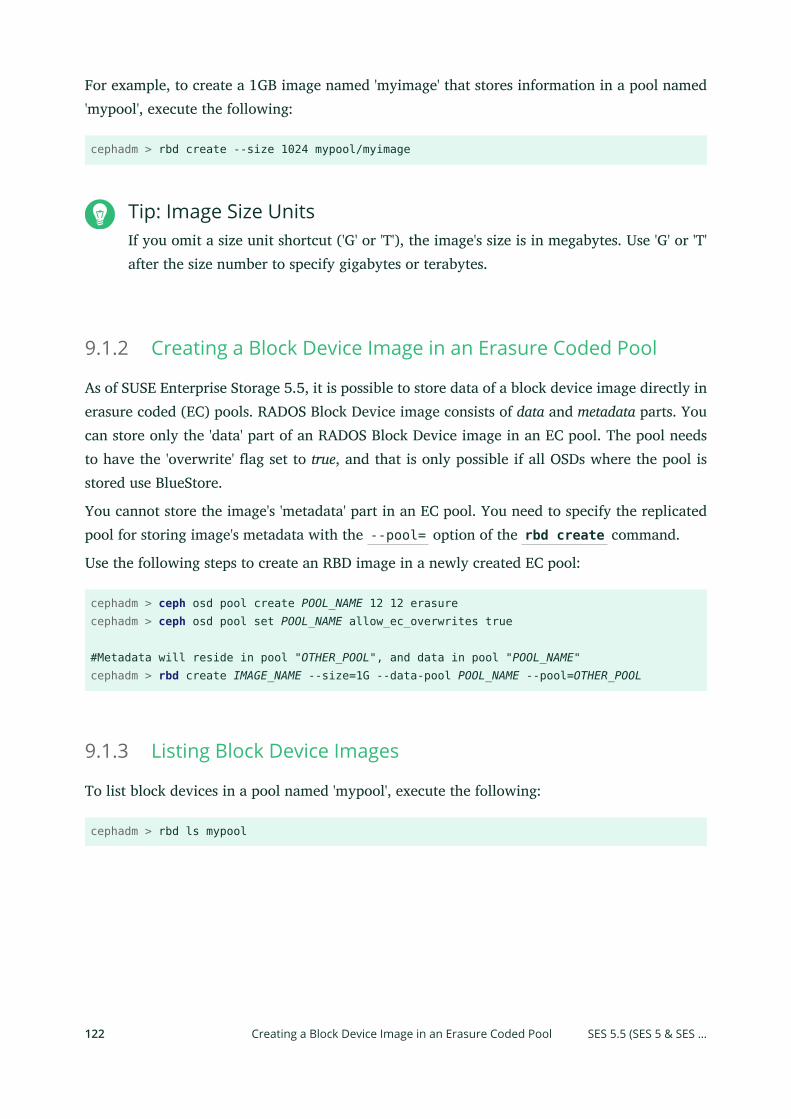
For example, to create a 1GB image named 'myimage' that stores information in a pool named'mypool', execute the following:
cephadm > rbd create --size 1024 mypool/myimage
Tip: Image Size UnitsIf you omit a size unit shortcut ('G' or 'T'), the image's size is in megabytes. Use 'G' or 'T'after the size number to specify gigabytes or terabytes.
9.1.2 Creating a Block Device Image in an Erasure Coded Pool
As of SUSE Enterprise Storage 5.5, it is possible to store data of a block device image directly inerasure coded (EC) pools. RADOS Block Device image consists of data and metadata parts. Youcan store only the 'data' part of an RADOS Block Device image in an EC pool. The pool needsto have the 'overwrite' ag set to true, and that is only possible if all OSDs where the pool isstored use BlueStore.
You cannot store the image's 'metadata' part in an EC pool. You need to specify the replicatedpool for storing image's metadata with the --pool= option of the rbd create command.
Use the following steps to create an RBD image in a newly created EC pool:
cephadm > ceph osd pool create POOL_NAME 12 12 erasurecephadm > ceph osd pool set POOL_NAME allow_ec_overwrites true
#Metadata will reside in pool "OTHER_POOL", and data in pool "POOL_NAME"cephadm > rbd create IMAGE_NAME --size=1G --data-pool POOL_NAME --pool=OTHER_POOL
9.1.3 Listing Block Device Images
To list block devices in a pool named 'mypool', execute the following:
cephadm > rbd ls mypool
122 Creating a Block Device Image in an Erasure Coded Pool SES 5.5 (SES 5 & SES …
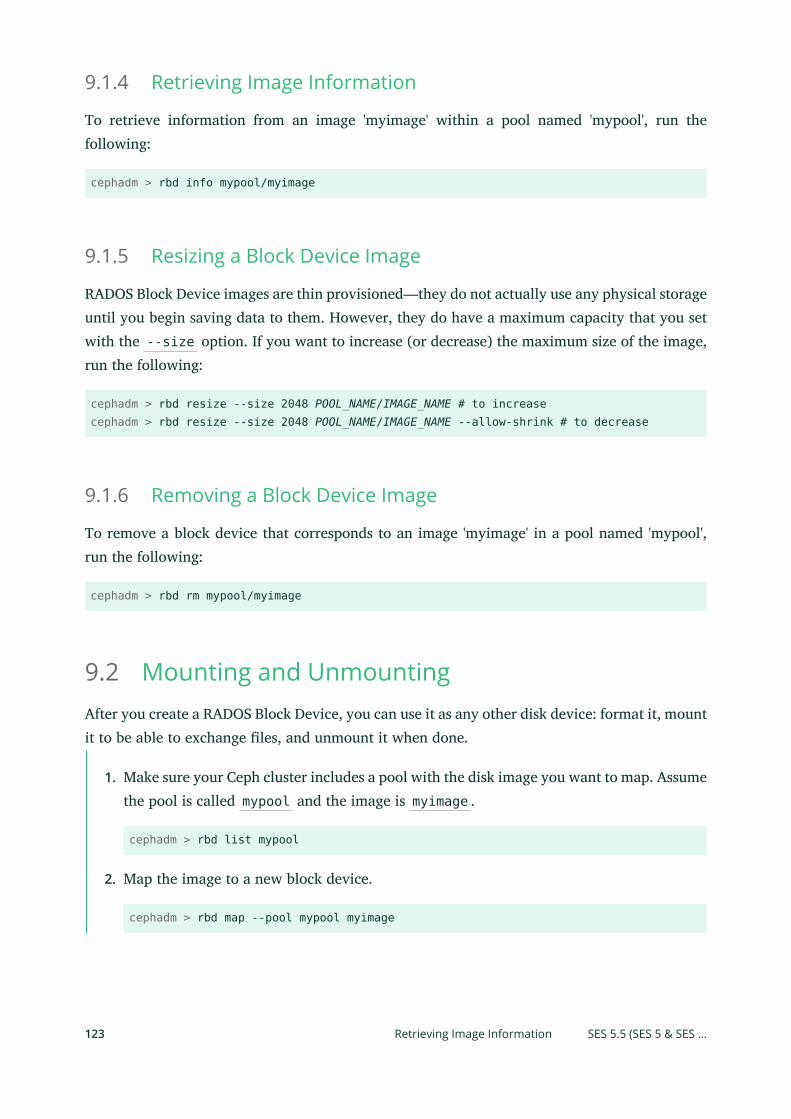
9.1.4 Retrieving Image Information
To retrieve information from an image 'myimage' within a pool named 'mypool', run thefollowing:
cephadm > rbd info mypool/myimage
9.1.5 Resizing a Block Device Image
RADOS Block Device images are thin provisioned—they do not actually use any physical storageuntil you begin saving data to them. However, they do have a maximum capacity that you setwith the --size option. If you want to increase (or decrease) the maximum size of the image,run the following:
cephadm > rbd resize --size 2048 POOL_NAME/IMAGE_NAME # to increasecephadm > rbd resize --size 2048 POOL_NAME/IMAGE_NAME --allow-shrink # to decrease
9.1.6 Removing a Block Device Image
To remove a block device that corresponds to an image 'myimage' in a pool named 'mypool',run the following:
cephadm > rbd rm mypool/myimage
9.2 Mounting and UnmountingAfter you create a RADOS Block Device, you can use it as any other disk device: format it, mountit to be able to exchange les, and unmount it when done.
1. Make sure your Ceph cluster includes a pool with the disk image you want to map. Assumethe pool is called mypool and the image is myimage .
cephadm > rbd list mypool
2. Map the image to a new block device.
cephadm > rbd map --pool mypool myimage
123 Retrieving Image Information SES 5.5 (SES 5 & SES …
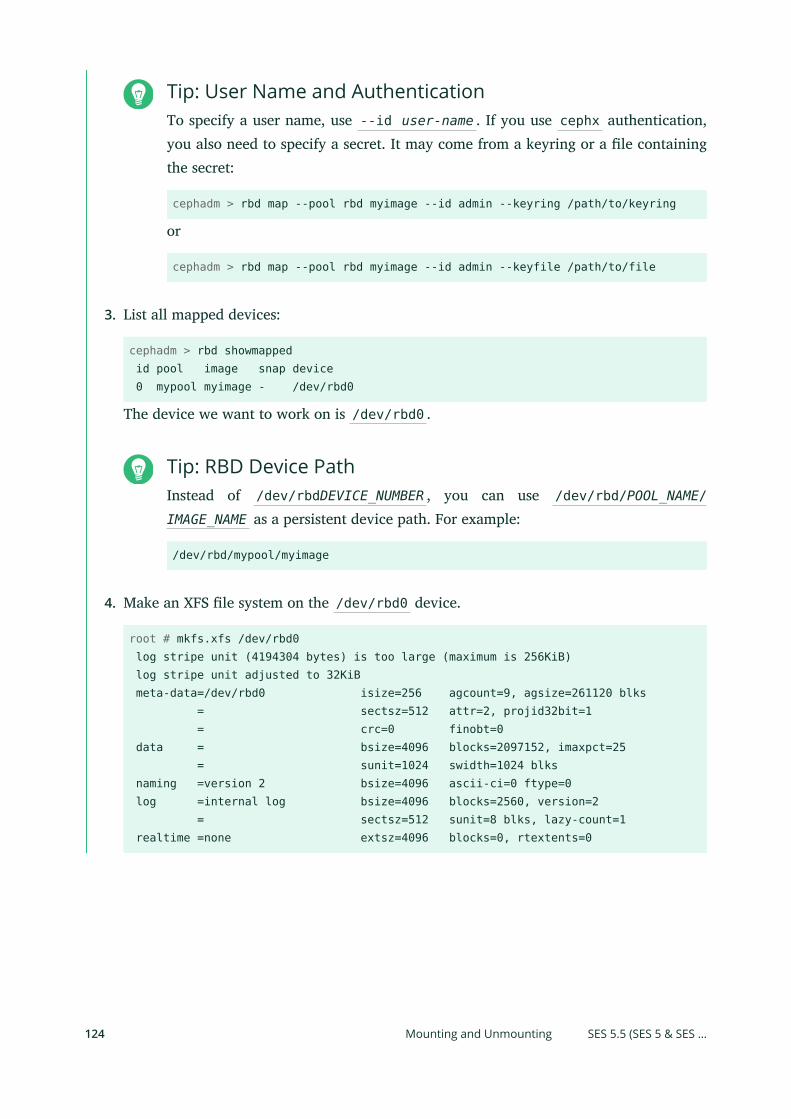
Tip: User Name and AuthenticationTo specify a user name, use --id user-name . If you use cephx authentication,you also need to specify a secret. It may come from a keyring or a le containingthe secret:
cephadm > rbd map --pool rbd myimage --id admin --keyring /path/to/keyring
or
cephadm > rbd map --pool rbd myimage --id admin --keyfile /path/to/file
3. List all mapped devices:
cephadm > rbd showmapped id pool image snap device 0 mypool myimage - /dev/rbd0
The device we want to work on is /dev/rbd0 .
Tip: RBD Device PathInstead of /dev/rbdDEVICE_NUMBER , you can use /dev/rbd/POOL_NAME/
IMAGE_NAME as a persistent device path. For example:
/dev/rbd/mypool/myimage
4. Make an XFS le system on the /dev/rbd0 device.
root # mkfs.xfs /dev/rbd0 log stripe unit (4194304 bytes) is too large (maximum is 256KiB) log stripe unit adjusted to 32KiB meta-data=/dev/rbd0 isize=256 agcount=9, agsize=261120 blks = sectsz=512 attr=2, projid32bit=1 = crc=0 finobt=0 data = bsize=4096 blocks=2097152, imaxpct=25 = sunit=1024 swidth=1024 blks naming =version 2 bsize=4096 ascii-ci=0 ftype=0 log =internal log bsize=4096 blocks=2560, version=2 = sectsz=512 sunit=8 blks, lazy-count=1 realtime =none extsz=4096 blocks=0, rtextents=0
124 Mounting and Unmounting SES 5.5 (SES 5 & SES …
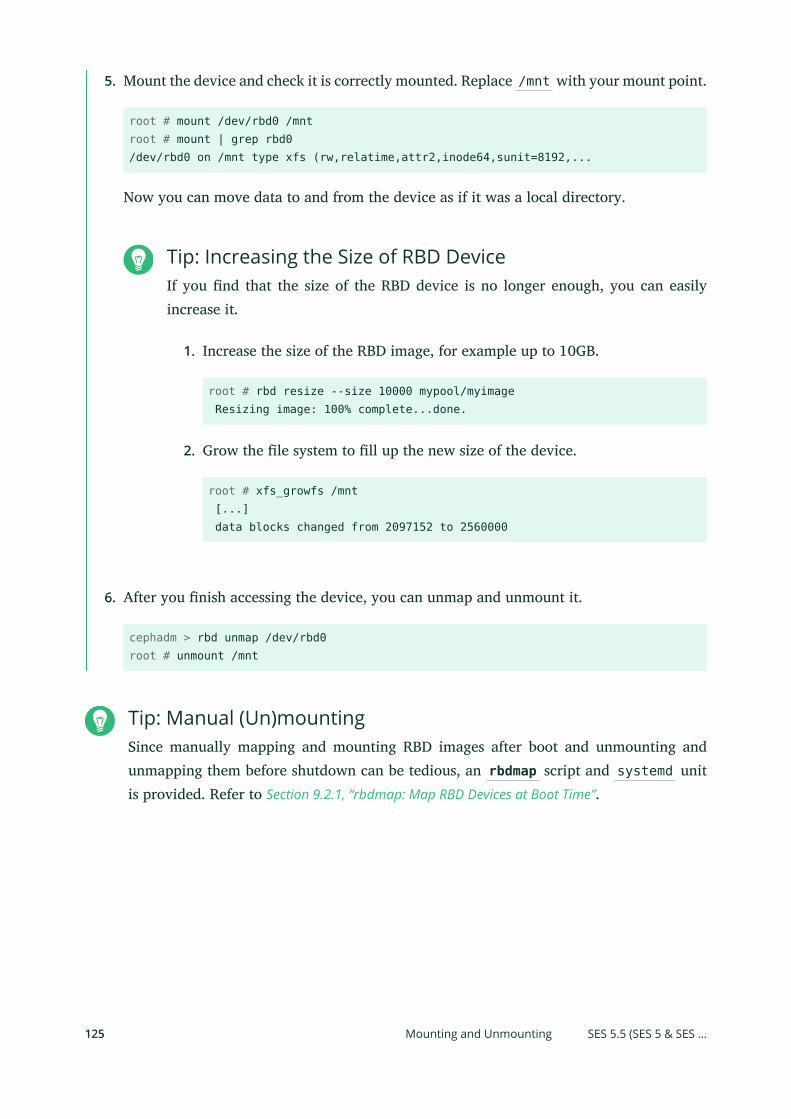
5. Mount the device and check it is correctly mounted. Replace /mnt with your mount point.
root # mount /dev/rbd0 /mntroot # mount | grep rbd0/dev/rbd0 on /mnt type xfs (rw,relatime,attr2,inode64,sunit=8192,...
Now you can move data to and from the device as if it was a local directory.
Tip: Increasing the Size of RBD DeviceIf you nd that the size of the RBD device is no longer enough, you can easilyincrease it.
1. Increase the size of the RBD image, for example up to 10GB.
root # rbd resize --size 10000 mypool/myimage Resizing image: 100% complete...done.
2. Grow the le system to ll up the new size of the device.
root # xfs_growfs /mnt [...] data blocks changed from 2097152 to 2560000
6. After you nish accessing the device, you can unmap and unmount it.
cephadm > rbd unmap /dev/rbd0root # unmount /mnt
Tip: Manual (Un)mountingSince manually mapping and mounting RBD images after boot and unmounting andunmapping them before shutdown can be tedious, an rbdmap script and systemd unitis provided. Refer to Section 9.2.1, “rbdmap: Map RBD Devices at Boot Time”.
125 Mounting and Unmounting SES 5.5 (SES 5 & SES …
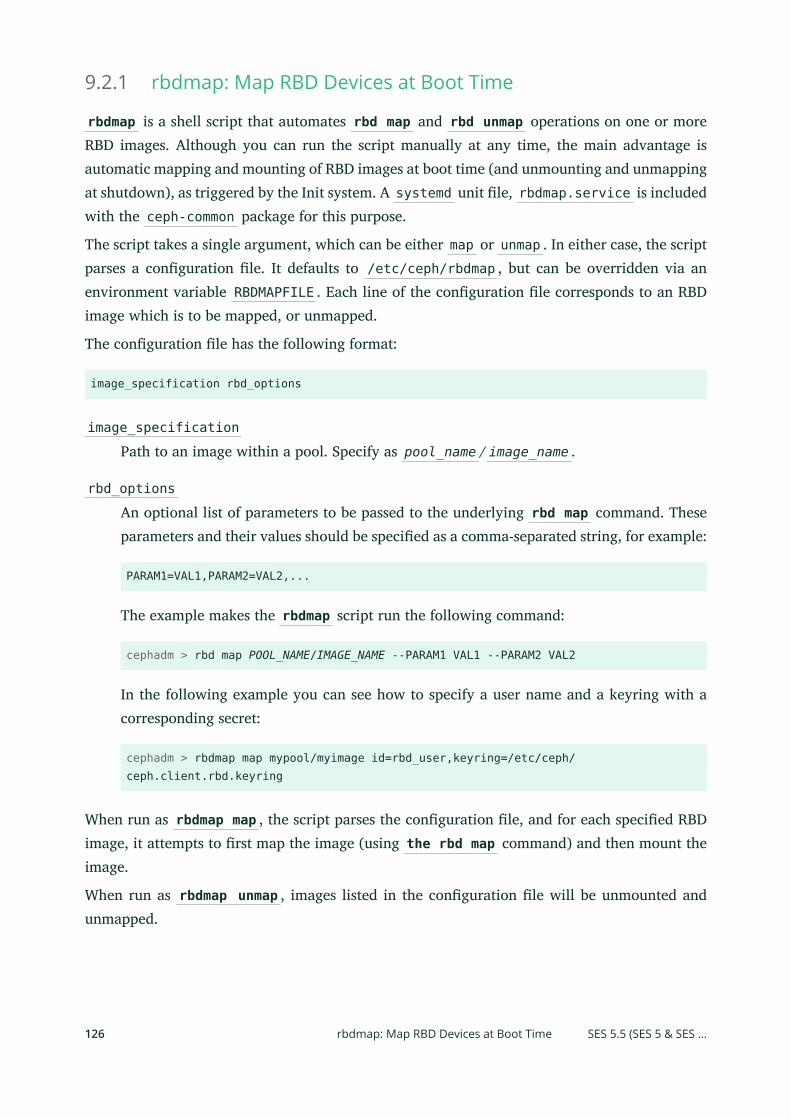
9.2.1 rbdmap: Map RBD Devices at Boot Time
rbdmap is a shell script that automates rbd map and rbd unmap operations on one or moreRBD images. Although you can run the script manually at any time, the main advantage isautomatic mapping and mounting of RBD images at boot time (and unmounting and unmappingat shutdown), as triggered by the Init system. A systemd unit le, rbdmap.service is includedwith the ceph-common package for this purpose.
The script takes a single argument, which can be either map or unmap . In either case, the scriptparses a conguration le. It defaults to /etc/ceph/rbdmap , but can be overridden via anenvironment variable RBDMAPFILE . Each line of the conguration le corresponds to an RBDimage which is to be mapped, or unmapped.
The conguration le has the following format:
image_specification rbd_options
image_specification
Path to an image within a pool. Specify as pool_name / image_name .
rbd_options
An optional list of parameters to be passed to the underlying rbd map command. Theseparameters and their values should be specied as a comma-separated string, for example:
PARAM1=VAL1,PARAM2=VAL2,...
The example makes the rbdmap script run the following command:
cephadm > rbd map POOL_NAME/IMAGE_NAME --PARAM1 VAL1 --PARAM2 VAL2
In the following example you can see how to specify a user name and a keyring with acorresponding secret:
cephadm > rbdmap map mypool/myimage id=rbd_user,keyring=/etc/ceph/ceph.client.rbd.keyring
When run as rbdmap map , the script parses the conguration le, and for each specied RBDimage, it attempts to rst map the image (using the rbd map command) and then mount theimage.
When run as rbdmap unmap , images listed in the conguration le will be unmounted andunmapped.
126 rbdmap: Map RBD Devices at Boot Time SES 5.5 (SES 5 & SES …
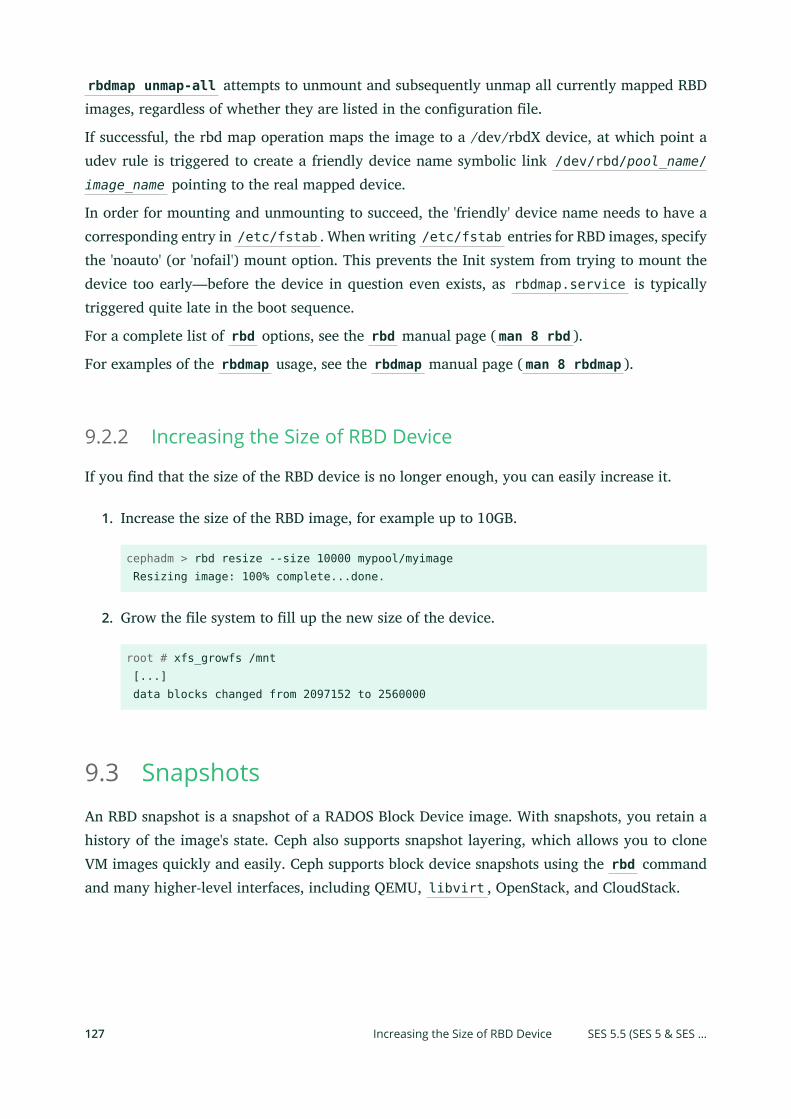
rbdmap unmap-all attempts to unmount and subsequently unmap all currently mapped RBDimages, regardless of whether they are listed in the conguration le.
If successful, the rbd map operation maps the image to a /dev/rbdX device, at which point audev rule is triggered to create a friendly device name symbolic link /dev/rbd/pool_name/image_name pointing to the real mapped device.
In order for mounting and unmounting to succeed, the 'friendly' device name needs to have acorresponding entry in /etc/fstab . When writing /etc/fstab entries for RBD images, specifythe 'noauto' (or 'nofail') mount option. This prevents the Init system from trying to mount thedevice too early—before the device in question even exists, as rbdmap.service is typicallytriggered quite late in the boot sequence.
For a complete list of rbd options, see the rbd manual page ( man 8 rbd ).
For examples of the rbdmap usage, see the rbdmap manual page ( man 8 rbdmap ).
9.2.2 Increasing the Size of RBD Device
If you nd that the size of the RBD device is no longer enough, you can easily increase it.
1. Increase the size of the RBD image, for example up to 10GB.
cephadm > rbd resize --size 10000 mypool/myimage Resizing image: 100% complete...done.
2. Grow the le system to ll up the new size of the device.
root # xfs_growfs /mnt [...] data blocks changed from 2097152 to 2560000
9.3 SnapshotsAn RBD snapshot is a snapshot of a RADOS Block Device image. With snapshots, you retain ahistory of the image's state. Ceph also supports snapshot layering, which allows you to cloneVM images quickly and easily. Ceph supports block device snapshots using the rbd commandand many higher-level interfaces, including QEMU, libvirt , OpenStack, and CloudStack.
127 Increasing the Size of RBD Device SES 5.5 (SES 5 & SES …
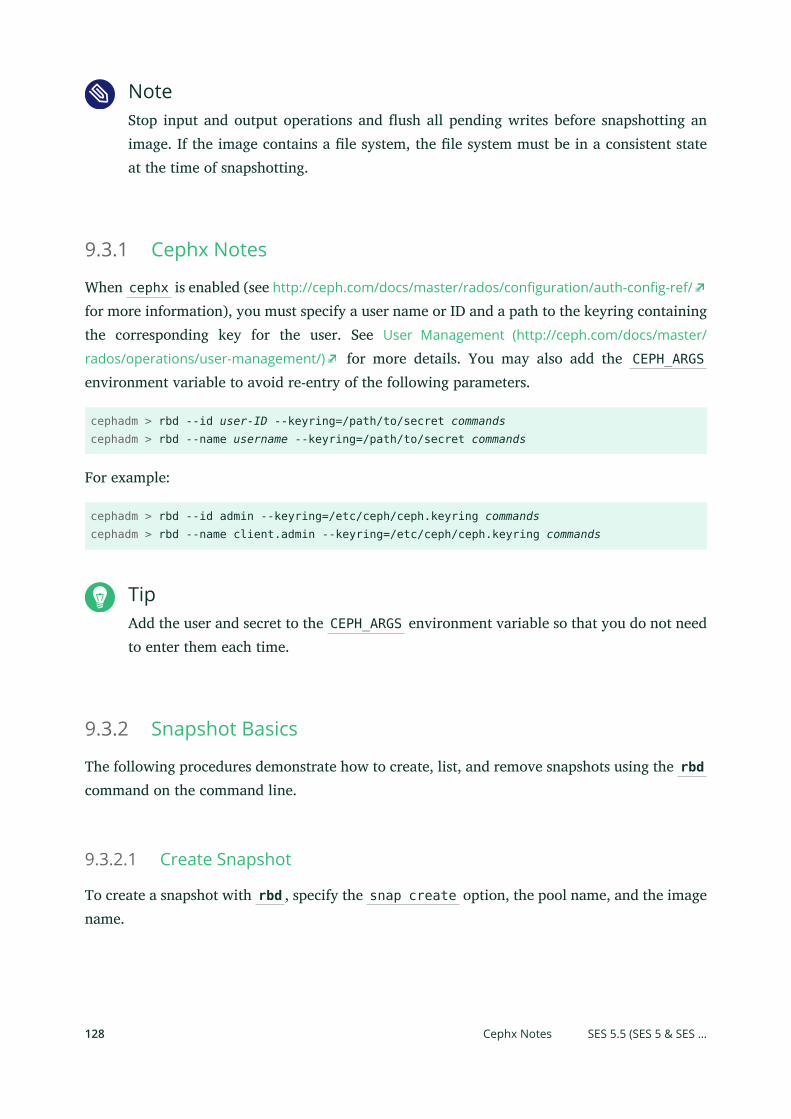
NoteStop input and output operations and ush all pending writes before snapshotting animage. If the image contains a le system, the le system must be in a consistent stateat the time of snapshotting.
9.3.1 Cephx Notes
When cephx is enabled (see http://ceph.com/docs/master/rados/configuration/auth-config-ref/
for more information), you must specify a user name or ID and a path to the keyring containingthe corresponding key for the user. See User Management (http://ceph.com/docs/master/
rados/operations/user-management/) for more details. You may also add the CEPH_ARGSenvironment variable to avoid re-entry of the following parameters.
cephadm > rbd --id user-ID --keyring=/path/to/secret commandscephadm > rbd --name username --keyring=/path/to/secret commands
For example:
cephadm > rbd --id admin --keyring=/etc/ceph/ceph.keyring commandscephadm > rbd --name client.admin --keyring=/etc/ceph/ceph.keyring commands
TipAdd the user and secret to the CEPH_ARGS environment variable so that you do not needto enter them each time.
9.3.2 Snapshot Basics
The following procedures demonstrate how to create, list, and remove snapshots using the rbdcommand on the command line.
9.3.2.1 Create Snapshot
To create a snapshot with rbd , specify the snap create option, the pool name, and the imagename.
128 Cephx Notes SES 5.5 (SES 5 & SES …
cephadm > rbd --pool pool-name snap create --snap snap-name image-namecephadm > rbd snap create pool-name/image-name@snap-name
For example:
cephadm > rbd --pool rbd snap create --snap snapshot1 image1cephadm > rbd snap create rbd/image1@snapshot1
9.3.2.2 List Snapshots
To list snapshots of an image, specify the pool name and the image name.
cephadm > rbd --pool pool-name snap ls image-namecephadm > rbd snap ls pool-name/image-name
For example:
cephadm > rbd --pool rbd snap ls image1cephadm > rbd snap ls rbd/image1
9.3.2.3 Rollback Snapshot
To rollback to a snapshot with rbd , specify the snap rollback option, the pool name, theimage name, and the snapshot name.
cephadm > rbd --pool pool-name snap rollback --snap snap-name image-namecephadm > rbd snap rollback pool-name/image-name@snap-name
For example:
cephadm > rbd --pool pool1 snap rollback --snap snapshot1 image1cephadm > rbd snap rollback pool1/image1@snapshot1
NoteRolling back an image to a snapshot means overwriting the current version of the imagewith data from a snapshot. The time it takes to execute a rollback increases with the sizeof the image. It is faster to clone from a snapshot than to rollback an image to a snapshot,and it is the preferred method of returning to a pre-existing state.
129 Snapshot Basics SES 5.5 (SES 5 & SES …
9.3.2.4 Delete a Snapshot
To delete a snapshot with rbd , specify the snap rm option, the pool name, the image name,and the user name.
cephadm > rbd --pool pool-name snap rm --snap snap-name image-namecephadm > rbd snap rm pool-name/image-name@snap-name
For example:
cephadm > rbd --pool pool1 snap rm --snap snapshot1 image1cephadm > rbd snap rm pool1/image1@snapshot1
NoteCeph OSDs delete data asynchronously, so deleting a snapshot does not free up the diskspace immediately.
9.3.2.5 Purge Snapshots
To delete all snapshots for an image with rbd , specify the snap purge option and the imagename.
cephadm > rbd --pool pool-name snap purge image-namecephadm > rbd snap purge pool-name/image-name
For example:
cephadm > rbd --pool pool1 snap purge image1cephadm > rbd snap purge pool1/image1
9.3.3 Layering
Ceph supports the ability to create multiple copy-on-write (COW) clones of a block devicesnapshot. Snapshot layering enables Ceph block device clients to create images very quickly. Forexample, you might create a block device image with a Linux VM written to it, then, snapshotthe image, protect the snapshot, and create as many copy-on-write clones as you like. A snapshotis read-only, so cloning a snapshot simplies semantics—making it possible to create clonesrapidly.
130 Layering SES 5.5 (SES 5 & SES …
NoteThe terms 'parent' and 'child' mentioned in the command line examples below meana Ceph block device snapshot (parent) and the corresponding image cloned from thesnapshot (child).
Each cloned image (child) stores a reference to its parent image, which enables the cloned imageto open the parent snapshot and read it.
A COW clone of a snapshot behaves exactly like any other Ceph block device image. You canread to, write from, clone, and resize cloned images. There are no special restrictions with clonedimages. However, the copy-on-write clone of a snapshot refers to the snapshot, so you mustprotect the snapshot before you clone it.
Note: --image-format 1 not SupportedYou cannot create snapshots of images created with the deprecated rbd create --image-format 1 option. Ceph only supports cloning of the default format 2 images.
9.3.3.1 Getting Started with Layering
Ceph block device layering is a simple process. You must have an image. You must create asnapshot of the image. You must protect the snapshot. After you have performed these steps,you can begin cloning the snapshot.
The cloned image has a reference to the parent snapshot, and includes the pool ID, image ID,and snapshot ID. The inclusion of the pool ID means that you may clone snapshots from onepool to images in another pool.
Image Template: A common use case for block device layering is to create a master imageand a snapshot that serves as a template for clones. For example, a user may create animage for a Linux distribution (for example, SUSE Linux Enterprise Server), and create a
131 Layering SES 5.5 (SES 5 & SES …
snapshot for it. Periodically, the user may update the image and create a new snapshot(for example, zypper ref && zypper patch followed by rbd snap create ). As theimage matures, the user can clone any one of the snapshots.
Extended Template: A more advanced use case includes extending a template image thatprovides more information than a base image. For example, a user may clone an image (aVM template) and install other software (for example, a database, a content managementsystem, or an analytics system), and then snapshot the extended image, which itself maybe updated in the same way as the base image.
Template Pool: One way to use block device layering is to create a pool that contains masterimages that act as templates, and snapshots of those templates. You may then extend read-only privileges to users so that they may clone the snapshots without the ability to writeor execute within the pool.
Image Migration/Recovery: One way to use block device layering is to migrate or recoverdata from one pool into another pool.
9.3.3.2 Protecting a Snapshot
Clones access the parent snapshots. All clones would break if a user inadvertently deleted theparent snapshot. To prevent data loss, you need to protect the snapshot before you can clone it.
cephadm > rbd --pool pool-name snap protect \ --image image-name --snap snapshot-namecephadm > rbd snap protect pool-name/image-name@snapshot-name
For example:
cephadm > rbd --pool pool1 snap protect --image image1 --snap snapshot1cephadm > rbd snap protect pool1/image1@snapshot1
NoteYou cannot delete a protected snapshot.
9.3.3.3 Cloning a Snapshot
To clone a snapshot, you need to specify the parent pool, image, snapshot, the child pool, andthe image name. You need to protect the snapshot before you can clone it.
132 Layering SES 5.5 (SES 5 & SES …
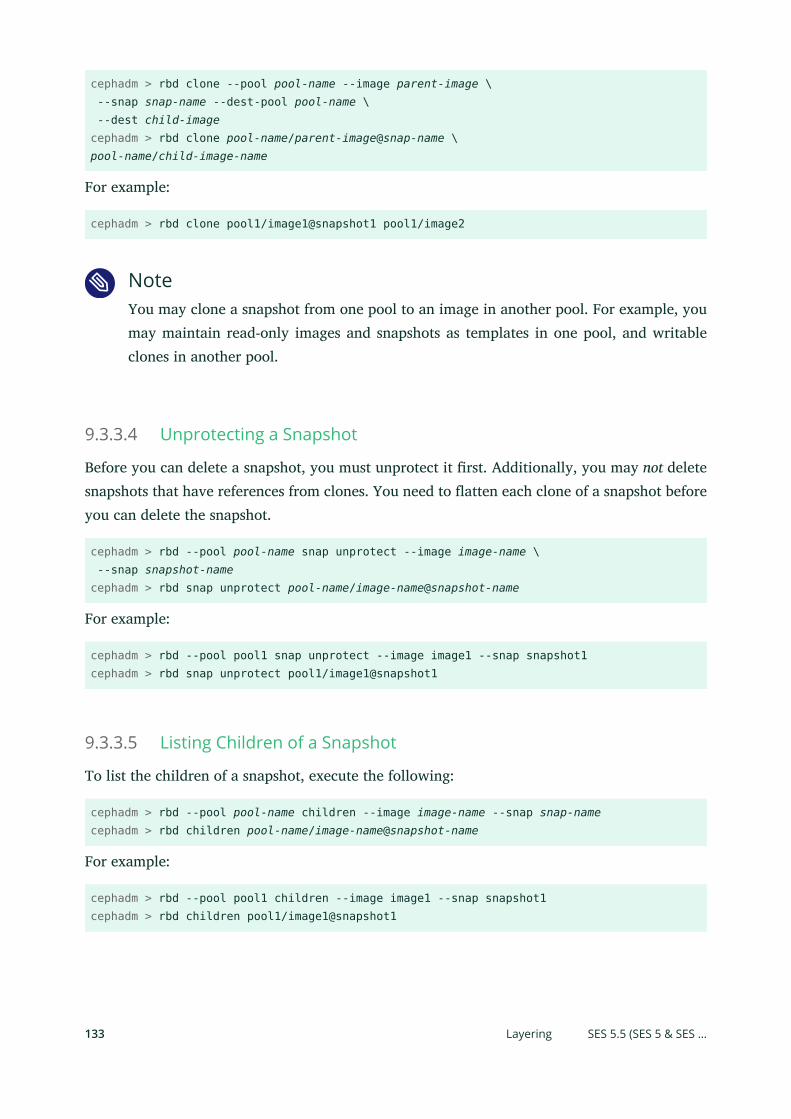
cephadm > rbd clone --pool pool-name --image parent-image \ --snap snap-name --dest-pool pool-name \ --dest child-imagecephadm > rbd clone pool-name/parent-image@snap-name \pool-name/child-image-name
For example:
cephadm > rbd clone pool1/image1@snapshot1 pool1/image2
NoteYou may clone a snapshot from one pool to an image in another pool. For example, youmay maintain read-only images and snapshots as templates in one pool, and writableclones in another pool.
9.3.3.4 Unprotecting a Snapshot
Before you can delete a snapshot, you must unprotect it rst. Additionally, you may not deletesnapshots that have references from clones. You need to atten each clone of a snapshot beforeyou can delete the snapshot.
cephadm > rbd --pool pool-name snap unprotect --image image-name \ --snap snapshot-namecephadm > rbd snap unprotect pool-name/image-name@snapshot-name
For example:
cephadm > rbd --pool pool1 snap unprotect --image image1 --snap snapshot1cephadm > rbd snap unprotect pool1/image1@snapshot1
9.3.3.5 Listing Children of a Snapshot
To list the children of a snapshot, execute the following:
cephadm > rbd --pool pool-name children --image image-name --snap snap-namecephadm > rbd children pool-name/image-name@snapshot-name
For example:
cephadm > rbd --pool pool1 children --image image1 --snap snapshot1cephadm > rbd children pool1/image1@snapshot1
133 Layering SES 5.5 (SES 5 & SES …
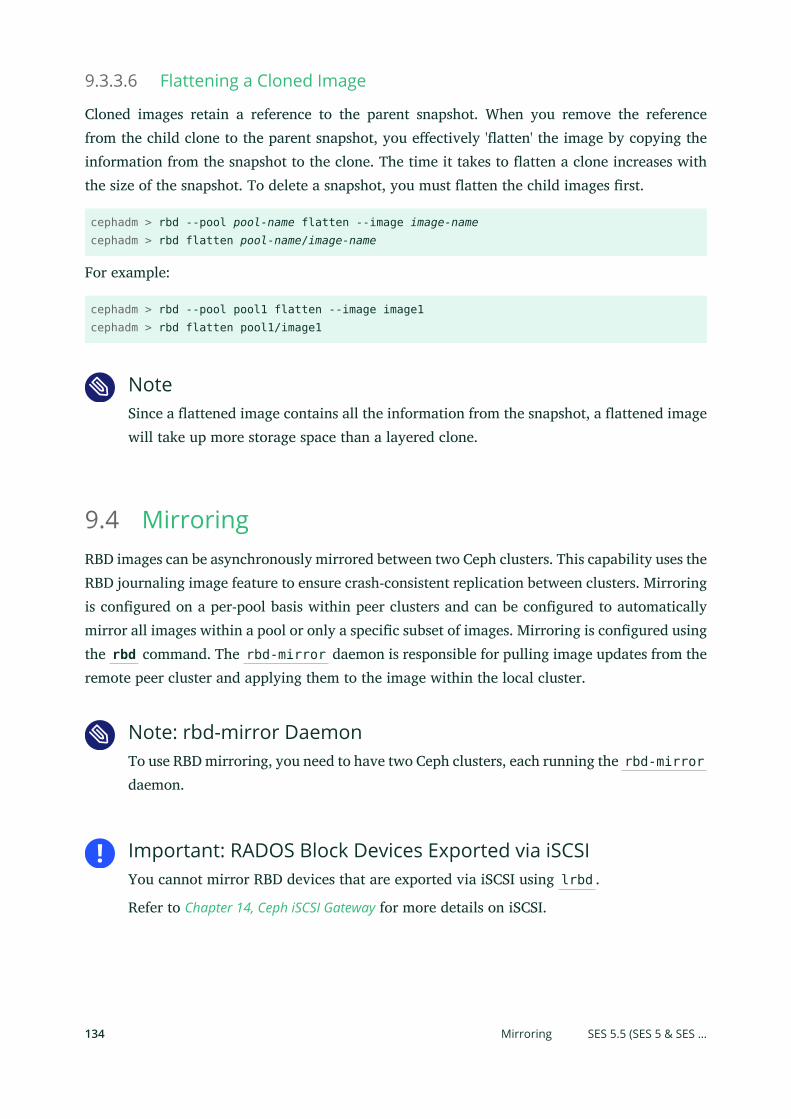
9.3.3.6 Flattening a Cloned Image
Cloned images retain a reference to the parent snapshot. When you remove the referencefrom the child clone to the parent snapshot, you eectively 'atten' the image by copying theinformation from the snapshot to the clone. The time it takes to atten a clone increases withthe size of the snapshot. To delete a snapshot, you must atten the child images rst.
cephadm > rbd --pool pool-name flatten --image image-namecephadm > rbd flatten pool-name/image-name
For example:
cephadm > rbd --pool pool1 flatten --image image1cephadm > rbd flatten pool1/image1
NoteSince a attened image contains all the information from the snapshot, a attened imagewill take up more storage space than a layered clone.
9.4 MirroringRBD images can be asynchronously mirrored between two Ceph clusters. This capability uses theRBD journaling image feature to ensure crash-consistent replication between clusters. Mirroringis congured on a per-pool basis within peer clusters and can be congured to automaticallymirror all images within a pool or only a specic subset of images. Mirroring is congured usingthe rbd command. The rbd-mirror daemon is responsible for pulling image updates from theremote peer cluster and applying them to the image within the local cluster.
Note: rbd-mirror DaemonTo use RBD mirroring, you need to have two Ceph clusters, each running the rbd-mirrordaemon.
Important: RADOS Block Devices Exported via iSCSIYou cannot mirror RBD devices that are exported via iSCSI using lrbd .
Refer to Chapter 14, Ceph iSCSI Gateway for more details on iSCSI.
134 Mirroring SES 5.5 (SES 5 & SES …
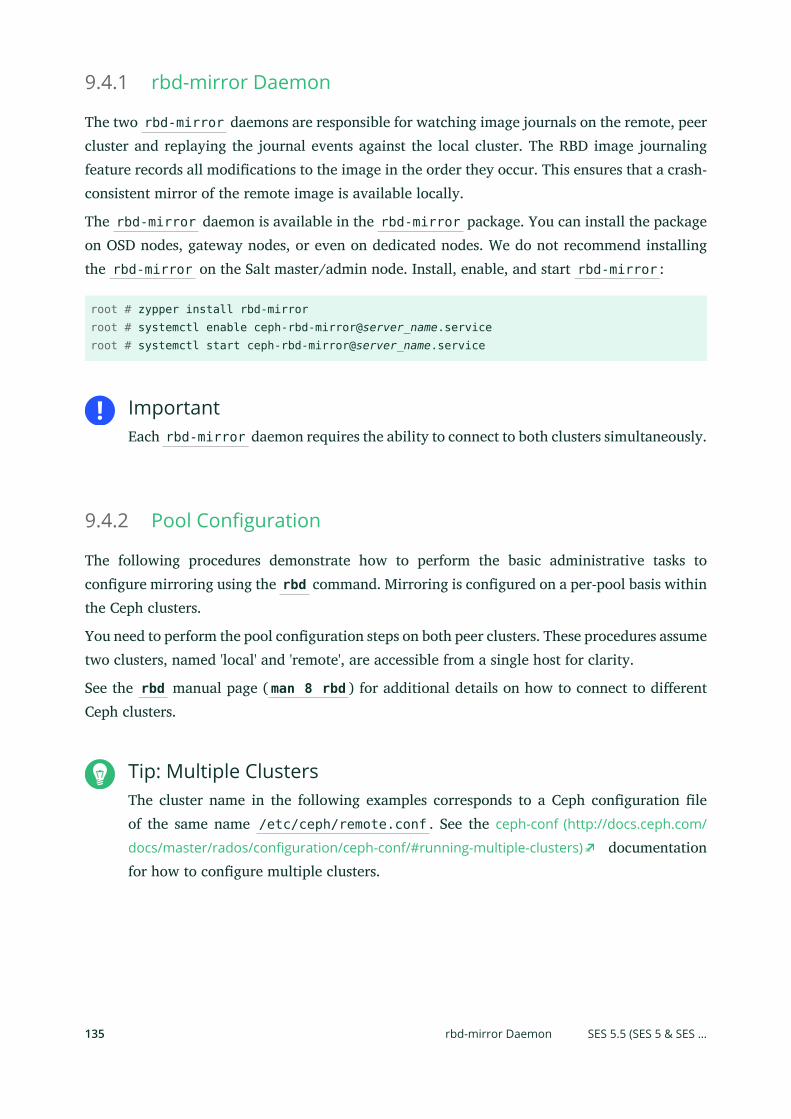
9.4.1 rbd-mirror Daemon
The two rbd-mirror daemons are responsible for watching image journals on the remote, peercluster and replaying the journal events against the local cluster. The RBD image journalingfeature records all modications to the image in the order they occur. This ensures that a crash-consistent mirror of the remote image is available locally.
The rbd-mirror daemon is available in the rbd-mirror package. You can install the packageon OSD nodes, gateway nodes, or even on dedicated nodes. We do not recommend installingthe rbd-mirror on the Salt master/admin node. Install, enable, and start rbd-mirror :
root # zypper install rbd-mirrorroot # systemctl enable ceph-rbd-mirror@server_name.serviceroot # systemctl start ceph-rbd-mirror@server_name.service
ImportantEach rbd-mirror daemon requires the ability to connect to both clusters simultaneously.
9.4.2 Pool Configuration
The following procedures demonstrate how to perform the basic administrative tasks tocongure mirroring using the rbd command. Mirroring is congured on a per-pool basis withinthe Ceph clusters.
You need to perform the pool conguration steps on both peer clusters. These procedures assumetwo clusters, named 'local' and 'remote', are accessible from a single host for clarity.
See the rbd manual page ( man 8 rbd ) for additional details on how to connect to dierentCeph clusters.
Tip: Multiple ClustersThe cluster name in the following examples corresponds to a Ceph conguration leof the same name /etc/ceph/remote.conf . See the ceph-conf (http://docs.ceph.com/
docs/master/rados/configuration/ceph-conf/#running-multiple-clusters) documentationfor how to congure multiple clusters.
135 rbd-mirror Daemon SES 5.5 (SES 5 & SES …
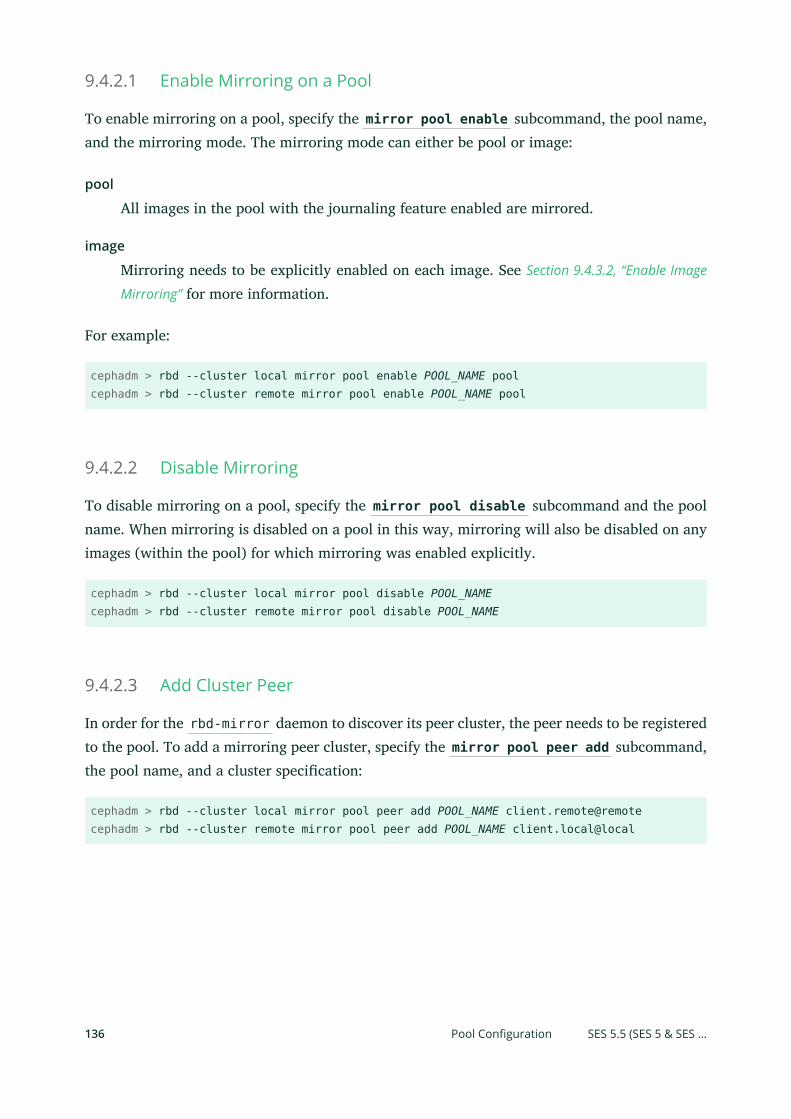
9.4.2.1 Enable Mirroring on a Pool
To enable mirroring on a pool, specify the mirror pool enable subcommand, the pool name,and the mirroring mode. The mirroring mode can either be pool or image:
pool
All images in the pool with the journaling feature enabled are mirrored.
image
Mirroring needs to be explicitly enabled on each image. See Section 9.4.3.2, “Enable Image
Mirroring” for more information.
For example:
cephadm > rbd --cluster local mirror pool enable POOL_NAME poolcephadm > rbd --cluster remote mirror pool enable POOL_NAME pool
9.4.2.2 Disable Mirroring
To disable mirroring on a pool, specify the mirror pool disable subcommand and the poolname. When mirroring is disabled on a pool in this way, mirroring will also be disabled on anyimages (within the pool) for which mirroring was enabled explicitly.
cephadm > rbd --cluster local mirror pool disable POOL_NAMEcephadm > rbd --cluster remote mirror pool disable POOL_NAME
9.4.2.3 Add Cluster Peer
In order for the rbd-mirror daemon to discover its peer cluster, the peer needs to be registeredto the pool. To add a mirroring peer cluster, specify the mirror pool peer add subcommand,the pool name, and a cluster specication:
cephadm > rbd --cluster local mirror pool peer add POOL_NAME client.remote@remotecephadm > rbd --cluster remote mirror pool peer add POOL_NAME client.local@local
136 Pool Configuration SES 5.5 (SES 5 & SES …
9.4.2.4 Remove Cluster Peer
To remove a mirroring peer cluster, specify the mirror pool peer remove subcommand, thepool name, and the peer UUID (available from the rbd mirror pool info command):
cephadm > rbd --cluster local mirror pool peer remove POOL_NAME \ 55672766-c02b-4729-8567-f13a66893445cephadm > rbd --cluster remote mirror pool peer remove POOL_NAME \ 60c0e299-b38f-4234-91f6-eed0a367be08
9.4.3 Image Configuration
Unlike pool conguration, image conguration only needs to be performed against a singlemirroring peer Ceph cluster.
Mirrored RBD images are designated as either primary or non-primary. This is a property of theimage and not the pool. Images that are designated as non-primary cannot be modied.
Images are automatically promoted to primary when mirroring is rst enabled on an image(either implicitly if the pool mirror mode was 'pool' and the image has the journaling imagefeature enabled, or explicitly (see Section 9.4.3.2, “Enable Image Mirroring”) by the rbd command).
9.4.3.1 Image Journaling Support
RBD mirroring uses the RBD journaling feature to ensure that the replicated image alwaysremains crash-consistent. Before an image can be mirrored to a peer cluster, the journalingfeature must be enabled. The feature can be enabled at the time of image creation by providingthe --image-feature exclusive-lock,journaling option to the rbd command.
Alternatively, the journaling feature can be dynamically enabled on pre-existing RBD images.To enable journaling, specify the feature enable subcommand, the pool and image name,and the feature name:
cephadm > rbd --cluster local feature enable POOL_NAME/IMAGE_NAME journaling
Note: Option DependencyThe journaling feature is dependent on the exclusive-lock feature. If theexclusive-lock feature is not already enabled, you need to enable it prior to enablingthe journaling feature.
137 Image Configuration SES 5.5 (SES 5 & SES …
Warning: Journaling on All New ImagesYou can enable journaling on all new images by default by appending the journalingvalue to the rbd default features option in the Ceph conguration le. For example:
rbd default features = layering,exclusive-lock,object-map,deep-flatten,journaling
Before applying such change, carefully consider if enabling journaling on all new imagesis good for your deployment because it can have negative performance impact.
9.4.3.2 Enable Image Mirroring
If mirroring is congured in the 'image' mode, then it is necessary to explicitly enable mirroringfor each image within the pool. To enable mirroring for a specic image, specify the mirrorimage enable subcommand along with the pool and image name:
cephadm > rbd --cluster local mirror image enable POOL_NAME/IMAGE_NAME
9.4.3.3 Disable Image Mirroring
To disable mirroring for a specic image, specify the mirror image disable subcommandalong with the pool and image name:
cephadm > rbd --cluster local mirror image disable POOL_NAME/IMAGE_NAME
9.4.3.4 Image Promotion and Demotion
In a failover scenario where the primary designation needs to be moved to the image in thepeer cluster, you need to stop access to the primary image, demote the current primary image,promote the new primary image, and resume access to the image on the alternate cluster.
138 Image Configuration SES 5.5 (SES 5 & SES …
Note: Forced PromotionPromotion can be forced using the --force option. Forced promotion is needed whenthe demotion cannot be propagated to the peer cluster (for example, in case of clusterfailure or communication outage). This will result in a split-brain scenario between thetwo peers, and the image will no longer be synchronized until a resync subcommandis issued.
To demote a specic image to non-primary, specify the mirror image demote subcommandalong with the pool and image name:
cephadm > rbd --cluster local mirror image demote POOL_NAME/IMAGE_NAME
To demote all primary images within a pool to non-primary, specify the mirror pool demotesubcommand along with the pool name:
cephadm > rbd --cluster local mirror pool demote POOL_NAME
To promote a specic image to primary, specify the mirror image promote subcommandalong with the pool and image name:
cephadm > rbd --cluster remote mirror image promote POOL_NAME/IMAGE_NAME
To promote all non-primary images within a pool to primary, specify the mirror pool promotesubcommand along with the pool name:
cephadm > rbd --cluster local mirror pool promote POOL_NAME
Tip: Split I/O LoadSince the primary or non-primary status is per-image, it is possible to have two clusterssplit the IO load and stage failover or failback.
9.4.3.5 Force Image Resync
If a split-brain event is detected by the rbd-mirror daemon, it will not attempt to mirrorthe aected image until corrected. To resume mirroring for an image, rst demote the imagedetermined to be out of date and then request a resync to the primary image. To request an imageresync, specify the mirror image resync subcommand along with the pool and image name:
cephadm > rbd mirror image resync POOL_NAME/IMAGE_NAME
139 Image Configuration SES 5.5 (SES 5 & SES …
9.4.4 Mirror Status
The peer cluster replication status is stored for every primary mirrored image. This status canbe retrieved using the mirror image status and mirror pool status subcommands:
To request the mirror image status, specify the mirror image status subcommand along withthe pool and image name:
cephadm > rbd mirror image status POOL_NAME/IMAGE_NAME
To request the mirror pool summary status, specify the mirror pool status subcommandalong with the pool name:
cephadm > rbd mirror pool status POOL_NAME
Tip:Adding the --verbose option to the mirror pool status subcommand willadditionally output status details for every mirroring image in the pool.
9.5 Advanced FeaturesRADOS Block Device supports advanced features that enhance the functionality of RBD images.You can specify the features either on the command line when creating an RBD image, or in theCeph conguration le by using the rbd_default_features option.
You can specify the values of the rbd_default_features option in two ways:
As a sum of features' internal values. Each feature has its own internal value—for example'layering' has 1 and 'fast-di' has 16. Therefore to activate these two feature by default,include the following:
rbd_default_features = 17
As a comma-separated list of features. The previous example will look as follows:
rbd_default_features = layering,fast-diff
140 Mirror Status SES 5.5 (SES 5 & SES …
Note: Features not Supported by iSCSIRBD images with the following features will not be supported by iSCSI: deep-flatten ,striping , exclusive-lock , object-map , journaling , fast-diff
List of advanced RBD features follows:
layering
Layering enables you to use cloning.Internal value is 1, default is 'yes'.
striping
Striping spreads data across multiple objects and helps with parallelism for sequentialread/write workloads. It prevents single node bottleneck for large or busy RADOS BlockDevices.Internal value is 2, default is 'yes'.
exclusive-lock
When enabled, it requires a client to get a lock on an object before making a write. Enablethe exclusive lock only when a single client is accessing an image at the same time. Internalvalue is 4. Default is 'yes'.
object-map
Object map support depends on exclusive lock support. Block devices are thin provisionedmeaning that they only store data that actually exists. Object map support helps trackwhich objects actually exist (have data stored on a drive). Enabling object map supportspeeds up I/O operations for cloning, importing and exporting a sparsely populated image,and deleting.Internal value is 8, default is 'yes'.
fast-diff
Fast-di support depends on object map support and exclusive lock support. It adds anotherproperty to the object map, which makes it much faster to generate dis between snapshotsof an image, and the actual data usage of a snapshot.Internal value is 16, default is 'yes'.
deep-flatten
141 Advanced Features SES 5.5 (SES 5 & SES …

Deep-atten makes the rbd flatten (see Section 9.3.3.6, “Flattening a Cloned Image”) workon all the snapshots of an image, in addition to the image itself. Without it, snapshots of animage will still rely on the parent, therefore you will not be able to delete the parent imageuntil the snapshots are deleted. Deep-atten makes a parent independent of its clones,even if they have snapshots.Internal value is 32, default is 'yes'.
journaling
Journaling support depends on exclusive lock support. Journaling records all modicationsto an image in the order they occur. RBD mirroring (see Section 9.4, “Mirroring”) utilizes thejournal to replicate a crash consistent image to a remote cluster.Internal value is 64, default is 'no'.
142 Advanced Features SES 5.5 (SES 5 & SES …
10 Erasure Coded Pools
Ceph provides an alternative to the normal replication of data in pools, called erasure or erasurecoded pool. Erasure pools do not provide all functionality of replicated pools (for example itcannot store metadata for RBD pools), but require less raw storage. A default erasure poolcapable of storing 1 TB of data requires 1,5 TB of raw storage, allowing a single disk failure. Thiscompares favorably to a replicated pool which needs 2 TB of raw storage for the same purpose.
For background information on Erasure Code, see https://en.wikipedia.org/wiki/Erasure_code .
NoteWhen using FileStore, you cannot access erasure coded pools with the RBD interfaceunless you have a cache tier congured. Refer to Section 11.5, “Erasure Coded Pool and Cache
Tiering” for more details, or use BlueStore.
10.1 Prerequisite for Erasure Coded PoolsTo make use of erasure coding, you need to:
Dene an erasure rule in the CRUSH Map.
Dene an erasure code prole that species the coding algorithm to be used.
Create a pool using the previously mentioned rule and prole.
Keep in mind that changing the prole and the details in the prole will not be possible afterthe pool was created and has data.
Ensure that the CRUSH rules for erasure pools use indep for step . For details see Section 7.3.2,
“firstn and indep”.
10.2 Creating a Sample Erasure Coded PoolThe simplest erasure coded pool is equivalent to RAID5 and requires at least three hosts. Thisprocedure describes how to create a pool for testing purposes.
143 Prerequisite for Erasure Coded Pools SES 5.5 (SES 5 & SES …

1. The command ceph osd pool create is used to create a pool with type erasure. The12 stands for the number of placement groups. With default parameters, the pool is ableto handle the failure of one OSD.
cephadm > ceph osd pool create ecpool 12 12 erasurepool 'ecpool' created
2. The string ABCDEFGHI is written into an object called NYAN .
cephadm > echo ABCDEFGHI | rados --pool ecpool put NYAN -
3. For testing purposes OSDs can now be disabled, for example by disconnecting them fromthe network.
4. To test whether the pool can handle the failure of devices, the content of the le can beaccessed with the rados command.
cephadm > rados --pool ecpool get NYAN -ABCDEFGHI
10.3 Erasure Code ProfilesWhen the ceph osd pool create command is invoked to create an erasure pool, the defaultprole is used, unless another prole is specied. Proles dene the redundancy of data. Thisis done by setting two parameters, arbitrarily named k and m . k and m dene in how manychunks a piece of data is split and how many coding chunks are created. Redundant chunksare then stored on dierent OSDs.
Denitions required for erasure pool proles:
chunk
when the encoding function is called, it returns chunks of the same size: data chunks whichcan be concatenated to reconstruct the original object and coding chunks which can beused to rebuild a lost chunk.
k
the number of data chunks, that is the number of chunks into which the original object isdivided. For example if k = 2 a 10KB object will be divided into k objects of 5KB each.
m
144 Erasure Code Profiles SES 5.5 (SES 5 & SES …
the number of coding chunks, that is the number of additional chunks computed by theencoding functions. If there are 2 coding chunks, it means 2 OSDs can be out withoutlosing data.
crush-failure-domain
denes to which devices the chunks are distributed. A bucket type needs to be set as value.For all bucket types, see Section 7.2, “Buckets”. If the failure domain is rack , the chunkswill be stored on dierent racks to increase the resilience in case of rack failures. Keep inmind that this requires k+m racks.
With the default erasure code prole used in Section 10.2, “Creating a Sample Erasure Coded Pool”,you will not lose cluster data if a single OSD or host fails. Therefore, to store 1 TB of data itneeds another 0.5 TB of raw storage. That means 1.5 TB of raw storage are required for 1 TB ofdata (due to k=2,m=1). This is equivalent to a common RAID 5 conguration. For comparison:a replicated pool needs 2 TB of raw storage to store 1 TB of data.
The settings of the default prole can be displayed with:
cephadm > ceph osd erasure-code-profile get defaultdirectory=.libsk=2m=1plugin=jerasurecrush-failure-domain=hosttechnique=reed_sol_van
Choosing the right prole is important because it cannot be modied after the pool is created.A new pool with a dierent prole needs to be created and all objects from the previous poolmoved to the new one (see Section 8.3, “Pool Migration”).
The most important parameters of the prole are k , m and crush-failure-domain becausethey dene the storage overhead and the data durability. For example, if the desired architecturemust sustain the loss of two racks with a storage overhead of 66% overhead, the following prolecan be dened. Note that this is only valid with a CRUSH Map that has buckets of type 'rack':
cephadm > ceph osd erasure-code-profile set myprofile \ k=3 \ m=2 \ crush-failure-domain=rack
The example Section 10.2, “Creating a Sample Erasure Coded Pool” can be repeated with this newprole:
cephadm > ceph osd pool create ecpool 12 12 erasure myprofile
145 Erasure Code Profiles SES 5.5 (SES 5 & SES …
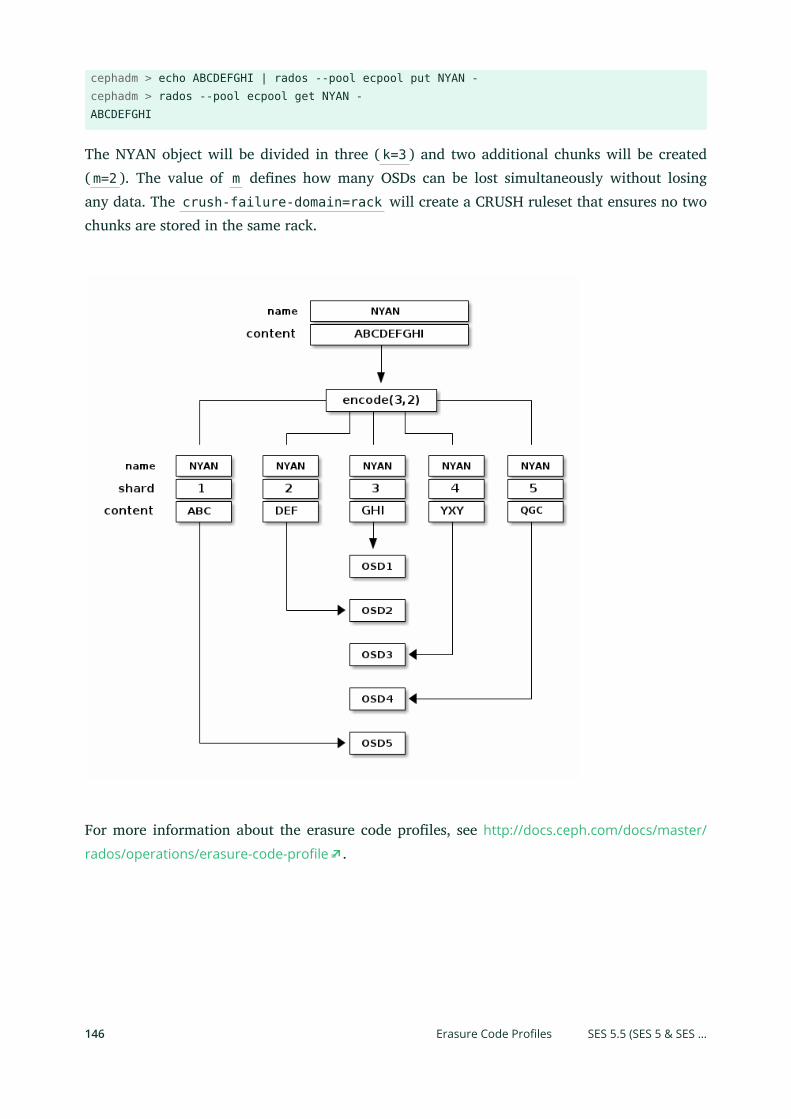
cephadm > echo ABCDEFGHI | rados --pool ecpool put NYAN -cephadm > rados --pool ecpool get NYAN -ABCDEFGHI
The NYAN object will be divided in three ( k=3 ) and two additional chunks will be created( m=2 ). The value of m denes how many OSDs can be lost simultaneously without losingany data. The crush-failure-domain=rack will create a CRUSH ruleset that ensures no twochunks are stored in the same rack.
For more information about the erasure code proles, see http://docs.ceph.com/docs/master/
rados/operations/erasure-code-profile .
146 Erasure Code Profiles SES 5.5 (SES 5 & SES …
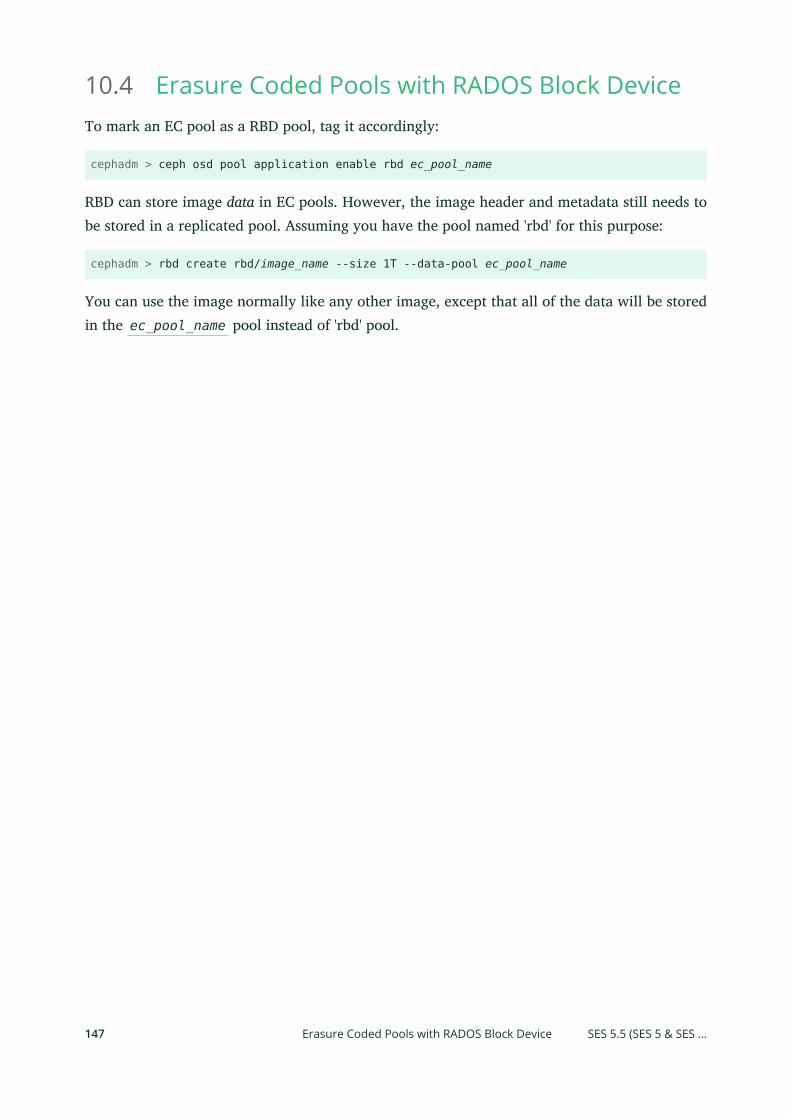
10.4 Erasure Coded Pools with RADOS Block DeviceTo mark an EC pool as a RBD pool, tag it accordingly:
cephadm > ceph osd pool application enable rbd ec_pool_name
RBD can store image data in EC pools. However, the image header and metadata still needs tobe stored in a replicated pool. Assuming you have the pool named 'rbd' for this purpose:
cephadm > rbd create rbd/image_name --size 1T --data-pool ec_pool_name
You can use the image normally like any other image, except that all of the data will be storedin the ec_pool_name pool instead of 'rbd' pool.
147 Erasure Coded Pools with RADOS Block Device SES 5.5 (SES 5 & SES …
11 Cache Tiering
A cache tier is an additional storage layer implemented between the client and the standardstorage. It is designed to speed up access to pools stored on slow hard disks and erasure codedpools.
Typically cache tiering involves creating a pool of relatively fast storage devices (for exampleSSD drives) congured to act as a cache tier, and a backing pool of slower and cheaper devicescongured to act as a storage tier. The size of the cache pool is usually 10-20% of the storagepool.
11.1 Tiered Storage TerminologyCache tiering recognizes two types of pools: a cache pool and a storage pool.
TipFor general information on pools, see Chapter 8, Managing Storage Pools.
storage pool
Either a standard replicated pool that stores several copies of an object in the Ceph storagecluster, or an erasure coded pool (see Chapter 10, Erasure Coded Pools).The storage pool is sometimes referred to as 'backing' or 'cold' storage.
cache pool
A standard replicated pool stored on a relatively small but fast storage device with theirown ruleset in a CRUSH Map.The cache pool is also referred to as 'hot' storage.
148 Tiered Storage Terminology SES 5.5 (SES 5 & SES …
11.2 Points to ConsiderCache tiering may degrade the cluster performance for specic workloads. The following pointsshow some of its aspects that you need to consider:
Workload-dependent: Whether a cache will improve performance is dependent on theworkload. Because there is a cost associated with moving objects into or out of the cache,it can be more eective when most of the requests touch a small number of objects. Thecache pool should be large enough to capture the working set for your workload to avoidthrashing.
Dicult to benchmark: Most performance benchmarks may show low performance withcache tiering. The reason is that they request a big set of objects, and it takes a long timefor the cache to 'warm up'.
Possibly low performance: For workloads that are not suitable for cache tiering, performanceis often slower than a normal replicated pool without cache tiering enabled.
librados object enumeration: If your application is using librados directly and relies onobject enumeration, cache tiering may not work as expected. (This is not a problem forObject Gateway, RBD, or CephFS.)
11.3 When to Use Cache TieringConsider using cache tiering in the following cases:
Your erasure coded pools are stored on FileStore and you need to access them via RADOSBlock Device. For more information on RBD, see Chapter 9, RADOS Block Device.
Your erasure coded pools are stored on FileStore and you need to access them via iSCSI.For more information on iSCSI, refer to Chapter 14, Ceph iSCSI Gateway.
You have a limited number of high-performance storage and a large collection of low-performance storage, and need to access the stored data faster.
149 Points to Consider SES 5.5 (SES 5 & SES …
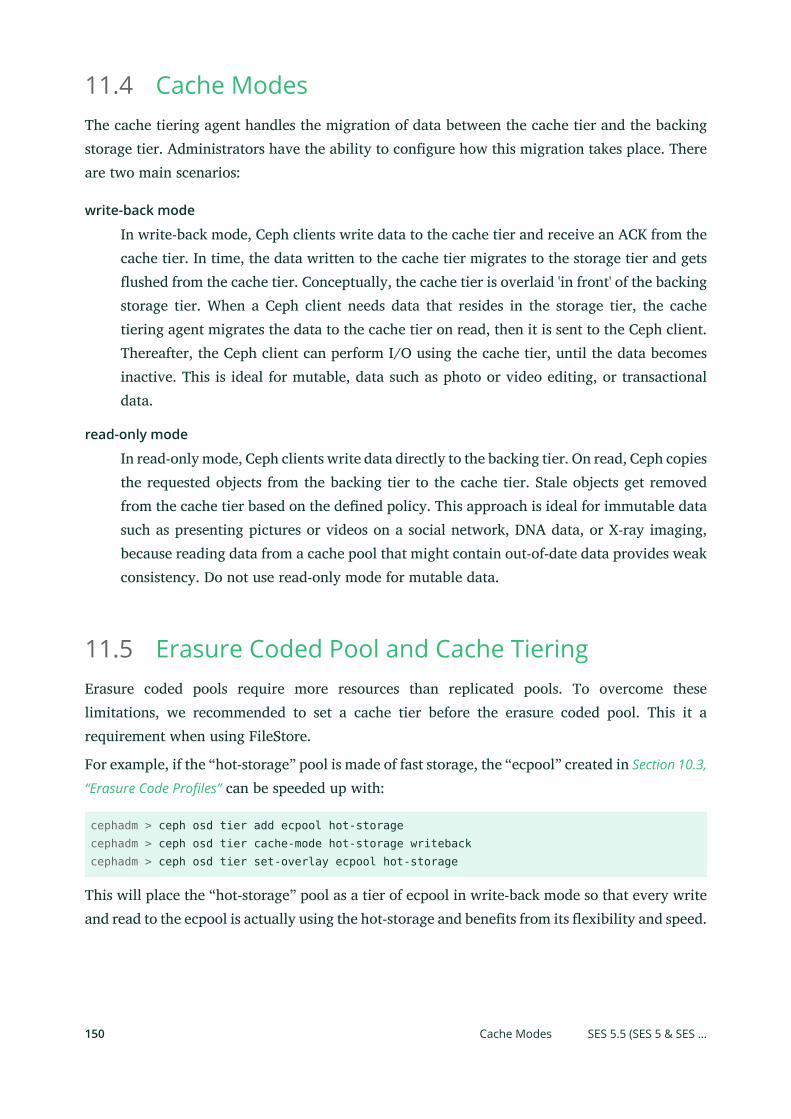
11.4 Cache ModesThe cache tiering agent handles the migration of data between the cache tier and the backingstorage tier. Administrators have the ability to congure how this migration takes place. Thereare two main scenarios:
write-back mode
In write-back mode, Ceph clients write data to the cache tier and receive an ACK from thecache tier. In time, the data written to the cache tier migrates to the storage tier and getsushed from the cache tier. Conceptually, the cache tier is overlaid 'in front' of the backingstorage tier. When a Ceph client needs data that resides in the storage tier, the cachetiering agent migrates the data to the cache tier on read, then it is sent to the Ceph client.Thereafter, the Ceph client can perform I/O using the cache tier, until the data becomesinactive. This is ideal for mutable, data such as photo or video editing, or transactionaldata.
read-only mode
In read-only mode, Ceph clients write data directly to the backing tier. On read, Ceph copiesthe requested objects from the backing tier to the cache tier. Stale objects get removedfrom the cache tier based on the dened policy. This approach is ideal for immutable datasuch as presenting pictures or videos on a social network, DNA data, or X-ray imaging,because reading data from a cache pool that might contain out-of-date data provides weakconsistency. Do not use read-only mode for mutable data.
11.5 Erasure Coded Pool and Cache TieringErasure coded pools require more resources than replicated pools. To overcome theselimitations, we recommended to set a cache tier before the erasure coded pool. This it arequirement when using FileStore.
For example, if the “hot-storage” pool is made of fast storage, the “ecpool” created in Section 10.3,
“Erasure Code Profiles” can be speeded up with:
cephadm > ceph osd tier add ecpool hot-storagecephadm > ceph osd tier cache-mode hot-storage writebackcephadm > ceph osd tier set-overlay ecpool hot-storage
This will place the “hot-storage” pool as a tier of ecpool in write-back mode so that every writeand read to the ecpool is actually using the hot-storage and benets from its exibility and speed.
150 Cache Modes SES 5.5 (SES 5 & SES …

cephadm > rbd --pool ecpool create --size 10 myvolume
For more information about cache tiering, see Chapter 11, Cache Tiering.
11.6 Setting Up an Example Tiered StorageThis section illustrates how to set up a fast SSD cache tier (hot storage) in front of a standardhard disk (cold storage).
TipThe following example is for illustration purposes only and includes a setup with one rootand one rule for the SSD part residing on a single Ceph node.
In the production environment, cluster setups typically include more root and rule entriesfor the hot storage, and also mixed nodes, with both SSDs and SATA disks.
1. Create two additional CRUSH rules, 'replicated_ssd' for the fast SSD caching device class,and 'replicated_hdd' for the slower HDD device class:
cephadm > ceph osd crush rule create-replicated replicated_ssd default host ssdcephadm > ceph osd crush rule create-replicated replicated_hdd default host hdd
2. Switch all existing pools to the 'replicated_hdd' rule. This prevents Ceph from storing datato the newly added SSD devices:
cephadm > ceph osd pool set POOL_NAME crush_rule replicated_hdd
3. Turn the machine into a Ceph node using DeepSea. Install the software and congure thehost machine as described in Section 1.1, “Adding New Cluster Nodes”. Let us assume that itsname is node-4 . This node needs to have 4 OSD disks.Turn the machines into a Ceph nodes using DeepSea. Install the software and congureas described in Section 1.1, “Adding New Cluster Nodes”. In this example, the nodes have 4OSD disks.
[...]host node-4 { id -5 # do not change unnecessarily # weight 0.012
151 Setting Up an Example Tiered Storage SES 5.5 (SES 5 & SES …
alg straw hash 0 # rjenkins1 item osd.6 weight 0.003 item osd.7 weight 0.003 item osd.8 weight 0.003 item osd.9 weight 0.003}[...]
4. Edit the CRUSH map for the hot storage pool mapped to the OSDs backed by the fast SSDdrives. Dene a second hierarchy with a root node for the SSDs (as 'root ssd'). Additionally,change the weight and a CRUSH rule for the SSDs. For more information on CRUSH map,see http://docs.ceph.com/docs/master/rados/operations/crush-map/ .Edit the CRUSH map directly with command line tools such as getcrushmap andcrushtool :
cephadm > ceph osd crush rm-device-class osd.6 osd.7 osd.8 osd.9cephadm > ceph osd crush set-device-class ssd osd.6 osd.7 osd.8 osd.9
5. Create the hot storage pool to be used for cache tiering. Use the new 'ssd' rule for it:
cephadm > ceph osd pool create hot-storage 100 100 replicated ssd
6. Create the cold storage pool using the default 'replicated_ruleset' rule:
cephadm > ceph osd pool create cold-storage 100 100 replicated replicated_ruleset
7. Then, setting up a cache tier involves associating a backing storage pool with a cache pool,in this case, cold storage (= storage pool) with hot storage (= cache pool):
cephadm > ceph osd tier add cold-storage hot-storage
8. To set the cache mode to 'writeback', execute the following:
cephadm > ceph osd tier cache-mode hot-storage writeback
For more information about cache modes, see Section 11.4, “Cache Modes”.Writeback cache tiers overlay the backing storage tier, so they require one additional step:you must direct all client trac from the storage pool to the cache pool. To direct clienttrac directly to the cache pool, execute the following, for example:
cephadm > ceph osd tier set-overlay cold-storage hot-storage
152 Setting Up an Example Tiered Storage SES 5.5 (SES 5 & SES …
11.7 Configuring a Cache TierThere are several options you can use to congure cache tiers. Use the following syntax:
cephadm > ceph osd pool set cachepool key value
11.7.1 Hit Set
Hit set parameters allow for tuning of cache pools. Hit sets in Ceph are usually bloom lters andprovide a memory-ecient way of tracking objects that are already in the cache pool.
The hit set is a bit array that is used to store the result of a set of hashing functions applied onobject names. Initially, all bits are set to 0 . When an object is added to the hit set, its nameis hashed and the result is mapped on dierent positions in the hit set, where the value of thebit is then set to 1 .
To nd out whether an object exists in the cache, the object name is hashed again. If any bit is0 , the object is denitely not in the cache and needs to be retrieved from cold storage.
It is possible that the results of dierent objects are stored in the same location of the hit set.By chance, all bits can be 1 without the object being in the cache. Therefore, hit sets workingwith a bloom lter can only tell whether an object is denitely not in the cache and needs tobe retrieved from cold storage.
A cache pool can have more than one hit set tracking le access over time. The settinghit_set_count denes how many hit sets are being used, and hit_set_period denes forhow long each hit set has been used. After the period has expired, the next hit set is used. If thenumber of hit sets is exhausted, the memory from the oldest hit set is freed and a new hit set iscreated. The values of hit_set_count and hit_set_period multiplied by each other denethe overall time frame in which access to objects has been tracked.
153 Configuring a Cache Tier SES 5.5 (SES 5 & SES …
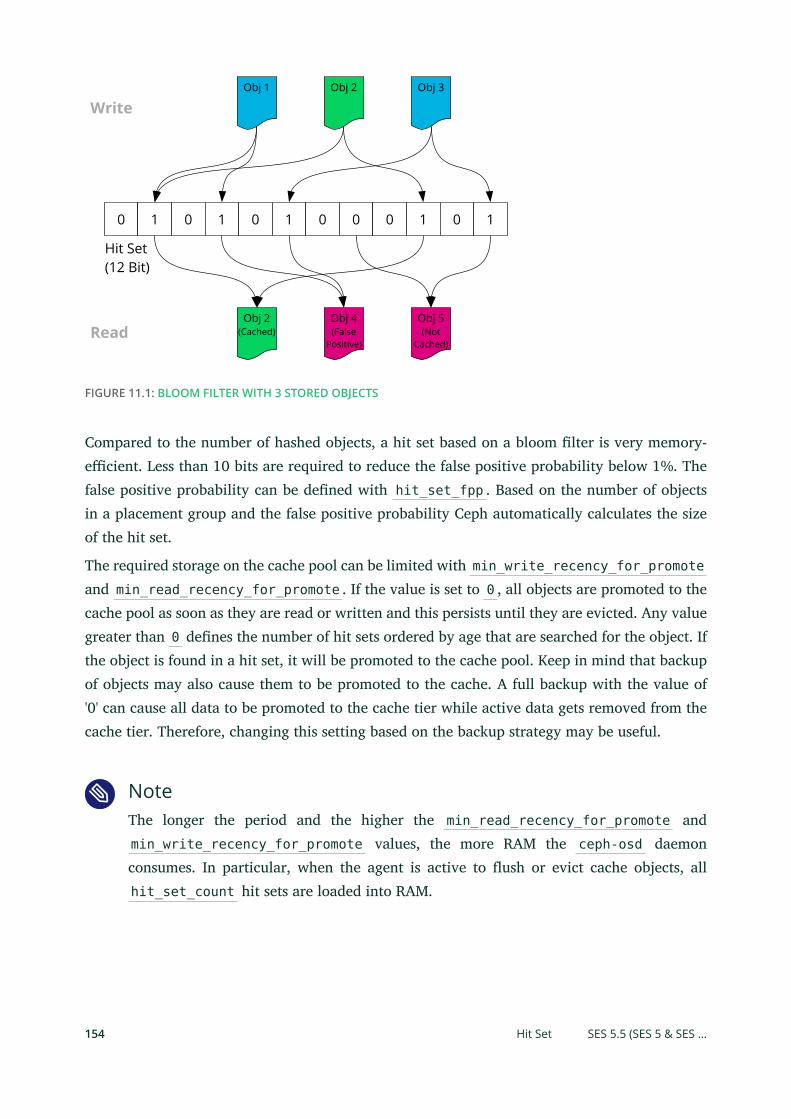
Read
Write
0 1 0 1 0 1 0 0 0 1 0 1
Obj 2(Cached)
Obj 4(False
Positive)
Obj 5(Not
Cached)
Obj 1 Obj 2 Obj 3
Hit Set(12 Bit)
FIGURE 11.1: BLOOM FILTER WITH 3 STORED OBJECTS
Compared to the number of hashed objects, a hit set based on a bloom lter is very memory-ecient. Less than 10 bits are required to reduce the false positive probability below 1%. Thefalse positive probability can be dened with hit_set_fpp . Based on the number of objectsin a placement group and the false positive probability Ceph automatically calculates the sizeof the hit set.
The required storage on the cache pool can be limited with min_write_recency_for_promoteand min_read_recency_for_promote . If the value is set to 0 , all objects are promoted to thecache pool as soon as they are read or written and this persists until they are evicted. Any valuegreater than 0 denes the number of hit sets ordered by age that are searched for the object. Ifthe object is found in a hit set, it will be promoted to the cache pool. Keep in mind that backupof objects may also cause them to be promoted to the cache. A full backup with the value of'0' can cause all data to be promoted to the cache tier while active data gets removed from thecache tier. Therefore, changing this setting based on the backup strategy may be useful.
NoteThe longer the period and the higher the min_read_recency_for_promote andmin_write_recency_for_promote values, the more RAM the ceph-osd daemonconsumes. In particular, when the agent is active to ush or evict cache objects, allhit_set_count hit sets are loaded into RAM.
154 Hit Set SES 5.5 (SES 5 & SES …
11.7.1.1 Use GMT for Hit Set
Cache tier setups have a bloom lter called hit set. The lter tests whether an object belongsto a set of either hot or cold objects. The objects are added to the hit set using time stampsappended to their names.
If cluster machines are placed in dierent time zones and the time stamps are derived fromthe local time, objects in a hit set can have misleading names consisting of future or past timestamps. In the worst case, objects may not exist in the hit set at all.
To prevent this, the use_gmt_hitset defaults to '1' on a newly created cache tier setups. Thisway, you force OSDs to use GMT (Greenwich Mean Time) time stamps when creating the objectnames for the hit set.
Warning: Leave the Default ValueDo not touch the default value '1' of use_gmt_hitset . If errors related to this optionare not caused by your cluster setup, never change it manually. Otherwise, the clusterbehavior may become unpredictable.
11.7.2 Cache Sizing
The cache tiering agent performs two main functions:
Flushing
The agent identies modied (dirty) objects and forwards them to the storage pool forlong-term storage.
Evicting
The agent identies objects that have not been modied (clean) and evicts the leastrecently used among them from the cache.
11.7.2.1 Absolute Sizing
The cache tiering agent can ush or evict objects based on the total number of bytes or the totalnumber of objects. To specify a maximum number of bytes, execute the following:
cephadm > ceph osd pool set cachepool target_max_bytes num_of_bytes
155 Cache Sizing SES 5.5 (SES 5 & SES …
To specify the maximum number of objects, execute the following:
cephadm > ceph osd pool set cachepool target_max_objects num_of_objects
NoteCeph is not able to determine the size of a cache pool automatically, so the congurationon the absolute size is required here. Otherwise, ush and evict will not work. If youspecify both limits, the cache tiering agent will begin ushing or evicting when eitherthreshold is triggered.
NoteAll client requests will be blocked only when target_max_bytes ortarget_max_objects reached.
11.7.2.2 Relative Sizing
The cache tiering agent can ush or evict objects relative to the size of the cache pool (speciedby target_max_bytes or target_max_objects in Section 11.7.2.1, “Absolute Sizing”). Whenthe cache pool consists of a certain percentage of modied (dirty) objects, the cache tieringagent will ush them to the storage pool. To set the cache_target_dirty_ratio , execute thefollowing:
cephadm > ceph osd pool set cachepool cache_target_dirty_ratio 0.0...1.0
For example, setting the value to 0.4 will begin ushing modied (dirty) objects when theyreach 40% of the cache pool's capacity:
cephadm > ceph osd pool set hot-storage cache_target_dirty_ratio 0.4
When the dirty objects reach a certain percentage of the capacity, ush them at a higher speed.Use cache_target_dirty_high_ratio :
cephadm > ceph osd pool set cachepool cache_target_dirty_high_ratio 0.0..1.0
When the cache pool reaches a certain percentage of its capacity, the cache tiering agent willevict objects to maintain free capacity. To set the cache_target_full_ratio , execute thefollowing:
cephadm > ceph osd pool set cachepool cache_target_full_ratio 0.0..1.0
156 Cache Sizing SES 5.5 (SES 5 & SES …
11.7.3 Cache Age
You can specify the minimum age of a recently modied (dirty) object before the cache tieringagent ushes it to the backing storage pool. Note that this will only apply if the cache actuallyneeds to ush/evict objects:
cephadm > ceph osd pool set cachepool cache_min_flush_age num_of_seconds
You can specify the minimum age of an object before it will be evicted from the cache tier:
cephadm > ceph osd pool set cachepool cache_min_evict_age num_of_seconds
11.7.4 Examples
11.7.4.1 Large Cache Pool and Small Memory
If lots of storage and only a small amount of RAM is available, all objects can be promoted tothe cache pool as soon as they are accessed. The hit set is kept small. The following is a set ofexample conguration values:
hit_set_count = 1hit_set_period = 3600hit_set_fpp = 0.05min_write_recency_for_promote = 0min_read_recency_for_promote = 0
11.7.4.2 Small Cache Pool and Large Memory
If a small amount of storage but a comparably large amount of memory is available, the cachetier can be congured to promote a limited number of objects into the cache pool. Twelve hitsets, of which each is used over a period of 14,400 seconds, provide tracking for a total of 48hours. If an object has been accessed in the last 8 hours, it is promoted to the cache pool. Theset of example conguration values then is:
hit_set_count = 12hit_set_period = 14400hit_set_fpp = 0.01min_write_recency_for_promote = 2min_read_recency_for_promote = 2
157 Cache Age SES 5.5 (SES 5 & SES …
12 Ceph Cluster Configuration
This chapter provides a list of important Ceph cluster settings and their description. The settingsare sorted by topic.
12.1 Runtime ConfigurationSection 1.12, “Adjusting ceph.conf with Custom Settings” describes how to make changes to theCeph conguration le ceph.conf . However, the actual cluster behavior is determined not bythe current state of the ceph.conf le but by the conguration of the running Ceph daemons,which is stored in memory.
You can query an individual Ceph daemon for a particular conguration setting using the adminsocket on the node where the daemon is running. For example, the following command gets thevalue of the osd_max_write_size conguration parameter from daemon named osd.0 :
cephadm > ceph --admin-daemon /var/run/ceph/ceph-osd.0.asok \config get osd_max_write_size{ "osd_max_write_size": "90"}
You can also change the daemons' settings at runtime. Remember that this change is temporaryand will be lost after the next daemon restart. For example, the following command changes theosd_max_write_size parameter to '50' for all OSDs in the cluster:
cephadm > ceph tell osd.* injectargs --osd_max_write_size 50
Warning: injectargs is Not ReliableUnfortunately, changing the cluster settings with the injectargs command is not 100%reliable. If you need to be sure that the changed parameter is active, change it in theconguration les on all cluster nodes and restart all daemons in the cluster.
158 Runtime Configuration SES 5.5 (SES 5 & SES …
12.2 Ceph OSD and BlueStore
12.2.1 Automatic Cache Sizing
BlueStore can be congured to automatically resize its caches when tc_malloc is conguredas the memory allocator and the bluestore_cache_autotune setting is enabled. Thisoption is currently enabled by default. BlueStore will attempt to keep OSD heap memoryusage under a designated target size via the osd_memory_target conguration option.This is a best eort algorithm and caches will not shrink smaller than the amountspecied by osd_memory_cache_min . Cache ratios will be chosen based on a hierarchy ofpriorities. If priority information is not available, the bluestore_cache_meta_ratio andbluestore_cache_kv_ratio options are used as fallbacks.
bluestore_cache_autotune
Automatically tunes the ratios assigned to dierent BlueStore caches while respectingminimum values. Default is True .
osd_memory_target
When tc_malloc and bluestore_cache_autotune are enabled, try to keep this manybytes mapped in memory.
NoteThis may not exactly match the RSS memory usage of the process. While the totalamount of heap memory mapped by the process should generally stay close to thistarget, there is no guarantee that the kernel will actually reclaim memory that hasbeen unmapped.
osd_memory_cache_min
When tc_malloc and bluestore_cache_autotune are enabled, set the minimumamount of memory used for caches.
NoteSetting this value too low can result in signicant cache thrashing.
159 Ceph OSD and BlueStore SES 5.5 (SES 5 & SES …
III Accessing Cluster Data
13 Ceph Object Gateway 161
14 Ceph iSCSI Gateway 215
15 Clustered File System 233
16 NFS Ganesha: Export Ceph Data via NFS 242
13 Ceph Object Gateway
This chapter introduces details about administration tasks related to Object Gateway, such aschecking status of the service, managing accounts, multisite gateways, or LDAP authentication.
13.1 Object Gateway Restrictions and NamingLimitationsFollowing is a list of important Object Gateway limits:
13.1.1 Bucket Limitations
When approaching Object Gateway via the S3 API, bucket names are limited to DNS-compliantnames with a dash character '-' allowed. When approaching Object Gateway via the Swift API,you may use any combination of UTF-8 supported characters except for a slash character '/'. Themaximum length of a bucket name is 255 characters. Bucket names must be unique.
Tip: Use DNS-compliant Bucket NamesAlthough you may use any UTF-8 based bucket name via the Swift API, it is recommendedto name buckets with regard to the S3 naming limitations to avoid problems accessingthe same bucket via the S3 API.
13.1.2 Stored Object Limitations
Maximum number of object per user
No restriction by default (limited by ~ 2^63).
Maximum number of object per bucket
No restriction by default (limited by ~ 2^63).
Maximum size of an object to upload / store
Single uploads are restricted to 5GB. Use multipart for larger object sizes. The maximumnumber of multipart chunks is 10000.
161 Object Gateway Restrictions and Naming Limitations SES 5.5 (SES 5 & SES …
13.1.3 HTTP Header Limitations
HTTP header and request limitation depend on the Web front-end used. The default CivetWebrestricts the number of HTTP headers to 64 headers, and the size of the HTTP header to 16kB.
13.2 Deploying the Object GatewayThe recommended way of deploying the Ceph Object Gateway is via the DeepSea infrastructureby adding the relevant role-rgw [...] line(s) into the policy.cfg le on the Salt master,and running required DeepSea stages.
To include the Object Gateway during the Ceph cluster deployment process, refer to Book
“Deployment Guide”, Chapter 4 “Deploying with DeepSea/Salt”, Section 4.3 “Cluster Deployment” andBook “Deployment Guide”, Chapter 4 “Deploying with DeepSea/Salt”, Section 4.5.1 “The policy.cfg
File”.
To add the Object Gateway role to an already deployed cluster, refer to Section 1.2, “Adding
New Roles to Nodes”.
13.3 Operating the Object Gateway ServiceObject Gateway service is operated with the systemctl command. You need to have rootprivileges to operate the Object Gateway service. Note that gateway_host is the host name ofthe server whose Object Gateway instance you need to operate.
The following subcommands are supported for the Object Gateway service:
systemctl status ceph-radosgw@rgw. gateway_host
Prints the status information of the service.
systemctl start ceph-radosgw@rgw. gateway_host
Starts the service if it is not already running.
systemctl restart ceph-radosgw@rgw. gateway_host
Restarts the service.
systemctl stop ceph-radosgw@rgw. gateway_host
Stops the running service.
systemctl enable ceph-radosgw@rgw. gateway_host
162 HTTP Header Limitations SES 5.5 (SES 5 & SES …
Enables the service so that it is automatically started on system start-up.
systemctl disable ceph-radosgw@rgw. gateway_host
Disables the service so that it is not automatically started on system start-up.
13.4 Configuration ParametersYou can inuence the Object Gateway behavior by a number of options in the ceph.conf leunder the section named
[client.radosgw.INSTANCE_NAME]
If an option is not specied, its default value is used. A complete list of the Object Gatewayoptions follows:
GENERAL SETTINGS
rgw frontends
Congures the HTTP front end(s). Specify multiple front ends in a comma-delimited list.Each front end conguration may include a list of options separated by spaces, where eachoption is in the form “key=value” or “key”. Default is
rgw frontends = civetweb port=7480
Note: tcp_nodelayThis option may aect the transfer rate of sending TCP packets, depending on thedata chunk sizes. If set to '1', the socket option will disable Nagle's algorithm on theconnection. Therefore packets will be sent as soon as possible instead of waiting fora full buer or timeout to occur.
rgw data
Sets the location of the data les for the Object Gateway. Default is /var/lib/ceph/radosgw/CLUSTER_ID .
rgw enable apis
Enables the specied APIs. Default is 's3, swift, swift_auth, admin All APIs'.
rgw cache enabled
Enables or disables the Object Gateway cache. Default is 'true'.
163 Configuration Parameters SES 5.5 (SES 5 & SES …
rgw cache lru size
The number of entries in the Object Gateway cache. Default is 10000.
rgw socket path
The socket path for the domain socket. FastCgiExternalServer uses this socket. If youdo not specify a socket path, the Object Gateway will not run as an external server. Thepath you specify here needs to be the same as the path specied in the rgw.conf le.
rgw fcgi socket backlog
The socket backlog for fcgi. Default is 1024.
rgw host
The host for the Object Gateway instance. It can be an IP address or a hostname. Defaultis 0.0.0.0
rgw port
The port number where the instance listens for requests. If not specied, the ObjectGateway runs external FastCGI.
rgw dns name
The DNS name of the served domain.
rgw script uri
The alternative value for the SCRIPT_URI if not set in the request.
rgw request uri
The alternative value for the REQUEST_URI if not set in the request.
rgw print continue
Enable 100-continue if it is operational. Default is 'true'.
rgw remote addr param
The remote address parameter. For example, the HTTP eld containing the remoteaddress, or the X-Forwarded-For address if a reverse proxy is operational. Default isREMOTE_ADDR.
rgw op thread timeout
The timeout in seconds for open threads. Default is 600.
rgw op thread suicide timeout
The time timeout in seconds before the Object Gateway process dies. Disabled if set to 0(default).
164 Configuration Parameters SES 5.5 (SES 5 & SES …
rgw thread pool size
Number of threads for the CivetWeb server. Increase to a higher value if you need to servemore requests. Defaults to 100 threads.
rgw num rados handles
The number of RADOS cluster handles for Object Gateway. Having a congurable numberof RADOS handles results in signicant performance boost for all types of workloads. EachObject Gateway worker thread now gets to pick a RADOS handle for its lifetime. Defaultis 1.
rgw num control oids
The number of notication objects used for cache synchronization between dierent rgwinstances. Default is 8.
rgw init timeout
The number of seconds before the Object Gateway gives up on initialization. Default is 30.
rgw mime types file
The path and location of the MIME types. Used for Swift auto-detection of object types.Default is /etc/mime.types .
rgw gc max objs
The maximum number of objects that may be handled by garbage collection in one garbagecollection processing cycle. Default is 32.
rgw gc obj min wait
The minimum wait time before the object may be removed and handled by garbagecollection processing. Default is 2 * 3600.
rgw gc processor max time
The maximum time between the beginning of two consecutive garbage collectionprocessing cycles. Default is 3600.
rgw gc processor period
The cycle time for garbage collection processing. Default is 3600.
rgw s3 success create obj status
The alternate success status response for create-obj . Default is 0.
rgw resolve cname
Whether the Object Gateway should use DNS CNAME record of the request host name eld(if host name is not equal to the Object Gateway DNS name). Default is 'false'.
165 Configuration Parameters SES 5.5 (SES 5 & SES …
rgw obj stripe size
The size of an object stripe for Object Gateway objects. Default is 4 << 20.
rgw extended http attrs
Add a new set of attributes that can be set on an entity (for example a user, a bucket oran object). These extra attributes can be set through HTTP header elds when putting theentity or modifying it using POST method. If set, these attributes will return as HTTP eldswhen requesting GET/HEAD on the entity. Default is 'content_foo, content_bar, x-foo-bar'.
rgw exit timeout secs
Number of seconds to wait for a process before exiting unconditionally. Default is 120.
rgw get obj window size
The window size in bytes for a single object request. Default is '16 << 20'.
rgw get obj max req size
The maximum request size of a single GET operation sent to the Ceph Storage Cluster.Default is 4 << 20.
rgw relaxed s3 bucket names
Enables relaxed S3 bucket names rules for US region buckets. Default is 'false'.
rgw list buckets max chunk
The maximum number of buckets to retrieve in a single operation when listing userbuckets. Default is 1000.
rgw override bucket index max shards
Represents the number of shards for the bucket index object. Setting 0 (default) indicatesthere is no sharding. It is not recommended to set a value too large (for example 1000) asit increases the cost for bucket listing. This variable should be set in the client or globalsections so that it is automatically applied to radosgw-admin commands.
rgw curl wait timeout ms
The timeout in milliseconds for certain curl calls. Default is 1000.
rgw copy obj progress
Enables output of object progress during long copy operations. Default is 'true'.
rgw copy obj progress every bytes
The minimum bytes between copy progress output. Default is 1024 * 1024.
rgw admin entry
The entry point for an admin request URL. Default is 'admin'.
166 Configuration Parameters SES 5.5 (SES 5 & SES …
rgw content length compat
Enable compatibility handling of FCGI requests with both CONTENT_LENGTH ANDHTTP_CONTENT_LENGTH set. Default is 'false'.
rgw bucket quota ttl
The amount of time in seconds that cached quota information is trusted. After this timeout,the quota information will be re-fetched from the cluster. Default is 600.
rgw user quota bucket sync interval
The amount of time in seconds for which the bucket quota information is accumulatedbefore syncing to the cluster. During this time, other Object Gateway instances will not seethe changes in the bucket quota stats related to operations on this instance. Default is 180.
rgw user quota sync interval
The amount of time in seconds for which user quota information is accumulated beforesyncing to the cluster. During this time, other Object Gateway instances will not see thechanges in the user quota stats related to operations on this instance. Default is 180.
rgw bucket default quota max objects
Default maximum number of objects per bucket. It is set on new users if no other quota isspecied, and has no eect on existing users. This variable should be set in the client orglobal sections so that it is automatically applied to radosgw-admin commands. Defaultis -1.
rgw bucket default quota max size
Default maximum capacity per bucket in bytes. It is set on new users if no other quota isspecied, and has no eect on existing users. Default is -1.
rgw user default quota max objects
Default maximum number of objects for a user. This includes all objects in all bucketsowned by the user. It is set on new users if no other quota is specied, and has no eecton existing users. Default is -1.
rgw user default quota max size
The value for user maximum size quota in bytes set on new users if no other quota isspecied. It has no eect on existing users. Default is -1.
rgw verify ssl
Verify SSL certicates while making requests. Default is 'true'.
rgw max chunk size
167 Configuration Parameters SES 5.5 (SES 5 & SES …
Maximum size of a chunk of data that will be read in a single operation. Increasing thevalue to 4MB (4194304) will provide better performance when processing large objects.Default is 128kB (131072).
MULTISITE SETTINGS
rgw zone
The name of the zone for the gateway instance. If no zone is set, a cluster-wide default canbe congured with the radosgw-admin zone default command.
rgw zonegroup
The name of the zonegroup for the gateway instance. If no zonegroup is set, a cluster-widedefault can be congured with the radosgw-admin zonegroup default command.
rgw realm
The name of the realm for the gateway instance. If no realm is set, a cluster-wide defaultcan be congured with the radosgw-admin realm default command.
rgw run sync thread
If there are other zones in the realm to synchronize from, spawn threads to handle thesynchronization of data and metadata. Default is 'true'.
rgw data log window
The data log entries window in seconds. Default is 30/
rgw data log changes size
The number of in-memory entries to hold for the data changes log. Default is 1000.
rgw data log obj prefix
The object name prex for the data log. Default is 'data_log'.
rgw data log num shards
The number of shards (objects) on which to keep the data changes log. Default is 128.
rgw md log max shards
The maximum number of shards for the metadata log. Default is 64.
SWIFT SETTINGS
rgw enforce swift acls
Enforces the Swift Access Control List (ACL) settings. Default is 'true'.
rgw swift token expiration
The time in seconds for expiring a Swift token. Default is 24 * 3600.
168 Configuration Parameters SES 5.5 (SES 5 & SES …
rgw swift url
The URL for the Ceph Object Gateway Swift API.
rgw swift url prefix
The URL prex for the Swift StorageURL that goes in front of the “/v1” part. Thisallows to run several Gateway instances on the same host. For compatibility, setting thisconguration variable to empty causes the default “/swift” to be used. Use explicit prex“/” to start StorageURL at the root.
WarningSetting this option to “/” will not work if S3 API is enabled. Keep in mind thatdisabling S3 will make impossible to deploy the Object Gateway in the multisiteconguration!
rgw swift auth url
Default URL for verifying v1 authentication tokens when the internal Swift authenticationis not used.
rgw swift auth entry
The entry point for a Swift authentication URL. Default is 'auth'.
rgw swift versioning enabled
Enables the Object Versioning of OpenStack Object Storage API. This allows clients toput the X-Versions-Location attribute on containers that should be versioned. Theattribute species the name of container storing archived versions. It must be owned bythe same user that the versioned container due to access control verication - ACLs are nottaken into consideration. Those containers cannot be versioned by the S3 object versioningmechanism. Default is 'false'.
LOGGING SETTINGS
rgw log nonexistent bucket
Enables the Object Gateway to log a request for a non-existent bucket. Default is 'false'.
rgw log object name
The logging format for an object name. See the manual page man 1 date for details aboutformat speciers. Default is '%Y-%m-%d-%H-%i-%n'.
rgw log object name utc
169 Configuration Parameters SES 5.5 (SES 5 & SES …

Whether a logged object name includes a UTC time. If set to 'false' (default), it uses thelocal time.
rgw usage max shards
The maximum number of shards for usage logging. Default is 32.
rgw usage max user shards
The maximum number of shards used for a single user’s usage logging. Default is 1.
rgw enable ops log
Enable logging for each successful Object Gateway operation. Default is 'false'.
rgw enable usage log
Enable the usage log. Default is 'false'.
rgw ops log rados
Whether the operations log should be written to the Ceph Storage Cluster back end. Defaultis 'true'.
rgw ops log socket path
The Unix domain socket for writing operations logs.
rgw ops log data backlog
The maximum data backlog data size for operations logs written to a Unix domain socket.Default is 5 << 20.
rgw usage log flush threshold
The number of dirty merged entries in the usage log before ushing synchronously. Defaultis 1024.
rgw usage log tick interval
Flush pending usage log data every 'n' seconds. Default is 30.
rgw log http headers
Comma-delimited list of HTTP headers to include in log entries. Header names are caseinsensitive, and use the full header name with words separated by underscores. Forexample 'http_x_forwarded_for, http_x_special_k'.
rgw intent log object name
The logging format for the intent log object name. See the manual page man 1 date fordetails about format speciers. Default is '%Y-%m-%d-%i-%n'.
rgw intent log object name utc
170 Configuration Parameters SES 5.5 (SES 5 & SES …
Whether the intent log object name includes a UTC time. If set to 'false' (default), it usesthe local time.
KEYSTONE SETTINGS
rgw keystone url
The URL for the Keystone server.
rgw keystone api version
The version (2 or 3) of OpenStack Identity API that should be used for communicationwith the Keystone server. Default is 2.
rgw keystone admin domain
The name of the OpenStack domain with the administrator privilege when using OpenStackIdentity API v3.
rgw keystone admin project
The name of the OpenStack project with the administrator privilege when using OpenStackIdentity API v3. If not set, the value of the rgw keystone admin tenant will be usedinstead.
rgw keystone admin token
The Keystone administrator token (shared secret). In the Object Gateway, authenticationwith the administrator token has priority over authentication with the administratorcredentials (options rgw keystone admin user , rgw keystone admin password , rgwkeystone admin tenant , rgw keystone admin project , and rgw keystone admindomain ). Administrator token feature is considered as deprecated.
rgw keystone admin tenant
The name of the OpenStack tenant with the administrator privilege (Service Tenant) whenusing OpenStack Identity API v2.
rgw keystone admin user
The name of the OpenStack user with the administrator privilege for Keystoneauthentication (Service User) when using OpenStack Identity API v2.
rgw keystone admin password
The password for the OpenStack administrator user when using OpenStack Identity API v2.
rgw keystone accepted roles
The roles required to serve requests. Default is 'Member, admin'.
rgw keystone token cache size
171 Configuration Parameters SES 5.5 (SES 5 & SES …
The maximum number of entries in each Keystone token cache. Default is 10000.
rgw keystone revocation interval
The number of seconds between token revocation checks. Default is 15 * 60.
rgw keystone verify ssl
Verify SSL certicates while making token requests to keystone. Default is 'true'.
13.4.1 Additional Notes
rgw dns name
If the parameter rgw dns name is added to the ceph.conf , make sure that the S3 clientis congured to direct requests at the endpoint specied by rgw dns name .
13.5 Managing Object Gateway AccessYou can communicate with Object Gateway using either S3- or Swift-compatible interface. S3interface is compatible with a large subset of the Amazon S3 RESTful API. Swift interface iscompatible with a large subset of the OpenStack Swift API.
Both interfaces require you to create a specic user, and install the relevant client software tocommunicate with the gateway using the user's secret key.
13.5.1 Accessing Object Gateway
13.5.1.1 S3 Interface Access
To access the S3 interface, you need a REST client. S3cmd is a command line S3 client. Youcan nd it in the OpenSUSE Build Service (https://build.opensuse.org/package/show/Cloud:Tools/
s3cmd) . The repository contains versions for both SUSE Linux Enterprise and openSUSE baseddistributions.
If you want to test your access to the S3 interface, you can also write a small a Python script. Thescript will connect to Object Gateway, create a new bucket, and list all buckets. The values foraws_access_key_id and aws_secret_access_key are taken from the values of access_keyand secret_key returned by the radosgw_admin command from Section 13.5.2.1, “Adding S3
and Swift Users”.
172 Additional Notes SES 5.5 (SES 5 & SES …
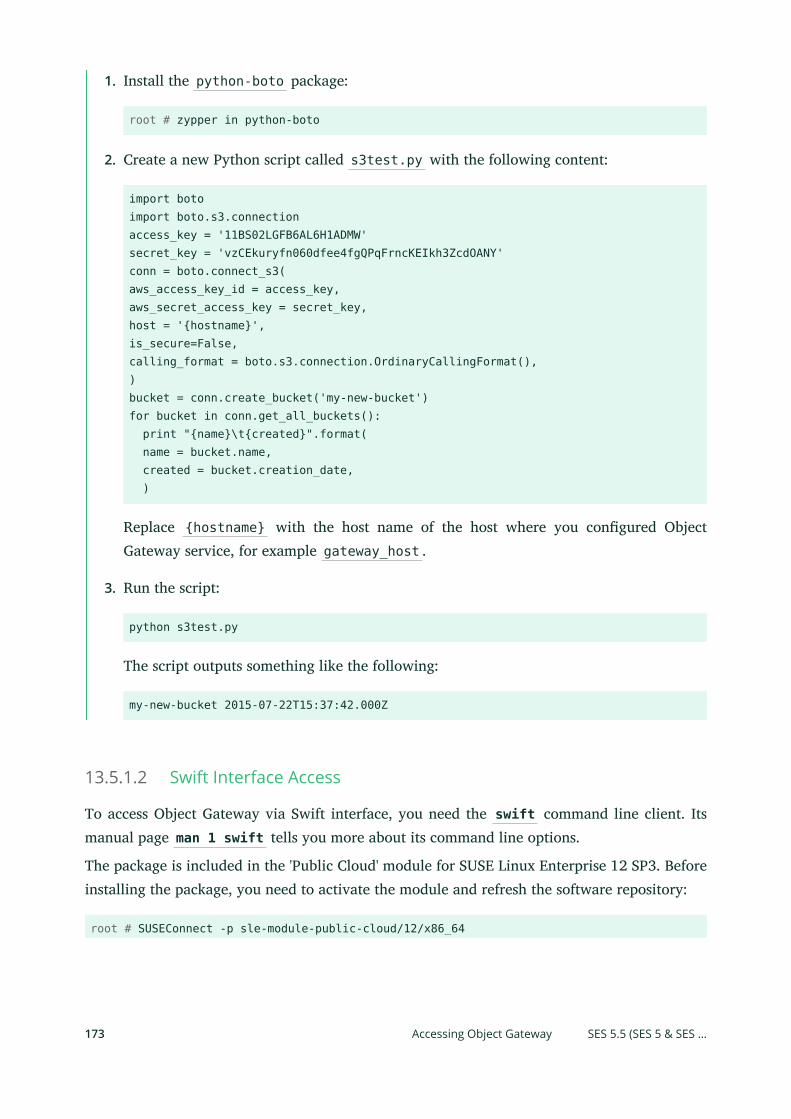
1. Install the python-boto package:
root # zypper in python-boto
2. Create a new Python script called s3test.py with the following content:
import botoimport boto.s3.connectionaccess_key = '11BS02LGFB6AL6H1ADMW'secret_key = 'vzCEkuryfn060dfee4fgQPqFrncKEIkh3ZcdOANY'conn = boto.connect_s3(aws_access_key_id = access_key,aws_secret_access_key = secret_key,host = '{hostname}',is_secure=False,calling_format = boto.s3.connection.OrdinaryCallingFormat(),)bucket = conn.create_bucket('my-new-bucket')for bucket in conn.get_all_buckets(): print "{name}\t{created}".format( name = bucket.name, created = bucket.creation_date, )
Replace {hostname} with the host name of the host where you congured ObjectGateway service, for example gateway_host .
3. Run the script:
python s3test.py
The script outputs something like the following:
my-new-bucket 2015-07-22T15:37:42.000Z
13.5.1.2 Swift Interface Access
To access Object Gateway via Swift interface, you need the swift command line client. Itsmanual page man 1 swift tells you more about its command line options.
The package is included in the 'Public Cloud' module for SUSE Linux Enterprise 12 SP3. Beforeinstalling the package, you need to activate the module and refresh the software repository:
root # SUSEConnect -p sle-module-public-cloud/12/x86_64
173 Accessing Object Gateway SES 5.5 (SES 5 & SES …
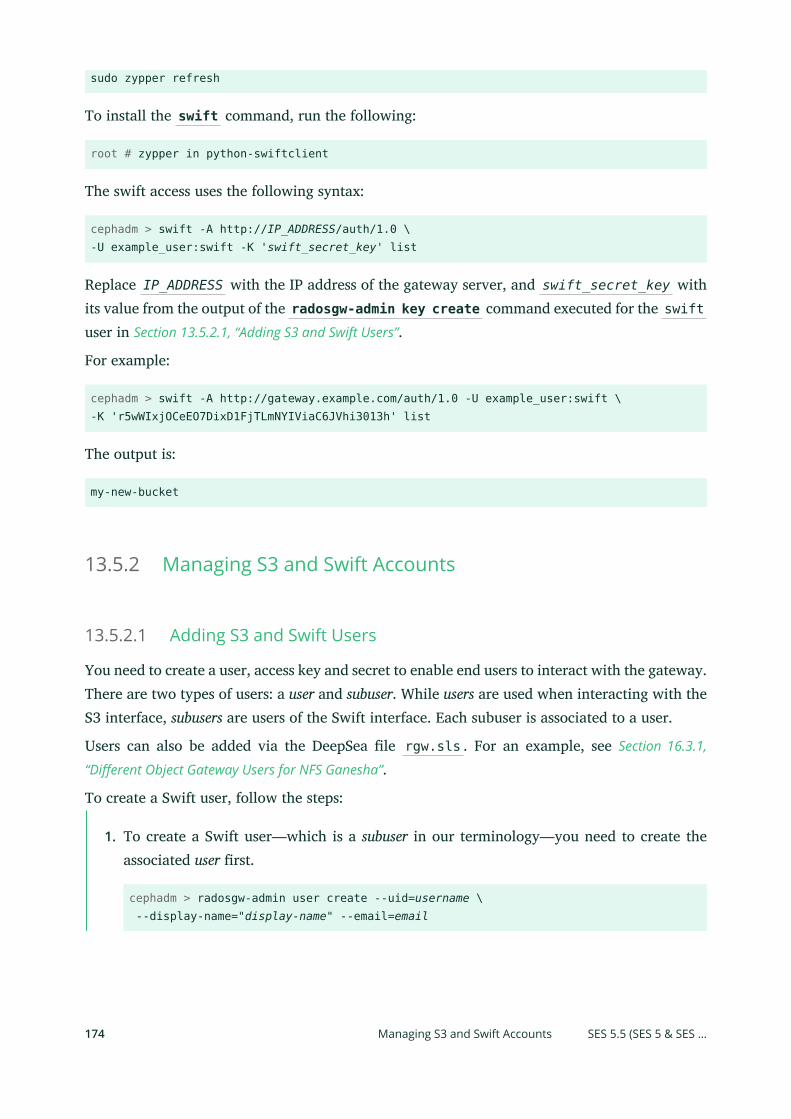
sudo zypper refresh
To install the swift command, run the following:
root # zypper in python-swiftclient
The swift access uses the following syntax:
cephadm > swift -A http://IP_ADDRESS/auth/1.0 \-U example_user:swift -K 'swift_secret_key' list
Replace IP_ADDRESS with the IP address of the gateway server, and swift_secret_key withits value from the output of the radosgw-admin key create command executed for the swiftuser in Section 13.5.2.1, “Adding S3 and Swift Users”.
For example:
cephadm > swift -A http://gateway.example.com/auth/1.0 -U example_user:swift \-K 'r5wWIxjOCeEO7DixD1FjTLmNYIViaC6JVhi3013h' list
The output is:
my-new-bucket
13.5.2 Managing S3 and Swift Accounts
13.5.2.1 Adding S3 and Swift Users
You need to create a user, access key and secret to enable end users to interact with the gateway.There are two types of users: a user and subuser. While users are used when interacting with theS3 interface, subusers are users of the Swift interface. Each subuser is associated to a user.
Users can also be added via the DeepSea le rgw.sls . For an example, see Section 16.3.1,
“Dierent Object Gateway Users for NFS Ganesha”.
To create a Swift user, follow the steps:
1. To create a Swift user—which is a subuser in our terminology—you need to create theassociated user rst.
cephadm > radosgw-admin user create --uid=username \ --display-name="display-name" --email=email
174 Managing S3 and Swift Accounts SES 5.5 (SES 5 & SES …
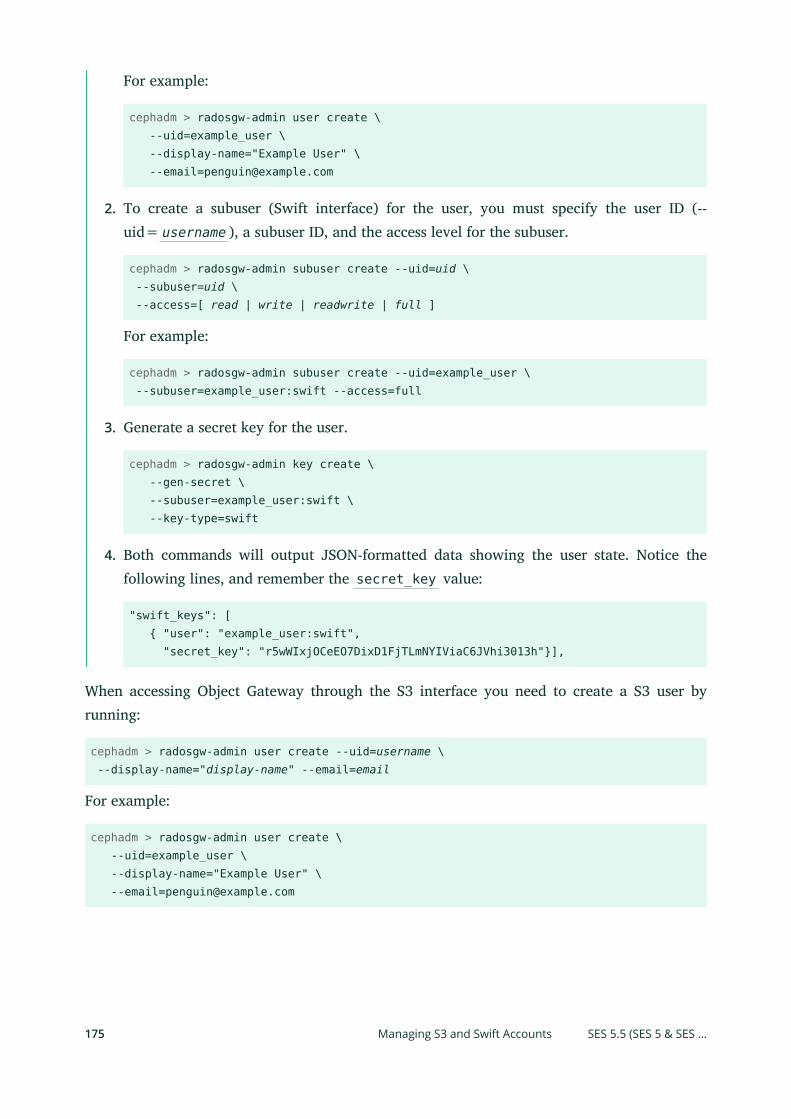
For example:
cephadm > radosgw-admin user create \ --uid=example_user \ --display-name="Example User" \ [email protected]
2. To create a subuser (Swift interface) for the user, you must specify the user ID (--uid= username ), a subuser ID, and the access level for the subuser.
cephadm > radosgw-admin subuser create --uid=uid \ --subuser=uid \ --access=[ read | write | readwrite | full ]
For example:
cephadm > radosgw-admin subuser create --uid=example_user \ --subuser=example_user:swift --access=full
3. Generate a secret key for the user.
cephadm > radosgw-admin key create \ --gen-secret \ --subuser=example_user:swift \ --key-type=swift
4. Both commands will output JSON-formatted data showing the user state. Notice thefollowing lines, and remember the secret_key value:
"swift_keys": [ { "user": "example_user:swift", "secret_key": "r5wWIxjOCeEO7DixD1FjTLmNYIViaC6JVhi3013h"}],
When accessing Object Gateway through the S3 interface you need to create a S3 user byrunning:
cephadm > radosgw-admin user create --uid=username \ --display-name="display-name" --email=email
For example:
cephadm > radosgw-admin user create \ --uid=example_user \ --display-name="Example User" \ [email protected]
175 Managing S3 and Swift Accounts SES 5.5 (SES 5 & SES …
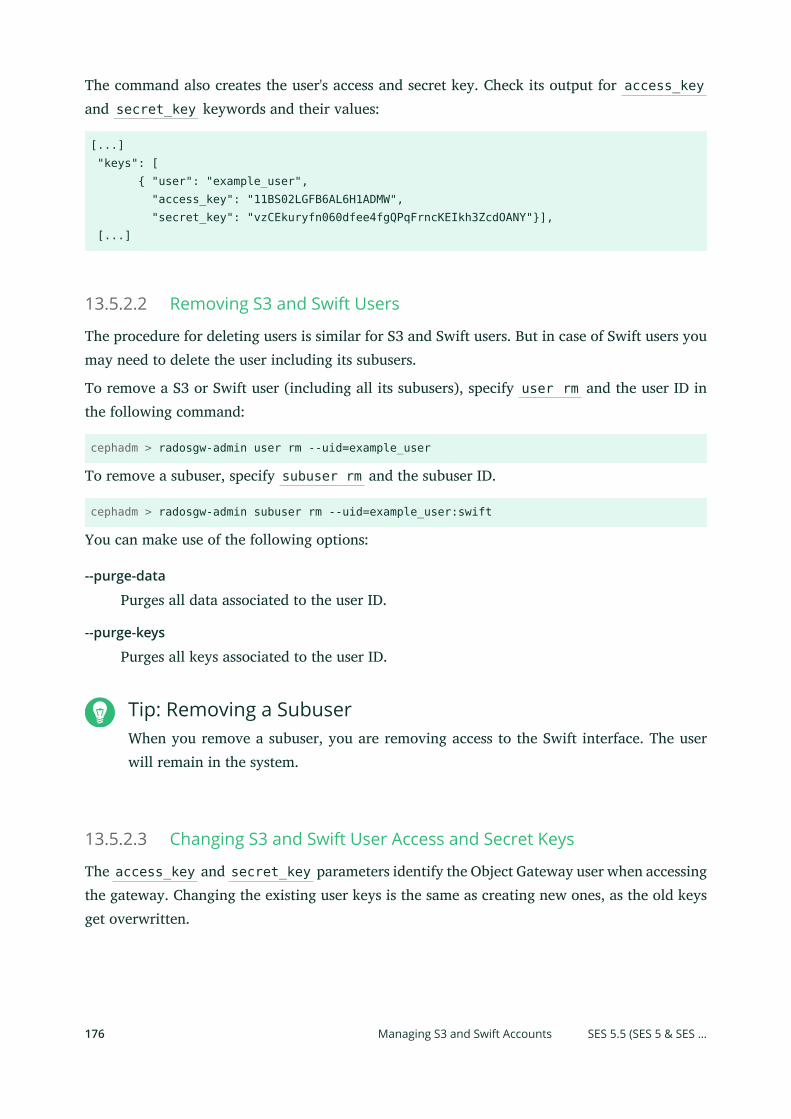
The command also creates the user's access and secret key. Check its output for access_keyand secret_key keywords and their values:
[...] "keys": [ { "user": "example_user", "access_key": "11BS02LGFB6AL6H1ADMW", "secret_key": "vzCEkuryfn060dfee4fgQPqFrncKEIkh3ZcdOANY"}], [...]
13.5.2.2 Removing S3 and Swift Users
The procedure for deleting users is similar for S3 and Swift users. But in case of Swift users youmay need to delete the user including its subusers.
To remove a S3 or Swift user (including all its subusers), specify user rm and the user ID inthe following command:
cephadm > radosgw-admin user rm --uid=example_user
To remove a subuser, specify subuser rm and the subuser ID.
cephadm > radosgw-admin subuser rm --uid=example_user:swift
You can make use of the following options:
--purge-data
Purges all data associated to the user ID.
--purge-keys
Purges all keys associated to the user ID.
Tip: Removing a SubuserWhen you remove a subuser, you are removing access to the Swift interface. The userwill remain in the system.
13.5.2.3 Changing S3 and Swift User Access and Secret Keys
The access_key and secret_key parameters identify the Object Gateway user when accessingthe gateway. Changing the existing user keys is the same as creating new ones, as the old keysget overwritten.
176 Managing S3 and Swift Accounts SES 5.5 (SES 5 & SES …
For S3 users, run the following:
cephadm > radosgw-admin key create --uid=example_user --key-type=s3 --gen-access-key --gen-secret
For Swift users, run the following:
cephadm > radosgw-admin key create --subuser=example_user:swift --key-type=swift --gen-secret
--key-type=type
Species the type of key. Either swift or s3 .
--gen-access-key
Generates a random access key (for S3 user by default).
--gen-secret
Generates a random secret key.
--secret=key
Species a secret key, for example manually generated.
13.5.2.4 User Quota Management
The Ceph Object Gateway enables you to set quotas on users and buckets owned by users. Quotasinclude the maximum number of objects in a bucket and the maximum storage size in megabytes.
Before you enable a user quota, you rst need to set its parameters:
cephadm > radosgw-admin quota set --quota-scope=user --uid=example_user \ --max-objects=1024 --max-size=1024
--max-objects
Species the maximum number of objects. A negative value disables the check.
--max-size
Species the maximum number of bytes. A negative value disables the check.
--quota-scope
Sets the scope for the quota. The options are bucket and user . Bucket quotas apply tobuckets a user owns. User quotas apply to a user.
177 Managing S3 and Swift Accounts SES 5.5 (SES 5 & SES …
Once you set a user quota, you may enable it:
cephadm > radosgw-admin quota enable --quota-scope=user --uid=example_user
To disable a quota:
cephadm > radosgw-admin quota disable --quota-scope=user --uid=example_user
To list quota settings:
cephadm > radosgw-admin user info --uid=example_user
To update quota statistics:
cephadm > radosgw-admin user stats --uid=example_user --sync-stats
13.6 Enabling HTTPS/SSL for Object GatewaysTo enable the default Object Gateway role to communicate securely using SSL, you need toeither have a CA-issued certicate, or create a self-signed one— not both. There are two waysto congure Object Gateway with HTTPS enabled: a simple way that makes use of the defaultsettings, and an advanced way that lets you ne-tune HTTPS related settings.
13.6.1 Create a Self-Signed Certificate
By default, DeepSea expects the certicate le in /srv/salt/ceph/rgw/cert/rgw.pem on theSalt master. It will then distribute the certicate to /etc/ceph/rgw.pem on the Salt minionwith the Object Gateway role, where Ceph reads it.
The following procedure describes how to generate a self-signed SSL certicate on the Saltmaster node.
NoteIf you have a valid certicated signed by a CA, proceed to Step 3.
1. If you need your Object Gateway to be known by additional subject identities, add them tothe subjectAltName option in the [v3_req] section of the /etc/ssl/openssl.cnf le:
[...][ v3_req ]
178 Enabling HTTPS/SSL for Object Gateways SES 5.5 (SES 5 & SES …
subjectAltName = DNS:server1.example.com DNS:server2.example.com[...]
Tip: IP Addresses in subjectAltNameTo use IP addresses instead of domain names in the subjectAltName option,replace the example line with the following:
subjectAltName = IP:10.0.0.10 IP:10.0.0.11
2. Create the key and the certicate using openssl . Enter all data you need to include inyour certicate. We recommend entering the FQDN as the common name. Before signingthe certicate, verify that 'X509v3 Subject Alternative Name:' is included in requestedextensions, and that the resulting certicate has "X509v3 Subject Alternative Name:" set.
root@master # openssl req -x509 -nodes -days 1095 \ -newkey rsa:4096 -keyout rgw.key -out /srv/salt/ceph/rgw/cert/rgw.pem
3. Append the les to the rgw.pem . For example:
root@master # cat rgw.key >> /srv/salt/ceph/rgw/cert/rgw.pem
13.6.2 Simple HTTPS Configuration
By default, Ceph on the Object Gateway node reads the /etc/ceph/rgw.pem certicate, anduses port 443 for secure SSL communication. If you do not need to change these values, followthese steps:
1. Edit /srv/pillar/ceph/stack/global.yml and add the following line:
rgw_init: default-ssl
2. Copy the default Object Gateway SSL conguration to the ceph.conf.d subdirectory:
root@master # cp /srv/salt/ceph/configuration/files/rgw-ssl.conf \ /srv/salt/ceph/configuration/files/ceph.conf.d/rgw.conf
3. Run DeepSea Stages 2, 3, and 4 to apply the changes:
root@master # salt-run state.orch ceph.stage.2root@master # salt-run state.orch ceph.stage.3
179 Simple HTTPS Configuration SES 5.5 (SES 5 & SES …
root@master # salt-run state.orch ceph.stage.4
13.6.3 Advanced HTTPS Configuration
If you need to change the default values for SSL settings of the Object Gateway, follow thesesteps:
1. Edit /srv/pillar/ceph/stack/global.yml and add the following line:
rgw_init: default-ssl
2. Copy the default Object Gateway SSL conguration to the ceph.conf.d subdirectory:
root@master # cp /srv/salt/ceph/configuration/files/rgw-ssl.conf \ /srv/salt/ceph/configuration/files/ceph.conf.d/rgw.conf
3. Edit /srv/salt/ceph/configuration/files/ceph.conf.d/rgw.conf and change thedefault options, such as port number or path to the SSL certicate, to reect your setup.
4. Run DeepSea Stage 3 and 4 to apply the changes:
root@master # salt-run state.orch ceph.stage.3root@master # salt-run state.orch ceph.stage.4
Tip: Binding to Multiple PortsThe CivetWeb server can bind to multiple ports. This is useful if you need to access a singleObject Gateway instance with both SSL and non-SSL connections. When specifying theports, separate their numbers by a plus sign '+'. A two-port conguration line examplefollows:
[client.{{ client }}]rgw_frontends = civetweb port=80+443s ssl_certificate=/etc/ceph/rgw.pem
13.7 Sync ModulesThe multisite functionality of Object Gateway introduced in Jewel allows to create multiplezones and mirror data and metadata between them. Sync Modules are built atop of the multisiteframework that allows for forwarding data and metadata to a dierent external tier. A sync
180 Advanced HTTPS Configuration SES 5.5 (SES 5 & SES …
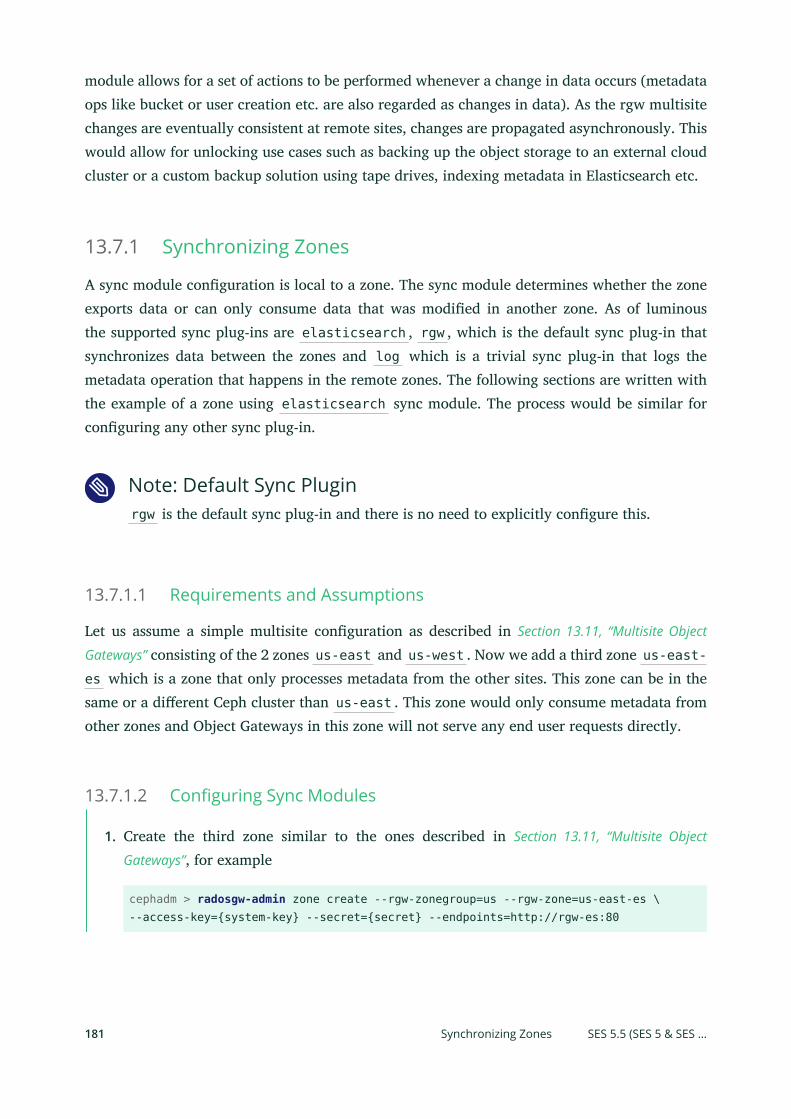
module allows for a set of actions to be performed whenever a change in data occurs (metadataops like bucket or user creation etc. are also regarded as changes in data). As the rgw multisitechanges are eventually consistent at remote sites, changes are propagated asynchronously. Thiswould allow for unlocking use cases such as backing up the object storage to an external cloudcluster or a custom backup solution using tape drives, indexing metadata in Elasticsearch etc.
13.7.1 Synchronizing Zones
A sync module conguration is local to a zone. The sync module determines whether the zoneexports data or can only consume data that was modied in another zone. As of luminousthe supported sync plug-ins are elasticsearch , rgw , which is the default sync plug-in thatsynchronizes data between the zones and log which is a trivial sync plug-in that logs themetadata operation that happens in the remote zones. The following sections are written withthe example of a zone using elasticsearch sync module. The process would be similar forconguring any other sync plug-in.
Note: Default Sync Pluginrgw is the default sync plug-in and there is no need to explicitly congure this.
13.7.1.1 Requirements and Assumptions
Let us assume a simple multisite conguration as described in Section 13.11, “Multisite Object
Gateways” consisting of the 2 zones us-east and us-west . Now we add a third zone us-east-es which is a zone that only processes metadata from the other sites. This zone can be in thesame or a dierent Ceph cluster than us-east . This zone would only consume metadata fromother zones and Object Gateways in this zone will not serve any end user requests directly.
13.7.1.2 Configuring Sync Modules
1. Create the third zone similar to the ones described in Section 13.11, “Multisite Object
Gateways”, for example
cephadm > radosgw-admin zone create --rgw-zonegroup=us --rgw-zone=us-east-es \--access-key={system-key} --secret={secret} --endpoints=http://rgw-es:80
181 Synchronizing Zones SES 5.5 (SES 5 & SES …
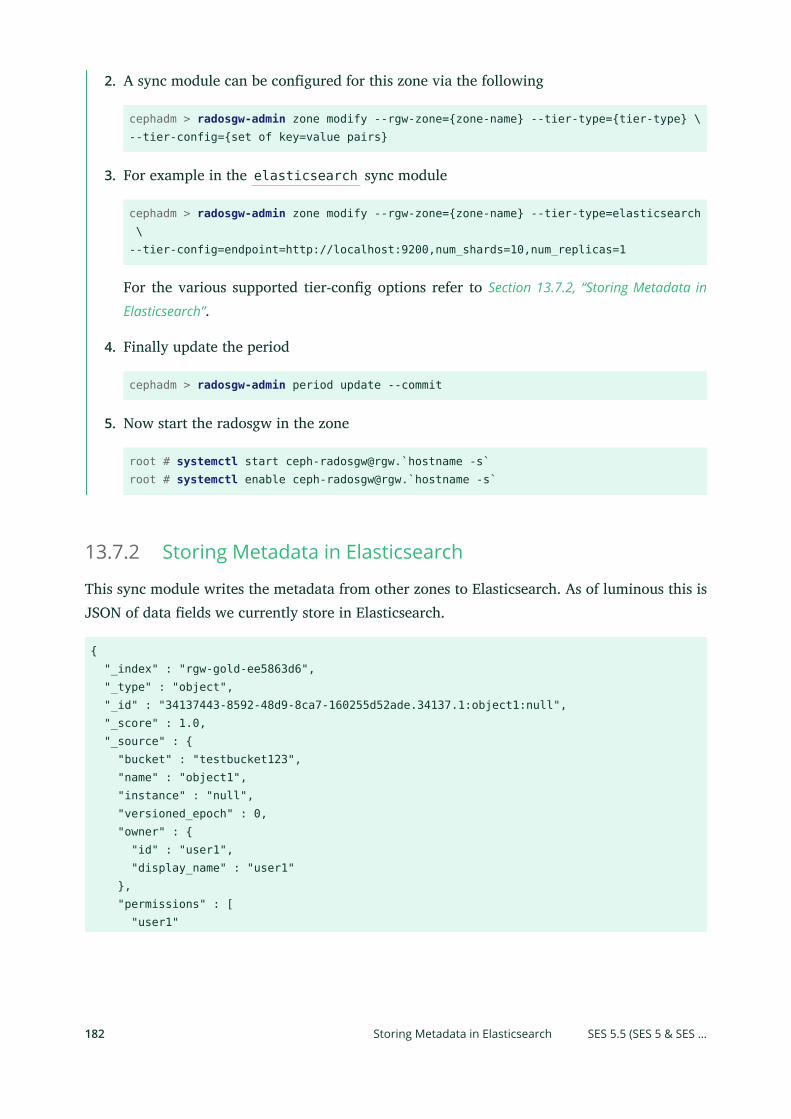
2. A sync module can be congured for this zone via the following
cephadm > radosgw-admin zone modify --rgw-zone={zone-name} --tier-type={tier-type} \--tier-config={set of key=value pairs}
3. For example in the elasticsearch sync module
cephadm > radosgw-admin zone modify --rgw-zone={zone-name} --tier-type=elasticsearch \--tier-config=endpoint=http://localhost:9200,num_shards=10,num_replicas=1
For the various supported tier-cong options refer to Section 13.7.2, “Storing Metadata in
Elasticsearch”.
4. Finally update the period
cephadm > radosgw-admin period update --commit
5. Now start the radosgw in the zone
root # systemctl start ceph-radosgw@rgw.`hostname -s`root # systemctl enable ceph-radosgw@rgw.`hostname -s`
13.7.2 Storing Metadata in Elasticsearch
This sync module writes the metadata from other zones to Elasticsearch. As of luminous this isJSON of data elds we currently store in Elasticsearch.
{ "_index" : "rgw-gold-ee5863d6", "_type" : "object", "_id" : "34137443-8592-48d9-8ca7-160255d52ade.34137.1:object1:null", "_score" : 1.0, "_source" : { "bucket" : "testbucket123", "name" : "object1", "instance" : "null", "versioned_epoch" : 0, "owner" : { "id" : "user1", "display_name" : "user1" }, "permissions" : [ "user1"
182 Storing Metadata in Elasticsearch SES 5.5 (SES 5 & SES …
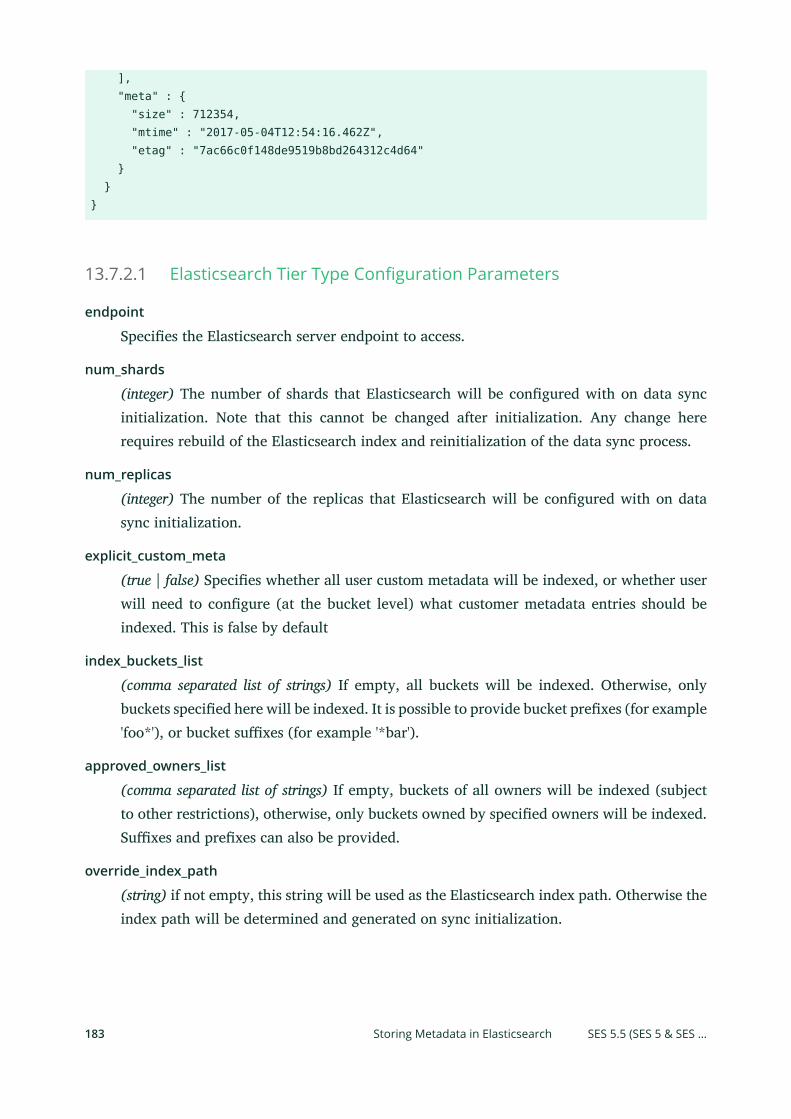
], "meta" : { "size" : 712354, "mtime" : "2017-05-04T12:54:16.462Z", "etag" : "7ac66c0f148de9519b8bd264312c4d64" } }}
13.7.2.1 Elasticsearch Tier Type Configuration Parameters
endpoint
Species the Elasticsearch server endpoint to access.
num_shards
(integer) The number of shards that Elasticsearch will be congured with on data syncinitialization. Note that this cannot be changed after initialization. Any change hererequires rebuild of the Elasticsearch index and reinitialization of the data sync process.
num_replicas
(integer) The number of the replicas that Elasticsearch will be congured with on datasync initialization.
explicit_custom_meta
(true | false) Species whether all user custom metadata will be indexed, or whether userwill need to congure (at the bucket level) what customer metadata entries should beindexed. This is false by default
index_buckets_list
(comma separated list of strings) If empty, all buckets will be indexed. Otherwise, onlybuckets specied here will be indexed. It is possible to provide bucket prexes (for example'foo*'), or bucket suxes (for example '*bar').
approved_owners_list
(comma separated list of strings) If empty, buckets of all owners will be indexed (subjectto other restrictions), otherwise, only buckets owned by specied owners will be indexed.Suxes and prexes can also be provided.
override_index_path
(string) if not empty, this string will be used as the Elasticsearch index path. Otherwise theindex path will be determined and generated on sync initialization.
183 Storing Metadata in Elasticsearch SES 5.5 (SES 5 & SES …
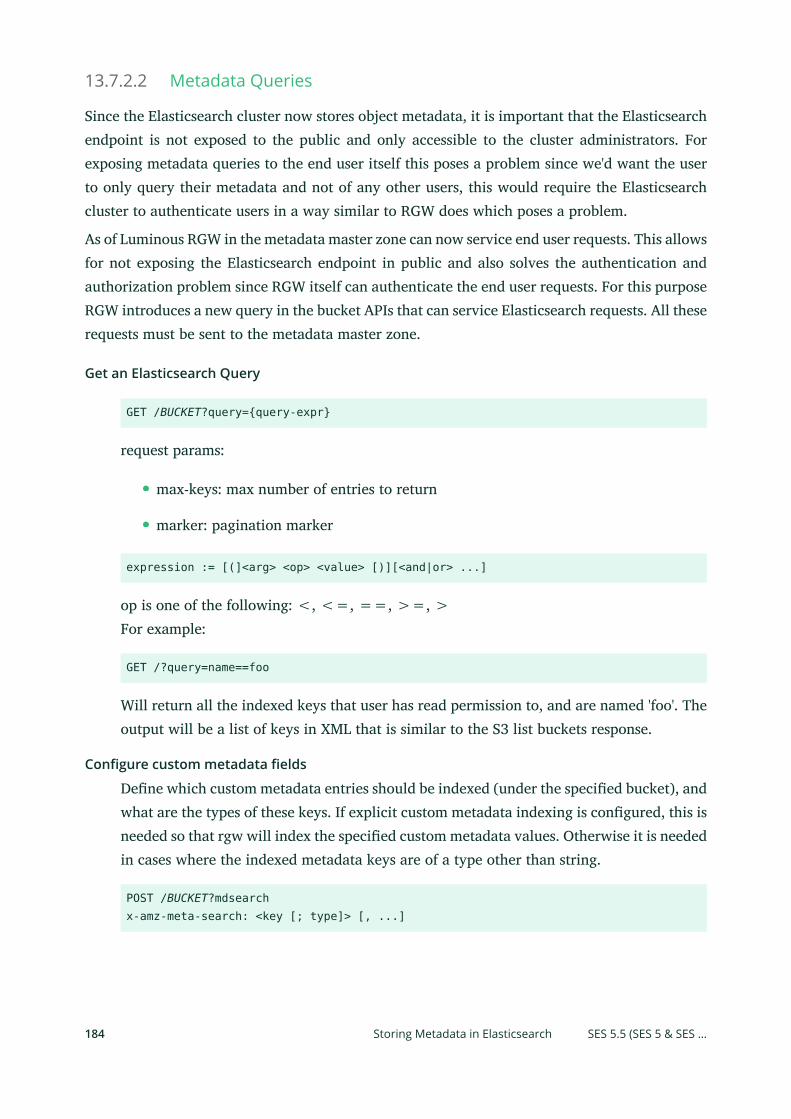
13.7.2.2 Metadata Queries
Since the Elasticsearch cluster now stores object metadata, it is important that the Elasticsearchendpoint is not exposed to the public and only accessible to the cluster administrators. Forexposing metadata queries to the end user itself this poses a problem since we'd want the userto only query their metadata and not of any other users, this would require the Elasticsearchcluster to authenticate users in a way similar to RGW does which poses a problem.
As of Luminous RGW in the metadata master zone can now service end user requests. This allowsfor not exposing the Elasticsearch endpoint in public and also solves the authentication andauthorization problem since RGW itself can authenticate the end user requests. For this purposeRGW introduces a new query in the bucket APIs that can service Elasticsearch requests. All theserequests must be sent to the metadata master zone.
Get an Elasticsearch Query
GET /BUCKET?query={query-expr}
request params:
max-keys: max number of entries to return
marker: pagination marker
expression := [(]<arg> <op> <value> [)][<and|or> ...]
op is one of the following: <, <=, ==, >=, >For example:
GET /?query=name==foo
Will return all the indexed keys that user has read permission to, and are named 'foo'. Theoutput will be a list of keys in XML that is similar to the S3 list buckets response.
Configure custom metadata fields
Dene which custom metadata entries should be indexed (under the specied bucket), andwhat are the types of these keys. If explicit custom metadata indexing is congured, this isneeded so that rgw will index the specied custom metadata values. Otherwise it is neededin cases where the indexed metadata keys are of a type other than string.
POST /BUCKET?mdsearchx-amz-meta-search: <key [; type]> [, ...]
184 Storing Metadata in Elasticsearch SES 5.5 (SES 5 & SES …
Multiple metadata elds must be comma separated, a type can be forced for a eld witha `;`. The currently allowed types are string(default), integer and date, for example, if youwant to index a custom object metadata x-amz-meta-year as int, x-amz-meta-date as typedate and x-amz-meta-title as string, you would do
POST /mybooks?mdsearchx-amz-meta-search: x-amz-meta-year;int, x-amz-meta-release-date;date, x-amz-meta-title;string
Delete custom metadata configuration
Delete custom metadata bucket conguration.
DELETE /BUCKET?mdsearch
Get custom metadata configuration
Retrieve custom metadata bucket conguration.
GET /BUCKET?mdsearch
13.8 LDAP AuthenticationApart from the default local user authentication, Object Gateway can use LDAP server servicesto authenticate users as well.
13.8.1 Authentication Mechanism
The Object Gateway extracts the user's LDAP credentials from a token. A search lter isconstructed from the user name. The Object Gateway uses the congured service account tosearch the directory for a matching entry. If an entry is found, the Object Gateway attempts tobind to the found distinguished name with the password from the token. If the credentials arevalid, the bind will succeed, and the Object Gateway grants access.
You can limit the allowed users by setting the base for the search to a specic organizationalunit or by specifying a custom search lter, for example requiring specic group membership,custom object classes, or attributes.
185 LDAP Authentication SES 5.5 (SES 5 & SES …
13.8.2 Requirements
LDAP or Active Directory: A running LDAP instance accessible by the Object Gateway.
Service account: LDAP credentials to be used by the Object Gateway with searchpermissions.
User account: At least one user account in the LDAP directory.
Important: Do Not Overlap LDAP and Local UsersYou should not use the same user names for local users and for users being authenticatedby using LDAP. The Object Gateway cannot distinguish them and it treats them as thesame user.
Tip: Sanity ChecksUse the ldapsearch utility to verify the service account or the LDAP connection. Forexample:
cephadm > ldapsearch -x -D "uid=ceph,ou=system,dc=example,dc=com" -W \-H ldaps://example.com -b "ou=users,dc=example,dc=com" 'uid=*' dn
Make sure to use the same LDAP parameters as in the Ceph conguration le to eliminatepossible problems.
13.8.3 Configure Object Gateway to Use LDAP Authentication
The following parameters in the /etc/ceph/ceph.conf conguration le are related to theLDAP authentication:
rgw_ldap_uri
Species the LDAP server to use. Make sure to use the ldaps://fqdn:port parameter toavoid transmitting the plain text credentials openly.
rgw_ldap_binddn
The Distinguished Name (DN) of the service account used by the Object Gateway.
rgw_ldap_secret
186 Requirements SES 5.5 (SES 5 & SES …
The password for the service account.
rgw_ldap_searchdn
Species the base in the directory information tree for searching users. This might be yourusers organizational unit or some more specic Organizational Unit (OU).
rgw_ldap_dnattr
The attribute being used in the constructed search lter to match a user name. Dependingon your Directory Information Tree (DIT) this would probably be uid or cn .
rgw_search_filter
If not specied, the Object Gateway automatically constructs the search lter with thergw_ldap_dnattr setting. Use this parameter to narrow the list of allowed users in veryexible ways. Consult Section 13.8.4, “Using a Custom Search Filter to Limit User Access” fordetails.
13.8.4 Using a Custom Search Filter to Limit User Access
There are two ways you can use the rgw_search_filter parameter.
13.8.4.1 Partial Filter to Further Limit the Constructed Search Filter
An example of a partial lter:
"objectclass=inetorgperson"
The Object Gateway will generate the search lter as usual with the user name from the tokenand the value of rgw_ldap_dnattr . The constructed lter is then combined with the partiallter from the rgw_search_filter attribute. Depending on the user name and the settings thenal search lter may become:
"(&(uid=hari)(objectclass=inetorgperson))"
In that case, user 'hari' will only be granted access if he is found in the LDAP directory, has anobject class of 'inetorgperson', and did specify a valid password.
187 Using a Custom Search Filter to Limit User Access SES 5.5 (SES 5 & SES …
13.8.4.2 Complete Filter
A complete lter must contain a USERNAME token which will be substituted with the user nameduring the authentication attempt. The rgw_ldap_dnattr parameter is not used anymore inthis case. For example, to limit valid users to a specic group, use the following lter:
"(&(uid=USERNAME)(memberOf=cn=ceph-users,ou=groups,dc=mycompany,dc=com))"
Note: memberOf AttributeUsing the memberOf attribute in LDAP searches requires server side support from youspecic LDAP server implementation.
13.8.5 Generating an Access Token for LDAP authentication
The radosgw-token utility generates the access token based on the LDAP user name andpassword. It outputs a base-64 encoded string which is the actual access token. Use your favoriteS3 client (refer to Section 13.5.1, “Accessing Object Gateway”) and specify the token as the accesskey and use an empty secret key.
cephadm > export RGW_ACCESS_KEY_ID="username"cephadm > export RGW_SECRET_ACCESS_KEY="password"cephadm > radosgw-token --encode --ttype=ldap
Important: Clear Text CredentialsThe access token is a base-64 encoded JSON structure and contains the LDAP credentialsas a clear text.
Note: Active DirectoryFor Active Directory, use the --ttype=ad parameter.
188 Generating an Access Token for LDAP authentication SES 5.5 (SES 5 & SES …
13.9 Bucket Index ShardingThe Object Gateway stores bucket index data in an index pool, which defaults to.rgw.buckets.index . If you put too many (hundreds of thousands) objects into a single bucketand the quota for maximum number of objects per bucket ( rgw bucket default quota maxobjects ) is not set, the performance of the index pool may degrade. Bucket index shardingprevents such performance decreases and allows a high number of objects per bucket.
13.9.1 Bucket Index Resharding
If a bucket has grown large and its initial conguration is not sucient anymore, the bucket'sindex pool needs to be resharded. You can either use automatic online bucket index resharding(refer to Section 13.9.1.1, “Dynamic Resharding”, or reshard the bucket index oine manually (referto Section 13.9.1.2, “Manual Resharding”.
13.9.1.1 Dynamic Resharding
Since SUSE Enterprise Storage 5.5, we support online bucket resharding. It detects if the numberof objects per bucket reaches a certain threshold, and automatically increases the number ofshards used by the bucket index. This process reduces the number of entries in each bucketindex shard.
The detection process runs:
When new objects are added to the bucket.
In a background process that periodically scans all the buckets. This is needed in order todeal with existing buckets that are not being updated.
A bucket that requires resharding is added to the reshard_log queue and will be scheduledto be resharded later. The reshard threads run in the background and execute the scheduledresharding, one at a time.
CONFIGURING DYNAMIC RESHARDING
rgw_dynamic_resharding
Enables or disables dynamic bucket index resharding. Possible values are 'true' or 'false'.Defaults to 'true'.
rgw_reshard_num_logs
189 Bucket Index Sharding SES 5.5 (SES 5 & SES …
Number of shards for the resharding log. Defaults to 16.
rgw_reshard_bucket_lock_duration
Duration of lock on the bucket object during resharding. Defaults to 120 seconds.
rgw_max_objs_per_shard
Maximum number of objects per bucket index shard. Defaults to 100000 objects.
rgw_reshard_thread_interval
Maximum time between rounds of reshard thread processing. Defaults to 600 seconds.
Important: Multisite ConfigurationsDynamic resharding is not supported in multisite environment. It is disabled by defaultsince Ceph 12.2.2, but we recommend you to double check the setting.
COMMANDS TO ADMINISTER THE RESHARDING PROCESS
Add a bucket to the resharding queue:
cephadm > radosgw-admin reshard add \ --bucket BUCKET_NAME \ --num-shards NEW_NUMBER_OF_SHARDS
List resharding queue:
cephadm > radosgw-admin reshard list
Process / schedule a bucket resharding:
cephadm > radosgw-admin reshard process
Display the bucket resharding status:
cephadm > radosgw-admin reshard status --bucket BUCKET_NAME
Cancel pending bucket resharding:
cephadm > radosgw-admin reshard cancel --bucket BUCKET_NAME
13.9.1.2 Manual Resharding
Dynamic resharding mentioned in Section 13.9.1.1, “Dynamic Resharding” is supported only forsimple Object Gateway congurations. For multisite congurations, use manual reshardingdescribed in this section.
190 Bucket Index Resharding SES 5.5 (SES 5 & SES …
To reshard the bucket index manually oine, use the following command:
cephadm > radosgw-admin bucket reshard
The bucket reshard command performs the following:
Creates a new set of bucket index objects for the specied object.
Spreads all objects entries of these index objects.
Creates a new bucket instance.
Links the new bucket instance with the bucket so that all new index operations go throughthe new bucket indexes.
Prints the old and the new bucket ID to the standard output.
PROCEDURE 13.1: RESHARDING THE BUCKET INDEX POOL
1. Make sure that all operations to the bucket are stopped.
2. Back up the original bucket index:
cephadm > radosgw-admin bi list \ --bucket=BUCKET_NAME \ > BUCKET_NAME.list.backup
3. Reshard the bucket index:
cephadm > radosgw-admin reshard \ --bucket=BUCKET_NAME \ --num-shards=NEW_SHARDS_NUMBER
Tip: Old Bucket IDAs part of its output, this command also prints the new and the old bucket ID. Notethe old bucket ID down; you will need it to purge the old bucket index objects.
4. Verify that the objects are listed correctly by comparing the old bucket index listing withthe new one. Then purge the old bucket index objects:
cephadm > radosgw-admin bi purge --bucket=BUCKET_NAME
191 Bucket Index Resharding SES 5.5 (SES 5 & SES …
--bucket-id=OLD_BUCKET_ID
13.9.2 Bucket Index Sharding for New Buckets
There are two options that aect bucket index sharding:
Use the rgw_override_bucket_index_max_shards option for simple congurations.
Use the bucket_index_max_shards option for multisite congurations.
Setting the options to 0 disables bucket index sharding. A value greater than 0 enables bucketindex sharding and sets the maximum number of shards.
The following formula helps you calculate the recommended number of shards:
number_of_objects_expected_in_a_bucket / 100000
Be aware that the maximum number of shards is 7877.
13.9.2.1 Simple Configurations
1. Open the Ceph conguration le and add or modify the following option:
rgw_override_bucket_index_max_shards = 12
Tip: All or One Object Gateway InstancesTo congure bucket index sharding for all instances of the Object Gateway, includergw_override_bucket_index_max_shards in the [global] section.
To congure bucket index sharding only for a particular instance of the ObjectGateway, include rgw_override_bucket_index_max_shards in the relatedinstance section.
2. Restart the Object Gateway. See Section 13.3, “Operating the Object Gateway Service” for moredetails.
192 Bucket Index Sharding for New Buckets SES 5.5 (SES 5 & SES …
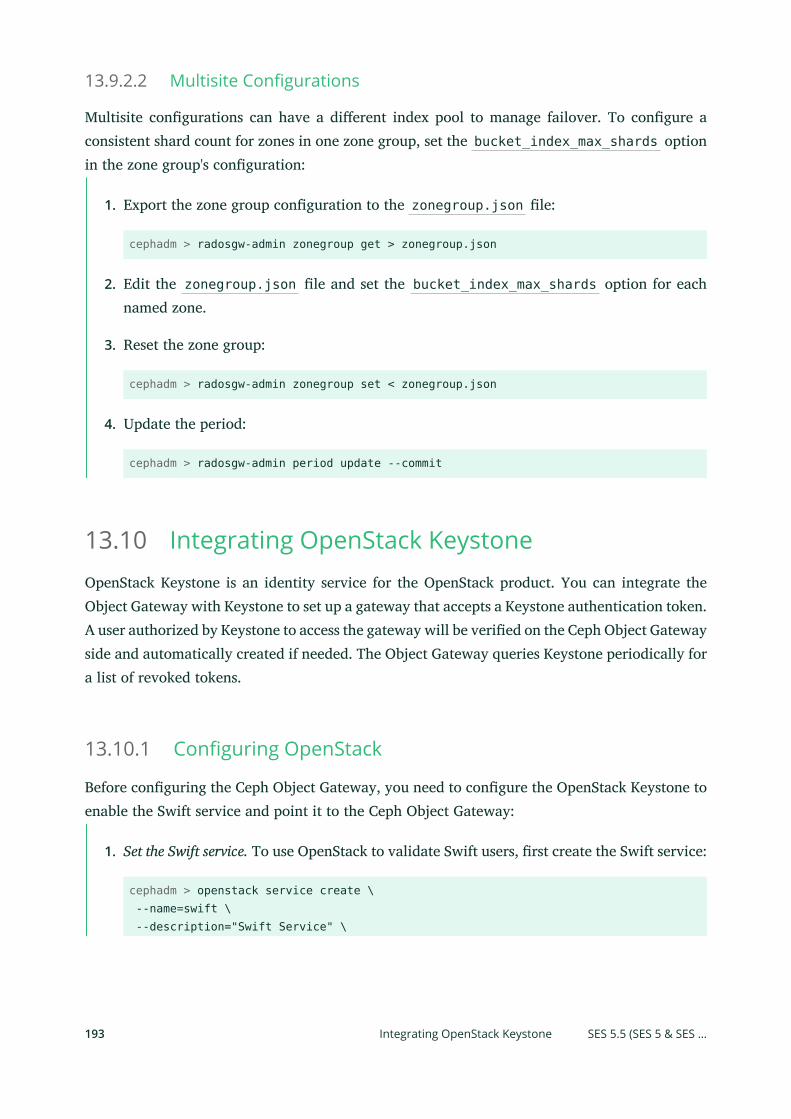
13.9.2.2 Multisite Configurations
Multisite congurations can have a dierent index pool to manage failover. To congure aconsistent shard count for zones in one zone group, set the bucket_index_max_shards optionin the zone group's conguration:
1. Export the zone group conguration to the zonegroup.json le:
cephadm > radosgw-admin zonegroup get > zonegroup.json
2. Edit the zonegroup.json le and set the bucket_index_max_shards option for eachnamed zone.
3. Reset the zone group:
cephadm > radosgw-admin zonegroup set < zonegroup.json
4. Update the period:
cephadm > radosgw-admin period update --commit
13.10 Integrating OpenStack KeystoneOpenStack Keystone is an identity service for the OpenStack product. You can integrate theObject Gateway with Keystone to set up a gateway that accepts a Keystone authentication token.A user authorized by Keystone to access the gateway will be veried on the Ceph Object Gatewayside and automatically created if needed. The Object Gateway queries Keystone periodically fora list of revoked tokens.
13.10.1 Configuring OpenStack
Before conguring the Ceph Object Gateway, you need to congure the OpenStack Keystone toenable the Swift service and point it to the Ceph Object Gateway:
1. Set the Swift service. To use OpenStack to validate Swift users, rst create the Swift service:
cephadm > openstack service create \ --name=swift \ --description="Swift Service" \
193 Integrating OpenStack Keystone SES 5.5 (SES 5 & SES …
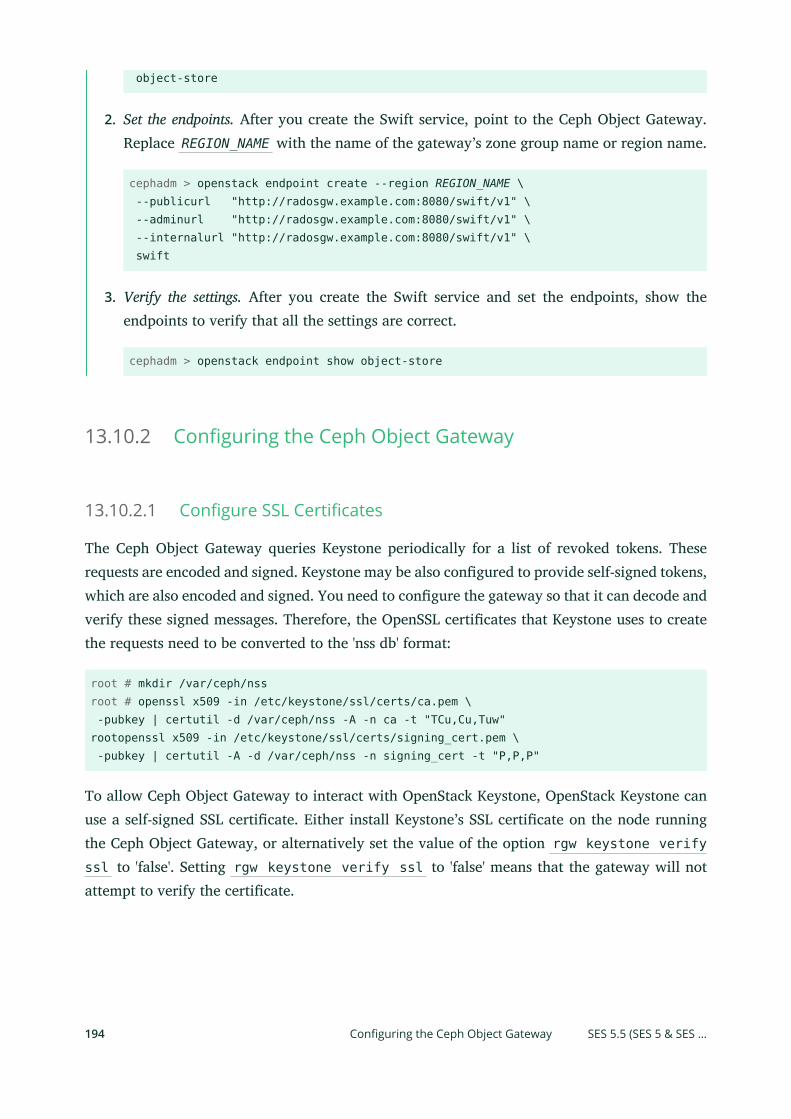
object-store
2. Set the endpoints. After you create the Swift service, point to the Ceph Object Gateway.Replace REGION_NAME with the name of the gateway’s zone group name or region name.
cephadm > openstack endpoint create --region REGION_NAME \ --publicurl "http://radosgw.example.com:8080/swift/v1" \ --adminurl "http://radosgw.example.com:8080/swift/v1" \ --internalurl "http://radosgw.example.com:8080/swift/v1" \ swift
3. Verify the settings. After you create the Swift service and set the endpoints, show theendpoints to verify that all the settings are correct.
cephadm > openstack endpoint show object-store
13.10.2 Configuring the Ceph Object Gateway
13.10.2.1 Configure SSL Certificates
The Ceph Object Gateway queries Keystone periodically for a list of revoked tokens. Theserequests are encoded and signed. Keystone may be also congured to provide self-signed tokens,which are also encoded and signed. You need to congure the gateway so that it can decode andverify these signed messages. Therefore, the OpenSSL certicates that Keystone uses to createthe requests need to be converted to the 'nss db' format:
root # mkdir /var/ceph/nssroot # openssl x509 -in /etc/keystone/ssl/certs/ca.pem \ -pubkey | certutil -d /var/ceph/nss -A -n ca -t "TCu,Cu,Tuw"rootopenssl x509 -in /etc/keystone/ssl/certs/signing_cert.pem \ -pubkey | certutil -A -d /var/ceph/nss -n signing_cert -t "P,P,P"
To allow Ceph Object Gateway to interact with OpenStack Keystone, OpenStack Keystone canuse a self-signed SSL certicate. Either install Keystone’s SSL certicate on the node runningthe Ceph Object Gateway, or alternatively set the value of the option rgw keystone verifyssl to 'false'. Setting rgw keystone verify ssl to 'false' means that the gateway will notattempt to verify the certicate.
194 Configuring the Ceph Object Gateway SES 5.5 (SES 5 & SES …
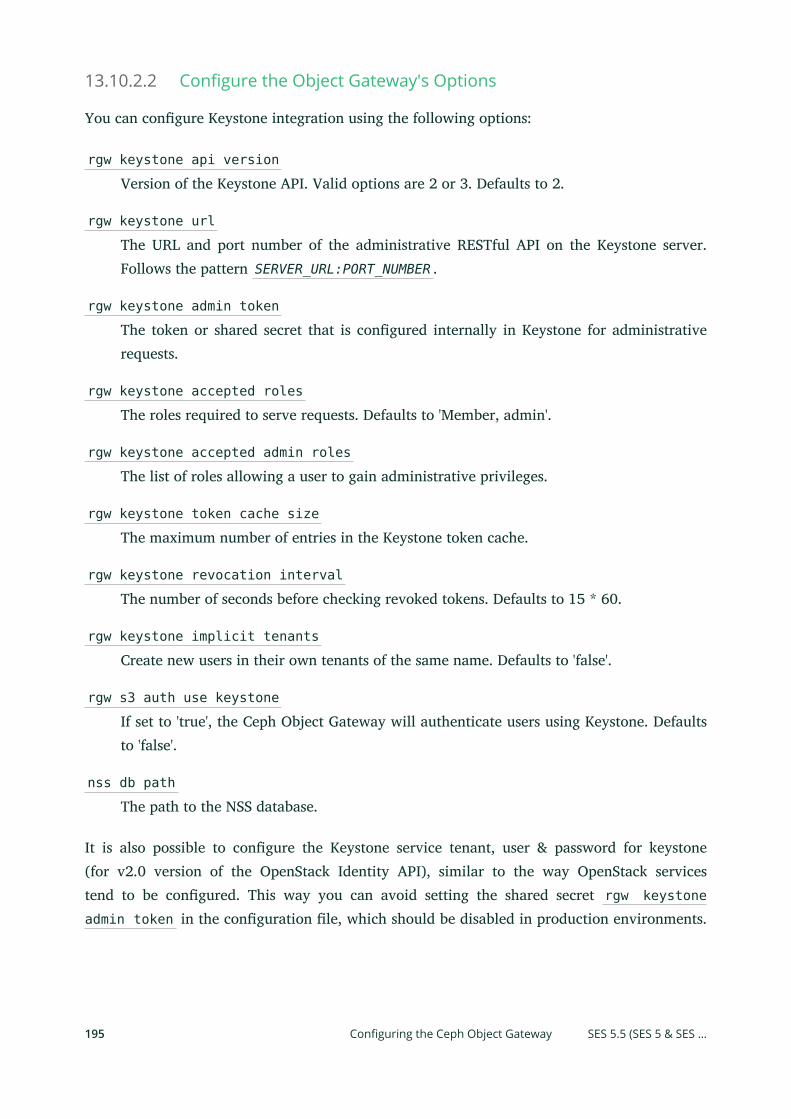
13.10.2.2 Configure the Object Gateway's Options
You can congure Keystone integration using the following options:
rgw keystone api version
Version of the Keystone API. Valid options are 2 or 3. Defaults to 2.
rgw keystone url
The URL and port number of the administrative RESTful API on the Keystone server.Follows the pattern SERVER_URL:PORT_NUMBER .
rgw keystone admin token
The token or shared secret that is congured internally in Keystone for administrativerequests.
rgw keystone accepted roles
The roles required to serve requests. Defaults to 'Member, admin'.
rgw keystone accepted admin roles
The list of roles allowing a user to gain administrative privileges.
rgw keystone token cache size
The maximum number of entries in the Keystone token cache.
rgw keystone revocation interval
The number of seconds before checking revoked tokens. Defaults to 15 * 60.
rgw keystone implicit tenants
Create new users in their own tenants of the same name. Defaults to 'false'.
rgw s3 auth use keystone
If set to 'true', the Ceph Object Gateway will authenticate users using Keystone. Defaultsto 'false'.
nss db path
The path to the NSS database.
It is also possible to congure the Keystone service tenant, user & password for keystone(for v2.0 version of the OpenStack Identity API), similar to the way OpenStack servicestend to be congured. This way you can avoid setting the shared secret rgw keystone
admin token in the conguration le, which should be disabled in production environments.
195 Configuring the Ceph Object Gateway SES 5.5 (SES 5 & SES …
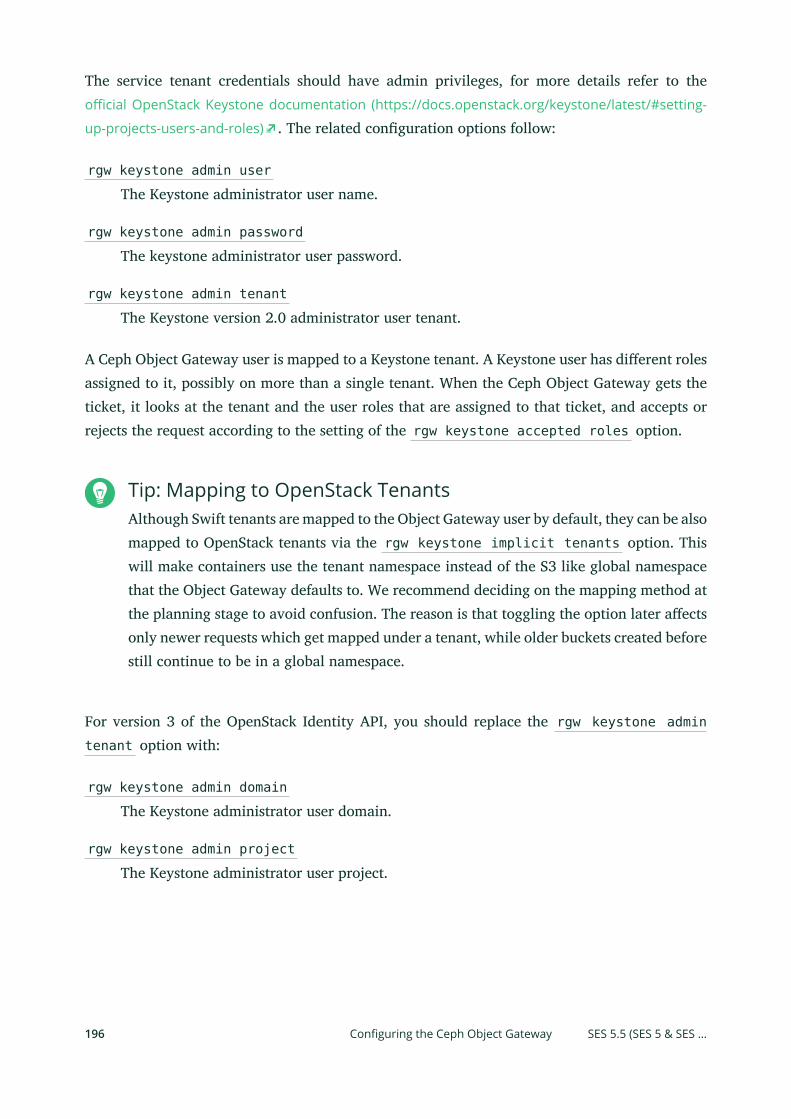
The service tenant credentials should have admin privileges, for more details refer to theocial OpenStack Keystone documentation (https://docs.openstack.org/keystone/latest/#setting-
up-projects-users-and-roles) . The related conguration options follow:
rgw keystone admin user
The Keystone administrator user name.
rgw keystone admin password
The keystone administrator user password.
rgw keystone admin tenant
The Keystone version 2.0 administrator user tenant.
A Ceph Object Gateway user is mapped to a Keystone tenant. A Keystone user has dierent rolesassigned to it, possibly on more than a single tenant. When the Ceph Object Gateway gets theticket, it looks at the tenant and the user roles that are assigned to that ticket, and accepts orrejects the request according to the setting of the rgw keystone accepted roles option.
Tip: Mapping to OpenStack TenantsAlthough Swift tenants are mapped to the Object Gateway user by default, they can be alsomapped to OpenStack tenants via the rgw keystone implicit tenants option. Thiswill make containers use the tenant namespace instead of the S3 like global namespacethat the Object Gateway defaults to. We recommend deciding on the mapping method atthe planning stage to avoid confusion. The reason is that toggling the option later aectsonly newer requests which get mapped under a tenant, while older buckets created beforestill continue to be in a global namespace.
For version 3 of the OpenStack Identity API, you should replace the rgw keystone admintenant option with:
rgw keystone admin domain
The Keystone administrator user domain.
rgw keystone admin project
The Keystone administrator user project.
196 Configuring the Ceph Object Gateway SES 5.5 (SES 5 & SES …
13.11 Multisite Object Gateways
Zone
A logical grouping of one or more Object Gateway instances. There must be one zonedesignated as the master zone in a zonegroup, which handles all bucket and user creation.
Zonegroup
A zonegroup consists of multiple zones. There should be a master zonegroup that willhandle changes to the system conguration.
Zonegroup map
A conguration structure that holds the map of the entire system, for example whichzonegroup is the master, relationships between dierent zone groups, and certainconguration options such as storage policies.
Realm
A container for zone groups. This allows for separation of zone groups between clusters.It is possible to create multiple realms, making it easier to run completely dierentcongurations in the same cluster.
Period
A period holds the conguration structure for the current state of the realm. Every periodcontains a unique ID and an epoch. Every realm has an associated current period, holdingthe current state of conguration of the zone groups and storage policies. Any congurationchange for a non-master zone will increment the period's epoch. Changing the master zoneto a dierent zone will trigger the following changes:
A new period is generated with a new period ID and epoch of 1.
Realm's current period is updated to point to the newly generated period ID.
Realm's epoch is incremented.
You can congure each Object Gateway to participate in a federated architecture, working inan active zone conguration while allowing for writes to non-master zones.
13.11.1 Terminology
A description of terms specic to a federated architecture follows:
197 Multisite Object Gateways SES 5.5 (SES 5 & SES …
13.11.2 Example Cluster Setup
In this example, we will focus on creating a single zone group with three separate zones, whichactively synchronize their data. Two zones belong to the same cluster, while the third belongs toa dierent one. There is no synchronization agent involved in mirroring data changes betweenthe Object Gateways. This allows for a much simpler conguration scheme and active-activecongurations. Note that metadata operations—such as creating a new user—still need to gothrough the master zone. However, data operations—such as creation of buckets and objects—can be handled by any of the zones.
13.11.3 System Keys
While conguring zones, Object Gateway expects creation of an S3-compatible system usertogether with their access and secret keys. This allows another Object Gateway instance to pullthe conguration remotely with the access and secret keys. For more information on creatingS3 users, see Section 13.5.2.1, “Adding S3 and Swift Users”.
TipIt is useful to generate the access and secret keys before the zone creation itself becauseit makes scripting and use of conguration management tools easier later on.
For the purpose of this example, let us assume that the access and secret keys are set in theenvironment variables:
# SYSTEM_ACCESS_KEY=1555b35654ad1656d805# SYSTEM_SECRET_KEY=h7GhxuBLTrlhVUyxSPUKUV8r/2EI4ngqJxD7iBdBYLhwluN30JaT3Q==
Generally, access keys consist of 20 alphanumeric characters, while secret keys consist of 40alphanumeric characters (they can contain +/= characters as well). You can generate thesekeys in the command line:
# SYSTEM_ACCESS_KEY=$(cat /dev/urandom | tr -dc 'a-zA-Z0-9' | fold -w 20 | head -n 1)# SYSTEM_SECRET_KEY=$(cat /dev/urandom | tr -dc 'a-zA-Z0-9' | fold -w 40 | head -n 1)
198 Example Cluster Setup SES 5.5 (SES 5 & SES …
13.11.4 Naming Conventions
This example describes the process of setting up a master zone. We will assume a zonegroupcalled us spanning the United States, which will be our master zonegroup. This will contain twozones written in a zonegroup - zone format. This is our convention only and you can choosea format that you prefer. In summary:
Master zonegroup: United States us
Master zone: United States, East Region 1: us-east-1
Secondary zone: United States, East Region 2: us-east-2
Secondary zone: United States, West Region: us-west
This will be a part of a larger realm named gold . The us-east-1 and us-east-2 zones arepart of the same Ceph cluster, us-east-1 being the primary one. us-west is in a dierentCeph cluster.
13.11.5 Default Pools
When congured with the appropriate permissions, Object Gateway creates default pools on itsown. The pg_num and pgp_num values are taken from the ceph.conf conguration le. Poolsrelated to a zone by default follow the convention of zone-name . pool-name . For example forthe us-east-1 zone, it will be the following pools:
.rgw.rootus-east-1.rgw.controlus-east-1.rgw.data.rootus-east-1.rgw.gcus-east-1.rgw.logus-east-1.rgw.intent-logus-east-1.rgw.usageus-east-1.rgw.users.keysus-east-1.rgw.users.emailus-east-1.rgw.users.swiftus-east-1.rgw.users.uidus-east-1.rgw.buckets.indexus-east-1.rgw.buckets.dataus-east-1.rgw.meta
These pools can be created in other zones as well, by replacing us-east-1 with the appropriatezone name.
199 Naming Conventions SES 5.5 (SES 5 & SES …
13.11.6 Creating a Realm
Congure a realm called gold and make it the default realm:
cephadm > radosgw-admin realm create --rgw-realm=gold --default{ "id": "4a367026-bd8f-40ee-b486-8212482ddcd7", "name": "gold", "current_period": "09559832-67a4-4101-8b3f-10dfcd6b2707", "epoch": 1}
Note that every realm has an ID, which allows for exibility such as renaming the realm later ifneeded. The current_period changes whenever we change anything in the master zone. Theepoch is incremented when there is a change in the master zone's conguration which resultsin a change of the current period.
13.11.7 Deleting the Default Zonegroup
The default installation of Object Gateway creates the default zonegroup called default .Because we no longer need the default zonegroup, remove it.
cephadm > radosgw-admin zonegroup delete --rgw-zonegroup=default
13.11.8 Creating a Master Zonegroup
Create a master zonegroup called us . The zonegroup will manage the zonegroup map andpropagate changes to the rest of the system. By marking the zonegroup as default, you allowexplicitly mentioning the rgw-zonegroup switch for later commands.
cephadm > radosgw-admin zonegroup create --rgw-zonegroup=us \--endpoints=http://rgw1:80 --master --default{ "id": "d4018b8d-8c0d-4072-8919-608726fa369e", "name": "us", "api_name": "us", "is_master": "true", "endpoints": [ "http:\/\/rgw1:80" ], "hostnames": [],
200 Creating a Realm SES 5.5 (SES 5 & SES …
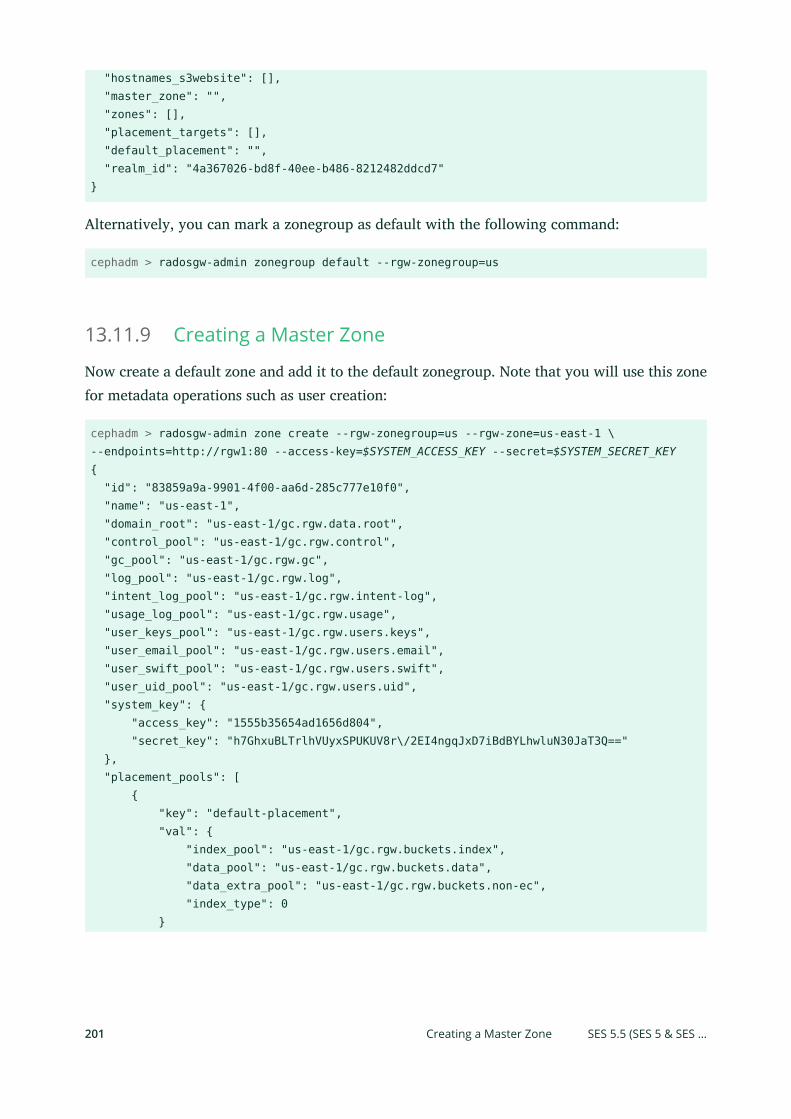
"hostnames_s3website": [], "master_zone": "", "zones": [], "placement_targets": [], "default_placement": "", "realm_id": "4a367026-bd8f-40ee-b486-8212482ddcd7"}
Alternatively, you can mark a zonegroup as default with the following command:
cephadm > radosgw-admin zonegroup default --rgw-zonegroup=us
13.11.9 Creating a Master Zone
Now create a default zone and add it to the default zonegroup. Note that you will use this zonefor metadata operations such as user creation:
cephadm > radosgw-admin zone create --rgw-zonegroup=us --rgw-zone=us-east-1 \--endpoints=http://rgw1:80 --access-key=$SYSTEM_ACCESS_KEY --secret=$SYSTEM_SECRET_KEY{ "id": "83859a9a-9901-4f00-aa6d-285c777e10f0", "name": "us-east-1", "domain_root": "us-east-1/gc.rgw.data.root", "control_pool": "us-east-1/gc.rgw.control", "gc_pool": "us-east-1/gc.rgw.gc", "log_pool": "us-east-1/gc.rgw.log", "intent_log_pool": "us-east-1/gc.rgw.intent-log", "usage_log_pool": "us-east-1/gc.rgw.usage", "user_keys_pool": "us-east-1/gc.rgw.users.keys", "user_email_pool": "us-east-1/gc.rgw.users.email", "user_swift_pool": "us-east-1/gc.rgw.users.swift", "user_uid_pool": "us-east-1/gc.rgw.users.uid", "system_key": { "access_key": "1555b35654ad1656d804", "secret_key": "h7GhxuBLTrlhVUyxSPUKUV8r\/2EI4ngqJxD7iBdBYLhwluN30JaT3Q==" }, "placement_pools": [ { "key": "default-placement", "val": { "index_pool": "us-east-1/gc.rgw.buckets.index", "data_pool": "us-east-1/gc.rgw.buckets.data", "data_extra_pool": "us-east-1/gc.rgw.buckets.non-ec", "index_type": 0 }
201 Creating a Master Zone SES 5.5 (SES 5 & SES …
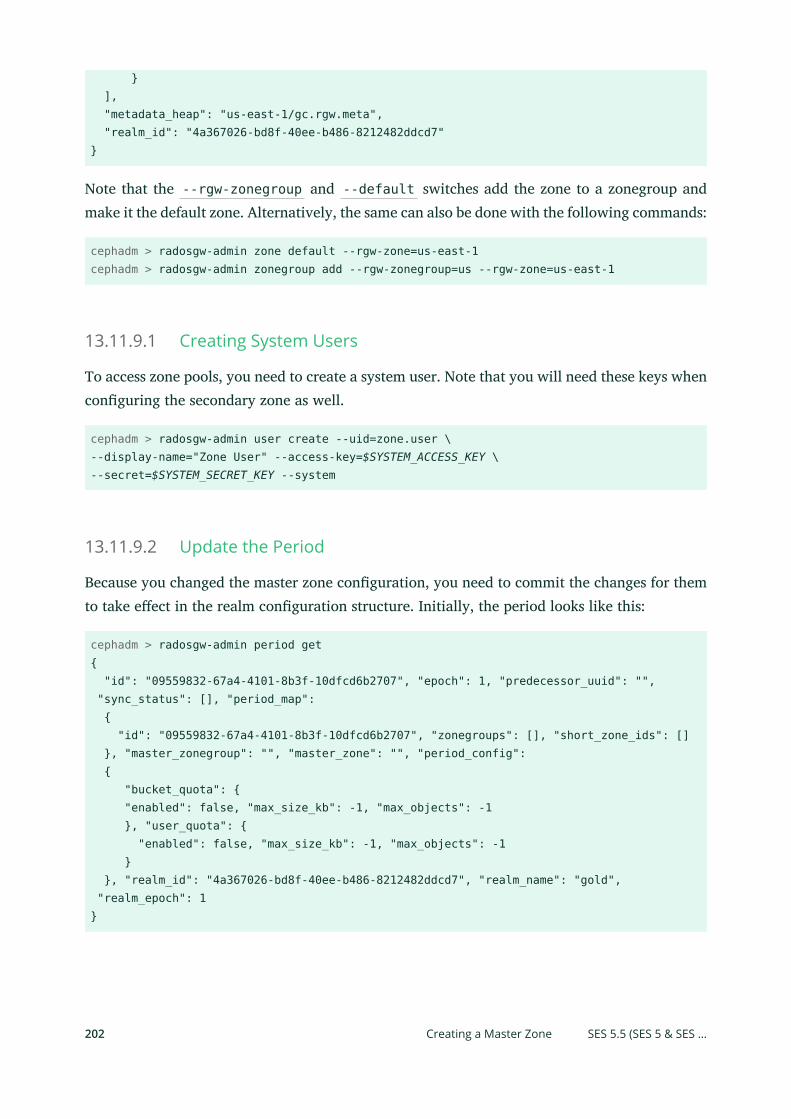
} ], "metadata_heap": "us-east-1/gc.rgw.meta", "realm_id": "4a367026-bd8f-40ee-b486-8212482ddcd7"}
Note that the --rgw-zonegroup and --default switches add the zone to a zonegroup andmake it the default zone. Alternatively, the same can also be done with the following commands:
cephadm > radosgw-admin zone default --rgw-zone=us-east-1cephadm > radosgw-admin zonegroup add --rgw-zonegroup=us --rgw-zone=us-east-1
13.11.9.1 Creating System Users
To access zone pools, you need to create a system user. Note that you will need these keys whenconguring the secondary zone as well.
cephadm > radosgw-admin user create --uid=zone.user \--display-name="Zone User" --access-key=$SYSTEM_ACCESS_KEY \--secret=$SYSTEM_SECRET_KEY --system
13.11.9.2 Update the Period
Because you changed the master zone conguration, you need to commit the changes for themto take eect in the realm conguration structure. Initially, the period looks like this:
cephadm > radosgw-admin period get{ "id": "09559832-67a4-4101-8b3f-10dfcd6b2707", "epoch": 1, "predecessor_uuid": "", "sync_status": [], "period_map": { "id": "09559832-67a4-4101-8b3f-10dfcd6b2707", "zonegroups": [], "short_zone_ids": [] }, "master_zonegroup": "", "master_zone": "", "period_config": { "bucket_quota": { "enabled": false, "max_size_kb": -1, "max_objects": -1 }, "user_quota": { "enabled": false, "max_size_kb": -1, "max_objects": -1 } }, "realm_id": "4a367026-bd8f-40ee-b486-8212482ddcd7", "realm_name": "gold", "realm_epoch": 1}
202 Creating a Master Zone SES 5.5 (SES 5 & SES …
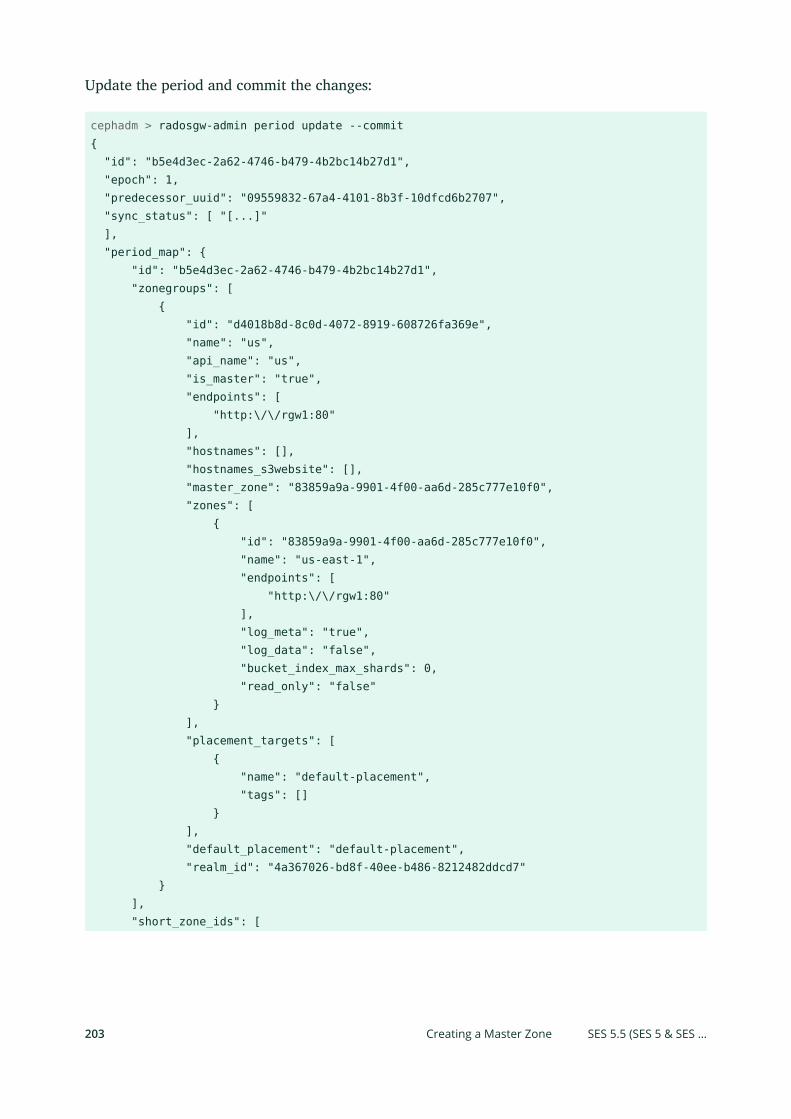
Update the period and commit the changes:
cephadm > radosgw-admin period update --commit{ "id": "b5e4d3ec-2a62-4746-b479-4b2bc14b27d1", "epoch": 1, "predecessor_uuid": "09559832-67a4-4101-8b3f-10dfcd6b2707", "sync_status": [ "[...]" ], "period_map": { "id": "b5e4d3ec-2a62-4746-b479-4b2bc14b27d1", "zonegroups": [ { "id": "d4018b8d-8c0d-4072-8919-608726fa369e", "name": "us", "api_name": "us", "is_master": "true", "endpoints": [ "http:\/\/rgw1:80" ], "hostnames": [], "hostnames_s3website": [], "master_zone": "83859a9a-9901-4f00-aa6d-285c777e10f0", "zones": [ { "id": "83859a9a-9901-4f00-aa6d-285c777e10f0", "name": "us-east-1", "endpoints": [ "http:\/\/rgw1:80" ], "log_meta": "true", "log_data": "false", "bucket_index_max_shards": 0, "read_only": "false" } ], "placement_targets": [ { "name": "default-placement", "tags": [] } ], "default_placement": "default-placement", "realm_id": "4a367026-bd8f-40ee-b486-8212482ddcd7" } ], "short_zone_ids": [
203 Creating a Master Zone SES 5.5 (SES 5 & SES …
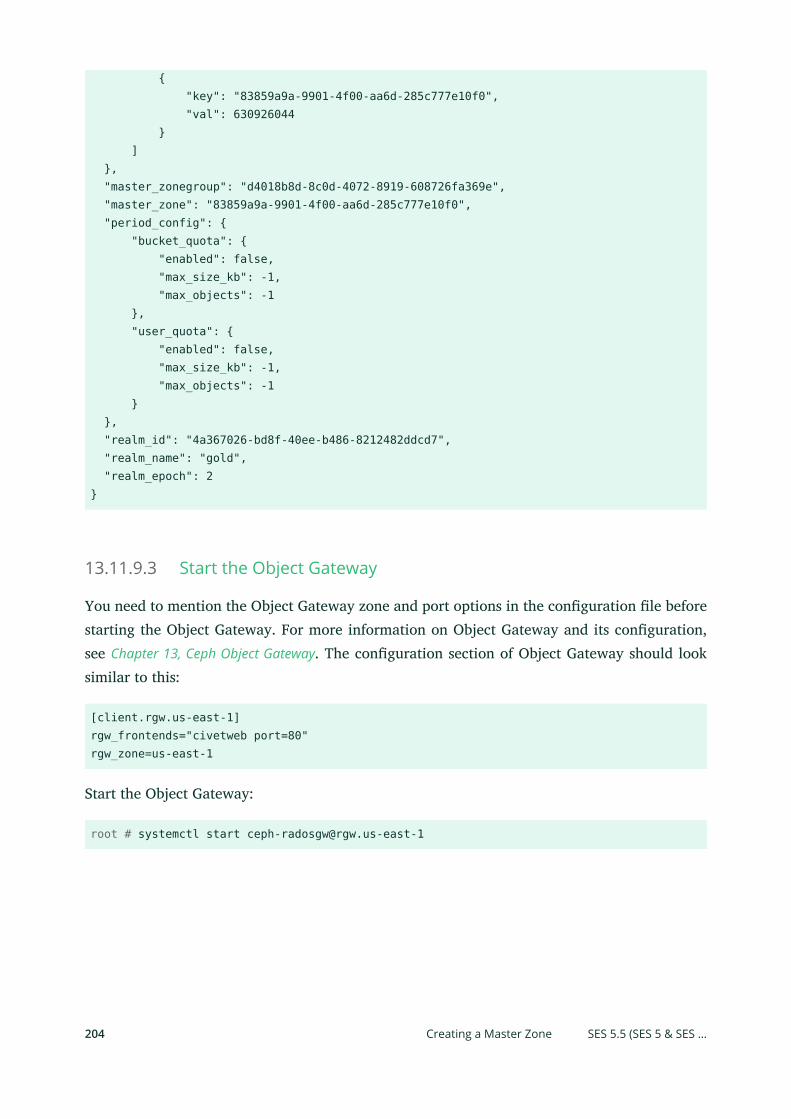
{ "key": "83859a9a-9901-4f00-aa6d-285c777e10f0", "val": 630926044 } ] }, "master_zonegroup": "d4018b8d-8c0d-4072-8919-608726fa369e", "master_zone": "83859a9a-9901-4f00-aa6d-285c777e10f0", "period_config": { "bucket_quota": { "enabled": false, "max_size_kb": -1, "max_objects": -1 }, "user_quota": { "enabled": false, "max_size_kb": -1, "max_objects": -1 } }, "realm_id": "4a367026-bd8f-40ee-b486-8212482ddcd7", "realm_name": "gold", "realm_epoch": 2}
13.11.9.3 Start the Object Gateway
You need to mention the Object Gateway zone and port options in the conguration le beforestarting the Object Gateway. For more information on Object Gateway and its conguration,see Chapter 13, Ceph Object Gateway. The conguration section of Object Gateway should looksimilar to this:
[client.rgw.us-east-1]rgw_frontends="civetweb port=80"rgw_zone=us-east-1
Start the Object Gateway:
root # systemctl start [email protected]
204 Creating a Master Zone SES 5.5 (SES 5 & SES …
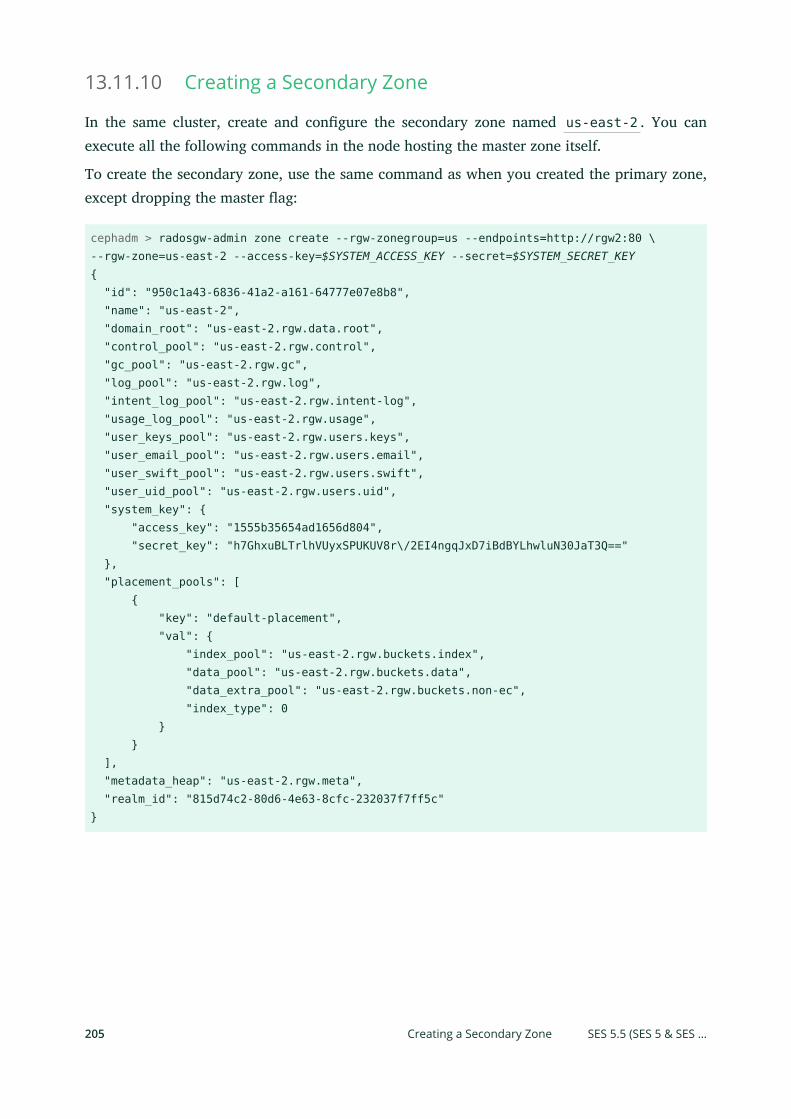
13.11.10 Creating a Secondary Zone
In the same cluster, create and congure the secondary zone named us-east-2 . You canexecute all the following commands in the node hosting the master zone itself.
To create the secondary zone, use the same command as when you created the primary zone,except dropping the master ag:
cephadm > radosgw-admin zone create --rgw-zonegroup=us --endpoints=http://rgw2:80 \--rgw-zone=us-east-2 --access-key=$SYSTEM_ACCESS_KEY --secret=$SYSTEM_SECRET_KEY{ "id": "950c1a43-6836-41a2-a161-64777e07e8b8", "name": "us-east-2", "domain_root": "us-east-2.rgw.data.root", "control_pool": "us-east-2.rgw.control", "gc_pool": "us-east-2.rgw.gc", "log_pool": "us-east-2.rgw.log", "intent_log_pool": "us-east-2.rgw.intent-log", "usage_log_pool": "us-east-2.rgw.usage", "user_keys_pool": "us-east-2.rgw.users.keys", "user_email_pool": "us-east-2.rgw.users.email", "user_swift_pool": "us-east-2.rgw.users.swift", "user_uid_pool": "us-east-2.rgw.users.uid", "system_key": { "access_key": "1555b35654ad1656d804", "secret_key": "h7GhxuBLTrlhVUyxSPUKUV8r\/2EI4ngqJxD7iBdBYLhwluN30JaT3Q==" }, "placement_pools": [ { "key": "default-placement", "val": { "index_pool": "us-east-2.rgw.buckets.index", "data_pool": "us-east-2.rgw.buckets.data", "data_extra_pool": "us-east-2.rgw.buckets.non-ec", "index_type": 0 } } ], "metadata_heap": "us-east-2.rgw.meta", "realm_id": "815d74c2-80d6-4e63-8cfc-232037f7ff5c"}
205 Creating a Secondary Zone SES 5.5 (SES 5 & SES …
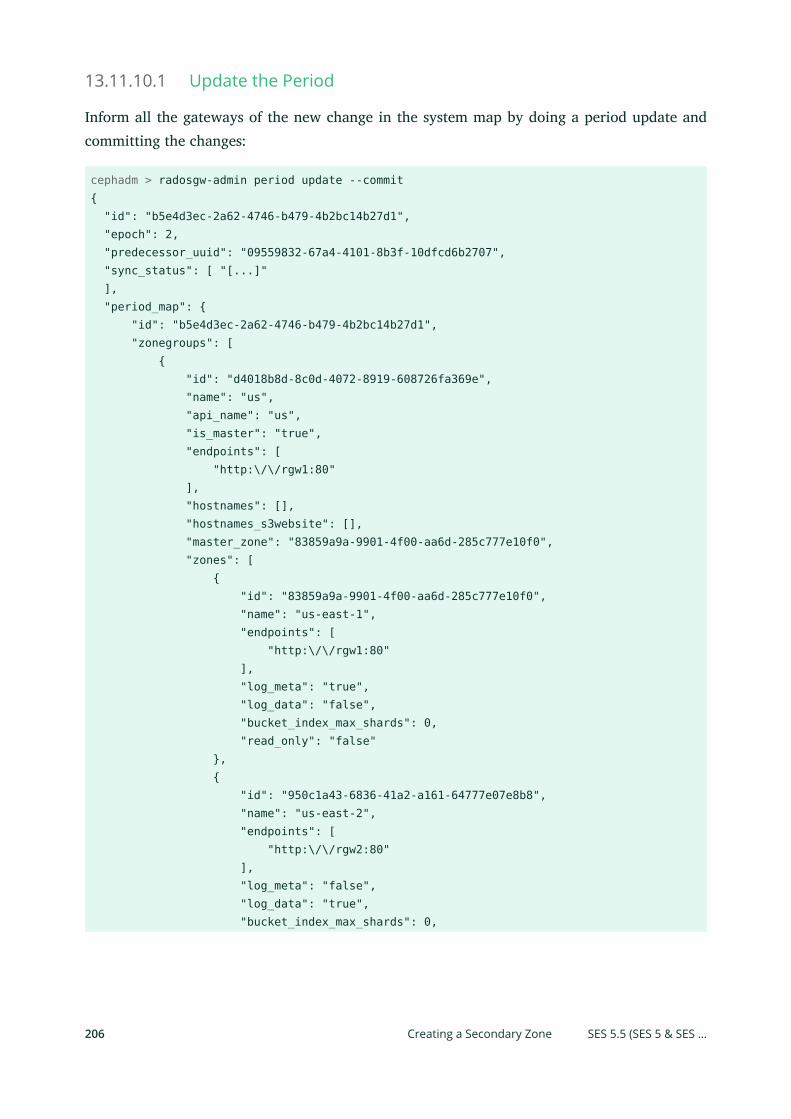
13.11.10.1 Update the Period
Inform all the gateways of the new change in the system map by doing a period update andcommitting the changes:
cephadm > radosgw-admin period update --commit{ "id": "b5e4d3ec-2a62-4746-b479-4b2bc14b27d1", "epoch": 2, "predecessor_uuid": "09559832-67a4-4101-8b3f-10dfcd6b2707", "sync_status": [ "[...]" ], "period_map": { "id": "b5e4d3ec-2a62-4746-b479-4b2bc14b27d1", "zonegroups": [ { "id": "d4018b8d-8c0d-4072-8919-608726fa369e", "name": "us", "api_name": "us", "is_master": "true", "endpoints": [ "http:\/\/rgw1:80" ], "hostnames": [], "hostnames_s3website": [], "master_zone": "83859a9a-9901-4f00-aa6d-285c777e10f0", "zones": [ { "id": "83859a9a-9901-4f00-aa6d-285c777e10f0", "name": "us-east-1", "endpoints": [ "http:\/\/rgw1:80" ], "log_meta": "true", "log_data": "false", "bucket_index_max_shards": 0, "read_only": "false" }, { "id": "950c1a43-6836-41a2-a161-64777e07e8b8", "name": "us-east-2", "endpoints": [ "http:\/\/rgw2:80" ], "log_meta": "false", "log_data": "true", "bucket_index_max_shards": 0,
206 Creating a Secondary Zone SES 5.5 (SES 5 & SES …
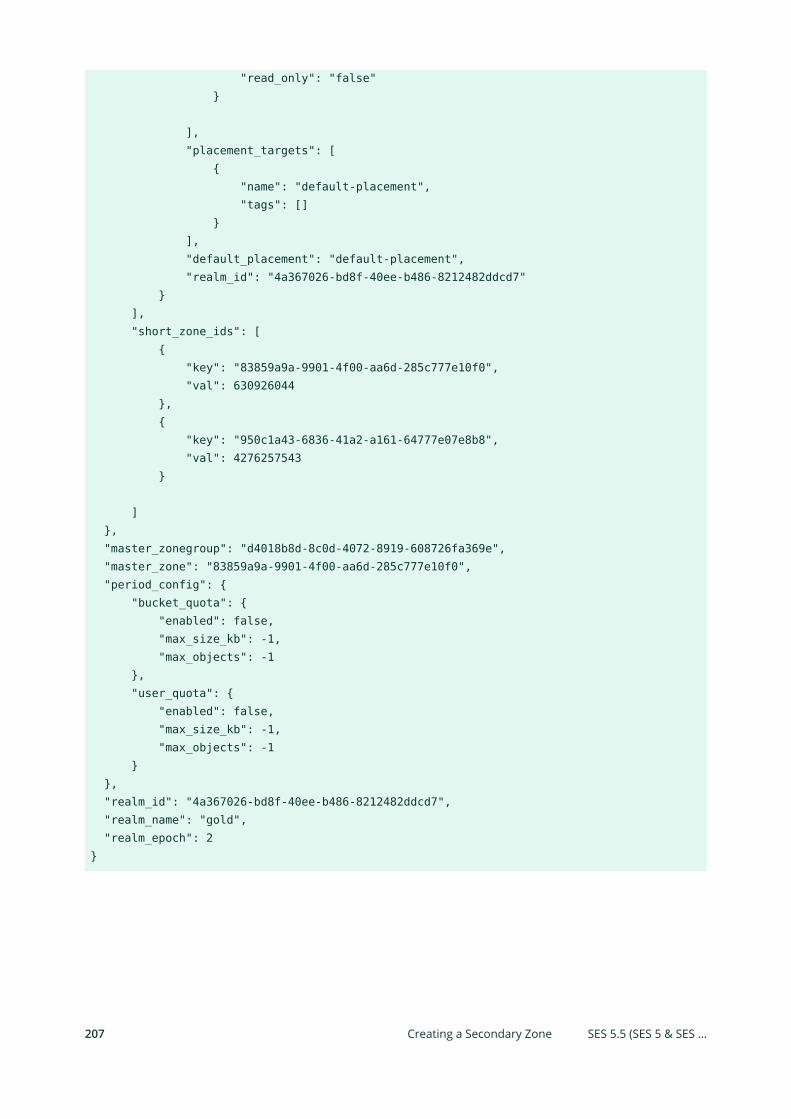
"read_only": "false" }
], "placement_targets": [ { "name": "default-placement", "tags": [] } ], "default_placement": "default-placement", "realm_id": "4a367026-bd8f-40ee-b486-8212482ddcd7" } ], "short_zone_ids": [ { "key": "83859a9a-9901-4f00-aa6d-285c777e10f0", "val": 630926044 }, { "key": "950c1a43-6836-41a2-a161-64777e07e8b8", "val": 4276257543 }
] }, "master_zonegroup": "d4018b8d-8c0d-4072-8919-608726fa369e", "master_zone": "83859a9a-9901-4f00-aa6d-285c777e10f0", "period_config": { "bucket_quota": { "enabled": false, "max_size_kb": -1, "max_objects": -1 }, "user_quota": { "enabled": false, "max_size_kb": -1, "max_objects": -1 } }, "realm_id": "4a367026-bd8f-40ee-b486-8212482ddcd7", "realm_name": "gold", "realm_epoch": 2}
207 Creating a Secondary Zone SES 5.5 (SES 5 & SES …
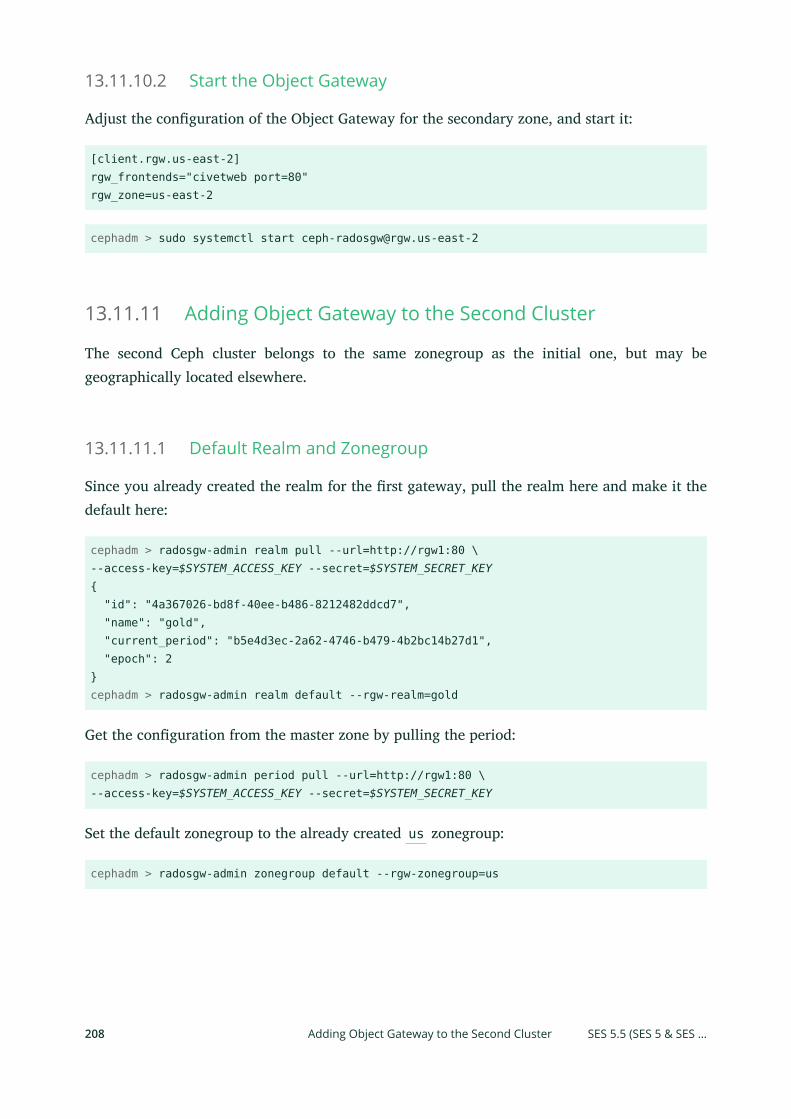
13.11.10.2 Start the Object Gateway
Adjust the conguration of the Object Gateway for the secondary zone, and start it:
[client.rgw.us-east-2]rgw_frontends="civetweb port=80"rgw_zone=us-east-2
cephadm > sudo systemctl start [email protected]
13.11.11 Adding Object Gateway to the Second Cluster
The second Ceph cluster belongs to the same zonegroup as the initial one, but may begeographically located elsewhere.
13.11.11.1 Default Realm and Zonegroup
Since you already created the realm for the rst gateway, pull the realm here and make it thedefault here:
cephadm > radosgw-admin realm pull --url=http://rgw1:80 \--access-key=$SYSTEM_ACCESS_KEY --secret=$SYSTEM_SECRET_KEY{ "id": "4a367026-bd8f-40ee-b486-8212482ddcd7", "name": "gold", "current_period": "b5e4d3ec-2a62-4746-b479-4b2bc14b27d1", "epoch": 2}cephadm > radosgw-admin realm default --rgw-realm=gold
Get the conguration from the master zone by pulling the period:
cephadm > radosgw-admin period pull --url=http://rgw1:80 \--access-key=$SYSTEM_ACCESS_KEY --secret=$SYSTEM_SECRET_KEY
Set the default zonegroup to the already created us zonegroup:
cephadm > radosgw-admin zonegroup default --rgw-zonegroup=us
208 Adding Object Gateway to the Second Cluster SES 5.5 (SES 5 & SES …

13.11.11.2 Secondary Zone Configuration
Create a new zone named us-west with the same system keys:
cephadm > radosgw-admin zone create --rgw-zonegroup=us --rgw-zone=us-west \--access-key=$SYSTEM_ACCESS_KEY --secret=$SYSTEM_SECRET_KEY \--endpoints=http://rgw3:80 --default{ "id": "950c1a43-6836-41a2-a161-64777e07e8b8", "name": "us-west", "domain_root": "us-west.rgw.data.root", "control_pool": "us-west.rgw.control", "gc_pool": "us-west.rgw.gc", "log_pool": "us-west.rgw.log", "intent_log_pool": "us-west.rgw.intent-log", "usage_log_pool": "us-west.rgw.usage", "user_keys_pool": "us-west.rgw.users.keys", "user_email_pool": "us-west.rgw.users.email", "user_swift_pool": "us-west.rgw.users.swift", "user_uid_pool": "us-west.rgw.users.uid", "system_key": { "access_key": "1555b35654ad1656d804", "secret_key": "h7GhxuBLTrlhVUyxSPUKUV8r\/2EI4ngqJxD7iBdBYLhwluN30JaT3Q==" }, "placement_pools": [ { "key": "default-placement", "val": { "index_pool": "us-west.rgw.buckets.index", "data_pool": "us-west.rgw.buckets.data", "data_extra_pool": "us-west.rgw.buckets.non-ec", "index_type": 0 } } ], "metadata_heap": "us-west.rgw.meta", "realm_id": "4a367026-bd8f-40ee-b486-8212482ddcd7"}
13.11.11.3 Update the Period
To propagate the zonegroup map changes, we update and commit the period:
cephadm > radosgw-admin period update --commit --rgw-zone=us-west{ "id": "b5e4d3ec-2a62-4746-b479-4b2bc14b27d1",
209 Adding Object Gateway to the Second Cluster SES 5.5 (SES 5 & SES …
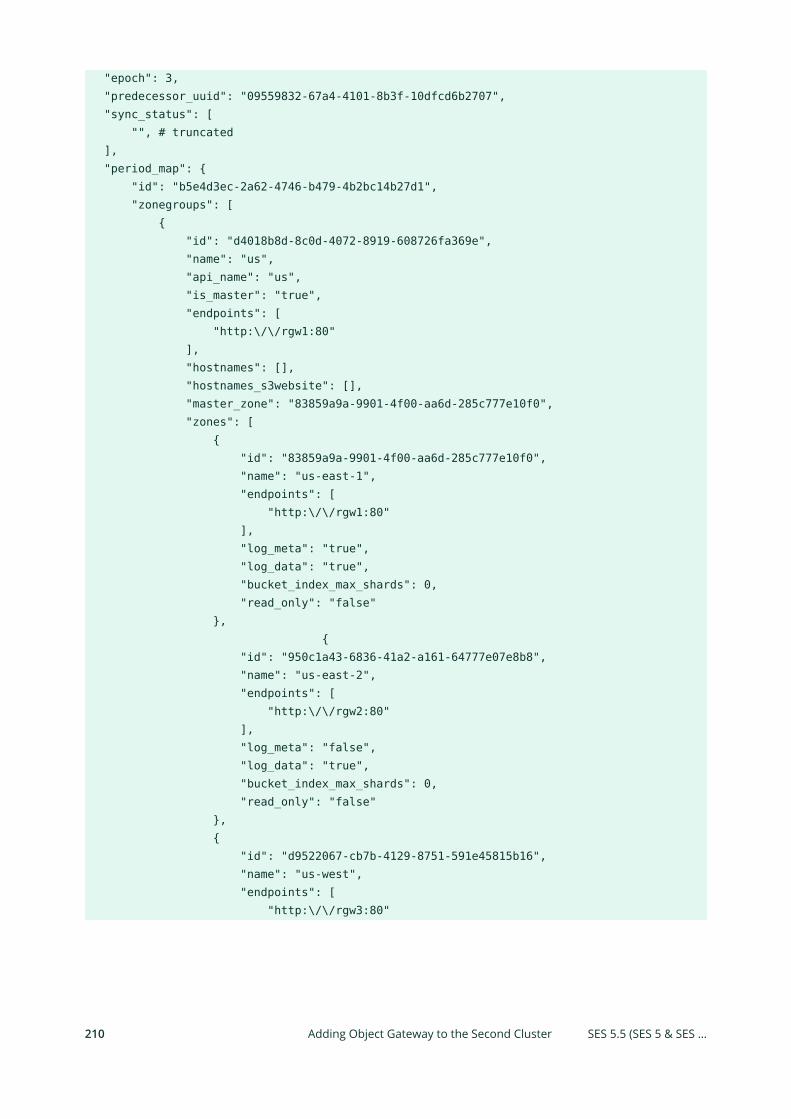
"epoch": 3, "predecessor_uuid": "09559832-67a4-4101-8b3f-10dfcd6b2707", "sync_status": [ "", # truncated ], "period_map": { "id": "b5e4d3ec-2a62-4746-b479-4b2bc14b27d1", "zonegroups": [ { "id": "d4018b8d-8c0d-4072-8919-608726fa369e", "name": "us", "api_name": "us", "is_master": "true", "endpoints": [ "http:\/\/rgw1:80" ], "hostnames": [], "hostnames_s3website": [], "master_zone": "83859a9a-9901-4f00-aa6d-285c777e10f0", "zones": [ { "id": "83859a9a-9901-4f00-aa6d-285c777e10f0", "name": "us-east-1", "endpoints": [ "http:\/\/rgw1:80" ], "log_meta": "true", "log_data": "true", "bucket_index_max_shards": 0, "read_only": "false" }, { "id": "950c1a43-6836-41a2-a161-64777e07e8b8", "name": "us-east-2", "endpoints": [ "http:\/\/rgw2:80" ], "log_meta": "false", "log_data": "true", "bucket_index_max_shards": 0, "read_only": "false" }, { "id": "d9522067-cb7b-4129-8751-591e45815b16", "name": "us-west", "endpoints": [ "http:\/\/rgw3:80"
210 Adding Object Gateway to the Second Cluster SES 5.5 (SES 5 & SES …
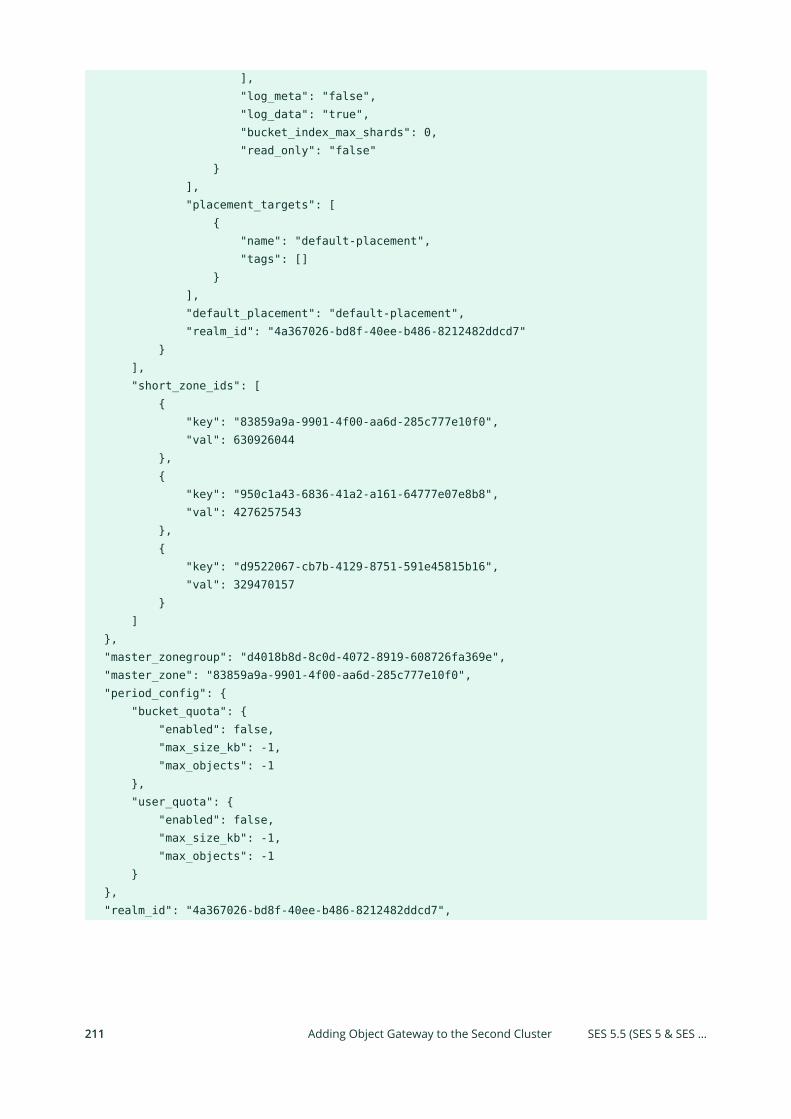
], "log_meta": "false", "log_data": "true", "bucket_index_max_shards": 0, "read_only": "false" } ], "placement_targets": [ { "name": "default-placement", "tags": [] } ], "default_placement": "default-placement", "realm_id": "4a367026-bd8f-40ee-b486-8212482ddcd7" } ], "short_zone_ids": [ { "key": "83859a9a-9901-4f00-aa6d-285c777e10f0", "val": 630926044 }, { "key": "950c1a43-6836-41a2-a161-64777e07e8b8", "val": 4276257543 }, { "key": "d9522067-cb7b-4129-8751-591e45815b16", "val": 329470157 } ] }, "master_zonegroup": "d4018b8d-8c0d-4072-8919-608726fa369e", "master_zone": "83859a9a-9901-4f00-aa6d-285c777e10f0", "period_config": { "bucket_quota": { "enabled": false, "max_size_kb": -1, "max_objects": -1 }, "user_quota": { "enabled": false, "max_size_kb": -1, "max_objects": -1 } }, "realm_id": "4a367026-bd8f-40ee-b486-8212482ddcd7",
211 Adding Object Gateway to the Second Cluster SES 5.5 (SES 5 & SES …
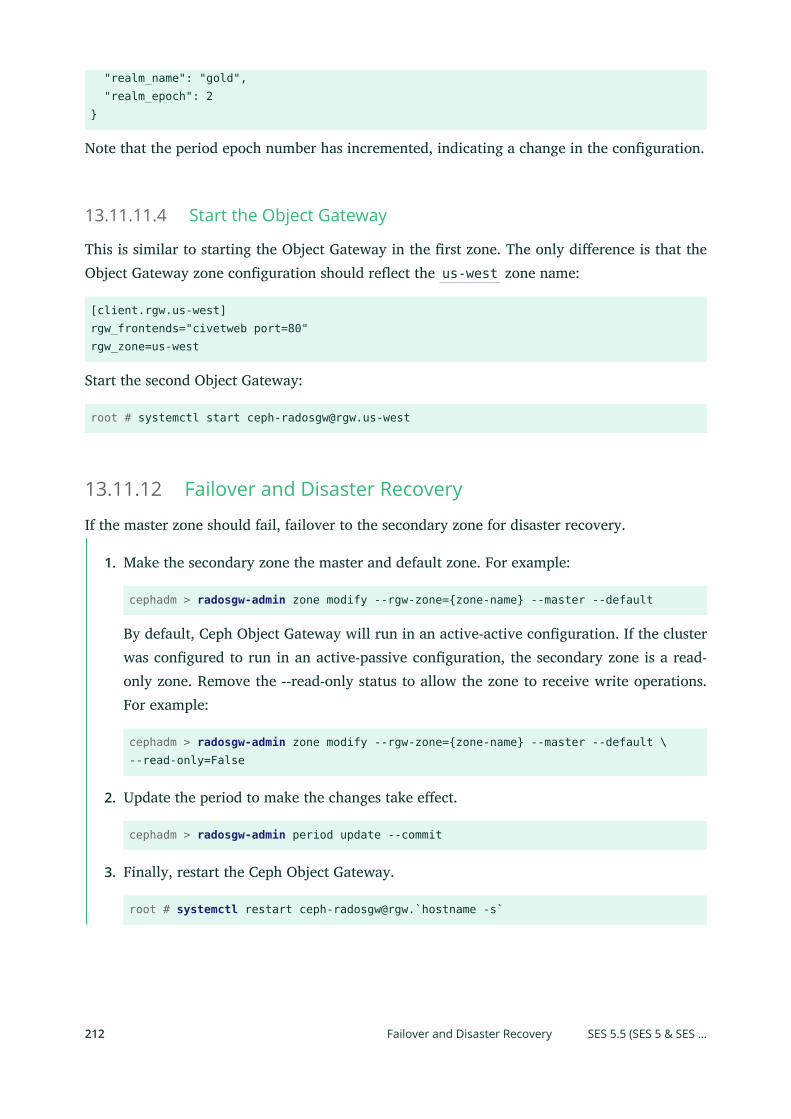
"realm_name": "gold", "realm_epoch": 2}
Note that the period epoch number has incremented, indicating a change in the conguration.
13.11.11.4 Start the Object Gateway
This is similar to starting the Object Gateway in the rst zone. The only dierence is that theObject Gateway zone conguration should reect the us-west zone name:
[client.rgw.us-west]rgw_frontends="civetweb port=80"rgw_zone=us-west
Start the second Object Gateway:
root # systemctl start [email protected]
13.11.12 Failover and Disaster Recovery
If the master zone should fail, failover to the secondary zone for disaster recovery.
1. Make the secondary zone the master and default zone. For example:
cephadm > radosgw-admin zone modify --rgw-zone={zone-name} --master --default
By default, Ceph Object Gateway will run in an active-active conguration. If the clusterwas congured to run in an active-passive conguration, the secondary zone is a read-only zone. Remove the --read-only status to allow the zone to receive write operations.For example:
cephadm > radosgw-admin zone modify --rgw-zone={zone-name} --master --default \--read-only=False
2. Update the period to make the changes take eect.
cephadm > radosgw-admin period update --commit
3. Finally, restart the Ceph Object Gateway.
root # systemctl restart ceph-radosgw@rgw.`hostname -s`
212 Failover and Disaster Recovery SES 5.5 (SES 5 & SES …
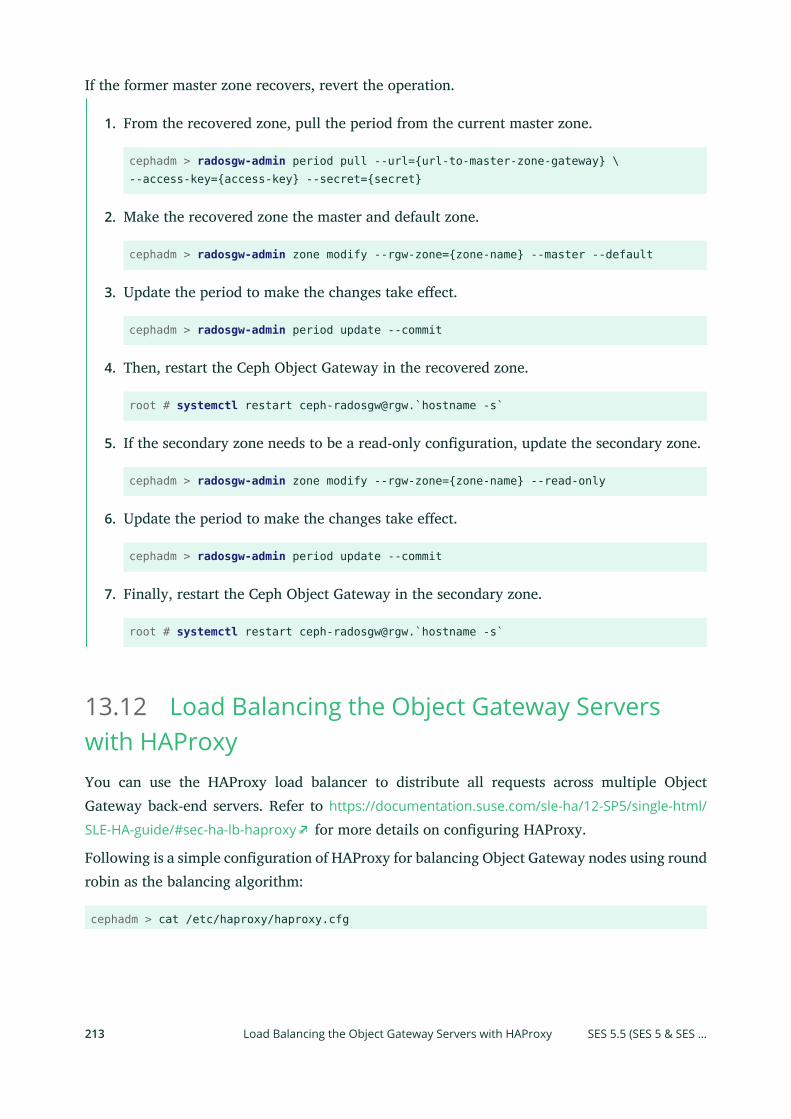
If the former master zone recovers, revert the operation.
1. From the recovered zone, pull the period from the current master zone.
cephadm > radosgw-admin period pull --url={url-to-master-zone-gateway} \--access-key={access-key} --secret={secret}
2. Make the recovered zone the master and default zone.
cephadm > radosgw-admin zone modify --rgw-zone={zone-name} --master --default
3. Update the period to make the changes take eect.
cephadm > radosgw-admin period update --commit
4. Then, restart the Ceph Object Gateway in the recovered zone.
root # systemctl restart ceph-radosgw@rgw.`hostname -s`
5. If the secondary zone needs to be a read-only conguration, update the secondary zone.
cephadm > radosgw-admin zone modify --rgw-zone={zone-name} --read-only
6. Update the period to make the changes take eect.
cephadm > radosgw-admin period update --commit
7. Finally, restart the Ceph Object Gateway in the secondary zone.
root # systemctl restart ceph-radosgw@rgw.`hostname -s`
13.12 Load Balancing the Object Gateway Serverswith HAProxyYou can use the HAProxy load balancer to distribute all requests across multiple ObjectGateway back-end servers. Refer to https://documentation.suse.com/sle-ha/12-SP5/single-html/
SLE-HA-guide/#sec-ha-lb-haproxy for more details on conguring HAProxy.
Following is a simple conguration of HAProxy for balancing Object Gateway nodes using roundrobin as the balancing algorithm:
cephadm > cat /etc/haproxy/haproxy.cfg
213 Load Balancing the Object Gateway Servers with HAProxy SES 5.5 (SES 5 & SES …
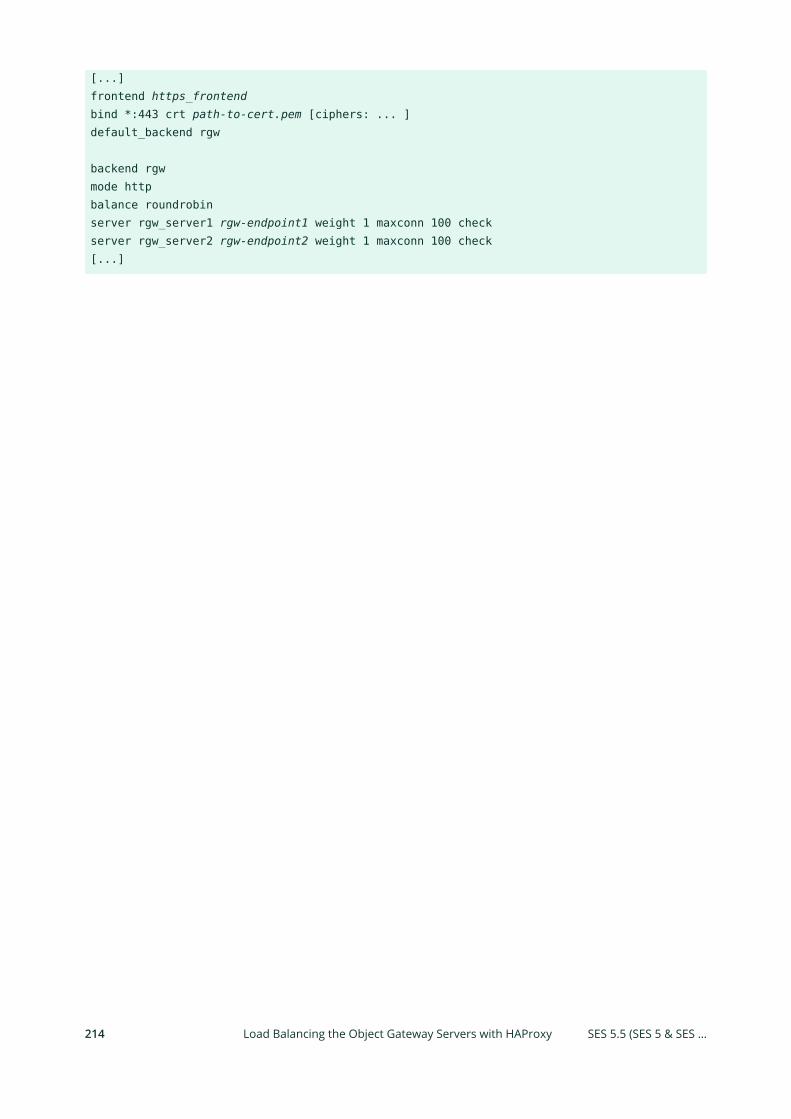
[...]frontend https_frontendbind *:443 crt path-to-cert.pem [ciphers: ... ]default_backend rgw
backend rgwmode httpbalance roundrobinserver rgw_server1 rgw-endpoint1 weight 1 maxconn 100 checkserver rgw_server2 rgw-endpoint2 weight 1 maxconn 100 check[...]
214 Load Balancing the Object Gateway Servers with HAProxy SES 5.5 (SES 5 & SES …

14 Ceph iSCSI Gateway
The chapter focuses on administration tasks related to the iSCSI Gateway. For a procedure ofdeployment refer to Book “Deployment Guide”, Chapter 10 “Installation of iSCSI Gateway”.
14.1 Connecting to lrbd-managed TargetsThis chapter describes how to connect to lrdb-managed targets from clients running Linux,Microsoft Windows, or VMware.
14.1.1 Linux (open-iscsi)
Connecting to lrbd-backed iSCSI targets with open-iscsi is a two-step process. First theinitiator must discover the iSCSI targets available on the gateway host, then it must log in andmap the available Logical Units (LUs).
Both steps require that the open-iscsi daemon is running. The way you start the open-iscsidaemon is dependent on your Linux distribution:
On SUSE Linux Enterprise Server (SLES); and Red Hat Enterprise Linux (RHEL) hosts, runsystemctl start iscsid (or service iscsid start if systemctl is not available).
On Debian and Ubuntu hosts, run systemctl start open-iscsi (or service open-iscsi start ).
If your initiator host runs SUSE Linux Enterprise Server, refer to https://documentation.suse.com/
sles/12-SP5/single-html/SLES-storage/#sec-iscsi-initiator for details on how to connect to aniSCSI target.
For any other Linux distribution supporting open-iscsi , proceed to discover targets on yourlrbd gateway (this example uses iscsi1.example.com as the portal address; for multipath accessrepeat these steps with iscsi2.example.com):
root # iscsiadm -m discovery -t sendtargets -p iscsi1.example.com192.168.124.104:3260,1 iqn.2003-01.org.linux-iscsi.iscsi.x86:testvol
Then, log in to the portal. If the login completes successfully, any RBD-backed logical units onthe portal will immediately become available on the system SCSI bus:
root # iscsiadm -m node -p iscsi1.example.com --login
215 Connecting to lrbd-managed Targets SES 5.5 (SES 5 & SES …
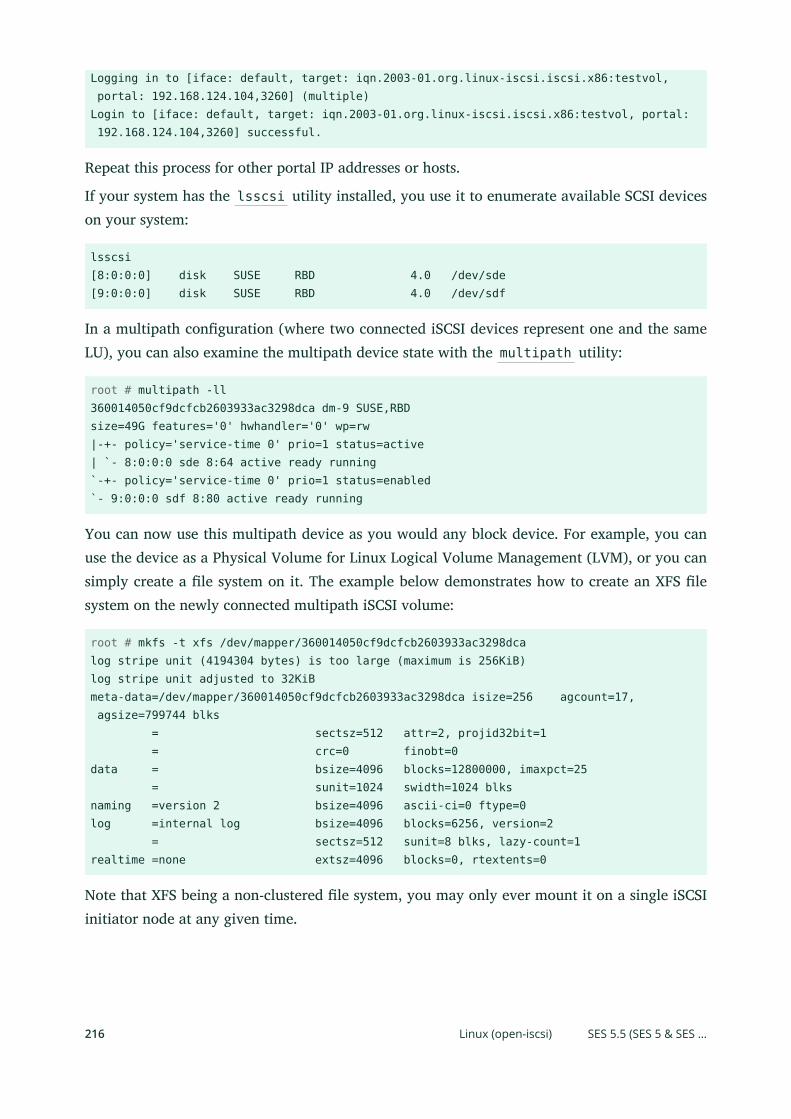
Logging in to [iface: default, target: iqn.2003-01.org.linux-iscsi.iscsi.x86:testvol, portal: 192.168.124.104,3260] (multiple)Login to [iface: default, target: iqn.2003-01.org.linux-iscsi.iscsi.x86:testvol, portal: 192.168.124.104,3260] successful.
Repeat this process for other portal IP addresses or hosts.
If your system has the lsscsi utility installed, you use it to enumerate available SCSI deviceson your system:
lsscsi[8:0:0:0] disk SUSE RBD 4.0 /dev/sde[9:0:0:0] disk SUSE RBD 4.0 /dev/sdf
In a multipath conguration (where two connected iSCSI devices represent one and the sameLU), you can also examine the multipath device state with the multipath utility:
root # multipath -ll360014050cf9dcfcb2603933ac3298dca dm-9 SUSE,RBDsize=49G features='0' hwhandler='0' wp=rw|-+- policy='service-time 0' prio=1 status=active| `- 8:0:0:0 sde 8:64 active ready running`-+- policy='service-time 0' prio=1 status=enabled`- 9:0:0:0 sdf 8:80 active ready running
You can now use this multipath device as you would any block device. For example, you canuse the device as a Physical Volume for Linux Logical Volume Management (LVM), or you cansimply create a le system on it. The example below demonstrates how to create an XFS lesystem on the newly connected multipath iSCSI volume:
root # mkfs -t xfs /dev/mapper/360014050cf9dcfcb2603933ac3298dcalog stripe unit (4194304 bytes) is too large (maximum is 256KiB)log stripe unit adjusted to 32KiBmeta-data=/dev/mapper/360014050cf9dcfcb2603933ac3298dca isize=256 agcount=17, agsize=799744 blks = sectsz=512 attr=2, projid32bit=1 = crc=0 finobt=0data = bsize=4096 blocks=12800000, imaxpct=25 = sunit=1024 swidth=1024 blksnaming =version 2 bsize=4096 ascii-ci=0 ftype=0log =internal log bsize=4096 blocks=6256, version=2 = sectsz=512 sunit=8 blks, lazy-count=1realtime =none extsz=4096 blocks=0, rtextents=0
Note that XFS being a non-clustered le system, you may only ever mount it on a single iSCSIinitiator node at any given time.
216 Linux (open-iscsi) SES 5.5 (SES 5 & SES …
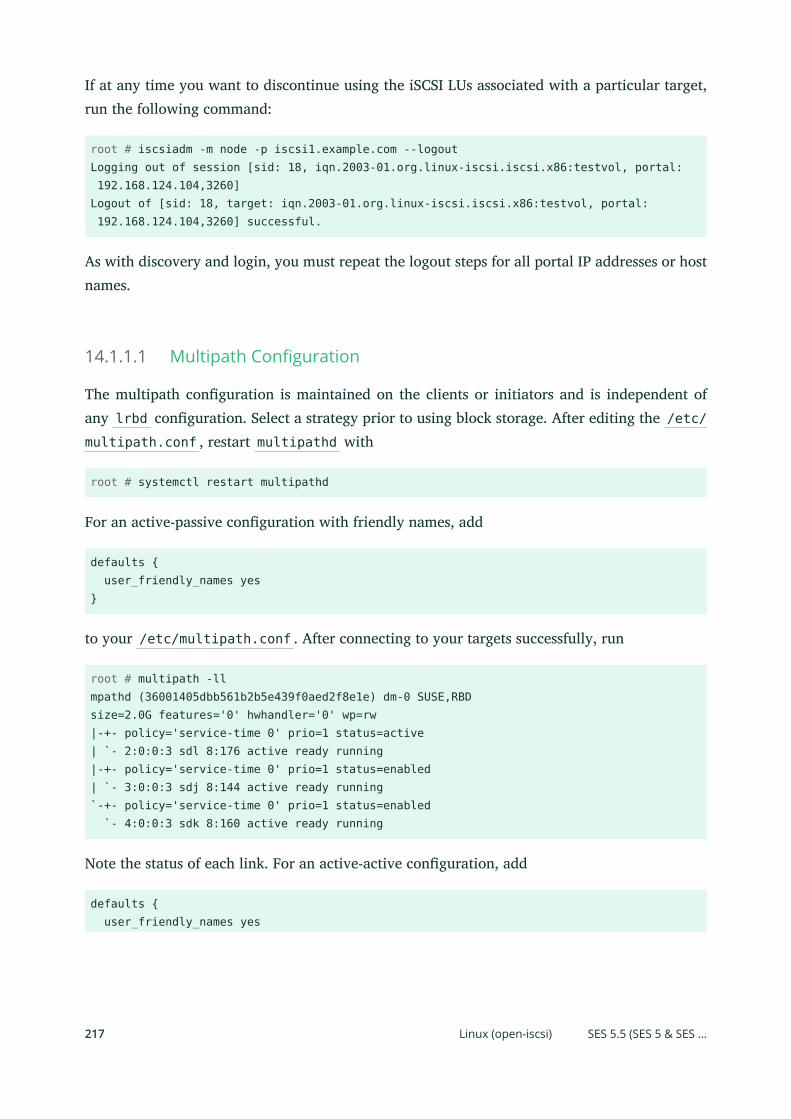
If at any time you want to discontinue using the iSCSI LUs associated with a particular target,run the following command:
root # iscsiadm -m node -p iscsi1.example.com --logoutLogging out of session [sid: 18, iqn.2003-01.org.linux-iscsi.iscsi.x86:testvol, portal: 192.168.124.104,3260]Logout of [sid: 18, target: iqn.2003-01.org.linux-iscsi.iscsi.x86:testvol, portal: 192.168.124.104,3260] successful.
As with discovery and login, you must repeat the logout steps for all portal IP addresses or hostnames.
14.1.1.1 Multipath Configuration
The multipath conguration is maintained on the clients or initiators and is independent ofany lrbd conguration. Select a strategy prior to using block storage. After editing the /etc/multipath.conf , restart multipathd with
root # systemctl restart multipathd
For an active-passive conguration with friendly names, add
defaults { user_friendly_names yes}
to your /etc/multipath.conf . After connecting to your targets successfully, run
root # multipath -llmpathd (36001405dbb561b2b5e439f0aed2f8e1e) dm-0 SUSE,RBDsize=2.0G features='0' hwhandler='0' wp=rw|-+- policy='service-time 0' prio=1 status=active| `- 2:0:0:3 sdl 8:176 active ready running|-+- policy='service-time 0' prio=1 status=enabled| `- 3:0:0:3 sdj 8:144 active ready running`-+- policy='service-time 0' prio=1 status=enabled `- 4:0:0:3 sdk 8:160 active ready running
Note the status of each link. For an active-active conguration, add
defaults { user_friendly_names yes
217 Linux (open-iscsi) SES 5.5 (SES 5 & SES …
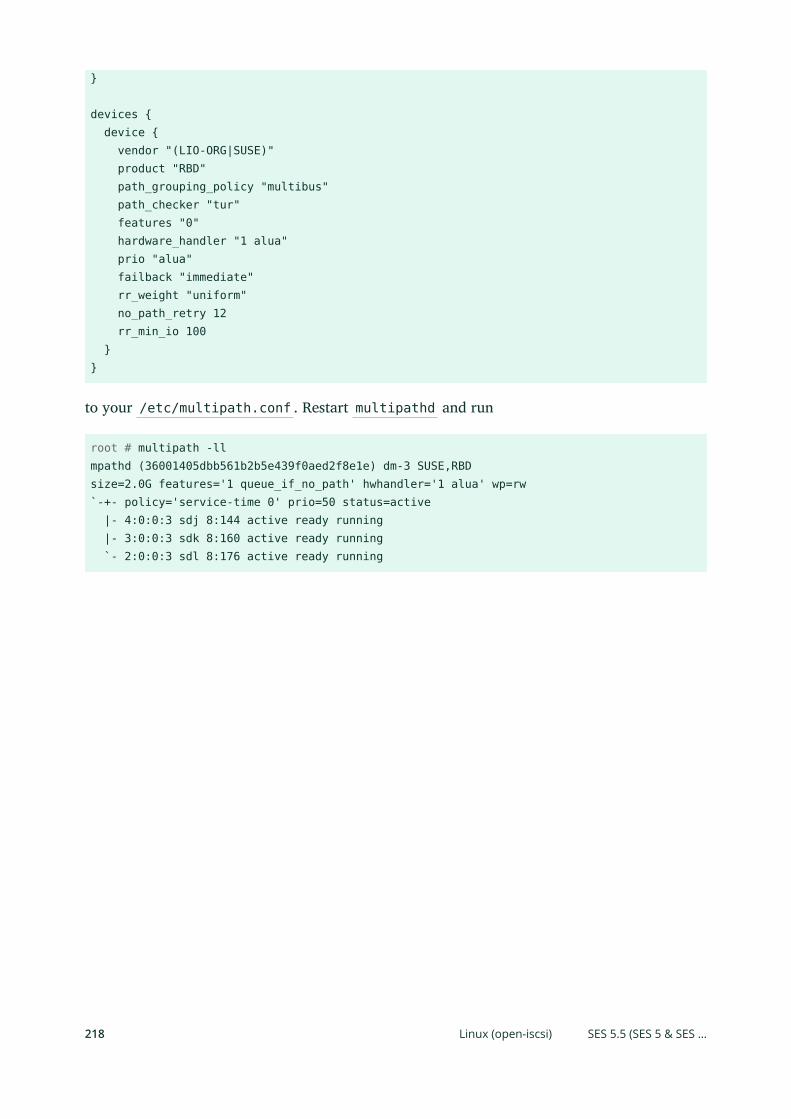
}
devices { device { vendor "(LIO-ORG|SUSE)" product "RBD" path_grouping_policy "multibus" path_checker "tur" features "0" hardware_handler "1 alua" prio "alua" failback "immediate" rr_weight "uniform" no_path_retry 12 rr_min_io 100 }}
to your /etc/multipath.conf . Restart multipathd and run
root # multipath -llmpathd (36001405dbb561b2b5e439f0aed2f8e1e) dm-3 SUSE,RBDsize=2.0G features='1 queue_if_no_path' hwhandler='1 alua' wp=rw`-+- policy='service-time 0' prio=50 status=active |- 4:0:0:3 sdj 8:144 active ready running |- 3:0:0:3 sdk 8:160 active ready running `- 2:0:0:3 sdl 8:176 active ready running
218 Linux (open-iscsi) SES 5.5 (SES 5 & SES …
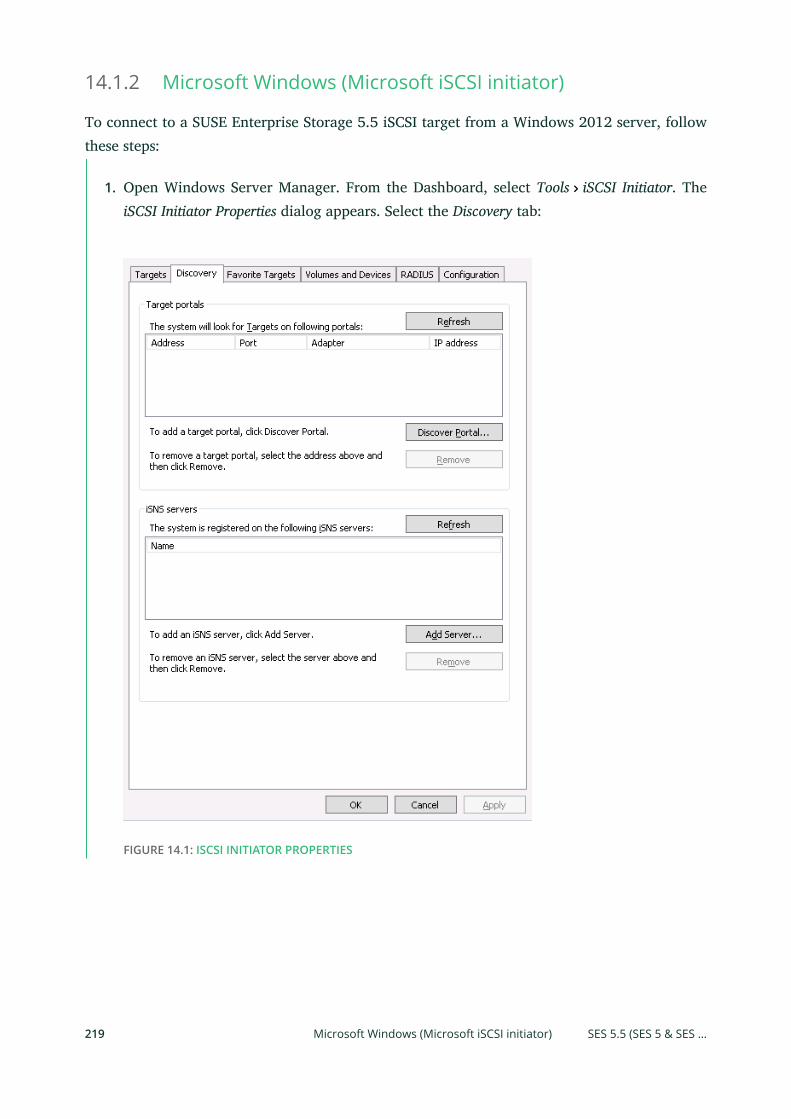
14.1.2 Microsoft Windows (Microsoft iSCSI initiator)
To connect to a SUSE Enterprise Storage 5.5 iSCSI target from a Windows 2012 server, followthese steps:
1. Open Windows Server Manager. From the Dashboard, select Tools iSCSI Initiator. TheiSCSI Initiator Properties dialog appears. Select the Discovery tab:
FIGURE 14.1: ISCSI INITIATOR PROPERTIES
219 Microsoft Windows (Microsoft iSCSI initiator) SES 5.5 (SES 5 & SES …
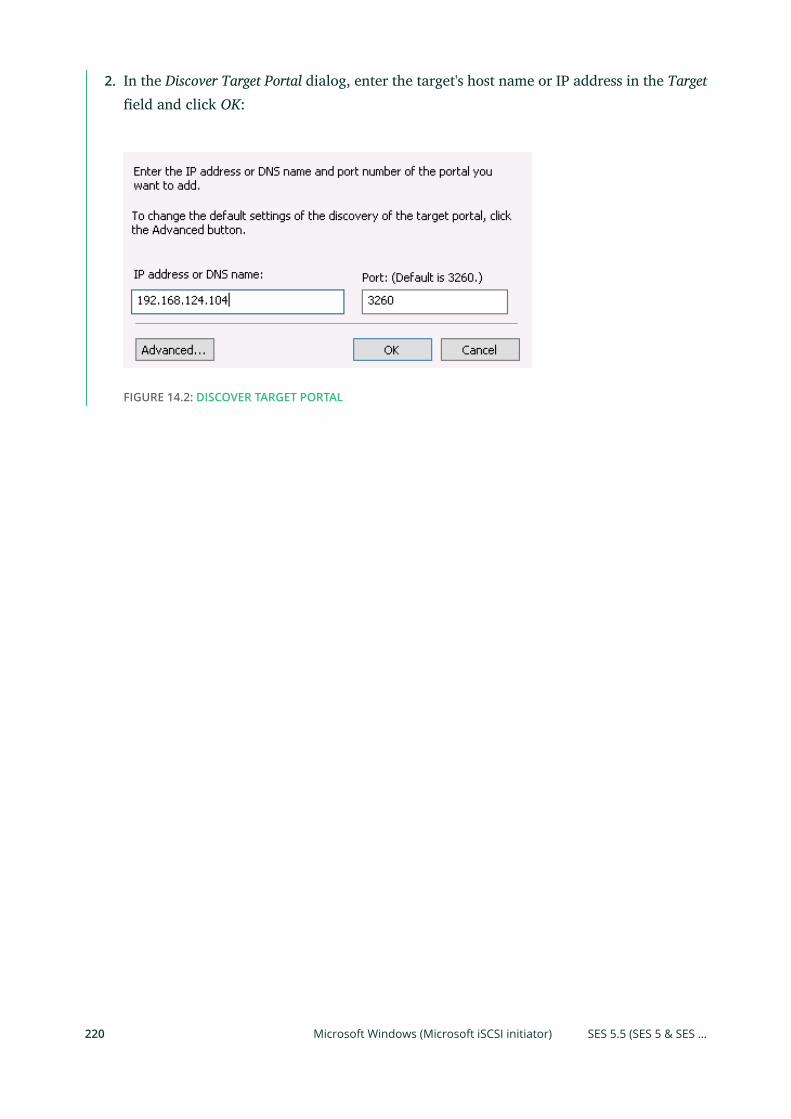
2. In the Discover Target Portal dialog, enter the target's host name or IP address in the Targeteld and click OK:
FIGURE 14.2: DISCOVER TARGET PORTAL
220 Microsoft Windows (Microsoft iSCSI initiator) SES 5.5 (SES 5 & SES …
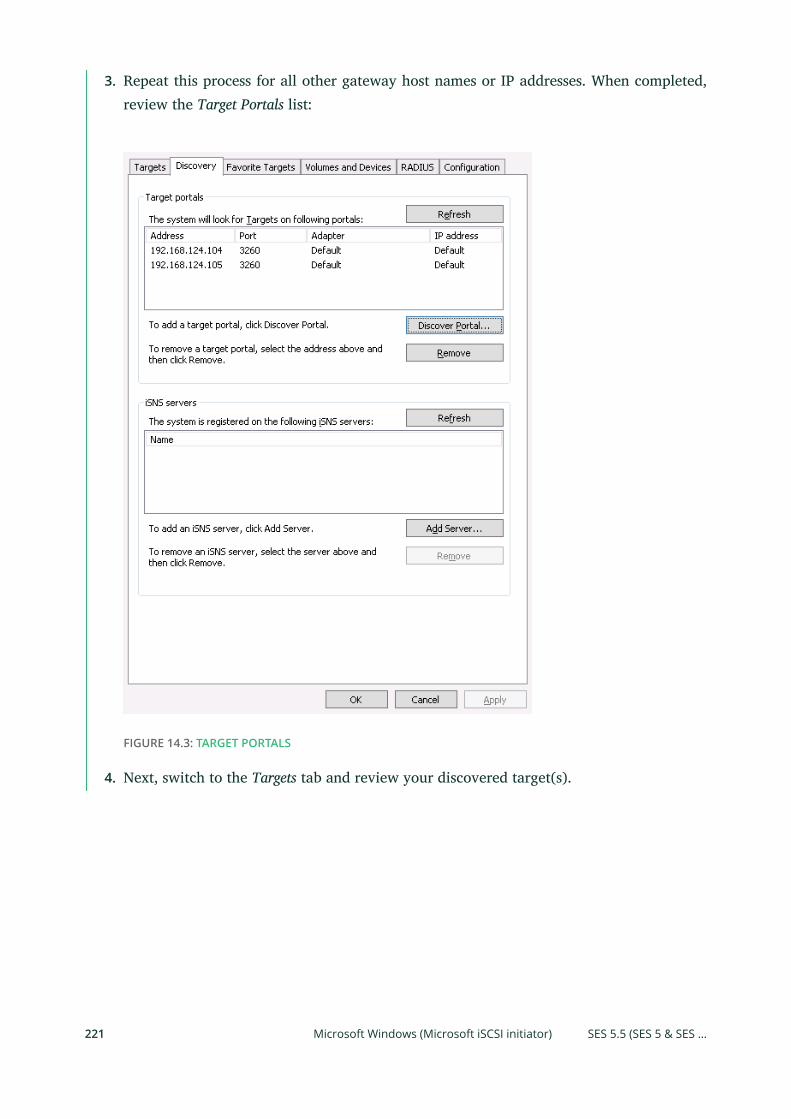
3. Repeat this process for all other gateway host names or IP addresses. When completed,review the Target Portals list:
FIGURE 14.3: TARGET PORTALS
4. Next, switch to the Targets tab and review your discovered target(s).
221 Microsoft Windows (Microsoft iSCSI initiator) SES 5.5 (SES 5 & SES …
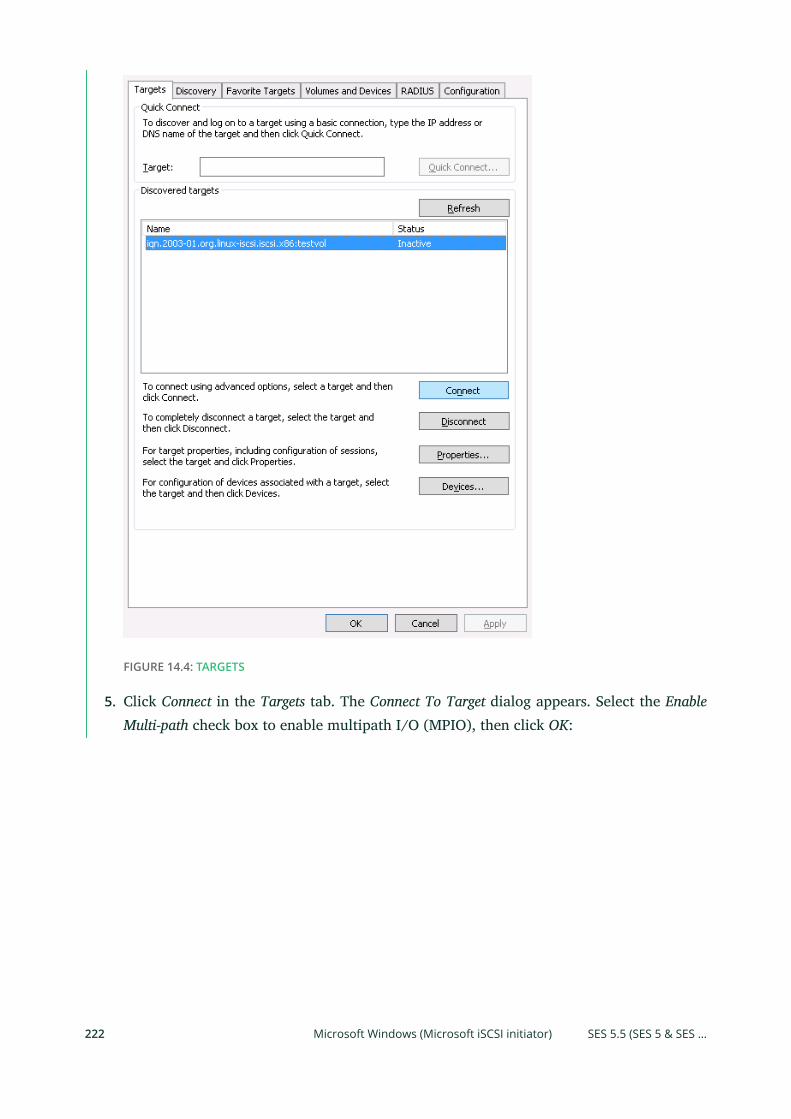
FIGURE 14.4: TARGETS
5. Click Connect in the Targets tab. The Connect To Target dialog appears. Select the EnableMulti-path check box to enable multipath I/O (MPIO), then click OK:
222 Microsoft Windows (Microsoft iSCSI initiator) SES 5.5 (SES 5 & SES …
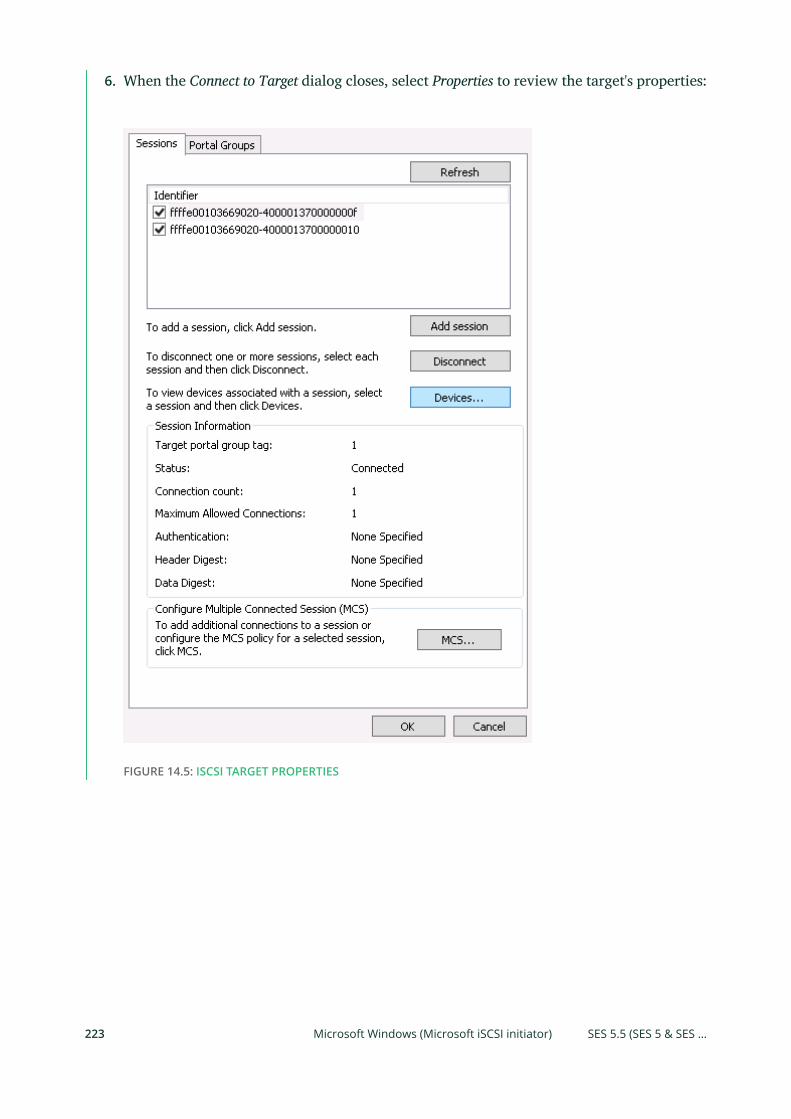
6. When the Connect to Target dialog closes, select Properties to review the target's properties:
FIGURE 14.5: ISCSI TARGET PROPERTIES
223 Microsoft Windows (Microsoft iSCSI initiator) SES 5.5 (SES 5 & SES …
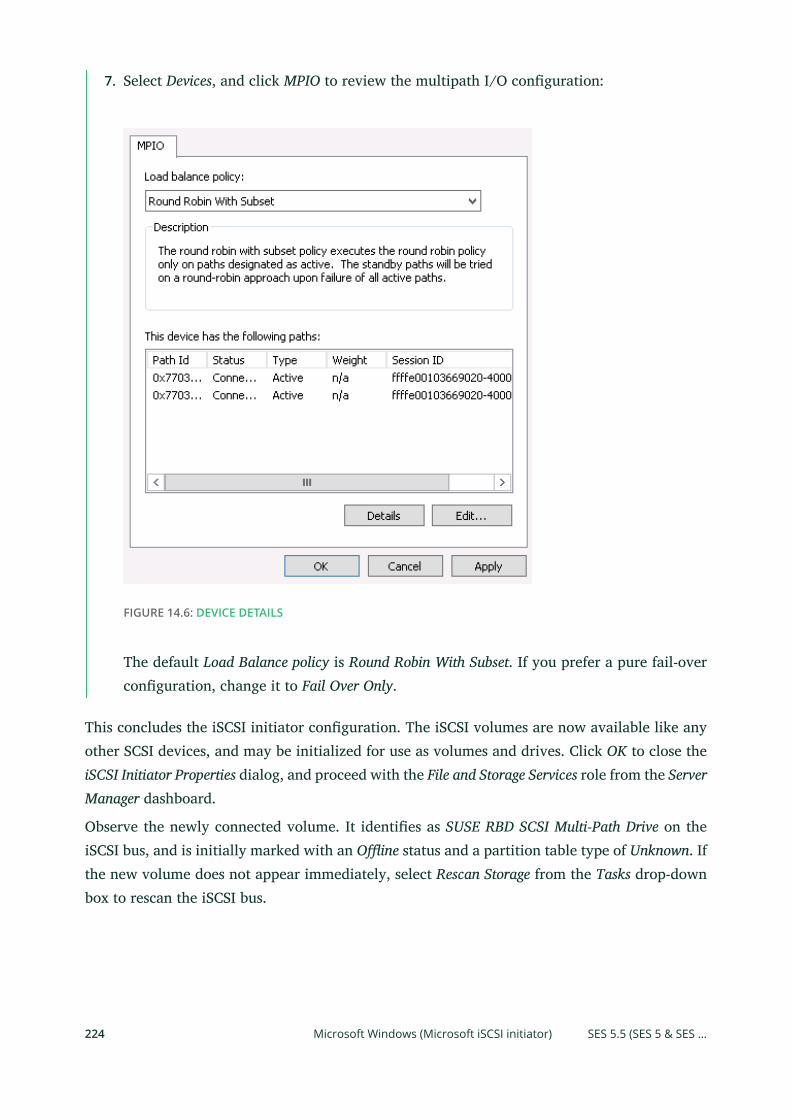
7. Select Devices, and click MPIO to review the multipath I/O conguration:
FIGURE 14.6: DEVICE DETAILS
The default Load Balance policy is Round Robin With Subset. If you prefer a pure fail-overconguration, change it to Fail Over Only.
This concludes the iSCSI initiator conguration. The iSCSI volumes are now available like anyother SCSI devices, and may be initialized for use as volumes and drives. Click OK to close theiSCSI Initiator Properties dialog, and proceed with the File and Storage Services role from the ServerManager dashboard.
Observe the newly connected volume. It identies as SUSE RBD SCSI Multi-Path Drive on theiSCSI bus, and is initially marked with an Oine status and a partition table type of Unknown. Ifthe new volume does not appear immediately, select Rescan Storage from the Tasks drop-downbox to rescan the iSCSI bus.
224 Microsoft Windows (Microsoft iSCSI initiator) SES 5.5 (SES 5 & SES …
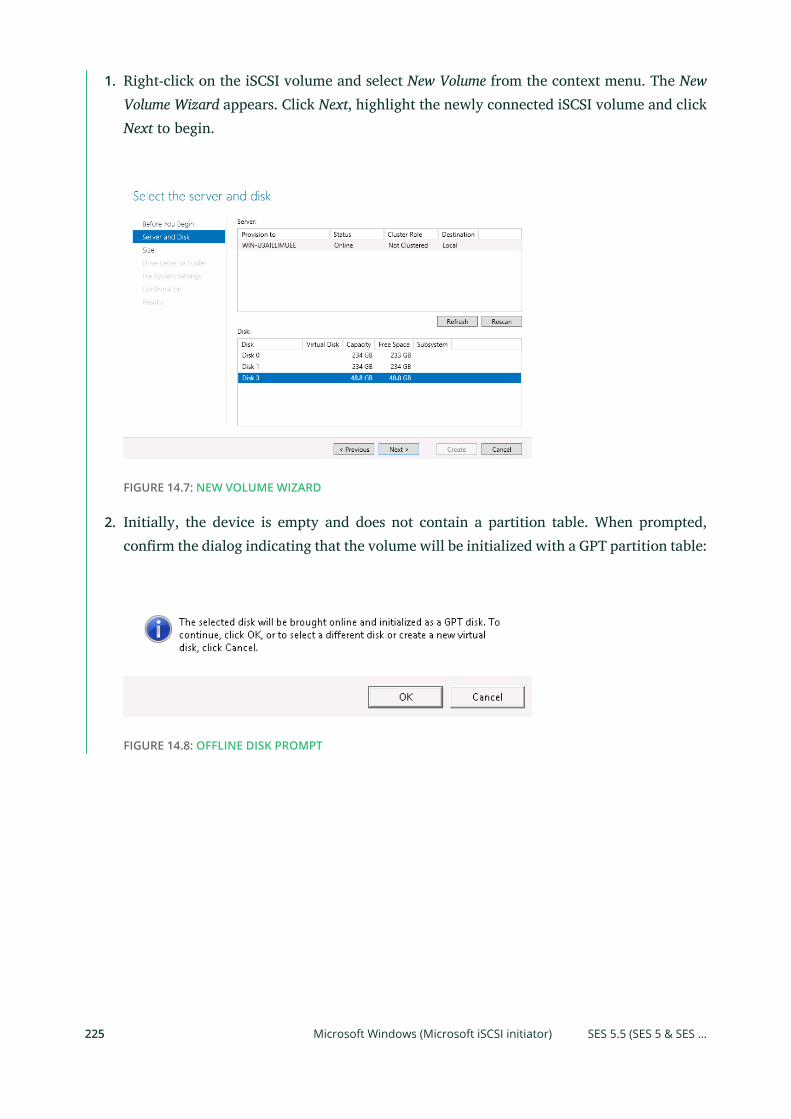
1. Right-click on the iSCSI volume and select New Volume from the context menu. The NewVolume Wizard appears. Click Next, highlight the newly connected iSCSI volume and clickNext to begin.
FIGURE 14.7: NEW VOLUME WIZARD
2. Initially, the device is empty and does not contain a partition table. When prompted,conrm the dialog indicating that the volume will be initialized with a GPT partition table:
FIGURE 14.8: OFFLINE DISK PROMPT
225 Microsoft Windows (Microsoft iSCSI initiator) SES 5.5 (SES 5 & SES …
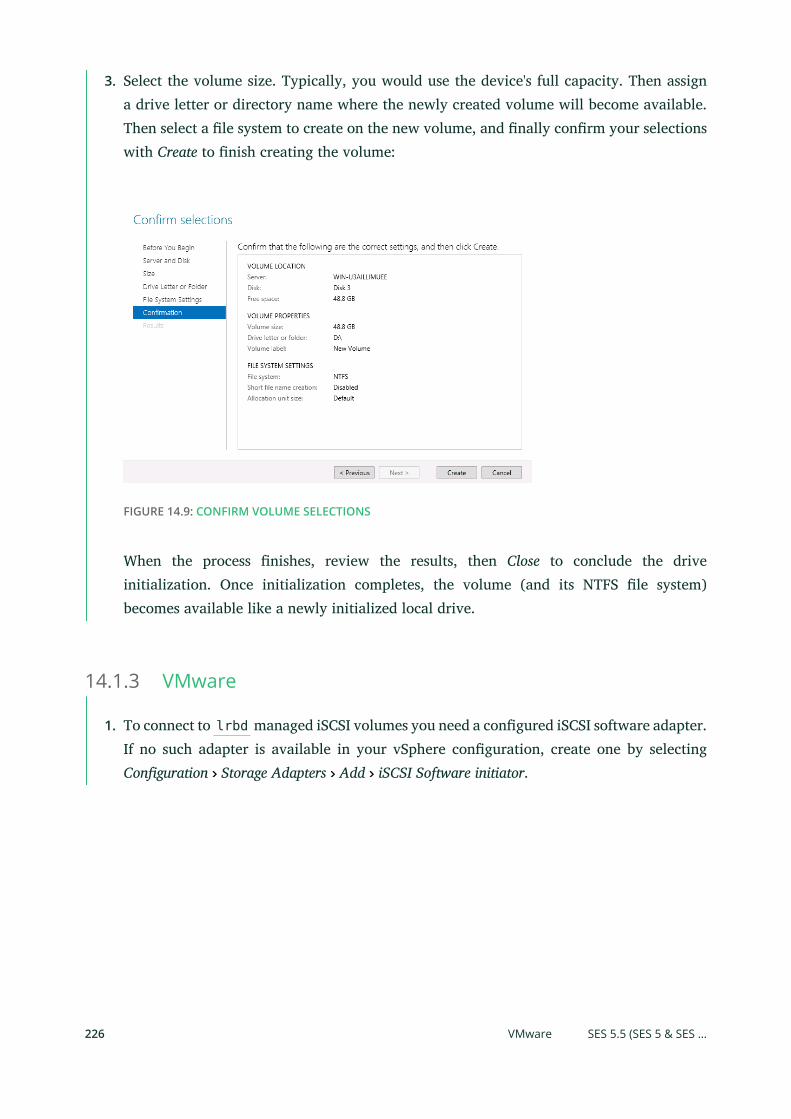
3. Select the volume size. Typically, you would use the device's full capacity. Then assigna drive letter or directory name where the newly created volume will become available.Then select a le system to create on the new volume, and nally conrm your selectionswith Create to nish creating the volume:
FIGURE 14.9: CONFIRM VOLUME SELECTIONS
When the process nishes, review the results, then Close to conclude the driveinitialization. Once initialization completes, the volume (and its NTFS le system)becomes available like a newly initialized local drive.
14.1.3 VMware
1. To connect to lrbd managed iSCSI volumes you need a congured iSCSI software adapter.If no such adapter is available in your vSphere conguration, create one by selectingConguration Storage Adapters Add iSCSI Software initiator.
226 VMware SES 5.5 (SES 5 & SES …
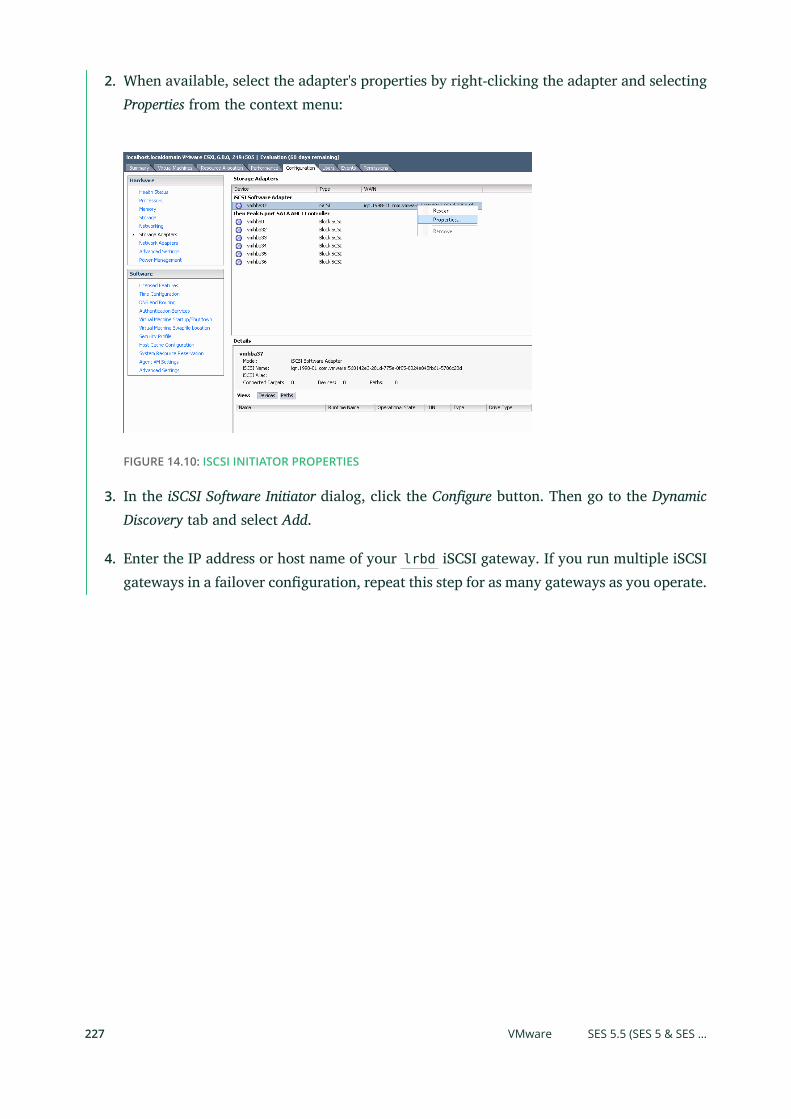
2. When available, select the adapter's properties by right-clicking the adapter and selectingProperties from the context menu:
FIGURE 14.10: ISCSI INITIATOR PROPERTIES
3. In the iSCSI Software Initiator dialog, click the Congure button. Then go to the DynamicDiscovery tab and select Add.
4. Enter the IP address or host name of your lrbd iSCSI gateway. If you run multiple iSCSIgateways in a failover conguration, repeat this step for as many gateways as you operate.
227 VMware SES 5.5 (SES 5 & SES …
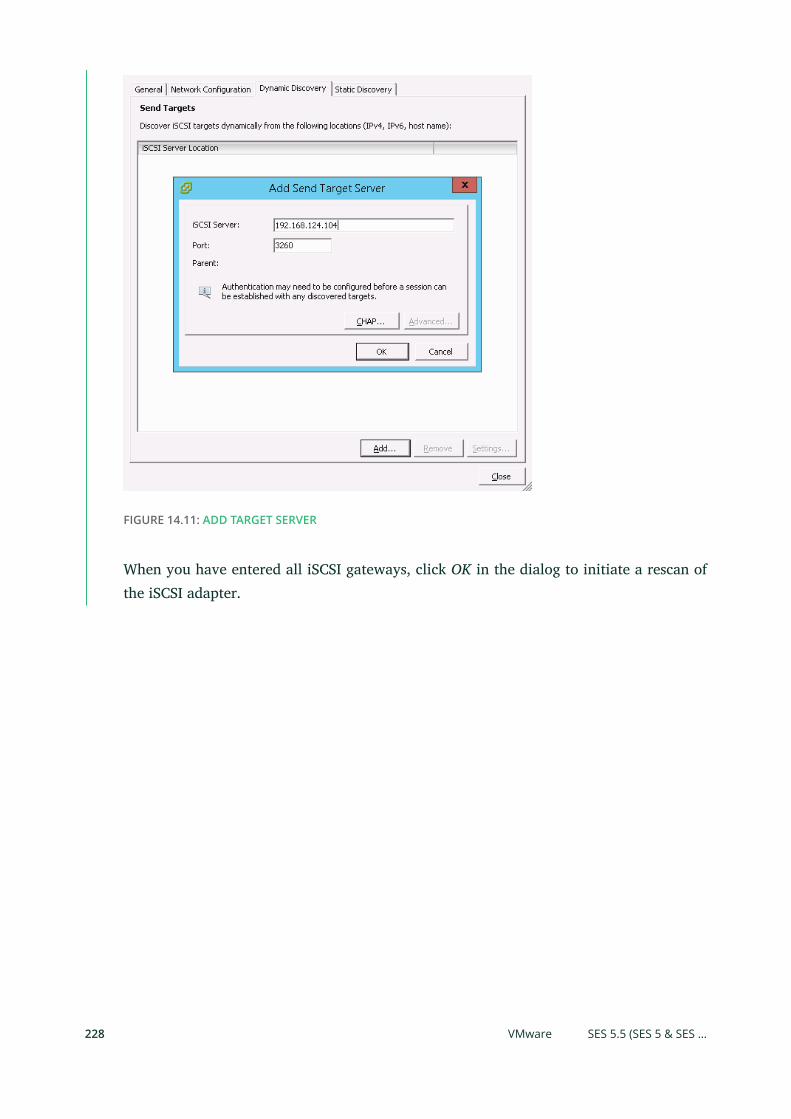
FIGURE 14.11: ADD TARGET SERVER
When you have entered all iSCSI gateways, click OK in the dialog to initiate a rescan ofthe iSCSI adapter.
228 VMware SES 5.5 (SES 5 & SES …
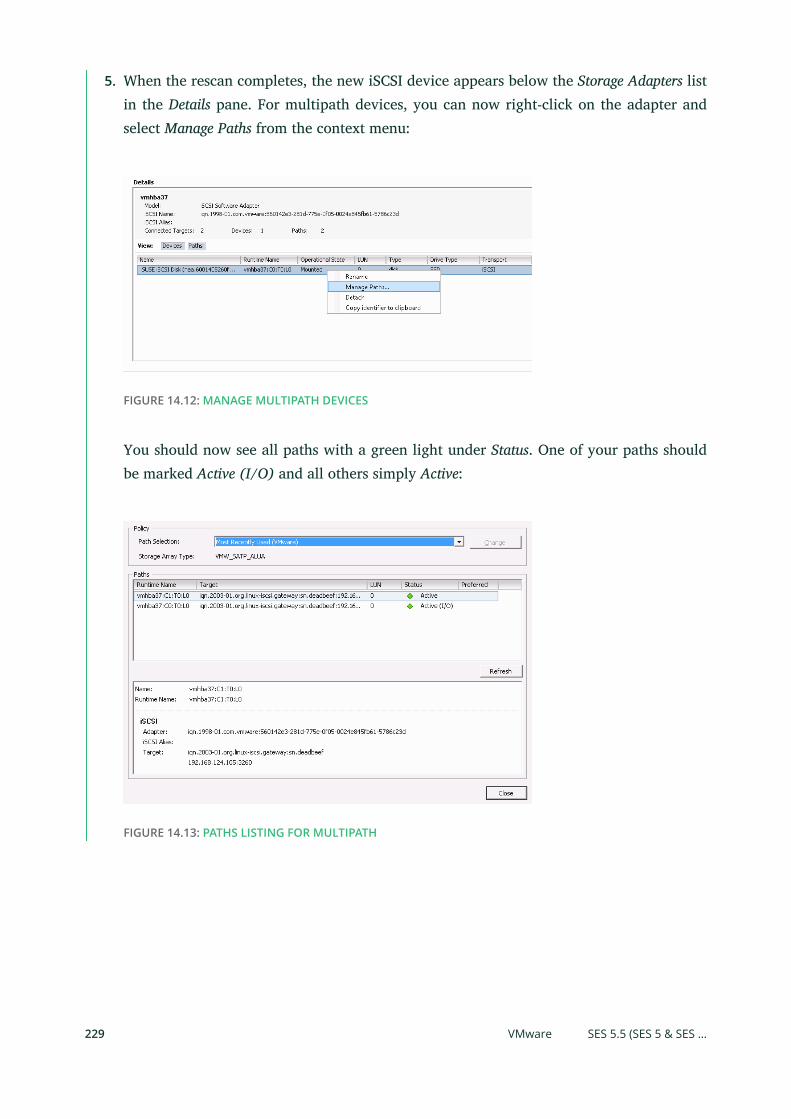
5. When the rescan completes, the new iSCSI device appears below the Storage Adapters listin the Details pane. For multipath devices, you can now right-click on the adapter andselect Manage Paths from the context menu:
FIGURE 14.12: MANAGE MULTIPATH DEVICES
You should now see all paths with a green light under Status. One of your paths shouldbe marked Active (I/O) and all others simply Active:
FIGURE 14.13: PATHS LISTING FOR MULTIPATH
229 VMware SES 5.5 (SES 5 & SES …
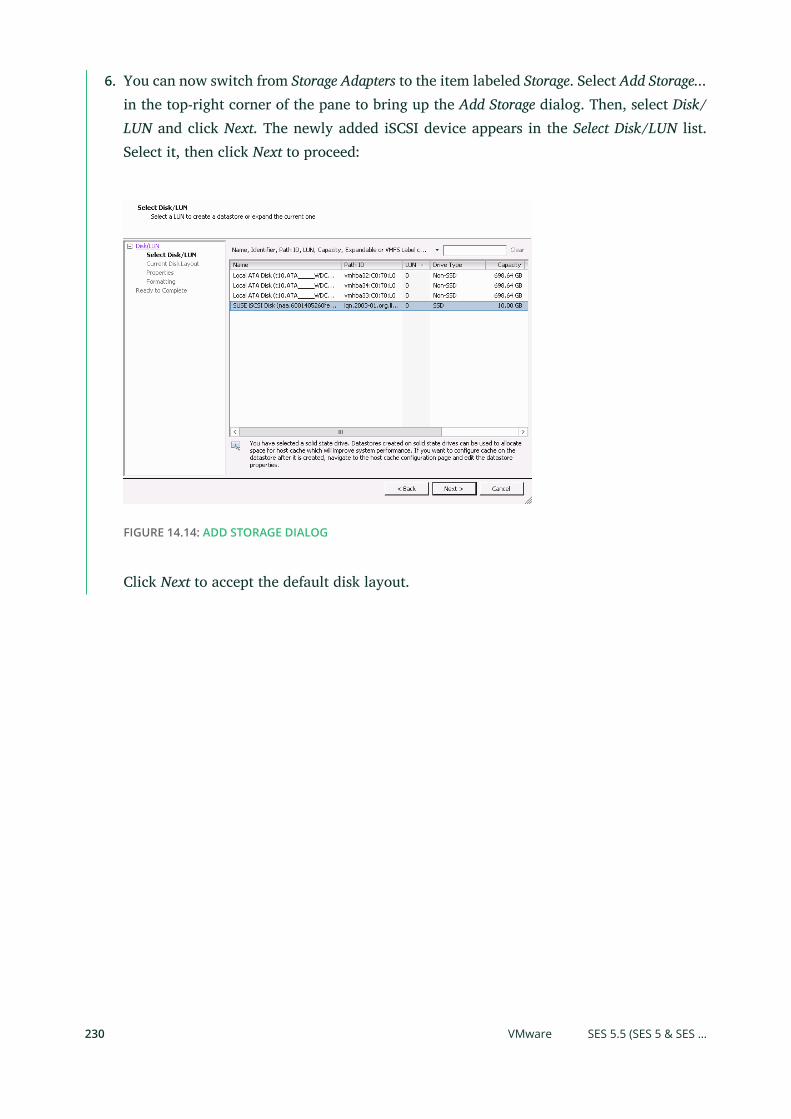
6. You can now switch from Storage Adapters to the item labeled Storage. Select Add Storage...in the top-right corner of the pane to bring up the Add Storage dialog. Then, select Disk/LUN and click Next. The newly added iSCSI device appears in the Select Disk/LUN list.Select it, then click Next to proceed:
FIGURE 14.14: ADD STORAGE DIALOG
Click Next to accept the default disk layout.
230 VMware SES 5.5 (SES 5 & SES …
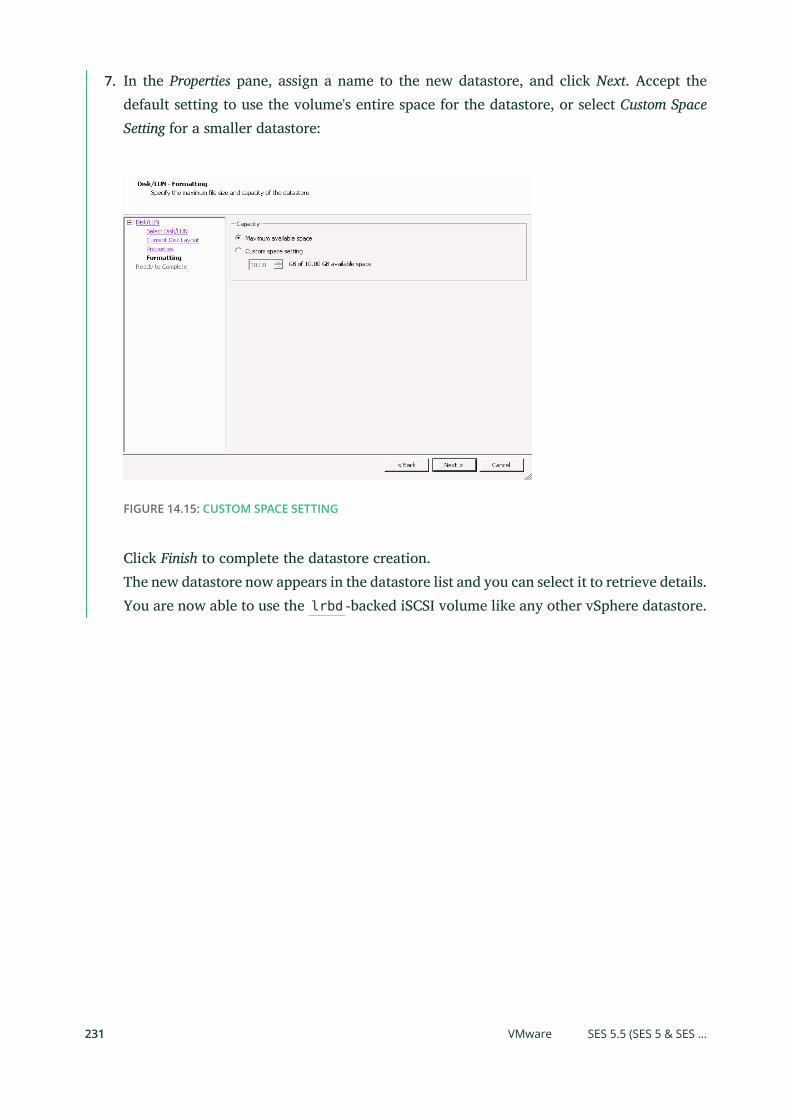
7. In the Properties pane, assign a name to the new datastore, and click Next. Accept thedefault setting to use the volume's entire space for the datastore, or select Custom SpaceSetting for a smaller datastore:
FIGURE 14.15: CUSTOM SPACE SETTING
Click Finish to complete the datastore creation.The new datastore now appears in the datastore list and you can select it to retrieve details.You are now able to use the lrbd -backed iSCSI volume like any other vSphere datastore.
231 VMware SES 5.5 (SES 5 & SES …
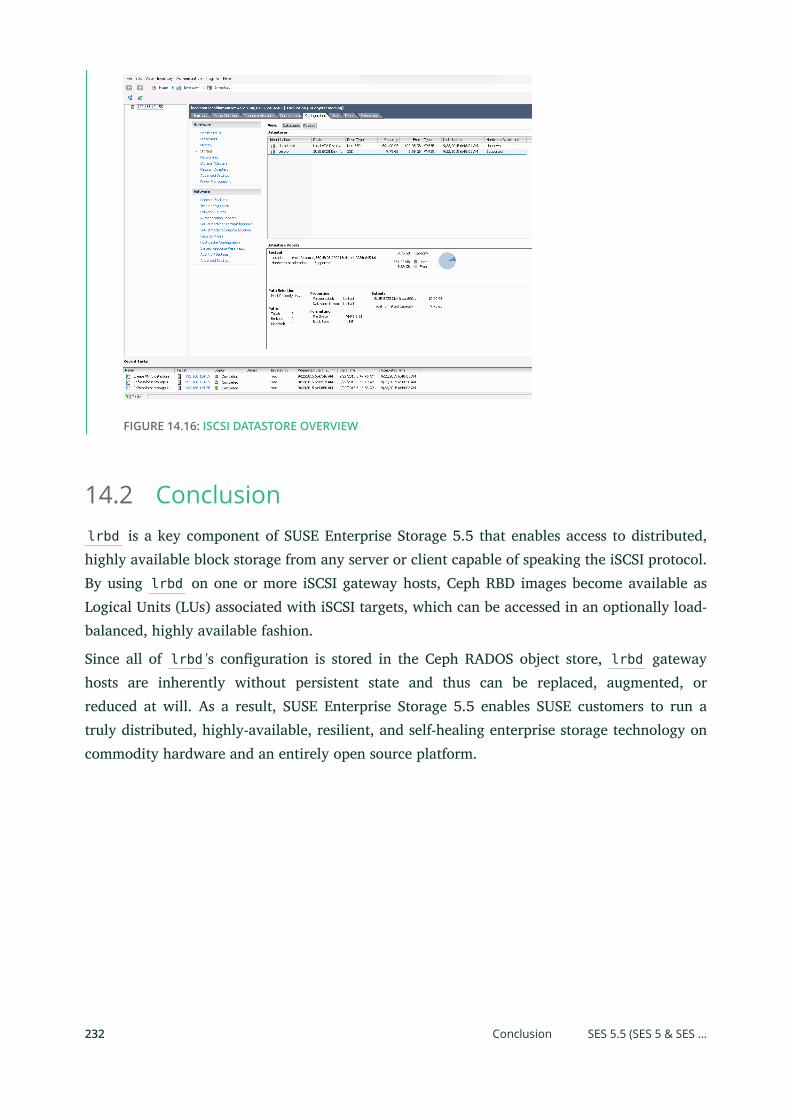
FIGURE 14.16: ISCSI DATASTORE OVERVIEW
14.2 Conclusionlrbd is a key component of SUSE Enterprise Storage 5.5 that enables access to distributed,highly available block storage from any server or client capable of speaking the iSCSI protocol.By using lrbd on one or more iSCSI gateway hosts, Ceph RBD images become available asLogical Units (LUs) associated with iSCSI targets, which can be accessed in an optionally load-balanced, highly available fashion.
Since all of lrbd 's conguration is stored in the Ceph RADOS object store, lrbd gatewayhosts are inherently without persistent state and thus can be replaced, augmented, orreduced at will. As a result, SUSE Enterprise Storage 5.5 enables SUSE customers to run atruly distributed, highly-available, resilient, and self-healing enterprise storage technology oncommodity hardware and an entirely open source platform.
232 Conclusion SES 5.5 (SES 5 & SES …
15 Clustered File System
This chapter describes administration tasks that are normally performed after the cluster is setup and CephFS exported. If you need more information on setting up CephFS, refer to Book
“Deployment Guide”, Chapter 11 “Installation of CephFS”.
15.1 Mounting CephFSWhen the le system is created and the MDS is active, you are ready to mount the le systemfrom a client host.
15.1.1 Client Preparation
If the client host is running SUSE Linux Enterprise 12 SP2 or SP3, you can skip this section asthe system is ready to mount CephFS 'out of the box'.
If the client host is running SUSE Linux Enterprise 12 SP1, you need to apply all the latestpatches before mounting CephFS.
In any case, everything needed to mount CephFS is included in SUSE Linux Enterprise. The SUSEEnterprise Storage 5.5 product is not needed.
To support the full mount syntax, the ceph-common package (which is shipped with SUSE LinuxEnterprise) should be installed before trying to mount CephFS.
15.1.2 Create a Secret File
The Ceph cluster runs with authentication turned on by default. You should create a le thatstores your secret key (not the keyring itself). To obtain the secret key for a particular user andthen create the le, do the following:
PROCEDURE 15.1: CREATING A SECRET KEY
1. View the key for the particular user in a keyring le:
cephadm > cat /etc/ceph/ceph.client.admin.keyring
233 Mounting CephFS SES 5.5 (SES 5 & SES …
2. Copy the key of the user who will be using the mounted Ceph FS le system. Usually, thekey looks similar to the following:
AQCj2YpRiAe6CxAA7/ETt7Hcl9IyxyYciVs47w==
3. Create a le with the user name as a le name part, for example /etc/ceph/
admin.secret for the user admin.
4. Paste the key value to the le created in the previous step.
5. Set proper access rights to the le. The user should be the only one who can read the le—others may not have any access rights.
15.1.3 Mount CephFS
You can mount CephFS with the mount command. You need to specify the monitor host name orIP address. Because the cephx authentication is enabled by default in SUSE Enterprise Storage5.5, you need to specify a user name and their related secret as well:
root # mount -t ceph ceph_mon1:6789:/ /mnt/cephfs \ -o name=admin,secret=AQATSKdNGBnwLhAAnNDKnH65FmVKpXZJVasUeQ==
As the previous command remains in the shell history, a more secure approach is to read thesecret from a le:
root # mount -t ceph ceph_mon1:6789:/ /mnt/cephfs \ -o name=admin,secretfile=/etc/ceph/admin.secret
Note that the secret le should only contain the actual keyring secret. In our example, the lewill then contain only the following line:
AQATSKdNGBnwLhAAnNDKnH65FmVKpXZJVasUeQ==
Tip: Specify Multiple MonitorsIt is a good idea to specify multiple monitors separated by commas on the mountcommand line in case one monitor happens to be down at the time of mount. Each monitoraddress takes the form host[:port] . If the port is not specied, it defaults to 6789.
Create the mount point on the local host:
root # mkdir /mnt/cephfs
234 Mount CephFS SES 5.5 (SES 5 & SES …
Mount the CephFS:
root # mount -t ceph ceph_mon1:6789:/ /mnt/cephfs \ -o name=admin,secretfile=/etc/ceph/admin.secret
A subdirectory subdir may be specied if a subset of the le system is to be mounted:
root # mount -t ceph ceph_mon1:6789:/subdir /mnt/cephfs \ -o name=admin,secretfile=/etc/ceph/admin.secret
You can specify more than one monitor host in the mount command:
root # mount -t ceph ceph_mon1,ceph_mon2,ceph_mon3:6789:/ /mnt/cephfs \ -o name=admin,secretfile=/etc/ceph/admin.secret
Important: Read Access to the Root DirectoryIf clients with path restriction are used, the MDS capabilities need to include read accessto the root directory. For example, a keyring may look as follows:
client.bar key: supersecretkey caps: [mds] allow rw path=/barjail, allow r path=/ caps: [mon] allow r caps: [osd] allow rwx
The allow r path=/ part means that path-restricted clients are able to see the rootvolume, but cannot write to it. This may be an issue for use cases where complete isolationis a requirement.
15.2 Unmounting CephFSTo unmount the CephFS, use the umount command:
root # umount /mnt/cephfs
235 Unmounting CephFS SES 5.5 (SES 5 & SES …
15.3 CephFS in /etc/fstabTo mount CephFS automatically upon client start-up, insert the corresponding line in its lesystems table /etc/fstab :
mon1:6790,mon2:/subdir /mnt/cephfs ceph name=admin,secretfile=/etc/ceph/secret.key,noatime,_netdev 0 2
15.4 Multiple Active MDS Daemons (Active-ActiveMDS)CephFS is congured for a single active MDS daemon by default. To scale metadata performancefor large-scale systems, you can enable multiple active MDS daemons, which will share themetadata workload with one another.
15.4.1 When to Use Active-Active MDS
Consider using multiple active MDS daemons when your metadata performance is bottleneckedon the default single MDS.
Adding more daemons does not increase performance on all workload types. For example, asingle application running on a single client will not benet from an increased number of MDSdaemons unless the application is doing a lot of metadata operations in parallel.
Workloads that typically benet from a larger number of active MDS daemons are those withmany clients, perhaps working on many separate directories.
15.4.2 Increasing the MDS Active Cluster Size
Each CephFS le system has a max_mds setting, which controls how many ranks will be created.The actual number of ranks in the le system will only be increased if a spare daemon is availableto take on the new rank. For example, if there is only one MDS daemon running and max_mdsis set to two, no second rank will be created.
236 CephFS in /etc/fstab SES 5.5 (SES 5 & SES …
In the following example, we set the max_mds option to 2 to create a new rank apart from thedefault one. To see the changes, run ceph status before and after you set max_mds , and watchthe line containing fsmap :
cephadm > ceph status [...] services: [...] mds: cephfs-1/1/1 up {0=node2=up:active}, 1 up:standby [...]cephadm > ceph mds set max_mds 2cephadm > ceph status [...] services: [...] mds: cephfs-2/2/2 up {0=node2=up:active,1=node1=up:active} [...]
The newly created rank (1) passes through the 'creating' state and then enter its 'active' state.
Important: Standby DaemonsEven with multiple active MDS daemons, a highly available system still requires standbydaemons to take over if any of the servers running an active daemon fail.
Consequently, the practical maximum of max_mds for highly available systems is one lessthan the total number of MDS servers in your system. To remain available in the event ofmultiple server failures, increase the number of standby daemons in the system to matchthe number of server failures you need to survive.
15.4.3 Decreasing the Number of Ranks
All ranks—including the ranks to be removed—must rst be active. This means that you needto have at least max_mds MDS daemons available.
First, set max_mds to a lower number. For example, go back to having a single active MDS:
cephadm > ceph status [...] services: [...] mds: cephfs-2/2/2 up {0=node2=up:active,1=node1=up:active}
237 Decreasing the Number of Ranks SES 5.5 (SES 5 & SES …

[...]cephadm > ceph mds set max_mds 1cephadm > ceph status [...] services: [...] mds: cephfs-1/1/1 up {0=node2=up:active}, 1 up:standby [...]
Note that we still have two active MDSs. The ranks still exist even though we have decreasedmax_mds , because max_mds only restricts the creation of new ranks.
Next, use the ceph mds deactivate rank command to remove the unneeded rank:
cephadm > ceph status [...] services: [...] mds: cephfs-2/2/1 up {0=node2=up:active,1=node1=up:active}cephadm > ceph mds deactivate 1telling mds.1:1 192.168.58.101:6805/2799214375 to deactivate
cephadm > ceph status [...] services: [...] mds: cephfs-2/2/1 up {0=node2=up:active,1=node1=up:stopping}
cephadm > ceph status [...] services: [...] mds: cephfs-1/1/1 up {0=node2=up:active}, 1 up:standby
The deactivated rank will rst enter the stopping state, for a period of time while it hands oits share of the metadata to the remaining active daemons. This phase can take from seconds tominutes. If the MDS appears to be stuck in the stopping state then that should be investigatedas a possible bug.
If an MDS daemon crashes or is terminated while in the 'stopping' state, a standby will take overand the rank will go back to 'active'. You can try to deactivate it again when it has come back up.
When a daemon nishes stopping, it will start again and go back to being a standby.
238 Decreasing the Number of Ranks SES 5.5 (SES 5 & SES …
15.4.4 Manually Pinning Directory Trees to a Rank
In multiple active metadata server congurations, a balancer runs, which works to spreadmetadata load evenly across the cluster. This usually works well enough for most users, butsometimes it is desirable to override the dynamic balancer with explicit mappings of metadatato particular ranks. This can allow the administrator or users to evenly spread application loador limit impact of users' metadata requests on the entire cluster.
The mechanism provided for this purpose is called an 'export pin'. It is an extended attribute ofdirectories. The name of this extended attribute is ceph.dir.pin . Users can set this attributeusing standard commands:
root # setfattr -n ceph.dir.pin -v 2 /path/to/dir
The value ( -v ) of the extended attribute is the rank to assign the directory sub-tree to. A defaultvalue of -1 indicates that the directory is not pinned.
A directory export pin is inherited from its closest parent with a set export pin. Therefore,setting the export pin on a directory aects all of its children. However, the parent's pin can beoverridden by setting the child directory export pin. For example:
root # mkdir -p a/b # "a" and "a/b" start with no export pin set.setfattr -n ceph.dir.pin -v 1 a/ # "a" and "b" are now pinned to rank 1.setfattr -n ceph.dir.pin -v 0 a/b # "a/b" is now pinned to rank 0 # and "a/" and the rest of its children # are still pinned to rank 1.
15.5 Managing FailoverIf an MDS daemon stops communicating with the monitor, the monitor will waitmds_beacon_grace seconds (default 15 seconds) before marking the daemon as laggy. You cancongure one or more 'standby' daemons that will take over during the MDS daemon failover.
15.5.1 Configuring Standby Daemons
There are several conguration settings that control how a daemon will behave while in standby.You can specify them in the ceph.conf on the host where the MDS daemon runs. The daemonloads these settings when it starts, and sends them to the monitor.
By default, if none of these settings are used, all MDS daemons which do not hold a rank willbe used as 'standbys' for any rank.
239 Manually Pinning Directory Trees to a Rank SES 5.5 (SES 5 & SES …
The settings which associate a standby daemon with a particular name or rank do not guaranteethat the daemon will only be used for that rank. They mean that when several standbys areavailable, the associated standby daemon will be used. If a rank is failed, and a standby isavailable, it will be used even if it is associated with a dierent rank or named daemon.
mds_standby_replay
If set to true, then the standby daemon will continuously read the metadata journal of anup rank. This will give it a warm metadata cache, and speed up the process of failing overif the daemon serving the rank fails.An up rank may only have one standby replay, daemon assigned to it. If two daemonsare both set to be standby replay then one of them will arbitrarily win, and the other willbecome a normal non-replay standby.When a daemon has entered the standby replay state, it will only be used as a standby forthe rank that it is following. If another rank fails, this standby replay daemon will not beused as a replacement, even if no other standbys are available.
mds_standby_for_name
Set this to make the standby daemon only take over a failed rank if the last daemon tohold it matches this name.
mds_standby_for_rank
Set this to make the standby daemon only take over the specied rank. If another rankfails, this daemon will not be used to replace it.Use in conjunction with mds_standby_for_fscid to be specic about which le system'srank you are targeting in case of multiple le systems.
mds_standby_for_fscid
If mds_standby_for_rank is set, this is simply a qualier to say which le system's rankis being referred to.If mds_standby_for_rank is not set, then setting FSCID will cause this daemon to targetany rank in the specied FSCID. Use this if you have a daemon that you want to use forany rank, but only within a particular le system.
mon_force_standby_active
This setting is used on monitor hosts. It defaults to true.If it is false, then daemons congured with standby_replay=true will only become activeif the rank/name that they have been congured to follow fails. On the other hand, if thissetting is true, then a daemon congured with standby_replay=true may be assignedsome other rank.
240 Configuring Standby Daemons SES 5.5 (SES 5 & SES …
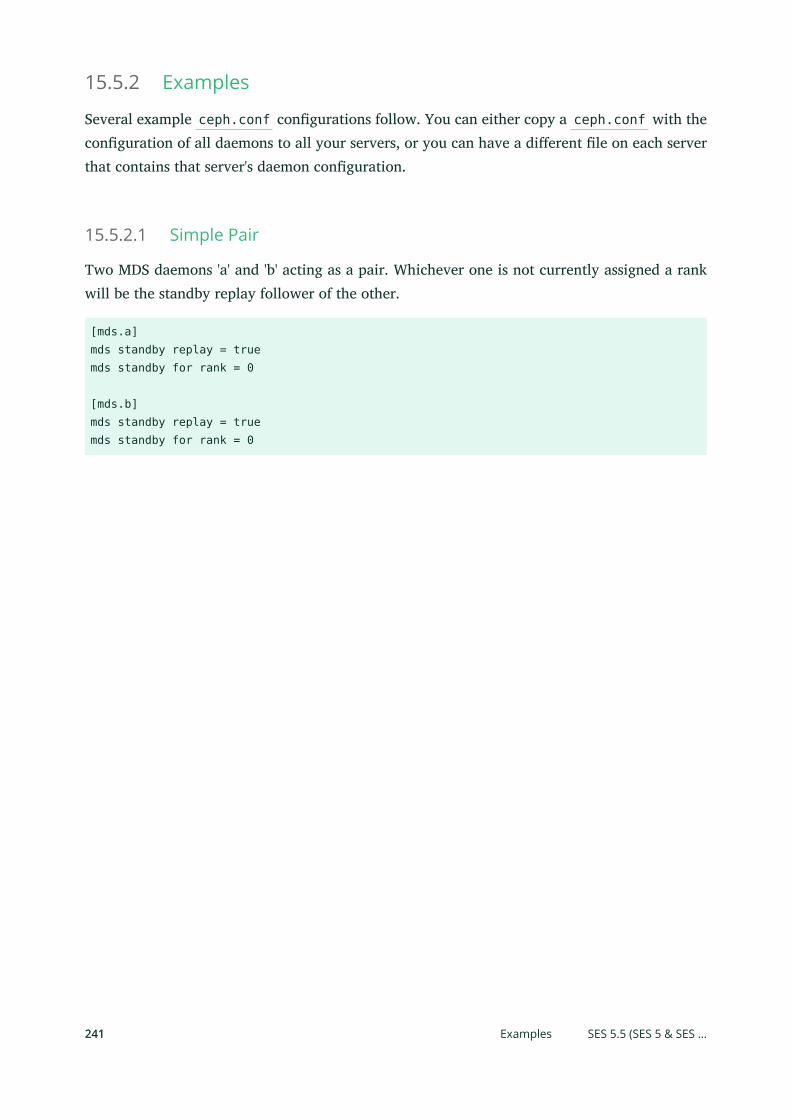
15.5.2 Examples
Several example ceph.conf congurations follow. You can either copy a ceph.conf with theconguration of all daemons to all your servers, or you can have a dierent le on each serverthat contains that server's daemon conguration.
15.5.2.1 Simple Pair
Two MDS daemons 'a' and 'b' acting as a pair. Whichever one is not currently assigned a rankwill be the standby replay follower of the other.
[mds.a]mds standby replay = truemds standby for rank = 0
[mds.b]mds standby replay = truemds standby for rank = 0
241 Examples SES 5.5 (SES 5 & SES …
16 NFS Ganesha: Export Ceph Data via NFS
NFS Ganesha is an NFS server (refer to Sharing File Systems with NFS (https://
documentation.suse.com/sles/12-SP5/single-html/SLES-admin/#cha-nfs) ) that runs in a useraddress space instead of as part of the operating system kernel. With NFS Ganesha, you can plugin your own storage mechanism—such as Ceph—and access it from any NFS client.
S3 buckets are exported to NFS on a per-user basis, for example via the path GANESHA_NODE:/USERNAME/BUCKETNAME .
A CephFS is exported by default via the path GANESHA_NODE:/cephfs .
Note: NFS Ganesha PerformanceDue to increased protocol overhead and additional latency caused by extra network hopsbetween the client and the storage, accessing Ceph via an NFS Gateway may signicantlyreduce application performance when compared to native CephFS or Object Gatewayclients.
16.1 InstallationFor installation instructions, see Book “Deployment Guide”, Chapter 12 “Installation of NFS Ganesha”.
16.2 ConfigurationFor a list of all parameters available within the conguration le, see:
man ganesha-config
man ganesha-ceph-config for CephFS File System Abstraction Layer (FSAL) options.
man ganesha-rgw-config for Object Gateway FSAL options.
This section includes information to help you congure the NFS Ganesha server to export thecluster data accessible via Object Gateway and CephFS.
NFS Ganesha conguration is controlled by /etc/ganesha/ganesha.conf . Note that changesto this le are overwritten when DeepSea Stage 4 is executed. To persistently change the settings,edit the le /srv/salt/ceph/ganesha/files/ganesha.conf.j2 located on the Salt master.
242 Installation SES 5.5 (SES 5 & SES …
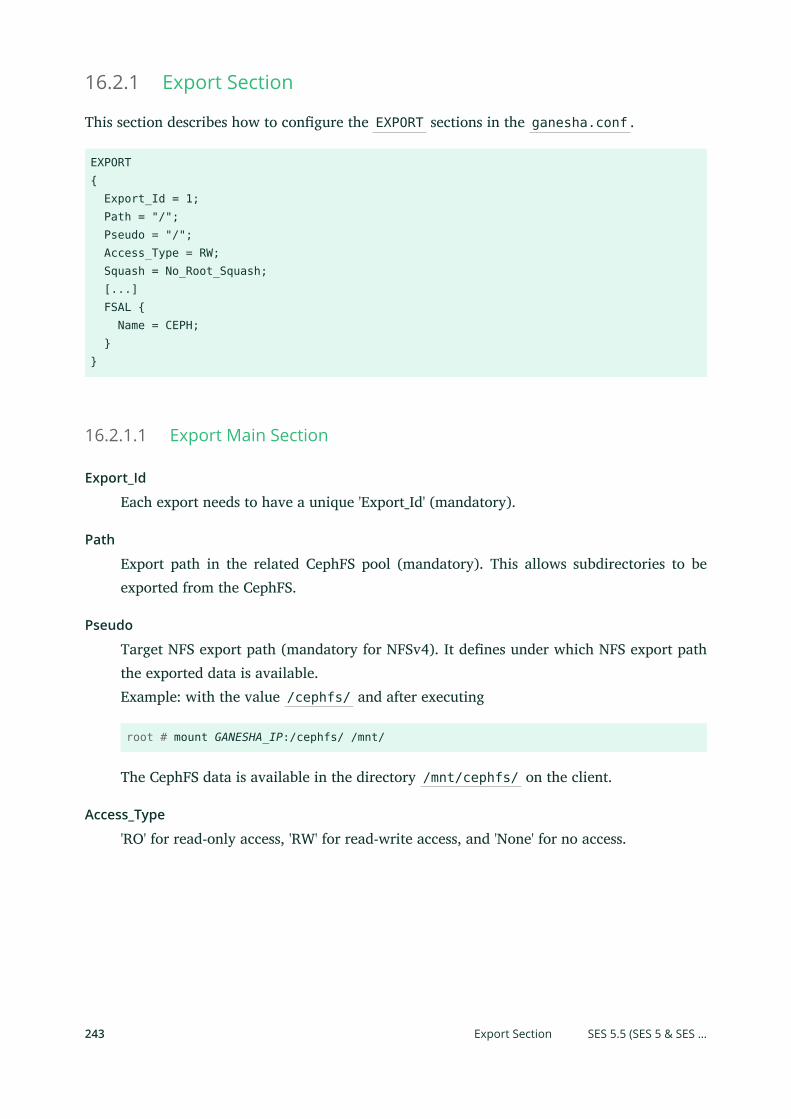
16.2.1 Export Section
This section describes how to congure the EXPORT sections in the ganesha.conf .
EXPORT{ Export_Id = 1; Path = "/"; Pseudo = "/"; Access_Type = RW; Squash = No_Root_Squash; [...] FSAL { Name = CEPH; }}
16.2.1.1 Export Main Section
Export_Id
Each export needs to have a unique 'Export_Id' (mandatory).
Path
Export path in the related CephFS pool (mandatory). This allows subdirectories to beexported from the CephFS.
Pseudo
Target NFS export path (mandatory for NFSv4). It denes under which NFS export paththe exported data is available.Example: with the value /cephfs/ and after executing
root # mount GANESHA_IP:/cephfs/ /mnt/
The CephFS data is available in the directory /mnt/cephfs/ on the client.
Access_Type
'RO' for read-only access, 'RW' for read-write access, and 'None' for no access.
243 Export Section SES 5.5 (SES 5 & SES …
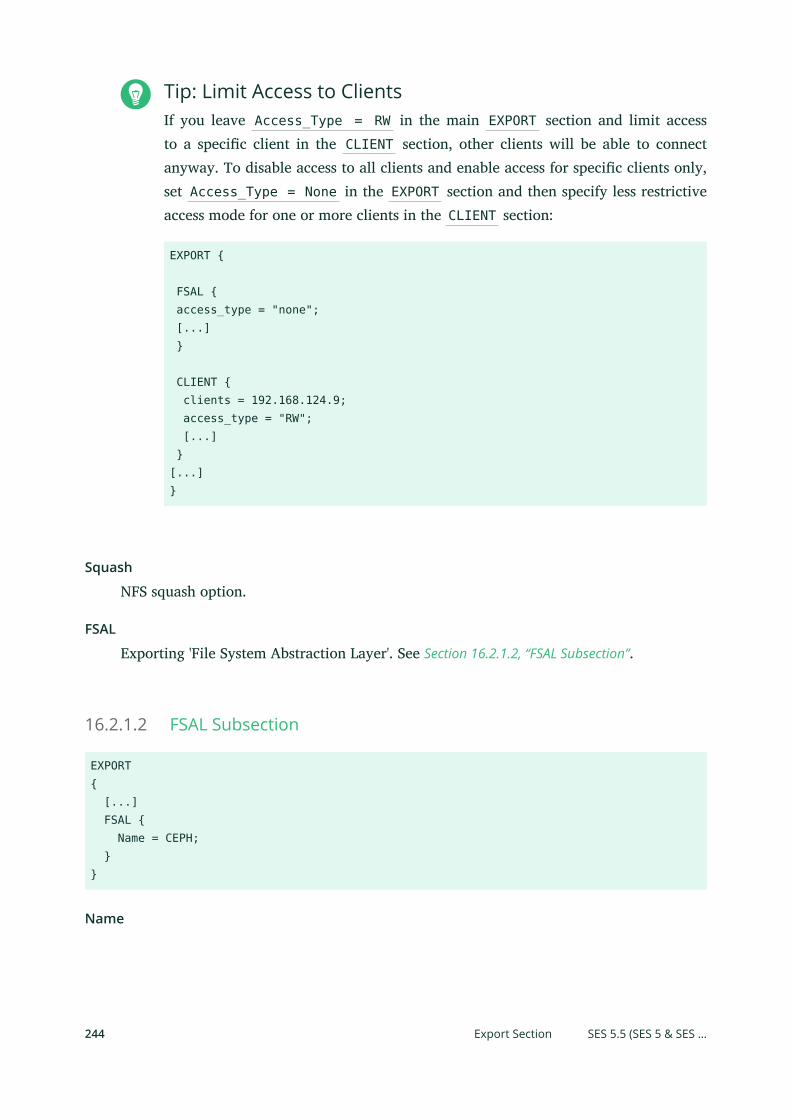
Tip: Limit Access to ClientsIf you leave Access_Type = RW in the main EXPORT section and limit accessto a specic client in the CLIENT section, other clients will be able to connectanyway. To disable access to all clients and enable access for specic clients only,set Access_Type = None in the EXPORT section and then specify less restrictiveaccess mode for one or more clients in the CLIENT section:
EXPORT {
FSAL { access_type = "none"; [...] }
CLIENT { clients = 192.168.124.9; access_type = "RW"; [...] }[...]}
Squash
NFS squash option.
FSAL
Exporting 'File System Abstraction Layer'. See Section 16.2.1.2, “FSAL Subsection”.
16.2.1.2 FSAL Subsection
EXPORT{ [...] FSAL { Name = CEPH; }}
Name
244 Export Section SES 5.5 (SES 5 & SES …
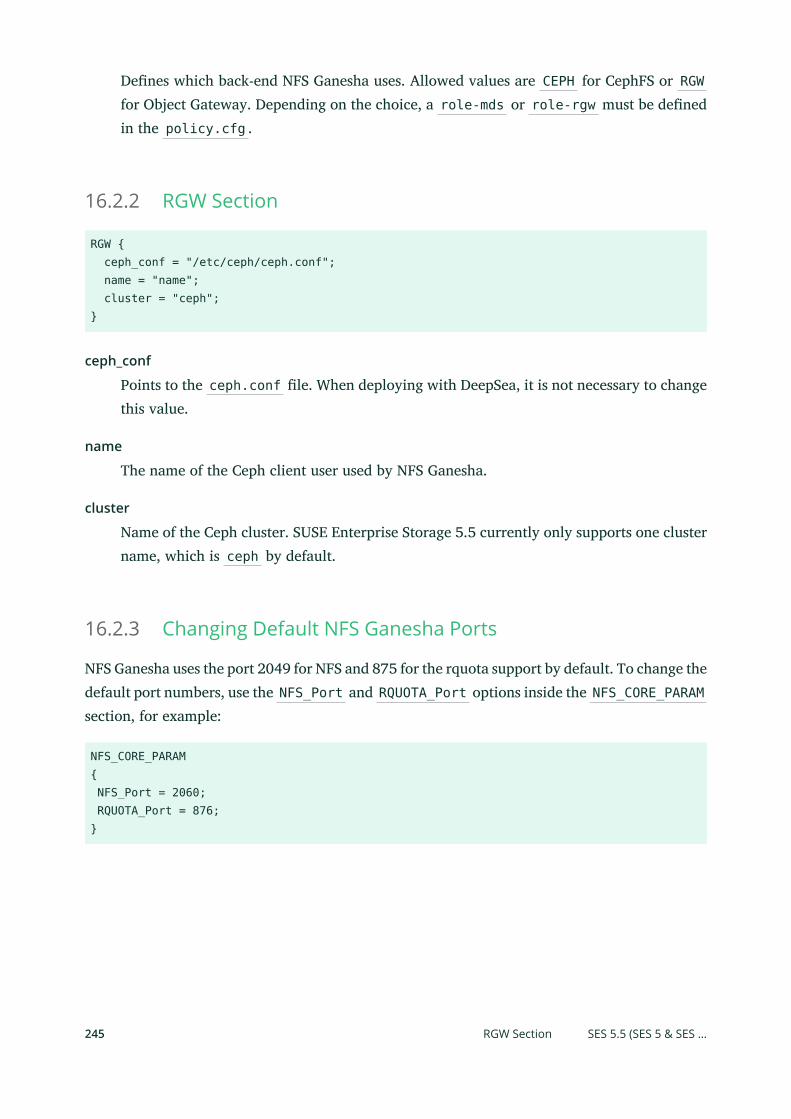
Denes which back-end NFS Ganesha uses. Allowed values are CEPH for CephFS or RGWfor Object Gateway. Depending on the choice, a role-mds or role-rgw must be denedin the policy.cfg .
16.2.2 RGW Section
RGW { ceph_conf = "/etc/ceph/ceph.conf"; name = "name"; cluster = "ceph";}
ceph_conf
Points to the ceph.conf le. When deploying with DeepSea, it is not necessary to changethis value.
name
The name of the Ceph client user used by NFS Ganesha.
cluster
Name of the Ceph cluster. SUSE Enterprise Storage 5.5 currently only supports one clustername, which is ceph by default.
16.2.3 Changing Default NFS Ganesha Ports
NFS Ganesha uses the port 2049 for NFS and 875 for the rquota support by default. To change thedefault port numbers, use the NFS_Port and RQUOTA_Port options inside the NFS_CORE_PARAMsection, for example:
NFS_CORE_PARAM{ NFS_Port = 2060; RQUOTA_Port = 876;}
245 RGW Section SES 5.5 (SES 5 & SES …
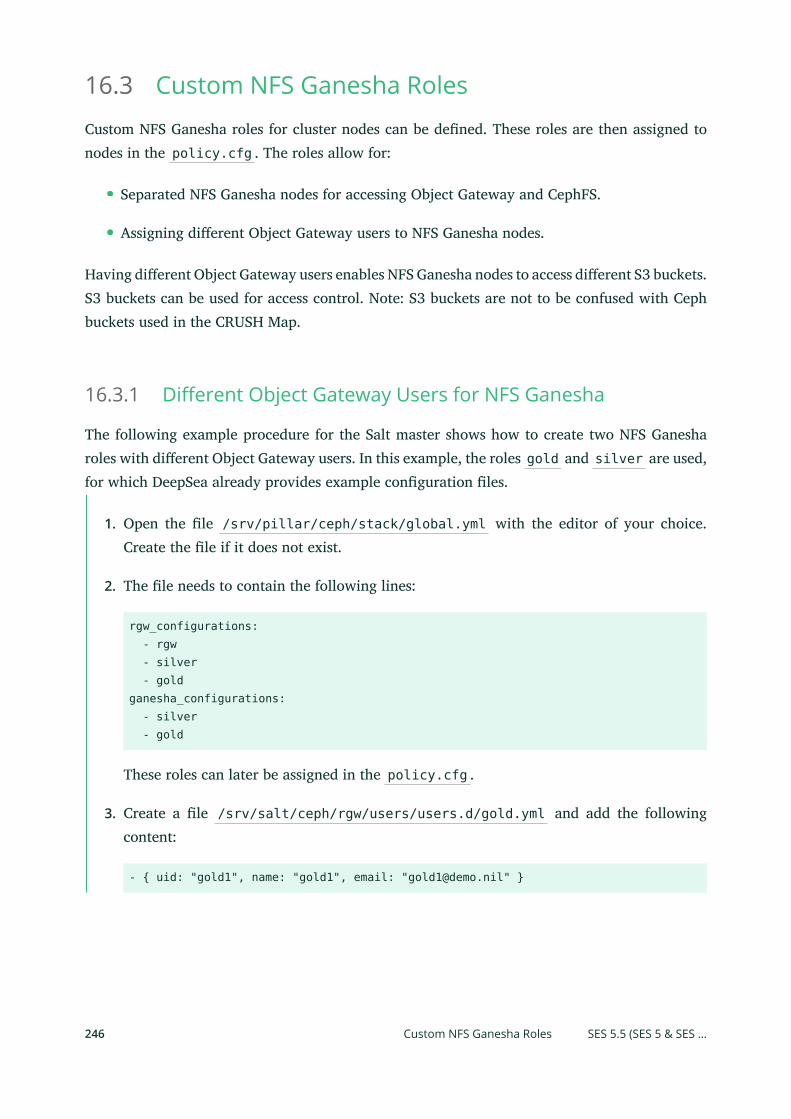
16.3 Custom NFS Ganesha RolesCustom NFS Ganesha roles for cluster nodes can be dened. These roles are then assigned tonodes in the policy.cfg . The roles allow for:
Separated NFS Ganesha nodes for accessing Object Gateway and CephFS.
Assigning dierent Object Gateway users to NFS Ganesha nodes.
Having dierent Object Gateway users enables NFS Ganesha nodes to access dierent S3 buckets.S3 buckets can be used for access control. Note: S3 buckets are not to be confused with Cephbuckets used in the CRUSH Map.
16.3.1 Dierent Object Gateway Users for NFS Ganesha
The following example procedure for the Salt master shows how to create two NFS Ganesharoles with dierent Object Gateway users. In this example, the roles gold and silver are used,for which DeepSea already provides example conguration les.
1. Open the le /srv/pillar/ceph/stack/global.yml with the editor of your choice.Create the le if it does not exist.
2. The le needs to contain the following lines:
rgw_configurations: - rgw - silver - goldganesha_configurations: - silver - gold
These roles can later be assigned in the policy.cfg .
3. Create a le /srv/salt/ceph/rgw/users/users.d/gold.yml and add the followingcontent:
- { uid: "gold1", name: "gold1", email: "[email protected]" }
246 Custom NFS Ganesha Roles SES 5.5 (SES 5 & SES …
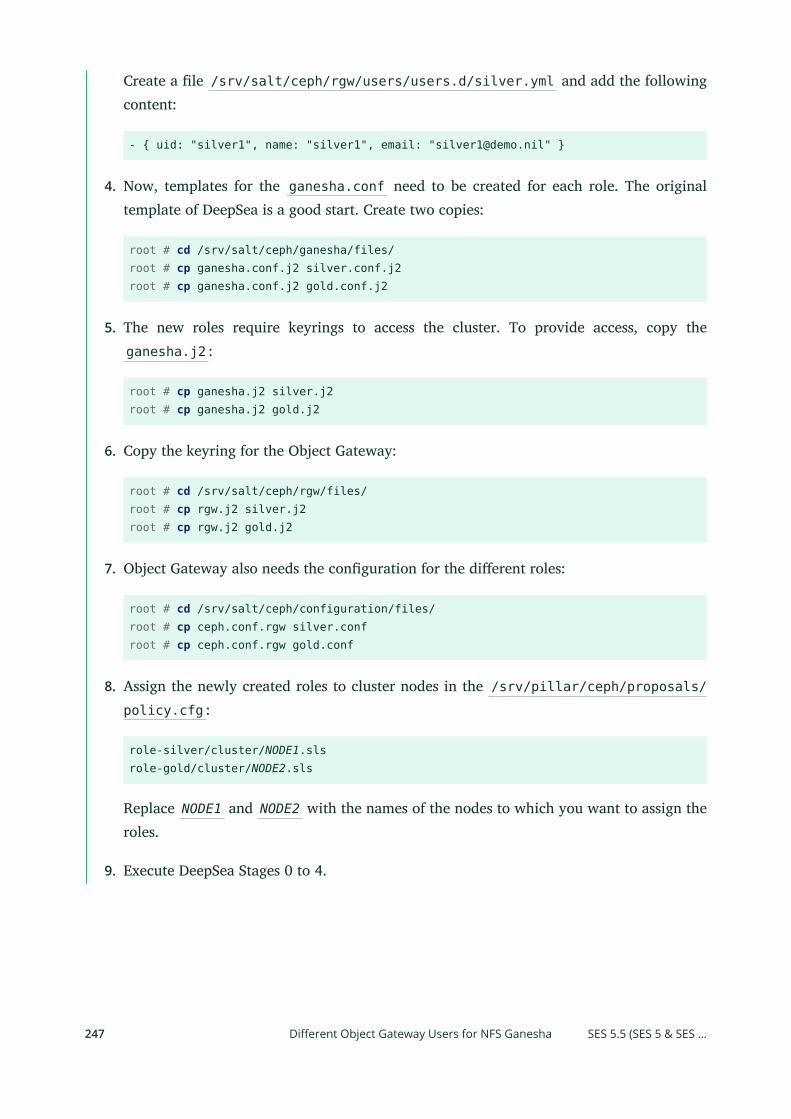
Create a le /srv/salt/ceph/rgw/users/users.d/silver.yml and add the followingcontent:
- { uid: "silver1", name: "silver1", email: "[email protected]" }
4. Now, templates for the ganesha.conf need to be created for each role. The originaltemplate of DeepSea is a good start. Create two copies:
root # cd /srv/salt/ceph/ganesha/files/root # cp ganesha.conf.j2 silver.conf.j2root # cp ganesha.conf.j2 gold.conf.j2
5. The new roles require keyrings to access the cluster. To provide access, copy theganesha.j2 :
root # cp ganesha.j2 silver.j2root # cp ganesha.j2 gold.j2
6. Copy the keyring for the Object Gateway:
root # cd /srv/salt/ceph/rgw/files/root # cp rgw.j2 silver.j2root # cp rgw.j2 gold.j2
7. Object Gateway also needs the conguration for the dierent roles:
root # cd /srv/salt/ceph/configuration/files/root # cp ceph.conf.rgw silver.confroot # cp ceph.conf.rgw gold.conf
8. Assign the newly created roles to cluster nodes in the /srv/pillar/ceph/proposals/policy.cfg :
role-silver/cluster/NODE1.slsrole-gold/cluster/NODE2.sls
Replace NODE1 and NODE2 with the names of the nodes to which you want to assign theroles.
9. Execute DeepSea Stages 0 to 4.
247 Dierent Object Gateway Users for NFS Ganesha SES 5.5 (SES 5 & SES …
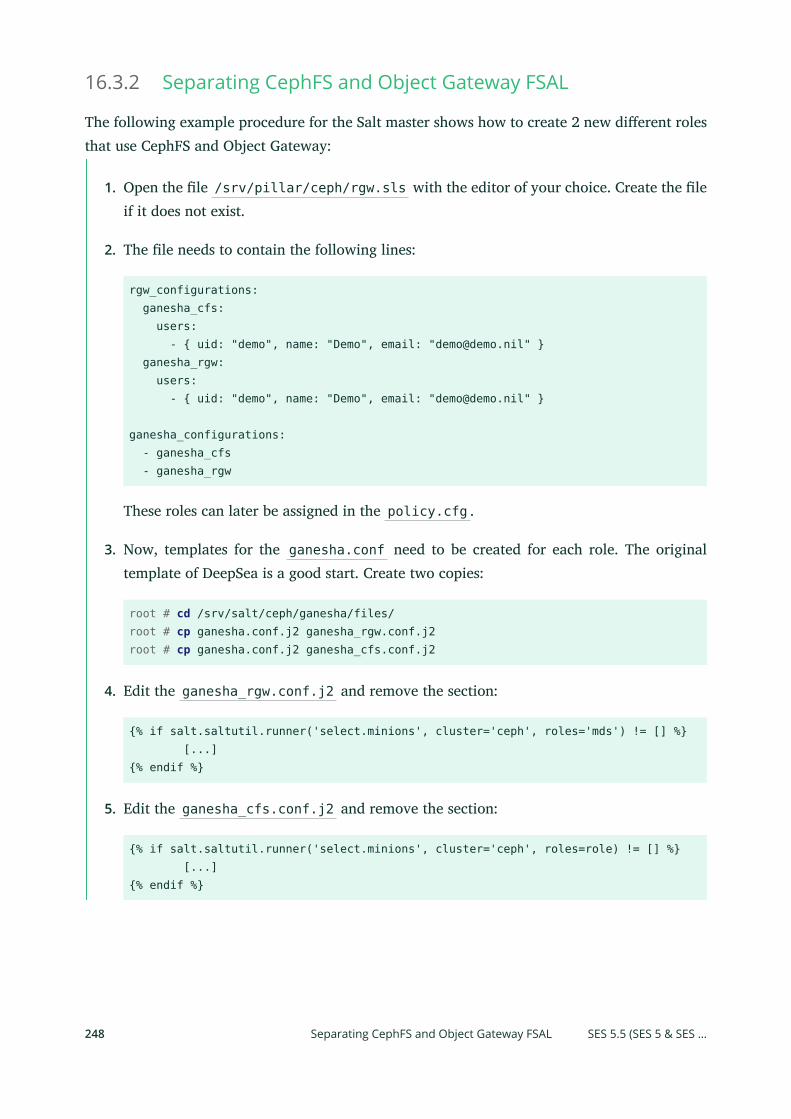
16.3.2 Separating CephFS and Object Gateway FSAL
The following example procedure for the Salt master shows how to create 2 new dierent rolesthat use CephFS and Object Gateway:
1. Open the le /srv/pillar/ceph/rgw.sls with the editor of your choice. Create the leif it does not exist.
2. The le needs to contain the following lines:
rgw_configurations: ganesha_cfs: users: - { uid: "demo", name: "Demo", email: "[email protected]" } ganesha_rgw: users: - { uid: "demo", name: "Demo", email: "[email protected]" }
ganesha_configurations: - ganesha_cfs - ganesha_rgw
These roles can later be assigned in the policy.cfg .
3. Now, templates for the ganesha.conf need to be created for each role. The originaltemplate of DeepSea is a good start. Create two copies:
root # cd /srv/salt/ceph/ganesha/files/root # cp ganesha.conf.j2 ganesha_rgw.conf.j2root # cp ganesha.conf.j2 ganesha_cfs.conf.j2
4. Edit the ganesha_rgw.conf.j2 and remove the section:
{% if salt.saltutil.runner('select.minions', cluster='ceph', roles='mds') != [] %} [...]{% endif %}
5. Edit the ganesha_cfs.conf.j2 and remove the section:
{% if salt.saltutil.runner('select.minions', cluster='ceph', roles=role) != [] %} [...]{% endif %}
248 Separating CephFS and Object Gateway FSAL SES 5.5 (SES 5 & SES …
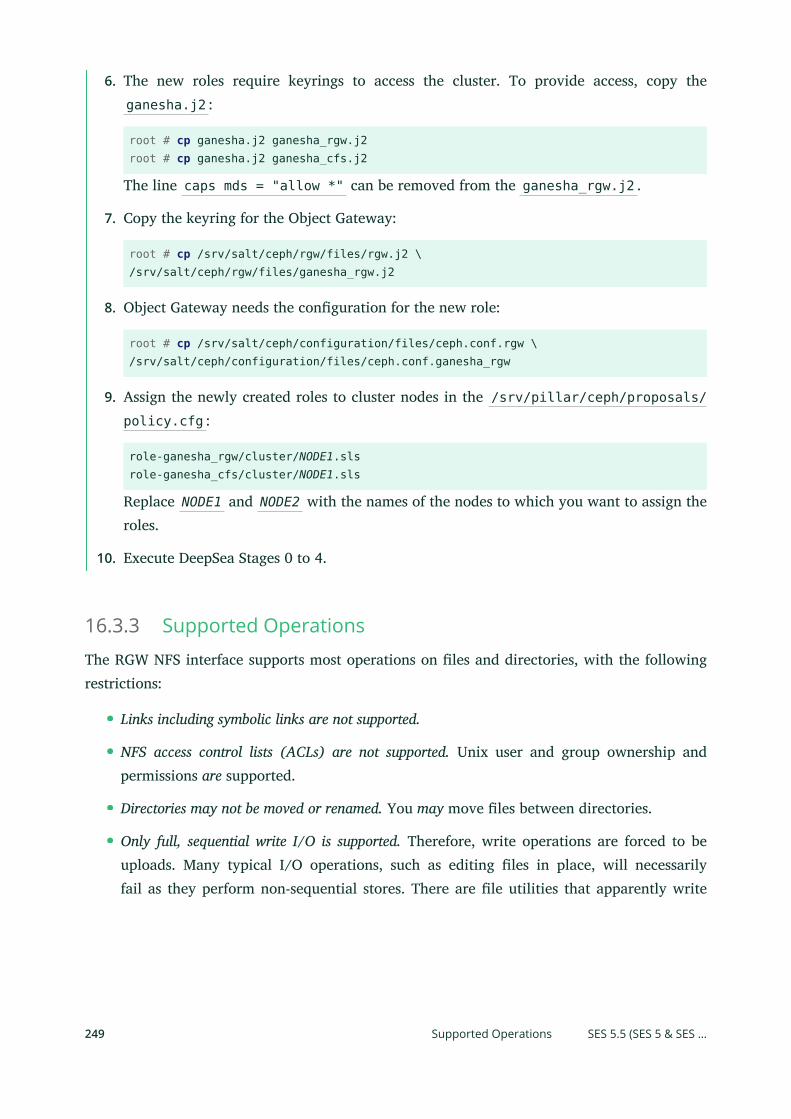
6. The new roles require keyrings to access the cluster. To provide access, copy theganesha.j2 :
root # cp ganesha.j2 ganesha_rgw.j2root # cp ganesha.j2 ganesha_cfs.j2
The line caps mds = "allow *" can be removed from the ganesha_rgw.j2 .
7. Copy the keyring for the Object Gateway:
root # cp /srv/salt/ceph/rgw/files/rgw.j2 \/srv/salt/ceph/rgw/files/ganesha_rgw.j2
8. Object Gateway needs the conguration for the new role:
root # cp /srv/salt/ceph/configuration/files/ceph.conf.rgw \/srv/salt/ceph/configuration/files/ceph.conf.ganesha_rgw
9. Assign the newly created roles to cluster nodes in the /srv/pillar/ceph/proposals/policy.cfg :
role-ganesha_rgw/cluster/NODE1.slsrole-ganesha_cfs/cluster/NODE1.sls
Replace NODE1 and NODE2 with the names of the nodes to which you want to assign theroles.
10. Execute DeepSea Stages 0 to 4.
16.3.3 Supported OperationsThe RGW NFS interface supports most operations on les and directories, with the followingrestrictions:
Links including symbolic links are not supported.
NFS access control lists (ACLs) are not supported. Unix user and group ownership andpermissions are supported.
Directories may not be moved or renamed. You may move les between directories.
Only full, sequential write I/O is supported. Therefore, write operations are forced to beuploads. Many typical I/O operations, such as editing les in place, will necessarilyfail as they perform non-sequential stores. There are le utilities that apparently write
249 Supported Operations SES 5.5 (SES 5 & SES …
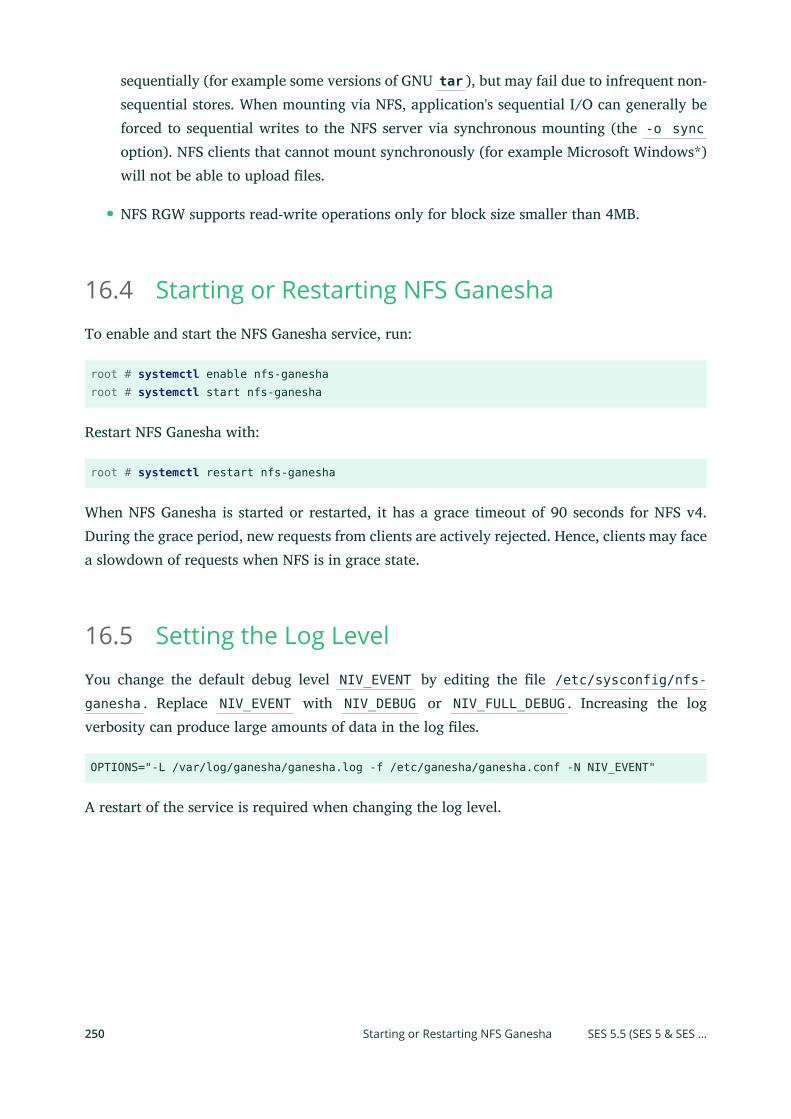
sequentially (for example some versions of GNU tar ), but may fail due to infrequent non-sequential stores. When mounting via NFS, application's sequential I/O can generally beforced to sequential writes to the NFS server via synchronous mounting (the -o syncoption). NFS clients that cannot mount synchronously (for example Microsoft Windows*)will not be able to upload les.
NFS RGW supports read-write operations only for block size smaller than 4MB.
16.4 Starting or Restarting NFS GaneshaTo enable and start the NFS Ganesha service, run:
root # systemctl enable nfs-ganesharoot # systemctl start nfs-ganesha
Restart NFS Ganesha with:
root # systemctl restart nfs-ganesha
When NFS Ganesha is started or restarted, it has a grace timeout of 90 seconds for NFS v4.During the grace period, new requests from clients are actively rejected. Hence, clients may facea slowdown of requests when NFS is in grace state.
16.5 Setting the Log LevelYou change the default debug level NIV_EVENT by editing the le /etc/sysconfig/nfs-ganesha . Replace NIV_EVENT with NIV_DEBUG or NIV_FULL_DEBUG . Increasing the logverbosity can produce large amounts of data in the log les.
OPTIONS="-L /var/log/ganesha/ganesha.log -f /etc/ganesha/ganesha.conf -N NIV_EVENT"
A restart of the service is required when changing the log level.
250 Starting or Restarting NFS Ganesha SES 5.5 (SES 5 & SES …
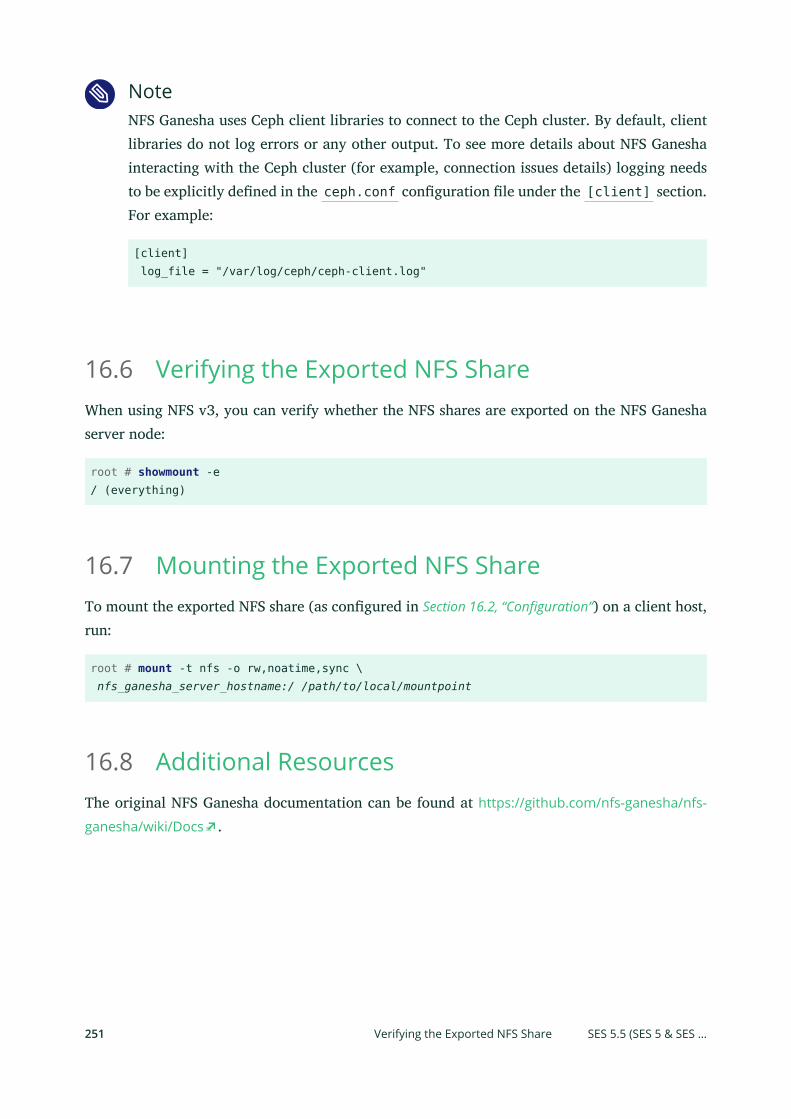
NoteNFS Ganesha uses Ceph client libraries to connect to the Ceph cluster. By default, clientlibraries do not log errors or any other output. To see more details about NFS Ganeshainteracting with the Ceph cluster (for example, connection issues details) logging needsto be explicitly dened in the ceph.conf conguration le under the [client] section.For example:
[client] log_file = "/var/log/ceph/ceph-client.log"
16.6 Verifying the Exported NFS ShareWhen using NFS v3, you can verify whether the NFS shares are exported on the NFS Ganeshaserver node:
root # showmount -e/ (everything)
16.7 Mounting the Exported NFS ShareTo mount the exported NFS share (as congured in Section 16.2, “Configuration”) on a client host,run:
root # mount -t nfs -o rw,noatime,sync \ nfs_ganesha_server_hostname:/ /path/to/local/mountpoint
16.8 Additional ResourcesThe original NFS Ganesha documentation can be found at https://github.com/nfs-ganesha/nfs-
ganesha/wiki/Docs .
251 Verifying the Exported NFS Share SES 5.5 (SES 5 & SES …
IV Managing Cluster with GUI Tools
17 openATTIC 253
17 openATTIC
Tip: Calamari RemovedCalamari used to be the preferred Web UI application for managing and monitoring theCeph cluster. Since SUSE Enterprise Storage 5.5, Calamari has been removed in favor ofthe more advanced openATTIC.
openATTIC is a central storage management system which supports Ceph storage cluster. WithopenATTIC, you can control everything from a central management interface. It is no longernecessary to be familiar with the inner workings of the Ceph storage tools. Cluster managementtasks can be carried out either by using openATTIC's intuitive Web interface, or via its REST API.
17.1 openATTIC Deployment and ConfigurationThis section introduces steps to deploy and congure openATTIC and its supported features sothat you can administer your Ceph cluster using a user-friendly Web interface.
17.1.1 Enabling Secure Access to openATTIC using SSL
Access to the openATTIC Web application uses non-secure HTTP protocol by default. To enablesecure access to openATTIC, you need to congure the Apache Web server manually:
1. If you do not have an SSL certicate signed by a well known certicate authority (CA),create a self-signed SSL certicate and copy its les to the directory where the Web serverexpects it, for example:
root # openssl req -newkey rsa:2048 -new -nodes -x509 -days 3650 \ -keyout key.pem -out cert.pemroot # cp cert.pem /etc/ssl/certs/servercert.pemroot # cp key.pem /etc/ssl/certs/serverkey.pem
Refer to https://documentation.suse.com/sles/12-SP5/single-html/SLES-admin/#sec-
apache2-ssl for more details on creating SSL certicates.
253 openATTIC Deployment and Configuration SES 5.5 (SES 5 & SES …
2. Add 'SSL' to the APACHE_SERVER_FLAGS option in the /etc/sysconfig/apache2
conguration le. You can do it manually, or run the following commands:
root # a2enmod sslroot # a2enflag SSL
3. Create /etc/apache2/vhosts.d/vhost-ssl.conf for a new Apache virtual host withthe following content:
<IfDefine SSL><IfDefine !NOSSL><VirtualHost *:80> ServerName OA_HOST_NAME Redirect "/" "https://OA_HOST_NAME/"</VirtualHost><VirtualHost _default_:443> ServerName OA_HOST_NAME DocumentRoot "/srv/www/htdocs" ErrorLog /var/log/apache2/error_log TransferLog /var/log/apache2/access_log SSLEngine on SSLCertificateFile /etc/ssl/certs/servercert.pem SSLCertificateKeyFile /etc/ssl/certs/serverkey.pem CustomLog /var/log/apache2/ssl_request_log ssl_combined</VirtualHost></IfDefine></IfDefine>
4. Restart the Web server to reload the new virtual host denition together with thecerticate les:
root # systemctl restart apache2.service
17.1.2 Deploying openATTIC
Since SUSE Enterprise Storage 5.5, openATTIC has been deployed as a DeepSea role. Refer toChapter 1, Salt Cluster Administration for a general procedure.
254 Deploying openATTIC SES 5.5 (SES 5 & SES …
17.1.3 openATTIC Initial Setup
By default, oaconfig creates an administrative user account, openattic , with the samepassword as the user name. As a security precaution, we strongly recommend changing thispassword immediately:
cephadm > oaconfig changepassword openatticChanging password for user 'openattic'Password: <enter password>Password (again): <re-enter password>Password changed successfully for user 'openattic'
17.1.4 DeepSea Integration in openATTIC
Some openATTIC features, such as iSCSI Gateway and Object Gateway management, make useof the DeepSea REST API. It is enabled and congured by default. If you need to override itsdefault settings for debugging purposes, edit /etc/sysconfig/openattic and add or changethe following lines:
SALT_API_HOST="salt_api_host"SALT_API_PORT=8001SALT_API_USERNAME="example_user"SALT_API_PASSWORD="password"
Important: oaconfig restartRemember to run oaconfig restart after you make changes to the /etc/sysconfig/openattic le.
Important: File Syntax/etc/sysconfig/openattic is used in Python as well as Bash. Therefore, the les needto be in a format which Bash can understand, and it is not possible to have spaces beforeor after the 'equals' signs.
255 openATTIC Initial Setup SES 5.5 (SES 5 & SES …
17.1.5 Object Gateway Management
Object Gateway management features in openATTIC are enabled by default. If you need tooverride the default values for Object Gateway API as discovered from DeepSea, include thefollowing options with relevant values in /etc/sysconfig/openattic . For example:
RGW_API_HOST="rgw_api_host"RGW_API_PORT=80RGW_API_SCHEME="http"RGW_API_ACCESS_KEY="VFEG733GBY0DJCIV6NK0"RGW_API_SECRET_KEY="lJzPbZYZTv8FzmJS5eiiZPHxlT2LMGOMW8ZAeOAq"
Note: Default Resource for Object GatewayIf your Object Gateway admin resource is not congured to use the default value 'admin' asused in 'http://rgw_host:80/admin', you need to also set the RGW_API_ADMIN_RESOURCEoption appropriately.
To obtain Object Gateway credentials, use the radosgw-admin command:
cephadm > radosgw-admin user info --uid=admin
17.1.6 iSCSI Gateway Management
iSCSI Gateway management features in openATTIC are enabled by default. If you need overridethe default Salt API host name, change the SALT_API_HOST value as described in Section 17.1.4,
“DeepSea Integration in openATTIC”.
17.2 openATTIC Web User InterfaceopenATTIC can be managed using a Web user interface. Open a Web browser and navigateto http:// SERVER_HOST /openattic. To log in, use the default user name openattic and thecorresponding password.
256 Object Gateway Management SES 5.5 (SES 5 & SES …
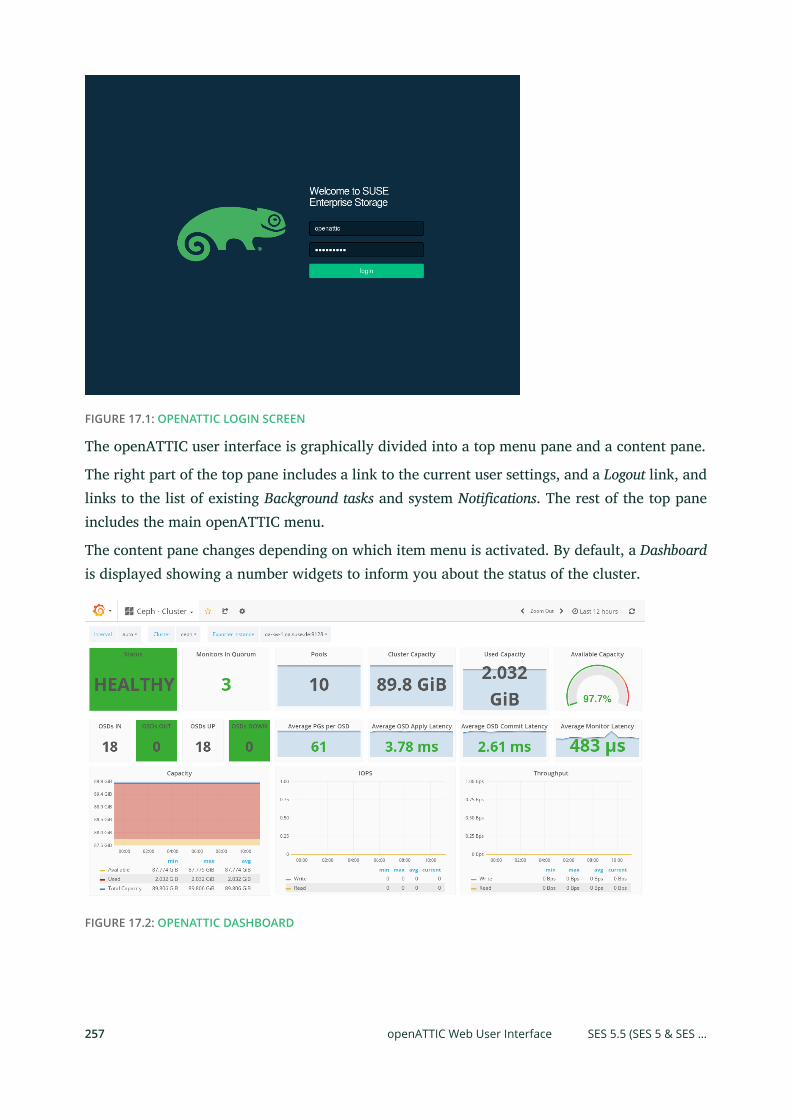
FIGURE 17.1: OPENATTIC LOGIN SCREEN
The openATTIC user interface is graphically divided into a top menu pane and a content pane.
The right part of the top pane includes a link to the current user settings, and a Logout link, andlinks to the list of existing Background tasks and system Notications. The rest of the top paneincludes the main openATTIC menu.
The content pane changes depending on which item menu is activated. By default, a Dashboardis displayed showing a number widgets to inform you about the status of the cluster.
FIGURE 17.2: OPENATTIC DASHBOARD
257 openATTIC Web User Interface SES 5.5 (SES 5 & SES …
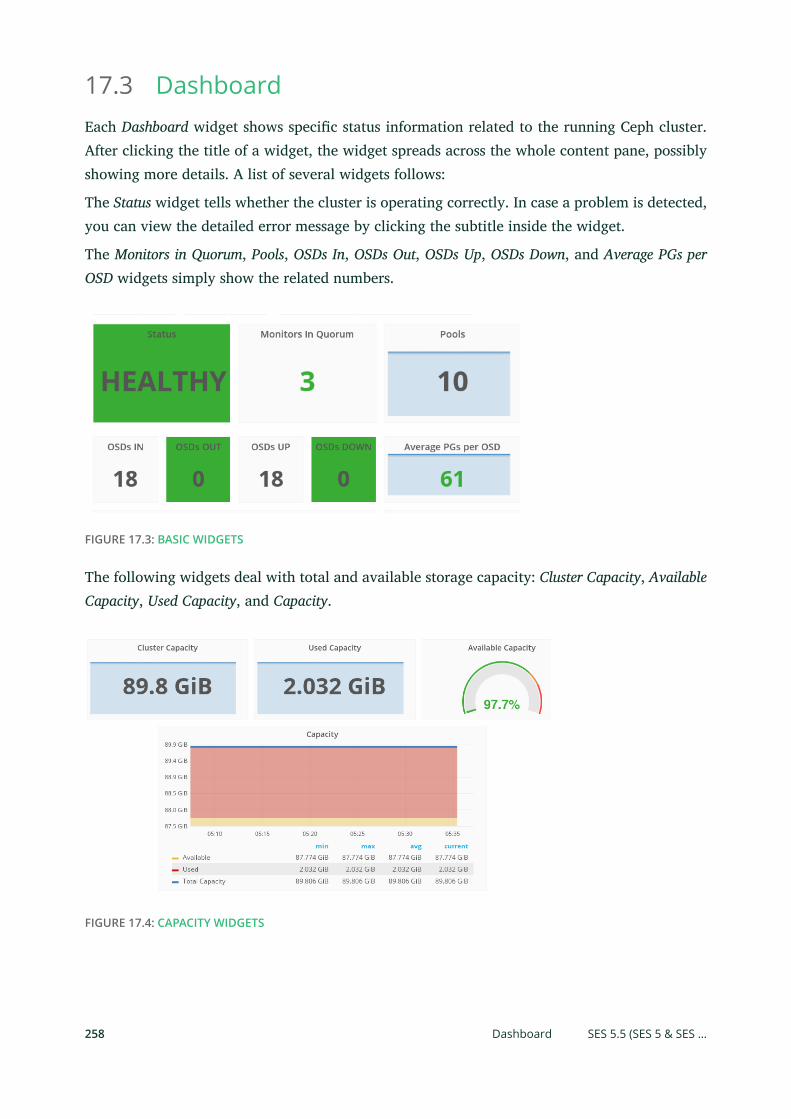
17.3 DashboardEach Dashboard widget shows specic status information related to the running Ceph cluster.After clicking the title of a widget, the widget spreads across the whole content pane, possiblyshowing more details. A list of several widgets follows:
The Status widget tells whether the cluster is operating correctly. In case a problem is detected,you can view the detailed error message by clicking the subtitle inside the widget.
The Monitors in Quorum, Pools, OSDs In, OSDs Out, OSDs Up, OSDs Down, and Average PGs perOSD widgets simply show the related numbers.
FIGURE 17.3: BASIC WIDGETS
The following widgets deal with total and available storage capacity: Cluster Capacity, AvailableCapacity, Used Capacity, and Capacity.
FIGURE 17.4: CAPACITY WIDGETS
258 Dashboard SES 5.5 (SES 5 & SES …
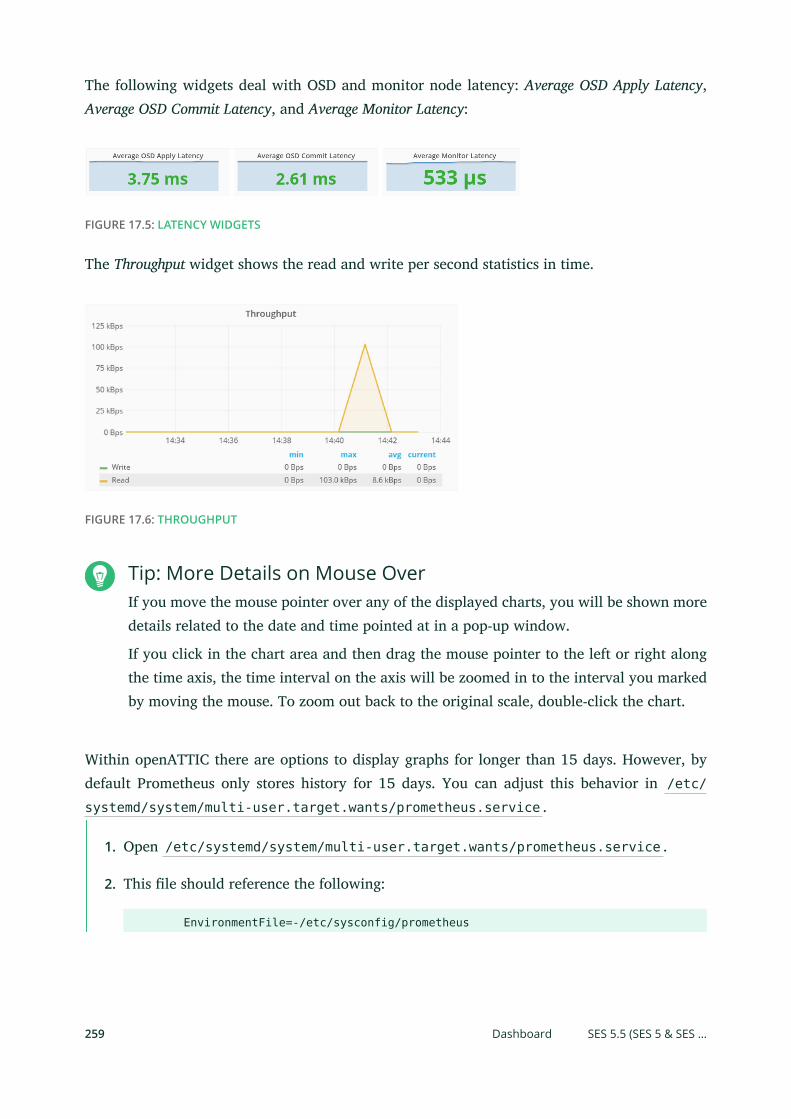
The following widgets deal with OSD and monitor node latency: Average OSD Apply Latency,Average OSD Commit Latency, and Average Monitor Latency:
FIGURE 17.5: LATENCY WIDGETS
The Throughput widget shows the read and write per second statistics in time.
FIGURE 17.6: THROUGHPUT
Tip: More Details on Mouse OverIf you move the mouse pointer over any of the displayed charts, you will be shown moredetails related to the date and time pointed at in a pop-up window.
If you click in the chart area and then drag the mouse pointer to the left or right alongthe time axis, the time interval on the axis will be zoomed in to the interval you markedby moving the mouse. To zoom out back to the original scale, double-click the chart.
Within openATTIC there are options to display graphs for longer than 15 days. However, bydefault Prometheus only stores history for 15 days. You can adjust this behavior in /etc/systemd/system/multi-user.target.wants/prometheus.service .
1. Open /etc/systemd/system/multi-user.target.wants/prometheus.service .
2. This le should reference the following:
EnvironmentFile=-/etc/sysconfig/prometheus
259 Dashboard SES 5.5 (SES 5 & SES …
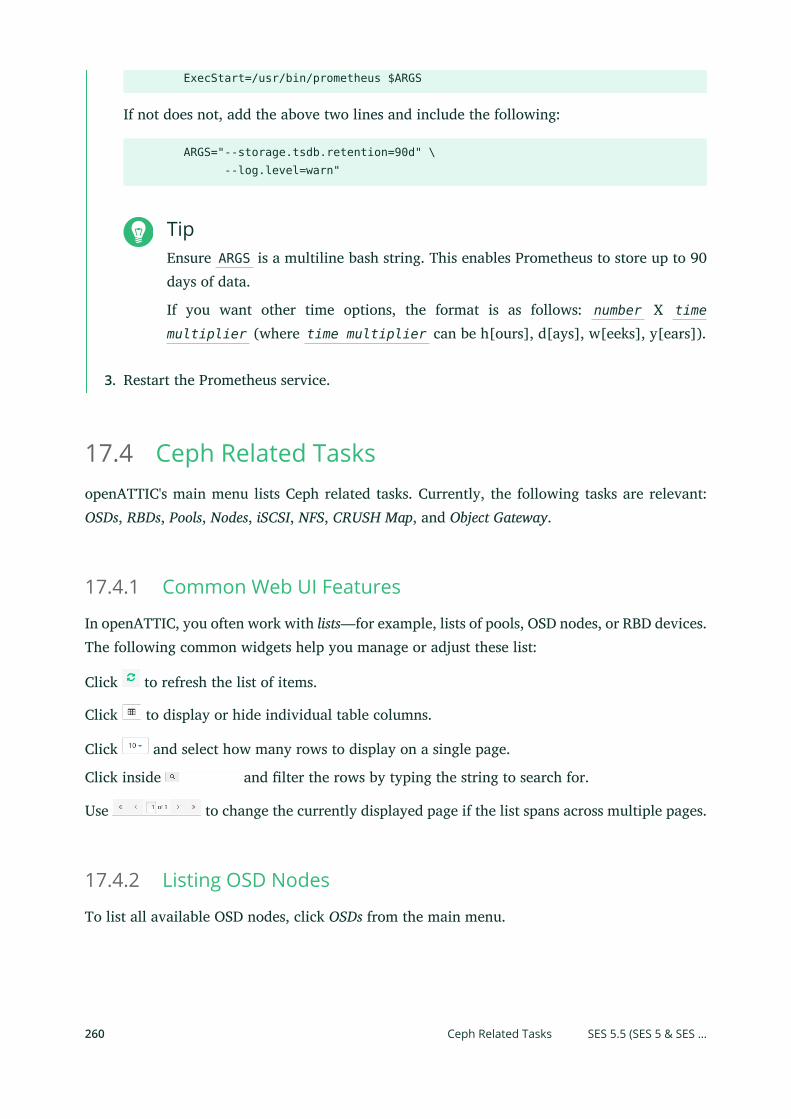
ExecStart=/usr/bin/prometheus $ARGS
If not does not, add the above two lines and include the following:
ARGS="--storage.tsdb.retention=90d" \ --log.level=warn"
TipEnsure ARGS is a multiline bash string. This enables Prometheus to store up to 90days of data.
If you want other time options, the format is as follows: number X time
multiplier (where time multiplier can be h[ours], d[ays], w[eeks], y[ears]).
3. Restart the Prometheus service.
17.4 Ceph Related TasksopenATTIC's main menu lists Ceph related tasks. Currently, the following tasks are relevant:OSDs, RBDs, Pools, Nodes, iSCSI, NFS, CRUSH Map, and Object Gateway.
17.4.1 Common Web UI Features
In openATTIC, you often work with lists—for example, lists of pools, OSD nodes, or RBD devices.The following common widgets help you manage or adjust these list:
Click to refresh the list of items.
Click to display or hide individual table columns.
Click and select how many rows to display on a single page.
Click inside and lter the rows by typing the string to search for.
Use to change the currently displayed page if the list spans across multiple pages.
17.4.2 Listing OSD Nodes
To list all available OSD nodes, click OSDs from the main menu.
260 Ceph Related Tasks SES 5.5 (SES 5 & SES …
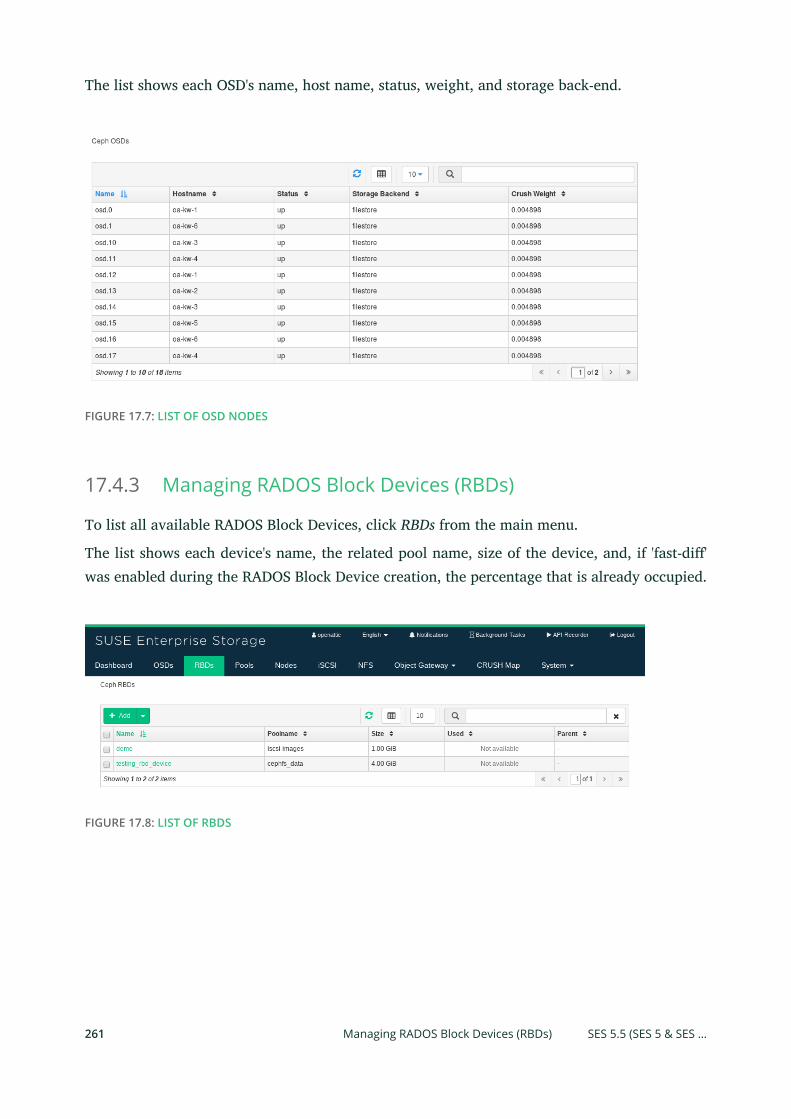
The list shows each OSD's name, host name, status, weight, and storage back-end.
FIGURE 17.7: LIST OF OSD NODES
17.4.3 Managing RADOS Block Devices (RBDs)
To list all available RADOS Block Devices, click RBDs from the main menu.
The list shows each device's name, the related pool name, size of the device, and, if 'fast-di'was enabled during the RADOS Block Device creation, the percentage that is already occupied.
FIGURE 17.8: LIST OF RBDS
261 Managing RADOS Block Devices (RBDs) SES 5.5 (SES 5 & SES …
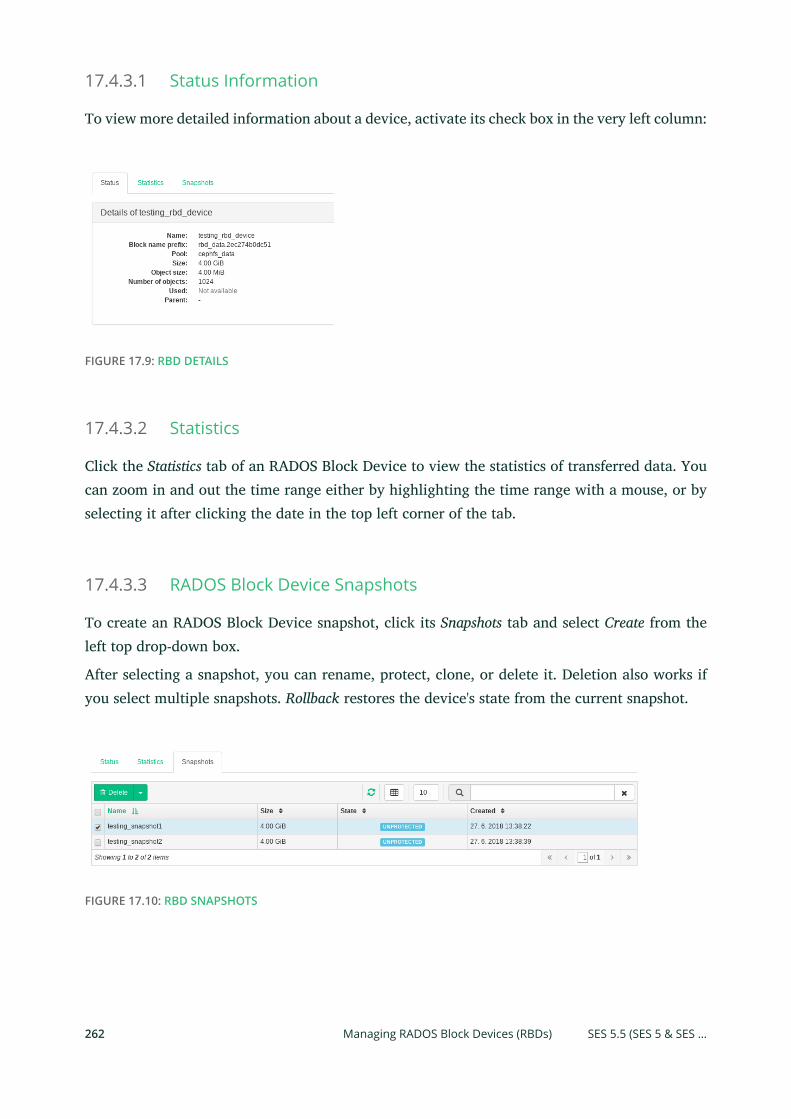
17.4.3.1 Status Information
To view more detailed information about a device, activate its check box in the very left column:
FIGURE 17.9: RBD DETAILS
17.4.3.2 Statistics
Click the Statistics tab of an RADOS Block Device to view the statistics of transferred data. Youcan zoom in and out the time range either by highlighting the time range with a mouse, or byselecting it after clicking the date in the top left corner of the tab.
17.4.3.3 RADOS Block Device Snapshots
To create an RADOS Block Device snapshot, click its Snapshots tab and select Create from theleft top drop-down box.
After selecting a snapshot, you can rename, protect, clone, or delete it. Deletion also works ifyou select multiple snapshots. Rollback restores the device's state from the current snapshot.
FIGURE 17.10: RBD SNAPSHOTS
262 Managing RADOS Block Devices (RBDs) SES 5.5 (SES 5 & SES …
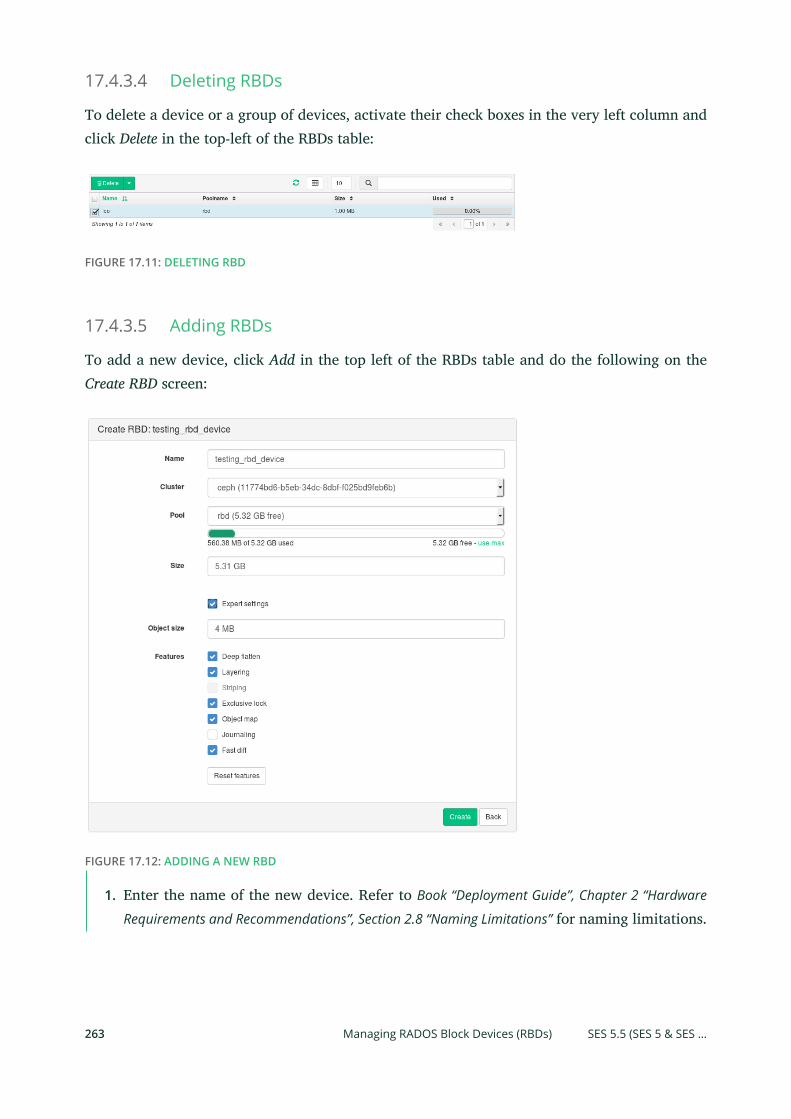
17.4.3.4 Deleting RBDs
To delete a device or a group of devices, activate their check boxes in the very left column andclick Delete in the top-left of the RBDs table:
FIGURE 17.11: DELETING RBD
17.4.3.5 Adding RBDs
To add a new device, click Add in the top left of the RBDs table and do the following on theCreate RBD screen:
FIGURE 17.12: ADDING A NEW RBD
1. Enter the name of the new device. Refer to Book “Deployment Guide”, Chapter 2 “Hardware
Requirements and Recommendations”, Section 2.8 “Naming Limitations” for naming limitations.
263 Managing RADOS Block Devices (RBDs) SES 5.5 (SES 5 & SES …
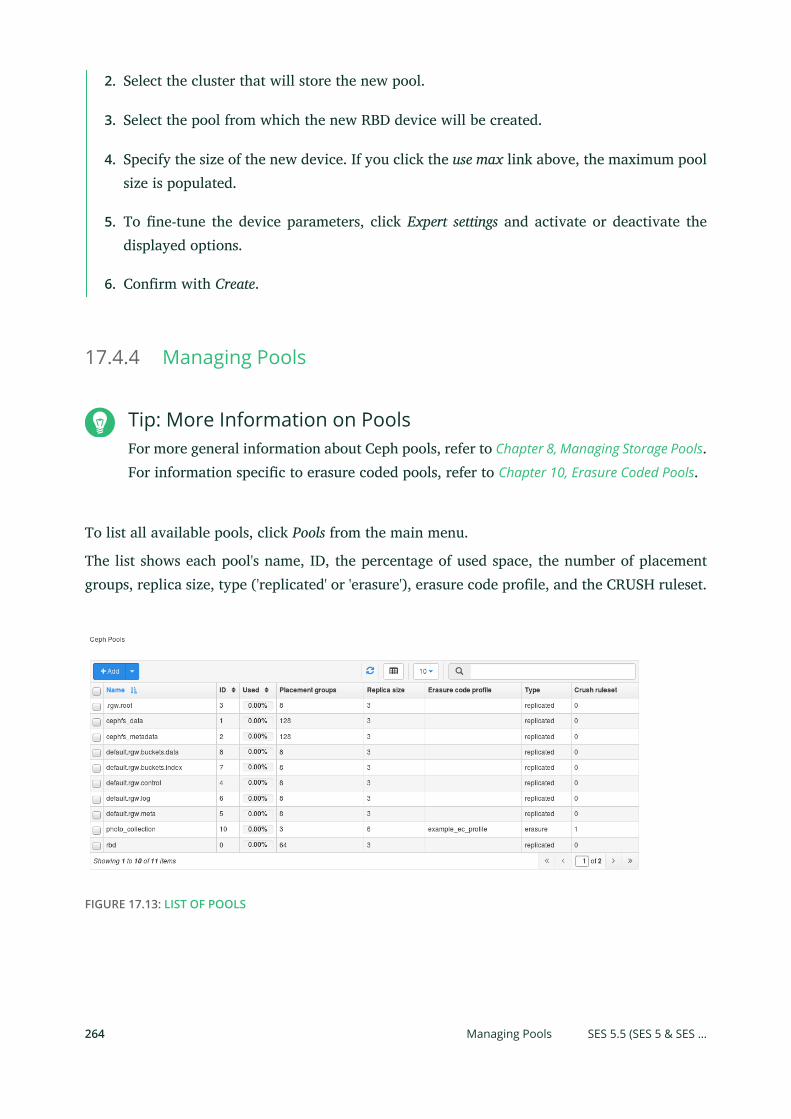
2. Select the cluster that will store the new pool.
3. Select the pool from which the new RBD device will be created.
4. Specify the size of the new device. If you click the use max link above, the maximum poolsize is populated.
5. To ne-tune the device parameters, click Expert settings and activate or deactivate thedisplayed options.
6. Conrm with Create.
17.4.4 Managing Pools
Tip: More Information on PoolsFor more general information about Ceph pools, refer to Chapter 8, Managing Storage Pools.For information specic to erasure coded pools, refer to Chapter 10, Erasure Coded Pools.
To list all available pools, click Pools from the main menu.
The list shows each pool's name, ID, the percentage of used space, the number of placementgroups, replica size, type ('replicated' or 'erasure'), erasure code prole, and the CRUSH ruleset.
FIGURE 17.13: LIST OF POOLS
264 Managing Pools SES 5.5 (SES 5 & SES …
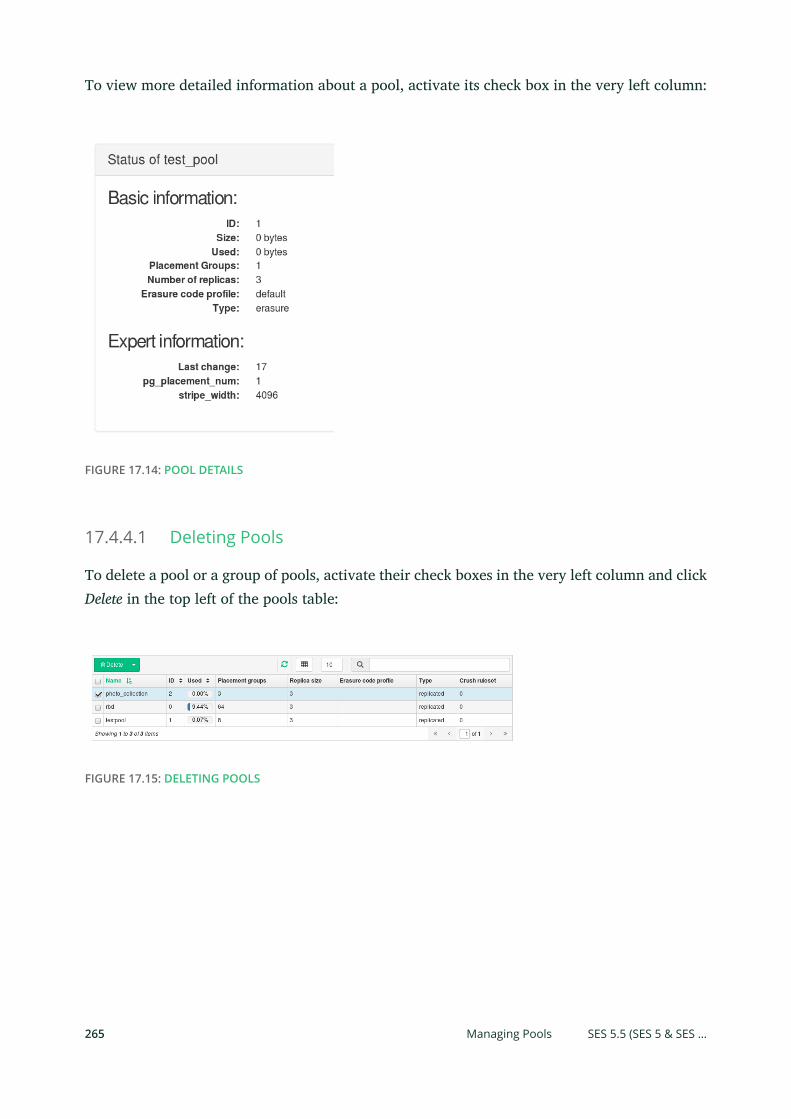
To view more detailed information about a pool, activate its check box in the very left column:
FIGURE 17.14: POOL DETAILS
17.4.4.1 Deleting Pools
To delete a pool or a group of pools, activate their check boxes in the very left column and clickDelete in the top left of the pools table:
FIGURE 17.15: DELETING POOLS
265 Managing Pools SES 5.5 (SES 5 & SES …
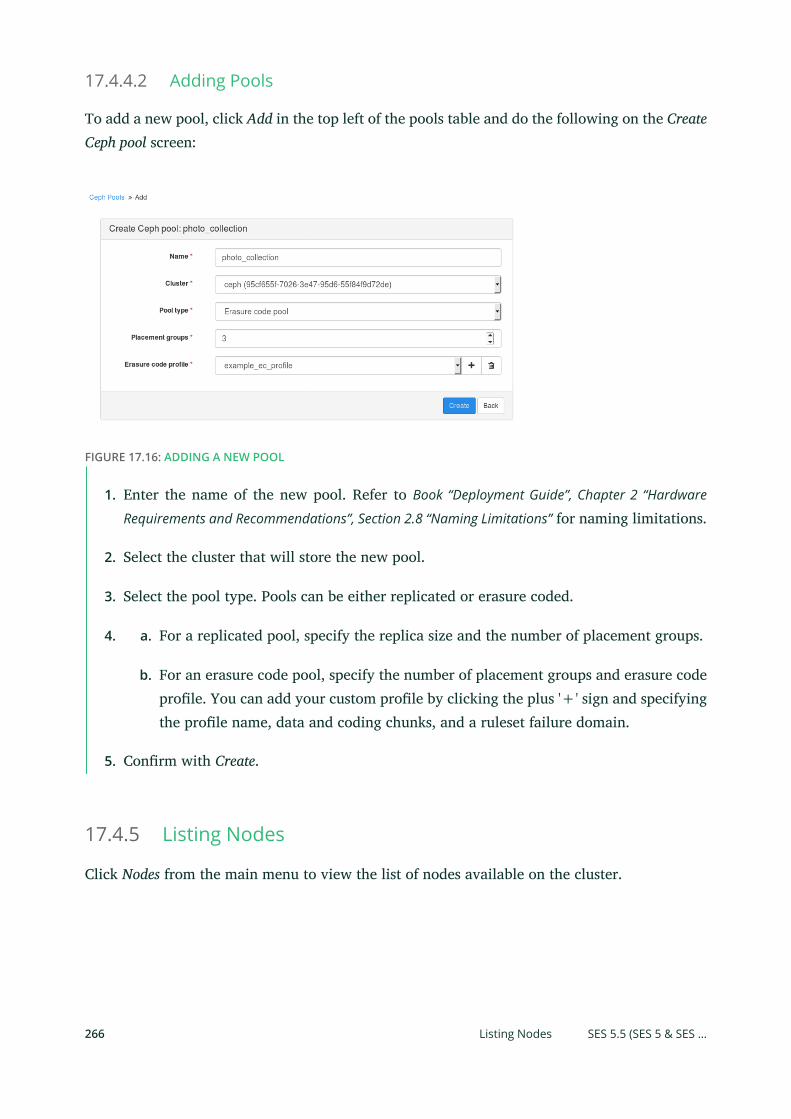
17.4.4.2 Adding Pools
To add a new pool, click Add in the top left of the pools table and do the following on the CreateCeph pool screen:
FIGURE 17.16: ADDING A NEW POOL
1. Enter the name of the new pool. Refer to Book “Deployment Guide”, Chapter 2 “Hardware
Requirements and Recommendations”, Section 2.8 “Naming Limitations” for naming limitations.
2. Select the cluster that will store the new pool.
3. Select the pool type. Pools can be either replicated or erasure coded.
4. a. For a replicated pool, specify the replica size and the number of placement groups.
b. For an erasure code pool, specify the number of placement groups and erasure codeprole. You can add your custom prole by clicking the plus '+' sign and specifyingthe prole name, data and coding chunks, and a ruleset failure domain.
5. Conrm with Create.
17.4.5 Listing Nodes
Click Nodes from the main menu to view the list of nodes available on the cluster.
266 Listing Nodes SES 5.5 (SES 5 & SES …
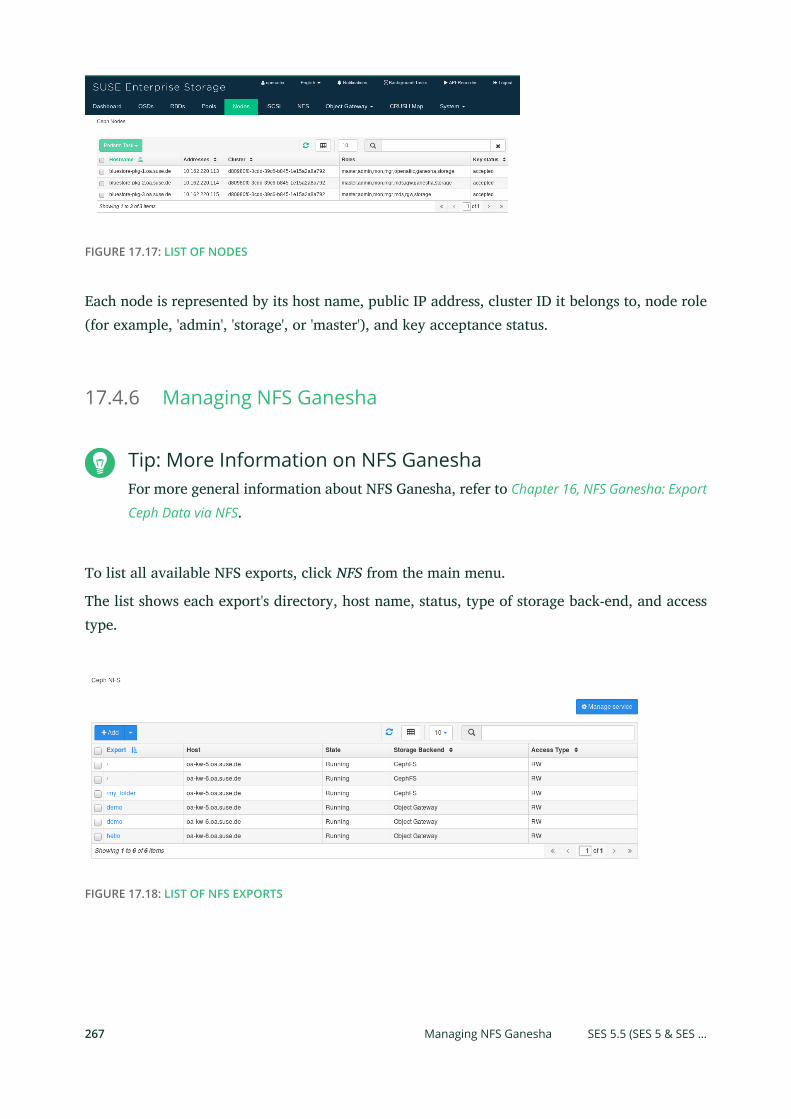
FIGURE 17.17: LIST OF NODES
Each node is represented by its host name, public IP address, cluster ID it belongs to, node role(for example, 'admin', 'storage', or 'master'), and key acceptance status.
17.4.6 Managing NFS Ganesha
Tip: More Information on NFS GaneshaFor more general information about NFS Ganesha, refer to Chapter 16, NFS Ganesha: Export
Ceph Data via NFS.
To list all available NFS exports, click NFS from the main menu.
The list shows each export's directory, host name, status, type of storage back-end, and accesstype.
FIGURE 17.18: LIST OF NFS EXPORTS
267 Managing NFS Ganesha SES 5.5 (SES 5 & SES …
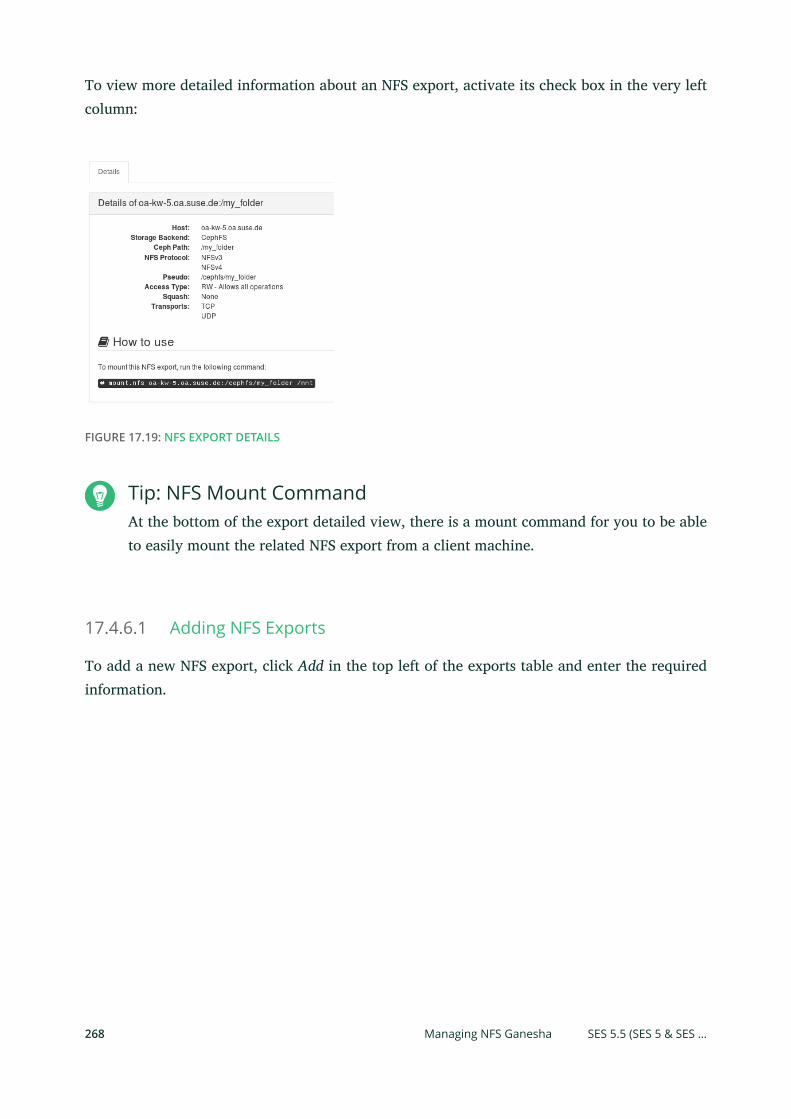
To view more detailed information about an NFS export, activate its check box in the very leftcolumn:
FIGURE 17.19: NFS EXPORT DETAILS
Tip: NFS Mount CommandAt the bottom of the export detailed view, there is a mount command for you to be ableto easily mount the related NFS export from a client machine.
17.4.6.1 Adding NFS Exports
To add a new NFS export, click Add in the top left of the exports table and enter the requiredinformation.
268 Managing NFS Ganesha SES 5.5 (SES 5 & SES …
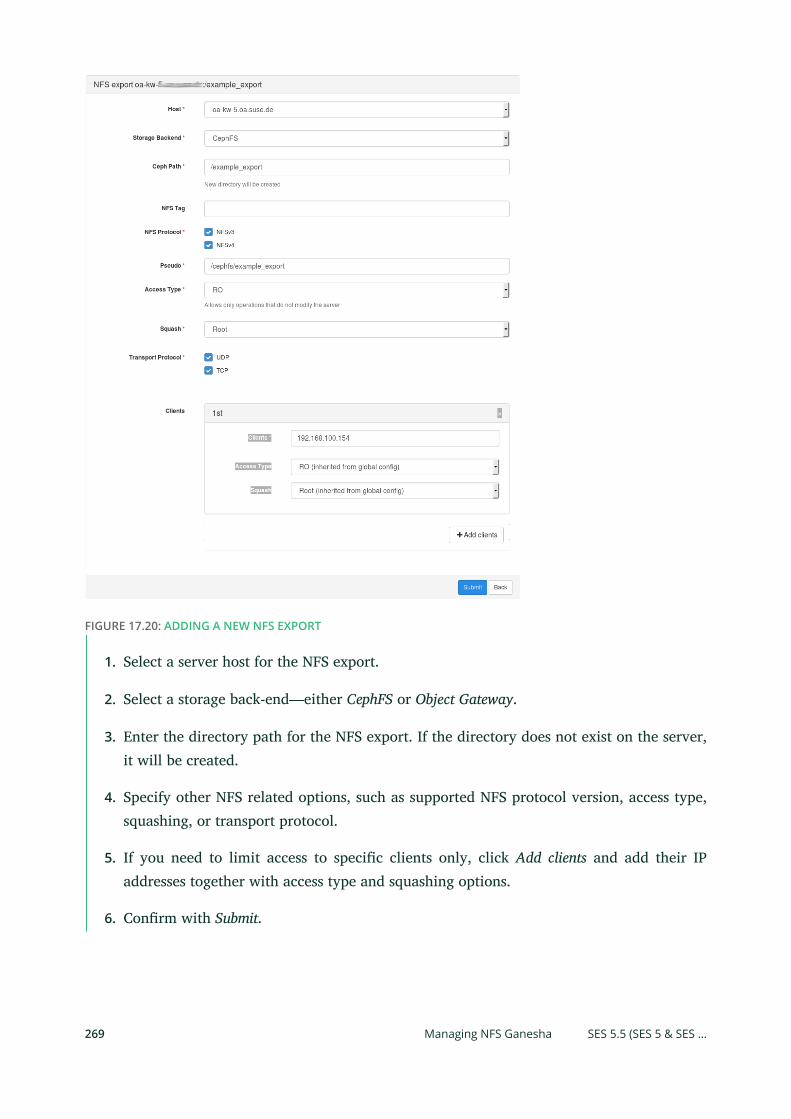
FIGURE 17.20: ADDING A NEW NFS EXPORT
1. Select a server host for the NFS export.
2. Select a storage back-end—either CephFS or Object Gateway.
3. Enter the directory path for the NFS export. If the directory does not exist on the server,it will be created.
4. Specify other NFS related options, such as supported NFS protocol version, access type,squashing, or transport protocol.
5. If you need to limit access to specic clients only, click Add clients and add their IPaddresses together with access type and squashing options.
6. Conrm with Submit.
269 Managing NFS Ganesha SES 5.5 (SES 5 & SES …
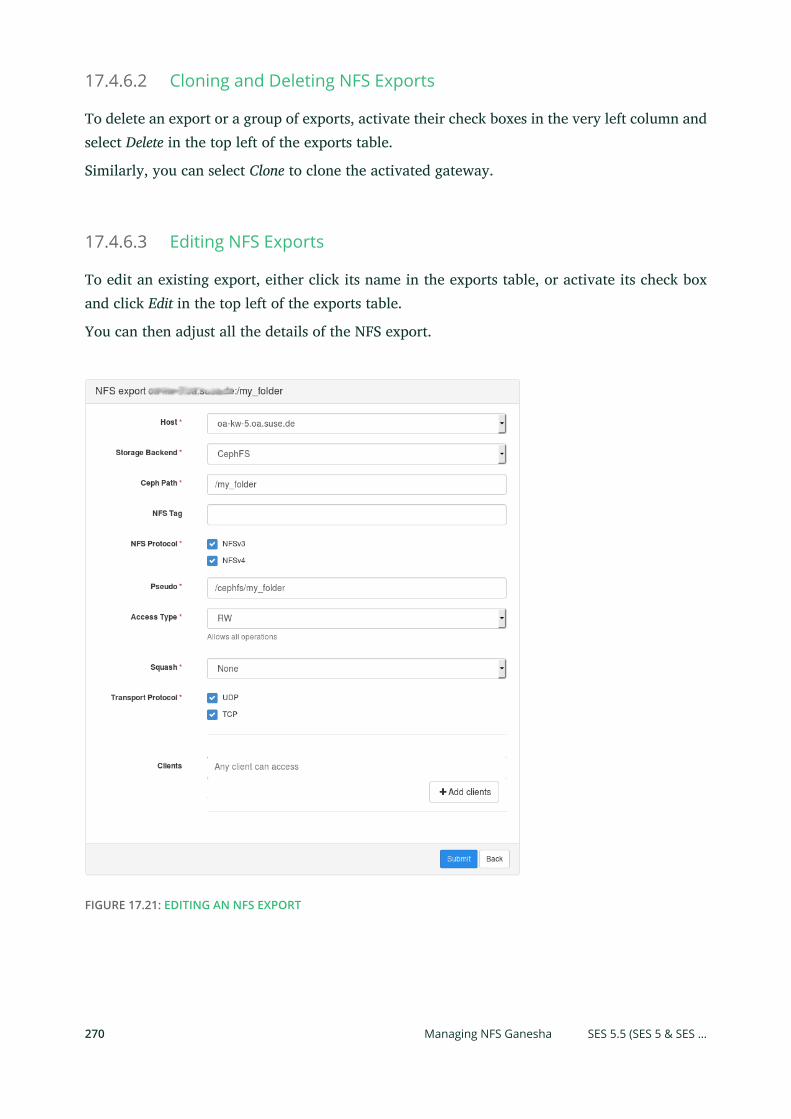
17.4.6.2 Cloning and Deleting NFS Exports
To delete an export or a group of exports, activate their check boxes in the very left column andselect Delete in the top left of the exports table.
Similarly, you can select Clone to clone the activated gateway.
17.4.6.3 Editing NFS Exports
To edit an existing export, either click its name in the exports table, or activate its check boxand click Edit in the top left of the exports table.
You can then adjust all the details of the NFS export.
FIGURE 17.21: EDITING AN NFS EXPORT
270 Managing NFS Ganesha SES 5.5 (SES 5 & SES …
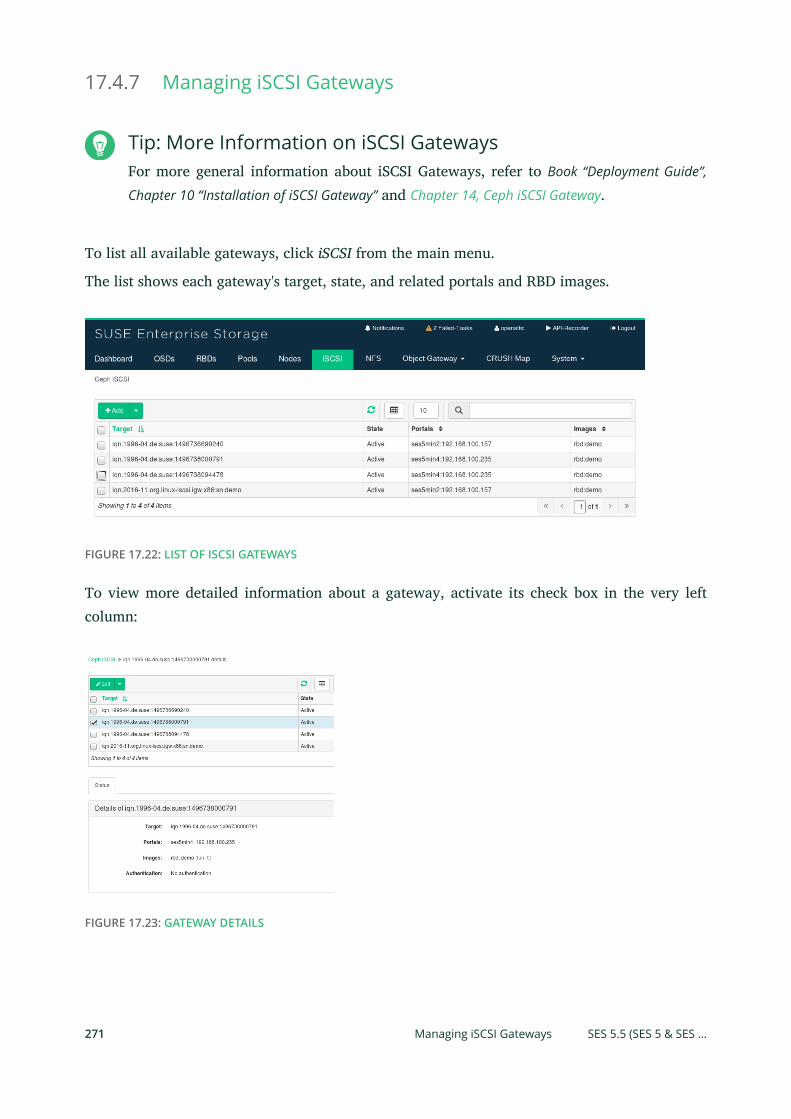
17.4.7 Managing iSCSI Gateways
Tip: More Information on iSCSI GatewaysFor more general information about iSCSI Gateways, refer to Book “Deployment Guide”,
Chapter 10 “Installation of iSCSI Gateway” and Chapter 14, Ceph iSCSI Gateway.
To list all available gateways, click iSCSI from the main menu.
The list shows each gateway's target, state, and related portals and RBD images.
FIGURE 17.22: LIST OF ISCSI GATEWAYS
To view more detailed information about a gateway, activate its check box in the very leftcolumn:
FIGURE 17.23: GATEWAY DETAILS
271 Managing iSCSI Gateways SES 5.5 (SES 5 & SES …
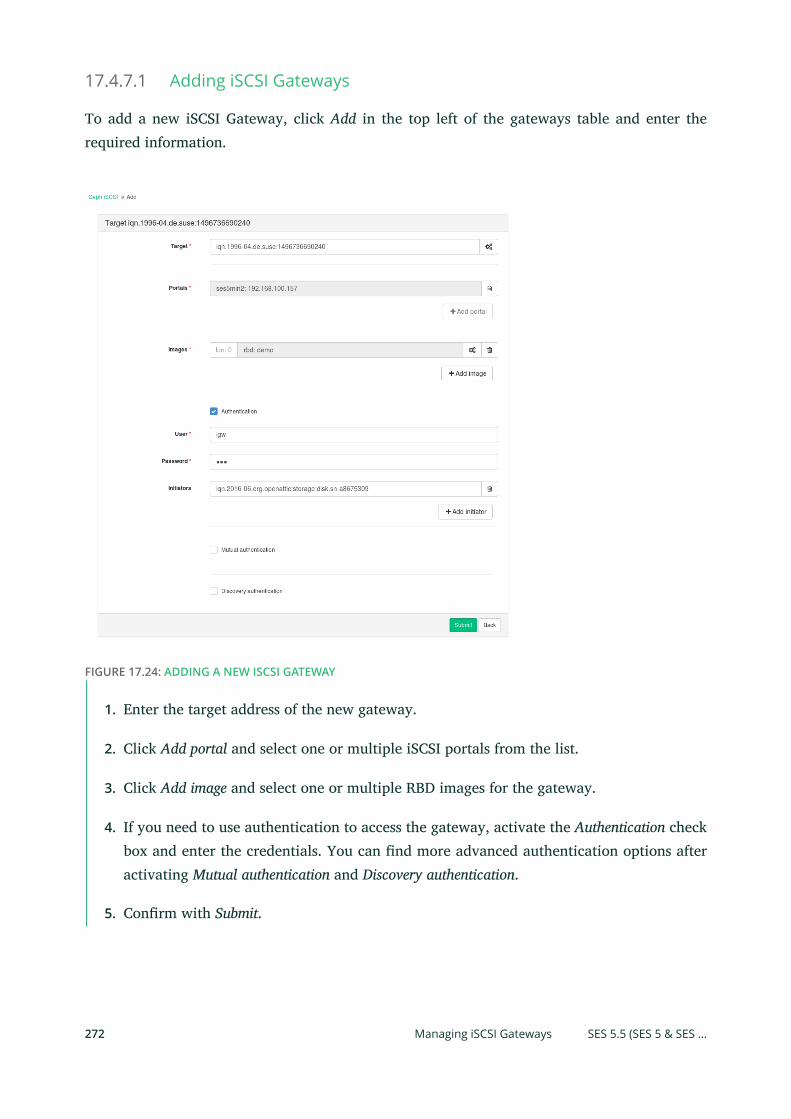
17.4.7.1 Adding iSCSI Gateways
To add a new iSCSI Gateway, click Add in the top left of the gateways table and enter therequired information.
FIGURE 17.24: ADDING A NEW ISCSI GATEWAY
1. Enter the target address of the new gateway.
2. Click Add portal and select one or multiple iSCSI portals from the list.
3. Click Add image and select one or multiple RBD images for the gateway.
4. If you need to use authentication to access the gateway, activate the Authentication checkbox and enter the credentials. You can nd more advanced authentication options afteractivating Mutual authentication and Discovery authentication.
5. Conrm with Submit.
272 Managing iSCSI Gateways SES 5.5 (SES 5 & SES …
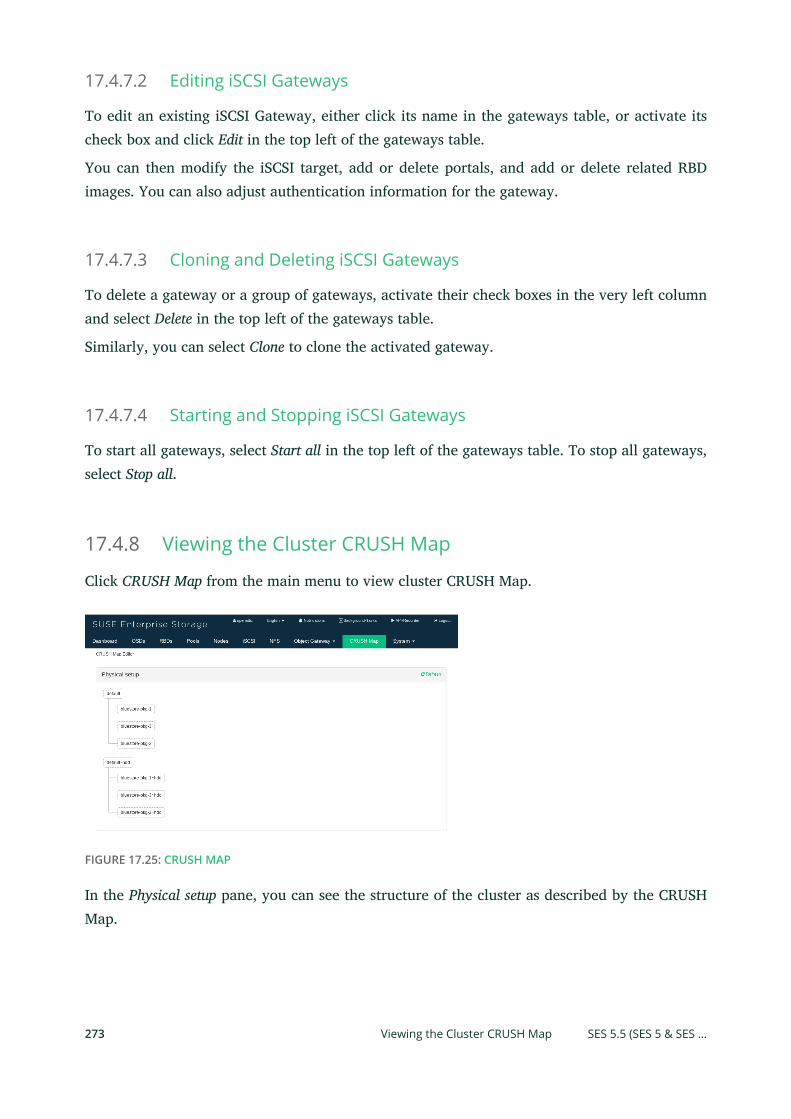
17.4.7.2 Editing iSCSI Gateways
To edit an existing iSCSI Gateway, either click its name in the gateways table, or activate itscheck box and click Edit in the top left of the gateways table.
You can then modify the iSCSI target, add or delete portals, and add or delete related RBDimages. You can also adjust authentication information for the gateway.
17.4.7.3 Cloning and Deleting iSCSI Gateways
To delete a gateway or a group of gateways, activate their check boxes in the very left columnand select Delete in the top left of the gateways table.
Similarly, you can select Clone to clone the activated gateway.
17.4.7.4 Starting and Stopping iSCSI Gateways
To start all gateways, select Start all in the top left of the gateways table. To stop all gateways,select Stop all.
17.4.8 Viewing the Cluster CRUSH Map
Click CRUSH Map from the main menu to view cluster CRUSH Map.
FIGURE 17.25: CRUSH MAP
In the Physical setup pane, you can see the structure of the cluster as described by the CRUSHMap.
273 Viewing the Cluster CRUSH Map SES 5.5 (SES 5 & SES …
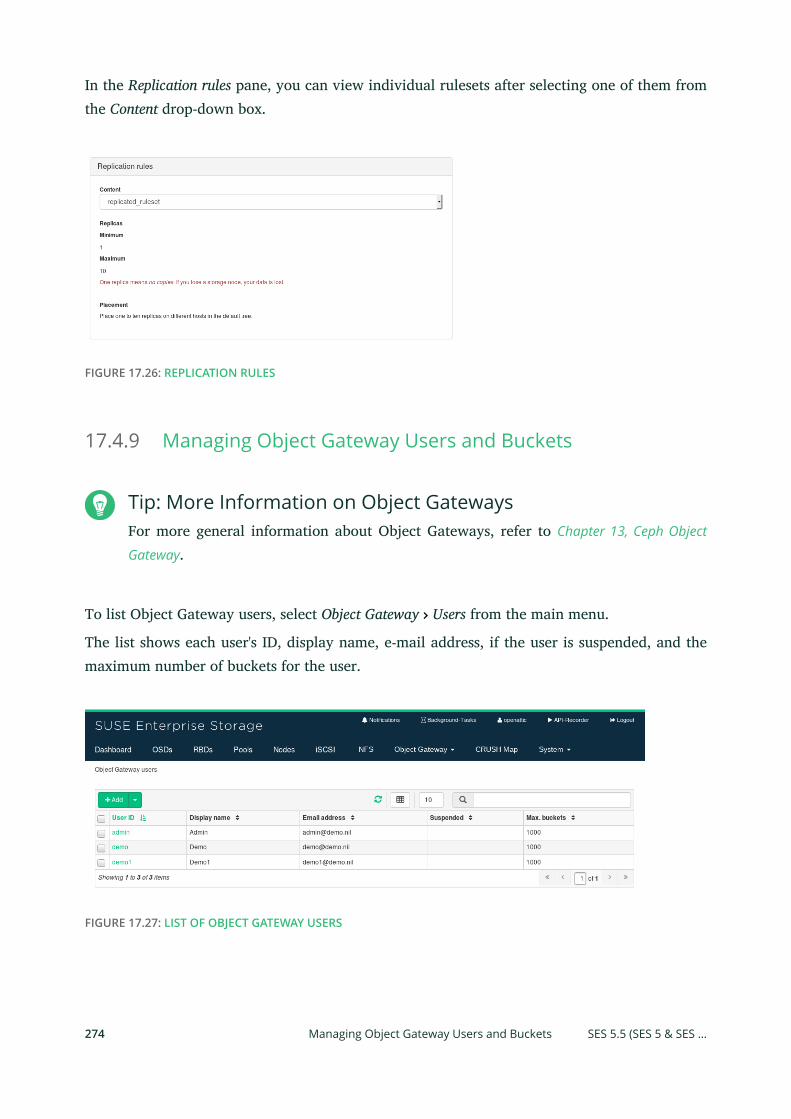
In the Replication rules pane, you can view individual rulesets after selecting one of them fromthe Content drop-down box.
FIGURE 17.26: REPLICATION RULES
17.4.9 Managing Object Gateway Users and Buckets
Tip: More Information on Object GatewaysFor more general information about Object Gateways, refer to Chapter 13, Ceph Object
Gateway.
To list Object Gateway users, select Object Gateway Users from the main menu.
The list shows each user's ID, display name, e-mail address, if the user is suspended, and themaximum number of buckets for the user.
FIGURE 17.27: LIST OF OBJECT GATEWAY USERS
274 Managing Object Gateway Users and Buckets SES 5.5 (SES 5 & SES …
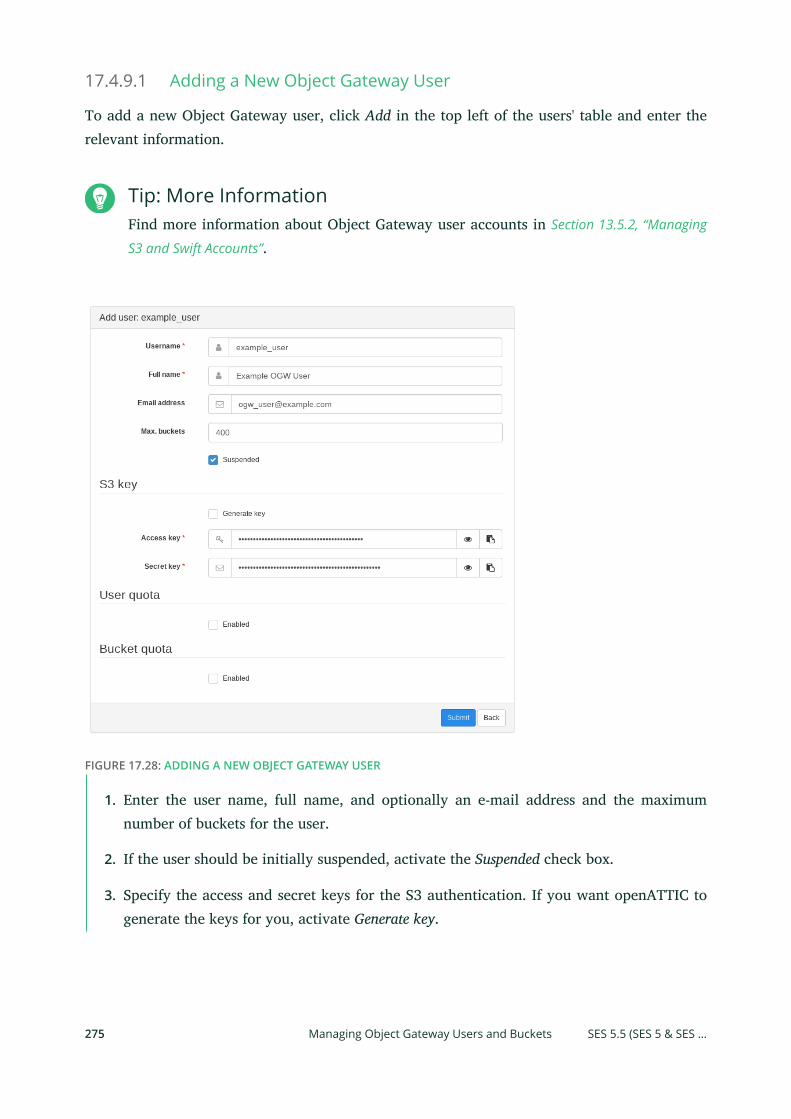
17.4.9.1 Adding a New Object Gateway User
To add a new Object Gateway user, click Add in the top left of the users' table and enter therelevant information.
Tip: More InformationFind more information about Object Gateway user accounts in Section 13.5.2, “Managing
S3 and Swift Accounts”.
FIGURE 17.28: ADDING A NEW OBJECT GATEWAY USER
1. Enter the user name, full name, and optionally an e-mail address and the maximumnumber of buckets for the user.
2. If the user should be initially suspended, activate the Suspended check box.
3. Specify the access and secret keys for the S3 authentication. If you want openATTIC togenerate the keys for you, activate Generate key.
275 Managing Object Gateway Users and Buckets SES 5.5 (SES 5 & SES …
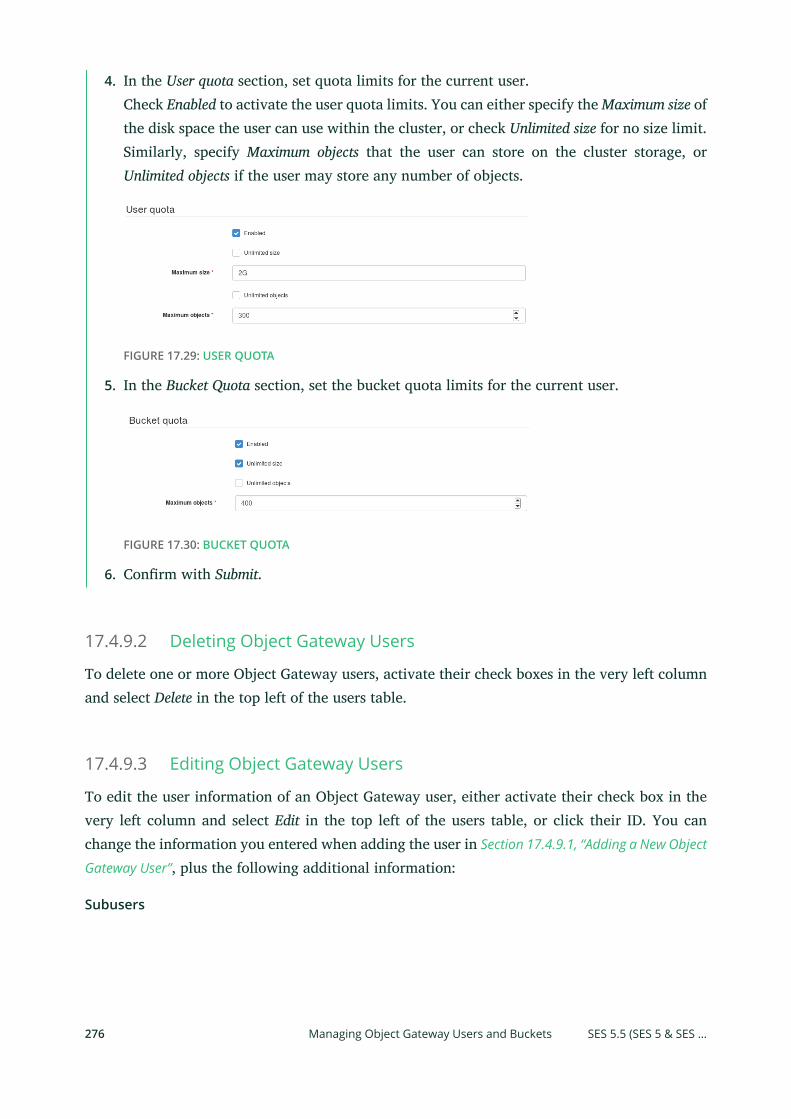
4. In the User quota section, set quota limits for the current user.Check Enabled to activate the user quota limits. You can either specify the Maximum size ofthe disk space the user can use within the cluster, or check Unlimited size for no size limit.Similarly, specify Maximum objects that the user can store on the cluster storage, orUnlimited objects if the user may store any number of objects.
FIGURE 17.29: USER QUOTA
5. In the Bucket Quota section, set the bucket quota limits for the current user.
FIGURE 17.30: BUCKET QUOTA
6. Conrm with Submit.
17.4.9.2 Deleting Object Gateway Users
To delete one or more Object Gateway users, activate their check boxes in the very left columnand select Delete in the top left of the users table.
17.4.9.3 Editing Object Gateway Users
To edit the user information of an Object Gateway user, either activate their check box in thevery left column and select Edit in the top left of the users table, or click their ID. You canchange the information you entered when adding the user in Section 17.4.9.1, “Adding a New Object
Gateway User”, plus the following additional information:
Subusers
276 Managing Object Gateway Users and Buckets SES 5.5 (SES 5 & SES …
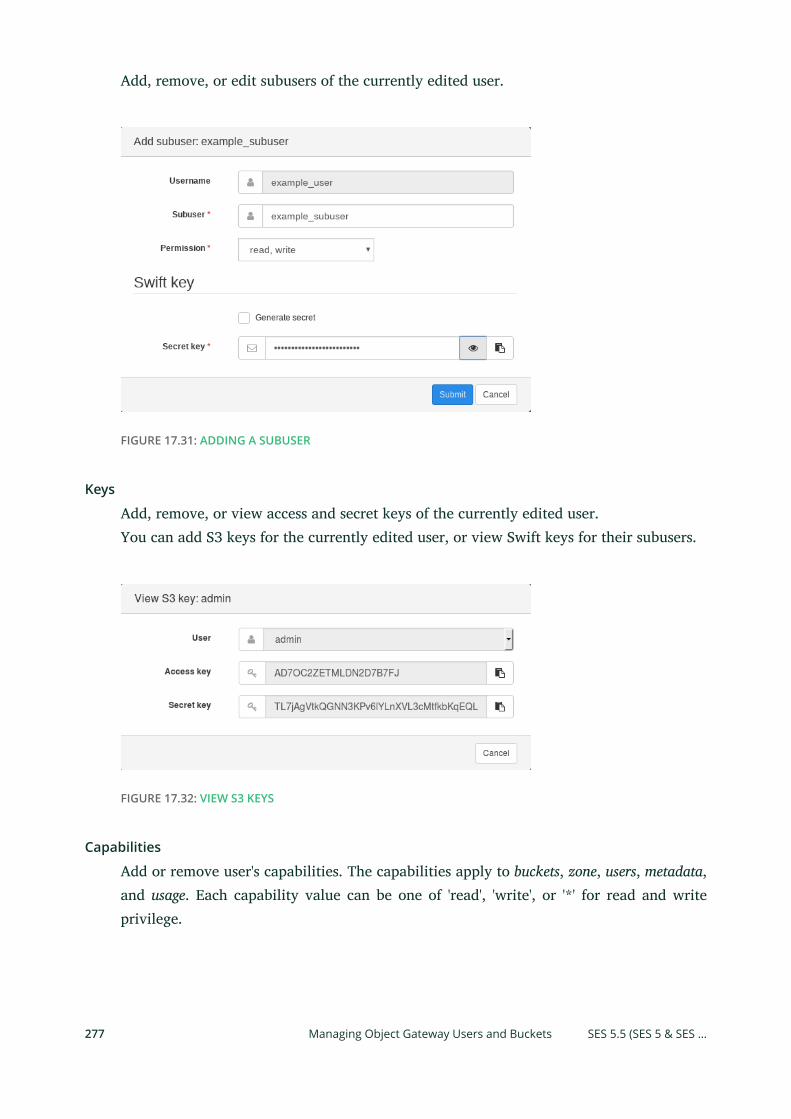
Add, remove, or edit subusers of the currently edited user.
FIGURE 17.31: ADDING A SUBUSER
Keys
Add, remove, or view access and secret keys of the currently edited user.You can add S3 keys for the currently edited user, or view Swift keys for their subusers.
FIGURE 17.32: VIEW S3 KEYS
Capabilities
Add or remove user's capabilities. The capabilities apply to buckets, zone, users, metadata,and usage. Each capability value can be one of 'read', 'write', or '*' for read and writeprivilege.
277 Managing Object Gateway Users and Buckets SES 5.5 (SES 5 & SES …
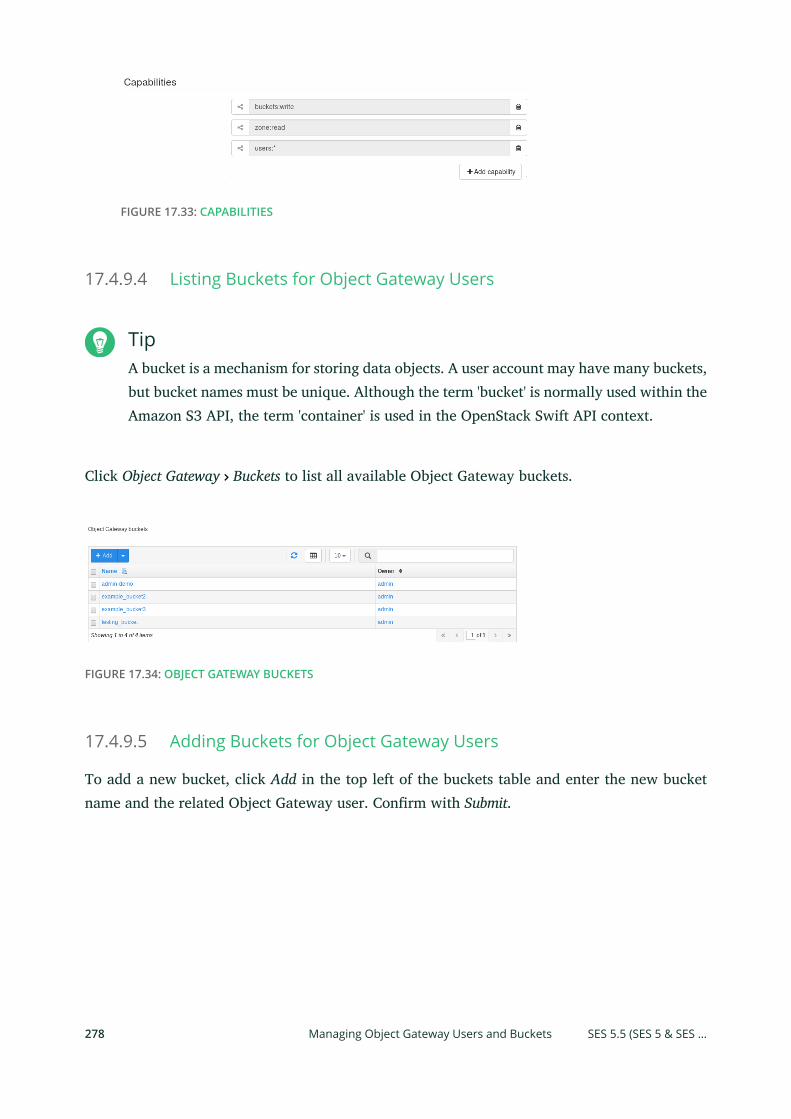
FIGURE 17.33: CAPABILITIES
17.4.9.4 Listing Buckets for Object Gateway Users
TipA bucket is a mechanism for storing data objects. A user account may have many buckets,but bucket names must be unique. Although the term 'bucket' is normally used within theAmazon S3 API, the term 'container' is used in the OpenStack Swift API context.
Click Object Gateway Buckets to list all available Object Gateway buckets.
FIGURE 17.34: OBJECT GATEWAY BUCKETS
17.4.9.5 Adding Buckets for Object Gateway Users
To add a new bucket, click Add in the top left of the buckets table and enter the new bucketname and the related Object Gateway user. Conrm with Submit.
278 Managing Object Gateway Users and Buckets SES 5.5 (SES 5 & SES …
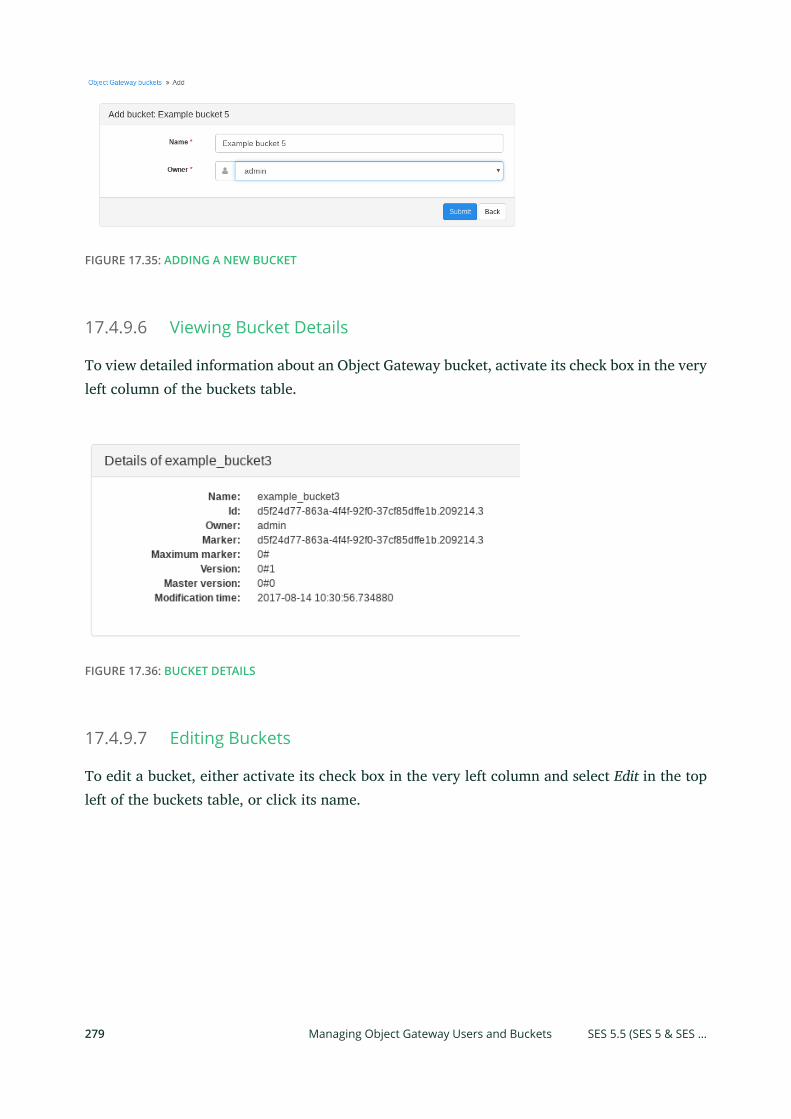
FIGURE 17.35: ADDING A NEW BUCKET
17.4.9.6 Viewing Bucket Details
To view detailed information about an Object Gateway bucket, activate its check box in the veryleft column of the buckets table.
FIGURE 17.36: BUCKET DETAILS
17.4.9.7 Editing Buckets
To edit a bucket, either activate its check box in the very left column and select Edit in the topleft of the buckets table, or click its name.
279 Managing Object Gateway Users and Buckets SES 5.5 (SES 5 & SES …
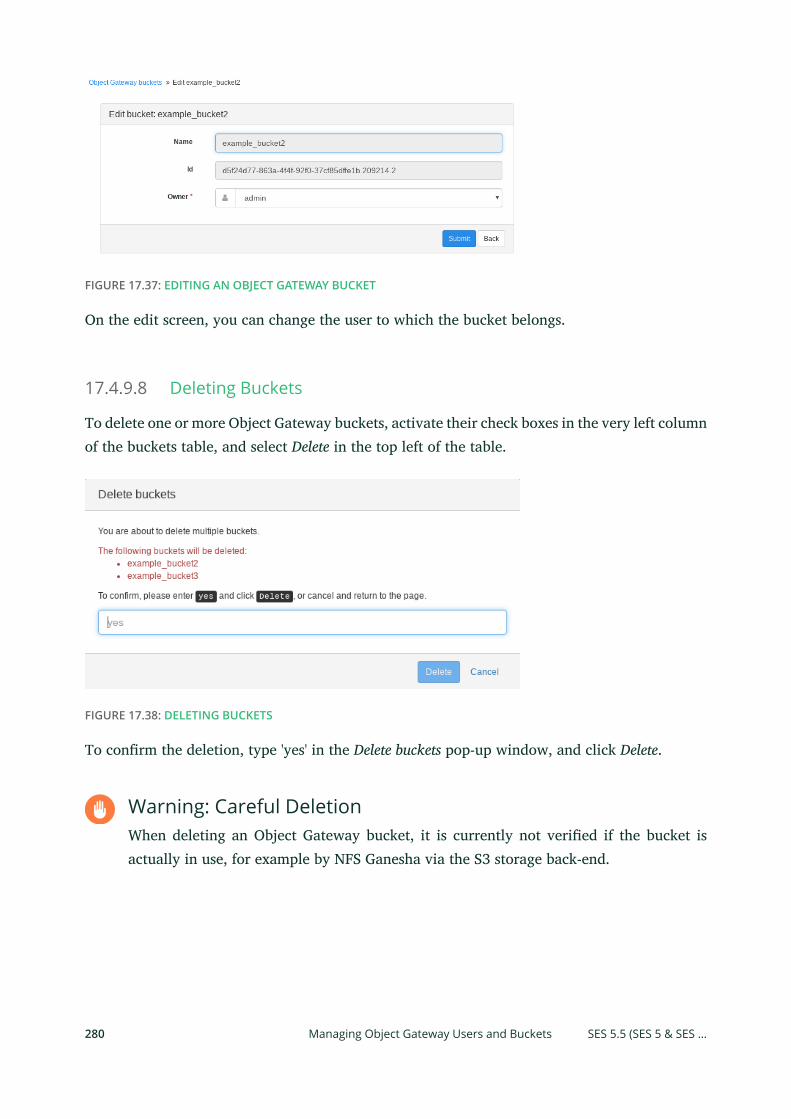
FIGURE 17.37: EDITING AN OBJECT GATEWAY BUCKET
On the edit screen, you can change the user to which the bucket belongs.
17.4.9.8 Deleting Buckets
To delete one or more Object Gateway buckets, activate their check boxes in the very left columnof the buckets table, and select Delete in the top left of the table.
FIGURE 17.38: DELETING BUCKETS
To conrm the deletion, type 'yes' in the Delete buckets pop-up window, and click Delete.
Warning: Careful DeletionWhen deleting an Object Gateway bucket, it is currently not veried if the bucket isactually in use, for example by NFS Ganesha via the S3 storage back-end.
280 Managing Object Gateway Users and Buckets SES 5.5 (SES 5 & SES …

V Integration with Virtualization Tools
18 Using libvirt with Ceph 282
19 Ceph as a Back-end for QEMU KVM Instance 288
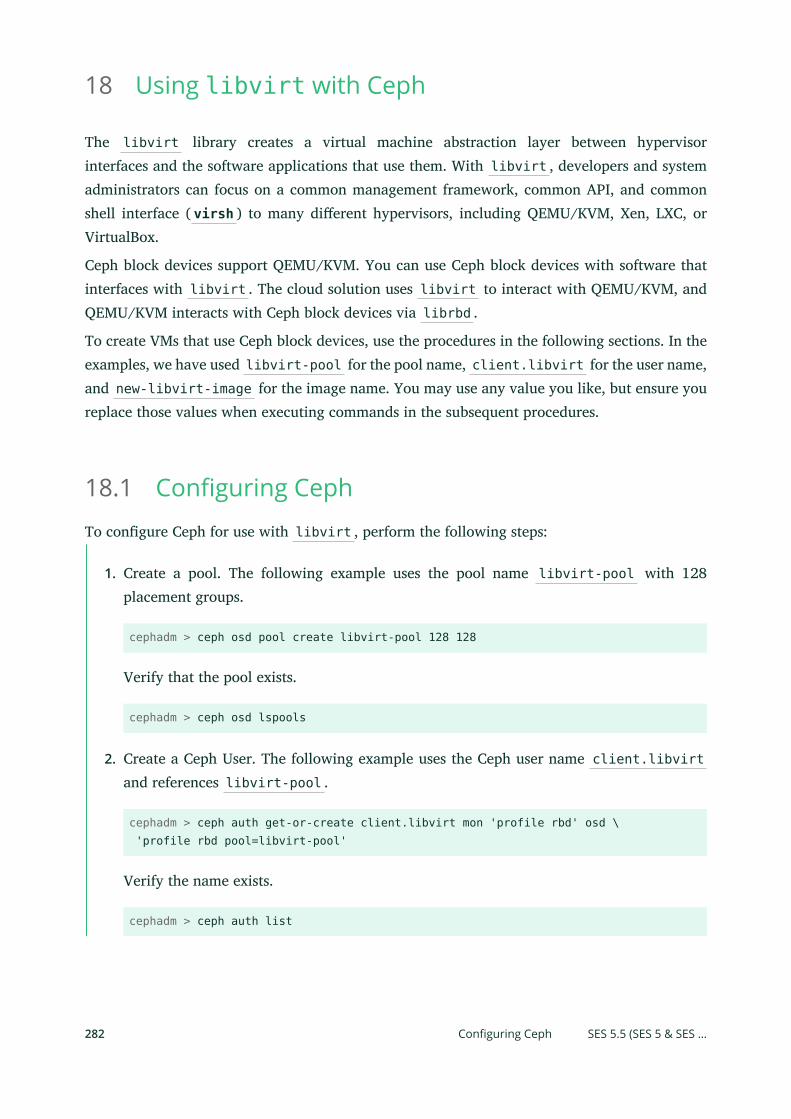
18 Using libvirt with Ceph
The libvirt library creates a virtual machine abstraction layer between hypervisorinterfaces and the software applications that use them. With libvirt , developers and systemadministrators can focus on a common management framework, common API, and commonshell interface ( virsh ) to many dierent hypervisors, including QEMU/KVM, Xen, LXC, orVirtualBox.
Ceph block devices support QEMU/KVM. You can use Ceph block devices with software thatinterfaces with libvirt . The cloud solution uses libvirt to interact with QEMU/KVM, andQEMU/KVM interacts with Ceph block devices via librbd .
To create VMs that use Ceph block devices, use the procedures in the following sections. In theexamples, we have used libvirt-pool for the pool name, client.libvirt for the user name,and new-libvirt-image for the image name. You may use any value you like, but ensure youreplace those values when executing commands in the subsequent procedures.
18.1 Configuring CephTo congure Ceph for use with libvirt , perform the following steps:
1. Create a pool. The following example uses the pool name libvirt-pool with 128placement groups.
cephadm > ceph osd pool create libvirt-pool 128 128
Verify that the pool exists.
cephadm > ceph osd lspools
2. Create a Ceph User. The following example uses the Ceph user name client.libvirtand references libvirt-pool .
cephadm > ceph auth get-or-create client.libvirt mon 'profile rbd' osd \ 'profile rbd pool=libvirt-pool'
Verify the name exists.
cephadm > ceph auth list
282 Configuring Ceph SES 5.5 (SES 5 & SES …
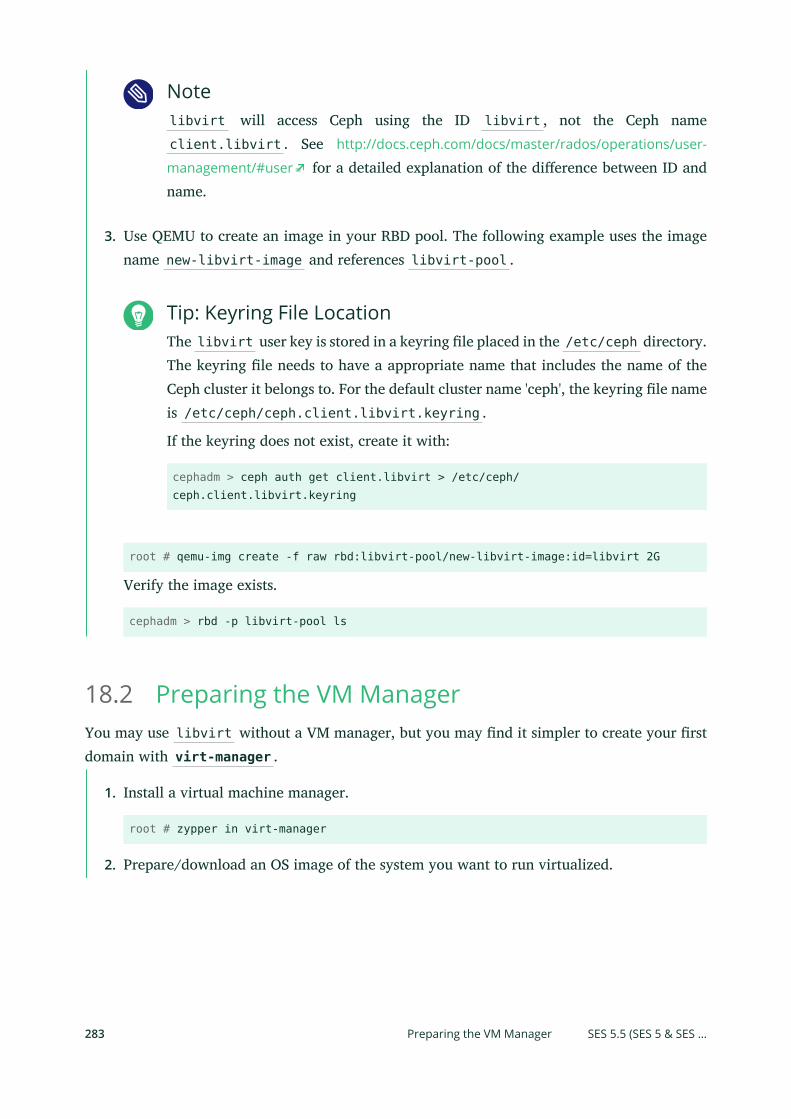
Notelibvirt will access Ceph using the ID libvirt , not the Ceph nameclient.libvirt . See http://docs.ceph.com/docs/master/rados/operations/user-
management/#user for a detailed explanation of the dierence between ID andname.
3. Use QEMU to create an image in your RBD pool. The following example uses the imagename new-libvirt-image and references libvirt-pool .
Tip: Keyring File LocationThe libvirt user key is stored in a keyring le placed in the /etc/ceph directory.The keyring le needs to have a appropriate name that includes the name of theCeph cluster it belongs to. For the default cluster name 'ceph', the keyring le nameis /etc/ceph/ceph.client.libvirt.keyring .
If the keyring does not exist, create it with:
cephadm > ceph auth get client.libvirt > /etc/ceph/ceph.client.libvirt.keyring
root # qemu-img create -f raw rbd:libvirt-pool/new-libvirt-image:id=libvirt 2G
Verify the image exists.
cephadm > rbd -p libvirt-pool ls
18.2 Preparing the VM ManagerYou may use libvirt without a VM manager, but you may nd it simpler to create your rstdomain with virt-manager .
1. Install a virtual machine manager.
root # zypper in virt-manager
2. Prepare/download an OS image of the system you want to run virtualized.
283 Preparing the VM Manager SES 5.5 (SES 5 & SES …
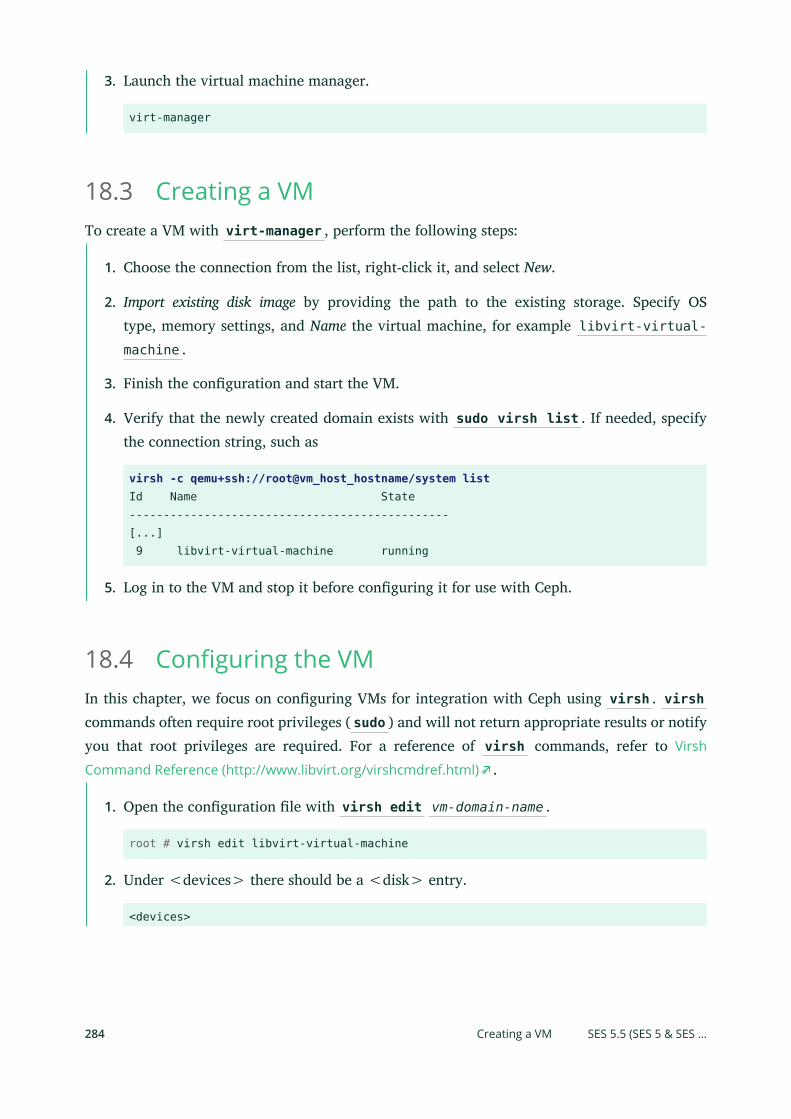
3. Launch the virtual machine manager.
virt-manager
18.3 Creating a VMTo create a VM with virt-manager , perform the following steps:
1. Choose the connection from the list, right-click it, and select New.
2. Import existing disk image by providing the path to the existing storage. Specify OStype, memory settings, and Name the virtual machine, for example libvirt-virtual-machine .
3. Finish the conguration and start the VM.
4. Verify that the newly created domain exists with sudo virsh list . If needed, specifythe connection string, such as
virsh -c qemu+ssh://root@vm_host_hostname/system listId Name State-----------------------------------------------[...] 9 libvirt-virtual-machine running
5. Log in to the VM and stop it before conguring it for use with Ceph.
18.4 Configuring the VMIn this chapter, we focus on conguring VMs for integration with Ceph using virsh . virshcommands often require root privileges ( sudo ) and will not return appropriate results or notifyyou that root privileges are required. For a reference of virsh commands, refer to Virsh
Command Reference (http://www.libvirt.org/virshcmdref.html) .
1. Open the conguration le with virsh edit vm-domain-name .
root # virsh edit libvirt-virtual-machine
2. Under <devices> there should be a <disk> entry.
<devices>
284 Creating a VM SES 5.5 (SES 5 & SES …
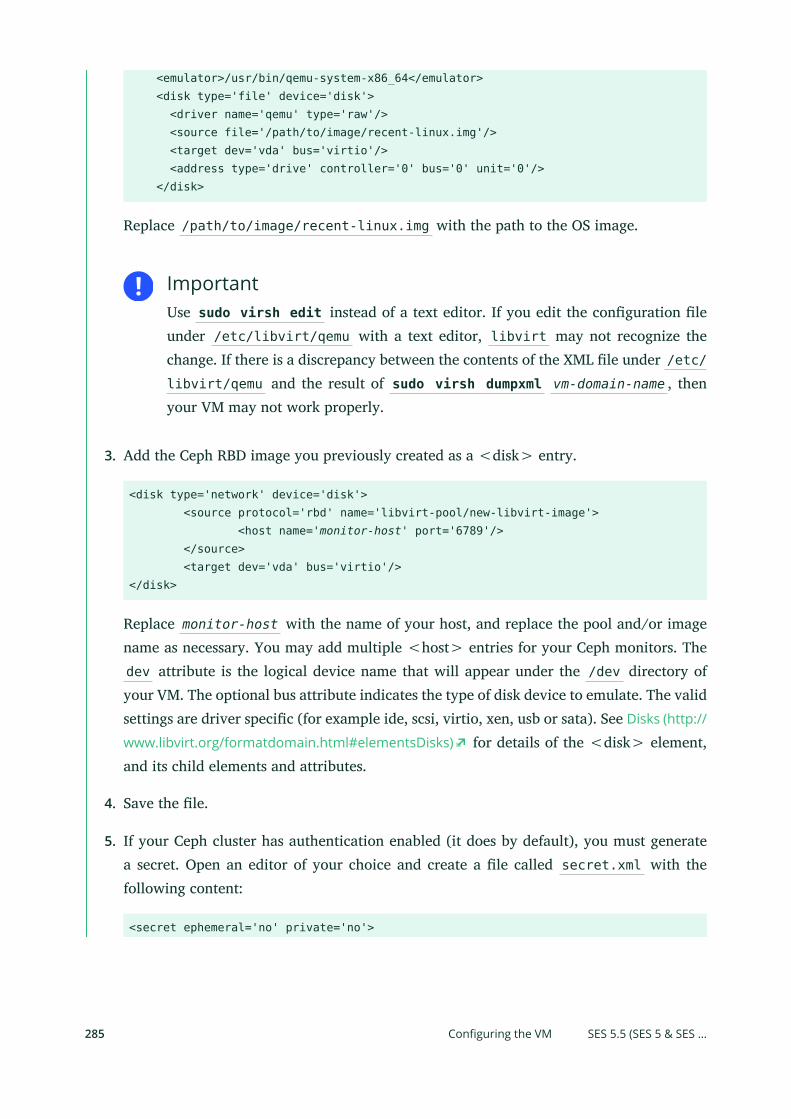
<emulator>/usr/bin/qemu-system-x86_64</emulator> <disk type='file' device='disk'> <driver name='qemu' type='raw'/> <source file='/path/to/image/recent-linux.img'/> <target dev='vda' bus='virtio'/> <address type='drive' controller='0' bus='0' unit='0'/> </disk>
Replace /path/to/image/recent-linux.img with the path to the OS image.
ImportantUse sudo virsh edit instead of a text editor. If you edit the conguration leunder /etc/libvirt/qemu with a text editor, libvirt may not recognize thechange. If there is a discrepancy between the contents of the XML le under /etc/libvirt/qemu and the result of sudo virsh dumpxml vm-domain-name , thenyour VM may not work properly.
3. Add the Ceph RBD image you previously created as a <disk> entry.
<disk type='network' device='disk'> <source protocol='rbd' name='libvirt-pool/new-libvirt-image'> <host name='monitor-host' port='6789'/> </source> <target dev='vda' bus='virtio'/></disk>
Replace monitor-host with the name of your host, and replace the pool and/or imagename as necessary. You may add multiple <host> entries for your Ceph monitors. Thedev attribute is the logical device name that will appear under the /dev directory ofyour VM. The optional bus attribute indicates the type of disk device to emulate. The validsettings are driver specic (for example ide, scsi, virtio, xen, usb or sata). See Disks (http://
www.libvirt.org/formatdomain.html#elementsDisks) for details of the <disk> element,and its child elements and attributes.
4. Save the le.
5. If your Ceph cluster has authentication enabled (it does by default), you must generatea secret. Open an editor of your choice and create a le called secret.xml with thefollowing content:
<secret ephemeral='no' private='no'>
285 Configuring the VM SES 5.5 (SES 5 & SES …
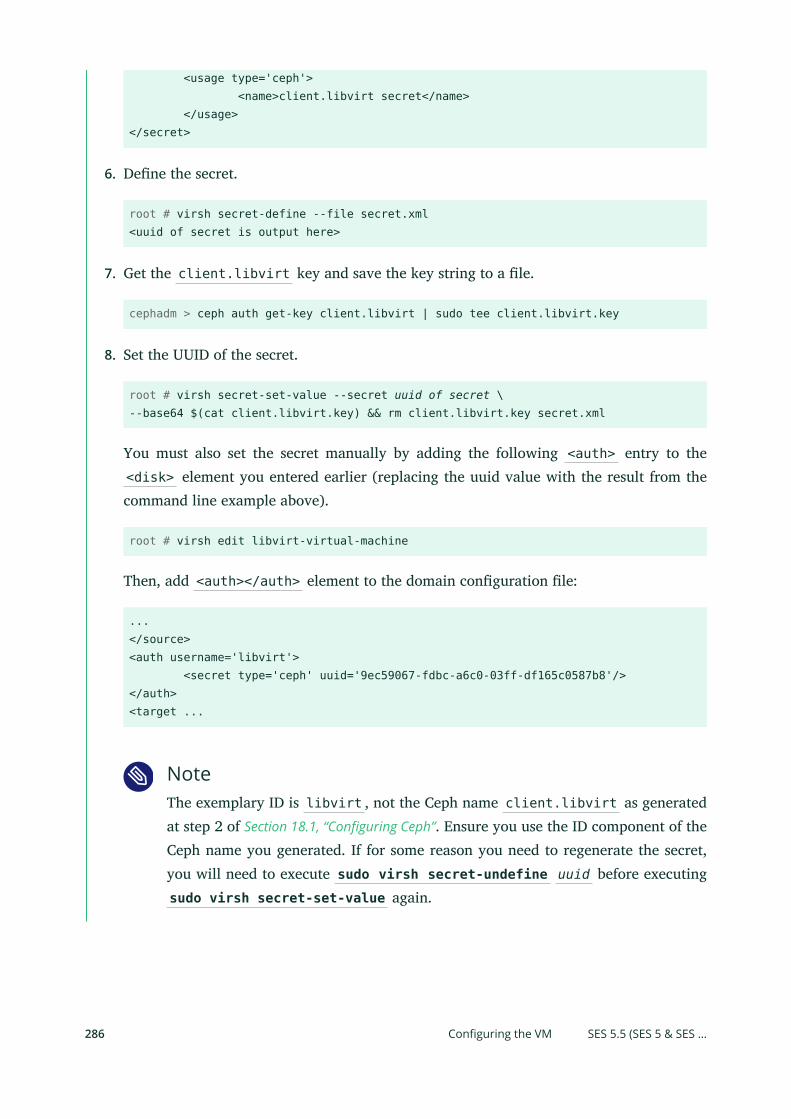
<usage type='ceph'> <name>client.libvirt secret</name> </usage></secret>
6. Dene the secret.
root # virsh secret-define --file secret.xml<uuid of secret is output here>
7. Get the client.libvirt key and save the key string to a le.
cephadm > ceph auth get-key client.libvirt | sudo tee client.libvirt.key
8. Set the UUID of the secret.
root # virsh secret-set-value --secret uuid of secret \--base64 $(cat client.libvirt.key) && rm client.libvirt.key secret.xml
You must also set the secret manually by adding the following <auth> entry to the<disk> element you entered earlier (replacing the uuid value with the result from thecommand line example above).
root # virsh edit libvirt-virtual-machine
Then, add <auth></auth> element to the domain conguration le:
...</source><auth username='libvirt'> <secret type='ceph' uuid='9ec59067-fdbc-a6c0-03ff-df165c0587b8'/></auth><target ...
NoteThe exemplary ID is libvirt , not the Ceph name client.libvirt as generatedat step 2 of Section 18.1, “Configuring Ceph”. Ensure you use the ID component of theCeph name you generated. If for some reason you need to regenerate the secret,you will need to execute sudo virsh secret-undefine uuid before executingsudo virsh secret-set-value again.
286 Configuring the VM SES 5.5 (SES 5 & SES …
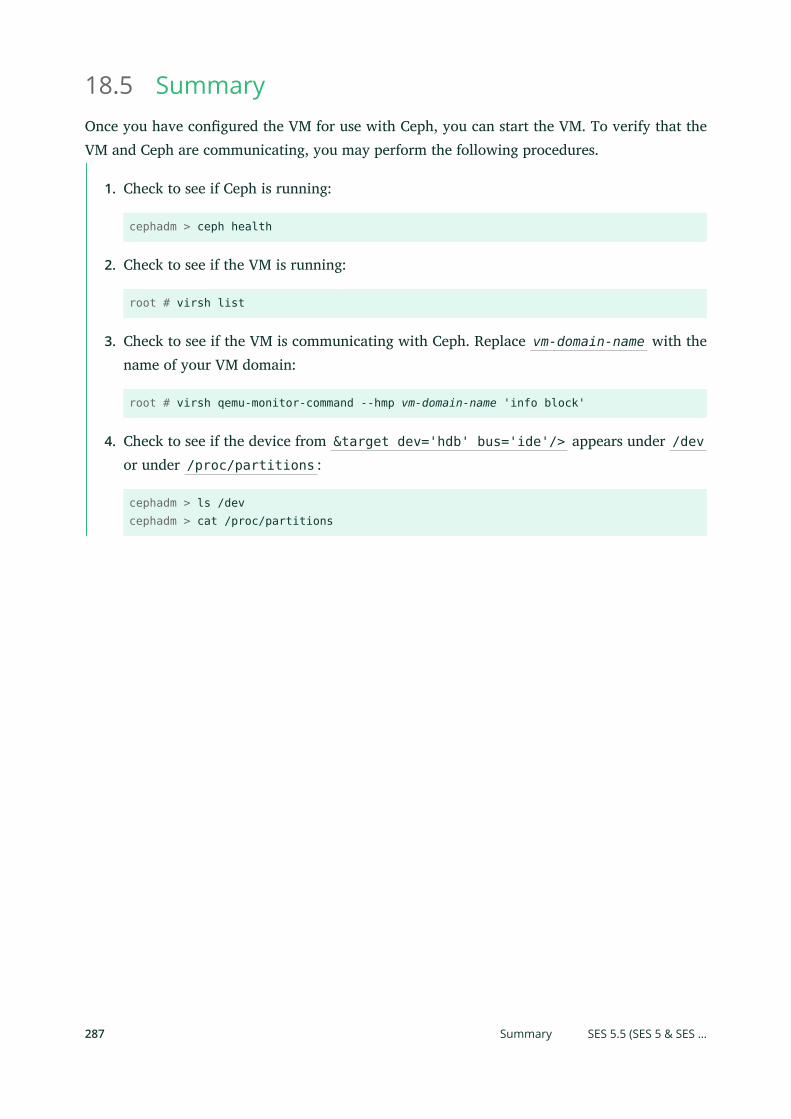
18.5 SummaryOnce you have congured the VM for use with Ceph, you can start the VM. To verify that theVM and Ceph are communicating, you may perform the following procedures.
1. Check to see if Ceph is running:
cephadm > ceph health
2. Check to see if the VM is running:
root # virsh list
3. Check to see if the VM is communicating with Ceph. Replace vm-domain-name with thename of your VM domain:
root # virsh qemu-monitor-command --hmp vm-domain-name 'info block'
4. Check to see if the device from &target dev='hdb' bus='ide'/> appears under /devor under /proc/partitions :
cephadm > ls /devcephadm > cat /proc/partitions
287 Summary SES 5.5 (SES 5 & SES …

19 Ceph as a Back-end for QEMU KVM Instance
The most frequent Ceph use case involves providing block device images to virtual machines.For example, a user may create a 'golden' image with an OS and any relevant software in anideal conguration. Then, the user takes a snapshot of the image. Finally, the user clones thesnapshot (usually many times, see Section 9.3, “Snapshots” for details). The ability to make copy-on-write clones of a snapshot means that Ceph can provision block device images to virtualmachines quickly, because the client does not need to download an entire image each time itspins up a new virtual machine.
Ceph block devices can integrate with the QEMU virtual machines. For more informationon QEMU KVM, see https://documentation.suse.com/sles/12-SP5/single-html/SLES-virtualization/
#part-virt-qemu .
19.1 InstallationIn order to use Ceph block devices, QEMU needs to have the appropriate driver installed. Checkwhether the qemu-block-rbd package is installed, and install it if needed:
root # zypper install qemu-block-rbd
19.2 UsageThe QEMU command line expects you to specify the pool name and image name. You may alsospecify a snapshot name.
qemu-img command options \rbd:pool-name/image-name@snapshot-name:option1=value1:option2=value2...
For example, specifying the id and conf options might look like the following:
qemu-img command options \rbd:pool_name/image_name:id=glance:conf=/etc/ceph/ceph.conf
19.3 Creating Images with QEMUYou can create a block device image from QEMU. You must specify rbd , the pool name, andthe name of the image you want to create. You must also specify the size of the image.
288 Installation SES 5.5 (SES 5 & SES …
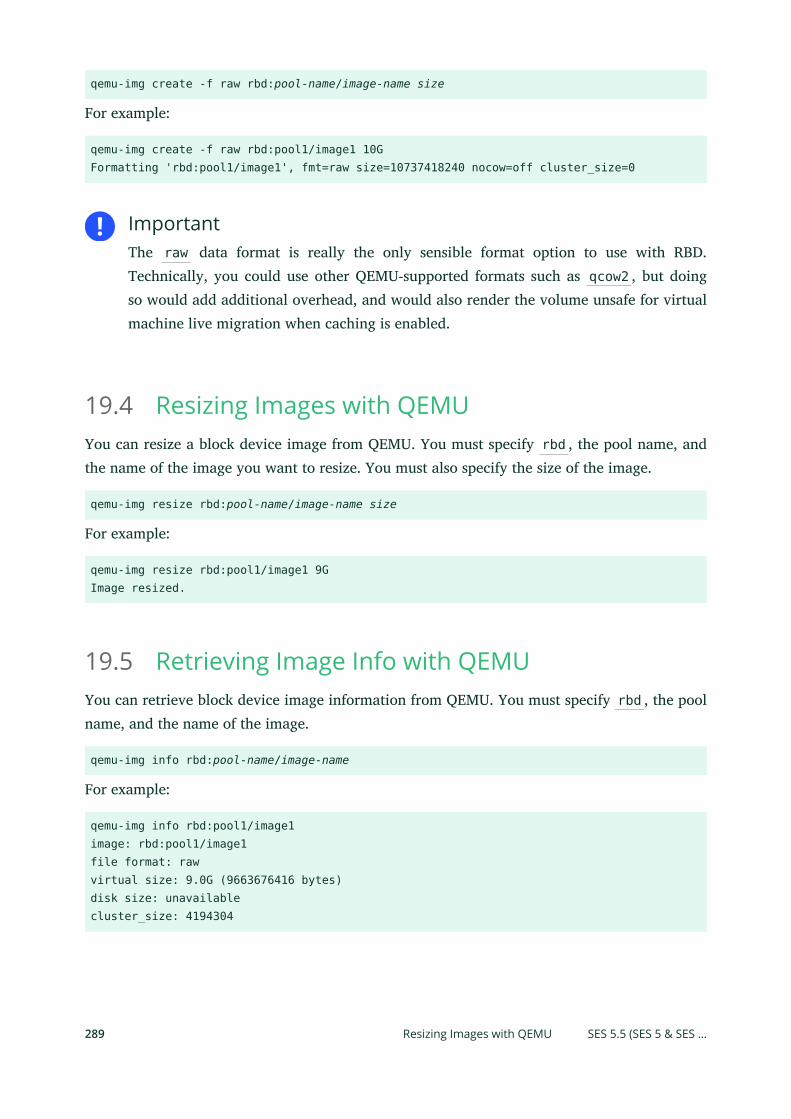
qemu-img create -f raw rbd:pool-name/image-name size
For example:
qemu-img create -f raw rbd:pool1/image1 10GFormatting 'rbd:pool1/image1', fmt=raw size=10737418240 nocow=off cluster_size=0
ImportantThe raw data format is really the only sensible format option to use with RBD.Technically, you could use other QEMU-supported formats such as qcow2 , but doingso would add additional overhead, and would also render the volume unsafe for virtualmachine live migration when caching is enabled.
19.4 Resizing Images with QEMUYou can resize a block device image from QEMU. You must specify rbd , the pool name, andthe name of the image you want to resize. You must also specify the size of the image.
qemu-img resize rbd:pool-name/image-name size
For example:
qemu-img resize rbd:pool1/image1 9GImage resized.
19.5 Retrieving Image Info with QEMUYou can retrieve block device image information from QEMU. You must specify rbd , the poolname, and the name of the image.
qemu-img info rbd:pool-name/image-name
For example:
qemu-img info rbd:pool1/image1image: rbd:pool1/image1file format: rawvirtual size: 9.0G (9663676416 bytes)disk size: unavailablecluster_size: 4194304
289 Resizing Images with QEMU SES 5.5 (SES 5 & SES …

19.6 Running QEMU with RBDQEMU can access an image as a virtual block device directly via librbd . This avoids anadditional context switch, and can take advantage of RBD caching.
You can use qemu-img to convert existing virtual machine images to Ceph block device images.For example, if you have a qcow2 image, you could run:
qemu-img convert -f qcow2 -O raw sles12.qcow2 rbd:pool1/sles12
To run a virtual machine booting from that image, you could run:
root # qemu -m 1024 -drive format=raw,file=rbd:pool1/sles12
RBD caching (http://ceph.com/docs/master/rbd/rbd-config-ref/#cache-settings) can signicantlyimprove performance. QEMU’s cache options control librbd caching:
root # qemu -m 1024 -drive format=rbd,file=rbd:pool1/sles12,cache=writeback
19.7 Enabling Discard/TRIMCeph block devices support the discard operation. This means that a guest can send TRIMrequests to let a Ceph block device reclaim unused space. This can be enabled in the guest bymounting XFS with the discard option.
For this to be available to the guest, it must be explicitly enabled for the block device. To dothis, you must specify a discard_granularity associated with the drive:
root # qemu -m 1024 -drive format=raw,file=rbd:pool1/sles12,id=drive1,if=none \-device driver=ide-hd,drive=drive1,discard_granularity=512
NoteThe above example uses the IDE driver. The virtio driver does not support discard.
If using libvirt , edit your libvirt domain’s conguration le using virsh edit toinclude the xmlns:qemu value. Then, add a qemu:commandline block as a child of thatdomain. The following example shows how to set two devices with qemu id= to dierentdiscard_granularity values.
<domain type='kvm' xmlns:qemu='http://libvirt.org/schemas/domain/qemu/1.0'>
290 Running QEMU with RBD SES 5.5 (SES 5 & SES …
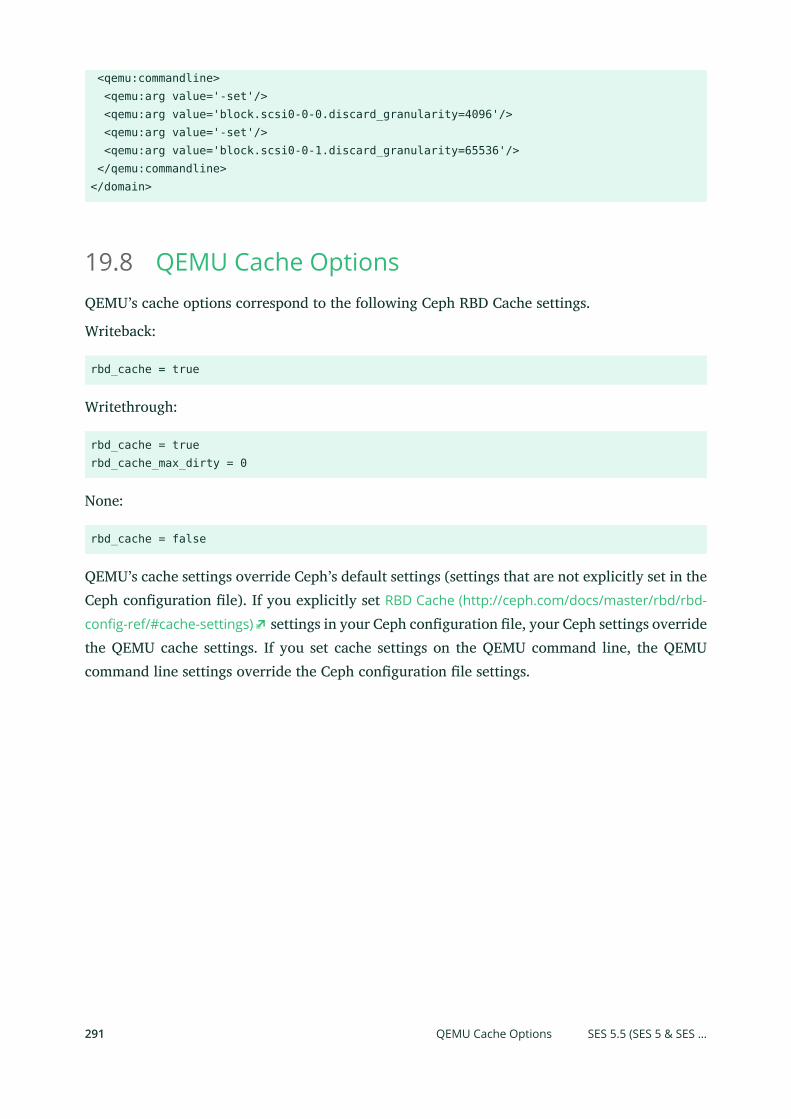
<qemu:commandline> <qemu:arg value='-set'/> <qemu:arg value='block.scsi0-0-0.discard_granularity=4096'/> <qemu:arg value='-set'/> <qemu:arg value='block.scsi0-0-1.discard_granularity=65536'/> </qemu:commandline></domain>
19.8 QEMU Cache OptionsQEMU’s cache options correspond to the following Ceph RBD Cache settings.
Writeback:
rbd_cache = true
Writethrough:
rbd_cache = truerbd_cache_max_dirty = 0
None:
rbd_cache = false
QEMU’s cache settings override Ceph’s default settings (settings that are not explicitly set in theCeph conguration le). If you explicitly set RBD Cache (http://ceph.com/docs/master/rbd/rbd-
config-ref/#cache-settings) settings in your Ceph conguration le, your Ceph settings overridethe QEMU cache settings. If you set cache settings on the QEMU command line, the QEMUcommand line settings override the Ceph conguration le settings.
291 QEMU Cache Options SES 5.5 (SES 5 & SES …

VI FAQs, Tips and Troubleshooting
20 Hints and Tips 293
21 Frequently Asked Questions 306
22 Troubleshooting 309
20 Hints and Tips
The chapter provides information to help you enhance performance of your Ceph cluster andprovides tips how to set the cluster up.
20.1 Identifying Orphaned PartitionsTo identify possibly orphaned journal/WAL/DB devices, follow these steps:
1. Pick the device that may have orphaned partitions and save the list of its partitions to a le:
root@minion > ls /dev/sdd?* > /tmp/partitions
2. Run readlink against all block.wal, block.db, and journal devices, and compare theoutput to the previously saved list of partitions:
root@minion > readlink -f /var/lib/ceph/osd/ceph-*/{block.wal,block.db,journal} \ | sort | comm -23 /tmp/partitions -
The output is the list of partitions that are not used by Ceph.
3. Remove the orphaned partitions that do not belong to Ceph with your preferred command(for example fdisk , parted , or sgdisk ).
20.2 Adjusting ScrubbingBy default, Ceph performs light scrubbing (nd more details in Section 7.5, “Scrubbing”) dailyand deep scrubbing weekly. Light scrubbing checks object sizes and checksums to ensure thatplacement groups are storing the same object data. Deep scrubbing checks an object’s contentwith that of its replicas to ensure that the actual contents are the same. The price for checkingdata integrity is increased I/O load on the cluster during the scrubbing procedure.
The default settings allow Ceph OSDs to initiate scrubbing at inappropriate times, such asduring periods of heavy loads. Customers may experience latency and poor performance whenscrubbing operations conict with their operations. Ceph provides several scrubbing settingsthat can limit scrubbing to periods with lower loads or during o-peak hours.
293 Identifying Orphaned Partitions SES 5.5 (SES 5 & SES …
If the cluster experiences high loads during the day and low loads late at night, considerrestricting scrubbing to night time hours, such as 11pm till 6am:
[osd]osd_scrub_begin_hour = 23osd_scrub_end_hour = 6
If time restriction is not an eective method of determining a scrubbing schedule, consider usingthe osd_scrub_load_threshold option. The default value is 0.5, but it could be modied forlow load conditions:
[osd]osd_scrub_load_threshold = 0.25
20.3 Stopping OSDs without RebalancingYou may need to stop OSDs for maintenance periodically. If you do not want CRUSH toautomatically rebalance the cluster in order to avoid huge data transfers, set the cluster tonoout rst:
root@minion > ceph osd set noout
When the cluster is set to noout , you can begin stopping the OSDs within the failure domainthat requires maintenance work:
root@minion > systemctl stop ceph-osd@OSD_NUMBER.service
Find more information in Section 3.1.2, “Starting, Stopping, and Restarting Individual Services”.
After you complete the maintenance, start OSDs again:
root@minion > systemctl start ceph-osd@OSD_NUMBER.service
After OSD services are started, unset the cluster from noout :
cephadm > ceph osd unset noout
20.4 Time Synchronization of NodesCeph requires precise time synchronization between all nodes.
294 Stopping OSDs without Rebalancing SES 5.5 (SES 5 & SES …
We recommend synchronizing all Ceph cluster nodes with at least three reliable time sourcesthat are located on the internal network. The internal time sources can point to a public timeserver or have their own time source.
Important: Public Time ServersDo not synchronize all Ceph cluster nodes directly with remote public time servers. Withsuch a conguration, each node in the cluster has its own NTP daemon that communicatescontinually over the Internet with a set of three or four time servers that may provideslightly dierent time. This solution introduces a large degree of latency variability thatmakes it dicult or impossible to keep the clock drift under 0.05 seconds which is whatthe Ceph monitors require.
For details how to set up the NTP server refer to SUSE Linux Enterprise Server Administration
Guide (https://documentation.suse.com/sles/12-SP5/single-html/SLES-admin/#cha-netz-xntp) .
Then to change the time on your cluster, do the following:
Important: Setting TimeYou may face a situation when you need to set the time back, for example if the timechanges from the summer to the standard time. We do not recommend to move the timebackward for a longer period than the cluster is down. Moving the time forward doesnot cause any trouble.
PROCEDURE 20.1: TIME SYNCHRONIZATION ON THE CLUSTER
1. Stop all clients accessing the Ceph cluster, especially those using iSCSI.
2. Shut down your Ceph cluster. On each node run:
root # systemctl stop ceph.target
NoteIf you use Ceph and SUSE OpenStack Cloud, stop also the SUSE OpenStack Cloud.
3. Verify that your NTP server is set up correctly—all ntpd daemons get their time from asource or sources in the local network.
295 Time Synchronization of Nodes SES 5.5 (SES 5 & SES …
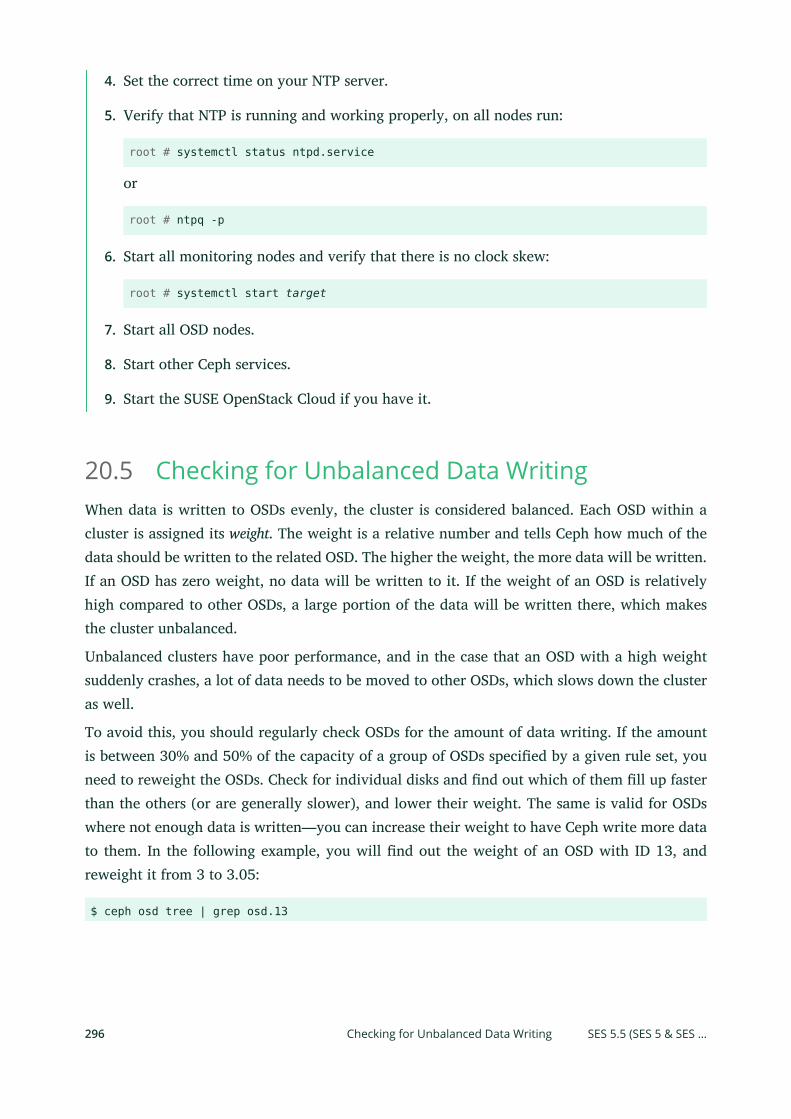
4. Set the correct time on your NTP server.
5. Verify that NTP is running and working properly, on all nodes run:
root # systemctl status ntpd.service
or
root # ntpq -p
6. Start all monitoring nodes and verify that there is no clock skew:
root # systemctl start target
7. Start all OSD nodes.
8. Start other Ceph services.
9. Start the SUSE OpenStack Cloud if you have it.
20.5 Checking for Unbalanced Data WritingWhen data is written to OSDs evenly, the cluster is considered balanced. Each OSD within acluster is assigned its weight. The weight is a relative number and tells Ceph how much of thedata should be written to the related OSD. The higher the weight, the more data will be written.If an OSD has zero weight, no data will be written to it. If the weight of an OSD is relativelyhigh compared to other OSDs, a large portion of the data will be written there, which makesthe cluster unbalanced.
Unbalanced clusters have poor performance, and in the case that an OSD with a high weightsuddenly crashes, a lot of data needs to be moved to other OSDs, which slows down the clusteras well.
To avoid this, you should regularly check OSDs for the amount of data writing. If the amountis between 30% and 50% of the capacity of a group of OSDs specied by a given rule set, youneed to reweight the OSDs. Check for individual disks and nd out which of them ll up fasterthan the others (or are generally slower), and lower their weight. The same is valid for OSDswhere not enough data is written—you can increase their weight to have Ceph write more datato them. In the following example, you will nd out the weight of an OSD with ID 13, andreweight it from 3 to 3.05:
$ ceph osd tree | grep osd.13
296 Checking for Unbalanced Data Writing SES 5.5 (SES 5 & SES …
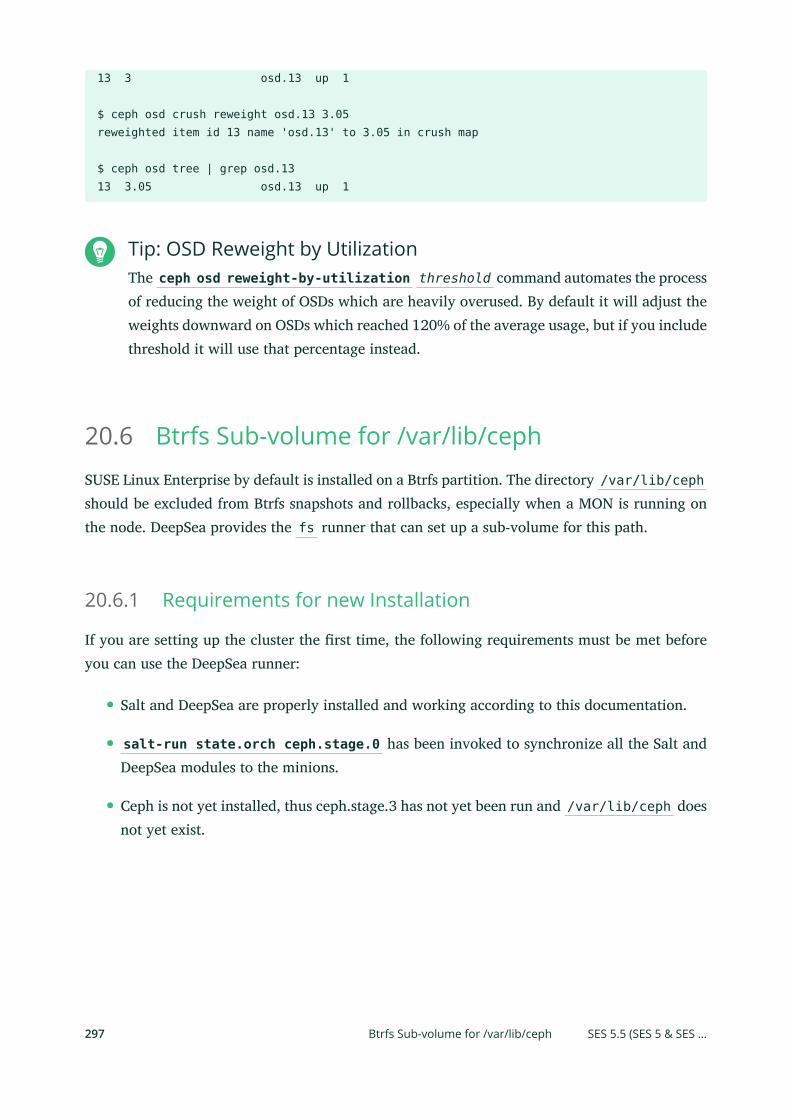
13 3 osd.13 up 1
$ ceph osd crush reweight osd.13 3.05 reweighted item id 13 name 'osd.13' to 3.05 in crush map
$ ceph osd tree | grep osd.13 13 3.05 osd.13 up 1
Tip: OSD Reweight by UtilizationThe ceph osd reweight-by-utilization threshold command automates the processof reducing the weight of OSDs which are heavily overused. By default it will adjust theweights downward on OSDs which reached 120% of the average usage, but if you includethreshold it will use that percentage instead.
20.6 Btrfs Sub-volume for /var/lib/cephSUSE Linux Enterprise by default is installed on a Btrfs partition. The directory /var/lib/cephshould be excluded from Btrfs snapshots and rollbacks, especially when a MON is running onthe node. DeepSea provides the fs runner that can set up a sub-volume for this path.
20.6.1 Requirements for new Installation
If you are setting up the cluster the rst time, the following requirements must be met beforeyou can use the DeepSea runner:
Salt and DeepSea are properly installed and working according to this documentation.
salt-run state.orch ceph.stage.0 has been invoked to synchronize all the Salt andDeepSea modules to the minions.
Ceph is not yet installed, thus ceph.stage.3 has not yet been run and /var/lib/ceph doesnot yet exist.
297 Btrfs Sub-volume for /var/lib/ceph SES 5.5 (SES 5 & SES …
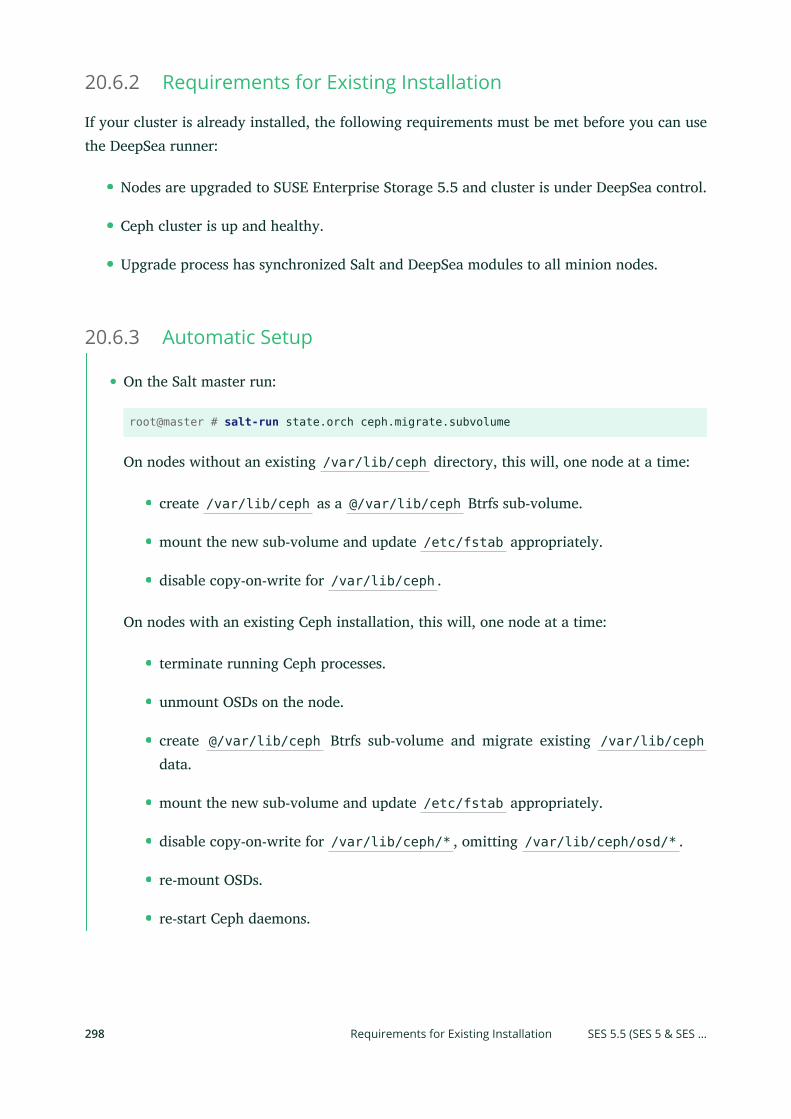
20.6.2 Requirements for Existing Installation
If your cluster is already installed, the following requirements must be met before you can usethe DeepSea runner:
Nodes are upgraded to SUSE Enterprise Storage 5.5 and cluster is under DeepSea control.
Ceph cluster is up and healthy.
Upgrade process has synchronized Salt and DeepSea modules to all minion nodes.
20.6.3 Automatic Setup
On the Salt master run:
root@master # salt-run state.orch ceph.migrate.subvolume
On nodes without an existing /var/lib/ceph directory, this will, one node at a time:
create /var/lib/ceph as a @/var/lib/ceph Btrfs sub-volume.
mount the new sub-volume and update /etc/fstab appropriately.
disable copy-on-write for /var/lib/ceph .
On nodes with an existing Ceph installation, this will, one node at a time:
terminate running Ceph processes.
unmount OSDs on the node.
create @/var/lib/ceph Btrfs sub-volume and migrate existing /var/lib/cephdata.
mount the new sub-volume and update /etc/fstab appropriately.
disable copy-on-write for /var/lib/ceph/* , omitting /var/lib/ceph/osd/* .
re-mount OSDs.
re-start Ceph daemons.
298 Requirements for Existing Installation SES 5.5 (SES 5 & SES …
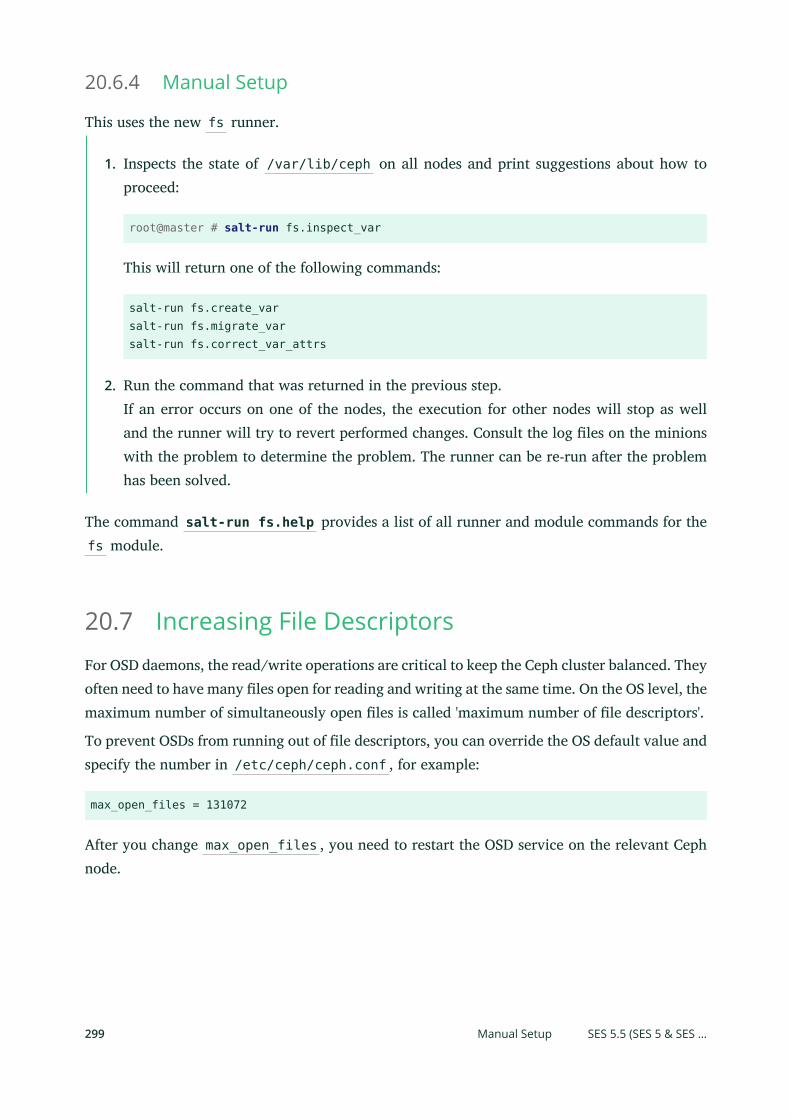
20.6.4 Manual Setup
This uses the new fs runner.
1. Inspects the state of /var/lib/ceph on all nodes and print suggestions about how toproceed:
root@master # salt-run fs.inspect_var
This will return one of the following commands:
salt-run fs.create_varsalt-run fs.migrate_varsalt-run fs.correct_var_attrs
2. Run the command that was returned in the previous step.If an error occurs on one of the nodes, the execution for other nodes will stop as welland the runner will try to revert performed changes. Consult the log les on the minionswith the problem to determine the problem. The runner can be re-run after the problemhas been solved.
The command salt-run fs.help provides a list of all runner and module commands for thefs module.
20.7 Increasing File DescriptorsFor OSD daemons, the read/write operations are critical to keep the Ceph cluster balanced. Theyoften need to have many les open for reading and writing at the same time. On the OS level, themaximum number of simultaneously open les is called 'maximum number of le descriptors'.
To prevent OSDs from running out of le descriptors, you can override the OS default value andspecify the number in /etc/ceph/ceph.conf , for example:
max_open_files = 131072
After you change max_open_files , you need to restart the OSD service on the relevant Cephnode.
299 Manual Setup SES 5.5 (SES 5 & SES …
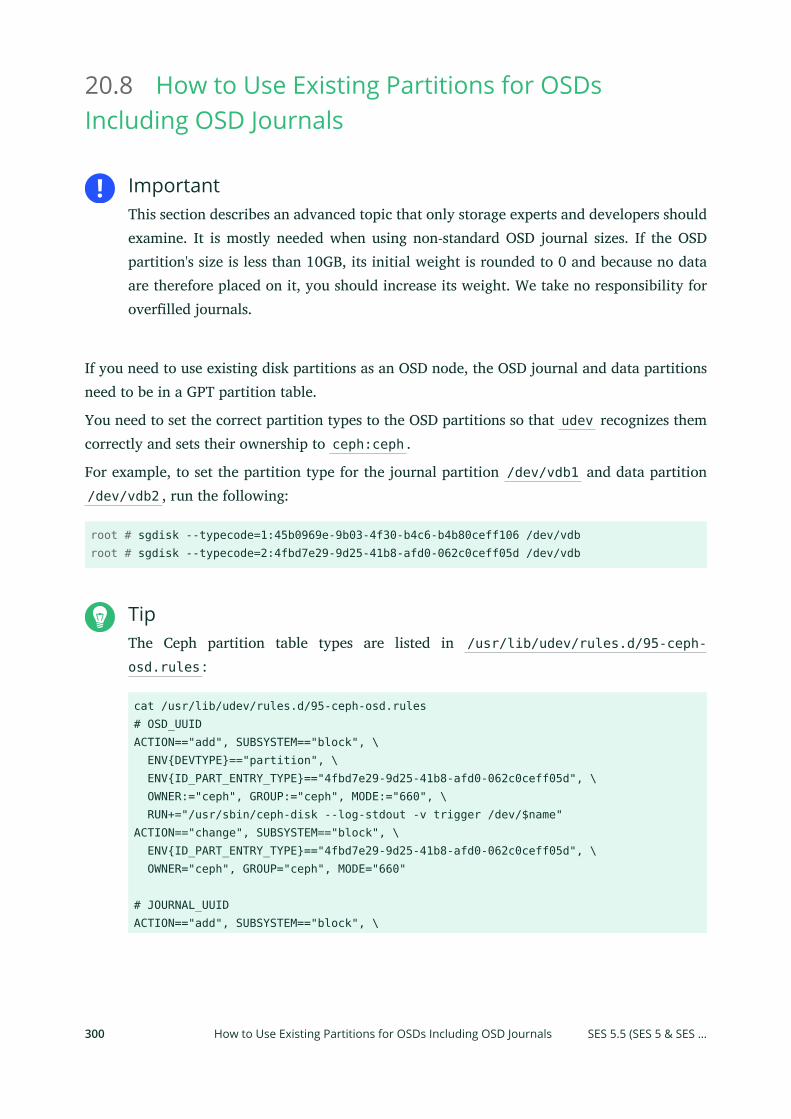
20.8 How to Use Existing Partitions for OSDsIncluding OSD Journals
ImportantThis section describes an advanced topic that only storage experts and developers shouldexamine. It is mostly needed when using non-standard OSD journal sizes. If the OSDpartition's size is less than 10GB, its initial weight is rounded to 0 and because no dataare therefore placed on it, you should increase its weight. We take no responsibility foroverlled journals.
If you need to use existing disk partitions as an OSD node, the OSD journal and data partitionsneed to be in a GPT partition table.
You need to set the correct partition types to the OSD partitions so that udev recognizes themcorrectly and sets their ownership to ceph:ceph .
For example, to set the partition type for the journal partition /dev/vdb1 and data partition/dev/vdb2 , run the following:
root # sgdisk --typecode=1:45b0969e-9b03-4f30-b4c6-b4b80ceff106 /dev/vdbroot # sgdisk --typecode=2:4fbd7e29-9d25-41b8-afd0-062c0ceff05d /dev/vdb
TipThe Ceph partition table types are listed in /usr/lib/udev/rules.d/95-ceph-
osd.rules :
cat /usr/lib/udev/rules.d/95-ceph-osd.rules# OSD_UUIDACTION=="add", SUBSYSTEM=="block", \ ENV{DEVTYPE}=="partition", \ ENV{ID_PART_ENTRY_TYPE}=="4fbd7e29-9d25-41b8-afd0-062c0ceff05d", \ OWNER:="ceph", GROUP:="ceph", MODE:="660", \ RUN+="/usr/sbin/ceph-disk --log-stdout -v trigger /dev/$name"ACTION=="change", SUBSYSTEM=="block", \ ENV{ID_PART_ENTRY_TYPE}=="4fbd7e29-9d25-41b8-afd0-062c0ceff05d", \ OWNER="ceph", GROUP="ceph", MODE="660"
# JOURNAL_UUIDACTION=="add", SUBSYSTEM=="block", \
300 How to Use Existing Partitions for OSDs Including OSD Journals SES 5.5 (SES 5 & SES …
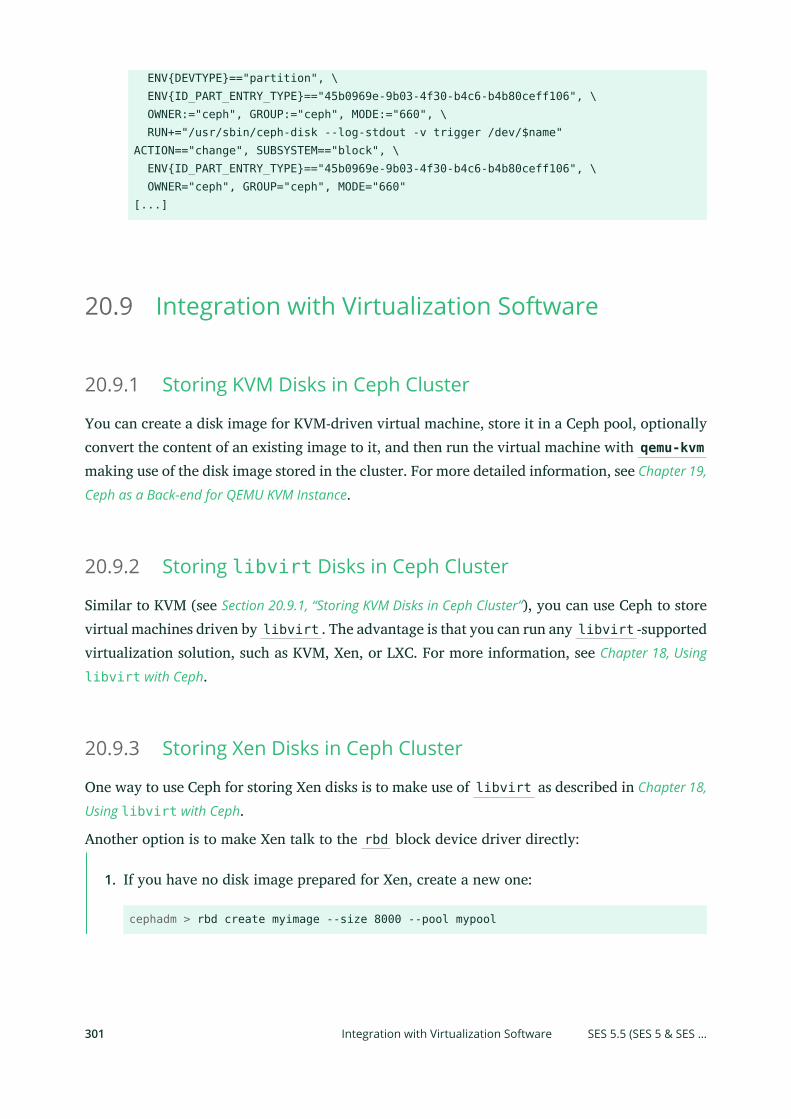
ENV{DEVTYPE}=="partition", \ ENV{ID_PART_ENTRY_TYPE}=="45b0969e-9b03-4f30-b4c6-b4b80ceff106", \ OWNER:="ceph", GROUP:="ceph", MODE:="660", \ RUN+="/usr/sbin/ceph-disk --log-stdout -v trigger /dev/$name"ACTION=="change", SUBSYSTEM=="block", \ ENV{ID_PART_ENTRY_TYPE}=="45b0969e-9b03-4f30-b4c6-b4b80ceff106", \ OWNER="ceph", GROUP="ceph", MODE="660"[...]
20.9 Integration with Virtualization Software
20.9.1 Storing KVM Disks in Ceph Cluster
You can create a disk image for KVM-driven virtual machine, store it in a Ceph pool, optionallyconvert the content of an existing image to it, and then run the virtual machine with qemu-kvmmaking use of the disk image stored in the cluster. For more detailed information, see Chapter 19,
Ceph as a Back-end for QEMU KVM Instance.
20.9.2 Storing libvirt Disks in Ceph Cluster
Similar to KVM (see Section 20.9.1, “Storing KVM Disks in Ceph Cluster”), you can use Ceph to storevirtual machines driven by libvirt . The advantage is that you can run any libvirt -supportedvirtualization solution, such as KVM, Xen, or LXC. For more information, see Chapter 18, Using
libvirt with Ceph.
20.9.3 Storing Xen Disks in Ceph Cluster
One way to use Ceph for storing Xen disks is to make use of libvirt as described in Chapter 18,
Using libvirt with Ceph.
Another option is to make Xen talk to the rbd block device driver directly:
1. If you have no disk image prepared for Xen, create a new one:
cephadm > rbd create myimage --size 8000 --pool mypool
301 Integration with Virtualization Software SES 5.5 (SES 5 & SES …
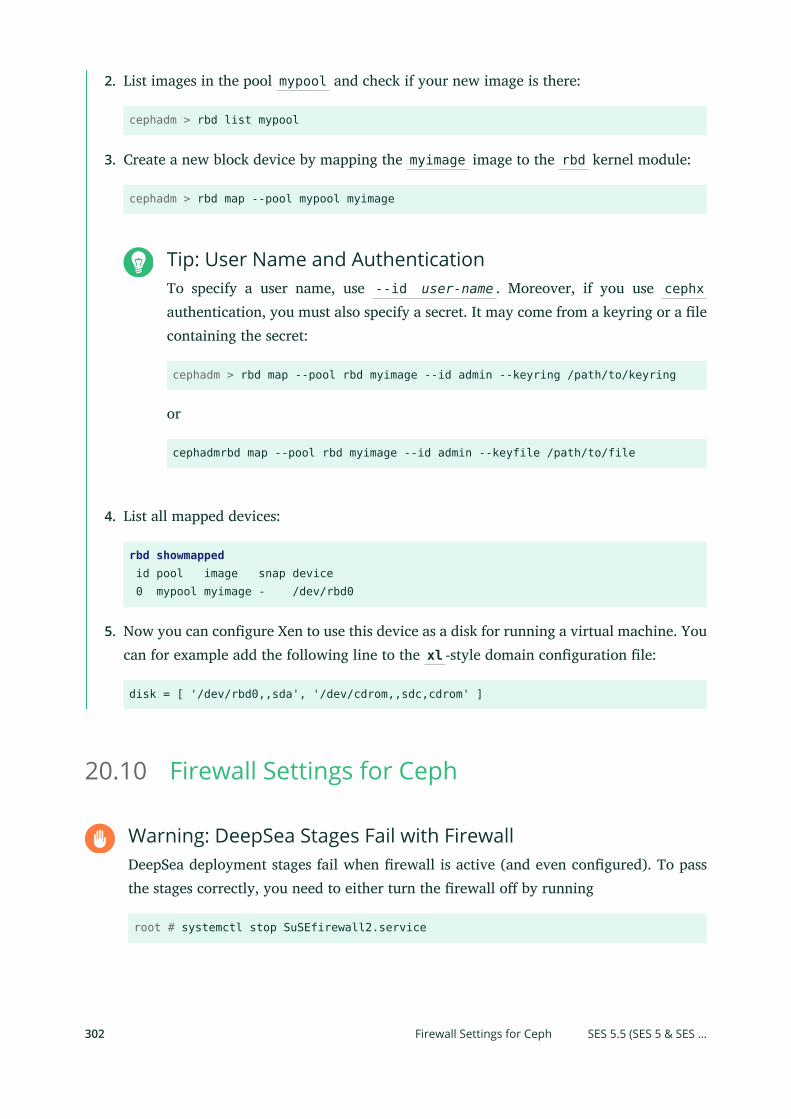
2. List images in the pool mypool and check if your new image is there:
cephadm > rbd list mypool
3. Create a new block device by mapping the myimage image to the rbd kernel module:
cephadm > rbd map --pool mypool myimage
Tip: User Name and AuthenticationTo specify a user name, use --id user-name . Moreover, if you use cephxauthentication, you must also specify a secret. It may come from a keyring or a lecontaining the secret:
cephadm > rbd map --pool rbd myimage --id admin --keyring /path/to/keyring
or
cephadmrbd map --pool rbd myimage --id admin --keyfile /path/to/file
4. List all mapped devices:
rbd showmapped id pool image snap device 0 mypool myimage - /dev/rbd0
5. Now you can congure Xen to use this device as a disk for running a virtual machine. Youcan for example add the following line to the xl -style domain conguration le:
disk = [ '/dev/rbd0,,sda', '/dev/cdrom,,sdc,cdrom' ]
20.10 Firewall Settings for Ceph
Warning: DeepSea Stages Fail with FirewallDeepSea deployment stages fail when rewall is active (and even congured). To passthe stages correctly, you need to either turn the rewall o by running
root # systemctl stop SuSEfirewall2.service
302 Firewall Settings for Ceph SES 5.5 (SES 5 & SES …
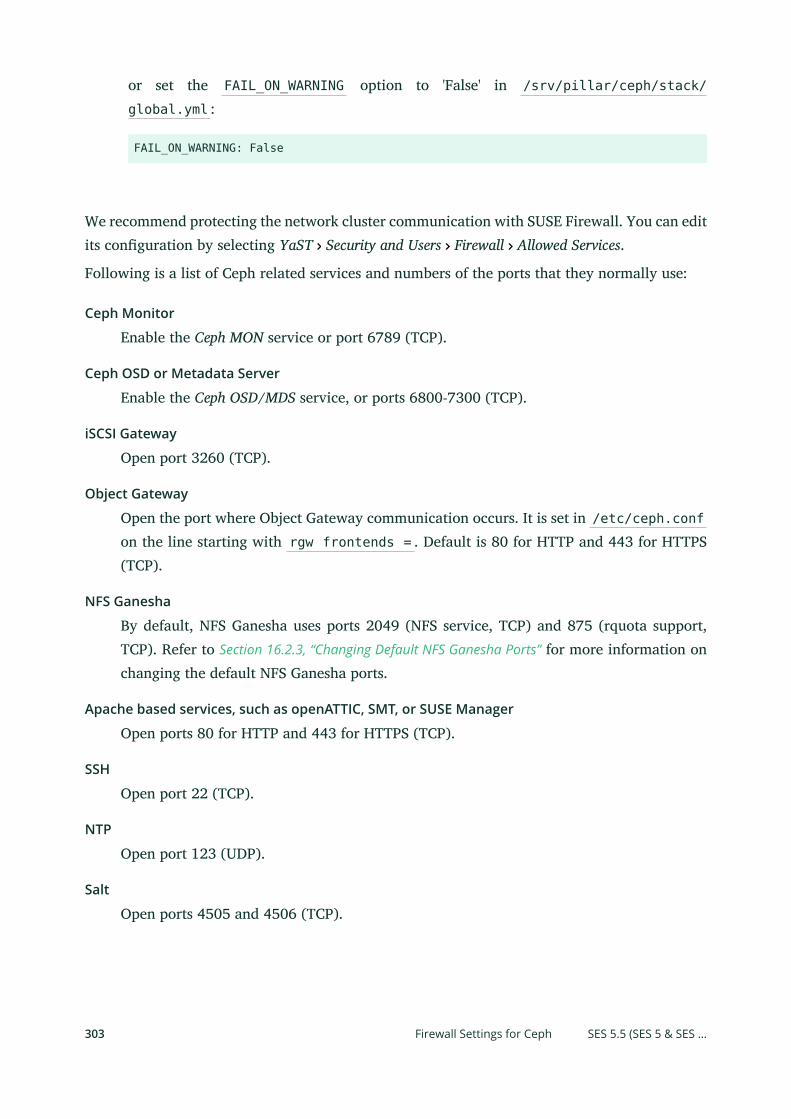
or set the FAIL_ON_WARNING option to 'False' in /srv/pillar/ceph/stack/
global.yml :
FAIL_ON_WARNING: False
We recommend protecting the network cluster communication with SUSE Firewall. You can editits conguration by selecting YaST Security and Users Firewall Allowed Services.
Following is a list of Ceph related services and numbers of the ports that they normally use:
Ceph Monitor
Enable the Ceph MON service or port 6789 (TCP).
Ceph OSD or Metadata Server
Enable the Ceph OSD/MDS service, or ports 6800-7300 (TCP).
iSCSI Gateway
Open port 3260 (TCP).
Object Gateway
Open the port where Object Gateway communication occurs. It is set in /etc/ceph.confon the line starting with rgw frontends = . Default is 80 for HTTP and 443 for HTTPS(TCP).
NFS Ganesha
By default, NFS Ganesha uses ports 2049 (NFS service, TCP) and 875 (rquota support,TCP). Refer to Section 16.2.3, “Changing Default NFS Ganesha Ports” for more information onchanging the default NFS Ganesha ports.
Apache based services, such as openATTIC, SMT, or SUSE Manager
Open ports 80 for HTTP and 443 for HTTPS (TCP).
SSH
Open port 22 (TCP).
NTP
Open port 123 (UDP).
Salt
Open ports 4505 and 4506 (TCP).
303 Firewall Settings for Ceph SES 5.5 (SES 5 & SES …

Grafana
Open port 3000 (TCP).
Prometheus
Open port 9100 (TCP).
20.11 Testing Network PerformanceTo test the network performance the DeepSea net runner provides the following commands.
A simple ping to all nodes:
root@master # salt-run net.pingSucceeded: 9 addresses from 9 minions average rtt 1.35 ms
A jumbo ping to all nodes:
root@master # salt-run net.jumbo_pingSucceeded: 9 addresses from 9 minions average rtt 2.13 ms
A bandwidth test:
root@master # salt-run net.iperfFastest 2 hosts: |_ - 192.168.58.106 - 2981 Mbits/sec |_ - 192.168.58.107 - 2967 Mbits/secSlowest 2 hosts: |_ - 192.168.58.102 - 2857 Mbits/sec |_ - 192.168.58.103 - 2842 Mbits/sec
304 Testing Network Performance SES 5.5 (SES 5 & SES …
Tip: Stop 'iperf3' Processes ManuallyWhen running a test using the net.iperf runner, the 'iperf3' server processes thatare started do not stop automatically when a test is completed. To stop the processes,use the following runner:
root@master # salt '*' multi.kill_iperf_cmd
20.12 Replacing Storage DiskIf you need to replace a storage disk in a Ceph cluster, you can do so during the cluster's fulloperation. The replacement will cause temporary increase in data transfer.
If the disk fails entirely, Ceph needs to rewrite at least the same amount of data as the capacity ofthe failed disk is. If the disk is properly evacuated and then re-added to avoid loss of redundancyduring the process, the amount of rewritten data will be twice as big. If the new disk has adierent size as the replaced one, it will cause some additional data to be redistributed to evenout the usage of all OSDs.
305 Replacing Storage Disk SES 5.5 (SES 5 & SES …
21 Frequently Asked Questions
21.1 How Does the Number of Placement GroupsAect the Cluster Performance?When your cluster is becoming 70% to 80% full, it is time to add more OSDs to it. When youincrease the number of OSDs, you may consider increasing the number of placement groupsas well.
WarningChanging the number of PGs causes a lot of data transfer within the cluster.
To calculate the optimal value for your newly-resized cluster is a complex task.
A high number of PGs creates small chunks of data. This speeds up recovery after an OSD failure,but puts a lot of load on the monitor nodes as they are responsible for calculating the datalocation.
On the other hand, a low number of PGs takes more time and data transfer to recover from anOSD failure, but does not impose that much load on monitor nodes as they need to calculatelocations for less (but larger) data chunks.
Find more information on the optimal number of PGs for your cluster using the online calculator
(http://ceph.com/pgcalc/) .
21.2 Can I Use SSDs and Hard Disks on the SameCluster?Solid-state drives (SSD) are generally faster than hard disks. If you mix the two types of disksfor the same write operation, the data writing to the SSD disk will be slowed down by the harddisk performance. Thus, you should never mix SSDs and hard disks for data writing following thesame rule (see Section 7.3, “Rule Sets” for more information on rules for storing data).
306
How Does the Number of Placement Groups Aect the Cluster Performance? SES 5.5 (SES
5 & SES …
There are generally 2 cases where using SSD and hard disk on the same cluster makes sense:
1. Use each disk type for writing data following dierent rules. Then you need to have aseparate rule for the SSD disk, and another rule for the hard disk.
2. Use each disk type for a specic purpose. For example the SSD disk for journal, and thehard disk for storing data.
21.3 What are the Trade-os of Using a Journal onSSD?Using SSDs for OSD journal(s) is better for performance as the journal is usually the bottleneckof hard disk-only OSDs. SSDs are often used to share journals of several OSDs.
Following is a list of potential disadvantages of using SSDs for OSD journal:
SSD disks are more expensive than hard disks. But as one OSD journal requires up to 6GBof disk space only, the price may not be so crucial.
SSD disk consumes storage slots which can be otherwise used by a large hard disk to extendthe cluster capacity.
SSD disks have reduced write cycles compared to hard disks, but modern technologies arebeginning to eliminate the problem.
If you share more journals on the same SSD disk, you risk losing all the related OSDs afterthe SSD disk fails. This will require a lot of data to be moved to rebalance the cluster.
Hotplugging disks becomes more complex as the data mapping is not 1:1 the failed OSDand the journal disk.
307 What are the Trade-os of Using a Journal on SSD? SES 5.5 (SES 5 & SES …
21.4 What Happens When a Disk Fails?When a disk with a stored cluster data has a hardware problem and fails to operate, here iswhat happens:
The related OSD crashed and is automatically removed from the cluster.
The failed disk's data is replicated to another OSD in the cluster from other copies of thesame data stored in other OSDs.
Then you should remove the disk from the cluster CRUSH Map, and physically from thehost hardware.
21.5 What Happens When a Journal Disk Fails?Ceph can be congured to store journals or write ahead logs on devices separate from the OSDs.When a disk dedicated to a journal fails, the related OSD(s) fail as well (see Section 21.4, “What
Happens When a Disk Fails?”).
Warning: Hosting Multiple Journals on One DiskFor performance boost, you can use a fast disk (such as SSD) to store journal partitionsfor several OSDs. We do not recommend to host journals for more than 4 OSDs on onedisk, because in case of the journals' disk failure, you risk losing stored data for all therelated OSDs' disks.
308 What Happens When a Disk Fails? SES 5.5 (SES 5 & SES …
22 Troubleshooting
This chapter describes several issues that you may face when you operate a Ceph cluster.
22.1 Reporting Software ProblemsIf you come across a problem when running SUSE Enterprise Storage 5.5 related to some of itscomponents, such as Ceph or Object Gateway, report the problem to SUSE Technical Support.The recommended way is with the supportconfig utility.
TipBecause supportconfig is modular software, make sure that the supportutils-plugin-ses package is installed.
cephadm > rpm -q supportutils-plugin-ses
If it is missing on the Ceph server, install it with
root # zypper ref && zypper in supportutils-plugin-ses
Although you can use supportconfig on the command line, we recommend using the relatedYaST module. Find more information about supportconfig in https://documentation.suse.com/
sles/12-SP5/single-html/SLES-admin/#sec-admsupport-supportconfig .
22.2 Sending Large Objects with rados Fails with FullOSDrados is a command line utility to manage RADOS object storage. For more information, seeman 8 rados .
If you send a large object to a Ceph cluster with the rados utility, such as
cephadm > rados -p mypool put myobject /file/to/send
it can ll up all the related OSD space and cause serious trouble to the cluster performance.
309 Reporting Software Problems SES 5.5 (SES 5 & SES …
22.3 Corrupted XFS File systemIn rare circumstances like kernel bug or broken/miscongured hardware, the underlying lesystem (XFS) in which an OSD stores its data might be damaged and unmountable.
If you are sure there is no problem with your hardware and the system is congured properly,raise a bug against the XFS subsystem of the SUSE Linux Enterprise Server kernel and mark theparticular OSD as down:
cephadm > ceph osd down OSD identification
Warning: Do Not Format or Otherwise Modify the DamagedDeviceEven though using xfs_repair to x the problem in the le system may seemreasonable, do not use it as the command modies the le system. The OSD may startbut its functioning may be inuenced.
Now zap the underlying disk and re-create the OSD by running:
cephadm > ceph-disk prepare --zap $OSD_DISK_DEVICE $OSD_JOURNAL_DEVICE"
for example:
cephadm > ceph-disk prepare --zap /dev/sdb /dev/sdd2
22.4 'Too Many PGs per OSD' Status MessageIf you receive a Too Many PGs per OSD message after running ceph status , it means thatthe mon_pg_warn_max_per_osd value (300 by default) was exceeded. This value is comparedto the number of PGs per OSD ratio. This means that the cluster setup is not optimal.
The number of PGs cannot be reduced after the pool is created. Pools that do not yet containany data can safely be deleted and then re-created with a lower number of PGs. Where poolsalready contain data, the only solution is to add OSDs to the cluster so that the ratio of PGsper OSD becomes lower.
310 Corrupted XFS File system SES 5.5 (SES 5 & SES …
22.5 'nn pg stuck inactive' Status MessageIf you receive a stuck inactive status message after running ceph status , it means thatCeph does not know where to replicate the stored data to fulll the replication rules. It canhappen shortly after the initial Ceph setup and x itself automatically. In other cases, this mayrequire a manual interaction, such as bringing up a broken OSD, or adding a new OSD to thecluster. In very rare cases, reducing the replication level may help.
If the placement groups are stuck perpetually, you need to check the output of ceph osd tree .The output should look tree-structured, similar to the example in Section 22.7, “OSD is Down”.
If the output of ceph osd tree is rather at as in the following example
cephadm > ceph osd treeID WEIGHT TYPE NAME UP/DOWN REWEIGHT PRIMARY-AFFINITY-1 0 root default 0 0 osd.0 up 1.00000 1.00000 1 0 osd.1 up 1.00000 1.00000 2 0 osd.2 up 1.00000 1.00000
You should check that the related CRUSH map has a tree structure. If it is also at, or with nohosts as in the above example, it may mean that host name resolution is not working correctlyacross the cluster.
If the hierarchy is incorrect—for example the root contains hosts, but the OSDs are at the toplevel and are not themselves assigned to hosts—you will need to move the OSDs to the correctplace in the hierarchy. This can be done using the ceph osd crush move and/or ceph osdcrush set commands. For further details see Section 7.4, “CRUSH Map Manipulation”.
22.6 OSD Weight is 0When OSD starts, it is assigned a weight. The higher the weight, the bigger the chance thatthe cluster writes data to the OSD. The weight is either specied in a cluster CRUSH Map, orcalculated by the OSDs' start-up script.
In some cases, the calculated value for OSDs' weight may be rounded down to zero. It meansthat the OSD is not scheduled to store data, and no data is written to it. The reason is usuallythat the disk is too small (smaller than 15GB) and should be replaced with a bigger one.
311 'nn pg stuck inactive' Status Message SES 5.5 (SES 5 & SES …

22.7 OSD is DownOSD daemon is either running, or stopped/down. There are 3 general reasons why an OSD isdown:
Hard disk failure.
The OSD crashed.
The server crashed.
You can see the detailed status of OSDs by running
cephadm > ceph osd tree# id weight type name up/down reweight -1 0.02998 root default -2 0.009995 host doc-ceph1 0 0.009995 osd.0 up 1 -3 0.009995 host doc-ceph2 1 0.009995 osd.1 up 1 -4 0.009995 host doc-ceph3 2 0.009995 osd.2 down 1
The example listing shows that the osd.2 is down. Then you may check if the disk where theOSD is located is mounted:
root # lsblk -f [...] vdb ├─vdb1 /var/lib/ceph/osd/ceph-2 └─vdb2
You can track the reason why the OSD is down by inspecting its log le /var/log/ceph/ceph-osd.2.log . After you nd and x the reason why the OSD is not running, start it with
root # systemctl start [email protected]
Do not forget to replace 2 with the actual number of your stopped OSD.
22.8 Finding Slow OSDsWhen tuning the cluster performance, it is very important to identify slow storage/OSDs withinthe cluster. The reason is that if the data is written to the slow(est) disk, the complete writeoperation slows down as it always waits until it is nished on all the related disks.
312 OSD is Down SES 5.5 (SES 5 & SES …

It is not trivial to locate the storage bottleneck. You need to examine each and every OSD tond out the ones slowing down the write process. To do a benchmark on a single OSD, run:
ceph tell osd.OSD_ID_NUMBER bench
For example:
cephadm > ceph tell osd.0 bench { "bytes_written": 1073741824, "blocksize": 4194304, "bytes_per_sec": "19377779.000000"}
Then you need to run this command on each OSD and compare the bytes_per_sec value toget the slow(est) OSDs.
22.9 Fixing Clock Skew WarningsThe time information in all cluster nodes must be synchronized. If a node's time is not fullysynchronized, you may get clock skew warnings when checking the state of the cluster.
Time synchronization is managed with NTP (see http://en.wikipedia.org/wiki/
Network_Time_Protocol ). Set each node to synchronize its time with one or more NTP servers,preferably to the same group of NTP servers. If the time skew still occurs on a node, followthese steps to x it:
root # systemctl stop ntpd.serviceroot # systemctl stop ceph-mon.targetroot # systemctl start ntpd.serviceroot # systemctl start ceph-mon.target
You can then query the NTP peers and check the time oset with sudo ntpq -p .
The Ceph monitors need to have their clocks synchronized to within 0.05 seconds of each other.Refer to Section 20.4, “Time Synchronization of Nodes” for more information.
22.10 Poor Cluster Performance Caused by NetworkProblemsThere are more reasons why the cluster performance may become weak. One of them can benetwork problems. In such case, you may notice the cluster reaching quorum, OSD and monitornodes going oine, data transfers taking a long time, or a lot of reconnect attempts.
313 Fixing Clock Skew Warnings SES 5.5 (SES 5 & SES …
To check whether cluster performance is degraded by network problems, inspect the Ceph logles under the /var/log/ceph directory.
To x network issues on the cluster, focus on the following points:
Basic network diagnostics. Try DeepSea diagnostics tools runner net.ping to pingbetween cluster nodes to see if individual interface can reach to specic interface and theaverage response time. Any specic response time much slower then average will also bereported. For example:
root@master # salt-run net.ping Succeeded: 8 addresses from 7 minions average rtt 0.15 ms
Try validating all interface with JumboFrame enable:
root@master # salt-run net.jumbo_ping Succeeded: 8 addresses from 7 minions average rtt 0.26 ms
Network performance benchmark. Try DeepSea's network performance runner net.iperfto test intern-node network bandwidth. On a given cluster node, a number of iperfprocesses (according to the number of CPU cores) are started as servers. The remainingcluster nodes will be used as clients to generate network trac. The accumulatedbandwidth of all per-node iperf processes is reported. This should reect the maximumachievable network throughput on all cluster nodes. For example:
root@master # salt-run net.iperf cluster=ceph output=full192.168.128.1: 8644.0 Mbits/sec192.168.128.2: 10360.0 Mbits/sec192.168.128.3: 9336.0 Mbits/sec192.168.128.4: 9588.56 Mbits/sec192.168.128.5: 10187.0 Mbits/sec192.168.128.6: 10465.0 Mbits/sec
314 Poor Cluster Performance Caused by Network Problems SES 5.5 (SES 5 & SES …
Check rewall settings on cluster nodes. Make sure they do not block ports/protocolsrequired by Ceph operation. See Section 20.10, “Firewall Settings for Ceph” for moreinformation on rewall settings.
Check the networking hardware, such as network cards, cables, or switches, for properoperation.
Tip: Separate NetworkTo ensure fast and safe network communication between cluster nodes, set up a separatenetwork used exclusively by the cluster OSD and monitor nodes.
22.11 /var Running Out of SpaceBy default, the Salt master saves every minion's return for every job in its job cache. The cachecan then be used later to lookup results for previous jobs. The cache directory defaults to /var/cache/salt/master/jobs/ .
Each job return from every minion is saved in a single le. Over time this directory can growvery large, depending on the number of published jobs and the value of the keep_jobs optionin the /etc/salt/master le. keep_jobs sets the number of hours (24 by default) to keepinformation about past minion jobs.
keep_jobs: 24
Important: Do Not Set keep_jobs: 0Setting keep_jobs to '0' will cause the job cache cleaner to never run, possibly resultingin a full partition.
If you want to disable the job cache, set job_cache to 'False':
job_cache: False
315 /var Running Out of Space SES 5.5 (SES 5 & SES …
Tip: Restoring Partition Full because of Job CacheWhen the partition with job cache les gets full because of wrong keep_jobs setting,follow these steps to free disk space and improve the job cache settings:
1. Stop the Salt master service:
root@master # systemctl stop salt-master
2. Change the Salt master conguration related to job cache by editing /etc/salt/master :
job_cache: Falsekeep_jobs: 1
3. Clear the Salt master job cache:
root # rm -rfv /var/cache/salt/master/jobs/*
4. Start the Salt master service:
root@master # systemctl start salt-master
22.12 Too Many PGs Per OSDThe TOO_MANY_PGS ag is raised when the number of PGs in use is above the congurablethreshold of mon_pg_warn_max_per_osd PGs per OSD. If this threshold is exceeded, the clusterdoes not allow new pools to be created, pool pg_num to be increased, or pool replication tobe increased.
SUSE Enterprise Storage 4 and 5.5 have two ways to solve this issue.
PROCEDURE 22.1: SOLUTION 1
1. Set the following in your ceph.conf :
[global]
mon_max_pg_per_osd = 800 # depends on your amount of PGsosd max pg per osd hard ratio = 10 # the default is 2. We recommend to set at least 5.
316 Too Many PGs Per OSD SES 5.5 (SES 5 & SES …
mon allow pool delete = true # without it you can't remove a pool
2. Restart all MONs and OSDs one by one.
3. Check the value of your MON and OSD ID:
cephadm > ceph --admin-daemon /var/run/ceph/ceph-mon.ID.asok config get mon_max_pg_per_osdcephadm > ceph --admin-daemon /var/run/ceph/ceph-osd.ID.asok config get osd_max_pg_per_osd_hard_ratio
4. Execute the following to determine your default pg_num :
cephadm > rados lspoolscephadm > ceph osd pool get USER-EMAIL pg_num
5. With caution, execute the following commands to remove pools:
cephadm > ceph osd pool create USER-EMAILnew 8cephadm > rados cppool USER-EMAIL default.rgw.lc.newcephadm > ceph osd pool delete USER-EMAIL USER-EMAIL --yes-i-really-really-mean-itcephadm > ceph osd pool rename USER-EMAIL.new USER-EMAILcephadm > ceph osd pool application enable USER-EMAIL rgw
If this does not remove enough PGs per OSD and you are still receiving blocking requests,you may need to nd another pool to remove.
PROCEDURE 22.2: SOLUTION 2
1. Create a new pool with the correct PG count:
cephadm > ceph osd pool create NEW-POOL PG-COUNT
2. Copy the contents of the old pool the new pool:
cephadm > rados cppool OLD-POOL NEW-POOL
3. Remove the old pool:
cephadm > ceph osd pool delete OLD-POOL OLD-POOL --yes-i-really-really-mean-it
4. Rename the new pool:
cephadm > ceph osd pool rename NEW-POOL OLD-POOL
5. Restart the Object Gateway.
317 Too Many PGs Per OSD SES 5.5 (SES 5 & SES …

Glossary
General
Admin nodeThe node from which you run the ceph-deploy utility to deploy Ceph on OSD nodes.
BucketA point which aggregates other nodes into a hierarchy of physical locations.
CRUSH, CRUSH MapAn algorithm that determines how to store and retrieve data by computing data storagelocations. CRUSH requires a map of the cluster to pseudo-randomly store and retrieve datain OSDs with a uniform distribution of data across the cluster.
Monitor node, MONA cluster node that maintains maps of cluster state, including the monitor map, or the OSDmap.
NodeAny single machine or server in a Ceph cluster.
OSD nodeA cluster node that stores data, handles data replication, recovery, backlling, rebalancing,and provides some monitoring information to Ceph monitors by checking other Ceph OSDdaemons.
PoolLogical partitions for storing objects such as disk images.
Rule SetRules to determine data placement for a pool.
318 SES 5.5 (SES 5 & SES …
Ceph Specific Terms
Ceph Storage ClusterThe core set of storage software which stores the user’s data. Such a set consists of Cephmonitors and OSDs.
AKA “Ceph Object Store”.
Object GatewayThe S3/Swift gateway component for Ceph Object Store.
319 SES 5.5 (SES 5 & SES …
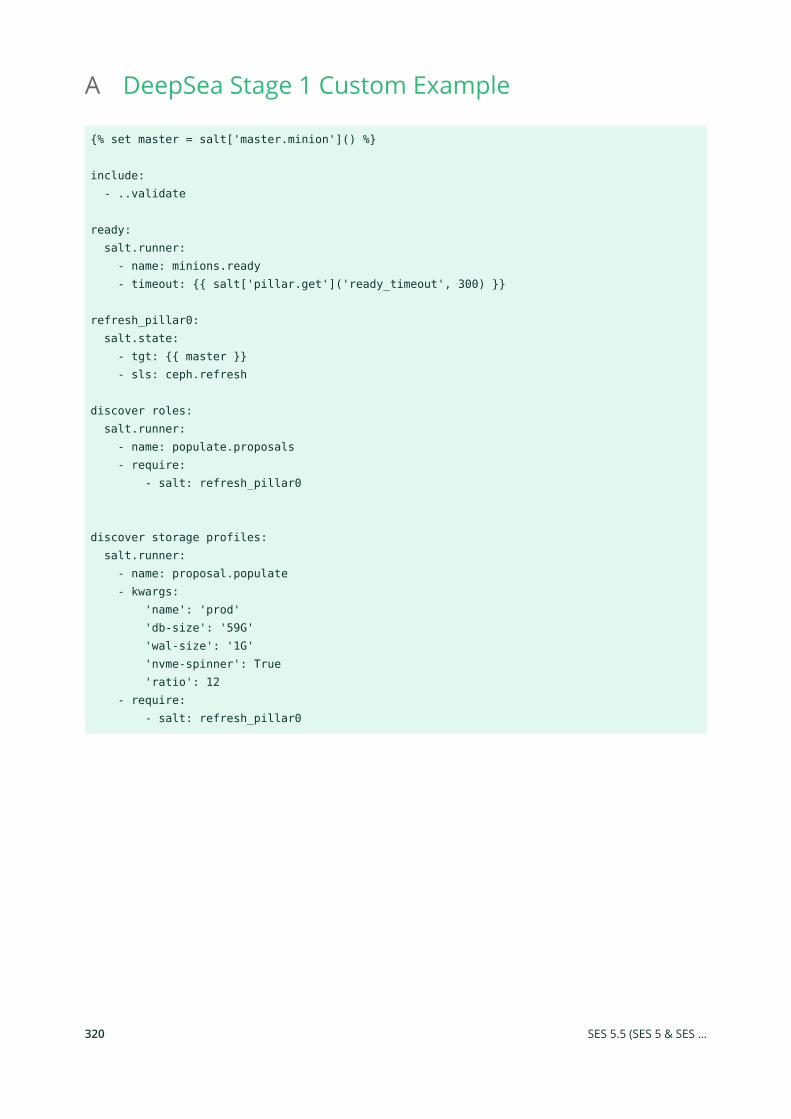
A DeepSea Stage 1 Custom Example
{% set master = salt['master.minion']() %}
include: - ..validate
ready: salt.runner: - name: minions.ready - timeout: {{ salt['pillar.get']('ready_timeout', 300) }}
refresh_pillar0: salt.state: - tgt: {{ master }} - sls: ceph.refresh
discover roles: salt.runner: - name: populate.proposals - require: - salt: refresh_pillar0
discover storage profiles: salt.runner: - name: proposal.populate - kwargs: 'name': 'prod' 'db-size': '59G' 'wal-size': '1G' 'nvme-spinner': True 'ratio': 12 - require: - salt: refresh_pillar0
320 SES 5.5 (SES 5 & SES …
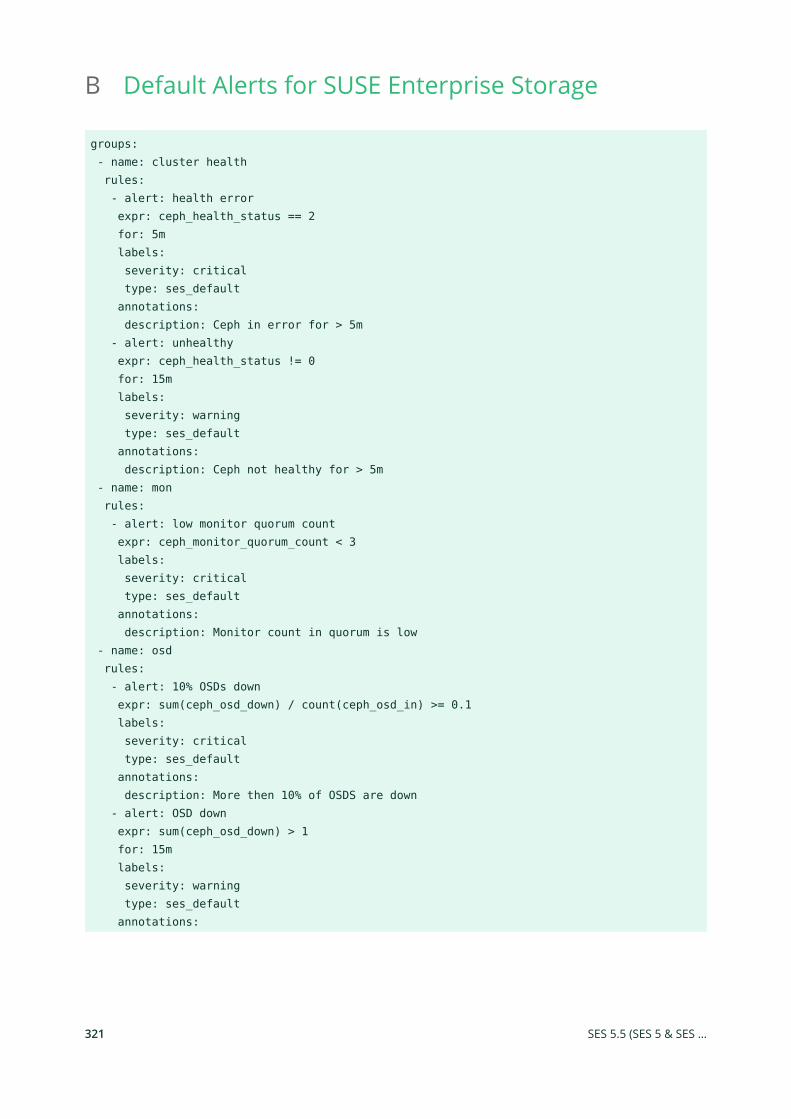
B Default Alerts for SUSE Enterprise Storage
groups: - name: cluster health rules: - alert: health error expr: ceph_health_status == 2 for: 5m labels: severity: critical type: ses_default annotations: description: Ceph in error for > 5m - alert: unhealthy expr: ceph_health_status != 0 for: 15m labels: severity: warning type: ses_default annotations: description: Ceph not healthy for > 5m - name: mon rules: - alert: low monitor quorum count expr: ceph_monitor_quorum_count < 3 labels: severity: critical type: ses_default annotations: description: Monitor count in quorum is low - name: osd rules: - alert: 10% OSDs down expr: sum(ceph_osd_down) / count(ceph_osd_in) >= 0.1 labels: severity: critical type: ses_default annotations: description: More then 10% of OSDS are down - alert: OSD down expr: sum(ceph_osd_down) > 1 for: 15m labels: severity: warning type: ses_default annotations:
321 SES 5.5 (SES 5 & SES …
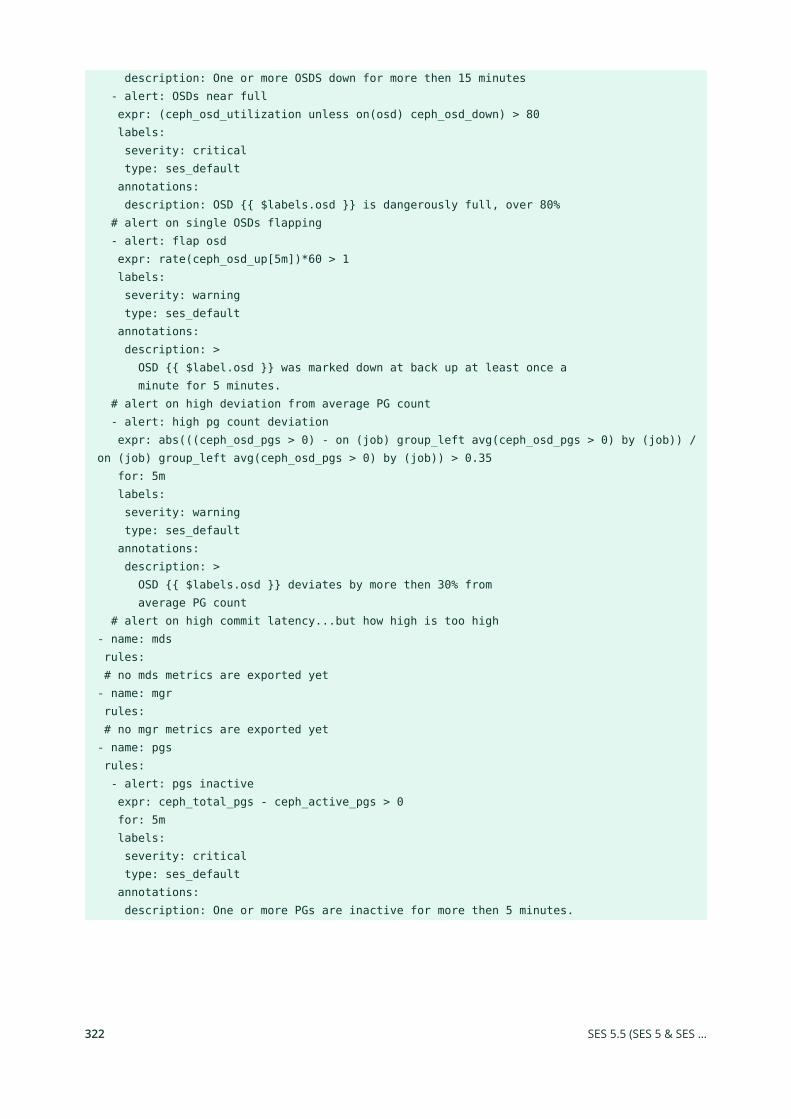
description: One or more OSDS down for more then 15 minutes - alert: OSDs near full expr: (ceph_osd_utilization unless on(osd) ceph_osd_down) > 80 labels: severity: critical type: ses_default annotations: description: OSD {{ $labels.osd }} is dangerously full, over 80% # alert on single OSDs flapping - alert: flap osd expr: rate(ceph_osd_up[5m])*60 > 1 labels: severity: warning type: ses_default annotations: description: > OSD {{ $label.osd }} was marked down at back up at least once a minute for 5 minutes. # alert on high deviation from average PG count - alert: high pg count deviation expr: abs(((ceph_osd_pgs > 0) - on (job) group_left avg(ceph_osd_pgs > 0) by (job)) / on (job) group_left avg(ceph_osd_pgs > 0) by (job)) > 0.35 for: 5m labels: severity: warning type: ses_default annotations: description: > OSD {{ $labels.osd }} deviates by more then 30% from average PG count # alert on high commit latency...but how high is too high - name: mds rules: # no mds metrics are exported yet - name: mgr rules: # no mgr metrics are exported yet - name: pgs rules: - alert: pgs inactive expr: ceph_total_pgs - ceph_active_pgs > 0 for: 5m labels: severity: critical type: ses_default annotations: description: One or more PGs are inactive for more then 5 minutes.
322 SES 5.5 (SES 5 & SES …
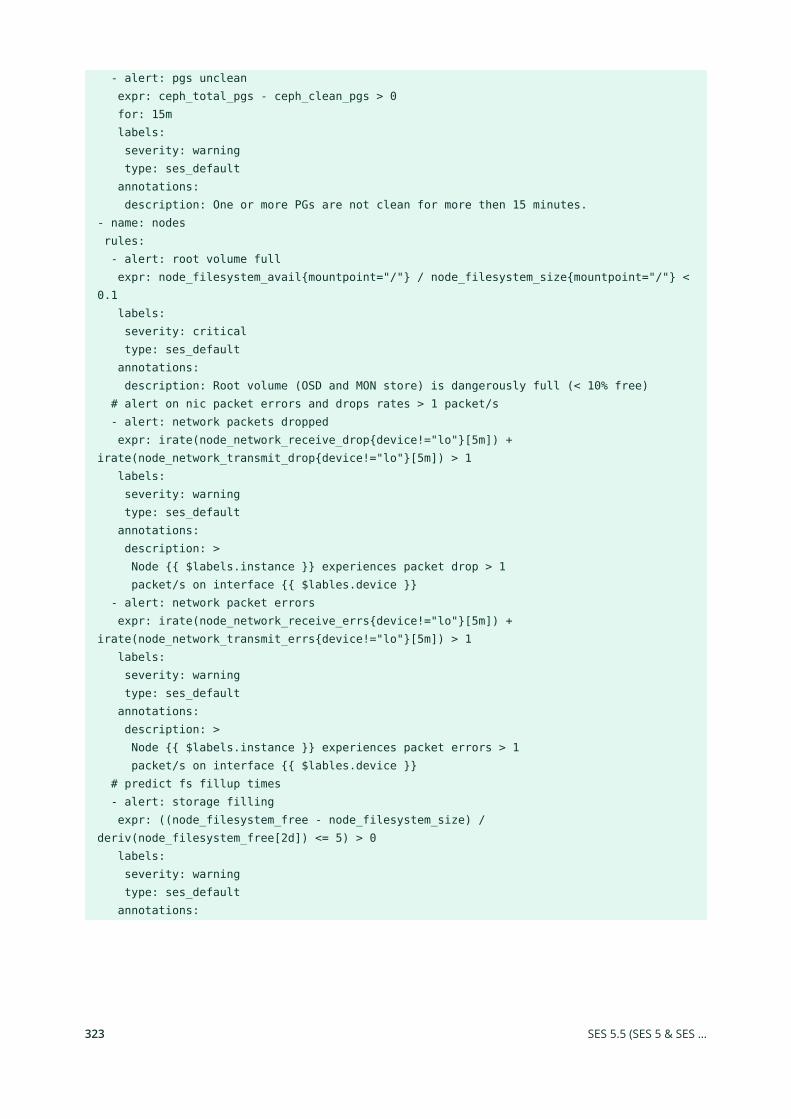
- alert: pgs unclean expr: ceph_total_pgs - ceph_clean_pgs > 0 for: 15m labels: severity: warning type: ses_default annotations: description: One or more PGs are not clean for more then 15 minutes. - name: nodes rules: - alert: root volume full expr: node_filesystem_avail{mountpoint="/"} / node_filesystem_size{mountpoint="/"} < 0.1 labels: severity: critical type: ses_default annotations: description: Root volume (OSD and MON store) is dangerously full (< 10% free) # alert on nic packet errors and drops rates > 1 packet/s - alert: network packets dropped expr: irate(node_network_receive_drop{device!="lo"}[5m]) + irate(node_network_transmit_drop{device!="lo"}[5m]) > 1 labels: severity: warning type: ses_default annotations: description: > Node {{ $labels.instance }} experiences packet drop > 1 packet/s on interface {{ $lables.device }} - alert: network packet errors expr: irate(node_network_receive_errs{device!="lo"}[5m]) + irate(node_network_transmit_errs{device!="lo"}[5m]) > 1 labels: severity: warning type: ses_default annotations: description: > Node {{ $labels.instance }} experiences packet errors > 1 packet/s on interface {{ $lables.device }} # predict fs fillup times - alert: storage filling expr: ((node_filesystem_free - node_filesystem_size) / deriv(node_filesystem_free[2d]) <= 5) > 0 labels: severity: warning type: ses_default annotations:
323 SES 5.5 (SES 5 & SES …
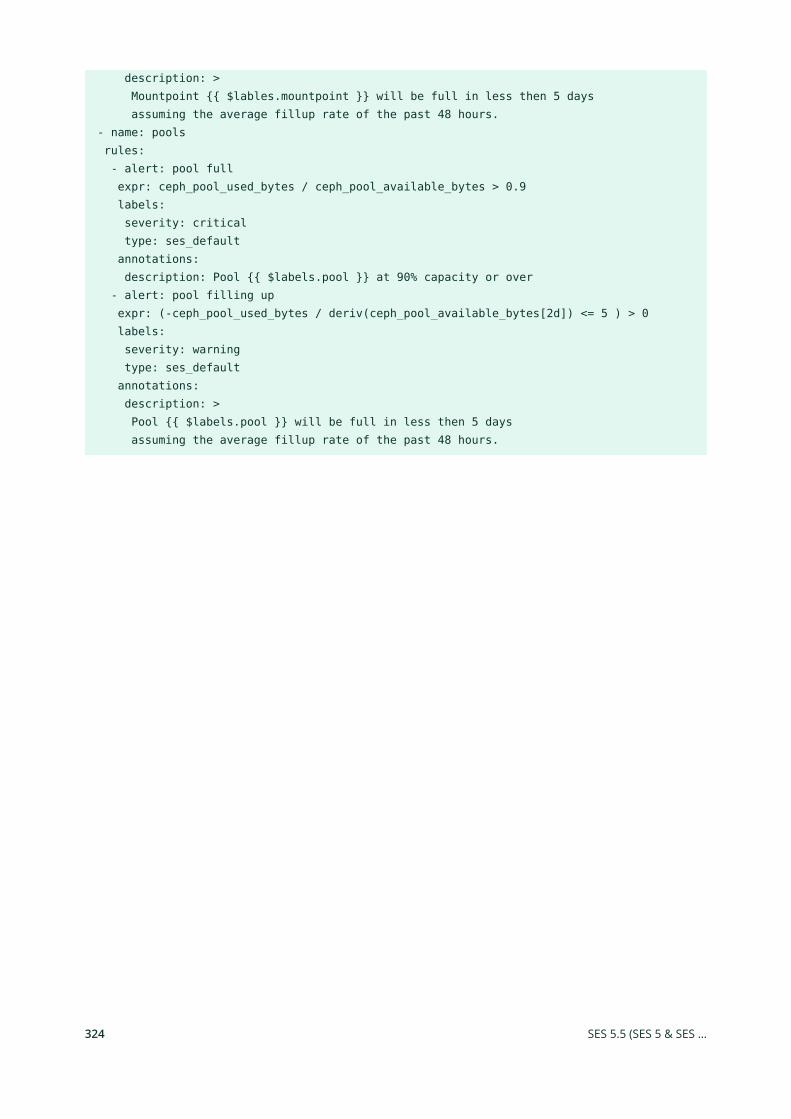
description: > Mountpoint {{ $lables.mountpoint }} will be full in less then 5 days assuming the average fillup rate of the past 48 hours. - name: pools rules: - alert: pool full expr: ceph_pool_used_bytes / ceph_pool_available_bytes > 0.9 labels: severity: critical type: ses_default annotations: description: Pool {{ $labels.pool }} at 90% capacity or over - alert: pool filling up expr: (-ceph_pool_used_bytes / deriv(ceph_pool_available_bytes[2d]) <= 5 ) > 0 labels: severity: warning type: ses_default annotations: description: > Pool {{ $labels.pool }} will be full in less then 5 days assuming the average fillup rate of the past 48 hours.
324 SES 5.5 (SES 5 & SES …
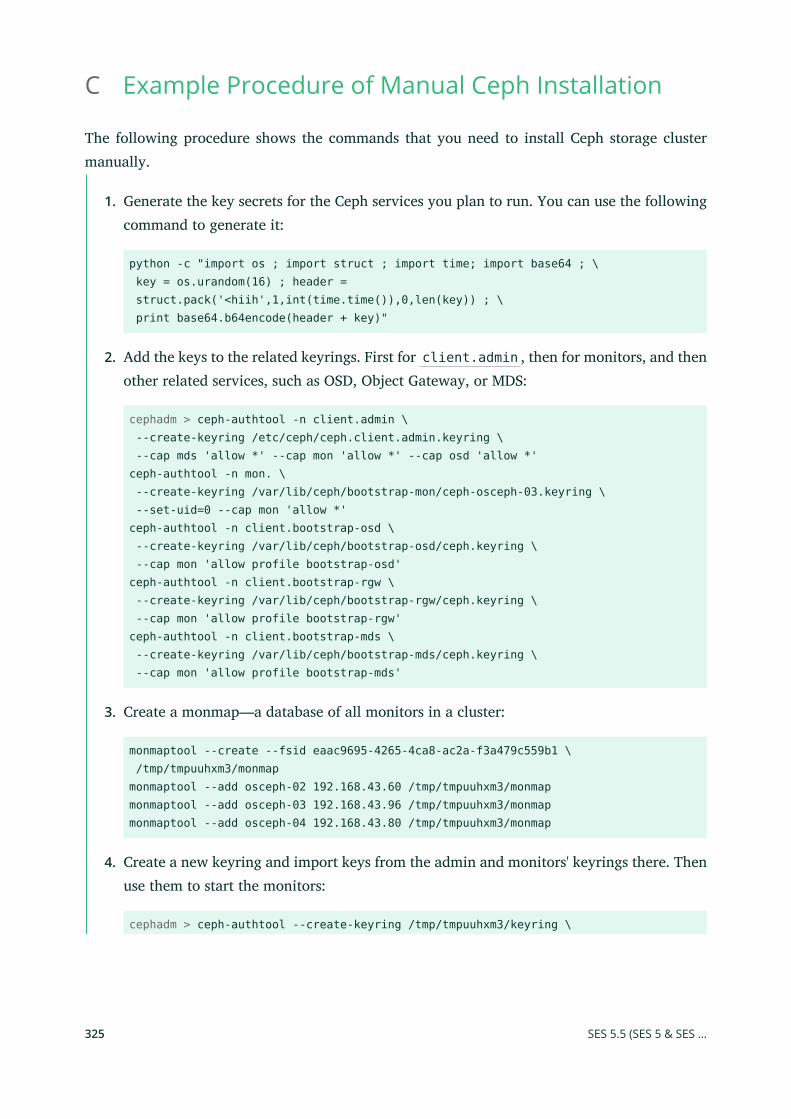
C Example Procedure of Manual Ceph Installation
The following procedure shows the commands that you need to install Ceph storage clustermanually.
1. Generate the key secrets for the Ceph services you plan to run. You can use the followingcommand to generate it:
python -c "import os ; import struct ; import time; import base64 ; \ key = os.urandom(16) ; header = struct.pack('<hiih',1,int(time.time()),0,len(key)) ; \ print base64.b64encode(header + key)"
2. Add the keys to the related keyrings. First for client.admin , then for monitors, and thenother related services, such as OSD, Object Gateway, or MDS:
cephadm > ceph-authtool -n client.admin \ --create-keyring /etc/ceph/ceph.client.admin.keyring \ --cap mds 'allow *' --cap mon 'allow *' --cap osd 'allow *'ceph-authtool -n mon. \ --create-keyring /var/lib/ceph/bootstrap-mon/ceph-osceph-03.keyring \ --set-uid=0 --cap mon 'allow *'ceph-authtool -n client.bootstrap-osd \ --create-keyring /var/lib/ceph/bootstrap-osd/ceph.keyring \ --cap mon 'allow profile bootstrap-osd'ceph-authtool -n client.bootstrap-rgw \ --create-keyring /var/lib/ceph/bootstrap-rgw/ceph.keyring \ --cap mon 'allow profile bootstrap-rgw'ceph-authtool -n client.bootstrap-mds \ --create-keyring /var/lib/ceph/bootstrap-mds/ceph.keyring \ --cap mon 'allow profile bootstrap-mds'
3. Create a monmap—a database of all monitors in a cluster:
monmaptool --create --fsid eaac9695-4265-4ca8-ac2a-f3a479c559b1 \ /tmp/tmpuuhxm3/monmapmonmaptool --add osceph-02 192.168.43.60 /tmp/tmpuuhxm3/monmapmonmaptool --add osceph-03 192.168.43.96 /tmp/tmpuuhxm3/monmapmonmaptool --add osceph-04 192.168.43.80 /tmp/tmpuuhxm3/monmap
4. Create a new keyring and import keys from the admin and monitors' keyrings there. Thenuse them to start the monitors:
cephadm > ceph-authtool --create-keyring /tmp/tmpuuhxm3/keyring \
325 SES 5.5 (SES 5 & SES …
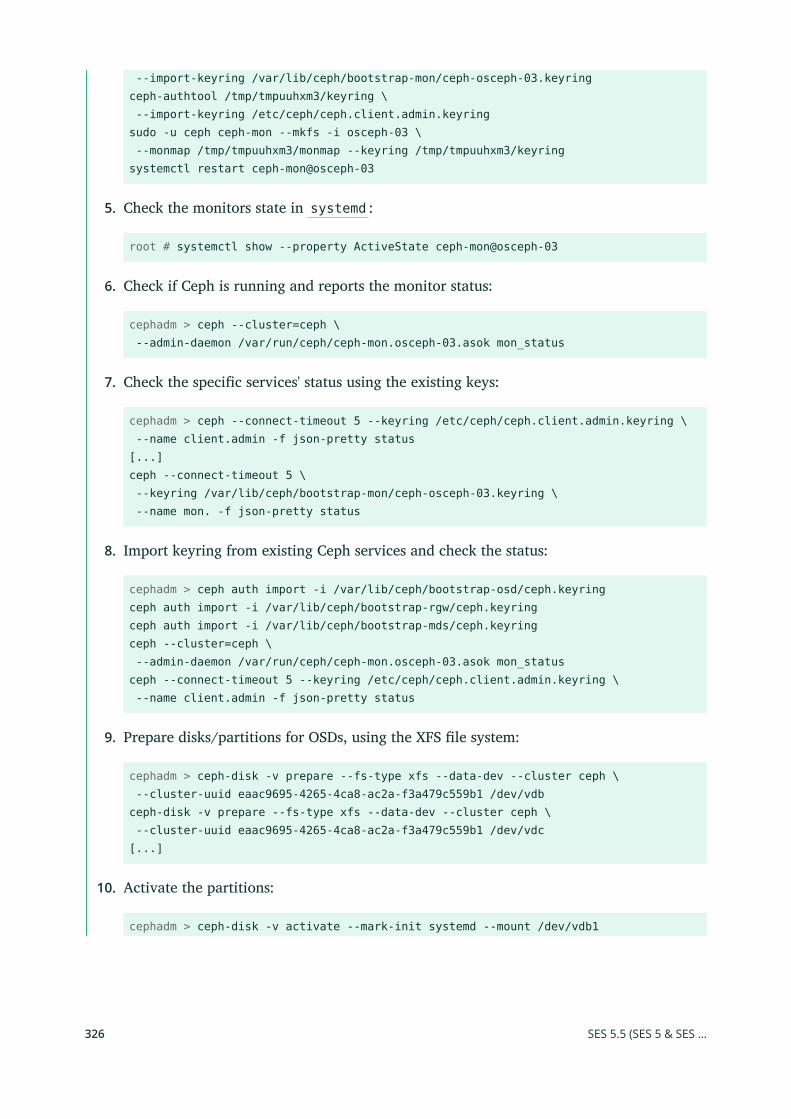
--import-keyring /var/lib/ceph/bootstrap-mon/ceph-osceph-03.keyringceph-authtool /tmp/tmpuuhxm3/keyring \ --import-keyring /etc/ceph/ceph.client.admin.keyringsudo -u ceph ceph-mon --mkfs -i osceph-03 \ --monmap /tmp/tmpuuhxm3/monmap --keyring /tmp/tmpuuhxm3/keyringsystemctl restart ceph-mon@osceph-03
5. Check the monitors state in systemd :
root # systemctl show --property ActiveState ceph-mon@osceph-03
6. Check if Ceph is running and reports the monitor status:
cephadm > ceph --cluster=ceph \ --admin-daemon /var/run/ceph/ceph-mon.osceph-03.asok mon_status
7. Check the specic services' status using the existing keys:
cephadm > ceph --connect-timeout 5 --keyring /etc/ceph/ceph.client.admin.keyring \ --name client.admin -f json-pretty status[...]ceph --connect-timeout 5 \ --keyring /var/lib/ceph/bootstrap-mon/ceph-osceph-03.keyring \ --name mon. -f json-pretty status
8. Import keyring from existing Ceph services and check the status:
cephadm > ceph auth import -i /var/lib/ceph/bootstrap-osd/ceph.keyringceph auth import -i /var/lib/ceph/bootstrap-rgw/ceph.keyringceph auth import -i /var/lib/ceph/bootstrap-mds/ceph.keyringceph --cluster=ceph \ --admin-daemon /var/run/ceph/ceph-mon.osceph-03.asok mon_statusceph --connect-timeout 5 --keyring /etc/ceph/ceph.client.admin.keyring \ --name client.admin -f json-pretty status
9. Prepare disks/partitions for OSDs, using the XFS le system:
cephadm > ceph-disk -v prepare --fs-type xfs --data-dev --cluster ceph \ --cluster-uuid eaac9695-4265-4ca8-ac2a-f3a479c559b1 /dev/vdbceph-disk -v prepare --fs-type xfs --data-dev --cluster ceph \ --cluster-uuid eaac9695-4265-4ca8-ac2a-f3a479c559b1 /dev/vdc[...]
10. Activate the partitions:
cephadm > ceph-disk -v activate --mark-init systemd --mount /dev/vdb1
326 SES 5.5 (SES 5 & SES …
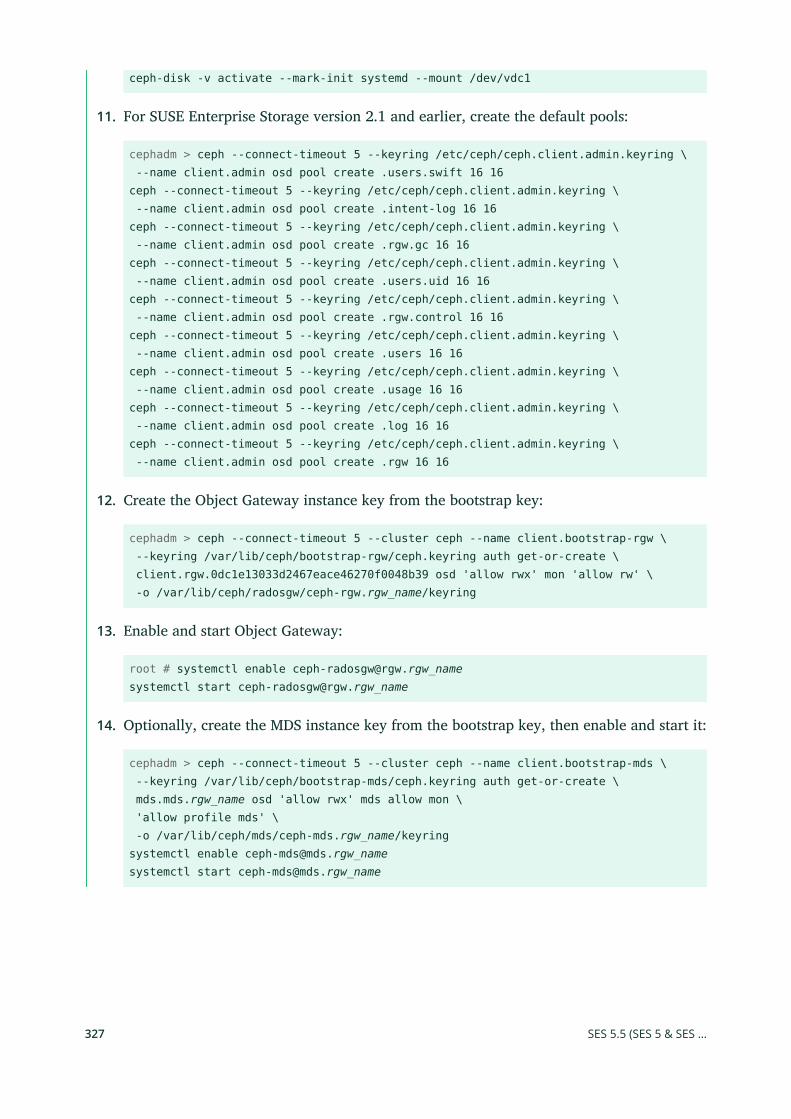
ceph-disk -v activate --mark-init systemd --mount /dev/vdc1
11. For SUSE Enterprise Storage version 2.1 and earlier, create the default pools:
cephadm > ceph --connect-timeout 5 --keyring /etc/ceph/ceph.client.admin.keyring \ --name client.admin osd pool create .users.swift 16 16ceph --connect-timeout 5 --keyring /etc/ceph/ceph.client.admin.keyring \ --name client.admin osd pool create .intent-log 16 16ceph --connect-timeout 5 --keyring /etc/ceph/ceph.client.admin.keyring \ --name client.admin osd pool create .rgw.gc 16 16ceph --connect-timeout 5 --keyring /etc/ceph/ceph.client.admin.keyring \ --name client.admin osd pool create .users.uid 16 16ceph --connect-timeout 5 --keyring /etc/ceph/ceph.client.admin.keyring \ --name client.admin osd pool create .rgw.control 16 16ceph --connect-timeout 5 --keyring /etc/ceph/ceph.client.admin.keyring \ --name client.admin osd pool create .users 16 16ceph --connect-timeout 5 --keyring /etc/ceph/ceph.client.admin.keyring \ --name client.admin osd pool create .usage 16 16ceph --connect-timeout 5 --keyring /etc/ceph/ceph.client.admin.keyring \ --name client.admin osd pool create .log 16 16ceph --connect-timeout 5 --keyring /etc/ceph/ceph.client.admin.keyring \ --name client.admin osd pool create .rgw 16 16
12. Create the Object Gateway instance key from the bootstrap key:
cephadm > ceph --connect-timeout 5 --cluster ceph --name client.bootstrap-rgw \ --keyring /var/lib/ceph/bootstrap-rgw/ceph.keyring auth get-or-create \ client.rgw.0dc1e13033d2467eace46270f0048b39 osd 'allow rwx' mon 'allow rw' \ -o /var/lib/ceph/radosgw/ceph-rgw.rgw_name/keyring
13. Enable and start Object Gateway:
root # systemctl enable [email protected]_namesystemctl start [email protected]_name
14. Optionally, create the MDS instance key from the bootstrap key, then enable and start it:
cephadm > ceph --connect-timeout 5 --cluster ceph --name client.bootstrap-mds \ --keyring /var/lib/ceph/bootstrap-mds/ceph.keyring auth get-or-create \ mds.mds.rgw_name osd 'allow rwx' mds allow mon \ 'allow profile mds' \ -o /var/lib/ceph/mds/ceph-mds.rgw_name/keyringsystemctl enable [email protected]_namesystemctl start [email protected]_name
327 SES 5.5 (SES 5 & SES …
D Documentation Updates
This chapter lists content changes for this document since the initial release of SUSE EnterpriseStorage 4. You can nd changes related to the cluster deployment that apply to previous versionsin https://documentation.suse.com/ses/5.5/single-html/ses-deployment/#ap-deploy-docupdate .
The document was updated on the following dates:
Section D.1, “The Latest Documentation Update”
Section D.2, “October, 2018 (Documentation Maintenance Update)”
Section D.3, “November 2017 (Documentation Maintenance Update)”
Section D.4, “October, 2017 (Release of SUSE Enterprise Storage 5.5)”
D.1 The Latest Documentation UpdateBUGFIXES
Added hint on verifying prole proposal in Section 1.5, “Adding an OSD Disk to a Node” (https://
bugzilla.suse.com/show_bug.cgi?id=1134736 ).
Remove minion's key from the Salt master temporarily when problematic inSection 1.3, “Removing and Reinstalling Cluster Nodes” (https://bugzilla.suse.com/show_bug.cgi?
id=1120662 ).
Added procedure on making ceph.conf parameters unique in Section 1.12, “Adjusting
ceph.conf with Custom Settings” (https://bugzilla.suse.com/show_bug.cgi?id=1116349 ).
Extended a tip on preventing rebalancing after adding a node in Section 1.1, “Adding New
Cluster Nodes” (https://bugzilla.suse.com/show_bug.cgi?id=1131044 ).
Added performance notes to Book “Deployment Guide”, Chapter 13 “Exporting Ceph Data via
Samba” and Chapter 16, NFS Ganesha: Export Ceph Data via NFS (https://bugzilla.suse.com/
show_bug.cgi?id=1124674 ).
Added Section 7.1.1.5, “Migrating from a Legacy SSD Rule to Device Classes” (https://
bugzilla.suse.com/show_bug.cgi?id=1112883 ).
Added a list of corresponding software repositories in Section 1.10, “Updating the Cluster
Nodes” (https://bugzilla.suse.com/show_bug.cgi?id=1117474 ).
328 The Latest Documentation Update SES 5.5 (SES 5 & SES …
Added Section 9.5, “Advanced Features” (https://bugzilla.suse.com/show_bug.cgi?
id=1120706 ).
Extended examples of Ceph services identication in Section 3.1.3, “Identifying Individual
Services” (https://bugzilla.suse.com/show_bug.cgi?id=1120682 ).
Updated Section 11.6, “Setting Up an Example Tiered Storage” to use device classes (https://
bugzilla.suse.com/show_bug.cgi?id=1114827 ).
Added example to Book “Deployment Guide”, Chapter 7 “Customizing the Default Configuration”,
Section 7.1.5 “Updates and Reboots during Stage 0” (https://bugzilla.suse.com/show_bug.cgi?
id=1119451 ).
Use multiple internal time sources in Section 20.4, “Time Synchronization of Nodes” (https://
bugzilla.suse.com/show_bug.cgi?id=1119571 ).
Added listing of pool snapshots in Section 8.4, “Pool Snapshots” (https://bugzilla.suse.com/
show_bug.cgi?id=1113911 ).
Added Section 7.1.1, “Device Classes” (https://bugzilla.suse.com/show_bug.cgi?id=1113292 ).
Added tcp_nodelay explanation in Section 13.4, “Configuration Parameters” (https://
bugzilla.suse.com/show_bug.cgi?id=1106274 ).
Added more details on pool compression in Section 8.5, “Data Compression” (https://
bugzilla.suse.com/show_bug.cgi?id=1113934 ).
Improved Section 8.3.2, “Migrate Using Cache Tier” and added Section 8.3.3, “Migrating RBD
Images” (https://bugzilla.suse.com/show_bug.cgi?id=1113900 ).
Added Important: Removed OSD ID Still Present in grains (https://bugzilla.suse.com/
show_bug.cgi?id=1107464 ).
D.2 October, 2018 (Documentation MaintenanceUpdate)GENERAL UPDATES
Moved Section 20.1, “Identifying Orphaned Partitions” into Chapter 20, Hints and Tips.
Extended Section 17.4.3, “Managing RADOS Block Devices (RBDs)”, mainly added a section aboutsnapshots (Fate #325642).
329 October, 2018 (Documentation Maintenance Update) SES 5.5 (SES 5 & SES …
Added Section 8.3, “Pool Migration” (Fate#322006).
Inserted Section 3.2, “Restarting Ceph Services using DeepSea” into Chapter 3, Operating Ceph
Services.
Added Section 1.7, “Replacing an OSD Disk”.
BUGFIXES
Extended Section 1.7.2, “Automated Configuration” (https://bugzilla.suse.com/show_bug.cgi?
id=1111442 ).
Added /etc/ceph to the list of backup content in Book “Deployment Guide”, Chapter 6
“Backing Up the Cluster Configuration”, Section 6.1 “Back Up Ceph COnfiguration” (https://
bugzilla.suse.com/show_bug.cgi?id=1153342 ).
Removed 'default-update-no-reboot' as it is 'default' now, in Book “Deployment Guide”,
Chapter 7 “Customizing the Default Configuration”, Section 7.2 “Modifying Discovered Configuration”
(https://bugzilla.suse.com/show_bug.cgi?id=1111318 ).
Fixed path to *-replace le in Section 1.7, “Replacing an OSD Disk” (https://
bugzilla.suse.com/show_bug.cgi?id=1111470 ). Removed AppArmor snippets from Book
“Deployment Guide”, Chapter 5 “Upgrading from Previous Releases” and added Section 1.13,
“Enabling AppArmor Profiles” (https://bugzilla.suse.com/show_bug.cgi?id=1110861 ).
Added Chapter 5, Monitoring and Alerting (https://bugzilla.suse.com/show_bug.cgi?
id=1107833 ).
Disable kernel NFS on role-ganesha in Book “Deployment Guide”, Chapter 12 “Installation
of NFS Ganesha”, Section 12.1.2 “Summary of Requirements” (https://bugzilla.suse.com/
show_bug.cgi?id=1107625 ).
Added Section 16.3.3, “Supported Operations” (https://bugzilla.suse.com/show_bug.cgi?
id=1107624 ).
Improved auto-replacement OSDs procedure in Section 1.7, “Replacing an OSD Disk” (https://
bugzilla.suse.com/show_bug.cgi?id=1107090 ).
Fixed libvirt keyring creation in Section 18.1, “Configuring Ceph” (https://bugzilla.suse.com/
show_bug.cgi?id=1106495 ).
Simplied a user creation command in Section 18.1, “Configuring Ceph” https://
bugzilla.suse.com/show_bug.cgi?id=1102467 ).
330 October, 2018 (Documentation Maintenance Update) SES 5.5 (SES 5 & SES …
Added 'tier' to the command in Section 8.3.2, “Migrate Using Cache Tier” https://
bugzilla.suse.com/show_bug.cgi?id=1102212 ).
Added a missing salt command in Section 1.6.2, “Removing Broken OSDs Forcefully” https://
bugzilla.suse.com/show_bug.cgi?id=1100701 ).
Added the state.apply part to the salt in Section 1.8, “Recovering a Reinstalled OSD Node”
https://bugzilla.suse.com/show_bug.cgi?id=1095937 ).
Added Section 17.1.1, “Enabling Secure Access to openATTIC using SSL” https://bugzilla.suse.com/
show_bug.cgi?id=1083216 ).
Added Section 13.12, “Load Balancing the Object Gateway Servers with HAProxy” https://
bugzilla.suse.com/show_bug.cgi?id=1093513 ).
Added Section 7.5, “Scrubbing” https://bugzilla.suse.com/show_bug.cgi?id=1079256 ).
Enhanced the port list for Firewall setting in Section 20.10, “Firewall Settings for Ceph” https://
bugzilla.suse.com/show_bug.cgi?id=1070087 ).
Diered roles restarting as per DeepSea version in Section 3.2.2, “Restarting Specific Services”
https://bugzilla.suse.com/show_bug.cgi?id=1091075 ).
Added Section 1.4, “Redeploying Monitor Nodes” https://bugzilla.suse.com/show_bug.cgi?
id=1038731 ).
Added Section 13.9.1.1, “Dynamic Resharding” https://bugzilla.suse.com/show_bug.cgi?
id=1076001 ).
Added Section 13.9, “Bucket Index Sharding” https://bugzilla.suse.com/show_bug.cgi?
id=1076000 ).
Updated the Object Gateway SSL the DeepSea way in Section 13.6, “Enabling HTTPS/
SSL for Object Gateways” (https://bugzilla.suse.com/show_bug.cgi?id=1083756 and https://
bugzilla.suse.com/show_bug.cgi?id=1077809 ).
Changes in DeepSea require a modied deployment of NFS Ganesha with Object Gateway.See Section 16.3.1, “Dierent Object Gateway Users for NFS Ganesha” (https://bugzilla.suse.com/
show_bug.cgi?id=1058821 ). ceph osd pool create fails if placement group limit perOSD is exceeded. See Section 8.2.2, “Create a Pool”. (https://bugzilla.suse.com/show_bug.cgi?
id=1076509 )
Added Section 1.8, “Recovering a Reinstalled OSD Node” (https://bugzilla.suse.com/
show_bug.cgi?id=1057764 ).
331 October, 2018 (Documentation Maintenance Update) SES 5.5 (SES 5 & SES …
Added a reliability warning in Section 12.1, “Runtime Configuration” (https://
bugzilla.suse.com/show_bug.cgi?id=989349 ).
Added Section 13.2, “Deploying the Object Gateway” (https://bugzilla.suse.com/show_bug.cgi?
id=1088895 ).
Removed lz4 from the list of compression algorithms in Section 8.5.3, “Global Compression
Options” (https://bugzilla.suse.com/show_bug.cgi?id=1088450 ).
Added a tip on removing multiple OSDs in Section 1.6, “Removing an OSD” (https://
bugzilla.suse.com/show_bug.cgi?id=1070791 ).
Added Section 20.3, “Stopping OSDs without Rebalancing” (https://bugzilla.suse.com/
show_bug.cgi?id=1051039 ).
Added MDS cache size congurables in Book “Deployment Guide”, Chapter 11 “Installation
of CephFS”, Section 11.2.2 “Configuring a Metadata Server” (https://bugzilla.suse.com/
show_bug.cgi?id=1062692 ).
Added Section 13.10, “Integrating OpenStack Keystone” (https://bugzilla.suse.com/
show_bug.cgi?id=1077941 ).
Added a tip about synchronizing iSCSI Gateway conguration in Book “Deployment Guide”,
Chapter 10 “Installation of iSCSI Gateway”, Section 10.4.3 “Export RBD Images via iSCSI” (https://
bugzilla.suse.com/show_bug.cgi?id=1073327 ).
Changes in DeepSea require a modied deployment of NFS Ganesha with Object Gateway.See Section 16.3.1, “Dierent Object Gateway Users for NFS Ganesha” (https://bugzilla.suse.com/
show_bug.cgi?id=1058821 ).
D.3 November 2017 (Documentation MaintenanceUpdate)GENERAL UPDATES
Added Section 20.12, “Replacing Storage Disk” (Fate #321032).
BUGFIXES
Added Section 10.4, “Erasure Coded Pools with RADOS Block Device” (https://bugzilla.suse.com/
show_bug.cgi?id=1075158 ).
332 November 2017 (Documentation Maintenance Update) SES 5.5 (SES 5 & SES …
Added a section about adding a disk to OSD nodes. See Section 1.5, “Adding an OSD Disk to a
Node”. (https://bugzilla.suse.com/show_bug.cgi?id=1066005 )
salt-run remove.osd requires OSD_ID digit without leading osd. . See Section 1.6,
“Removing an OSD”.
ceph tell requires OSD_ID digit and leading osd. . See Section 22.8, “Finding Slow OSDs”.
Added Section 22.11, “/var Running Out of Space” (https://bugzilla.suse.com/show_bug.cgi?
id=1069255 ).
Added Section 13.1, “Object Gateway Restrictions and Naming Limitations” (https://
bugzilla.suse.com/show_bug.cgi?id=1067613 ).
Fixed rbd-mirror starting and stopping commands in Section 9.4.1, “rbd-mirror Daemon”
(https://bugzilla.suse.com/show_bug.cgi?id=1068061 ).
D.4 October, 2017 (Release of SUSE EnterpriseStorage 5.5)GENERAL UPDATES
Removed Calamari in favor of openATTIC.
Added Section 17.4.6, “Managing NFS Ganesha” (Fate #321620).
Added Section 9.2.1, “rbdmap: Map RBD Devices at Boot Time”
Added Chapter 9, RADOS Block Device (Fate #321061).
Added Section 17.4.9, “Managing Object Gateway Users and Buckets” (Fate #320318).
Added Section 13.8, “LDAP Authentication” (Fate #321631).
Added Section 15.4, “Multiple Active MDS Daemons (Active-Active MDS)” (Fate #322976).
Added Section 17.4.7, “Managing iSCSI Gateways” (Fate #321370).
Added iSCSI Gateway and Object Gateway conguration for openATTIC, see Section 17.1.5,
“Object Gateway Management” and Section 17.1.6, “iSCSI Gateway Management” (Fate #320318and #321370).
333 October, 2017 (Release of SUSE Enterprise Storage 5.5) SES 5.5 (SES 5 & SES …
Updated Chapter 16, NFS Ganesha: Export Ceph Data via NFS (https://bugzilla.suse.com/
show_bug.cgi?id=1036495 , https://bugzilla.suse.com/show_bug.cgi?id=1031444 ).
RBD images can now be stored in EC pools, see Section 9.1.2, “Creating a Block Device Image
in an Erasure Coded Pool” (https://bugzilla.suse.com/show_bug.cgi?id=1040752 ).
Added section about backing up DeepSea conguration, see Book “Deployment Guide”,
Chapter 6 “Backing Up the Cluster Configuration” (https://bugzilla.suse.com/show_bug.cgi?
id=1046497 ).
Object Gateway failover and disaster recovery, see Section 13.11.12, “Failover and Disaster
Recovery” (https://bugzilla.suse.com/show_bug.cgi?id=1036084 ).
BlueStore enables data compression for pools, see Section 8.5, “Data Compression”
(FATE#318582).
CIFS export of CephFS is possible, see Book “Deployment Guide”, Chapter 13 “Exporting Ceph
Data via Samba” (FATE#321622).
Added procedure for cluster reboot, see Section 1.11, “Halting or Rebooting Cluster” (https://
bugzilla.suse.com/show_bug.cgi?id=1047638 ).
DeepSea stage 0 can update without rebooting, see Section 1.10, “Updating the Cluster Nodes”.
ceph fs replaced, see Section 15.4.3, “Decreasing the Number of Ranks” andSection 15.4.2, “Increasing the MDS Active Cluster Size” (https://bugzilla.suse.com/show_bug.cgi?
id=1047638 ).
Added section Section 20.11, “Testing Network Performance” (FATE#321031).
BUGFIXES
The swift client package is now part of the 'Public Cloud' module in Section 13.5.1, “Accessing
Object Gateway” (https://bugzilla.suse.com/show_bug.cgi?id=1057591 ).
Added Section 12.1, “Runtime Configuration” (https://bugzilla.suse.com/show_bug.cgi?
id=1061435 ).
CivetWeb binds to multiple ports in Tip: Binding to Multiple Ports (https://bugzilla.suse.com/
show_bug.cgi?id=1055181 ).
Included 3 Object Gateway options aecting performance in Section 13.4, “Configuration
Parameters” (https://bugzilla.suse.com/show_bug.cgi?id=1052983 ).
334 October, 2017 (Release of SUSE Enterprise Storage 5.5) SES 5.5 (SES 5 & SES …
Imported Section 1.12, “Adjusting ceph.conf with Custom Settings” and added the need forStage 3 (https://bugzilla.suse.com/show_bug.cgi?id=1057273 ).
Added libvirt keyring creation in Section 18.1, “Configuring Ceph” (https://bugzilla.suse.com/
show_bug.cgi?id=1055610 ).
Added Example 1.1, “Removing a Salt minion from the Cluster” (https://bugzilla.suse.com/
show_bug.cgi?id=1054516 ).
Updated Section 4.3, “Watching a Cluster” (https://bugzilla.suse.com/show_bug.cgi?
id=1053638 ).
Made Salt REST API variables optional in Section 17.1, “openATTIC Deployment
and Configuration” (https://bugzilla.suse.com/show_bug.cgi?id=1054748 and https://
bugzilla.suse.com/show_bug.cgi?id=1054749 ).
Removed oaconfig install in Section 17.1.3, “openATTIC Initial Setup” (https://
bugzilla.suse.com/show_bug.cgi?id=1054747 ).
Added a section about displaying a pool metadata in Section 8.1, “Associate Pools with an
Application” (https://bugzilla.suse.com/show_bug.cgi?id=1053327 ).
A list of health codes imported in Section 4.2, “Checking Cluster Health” (https://
bugzilla.suse.com/show_bug.cgi?id=1052939 ).
Updated screenshots and related text in Section 17.4.9.1, “Adding a New Object Gateway User”
and Section 17.4.9.3, “Editing Object Gateway Users” (https://bugzilla.suse.com/show_bug.cgi?
id=1051814 and (https://bugzilla.suse.com/show_bug.cgi?id=1051816 ).
Added Object Gateway buckets in Section 17.4.9, “Managing Object Gateway Users and Buckets”
(https://bugzilla.suse.com/show_bug.cgi?id=1051800 ).
Included cephx in mount examples in Section 15.1.3, “Mount CephFS” (https://
bugzilla.suse.com/show_bug.cgi?id=1053022 ).
Updated and improved the description of pool deletion in Section 8.2.4, “Delete a Pool”
(https://bugzilla.suse.com/show_bug.cgi?id=1052981 ).
Added compression algorithms description in Section 8.5.2, “Pool Compression Options”
(https://bugzilla.suse.com/show_bug.cgi?id=1051457 ).
Replaced network diagnostics and benchmark in Section 22.10, “Poor Cluster Performance
Caused by Network Problems” (https://bugzilla.suse.com/show_bug.cgi?id=1050190 ).
335 October, 2017 (Release of SUSE Enterprise Storage 5.5) SES 5.5 (SES 5 & SES …
Extended Section 22.5, “'nn pg stuck inactive' Status Message” (https://bugzilla.suse.com/
show_bug.cgi?id=1050183 ).
Mentioned pool re-creation in Section 22.4, “'Too Many PGs per OSD' Status Message” (https://
bugzilla.suse.com/show_bug.cgi?id=1050178 ).
Fixed RGW section name in ceph.conf in Book “Deployment Guide”, Chapter 9 “Ceph
Object Gateway”, Section 9.1 “Object Gateway Manual Installation” (https://bugzilla.suse.com/
show_bug.cgi?id=1050170 ).
Updated commands output in Section 4.4, “Checking a Cluster's Usage Stats” and Section 4.3,
“Watching a Cluster” (https://bugzilla.suse.com/show_bug.cgi?id=1050175 ).
Removed a preventive HEALTCH_WARN section in Section 4.2, “Checking Cluster Health”
(https://bugzilla.suse.com/show_bug.cgi?id=1050174 ).
Fixed sudo in Section 13.5.2.1, “Adding S3 and Swift Users” (https://bugzilla.suse.com/
show_bug.cgi?id=1050177 ).
Removed a reference to a RADOS striper in Section 22.2, “Sending Large Objects with radosFails with Full OSD” (https://bugzilla.suse.com/show_bug.cgi?id=1050171 ).
Improved section about OSD failure because of journal failure in Section 21.5, “What Happens
When a Journal Disk Fails?” (https://bugzilla.suse.com/show_bug.cgi?id=1050169 ).
Added a tip on zypper patch during Stage 0 in Section 1.10, “Updating the Cluster Nodes”
(https://bugzilla.suse.com/show_bug.cgi?id=1050165 ).
Added Section 8.1, “Associate Pools with an Application” (https://bugzilla.suse.com/
show_bug.cgi?id=1049940 ).
Improved time synchronization information in Section 22.9, “Fixing Clock Skew Warnings”
(https://bugzilla.suse.com/show_bug.cgi?id=1050186 ).
Replaced 'erasure pool' with the correct 'erasure coded pool' (https://bugzilla.suse.com/
show_bug.cgi?id=1050093 ).
Replaced rcceph with systemctl (https://bugzilla.suse.com/show_bug.cgi?
id=1050111 ).
Updated CephFS mounting preparation in Section 15.1.1, “Client Preparation” (https://
bugzilla.suse.com/show_bug.cgi?id=1049451 ).
336 October, 2017 (Release of SUSE Enterprise Storage 5.5) SES 5.5 (SES 5 & SES …
Fixed qemu-img command in Section 18.1, “Configuring Ceph” (https://bugzilla.suse.com/
show_bug.cgi?id=1047190 ).
Specied which DeepSea stages to run when removing roles in Section 1.3, “Removing and
Reinstalling Cluster Nodes” (https://bugzilla.suse.com/show_bug.cgi?id=1047430 ).
Added a new DeepSea role Ceph Manager (https://bugzilla.suse.com/show_bug.cgi?
id=1047472 ).
Adjusted intro for 12 SP3 in Section 15.1.1, “Client Preparation” (https://bugzilla.suse.com/
show_bug.cgi?id=1043739 ).
Fixed typo in XML entity in Section 18.4, “Configuring the VM” (https://bugzilla.suse.com/
show_bug.cgi?id=1042917 ).
Added information to re-run DeepSea Stages 2-5 for a role removal in Section 1.3, “Removing
and Reinstalling Cluster Nodes” (https://bugzilla.suse.com/show_bug.cgi?id=1041899 ).
Added Object Gateway, iSCSI Gateway, and NFS Ganesha ports numbers that need to beopen in SUSE Firewall in Section 20.10, “Firewall Settings for Ceph” (https://bugzilla.suse.com/
show_bug.cgi?id=1034081 ).
Added description of CRUSH map tree iteration, see Section 7.3.1, “Iterating Through the Node
Tree”.
Added indep parameter to CRUSH rule, see Section 7.3.2, “firstn and indep”. (https://
bugzilla.suse.com/show_bug.cgi?id=1025189 )
Mounting CephFS via /etc/fstab requires _netdev parameter. See Section 15.3, “CephFS
in /etc/fstab” (https://bugzilla.suse.com/show_bug.cgi?id=989349 )
Added tip on an existing rbdmap systemd service le in Section 9.2, “Mounting and
Unmounting” (https://bugzilla.suse.com/show_bug.cgi?id=1015748 ).
Added an explanation to use_gmt_hitset option in Section 11.7.1.1, “Use GMT for Hit Set”
(https://bugzilla.suse.com/show_bug.cgi?id=1024522 ).
Moved mounting CephFS back into the admin guide and added a client preparation sectionin Section 15.1.1, “Client Preparation” (https://bugzilla.suse.com/show_bug.cgi?id=1025447 ).
337 October, 2017 (Release of SUSE Enterprise Storage 5.5) SES 5.5 (SES 5 & SES …