Embed Size (px)
Citation preview

Administrator�s Guide
Citrix® ICA® Macintosh ClientVersion 6.30
Citrix Systems, Inc.

Information in this document is subject to change without notice. Companies, names, and data used in examples herein are fictitious unless otherwise noted. No part of this document may be reproduced or transmitted in any form or by any means, electronic or mechanical, for any purpose, without the express written permission of Citrix Systems, Inc.
Copyright © 2002 Citrix Systems, Inc. All rights reserved.
RSA Encryption © 1996-1997 RSA Security Inc. All Rights Reserved.
Citrix®, ICA®, NFuse®, MetaFrame®, MetaFrame XP�, and SpeedScreen� are registered trademarks or trademarks of Citrix Systems, Inc. in the United States and other countries. All other trademarks are the property of their respective owners.
Microsoft, MS, MS-DOS, Windows, Windows NT, and Windows 2000 Servers are registered trademarks or trademarks of Microsoft Corporation in the U.S.A and other countries.
UNIX is a registered trademark of The Open Group in the U.S.A. and other countries.
Apple, the Apple logo, AppleVision, ColorSync, FireWire, Mac, Macintosh, PlainTalk, and Power Macintosh are trademarks of Apple Computer, Inc., registered in the U.S.A and other countries.
Adobe, Acrobat, and PostScript are trademarks or registered trademarks of Adobe Systems Incorporated in the U.S.A and/or other countries.
Last updated: SEP 2002

Contents 3
Contents
Chapter 1 Before You BeginWho Should Use this Manual . . . . . . . . . . . . . . . . . . . . . . . . . . . . . . . . . . . . . . . . . . 5How to Use this Guide . . . . . . . . . . . . . . . . . . . . . . . . . . . . . . . . . . . . . . . . . . . . . . . . 5Conventions . . . . . . . . . . . . . . . . . . . . . . . . . . . . . . . . . . . . . . . . . . . . . . . . . . . . . . . . 6Finding More Information . . . . . . . . . . . . . . . . . . . . . . . . . . . . . . . . . . . . . . . . . . . . . 6Citrix on the World Wide Web . . . . . . . . . . . . . . . . . . . . . . . . . . . . . . . . . . . . . . . . . 7Providing Feedback About this Guide. . . . . . . . . . . . . . . . . . . . . . . . . . . . . . . . . . . . 8
Chapter 2 Introduction to the Citrix ICA Macintosh ClientOverview . . . . . . . . . . . . . . . . . . . . . . . . . . . . . . . . . . . . . . . . . . . . . . . . . . . . . . . . . . 9New Features Introduced in this Release. . . . . . . . . . . . . . . . . . . . . . . . . . . . . . . . . . 9
Mac OS X Look and Feel . . . . . . . . . . . . . . . . . . . . . . . . . . . . . . . . . . . . . . . . . . . 9Enhanced Internet Proxy Server Support . . . . . . . . . . . . . . . . . . . . . . . . . . . . . . 10Transport Layer Security Encryption . . . . . . . . . . . . . . . . . . . . . . . . . . . . . . . . . 10
Features Enhanced in Version 6.30 . . . . . . . . . . . . . . . . . . . . . . . . . . . . . . . . . . . . . 10Printing . . . . . . . . . . . . . . . . . . . . . . . . . . . . . . . . . . . . . . . . . . . . . . . . . . . . . . . . 10Multiple Session Support . . . . . . . . . . . . . . . . . . . . . . . . . . . . . . . . . . . . . . . . . . 10Alternate Addresses When Connecting Across Firewalls . . . . . . . . . . . . . . . . . 11Multi-Button Mouse Support . . . . . . . . . . . . . . . . . . . . . . . . . . . . . . . . . . . . . . . 11
Existing Features . . . . . . . . . . . . . . . . . . . . . . . . . . . . . . . . . . . . . . . . . . . . . . . . . . . 11
Chapter 3 Deploying the Citrix ICA Macintosh ClientOverview . . . . . . . . . . . . . . . . . . . . . . . . . . . . . . . . . . . . . . . . . . . . . . . . . . . . . . . . . 15System Requirements. . . . . . . . . . . . . . . . . . . . . . . . . . . . . . . . . . . . . . . . . . . . . . . . 15Installing the ICA Macintosh Client . . . . . . . . . . . . . . . . . . . . . . . . . . . . . . . . . . . . 16
About Installation . . . . . . . . . . . . . . . . . . . . . . . . . . . . . . . . . . . . . . . . . . . . . . . . 16Installing Using Citrix ICA Client Auto Update . . . . . . . . . . . . . . . . . . . . . . . . 16
Uninstalling the ICA Macintosh Client . . . . . . . . . . . . . . . . . . . . . . . . . . . . . . . . . . 18
Chapter 4 Configuring the Citrix ICA Macintosh ClientOverview . . . . . . . . . . . . . . . . . . . . . . . . . . . . . . . . . . . . . . . . . . . . . . . . . . . . . . . . . 19Starting the ICA Client Editor . . . . . . . . . . . . . . . . . . . . . . . . . . . . . . . . . . . . . . . . . 20Creating a Basic Connection File. . . . . . . . . . . . . . . . . . . . . . . . . . . . . . . . . . . . . . . 21

4 Citrix ICA Macintosh Client Administrator�s Guide
Configuring Network Protocol and Server Location. . . . . . . . . . . . . . . . . . . . . . . . 22Setting Network Protocols . . . . . . . . . . . . . . . . . . . . . . . . . . . . . . . . . . . . . . . . . 22Setting Server Location and Business Recovery . . . . . . . . . . . . . . . . . . . . . . . . 25
Starting an ICA Session . . . . . . . . . . . . . . . . . . . . . . . . . . . . . . . . . . . . . . . . . . . . . . 27Changing Connection File Settings and Default Settings . . . . . . . . . . . . . . . . . . . . 28
Configuring an Existing Connection File. . . . . . . . . . . . . . . . . . . . . . . . . . . . . . 28Making Default Settings for All Connections . . . . . . . . . . . . . . . . . . . . . . . . . . 30
Deploying a Common Connection File . . . . . . . . . . . . . . . . . . . . . . . . . . . . . . . . . . 32User Interface Configuration . . . . . . . . . . . . . . . . . . . . . . . . . . . . . . . . . . . . . . . . . . 32
Window Properties . . . . . . . . . . . . . . . . . . . . . . . . . . . . . . . . . . . . . . . . . . . . . . . 33Sound Support (Audio Mapping) . . . . . . . . . . . . . . . . . . . . . . . . . . . . . . . . . . . . 34Windows Alert Beeps . . . . . . . . . . . . . . . . . . . . . . . . . . . . . . . . . . . . . . . . . . . . . 34Hotkeys . . . . . . . . . . . . . . . . . . . . . . . . . . . . . . . . . . . . . . . . . . . . . . . . . . . . . . . . 35Keyboards . . . . . . . . . . . . . . . . . . . . . . . . . . . . . . . . . . . . . . . . . . . . . . . . . . . . . . 37
Mapping Client Devices. . . . . . . . . . . . . . . . . . . . . . . . . . . . . . . . . . . . . . . . . . . . . . 38Mapping Client Drives . . . . . . . . . . . . . . . . . . . . . . . . . . . . . . . . . . . . . . . . . . . . 38Mapping Client COM Ports . . . . . . . . . . . . . . . . . . . . . . . . . . . . . . . . . . . . . . . . 42Mapping Client Audio . . . . . . . . . . . . . . . . . . . . . . . . . . . . . . . . . . . . . . . . . . . . 43Mapping Client Printers . . . . . . . . . . . . . . . . . . . . . . . . . . . . . . . . . . . . . . . . . . . 44
Configuring File Type Association to Access Published Applications . . . . . . . . . 47Opening a Specific Application Using a Connection File . . . . . . . . . . . . . . . . . . . 52Improving Performance . . . . . . . . . . . . . . . . . . . . . . . . . . . . . . . . . . . . . . . . . . . . . . 52
Data Compression. . . . . . . . . . . . . . . . . . . . . . . . . . . . . . . . . . . . . . . . . . . . . . . . 53Disk (Bitmap) Caching . . . . . . . . . . . . . . . . . . . . . . . . . . . . . . . . . . . . . . . . . . . . 53SpeedScreen Latency Reduction . . . . . . . . . . . . . . . . . . . . . . . . . . . . . . . . . . . . 54Improving Performance Over a Low-Bandwidth Connection. . . . . . . . . . . . . . 55
Integrating the ICA Macintosh Client with Security Solutions . . . . . . . . . . . . . . . 57Configuring the ICA Macintosh Client to Work with a Proxy Server . . . . . . . 57Integrating Citrix Secure Gateway or SSL Relay . . . . . . . . . . . . . . . . . . . . . . . 60Connecting to a Server Through a Firewall . . . . . . . . . . . . . . . . . . . . . . . . . . . . 63Using ICA Encryption . . . . . . . . . . . . . . . . . . . . . . . . . . . . . . . . . . . . . . . . . . . . 65
Index . . . . . . . . . . . . . . . . . . . . . . . . . . . . . . . . . . . . . . . . . . . . . . . . . . . . . . . . . . . . . . . . . . . 67

C H A P T E R 1
Before You Begin
Who Should Use this ManualThis manual is for system administrators responsible for installing, configuring, deploying, and maintaining the Citrix ICA Client for Macintosh (also called the Citrix ICA Macintosh Client). This manual assumes knowledge of:
� The MetaFrame server to which your ICA Clients connect
� The operating system on the client computer (Mac OS X)
� Installation, operation, and maintenance of network and asynchronous communication hardware, including serial ports, modems, and device adapters
How to Use this GuideTo get the most out of the Citrix ICA Macintosh Client Administrator�s Guide, review the table of contents to familiarize yourself with the topics discussed.
This guide contains the following sections:
Chapter Contents
Chapter 1, �Before You Begin� Introduces the Citrix ICA Macintosh Client Administrator�s Guide.
Chapter 2, �Introduction to the Citrix ICA Macintosh Client�
Gives a detailed list of features.
Chapter 3, �Deploying the Citrix ICA Macintosh Client�
Describes how to install and deploy the ICA Macintosh Client.
Chapter 4, �Configuring the Citrix ICA Macintosh Client�
Describes how to configure connection properties and device mappings for the ICA Macintosh Client.

6 Citrix ICA Macintosh Client Administrator�s Guide
ConventionsThe following conventional terms, text formats, and symbols are used throughout the document:
Finding More InformationThis manual contains conceptual information and installation and configuration steps for the ICA Macintosh Client. For additional information, consult the following:
� Apple Help for the ICA Client and ICA Client Editor: this is shipped with the client software and accessed from the Client and Client Editor menu bars, and by using COMMAND+SHIFT+? in the Client Editor
� The Citrix ICA Client Administrator�s Guides for the other ICA Clients you deploy
� The documentation included in your MetaFrame server package for instructions about installing, configuring, and maintaining your MetaFrame servers
This book and other Citrix documentation is available in Adobe PDF format in the following locations:
Convention Meaning
Bold Indicates boxes and buttons, column headings, command-line commands and options, dialog box titles, lists, menu names, tabs, and menu commands.
Italic Indicates a placeholder for information or parameters that you must provide. For example, if the procedure asks you to type filename, you must type the actual name of a file. Italic also indicates new terms and the titles of other books.
ALL UPPERCASE Represents keyboard keys (for example, CTRL, ENTER, F2).
[brackets] Encloses optional items in syntax statements. For example, [password] indicates that you can choose to type a password with the command. Type only the information within the brackets, not the brackets themselves.
...(ellipsis) Indicates a command element that can be repeated.
Monospace Represents examples of screen text or entries that you might type at the command line or initialization files.
! Indicates a procedure.

Chapter 1 Before You Begin 7
� The documentation directory of your MetaFrame XP Components CD-ROM
� http://www.citrix.com/download/. Click the ICA Client platform for which you want information
� http://www.citrix.com/support/. Click Product Documentation and choose ICA Client
Using the Adobe Acrobat Reader, you can view and search the documentation electronically or print it for easy reference. You can download the Adobe Acrobat Reader for free from the Adobe Web site at http://www.adobe.com.
Important Always consult the Readme files for your MetaFrame server and the ICA Macintosh Client for any last-minute updates, installation instructions, and corrections to the documentation.
Citrix on the World Wide WebThe Citrix Web site, at http://www.citrix.com/, offers a variety of information and services for Citrix customers and users. From the Citrix home page, you can access Citrix online Technical Support Services and other information designed to assist MetaFrame administrators, including the following:
� Downloadable Citrix ICA Clients at http://www.citrix.com/download/.
� Citrix Product Documentation Library, containing the latest documentation for all Citrix products (at http://www.citrix.com/support/; select Product Documentation). You can download updated editions of the documentation that ships with Citrix products and supplemental documentation that may only be available from the Citrix Web site.
� Program information about Citrix Preferred Support Services options.
� An FTP server containing the latest service packs, hotfixes, and utilities.
� An online Solution Knowledge Base containing an extensive collection of application notes, technical articles, troubleshooting tips, and white papers.
� Interactive online Solution Forums for discussion of technical issues with other users.
� Information about programs and courseware for Citrix training and certifications.
� Contact information for Citrix headquarters, including worldwide, European, Asia Pacific, and Japan headquarters.

8 Citrix ICA Macintosh Client Administrator�s Guide
� The Citrix Developer Network (CDN) at http://www.citrix.com/cdn/ This open enrollment membership program provides access to developer tool kits, technical information, and test programs, for software and hardware vendors, system integrators, ICA licensees, and corporate IT developers who incorporate MetaFrame server-based computing solutions into their products.
Providing Feedback About this GuideWe strive to provide accurate, clear, complete, and usable documentation for Citrix products. If you have any comments, corrections, or suggestions for improving our documentation, we want to hear from you.
You can send email to the documentation authors at [email protected]. Please include the product name, version number, and the title of the document in your message.

C H A P T E R 2
Introduction to the Citrix ICA Macintosh Client
OverviewWhen connected to a MetaFrame server, the ICA Macintosh Client provides features that make remote computing just like running applications on a local desktop.
Note Some client features are available only when connecting to MetaFrame for Windows NT and MetaFrame for Windows 2000 servers.
Topics covered in this chapter include:
� New features introduced in this release
� Features enhanced in Version 6.30
� Existing features
New Features Introduced in this ReleaseThe following additional features are available with this release of the ICA Macintosh Client.
Mac OS X Look and FeelVersion 6.30 of the ICA Macintosh Client is an ICA Client developed specifically for the Mac OS X operating system, providing native connectivity to MetaFrame servers for Macintosh users. It adheres to the new Aqua user interface features and behaviors to offer a user experience consistent with other applications running on Mac OS X.

10 Citrix ICA Macintosh Client Administrator�s Guide
Enhanced Internet Proxy Server SupportAs an alternative to using a SOCKS proxy, the ICA Macintosh Client also supports using a Secure proxy (also known as Security proxy, HTTPS proxy, and SSL-tunneling). Proxy authentication is also supported. When used with Citrix Secure Gateway, applications can be delivered securely to anywhere in the world by the Internet. The ICA Macintosh Client can automatically detect proxy server settings from the network settings in the client computer Network System Preferences. For more information, see �Configuring the ICA Macintosh Client to Work with a Proxy Server� on page 57.
Transport Layer Security EncryptionAs an alternative to Secure Sockets Layer (SSL) 3.0, the ICA Macintosh Client also supports Transport Layer Security (TLS) 1.0. TLS is the standardized form of SSL. Both are cryptographic security protocols designed to ensure the integrity and privacy of data transfers across public networks. SSL and TLS are functionally equivalent. There are no differences in the way you configure SSL or TLS for the ICA Macintosh Client. The client detects which of them the server is using.
Features Enhanced in Version 6.30The following features are enhanced in Version 6.30 of the ICA Macintosh Client.
PrintingPrinting now uses the Citrix Universal Printer Driver technology. This means there is no need for any special printer setup on the client computer. When a MetaFrame server is configured to allow client printing, applications running remotely on the server can print to local printers. Users can print to a PostScript printer, or to a PC printer connected to the Macintosh serial port. For more information, see �Mapping Client Printers� on page 44.
Multiple Session SupportUsers can run multiple connections concurrently and the ICA Connection Center is no longer needed.
Note The amount of available memory on the client computer limits the number of concurrent connections.

Chapter 2 Introduction to the Citrix ICA Macintosh Client 11
Alternate Addresses When Connecting Across FirewallsUsers can now set whether to use an alternate address when connecting to a server across a firewall for individual connections, not just as a default setting.
Multi-Button Mouse Support The ICA Macintosh Client recognizes three buttons (left, right, and center) on a multi-button mouse. When a wheel is used as a center button, that is recognized, and wheel scrolling functions.
Note Cursor feedback is not supported in the ICA Macintosh Client Version 6.30. This means, for example, that if an administrator is �shadowing� a user�s ICA session, (that is, controlling what is happening in the session window), the user might see a menu open, but the cursor on that user�s computer would not move to track the administrator�s mouse movement.
Existing Features � Client Device Mapping. The ICA Macintosh Client supports client device
mapping. See �Mapping Client Devices� on page 38.
� Client Drive Mapping. Client drive mapping allows users to access the local disk drives of the client computer from ICA sessions. See �Mapping Client Drives� on page 38.
� Client COM Port Mapping. Client COM port mapping allows devices attached to the client computer�s COM ports to be used from ICA sessions. See �Mapping Client COM Ports� on page 42.
� Client Audio Mapping. Client audio mapping allows the client computer to play sounds generated by applications running on the MetaFrame server. See �Mapping Client Audio� on page 43.
� Encryption. The ICA Macintosh Client supports different levels of encryption, including RSA RC5 encryption. See �Using ICA Encryption� on page 65.
� Client Auto Update. Client auto update allows administrators to update ICA Macintosh Client installations from a central location instead of having to install new versions on each client computer manually. See �About the Citrix ICA Client Update Database� on page 17.

12 Citrix ICA Macintosh Client Administrator�s Guide
� Disk Caching and Data Compression. Disk caching stores commonly used portions of the screen (such as icons and bitmaps) locally, increasing performance by avoiding retransmission of locally cached data. See �Disk (Bitmap) Caching� on page 53. Data compression reduces the amount of data sent over the communications link to the client. See �Data Compression� on page 53.
� SpeedScreen Latency Reduction. SpeedScreen Latency Reduction enhances the user�s experience on slower network connections by accelerating the display of text input on the client computer and providing visual feedback for mouse clicks to show the user�s input is being processed. See �SpeedScreen Latency Reduction� on page 54.
� Local Clipboard Integration. Users can use the client computer�s clipboard to cut and paste objects between applications running locally on the client computer and applications running remotely in an ICA session. Access to the local clipboard requires no special configuration or procedures; using the familiar cut, copy, and paste commands, users can transfer text, pictures, and other objects back and forth between local and remote applications. Not all server platforms support all media types on the clipboard. When copying text in RTF format between the ICA session and Macintosh applications, the pasted text may not look identical to the text that was copied. This is because the RTF format does not embed all font information when users copy text. If a font is not available on the platform users paste the RTF text to, the application uses a similar font on that platform.
� Business Recovery Support. The ICA Macintosh Client supports multiple server sites with different addresses for the same published application name. See �Setting Server Location and Business Recovery� on page 25.
� PC Key Mapping. Users can use special key combinations to mimic PC keys not available on standard Macintosh keyboards, and to replicate mouse actions. See �Hotkeys� on page 35.
� Time Zone Support. This feature lets users logging on to a MetaFrame server in a different time zone have the ICA session reflect the time zone of the client computer.For example, a user in London logs on to a server in the USA and launches Microsoft Outlook as a published application. Microsoft Outlook stamps emails sent during this session with the user�s London time zone information.The reported time zone may be different from the user�s actual location, because the description uses the first named location in that time zone for display purposes.

Chapter 2 Introduction to the Citrix ICA Macintosh Client 13
� NDS Support. When users launch the ICA Macintosh Client, they can log on and be authenticated using their Novell Directory Services (NDS) credentials. Supported NDS credentials are user name (or distinguished name), password, directory tree, and context.
� Secure Sockets Layer (SSL) Support for ICA. SSL provides server authentication, encryption of the data stream, and message integrity checks. (Transport Layer Security (TLS) is now supported.) See �Integrating Citrix Secure Gateway or SSL Relay� on page 60.
� Client File Type Association. File extensions can be mapped on to published applications so that MetaFrame sessions are launched automatically, with the correct application, when a file is double-clicked or dragged and dropped onto the ICA Macintosh Client. See �Mapping Client Devices� on page 38.
� MIME Type Registration. The ICA Macintosh Client can register the MIME type automatically at install and during a client update. This feature is supported by Microsoft Internet Explorer.
� Per Connection Browsing. This feature allows users to specify a server for a particular connection. This means users can define specific network protocols and servers, or change security settings, for each connection.


C H A P T E R 3
Deploying the Citrix ICA Macintosh Client
OverviewThis chapter describes how to install the Citrix ICA Macintosh Client. Topics covered in this chapter include:
� System requirements
� Installing the ICA Macintosh Client
� Installing using Citrix ICA Client auto update
� Uninstalling the ICA Macintosh Client
System RequirementsUsers need equipment that meets these requirements to run this release of the ICA Macintosh Client:
� A Macintosh running operating system Mac OS X Version 10.1 or later, with at least 128MB of RAM
� 4MB of free disk space
� A network interface card (NIC) for network connections to MetaFrame servers�Or�A modem and PPP networking software for serial connections to MetaFrame servers

16 Citrix ICA Macintosh Client Administrator�s Guide
Installing the ICA Macintosh ClientAbout InstallationThe first time you install ICA Macintosh Client Version 6.30 you must install it manually on each client computer. For versions later than 6.30 you can choose to update the client computers using the auto update feature.
Important You cannot update ICA Macintosh Client Version 6.20 using Version 6.30, nor would any future updates of Version 6.20 update Version 6.30. To start using Version 6.30, you must make a fresh install. Later versions will update Version 6.30.
The ICA Macintosh Client is available as a disk image (MacICA_OSX.dmg) for downloading from the Citrix Web site, or on a CD-ROM.
" To install the ICA Macintosh Client (downloaded from the Citrix Web site)
1. After you download the .dmg file, double-click it. This runs the Disk Copy program, which mounts the file as a disk image accessible from your Macintosh desktop.
2. Open the disk image and place the Citrix ICA Client folder, containing the Client, Editor, and associated files, in the folder where you are installing the ICA Macintosh Client. (You might also want to put the Client and the Editor in your Dock so they are always available.)
" To install the ICA Macintosh Client (from CD-ROM)
1. Insert the Citrix ICA Client CD-ROM in the client computer�s CD-ROM drive. Double-click the CD-ROM icon on the desktop.
2. Locate the Citrix ICA Macintosh Client folder containing the disk image.
3. Open the disk image and place the Citrix ICA Client folder, containing the Client, Editor, and associated files, in the folder where you are installing the ICA Macintosh Client. (You might also want to put the Client and the Editor in your Dock so they are always available.)
Installing Using Citrix ICA Client Auto UpdateThe ICA Macintosh Client can be set up so that you can automatically update it from a MetaFrame server when a newer version is available. This means that you can �push� a new version of the client software from a central database to the client computer instead of installing the client manually at each computer.

Chapter 3 Deploying the Citrix ICA Macintosh Client 17
Note ICA Client auto update is not supported by MetaFrame for UNIX 1.0 or 1.1 servers.
" To turn automatic update on in the ICA Macintosh Client
1. Start the Citrix ICA Client Editor (see �Starting the ICA Client Editor� on page 20.)
2. From the Citrix ICA Client Editor Options menu, choose Default Settings.
3. In the Citrix ICA Client Editor Default Settings dialog box choose Connection Properties>Performance.
4. Select Allow Automatic Updates to allow the client to be automatically updated with a newer version from the MetaFrame server.
About the Citrix ICA Client Update DatabaseThis version of the ICA Client supports Client Auto Update, so future versions of the ICA Client can be automatically downloaded and installed when a user connects to a MetaFrame server. The new versions of the ICA Clients are downloaded from the client update database on the server.
ICA Client Auto Update for Macintosh supports the following features:
� Automatically detects older client installations
� Provides full administrative control of client update options for each client
� Updates clients from a single database on a network share point
� Safely restores older client versions when needed
Citrix ICA Client Update ProcessICA Clients are identified by platform with a product and model number.
The process of updating ICA Clients with new versions uses the standard ICA protocol:
� The MetaFrame server queries the ICA Client when the user logs on. If the server detects that the ICA Client is up-to-date, the logon continues transparently.
� If an update is needed, by default, the MetaFrame server informs the user that a new client is available and asks to perform the update. You can specify that the update occurs without informing the user and without allowing the user to cancel the update. This is called transparent updating.

18 Citrix ICA Macintosh Client Administrator�s Guide
Note Updating is always visible if the user is logged on as administrator.
� By default, the user can choose to wait for the client files to finish downloading or to download the files in the background and continue working. Users connecting to the MetaFrame server with a modem get better performance by waiting for the update process to complete. You can configure the MetaFrame server to force the client update to complete before allowing the user to continue.
� During the client update, new ICA Client files are copied to the user�s computer. You can force the user to disconnect and complete the update before continuing the session. The user must log on to the server again to continue working.
� When the user disconnects from the server and closes all client programs, the ICA Client update process finishes.
� As a safeguard, the existing ICA Client files are saved to a folder named Backup in the ICA Client folder.
Note For full details of configuring and using the Client Update Database, see the MetaFrame Administrator�s Guide.
Uninstalling the ICA Macintosh ClientTo uninstall the ICA Macintosh Client, delete the folder containing the Client and Editor.
If you want to remove cache files and any initial settings used by the ICA Macintosh Client, delete the folder at:
/Users/home/Library/Preferences/Citrix ICA Client
Where home is the name of the current user�s personal Home folder.

C H A P T E R 4
Configuring the Citrix ICA Macintosh Client
OverviewThis chapter describes how to configure the ICA Macintosh Client. Topics in this chapter include:
� Starting the ICA Client Editor
� Creating a basic connection file
� Configuring network protocol and server location
� Setting network protocols
� Setting server location and business recovery
� Starting an ICA session
� Changing connection file settings and default settings
� Configuring an existing connection file
� Making default settings for all connections
� Deploying a common connection file
� User interface configuration
� Window properties
� Windows alert beeps
� Hotkeys
� Keyboards
� Mapping client devices
� Mapping client drives

20 Citrix ICA Macintosh Client Administrator�s Guide
� Mapping client COM ports
� Mapping client audio
� Mapping client printers
� Configuring File Type Association to access published applications
� Opening a specific application using a connection file
� Improving performance
� Data compression
� Disk (bitmap) caching
� SpeedScreen Latency Reduction
� Improving performance over a low-bandwidth connection
� Integrating the ICA Macintosh Client with security solutions
� Configuring the ICA Macintosh Client to work with a proxy server
� Integrating Citrix Secure Gateway or SSL Relay
� Connecting to a server through a firewall
� Using ICA encryption
Note To make it easier to read, all the procedures in this chapter refer to �you.� In some circumstances �you� refers to the administrator of the MetaFrame and ICA Client system, in others to the user of the ICA Client, and sometimes to both. The context makes clear whether a procedure is primarily an administrator or user activity.
Starting the ICA Client EditorYou use the Citrix ICA Client Editor to create and configure connection files. A connection file contains configuration options that define the attributes of an ICA session. These attributes include window size and color depth, initial application and working directory, and client device mapping preferences.
Connection files appear as icons on the Macintosh desktop or in a specified folder. You can also place connection files, the Client, and the Client Editor in the Dock so they are easily available.
You can also use the Editor for a once-only connection to a server. If you do not save the settings in a connection file, they are lost when you quit the Editor, create a new connection file, or open an existing connection file in the Editor.

Chapter 4 Configuring the Citrix ICA Macintosh Client 21
" To start the ICA Client Editor
Double-click the Citrix ICA Client Editor icon in the folder where you installed the ICA Macintosh Client.
Creating a Basic Connection FileYou can create two types of connections to MetaFrame servers: ICA connections to server desktops and published applications.
� An ICA connection to a server desktop lets you access the desktop of a specified MetaFrame server. You can run any applications available on the desktop, in any order.
� A published application is a predefined application and its associated environment. The published application might be available on more than one MetaFrame server.
This section describes how to create a basic connection file. Subsequent sections describe how to change the network protocol if necessary, and how to start an ICA session to a server desktop or to a published application.
" To create a connection file
1. In your ICA Macintosh Client installation folder, double-click Citrix ICA Client Editor. The Citrix ICA Client Editor opens at the Network Connection pane.
22 Citrix ICA Macintosh Client Administrator�s Guide
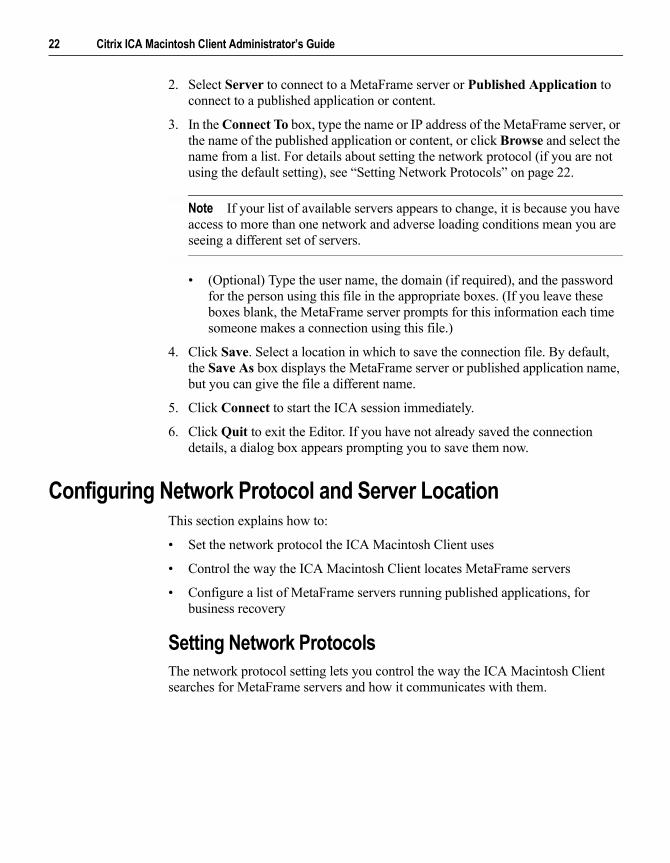
2. Select Server to connect to a MetaFrame server or Published Application to connect to a published application or content.
3. In the Connect To box, type the name or IP address of the MetaFrame server, or the name of the published application or content, or click Browse and select the name from a list. For details about setting the network protocol (if you are not using the default setting), see �Setting Network Protocols� on page 22.
Note If your list of available servers appears to change, it is because you have access to more than one network and adverse loading conditions mean you are seeing a different set of servers.
� (Optional) Type the user name, the domain (if required), and the password for the person using this file in the appropriate boxes. (If you leave these boxes blank, the MetaFrame server prompts for this information each time someone makes a connection using this file.)
4. Click Save. Select a location in which to save the connection file. By default, the Save As box displays the MetaFrame server or published application name, but you can give the file a different name.
5. Click Connect to start the ICA session immediately.
6. Click Quit to exit the Editor. If you have not already saved the connection details, a dialog box appears prompting you to save them now.
Configuring Network Protocol and Server LocationThis section explains how to:
� Set the network protocol the ICA Macintosh Client uses
� Control the way the ICA Macintosh Client locates MetaFrame servers
� Configure a list of MetaFrame servers running published applications, for business recovery
Setting Network ProtocolsThe network protocol setting lets you control the way the ICA Macintosh Client searches for MetaFrame servers and how it communicates with them.

Chapter 4 Configuring the Citrix ICA Macintosh Client 23
The protocols are:
� TCP/IP+HTTP. The client uses the HTTP protocol to search for MetaFrame servers. The client communicates with the MetaFrame server using ICA protocol over TCP/IP. This is the default protocol.
� TCP/IP. The client uses the UDP protocol to search for MetaFrame servers. The client communicates with the MetaFrame server using ICA protocol over TCP/IP.
� SSL/TLS+HTTPS. The client communicates with the MetaFrame server using the SSL/TLS protocol. This protocol is described in more detail in �Integrating Citrix Secure Gateway or SSL Relay� on page 60.
" To configure a default network protocol or server
1. From the Citrix ICA Client Editor Options menu, choose Default Settings.�Or�Click Default Settings in the Citrix ICA Client Editor. The Default Settings dialog box opens at the Making a Connection>Server Location pane.

24 Citrix ICA Macintosh Client Administrator�s Guide
2. On the Making a Connection>Server Location pane, select the Network Protocol you want to use.
Note For information about setting the encryption level, see �Using ICA Encryption� on page 65.
3. From the Server Group list, select the server group you want to configure.You can specify separate server groups for each protocol.
4. Click Add to add a server to the selected group.
5. In the Server Address box:For TCP/IP - Select or type the name of the server.For TCP/IP+HTTP or SLL/TLS+HTTPS - Type the name of the server and type a port number if different from the default 80.
6. Add more servers if necessary.
7. Click Save.
" To specify a network protocol or server for a connection file
1. From the Citrix ICA Client Editor File menu, choose Open and choose the connection file you want to edit.�Or�Drag and drop the connection file onto the Citrix ICA Client Editor.The network protocol shown depends on the current connection settings. (If you did not change these settings for this connection file, they show the default settings.)
� If the default is set up for secure communications (SSL/TLS), the Network Protocol Use Default check box is selected and the list of protocols displays SSL/TLS+HTTPS.
� If the default is set up for normal connections (that is, not using SSL/TLS), the Network Protocol Use Default check box is selected and the list of protocols displays TCP/IP or TCP/IP+HTTP.
2. To change the protocol setting for this connection file, clear Network Protocol Use Default. Choose the network protocol you want from the list.

Chapter 4 Configuring the Citrix ICA Macintosh Client 25
3. If you want to use a server other than the default one, clear Server Location Use Default.
4. Type the full name of the server. For SSL/TLS+HTTPS, type the fully-qualified domain name (FQDN) of the server, for example:winston.secure.company.com
For more information about fully-qualified domain names, see �Citrix Secure Gateway� on page 60.
5. Click Save. Any changes you make affect only this specific connection file.
Setting Server Location and Business RecoveryServer location (also called server browsing) provides a method for a network-connected ICA Macintosh Client to connect to a published application. The way server location works depends on which network protocol is configured:
� TCP/IP+HTTP and SSL/TLS+HTTPS. You must set specific server addresses for the MetaFrame servers. The ICA Macintosh Client uses the HTTP or HTTPS protocol respectively, to contact the servers.
� TCP/IP. The default setting for server location is auto-locate. The ICA Macintosh Client attempts to contact all of the servers on the network by broadcasting on the UDP protocol. Alternatively, you can set specific addresses for MetaFrame servers.

26 Citrix ICA Macintosh Client Administrator�s Guide
Business recovery provides consistent connections to published applications in the event of a master ICA browser server disruption. You can define up to three groups of MetaFrame servers: a primary and two backups. Each group can contain from one to five servers.
When you configure business recovery, the ICA Macintosh Client attempts to contact all the servers within the Primary group simultaneously; the first server to respond acts as the master ICA browser. If none of the servers respond, the client attempts to contact all the servers within the Backup 1 group. If there is still no response, the client attempts to contact all of the servers in the Backup 2 group. When a server responds, the client queries the server for the address of the server on which to run the published application. This process is repeated each time the user attempts to make an ICA connection.
By default, the ICA Macintosh Client uses the TCP/IP+HTTP protocol. You can change the protocol and specify business recovery server addresses as described here.
Tip It is a good idea to specify the server address for the MetaFrame server that functions as the master ICA browser when your network configuration uses routers or gateways, or if you want to eliminate the broadcasts on your network.
" To configure a default business recovery server group
1. Open the Default Settings dialog box. (For ways to do this, see �To configure default settings� on page 30.)
2. On the Making a Connection>Server Location pane, look at the Server Group Address List and select the server group you want to configure.You can specify separate server groups for each protocol.
3. Click Add to add a server to the selected group.
4. In the Server Address box:For TCP/IP - Select or type the name of the server.For TCP/IP+HTTP and SSL/TLS+HTTPS -Type the name of the server and type a port number if different from the default 80.
5. Add more servers as necessary.
6. Click Save.

Chapter 4 Configuring the Citrix ICA Macintosh Client 27
Configuring SSL/TLS and Proxy ServersYou also use the Server Location pane to configure the SSL/TLS settings used to implement secure communications between the ICA Macintosh Client and the server. For full details, see �Integrating the ICA Macintosh Client with Security Solutions� on page 57.
Starting an ICA SessionAfter you create one or more connection files (or completed connection details in the Editor), you can start an ICA session on a MetaFrame server.
" To start an ICA session
� Double-click the connection file, (or single-click the connection file if it is in the Dock.)�Or�
� Drag and drop the connection file onto the Citrix ICA Client.�Or�
� Open the Citrix ICA Client. From the File menu, choose Open Connection and choose the connection file you want to open.�Or�
� Open the Citrix ICA Client Editor. From the File menu choose Open and choose the connection file you want to open. On the Network Connection pane click Connect.�Or�
� If you configure File Type Association, you can start an ICA session by double-clicking a data file on your Macintosh, or drag this file onto the Citrix ICA Client. (See �Mapping Client Devices� on page 38.)
Note If you cannot connect to a MetaFrame server, you may need to change the Server Location (see �Setting Server Location and Business Recovery� on page 25) or proxy server details (see �Configuring the ICA Macintosh Client to Work with a Proxy Server� on page 57).
When you start an ICA session, you may see additional messages or warnings displayed on your screen, depending on the requirements of the application you are opening. For example, some applications require read/write access to a directory on your local hard disk (for example, the Home directory) and you may get a dialog box asking you to deny or allow access. If you deny access, you may have trouble using the application: if it needs to access local files, for example.

28 Citrix ICA Macintosh Client Administrator�s Guide
Changing Connection File Settings and Default SettingsAs well as the basic settings detailed in �To create a connection file� on page 21, each connection file has default settings that control settings such as window size, color depth, and security features.
There are three ways to use the Citrix ICA Client Editor to configure these settings:
� Use the Citrix ICA Client Editor to configure a connection, then save the file so you can use it again. �Creating a Basic Connection File� on page 21 gives basic instructions for creating a connection file.
� Take an existing connection file and make changes to some of the settings using the Citrix ICA Client Editor. Save these changes if you are likely to need them again. See �Configuring an Existing Connection File� on page 28 for details.
� Change the Citrix ICA Client Editor default settings so that all new connections use these changed settings. See �Making Default Settings for All Connections� on page 30 for details.
Configuring an Existing Connection FileThis section explains how to make changes to an existing connection file. For details about how to make changes to the default settings so they apply to all new connections, see �Making Default Settings for All Connections� on page 30.
" To edit an existing connection file
1. From the Citrix ICA Client Editor File menu, choose Open and choose the connection file you want to edit.�Or�Drag and drop the connection file onto the Citrix ICA Client Editor.
2. In the Citrix ICA Client Editor, edit the properties you want to change and then click Save to save the connection file, or choose Save or Save As from the File menu.

Chapter 4 Configuring the Citrix ICA Macintosh Client 29
You can configure the connection file using the following panes in the Citrix ICA Client Editor:
Use this pane To configure
Network Connection The basic settings required to establish a connection with a MetaFrame server. For details, see �Creating a Basic Connection File� on page 21.
Security Settings for using a proxy server, SSL/TLS, and encryption. For details, see �Integrating the ICA Macintosh Client with Security Solutions� on page 57.
Connection Properties
Settings that allow you to control the connection between the MetaFrame server and the client computer. For details, see �Mapping Client Devices� on page 38 and �Improving Performance� on page 52.
Window The size and color depth to use for ICA session windows. For details, see �To specify the window properties for a connection file� on page 33.
Application The path and file name of an application to be executed after connecting to the MetaFrame server. For details, see �Opening a Specific Application Using a Connection File� on page 52.

30 Citrix ICA Macintosh Client Administrator�s Guide
Making Default Settings for All ConnectionsThis section explains how to make changes to the default settings. These changed settings then apply to all new connections, but you can change the settings for individual connections. For details about how to make changes to an existing connection file, see �Configuring an Existing Connection File� on page 28.
" To configure default settings
1. From the Citrix ICA Client Editor Options menu, choose Default Settings.�Or�Click Default Settings in the Citrix ICA Client Editor. The Default Settings dialog box opens at the Making a Connection>Server Location pane.
2. Change the settings as necessary, then click Save.

Chapter 4 Configuring the Citrix ICA Macintosh Client 31
The following table lists the settings you can change, together with cross-references to the parts of this Guide where there are full details of how to change the settings.
Use this pane To configure
Making a Connection tab
Server Location pane
Network Protocol
The default network protocol and security settings. See �Setting Network Protocols� on page 22 and �Integrating the ICA Macintosh Client with Security Solutions� on page 57.
Encryption Level
The default encryption level for connections. See �Integrating the ICA Macintosh Client with Security Solutions� on page 57.
Server Group The group of MetaFrame servers to use. See �Setting Network Protocols� on page 22.
Firewalls Various settings for firewalls and proxy servers. See �Configuring the ICA Macintosh Client to Work with a Proxy Server� on page 57 and �Connecting to a Server Through a Firewall� on page 63.
File Type Association pane
Settings to associate file types to applications to open a connection with a specific application open. See �Mapping Client Devices� on page 38.
Connection Properties tab
Performance pane
Disk Cache Settings for disk cache. See �Disk (Bitmap) Caching� on page 53.
Auto Update Whether or not to allow the MetaFrame server to update the ICA Macintosh Client when newer versions become available. See �Installing Using Citrix ICA Client Auto Update� on page 16.
Windows and Sounds pane
Sounds Whether or not to play the default Macintosh beep when an application in the ICA session triggers the default Windows beep. See �Windows Alert Beeps� on page 34.
Window Size The default size to use for ICA session windows. See �Window Properties� on page 33.
Window Colors
The default color depth to use for ICA session windows. See �Window Properties� on page 33.
Keyboard pane
Keyboard Layout
The keyboard layout currently in use on the ICA Macintosh Client. See �Keyboards� on page 37.

32 Citrix ICA Macintosh Client Administrator�s Guide
Deploying a Common Connection FileIf a number of users all need to connect to the same MetaFrame server with the same settings, administrators can create one standard connection file and install this with the ICA Client software on each user�s computer.
User Interface ConfigurationThis section discusses the various user interface settings you can configure to make connections work according to personal taste, and to make them more efficient. It includes the following topics:
� Window properties
� Sound support (audio mapping)
� Windows alert beeps
� Hotkeys
� Keyboards
Keyboard pane (continued)
Keyboard Type
The keyboard type currently in use on the ICA Macintosh Client. See �Keyboards� on page 37.
Hotkeys The key combination for the latency reduction hotkey. See �Hotkeys� on page 35.
Japanese Hotkeys pane Settings to change the hotkeys assigned to Japanese functions. See �Hotkeys� on page 35.
Drives and Devices tab
Drive Mapping pane Settings for client drive mapping. See �Mapping Client Drives� on page 38.
COM Port Mapping pane Settings for client COM port mapping. See �Mapping Client COM Ports� on page 42.
Use this pane To configure

Chapter 4 Configuring the Citrix ICA Macintosh Client 33
Window PropertiesYou can change the size and color depth of the window used for ICA connections. You can change the default settings or change them for specific connections.
" To configure the default window properties
1. Open the Default Settings dialog box. (For ways to do this, see �To configure default settings� on page 30.)
2. Choose Connection Properties>Windows and Sounds.
3. Make your changes:
� For window size, use the Size pop-up menu to choose Full Screen, or a preconfigured window size, or choose Custom and type dimensions at Width and Height. (The maximum window size is determined by the server.)
� Choose the window color depth to display.
4. Click Save.
" To specify the window properties for a connection file
1. Open the connection file you want to edit in the Citrix ICA Client Editor. (For ways to do this, see �To edit an existing connection file� on page 28.)
2. Click the Window tab.

34 Citrix ICA Macintosh Client Administrator�s Guide
3. Clear Use Default and enter your own settings.
� For window size, use the size list to choose Full Screen, or a preconfigured window size, or choose Custom and type your own dimensions. (The maximum window size is determined by the server.)
� Choose the window color depth to display.
4. Click Save.
Note For some screen sizes, the Macintosh menu bar is hidden during the ICA session. Press OPTION+CONTROL to display the Macintosh menu bar. (The same key combination also hides it again.) To display both the complete window and the ICA Client menu bar in the Citrix ICA Client File menu click Best Window Position. If your window size is large enough to display the entire server desktop, there is a standard Macintosh resize box in the bottom right-hand corner of the window. If this is obscuring an item in the window, press OPTION+CONTROL to hide the resize box. (The same key combination displays the resize box again.)
Sound Support (Audio Mapping)You can configure sound support for a connection file using settings on the Connection Properties pane of the Citrix ICA Client Editor. For details, see �To turn audio mapping on for a specific connection file� on page 44.
Windows Alert BeepsYou can set the ICA Macintosh Client to play the default Macintosh beep when an application in the ICA session triggers the default Windows beep.
" To configure the default alert beep setting
1. Open the Default Settings dialog box. (For ways to do this, see �To configure default settings� on page 30.)
2. Choose Connection Properties>Windows and Sounds.
3. Select or clear Enable Windows Alert Sounds.
4. Click Save.

Chapter 4 Configuring the Citrix ICA Macintosh Client 35
HotkeysYou can use the following special key combinations to mimic PC keys or mouse clicks not available on standard Macintosh keyboards:
" To display or configure the default hotkeys
1. Open the Default Settings dialog box. (For ways to do this, see �To configure default settings� on page 30.)
2. Choose Connection Properties>Keyboard or Connection Properties>Japanese Hotkeys to see the current list of hotkeys.
3. Select the main key for the function, then use the check boxes to select the additional keystrokes.
4. Click Save.
PC Key or action ICA Macintosh Client equivalent
ALT COMMAND (the key with the cloverleaf and Apple logo)
INSERT 0 (Zero on the numeric keypad; NUM LOCK must be off)
DEL . (Dot key on the numeric keypad; NUM LOCK must be off)
Mouse right-click = (equals key on numeric keypad) or OPTION and mouse click
Function keys OPTION and 1 through 9 on the numeric keypad for F1 through F9OPTION and 0 on the numeric keypad for F10OPTION and - on the numeric keypad for F11OPTION and + on the numeric keypad for F12�Or�ESC and OPTION to enter Function key mapping mode, then 1 through 9 for F1 through F9ESC and OPTION, then 0 for F10
ALT+TAB Hold OPTION down, then press TAB to cycle through open applications. (User-configurable.)
ALT+SHIFT+TAB Hold OPTION and SHIFT down, then press TAB to cycle through open applications in reverse order. (User-configurable.)
36 Citrix ICA Macintosh Client Administrator�s Guide
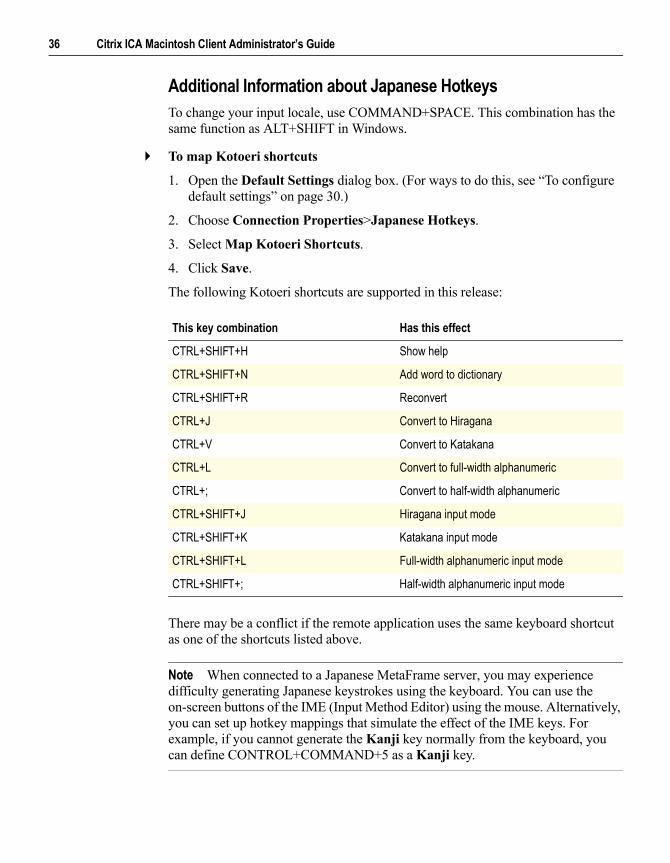
Additional Information about Japanese HotkeysTo change your input locale, use COMMAND+SPACE. This combination has the same function as ALT+SHIFT in Windows.
" To map Kotoeri shortcuts
1. Open the Default Settings dialog box. (For ways to do this, see �To configure default settings� on page 30.)
2. Choose Connection Properties>Japanese Hotkeys.
3. Select Map Kotoeri Shortcuts.
4. Click Save.
The following Kotoeri shortcuts are supported in this release:
There may be a conflict if the remote application uses the same keyboard shortcut as one of the shortcuts listed above.
Note When connected to a Japanese MetaFrame server, you may experience difficulty generating Japanese keystrokes using the keyboard. You can use the on-screen buttons of the IME (Input Method Editor) using the mouse. Alternatively, you can set up hotkey mappings that simulate the effect of the IME keys. For example, if you cannot generate the Kanji key normally from the keyboard, you can define CONTROL+COMMAND+5 as a Kanji key.
This key combination Has this effect
CTRL+SHIFT+H Show help
CTRL+SHIFT+N Add word to dictionary
CTRL+SHIFT+R Reconvert
CTRL+J Convert to Hiragana
CTRL+V Convert to Katakana
CTRL+L Convert to full-width alphanumeric
CTRL+; Convert to half-width alphanumeric
CTRL+SHIFT+J Hiragana input mode
CTRL+SHIFT+K Katakana input mode
CTRL+SHIFT+L Full-width alphanumeric input mode
CTRL+SHIFT+; Half-width alphanumeric input mode

Chapter 4 Configuring the Citrix ICA Macintosh Client 37
KeyboardsIf you use a Japanese keyboard you need to specify the layout and type.
" To configure default keyboard layout and type settings
1. Open the Default Settings dialog box. (For ways to do this, see �To configure default settings� on page 30.)
2. Choose Connection Properties>Keyboard.
3. Choose the keyboard layout and keyboard type.
4. Click Save.
Additional Information about Japanese KeyboardsIf you are using IME version 2000 or later, the Kanji Bango hotkey and the CAPS LOCK key may not work with the default settings.
If you are using SpeedScreen (Local Text Echo) and your MetaFrame server has two or more input locales, you may experience a problem with 106 key Japanese Keyboards with US keyboard layout.
" To solve keyboard problems
1. Open the Default Settings dialog box. (For ways to do this, see �To configure default settings� on page 30.)
2. Choose Connection Properties>Keyboard.
3. Either
� To enable the Kanji Bongo hotkey and CAPS LOCK key, from the Keyboard Layout list, select Japanese MS-IME2000.�Or�
� To overcome problems using 106 key Japanese keyboards with US keyboard layout, from the Keyboard Type list, select 101 Keyboard (Japanese).
4. Click Save.
Note Kana input is not supported when using the Apple Extended Keyboard II Japanese with the Macintosh ICA client. You can use this keyboard for Roman input.

38 Citrix ICA Macintosh Client Administrator�s Guide
Mapping Client DevicesThe ICA Macintosh Client supports client device mapping for connections to MetaFrame servers. Client device mapping allows a remote application running on the MetaFrame server to access devices attached to the local client computer.
This section includes more information about:
� Mapping client drives
� Mapping client COM ports
� Mapping client audio
� Mapping client printers
Note MetaFrame for UNIX 1.0 and 1.1 servers support only printer mapping.
Mapping Client DrivesClient drive mapping allows users to access the local disk drives of the client computer, including CD-ROMs, during ICA sessions on MetaFrame servers. When a MetaFrame server is configured to allow client drive mapping, users can access their locally stored files, work with them during their ICA sessions, and then save them again either on a local drive or on a drive on the MetaFrame server.
" To map a folder on the Macintosh hard drive to an ICA session
1. Open the Default Settings dialog box. (For ways to do this, see �To configure default settings� on page 30.)
2. Choose Drives and Devices>Drive Mapping and select Enable Drive Mapping.For each server drive letter, the Drive Mapping list shows the disk or path name of the Macintosh folder mapped to the drive. In the Enabled/Read/Write column, icons display each mapped drive that is enabled for use and what type of access users have to the drive. Items users cannot change (such as the user�s home folder on the hard drive) are grayed out. Items that are no longer available do not display a folder icon.

Chapter 4 Configuring the Citrix ICA Macintosh Client 39
Drives A, B, and C are mapped as follows:
3. Select an available drive letter.
4. Click Browse. Select the folder on the Macintosh hard drive to map and click Choose. The Drive Mapping pane now displays the mapped folder. If the drive letter selected is not available on the MetaFrame server, the specified folder is mapped to another free drive letter.
Drive: Mapped to:
A The Macintosh removable media drive (for example, floppy or Iomega® Zip® drive.) Where there is more than one removable drive, users can change the one to which drive A is mapped from within an ICA session: from the Drives menu, choose Client A Diskette to display the options and select the required drive.
B The Macintosh internal CD or DVD drive, or any other item that is removable and non-writable, such as a disk image .dmg file. Where there is more than one such item, users can change the one to which drive B is mapped from within an ICA session: from the Drives menu, choose Client B CDROM to display the options and select the required item.
C Permanently mapped to the user�s home folder on the Macintosh hard drive.

40 Citrix ICA Macintosh Client Administrator�s Guide
5. Click Save.
6. Log off from any open ICA connections and reconnect.
Note There is no way of ejecting removable media from within the ICA Macintosh Client. To eject a CD or other item, use the standard Macintosh methods.
" To view mapped client drives when connected to a MetaFrame server
From within the ICA session, double-click My Computer on the desktop to display the My Computer window.
MetaFrame servers can be configured to remap their server drives. When server drives are remapped, the local drives may take different drive letters.
Published applications and MetaFrame server desktop connections that have an initial program configured offer users the same access to their local drives. When connected to published applications, they can access local drives in the same way as when using applications running locally.

Chapter 4 Configuring the Citrix ICA Macintosh Client 41
" To turn drive mapping off for a specific connection file
1. Open the connection file you want to edit in the Citrix ICA Client Editor. (For ways to do this, see �To edit an existing connection file� on page 28.)
2. Click the Connection Properties tab.
3. Select Turn Drive Mapping Off for this Server.
4. Click Save.
CAUTION To ensure that client drive mapping works with filenames containing accented characters (for example, é) set the MetaFrame server DOS codepage to 1252. You can do this by changing a setting in the server registry.
Using Registry Editor incorrectly can cause serious problems that can require you to reinstall the operating system. Citrix cannot guarantee that problems resulting from incorrect use of Registry Editor can be solved. Use Registry Editor at your own risk.
Make sure you back up the registry before you edit it. If you are running Windows NT, make sure you also update your Emergency Repair Disk.
Set the registry entry:
HKEY_LOCAL_MACHINE\SYSTEM\CurrentControlSet\Control\Nls\CodePage\OEMCP
to 1252.
However, within a console window you may then need to set the codepage back to the original value of the server registry entry:
HKEY_LOCAL_MACHINE\SYSTEM\CurrentControlSet\Control\Nls\CodePage\OEMCP
You can do this using the CHCP command. This ensures that DOS applications can display correct characters and accept alt-numeric entries from the keypad.

42 Citrix ICA Macintosh Client Administrator�s Guide
Mapping Client COM PortsClient COM port mapping lets users access serial devices on the client computer as if they were connected to the MetaFrame server. Applications running on the MetaFrame server can use local devices like modems and serial port printers.
Note Client COM port mapping is not TAPI-compatible. Applications that communicate with devices using TAPI are not supported.
Macintosh serial ports do not provide all the control signal lines that are used by Windows applications. Notably the DSR (Data Set Ready), DCD (Device Carrier Detect), RI (Ring Indicator), and RTS (Request To Send) lines are not provided. The DSR, DCD, and RI lines are all reported to be asserted by the ICA Macintosh Client. Windows applications that rely on these signals for hardware handshaking/flow control may not work. The Macintosh implementation of serial communications relies on CTS (Clear To Send) and DTR (Data Terminal Ready) lines for input and output hardware handshaking only.
" To map a client COM port
1. Open the Default Settings dialog box. (For ways to do this, see �To configure default settings� on page 30.)
2. Choose Drives and Devices>COM Port Mapping.
3. Select the COM port you want to configure. This is a virtual client COM port that is displayed in the ICA session. It does not refer to a physical port on the MetaFrame server.
4. Click Modify to display the Select Serial Port dialog box.
5. Select the physical port to associate with the selected COM port and click Select.
6. Repeat the last three steps to map other ports as necessary and then click Save to save the new settings.
" To use a mapped client COM port from within an ICA session
1. Start the Citrix ICA Client and log on to a MetaFrame server.
2. To start a command prompt, click Start, then click Programs, then click Accessories>Command Prompt.
3. At the prompt, type net use comx: \\client\comz: where x is the number of the COM port on the server (ports 1 through 9 are available for mapping) and z is the number of the client COM port (ports 1 through 4 are available).
Chapter 4 Configuring the Citrix ICA Macintosh Client 43
4. To confirm the operation, type net use at the prompt. A list displays mapped drives, LPT ports, and mapped COM ports.
5. Use this mapped COM port as you would a COM port on the MetaFrame server.
Mapping Client AudioClient audio mapping lets applications running on the MetaFrame server play sounds through the client computer.
The higher the audio quality, the more bandwidth is required to transfer the audio data. Higher quality audio also uses more server CPU to process. Three different audio quality settings are available, or administrators can turn client audio mapping off completely.
An administrator can set the audio quality or turn client audio mapping on or off on the MetaFrame server. A user can set the audio quality or turn client audio mapping on or off for a connection file from the client computer. If the client and server audio quality settings are different, the lower of the two qualities is used.
The client audio quality options are:
� High. This setting is recommended only for connections where bandwidth is plentiful and sound quality is important. This setting allows client computers to play a sound file at its native data rate. Sounds at the highest quality level require about 1.3Mbps of bandwidth to play clearly. Transmitting this amount of data can result in increased CPU utilization and network congestion.
� Medium. This setting is recommended for most LAN-based connections. This setting causes any sounds sent to the client computer to be compressed to a maximum of 64Kbps. This compression results in a moderate decrease in the quality of the sound played on the client computer. The host CPU utilization decreases compared with the uncompressed version because of the reduction in the amount of data being sent.
� Low. This setting is recommended for low-bandwidth connections, including most modem connections. This setting causes any sounds sent to the client computer to be compressed to a maximum of 16Kbps. This compression results in a significant decrease in the quality of the sound. The CPU requirements and benefits of this setting are similar to those of the Medium setting; however, the lower data rate allows reasonable performance for a low-bandwidth connection.
" To turn ICA Client audio on or off on a MetaFrame for Windows server
From the ICA Settings dialog box on the MetaFrame server, administrators can turn client audio on or off by choosing the appropriate option. See the MetaFrame Administrator�s Guide for details.

44 Citrix ICA Macintosh Client Administrator�s Guide
" To turn audio mapping on for a specific connection file
1. Open the connection file you want to edit in the Citrix ICA Client Editor. (For ways to do this, see �To edit an existing connection file� on page 28.)
2. Click the Connection Properties tab.
3. Select Enable Sound.
4. Set Quality to High, Medium, or Low, depending on the available bandwidth.
Mapping Client PrintersUsers can access printers connected to their client computer during an ICA session. When a MetaFrame server is configured to allow client printer mapping, applications running remotely on the MetaFrame server can print to any printer to which the user can print.
Using a Mapped PrinterNo special configuration is needed to set up local printers to print during an ICA session. Users can change their local print settings during the session.
" To print a document during an ICA session
1. Make a connection to a server and open the application you want to use.
2. When you are ready to print, from the Citrix ICA Client File menu choose one of the two printing settings. (If the menu bar is not visible in the session window see the note at �To specify the window properties for a connection file� on page 33.)
� Print Automatically - Prints (using the current printer settings) when you select the printer and click Print.
� Print With Dialog - After you select the printer and click Print, you see the standard Macintosh print dialog box where you can change printer settings.
Click the setting you want to use.
3. From the application�s File menu, choose Print.

Chapter 4 Configuring the Citrix ICA Macintosh Client 45
4. In the Print dialog box, select the printer: Client\username#\Mac Printer or Client\Macintosh ICA Client#\Mac Printer.and click Print.
" To view client printers when connected to a MetaFrame server
1. Connect to the MetaFrame server.
2. In the ICA session window, double-click My Computer, double-click Control Panel, and then double-click Printers.The Printers screen displays the local printer along with any other printers available on the MetaFrame server. The name of the local printer is either Client\username#\Mac Printer or Client\Macintosh ICA Client#\Mac Printer. This means that if you change a local printer, there is no need to change the printer setup on the MetaFrame server.
If the local printer is not automatically available on the MetaFrame server, you can add it during the ICA session using this procedure:
" To map a client printer manually on a MetaFrame for Windows server
1. Connect to the MetaFrame server.
2. In the ICA session window, double-click My Computer, double-click Control Panel and then double-click Printers.
3. Double-click Add Printer. Use the Add Printer Wizard to select Network printer. Click Next to browse for the printer, and in the Shared Printers list, double-click Client Network, then double-click Client. If the Add Printer Wizard asks you to choose a printer driver, choose HP LaserJet Series II.
4. Select Client\username#\Mac Printer or Client\Macintosh ICA Client#\Mac Printer, then click Next.
5. If you want this printer to be your default printer, click Yes.
6. Click Next and then click Finish.

46 Citrix ICA Macintosh Client Administrator�s Guide
You can turn printing off for a specific connection file using this procedure:
" To turn printing off for a specific connection file:
1. Before you make the connection, open the connection file you want to edit in the Citrix ICA Client Editor. (For ways to do this, see �To edit an existing connection file� on page 28.)
2. Click the Connection Properties tab.
3. Select Turn Printer Mapping Off for this Server.
4. Click Save.
Note In some circumstances, when you connect to the MetaFrame server the Macintosh Printer icon is still present, even though you turned printer mapping off. However, if you try to print, you see a Windows error message saying there is a problem when trying to print, and printing is not possible.

Chapter 4 Configuring the Citrix ICA Macintosh Client 47
Configuring File Type Association to Access Published Applications
This feature lets you assign certain file types to specific applications so that the appropriate published application starts automatically when you use a file on your computer. For example, while working on files using a Windows published application on a MetaFrame server, you can work on PC files that you can save to the Macintosh hard drive. You can set up File Type Association so that double-clicking these files or dragging them to the Citrix ICA Client starts the ICA connection to the appropriate published application.
PrerequisitesA number of settings must be configured on both the server and the client. The MetaFrame administrator needs to complete these preliminary tasks for this feature to work:
1. Set extended parameter passing, if necessary.
2. Identify the server drive letter that is mapped to the client hard drive and tell users so they can map their hard drive or document folder to the correct server drive letter.
Extended Parameter PassingA document file name may be passed to the published application so that the document can be loaded when the application starts. The MetaFrame administrator may need to set up the published application to receive and use the file name by appending the parameter %* to the command line. For example:PowerPoint %*
Full details about how to publish applications and set up commands, and whether or not this parameter is needed for the server you are using, can be found in the MetaFrame Administrator�s Guide.
Drive MappingMetaFrame maps client drives to drive letters automatically when a client logs on. The server tries to match the client drives to client drive letters, typically A for the first floppy drive, B for the CD or DVD drive, C for the current user�s home folder, and so on. If these letters are already used for drives on the server, the server uses other letters. MetaFrame XP servers start at V and search in ascending order for free drive letters.

48 Citrix ICA Macintosh Client Administrator�s Guide
For File Type Association to work, these drive mappings must match in the client and server. However, Citrix recommends that you change the mapping on the client rather than change the drive mapping on the server. (See the MetaFrame Administrator�s Guide.)
The administrator must identify which drive letter is mapped to the client hard drive and make this information available to users. Users can then remap the drive letter when creating ICA connection files.
The Macintosh HD:Users:home folder (the current user�s home folder) on the client is fixed as C and cannot be changed, so users must map another drive letter (for example W) to the hard drive, or to the specific folder containing their documents.
For more information about drive mapping, see �Mapping Client Devices� on page 38.

Chapter 4 Configuring the Citrix ICA Macintosh Client 49
Configuring File Type AssociationAfter the preliminary tasks described above, there are two more steps to take to complete configuring File Type Association. The option you choose at Step 2 depends on which method you prefer to use for opening files: drag and drop or double-click.
1. Associate the file name extension with a published application.
2. Either:
� Drag and drop a file to the Citrix ICA Client to open the associated published application, with the file open in it. �Or�
� Set up file association to allow double-clicking.
" To associate a file type (extension) with a published application
1. Create a connection file that connects to the published application you want to use. (See �Creating a Basic Connection File� on page 21.)
2. Open the Default Settings dialog box. (For ways to do this, see �To configure default settings� on page 30.)
3. Choose Making a Connection>File Type Association to see a list of current associations.
4. Click Add. The File Type Association dialog box opens.

50 Citrix ICA Macintosh Client Administrator�s Guide
5. At Extension, type the file type (extension); for example, PPT.
6. Click Browse to display a list of files, folders, and connection files on your Macintosh.
7. Select the folder containing the connection file you created in Step1 above. Select the connection file and click Choose.The connection file name appears at Map to Connection File.
8. Click OK to confirm. This associates the connection file with the file type (extension) and displays the details in the list.To remove or change the association, select the association to make the Remove and Change buttons active and then click the relevant button.
9. Click Save to exit and confirm the association you just set up.
This procedure associates the file type (as identified by its extension) with a specific connection file.

Chapter 4 Configuring the Citrix ICA Macintosh Client 51
" To open a file in a published application (drag and drop method)
1. Choose a file of the type (as identified by its extension) you associated with a published application.
2. Drag and drop the file onto the Citrix ICA Client. The published application opens, and opens your file in it.
Note This procedure assumes that you observed the requirements set out in �Prerequisites� on page 47 and �To associate a file type (extension) with a published application� on page 49.
" To open a file in a published application (double-click method)
1. Select a file of the type (as identified by its extension) you associated with a connection file to a published application.
2. From the Finder menu bar, choose File>Show Info. (Choose File>Get Info on Mac OS X 10.2.)
3. From the pop-up menu, choose Open with application. (Choose Open with on Mac OS X 10.2.)
4. Click the small black triangle on the blank icon and choose Other. (Choose Other on Mac OS X 10.2.)
5. Select the folder containing the Citrix ICA Client. Select the Citrix ICA Client and click Add.This associates the file with the connection file that you configured the Citrix ICA Client to use for file type association. If you want to associate all files with the same extension to the Citrix ICA Client, click Change All.
6. Double-clicking the file now opens the published application with your file in it.
Note This procedure assumes that you observed the requirements set out in �Prerequisites� on page 47, and �To associate a file type (extension) with a published application� on page 49.

52 Citrix ICA Macintosh Client Administrator�s Guide
Opening a Specific Application Using a Connection FileThe Application pane lets you specify an application to run after you connect to a MetaFrame server. If you specify an application, you do not see the MetaFrame server desktop when you connect and the connection closes when you exit from the application.
If you specify an application, you cannot run any other application in the ICA session nor access the server desktop.
Note The Application pane is not available when you configure a connection to a published application.
" To specify application properties for a connection file
1. Open the connection file you want to edit in the Citrix ICA Client Editor. (For ways to do this, see �To edit an existing connection file� on page 28.)
2. Click the Application tab.
3. Specify the path and file name of the application to be executed after connecting to the MetaFrame server.For example, to launch Microsoft Word automatically after connecting to the MetaFrame server, you might type:C:\WINWORD\WINWORD.EXE
4. If necessary, type the working directory to be used for the application in the Working Directory box.
Improving PerformanceThis section describes ways you can improve the performance of the ICA Macintosh Client including:
� Data compression
� Disk (bitmap) caching
� SpeedScreen Latency Reduction
It also gives some tips for improving performance over a low-bandwidth connection.

Chapter 4 Configuring the Citrix ICA Macintosh Client 53
Data CompressionData compression reduces the amount of data that needs to be transferred over the connection but requires additional processor resources to compress and decompress the data. In high-bandwidth LAN environments where bandwidth consumption is not a concern, turning data compression off may give better performance because it reduces the demand on the processor.
" To turn data compression on or off for a specific connection file
1. Open the connection file you want to edit in the Citrix ICA Client Editor. (For ways to do this, see �To edit an existing connection file� on page 28.)
2. Click the Connection Properties tab.
3. Select or clear Use Data Compression.
4. Click Save.
Disk (Bitmap) CachingDisk caching stores commonly-used graphical objects, such as bitmaps, in a local cache on the client computer�s hard disk. If the connection is bandwidth-limited, using disk caching increases performance. If the connection is a high-speed LAN, you do not need disk caching.
Important Although you can configure the default disk cache settings, disk caching does not happen unless you turn it on for a particular connection file.
" To configure the default settings for disk caching
1. Open the Default Settings dialog box. (For ways to do this, see �To configure default settings� on page 30.)
2. Choose Connection Properties>Performance.
3. Change the disk cache settings as required. You can do the following:
� Use a different Disk cache folder (the default directory where the cached data is stored). To do this, click Browse and select the folder you want.
� Change the Amount of disk space to use by adjusting the percentage of the total size of the disk that contains the cache folder.
� For The minimum size bitmap that will be cached is: specify the size (between 2 and 64 kilobytes) of the smallest bitmap to be cached to disk.
� To remove all cached data from the client computer, click Clear Disk Cache.

54 Citrix ICA Macintosh Client Administrator�s Guide
4. Click Save.
" To turn disk caching on or off for a specific connection file
1. Open the connection file you want to edit in the Citrix ICA Client Editor. (For ways to do this, see �To edit an existing connection file� on page 28.)
2. Click the Connection Properties tab.
3. Select or clear Use Disk Cache for Bitmaps.
4. Click Save.
SpeedScreen Latency ReductionOver high latency connections, users often experience significant delays between the time when they type text at the keyboard and when it is displayed on the screen. Similarly, there may be a delay between clicking a mouse button and the screen displaying any visible feedback. This can result in users making multiple mouse clicks or retyping text.
Note SpeedScreen Latency Reduction only works if enabled on the MetaFrame server. For full details, see the MetaFrame Administrator�s Guide. Note that SpeedScreen Latency Reduction is not available when connecting to MetaFrame for UNIX 1.0 and 1.1 servers.

Chapter 4 Configuring the Citrix ICA Macintosh Client 55
" To turn SpeedScreen Latency Reduction on or off for a specific connection file
1. Open the connection file you want to edit in the Citrix ICA Client Editor. (For ways to do this, see �To edit an existing connection file� on page 28.)
2. Click the Connection Properties tab.
3. Set SpeedScreen Latency Reduction settings:
� Mouse Click Feedback - displays an hourglass to show the mouse input is being processed.
� Local Text Echo - displays input text on the client computer, effectively shielding users from latency on the network.
For each setting, choose an option:
� Auto - automatically turns the feature on or off depending on the speed of the connection. Choose this option if you are not certain of the connection speed.
� On - choose for slower connections (for example, over a WAN or a dial-in connection).
� Off - choose for faster connections (for example, over a LAN).
4. Click Save.
Note You can override the selected SpeedScreen mode for the current session by using the Latency Reduction hotkey. See �Hotkeys� on page 35 for details.
Improving Performance Over a Low-Bandwidth ConnectionIf you are using ICA over a low-bandwidth connection, such as a modem, there are a number of changes that you can make to your client configuration and the way you use the client to improve performance:
� Change your ICA Client configuration. Changing your client configuration can reduce the bandwidth that ICA requires, and improve performance. See �Changing Your ICA Macintosh Client Configuration� on page 56.
� Change the way you use the ICA Client. Changing the way you use the client, as described in �Changing the Way You Use the ICA Macintosh Client� on page 56, can also reduce the bandwidth required for a high-performance connection.
� Use the latest MetaFrame server and ICA Client. Citrix is continually enhancing and improving ICA performance with each release, and many performance features require the latest client and server software.

56 Citrix ICA Macintosh Client Administrator�s Guide
Changing Your ICA Macintosh Client ConfigurationOn devices with limited processing power, or where limited bandwidth is available, there is a trade-off between performance and functionality. The ICA Macintosh Client provides both user and administrator with the ability to choose an acceptable mixture of rich functionality and interactive performance. Making one or more of the following changes can reduce the bandwidth that your connection requires, and improve performance:
� Allow maximum data compression. Compression reduces the size of the data that is transferred over the ICA connection.
� Turn the disk (bitmap) cache on. Disk caching stores commonly used bitmaps (images) locally on your client computer so that they do not have to be transferred over the ICA connection every time they are needed.
� Turn SpeedScreen Latency Reduction on. SpeedScreen Latency Reduction improves performance over high latency connections by providing instant feedback in response to typed data or mouse clicks.
� Reduce the window size. Change the window size to the minimum size you can comfortably use.
� Turn client audio mapping off. If you do not need sound, turn client audio mapping off.
Changing the Way You Use the ICA Macintosh Client ICA technology is highly optimized and typically does not have high CPU and bandwidth requirements. However, if you are using a very low-bandwidth connection, consider the following to preserve performance:
� Avoid accessing large files using client drive mapping. When you access a large file with client drive mapping, the file is transferred over the ICA connection. On slow connections, this may take a long time.
� Avoid printing large documents on local client printers. When you print a document on a local client printer, the print file is transferred over the ICA connection. On slow connections, this may take a long time.
� Avoid playing multimedia content. Playing multimedia content uses a lot of bandwidth and can reduce performance.

Chapter 4 Configuring the Citrix ICA Macintosh Client 57
Integrating the ICA Macintosh Client with Security SolutionsYou can integrate the ICA Macintosh Client with a range of security technologies, including proxy servers, firewalls, and Secure Sockets Layer/Transport Layer Security (SSL/TLS) based systems. This section describes:
� Connecting through a SOCKS proxy server or Secure proxy server (also known as Security proxy server, HTTPS proxy server, or SSL tunneling proxy server)
� Integrating the client with Citrix Secure Gateway or Citrix SSL Relay solutions with SSL/TLS protocols
� Connecting to a server using alternate addressing across a firewall
� Using ICA encryption to help protect data on local networks
Configuring the ICA Macintosh Client to Work with a Proxy ServerTo configure the ICA Macintosh Client to work with a proxy server, do one of the following:
� Specify the default details of your proxy server manually�Or�
� Turn auto proxy server detection on
Specifying the Proxy Server ManuallyIf you are specifying the proxy server manually, you need to know its address. You also need to know its port number if it is not set to 1080 for a SOCKS proxy server or 8080 for a Secure proxy server.
Note The ICA Macintosh Client supports only clear text user name and password authentication.
" To configure a default SOCKS or Secure Proxy Server
1. Open the Default Settings dialog box. (For ways to do this, see �To configure default settings� on page 30.)
2. On the Making a Connection>Server Location pane, click Firewalls to open the Firewalls Settings dialog box.

58 Citrix ICA Macintosh Client Administrator�s Guide
3. Select the Proxy type (or No Proxy for a direct connection.)
4. Type the address of the proxy server, and the port number if not 1080 (for a SOCKS proxy server) or 8080 (for a Secure proxy server).
5. Click OK, then Save.
" To specify a SOCKS or Secure Proxy Server for a connection file
1. Open the connection file you want to edit in the Citrix ICA Client Editor. (For ways to do this, see �To edit an existing connection file� on page 28.)
2. Click the Security tab to see your current proxy settings.

Chapter 4 Configuring the Citrix ICA Macintosh Client 59
3. Clear Proxy Use Default.
4. Click Firewall Settings.
5. Select the Proxy type (or No Proxy for a direct connection.)
6. Type the address of the proxy server, and the port number if not 1080 (for a SOCKS proxy server) or 8080 (for a Secure proxy server).
7. Click OK.
Note You can enter only one proxy server address.
Using Auto Detection to Get Proxy DetailsIf you are deploying the ICA Macintosh Client in an organization with many proxy servers, consider using auto proxy server detection (also called auto-client proxy detection.) It is also useful if you cannot determine which proxy server will be used when you configure the client. Auto proxy server detection obtains proxy details from the network settings in the client computer Network System Preferences.
" To turn auto proxy server detection on by default
1. Open the Default Settings dialog box. (For ways to do this, see �To configure default settings� on page 30.)
2. On the Making a Connection>Server Location pane, click Firewalls.

60 Citrix ICA Macintosh Client Administrator�s Guide
3. Select Use Web browser proxy settings.
4. Click OK, then Save.
Integrating Citrix Secure Gateway or SSL RelayYou can integrate the ICA Macintosh Client with a Citrix Secure Gateway or SSL Relay service. The client supports both SSL and TLS protocols:
� SSL provides strong encryption to increase the privacy of your ICA connections and certificate-based server authentication to ensure that the server you are connecting to is a genuine server.
� TLS is the latest, standardized version of the SSL protocol. Because there are only minor technical differences between SSL Version 3.0 and TLS Version 1.0, they are functionally equivalent.
Citrix Secure GatewayIf you are using Citrix Secure Gateway in Relay mode, the Secure Gateway functions as a proxy server. You must configure the ICA Macintosh Client to use both the fully-qualified domain name (FQDN) and port number of the Secure Gateway server. (For further details, see the Citrix Secure Gateway documentation.)
Important The fully-qualified domain name of the Secure Gateway server must list the following components in sequence:
� Host name
� Intermediate domain
� Top-level domain
For example, my_computer.my_company.com is an FQDN because it lists, in sequence, a host name (my_computer), an intermediate domain (my_company), and a top-level domain (com). The combination of intermediate and top-level domain (my_company.com) is generally referred to as the domain name.
" To configure a default Citrix Secure Gateway server (Relay mode)
Note You can configure the Citrix Secure Gateway settings only if you already selected SSL/TLS+HTTPS.
1. Open the Default Settings dialog box. (For ways to do this, see �To configure default settings� on page 30.)

Chapter 4 Configuring the Citrix ICA Macintosh Client 61
2. On the Making a Connection>Server Location pane, click Firewalls to open the Firewalls Settings dialog box.
3. Type the fully-qualified domain name of the Secure Gateway server and the port number, if not 443.
4. Click OK, then Save.
" To specify a Citrix Secure Gateway server (Relay mode) for a connection file
Note You can configure the Citrix Secure Gateway settings only if you already selected SSL/TLS+HTTPS.
1. Open the connection file you want to edit in the Citrix ICA Client Editor. (For ways to do this, see �To edit an existing connection file� on page 28.)
2. Click the Security tab to see your current proxy settings.
3. Clear Proxy Use Default.
4. Click Firewall Settings.
5. Type the fully-qualified domain name of the Secure Gateway server and the port number, if not 443.
6. Click OK.
Citrix SSL RelayYou can use Citrix SSL Relay to secure communications:
� Between an SSL/TLS-enabled ICA Macintosh Client and a MetaFrame server
� In an NFuse Classic deployment, between the MetaFrame and NFuse Classic servers
For information about configuring and using Citrix SSL Relay to secure your MetaFrame installation, see your MetaFrame server Administrator�s Guide. For information about configuring the NFuse Classic server to use SSL/TLS encryption, see the NFuse Classic Administrator�s Guide.
Configuring SSL/TLSSSL and TLS are configured in the same way and use the same certificates. When SSL and TLS are enabled, each time you initiate a connection the client tries to use TLS first, then tries SSL. If it cannot connect with SSL, the connection fails and an error message appears.

62 Citrix ICA Macintosh Client Administrator�s Guide
There are three main steps involved in setting up SSL/TLS:
1. Set up Citrix SSL Relay on your MetaFrame or NFuse Classic server and obtain and install the necessary server certificate. See the server and Citrix SSL Relay documentation for details.
2. Install the equivalent root certificate on the ICA Macintosh Client. See �Installing Root Certificates on ICA Macintosh Clients� on page 62.
3. Configure a connection, or all connections, to connect to the server using SSL/TLS. See �Configuring SSL/TLS� on page 61.
Installing Root Certificates on ICA Macintosh ClientsTo use SSL/TLS to secure communications between SSL/TLS-enabled ICA Clients and the MetaFrame server, you need a root certificate on the client computer that can verify the signature of the Certificate Authority on the server certificate.
You must obtain a root certificate from the Certificate Authority and install it on each client computer. (The certificate must have the extension .crt. If it has a different extension, rename it to have a .crt extension.) This root certificate is then used and trusted by the ICA Macintosh Client.
Depending on your organization�s policies and procedures, you may want to install the root certificate on each client computer instead of directing users to install it.
Important The following steps assume your organization has a procedure in place for users to check the root certificate as they install it. It is important to verify the authenticity of a root certificate before installing it.
" To install a root certificate on the Macintosh client computer
1. If they do not already exist under the folder containing your ICA Macintosh Client, create a folder called keystore and then create a sub-subfolder called cacerts. The tree will look like this:
2. Copy the certificate file into the cacerts folder.

Chapter 4 Configuring the Citrix ICA Macintosh Client 63
Configuring the ICA Macintosh Client to use SSL/TLSThe following section explains how to configure the ICA Macintosh Client to use SSL/TLS.
" To configure the default SSL/TLS settings
1. Open the Default Settings dialog box. (For ways to do this, see �To configure default settings� on page 30.)
2. On the Making a Connection>Server Location pane, at Network Protocol, select SSL/TLS+HTTPS. The Address List changes to show available SSL/TLS-enabled servers.
3. If the Address List does not include the server you want, click Add. The Server Address dialog box appears.
4. Type the name of the required server, using the fully-qualified domain name, such as:my_computer.my_company.com
For more information about fully-qualified domain names, see �Citrix Secure Gateway� on page 60. If you are unsure about these details, ask your system administrator.
5. Type the port number if different from the default.
6. Click OK to save this server information to the Address List.
7. Click Save.
Connecting to a Server Through a FirewallIf there is a firewall between the ICA Macintosh Client and the MetaFrame server you must configure the ICA Client default setting to use the alternate server address returned by the master ICA browser. You need to do this even if you are not using a SOCKS proxy server.
" To configure the default firewall alternate address setting
1. Open the Default Settings dialog box. (For ways to do this, see �To configure default settings� on page 30.)
2. On the Making a Connection>Server Location pane, click Firewalls.

64 Citrix ICA Macintosh Client Administrator�s Guide
3. Select Use alternate address for firewall connection and click OK.
4. Click Save.
" To specify the alternate server address setting for a connection file
1. Open the connection file you want to edit in the Citrix ICA Client Editor. (For ways to do this, see �To edit an existing connection file� on page 28.)
2. Click the Security tab to see your current proxy settings.
3. Clear Proxy Use Default.
4. Click Firewall Settings.
5. Select Use alternate address for firewall connection and click OK.
6. Click Save.
Users who sometimes use the ICA Macintosh Client inside a firewall and sometimes outside a firewall (at work and at home, for example) can create two connection files, one with the alternate address setting off (for work) and one with the alternate address setting on (for home.)

Chapter 4 Configuring the Citrix ICA Macintosh Client 65
Using ICA EncryptionICA encryption increases the security of your ICA connection. By default, basic encryption is turned on for all connections. This type of security is primarily suited to local networks. If the MetaFrame server you are connecting to supports ICA encryption, you can use it to improve security.
Note To allow encryption levels higher than Basic, the MetaFrame server must support RC5 encryption. This support is included with SecureICA Services and Feature Release 1. However, SecureICA Services is not supported by all MetaFrame servers.
" To configure a default encryption level
1. Open the Default Settings dialog box. (For ways to do this, see �To configure default settings� on page 30.)
2. On the Making a Connection>Server Location pane, change the encryption level.
3. Click Save.
" To change the encryption settings for a specific connection file
1. Open the connection file you want to edit in the Citrix ICA Client Editor. (For ways to do this, see �To edit an existing connection file� on page 28.)
2. Click the Security tab.

66 Citrix ICA Macintosh Client Administrator�s Guide
3. Clear Encryption Use Default and choose an encryption level supported by the MetaFrame server.
Note The MetaFrame server must be configured to allow the selected encryption level or greater.

Index 67
Index
Aalert beep, see windows alert beepalternate address
configuring 63described 11
Application pane 52application properties, specifying 52Application tab 52associating file extensions, see file type associationauto proxy server detection
configuring default setting 59described 59turning on or off 59
auto update, see client auto updateauto-client proxy detection, see auto proxy server detection
BBest Window Position command, Client File Menu 34bitmap caching, see disk cachingbusiness recovery
configuring server group 26described 26
CCitrix Secure Gateway
and fully-qualified domain name 61configuring default setting 60relay mode 60specifying 61
Citrix SSL Relay 61Citrix Universal Printer Driver, described 10Citrix Web site 7
Product Documentation Library 7client audio
mapping described 43options 43turning mapping on or off on a MetaFrame server 43with low-bandwidth connection 56
client auto updatedatabase described 17described 16process described 17turning on or off 17
client COM portin an ICA session 42mapping 42mapping described 42mapping not TAPI-compatible 42mapping supported 42setting default 42
client devicesmapping described 38mapping supported 38
client drivemapping 38mapping described 38mapping supported 38mapping, with low-bandwidth connection 56
client printerdescribed 44enhancements described 10mapping manually 45mapping supported 44printing during an ICA session 44printing with low-bandwidth connection 56turning printing on or off 46viewing 45
COM Port Mapping pane 32COM port, see client COM portconfiguring the Citrix ICA Macintosh Client 19�66configuring, default settings 30connection
low-bandwidth 55specifying network protocol 24specifying server 24types 21ways to configure 28

68 Citrix ICA Macintosh Client Administrator�s Guide
connection filecreating 21deploying for numerous users 32described 20disk caching 54editing 28firewall alternate address 64ICA Encryption settings 65network protocol 24server 24specifying application properties 52specifying Citrix Secure Gateway 61specifying proxy server 58SpeedScreen Latency Reduction 55turning client audio mapping on or off 44turning client drive mapping on or off 41turning client printing on or off 46window properties 33
Connection Properties tabdefault settings 31
conventions 6creating a connection file 21cursor feedback, not supported 11
Ddata compression
described 53turning on or off 53with low-bandwidth connection 56
default settingsauto proxy server detection 59business recovery server group 26Citrix Secure Gateway 60client auto update 17configuring 30disk caching 53firewall alternate address 63hotkeys 35ICA Encryption 65keyboard layout 37keyboard type 37mapping drives 38network protocol 23Secure proxy server 57server 23SOCKS proxy server 57SSL/TLS+HTTPS 63window properties 33windows alert beep 34
deploying the Citrix ICA Macintosh Client 15�18disabling, see turning on or offdisk caching
configuring default setting 53described 53turning on or off 54with low-bandwidth connection 56
displaying default hotkeys 35Dock
containing Client, Editor, and connection files 20starting an ICA session 27
Drive Mapping pane 32Drives and Devices tab 32Drives menu, Client 39
Eediting a connection file 28ejecting CDs or other removable media 40enabling, see turning on or offencryption, see ICA Encryption
Ffile type association 47�51
associating file extensions 49described 47drive mapping 47extended parameter passing 47prerequisites 47
File Type Association pane 31firewall
configuring alternate server address 63configuring default setting 63
folders, mapping 38FQDN, see fully-qualified domain namefully-qualified domain name
and Citrix Secure Gateway 61described 60SSL/TLS settings 63
Hhotkeys, configuring 35
IICA Client Editor
described 20starting 21

Index 69
ICA Clientsdownloading from the Citrix Web site 7
ICA connection, see connectionICA Encryption
changing settings 65configuring default setting 65described 65
ICA Macintosh Clientinstalling 16uninstalling 18
ICA sessionmapped client COM port 42mapping folders 38printing 44starting 27
improving performance 52�56improving performance over a low-bandwidth connection
55�56installing
described 16from CD-ROM 16from downloaded file 16root certificate 62
introduction to the Citrix ICA Macintosh Client 9�13
JJapanese Hotkeys pane 32Japanese Hotkeys, described 36
Kkeyboard
Japanese 36�37Japanese settings 37layout 37type 37
Keyboard pane 31
Llatency, see SpeedScreen Latency Reductionlocal clipboard integration, supported 12local text echo, see SpeedScreen Latency Reductionlow-bandwidth connection 55
MMac OS X, look and feel 9Making a Connection tab 31mapped drives, viewing 40
mappingclient audio 43client COM port 42client devices 38client drive 38client printer 44�45folders 38
master ICA browserdescribed 26specifying 26
MetaFrame for UNIX serverclient auto update not supported 17mapping (except for printing) not supported 38
MetaFrame servermapping client printer manually 45turning client audio mapping on or off 43viewing client printer 45
MIME type registration, supported 13mouse click feedback, see SpeedScreen Latency Reductionmouse clicks, replicating see hotkeysmulti-button mouse support, described 11multiple session support, enhancements described 10
NNDS support, described 13Network Connection pane 21network protocol
configuring 23described 22specifying 24SSL/TLS+HTTPS 23TCP/IP 23TCP/IP+HTTP 23
PPC keys, see hotkeysper connection browsing, described 13Performance pane 31Print Automatically command, Client File menu 44Print With Dialog command, Client File menu 44printer, see client printerproxy server
and server location 27configure with Citrix ICA Macintosh Client 57
published application, described 21

70 Citrix ICA Macintosh Client Administrator�s Guide
Rread/write access, denying or allowing 27resize box, hiding and displaying during an ICA session 34root certificate
described 62installing 62
SSecure proxy server
configuring default 57described 10specifying 58
Secure Sockets Layer, see SSLSecurity tab 58, 61, 64�65security, improving 57�66server
configuring 23specifying 24
server browsing, see server locationserver desktop, described 21server groups, described 26server location
and SSL/TLS+HTTPS and proxy server 27described 25SSL/TLS+HTTPS 25TCP/IP 25TCP/IP+HTTP 25
Server Location pane 23�24, 26�27, 30�31, 57, 59, 61, 63, 65
SOCKS proxy serverconfiguring default setting 57specifying 58
specifyingapplication properties 52Citrix Secure Gateway 61network protocol 24proxy server 58window properties for a connection file 33
SpeedScreen Latency Reductiondescribed 54local text echo 55mouse click feedback 55turning on or off 55with low-bandwidth connection 56
SSL/TLSdescribed 10, 60
SSL/TLS+HTTPSand server location 27default settings 63described 23server location 25
startingICA Client Editor 21ICA session 27
system requirementsdescription 15
TTCP/IP
described 23server location 25
TCP/IP+HTTPdefault setting 26described 23server location 25
time zone support, described 12Transport Layer Security, see SSL/TLSturning on or off
auto proxy server detection 59client audio mapping 43client audio mapping, specific connection 44client auto update 17client drive mapping, specific connection 41data compression 53disk caching 54drive mapping 38printing 46SpeedScreen Latency Reduction 55
Uunavailable PC keys, see hotkeysuninstalling the ICA Macintosh Client 18user interface configuration 32�37
Vviewing
client printer 45mapped drives 40

Index 71
Wwindow properties
configuring default setting 33described 33specifying 33with low-bandwidth connection 56
Window tab 33windows alert beep
configuring 34configuring default setting 34described 34
Windows and Sounds pane 31


![[Citrix] Perforce Standardisation at Citrix](https://img.pdfslide.net/doc/110x75/545591f6b1af9f40378b492e/citrix-perforce-standardisation-at-citrix.jpg)