Embed Size (px)
Citation preview

Adobe Photoshop TutorialPhotoShop is a pixel-based program for editing
photographs, painting, and creating digital artIn this tutorial, you will learn:
-Opening New Documents
-Extracting Images from their Backgrounds
-Changing Picture Size and Quality
-Combining Multiple Images
-Text Effects
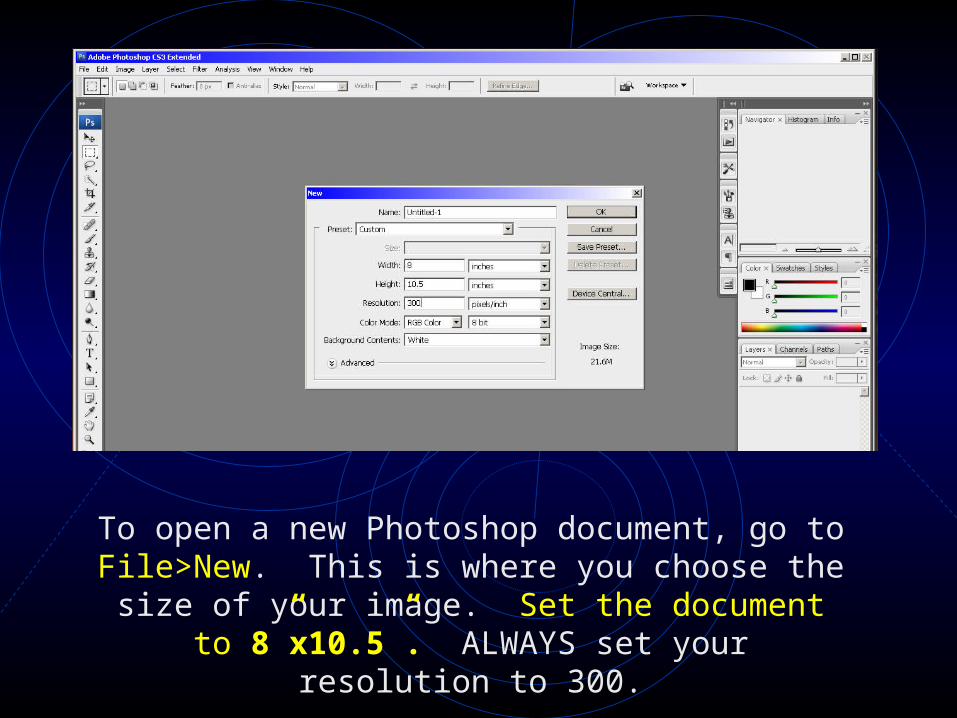
To open a new Photoshop document, go to File>New. This is where you choose the size of your image. Set the document to 8”x10.5”. ALWAYS set
your resolution to 300.

Always start by creating a NEW LAYER. Because the background layer is locked, you will need a new,
open layer to work with.
Copy and Paste this photo of Bob to your photoshop doc (Single click
the photo, right click, copy.)
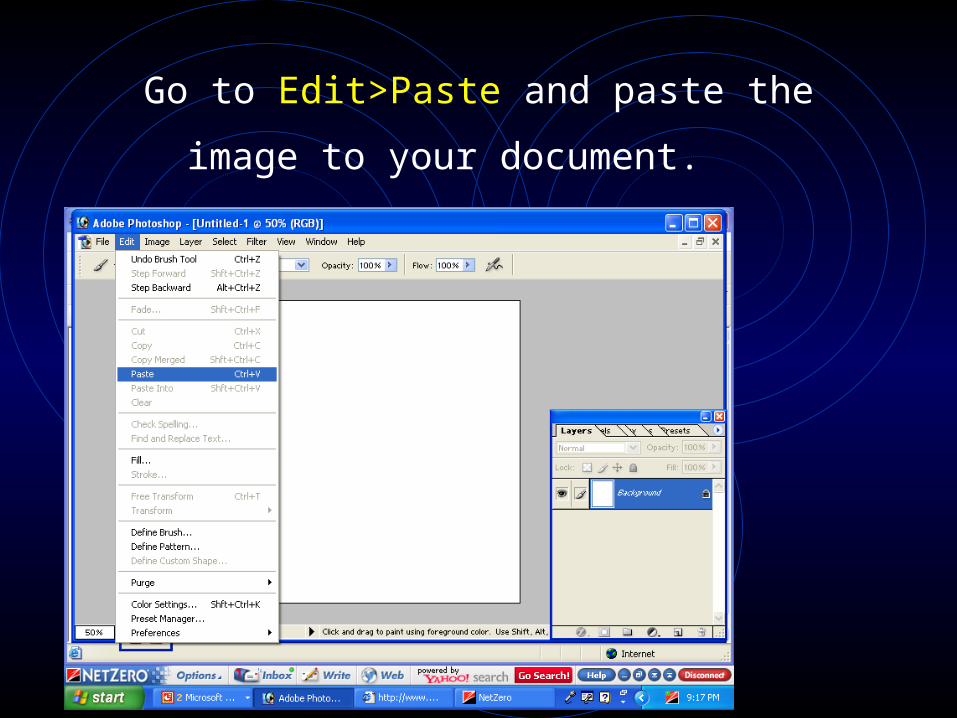
Go to Edit>Paste and paste the image to your
document.

The image appears. Notice you have a new layer with that image on it, separate from the
background.
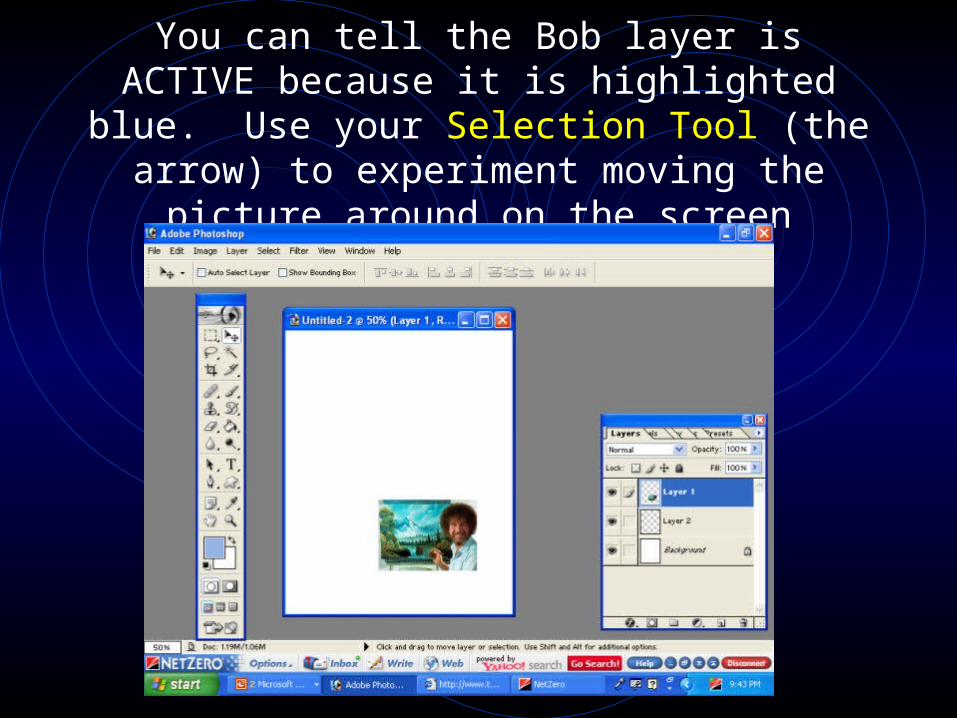
You can tell the Bob layer is ACTIVE because it is highlighted blue. Use your Selection Tool (the arrow) to experiment moving the picture
around on the screen
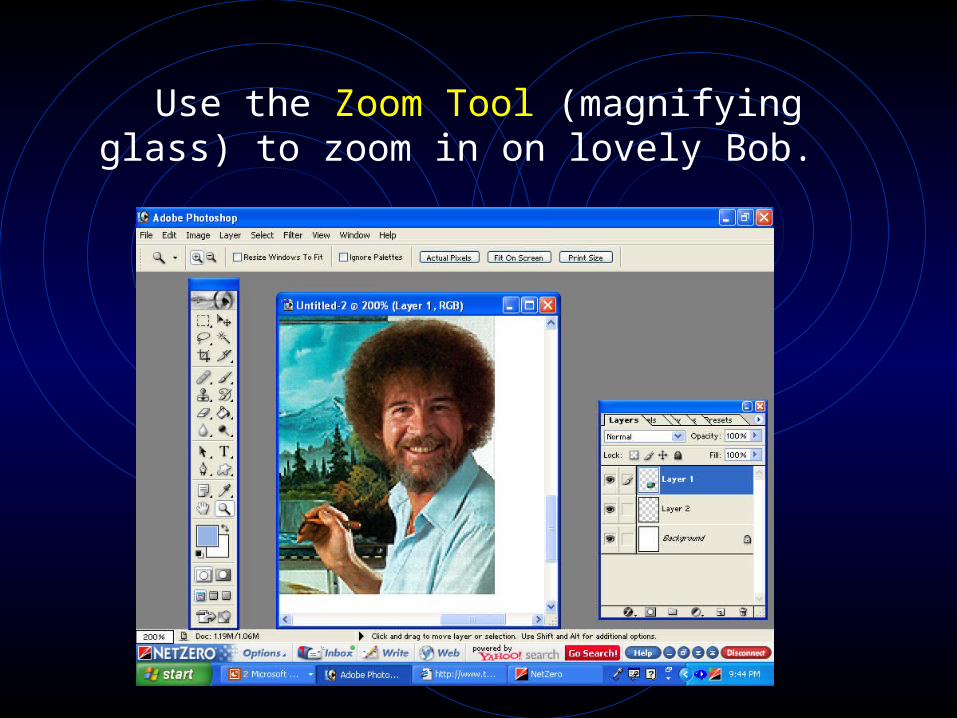
Use the Zoom Tool (magnifying glass) to zoom in on lovely Bob.

To remove Bob from his normal surroundings, go to Filter> Extract.

Change the brush size to 2 pixels.

Zoom in and begin drawing a line with the Highlighter Tool around Bob’s hand, halfway on
him, and halfway on the background. If you mess up, just use the eraser to fix it. The closer you are
zoomed in, the more accurate your selection will be.

You can use the Hand Tool to move the picture around as you continue highlighting, allowing
you to reach all areas of the photograph.

When you get up to his gorgeous `fro, switch to a bigger brush size (5 pix). This will allow you
to maintain its fluffiness for later.

The highlighted area must be COMPLETELY enclosed, or the next part won’t work. Don’t
forget the top and bottom edges of the image.
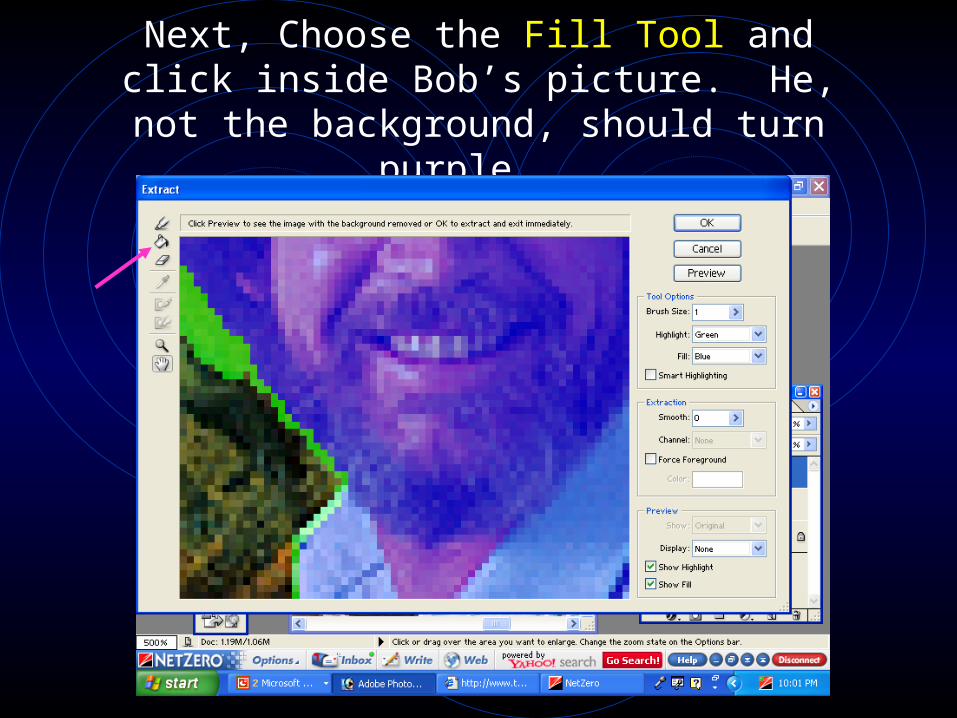
Next, Choose the Fill Tool and click inside Bob’s picture. He, not the background, should
turn purple.
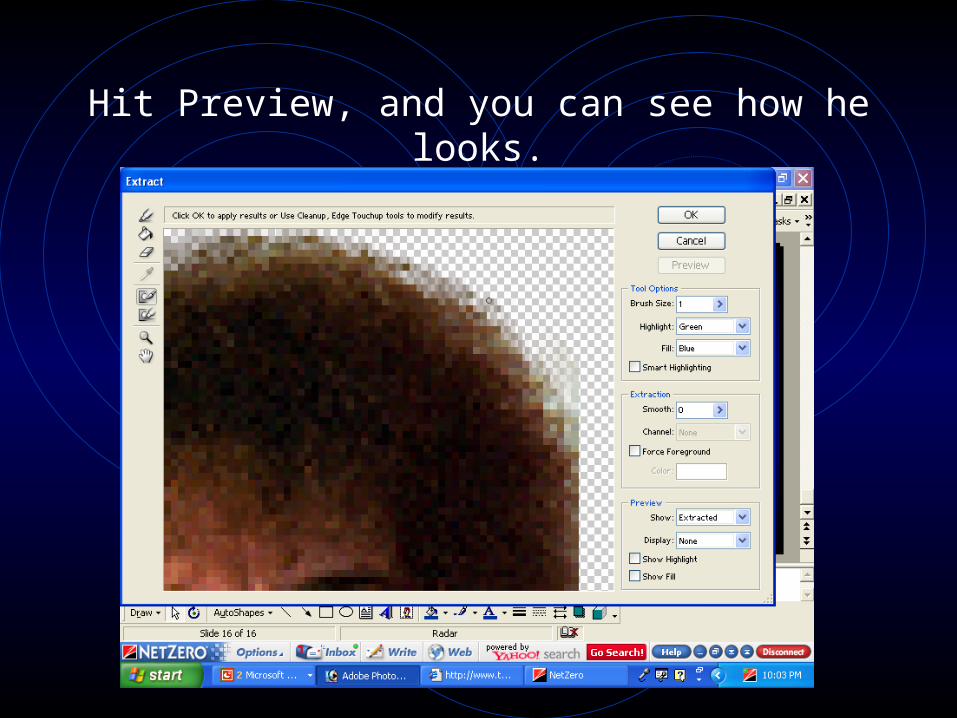
Hit Preview, and you can see how he looks.
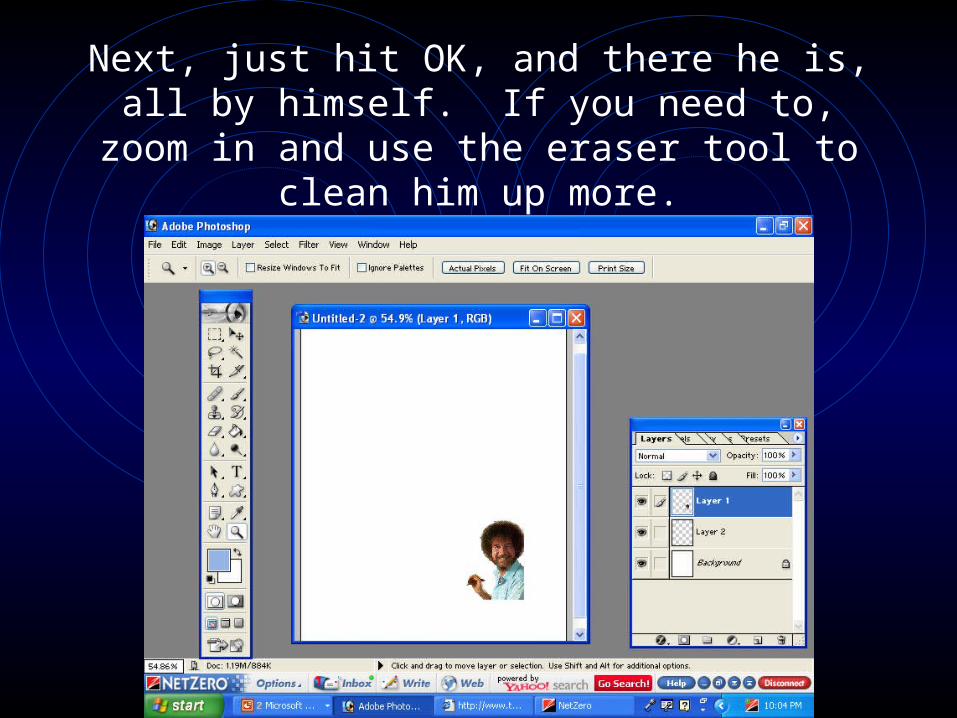
Next, just hit OK, and there he is, all by himself. If you need to, zoom in and use the eraser tool
to clean him up more.

Bob is too small. To resize an image in Photoshop, make sure that layer is active
(blue). Go to Edit>Free Transform (Ctrl + T).

A box appears around Bob. You must hold SHIFT down as you pull the image out, or it will
get all stretched out of proportion.

You must hit ENTER (or double click your mouse inside the box) to apply the
transformation. Now he should be much bigger. Remember EDIT> FREE TRANSFORM to
resize objects. You will use this a lot.

Copy/Paste this photograph into
Photoshop.

There’s the picture. Notice it is covering up Bob. To fix this, change your layer order (drag a layer above or below another layer, try this.)

Just take the Vegas layer and drag it below the Bob layer. He should appear on top now.
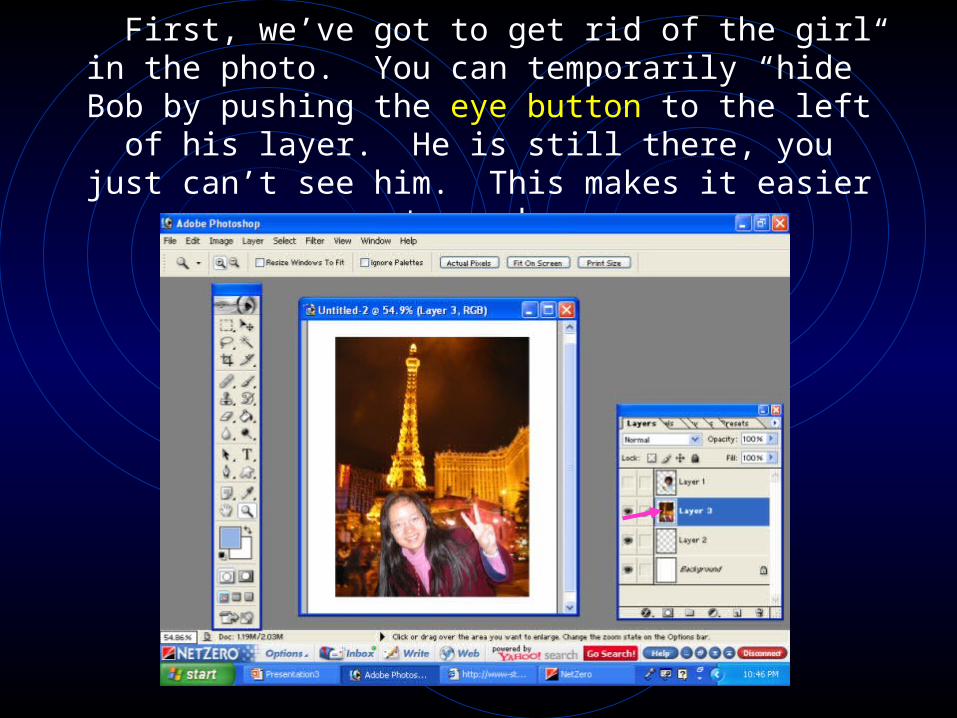
First, we’ve got to get rid of the girl in the photo. You can temporarily “hide” Bob by pushing the eye button to the left of his layer. He is still there, you just can’t see
him. This makes it easier to work.

Do you remember how to enlarge images?Go to Edit>Free Transform to stretch out the
Vegas photo to take up the entire picture plane.

Next, choose the Rubber Stamp Tool. This tool allows you to pick up pixels that you want to
“stamp over” unwanted images.
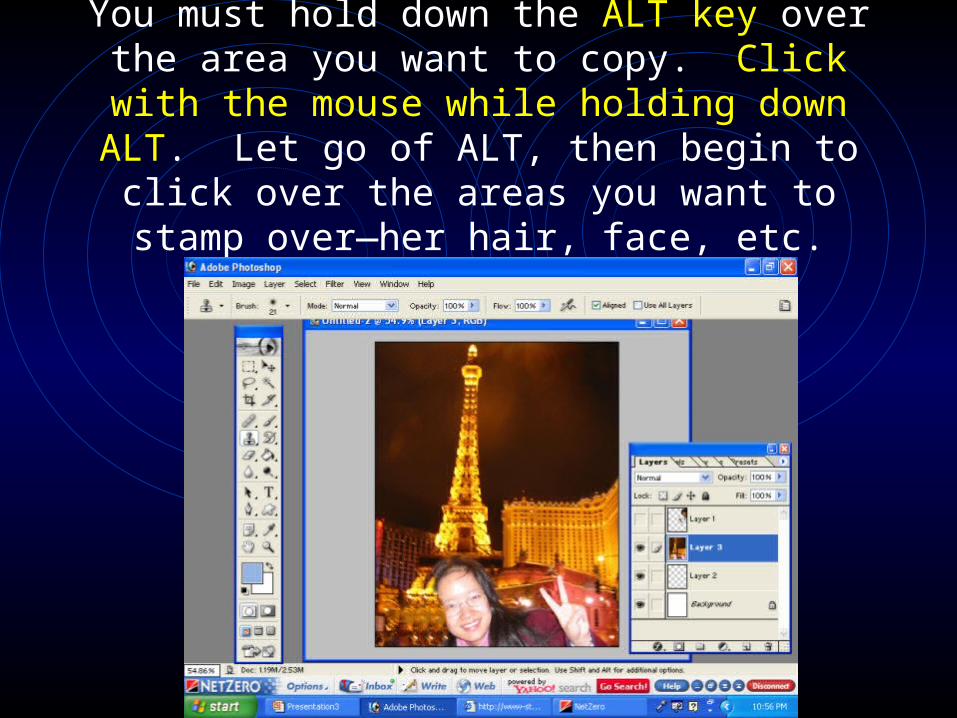
You must hold down the ALT key over the area you want to copy. Click with the mouse while
holding down ALT. Let go of ALT, then begin to click over the areas you want to stamp over—
her hair, face, etc.
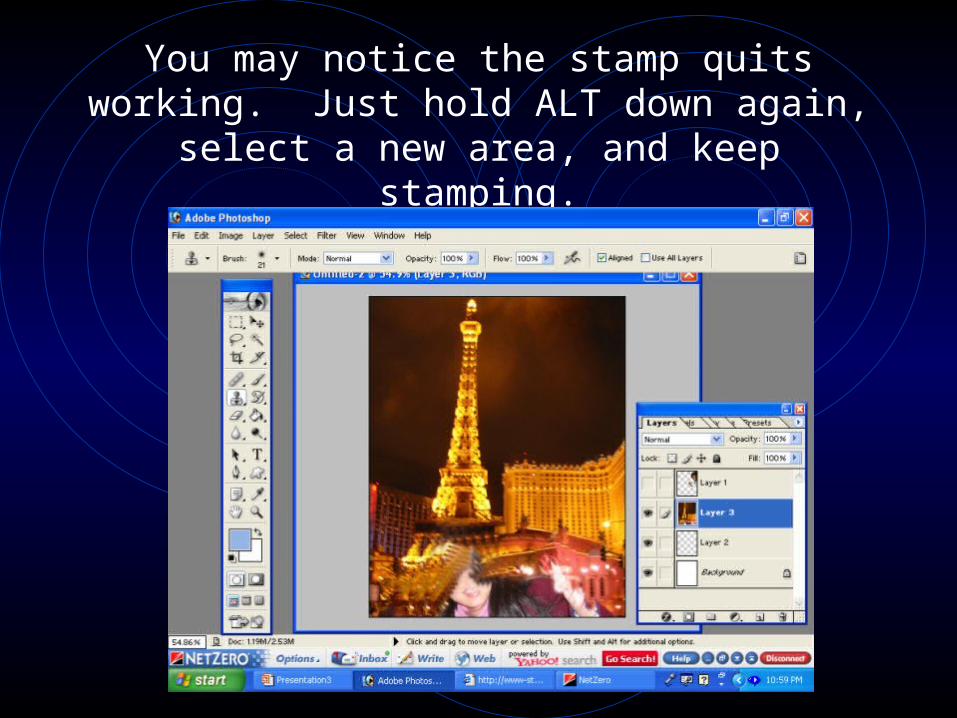
You may notice the stamp quits working. Just hold ALT down again, select a new area, and
keep stamping.
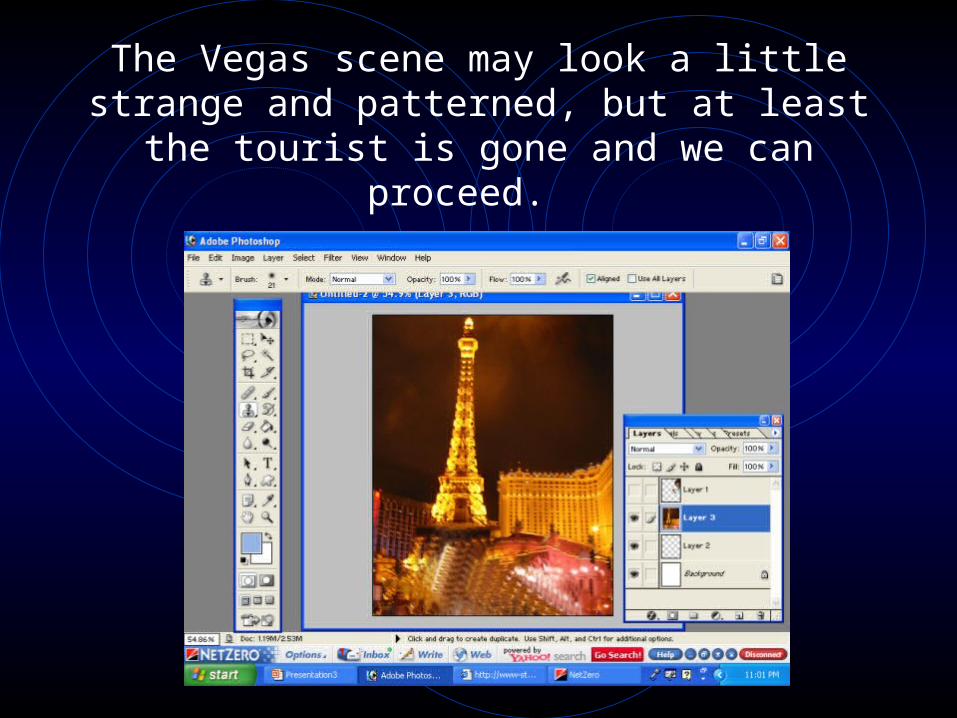
The Vegas scene may look a little strange and patterned, but at least the tourist is gone and
we can proceed.
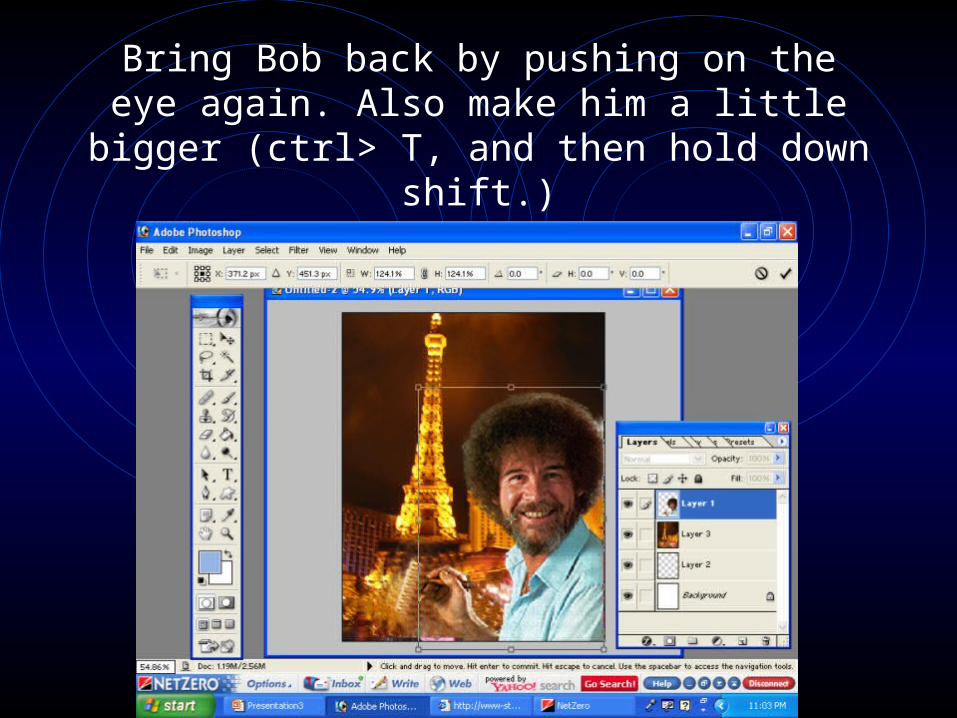
Bring Bob back by pushing on the eye again. Also make him a little bigger (ctrl> T, and then
hold down shift.)
Copy the playing cards.

Paste them into Photoshop. Notice they have their own layer.
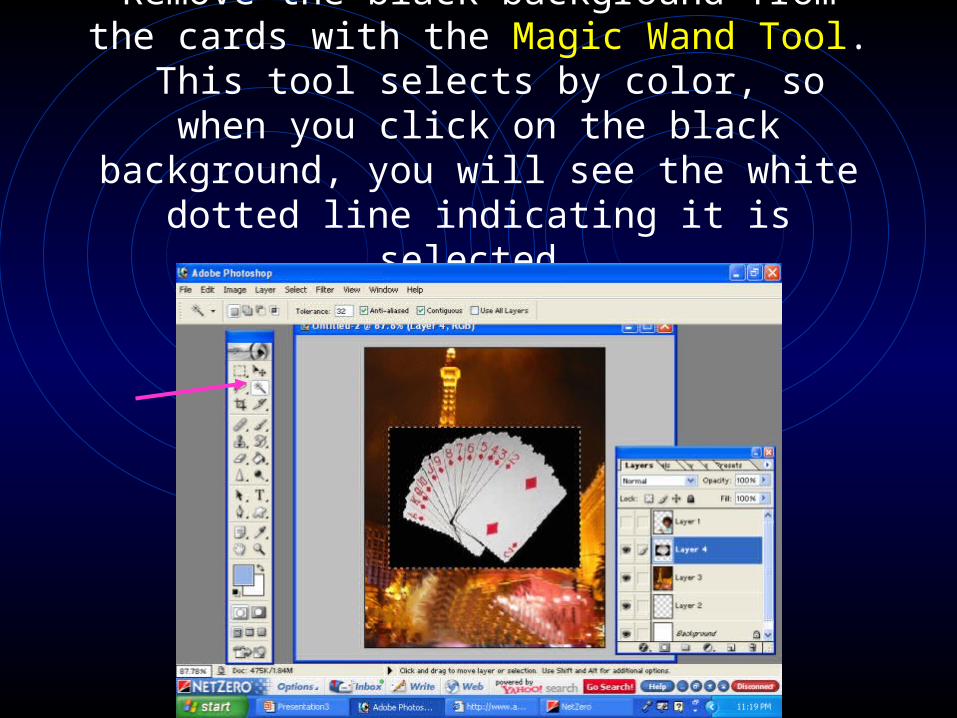
Remove the black background from the cards with the Magic Wand Tool. This tool selects by
color, so when you click on the black background, you will see the white dotted line
indicating it is selected.

Just hit the Delete Key, and the black disappears.
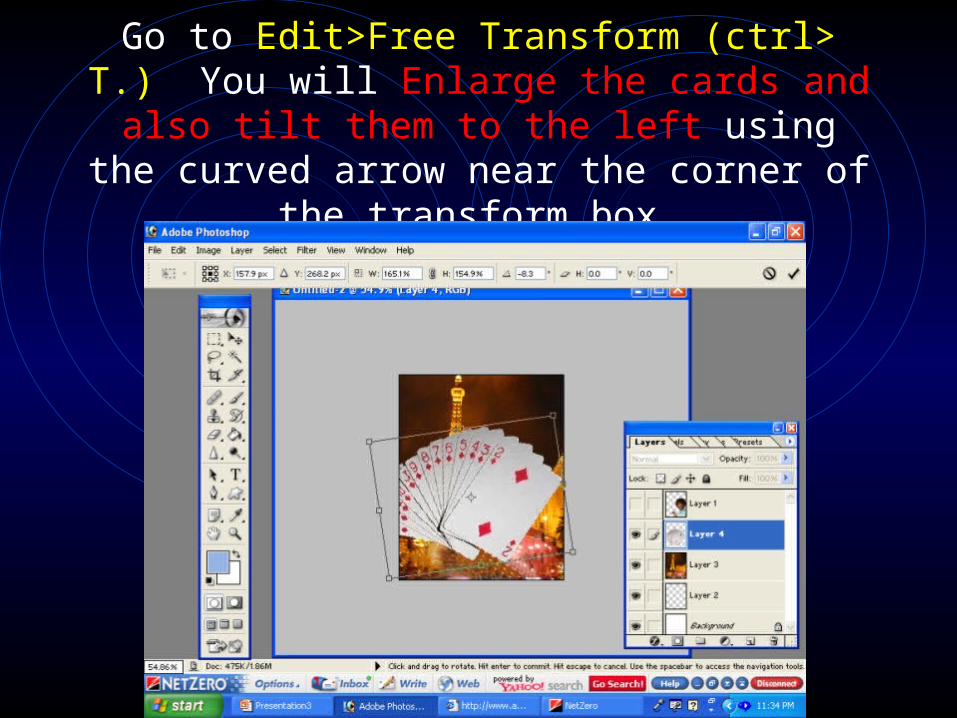
Go to Edit>Free Transform (ctrl> T.) You will Enlarge the cards and also tilt them to the left using the curved arrow near the corner of the
transform box.

Hit Enter to apply the transformation, and using the Arrow Tool, move the cards to the top of the
image.
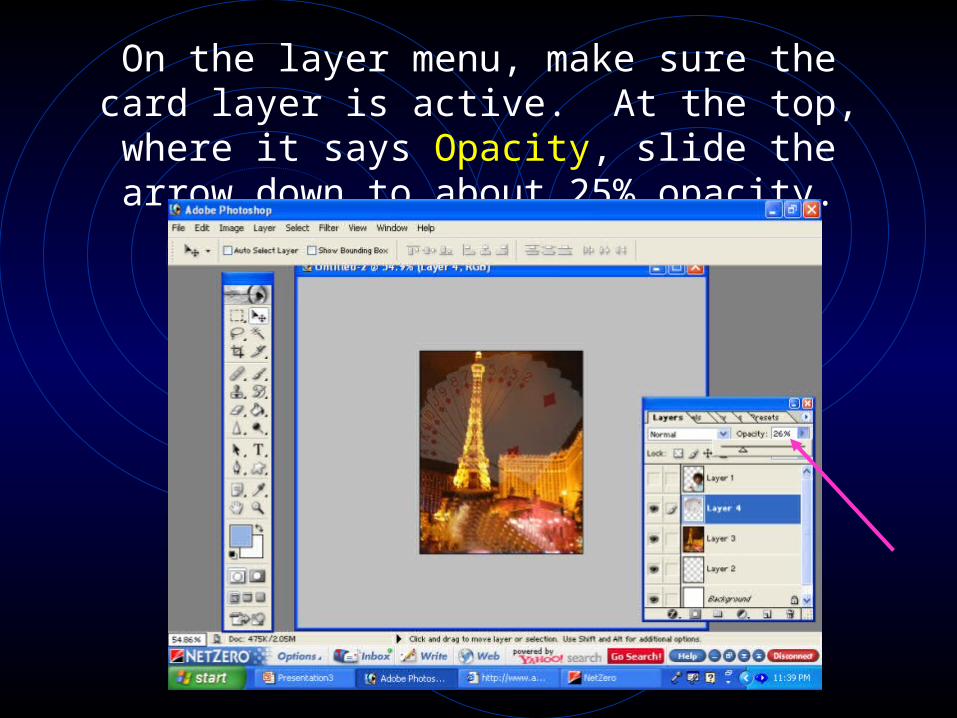
On the layer menu, make sure the card layer is active. At the top, where it says Opacity, slide
the arrow down to about 25% opacity.
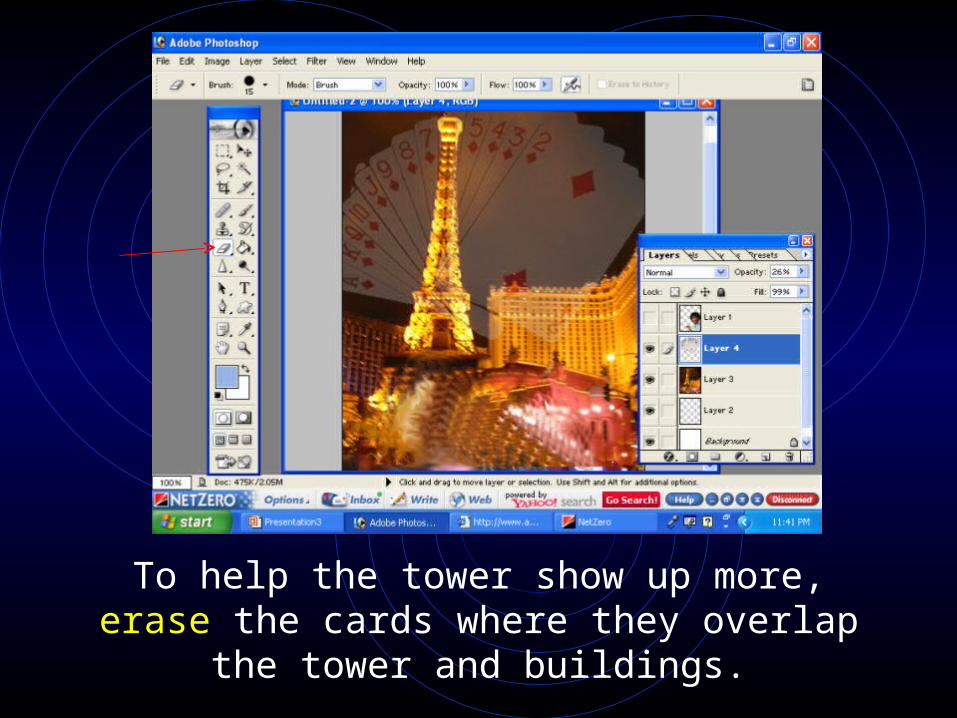
To help the tower show up more, erase the cards where they overlap the tower and
buildings.

Copy/paste the money.
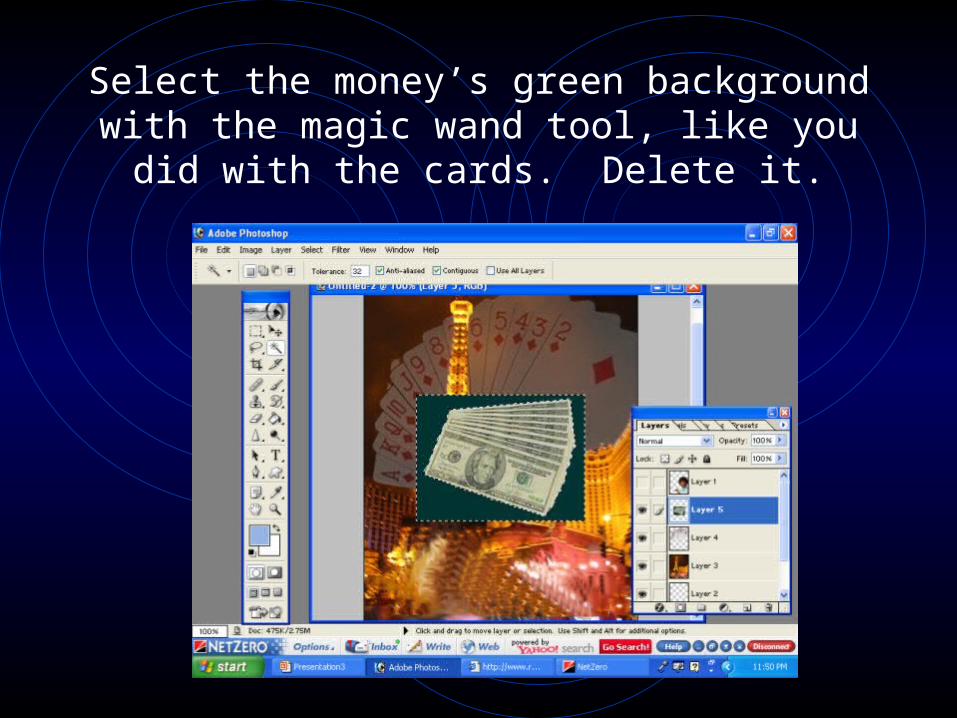
Select the money’s green background with the magic wand tool, like you did with the cards.
Delete it.

Now we are going to shrink (ctrl T and hold down shift) and move the money towards Bob’s
Hands.
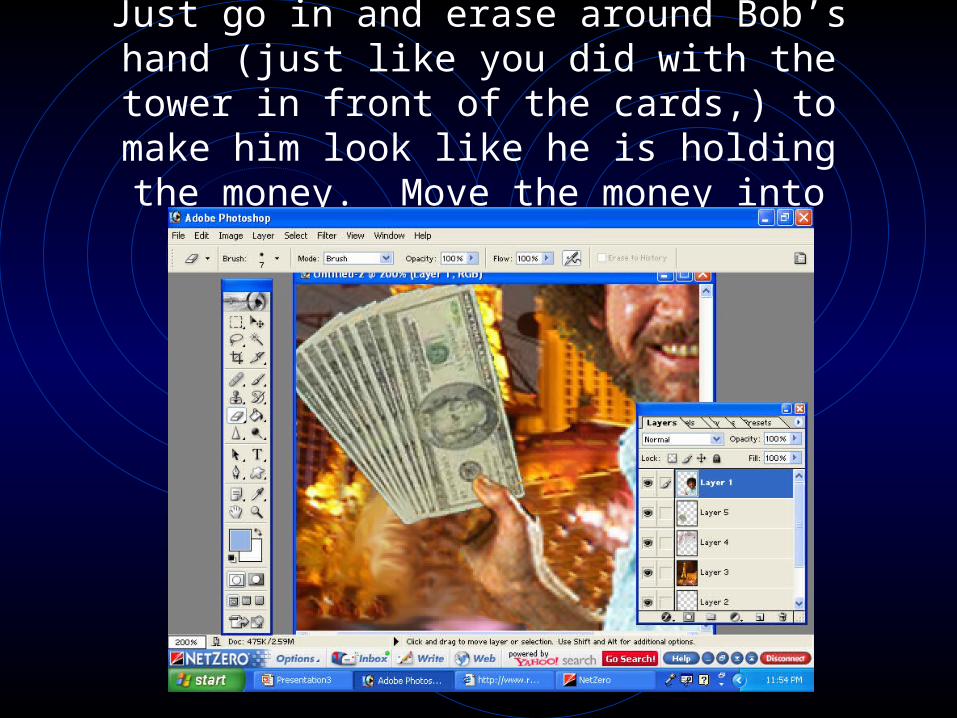
Just go in and erase around Bob’s hand (just like you did with the tower in front of the cards,) to make him look like he is holding the money.
Move the money into place.

Double click on the money layer (where it is highlighted blue). A menu will pop up. Click on the Drop Shadow words. Change the angle of
the shadow until it looks right, then hit OK.

Next we will add some interesting text. Click on the Text Tool. Draw a text box in the upper
portion of the image

Type in the box, “Good Times in Vegas”. Then select the text.
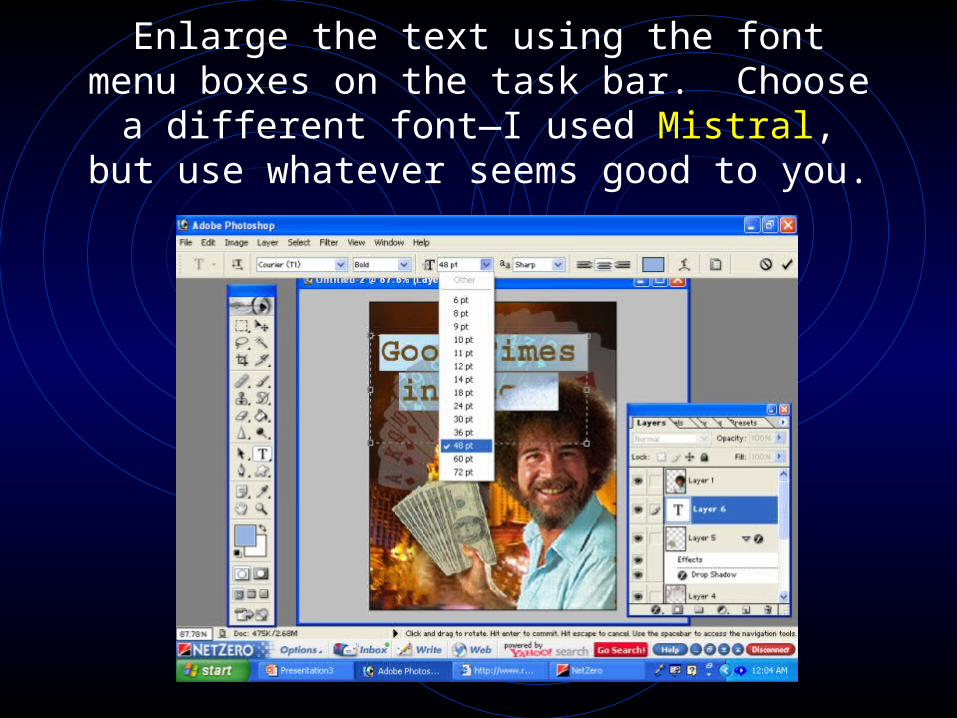
Enlarge the text using the font menu boxes on the task bar. Choose a different font—I used
Mistral, but use whatever seems good to you.
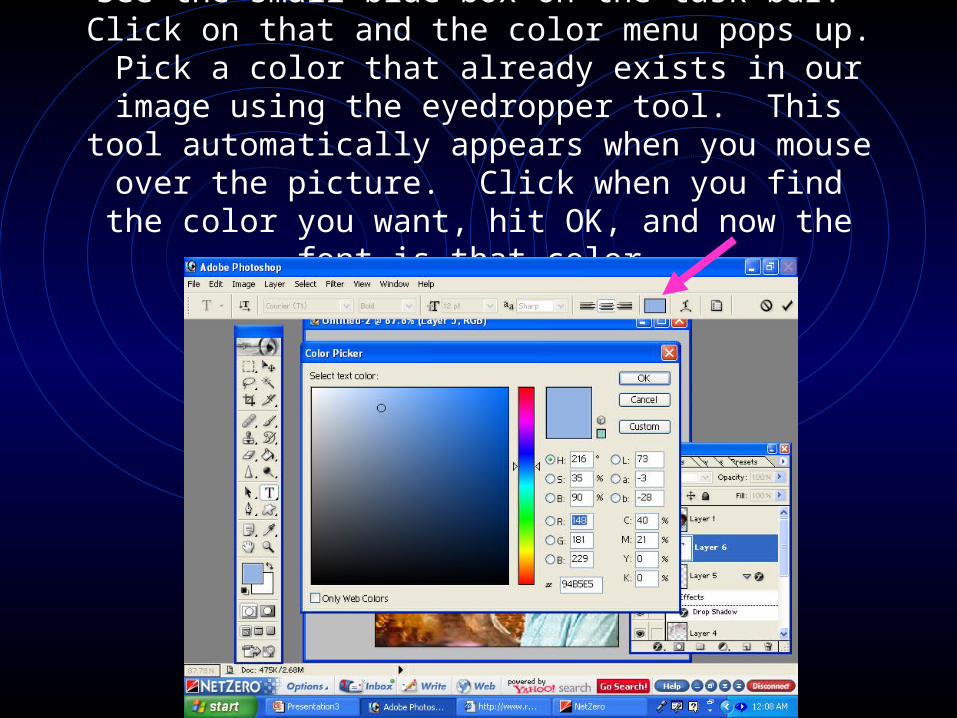
See the small blue box on the task bar? Click on that and the color menu pops up. Pick a color that already
exists in our image using the eyedropper tool. This tool automatically appears when you mouse over the
picture. Click when you find the color you want, hit OK, and now the font is that color.
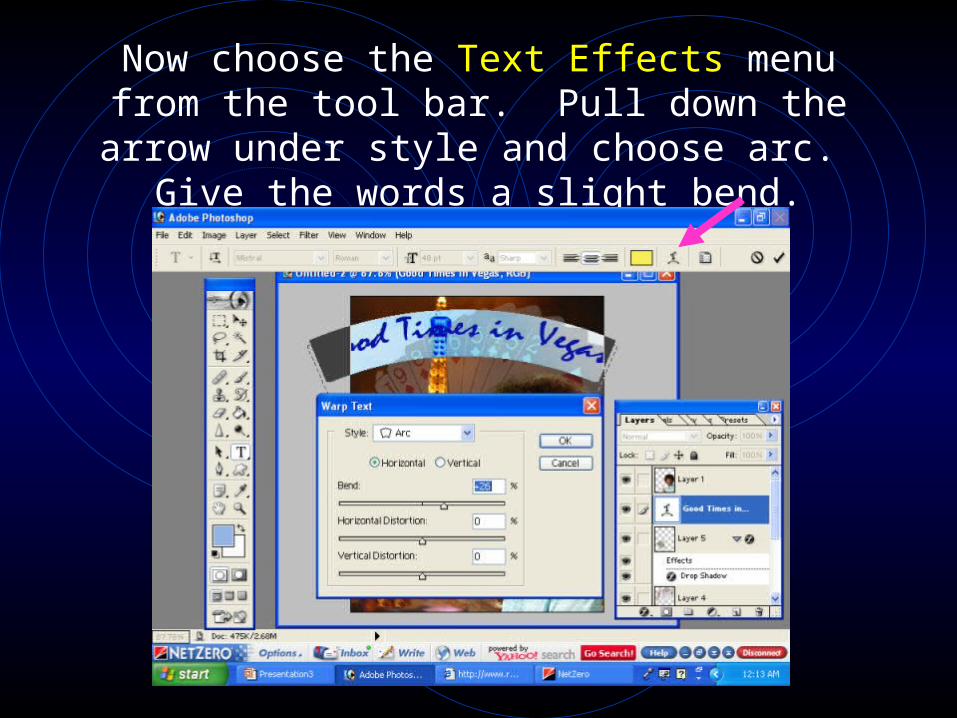
Now choose the Text Effects menu from the tool bar. Pull down the arrow under style and
choose arc. Give the words a slight bend.
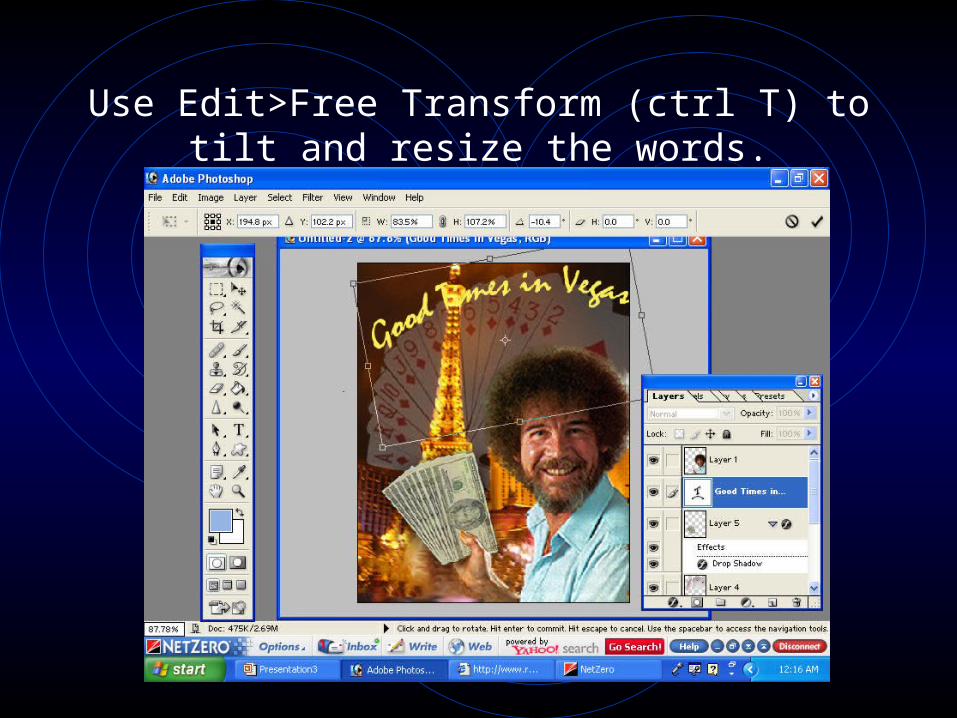
Use Edit>Free Transform (ctrl T) to tilt and resize the words.

Double Click the highlighted area on the text layer to activate the layer style dialog box. Choose Drop Shadow and make the words
show up better.
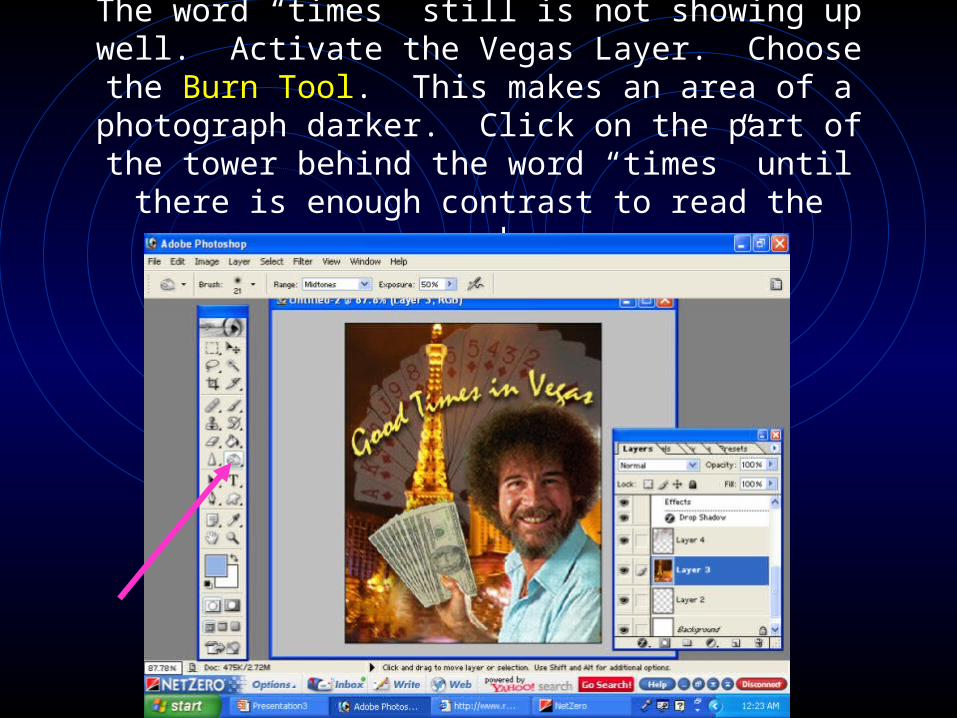
The word “times” still is not showing up well. Activate the Vegas Layer. Choose the Burn Tool. This makes
an area of a photograph darker. Click on the part of the tower behind the word “times” until there is enough
contrast to read the word.
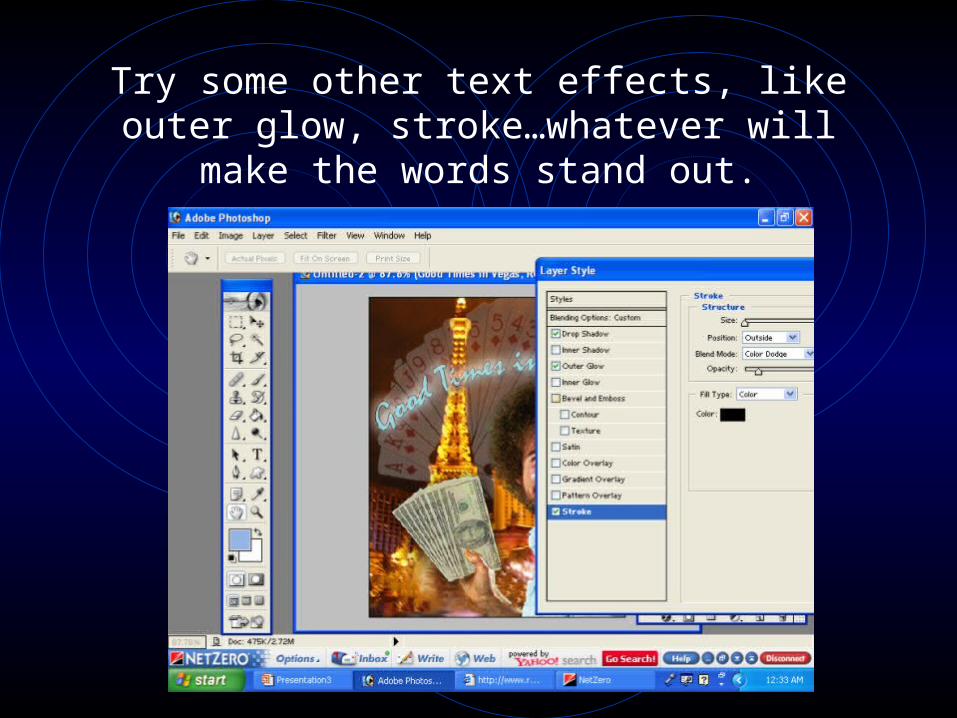
Try some other text effects, like outer glow, stroke…whatever will make the words stand
out.

To give Bob a little makeover, activate his layer, zoom in, and Magic Wand his teeth. To expand the area you are selecting, hold down Shift, and
continue to click.
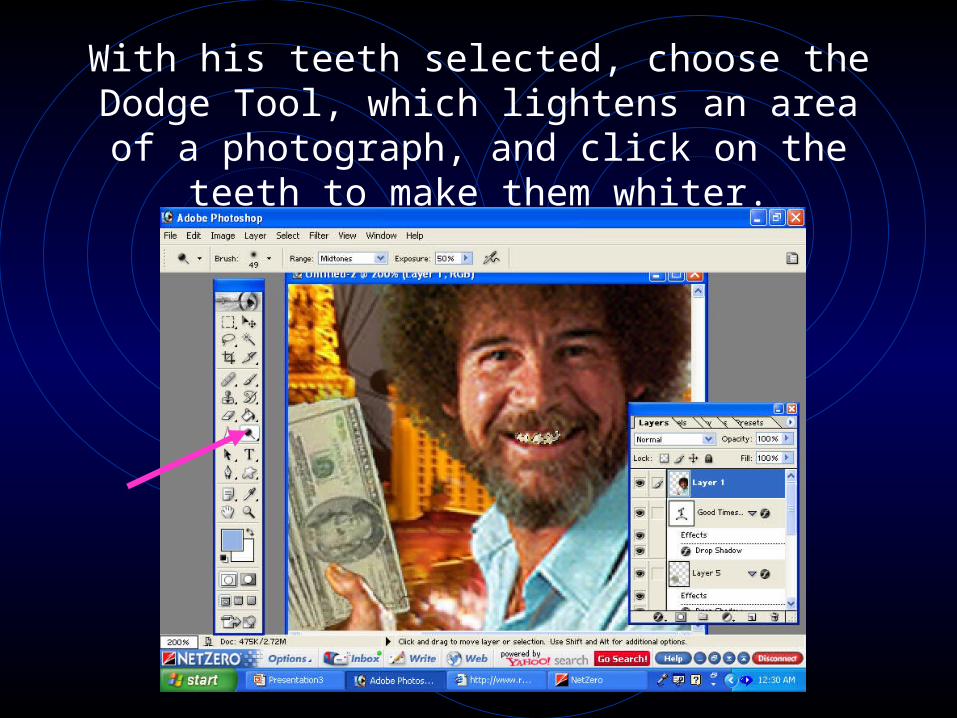
With his teeth selected, choose the Dodge Tool, which lightens an area of a photograph, and
click on the teeth to make them whiter.
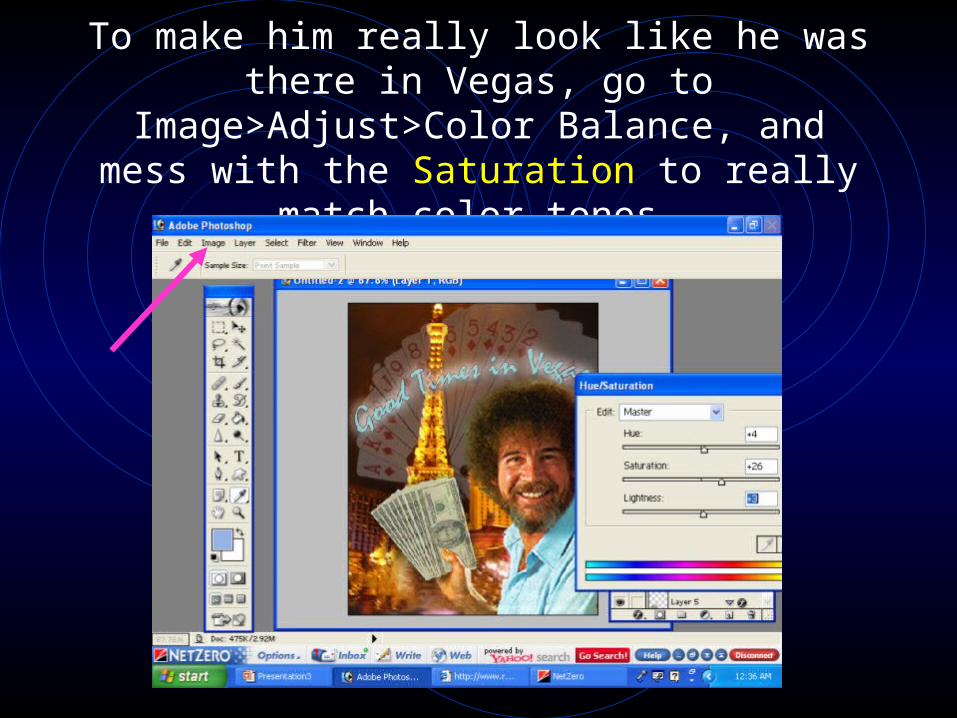
To make him really look like he was there in Vegas, go to Image>Adjust>Color Balance, and mess with the Saturation to really match color
tones.
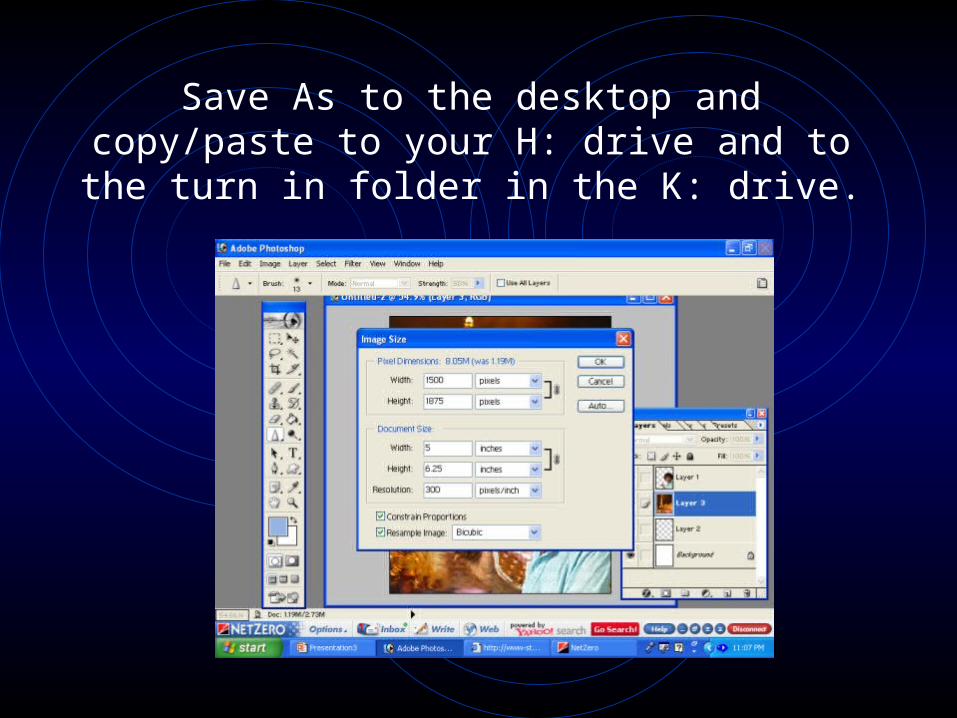
Save As to the desktop and copy/paste to your H: drive and to the turn in folder in the K: drive.