Embed Size (px)
Citation preview
Advanced Email setup on Android v1.1 (Eng).doc ©2012 Hong Kong Telecommunications (HKT) Ltd, All Rights Reserved Page 1 of 12
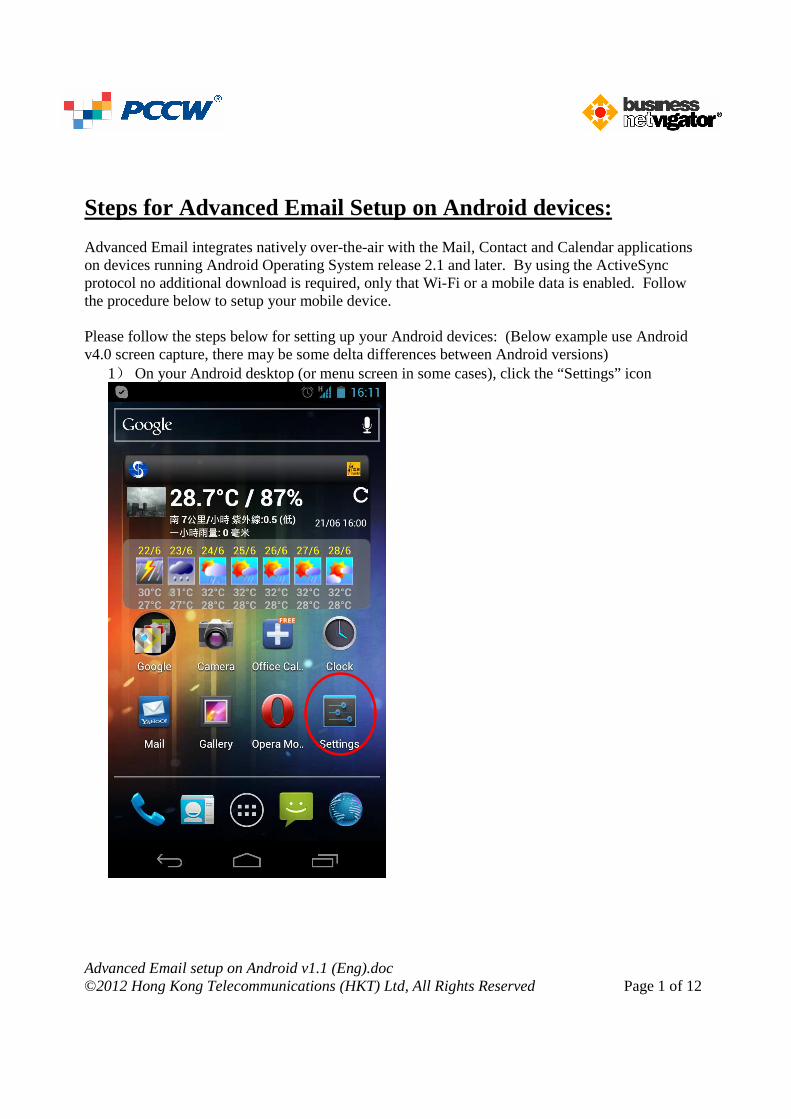
Steps for Advanced Email Setup on Android devices: Advanced Email integrates natively over-the-air with the Mail, Contact and Calendar applications on devices running Android Operating System release 2.1 and later. By using the ActiveSync protocol no additional download is required, only that Wi-Fi or a mobile data is enabled. Follow the procedure below to setup your mobile device. Please follow the steps below for setting up your Android devices: (Below example use Android v4.0 screen capture, there may be some delta differences between Android versions)
1) On your Android desktop (or menu screen in some cases), click the “Settings” icon
Advanced Email setup on Android v1.1 (Eng).doc ©2012 Hong Kong Telecommunications (HKT) Ltd, All Rights Reserved Page 2 of 12
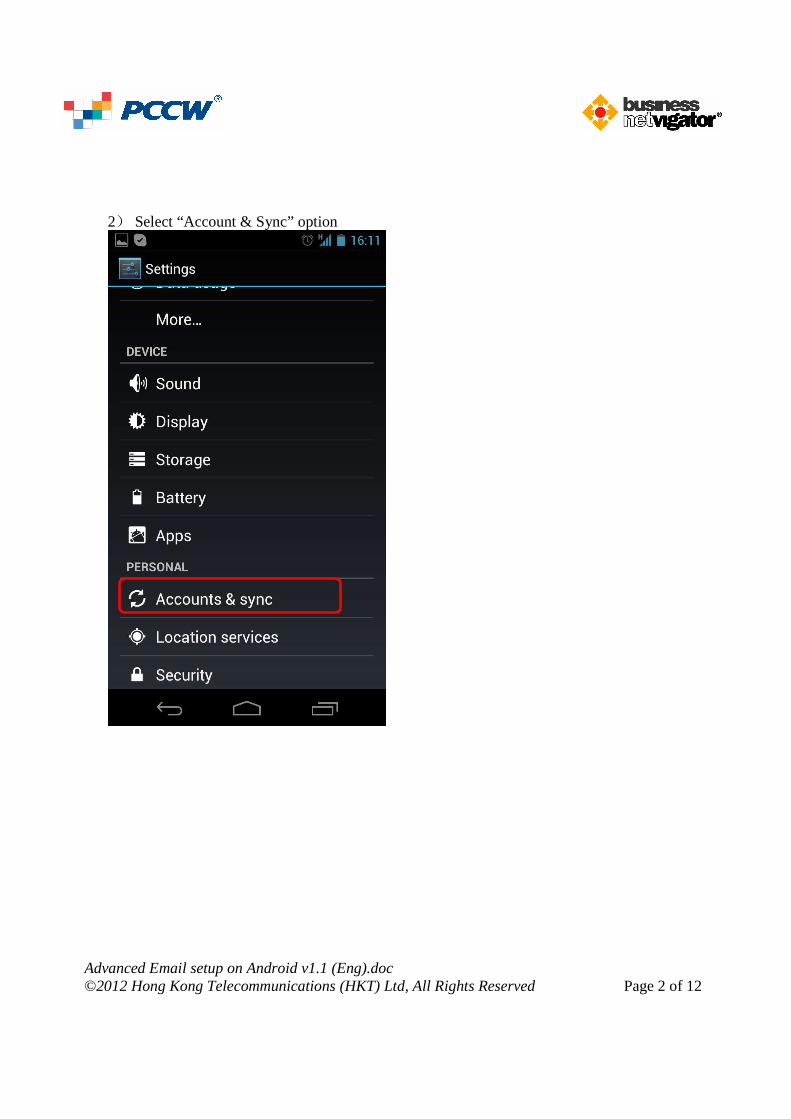
2) Select “Account & Sync” option
Advanced Email setup on Android v1.1 (Eng).doc ©2012 Hong Kong Telecommunications (HKT) Ltd, All Rights Reserved Page 3 of 12
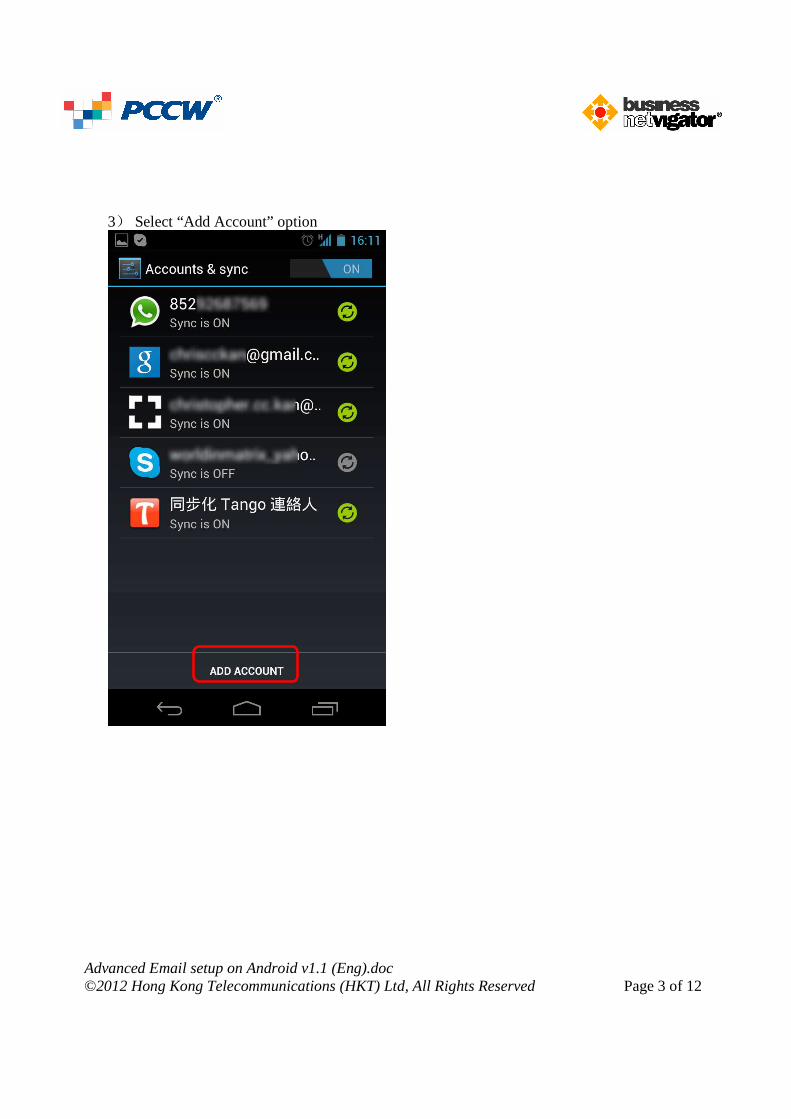
3) Select “Add Account” option
Advanced Email setup on Android v1.1 (Eng).doc ©2012 Hong Kong Telecommunications (HKT) Ltd, All Rights Reserved Page 4 of 12
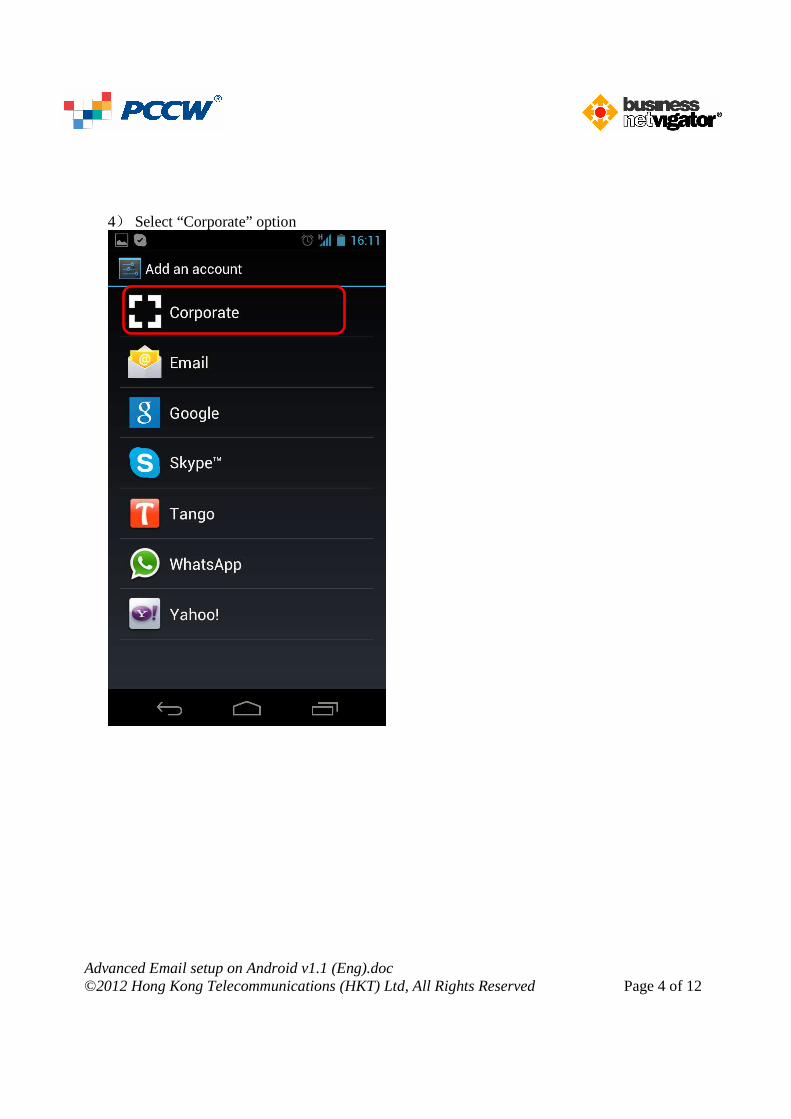
4) Select “Corporate” option
Advanced Email setup on Android v1.1 (Eng).doc ©2012 Hong Kong Telecommunications (HKT) Ltd, All Rights Reserved Page 5 of 12
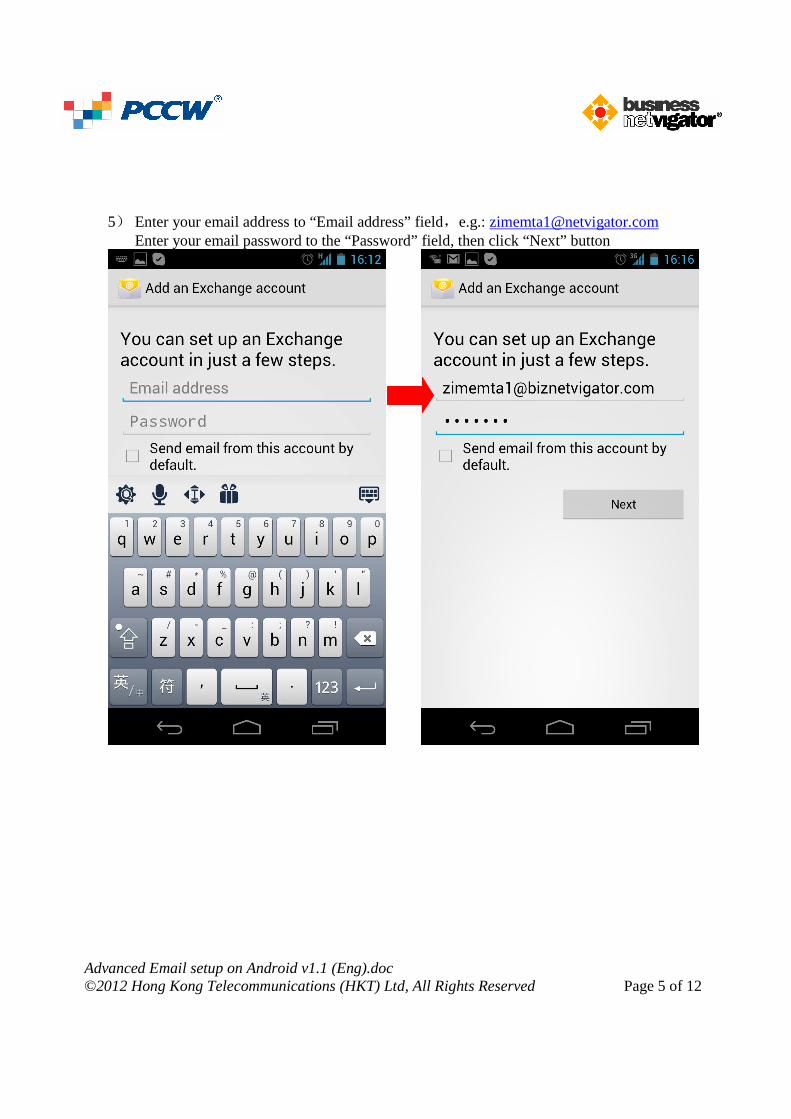
5) Enter your email address to “Email address” field,e.g.: [email protected]
Enter your email password to the “Password” field, then click “Next” button
Advanced Email setup on Android v1.1 (Eng).doc ©2012 Hong Kong Telecommunications (HKT) Ltd, All Rights Reserved Page 6 of 12
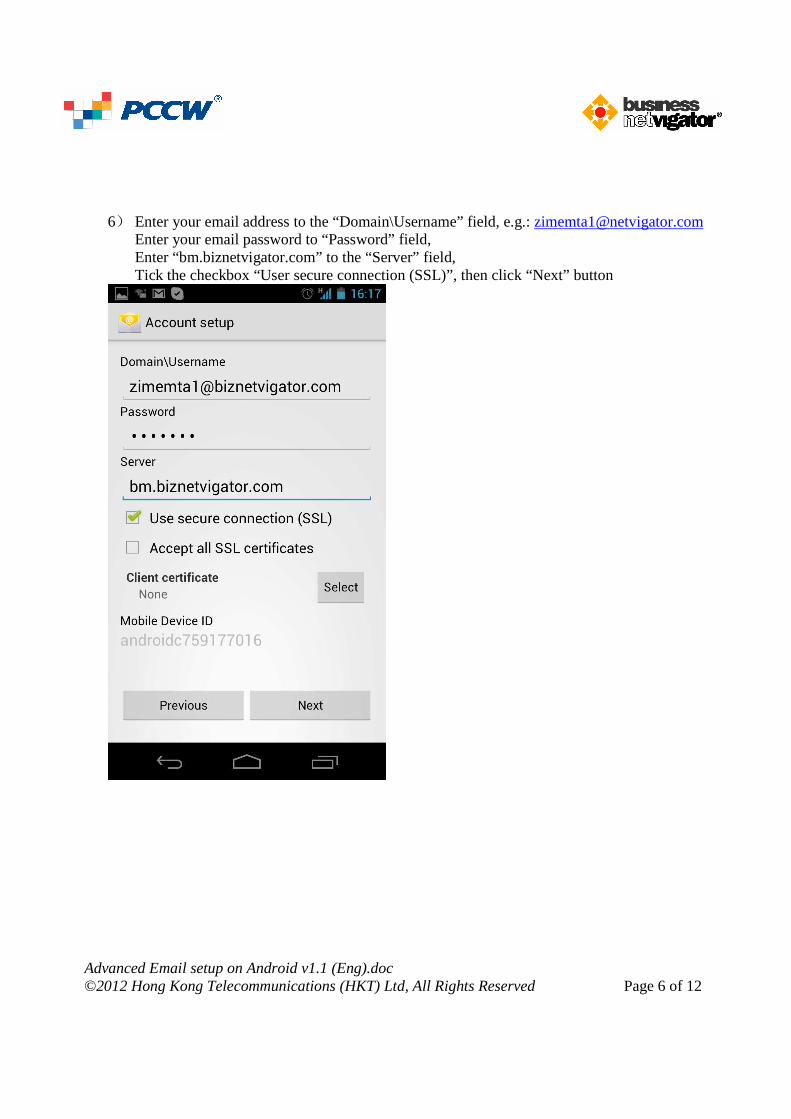
6) Enter your email address to the “Domain\Username” field, e.g.: [email protected]
Enter your email password to “Password” field, Enter “bm.biznetvigator.com” to the “Server” field, Tick the checkbox “User secure connection (SSL)”, then click “Next” button
Advanced Email setup on Android v1.1 (Eng).doc ©2012 Hong Kong Telecommunications (HKT) Ltd, All Rights Reserved Page 7 of 12
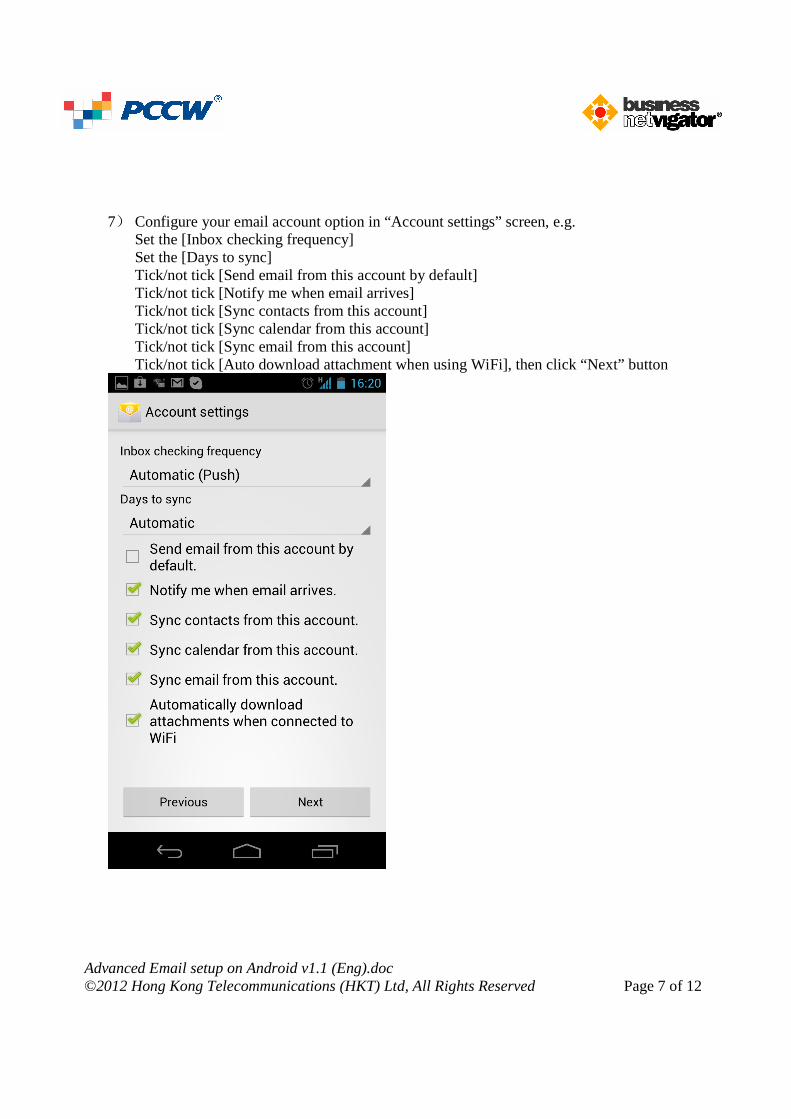
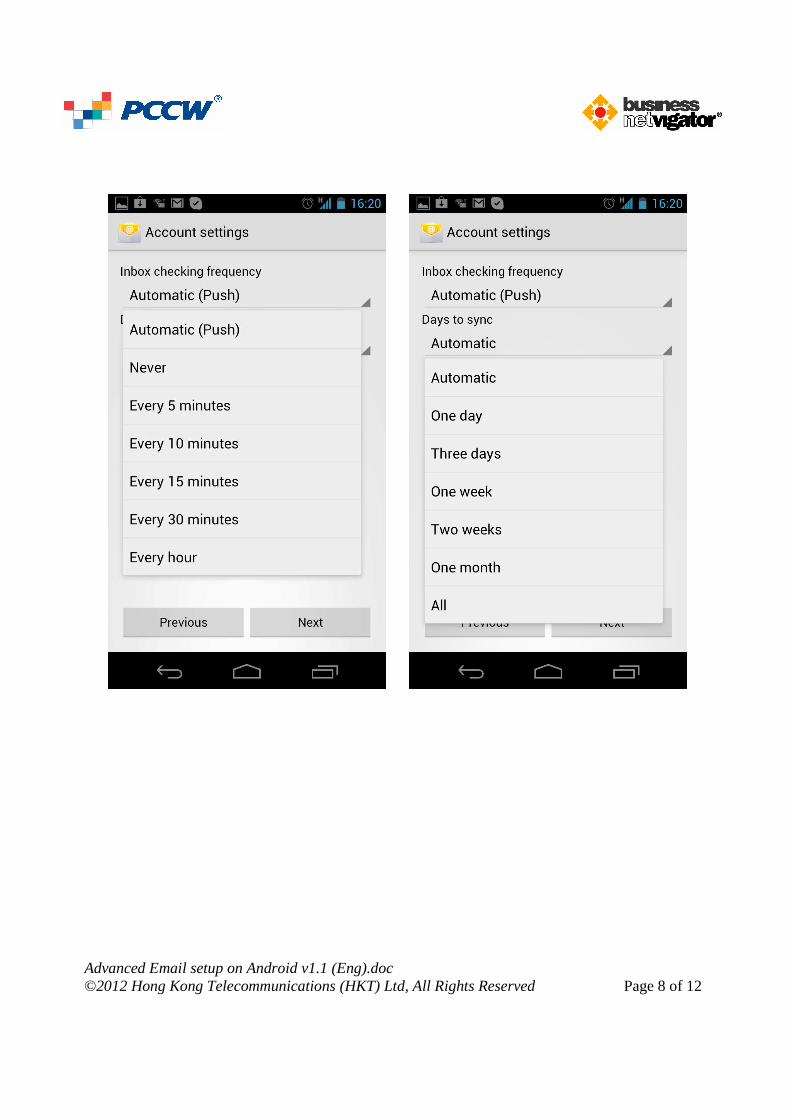
7) Configure your email account option in “Account settings” screen, e.g.
Set the [Inbox checking frequency] Set the [Days to sync] Tick/not tick [Send email from this account by default] Tick/not tick [Notify me when email arrives] Tick/not tick [Sync contacts from this account] Tick/not tick [Sync calendar from this account] Tick/not tick [Sync email from this account] Tick/not tick [Auto download attachment when using WiFi], then click “Next” button
Advanced Email setup on Android v1.1 (Eng).doc ©2012 Hong Kong Telecommunications (HKT) Ltd, All Rights Reserved Page 8 of 12
Advanced Email setup on Android v1.1 (Eng).doc ©2012 Hong Kong Telecommunications (HKT) Ltd, All Rights Reserved Page 9 of 12
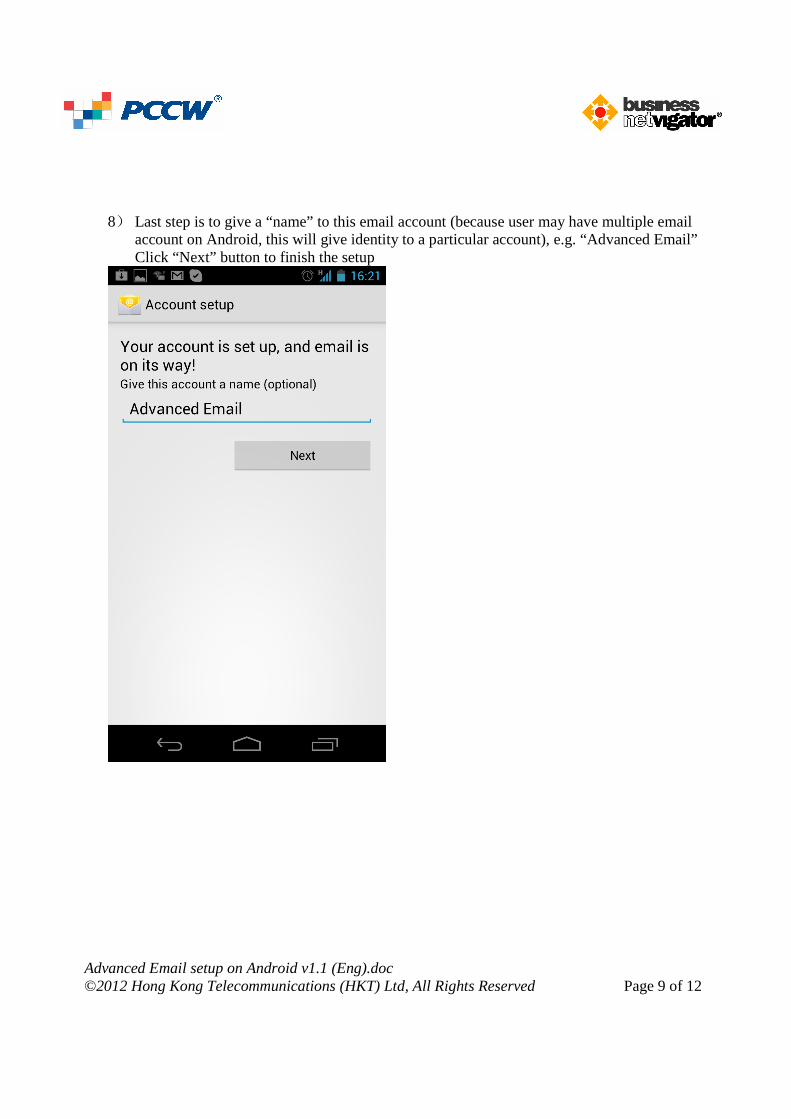
8) Last step is to give a “name” to this email account (because user may have multiple email
account on Android, this will give identity to a particular account), e.g. “Advanced Email” Click “Next” button to finish the setup
Advanced Email setup on Android v1.1 (Eng).doc ©2012 Hong Kong Telecommunications (HKT) Ltd, All Rights Reserved Page 10 of 12
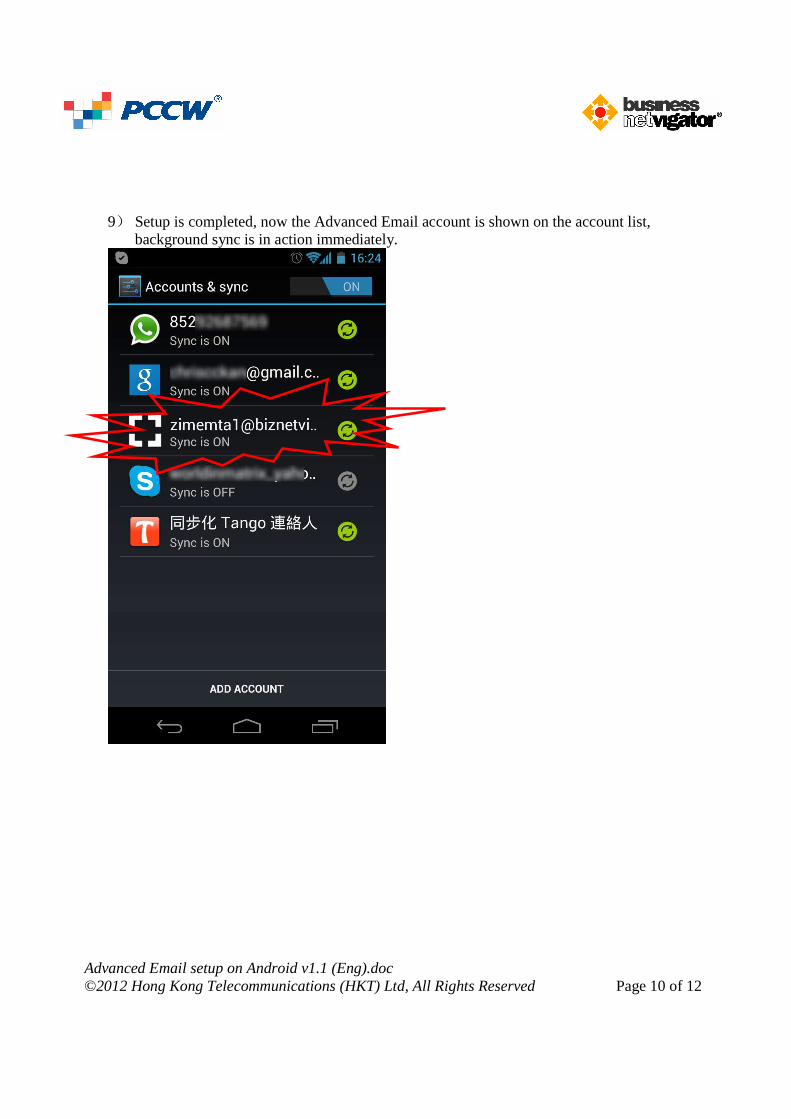
9) Setup is completed, now the Advanced Email account is shown on the account list,
background sync is in action immediately.
Advanced Email setup on Android v1.1 (Eng).doc ©2012 Hong Kong Telecommunications (HKT) Ltd, All Rights Reserved Page 11 of 12
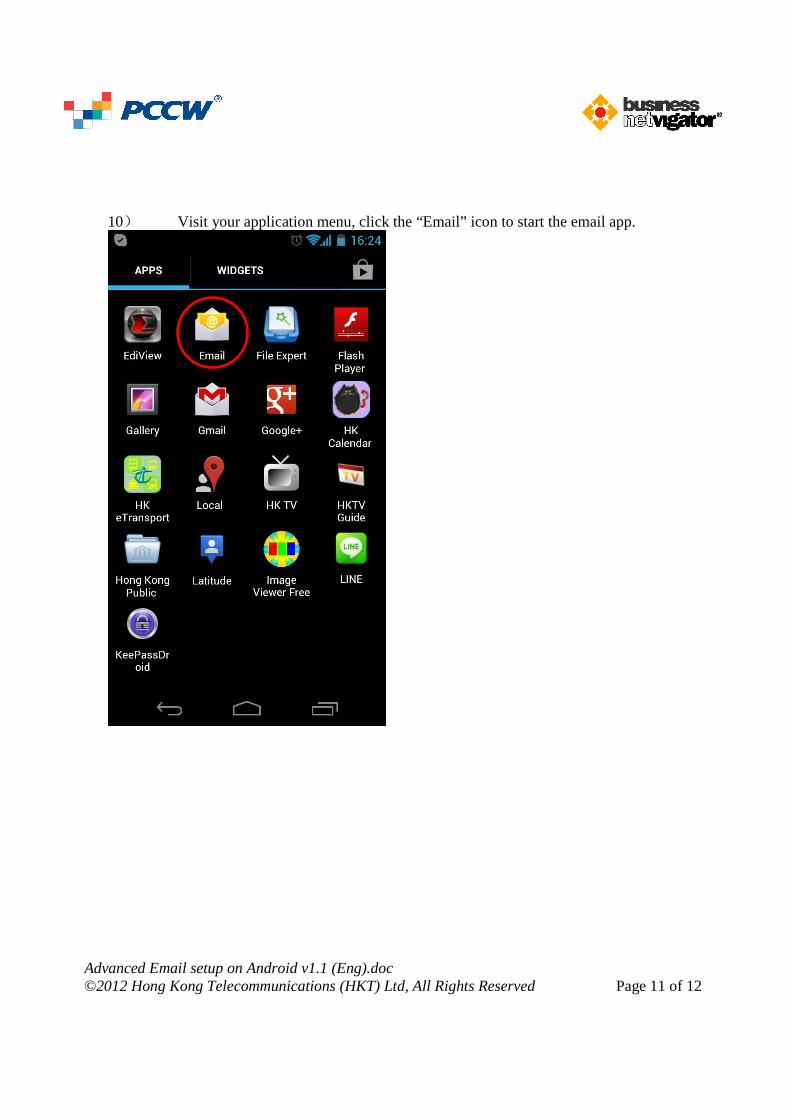
10) Visit your application menu, click the “Email” icon to start the email app.
Advanced Email setup on Android v1.1 (Eng).doc ©2012 Hong Kong Telecommunications (HKT) Ltd, All Rights Reserved Page 12 of 12
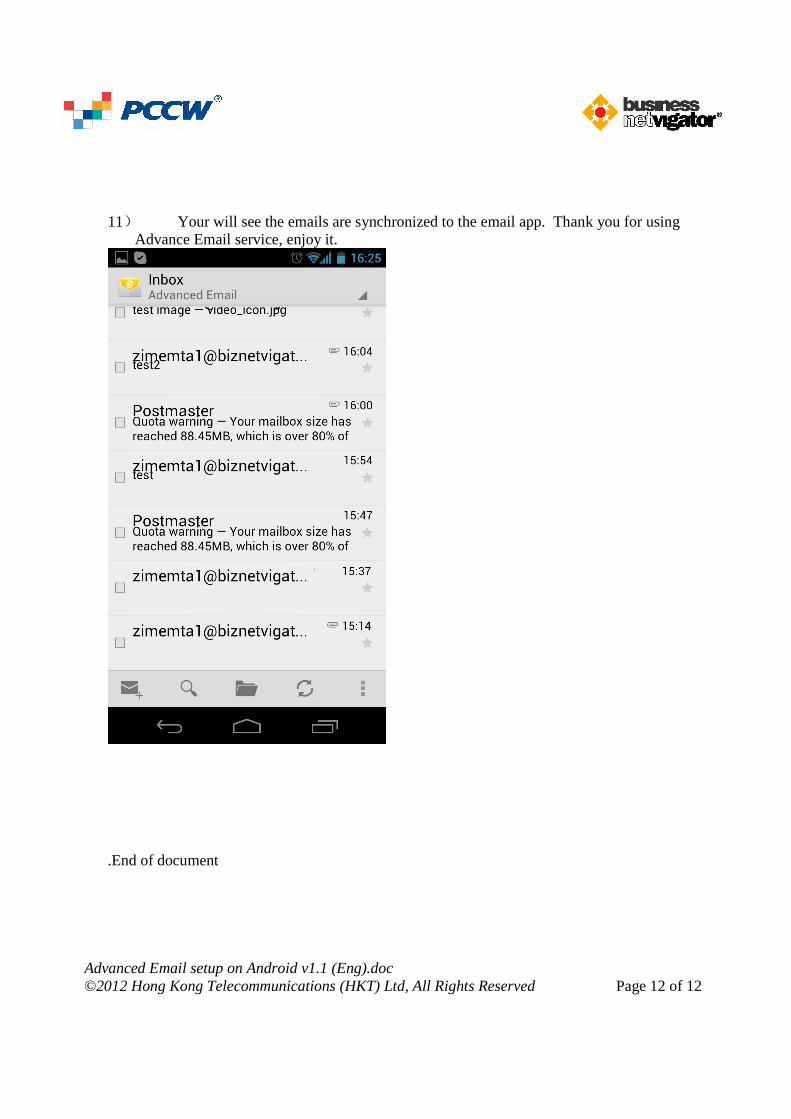
11) Your will see the emails are synchronized to the email app. Thank you for using
Advance Email service, enjoy it.
.End of document


![Navigating BIOS Setup - [email protected]](https://img.pdfslide.net/doc/110x75/6207449849d709492c2fb197/navigating-bios-setup-emailprotected.jpg)
