Embed Size (px)
Citation preview
Advanced Features Guide for Cisco Jabber for Windows Version 9.1.1and LaterFirst Published: December 14, 2012
Last Modified: April 11, 2013
Americas HeadquartersCisco Systems, Inc.170 West Tasman DriveSan Jose, CA 95134-1706USAhttp://www.cisco.comTel: 408 526-4000 800 553-NETS (6387)Fax: 408 527-0883
THE SPECIFICATIONS AND INFORMATION REGARDING THE PRODUCTS IN THIS MANUAL ARE SUBJECT TO CHANGE WITHOUT NOTICE. ALL STATEMENTS,INFORMATION, AND RECOMMENDATIONS IN THIS MANUAL ARE BELIEVED TO BE ACCURATE BUT ARE PRESENTED WITHOUT WARRANTY OF ANY KIND,EXPRESS OR IMPLIED. USERS MUST TAKE FULL RESPONSIBILITY FOR THEIR APPLICATION OF ANY PRODUCTS.
THE SOFTWARE LICENSE AND LIMITEDWARRANTY FOR THE ACCOMPANYING PRODUCT ARE SET FORTH IN THE INFORMATION PACKET THAT SHIPPED WITHTHE PRODUCT AND ARE INCORPORATED HEREIN BY THIS REFERENCE. IF YOU ARE UNABLE TO LOCATE THE SOFTWARE LICENSE OR LIMITED WARRANTY,CONTACT YOUR CISCO REPRESENTATIVE FOR A COPY.
The Cisco implementation of TCP header compression is an adaptation of a program developed by the University of California, Berkeley (UCB) as part of UCB's public domain versionof the UNIX operating system. All rights reserved. Copyright © 1981, Regents of the University of California.
NOTWITHSTANDINGANYOTHERWARRANTYHEREIN, ALL DOCUMENT FILES AND SOFTWARE OF THESE SUPPLIERS ARE PROVIDED “AS IS"WITH ALL FAULTS.CISCO AND THE ABOVE-NAMED SUPPLIERS DISCLAIM ALL WARRANTIES, EXPRESSED OR IMPLIED, INCLUDING, WITHOUT LIMITATION, THOSE OFMERCHANTABILITY, FITNESS FORA PARTICULAR PURPOSEANDNONINFRINGEMENTORARISING FROMACOURSEOFDEALING, USAGE, OR TRADE PRACTICE.
IN NO EVENT SHALL CISCO OR ITS SUPPLIERS BE LIABLE FOR ANY INDIRECT, SPECIAL, CONSEQUENTIAL, OR INCIDENTAL DAMAGES, INCLUDING, WITHOUTLIMITATION, LOST PROFITS OR LOSS OR DAMAGE TO DATA ARISING OUT OF THE USE OR INABILITY TO USE THIS MANUAL, EVEN IF CISCO OR ITS SUPPLIERSHAVE BEEN ADVISED OF THE POSSIBILITY OF SUCH DAMAGES.
Cisco and the Cisco logo are trademarks or registered trademarks of Cisco and/or its affiliates in the U.S. and other countries. To view a list of Cisco trademarks, go to this URL: http://www.cisco.com/go/trademarks. Third-party trademarks mentioned are the property of their respective owners. The use of the word partner does not imply a partnershiprelationship between Cisco and any other company. (1110R)
Any Internet Protocol (IP) addresses used in this document are not intended to be actual addresses. Any examples, command display output, and figures included in the document are shownfor illustrative purposes only. Any use of actual IP addresses in illustrative content is unintentional and coincidental.
Cisco and the Cisco logo are trademarks or registered trademarks of Cisco and/or its affiliates in the U.S. and other countries. To view a list of Cisco trademarks, go to this URL: http://www.cisco.com/go/trademarks. Third-party trademarks mentioned are the property of their respective owners. The use of the word partner does not imply a partnershiprelationship between Cisco and any other company. (1110R)
Google, Google Play, Android and certain other marks are trademarks of Google Inc.
© 2013 Cisco Systems, Inc. All rights reserved.

C O N T E N T S
C H A P T E R 1 Introduction 1
C H A P T E R 2 Availability 3
Create Personal Status Messages 3
Use Grayscale Status Icons 4
C H A P T E R 3 Contacts 5
Adjust Contact Lists 5
Add External Contacts 6
C H A P T E R 4 Chats 7
Search from Chat Windows 7
Start Group Chats 8
Transfer Files 9
Block Specific Contacts and Domains 10
Allow Specific Contacts and Domains 11
Control Who Can Interact with You 12
Manage Status Requests 13
C H A P T E R 5 Calls 15
Send Communicons 15
Adjust Audio Volume 16
Arrange Video Devices 17
Forward Calls 18
C H A P T E R 6 Meetings 21
Add Meeting Accounts 21
Integrate Your Calendar 23
Advanced Features Guide for Cisco Jabber for Windows Version 9.1.1 and Later iii

Integrate with Google Calendar 23
Allow Access to Google Calendar 23
Remove Google Calendar Integration 24
C H A P T E R 7 Other Features 25
Show the Docked Window 25
Create Custom Tabs 26
C H A P T E R 8 Further Reading 27
Advanced Features Guide for Cisco Jabber for Windows Version 9.1.1 and Lateriv
Contents
C H A P T E R 1Introduction
Welcome to the Advanced Features Guide for Cisco Jabber for Windows.
Cisco has designed Jabber for Windows to be intuitive and easy to use. The purpose of this guide is not todescribe every feature that Cisco Jabber offers. This guide provides task-based help for some features forwhich you might need some help or explanation.
If you are new to Cisco Jabber for Windows, you should do the following before you get started with thisguide:
1 Learn about instant messaging and availability features. Watch the video at:
http://www.cisco.com/en/US/prod/ps10265/jabber_windows.html
2 Learn about making voice calls with Cisco Jabber. Watch the video at:
http://www.cisco.com/en/US/prod/ps10265/jabber_windows_uc.html
3 Review and understand the following:
• How to use chat and call controls.
• How to use sharing features such as taking screen captures or transferring files.
Review the Quick Start Guide at:
http://www.cisco.com/en/US/products/ps12511/products_user_guide_list.html
Objectives
This guide helps you learn how to:
Share Your Status with Others
Let your contacts know if you are available to chat, in a meeting, or too busy to talk.
Organize and Add Contacts
Adjust your contact list and add your friends and family.
Advanced Features Guide for Cisco Jabber for Windows Version 9.1.1 and Later 1

Use Chats to Communicate
Learn how to quickly create group chats and control your privacy settings.
Make Calls and Adjust Your Settings
Forward calls and use other numbers. Change the volume on calls and organize your video cameras.
Use Meetings and Calendars
Add a meetings account to instantly start and join conferences. View your calendar to stay on top ofmeetings and events.
Advanced Features Guide for Cisco Jabber for Windows Version 9.1.1 and Later2
Introduction

C H A P T E R 2Availability
• Create Personal Status Messages, page 3
• Use Grayscale Status Icons, page 4
Create Personal Status MessagesCisco Jabber has three default messages to show availability status:
• Available
• Away
• Do not disturb
You can create personal status messages to replace the default messages and tell your contacts what you aredoing at a glance.
Cisco Jabber saves the three most recent personal status messages for each state. You can select yourstatus messages from the drop-down list on the main window.
Note
Advanced Features Guide for Cisco Jabber for Windows Version 9.1.1 and Later 3

Procedure
Step 1 Insert your cursor in the status message field on the main window.Step 2 Enter your personal status message.Step 3 Press the Enter key on your keyboard.
Cisco Jabber displays your personal status message.
Use Grayscale Status IconsGrayscale status icons are monochrome and use symbols to show availability status.
The following table shows standard and grayscale status icons:Default Availability StateGrayscale Status IconStandard Status Icon
Available
Away
Do Not Disturb
Unavailable
To show grayscale status icons, select View > Show status in grayscale.
In some versions of Cisco Jabber, you select View > Accessible presence.Note
Cisco Jabber displays grayscale status icons.
Advanced Features Guide for Cisco Jabber for Windows Version 9.1.1 and Later4
AvailabilityUse Grayscale Status Icons

C H A P T E R 3Contacts
• Adjust Contact Lists, page 5
• Add External Contacts, page 6
Adjust Contact ListsYou can arrange and organize your contacts.
Procedure
Select View and then choose from the following options:DescriptionOption
Select this option to show contact pictures.Deselect this option to hide contact pictures.
Show contact pictures
Select this option to show all contacts.Deselect this option to show only contacts who are loggedin.
Show offline contacts
Select this option to arrange contacts alphabetically by name.Sort contact by name
Select this option to arrange contacts by their availabilitystates.
Sort contact by status
Advanced Features Guide for Cisco Jabber for Windows Version 9.1.1 and Later 5

Add External ContactsCisco Jabber lets you add contacts from chat applications such as Google Talk or Microsoft Lync.
Your system administrator must enable this feature. If you cannot add external contacts, ask your systemadministrator for help.
Procedure
Step 1 Select File > New > Contact.Step 2 Enter the email address of your contact.Step 3 Select a contact group.Step 4 Select Add.
Advanced Features Guide for Cisco Jabber for Windows Version 9.1.1 and Later6
ContactsAdd External Contacts
C H A P T E R 4Chats
• Search from Chat Windows, page 7
• Start Group Chats, page 8
• Transfer Files, page 9
• Block Specific Contacts and Domains, page 10
• Allow Specific Contacts and Domains, page 11
• Control Who Can Interact with You, page 12
• Manage Status Requests, page 13
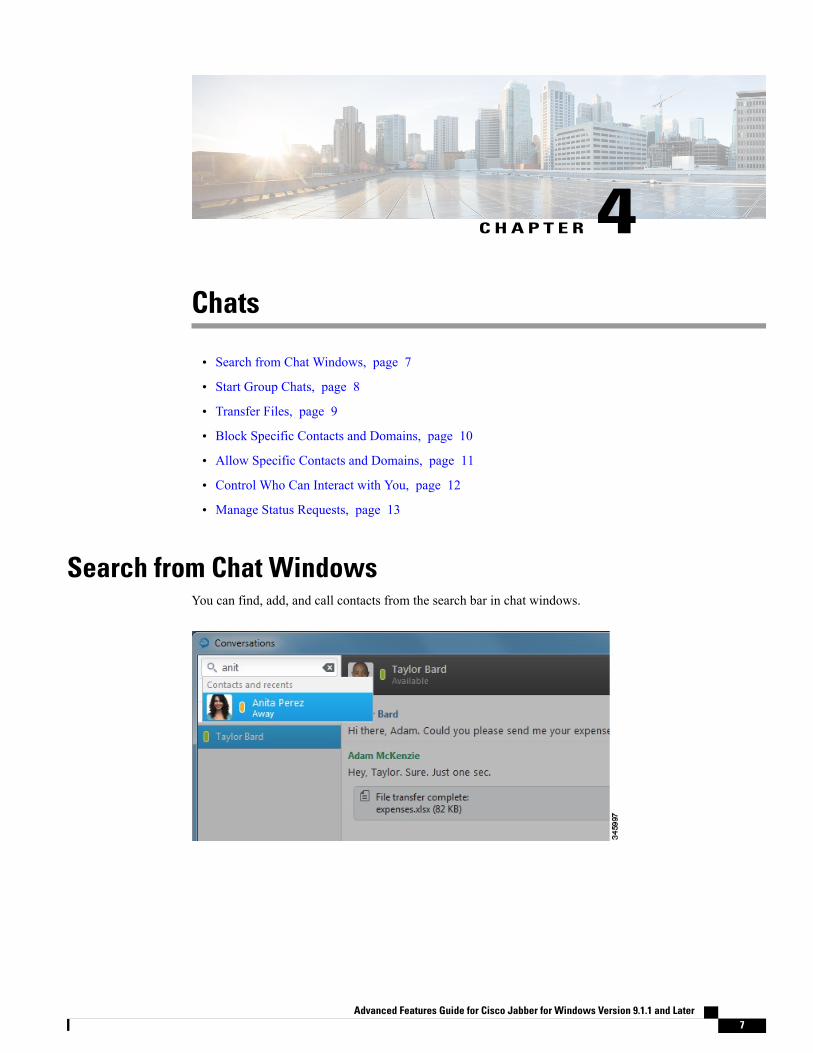
Search from Chat WindowsYou can find, add, and call contacts from the search bar in chat windows.
Advanced Features Guide for Cisco Jabber for Windows Version 9.1.1 and Later 7
Procedure
Step 1 Enter the name of a contact in the search bar of the chat window.Step 2 Do one of the following:
• Hover your cursor over the contact to add that contact to a list or to call that contact.
• Double-click the contact to start a chat session.
You can enter phone numbers in the search bar to call directly from the chat window.Tip
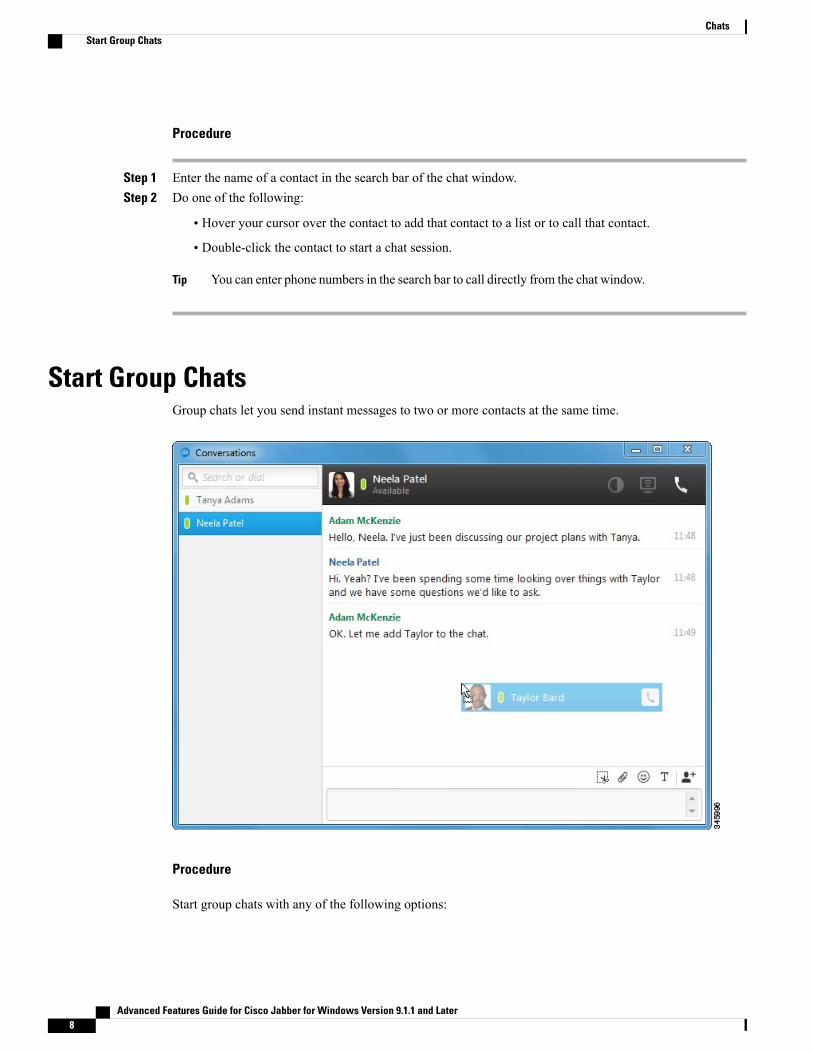
Start Group ChatsGroup chats let you send instant messages to two or more contacts at the same time.
Procedure
Start group chats with any of the following options:
Advanced Features Guide for Cisco Jabber for Windows Version 9.1.1 and Later8
ChatsStart Group Chats

ProcedureOption
1 Press and hold the Ctrl key on your keyboard.
2 Select several contacts from your contact list.
3 Right-click and then select Start group chat.
Select multiple contacts from yourcontact list
1 Select a contact from your contact list.
2 Drag and drop the contact into a chat window.
Drag and drop contacts into the chatwindow
1 Select Add participants in the bottom right corner of a chatwindow.
2 Enter the name of the contact you want to add to the chat.
3 Select Add.
Use the Add participants icon on thechat window
Transfer FilesTransfer files to quickly and easily share information.
Advanced Features Guide for Cisco Jabber for Windows Version 9.1.1 and Later 9
ChatsTransfer Files

Procedure
Use the following options to transfer files:ProcedureOption
1 Select a file on your computer.
2 Drag and drop the file into a chat window.
Drag and drop files into the chat window
1 Select Send file in the bottom right corner of a chat window.
2 Select a file on your computer.
3 Select Open.
Use the Send file icon on the chat window
Block Specific Contacts and DomainsYou can block specific contacts or domains.When you block a contact, that person cannot view your availabilitystatus or send you instant messages.
If you add a contact to your block list, and that contact has you in their contact list, that person cannotview your availability status or send you instant messages.
Note
The following are examples of how the block list works:
Example 1: Block specific contacts inside your organization
You add an IM address to your block list. That contact cannot view your availability status or send youinstant messages.
Example 2: Block specific domains
You add a specific domain, such as cisco.com, to your block list. No contacts who have IM accountsat that domain can view your availability status or send you instant messages.
Procedure
Step 1 Select File > Options.The Options window opens.
Step 2 Select the Privacy tab and then select Advanced.Step 3 Enter specific contact addresses or domains in the Block list.Step 4 Select Apply and then OK.
Advanced Features Guide for Cisco Jabber for Windows Version 9.1.1 and Later10
ChatsBlock Specific Contacts and Domains
Allow Specific Contacts and DomainsSome deployments of Cisco Jabber include an allow list that adds exceptions to the block list. You can enterspecific contacts or domains in your allow list to ensure those contacts can view your availability status andsend you messages.
Cisco Jabber uses your contact list as an allow list. You do not need to add contacts in your contact listto your allow list.
Note
The following are examples of how the allow list works:
Example 1: Allow specific contacts inside your organization
1 You set your basic privacy settings to block everyone inside your company.
2 You then add specific IM addresses for contacts inside your company to your allow list.
Cisco Jabber blocks all contacts inside your company, except for those specific people in your allowlist.
Example 2: Allow specific domains
1 You set your basic privacy settings to block everyone outside your company.
2 You then add a specific domain, such as cisco.com, to your allow list.
Cisco Jabber blocks everyone outside your company, except for people who have IM accounts atcisco.com.
Example 3: Allow specific contacts from blocked domains
1 You add a specific domain, such as cisco.com, to your block list.
2 You then add an IM address, such as [email protected], to your allow list.
Cisco Jabber blocks all people who have IM accounts at cisco.com, except for [email protected].
Procedure
Step 1 Select File > Options.The Options window opens.
Step 2 Select the Privacy tab and then select Advanced.Step 3 Enter specific contact addresses or domains in the Allow list.Step 4 Select Apply and then OK.
Advanced Features Guide for Cisco Jabber for Windows Version 9.1.1 and Later 11
ChatsAllow Specific Contacts and Domains
Control Who Can Interact with YouSome deployments of Cisco Jabber let you control who interacts with you inside your company and outsideyour company.
Procedure
Step 1 Select File > Options.The Options window opens.
Step 2 Select the Privacy tab.Step 3 Select one of the following options in the Inside my company section:
DescriptionOption
All contacts in your company can view youravailability status and send you instant messages.
Allow everyone
No contacts in your company can view youravailability status or send you instant messages.You can choose to block everyone and then addexceptions for specific contacts in your allow list.
This option does not block contacts in your contactlist.
Block everyone
Step 4 Select one of the following options in the Outside my company section:
Advanced Features Guide for Cisco Jabber for Windows Version 9.1.1 and Later12
ChatsControl Who Can Interact with You
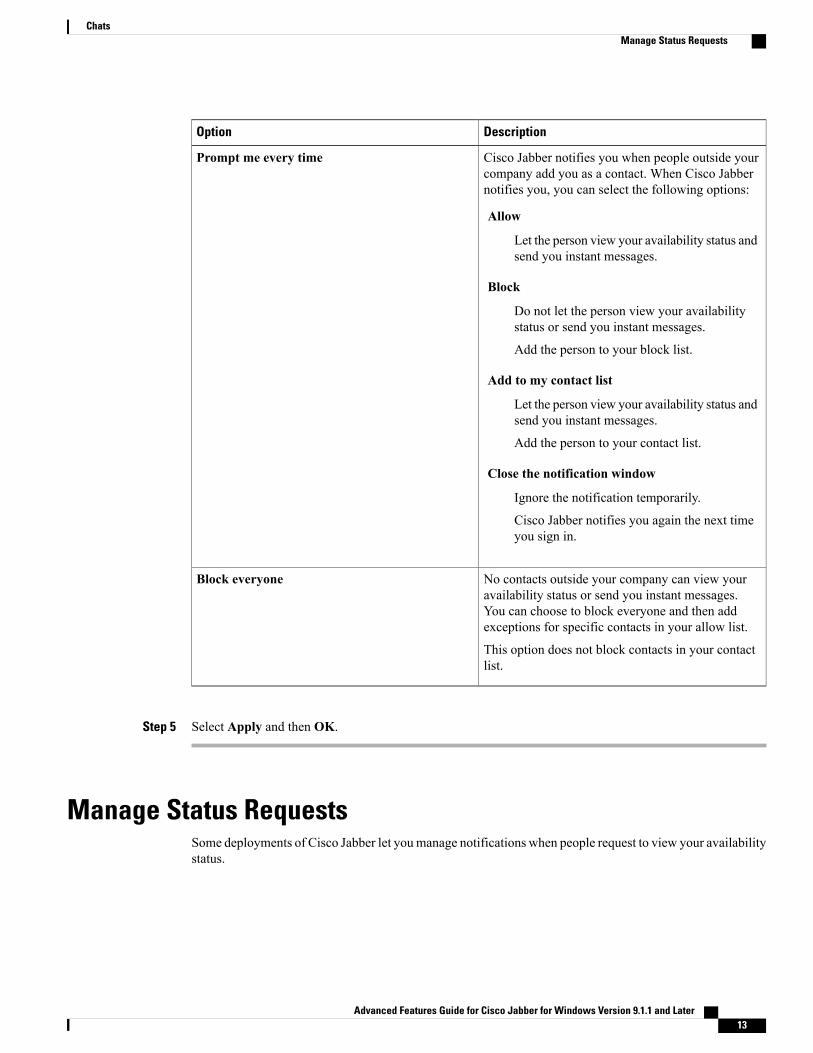
DescriptionOption
Cisco Jabber notifies you when people outside yourcompany add you as a contact. When Cisco Jabbernotifies you, you can select the following options:
Allow
Let the person view your availability status andsend you instant messages.
Block
Do not let the person view your availabilitystatus or send you instant messages.
Add the person to your block list.
Add to my contact list
Let the person view your availability status andsend you instant messages.
Add the person to your contact list.
Close the notification window
Ignore the notification temporarily.
Cisco Jabber notifies you again the next timeyou sign in.
Prompt me every time
No contacts outside your company can view youravailability status or send you instant messages.You can choose to block everyone and then addexceptions for specific contacts in your allow list.
This option does not block contacts in your contactlist.
Block everyone
Step 5 Select Apply and then OK.
Manage Status RequestsSome deployments of Cisco Jabber let youmanage notifications when people request to view your availabilitystatus.
Advanced Features Guide for Cisco Jabber for Windows Version 9.1.1 and Later 13
ChatsManage Status Requests
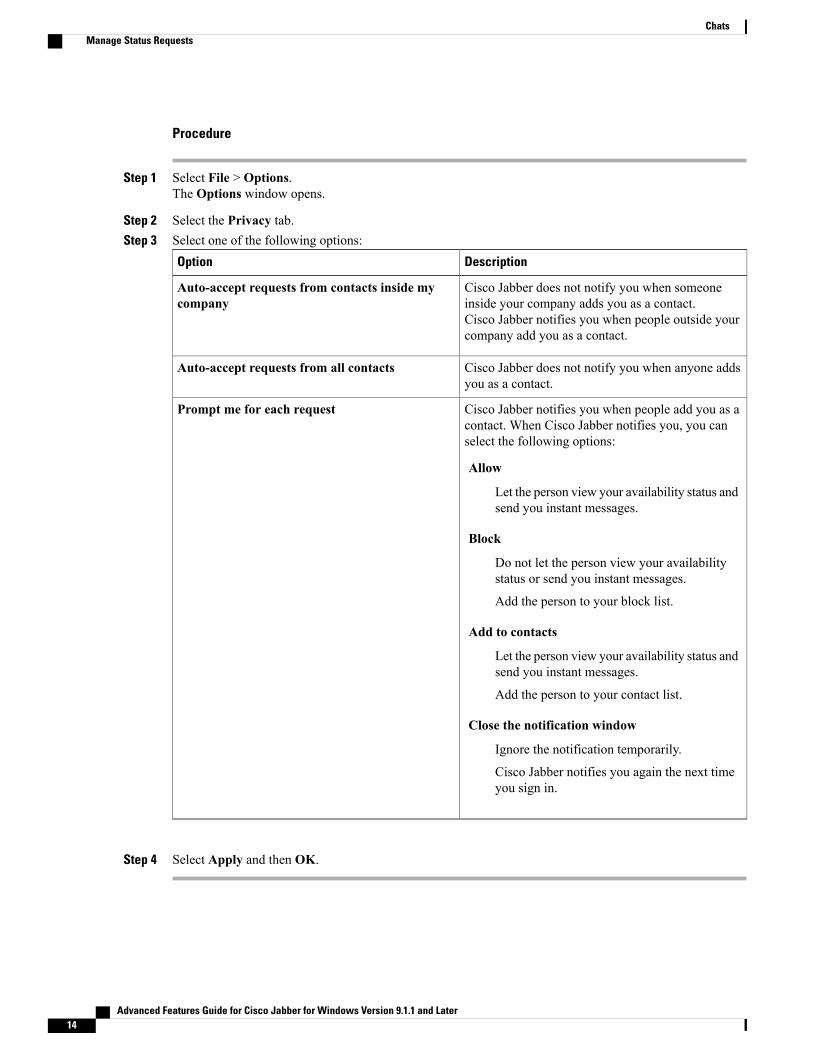
Procedure
Step 1 Select File > Options.The Options window opens.
Step 2 Select the Privacy tab.Step 3 Select one of the following options:
DescriptionOption
Cisco Jabber does not notify you when someoneinside your company adds you as a contact.Cisco Jabber notifies you when people outside yourcompany add you as a contact.
Auto-accept requests from contacts inside mycompany
Cisco Jabber does not notify you when anyone addsyou as a contact.
Auto-accept requests from all contacts
Cisco Jabber notifies you when people add you as acontact. When Cisco Jabber notifies you, you canselect the following options:
Allow
Let the person view your availability status andsend you instant messages.
Block
Do not let the person view your availabilitystatus or send you instant messages.
Add the person to your block list.
Add to contacts
Let the person view your availability status andsend you instant messages.
Add the person to your contact list.
Close the notification window
Ignore the notification temporarily.
Cisco Jabber notifies you again the next timeyou sign in.
Prompt me for each request
Step 4 Select Apply and then OK.
Advanced Features Guide for Cisco Jabber for Windows Version 9.1.1 and Later14
ChatsManage Status Requests

C H A P T E R 5Calls
• Send Communicons, page 15
• Adjust Audio Volume, page 16
• Arrange Video Devices, page 17
• Forward Calls, page 18
Send CommuniconsCommunicons give you an easy way to request calls from contacts. When someone receives a call emoticon,they can simply click it to start a phone call with you.
Advanced Features Guide for Cisco Jabber for Windows Version 9.1.1 and Later 15
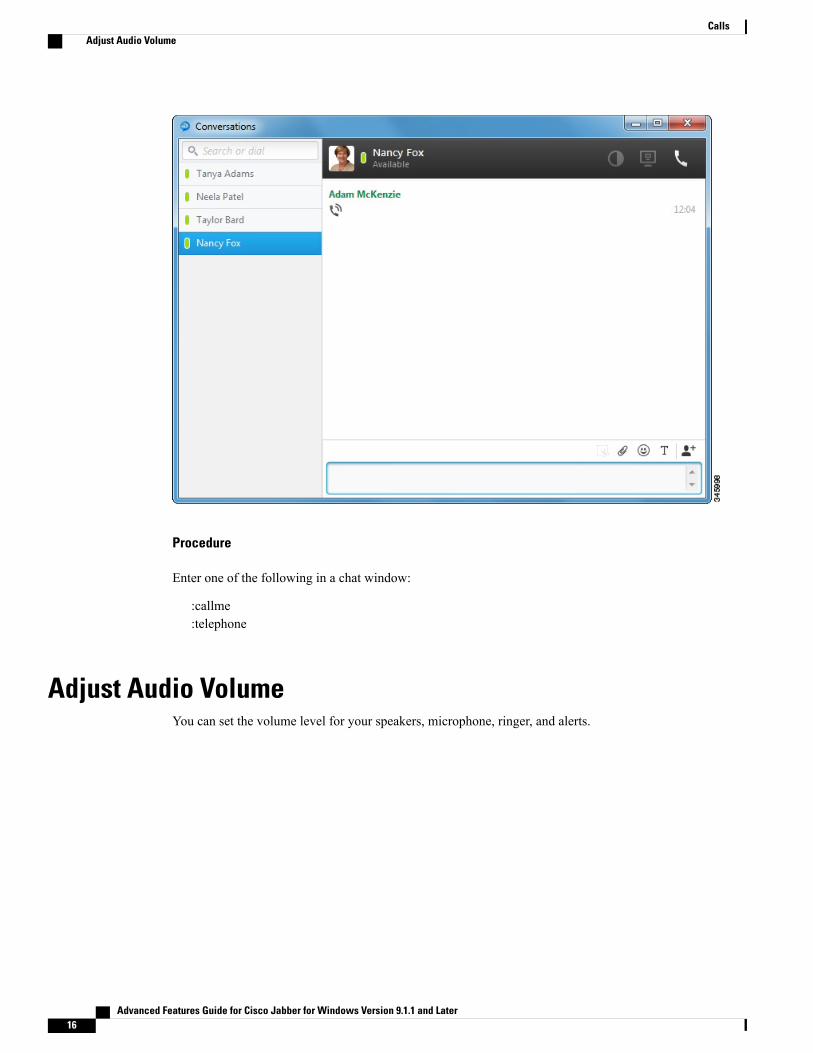
Procedure
Enter one of the following in a chat window:
:callme:telephone
Adjust Audio VolumeYou can set the volume level for your speakers, microphone, ringer, and alerts.
Advanced Features Guide for Cisco Jabber for Windows Version 9.1.1 and Later16
CallsAdjust Audio Volume

Procedure
Step 1 Select File > Options.The Options window opens.
Step 2 Select the Audio tab.Step 3 Select the audio device from the drop-down list.Step 4 Adjust the volume for the audio device with the slider control.
Arrange Video DevicesIf you have more than one video camera or device, you can arrange them in order of preference.
Advanced Features Guide for Cisco Jabber for Windows Version 9.1.1 and Later 17
CallsArrange Video Devices
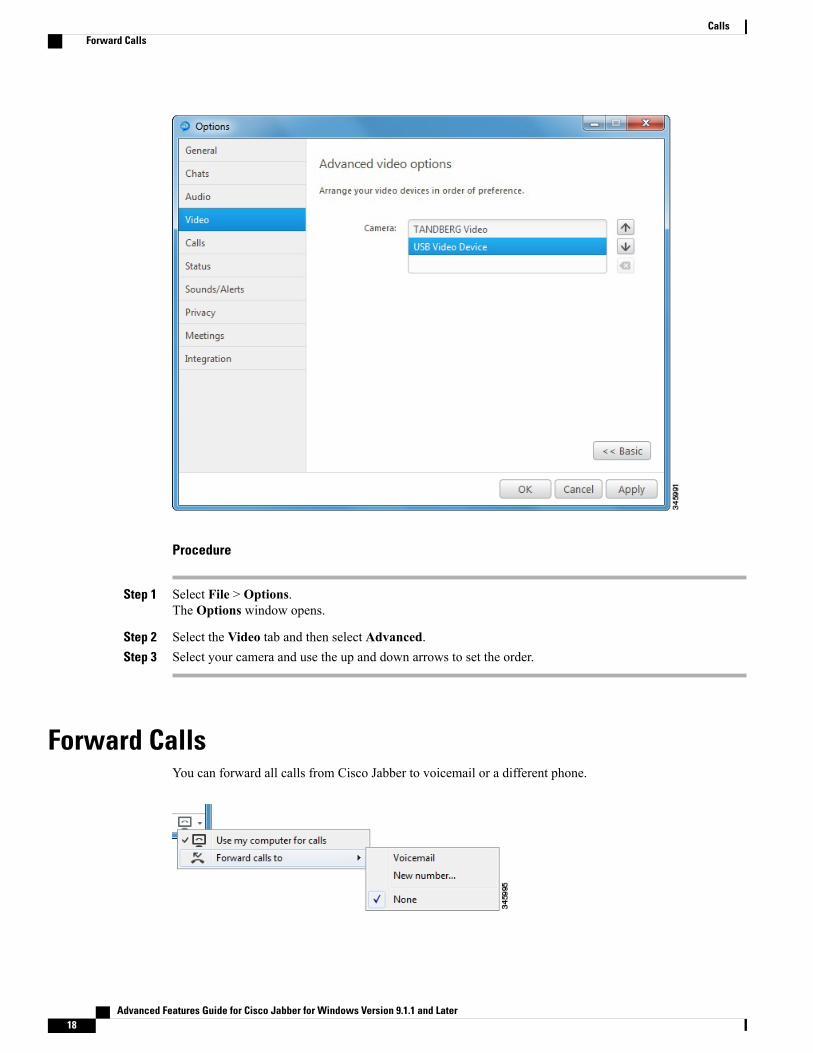
Procedure
Step 1 Select File > Options.The Options window opens.
Step 2 Select the Video tab and then select Advanced.Step 3 Select your camera and use the up and down arrows to set the order.
Forward CallsYou can forward all calls from Cisco Jabber to voicemail or a different phone.
Advanced Features Guide for Cisco Jabber for Windows Version 9.1.1 and Later18
CallsForward Calls

Procedure
Step 1 Select the phone control menu on the main window.Step 2 Select Forward calls to and then select the appropriate option.
Advanced Features Guide for Cisco Jabber for Windows Version 9.1.1 and Later 19
CallsForward Calls

Advanced Features Guide for Cisco Jabber for Windows Version 9.1.1 and Later20
CallsForward Calls

C H A P T E R 6Meetings
• Add Meeting Accounts, page 21
• Integrate Your Calendar, page 23
Add Meeting AccountsYou can add Cisco WebEx sites to Cisco Jabber to quickly start, join, and manage online conferences.
Advanced Features Guide for Cisco Jabber for Windows Version 9.1.1 and Later 21

Procedure
Step 1 Select File > Options.The Options window opens.
Step 2 Select theMeetings tab and then select Edit account.Step 3 Select New Site from theWebEx Site drop-down list.Step 4 Enter the required settings in the following fields:
WebEx site
The name of the Cisco WebEx site, for example, cisco.webex.com
Username
Your username
Password
Your password
Advanced Features Guide for Cisco Jabber for Windows Version 9.1.1 and Later22
MeetingsAdd Meeting Accounts

Integrate Your CalendarSet up calendar integration to view your meetings and calendar events directly from Cisco Jabber.
Procedure
Step 1 Select File > Options.The Options window opens.
Step 2 Select the Integration tab.Step 3 Select the application you use to organize your calendar.Step 4 Select File > Exit to close Cisco Jabber.Step 5 Restart Cisco Jabber.
What to Do Next
If you integrate with Google Calendar, you must allow access.
Integrate with Google CalendarComplete the additional steps to integrate with Google Calendar.
Integration with Google Calendar is currently an experimental feature.Note
Allow Access to Google CalendarWhen Cisco Jabber restarts, aGoogle Calendar Sign In window opens. You must enter your account detailsso that Cisco Jabber can access events in Google Calendar.
Before You Begin
Select Google Calendar on the Integration tab and restart Cisco Jabber.
Procedure
Step 1 Enter your Google account username and password and then select Sign in.A prompt displays to notify you that Cisco Jabber is requesting permission to manage your calendar.
Step 2 Select Allow access.Step 3 If prompted, select Yes to continue running scripts on the page.
The first time you allow access to your Google Calendar, you might notice an error message that indicates anerror occurs with scripts on the page.
Advanced Features Guide for Cisco Jabber for Windows Version 9.1.1 and Later 23
MeetingsIntegrate Your Calendar
The Google Calendar Sign In window closes.
Step 4 On the main Cisco Jabber window, select theMeetings tab on the left side navigation.
Cisco Jabber displays calendar events from your Google Calendar account.
Remove Google Calendar IntegrationYou can remove Google Calendar integration with Cisco Jabber. To completely remove Google Calendarintegration, you should also revoke access from your Google account.
Procedure
Step 1 Open the main Cisco Jabber window.Step 2 Select File > Options and then select the Integration tab.Step 3 Select None and then select OK.Step 4 Restart Cisco Jabber.
Cisco Jabber no longer displays events from Google Calendar.
What to Do Next
Open your Google Accounts page and revoke access for Cisco Jabber in the Authorized Access to yourGoogle Account section.
Advanced Features Guide for Cisco Jabber for Windows Version 9.1.1 and Later24
MeetingsIntegrate with Google Calendar

C H A P T E R 7Other Features
• Show the Docked Window, page 25
• Create Custom Tabs, page 26
Show the Docked WindowYou can optionally show the docked window at the top of your screen to quickly access common functions.
Procedure
Step 1 Open the main window.Step 2 Select View > Show docked window.
Deselect this option to hide the docked window.
Use global keyboard shortcuts to quickly search for contacts and start conversations.FunctionKeyboard shortcut
Tip
Access the search or call menu in thedocked window.You can use this shortcut to access thedockedwindow from other applications.
CTRL + Shift + ?
Toggle between menus on the dockedwindow.
Tab
Advanced Features Guide for Cisco Jabber for Windows Version 9.1.1 and Later 25
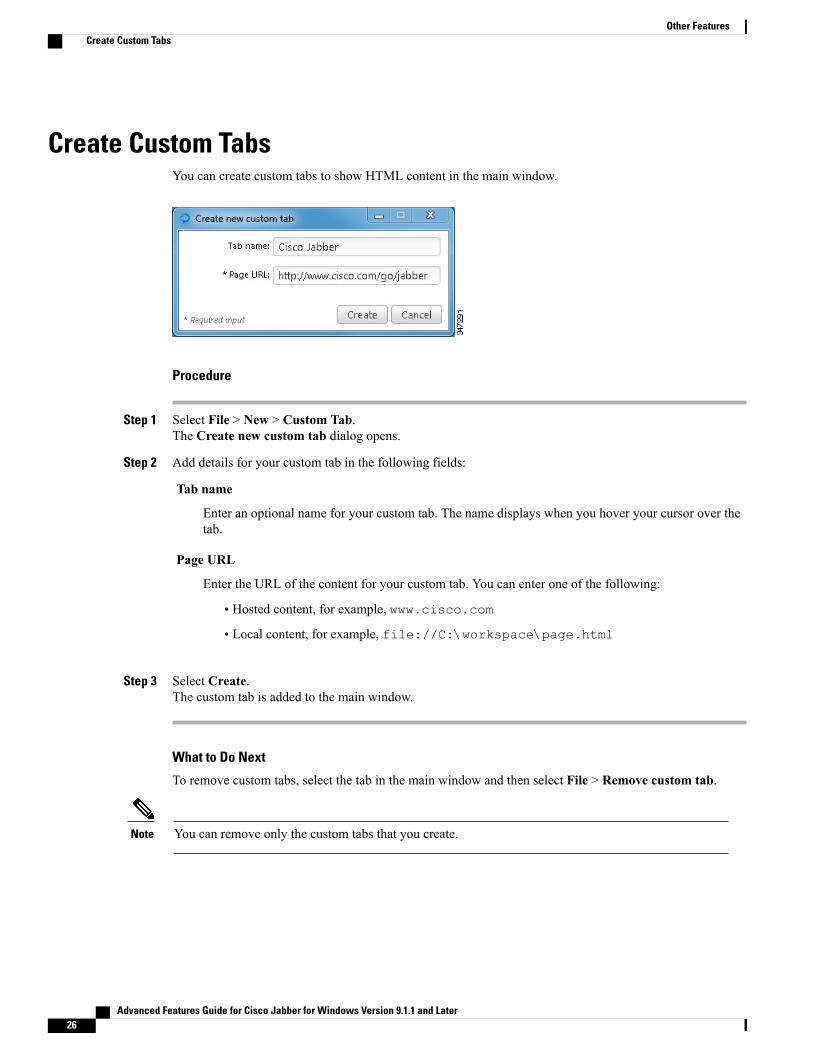
Create Custom TabsYou can create custom tabs to show HTML content in the main window.
Procedure
Step 1 Select File > New > Custom Tab.The Create new custom tab dialog opens.
Step 2 Add details for your custom tab in the following fields:
Tab name
Enter an optional name for your custom tab. The name displays when you hover your cursor over thetab.
Page URL
Enter the URL of the content for your custom tab. You can enter one of the following:
• Hosted content, for example, www.cisco.com
• Local content, for example, file://C:\workspace\page.html
Step 3 Select Create.The custom tab is added to the main window.
What to Do Next
To remove custom tabs, select the tab in the main window and then select File > Remove custom tab.
You can remove only the custom tabs that you create.Note
Advanced Features Guide for Cisco Jabber for Windows Version 9.1.1 and Later26
Other FeaturesCreate Custom Tabs

C H A P T E R 8Further Reading
To find out more about Cisco Jabber, visit our website at: http://www.cisco.com/go/jabber
Advanced Features Guide for Cisco Jabber for Windows Version 9.1.1 and Later 27

Advanced Features Guide for Cisco Jabber for Windows Version 9.1.1 and Later28
Further Reading