Embed Size (px)
Citation preview
Creating Terraserver and Georeferenced Maps for UAV Applications
www.airborneinnovations.com
Revision historyDate Revision
1 July 2004 Created
13 May 2005 Global Mapper documentation added
31 May 2005 USGS web site and conversion utility documentation
1 March 2007 Detail added to UTM to Geographic section
Airborne Innovations LLC
Table of Contents1 Introduction...................................................................................................................................3
2 Tools............................................................................................................................................. 3
2.1 Global Mapper....................................................................................................................... 3
2.2 Georeferencing a scanned map with Global Mapper.............................................................5
2.3 USGS web site download (free).............................................................................................6
2.4 Converting a UTM GeoTiff to a Geographic (lat-lon) GeoTiff.............................................9
2.5 USAPhotoMaps Terraserver download (freeware method).................................................10
2.6 Creating a georeferenced image from USAPhotoMaps.......................................................12
2.7 GeoJPEG to GeoTIFF conversion and reprojection (commercial and freeware)................ 13
1 IntroductionTerraserver has a database of satellite photos which can be converted into georeferenced files for use with generic mapping software.
These maps can be used as background images with the Piccolo UAV system Operator Interface or with the Airborne Innovations Satcam / Megacam realtime UAV imaging system visualization software.
This document outlines several approaches to creating these maps.
2 ToolsA number of different tools can generate geoferenced Terraserver maps, both commercial and freeware.
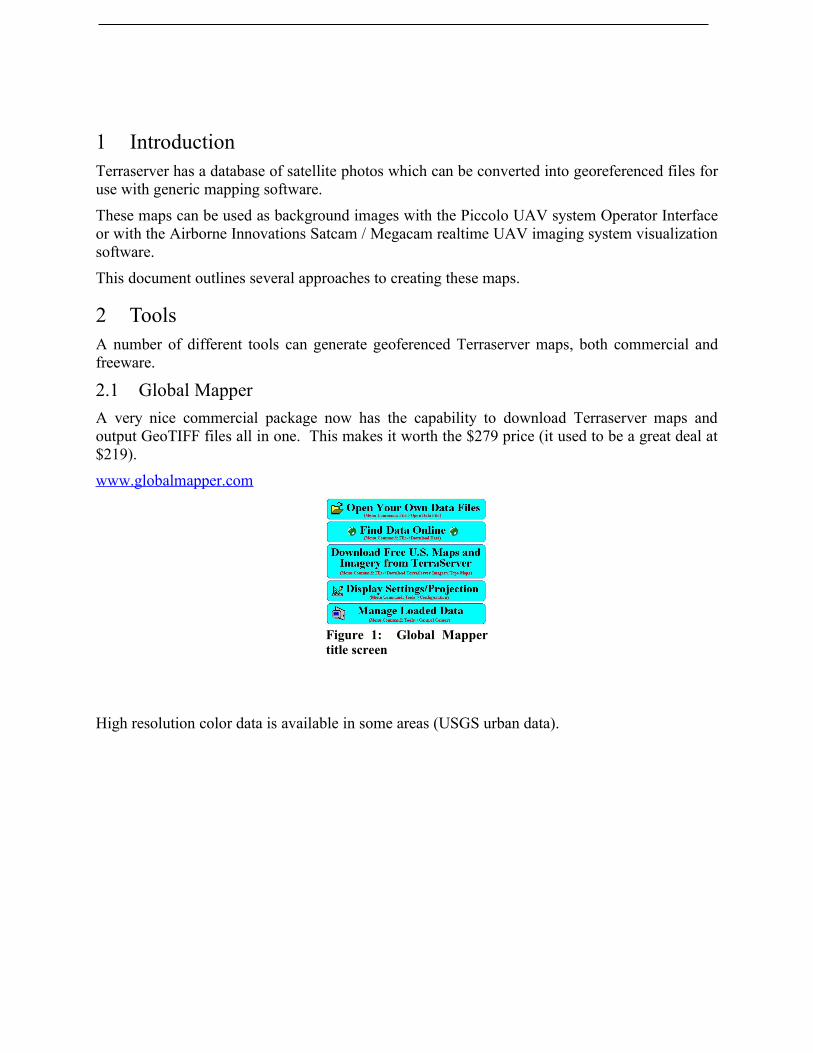
2.1 Global MapperA very nice commercial package now has the capability to download Terraserver maps and output GeoTIFF files all in one. This makes it worth the $279 price (it used to be a great deal at $219).
www.globalmapper.com
High resolution color data is available in some areas (USGS urban data).
Figure 1: Global Mapper title screen

Now simply export the data to a GeoTIFF file:
File/ export raster and elevation data / Export GeoTIFF
Use 8-bit palette PackBits compression and Generate TFW file for the Piccolo (it's not necessary to generate the TFW file as georeferencing information is embedded in the GeoTIFF file but it can be useful for other things)
Figure 2: Terraserver Download dialog
Figure 3: High resolution terraserver map after download
Figure 4: GeoTIFF export dialog
2.2 Georeferencing a scanned map with Global MapperGlobal mapper can georeference a scanned map.
The procedure is:
File / Open Data Files the ungeoreferenced image.
Global Mapper will prompt you whether you want to georeference the image. Select Yes.
Zoom into an area where there is a known lat/lon line intersection on the scanned map, in the center map display area. Zoom by dragging a rectangle.
Make sure the projection shown is Geographic / WGS84. If not, change it.
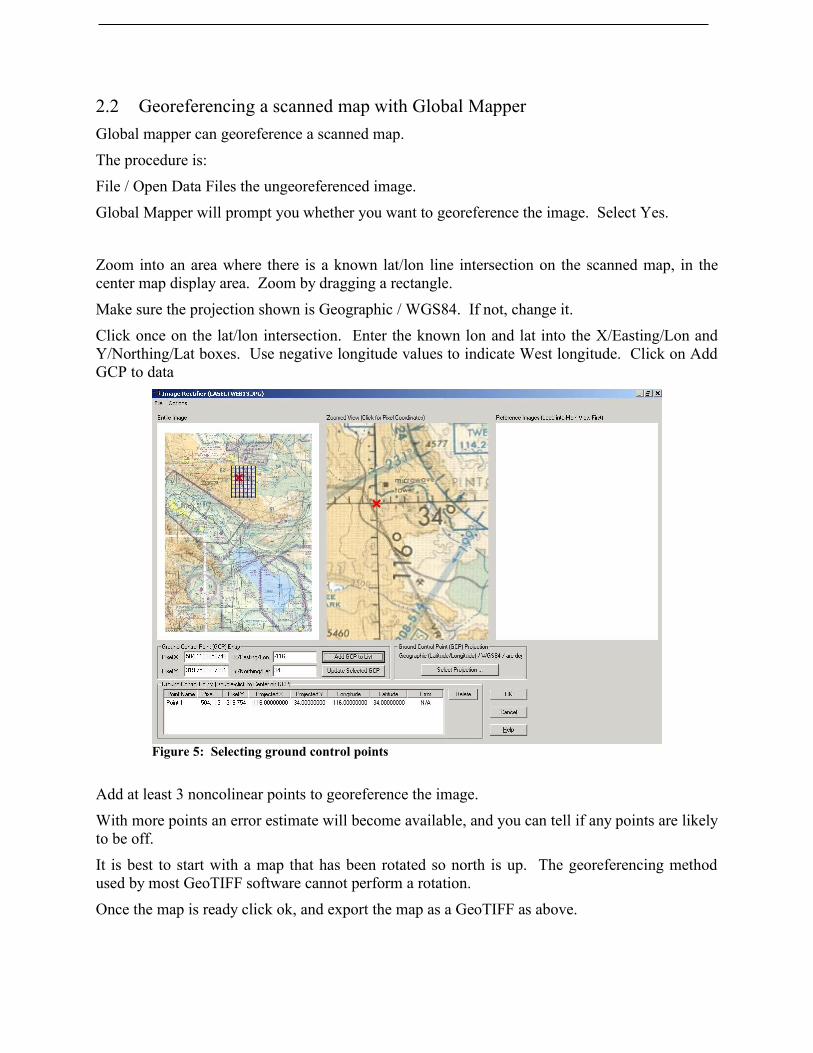
Click once on the lat/lon intersection. Enter the known lon and lat into the X/Easting/Lon and Y/Northing/Lat boxes. Use negative longitude values to indicate West longitude. Click on Add GCP to data
Add at least 3 noncolinear points to georeference the image.
With more points an error estimate will become available, and you can tell if any points are likely to be off.
It is best to start with a map that has been rotated so north is up. The georeferencing method used by most GeoTIFF software cannot perform a rotation.
Once the map is ready click ok, and export the map as a GeoTIFF as above.
Figure 5: Selecting ground control points
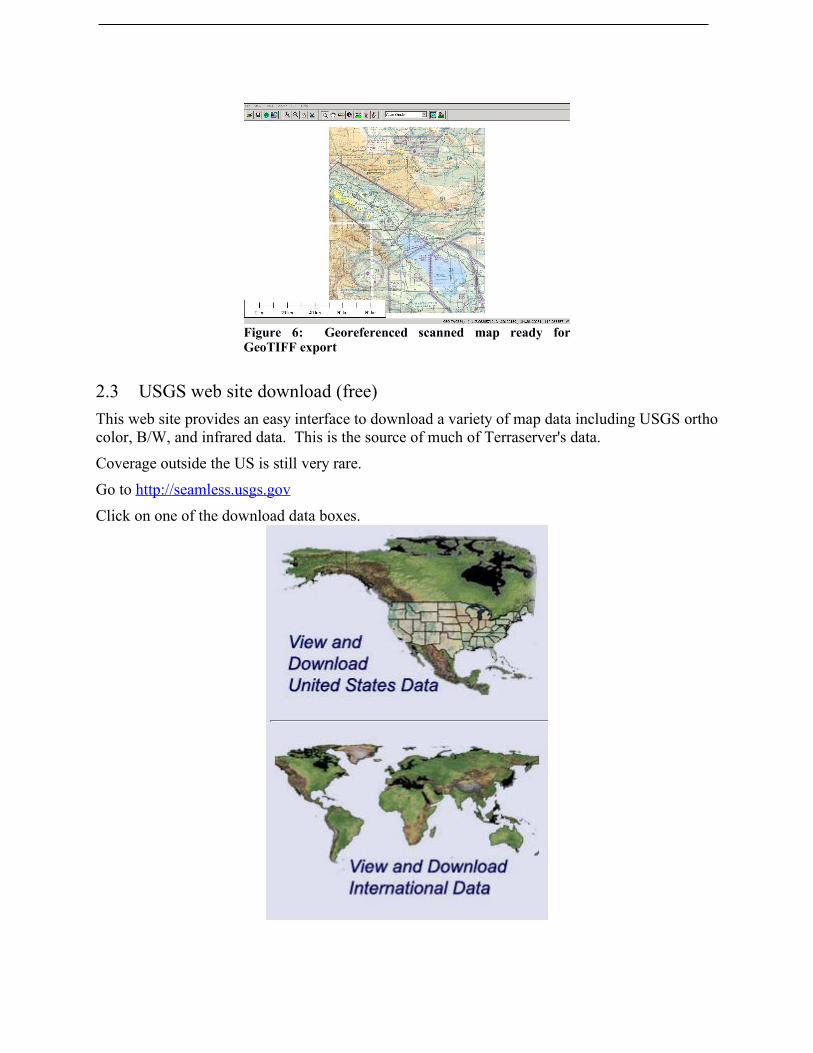
2.3 USGS web site download (free)This web site provides an easy interface to download a variety of map data including USGS ortho color, B/W, and infrared data. This is the source of much of Terraserver's data.
Coverage outside the US is still very rare.
Go to http://seamless.usgs.gov
Click on one of the download data boxes.
Figure 6: Georeferenced scanned map ready for GeoTIFF export
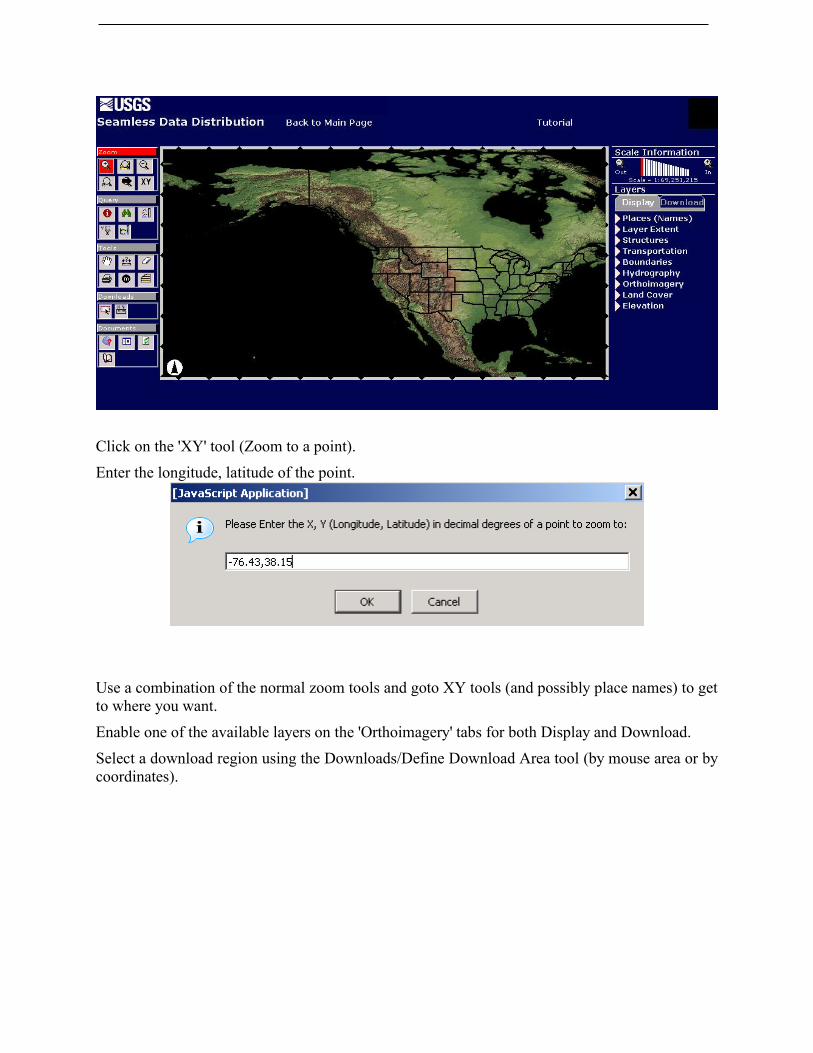
Click on the 'XY' tool (Zoom to a point).
Enter the longitude, latitude of the point.
Use a combination of the normal zoom tools and goto XY tools (and possibly place names) to get to where you want.
Enable one of the available layers on the 'Orthoimagery' tabs for both Display and Download.
Select a download region using the Downloads/Define Download Area tool (by mouse area or by coordinates).
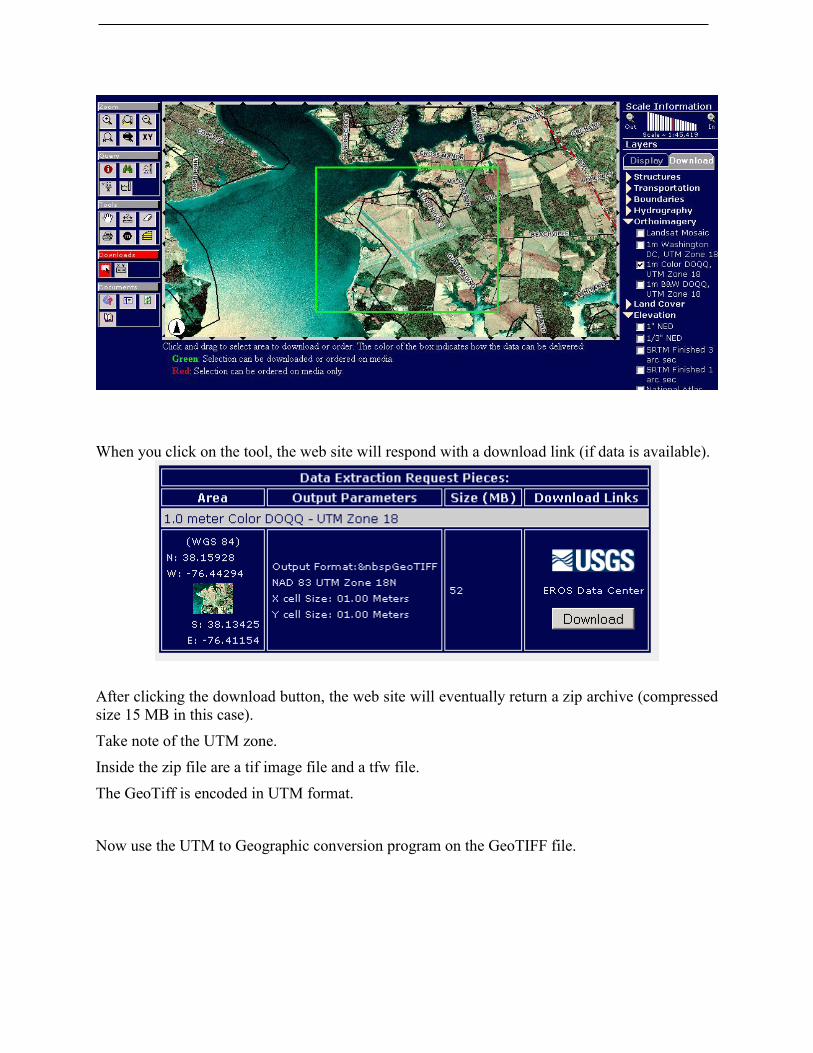
When you click on the tool, the web site will respond with a download link (if data is available).
After clicking the download button, the web site will eventually return a zip archive (compressed size 15 MB in this case).
Take note of the UTM zone.
Inside the zip file are a tif image file and a tfw file.
The GeoTiff is encoded in UTM format.
Now use the UTM to Geographic conversion program on the GeoTIFF file.
2.4 Converting a UTM GeoTiff to a Geographic (lat-lon) GeoTiffObtain the conversion utility from Airborne Innovations. It is available on the downloads page at http://www.airborneinnovations.com but you need login access. (Send email with a request for access).
Open the zip archive. Create a local directory ConvertGeoTIFF and copy the files from the archive to the local directory.
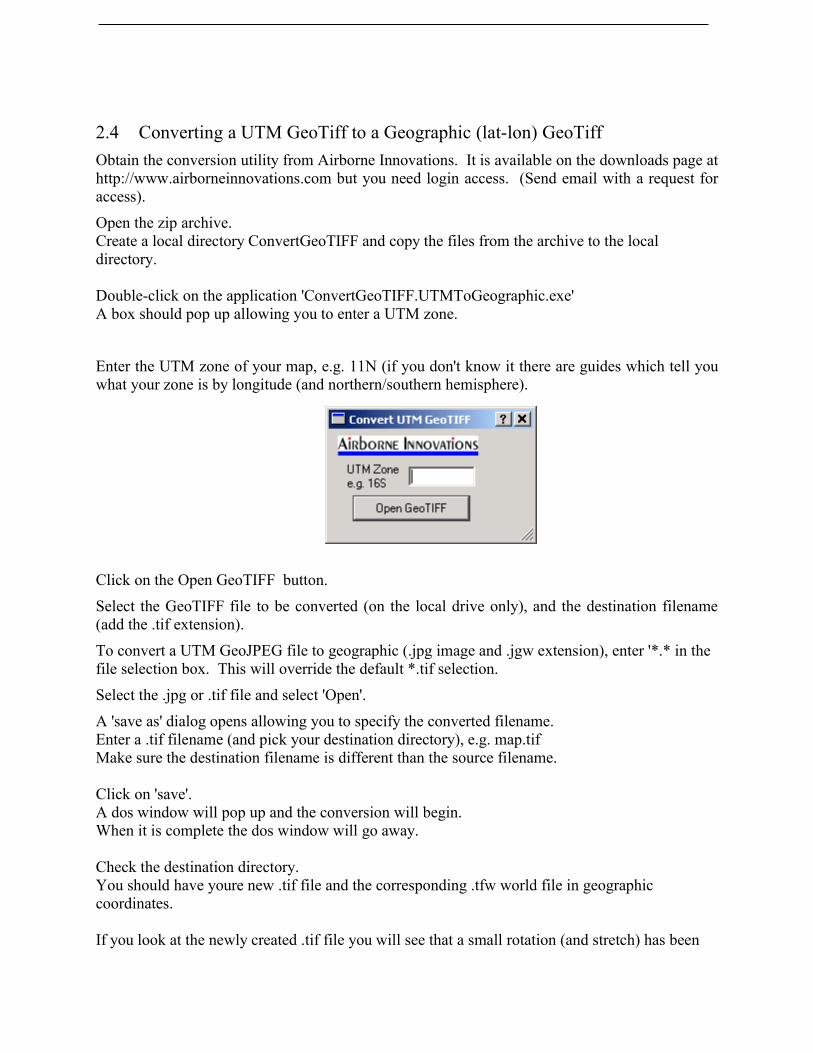
Double-click on the application 'ConvertGeoTIFF.UTMToGeographic.exe' A box should pop up allowing you to enter a UTM zone.
Enter the UTM zone of your map, e.g. 11N (if you don't know it there are guides which tell you what your zone is by longitude (and northern/southern hemisphere).
Click on the Open GeoTIFF button.
Select the GeoTIFF file to be converted (on the local drive only), and the destination filename (add the .tif extension).
To convert a UTM GeoJPEG file to geographic (.jpg image and .jgw extension), enter '*.* in the file selection box. This will override the default *.tif selection.
Select the .jpg or .tif file and select 'Open'.
A 'save as' dialog opens allowing you to specify the converted filename. Enter a .tif filename (and pick your destination directory), e.g. map.tif Make sure the destination filename is different than the source filename.
Click on 'save'. A dos window will pop up and the conversion will begin. When it is complete the dos window will go away.
Check the destination directory. You should have youre new .tif file and the corresponding .tfw world file in geographic coordinates.
If you look at the newly created .tif file you will see that a small rotation (and stretch) has been
performed corresponding to the UTM to geographic transformation.
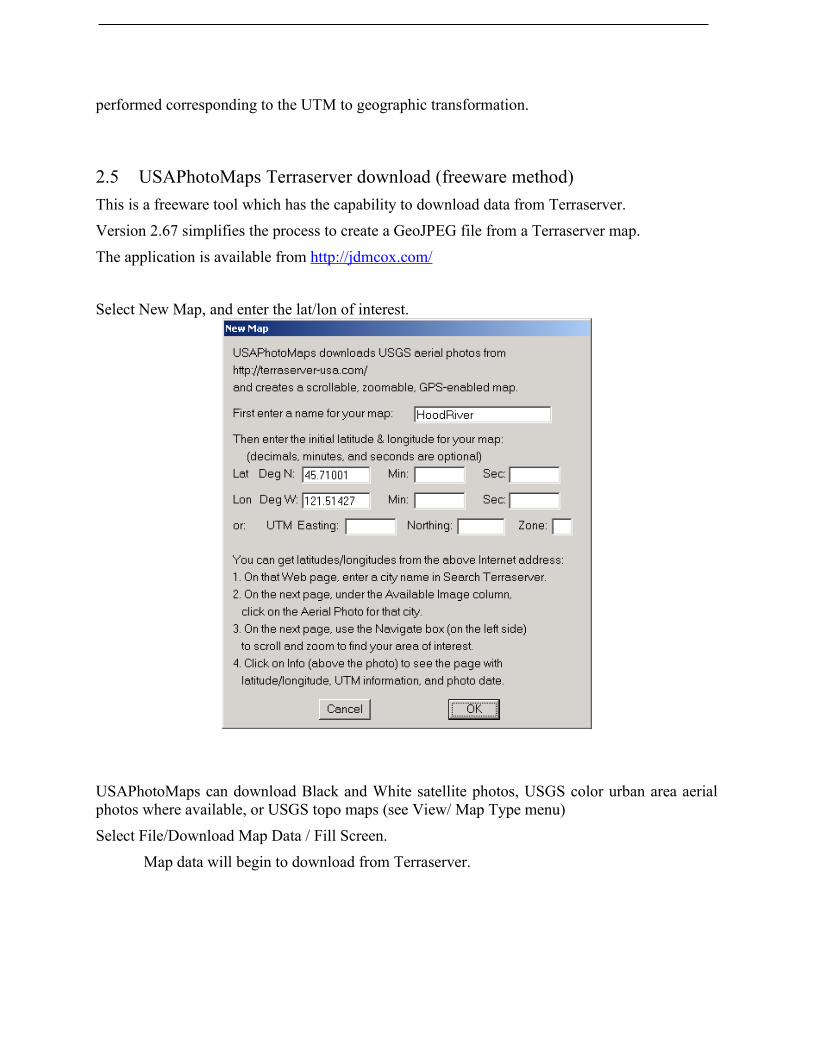
2.5 USAPhotoMaps Terraserver download (freeware method)This is a freeware tool which has the capability to download data from Terraserver.
Version 2.67 simplifies the process to create a GeoJPEG file from a Terraserver map.
The application is available from http://jdmcox.com/
Select New Map, and enter the lat/lon of interest.
USAPhotoMaps can download Black and White satellite photos, USGS color urban area aerial photos where available, or USGS topo maps (see View/ Map Type menu)
Select File/Download Map Data / Fill Screen.
Map data will begin to download from Terraserver.
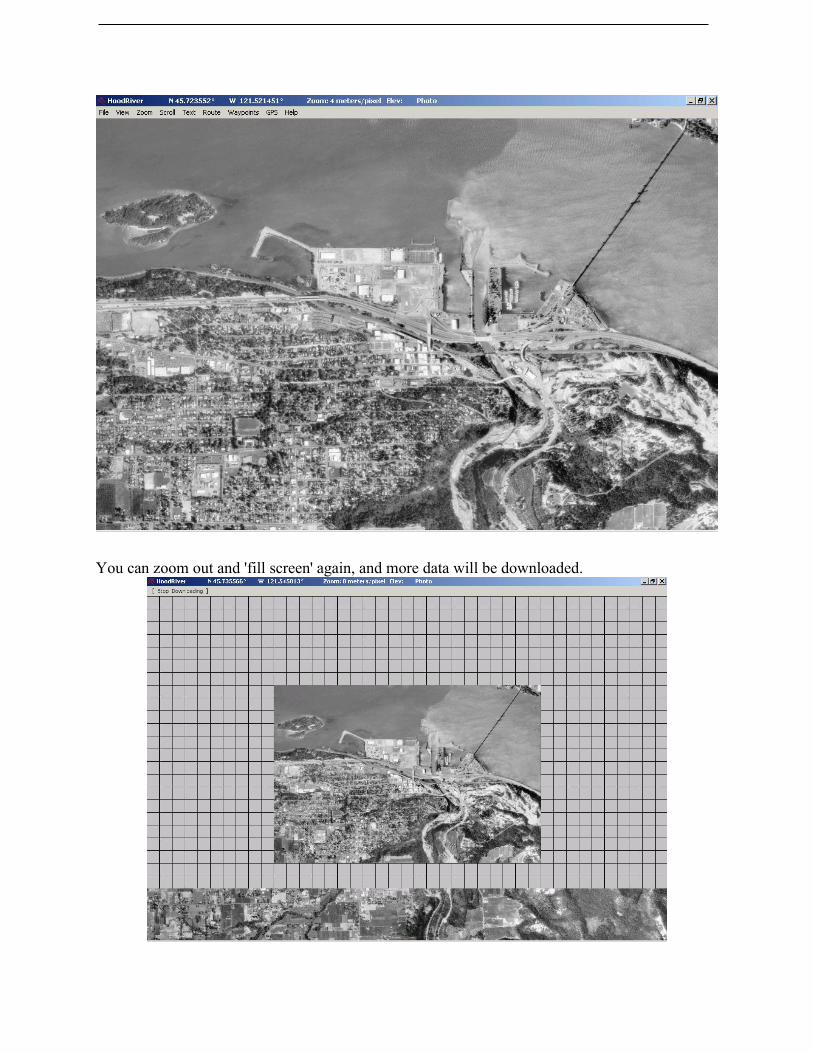
You can zoom out and 'fill screen' again, and more data will be downloaded.
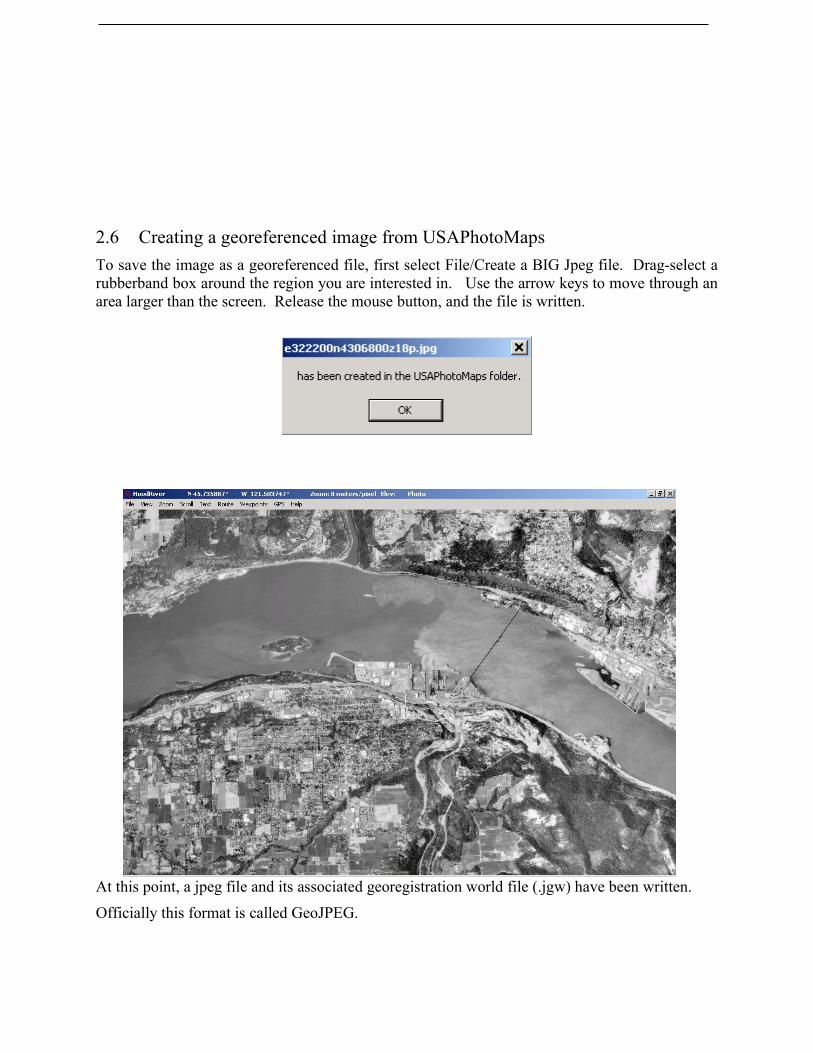
2.6 Creating a georeferenced image from USAPhotoMapsTo save the image as a georeferenced file, first select File/Create a BIG Jpeg file. Drag-select a rubberband box around the region you are interested in. Use the arrow keys to move through an area larger than the screen. Release the mouse button, and the file is written.
At this point, a jpeg file and its associated georegistration world file (.jgw) have been written.
Officially this format is called GeoJPEG.

However the projection stored in this jpg/jgw file is UTM, not WGS84 geographic.
Note that in general the transformation from UTM to geographic coordinates involves a rotation.
So there are two problems- the projection needs to be transformed and/or the image file format may need to be changed (unless your application can load GeoJPEG files, e.g. Airborne Innovations visualization software) .
2.7 GeoJPEG to GeoTIFF conversion and reprojection (commercial and freeware)
There are many possible ways to perform this conversion.
(See the earlier section on the simple utility to do this, available from Airborne Innovations).
The image part of the conversion may be performed with any image conversion tool that can convert jpeg's to a specific type of TIF image format- Usually 8-bit color with Packbits compression. However note that if using a paint program on a GeoTIFF with embedded georeferencing information will probably strip the file of that information. If using a GeoTIFF world file this is not a problem.
Global Mapper / dlgpro32 is one easy way to do this conversion
Other Utilities:
Global mapper is an excellent commercial product at www.globalmapper.com
Dlgv32Pro is a freeware version of the same product, with some features disabled, like saving GeoTIFF files (but many features are functional). It can be downloaded from http://mcmcweb.er.usgs.gov/drc/dlgv32pro
Note: The latest version now has terraserver support so this method need not be used!
If using Global Mapper:
File/Open Data Files
Pick the jpeg file
Use UTM projection, NAD83, and make sure you specify the correct UTM zone (longitude region)
Then Tools/Configure/Projection, change to Geographic, WGS84.
Then File/Export Raster / GeoTiff
A number of mapping programs can handle these maps, and convert between various formats.
(below gathered from various online sources including
http://www.ruraltech.org/gis/map_info/toolbox/index.asp
)
http://www.digitalgrove.net/Toolbox_mappers.htm#USAPhotoMaps
In combination with other free software, you can use the Zoner Viewer to convert a JPEG image made by USAPhotoMaps/BigJPEG into a GeoTIFF file. (Map Maker Gratis and 3DEM will correctly scale and position GeoTIFF layers automatically.)
1. Use Zoner Viewer to open a JPEG aerial photo made by USAPhotoMaps-BigJPEG. Tune up the contrast-brightness- sharpness to suit your needs. (If you wish, you can also add text, lines or symbols in Zoner Draw.)
2. Convert the image to a TIFF format file with Zoner Viewer's "Convert" tool.
3. Use Properties Plus to rename the image's "jgw" world coordinate file so it has a "tfw" extension.
4. Use another free utility called GeoTIFF Examiner to change the paired TIFF and "tfw" files into a single GeoTIFF file. GeoTIFF Examiner will write the world coordinate calibration into the header of the TIFF file. (Note: Do not create the GeoTIFF file until you are done making adjustments with Zoner.)
http://ioc.unesco.org/oceanteacher/resourcekit/M3/Toolbox/GeoTIFFExaminer.htm