Embed Size (px)
Citation preview
Download the open source software Fiji from http://fiji.sc/wiki/index.php/Fiji It’s essentially the same as ImageJ, but comes with many pre-installed plugins and can update itself automatically.
If you prefer, ImageJ can be downloaded at http://rsbweb.nih.gov/ij/ but you will have to find and install a registration plugin yourself. One can be found at http://bigwww.epfl.ch/thevenaz/stackreg/
Image Alignment
This procedure will automatically align images by rotating and / or shifting the laterally to match up. It will work best on images which have clearly recognisable features and are generally sharp and clear. In other words, work with good images.
Open Fiji. (Yes, seems obvious, but it has to be said.)
Go to the menu Plugin / Registration / Register Virtual Slices
Set up the appropriate folders for the source and files and destination folder or output.
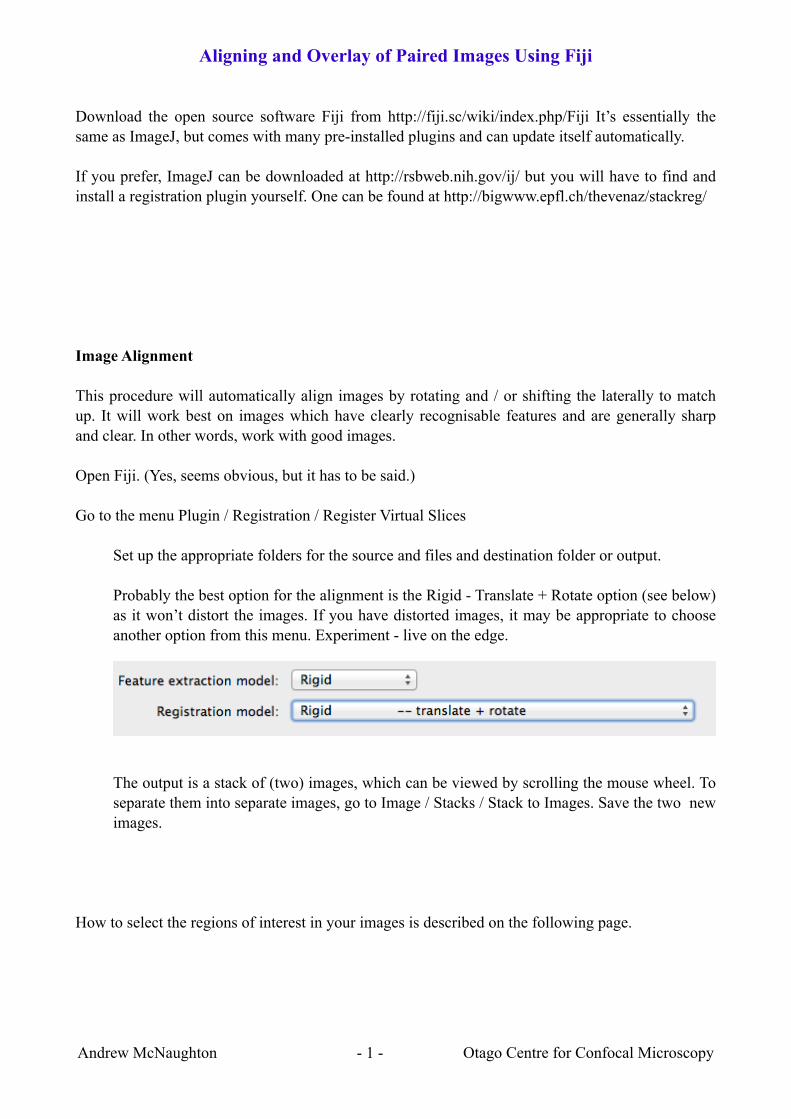
Probably the best option for the alignment is the Rigid - Translate + Rotate option (see below) as it won’t distort the images. If you have distorted images, it may be appropriate to choose another option from this menu. Experiment - live on the edge.
The output is a stack of (two) images, which can be viewed by scrolling the mouse wheel. To separate them into separate images, go to Image / Stacks / Stack to Images. Save the two new images.
How to select the regions of interest in your images is described on the following page.
Aligning and Overlay of Paired Images Using Fiji
Andrew McNaughton - 1 - Otago Centre for Confocal Microscopy
Thresholding Images
Before starting, choose the fill colour you want by going to Edit / Options /Colours and choose the fill (foreground) colour you want to use to colour the selected regions.
This selects regions of interest in the image by limiting hue, saturation and brightness (for colour images, just brightness for greyscale images).
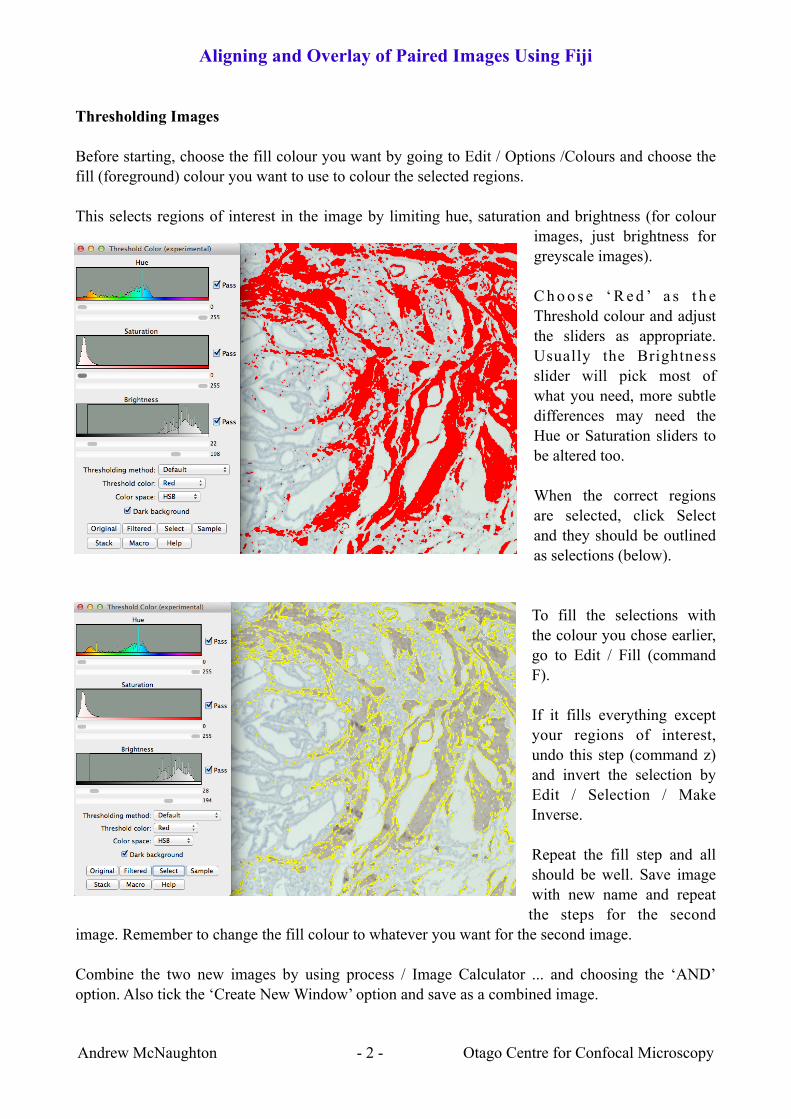
C h o o s e ‘ R e d ’ a s t h e Threshold colour and adjust the sliders as appropriate. Usually the Brightness slider will pick most of what you need, more subtle differences may need the Hue or Saturation sliders to be altered too.
When the correct regions are selected, click Select and they should be outlined as selections (below).
To fill the selections with the colour you chose earlier, go to Edit / Fill (command F).
If it fills everything except your regions of interest, undo this step (command z) and invert the selection by Edit / Selection / Make Inverse.
Repeat the fill step and all should be well. Save image with new name and repeat the steps for the second
image. Remember to change the fill colour to whatever you want for the second image.
Combine the two new images by using process / Image Calculator ... and choosing the ‘AND’ option. Also tick the ‘Create New Window’ option and save as a combined image.
Aligning and Overlay of Paired Images Using Fiji
Andrew McNaughton - 2 - Otago Centre for Confocal Microscopy