Embed Size (px)
Citation preview
1
AmeriCorps Members Enhanced Time Tracking Tutorial
This user guide is designed as a guide for AmeriCorps members on how to access, enter,
and review their service hours. Each program can customize their timesheets, so your
actual timesheet may look different than the examples shown in this tutorial. You program
can advise you on any particular steps or standards they want you to follow in reporting
your service time.
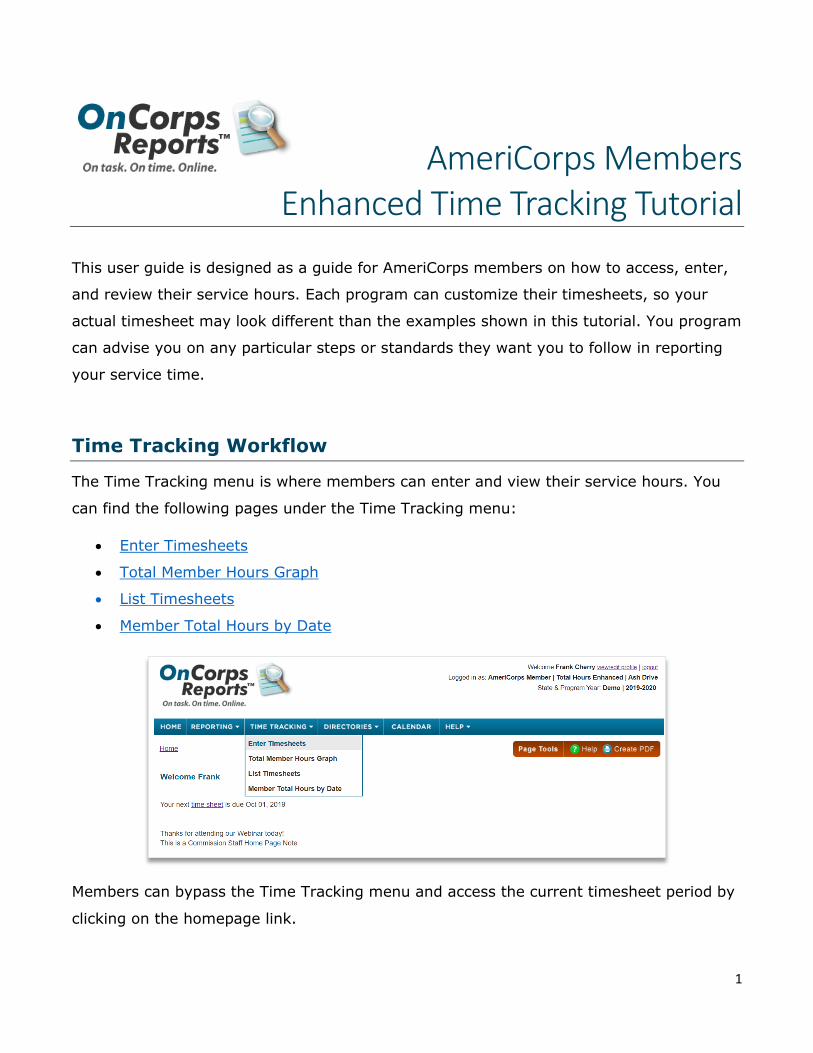
Time Tracking Workflow
The Time Tracking menu is where members can enter and view their service hours. You
can find the following pages under the Time Tracking menu:
• Enter Timesheets
• Total Member Hours Graph
• List Timesheets
• Member Total Hours by Date
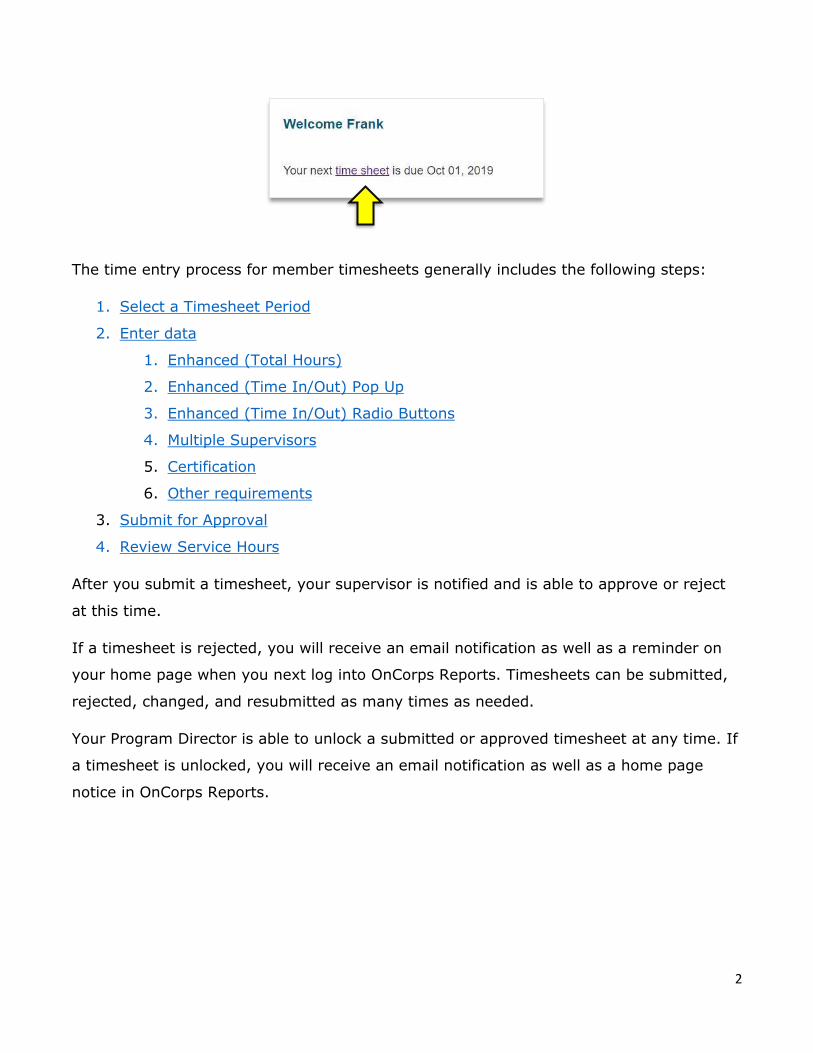
Members can bypass the Time Tracking menu and access the current timesheet period by
clicking on the homepage link.
2
The time entry process for member timesheets generally includes the following steps:
1. Select a Timesheet Period
2. Enter data
1. Enhanced (Total Hours)
2. Enhanced (Time In/Out) Pop Up
3. Enhanced (Time In/Out) Radio Buttons
4. Multiple Supervisors
5. Certification
6. Other requirements
3. Submit for Approval
4. Review Service Hours
After you submit a timesheet, your supervisor is notified and is able to approve or reject
at this time.
If a timesheet is rejected, you will receive an email notification as well as a reminder on
your home page when you next log into OnCorps Reports. Timesheets can be submitted,
rejected, changed, and resubmitted as many times as needed.
Your Program Director is able to unlock a submitted or approved timesheet at any time. If
a timesheet is unlocked, you will receive an email notification as well as a home page
notice in OnCorps Reports.
3
Enter Timesheets
Time Tracking > Enter Timesheets
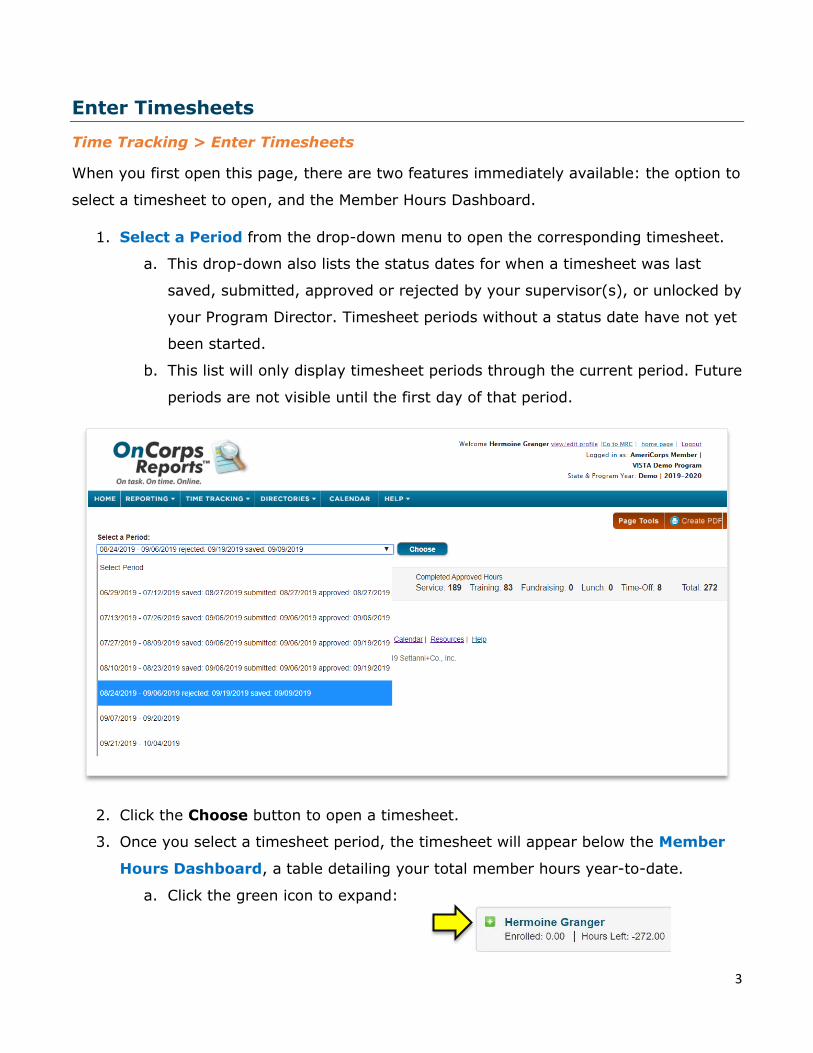
When you first open this page, there are two features immediately available: the option to
select a timesheet to open, and the Member Hours Dashboard.
1. Select a Period from the drop-down menu to open the corresponding timesheet.
a. This drop-down also lists the status dates for when a timesheet was last
saved, submitted, approved or rejected by your supervisor(s), or unlocked by
your Program Director. Timesheet periods without a status date have not yet
been started.
b. This list will only display timesheet periods through the current period. Future
periods are not visible until the first day of that period.
2. Click the Choose button to open a timesheet.
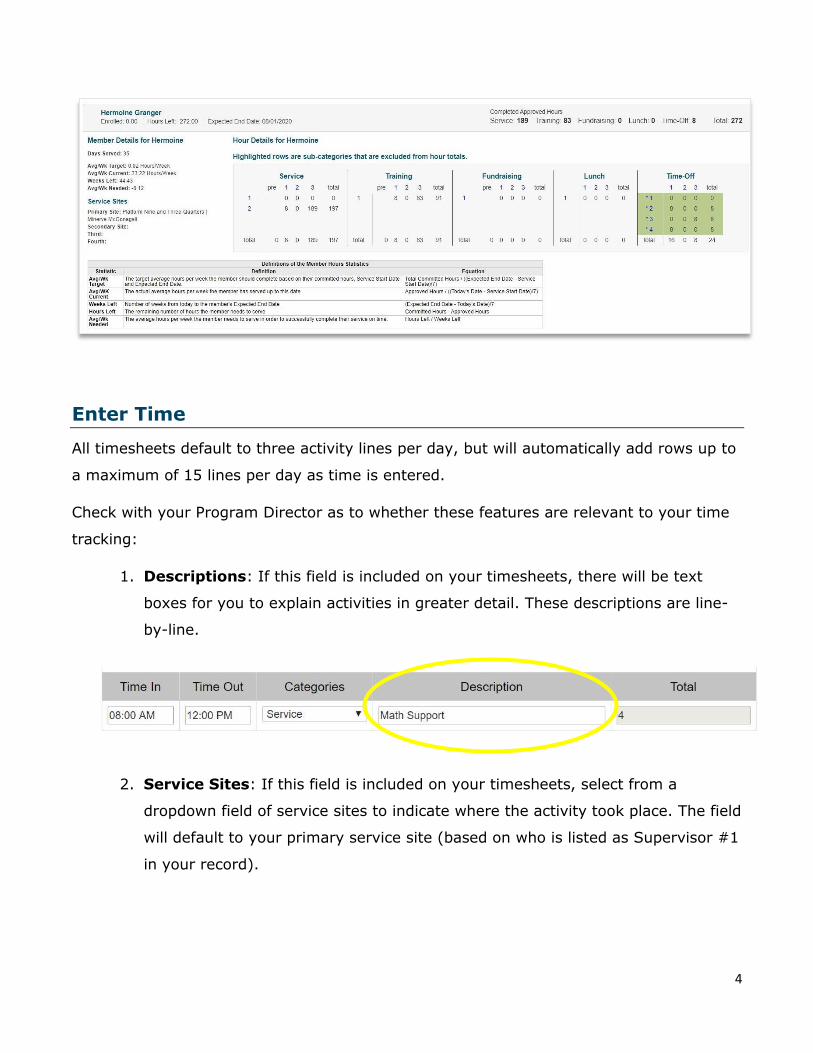
3. Once you select a timesheet period, the timesheet will appear below the Member
Hours Dashboard, a table detailing your total member hours year-to-date.
a. Click the green icon to expand:
4
Enter Time
All timesheets default to three activity lines per day, but will automatically add rows up to
a maximum of 15 lines per day as time is entered.
Check with your Program Director as to whether these features are relevant to your time
tracking:
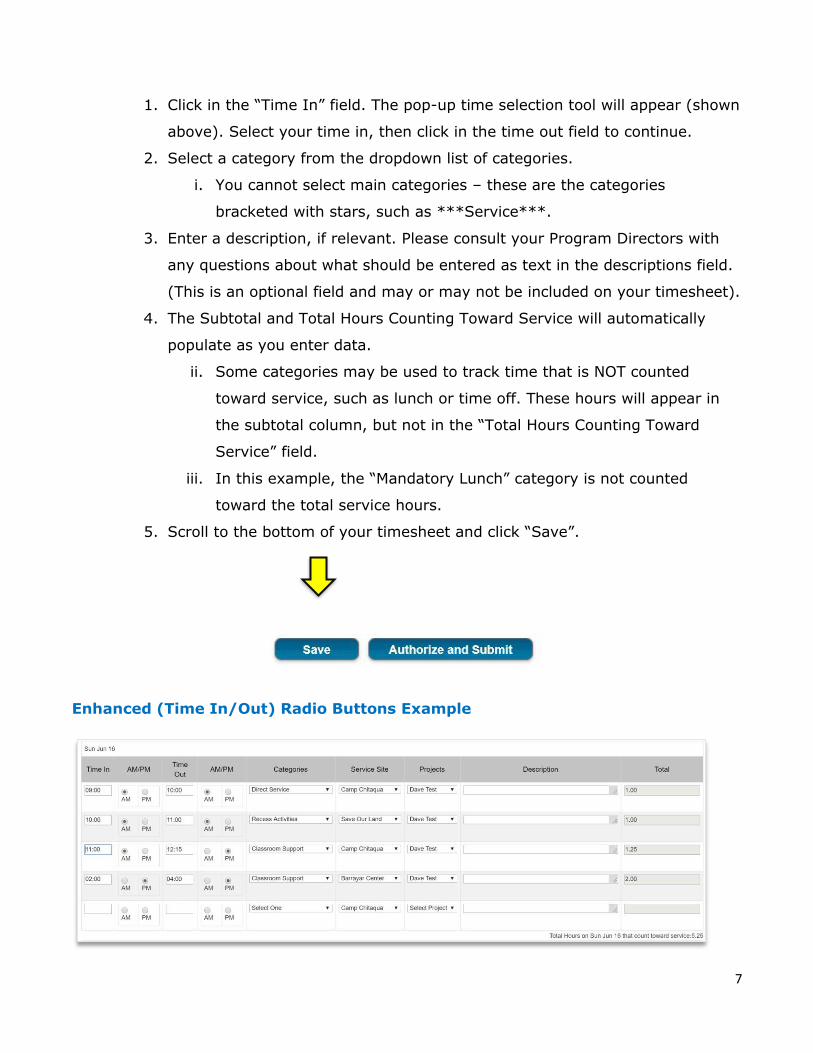
1. Descriptions: If this field is included on your timesheets, there will be text
boxes for you to explain activities in greater detail. These descriptions are line-
by-line.
2. Service Sites: If this field is included on your timesheets, select from a
dropdown field of service sites to indicate where the activity took place. The field
will default to your primary service site (based on who is listed as Supervisor #1
in your record).

5
3. Projects: This field allows you to report which project corresponds with your
reported service hours. This field is only required when Service categories are
selected. Program Directors create the drop-down list of options, and how this
field is used varies from program to program. Please follow up with your
Program Director with further questions.
Here is a sample of what entering a single day looks like in each Enhanced version (Total
Hours, Time In/Out with popup tool, and Time In/Out with radio buttons):
Enhanced (Total Hours) Example
1. Select a category from the dropdown list of categories.
i. You cannot select main categories – these are the categories
bracketed with stars, such as ***Service***.
2. Select a Service Site from the dropdown list. (This is an optional field and
may or may not be included on your timesheet).

6
3. Enter a description, if relevant. Please consult your Program Directors with
any questions about what should be entered as text in the descriptions field.
(This is an optional field and may or may not be included on your timesheet).
4. The Subtotal and Total Hours Counting Toward Service will automatically
populate as you enter data.
i. Some categories may be used to track time that is NOT counted
toward service, such as lunch or time off. These hours will appear in
the subtotal column, but not in the “Total Hours Counting Toward
Service” field.
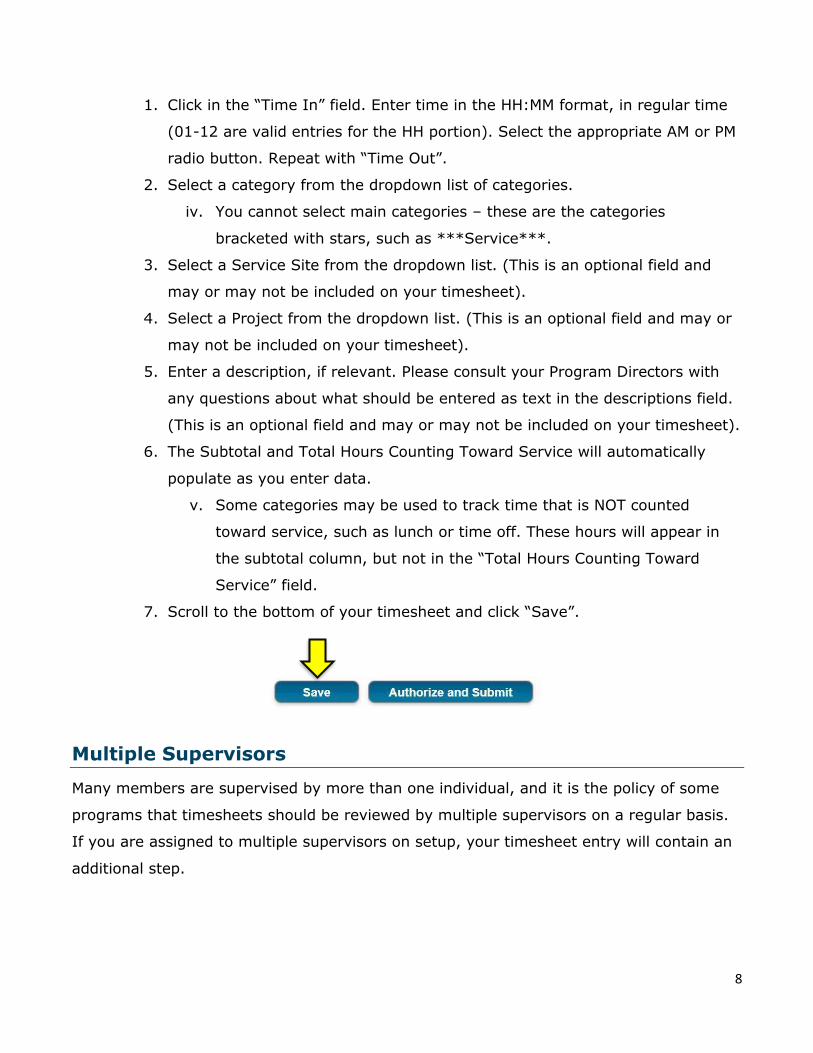
5. Scroll to the bottom of your timesheet and click “Save”.
Enhanced (Time In/Out) Pop Up Example
7
1. Click in the “Time In” field. The pop-up time selection tool will appear (shown
above). Select your time in, then click in the time out field to continue.
2. Select a category from the dropdown list of categories.
i. You cannot select main categories – these are the categories
bracketed with stars, such as ***Service***.
3. Enter a description, if relevant. Please consult your Program Directors with
any questions about what should be entered as text in the descriptions field.
(This is an optional field and may or may not be included on your timesheet).
4. The Subtotal and Total Hours Counting Toward Service will automatically
populate as you enter data.
ii. Some categories may be used to track time that is NOT counted
toward service, such as lunch or time off. These hours will appear in
the subtotal column, but not in the “Total Hours Counting Toward
Service” field.
iii. In this example, the “Mandatory Lunch” category is not counted
toward the total service hours.
5. Scroll to the bottom of your timesheet and click “Save”.
Enhanced (Time In/Out) Radio Buttons Example
8
1. Click in the “Time In” field. Enter time in the HH:MM format, in regular time
(01-12 are valid entries for the HH portion). Select the appropriate AM or PM
radio button. Repeat with “Time Out”.
2. Select a category from the dropdown list of categories.
iv. You cannot select main categories – these are the categories
bracketed with stars, such as ***Service***.
3. Select a Service Site from the dropdown list. (This is an optional field and
may or may not be included on your timesheet).
4. Select a Project from the dropdown list. (This is an optional field and may or
may not be included on your timesheet).
5. Enter a description, if relevant. Please consult your Program Directors with
any questions about what should be entered as text in the descriptions field.
(This is an optional field and may or may not be included on your timesheet).
6. The Subtotal and Total Hours Counting Toward Service will automatically
populate as you enter data.
v. Some categories may be used to track time that is NOT counted
toward service, such as lunch or time off. These hours will appear in
the subtotal column, but not in the “Total Hours Counting Toward
Service” field.
7. Scroll to the bottom of your timesheet and click “Save”.
Multiple Supervisors
Many members are supervised by more than one individual, and it is the policy of some
programs that timesheets should be reviewed by multiple supervisors on a regular basis.
If you are assigned to multiple supervisors on setup, your timesheet entry will contain an
additional step.
9
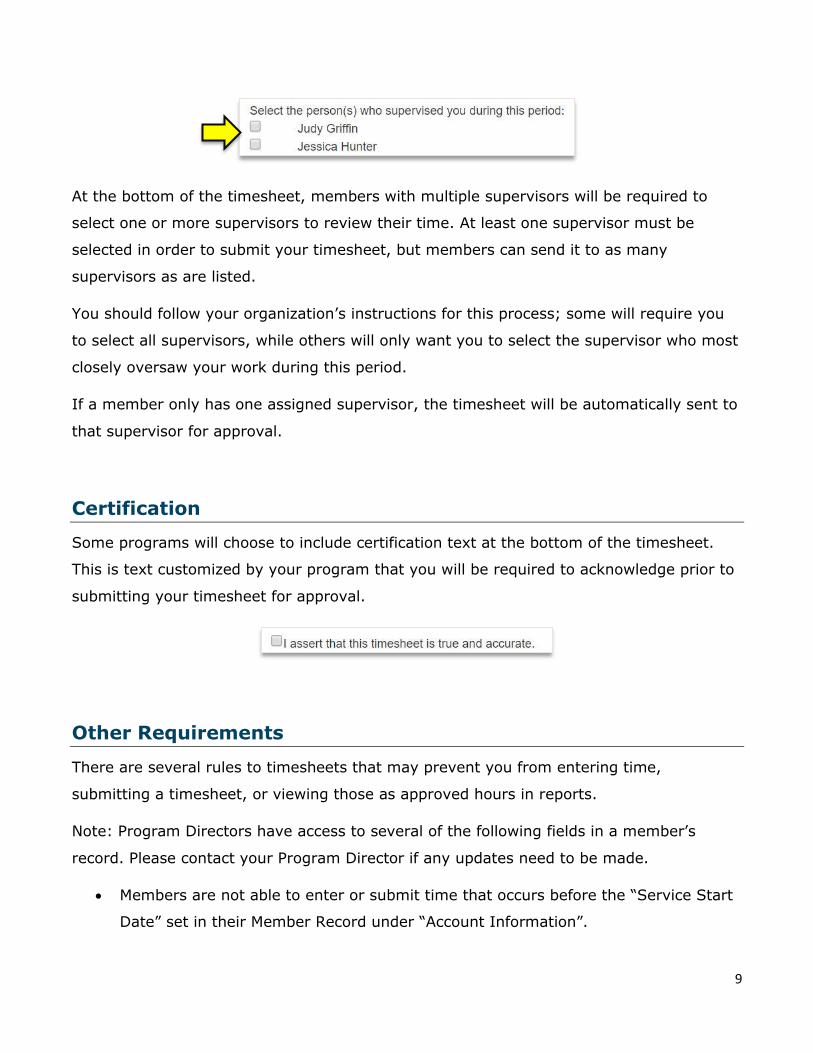
At the bottom of the timesheet, members with multiple supervisors will be required to
select one or more supervisors to review their time. At least one supervisor must be
selected in order to submit your timesheet, but members can send it to as many
supervisors as are listed.
You should follow your organization’s instructions for this process; some will require you
to select all supervisors, while others will only want you to select the supervisor who most
closely oversaw your work during this period.
If a member only has one assigned supervisor, the timesheet will be automatically sent to
that supervisor for approval.
Certification
Some programs will choose to include certification text at the bottom of the timesheet.
This is text customized by your program that you will be required to acknowledge prior to
submitting your timesheet for approval.
Other Requirements
There are several rules to timesheets that may prevent you from entering time,
submitting a timesheet, or viewing those as approved hours in reports.
Note: Program Directors have access to several of the following fields in a member’s
record. Please contact your Program Director if any updates need to be made.
• Members are not able to enter or submit time that occurs before the “Service Start
Date” set in their Member Record under “Account Information”.

10
• If you work with vulnerable populations and your program is waiting for background
checks to clear, you will be required to enter information regarding who
accompanied you in your work during the period (this field will not appear or be
visible once your program director indicates in your record that accompaniment is
no longer required).
• Members cannot enter time while their record is in suspension. If you are
suspended and need to enter time upon your return, you will need a program
director to update your record.
• Depending on how your timesheets have been setup, hours can only be entered in
quarter hour increments (numbers ending in .00, .25, .50, and .75), five-minute
intervals, or any valid time entry (e.g. 5:57).
• Timesheets can only be approved by a supervisor to whom the member is assigned.
• If multiple supervisors are selected when the timesheet is submitted, the time will
not show as approved until all supervisors have reviewed and approved the time.
• While members may enter time before it is served, supervisors are not able to
approve a timesheet until after the latest time entry in the timesheet has passed
(i.e. timesheets containing future hours). They are able to navigate to the
timesheet to look it over, and can reject it if errors are found, however.
• All submit, reject, approve, and unlock actions are timestamped to the user who
took the action, and become a part of the timesheet’s history.
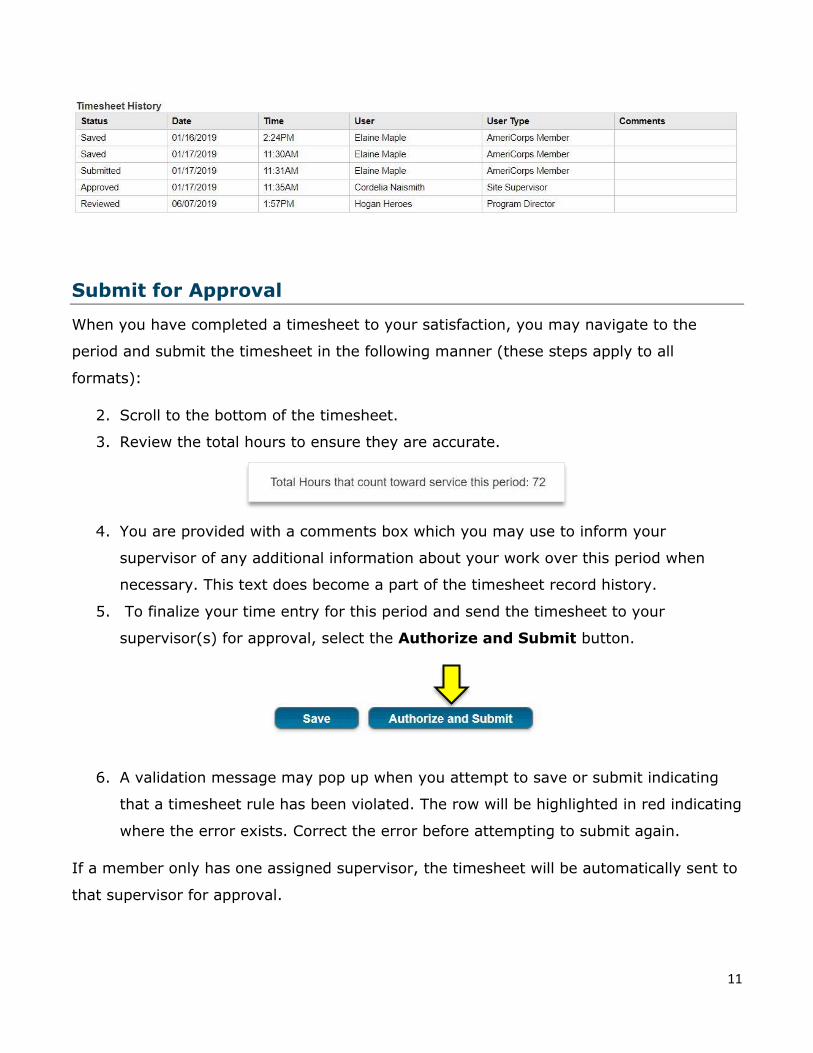
11
Submit for Approval
When you have completed a timesheet to your satisfaction, you may navigate to the
period and submit the timesheet in the following manner (these steps apply to all
formats):
2. Scroll to the bottom of the timesheet.
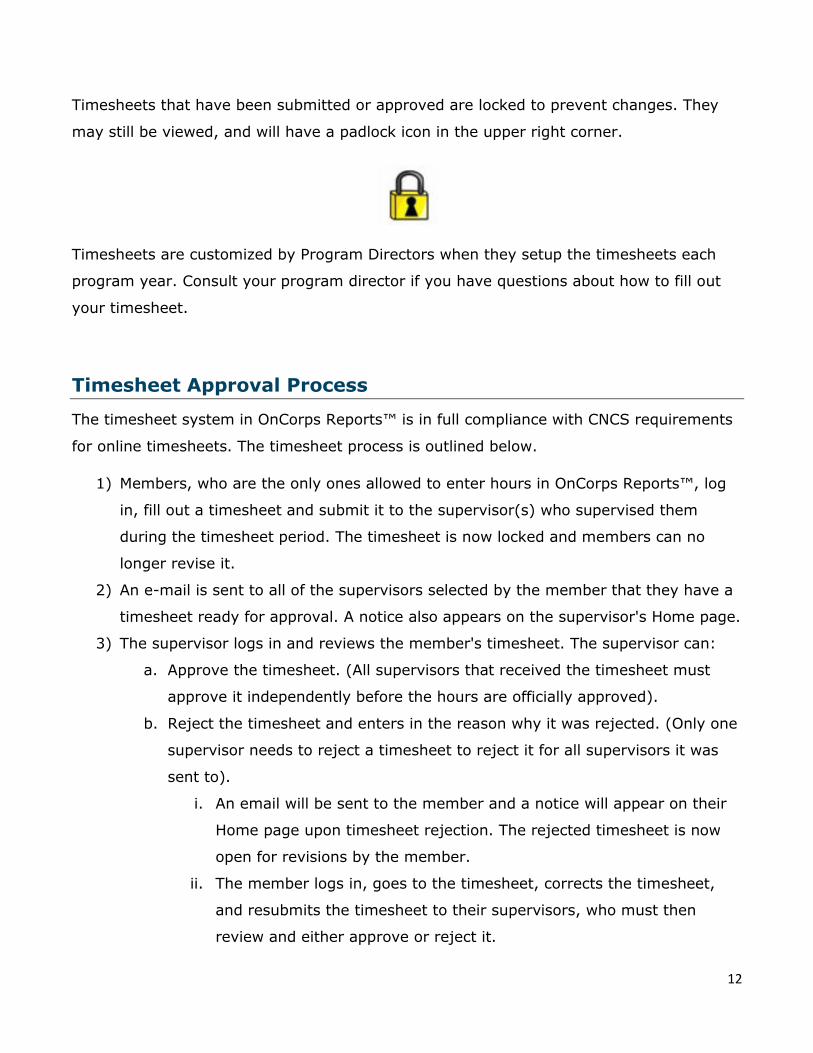
3. Review the total hours to ensure they are accurate.
4. You are provided with a comments box which you may use to inform your
supervisor of any additional information about your work over this period when
necessary. This text does become a part of the timesheet record history.
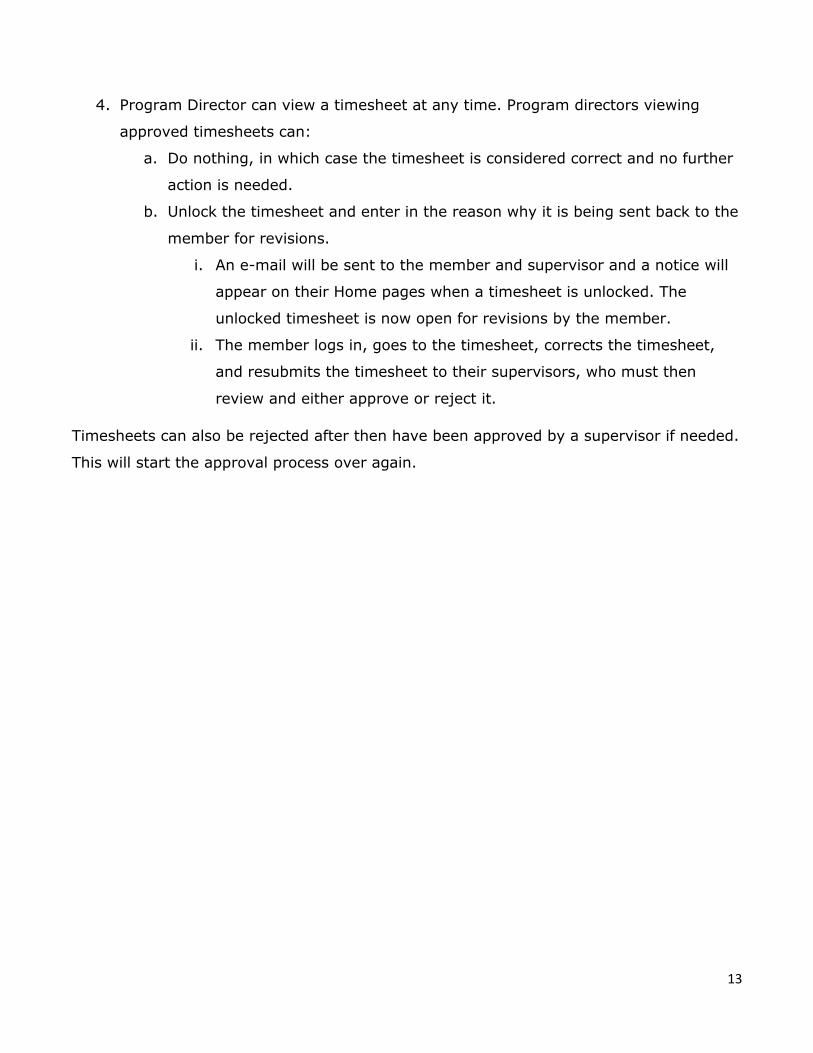
5. To finalize your time entry for this period and send the timesheet to your
supervisor(s) for approval, select the Authorize and Submit button.
6. A validation message may pop up when you attempt to save or submit indicating
that a timesheet rule has been violated. The row will be highlighted in red indicating
where the error exists. Correct the error before attempting to submit again.
If a member only has one assigned supervisor, the timesheet will be automatically sent to
that supervisor for approval.
12
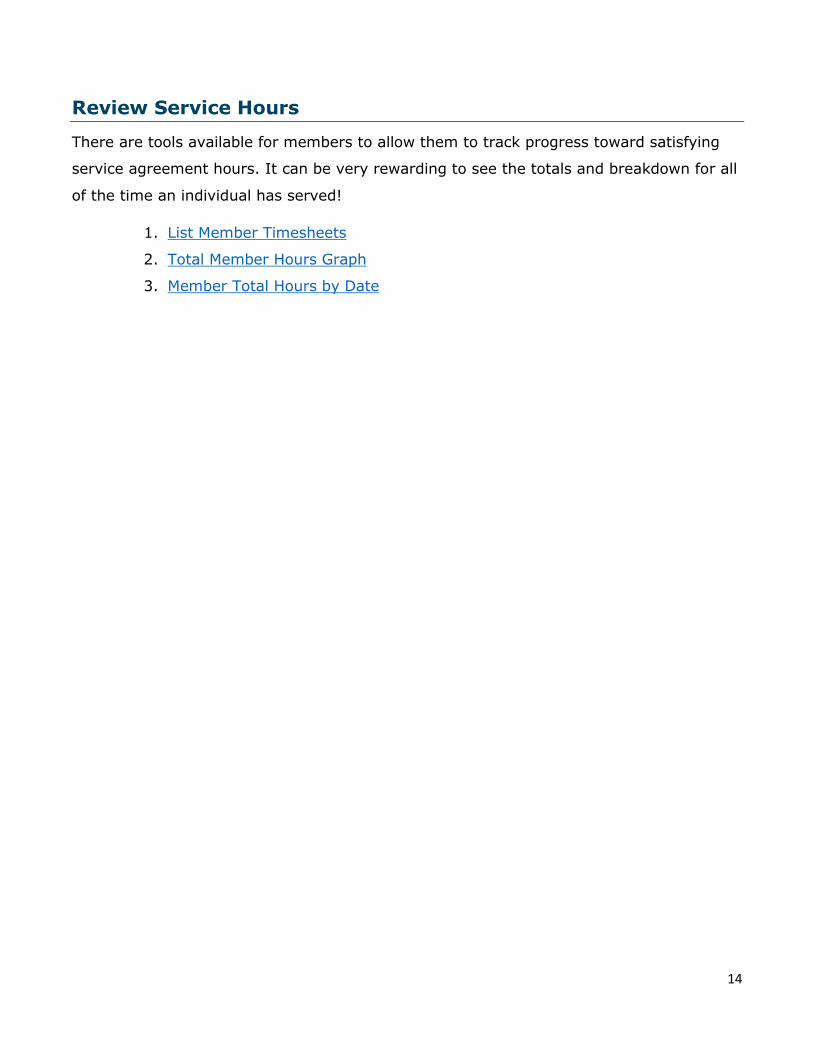
Timesheets that have been submitted or approved are locked to prevent changes. They
may still be viewed, and will have a padlock icon in the upper right corner.
Timesheets are customized by Program Directors when they setup the timesheets each
program year. Consult your program director if you have questions about how to fill out
your timesheet.
Timesheet Approval Process
The timesheet system in OnCorps Reports™ is in full compliance with CNCS requirements
for online timesheets. The timesheet process is outlined below.
1) Members, who are the only ones allowed to enter hours in OnCorps Reports™, log
in, fill out a timesheet and submit it to the supervisor(s) who supervised them
during the timesheet period. The timesheet is now locked and members can no
longer revise it.
2) An e-mail is sent to all of the supervisors selected by the member that they have a
timesheet ready for approval. A notice also appears on the supervisor's Home page.
3) The supervisor logs in and reviews the member's timesheet. The supervisor can:
a. Approve the timesheet. (All supervisors that received the timesheet must
approve it independently before the hours are officially approved).
b. Reject the timesheet and enters in the reason why it was rejected. (Only one
supervisor needs to reject a timesheet to reject it for all supervisors it was
sent to).
i. An email will be sent to the member and a notice will appear on their
Home page upon timesheet rejection. The rejected timesheet is now
open for revisions by the member.
ii. The member logs in, goes to the timesheet, corrects the timesheet,
and resubmits the timesheet to their supervisors, who must then
review and either approve or reject it.
13
4. Program Director can view a timesheet at any time. Program directors viewing
approved timesheets can:
a. Do nothing, in which case the timesheet is considered correct and no further
action is needed.
b. Unlock the timesheet and enter in the reason why it is being sent back to the
member for revisions.
i. An e-mail will be sent to the member and supervisor and a notice will
appear on their Home pages when a timesheet is unlocked. The
unlocked timesheet is now open for revisions by the member.
ii. The member logs in, goes to the timesheet, corrects the timesheet,
and resubmits the timesheet to their supervisors, who must then
review and either approve or reject it.
Timesheets can also be rejected after then have been approved by a supervisor if needed.
This will start the approval process over again.
14
Review Service Hours
There are tools available for members to allow them to track progress toward satisfying
service agreement hours. It can be very rewarding to see the totals and breakdown for all
of the time an individual has served!
1. List Member Timesheets
2. Total Member Hours Graph
3. Member Total Hours by Date
15
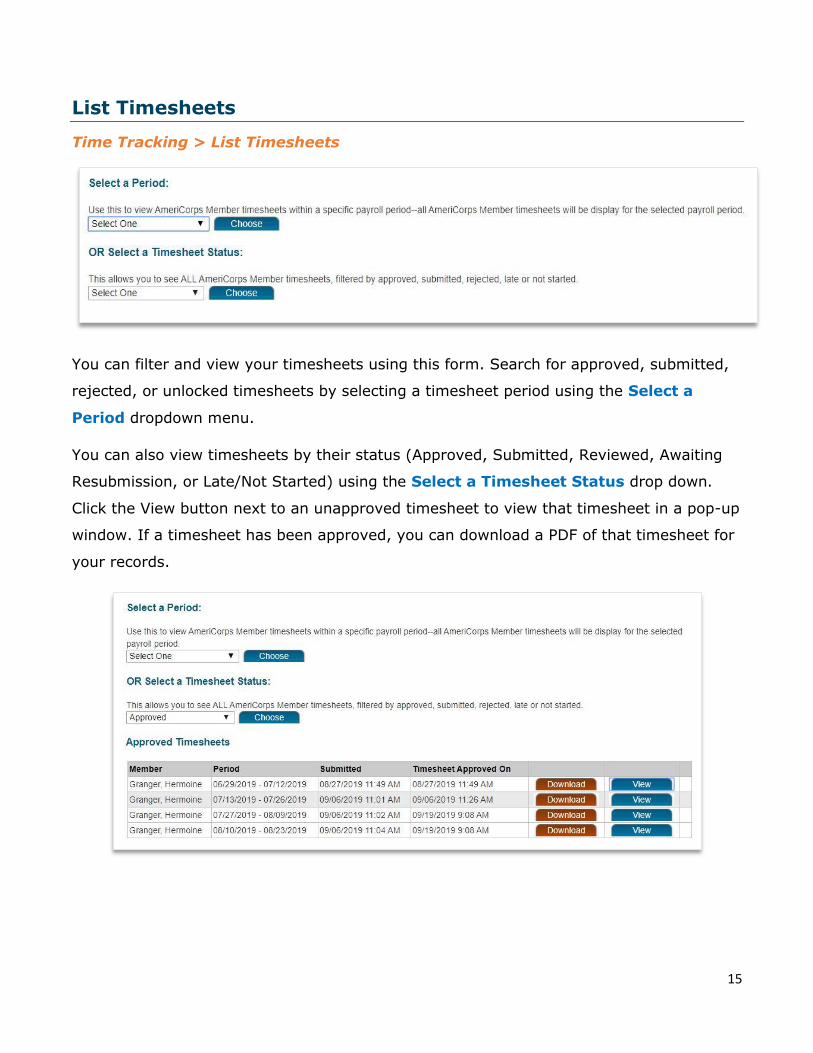
List Timesheets
Time Tracking > List Timesheets
You can filter and view your timesheets using this form. Search for approved, submitted,
rejected, or unlocked timesheets by selecting a timesheet period using the Select a
Period dropdown menu.
You can also view timesheets by their status (Approved, Submitted, Reviewed, Awaiting
Resubmission, or Late/Not Started) using the Select a Timesheet Status drop down.
Click the View button next to an unapproved timesheet to view that timesheet in a pop-up
window. If a timesheet has been approved, you can download a PDF of that timesheet for
your records.
16
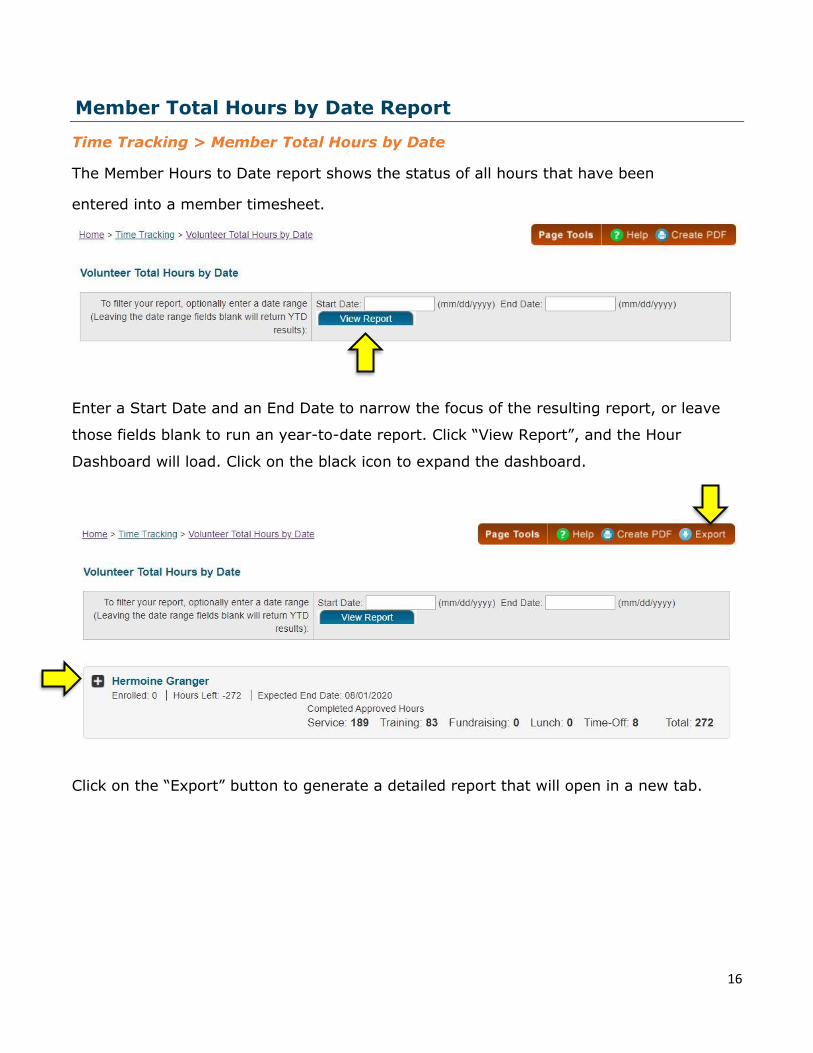
Member Total Hours by Date Report
Time Tracking > Member Total Hours by Date
The Member Hours to Date report shows the status of all hours that have been
entered into a member timesheet.
Enter a Start Date and an End Date to narrow the focus of the resulting report, or leave
those fields blank to run an year-to-date report. Click “View Report”, and the Hour
Dashboard will load. Click on the black icon to expand the dashboard.
Click on the “Export” button to generate a detailed report that will open in a new tab.
17
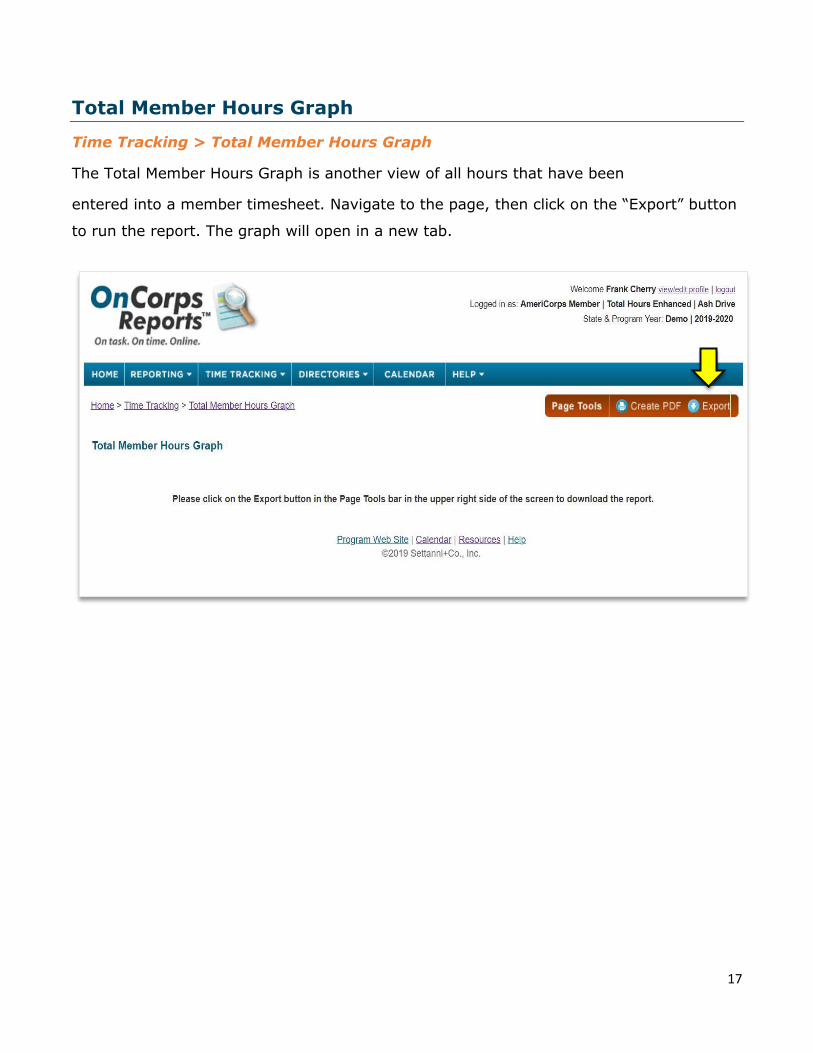
Total Member Hours Graph
Time Tracking > Total Member Hours Graph
The Total Member Hours Graph is another view of all hours that have been
entered into a member timesheet. Navigate to the page, then click on the “Export” button
to run the report. The graph will open in a new tab.