Embed Size (px)
Citation preview

S.W. Prescott, J. McDonald, C.M. Fellows, R.G. Gilbert 1
An introduction to the scientific process: Preparation of poly(vinyl acetate) glue
Supplementary Material for JCE Online
INSTRUCTORS� GUIDELINES........................................................................................2 (i) Equipment Required .......................................................................................2 (ii) Chemicals Required........................................................................................3 (iii) Before the Practical........................................................................................3 (iv) During the Practical .......................................................................................3 (v) After the Practical ..........................................................................................5 (vi) Troubleshooting the Practical ........................................................................5
INSTRUCTIONS FOR LATEX PREPARATION: LATEX A.............................................7
INSTRUCTIONS FOR LATEX PREPARATION: LATEX B .............................................8
INSTRUCTIONS FOR LATEX PREPARATION: LATEX C.............................................9
ADHESIVE TEST REPORT SHEET...............................................................................10
SAMPLE RESULTS SET...............................................................................................11
STUDENT EVALUATION .............................................................................................22 (i) Aspects Helpful to the Learning Experience ................................................22 (ii) Aspects Hindering the Learning Experience ................................................23 (iii) Suggested Changes .......................................................................................24 (iv) General Comments .......................................................................................25 (v) Multiple Choice Questions ...........................................................................26

An introduction to the scientific process: Preparation of poly(vinyl acetate) glue
S.W. Prescott, J. McDonald, C.M. Fellows, R.G. Gilbert 2
Instructors� Guidelines The key to the overall success of this practical is to encourage the students to think independently. In doing so, the practical teaches the students about the scientific method and how research is conducted in many groups around the world. It is important that the instructor guide the students through this process in a gentle way, rather than telling them what to do at each stage. The background information given to the students (in the form of a lecture) should cover the theory and terminology associated with the practical, while the information given to the students in the laboratory should be minimal: a basic recipe to make the latex and necessary safety instructions.
(i) Equipment Required
The �Toybox� should contain, but is not limited to, the following items:
Substrates: (numerous pieces approx. 5 × 10 cm)
Other Equipment:
• Hardboard e.g. Masonite • Cardboard • Loose-weave fabric e.g. cheesecloth • Denim • Paper • Scissors • Leather
• Permanent markers • String • Wire • Pliers • 4 L plastic bottles • 5 kg spring balances with hooks
(�fish scales�) • Masking tape • Small paint brushes • Wood glue
In addition, the following materials will be required (per pair of students):
• 100 mL brown glass bottle with lid (a) • 2 × 50 mL beakers • 50 or 100 mL measuring cylinder
• Spatula • Funnel
a Metal rather than plastic lids are advised as the latter may be swollen by monomer, with resulting loss of the reaction mixture. We used Cospak 100ml Amber bottles, Cat. No.M2180/S721
Requirements for the laboratory include:
• Safety glasses for all students • Disposable gloves for all students • Retort stands and clamps • Top loading balances
• Thermostatted agitator (b) • A pump dispenser for the vinyl
acetate bottle • A fumehood • Plentiful water
b A thermostatted water bath with the means to agitate the polymerization bottles. We wired a cage containing the immobilised bottles to the moving tray of a Haake SWB 20 thermostatted agitator.
Very useful but not essential are:
• An oven suitable for drying glued samples at 60 ºC • An electric drill

An introduction to the scientific process: Preparation of poly(vinyl acetate) glue
S.W. Prescott, J. McDonald, C.M. Fellows, R.G. Gilbert 3
(ii) Chemicals Required vinyl acetate CAS 108-05-04
poly(vinyl alcohol) 87-89% hydrolyzed, 124,000 � 186,000 m.w. (Aldrich catalog no.36,310-3)
CAS 9002-89-5
AOT-75, bis(2-ethylhexyl) sodium sulfosuccinate, 75% w/w solution in water/alcohol (Aerosol OT-75, American Cyanamid Co.)
CAS 577-11-7
AMA-80, dihexyl sodium sulfosuccinate, 80% w/w solution in water/alcohol (Aerosol MA-80, American Cyanamid Co.)
CAS 3006-15-3
potassium persulfate CAS 7727-21-1
sodium hydrogencarbonate CAS 144-55-8
(iii) Before the Practical Vinyl acetate must be filtered through a plug of alumina prior to use to remove inhibitor. As it is a suspected carcinogen with a strong odor, we recommend fixing a pump dispenser set to an appropriate volume to the bottle to minimize the risk of students coming into contact with it. Approximately 40 mL of vinyl acetate should be purified for each pair of students.
The surfactant solution should be prepared at least 24 hours before the experiment, as the surfactants take considerable time to dissolve. 33 g of AMA-80 and AOT-75 should be dissolved in each litre of water. Approximately 30 mL of surfactant solution should be prepared for each pair of students.
Two poly(vinyl alcohol) solutions should also be prepared 24 hours in advance; one 5% solution labeled �Poly(vinyl alcohol) for Latex B� and one 10% solution labeled �Poly(vinyl alcohol) for Latex C�. Approximately 25 mL of poly(vinyl alcohol) solution should be purified for each student.
Before the first practical session, assemble the ingredients for the toolbox. The students will normally use more of everything than you think. Cutting the masonite/wood can be time consuming and should be done well in advance; the cut-up pieces do not need to be of uniform size, nor do they need to have the same roughness on both sides.
Turn on the thermostatted water bath before the session begins to ensure it is hot when required by the students.
(iv) During the Practical SAFETY NOTICE:
Students should wear safety glasses at all times Students should wear latex gloves when handling vinyl acetate.
The importance of immediately discarding the gloves should they become contaminated by vinyl acetate should be impressed on the students. They should also be told to ensure the pump dispenser is pointed away from their bodies. Under no

An introduction to the scientific process: Preparation of poly(vinyl acetate) glue
S.W. Prescott, J. McDonald, C.M. Fellows, R.G. Gilbert 4
circumstances should the vinyl acetate bottle be removed from the fumehood. The surfactant solutions may irritate the skin, and care should be taken in their use.
Session 1 Begin by ensuring students are aware of the chemical hazards of the practical, and that they all have safety glasses. We had the students work in pairs, with each pair preparing one latex recipe. It is probably wise to give a brief introductory lecture, revising free radical polymerization, emulsion polymerization, and adhesion, even if these topics have been covered recently.
Distribute �recipe� sheets for Latex A, B, or C to the students. The three latex recipes include different amounts of poly(vinyl alcohol) to vary the observed adhesive interactions. The recipe sheets provided are written for high school students with very little practical experience.
Once the students have mixed the reagents together, ensure the lid of the bottle is tightly closed and the bottle itself is labelled fully enough that the students will be able to identify it later, noting that permanent marker may come off in the hot-water bath. Place all bottles in the thermostatted bath and begin agitation.
Briefly explain to the students that they will now be designing a procedure for testing the glue they are making. Show them the contents of the toolbox. Divide them up into groups of twelve or less, each under the guidance of a demonstrator/facilitator, obtain a volunteer to keep the notes of the brainstorming session. Try not to allow your body language or facial expressions steer the conversation and try to remain inconspicuous.
It is useful to:
• Ask the students to consider what variables need to be controlled and how they can be controlled in order to obtain reproducible measurements.
• Help students to see any obvious flaws in their proposals and reach a consensus on action to be taken.
• Stay in touch with other demonstrators and gently steer the discussion, if necessary, so that groups do not end up doing exactly the same thing. (If there is only one demonstrator, you may wish to distribute a sheet of starting suggestions and then circulate between groups. )
• Ensure that adequate notes are made of the decisions made of the students. If sufficient time remains and elements of the students� testing apparatus can be assembled beforehand, encourage them to do so.
Session 2 Remove all the latex bottles from the polymerization apparatus before the students arrive. If there have been any failures, suggest the students use a commercial poly(vinyl acetate)-based wood glue instead. Exhort the students to organize themselves � time will be of the essence! Encourage the students to quickly assemble their test strips and place them in an oven at 60 ºC.
While the glue is drying in the oven, the students can assemble their apparatus, fill out the preliminary parts of the report sheet, and review any information that has been provided about previous experiments.
It is important that the glue be allowed to cool after removal from the oven. Five minutes is usually sufficient. Not allowing the glue to cool will lead to temperature

An introduction to the scientific process: Preparation of poly(vinyl acetate) glue
S.W. Prescott, J. McDonald, C.M. Fellows, R.G. Gilbert 5
dependent failures � the hot glue fails cohesively as it is less viscous. Advanced classes may like to include this in their list of variables that need to be controlled.
Ensure that the results the students obtain are recorded. Encourage them to examine the �failures� and note their appearance to judge whether failure was adhesive, cohesive, or structural. The interpretation of the results is influenced by the nature of the failure:
• Structural failures mean that their results will have a correlation with the strength of the substrate used, rather than the actual adhesive strength of the glue.
• Adhesive failures mean that their explanation for any differences between the three glues should relate to binding of the glue with the wood.
• Cohesive failures mean their explanation should focus on the chemical and physical effects of adding poly(vinyl alcohol) on the strength of the glue itself.
(v) After the Practical Tabulate the results obtained by the students and lead them in a discussion to see if any conclusions can be drawn. Have the group prepare a list of suggestions for the next group of students.
• Which variables may not have been considered?
• Is the sample size sufficient to make any meaningful comparisons between latexes A, B, and C?
• What unforeseen practical difficulties may suggest improvements in the testing methods?
The instructor should bear in mind the reasons poly(vinyl alcohol) is added to commercial wood glues:
• As a steric stabiliser � as a surfactant, it might be expected to give smaller particle sizes. It may be interesting to change the relative surfactant:poly(vinyl aclohol) concentration and see what happens.
• As a plasitcisizer (glass transition temperature, Tg, modifier) � it lowers the glass transition temperature of poly(vinyl acetate), giving better film formation. (Tg = 30 °C for poly(vinyl acetate))
• As a rheology modifier � non-Newtonian fluid properties can be imparted with appropriate molecular weights, degrees of hydrolysis, and blockiness of hydrolysis give high viscosity at low shear and low viscosity at high shear, an ideal set of properties for adhesive application.
• In order to provide hydroxyl groups as targets for crosslinking agents � this is not done with �supermarket� glues, but with industrial and �two-pack� preparations
Clean up, ensuring especially that the vinyl acetate is disposed of in accordance with local regulations. Latex waste should not be disposed of in the sink, but collected in a waste bottle for appropriate disposal.
(vi) Troubleshooting the Practical The design of the practical allows experimentally inexperienced students to undertake the practical and obtain meaningful results with a high degree of success. The following difficulties were encountered with some groups and are easily worked around.

An introduction to the scientific process: Preparation of poly(vinyl acetate) glue
S.W. Prescott, J. McDonald, C.M. Fellows, R.G. Gilbert 6
Problem: Solution:
• reaction lost: cap loose on reaction bottle, ingredient missing, coagulates
• give the students a sample of a commercial poly(vinyl acetate)-based wood glue for their testing
• glue fails cohesively and easily
• make sure the samples were cooled before testing
• glue cannot be broken with testing apparatus
• use smaller amounts of glue in the testing apparatus
• students� glue stronger than commercial glue
• NOT a problem! commercial glues are made to give economic efficiency (i.e. strong enough) not necessarily the maximum strength
• one student dominates group discussion
• facilitator should actively seek input from all students
• groups do not share information well between sessions
• set up a formalized reporting system whereby information is shared between groups, e.g. a sheet where students give details of their apparatus and suggested improvements.

An introduction to the scientific process: Preparation of poly(vinyl acetate) glue
S.W. Prescott, J. McDonald, C.M. Fellows, R.G. Gilbert 7
Instructions for Latex Preparation: LATEX A Equipment: Balance Beakers (50 mL) Measuring cylinders (50 mL, 10 mL) Glass funnel Stirring rod/spatula Polymerization bottle (100 mL) Thermostatted agitator Materials: Vinyl acetate*� Surfactant solution (AMA*, AOT*) Sodium hydrogencarbonate Potassium persulfate* Deionized/Distilled Water * IRRITANTS: avoid contact with skin and eyes ��TOXIC: avoid exposure � use in fumehood with gloves
Safety goggles must be worn at all times in the laboratory Procedure: 1. Into a 50 mL beaker weigh out
• 0.12 g Sodium hydrogen carbonate (Buffer) Into another 50 mL beaker weigh out
• 0.12 g Potassium persulfate (Initiator) Avoid cross-contamination by cleaning the spatula between weighings.
Remove from balance and add distilled water (5 mL) to each beaker, stir and leave aside.
2. Into the polymerization bottle, using the 50 mL measuring cylinder
and the funnel to avoid spillage add; • Surfactant solution (20 mL) • Water (40 mL)
3. Into the polymerization bottle add 2 aliquots of vinyl acetate (2 ×
14.5 mL = 29 mL). Tighten the cap and shake for 20 seconds. 4. Pour the initiator and buffer solution (made previously in the 50 mL
beaker) into the polymerization bottle, firmly tighten the cap and label the bottle with a marker including your name, date, and latex preparation. See a demonstrator to place your bottle in the thermostatted agitator for 15 hours at 60o C.
An introduction to the scientific process: Preparation of poly(vinyl acetate) glue
S.W. Prescott, J. McDonald, C.M. Fellows, R.G. Gilbert 8
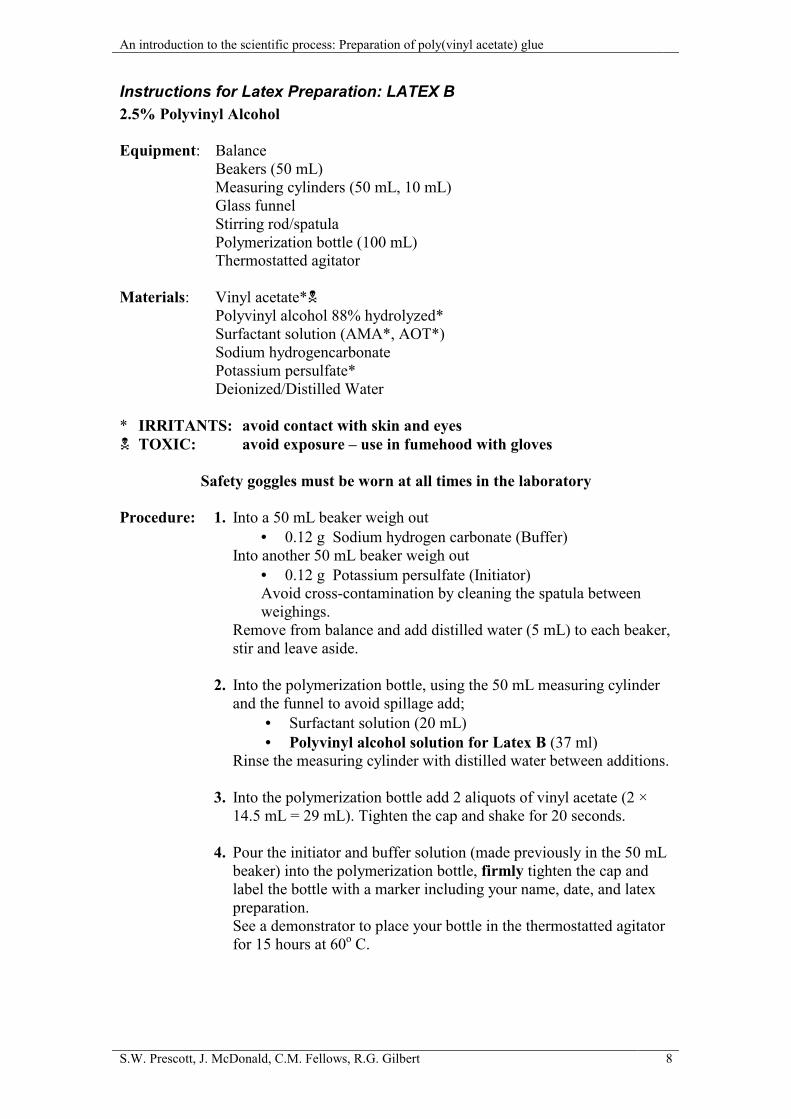
Instructions for Latex Preparation: LATEX B 2.5% Polyvinyl Alcohol Equipment: Balance Beakers (50 mL) Measuring cylinders (50 mL, 10 mL) Glass funnel Stirring rod/spatula Polymerization bottle (100 mL) Thermostatted agitator Materials: Vinyl acetate*� � � Polyvinyl alcohol 88% hydrolyzed* Surfactant solution (AMA*, AOT*) Sodium hydrogencarbonate Potassium persulfate* Deionized/Distilled Water * IRRITANTS: avoid contact with skin and eyes ��TOXIC: avoid exposure � use in fumehood with gloves
Safety goggles must be worn at all times in the laboratory Procedure: 1. Into a 50 mL beaker weigh out
• 0.12 g Sodium hydrogen carbonate (Buffer) Into another 50 mL beaker weigh out
• 0.12 g Potassium persulfate (Initiator) Avoid cross-contamination by cleaning the spatula between weighings.
Remove from balance and add distilled water (5 mL) to each beaker, stir and leave aside.
2. Into the polymerization bottle, using the 50 mL measuring cylinder
and the funnel to avoid spillage add; • Surfactant solution (20 mL) • Polyvinyl alcohol solution for Latex B (37 ml)
Rinse the measuring cylinder with distilled water between additions.
3. Into the polymerization bottle add 2 aliquots of vinyl acetate (2 × 14.5 mL = 29 mL). Tighten the cap and shake for 20 seconds.
4. Pour the initiator and buffer solution (made previously in the 50 mL
beaker) into the polymerization bottle, firmly tighten the cap and label the bottle with a marker including your name, date, and latex preparation. See a demonstrator to place your bottle in the thermostatted agitator for 15 hours at 60o C.

An introduction to the scientific process: Preparation of poly(vinyl acetate) glue
S.W. Prescott, J. McDonald, C.M. Fellows, R.G. Gilbert 9
Instructions for Latex Preparation: LATEX C 5% Polyvinyl Alcohol Equipment: Balance Beakers (50 mL) Measuring cylinders (50 mL, 10 mL) Glass funnel Stirring rod/spatula Polymerization bottle (100 mL) Thermostatted agitator Materials: Vinyl acetate*��� � Polyvinyl alcohol 88% hydrolyzed* Surfactant solution (AMA*, AOT*) Sodium hydrogencarbonate Potassium persulfate* Deionized/Distilled Water * IRRITANTS: avoid contact with skin and eyes ��TOXIC: avoid exposure � use in fumehood with gloves
Safety goggles must be worn at all times in the laboratory Procedure: 1. Into a 50 mL beaker weigh out
• 0.12 g Sodium hydrogen carbonate (Buffer) Into another 50 mL beaker weigh out
• 0.12 g Potassium persulfate (Initiator) Avoid cross-contamination by cleaning the spatula between weighings.
Remove from balance and add distilled water (5 mL) to each beaker, stir and leave aside.
2. Into the polymerization bottle, using the 50 mL measuring cylinder
and the funnel to avoid spillage add; • Surfactant solution (20 mL) • Polyvinyl alcohol solution for Latex C (37 ml)
Rinse the measuring cylinder with distilled water between additions.
3. Into the polymerization bottle add 2 aliquots of vinyl acetate (2 × 14.5 mL = 29 mL). Tighten the cap and shake for 20 seconds.
4. Pour the initiator and buffer solution (made previously in the 50 mL
beaker) into the polymerization bottle, firmly tighten the cap and label the bottle with a marker including your name, date, and latex preparation. See a demonstrator to place your bottle in the thermostatted agitator for 15 hours at 60o C.

An introduction to the scientific process: Preparation of poly(vinyl acetate) glue
S.W. Prescott, J. McDonald, C.M. Fellows, R.G. Gilbert 10
Adhesive Test Report Sheet
Latex preparation: Names: Date: Points to consider: Application method Comparison with other groups Reproducibility Adhesive failure, cohesive failure, or structural failure? Description of test: How did you construct and carry out the test to give reliable and meaning full results? Results: Record your observations. Can you quantify the results to make a more accurate conclusion? Comparison with other latex preparations: Here you should compare and correlate the results obtained from your collaboration with other groups with the same and different latex preparations. Problems/ Sources of error: What problems were associated with the measurement techniques? How did these problems effect correlation with other groups and latex preparations? Conclusions: Write a brief summary of the experiment and test results. Do you think the experiment gave reliable information on the adhesive properties of the latices? If not, why? What do you think are important points to consider when trying to obtain reliable information from any experiment?

An introduction to the scientific process: Preparation of poly(vinyl acetate) glue
S.W. Prescott, J. McDonald, C.M. Fellows, R.G. Gilbert 11
Sample Results Set Obtained by Students at the International Science School, July 1999 7/7/99 �Pull-away� Test 1
Masonite on Masonite, 2 x 2 cm area, 20 minutes drying, 5 minutes cooling. Force to pull pieces apart measured with fish scales. The main problem encountered was that the area covered by the glue was found to be far from constant, giving irreproducible results.
"Pull-away" Test 1, 7/7/99
0
50
100
150
200
250
Latex A Latex B Latex C Aquadhere
Forc
e to
bre
ak b
ond
(N)
Did not break
F (Fish Scales or Hanging Bucket)

An introduction to the scientific process: Preparation of poly(vinyl acetate) glue
S.W. Prescott, J. McDonald, C.M. Fellows, R.G. Gilbert 12
�Pull-away� Test 2
Masonite on Masonite, 1 x 1 cm area, 20 minutes drying, greater than 10 minutes cooling. Force to pull pieces apart was measured by adding 100 ml aliquots of water to hanging bucket. Pull-away Test 6 was similar. There are limited results for both tests, due to (1) In the case of Test 2, most were tested without cooling (2) In the case of Test 6, many latexes did not stick (probably due to coagulation of latex overnight?)
"Pull-away" Tests 2 and 6, 7/7/99 and 15/7/99
0
20
40
60
80
100
120
140
160
Latex A Latex B Latex C
Forc
e to
bre
ak b
ond
(N)

An introduction to the scientific process: Preparation of poly(vinyl acetate) glue
S.W. Prescott, J. McDonald, C.M. Fellows, R.G. Gilbert 13
8/7/99 Shear Test 1
Masonite on Masonite, 1.5 x 1.5 cm area, 20 minutes drying. Approximately 10 minutes cooling. Force was measured by adding 100 ml aliquots of water to hanging bucket. All the results shown thus far are for �smooth-smooth� masonite joins. Attempts to glue masonite together by the rough sides were unsuccessful. Due to equipment problems on the night of the 7th-8th, the latexes were insufficiently agitated and a product was obtained that was too runny, giving poor adhesion.
Shear Test 1, 7/7/99
0
10
20
30
40
50
60
70
80
90
100
Latex A Latex B Latex C
Forc
e to
bre
ak b
ond
(N)
F

An introduction to the scientific process: Preparation of poly(vinyl acetate) glue
S.W. Prescott, J. McDonald, C.M. Fellows, R.G. Gilbert 14
9/7/99 Shear Test 2
Masonite on Masonite (smooth sides), 0.3 grams of glue, 20 minutes drying. Approximately 10 minutes cooling. Force was measured by adding 100 ml aliquots of water to hanging bucket. The other group attempted a �lever� test where the pieces of masonite were levered apart by a hanging bucket. To ensure that an even area was covered, a piece of cardboard soaked in latex was used to glue the pieces of masonite together. Unfortunately, structural failure of the cardboard was seen in every case (another tragic case of bad demonstrator advice? You be the judges.)
Shear Test 2, 9/7/99
0
50
100
150
Latex C
Forc
e to
bre
ak b
ond
(N)
Did not break

An introduction to the scientific process: Preparation of poly(vinyl acetate) glue
S.W. Prescott, J. McDonald, C.M. Fellows, R.G. Gilbert 15
13/7/99 Shear Test 3
Masonite on Masonite (smooth sides), a measured quantity of glue painted on to lightweight fabric squares of about 1.5 x 1.5 cm used to stick the pieces together. 20 minutes drying. Approximately 10 minutes cooling. Force was measured by continuously pouring water into a hanging bucket. As you can see from the plot, with this test the main problem was that the pieces of wood stuck together too well � we cannot differentiate between glues when neither bond can be broken.
Shear Test 3, 13/7/99
0
10
20
30
40
50
60
70
80
90
100
Latex A Latex B Latex C Aquadhere
Forc
e to
bre
ak b
ond
(N)
Did not break Did not break

An introduction to the scientific process: Preparation of poly(vinyl acetate) glue
S.W. Prescott, J. McDonald, C.M. Fellows, R.G. Gilbert 16
�Pull-away� Test 3
Masonite on Masonite (rough sides), sticky tape stencil used to mark out region on which glue was applied. Force was measured by continuously pouring water into a hanging bucket. The rough side was again observed to �soak up� the glue, giving poorer adhesion and less reproducible results.
"Pull-away" Test 3, 13/7/99
0
1
2
3
4
5
6
Latex A Latex B Latex C AquadhereLatex
Forc
e to
bre
ak b
ond
(N)

An introduction to the scientific process: Preparation of poly(vinyl acetate) glue
S.W. Prescott, J. McDonald, C.M. Fellows, R.G. Gilbert 17
14/7/99 Shear Test 4 �Twist-Shear�
Masonite on Masonite (smooth sides), essentially as Shear Test Three. Instead of applying a direct shear, the two pieces of masonite were placed at 90 degrees to one another and the force applied magnified by a lever effect. With this test, a value for the strength of each glue could be found without the use of huge weights; assemblies glued with Latexes B and C gave way at easily measurable values.
Shear Test 4, 14/7/99
0
10
20
30
40
50
60
Latex A Latex B Latex C Aquadhere
Forc
e to
bre
ak b
ond
(N)
F

An introduction to the scientific process: Preparation of poly(vinyl acetate) glue
S.W. Prescott, J. McDonald, C.M. Fellows, R.G. Gilbert 18
Shear Test 5
Masonite on Masonite (smooth sides), essentially as Shear Test Three. 1 x 1 cm squares of fabric were used, and a three minute �setting time� was employed before pieces of masonite were placed together It was planned to do the test both with and without fabric; the only result reported without fabric suggests that the presence of fabric improves the strength of the bond formed. Again, it can be seen that the masonite stuck together too(?) well, making it difficult to differentiate between effectiveness of B, C, and Aquadhere.
Shear Test 5, 14/7/99
0
20
40
60
80
100
120
140
Latex A Latex B Latex C Aquadhere
Forc
e re
quire
d to
bre
ak b
ond
(N)
Did not break Did not break

An introduction to the scientific process: Preparation of poly(vinyl acetate) glue
S.W. Prescott, J. McDonald, C.M. Fellows, R.G. Gilbert 19
�Pull-away� Test 4
Masonite on Masonite (smooth sides), with a force applied horizontally through a pulley system. Assemblies were made of several pieces of wood in series, glued together with Latexes A, B, and C, so that their relative strength could readily be gauged.
"Pull-away"Test 4, 15/7/99
0
10
20
30
40
50
60
Latex A Latex B Latex C Aquadhere
Forc
e to
bre
ak b
ond
(N)

An introduction to the scientific process: Preparation of poly(vinyl acetate) glue
S.W. Prescott, J. McDonald, C.M. Fellows, R.G. Gilbert 20
15/7/99 �Pull-away� Test 5
Three pieces of wood were glued together with two different glues and a force applied simultaneously by adding water continuously to a vessel, which was weighed using fish scales once the glue gave way. In one test, B was found to be weaker than Aquadhere; in another, it was found to be stronger. The problems seen with latexes not sticking on 15/7/99 were probably due to the newly repaired Bottle Polymeriser agitating the polymerisation bottles to too great an extent and bringing on Shear-Induced Coagulation, judging from the appearance of some of the poorly performing latices. �Pull-away� Test 6 The results from this have been combined with those for �Pull-away� Test 2.
"Pull-away" Test 5, 15/7/99
0
10
20
30
40
50
60
Latex A Latex B Latex C Aquadhere
Forc
e to
bre
ak b
ond
(N)

An introduction to the scientific process: Preparation of poly(vinyl acetate) glue
S.W. Prescott, J. McDonald, C.M. Fellows, R.G. Gilbert 21
Peel Test
Fabric was glued to masonite and suspended vertically. The hook of the fish scales was put through a flap of fabric reinforced with masking tape and a bucket suspended from the other end; a gradually increasing force was then applied by adding water until the fabric pulled completely away from the masonite surface.
Peel Test, 15/7/99
0
5
10
15
20
25
30
Latex A Latex B Latex C Aquadhere
Forc
e to
bre
ak b
ond
(N)
An introduction to the scientific process: Preparation of poly(vinyl acetate) glue
S.W. Prescott, J. McDonald, C.M. Fellows, R.G. Gilbert 22
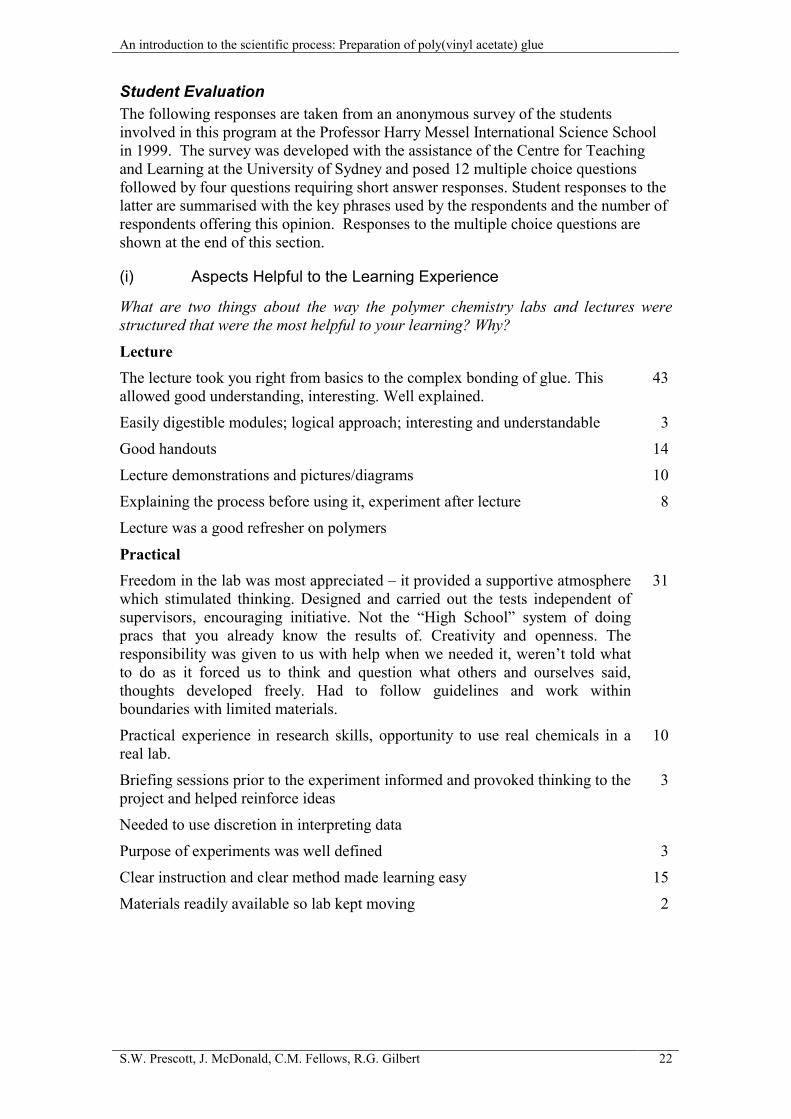
Student Evaluation The following responses are taken from an anonymous survey of the students involved in this program at the Professor Harry Messel International Science School in 1999. The survey was developed with the assistance of the Centre for Teaching and Learning at the University of Sydney and posed 12 multiple choice questions followed by four questions requiring short answer responses. Student responses to the latter are summarised with the key phrases used by the respondents and the number of respondents offering this opinion. Responses to the multiple choice questions are shown at the end of this section.
(i) Aspects Helpful to the Learning Experience
What are two things about the way the polymer chemistry labs and lectures were structured that were the most helpful to your learning? Why?
Lecture The lecture took you right from basics to the complex bonding of glue. This allowed good understanding, interesting. Well explained.
43
Easily digestible modules; logical approach; interesting and understandable 3
Good handouts 14
Lecture demonstrations and pictures/diagrams 10
Explaining the process before using it, experiment after lecture 8
Lecture was a good refresher on polymers
Practical Freedom in the lab was most appreciated � it provided a supportive atmosphere which stimulated thinking. Designed and carried out the tests independent of supervisors, encouraging initiative. Not the �High School� system of doing pracs that you already know the results of. Creativity and openness. The responsibility was given to us with help when we needed it, weren�t told what to do as it forced us to think and question what others and ourselves said, thoughts developed freely. Had to follow guidelines and work within boundaries with limited materials.
31
Practical experience in research skills, opportunity to use real chemicals in a real lab.
10
Briefing sessions prior to the experiment informed and provoked thinking to the project and helped reinforce ideas
3
Needed to use discretion in interpreting data
Purpose of experiments was well defined 3
Clear instruction and clear method made learning easy 15
Materials readily available so lab kept moving 2
An introduction to the scientific process: Preparation of poly(vinyl acetate) glue
S.W. Prescott, J. McDonald, C.M. Fellows, R.G. Gilbert 23
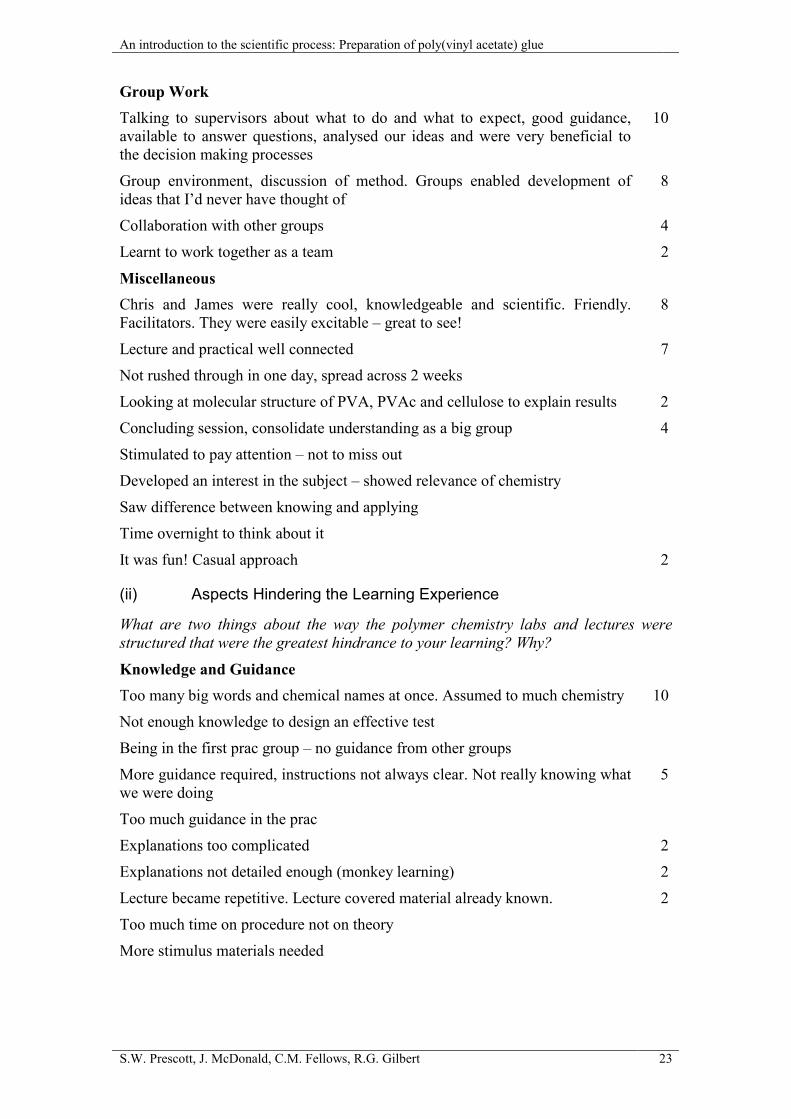
Group Work Talking to supervisors about what to do and what to expect, good guidance, available to answer questions, analysed our ideas and were very beneficial to the decision making processes
10
Group environment, discussion of method. Groups enabled development of ideas that I�d never have thought of
8
Collaboration with other groups 4
Learnt to work together as a team 2
Miscellaneous Chris and James were really cool, knowledgeable and scientific. Friendly. Facilitators. They were easily excitable � great to see!
8
Lecture and practical well connected 7
Not rushed through in one day, spread across 2 weeks
Looking at molecular structure of PVA, PVAc and cellulose to explain results 2
Concluding session, consolidate understanding as a big group 4
Stimulated to pay attention � not to miss out
Developed an interest in the subject � showed relevance of chemistry
Saw difference between knowing and applying
Time overnight to think about it
It was fun! Casual approach 2
(ii) Aspects Hindering the Learning Experience
What are two things about the way the polymer chemistry labs and lectures were structured that were the greatest hindrance to your learning? Why?
Knowledge and Guidance Too many big words and chemical names at once. Assumed to much chemistry 10
Not enough knowledge to design an effective test
Being in the first prac group � no guidance from other groups
More guidance required, instructions not always clear. Not really knowing what we were doing
5
Too much guidance in the prac
Explanations too complicated 2
Explanations not detailed enough (monkey learning) 2
Lecture became repetitive. Lecture covered material already known. 2
Too much time on procedure not on theory
More stimulus materials needed

An introduction to the scientific process: Preparation of poly(vinyl acetate) glue
S.W. Prescott, J. McDonald, C.M. Fellows, R.G. Gilbert 24
Groups and Session Structure Groups too big for the tests, not all contributed (12 in each group) 21
Older/more experience people dominated groups 4
Time too short for planning and testing 16
Not enough trial and improvement, not enough communication between groups, more feedback from previous groups required (a structured link)
20
Long time between lecture and lab or lab and wrap-up 7
Concluding session too structured and too short
See results first hand, not just hear about them in concluding session
Materials Not high-tech equipment, just backyard tools 3
Better materials for testing
Dirty glassware, faulty machinery 8
The instruments were poorly calibrated and the buckets were too small
Different/unfamiliar instruments and equipment
Became hard to find equipment in the mess
Not enough different bits of equipment to perform tests (esp force measurements)
Miscellaneous Language barrier 11
Too many variables to analyse results effectively
Irreproducible results 6
No oral explanation of what to do was given, only on sheet 2
No visuals (explosions) 2
(iii) Suggested Changes
What could be changed to make the labs and lectures a more effective learning experience for students?
Lecture Lecture at a faster pace
Lecture at a slower pace
More simplified explanations
More detailed explanations, diagrams of H-bonding 3
A more experienced lecturer
Explosions, vivid colour changes

An introduction to the scientific process: Preparation of poly(vinyl acetate) glue
S.W. Prescott, J. McDonald, C.M. Fellows, R.G. Gilbert 25
Practical Reduce the waiting around (give lecture info while waiting for stages in prac to finish). Use lab time more efficiently
4
More time for pracs, repetition of expts 5
Pracs too long
More information about the motivations for doing the experiments 2
Greater variation in glue strengths to get wider variety in results
More variety in the materials (and more of them) in the toy box eg thicker blocks
4
More polymer types
A short bridging session (10min) before start of prac to link back to lecture 3
Should be no specified amounts for polymerisation (stifles initiative) 2
Provide a list of possible problems with adhesive tests
Pose more questions or offer suggestions when students get stuck
Warn about adding excess surfactants
Develop a standard test-rig
Make sure toy-box items come back to the toy box
Session Structure Use a structured sheet for reporting to next group: what the test was and what should be changed.
Make more difficult 2
Distribute notes on polymers before the science school
More labs, more lectures on polymer chem
Concluding session: smaller discussion groups or small groups and large group 2
(iv) General Comments
This was by far the best practical in the ISS99.
New topic of polymer chemistry welcome! Not much done at school.
I must strongly congratulate the way that the lab was carried out as it promoted thinking and discussion within the group. At no time were we told what to do or what wouldn�t work, something that we will be faced with if we take on a scientific career.
Cool!

An introduction to the scientific process: Preparation of poly(vinyl acetate) glue
S.W. Prescott, J. McDonald, C.M. Fellows, R.G. Gilbert 26
(v) Multiple Choice Questions
1. The lectures and practicals developed my interest in the subject
0
20
40
60
80
stronglyagree
agree neutral disagree stronglydisagree
2. The material presented in the lectures and practicals was too difficult
0
20
40
60
80
stronglyagree
agree neutral disagree stronglydisagree
3. The time allotted to the experiments was too short
0
20
40
60
80
stronglyagree
agree neutral disagree stronglydisagree

An introduction to the scientific process: Preparation of poly(vinyl acetate) glue
S.W. Prescott, J. McDonald, C.M. Fellows, R.G. Gilbert 27
4. The necessary equipment and materials were readily available
0
20
40
60
80
stronglyagree
agree neutral disagree stronglydisagree
5. The lab work relied on my own initiative to develop the experiments
0
20
40
60
80
stronglyagree
agree neutral disagree stronglydisagree
6. Overall as a learning experience I would rate these sessions as worthwhile
0
20
40
60
80
stronglyagree
agree neutral disagree stronglydisagree

An introduction to the scientific process: Preparation of poly(vinyl acetate) glue
S.W. Prescott, J. McDonald, C.M. Fellows, R.G. Gilbert 28
7. The lab work trained me to interpret data
0
20
40
60
80
stronglyagree
agree neutral disagree stronglydisagree
8. The lab work assumed too many basic laboratory skills
0
20
40
60
80
stronglyagree
agree neutral disagree stronglydisagree
9. The lab work was relevant to the material presented in the lectures
0
20
40
60
80
stronglyagree
agree neutral disagree stronglydisagree

An introduction to the scientific process: Preparation of poly(vinyl acetate) glue
S.W. Prescott, J. McDonald, C.M. Fellows, R.G. Gilbert 29
10. The purpose of the experiment was clear to me
0
20
40
60
80
stronglyagree
agree neutral disagree stronglydisagree
11. The demonstrators offered effective supervision and guidance
0
20
40
60
80
stronglyagree
agree neutral disagree stronglydisagree
12. Experimental procedures were clearly explained in the lab notes
0
20
40
60
80
stronglyagree
agree neutral disagree stronglydisagree