Embed Size (px)
Citation preview
Android File System Babylon University , IT College , SW Dep. , Android
Assist. Lecturer : Wadhah R. Baiee (2014)
Ref: Wei-Meng Lee, “BEGINNING ANDROID™ 4 APPLICATION
DEVELOPMENT “, Ch6 , John Wiley & Sons , 2012
File System
Most of the Android user are using their
Android phone just for calls, SMS, browsing
and basic apps, But form the development
prospective, we should know about Android
internal structure.
Android uses several partitions (like boot,
system, recovery , data etc) to organize files
and folders on the device just like Windows
OS.
File System
Each of these partitions has it’s own
functionality, But most of us don’t know the
significance of each partition and its contents.
In this article, we will take you on a tour of
Android partitions. So lets start the android file
system tutorial.
File System
There are mainly 6 partitions in Android
phones, tablets and other Android devices.
Note that there might be some other partitions
available, it differs from Model to Model. But
logically below 6 partitions can be found in
any Android devices.
File System
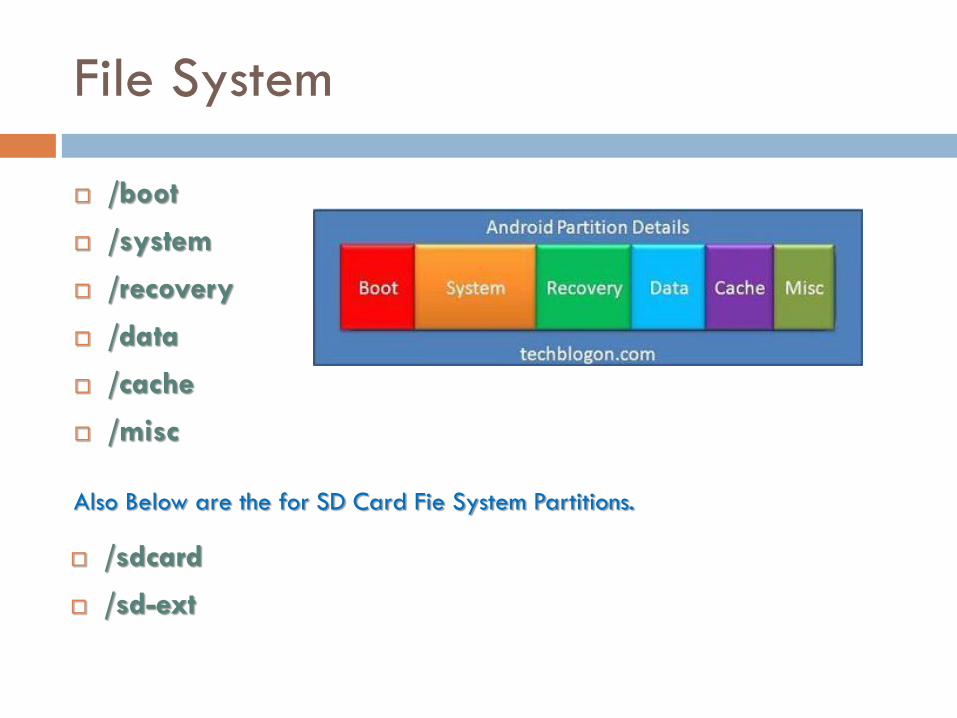
/boot
/system
/recovery
/data
/cache
/misc
Also Below are the for SD Card Fie System Partitions.
/sdcard
/sd-ext
File System
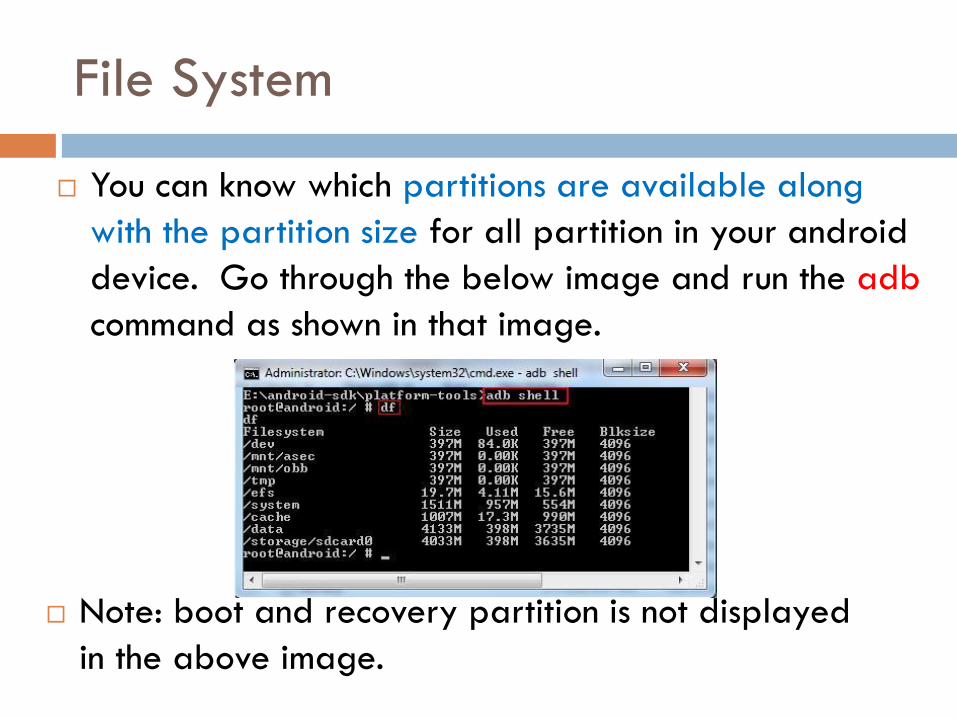
You can know which partitions are available along
with the partition size for all partition in your android
device. Go through the below image and run the adb
command as shown in that image.
Note: boot and recovery partition is not displayed
in the above image.
/boot
This is the boot partition of your Android device, as
the name suggests.
It includes the android kernel and the ramdisk.
The device will not boot without this partition.
Wiping this partition from recovery should only be
done if absolutely required and once done, the
device must NOT be rebooted before installing a new
one, which can be done by installing a ROM that
includes a /boot partition.
/system
As the name suggests, this partition contains the entire
Android OS.
This includes the Android GUI and all the system
applications that come pre-installed on the device.
Wiping this partition will remove Android from the
device without rendering it unbootable, and you will
still be able to put the phone into recovery or
bootloader mode to install a new ROM.
/recovery
This is specially designed for backup.
The recovery partition can be considered as an
alternative boot partition, that lets the device
boot into a recovery console for performing
advanced recovery and maintenance operations
on it.
/data
It is called userdata partition.
This partition contains the user’s data like your
contacts, sms, settings and all android
applications that you have installed.
While you are doing factory reset on your
device, this partition will wipe out, Then your
device will be in the state, when you use for he
first time, or the way it was after the last official
or custom ROM installation.
/cache
This is the partition where Android stores
frequently accessed data and app components.
Wiping the cache doesn’t effect your personal
data but simply gets rid of the existing data
there, which gets automatically rebuilt as you
continue using the device.
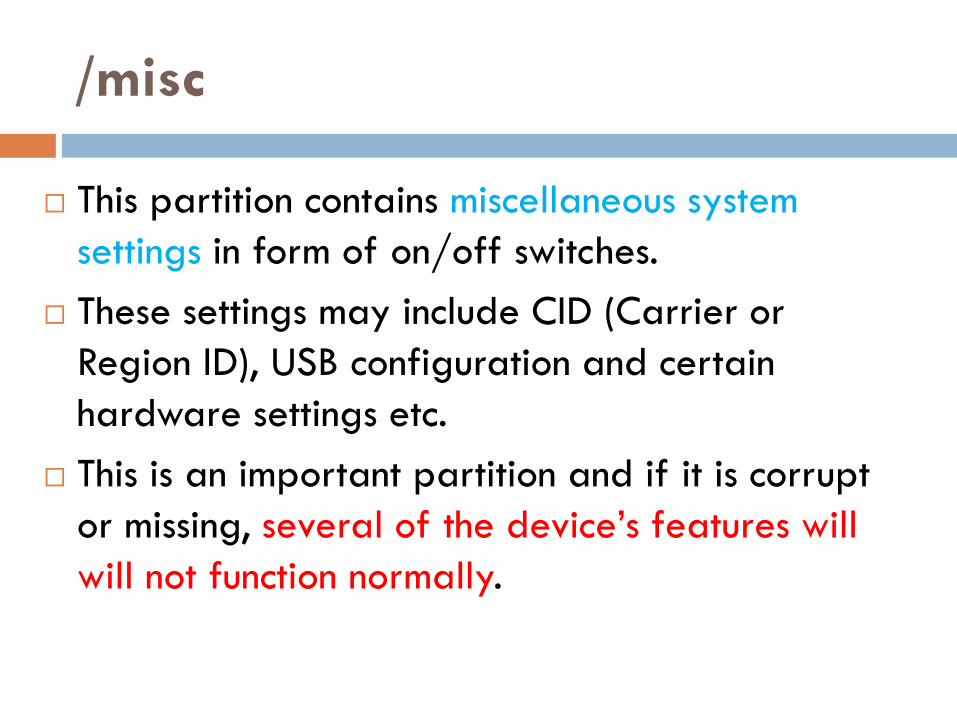
/misc
This partition contains miscellaneous system
settings in form of on/off switches.
These settings may include CID (Carrier or
Region ID), USB configuration and certain
hardware settings etc.
This is an important partition and if it is corrupt
or missing, several of the device’s features will
will not function normally.
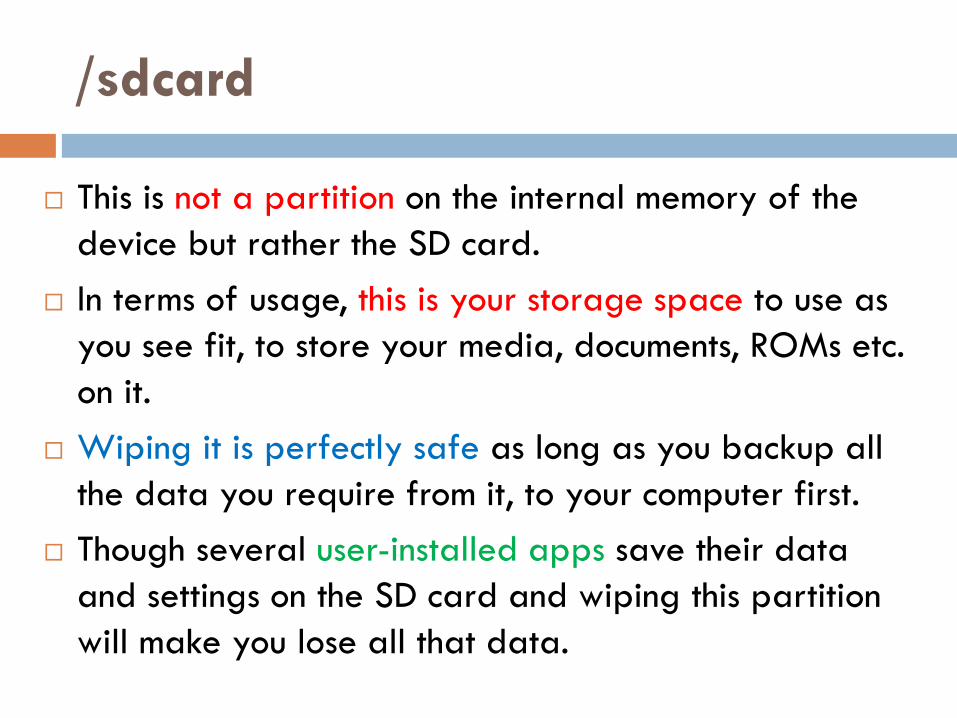
/sdcard
This is not a partition on the internal memory of the
device but rather the SD card.
In terms of usage, this is your storage space to use as
you see fit, to store your media, documents, ROMs etc.
on it.
Wiping it is perfectly safe as long as you backup all
the data you require from it, to your computer first.
Though several user-installed apps save their data
and settings on the SD card and wiping this partition
will make you lose all that data.
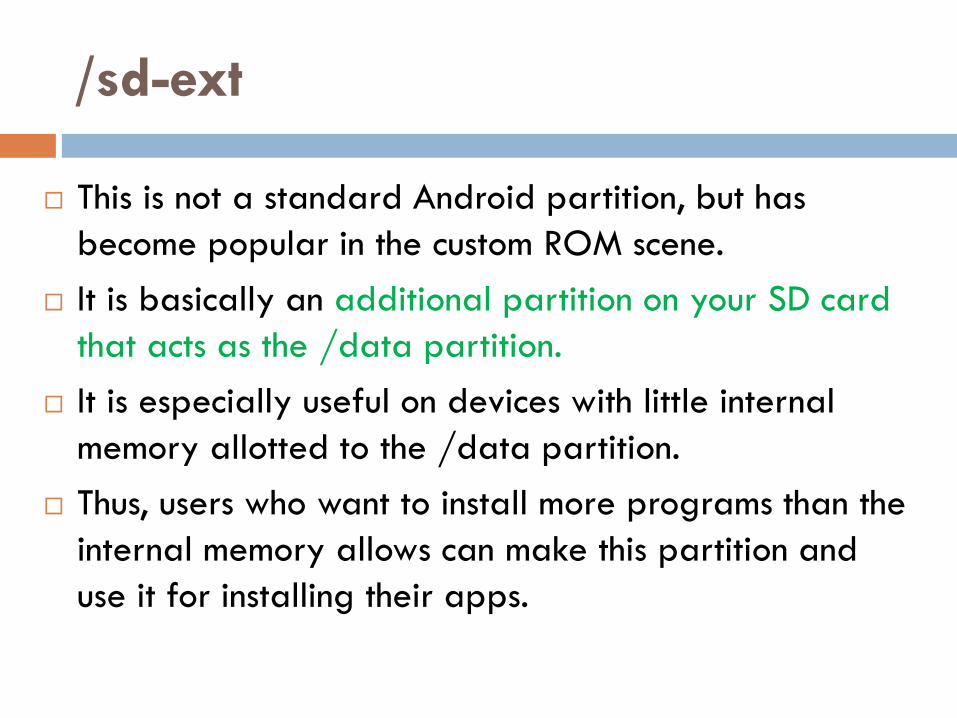
/sd-ext
This is not a standard Android partition, but has
become popular in the custom ROM scene.
It is basically an additional partition on your SD card
that acts as the /data partition.
It is especially useful on devices with little internal
memory allotted to the /data partition.
Thus, users who want to install more programs than the
internal memory allows can make this partition and
use it for installing their apps.
File System
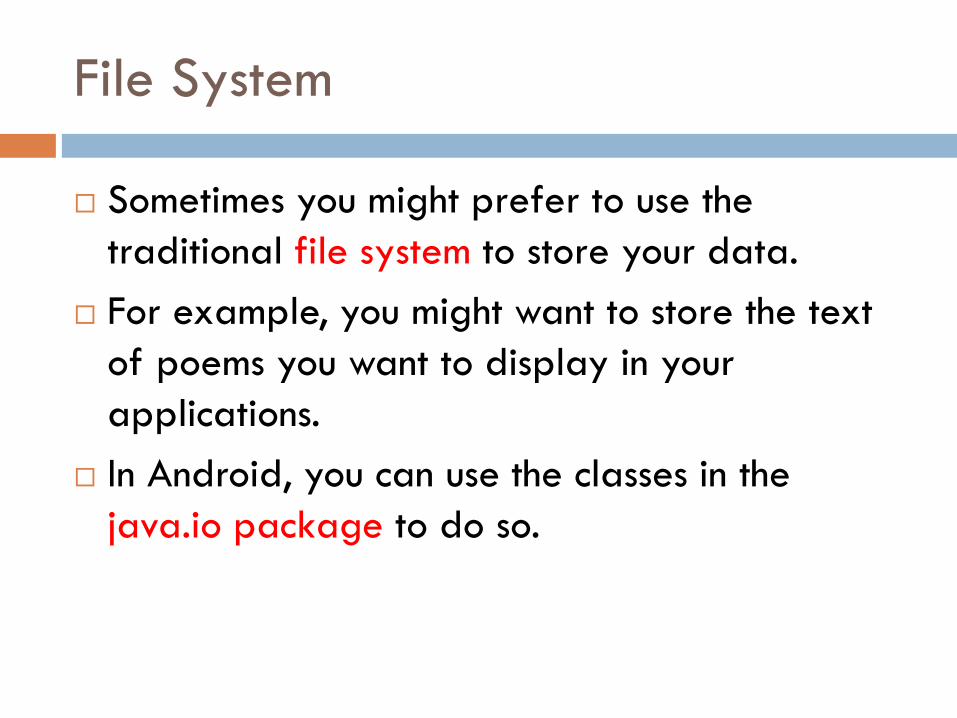
Sometimes you might prefer to use the
traditional file system to store your data.
For example, you might want to store the text
of poems you want to display in your
applications.
In Android, you can use the classes in the
java.io package to do so.
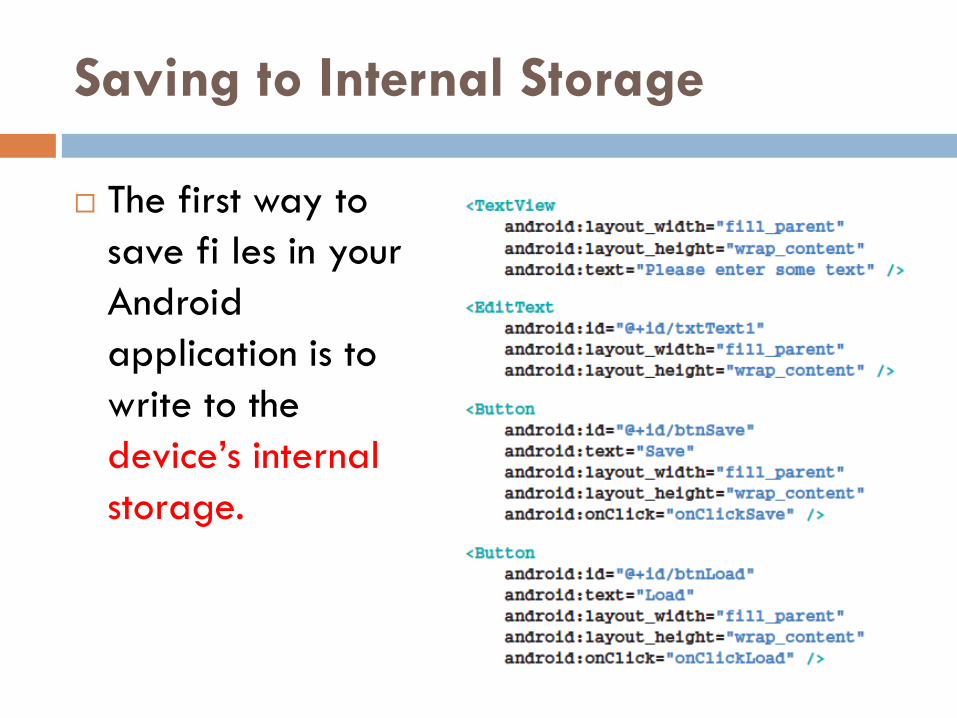
Saving to Internal Storage
The first way to
save fi les in your
Android
application is to
write to the
device’s internal
storage.
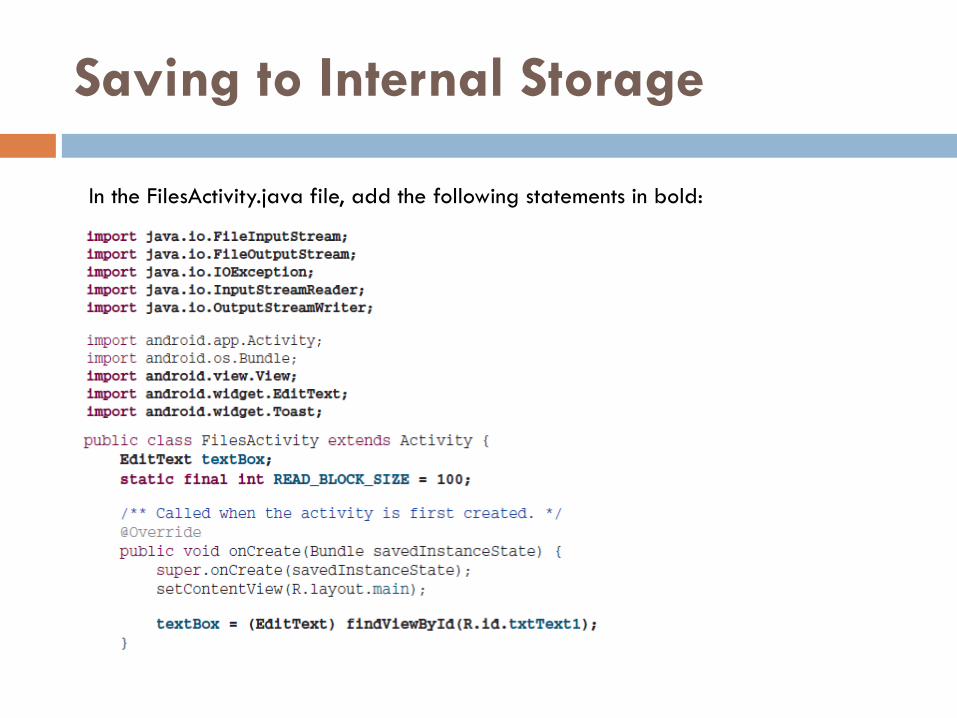
Saving to Internal Storage
In the FilesActivity.java file, add the following statements in bold:
Saving to Internal Storage
Saving to Internal Storage
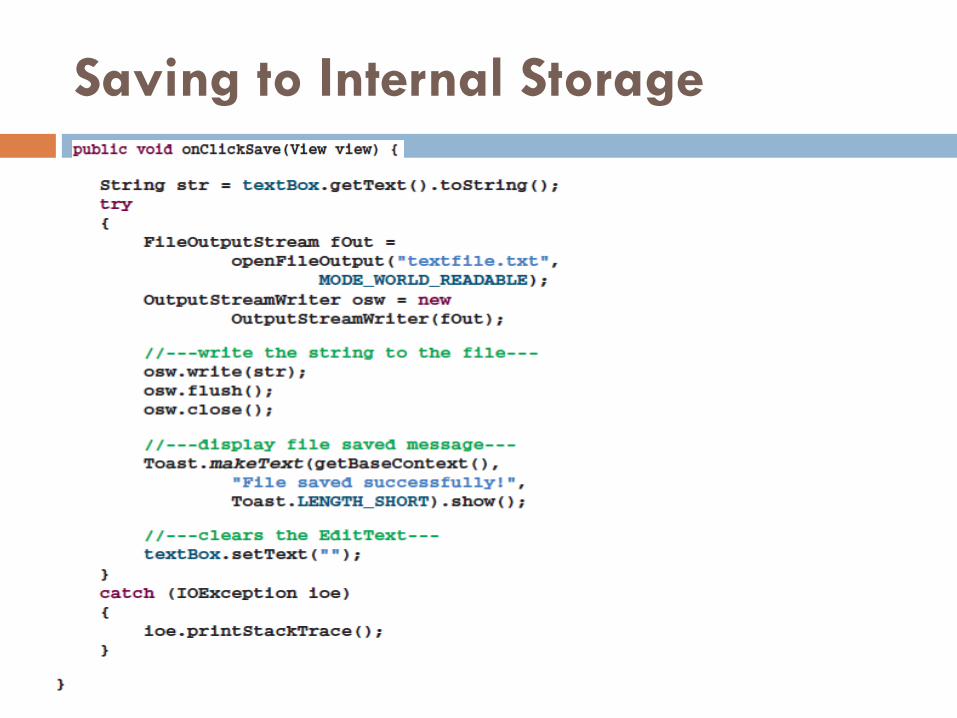
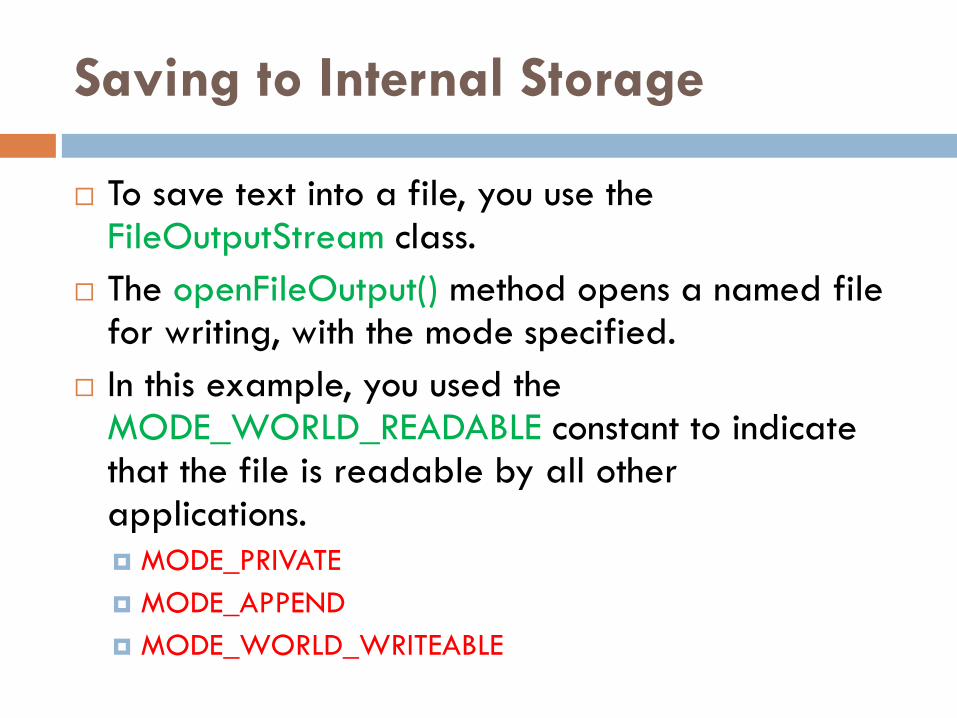
To save text into a file, you use the FileOutputStream class.
The openFileOutput() method opens a named file for writing, with the mode specified.
In this example, you used the MODE_WORLD_READABLE constant to indicate that the file is readable by all other applications.
MODE_PRIVATE
MODE_APPEND
MODE_WORLD_WRITEABLE
Saving to Internal Storage
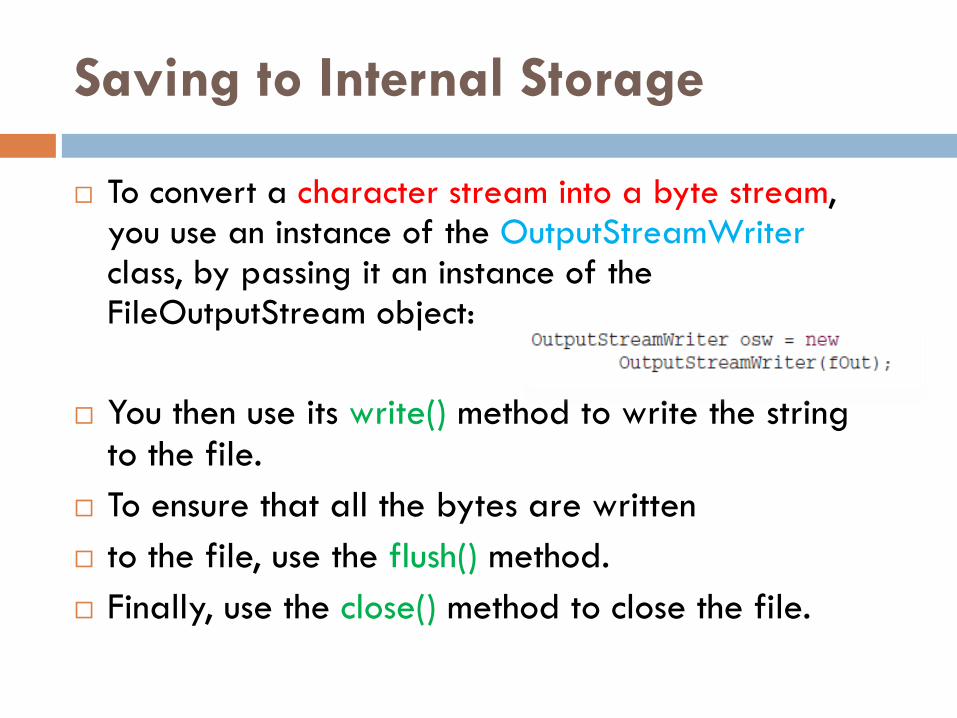
To convert a character stream into a byte stream, you use an instance of the OutputStreamWriter class, by passing it an instance of the FileOutputStream object:
You then use its write() method to write the string to the file.
To ensure that all the bytes are written
to the file, use the flush() method.
Finally, use the close() method to close the file.
Saving to Internal Storage
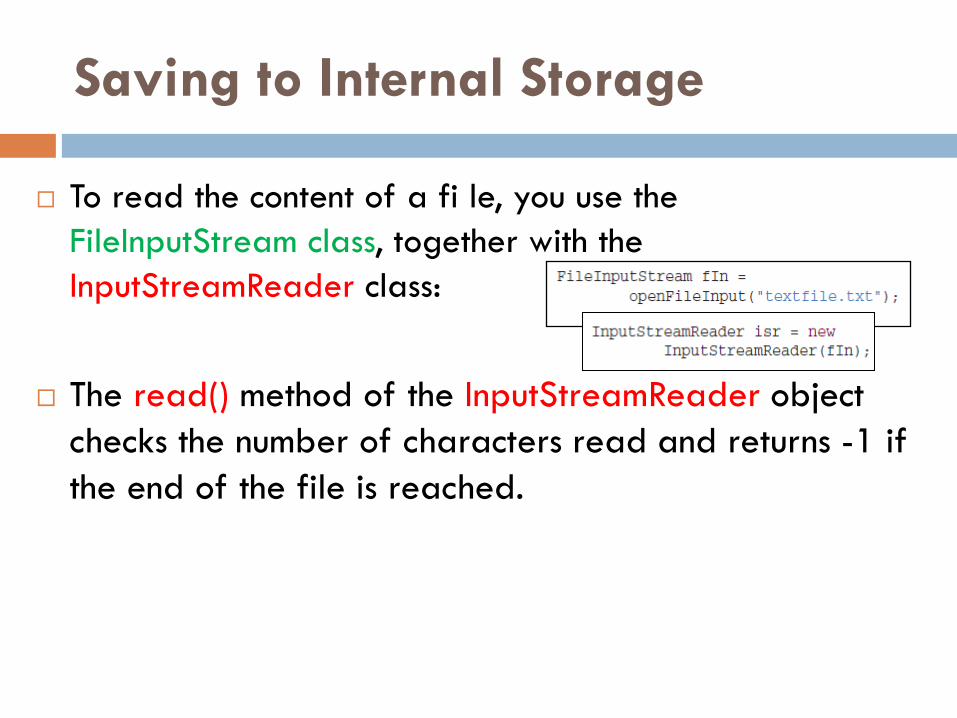
To read the content of a fi le, you use the
FileInputStream class, together with the
InputStreamReader class:
The read() method of the InputStreamReader object
checks the number of characters read and returns -1 if
the end of the file is reached.
Saving to Internal Storage
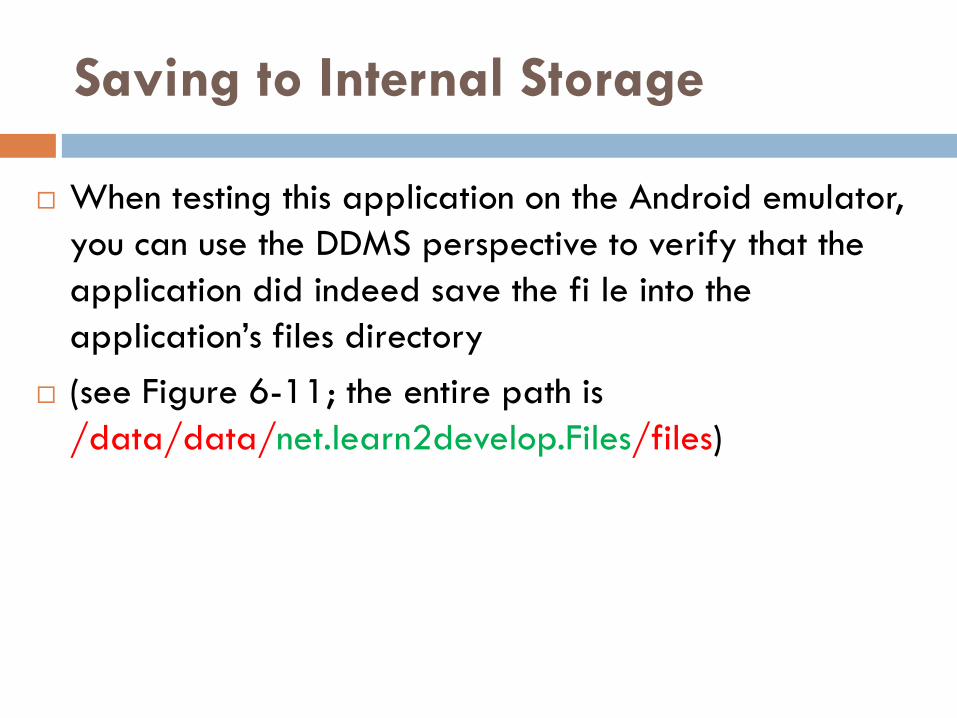
When testing this application on the Android emulator,
you can use the DDMS perspective to verify that the
application did indeed save the fi le into the
application’s files directory
(see Figure 6-11; the entire path is
/data/data/net.learn2develop.Files/files)

Saving to Internal Storage
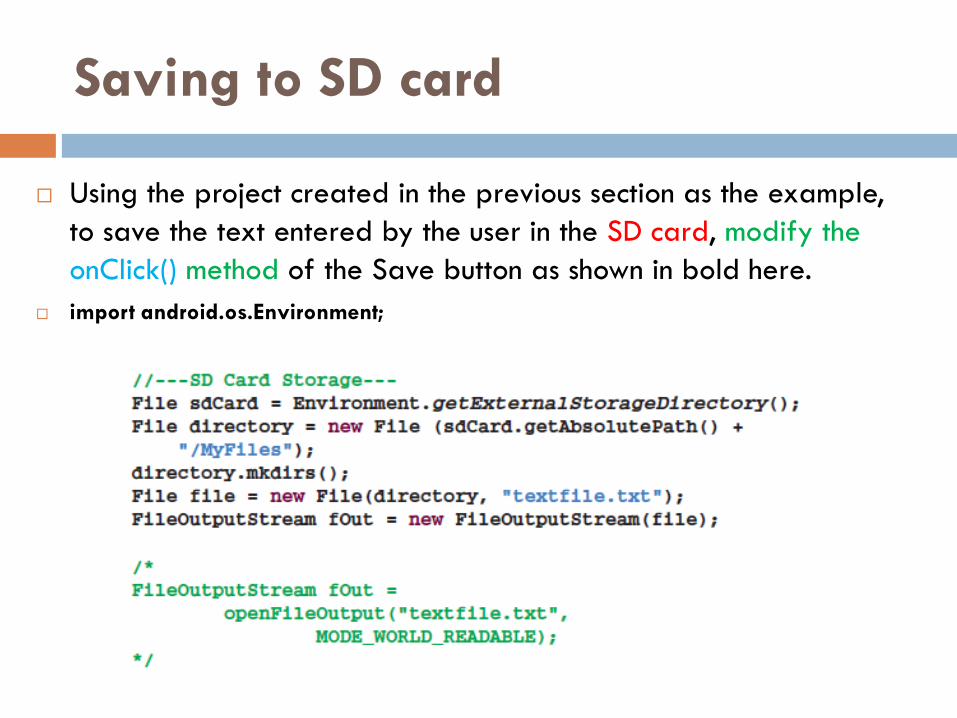
Saving to SD card
Using the project created in the previous section as the example,
to save the text entered by the user in the SD card, modify the
onClick() method of the Save button as shown in bold here.
import android.os.Environment;
Saving to SD card
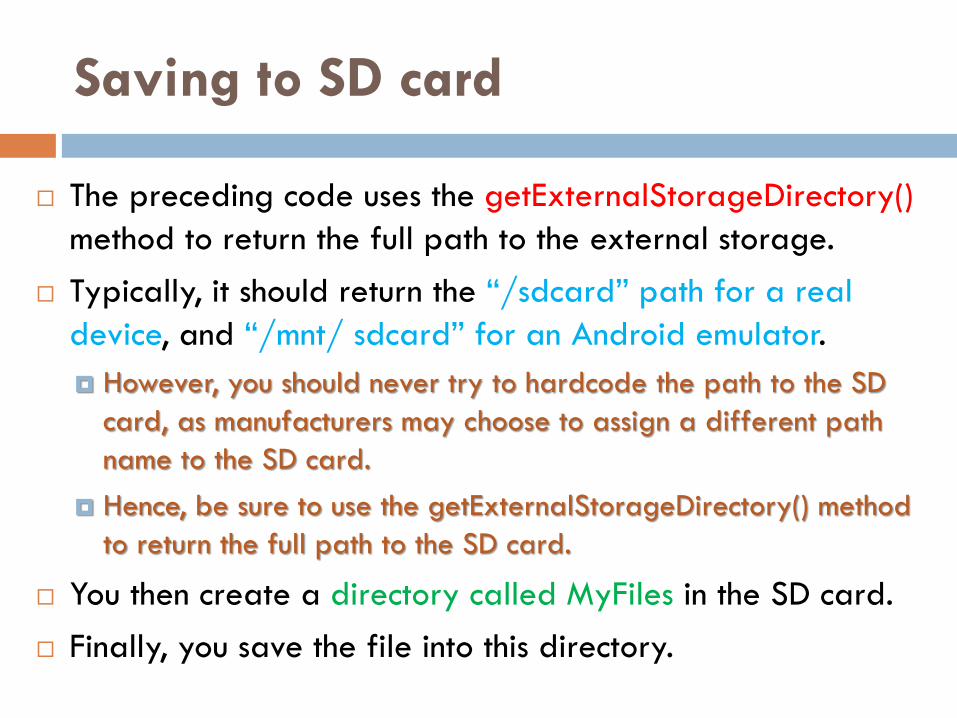
The preceding code uses the getExternalStorageDirectory()
method to return the full path to the external storage.
Typically, it should return the “/sdcard” path for a real
device, and “/mnt/ sdcard” for an Android emulator.
However, you should never try to hardcode the path to the SD
card, as manufacturers may choose to assign a different path
name to the SD card.
Hence, be sure to use the getExternalStorageDirectory() method
to return the full path to the SD card.
You then create a directory called MyFiles in the SD card.
Finally, you save the file into this directory.
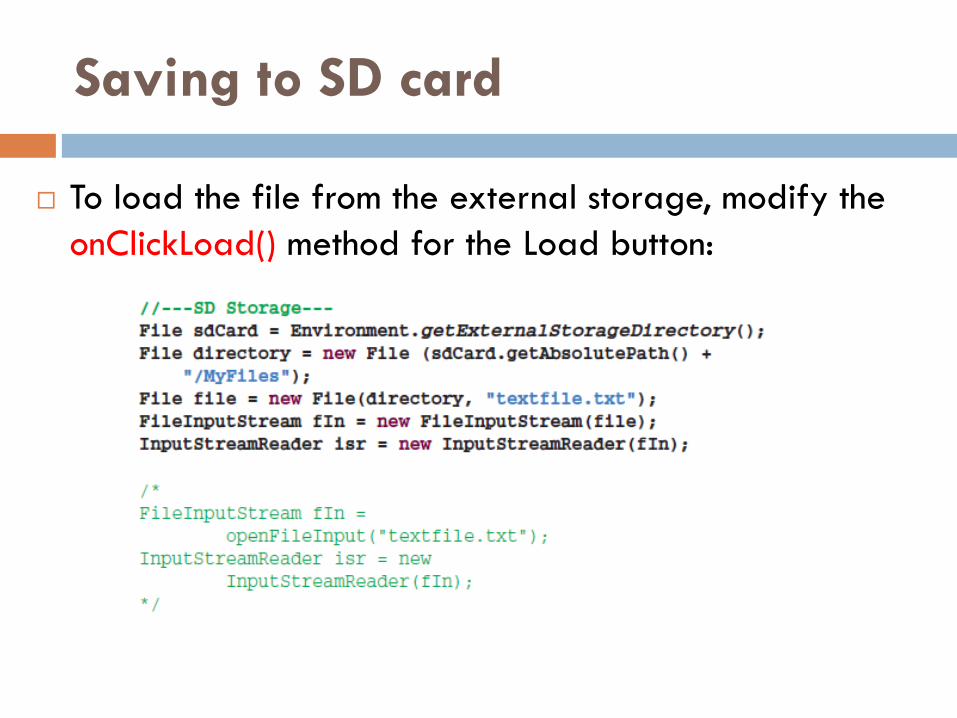
Saving to SD card
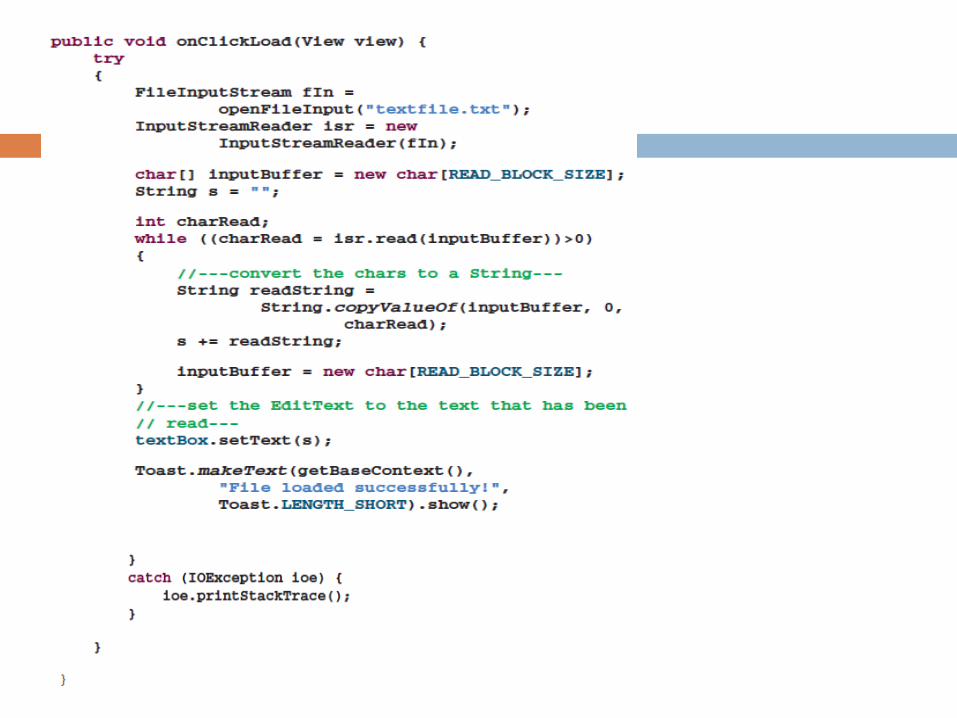
To load the file from the external storage, modify the
onClickLoad() method for the Load button:
Saving to SD card
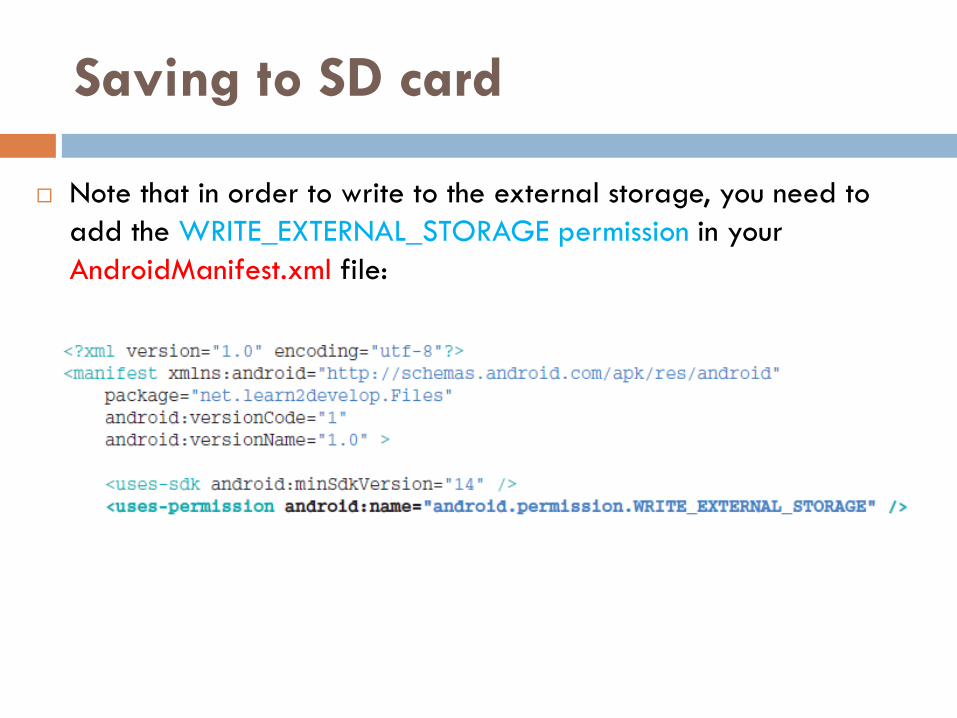
Note that in order to write to the external storage, you need to
add the WRITE_EXTERNAL_STORAGE permission in your
AndroidManifest.xml file: