Embed Size (px)
Citation preview
Appendix A
A Brief Look at the VisualStudio .NET IDETHE .NET FRAMEWORK IS A CORE SET of components used to develop object-oriented software on a variety of platforms (Windows only as of release, with otherimplementations to follow). As such, you don’t need to work with Visual Studio tocreate software for .NET. My contention, however, is that most developers useVisual Studio .NET to produce most of their code. Be sure to check out the com-panion Web site for this book for updates to neat new features of the Visual Studio.NET IDE.
Introducing the Visual Studio .NET IDEIDE is an acronym for Integrated Development Environment. Because you can edita variety of languages in Visual Studio .NET, it lives up to the IDE name. In light ofthis fact, you may think that Visual Studio .NET is just a beefed-up version ofVisual Studio 6, but that assessment is selling it short. The IDE is completelyredesigned from the ground up. Some of the nicer features include the following:
◆ All languages now share the same IDE. There is, of course, one notableexception: Visual FoxPro. The rest of the Microsoft languages (C#, VisualBasic .NET, JScript .NET, and J#), along with third-party languages (PERL,PYTHON, SmallTalk, COBOL, and so forth) integrate into the IDE.
◆ You can mix different language projects in a single solution. This allowsyou to create an ASP.NET file with Visual Basic .NET and inherit from aC# class in the same solution. The term solution here is similar to a solu-tion in Visual InterDev. For Visual Basic 6 developers, the closest equiva-lent is a Project Group.
◆ You get additional debugging tools and windows. The debugger alsocatches compilation errors before running the project rather than waitinguntil an error is encountered, à la Visual Basic 6.
◆ Auxiliary tools now roll into the IDE. For example, with Visual Studio .NET,Enterprise Architect, you can completely manage a SQL Server database asif you were using the SQL Server Enterprise Manager. 1

Start pageAfter you open Visual Studio .NET, you get a Start page, which acts as a minidevelopment portal. Figure A-1 shows the Start screen for Visual Studio .NET.
Figure A-1: The Visual Studio .NET Start page.
You start out in the Get Started area of the Start page, which contains a list ofyour last four solutions, along with the capability to open other solutions and cre-ate a new solution. You can alter the number of solutions this list shows. Althoughthe IDE has a New Project button, I prefer to use the new solution, because you canadd additional projects to a solution to create an entire application. The new solu-tion may include projects in different .NET languages.
I have to assume Microsoft uses Project here either for familiarity, becauseProject was the standard with Visual Basic 6, or due to the fact that many solutionswill only contain one project. Understand, however, when you click New Projectyou are really making a solution that contains one project.
The following list describes the additional sections of the start page. You must beonline to use all but the My Profile section.
◆ What’s New: This section links to Microsoft via the Internet to get the lat-est news about Visual Studio .NET and the .NET Framework. You’ll findthree subsections here: Visual Studio Resources, Partner Resources, andProduction Information.
2 Appendixes
◆ Online Community: This section links to a variety of Microsoft news-groups as well as to a set of pertinent links.
◆ Headlines: This section links to msdn.microsoft.com to get the latestinformation about .NET. The subsections for this section are Features,News, Technical Articles, and Knowledge Base.
◆ Search Online: This section enables you to search the MSDN LibraryOnline.
◆ Downloads: This section has different Microsoft downloads, both for .NETand for products that complement solutions created using .NET. The sub-sections for this section are Downloads (deals more with patches), CodeSamples (new samples to help you create solutions), and Reference (withdownloads such as the Platform SDK — Software Development Kit — aswell as various toolkits).
◆ XML Web Services: This section has general information about Web ser-vices, as well as tools to find and register services. The three subsectionsare Getting Started, Find a Service, and Register a Service.
◆ Web Hosting: This section deals with Web hosts that support ASP.NET.The subsections are Welcome, Hosting Services, and Premier HostingServices. The main difference I can see between Hosting Services andPremier Hosting Services is the scope of applications hosted. PremierHosting Services is aimed at enterprises, while Hosting Services is forsmall businesses and consumers.
◆ My Profile: This section gives you the capability to choose how VisualStudio .NET looks to better suit your style of programming.
If you ever shut down the Start page, you’ll have to use menus to create new
projects or open projects. You also can open the Start Page again by typing
vs:/default.htm in the address text box on the Web menu and pressing the
Enter key.
One of the nicest features about the Visual Studio .NET IDE is its capability tolook like your favorite development tool. If you’ve worked with a variety ofMicrosoft development tools, you realize that the IDE for Visual Basic is differentfrom the IDE for C++, which is different from the Visual InterDev IDE. VisualStudio .NET gives you the capability to choose how the IDE looks so that it best fitsyour experience and desires. You can edit managed C++ using a Visual Basic-stylelayout or C# using an Interdev-style layout. Figure A-1 shows the default layout,which is the Visual Studio Developer layout. To illustrate the different profiles thatare possible, Figure A-2 shows the Visual Basic layout. I urge you to take a littletime to experiment with your own profile to find what works best for you.
Appendix A: A Brief Look at the Visual Studio .NET IDE 3
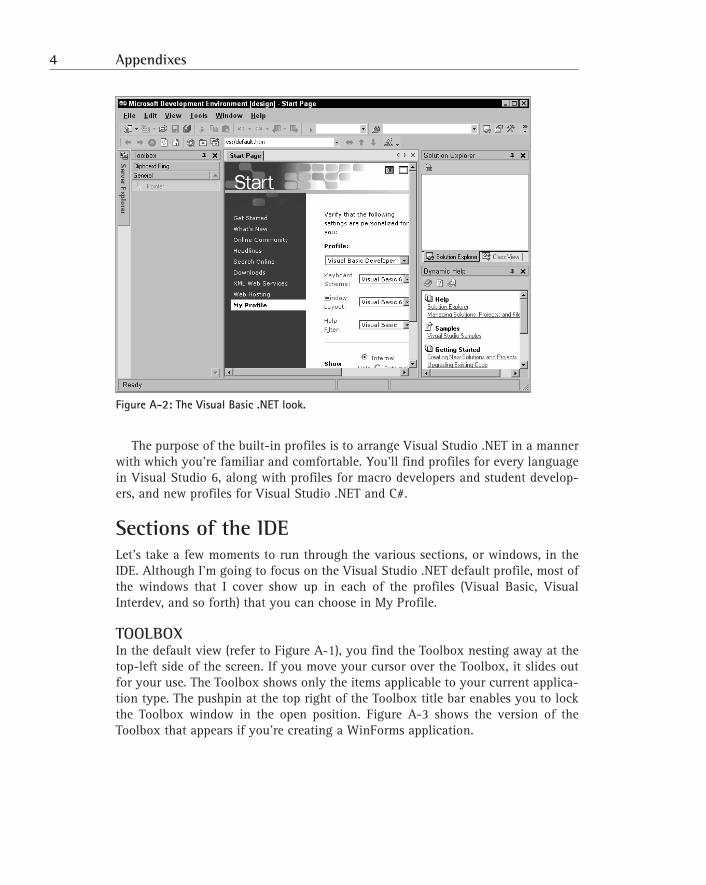
Figure A-2: The Visual Basic .NET look.
The purpose of the built-in profiles is to arrange Visual Studio .NET in a mannerwith which you’re familiar and comfortable. You’ll find profiles for every languagein Visual Studio 6, along with profiles for macro developers and student develop-ers, and new profiles for Visual Studio .NET and C#.
Sections of the IDELet’s take a few moments to run through the various sections, or windows, in theIDE. Although I’m going to focus on the Visual Studio .NET default profile, most ofthe windows that I cover show up in each of the profiles (Visual Basic, VisualInterdev, and so forth) that you can choose in My Profile.
TOOLBOXIn the default view (refer to Figure A-1), you find the Toolbox nesting away at thetop-left side of the screen. If you move your cursor over the Toolbox, it slides outfor your use. The Toolbox shows only the items applicable to your current applica-tion type. The pushpin at the top right of the Toolbox title bar enables you to lockthe Toolbox window in the open position. Figure A-3 shows the version of theToolbox that appears if you’re creating a WinForms application.
4 Appendixes

Figure A-3: The Visual Studio .NET Toolbox.
You drag components from the Toolbox onto your forms. The Toolbox is dividedinto sections, but is highly configurable. By right-clicking the Toolbox, you canadd, remove, and edit tabs, as well as change how the various components areorganized in the Toolbox.
SERVER EXPLORERThe Server Explorer is a new addition to Visual Studio .NET. It enables you to controland/or view most aspects of the servers and services in your enterprise. In the defaultprofile, the Server Explorer is nested with the Toolbox, on the left-hand side of theIDE. You can use the pushpin to lock the Server Explorer in the open position.
Figure A-4 shows Visual Studio .NET Enterprise Architect’s Server Explorer withthe SQL Server branch of the hierarchy open. If you have a different version ofVisual Studio .NET, such as Professional or Enterprise Developer, your screen maylook a bit different.
Appendix A: A Brief Look at the Visual Studio .NET IDE 5
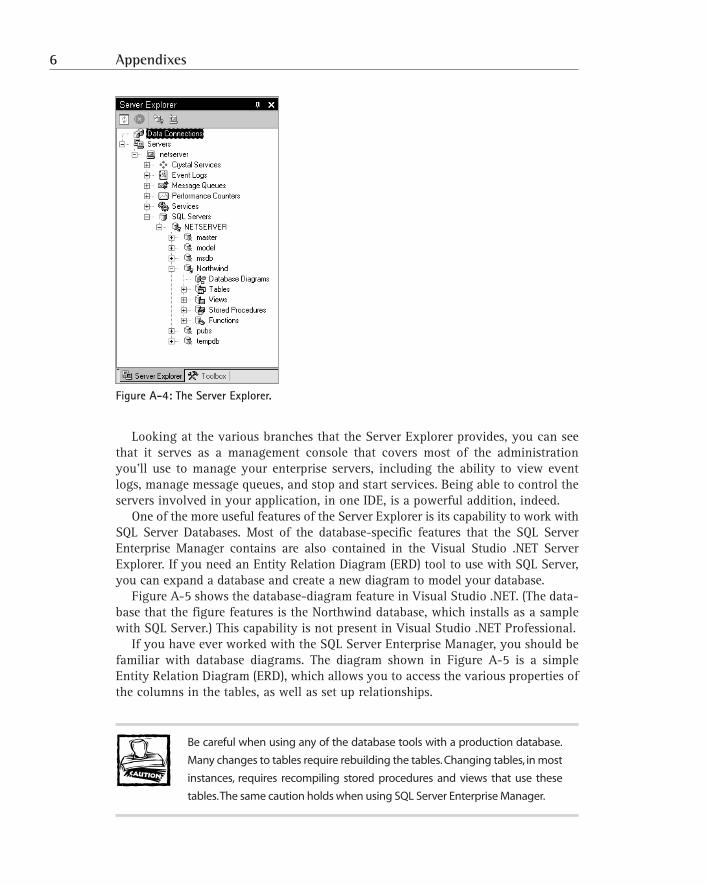
Figure A-4: The Server Explorer.
Looking at the various branches that the Server Explorer provides, you can seethat it serves as a management console that covers most of the administrationyou’ll use to manage your enterprise servers, including the ability to view eventlogs, manage message queues, and stop and start services. Being able to control theservers involved in your application, in one IDE, is a powerful addition, indeed.
One of the more useful features of the Server Explorer is its capability to work withSQL Server Databases. Most of the database-specific features that the SQL ServerEnterprise Manager contains are also contained in the Visual Studio .NET ServerExplorer. If you need an Entity Relation Diagram (ERD) tool to use with SQL Server,you can expand a database and create a new diagram to model your database.
Figure A-5 shows the database-diagram feature in Visual Studio .NET. (The data-base that the figure features is the Northwind database, which installs as a samplewith SQL Server.) This capability is not present in Visual Studio .NET Professional.
If you have ever worked with the SQL Server Enterprise Manager, you should befamiliar with database diagrams. The diagram shown in Figure A-5 is a simpleEntity Relation Diagram (ERD), which allows you to access the various properties ofthe columns in the tables, as well as set up relationships.
Be careful when using any of the database tools with a production database.
Many changes to tables require rebuilding the tables. Changing tables, in most
instances, requires recompiling stored procedures and views that use these
tables.The same caution holds when using SQL Server Enterprise Manager.
6 Appendixes

Figure A-5: A new database diagram.
SOLUTION EXPLORERThe Solution Explorer is an extended version of the Project Explorer that VisualBasic 6 provides and acts more like the Solution Explorer in Visual InterDev. Youcan find the Solution Explorer in the upper-right corner (below the menu) whenyou are working in the default profile.
Figure A-6 shows the Solution Explorer with the AppendixA solution open.
Figure A-6: The Solution Explorer.
Appendix A: A Brief Look at the Visual Studio .NET IDE 7
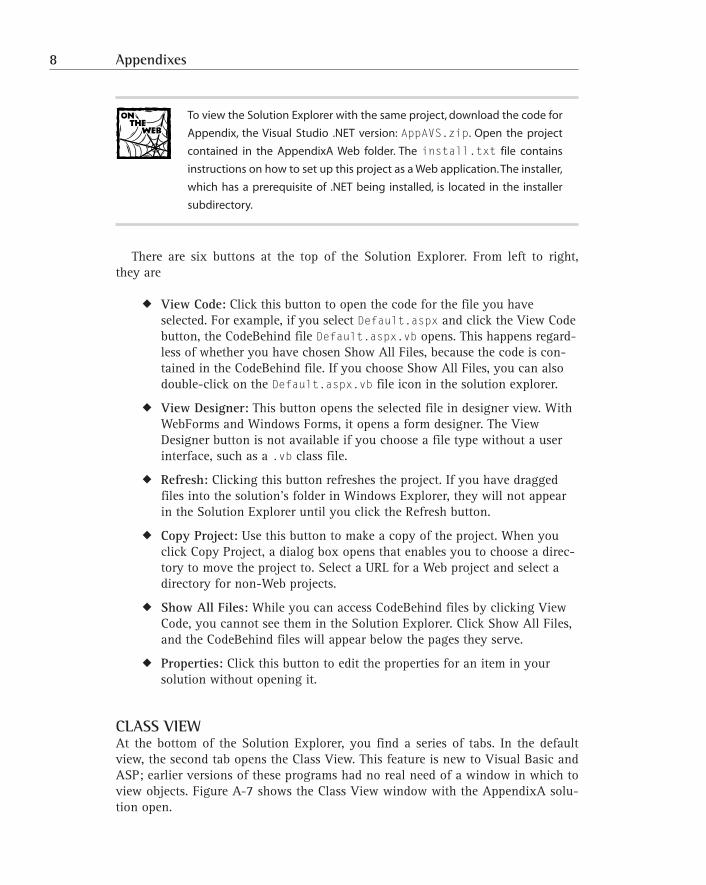
To view the Solution Explorer with the same project, download the code for
Appendix, the Visual Studio .NET version: AppAVS.zip. Open the project
contained in the AppendixA Web folder. The install.txt file contains
instructions on how to set up this project as a Web application.The installer,
which has a prerequisite of .NET being installed, is located in the installer
subdirectory.
There are six buttons at the top of the Solution Explorer. From left to right,they are
◆ View Code: Click this button to open the code for the file you haveselected. For example, if you select Default.aspx and click the View Codebutton, the CodeBehind file Default.aspx.vb opens. This happens regard-less of whether you have chosen Show All Files, because the code is con-tained in the CodeBehind file. If you choose Show All Files, you can alsodouble-click on the Default.aspx.vb file icon in the solution explorer.
◆ View Designer: This button opens the selected file in designer view. WithWebForms and Windows Forms, it opens a form designer. The ViewDesigner button is not available if you choose a file type without a userinterface, such as a .vb class file.
◆ Refresh: Clicking this button refreshes the project. If you have draggedfiles into the solution’s folder in Windows Explorer, they will not appearin the Solution Explorer until you click the Refresh button.
◆ Copy Project: Use this button to make a copy of the project. When youclick Copy Project, a dialog box opens that enables you to choose a direc-tory to move the project to. Select a URL for a Web project and select adirectory for non-Web projects.
◆ Show All Files: While you can access CodeBehind files by clicking ViewCode, you cannot see them in the Solution Explorer. Click Show All Files,and the CodeBehind files will appear below the pages they serve.
◆ Properties: Click this button to edit the properties for an item in yoursolution without opening it.
CLASS VIEWAt the bottom of the Solution Explorer, you find a series of tabs. In the defaultview, the second tab opens the Class View. This feature is new to Visual Basic andASP; earlier versions of these programs had no real need of a window in which toview objects. Figure A-7 shows the Class View window with the AppendixA solu-tion open.
8 Appendixes

Figure A-7: The Class View window with the AppendixA solution open.
As you look at the Class View in Figure A-7, notice I have two items in my newWeb application: Global and WebForm1. Global corresponds to the class for theglobal.asax file, while WebForm1 corresponds to Default.aspx.
When you use Class View, double-clicking an item opens a different window,depending on the item clicked. If you click a page or its methods, the page opens;with a method, the page opens to the method clicked. Click one of the Base andInterfaces, or its methods, and the Object Browser opens.
In this example, I’ve opened only a small portion of the hierarchy. I can ulti-mately trace every one of the pages back to Object, the base object for all softwarecreated in .NET. I recommend experimenting with the Class View in Visual Studio.NET to get a feel for what objects your pages and classes inherit from.Understanding how the pieces fit together will accelerate your competency indeveloping with .NET.
The Class View is one area where C# shines over Visual Basic .NET. When youuse C#, right-clicking a class in the Class View brings up an extra menu option thatenables you to add class methods, properties, fields, or indexers. For some reason,this capability is missing in Visual Basic .NET.
PROPERTIESThe Properties window is very similar to its equivalent in both Visual Basic andASP. The biggest difference is that you now switch your views of the properties byclicking buttons at the top of the Properties window instead of tabs. The Propertieswindow is located on the lower right in the default profile for Visual Studio .NET.
Figure A-8 shows the Properties window with default.aspx opened, from theAppendixA solution. The Label control (lblDateMessage) is selected, so Figure A-8shows the properties from that control. I am using the default configuration, whichis Properties in a Categorized order. The Property Pages button (far right) is grayedout because there’s no property page associated with a label control.
Appendix A: A Brief Look at the Visual Studio .NET IDE 9
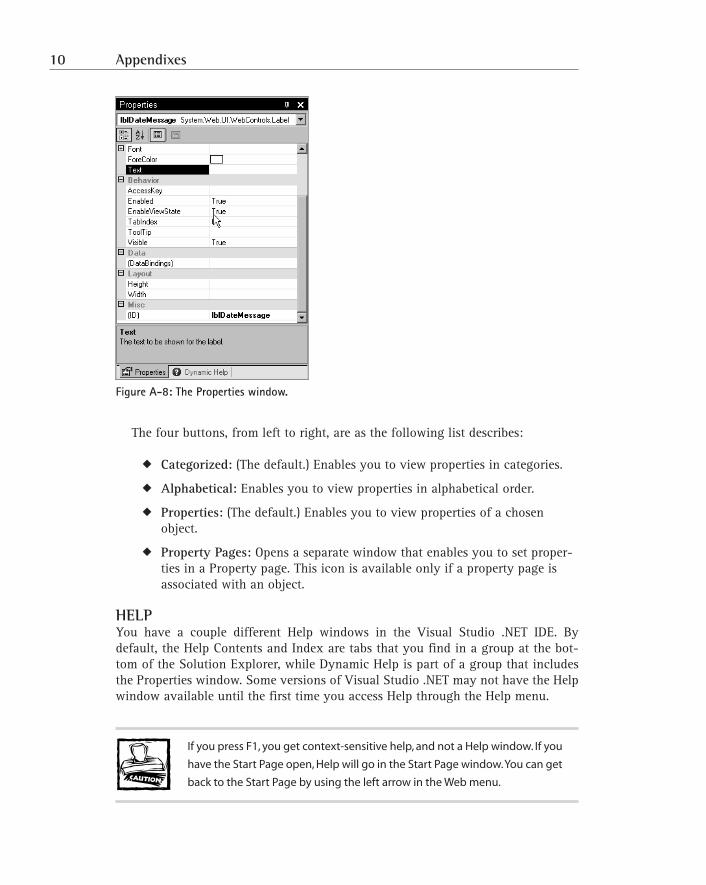
Figure A-8: The Properties window.
The four buttons, from left to right, are as the following list describes:
◆ Categorized: (The default.) Enables you to view properties in categories.
◆ Alphabetical: Enables you to view properties in alphabetical order.
◆ Properties: (The default.) Enables you to view properties of a chosenobject.
◆ Property Pages: Opens a separate window that enables you to set proper-ties in a Property page. This icon is available only if a property page isassociated with an object.
HELPYou have a couple different Help windows in the Visual Studio .NET IDE. Bydefault, the Help Contents and Index are tabs that you find in a group at the bot-tom of the Solution Explorer, while Dynamic Help is part of a group that includesthe Properties window. Some versions of Visual Studio .NET may not have the Helpwindow available until the first time you access Help through the Help menu.
If you press F1, you get context-sensitive help, and not a Help window. If you
have the Start Page open, Help will go in the Start Page window.You can get
back to the Start Page by using the left arrow in the Web menu.
10 Appendixes

Figure A-9 shows the Index tab, with an applied filter that shows only VisualBasic .NET documentation. The Help Contents and Index tabs are identical to theirequivalents in MSDN (Microsoft Developer Network).
Figure A-9: The Help Index.
When you click on an item in the Index, you get either a page (opens in the win-dow with the Start Page by default) or a list of topics (appears below the windowwith the Start Page) to view. Select a topic from the list to open it.
What about Search? The first time that you choose to search the Help library,Visual Basic .NET adds the Search tab to the bottom of the Solution Explorer. TheSearch window works in the same manner as the MSDN library tools. The topicsfrom the search open up in a window below the Start Page.
Dynamic Help, located by default at the bottom of the Properties window, is anew addition in Visual Basic .NET, but it acts very similar to the Shift + F1key combination in Visual Studio 6. Figure A-10 shows the Dynamic Help windowwith the module in the default.aspx page opened and the label control(lblDateMessage) selected.
The ability to get a filtered list of topics based on the item you are focusing onmakes Dynamic Help a very powerful feature.
Appendix A: A Brief Look at the Visual Studio .NET IDE 11
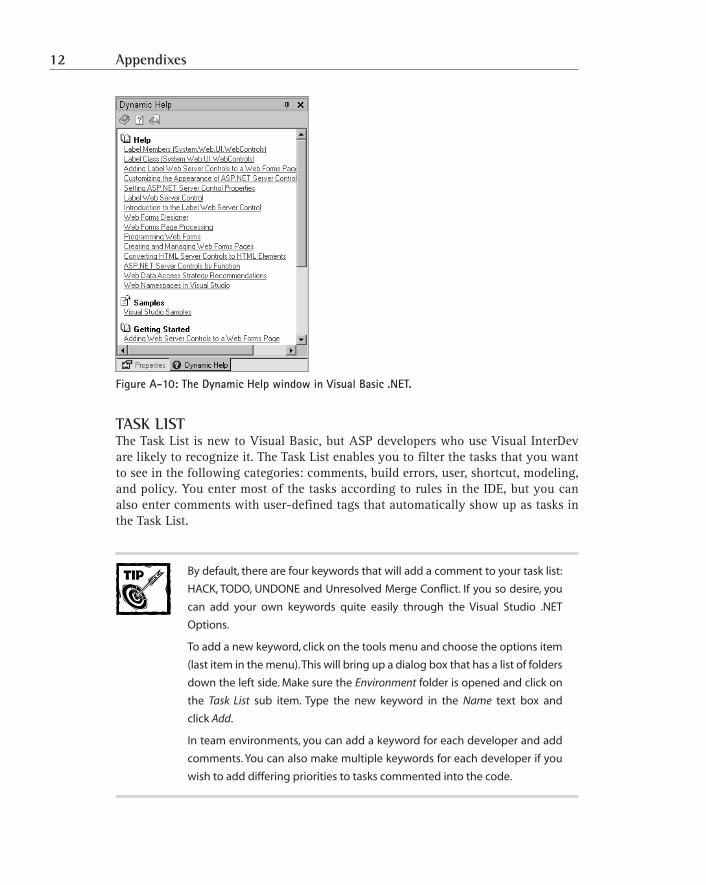
Figure A-10: The Dynamic Help window in Visual Basic .NET.
TASK LISTThe Task List is new to Visual Basic, but ASP developers who use Visual InterDevare likely to recognize it. The Task List enables you to filter the tasks that you wantto see in the following categories: comments, build errors, user, shortcut, modeling,and policy. You enter most of the tasks according to rules in the IDE, but you canalso enter comments with user-defined tags that automatically show up as tasks inthe Task List.
By default, there are four keywords that will add a comment to your task list:
HACK, TODO, UNDONE and Unresolved Merge Conflict. If you so desire, you
can add your own keywords quite easily through the Visual Studio .NET
Options.
To add a new keyword, click on the tools menu and choose the options item
(last item in the menu).This will bring up a dialog box that has a list of folders
down the left side. Make sure the Environment folder is opened and click on
the Task List sub item. Type the new keyword in the Name text box and
click Add.
In team environments, you can add a keyword for each developer and add
comments. You can also make multiple keywords for each developer if you
wish to add differing priorities to tasks commented into the code.
12 Appendixes
Figure A-11 shows a Task List with the AppendixA project opened. Notice thatI’ve added a comment type called Cowboy to Visual Studio .NET. If you look at theCodeBehind file, default.aspx.vb, you will see the comments there.
Figure A-11: The Task List.
You can download the code for the project used in Figure A-11 in the Visual
Studio version of the download for this appendix: AppAVS.zip. Open up
the AppendixA web folder and either run SetupAppA.msi, in the installer
folder, or follow the directions in the install.txt file.
OptionsIn Visual Studio .NET, the options available to you are much more extensive thanthose in Visual Studio 6. You can configure almost every aspect of the environ-ment. I’m going to focus only on the options that I think are the most useful, but Iencourage you to take some time to experiment, because the program offers a widevariety of options that may prove of interest to you. I’m covering only the high-lights; I leave to you the task of discovering all the details.
After you choose Tools → Options from the menu bar, a screen similar to the oneshown in Figure A-12 greets you.
Figure A-12: The Options window, showing the General Environment options.
Appendix A: A Brief Look at the Visual Studio .NET IDE 13
As you can see in the figure, the defaults for the general environment optionsinclude the following:
◆ A tabbed documents environment instead of a Multi-Document Interface(MDI) environment.
◆ At startup, a Start Page is shown. The other options are to Load the LastSolution, Show the Open Project Dialog Box, Show the New ProjectDialog Box, or Show Empty Environment.
◆ The status bar is shown by default, environmental tools are animated, andyou can use autocompletion with the Command window, which is like theVisual Basic 6 immediate window.
◆ You have four items in the Most Recently Used lists and 10 items in theWindows menu.
Table A-1 runs through some of the things that you can set by using the Optionsdialog box in Visual Basic .NET, organized by category. This list is by no means anexhaustive one; the program offers a full hierarchy of Option windows, organized inthe following categories: Environment, Source Control, Text Editor, Database Tools,Debugging, HTML Designer, Projects, Windows Forms Designer, and XML Designer.
TABLE A-1 OPTIONS IN VISUAL STUDIO .NET
Section Subsection Details
Environment General The Environment General section of options isshown in Figure A-12. You use it to set your start-up options, the number of items in the Windowsmenu and Start Page, and to set whether the IDEworks with a single document at a time or atabbed list of documents. These options arecovered in the list following Figure A-12.
Documents These options deal with document settings. Usethem to determine how the IDE responds todocument changes and whether you can editread-only documents.
Dynamic Help These options contain settings for the DynamicHelp window (refer to Figure A-10). Most ofthese options limit the number and types oftopics that appear in this window.
Fonts and Colors Use these to set the fonts and colors in the IDE.If you like larger fonts in your developmentenvironment, you can set that preference as well.
14 Appendixes
Section Subsection Details
Help The primary options for Help are Language, ifyou have a version of Visual Studio .NET thathas more than one language, and Collection(Visual Studio .NET or MSDN), and whether youwant the Help to appear inside or outside theIDE. Changes to this option don’t take effectuntil you restart the IDE.
International Settings This section of options is just to set the languageof the IDE. Changes don’t take effect until yourestart the IDE. You also have an option to changethe language for the Help files under Help.
Keyboard These options are a nice addition to the IDE. Youcan create your own shortcuts, and map keycombinations to commands.
Projects and Solutions If you have a particular location where youwould like Projects to be stored, you can specifyit in this section of the dialog window.
Task List These options enable you to set tags that createtasks in the Task List window.
Web Browser This section of the dialog window is a bitmisnamed, because you can set more than justthe Web browser. These options also enable you toset up different types of editors outside the IDE.
Source Control General These options cover the main settings for sourcecontrol with Visual SourceSafe. SourceSafe is asource control product from Microsoft.SourceSafe does not come with Visual Studio.NET; you have to install it separately.
SCC Provider This option enables you to set the SourceSafeusername for check in and check out.
Text Editor The Text Editor section divides into a variety ofoptions, both general and language-specific. Foreach language, you find a General and a Tabsoption and, optionally, a language-specificoption or two. The following entries cover theGeneral and Tabs options along with VisualBasic and HTML options.
Continued
Appendix A: A Brief Look at the Visual Studio .NET IDE 15
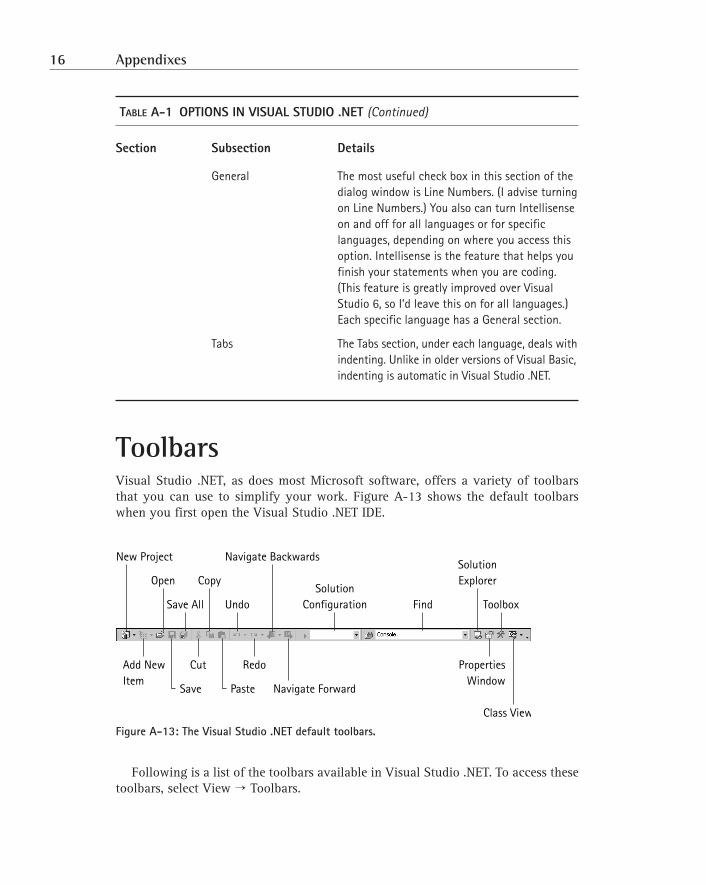
TABLE A-1 OPTIONS IN VISUAL STUDIO .NET (Continued)
Section Subsection Details
General The most useful check box in this section of thedialog window is Line Numbers. (I advise turningon Line Numbers.) You also can turn Intellisenseon and off for all languages or for specificlanguages, depending on where you access thisoption. Intellisense is the feature that helps youfinish your statements when you are coding.(This feature is greatly improved over VisualStudio 6, so I’d leave this on for all languages.)Each specific language has a General section.
Tabs The Tabs section, under each language, deals withindenting. Unlike in older versions of Visual Basic,indenting is automatic in Visual Studio .NET.
ToolbarsVisual Studio .NET, as does most Microsoft software, offers a variety of toolbarsthat you can use to simplify your work. Figure A-13 shows the default toolbarswhen you first open the Visual Studio .NET IDE.
Figure A-13: The Visual Studio .NET default toolbars.
Following is a list of the toolbars available in Visual Studio .NET. To access thesetoolbars, select View → Toolbars.
Navigate Backwards
Undo
Copy
Save All
Open
New Project
ToolboxFindSolution
Configuration
PropertiesWindow
Class View
SolutionExplorer
Navigate Forward
Redo
Paste
Cut
Save
Add NewItem
16 Appendixes
◆ Analyzer and Analyzer Windows: You use the Analyzer toolbar to record,edit, and play back events that relate to your applications. The AnalyzerWindows toolbar helps to create event lists and different diagrams, and isnot available in the Professional version of Visual Studio .NET.
◆ Build: This toolbar enables you to build your solution or selected items inyour solution.
◆ Crystal Reports — Insert and Main: The Insert toolbar facilitates insertingsummaries, groups, subreports, charts, and pictures into your reports,while the Main toolbar contains formatting buttons.
◆ Data Class Design: This toolbar contains buttons to generate DataSets andDataSetCommands along with a Preview button that you can click to pre-view your data.
◆ Database Diagram: The Database Diagram toolbar is very useful if youwant to use Visual Studio .NET as a simple Entity Relationship Diagram(ERD) tool. In many ways, this toolbar acts similarly to the diagrammingmechanism in SQL Server versions 7 and 2000. To use this tool, create oropen a database diagram from the Server Explorer. The diagrams that youcreate in Visual Studio .NET are visible in Enterprise Manager as well.While this toolbar is present in Visual Studio .NET Professional, most ofits options are grayed out.
◆ Debug and Debug Location: The Debug toolbar is a fairly straightforwardtoolbar that enables you to debug your application. It includes buttons tostop and start debugging as well as to enable and clear breakpoints. Anice new feature is the capability to choose to advance by line, statement,or instruction. The Debug Location toolbar is useful if you want to debuga certain program or thread; most users who come from a Visual Basic orASP background are unlikely to find this toolbar highly useful.
◆ Design: You use this toolbar to help you design WebForms if you set thepageLayout property to grid.
◆ Dialog Editor: This toolbar is primarily used to make dialog boxes, whichare pop-up forms, in Visual Studio .NET. It also can be used, instead ofthe layout toolbar, to align controls on your forms.
◆ Diff-Merge Viewer: This toolbar is useful if you’re merging two versionsof the same source file. Although the correct use of source control caneliminate these types of conflicts, having the capability to see differencesin files and then merge them is a nice extra. This toolbar is not availablein Visual Studio .NET Professional.
◆ Formatting: This toolbar enables you to format fonts and paragraphs inWebForms. If you’re working with ASP.NET, this toolbar is a nice one toaccess. The menu opens when you have pages with any form of userinterface open, like Windows Forms and WebForms.
Appendix A: A Brief Look at the Visual Studio .NET IDE 17

◆ Full-Screen: This toolbar has long been one of my favorites in VisualInterDev. It displays only one button, which enables you to toggle the cur-rent file from full screen to the size that you set it at in the IDE.
◆ HTML Editor: This toolbar enables you to work with your HTML sourcecode in the HTML tab of an ASP.NET document. It includes buttons forvalidation, indenting, and formatting, as well as the ability to set book-marks in your code. Bookmarks is a nice feature if you work with code inyour ASPX page instead of the CodeBehind file.
◆ Image Editor: Another WebForms toolbar, this one enables you to editimages inside the IDE. The buttons on this toolbar are primarily used fordrawing images. There are tools to create a variety of rectangular and cir-cular shapes, as well as line, pencil (freeform line), paintbrush, and air-brush tools. In addition, you’ll find text and color buttons to completeimage editing.
◆ Layout: Use this toolbar with Windows Forms and WebForms to aid youin the layout of the page. The Layout toolbar is the proper toolbar to useto align your controls on your forms.
◆ Modeling: You use this toolbar with the Visual Modeler to build classes.Microsoft is currently pushing the use of Visual, Enterprise Architect, as amodeling tool, so this toolbar is likely to be less important going forward.The Modeling toolbar is not included in Visual Studio .NET Professional.
◆ Query: Use this toolbar with databases to create queries. The options aresimilar to those that you find in Access and Visual InterDev. The buttonsinclude a diagram, SQL, results, and grid pane for designing your queries,and there are also buttons to verify and run your queries.
◆ Source Control: This toolbar enables you to interact with VisualSourceSafe for source control. The latest SourceSafe version, 6.0c, shipswith Visual Studio .NET Enterprise Architect.
◆ Standard: This default toolbar contains a variety of items from other tool-bars, along with options for creating and working with new solutions andprojects, as well as shortcuts to the Debugger and a variety of windows inthe IDE.
◆ Style Sheet: The Style Sheet toolbar aids you in building Cascading StyleSheets to work with your Web applications. You must add a style sheet toyour solution to use this toolbar.
◆ Table: You use this toolbar to work with tables in a database from theDatabase Diagram view.
◆ Text Editor: Use the Text Editor toolbar to format text in the Source win-dow (that is, the window that opens to edit your source code). You can usethis toolbar from the HTML tab of a Web form or in the Source window inother code modules.
18 Appendixes
◆ View: You use the View toolbar with the Query toolbar in creating SQLqueries. It enables you to change to different views of the query, such asSQL, design, and grid.
◆ Web: The Web toolbar is a mini-Internet Explorer toolbar that enables youto navigate to sites in the IDE as if it were a Web browser.
◆ XML Data: You use this toolbar with XML files if you’re in the Data view,which is basically a hierarchical view of the data that an XML file con-tains, arranged in cells that are similar to Excel.
◆ XML Schema: This toolbar can help you edit your XML schema files.Because the XML Designer enables you to drag and drop data objectsfrom the Server Explorer, you may not find a lot of use for this toolbar.
DebuggingAfter you start a debugging session in Visual Studio .NET, you see all theDebugging windows open. (This situation is different from that in Visual Basic 6,where you must specify which windows you want to see.) The Debugging windowsopen in two sets of tabbed windows at the bottom of the IDE.
To show the differences among the various debugging windows, I’ll use the samebreakpoint in the AppendixA solution for each window. The breakpoint is set onthe following line:
lblDateMessage.Text = “You have selected “ & strDate
If you would like to work through the debugging windows, download the
file AppAVS.zip from this book’s companion Web site, install the
AppendixA solution (either with the installer, or following the directions in
install.txt), open the default.aspx page, and set a breakpoint in the
CodeBehind file (default.aspx.vb).The breakpoint is on the line:
lblDateMessage.Text = “You have selected “ & strDate
If you have turned on line numbers (Tools → Options → Text Editor/All
Languages/General), you’ll notice that the breakpoint is set on Line 28.
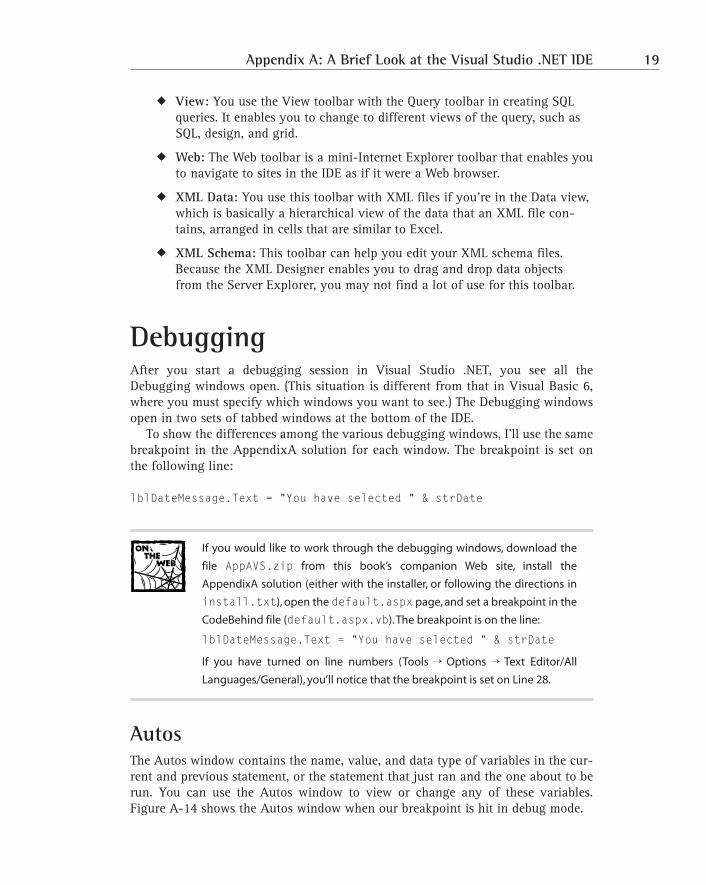
AutosThe Autos window contains the name, value, and data type of variables in the cur-rent and previous statement, or the statement that just ran and the one about to berun. You can use the Autos window to view or change any of these variables.Figure A-14 shows the Autos window when our breakpoint is hit in debug mode.
Appendix A: A Brief Look at the Visual Studio .NET IDE 19
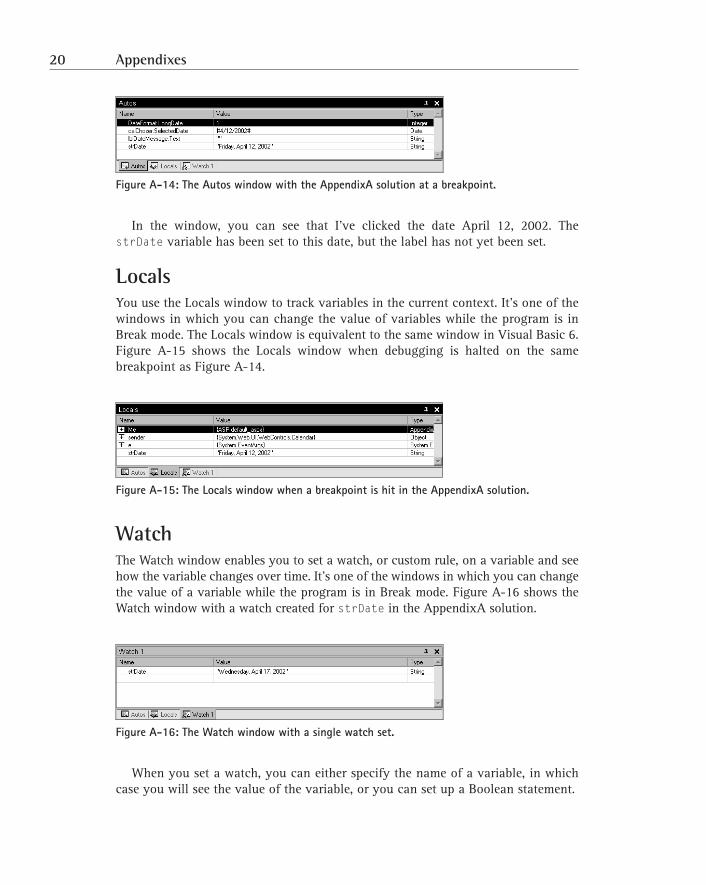
Figure A-14: The Autos window with the AppendixA solution at a breakpoint.
In the window, you can see that I’ve clicked the date April 12, 2002. ThestrDate variable has been set to this date, but the label has not yet been set.
LocalsYou use the Locals window to track variables in the current context. It’s one of thewindows in which you can change the value of variables while the program is inBreak mode. The Locals window is equivalent to the same window in Visual Basic 6.Figure A-15 shows the Locals window when debugging is halted on the samebreakpoint as Figure A-14.
Figure A-15: The Locals window when a breakpoint is hit in the AppendixA solution.
WatchThe Watch window enables you to set a watch, or custom rule, on a variable and seehow the variable changes over time. It’s one of the windows in which you can changethe value of a variable while the program is in Break mode. Figure A-16 shows theWatch window with a watch created for strDate in the AppendixA solution.
Figure A-16: The Watch window with a single watch set.
When you set a watch, you can either specify the name of a variable, in whichcase you will see the value of the variable, or you can set up a Boolean statement.
20 Appendixes
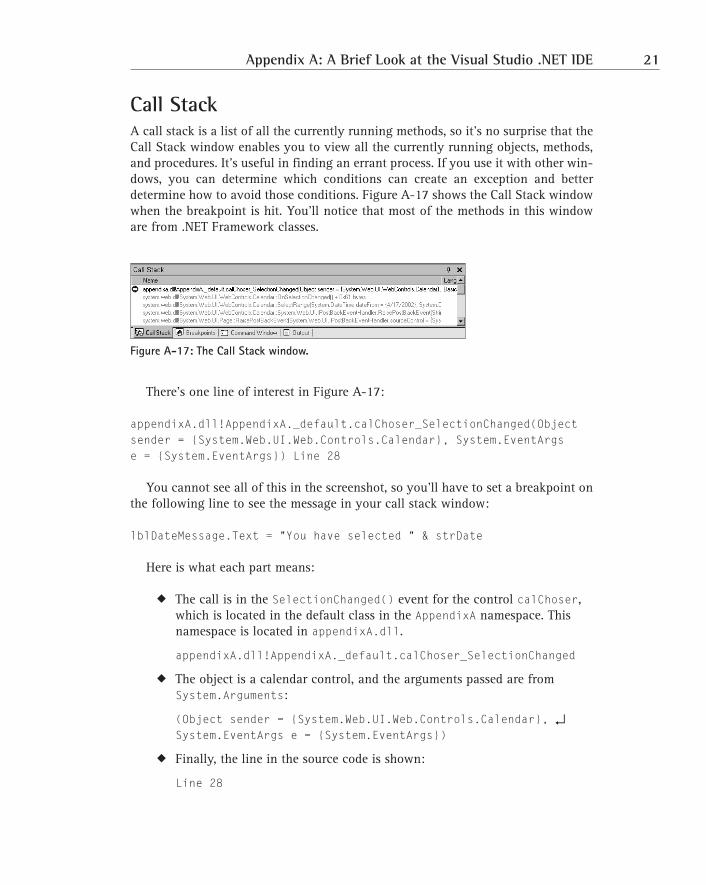
Call StackA call stack is a list of all the currently running methods, so it’s no surprise that theCall Stack window enables you to view all the currently running objects, methods,and procedures. It’s useful in finding an errant process. If you use it with other win-dows, you can determine which conditions can create an exception and betterdetermine how to avoid those conditions. Figure A-17 shows the Call Stack windowwhen the breakpoint is hit. You’ll notice that most of the methods in this windoware from .NET Framework classes.
Figure A-17: The Call Stack window.
There’s one line of interest in Figure A-17:
appendixA.dll!AppendixA._default.calChoser_SelectionChanged(Object sender = {System.Web.UI.Web.Controls.Calendar}, System.EventArgs e = {System.EventArgs}) Line 28
You cannot see all of this in the screenshot, so you’ll have to set a breakpoint onthe following line to see the message in your call stack window:
lblDateMessage.Text = “You have selected “ & strDate
Here is what each part means:
◆ The call is in the SelectionChanged() event for the control calChoser,which is located in the default class in the AppendixA namespace. Thisnamespace is located in appendixA.dll.
appendixA.dll!AppendixA._default.calChoser_SelectionChanged
◆ The object is a calendar control, and the arguments passed are fromSystem.Arguments:
(Object sender = {System.Web.UI.Web.Controls.Calendar}, ↵System.EventArgs e = {System.EventArgs})
◆ Finally, the line in the source code is shown:
Line 28
Appendix A: A Brief Look at the Visual Studio .NET IDE 21

BreakpointsThe Breakpoints window enables you to toggle breakpoints on and off from a cen-tral location. While setting breakpoints is nothing new, the ability to create, delete,and toggle breakpoints from one central location is unique to Visual Studio .NET.Figure A-18 shows the Breakpoints window.
Figure A-18: The Breakpoints window.
With the Breakpoints window, you can set a conditional breakpoint (only breakwhen a certain variable condition is true, or if the value of a variable has changed).You can also set a breakpoint to break when the breakpoint has been reached a cer-tain number of times.
CommandThe Command window is better known as the Immediate window by Visual Basic 6developers. You can run a variety of commands from this window while your pro-gram is in Break mode. Figure A-19 shows the Command window toggled fromImmediate to Command mode.
Figure A-19: The Command window in Immediate mode.
As you look at the Command window in Figure A-19, note that the caption tellsyou that the window is in Immediate mode. There is no word at the end of the cap-tion when it is in Command mode. The figure shows that you use > cmd to move toCommand mode from Immediate mode and immed to move from Command mode toImmediate mode.
In Command mode, you are running from a command prompt, which allows youto use a subset of the command line commands available from a Windows com-mand prompt (Start → Run and cmd). If you want to play with the Command mode,try typing in something like open c:\WINNT\win.ini, which will open the win.inifile in Visual Studio .NET.
22 Appendixes
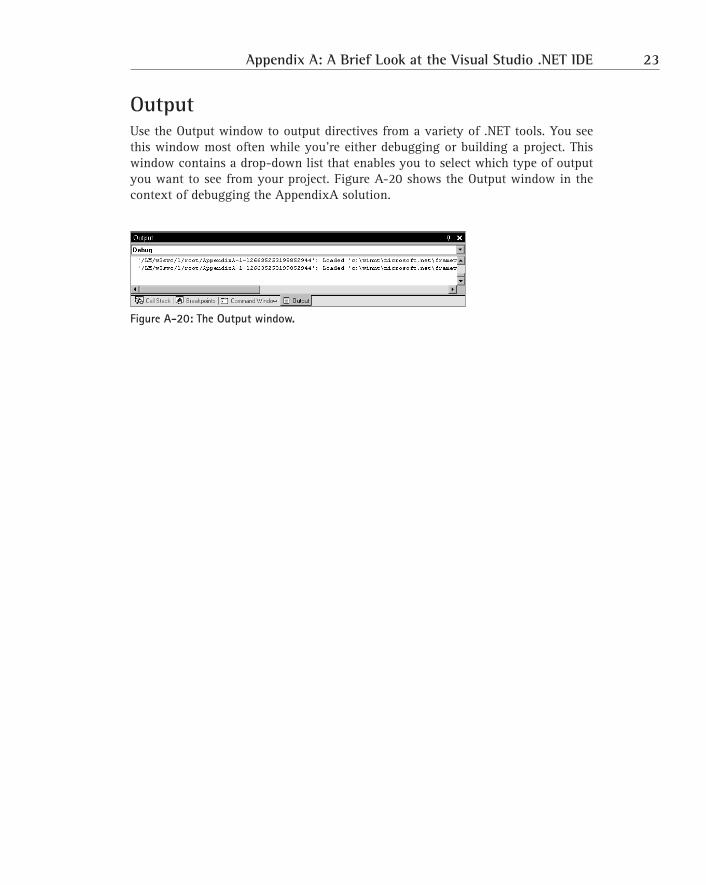
OutputUse the Output window to output directives from a variety of .NET tools. You seethis window most often while you’re either debugging or building a project. Thiswindow contains a drop-down list that enables you to select which type of outputyou want to see from your project. Figure A-20 shows the Output window in thecontext of debugging the AppendixA solution.
Figure A-20: The Output window.
Appendix A: A Brief Look at the Visual Studio .NET IDE 23


![[Webinar] Build Plugins Easily, with Nuxeo Studio and Nuxeo IDE](https://img.pdfslide.net/doc/110x75/54b538e14a7959027f8b47e6/webinar-build-plugins-easily-with-nuxeo-studio-and-nuxeo-ide.jpg)


