Embed Size (px)
Citation preview

AT&T Small Business SystemSpeakerphone with Intercom and
Caller ID/Call Waiting 974
Please also readPart 1 — Important product information
USER’S MANUAL Part 2
© 2006 Advanced American Telephones. All rights reserved.AT&T and the Globe Design are trademarks of AT&T Corp., licensed to Advanced American Telephones.
For Customer Service Or ProductInformation, Visit Our Web Site Atwww.telephones.att.com
974CIB_(Rev11-12)ml24.05.06 5/24/06 9:29 PM Page II

974CIB_(Rev11-12)ml24.05.06 5/24/06 9:29 PM Page III
Product overview ........................... 1
Before you begin ............................. 2Parts list.................................................. 2Tools needed......................................... 2DSL users............................................... 4Glossary ................................................. 5Programmable features list ............... 7Audible signals.................................... 10
Installation ....................................... 11Battery installation............................ 11Table/desk installation ...................... 13Wall installation ................................. 15Convenience ports ........................... 19
Menu operation............................. 20Menu structure .................................. 21Shortcut to language menu ............ 22Rapid scroll.......................................... 22
Feature setup ................................. 23Set one touch preference ............... 23Assign an extension number to
your phone ..................................... 24Turn the ringer on or off for
each line........................................... 25Select the ringer type....................... 26Set delay ring ...................................... 27Turn auto-mute on or off ............... 28Set dial mode...................................... 29Turn hold reminder on or off........ 29Set the time and date....................... 30Turn line usage on or off for
each line........................................... 31Assign the prime line
(line preference)............................ 32Set automatic mode ......................... 33Set the scroll rate.............................. 34Turn screen backlight on or off..... 35Turn COVM indicators on or
off for each line ............................. 36Reset COVM indicator.................... 37Program home and local
area codes....................................... 38
Assign the line group forthis phone ....................................... 39
Erase all settings and return the phone to default settings..... 40
Set this phone to be the Centrex console phone .............. 41
Set the Centrex console delayed ring time........................... 42
Set the display language ................... 42
Telephone operation...................... 43Make or answer a call ...................... 43Switch between handset,
headset and speakerphone......... 45Timer .................................................... 45Call privacy.......................................... 46Do not disturb................................... 46Volume ................................................. 47Redial .................................................... 47Redial stack ......................................... 48Auto redial .......................................... 48Hold ...................................................... 49Switch between lines........................ 49Mute...................................................... 50Flash ...................................................... 50Temporary tone dialing.................... 50Conference calls ................................ 51Transfer a call ..................................... 52Low battery indicator ...................... 53Lights and what they mean............. 54
One touch operation.................. 55Store a number in a one
touch location................................ 56Review a one touch entry .............. 58Dial a one touch number................ 59
Directory operation.................... 60Menu structure .................................. 60Store a name and number in
the directory .................................. 61Review directory entries................. 64Edit a directory entry ...................... 65Dial a number from the
directory.......................................... 66
i
Con
tent
sC
onte
nts
Contents
974CIB_(Rev11-12)ml24.05.06 5/24/06 9:29 PM Page i
Directory operationcontinued
Remove a name and number from the directory........................ 66
Remove all entries from thedirectory.......................................... 66
Intercom operation .................... 67Basic intercom operations.............. 68Make an intercom call with
the handset ..................................... 69Make an intercom call with the
speakerphone or headset ........... 70Answer an intercom call ................. 71End an intercom or page call ......... 71Page a specific extension
(single-phone page)....................... 72Answer a single-phone page .......... 72Page all system phones .................... 73Answer a system-wide page........... 73Make an intercom conference
call ..................................................... 74Room monitor................................... 74
Caller ID operation..................... 75Caller ID display ................................ 76Call waiting.......................................... 76Calls received on two or more
lines simultaneously...................... 77Display screen messages ................. 78Message waiting and
NEW CALL light .......................... 79Call history.......................................... 79Remove calls from call
history.............................................. 81Dial a number from call
history.............................................. 82Save a name and number from
call history to the directory ...... 83Save a number from call history
to a one touch location .............. 84
Adding a fax machine ................ 85Using a fax switch ............................. 85
General product care................. 86
Technical specifications ............ 87
In case of difficulty ....................... 88
Expanding the phone system ....93Line groups.......................................... 93Private lines......................................... 95
Centrex operation ....................... 96Setup checklist ................................... 96Enable the console phone............... 96Console operation............................ 96Set ring delay duration..................... 97Answer a delayed ring...................... 97Pick up another station’s line......... 97
Index.................................................... 98
ii
Con
tent
sC
onte
nts
974CIB_(Rev11-12)ml24.05.06 5/24/06 9:29 PM Page ii
This AT&T Small Business System Speakerphone with Intercom and Caller ID/Call Waiting 974 is expandable to a 16-extension telephone system. The 974is compatible with AT&T 945, 984, 944, 955 and 964 telephones. (See Beforeyou begin starting on page 2 and Expanding the phone system beginningon page 93 for details.)
The 974 is hearing-aid compatible and can be connected to up to fourincoming telephone lines. This phone features a speakerphone for hands-freeuse and a headset jack compatible with most two-band 2.5mm headsets (soldseparately). The 974 allows paging, intercom and call transfers betweensystem phones and is capable of connecting three parties in a conference call.This phone also features a 32-number memory for faster dialing and has adirectory which can store up to 200 additional numbers with names. Thisphone has a caller ID feature which supports caller ID with call waitingservice. (Caller ID services are subscriber services available from many localtelephone companies for a fee.) There are two convenience ports availablefor connecting the phone to another device such as a fax machine or modem.
The 974 is compatible with Centrex service. Centrex is a special subscriberservice which may be available from your local telephone company for a fee.If you subscribe to Centrex service, refer to the Centrex operationsection of this manual, beginning on page 96.
This user's manual contains detailed instructions for installing, programmingand operating your AT&T Small Business System Speakerphone with Intercomand Caller ID/Call Waiting 974. Please be sure to read Before you beginstarting on page 2 before installing this phone.
1
Pro
duct
over
view
Pro
duct
over
view
Product overview
974CIB_(Rev11-12)ml24.05.06 5/24/06 9:29 PM Page 1
2
Bef
ore
you
begi
nB
efor
e yo
u be
gin
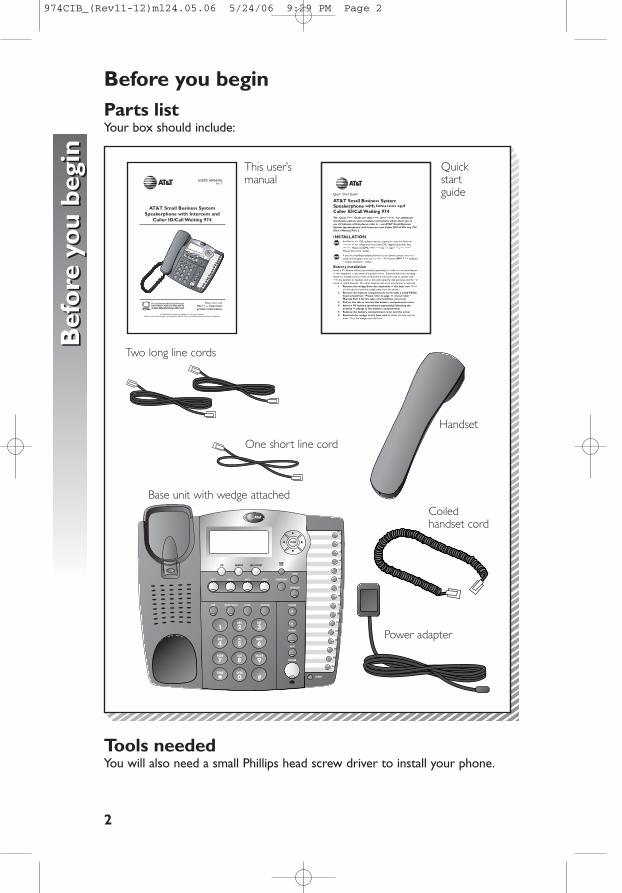
Before you beginParts listYour box should include:
Tools neededYou will also need a small Phillips head screw driver to install your phone.
AT&T Small Business SystemSpeakerphone with Intercom and
Caller ID/Call Waiting 974
Please also readPart 1 — Important product information
USER’S MANUAL Part 2
© 2006 Advanced American Telephones. All rights reserved.AT&T and the Globe Design are trademarks of AT&T Corp., licensed to Advanced American Telephones.
For Customer Service Or ProductInformation, Visit Our Web Site Atwww.telephones.att.com
Coiled handset cord
Power adapter
Two long line cords
Handset
This user’smanual
Quickstartguide
Base unit with wedge attached
1
Quick Start Guide
AA Small Business SystemSpeakk with Intercomrr andCaller ID/CallWaiting WW 974This Quick Start prorro basic instructions. Finstallation options i which allow oo ou touse a efer ff to y AA Small Business
ith ID/Call Waiting 974
IInstallation of a to the advancedfeaturff es of this line)service. DSL users starting on page 4 of your User’s’Manual,
If in your system, you mustat time. Each MUST be assigned
a n .
Batter installationInstall use esof this in failur and
with onetouch
of unit. ess
2. Phillips’s’’
3. y r.4.
polarity m5. Replace the coo the ewe .ww6. Reattach the w e the base t by sliding the tabs into the
holes. Sna the edge base.
One short line cord
974CIB_(Rev11-12)ml24.05.06 5/24/06 9:29 PM Page 2
3
Bef
ore
you
begi
nB
efor
e yo
u be
gin
This 974 telephone is fully compatible with any AT&T Four-Line SmallBusiness System Speakerphone 945 or 984 units you may have installed. Youcan use a total of 16 945/974/984 units together as extensions in your phonesystem.
This 974 telephone is also compatible with any AT&T 964/955/944 phonesyou have previously installed. This 974 telephone is NOT compatible withany 843, 853, 854, 874, or 954 telephones you may have previously installed.
�NOTE: If you have one or more 964, 955, or 944 phone(s) installed in the same phone system with this 974 telephone, you can have only 12extensions and 15 telephone lines in the phone system.
• You must have a modular telephone jack and an electrical outlet notcontrolled by a wall switch near where you’re installing the phone.The total length of telephone wiring used in this system MUSTNOT be more than 600 feet as it may cause interference with theadvanced features of this telephone.
• Identify the number of phone lines you’ll use.• Plan the layout of your phone system.• All connected phones must have the same line 1 phone number for
the intercom and paging features to work.Every individual phone in your telephone system MUST be assigneda unique extension number for the intercom feature to work. If youtry to assign the same extension number to a second phone, you will hear a repeating short ring and the screen display willincludehEXThXXhishalreadyhusedhAssignhnewhEXTh#hif thephone is in idle mode. If the phone is in the programming mode, youwill hear the repeating short ring only. See Assign an extensionnumber to your phone on page 24 of this manual for directions.
• Decide if you want a private line. A private line does not appear onall connected phones.
• Choose your setting for each feature. You will need to program the features after installation. See Programmable features listbeginning on page 7 for a brief description of the features. See theFeature setup section beginning on page 23 for programminginstructions.
974CIB_(Rev11-12)ml24.05.06 5/24/06 9:29 PM Page 3
DSL usersConnecting a DSL (digital subscriber line) to L1/L2 may interfere with theadvanced features of this telephone, (such as intercom, hold, and line privacy,)which work by sending data signals over line 1. These data signals are sent atsome of the same frequencies as those used by your DSL service.
Also, DSL lines usually have microfilters, which keep the DSL signals frominterfering with your telephone's sound quality. These same microfilters willalso block the data signals that this telephone system uses to support sometelephone system features. Therefore, the advanced features of this phonemay not work properly when DSL microfilters are installed on L1/L2 of yourphone system. However, you can use a DSL splitter to prevent theseproblems.
For only one or two DSL lines, install it/them into L3/L4 on the backof the phone.
If your system will only use two or three phone lines, plug a single non-DSLtelephone line into L1/L2. (Turn off the L2 line usage lights.) Be sure to usethe microfilter(s,) which were probably provided when DSL was installed, onlines 3 and/or 4 if the lines have DSL, to protect the sound quality.
If you have two telephone lines, one of which is DSL, which both appear at asingle wall jack, use a Triplex adapter to separate the lines at the wall jack.Call 1 (800) 222-3111 if you need help doing this.
If you must install a DSL line into L1/L2 on the back of the phone,use a DSL splitter.
Lines 1 and 2 share a telephone jack, so if you need to install a DSL line fortelephone line 1 or line 2, you will need additional equipment to avoidinterference. Any telephone line connected to L1/L2 cannot have amicrofilter. It must have a DSL splitter. Use a dual line DSL splitter or atwo-line DSL filter. Call 1 (800) 222-3111 if you need help doing this.
Installation, by your DSL service provider or other professional, of a DSLsplitter (not a microfilter) as close as possible to the protection block ornetwork interface (where the telephone line enters the house) may resolveDSL interference. (It may be necessary to use a DSL splitter intended foroutdoor use.) A DSL splitter allows the data and voice signals to use thesame telephone line without interfering with each other.
AT&T cannot supply the DSL splitter. Please contact your DSL serviceprovider or professional contractor for details about obtaining and installinga DSL splitter. Your DSL service provider may require you to bear anyinstallation costs. AT&T and the manufacturer of this product have noaffiliation with your DSL provider and the type or quality of services theyoffer. Installation must be performed at your own expense and AT&T cannottroubleshoot or provide installation support.
4
Bef
ore
you
begi
nB
efor
eyo
ube
gin
974CIB_(Rev11-12)ml24.05.06 5/24/06 9:29 PM Page 4
�NOTE: If your DSL service provider cannot supply a DSL splitter, it ispossible to purchase an outdoor DSL splitter over the Internet.
If you are a new DSL customer, your DSL service provider will probably askyou if you have more than one telephone line in your home or business, or ifyou are installing a phone system. If you answer yes, your DSL serviceprovider will probably advise you that you need a splitter. In most cases, yourDSL service provider will supply you with the proper splitter for your specificsituation. The DSL splitter, installed properly, should help overcome anyinterference between the DSL signal and the signals sent by your phonesystem.
AT&T shall not be responsible for the cost of installation, any damages, lostbusiness, direct or indirect expenses accrued or associated with installation,or other compatibility issues which may arise as a result of using this productwhile you subscribe to DSL service.
GlossaryCaller ID: Caller identification is a subscriber service available from most localtelephone companies for a fee. When you subscribe to caller identification, youcan see who’s calling before you answer the phone if you and the caller areboth in areas offering caller ID service with compatible equipment.
Caller ID with call waiting: This is a single, combined subscriber servicewhich may be available from your local telephone company. If you subscribeto this service, you can use your 974 telephone to see who’s calling evenwhile you are on another call (as long as your caller is in an area with callerID service and both telephone companies use compatible equipment).
Centrex service: A special subscriber service which may be available from your local telephone company for a fee. This 974 telephone can be used with Centrex service.
COVM: Central Office Voice Mail is a subscriber voice message servicewhich may be available from your local telephone company. This service maybe called by another name in your area (e.g. call answering).
DND: When activated, the Do Not Disturb (DND) feature preventsinterruptions during a call.
continued on page 6
5
Bef
ore
you
begi
nB
efor
e yo
u be
gin
974CIB_(Rev11-12)ml24.05.06 5/24/06 9:29 PM Page 5
Glossarycontinued from page 5
Home area code: This is the area code for your telephone number. Mostusers simply dial the seven digits of a phone number to make a call withintheir own area code and 11 digits outside of their area code. If this applies toyou, you should enter your own area code into the unit as the home areacode. After programming, if you receive a call from within your home areacode, the screen will display the seven digits of the phone number.You may, however, live in a region where for calls within your own area code,you must dial 10 digits (that is, the area code and phone number). If thisapplies to you, enter 000 for the home area code and enter your area codeas a local area code. After programming, if you receive a call from within yourarea code, the screen displays the 10 digits of the phone number.Be sure to follow the directions under Program home and local areacodes on page 38 during feature setup.
Line group: A group of system phones sharing some lines within a multi-phone system.
Local area code: Most users dial 11 digits to make calls outside their homearea codes. If this applies to you, you do not need to program any local areacodes.However, if you dial only 10 digits to make calls to some areas outside yourhome area code (without dialing 1), then program these local area codes intothe phone. Up to five local area codes can be programmed. See Programhome and local area codes on page 38 during feature setup forinstructions.After programming, if you receive a call from one of these local area codes,the screen displays the 10 digits of the phone number.
Navigation buttons: These are the buttons used when programmingyour 974 phone and for scrolling through feature options (E,+,-,>,<).
Phone system: Two or more system phones combined to form aninteracting system of shared lines. You can have up to 16 phones in the system.
�NOTE: If you have one or more 964, 955, or 944 phone(s) installed in the same phone system with this 974 telephone, you can have only 12extensions in the phone system.
Prime line: This is the line on your phone you designate to be selectedautomatically when you lift the handset, press K, or press h.
System phone: Any 944, 945, 955, 964, 974 or 984 phone in your phonesystem (also called an extension).
6
Bef
ore
you
begi
nB
efor
e yo
u be
gin
974CIB_(Rev11-12)ml24.05.06 5/24/06 9:29 PM Page 6
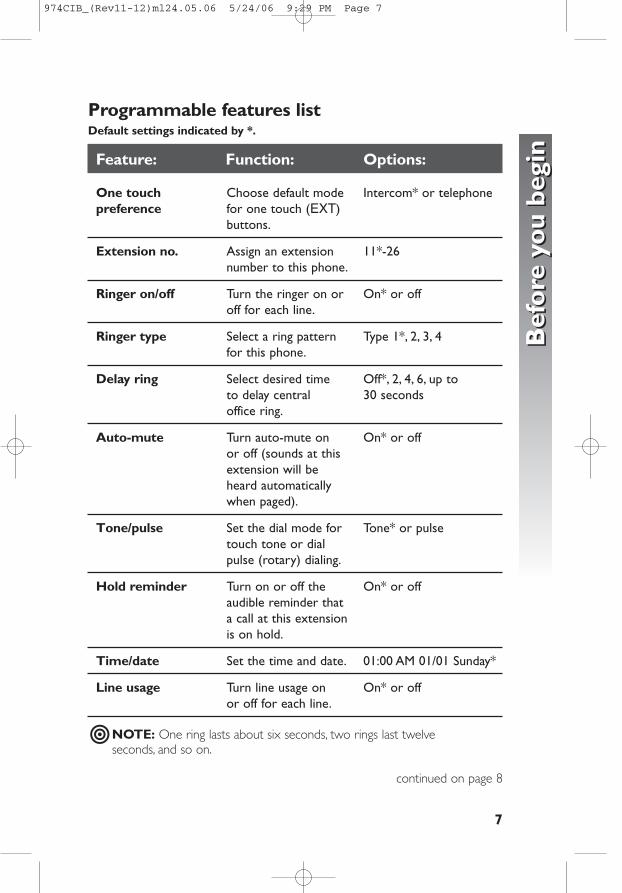
Programmable features listDefault settings indicated by *.
Feature: Function: Options:
One touch Choose default mode Intercom* or telephonepreference for one touch (EXT)
buttons.
Extension no. Assign an extension 11*-26number to this phone.
Ringer on/off Turn the ringer on or On* or offoff for each line.
Ringer type Select a ring pattern Type 1*, 2, 3, 4for this phone.
Delay ring Select desired time Off*, 2, 4, 6, up to to delay central 30 secondsoffice ring.
Auto-mute Turn auto-mute on On* or offor off (sounds at this extension will be heard automatically when paged).
Tone/pulse Set the dial mode for Tone* or pulsetouch tone or dialpulse (rotary) dialing.
Hold reminder Turn on or off the On* or offaudible reminder that a call at this extension is on hold.
Time/date Set the time and date. 01:00 AM 01/01 Sunday*
Line usage Turn line usage on On* or off or off for each line.
�NOTE: One ring lasts about six seconds, two rings last twelveseconds, and so on.
continued on page 8
7
Bef
ore
you
begi
nB
efor
e yo
u be
gin
974CIB_(Rev11-12)ml24.05.06 5/24/06 9:29 PM Page 7
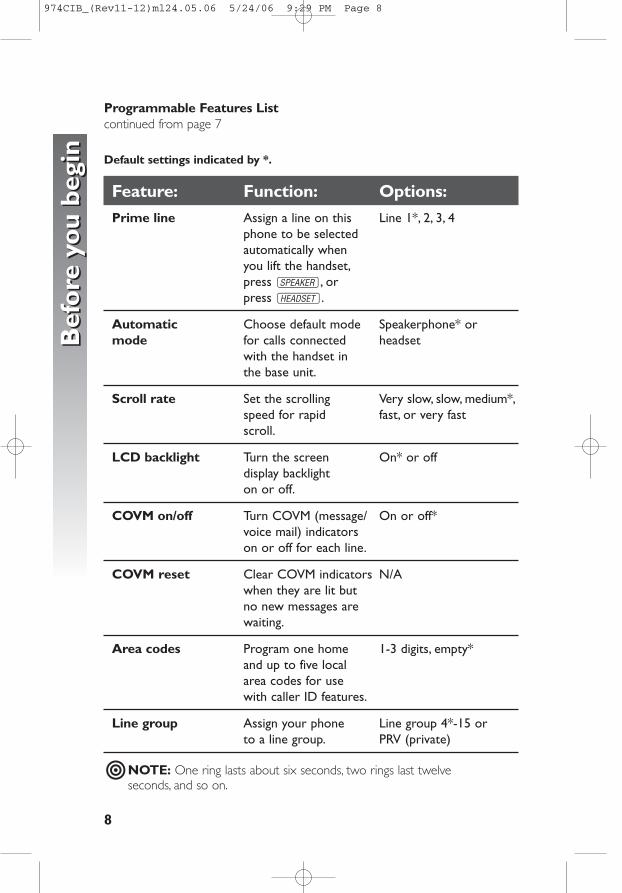
Programmable Features Listcontinued from page 7
Default settings indicated by *.
Feature: Function: Options:Prime line Assign a line on this Line 1*, 2, 3, 4
phone to be selected automatically when you lift the handset,press K, orpress h.
Automatic Choose default mode Speakerphone* or mode for calls connected headset
with the handset in the base unit.
Scroll rate Set the scrolling Very slow, slow, medium*,speed for rapid fast, or very fast scroll.
LCD backlight Turn the screen On* or off display backlighton or off.
COVM on/off Turn COVM (message/ On or off*voice mail) indicators on or off for each line.
COVM reset Clear COVM indicators N/Awhen they are lit but no new messages are waiting.
Area codes Program one home 1-3 digits, empty*and up to five localarea codes for use with caller ID features.
Line group Assign your phone Line group 4*-15 or to a line group. PRV (private)
�NOTE: One ring lasts about six seconds, two rings last twelveseconds, and so on.
8
Bef
ore
you
begi
nB
efor
e yo
u be
gin
974CIB_(Rev11-12)ml24.05.06 5/24/06 9:29 PM Page 8
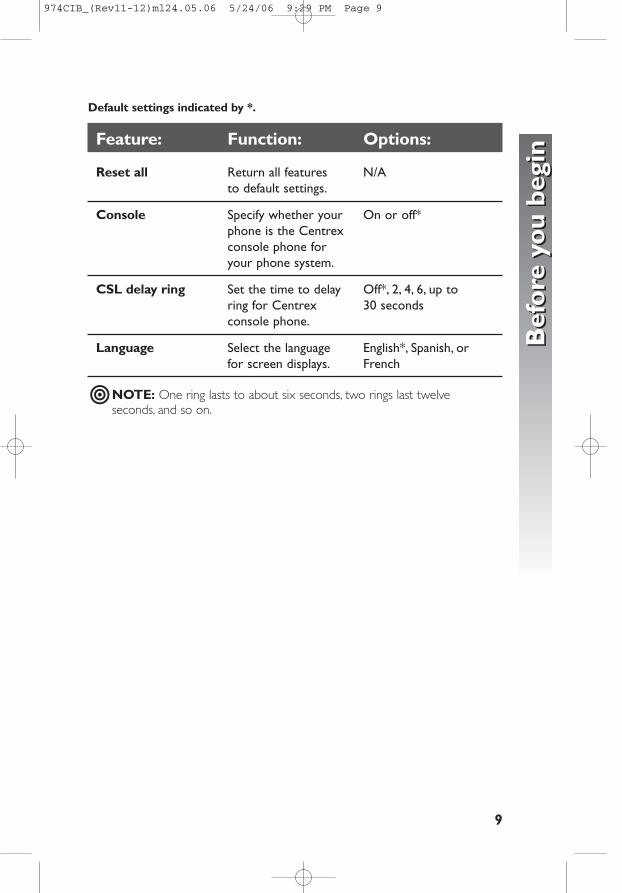
Default settings indicated by *.
Feature: Function: Options:
Reset all Return all features N/Ato default settings.
Console Specify whether your On or off*phone is the Centrexconsole phone for your phone system.
CSL delay ring Set the time to delay Off*, 2, 4, 6, up to ring for Centrex 30 secondsconsole phone.
Language Select the language English*, Spanish, orfor screen displays. French
�NOTE: One ring lasts to about six seconds, two rings last twelveseconds, and so on.
9
Bef
ore
you
begi
nB
efor
e yo
u be
gin
974CIB_(Rev11-12)ml24.05.06 5/24/06 9:29 PM Page 9
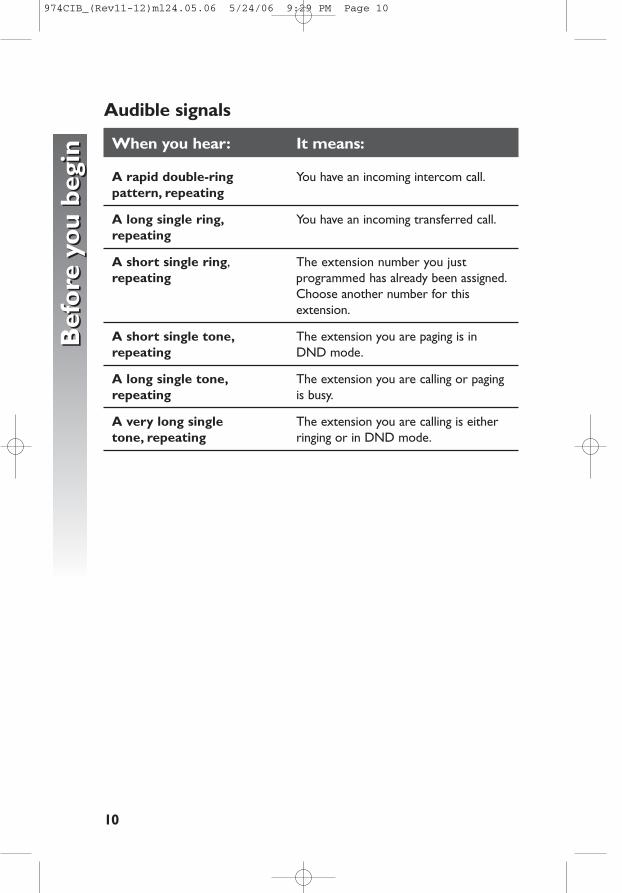
Audible signals
When you hear: It means:
A rapid double-ring You have an incoming intercom call.pattern, repeating
A long single ring, You have an incoming transferred call.repeating
A short single ring, The extension number you just repeating programmed has already been assigned.
Choose another number for thisextension.
A short single tone, The extension you are paging is in repeating DND mode.
A long single tone, The extension you are calling or pagingrepeating is busy.
A very long single The extension you are calling is either tone, repeating ringing or in DND mode.
10
Bef
ore
you
begi
nB
efor
e yo
u be
gin
974CIB_(Rev11-12)ml24.05.06 5/24/06 9:29 PM Page 10
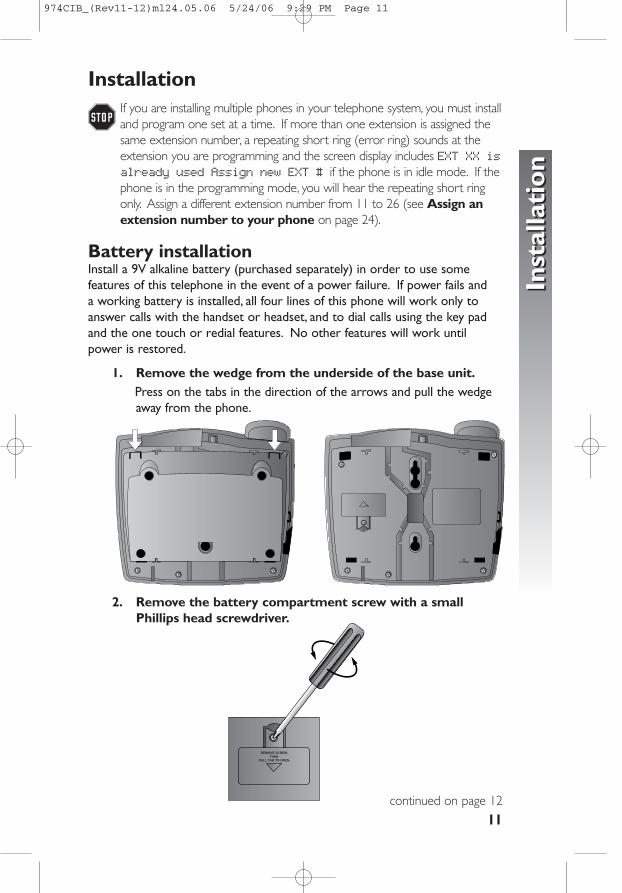
If you are installing multiple phones in your telephone system, you must installand program one set at a time. If more than one extension is assigned thesame extension number, a repeating short ring (error ring) sounds at theextension you are programming and the screen display includes EXTuXXuisalreadyuuseduAssignunewuEXTu#uif the phone is in idle mode. If thephone is in the programming mode, you will hear the repeating short ringonly. Assign a different extension number from 11 to 26 (see Assign anextension number to your phone on page 24).
Battery installationInstall a 9V alkaline battery (purchased separately) in order to use somefeatures of this telephone in the event of a power failure. If power fails and a working battery is installed, all four lines of this phone will work only toanswer calls with the handset or headset, and to dial calls using the key padand the one touch or redial features. No other features will work untilpower is restored.
1. Remove the wedge from the underside of the base unit.Press on the tabs in the direction of the arrows and pull the wedge away from the phone.
2. Remove the battery compartment screw with a smallPhillips head screwdriver.
continued on page 12
11
Inst
alla
tion
Inst
alla
tion
Installation
974CIB_(Rev11-12)ml24.05.06 5/24/06 9:29 PM Page 11
Battery installationcontinued from page 11
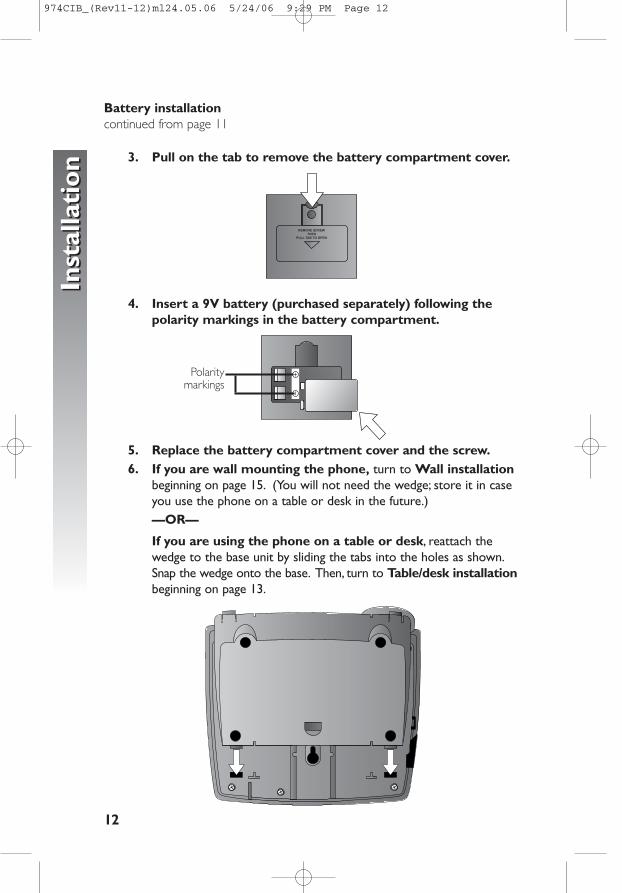
3. Pull on the tab to remove the battery compartment cover.
4. Insert a 9V battery (purchased separately) following thepolarity markings in the battery compartment.
5. Replace the battery compartment cover and the screw.6. If you are wall mounting the phone, turn to Wall installation
beginning on page 15. (You will not need the wedge; store it in caseyou use the phone on a table or desk in the future.)—OR—
If you are using the phone on a table or desk, reattach thewedge to the base unit by sliding the tabs into the holes as shown.Snap the wedge onto the base. Then, turn to Table/desk installationbeginning on page 13.
12
Inst
alla
tion
Inst
alla
tion
Polaritymarkings
974CIB_(Rev11-12)ml24.05.06 5/24/06 9:29 PM Page 12
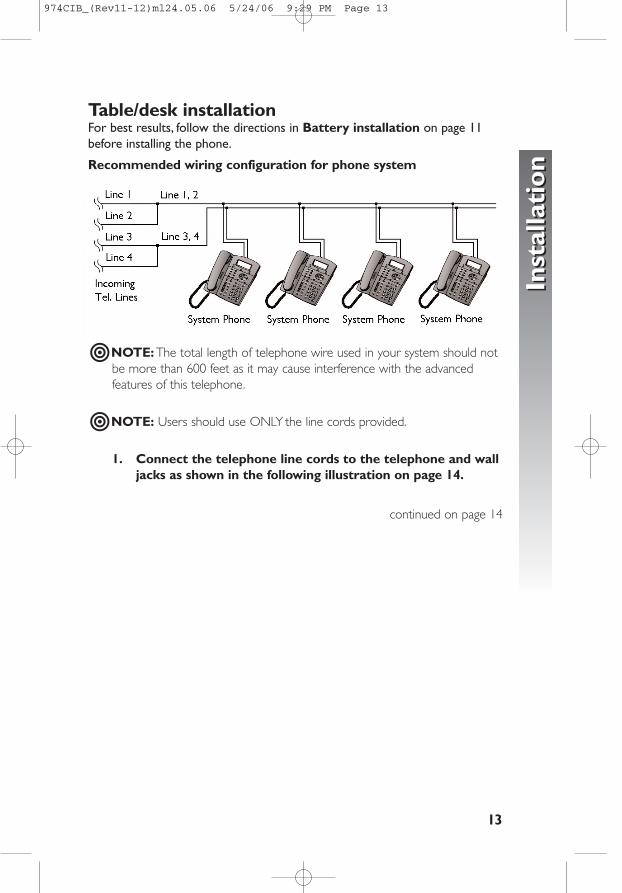
Table/desk installationFor best results, follow the directions in Battery installation on page 11before installing the phone.
Recommended wiring configuration for phone system
�NOTE: The total length of telephone wire used in your system should notbe more than 600 feet as it may cause interference with the advancedfeatures of this telephone.
�NOTE: Users should use ONLY the line cords provided.
1. Connect the telephone line cords to the telephone and wall jacks as shown in the following illustration on page 14.
continued on page 14
13
Inst
alla
tion
Inst
alla
tion
974CIB_(Rev11-12)ml24.05.06 5/24/06 9:29 PM Page 13
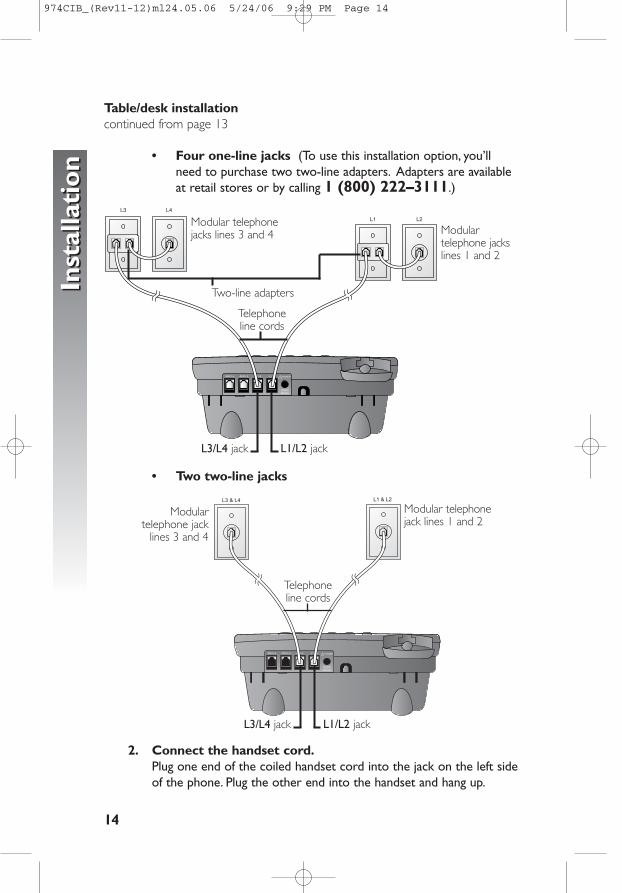
Table/desk installation continued from page 13
• Four one-line jacks (To use this installation option, you’llneed to purchase two two-line adapters. Adapters are availableat retail stores or by calling 1 (800) 222–3111.)
• Two two-line jacks
2. Connect the handset cord.Plug one end of the coiled handset cord into the jack on the left sideof the phone. Plug the other end into the handset and hang up.
14
Inst
alla
tion
Inst
alla
tion
Modular telephone jack
lines 3 and 4
Modular telephonejack lines 1 and 2
Telephoneline cords
L1/L2 jackL3/L4 jack
Two-line adapters
Telephoneline cords
Modular telephonejacks lines 3 and 4 Modular
telephone jackslines 1 and 2
L1/L2 jackL3/L4 jack
974CIB_(Rev11-12)ml24.05.06 5/24/06 9:29 PM Page 14
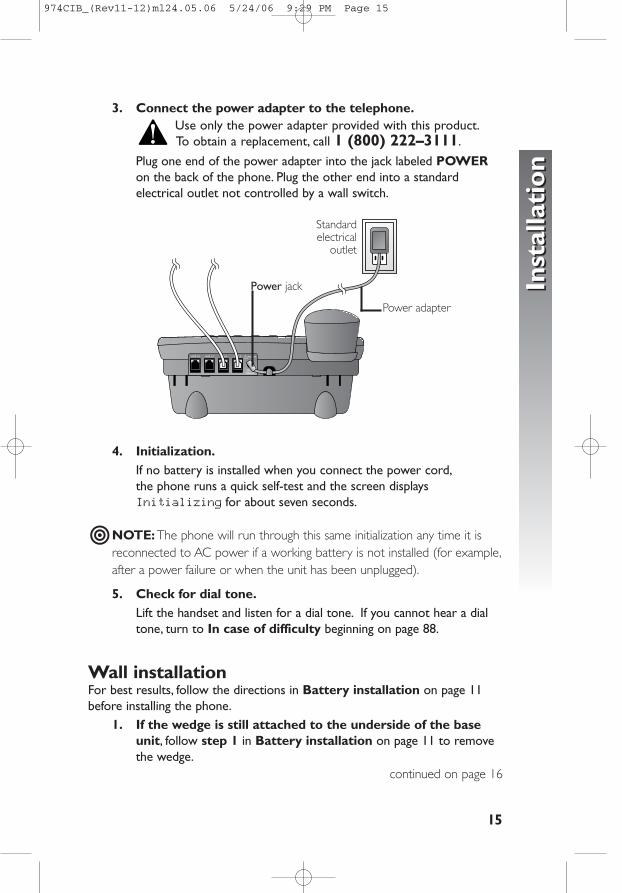
3. Connect the power adapter to the telephone.Use only the power adapter provided with this product.To obtain a replacement, call 1 (800) 222–3111.
Plug one end of the power adapter into the jack labeled POWER on the back of the phone. Plug the other end into a standard electrical outlet not controlled by a wall switch.
4. Initialization.If no battery is installed when you connect the power cord,the phone runs a quick self-test and the screen displaysInitializing for about seven seconds.
�NOTE: The phone will run through this same initialization any time it isreconnected to AC power if a working battery is not installed (for example,after a power failure or when the unit has been unplugged).
5. Check for dial tone.Lift the handset and listen for a dial tone. If you cannot hear a dialtone, turn to In case of difficulty beginning on page 88.
Wall installationFor best results, follow the directions in Battery installation on page 11before installing the phone.
1. If the wedge is still attached to the underside of the baseunit, follow step 1 in Battery installation on page 11 to removethe wedge.
continued on page 16
15
Inst
alla
tion
Inst
alla
tion
Standardelectrical
outlet
Power adapter
Power jack
974CIB_(Rev11-12)ml24.05.06 5/24/06 9:29 PM Page 15
Wall installation continued from page 15
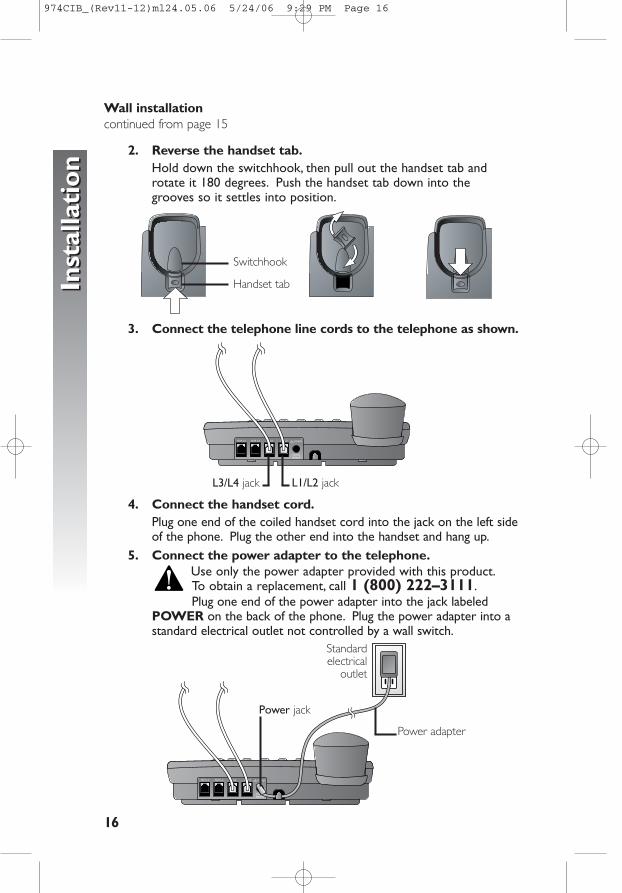
2. Reverse the handset tab.Hold down the switchhook, then pull out the handset tab androtate it 180 degrees. Push the handset tab down into the grooves so it settles into position.
3. Connect the telephone line cords to the telephone as shown.
4. Connect the handset cord.Plug one end of the coiled handset cord into the jack on the left sideof the phone. Plug the other end into the handset and hang up.
5. Connect the power adapter to the telephone.Use only the power adapter provided with this product.To obtain a replacement, call 1 (800) 222–3111.Plug one end of the power adapter into the jack labeled
POWER on the back of the phone. Plug the power adapter into astandard electrical outlet not controlled by a wall switch.
16
Inst
alla
tion
Inst
alla
tion
Standardelectrical
outlet
Power adapter
Power jack
Switchhook
Handset tab
L1/L2 jackL3/L4 jack
974CIB_(Rev11-12)ml24.05.06 5/24/06 9:29 PM Page 16
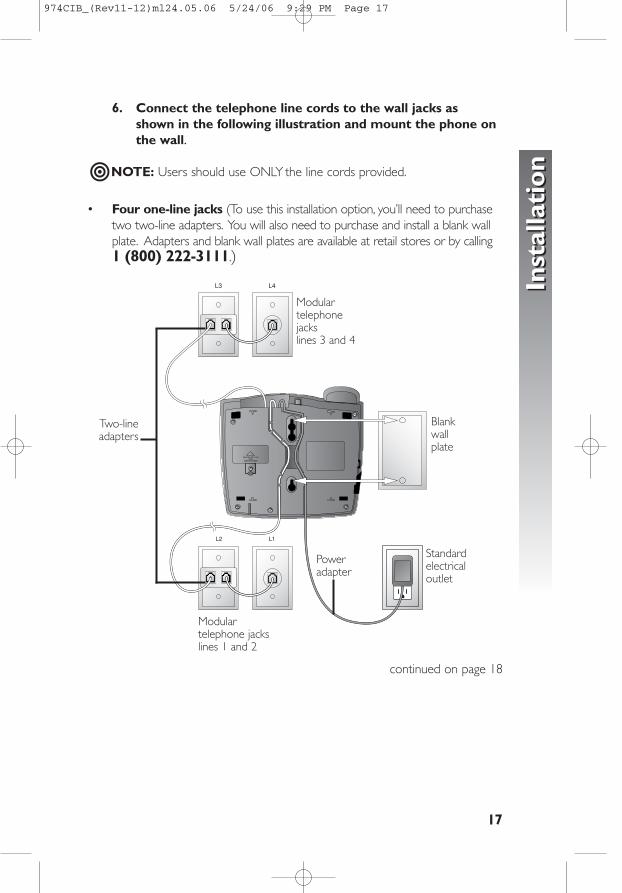
6. Connect the telephone line cords to the wall jacks as shown in the following illustration and mount the phone onthe wall.
�NOTE: Users should use ONLY the line cords provided.
• Four one-line jacks (To use this installation option, you’ll need to purchasetwo two-line adapters. You will also need to purchase and install a blank wallplate. Adapters and blank wall plates are available at retail stores or by calling1 (800) 222-3111.)
continued on page 18
17
Inst
alla
tion
Inst
alla
tion
Modulartelephone jacks lines 3 and 4
Modulartelephone jackslines 1 and 2
Standardelectricaloutlet
Blank wallplate
Poweradapter
Two-lineadapters
974CIB_(Rev11-12)ml24.05.06 5/24/06 9:29 PM Page 17
Wall installationcontinued from page 17
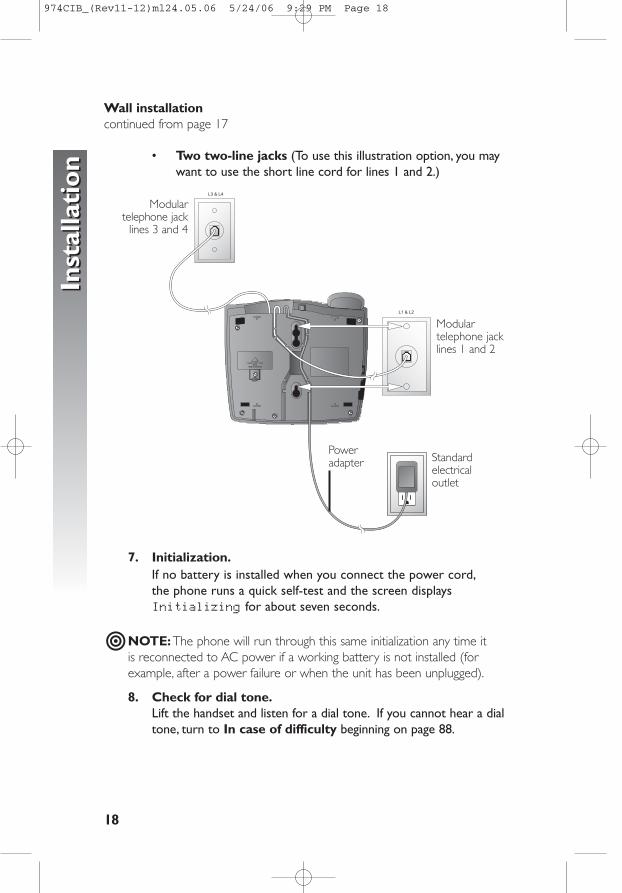
• Two two-line jacks (To use this illustration option, you maywant to use the short line cord for lines 1 and 2.)
7. Initialization.If no battery is installed when you connect the power cord,the phone runs a quick self-test and the screen displaysInitializing for about seven seconds.
�NOTE: The phone will run through this same initialization any time it is reconnected to AC power if a working battery is not installed (forexample, after a power failure or when the unit has been unplugged).
8. Check for dial tone.Lift the handset and listen for a dial tone. If you cannot hear a dialtone, turn to In case of difficulty beginning on page 88.
18
Inst
alla
tion
Inst
alla
tion
Modulartelephone jack
lines 3 and 4
Modulartelephone jacklines 1 and 2
Standardelectricaloutlet
Poweradapter
974CIB_(Rev11-12)ml24.05.06 5/24/06 9:29 PM Page 18
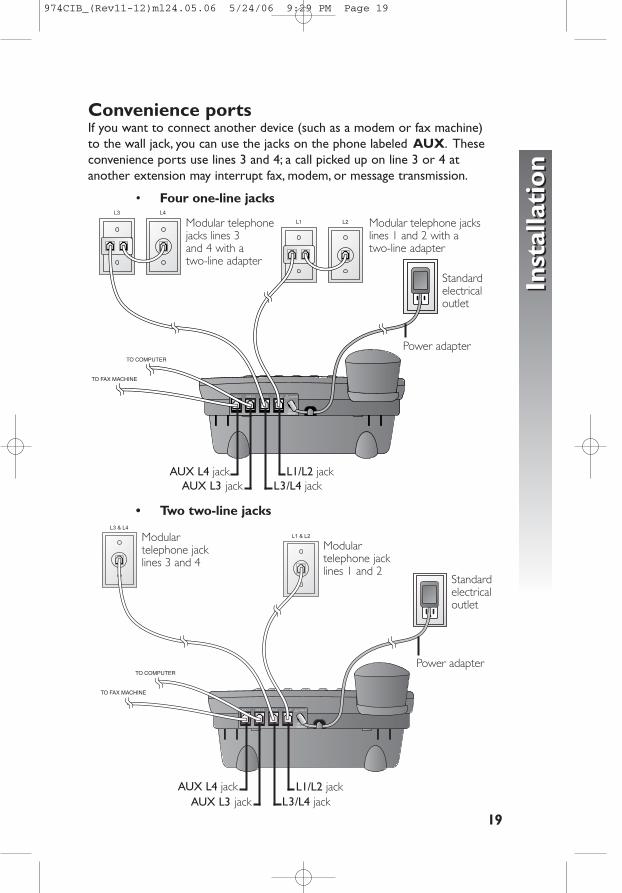
Convenience portsIf you want to connect another device (such as a modem or fax machine) to the wall jack, you can use the jacks on the phone labeled AUX. Theseconvenience ports use lines 3 and 4; a call picked up on line 3 or 4 atanother extension may interrupt fax, modem, or message transmission.
• Four one-line jacks
• Two two-line jacks
19
Inst
alla
tion
Inst
alla
tion
Modular telephone jacks lines 3 and 4 with atwo-line adapter
Modular telephone jacks lines 1 and 2 with atwo-line adapter
Standardelectricaloutlet
L1/L2 jackL3/L4 jack
AUX L4 jackAUX L3 jack
AUX L4 jack
Modulartelephone jack lines 3 and 4
Modulartelephone jack lines 1 and 2
Standardelectricaloutlet
Power adapter
L1/L2 jackL3/L4 jackAUX L3 jack
Power adapter
974CIB_(Rev11-12)ml24.05.06 5/24/06 9:29 PM Page 19
20
Men
u op
erat
ion
Men
u op
erat
ion
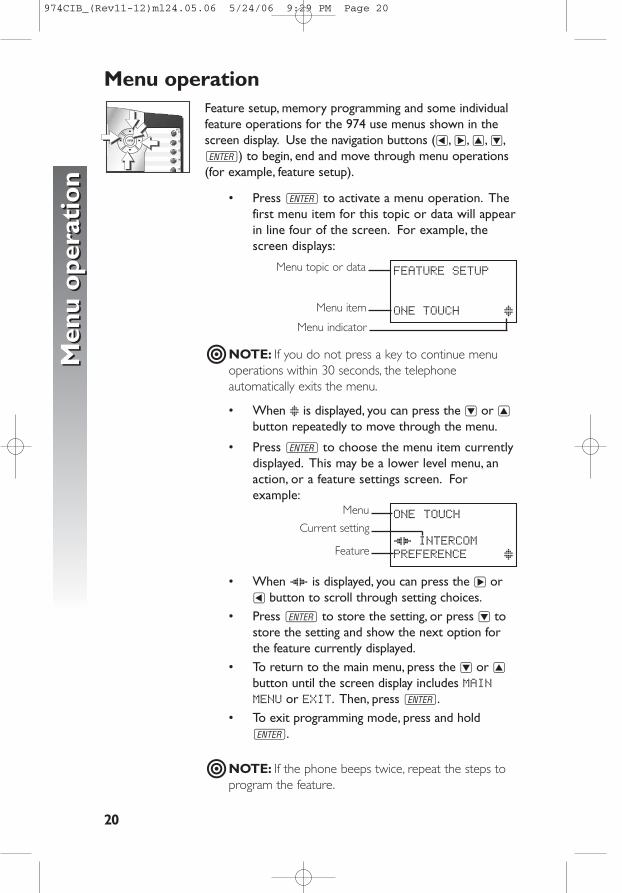
Feature setup, memory programming and some individualfeature operations for the 974 use menus shown in thescreen display. Use the navigation buttons (<,>,+,-,E) to begin, end and move through menu operations(for example, feature setup).
• Press E to activate a menu operation. Thefirst menu item for this topic or data will appearin line four of the screen. For example, thescreen displays:
�NOTE: If you do not press a key to continue menuoperations within 30 seconds, the telephoneautomatically exits the menu.
• When x is displayed, you can press the - or +button repeatedly to move through the menu.
• Press E to choose the menu item currentlydisplayed. This may be a lower level menu, anaction, or a feature settings screen. Forexample:
• When () is displayed, you can press the > or< button to scroll through setting choices.
• Press E to store the setting, or press - tostore the setting and show the next option forthe feature currently displayed.
• To return to the main menu, press the - or +button until the screen display includes MAINMENU or EXIT. Then, press E.
• To exit programming mode, press and holdE.
�NOTE: If the phone beeps twice, repeat the steps toprogram the feature.
ONE TOUCH
() INTERCOMPREFERENCEHHHHHx
FEATUREHSETUP
ONEHTOUCHHHHHHHx
Menu operation
Menu
Menu item
Menu topic or data
Menu indicator
Current setting
Feature
974CIB_(Rev11-12)ml24.05.06 5/24/06 9:29 PM Page 20
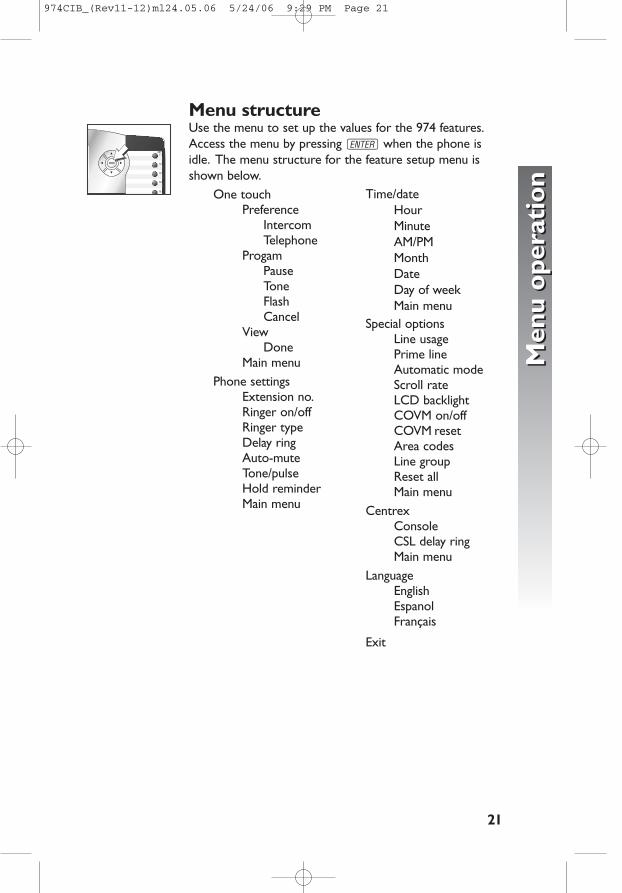
Menu structureUse the menu to set up the values for the 974 features.Access the menu by pressing E when the phone isidle. The menu structure for the feature setup menu isshown below.
One touchPreference
IntercomTelephone
ProgamPause ToneFlashCancel
ViewDone
Main menuPhone settings
Extension no.Ringer on/offRinger typeDelay ringAuto-muteTone/pulseHold reminderMain menu
21
Men
u op
erat
ion
Men
u op
erat
ion
Time/dateHourMinuteAM/PMMonthDateDay of weekMain menu
Special optionsLine usagePrime lineAutomatic modeScroll rateLCD backlightCOVM on/offCOVM resetArea codesLine groupReset allMain menu
CentrexConsoleCSL delay ringMain menu
LanguageEnglishEspanolFrançais
Exit
974CIB_(Rev11-12)ml24.05.06 5/24/06 9:29 PM Page 21
Shortcut to language menuThis phone comes programmed for English screen displays.If you need to change the screen language to Spanish orFrench, you can use these steps to reach the LANGUAGEmenu more quickly.
1. Press E to begin feature setup.2. Press + twice. The screen display includes
LANGUAGE and the current setting.3. Press < or > to scroll through the language
choices (English, Espanol, or Français).When the language you want to use is displayed,press - to save your choice. The screen displayincludes EXIT.
4. Press E to return to the idle screen.
�NOTE:You can exit feature setup and return to theidle screen any time. Simply press and hold E.
Rapid scrollYou can scroll through menu items or setting choicesmore quickly using this feature. Press and hold the desiredscroll button (+,-,> or <). The screen will scrollthrough your choices at the rate you program duringfeature setup. See Set the scroll rate on page 34 forprogramming instructions.
22
Men
u op
erat
ion
Men
u op
erat
ion
iiiiikkkkk ooooommmmm
jjjjj
iiiiikkkkk ooooommmmm
974CIB_(Rev11-12)ml24.05.06 5/24/06 9:29 PM Page 22

23
Fea
ture
set
upF
eatu
re s
etup
Set one touch preferenceChoose whether pressing an EXT button automaticallyinitiates an intercom or one touch call. If you want toplace one touch calls using only one button, set thisfeature to TELEPHONE. If you want to place intercomcalls using only one button, set this feature to INTERCOM.See One touch operation beginning on page 55 andIntercom operation beginning on page 67 for detailsabout one touch and intercom calls.
1. Press E to begin feature setup.2. Press E. The screen display includes
PREFERENCE and the current setting.3. Press < or > to toggle between INTERCOM
and TELEPHONE.4. When the correct setting is shown, press - to save your choice. The screen displayincludes PROGRAM.
5. Press and hold E to return to the idlescreen.
�NOTE:You can exit feature setup and return to theidle screen any time. Simply press and hold E.
Feature setup
iiiiikkkkk ooooonnnnn
974CIB_(Rev11-12)ml24.05.06 5/24/06 9:29 PM Page 23
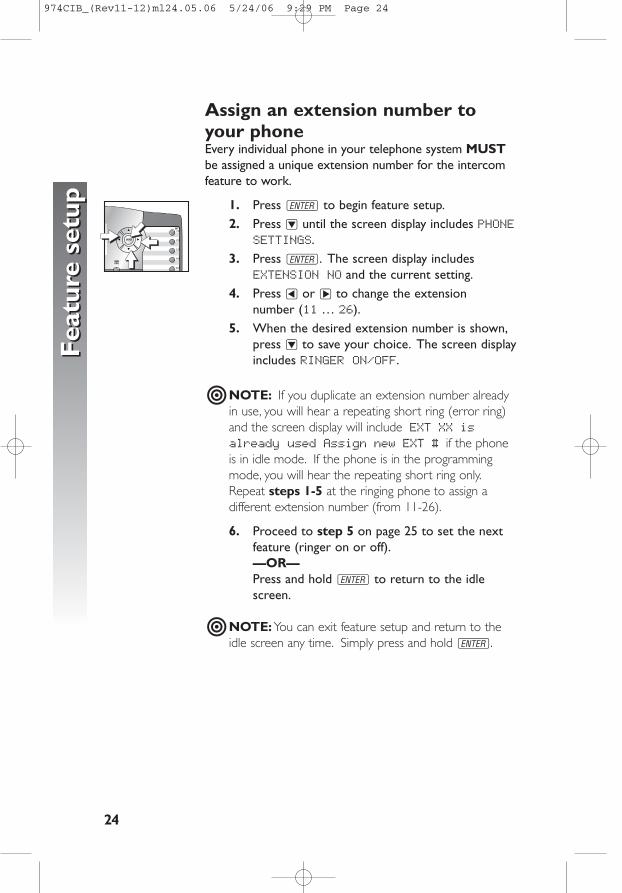
Assign an extension number toyour phoneEvery individual phone in your telephone system MUSTbe assigned a unique extension number for the intercomfeature to work.
1. Press E to begin feature setup.2. Press - until the screen display includes PHONE
SETTINGS.3. Press E. The screen display includes
EXTENSION NO and the current setting.4. Press < or > to change the extension
number (11 … 26).5. When the desired extension number is shown,
press - to save your choice. The screen displayincludes RINGER ON/OFF.
�NOTE: If you duplicate an extension number alreadyin use, you will hear a repeating short ring (error ring)and the screen display will includehEXThXXhisalready usedhAssignhnewhEXTh#hif the phoneis in idle mode. If the phone is in the programmingmode, you will hear the repeating short ring only.Repeat steps 1-5 at the ringing phone to assign adifferent extension number (from 11-26).
6. Proceed to step 5 on page 25 to set the nextfeature (ringer on or off).—OR—Press and hold E to return to the idlescreen.
�NOTE:You can exit feature setup and return to theidle screen any time. Simply press and hold E.
24
Fea
ture
set
upF
eatu
re s
etup
iiiiikkkkk ooooonnnnn
974CIB_(Rev11-12)ml24.05.06 5/24/06 9:29 PM Page 24

Turn the ringer on or off foreach line
1. Press E to begin feature setup.2. Press - until the screen display includes
PHONE SETTINGS.3. Press E. The screen display includes
EXTENSION NO.4. Press - until the screen display includes
RINGER ON/OFF.5. Press E. The screen display includes
L1 RINGER and the current setting.6. Press < or > to toggle between On and Off
for the line shown.7. When the desired setting for this line is
shown, press - to save your choice. Thescreen display will include the current ringersetting for the next line (L1 … L4).
8. Repeat steps 6 and 7 to turn the ringer on oroff for other lines at this phone.
9. When you are finished setting the ringer, press- until the screen display includes DONE.
10. Press E. The screen display includesRINGER ON/OFF.
11. Proceed to step 4 on page 26 to set the nextfeature (ringer type).—OR—Press and hold E to return to the idlescreen.
�NOTE:You can exit feature setup and return to theidle screen any time. Simply press and hold E.
25
Fea
ture
set
upF
eatu
re s
etupiiiii
kkkkk ooooojjjjj
974CIB_(Rev11-12)ml24.05.06 5/24/06 9:29 PM Page 25
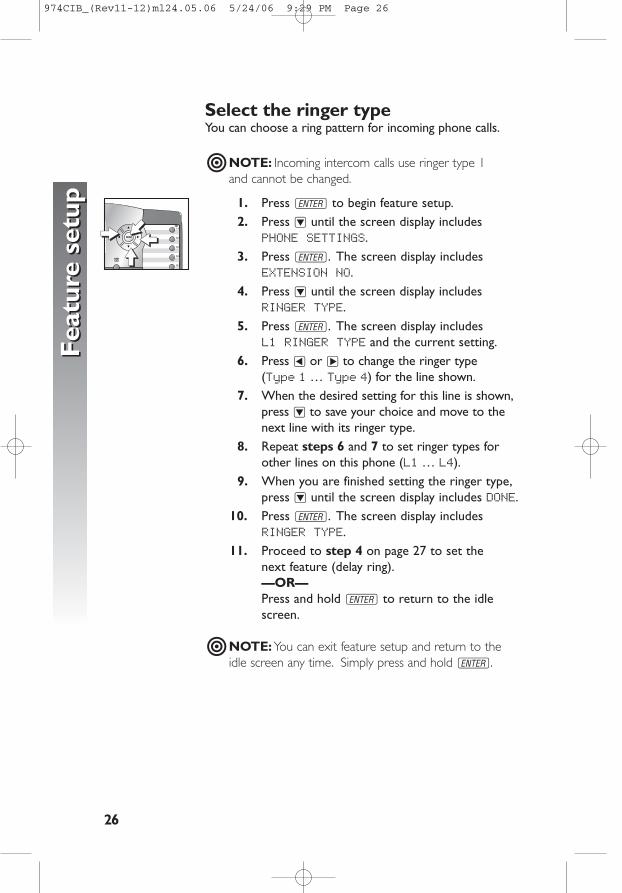
Select the ringer typeYou can choose a ring pattern for incoming phone calls.
�NOTE: Incoming intercom calls use ringer type 1 and cannot be changed.
1. Press E to begin feature setup.2. Press - until the screen display includes
PHONE SETTINGS.3. Press E. The screen display includes
EXTENSION NO.4. Press - until the screen display includes
RINGER TYPE.5. Press E. The screen display includes
L1 RINGER TYPE and the current setting.6. Press < or > to change the ringer type
(Type 1 … Type 4) for the line shown.7. When the desired setting for this line is shown,
press - to save your choice and move to thenext line with its ringer type.
8. Repeat steps 6 and 7 to set ringer types forother lines on this phone (L1 … L4).
9. When you are finished setting the ringer type,press - until the screen display includes DONE.
10. Press E. The screen display includesRINGER TYPE.
11. Proceed to step 4 on page 27 to set the next feature (delay ring).—OR—Press and hold E to return to the idlescreen.
�NOTE:You can exit feature setup and return to theidle screen any time. Simply press and hold E.
26
Fea
ture
set
upF
eatu
re s
etup
iiiiikkkkk ooooonnnnn
974CIB_(Rev11-12)ml24.05.06 5/24/06 9:29 PM Page 26
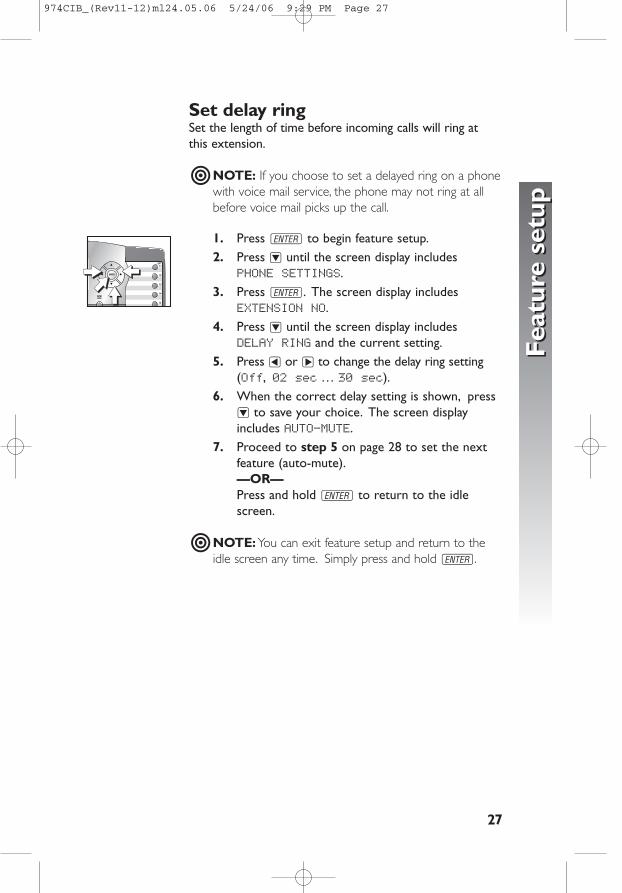
Set delay ringSet the length of time before incoming calls will ring at this extension.
�NOTE: If you choose to set a delayed ring on a phonewith voice mail service, the phone may not ring at allbefore voice mail picks up the call.
1. Press E to begin feature setup.2. Press - until the screen display includes
PHONE SETTINGS.3. Press E. The screen display includes
EXTENSION NO.4. Press - until the screen display includes
DELAY RING and the current setting.5. Press < or > to change the delay ring setting
(Off, 02 sec … 30 sec).6. When the correct delay setting is shown, press- to save your choice. The screen displayincludes AUTO-MUTE.
7. Proceed to step 5 on page 28 to set the nextfeature (auto-mute).—OR—Press and hold E to return to the idlescreen.
�NOTE:You can exit feature setup and return to theidle screen any time. Simply press and hold E.
27
Fea
ture
set
upF
eatu
re s
etup
iiiiikkkkk ooooojjjjj
974CIB_(Rev11-12)ml24.05.06 5/24/06 9:29 PM Page 27
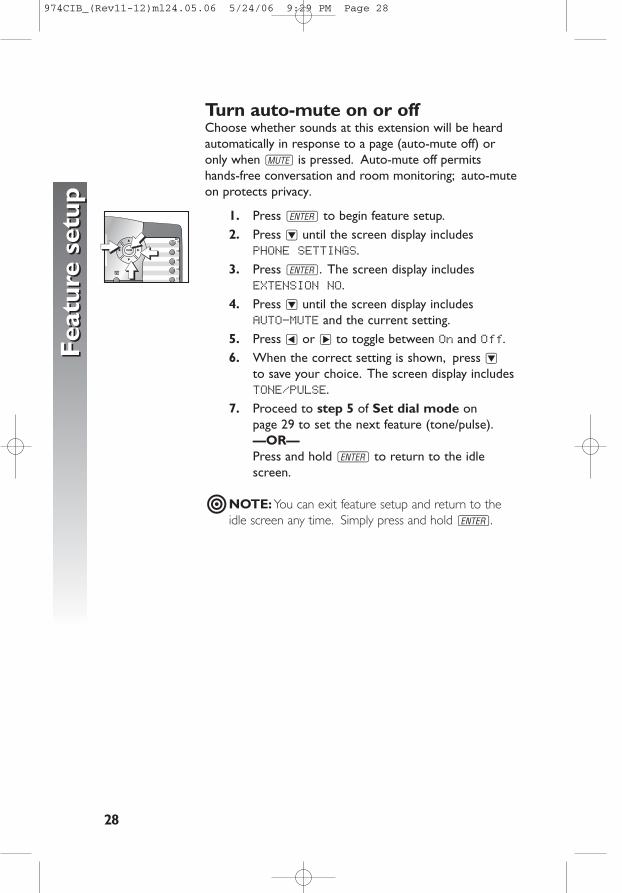
Turn auto-mute on or offChoose whether sounds at this extension will be heardautomatically in response to a page (auto-mute off) oronly when M is pressed. Auto-mute off permitshands-free conversation and room monitoring; auto-muteon protects privacy.
1. Press E to begin feature setup.2. Press - until the screen display includes
PHONE SETTINGS.3. Press E. The screen display includes
EXTENSION NO.4. Press - until the screen display includes
AUTO-MUTE and the current setting.5. Press < or > to toggle between On and Off.6. When the correct setting is shown, press -
to save your choice. The screen display includesTONE/PULSE.
7. Proceed to step 5 of Set dial mode on page 29 to set the next feature (tone/pulse).—OR—Press and hold E to return to the idlescreen.
�NOTE:You can exit feature setup and return to theidle screen any time. Simply press and hold E.
28
Fea
ture
set
upF
eatu
re s
etup
iiiiikkkkk ooooonnnnn
974CIB_(Rev11-12)ml24.05.06 5/24/06 9:29 PM Page 28
Set dial mode1. Press E to begin feature setup.2. Press - until the screen display includes
PHONE SETTINGS.3. Press E. The screen display includes
EXTENSION NO.4. Press - until the screen display includes
TONE/PULSE and the current setting.5. Press < or > to toggle between Tone
and Pulse.6. When the correct setting is shown, press - to save your choice. The screen displayincludes HOLDHREMINDER.
7. Proceed to step 5 below to set the nextfeature (hold reminder).—OR—Press and hold E to return to the idlescreen.
�NOTE:You can exit feature setup and return to theidle screen any time. Simply press and hold E.
Turn hold reminder on or off1. Press E to begin feature setup.2. Press - until the screen display includes
PHONE SETTINGS.3. Press E. The screen display includes
EXTENSION NO.4. Press - until the screen display includes HOLD
REMINDER and the current setting.5. Press < or > to toggle between On and Off.6. When the correct setting is shown, press -
to save your choice. The screen display includes MAIN MENU.
7. Press and hold E to return to the idlescreen.
�NOTE:You can exit feature setup and return to theidle screen any time. Simply press and hold E.
29
Fea
ture
set
upF
eatu
re s
etup
iiiiikkkkk ooooonnnnn
iiiiikkkkk ooooonnnnn
974CIB_(Rev11-12)ml24.05.06 5/24/06 9:29 PM Page 29
Set the time and date1. Press E to begin feature setup.2. Press - until the screen display includes
TIME/DATE.3. Press E. The screen display includes
HOUR and the current hour setting.4. Press < or > until the correct hour is shown.5. Press - to save the hour setting. The screen
display includes MINUTE and the currentminute setting.
6. Press < or > until the correct minute isshown.
7. Press - to save the minute setting. Thescreen display includes AM/PM and the currentsetting.
8. Press < or > to toggle between AM and PM.9. Press - to save the AM/PM setting. The
screen display includes MONTH and thenumber of the current month setting.
10. Press < or > until the number of the correctmonth is shown.
11. Press - to save the correct month setting.The screen display includes DATE and thecurrent day of the month setting.
12. Press < or > until the correct day of the month is shown.
13. Press - to save the day of the month. Thescreen display includes DAYhOFhWEEK and thecurrent setting.
14. Press < or > until the correct day of the week is shown.
15. Press - to save the time/date setting. Thescreen display includes MAINhMENU.
16. Press and hold E to return to the idlescreen.
�NOTE: In setting the 29th day of February (whichruns every four years), you can first set the month andday to either Jan 29 or Mar 29, DO NOT switch thedate item, and then ONLY change the month to Feb.The LCD on the base unit will show Feb 29 aftersetting.
�NOTE:You can exit feature setup and return to theidle screen any time. Simply press and hold E.
30
Fea
ture
set
upF
eatu
re s
etup
iiiiikkkkk ooooonnnnn
974CIB_(Rev11-12)ml24.05.06 5/24/06 9:29 PM Page 30
Turn line usage on or off for eachlineIf you are not using all four phone lines at this extension,you need to turn off line usage for the unused lines. Ifyou expand to a second, third or fourth line, turn lineusage back on. Line 1 must be turned on for the intercomto work.
�NOTE: You may use any combination of lines. Linesused do not need to be in order. For example, lineusage can be turned on for lines 1 and 3 and turned offfor lines 2 and 4.
You may also restrict the use of certain lines on this phoneto intercom and paging only, by turning off line usage foreach line you want restricted. When line usage is turnedoff, that line cannot be used to answer incoming calls or tomake outgoing or transfer calls.
1. Press E to begin feature setup.2. Press - until the screen display includes
SPECIAL OPTIONS.3. Press E. The screen display includes
LINE USAGE.4. Press E. The screen display includes
L1 USAGE and the current setting for this line.5. Press < or > to toggle between On and Off
for the line shown.6. Press - to save the current setting for this line
and move to the next line with its current lineusage setting.
7. Repeat steps 5 and 6 to set line usage forother lines at this extension.
8. When you are finished setting line usage,press - until the screen display includes DONE.
9. Press E. The screen display includesLINE USAGE.
10. Proceed to step 4 on page 32 to set up thenext feature (prime line).—OR—Press and hold E to return to the idlescreen.
�NOTE:You can exit feature setup and return to theidle screen any time. Simply press and hold E.
31
Fea
ture
set
upF
eatu
re s
etup
iiiiikkkkk ooooonnnnn
974CIB_(Rev11-12)ml24.05.06 5/24/06 9:29 PM Page 31
Assign the prime line (line preference)
1. Press E to begin feature setup.2. Press - until the screen display includes
SPECIAL OPTIONS.3. Press E. The screen display includes
LINE USAGE.4. Press - until the screen display includes
PRIME LINE and the current setting.5. Press < or > to scroll through the line
choices (Line1 … Line4).6. When the line you wish to set as prime is
displayed, press - to save your choice. Thescreen display includes AUTOMATIC MODE.
7. Proceed to step 5 on page 33 to set the next feature (automatic mode).—OR—Press and hold E to return to the idlescreen.
�NOTE:You can exit feature setup and return to theidle screen any time. Simply press and hold E.
32
Fea
ture
set
upF
eatu
re s
etup iiiii
kkkkk ooooonnnnn
974CIB_(Rev11-12)ml24.05.06 5/24/06 9:29 PM Page 32
33
Fea
ture
set
upF
eatu
re s
etup
Set automatic modeChoose the mode (headset or speakerphone) to be usedautomatically when you press a LINE button with thehandset in the base unit.
1. Press E to begin feature setup.2. Press - until the screen display includes
SPECIAL OPTIONS.3. Press E. The screen display includes
LINE USAGE.4. Press - until the screen display includes
AUTOMATIC MODE and the current setting.5. Press < or > to toggle between
Speakerphone and Headset.6. When the desired mode is displayed, press - to save your choice. The screen displayincludes SCROLL RATE.
7. Proceed to step 5 on page 34 to set the next feature (scroll rate).—OR—Press and hold E to return to the idlescreen.
�NOTE:You can exit feature setup and return to theidle screen any time. Simply press and hold E.
iiiiikkkkk ooooonnnnn
974CIB_(Rev11-12)ml24.05.06 5/24/06 9:29 PM Page 33
Set the scroll rateYou can choose the speed for the rapid scroll feature.(See Rapid scroll on page 22 for details.)
1. Press E to begin feature setup.2. Press - until the screen display includes
SPECIALhOPTIONS.3. Press E. The screen display includes
LINE USAGE.4. Press - until the screen display includes
SCROLL RATE and the current setting.5. Press < or > to change the setting (Very
Slow, Slow, Medium, Fast, or Very Fast).6. When the correct scroll rate is shown, press - to save your choice. The screen displayincludes LCD BACKLIGHT.
7. Proceed to step 5 on page 35 to set the next feature (LCD backlight).—OR—Press and hold E to return to the idlescreen.
�NOTE:You can exit feature setup and return to theidle screen any time. Simply press and hold E.
34
Fea
ture
set
upF
eatu
re s
etup iiiii
kkkkk ooooonnnnn
974CIB_(Rev11-12)ml24.05.06 5/24/06 9:29 PM Page 34
Turn screen backlight on or off1. Press E to begin feature setup.2. Press - until the screen display includes
SPECIALhOPTIONS.3. Press E. The screen display includes
LINE USAGE.4. Press - until the screen display includes
LCD BACKLIGHT and the current setting.5. Press < or > to toggle between On and Off.6. When the correct setting is shown, press -
to save your choice. The screen display includesCOVM ON/OFF.
7. Proceed to step 5 on page 36 to set the nextfeature (COVM on/off).—OR—Press and hold E to return to the idlescreen.
�NOTE:You can exit feature setup and return to theidle screen any time. Simply press and hold E.
35
Fea
ture
set
upF
eatu
re s
etup
iiiiikkkkk ooooonnnnn
974CIB_(Rev11-12)ml24.05.06 5/24/06 9:29 PM Page 35
Turn COVM indicators on or off for each lineIf you subscribe to voice mail service with your localtelephone service provider, turn the COVM indicator onto have the screen displayed the appropriate line numberswhen there are messages waiting. If you do not subscribeto voice mail service, turn the COVM indicators off foreach line.
1. Press E to begin feature setup.2. Press - until the screen display includes
SPECIALhOPTIONS.3. Press E. The screen display includes
LINE USAGE.4. Press - until the screen display includes
COVM ON/OFF.5. Press E. The screen display includes
L1HCOVMHON/OFF and the current setting.6. Press < or > to toggle between On and Off
for the line shown.7. When the correct setting is shown, press - to
save your choice. The screen display includesCOVMHON/OFF for the next line and thecurrent setting.
8. Repeat steps 6 and 7 to turn the COVMindicator on or off for other lines at thisextension.
9. When you are finished setting the COVMindicators, press - until the screen displayincludes DONE.
10. Press E. The screen display includes COVMHON/OFF.
11. Press - until the screen display includes COVM RESET, then proceed to step 5 on page 37 to clear the COVM indicators.—OR—Press and hold E to return to the idlescreen.
�NOTE:You can exit feature setup and return to theidle screen any time. Simply press and hold E.
36
Fea
ture
set
upF
eatu
re s
etup
iiiiikkkkk ooooonnnnn
974CIB_(Rev11-12)ml24.05.06 5/24/06 9:29 PM Page 36
Reset COVM indicatorIf a COVM indicator remains on when there are nomessages on that line, you may have received a false signalfrom your local telephone service provider. You can clearthe indicator manually.
1. Press E to begin feature setup.2. Press - until the screen display includes
SPECIALHOPTIONS.3. Press E. The screen display includes
LINEHUSAGE.4. Press - until the screen display includes
COVMHRESET.5. Press E. The screen display includes
L1HCOVMHRESET.6. Press + or - to scroll through the COVM
reset menu (L1hCOVMhRESET … L4hCOVMRESET, orhALLhCOVMhRESEThandhDONE).
7. When the line you want to reset is displayed,press E to remove the message waitingindicator. You can clear all the lines at once bychoosing ALLhCOVMhRESET. The screendisplay includes Reset!.
8. Press - until the screen display includes DONE.9. Press E. The screen display includes
COVM RESET.10. Press - until the screen display includes
AREAHCODES, then proceed to step 5 on page 38 to program the home or local areacodes.—OR—Press and hold E to return to the idlescreen.
�NOTE:You can exit feature setup and return to theidle screen any time. Simply press and hold E.
37
Fea
ture
set
upF
eatu
re s
etup
iiiii
mmmmm
jjjjj
974CIB_(Rev11-12)ml24.05.06 5/24/06 9:29 PM Page 37
Program home and local areacodesYou can program this phone to recognize one home and upto five local area codes. See home area code and localarea code on page 6 for definitions.
1. Press E to begin feature setup.2. Press - until the screen display includes
SPECIALHOPTIONS.3. Press E. The screen display includes
LINEHUSAGE.4. Press - until the screen display includes
AREAHCODES.5. Press E. The screen display includes
HOMEHAC and a prompt to enter a home areacode (1-3 digits).
6. Use the dial pad keys to enter your home areacode, then press -. The screen display includesLOCAL AC1 and a prompt to enter a local areacode (1-3 digits).If you need to enter any local area codes, use thedial pad keys and then press - to scroll to thenext screen (LOCALhAC2,hLOCALhAC3,hLOCALAC4, and LOCALhAC5).
�NOTE: If you must dial the area code to place calls within your own area code, enter 000 for thehome area code and enter your area code as a local area code.
7. When you are finished entering all of the areacodes you need to program, press - until thescreen display includes DONE.
8. Press E. The screen display includesAREAhCODES.
9. Press - until the screen display includesLINEhGROUP, then proceed to step 5 on page39 to assign the line group.—OR—Press and hold E to return to the idlescreen.
�NOTE:You can exit feature setup and return to theidle screen any time. Simply press and hold E.
38
Fea
ture
set
upF
eatu
re s
etup
iiiii
nnnnn
974CIB_(Rev11-12)ml24.05.06 5/24/06 9:29 PM Page 38
Assign the line group for thisphone
1. Press E to begin feature setup.2. Press - until the screen display includes
SPECIALHOPTIONS.3. Press E. The screen display includes
LINE USAGE.4. Press - until the screen display includes
LINE GROUP and the current setting.5. Press > or < to scroll through the line group
choices (Line 04 … Line15, or PRV).6. When the line group you want is shown,
press - to save your choice. The screen displayincludes RESETHALL.
7. Proceed to step 5 on page 40 to reset allfeature settings to default values.—OR—Press and hold E to return to the idlescreen.
�NOTE:You can exit feature setup and return to theidle screen any time. Simply press and hold E.
39
Fea
ture
set
upF
eatu
re s
etupiiiii
kkkkk ooooonnnnn
974CIB_(Rev11-12)ml24.05.06 5/24/06 9:29 PM Page 39
Erase all settings and return thephone to default settings
If you reset all features to the default settings,all previous feature programming and one touchentries will be erased. You will need to programyour preferences for every feature again andre-enter numbers in one touch locations. Youcannot undo the RESET ALL command.
1. Press E to begin feature setup.2. Press - until the screen display includes
SPECIALHOPTIONS.3. Press E. The screen display includes
LINEHUSAGE.4. Press - until the screen display includes
RESET ALL.5. Press E. The screen display includes
ENTER:Resethall?.6. Press E to confirm the command. The
screen displays Reset!. A tone sounds and the screen returns to showing RESETHALL.
7. Press and hold E to return to the idlescreen.
�NOTE:You can exit feature setup and return to theidle screen any time. Simply press and hold E.
40
Fea
ture
set
upF
eatu
re s
etup
iiiii
nnnnn
974CIB_(Rev11-12)ml24.05.06 5/24/06 9:29 PM Page 40
You will need to program the next two features ifthis phone is the designated console phone for yourCentrex system.
Set this phone to be the Centrex console phone
�NOTE: This feature is for use with Centrex systems only.
1. Press E to begin feature setup.2. Press - until the screen display includes
CENTREX.3. Press E. The screen display includes
CONSOLE and the current setting.4. Press < or > to toggle between On and Off.5. Press - to save your choice. The screen display
includes CSL DELAY RING.6. Proceed to step 5 of Set the Centrex
console delayed ring time on page 42 tochange the next feature (console delayed ring).—OR—Press and hold E to return to the idlescreen.
�NOTE:You can exit feature setup and return to theidle screen any time. Simply press and hold E.
41
Fea
ture
set
upF
eatu
re s
etup
iiiiikkkkk ooooonnnnn
974CIB_(Rev11-12)ml24.05.06 5/24/06 9:29 PM Page 41
Set the Centrex console delayedring time
�NOTE: This feature is for use with Centrexsystems only.
Set the length of time the phone will route your calls to the Centrex console phone. One ring is about six seconds.
1. Press E to begin feature setup.2. Press - until the screen display includes
CENTREX.3. Press E. The screen display includes
CONSOLE.4. Press - until the screen display includes
CSL DELAY RING and the current setting.5. Press < or > to scroll through the choices
(Off, 02 sec … 30 sec).6. Press - to save your choice. The screen display
includes MAIN MENU.7. Press and hold E to return to the idle
screen.
�NOTE:You can exit feature setup and return to theidle screen any time. Simply press and hold E.
Set the display language1. Press E to begin feature setup.2. Press - until the screen display includes
LANGUAGE and the current setting.3. Press < or > to scroll through the language
choices (English, Espanol, or Français).When the language you want to use is displayed,press - to save your choice. The screen displayincludes EXIT.
4. Press E to return to the idle screen.
�NOTE:You can exit feature setup and return to theidle screen any time. Simply press and hold E.
42
Fea
ture
set
upF
eatu
re s
etup
iiiiikkkkk ooooonnnnn
iiiiikkkkk ooooonnnnn
974CIB_(Rev11-12)ml24.05.06 5/24/06 9:29 PM Page 42
�NOTE: This phone comes programmed to use line 1(default prime line) for calls if you do not press a LINEbutton. (To change the prime line, see Assign the prime line on page 32 of this manual.) When youanswer a call, the phone automatically selects the ringingline.
Make or answer a call
�NOTE: This phone will automatically make and answer calls in the mode (speakerphone or headset)you programmed (see Set automatic mode on page 33). Follow the directions below to choose amode manually. If the phone is in use on one line, anyother calls made or answered will use the same mode already in use.
�NOTE: If you dial a phone number longer than 15digits, the screen will display only the last 13 digits.
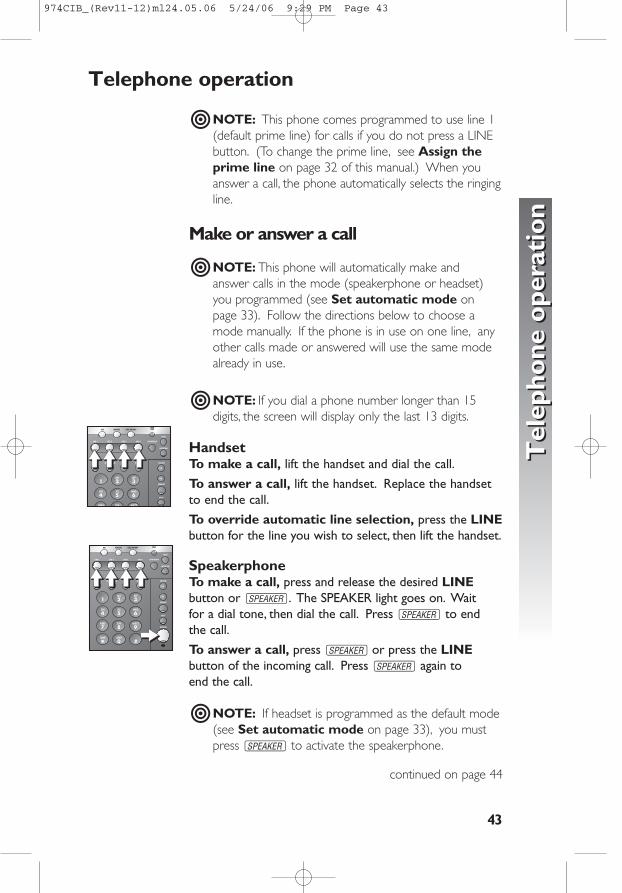
HandsetTo make a call, lift the handset and dial the call.
To answer a call, lift the handset. Replace the handsetto end the call.
To override automatic line selection, press the LINEbutton for the line you wish to select, then lift the handset.
SpeakerphoneTo make a call, press and release the desired LINEbutton or K. The SPEAKER light goes on. Wait for a dial tone, then dial the call. Press K to end the call.
To answer a call, press K or press the LINEbutton of the incoming call. Press K again to end the call.
�NOTE: If headset is programmed as the default mode(see Set automatic mode on page 33), you mustpress K to activate the speakerphone.
continued on page 44
43
Tel
epho
ne o
pera
tion
Tel
epho
ne o
pera
tion
Telephone operation
iiiiiiiiiiiiiiiiiiii
iiiiiiiiiiiiiiiiiiii
kkkkk
974CIB_(Rev11-12)ml24.05.06 5/24/06 9:29 PM Page 43
Make or answer a call continued from page 43
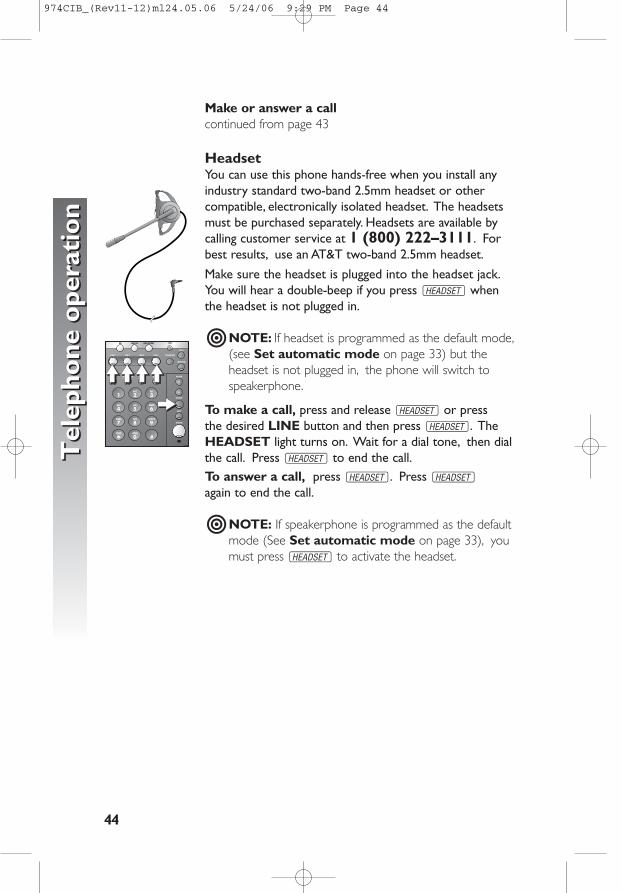
HeadsetYou can use this phone hands-free when you install anyindustry standard two-band 2.5mm headset or othercompatible, electronically isolated headset. The headsetsmust be purchased separately. Headsets are available bycalling customer service at 1 (800) 222–3111. Forbest results, use an AT&T two-band 2.5mm headset.
Make sure the headset is plugged into the headset jack.You will hear a double-beep if you press h whenthe headset is not plugged in.
�NOTE: If headset is programmed as the default mode,(see Set automatic mode on page 33) but theheadset is not plugged in, the phone will switch tospeakerphone.
To make a call, press and release h or press the desired LINE button and then press h. TheHEADSET light turns on. Wait for a dial tone, then dial the call. Press h to end the call.To answer a call, press h. Press hagain to end the call.
�NOTE: If speakerphone is programmed as the defaultmode (See Set automatic mode on page 33), youmust press h to activate the headset.
44
Tel
epho
ne o
pera
tion
Tel
epho
ne o
pera
tion
iiiiiiiiiiiiiiiiiiii
kkkkk
974CIB_(Rev11-12)ml24.05.06 5/24/06 9:29 PM Page 44
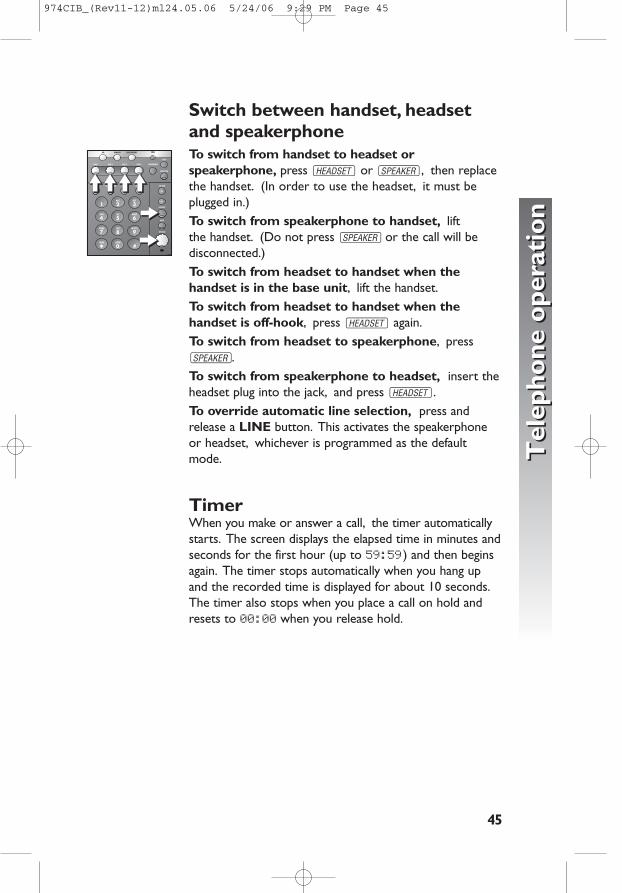
Switch between handset, headsetand speakerphoneTo switch from handset to headset orspeakerphone, press h or K, then replacethe handset. (In order to use the headset, it must beplugged in.)To switch from speakerphone to handset, liftthe handset. (Do not press K or the call will bedisconnected.) To switch from headset to handset when thehandset is in the base unit, lift the handset.To switch from headset to handset when thehandset is off-hook, press h again.To switch from headset to speakerphone, pressK.To switch from speakerphone to headset, insert theheadset plug into the jack, and press h.To override automatic line selection, press andrelease a LINE button. This activates the speakerphoneor headset, whichever is programmed as the defaultmode.
TimerWhen you make or answer a call, the timer automaticallystarts. The screen displays the elapsed time in minutes andseconds for the first hour (up to 59:59 ) and then beginsagain. The timer stops automatically when you hang upand the recorded time is displayed for about 10 seconds.The timer also stops when you place a call on hold andresets to 00:00 when you release hold.
45
Tel
epho
ne o
pera
tion
Tel
epho
ne o
pera
tion
iiiiiiiiiiiiiiiiiiii
kkkkkkkkkk
974CIB_(Rev11-12)ml24.05.06 5/24/06 9:29 PM Page 45
46
Tel
epho
ne o
pera
tion
Tel
epho
ne o
pera
tion
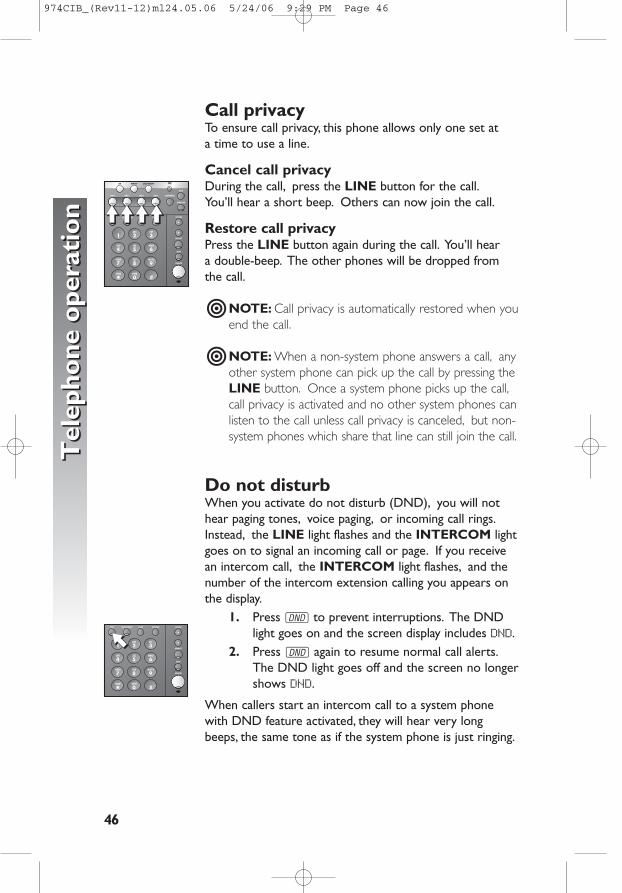
Call privacyTo ensure call privacy, this phone allows only one set at a time to use a line.
Cancel call privacyDuring the call, press the LINE button for the call.You’ll hear a short beep. Others can now join the call.
Restore call privacyPress the LINE button again during the call. You’ll hear a double-beep. The other phones will be dropped fromthe call.
�NOTE: Call privacy is automatically restored when youend the call.
�NOTE: When a non-system phone answers a call, anyother system phone can pick up the call by pressing theLINE button. Once a system phone picks up the call,call privacy is activated and no other system phones canlisten to the call unless call privacy is canceled, but non-system phones which share that line can still join the call.
Do not disturbWhen you activate do not disturb (DND), you will nothear paging tones, voice paging, or incoming call rings.Instead, the LINE light flashes and the INTERCOM lightgoes on to signal an incoming call or page. If you receivean intercom call, the INTERCOM light flashes, and thenumber of the intercom extension calling you appears onthe display.
1. Press N to prevent interruptions. The DNDlight goes on and the screen display includes DND.
2. Press N again to resume normal call alerts.The DND light goes off and the screen no longershows DND.
When callers start an intercom call to a system phonewith DND feature activated, they will hear very longbeeps, the same tone as if the system phone is just ringing.
iiiiiiiiiiiiiiiiiiii
ppppp
974CIB_(Rev11-12)ml24.05.06 5/24/06 9:29 PM Page 46
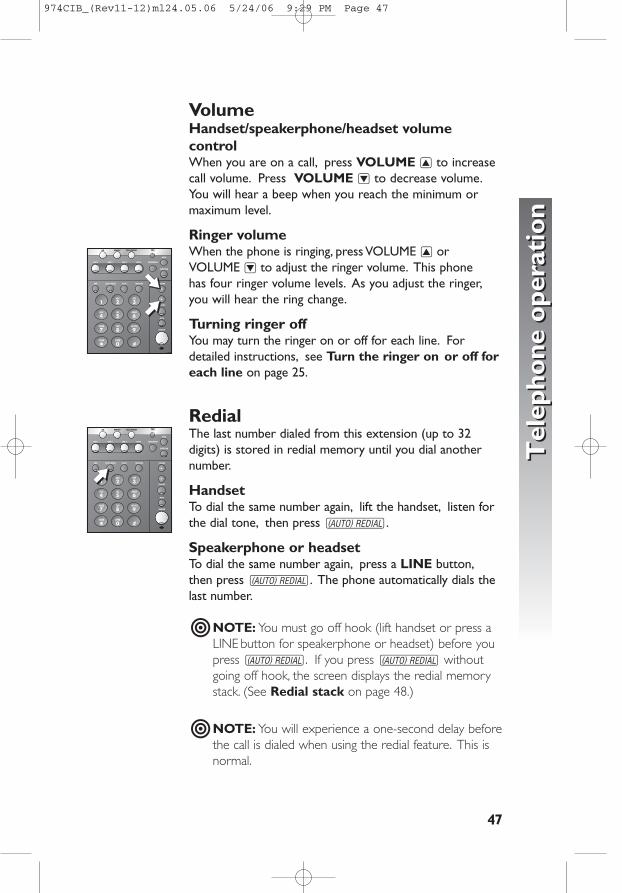
VolumeHandset/speakerphone/headset volumecontrolWhen you are on a call, press VOLUME + to increase call volume. Press VOLUME - to decrease volume.You will hear a beep when you reach the minimum ormaximum level.
Ringer volumeWhen the phone is ringing, press VOLUME+ orVOLUME- to adjust the ringer volume. This phone has four ringer volume levels. As you adjust the ringer,you will hear the ring change.
Turning ringer offYou may turn the ringer on or off for each line. Fordetailed instructions, see Turn the ringer on or off foreach line on page 25.
RedialThe last number dialed from this extension (up to 32digits) is stored in redial memory until you dial anothernumber.
HandsetTo dial the same number again, lift the handset, listen forthe dial tone, then press R.
Speakerphone or headsetTo dial the same number again, press a LINE button,then press R. The phone automatically dials thelast number.
�NOTE: You must go off hook (lift handset or press aLINE button for speakerphone or headset) before youpress R. If you press R withoutgoing off hook, the screen displays the redial memorystack. (See Redial stack on page 48.)
�NOTE: You will experience a one-second delay beforethe call is dialed when using the redial feature. This isnormal.
47
Tel
epho
ne o
pera
tion
Tel
epho
ne o
pera
tion
llllljjjjj
jjjjj
974CIB_(Rev11-12)ml24.05.06 5/24/06 9:29 PM Page 47
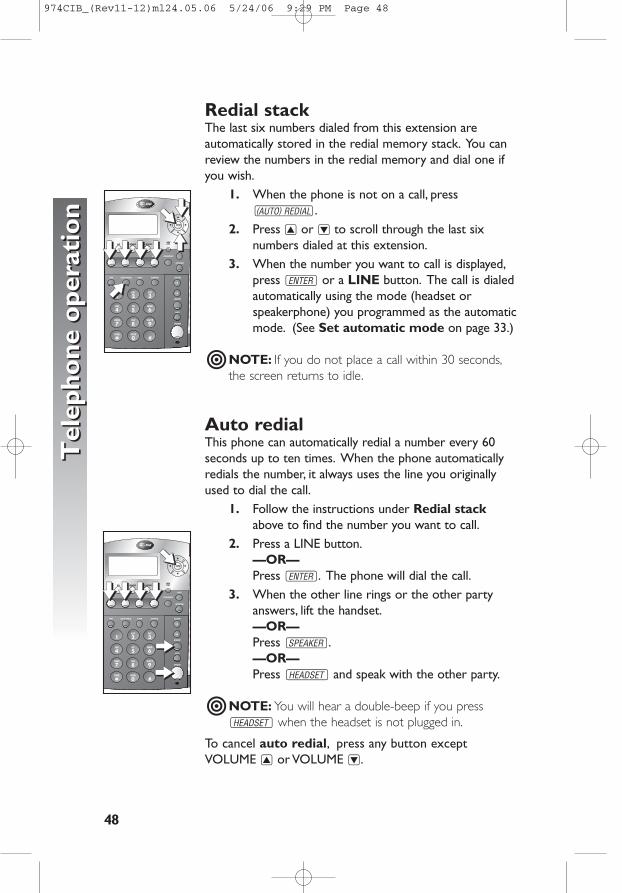
Redial stackThe last six numbers dialed from this extension areautomatically stored in the redial memory stack. You canreview the numbers in the redial memory and dial one ifyou wish.
1. When the phone is not on a call, pressR.
2. Press + or - to scroll through the last sixnumbers dialed at this extension.
3. When the number you want to call is displayed,press E or a LINE button. The call is dialedautomatically using the mode (headset orspeakerphone) you programmed as the automaticmode. (See Set automatic mode on page 33.)
�NOTE: If you do not place a call within 30 seconds,the screen returns to idle.
Auto redialThis phone can automatically redial a number every 60seconds up to ten times. When the phone automaticallyredials the number, it always uses the line you originallyused to dial the call.
1. Follow the instructions under Redial stackabove to find the number you want to call.
2. Press a LINE button.—OR—Press E. The phone will dial the call.
3. When the other line rings or the other partyanswers, lift the handset.—OR—Press K.—OR—Press h and speak with the other party.
�NOTE: You will hear a double-beep if you pressh when the headset is not plugged in.
To cancel auto redial, press any button exceptVOLUME + or VOLUME -.
48
Tel
epho
ne o
pera
tion
Tel
epho
ne o
pera
tion lllll
iiiii
jjjjj
mmmmm
mmmmm mmmmmmmmmmmmmmm
lllll
mmmmm mmmmmmmmmmmmmmm
kkkkkkkkkk
974CIB_(Rev11-12)ml24.05.06 5/24/06 9:29 PM Page 48
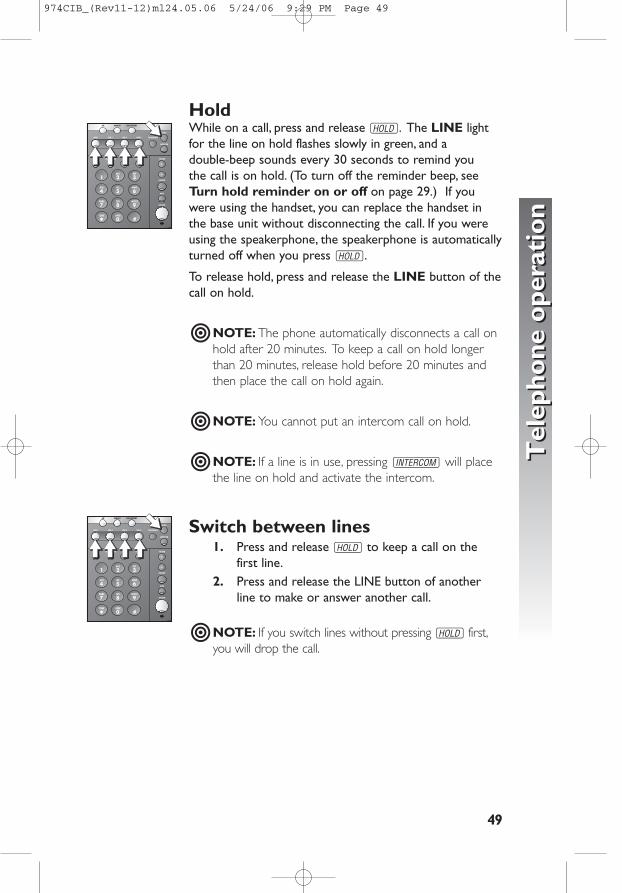
HoldWhile on a call, press and release H. The LINE lightfor the line on hold flashes slowly in green, and adouble-beep sounds every 30 seconds to remind youthe call is on hold. (To turn off the reminder beep, seeTurn hold reminder on or off on page 29.) If youwere using the handset, you can replace the handset inthe base unit without disconnecting the call. If you wereusing the speakerphone, the speakerphone is automaticallyturned off when you press H.
To release hold, press and release the LINE button of thecall on hold.
�NOTE: The phone automatically disconnects a call onhold after 20 minutes. To keep a call on hold longerthan 20 minutes, release hold before 20 minutes andthen place the call on hold again.
�NOTE: You cannot put an intercom call on hold.
�NOTE: If a line is in use, pressing I will placethe line on hold and activate the intercom.
Switch between lines1. Press and release H to keep a call on the
first line.2. Press and release the LINE button of another
line to make or answer another call.
�NOTE: If you switch lines without pressing H first,you will drop the call.
49
Tel
epho
ne o
pera
tion
Tel
epho
ne o
pera
tion
iiiiiiiiiiiiiiiiiiiilllll
iiiiiiiiiiiiiiiiiiiilllll
974CIB_(Rev11-12)ml24.05.06 5/24/06 9:29 PM Page 49
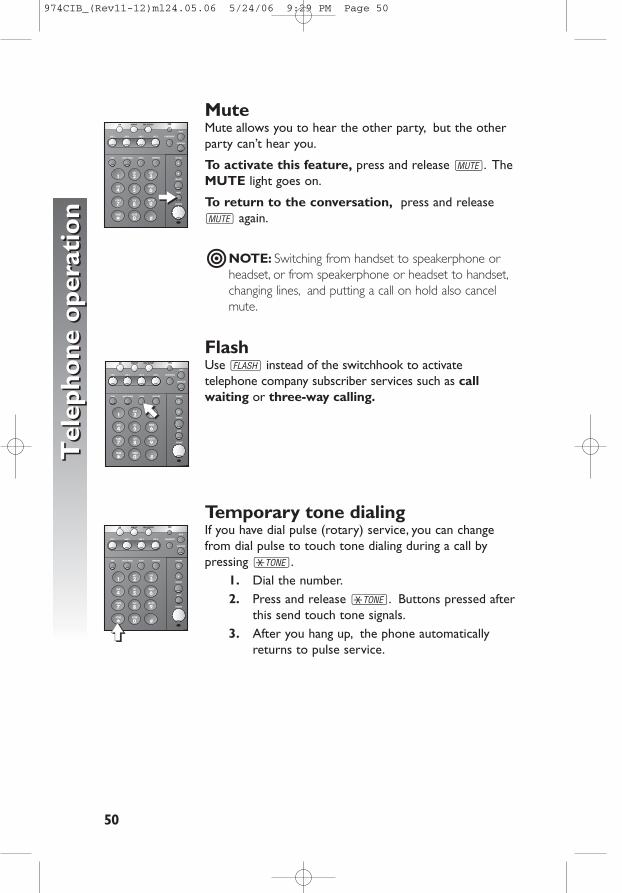
MuteMute allows you to hear the other party, but the otherparty can’t hear you.
To activate this feature, press and release M. TheMUTE light goes on.
To return to the conversation, press and release M again.
�NOTE: Switching from handset to speakerphone orheadset, or from speakerphone or headset to handset,changing lines, and putting a call on hold also cancelmute.
FlashUse F instead of the switchhook to activatetelephone company subscriber services such as callwaiting or three-way calling.
Temporary tone dialingIf you have dial pulse (rotary) service, you can changefrom dial pulse to touch tone dialing during a call bypressing t.
1. Dial the number.2. Press and release t. Buttons pressed after
this send touch tone signals.3. After you hang up, the phone automatically
returns to pulse service.
50
Tel
epho
ne o
pera
tion
Tel
epho
ne o
pera
tion
kkkkk
ppppp
iiiii
974CIB_(Rev11-12)ml24.05.06 5/24/06 9:29 PM Page 50
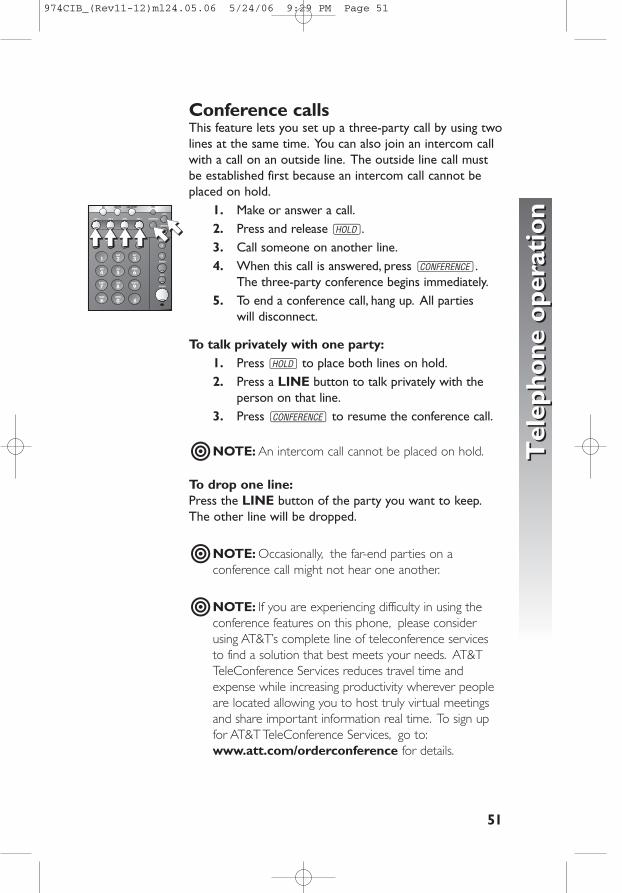
Conference callsThis feature lets you set up a three-party call by using twolines at the same time. You can also join an intercom callwith a call on an outside line. The outside line call mustbe established first because an intercom call cannot beplaced on hold.
1. Make or answer a call.2. Press and release H.3. Call someone on another line.4. When this call is answered, press C.
The three-party conference begins immediately.5. To end a conference call, hang up. All parties
will disconnect.
To talk privately with one party:1. Press H to place both lines on hold.2. Press a LINE button to talk privately with the
person on that line.3. Press C to resume the conference call.
�NOTE: An intercom call cannot be placed on hold.
To drop one line:Press the LINE button of the party you want to keep.The other line will be dropped.
�NOTE: Occasionally, the far-end parties on aconference call might not hear one another.
�NOTE: If you are experiencing difficulty in using theconference features on this phone, please considerusing AT&T’s complete line of teleconference servicesto find a solution that best meets your needs. AT&TTeleConference Services reduces travel time andexpense while increasing productivity wherever peopleare located allowing you to host truly virtual meetingsand share important information real time. To sign upfor AT&T TeleConference Services, go to:www.att.com/orderconference for details.
51
Tel
epho
ne o
pera
tion
Tel
epho
ne o
pera
tioniiiiiiiiiiiiiiiiiiiippppp
ppppp
974CIB_(Rev11-12)ml24.05.06 5/24/06 9:29 PM Page 51
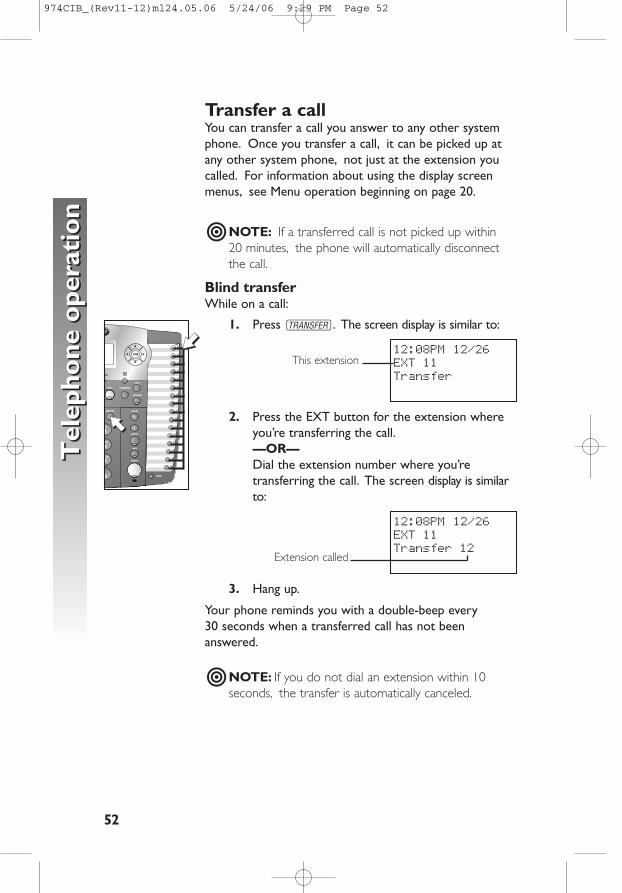
Transfer a callYou can transfer a call you answer to any other systemphone. Once you transfer a call, it can be picked up atany other system phone, not just at the extension youcalled. For information about using the display screenmenus, see Menu operation beginning on page 20.
�NOTE: If a transferred call is not picked up within 20 minutes, the phone will automatically disconnect the call.
Blind transferWhile on a call:
1. Press t. The screen display is similar to:
2. Press the EXT button for the extension whereyou’re transferring the call.—OR—Dial the extension number where you’retransferring the call. The screen display is similarto:
3. Hang up.
Your phone reminds you with a double-beep every 30 seconds when a transferred call has not beenanswered.
�NOTE: If you do not dial an extension within 10seconds, the transfer is automatically canceled.
12:08PM 12/26EXTH11TransferH12
12:08PM 12/26EXTH11Transfer
52
Tel
epho
ne o
pera
tion
Tel
epho
ne o
pera
tion
lllll
ppppp
nnnnnThis extension
Extension called
974CIB_(Rev11-12)ml24.05.06 5/24/06 9:29 PM Page 52
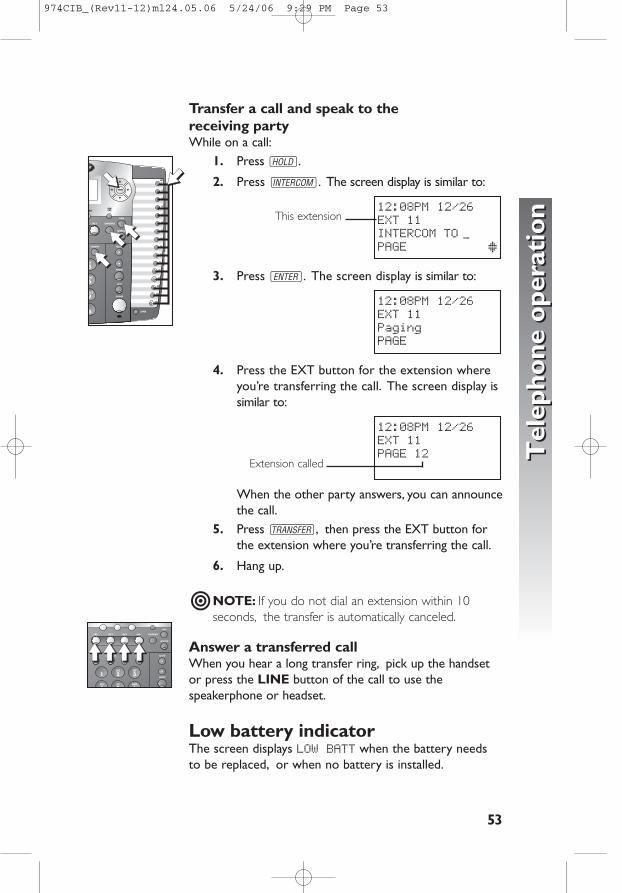
Transfer a call and speak to the receiving partyWhile on a call:
1. Press H.
2. Press I. The screen display is similar to:
3. Press E. The screen display is similar to:
4. Press the EXT button for the extension whereyou’re transferring the call. The screen display issimilar to:
When the other party answers, you can announcethe call.
5. Press T, then press the EXT button forthe extension where you’re transferring the call.
6. Hang up.
�NOTE: If you do not dial an extension within 10seconds, the transfer is automatically canceled.
Answer a transferred callWhen you hear a long transfer ring, pick up the handsetor press the LINE button of the call to use thespeakerphone or headset.
Low battery indicatorThe screen displays LOW BATT when the battery needsto be replaced, or when no battery is installed.
12:08PM 12/26EXTH11PAGEH12
12:08PM 12/26EXTH11PagingPAGE
12:08PM 12/26EXTH11INTERCOMHTO _PAGEHHHHHHHHHHHx
53
Tel
epho
ne o
pera
tion
Tel
epho
ne o
pera
tion
lllll
ppppp
nnnnnlllll
pppppppppp
iiiiiiiiiiiiiiiiiiii
This extension
Extension called
974CIB_(Rev11-12)ml24.05.06 5/24/06 9:29 PM Page 53
54
Tel
epho
ne o
pera
tion
Tel
epho
ne o
pera
tion
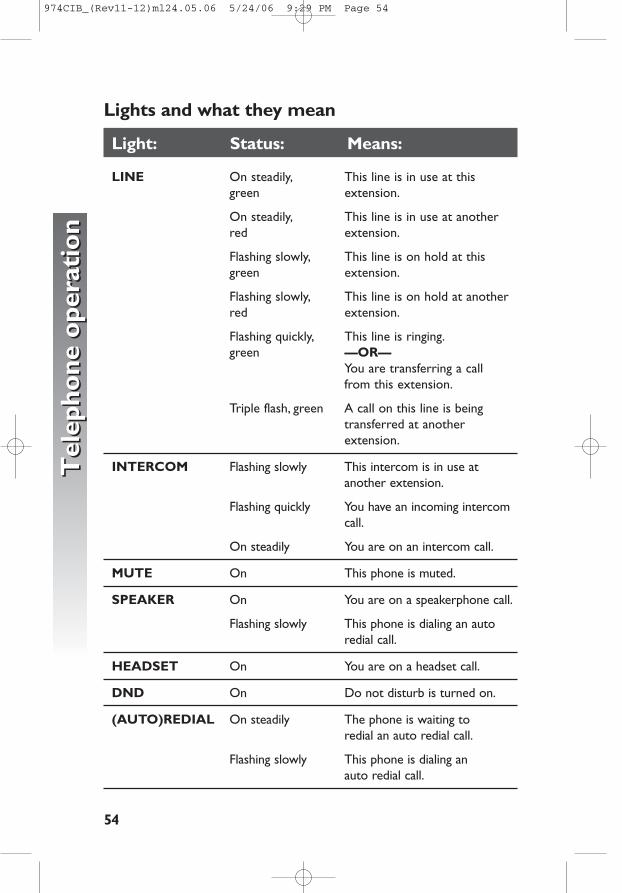
Lights and what they mean
Light: Status: Means:
LINE On steadily, This line is in use at thisgreen extension.
On steadily, This line is in use at another red extension.
Flashing slowly, This line is on hold at this green extension.
Flashing slowly, This line is on hold at another red extension.
Flashing quickly, This line is ringing.green —OR—
You are transferring a call from this extension.
Triple flash, green A call on this line is beingtransferred at anotherextension.
INTERCOM Flashing slowly This intercom is in use atanother extension.
Flashing quickly You have an incoming intercomcall.
On steadily You are on an intercom call.
MUTE On This phone is muted.
SPEAKER On You are on a speakerphone call.
Flashing slowly This phone is dialing an autoredial call.
HEADSET On You are on a headset call.
DND On Do not disturb is turned on.
(AUTO)REDIAL On steadily The phone is waiting to redial an auto redial call.
Flashing slowly This phone is dialing an auto redial call.
974CIB_(Rev11-12)ml24.05.06 5/24/06 9:29 PM Page 54
55
One
tou
ch o
pera
tion
One
tou
ch o
pera
tion
This telephone has 32 one touch locations where you can store phonenumbers you wish to dial using fewer keys than usual. You can store up to 24 digits in each location. The steps used to dial numbers stored in onetouch locations vary according to how you programmed the one touchpreference. See Set one touch preference on page 23 and Dial a onetouch number on page 59 for more details.The first 16 locations can be accessed using only the EXT buttons. To accessthe remaining 16 locations, press W and then the EXT button for thedesired location.
�NOTE: The EXT buttons are also used to place intercom calls. SeeIntercom operation beginning on page 67 for details.
You may wish to write the names or telephone numbers of one touch entrieson the directory card, using the light gray spaces for the first 16 locationsand the dark gray spaces for the second 16 locations.
One touch operation
16 lower one touch locations(all dark gray spaces)
EXT buttons
LOWER button
lllll
ppppp
16 one touch locations (all light gray spaces)
974CIB_(Rev11-12)ml24.05.06 5/24/06 9:29 PM Page 55
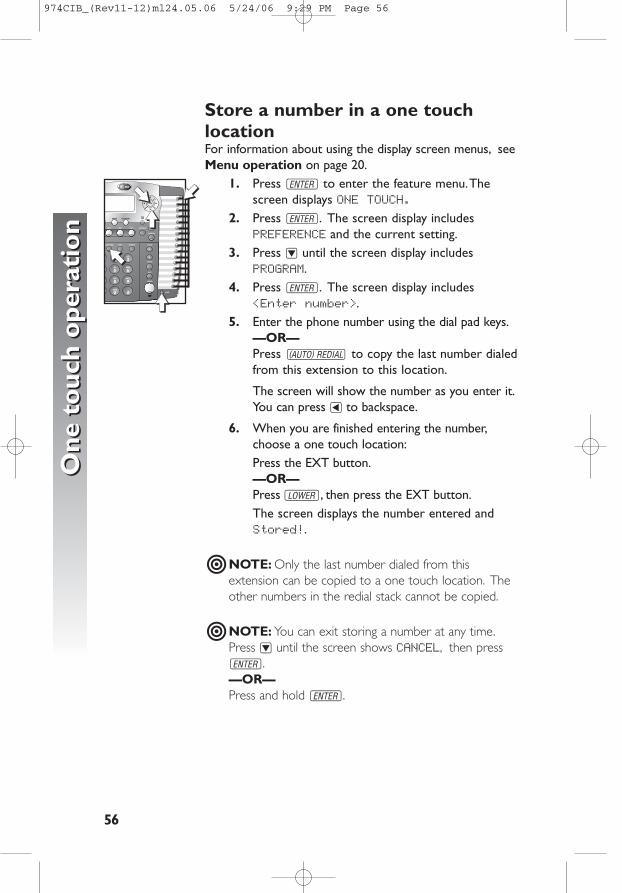
Store a number in a one touchlocationFor information about using the display screen menus, seeMenu operation on page 20.
1. Press E to enter the feature menu.Thescreen displays ONE TOUCH.
2. Press E. The screen display includesPREFERENCE and the current setting.
3. Press - until the screen display includesPROGRAM.
4. Press E. The screen display includes<Enter number>.
5. Enter the phone number using the dial pad keys.—OR—Press R to copy the last number dialedfrom this extension to this location.
The screen will show the number as you enter it.You can press < to backspace.
6. When you are finished entering the number,choose a one touch location:Press the EXT button.—OR— PressW, then press the EXT button.The screen displays the number entered andStored!.
�NOTE: Only the last number dialed from thisextension can be copied to a one touch location. Theother numbers in the redial stack cannot be copied.
�NOTE: You can exit storing a number at any time.Press - until the screen shows CANCEL, then pressE.—OR—Press and hold E.
56
One
tou
ch o
pera
tion
One
tou
ch o
pera
tion
ppppp
llllliiiii
iiiii
nnnnn
974CIB_(Rev11-12)ml24.05.06 5/24/06 9:29 PM Page 56
Store a pause in a one touch entryYou can include a pause while storing a dialing sequencewhich requires one during actual dialing.
While you are entering the number to be stored, thescreen display includes PAUSE.
Press E where you want to store a pause. Each pause counts as one digit. Continue storing the number as usual.
Store temporary touch tone signals in a one touch entryIf you have dial pulse (rotary) service, you can store adialing sequence which includes the touch tone signalsrequired for some special services.
While you are entering the number to be stored, thescreen display includes PAUSE.
When you want to begin storing temporary tone signals,press - until the screen display includes TONE, then pressE. All numbers you enter after this will send touchtone signals during dialing.
Store a flash in a one touch entryYou can store the flash signal required by some specialservices as part of a dialing sequence.
While you are entering the number to be stored, thescreen display includes PAUSE.
When you want to enter a flash signal, press - until the screen display includes FLASH, then press E.Continue storing the number as usual.
57
One
tou
ch o
pera
tion
One
tou
ch o
pera
tion
iiiii
lllll
974CIB_(Rev11-12)ml24.05.06 5/24/06 9:29 PM Page 57
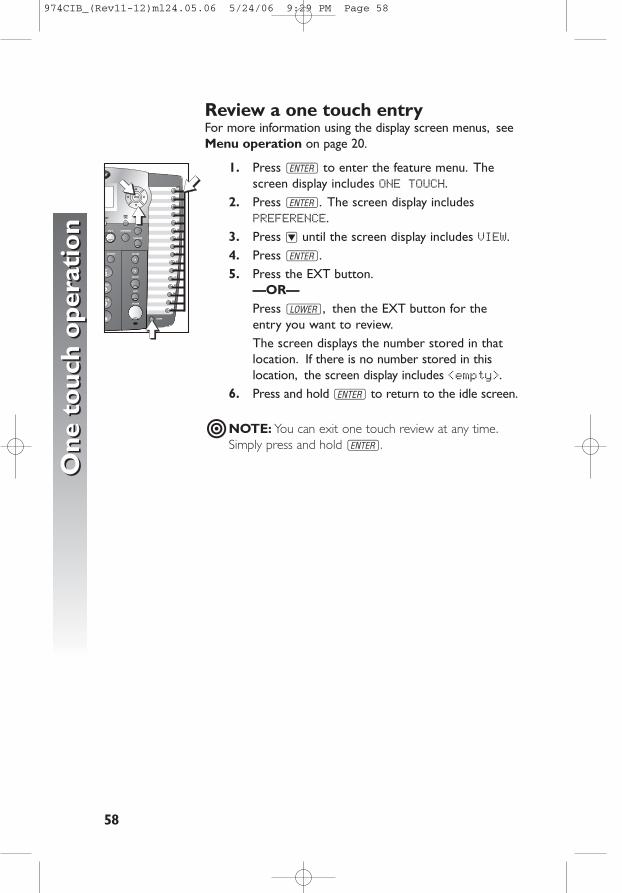
Review a one touch entry For more information using the display screen menus, seeMenu operation on page 20.
1. Press E to enter the feature menu. Thescreen display includes ONEHTOUCH.
2. Press E. The screen display includesPREFERENCE.
3. Press - until the screen display includes VIEW.4. Press E.5. Press the EXT button.
—OR—Press W, then the EXT button for theentry you want to review.The screen displays the number stored in thatlocation. If there is no number stored in thislocation, the screen display includes <empty>.
6. Press and hold E to return to the idle screen.
�NOTE: You can exit one touch review at any time.Simply press and hold E.
58
One
tou
ch o
pera
tion
One
tou
ch o
pera
tion
lllll nnnnnlllll
iiiii
iiiii
974CIB_(Rev11-12)ml24.05.06 5/24/06 9:29 PM Page 58
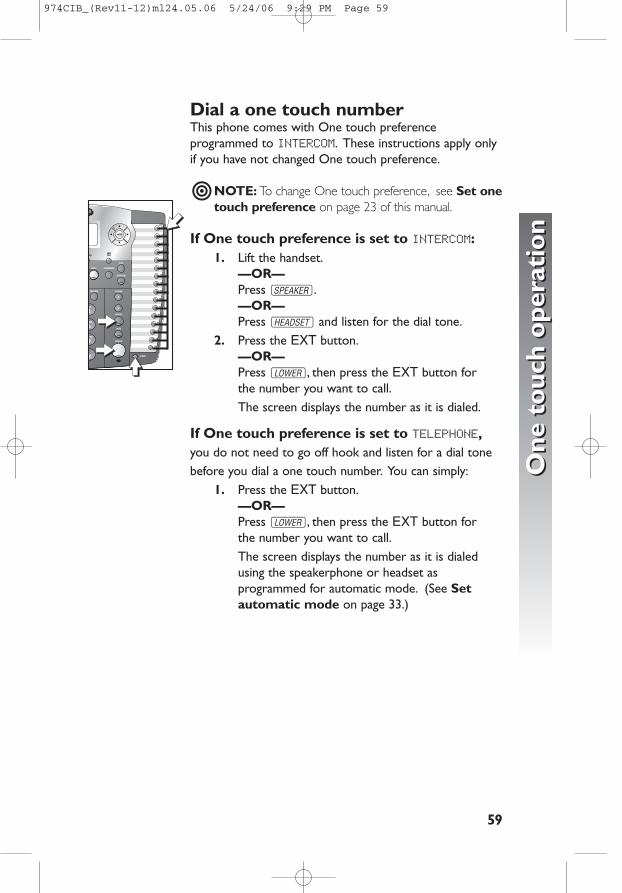
59
One
tou
ch o
pera
tion
One
tou
ch o
pera
tion
Dial a one touch numberThis phone comes with One touch preferenceprogrammed to INTERCOM. These instructions apply onlyif you have not changed One touch preference.
�NOTE: To change One touch preference, see Set onetouch preference on page 23 of this manual.
If One touch preference is set to INTERCOM:1. Lift the handset.
—OR—Press K.—OR—Press h and listen for the dial tone.
2. Press the EXT button.—OR—Press W, then press the EXT button for the number you want to call.The screen displays the number as it is dialed.
If One touch preference is set to TELEPHONE,you do not need to go off hook and listen for a dial tonebefore you dial a one touch number. You can simply:
1. Press the EXT button.—OR—Press W, then press the EXT button for the number you want to call.The screen displays the number as it is dialedusing the speakerphone or headset asprogrammed for automatic mode. (See Setautomatic mode on page 33.)
lllll nnnnn
iiiiikkkkk
kkkkk
974CIB_(Rev11-12)ml24.05.06 5/24/06 9:29 PM Page 59
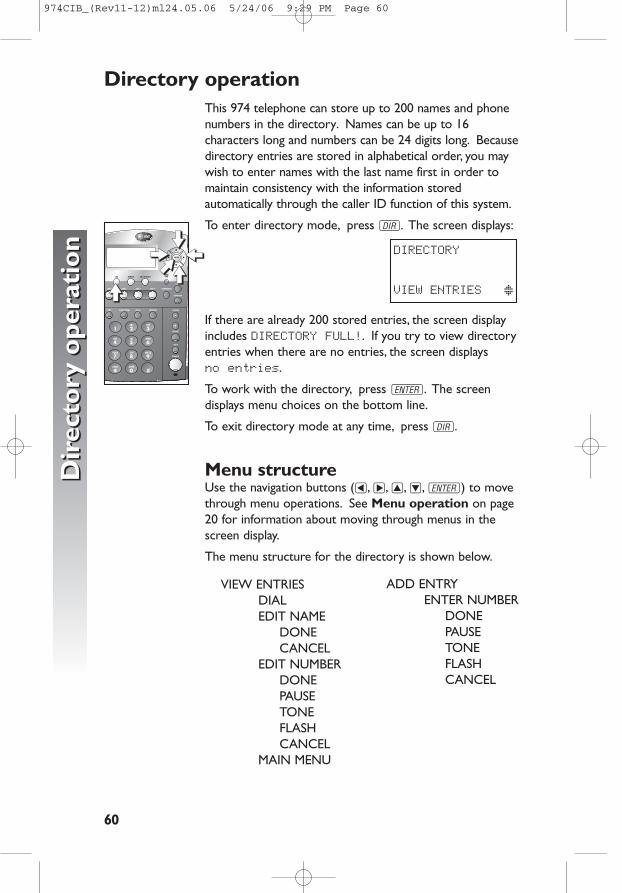
This 974 telephone can store up to 200 names and phonenumbers in the directory. Names can be up to 16characters long and numbers can be 24 digits long. Becausedirectory entries are stored in alphabetical order, you maywish to enter names with the last name first in order tomaintain consistency with the information storedautomatically through the caller ID function of this system.
To enter directory mode, press D. The screen displays:
If there are already 200 stored entries, the screen displayincludes DIRECTORY FULL!. If you try to view directoryentries when there are no entries, the screen displays no entries.
To work with the directory, press E. The screendisplays menu choices on the bottom line.
To exit directory mode at any time, press D.
Menu structureUse the navigation buttons (<,>,+,-,E) to movethrough menu operations. See Menu operation on page20 for information about moving through menus in thescreen display.
The menu structure for the directory is shown below.
VIEW ENTRIESDIALEDIT NAME
DONECANCEL
EDIT NUMBERDONEPAUSETONEFLASHCANCEL
MAIN MENU
DIRECTORYXFULLXXXXXXXXXXXXXXXXXXXXXXXXXXXXXXXXXxVIEWXENTRIESXXXx
60
Dir
ecto
ry o
pera
tion
Dir
ecto
ry o
pera
tion
Directory operation
iiiiiiiiii
kkkkk ooooommmmmjjjjj
ADD ENTRYENTER NUMBER
DONEPAUSETONEFLASHCANCEL
974CIB_(Rev11-12)ml24.05.06 5/24/06 9:29 PM Page 60
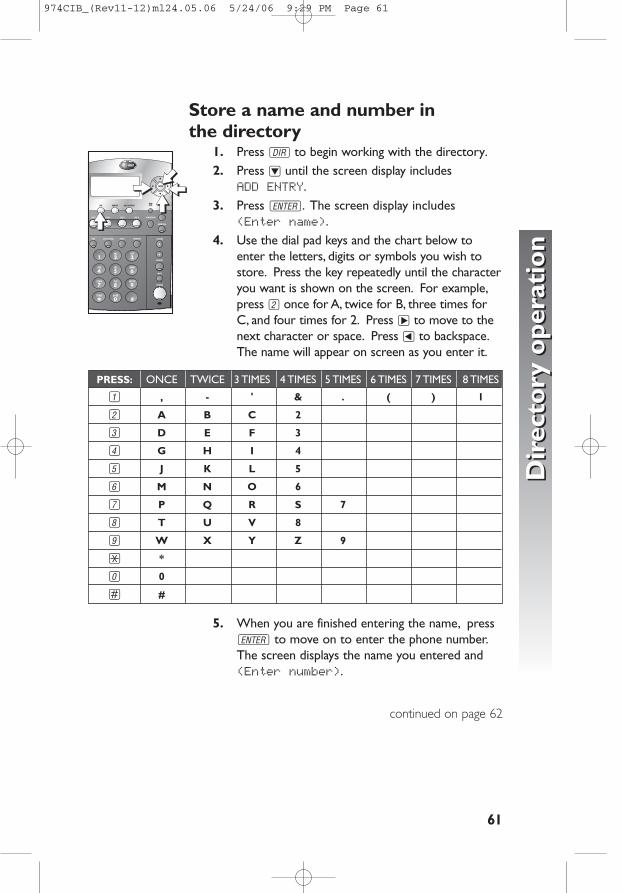
Store a name and number inthe directory
1. Press D to begin working with the directory.2. Press - until the screen display includes
ADD ENTRY.3. Press E. The screen display includes
(Enter name)..4. Use the dial pad keys and the chart below to
enter the letters, digits or symbols you wish tostore. Press the key repeatedly until the characteryou want is shown on the screen. For example,press 2 once for A, twice for B, three times forC, and four times for 2. Press > to move to thenext character or space. Press < to backspace.The name will appear on screen as you enter it.
5. When you are finished entering the name, pressE to move on to enter the phone number.The screen displays the name you entered and(Enter number).
continued on page 62
61
Dir
ecto
ry o
pera
tion
Dir
ecto
ry o
pera
tion
iiiii
PRESS: ONCE TWICE 3 TIMES 4 TIMES 5 TIMES 6 TIMES 7 TIMES 8 TIMES
1 , - ' & . ( ) 1
2 A B C 2
3 D E F 3
4 G H I 4
5 J K L 5
6 M N O 6
7 P Q R S 7
8 T U V 8
9 W X Y Z 9
* *
0 0
# #
kkkkk ooooonnnnniiiii
974CIB_(Rev11-12)ml24.05.06 5/24/06 9:29 PM Page 61
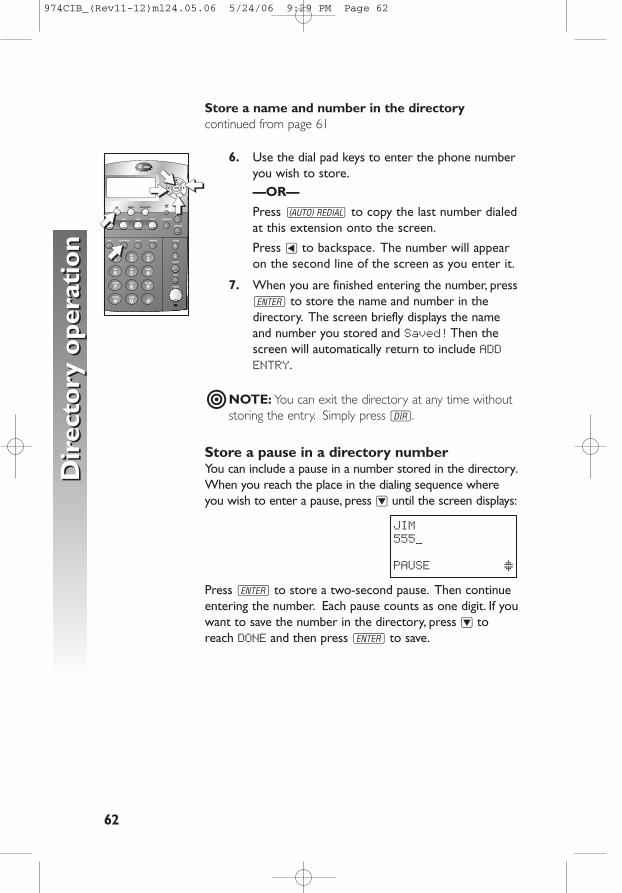
Store a name and number in the directorycontinued from page 61
6. Use the dial pad keys to enter the phone numberyou wish to store.—OR—
Press R to copy the last number dialedat this extension onto the screen.
Press < to backspace. The number will appearon the second line of the screen as you enter it.
7. When you are finished entering the number, pressE to store the name and number in thedirectory. The screen briefly displays the nameand number you stored and Saved!Then thescreen will automatically return to include ADDENTRY.
�NOTE: You can exit the directory at any time withoutstoring the entry. Simply press D.
Store a pause in a directory numberYou can include a pause in a number stored in the directory.When you reach the place in the dialing sequence whereyou wish to enter a pause, press - until the screen displays:
Press E to store a two-second pause. Then continueentering the number. Each pause counts as one digit. If youwant to save the number in the directory, press - toreach DONE and then press E to save.
JIMTERXNAMELLXX555_XXXXXXXXXXXXXXxPAUSEXNUMBERXXXx
62
Dir
ecto
ry o
pera
tion
Dir
ecto
ry o
pera
tion
lllllkkkkkiiiiiooooo
jjjjj
jjjjj
974CIB_(Rev11-12)ml24.05.06 5/24/06 9:29 PM Page 62
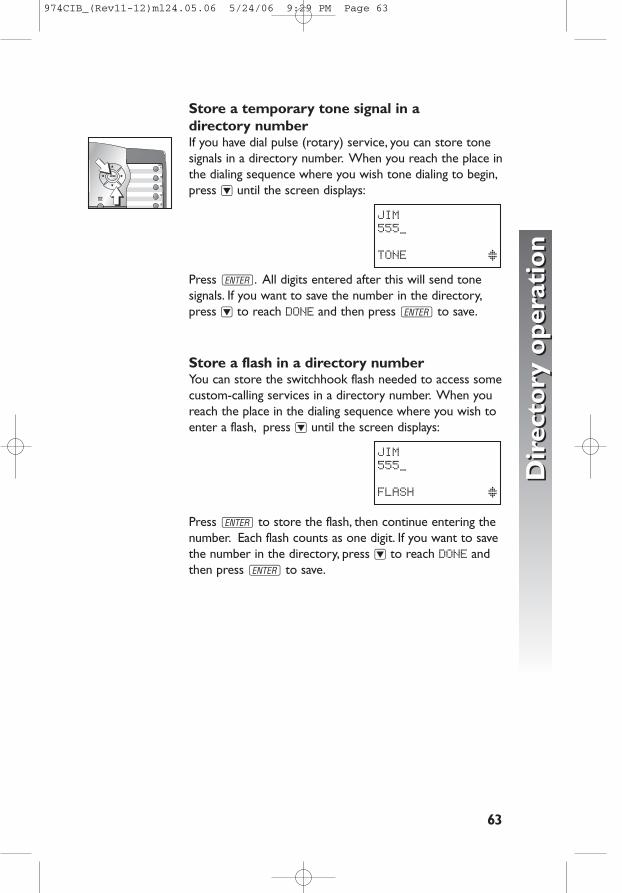
Store a temporary tone signal in a directory numberIf you have dial pulse (rotary) service, you can store tonesignals in a directory number. When you reach the place inthe dialing sequence where you wish tone dialing to begin,press - until the screen displays:
Press E. All digits entered after this will send tonesignals. If you want to save the number in the directory,press - to reach DONE and then press E to save.
Store a flash in a directory numberYou can store the switchhook flash needed to access somecustom-calling services in a directory number. When youreach the place in the dialing sequence where you wish toenter a flash, press - until the screen displays:
Press E to store the flash, then continue entering thenumber. Each flash counts as one digit. If you want to savethe number in the directory, press - to reach DONE andthen press E to save.
JIMTERXNAMELLXX555_XXXXXXXXXXXXXXxFLASHXNUMBERXXXx
JIMTERXNAMELLXX555_XXXXXXXXXXXXXXxTONEXXNUMBERXXXx
63
Dir
ecto
ry o
pera
tion
Dir
ecto
ry o
pera
tion
lllll
iiiii
974CIB_(Rev11-12)ml24.05.06 5/24/06 9:29 PM Page 63
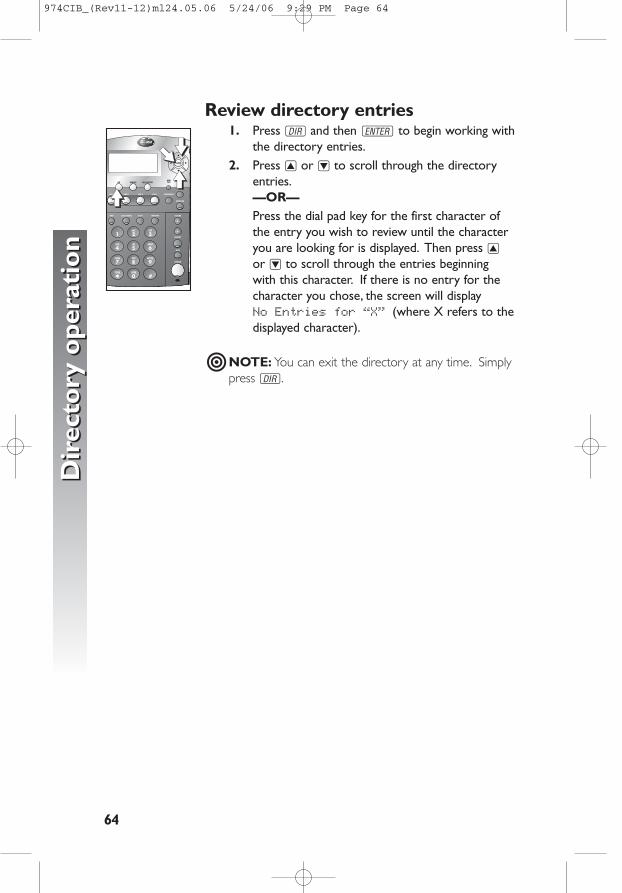
Review directory entries1. Press D and then E to begin working with
the directory entries.2. Press + or - to scroll through the directory
entries.—OR—Press the dial pad key for the first character ofthe entry you wish to review until the characteryou are looking for is displayed. Then press +or - to scroll through the entries beginning with this character. If there is no entry for thecharacter you chose, the screen will display NohEntrieshforh“X”h(where X refers to thedisplayed character).
�NOTE: You can exit the directory at any time. Simplypress D.
64
Dir
ecto
ry o
pera
tion
Dir
ecto
ry o
pera
tion
mmmmmllllliiiii
iiiii
974CIB_(Rev11-12)ml24.05.06 5/24/06 9:29 PM Page 64
Edit a directory entry1. Find the directory entry you wish to change by
following the directions under Reviewdirectory entries on page 64.
2. When the entry you want to edit is displayed,press E. The screen display includes DIAL.
3. Press - until the screen display includes EDITNAME.
4. Press E and start to edit the name using thedial pad keys. (See the instructions in step 4 ofStore a name and number in the directoryon page 61 for details.)
5. Press E to save the new name in thedirectory. The screen display briefly includesSaved!. The screen automatically returns toshowing the new name you stored and thenumber.
6. Press E and then press - until the screendisplay includes EDIT NUMBER.—OR—Press D to save the new name and return tothe idle screen without changing the numberstored in this directory entry.
7. Press E to begin editing the number usingthe dial pad keys. Press < to backspace. Thenumber will appear on the second line of thescreen as you enter it.
8. Press E to store the new number in thedirectory. The screen display briefly includesSaved!. The screen automatically returns toshowing the new name and number you stored.
�NOTE: You can exit the directory at any time withoutstoring the entry. Simply press D.
65
Dir
ecto
ry o
pera
tion
Dir
ecto
ry o
pera
tion
iiiiikkkkknnnnn
974CIB_(Rev11-12)ml24.05.06 5/24/06 9:29 PM Page 65
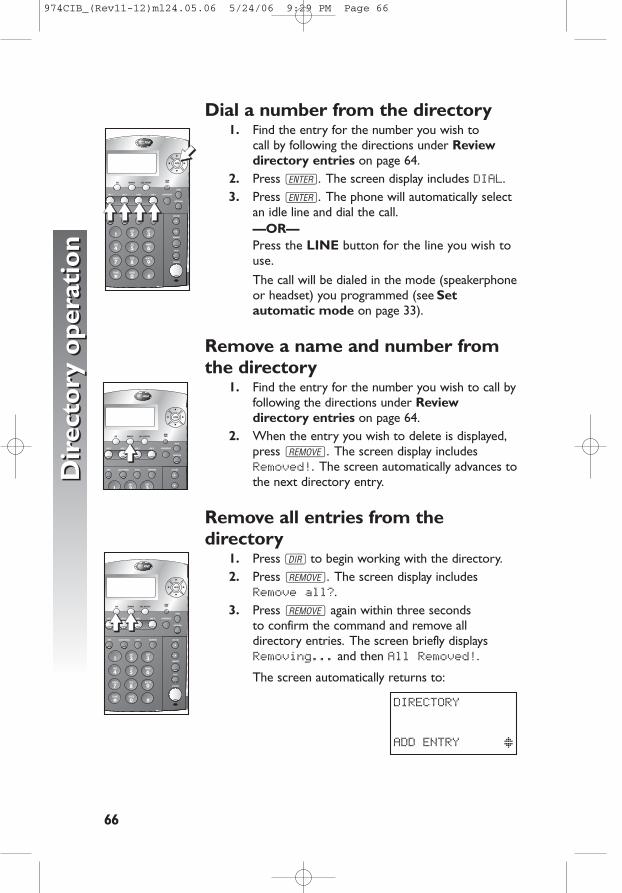
66
Dir
ecto
ry o
pera
tion
Dir
ecto
ry o
pera
tion
nnnnn
iiiiiiiiiiiiiiiiiiii
iiiii
Dial a number from the directory1. Find the entry for the number you wish to
call by following the directions under Reviewdirectory entries on page 64.
2. Press E. The screen display includes DIAL.3. Press E. The phone will automatically select
an idle line and dial the call.—OR—Press the LINE button for the line you wish touse.The call will be dialed in the mode (speakerphoneor headset) you programmed (see Setautomatic mode on page 33).
Remove a name and number fromthe directory
1. Find the entry for the number you wish to call byfollowing the directions under Reviewdirectory entries on page 64.
2. When the entry you wish to delete is displayed,press r. The screen display includesRemoved!. The screen automatically advances tothe next directory entry.
Remove all entries from thedirectory
1. Press D to begin working with the directory.2. Press r. The screen display includes
Remove all?.3. Press r again within three seconds
to confirm the command and remove alldirectory entries. The screen briefly displaysRemoving... and then All Removed!.
The screen automatically returns to:
DIRECTORYXFULLXXXXXXXXXXXXXXXXXXXXXXXXXXXXXXXXXxADDWENTRYESXXXXx
iiiiiiiiii
974CIB_(Rev11-12)ml24.05.06 5/24/06 9:29 PM Page 66

67
Inte
rcom
ope
rati
onIn
terc
om o
pera
tion
This 974 telephone is fully compatible with any AT&T Four-Line SmallBusiness System Speakerphone 945 or 984 units you may have installed. Youcan use a total of 16 945/974/984 units together as extensions in your phonesystem.
This 974 telephone is also compatible with any AT&T 964/955/944 phonesyou have previously installed. This 974 telephone is NOT compatible withany 843, 853, 854, 874, or 954 telephones you may have previously installed.
�NOTE: If you have one or more 964, 955, or 944 phone(s) installed in the same phone system with this 974 telephone, you can only have 12extensions in the phone system.
Each individual phone in your telephone system MUST be assigned a unique extension number for the intercom feature to work. See
Assign an extension number to your phone on page 24 for instructions.
�NOTE: If you subscribe to DSL service, please read DSL usersbeginning on page 4 for information about minimizing problems with this phone caused by DSL signals.
This intercom features both a single-phone page and a system-wide page.A single-phone page alerts only one phone. A system-wide page alerts allsystem phones. Any phone with the Do not disturb (DND) feature activatedwill not receive a page.
An intercom call rings at the extension called with a repeating double-ringpattern.
A single-phone page automatically activates the speakerphone on thereceiving phone. You can deactivate the speakerphone by lifting the handset.
�NOTE: If a line is in use, pressing I will place the line on hold andactivate the intercom.
Intercom operation
974CIB_(Rev11-12)ml24.05.06 5/24/06 9:29 PM Page 67
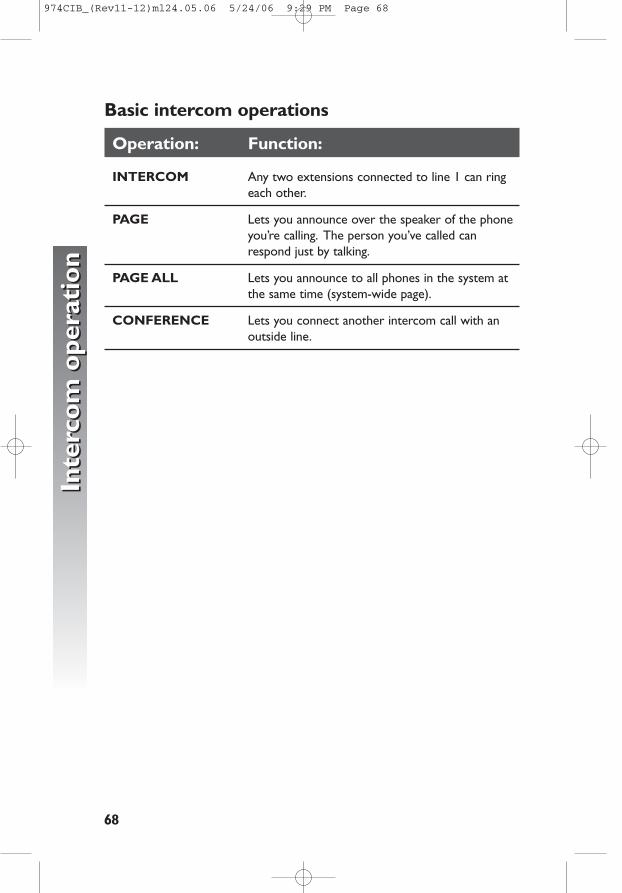
68
Inte
rcom
ope
rati
onIn
terc
om o
pera
tion
Basic intercom operations
Operation: Function:
INTERCOM Any two extensions connected to line 1 can ringeach other.
PAGE Lets you announce over the speaker of the phoneyou’re calling. The person you’ve called canrespond just by talking.
PAGE ALL Lets you announce to all phones in the system atthe same time (system-wide page).
CONFERENCE Lets you connect another intercom call with anoutside line.
974CIB_(Rev11-12)ml24.05.06 5/24/06 9:29 PM Page 68
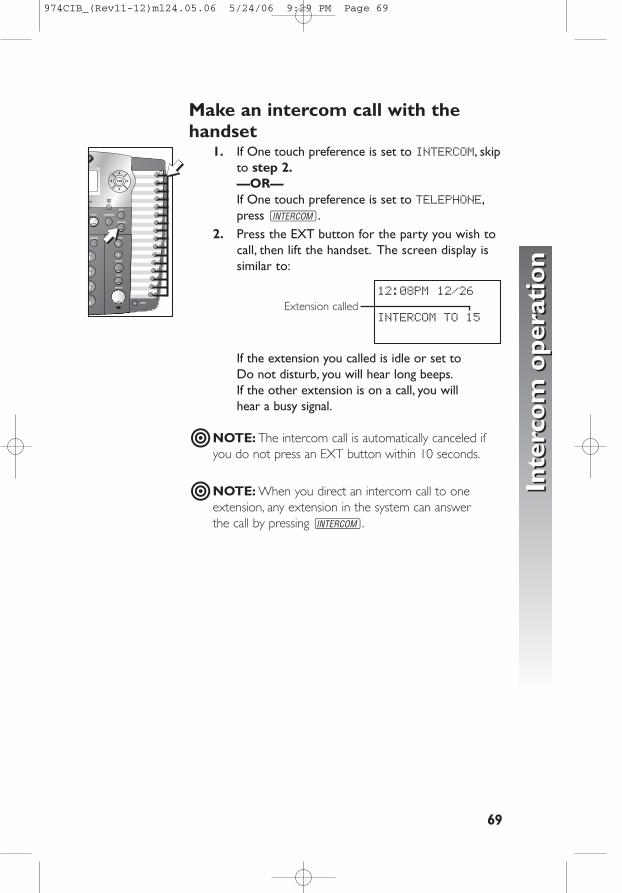
Make an intercom call with thehandset
1. If One touch preference is set to INTERCOM, skipto step 2.—OR—If One touch preference is set to TELEPHONE,press I.
2. Press the EXT button for the party you wish tocall, then lift the handset. The screen display issimilar to:
If the extension you called is idle or set to Do not disturb, you will hear long beeps.If the other extension is on a call, you will hear a busy signal.
�NOTE: The intercom call is automatically canceled ifyou do not press an EXT button within 10 seconds.
�NOTE: When you direct an intercom call to oneextension, any extension in the system can answer the call by pressing I.
12:08PM 12/26
INTERCOMHTOH15
69
Inte
rcom
ope
rati
onIn
terc
om o
pera
tion
Extension called
lllll nnnnn
jjjjj
974CIB_(Rev11-12)ml24.05.06 5/24/06 9:29 PM Page 69
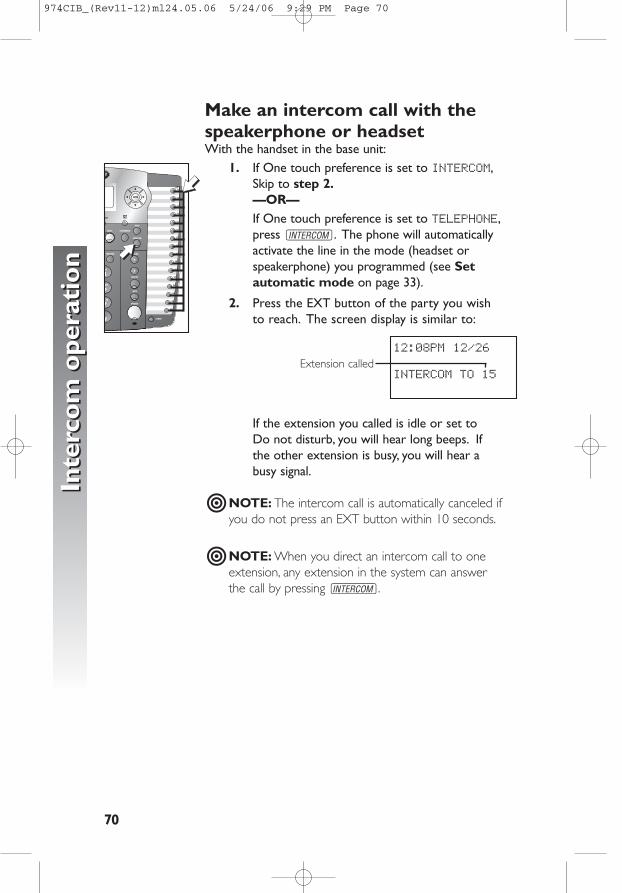
Make an intercom call with thespeakerphone or headsetWith the handset in the base unit:
1. If One touch preference is set to INTERCOM,Skip to step 2.—OR—If One touch preference is set to TELEPHONE,press I. The phone will automaticallyactivate the line in the mode (headset orspeakerphone) you programmed (see Setautomatic mode on page 33).
2. Press the EXT button of the party you wish to reach. The screen display is similar to:
If the extension you called is idle or set to Do not disturb, you will hear long beeps. If the other extension is busy, you will hear a busy signal.
�NOTE: The intercom call is automatically canceled ifyou do not press an EXT button within 10 seconds.
�NOTE: When you direct an intercom call to oneextension, any extension in the system can answer the call by pressing I.
12:08PM 12/26
INTERCOMHTOH15
70
Inte
rcom
ope
rati
onIn
terc
om o
pera
tion
Extension called
lllll nnnnn
jjjjj
974CIB_(Rev11-12)ml24.05.06 5/24/06 9:29 PM Page 70
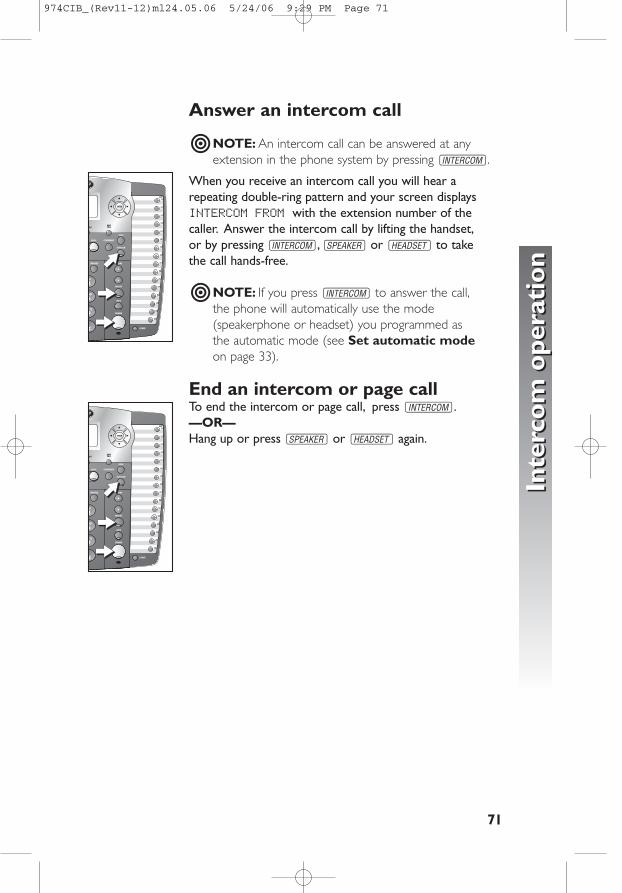
Answer an intercom call
�NOTE: An intercom call can be answered at anyextension in the phone system by pressing I.
When you receive an intercom call you will hear arepeating double-ring pattern and your screen displaysINTERCOM FROM with the extension number of thecaller. Answer the intercom call by lifting the handset,or by pressing I,K or h to take the call hands-free.
�NOTE: If you press I to answer the call,the phone will automatically use the mode(speakerphone or headset) you programmed as the automatic mode (see Set automatic modeon page 33).
End an intercom or page callTo end the intercom or page call, press I.—OR—Hang up or press K or h again.
71
Inte
rcom
ope
rati
onIn
terc
om o
pera
tion
kkkkk
kkkkk
jjjjj
kkkkk
kkkkk
jjjjj
974CIB_(Rev11-12)ml24.05.06 5/24/06 9:29 PM Page 71
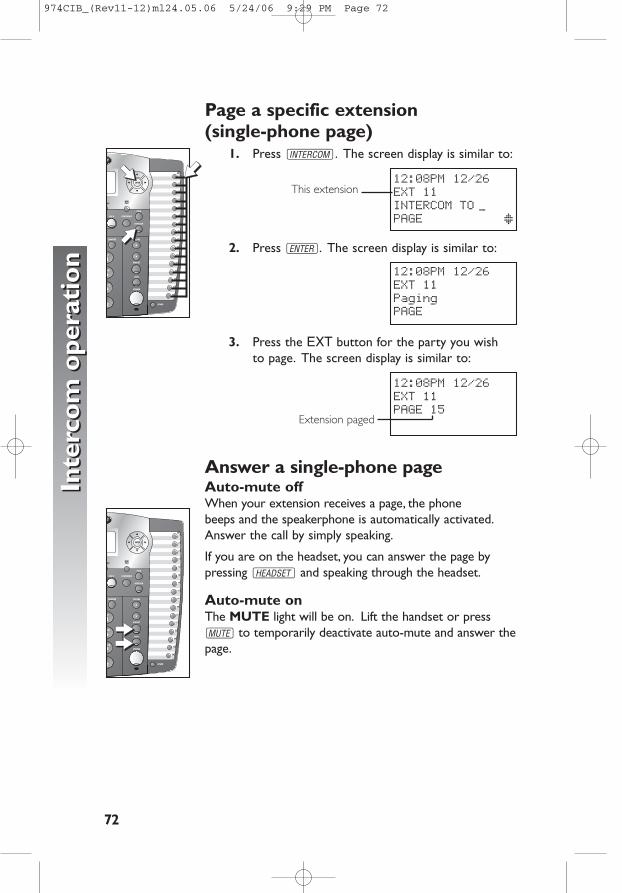
Page a specific extension (single-phone page)
1. Press I. The screen display is similar to:
2. Press E. The screen display is similar to:
3. Press the EXT button for the party you wish to page. The screen display is similar to:
Answer a single-phone pageAuto-mute offWhen your extension receives a page, the phone beeps and the speakerphone is automatically activated.Answer the call by simply speaking.
If you are on the headset, you can answer the page bypressing h and speaking through the headset.
Auto-mute onThe MUTE light will be on. Lift the handset or pressM to temporarily deactivate auto-mute and answer thepage.
12:08PM 12/26EXTH11PAGEH15
12:08PM 12/26EXTH11PagingPAGE
12:08PM 12/26EXTH11INTERCOMHTO _PAGEHHHHHHHHHHHx
72
Inte
rcom
ope
rati
onIn
terc
om o
pera
tion
nnnnnlllll
Extension paged
jjjjj
kkkkkkkkkk
This extension
974CIB_(Rev11-12)ml24.05.06 5/24/06 9:29 PM Page 72
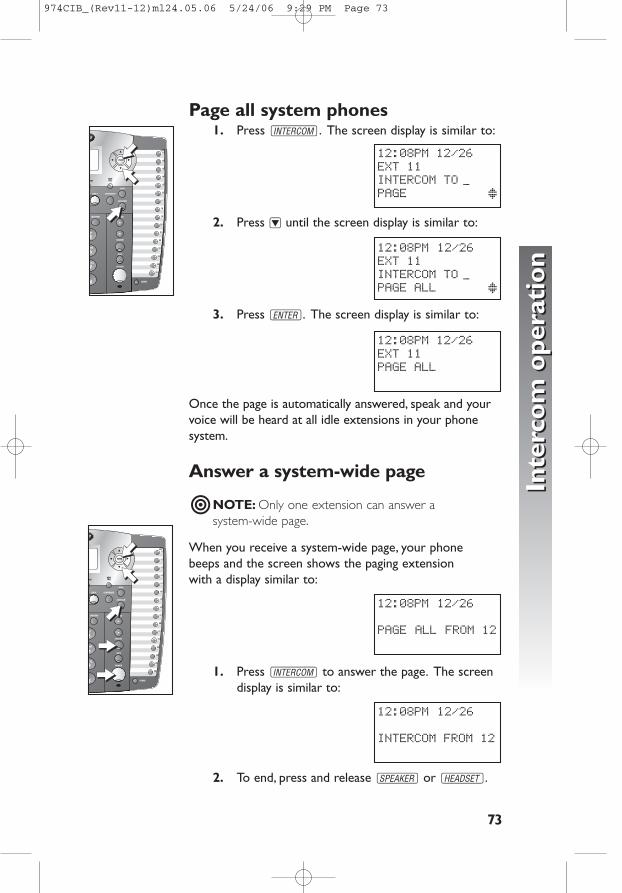
Page all system phones1. PressI. The screen display is similar to:
2. Press - until the screen display is similar to:
3. Press E. The screen display is similar to:
Once the page is automatically answered, speak and yourvoice will be heard at all idle extensions in your phonesystem.
Answer a system-wide page
�NOTE: Only one extension can answer a system-wide page.
When you receive a system-wide page, your phone beeps and the screen shows the paging extension with a display similar to:
1. Press I to answer the page. The screendisplay is similar to:
2. To end, press and release K or h.
12:08PM 12/26
INTERCOMHFROMH12
12:08PM 12/26
PAGE ALL FROMH12
12:08PMH12/26EXTH11PAGEHALL
12:08PM 12/26EXTH11INTERCOMHTO _PAGEHALLHHHHHHHx
12:08PMH12/26EXTH11INTERCOMHTO _PAGEHHHHHHHHHHHx
73
Inte
rcom
ope
rati
onIn
terc
om o
pera
tion
nnnnnppppp
jjjjj
nnnnnppppp
jjjjj
kkkkk
kkkkk
974CIB_(Rev11-12)ml24.05.06 5/24/06 9:29 PM Page 73
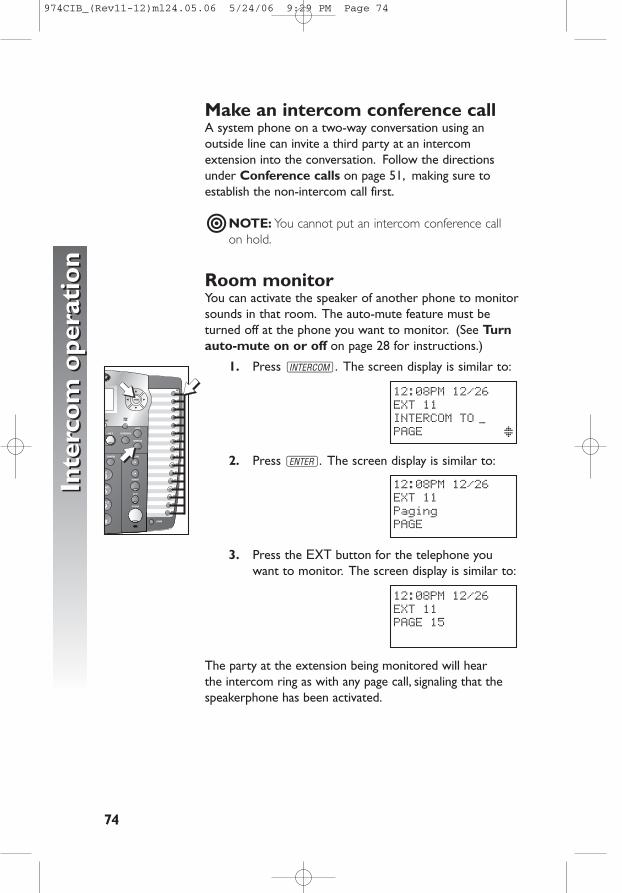
Make an intercom conference callA system phone on a two-way conversation using anoutside line can invite a third party at an intercomextension into the conversation. Follow the directionsunder Conference calls on page 51, making sure toestablish the non-intercom call first.
�NOTE: You cannot put an intercom conference callon hold.
Room monitorYou can activate the speaker of another phone to monitorsounds in that room. The auto-mute feature must beturned off at the phone you want to monitor. (See Turnauto-mute on or off on page 28 for instructions.)
1. Press I. The screen display is similar to:
2. Press E. The screen display is similar to:
3. Press the EXT button for the telephone youwant to monitor. The screen display is similar to:
The party at the extension being monitored will hear the intercom ring as with any page call, signaling that thespeakerphone has been activated.
12:08PMH12/26EXTH11PAGEH15
12:08PMH12/26EXTH11PagingPAGE
12:08PMH12/26EXTH11INTERCOMHTO _PAGEHHHHHHHHHHHx
74
Inte
rcom
ope
rati
onIn
terc
om o
pera
tion
lllll nnnnnlllll
jjjjj
974CIB_(Rev11-12)ml24.05.06 5/24/06 9:29 PM Page 74

75
Cal
ler
ID o
pera
tion
Cal
ler
ID o
pera
tion
This telephone has a Caller ID feature that works with caller identificationservice provided by your local telephone company. There is a fee for thisservice, and it may not be available in all areas. This phone can provideinformation only if both you and the caller are in areas offering calleridentification service, and if both telephone companies use compatibleequipment.
When you use this phone with caller ID service, you can see who’s callingbefore you answer the phone. If you subscribe to caller ID with call waiting,a combined service available through many local telephone companies, youcan see who’s trying to reach you even when you’re on another call. Thisservice may be called by different names (such as caller ID with visual callwaiting) by different local telephone companies and may not be available in all areas.
�NOTE: You must subscribe to combined caller ID with call waiting as asingle service to see caller ID information for a call waiting call. Check withyour telephone company for its availability.
This phone assigns each incoming call a number from 1 to 200. The mostrecent call will have the highest number. (For example, if two calls have beenreceived, call number 002 is the most recent.) When the call history is full,the earliest call information is automatically deleted to make room for newincoming call information.
The format of phone numbers displayed will depend on the home and localarea codes you programmed. (See Home area code and Local area codeon page 6 for explanations of area codes. See Program home and localarea codes on page 38 for programming instructions.) If the call came fromwithin your home area code, the screen displays only the seven digit number(without an area code). If the call came from one of your local area codes,the screen displays 10 digits (area code plus the seven-digit number). If thecall did not come from any of the area codes you programmed, (1) phonenumbers with 10 or more digits will automatically have a 1 inserted anddisplayed before the number and, (2) phone numbers with fewer than 10digits will be displayed without a 1.
Caller ID operation
974CIB_(Rev11-12)ml24.05.06 5/24/06 9:29 PM Page 75
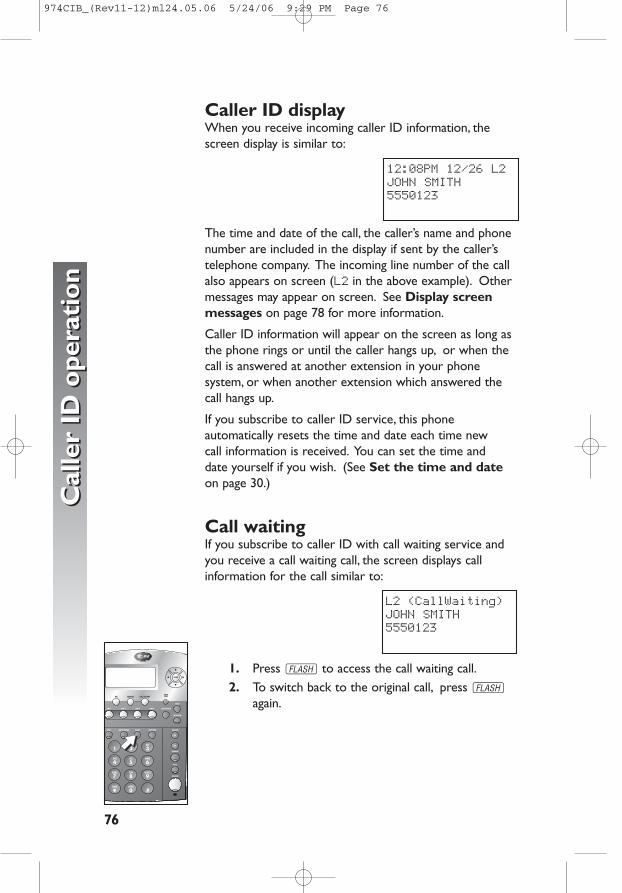
Caller ID displayWhen you receive incoming caller ID information, thescreen display is similar to:
The time and date of the call, the caller’s name and phonenumber are included in the display if sent by the caller’stelephone company. The incoming line number of the callalso appears on screen (L2 in the above example). Othermessages may appear on screen. See Display screenmessages on page 78 for more information.
Caller ID information will appear on the screen as long asthe phone rings or until the caller hangs up, or when thecall is answered at another extension in your phonesystem, or when another extension which answered thecall hangs up.
If you subscribe to caller ID service, this phoneautomatically resets the time and date each time new call information is received. You can set the time and date yourself if you wish. (See Set the time and dateon page 30.)
Call waitingIf you subscribe to caller ID with call waiting service andyou receive a call waiting call, the screen displays callinformation for the call similar to:
1. Press F to access the call waiting call.2. To switch back to the original call, press F
again.
L2X(CallWaiting)JOHN SMITH5550123PAGEHHHHHHHHHHHx
76
Cal
ler
ID o
pera
tion
Cal
ler
ID o
pera
tion
jjjjj
12:08PM 12/26 L2JOHN SMITH5550123PAGEHHHHHHHHHHHx
974CIB_(Rev11-12)ml24.05.06 5/24/06 9:29 PM Page 76
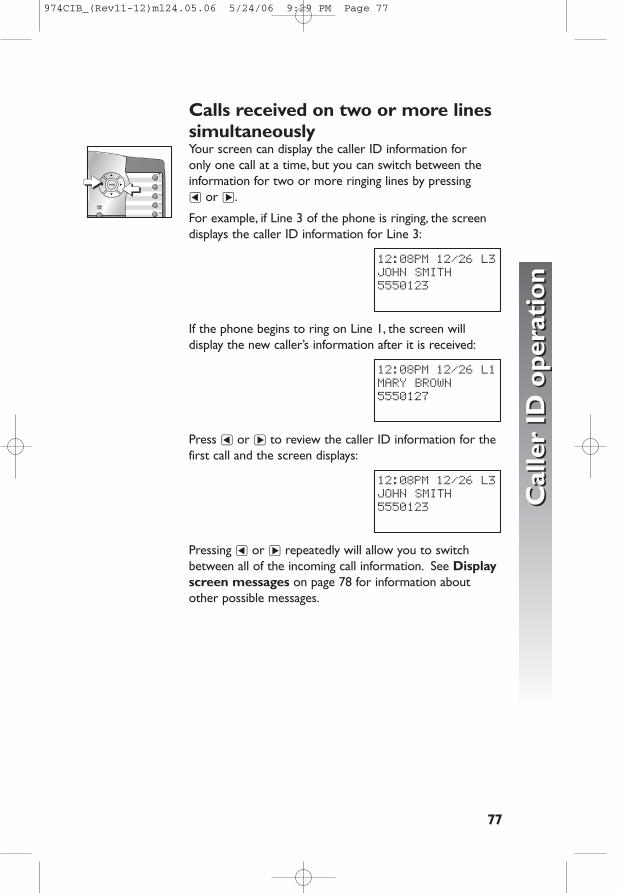
Calls received on two or more linessimultaneouslyYour screen can display the caller ID information for only one call at a time, but you can switch between theinformation for two or more ringing lines by pressing < or >.
For example, if Line 3 of the phone is ringing, the screendisplays the caller ID information for Line 3:
If the phone begins to ring on Line 1, the screen willdisplay the new caller’s information after it is received:
Press < or > to review the caller ID information for thefirst call and the screen displays:
Pressing < or > repeatedly will allow you to switchbetween all of the incoming call information. See Displayscreen messages on page 78 for information aboutother possible messages.
12:08PMX12/26 L3JOHN SMITH5550123PAGEHHHHHHHHHHHx
12:08PMX12/26 L1MARY BROWN5550127PAGEHHHHHHHHHHHx
12:08PMX12/26 L3JOHN SMITHX5550123PAGEHHHHHHHHHHHx
77
Cal
ler
ID o
pera
tion
Cal
ler
ID o
pera
tion
kkkkk ooooo
974CIB_(Rev11-12)ml24.05.06 5/24/06 9:29 PM Page 77
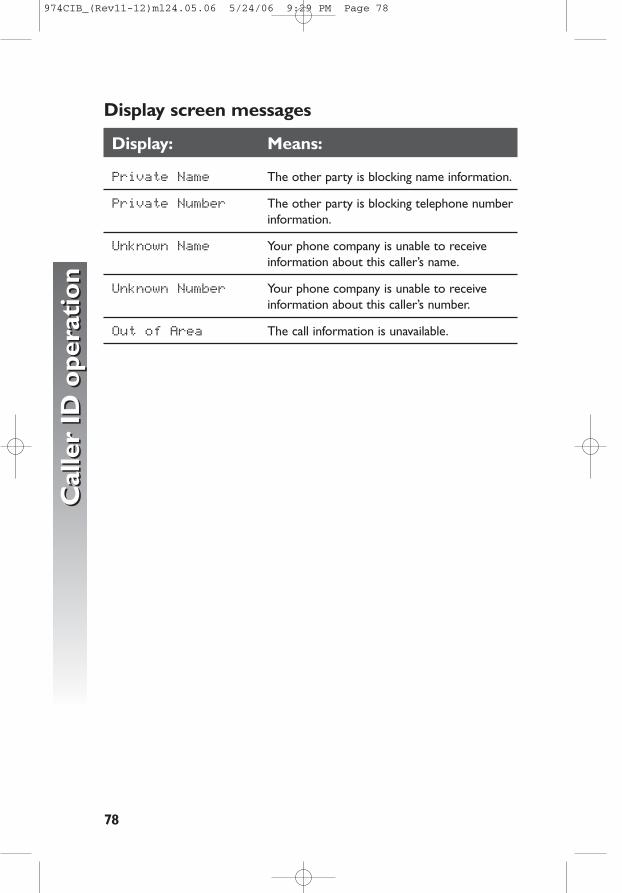
78
Cal
ler
ID o
pera
tion
Cal
ler
ID o
pera
tion
Display screen messages
Display: Means:
Private Name The other party is blocking name information.
Private Number The other party is blocking telephone numberinformation.
Unknown Name Your phone company is unable to receiveinformation about this caller’s name.
Unknown Number Your phone company is unable to receiveinformation about this caller’s number.
Out of Area The call information is unavailable.
974CIB_(Rev11-12)ml24.05.06 5/24/06 9:29 PM Page 78
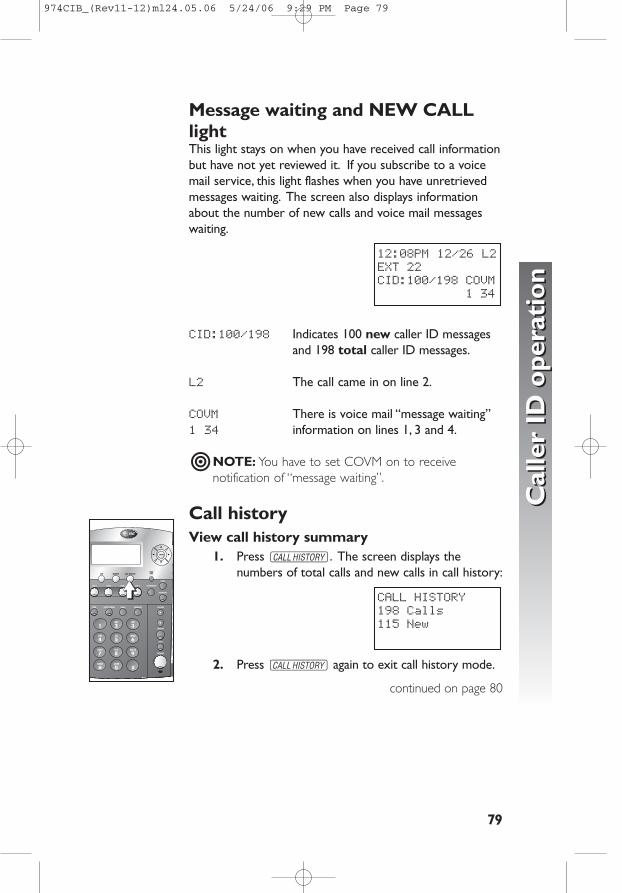
Message waiting and NEW CALLlightThis light stays on when you have received call informationbut have not yet reviewed it. If you subscribe to a voicemail service, this light flashes when you have unretrievedmessages waiting. The screen also displays informationabout the number of new calls and voice mail messageswaiting.
CID:100/198 Indicates 100 new caller ID messagesand 198 total caller ID messages.
L2 The call came in on line 2.
COVM There is voice mail “message waiting” 1 34 information on lines 1, 3 and 4.
�NOTE: You have to set COVM on to receivenotification of “message waiting”.
Call historyView call history summary
1. Press C. The screen displays thenumbers of total calls and new calls in call history:
2. Press C again to exit call history mode.
continued on page 80
CALLXHISTORY198XCalls115XNew
12:08PM 12/26 L2EXTX22CID:100/198XCOVMXXXXXXXXXXXX1X34
79
Cal
ler
ID o
pera
tion
Cal
ler
ID o
pera
tion
iiiii
974CIB_(Rev11-12)ml24.05.06 5/24/06 9:29 PM Page 79
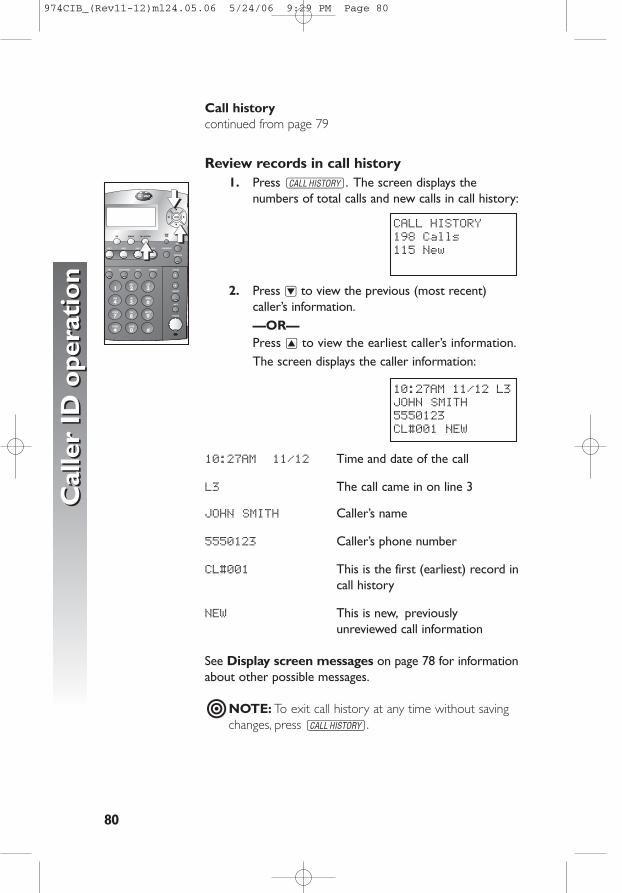
Call historycontinued from page 79
Review records in call history1. Press C. The screen displays the
numbers of total calls and new calls in call history:
2. Press - to view the previous (most recent)caller’s information.—OR—Press + to view the earliest caller’s information.The screen displays the caller information:
10:27AM 11/12 Time and date of the call
L3 The call came in on line 3
JOHN SMITH Caller’s name
5550123 Caller’s phone number
CL#001 This is the first (earliest) record incall history
NEW This is new, previouslyunreviewed call information
See Display screen messages on page 78 for informationabout other possible messages.
�NOTE: To exit call history at any time without savingchanges, press C.
10:27AMX11/12XL3JOHN SMITH5550123CL#001 NEW
CALLXHISTORY198XCalls115XNew
80
Cal
ler
ID o
pera
tion
Cal
ler
ID o
pera
tion
mmmmm
iiiiiiiiii
974CIB_(Rev11-12)ml24.05.06 5/24/06 9:29 PM Page 80
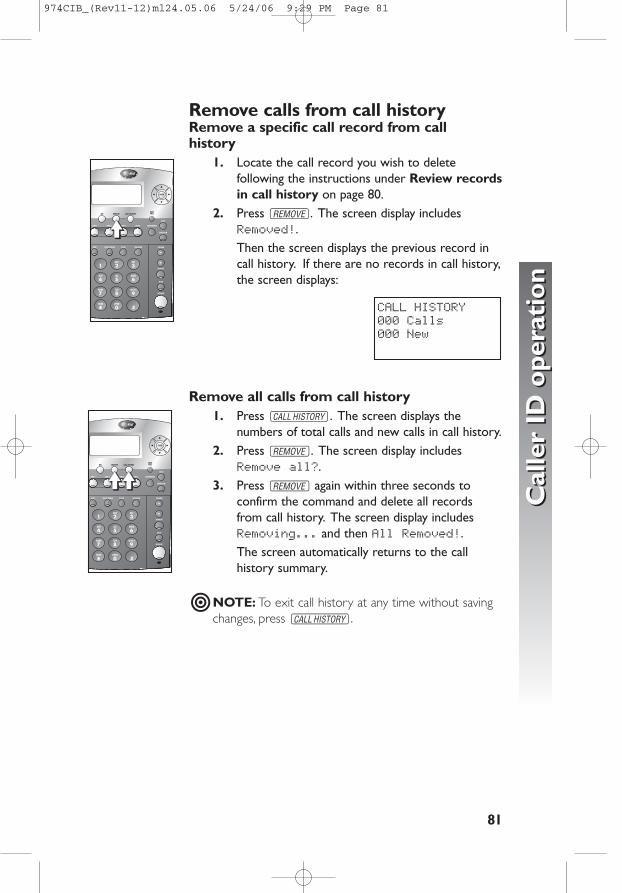
Remove calls from call history Remove a specific call record from callhistory
1. Locate the call record you wish to deletefollowing the instructions under Review recordsin call history on page 80.
2. Press R. The screen display includesRemoved!.Then the screen displays the previous record incall history. If there are no records in call history,the screen displays:
Remove all calls from call history 1. Press C. The screen displays the
numbers of total calls and new calls in call history.2. Press r. The screen display includes
Remove all?.3. Press r again within three seconds to
confirm the command and delete all records from call history. The screen display includesRemoving... and then All Removed!.The screen automatically returns to the callhistory summary.
�NOTE: To exit call history at any time without savingchanges, press C.
CALLXHISTORY000XCalls000XNew
81
Cal
ler
ID o
pera
tion
Cal
ler
ID o
pera
tion
iiiii
iiiiiiiiii
974CIB_(Rev11-12)ml24.05.06 5/24/06 9:29 PM Page 81
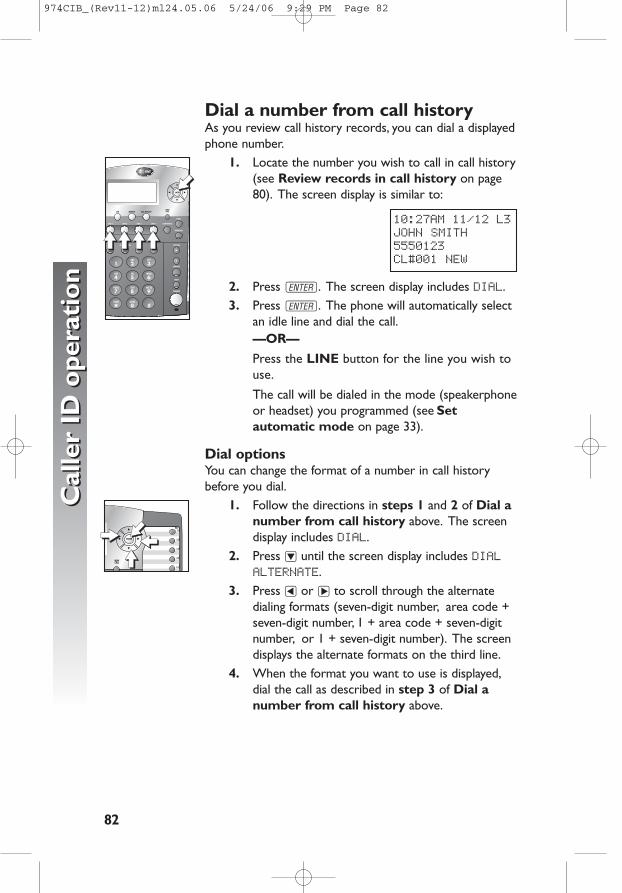
Dial a number from call historyAs you review call history records, you can dial a displayedphone number.
1. Locate the number you wish to call in call history(see Review records in call history on page80). The screen display is similar to:
2. Press E. The screen display includes DIAL.3. Press E. The phone will automatically select
an idle line and dial the call.—OR—
Press the LINE button for the line you wish touse.
The call will be dialed in the mode (speakerphoneor headset) you programmed (see Setautomatic mode on page 33).
Dial optionsYou can change the format of a number in call historybefore you dial.
1. Follow the directions in steps 1 and 2 of Dial anumber from call history above. The screendisplay includes DIAL.
2. Press - until the screen display includes DIALALTERNATE.
3. Press < or > to scroll through the alternatedialing formats (seven-digit number, area code +seven-digit number, 1 + area code + seven-digitnumber, or 1 + seven-digit number). The screendisplays the alternate formats on the third line.
4. When the format you want to use is displayed,dial the call as described in step 3 of Dial anumber from call history above.
10:27AMX11/12XL3JOHN SMITH5550123CL#001 NEW
82
Cal
ler
ID o
pera
tion
Cal
ler
ID o
pera
tion
iiiii iiiiiiiiiiiiiii
nnnnn
iiiiikkkkk ooooonnnnn
974CIB_(Rev11-12)ml24.05.06 5/24/06 9:29 PM Page 82
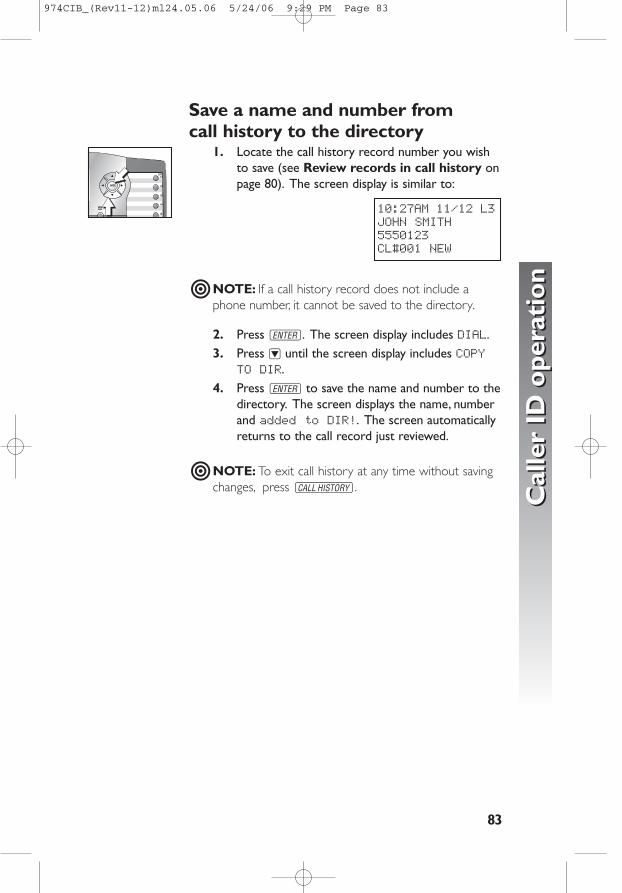
Save a name and number from call history to the directory
1. Locate the call history record number you wishto save (see Review records in call history onpage 80). The screen display is similar to:
�NOTE: If a call history record does not include aphone number, it cannot be saved to the directory.
2. Press E. The screen display includes DIAL.3. Press - until the screen display includes COPY
TO DIR.4. Press E to save the name and number to the
directory. The screen displays the name, numberand added to DIR!. The screen automaticallyreturns to the call record just reviewed.
�NOTE: To exit call history at any time without savingchanges, press C.
10:27AMX11/12XL3JOHN SMITH5550123CL#001 NEW
83
Cal
ler
ID o
pera
tion
Cal
ler
ID o
pera
tion
iiiii
nnnnn
974CIB_(Rev11-12)ml24.05.06 5/24/06 9:29 PM Page 83
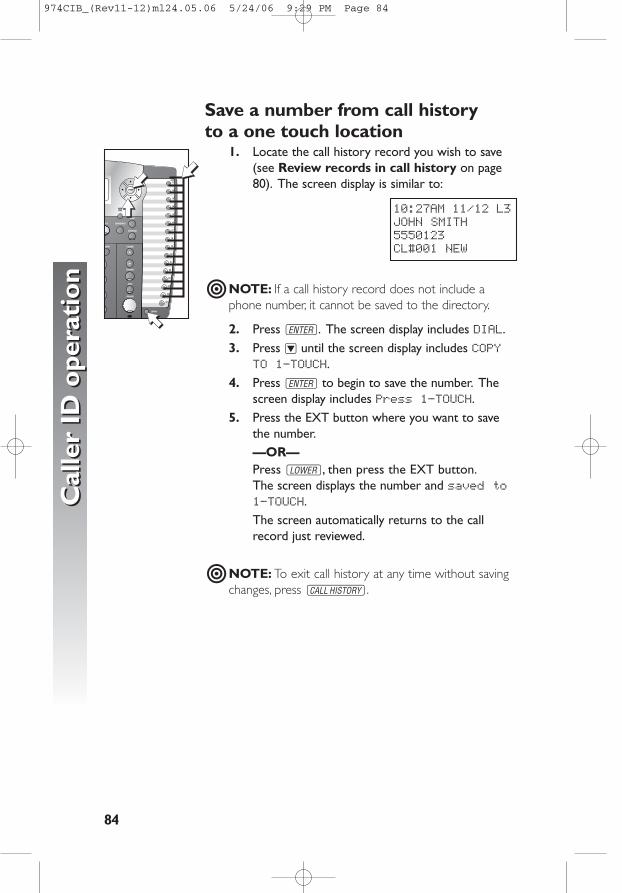
Save a number from call history to a one touch location
1. Locate the call history record you wish to save(see Review records in call history on page80). The screen display is similar to:
�NOTE: If a call history record does not include aphone number, it cannot be saved to the directory.
2. Press E. The screen display includes DIAL.3. Press - until the screen display includes COPY
TO 1-TOUCH.4. Press E to begin to save the number. The
screen display includes Press 1-TOUCH.5. Press the EXT button where you want to save
the number.—OR—Press W, then press the EXT button.The screen displays the number and saved to1-TOUCH.The screen automatically returns to the callrecord just reviewed.
�NOTE: To exit call history at any time without savingchanges, press C.
10:27AMX11/12XL3JOHN SMITH5550123CL#001 NEW
84
Cal
ler
ID o
pera
tion
Cal
ler
ID o
pera
tion
nnnnn
ppppp
iiiiinnnnn
974CIB_(Rev11-12)ml24.05.06 5/24/06 9:29 PM Page 84
85
Add
ing
a fa
x m
achi
neA
ddin
g a
fax
mac
hine
�NOTE: Do not connect a fax machine to line 1. Doing so will interruptthe telephone’s intercom data channel.
You may wish to use a fax machine with your phone. Choose line 2, 3 or 4for the fax machine, and connect it according to the manufacturer’sinstructions for installation and use.
• That line’s telephone number is your fax number.• The same line can be used for outgoing calls (incoming faxes will get
a busy signal when the line is in use).• Set your fax machine to answer on the first ring (follow manufacturer’s
instructions).• To prevent the fax line from ringing at all the extensions, turn the ringer
off for that line at other extensions (see Turn the ringer on or off for each line on page 25).
�NOTE: If you are using a fax switch, or a fax machine with a built-in faxswitch, see Using a fax switch below.
Using a fax switchA fax switch lets the telephone know, before the phone rings, whether anincoming call is a voice call or a fax call. Some fax machines have a built-in fax switch. Using a fax switch may affect the operation of the LINE lightsor other system features.
Adding a fax machine
974CIB_(Rev11-12)ml24.05.06 5/24/06 9:29 PM Page 85
To keep your phone working and looking good, follow these guidelines:
• Avoid putting it near heating appliances and devices that generateelectrical noise (for example, motors or fluorescent lamps).
• DO NOT expose it to direct sunlight or moisture.• Avoid dropping the phone and/or other rough treatment.• Clean with a soft cloth.• Never use a strong cleaning agent or abrasive powder because this
will damage the finish.• Retain the original packaging in case you need to ship it at a later
date.
86
Gen
eral
pro
duct
car
eG
ener
al p
rodu
ct c
are
General product care
974CIB_(Rev11-12)ml24.05.06 5/24/06 9:29 PM Page 86
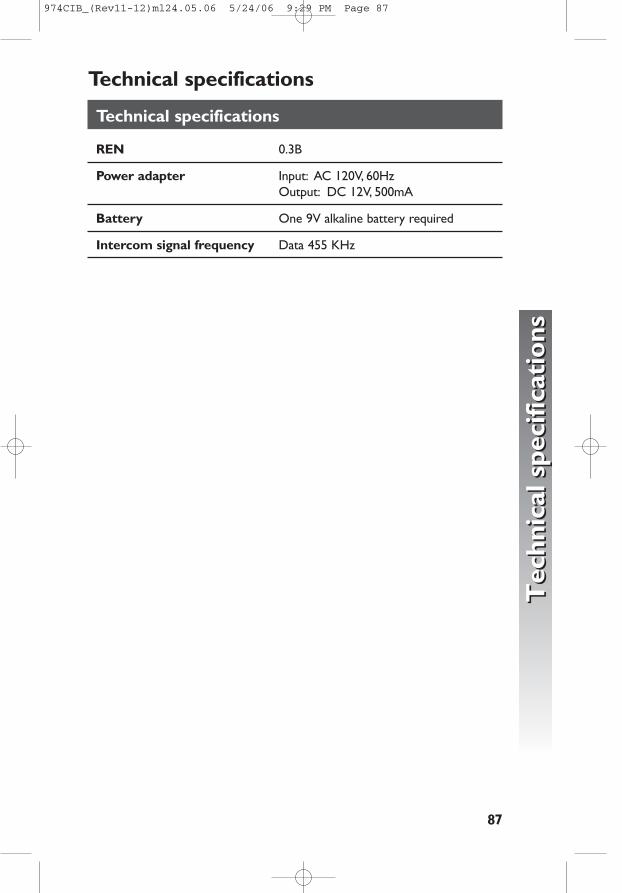
Technical specifications
REN 0.3B
Power adapter Input: AC 120V, 60HzOutput: DC 12V, 500mA
Battery One 9V alkaline battery required
Intercom signal frequency Data 455 KHz
87
Tec
hnic
al s
peci
ficat
ions
Tec
hnic
al s
peci
ficat
ions
Technical specifications
974CIB_(Rev11-12)ml24.05.06 5/24/06 9:29 PM Page 87
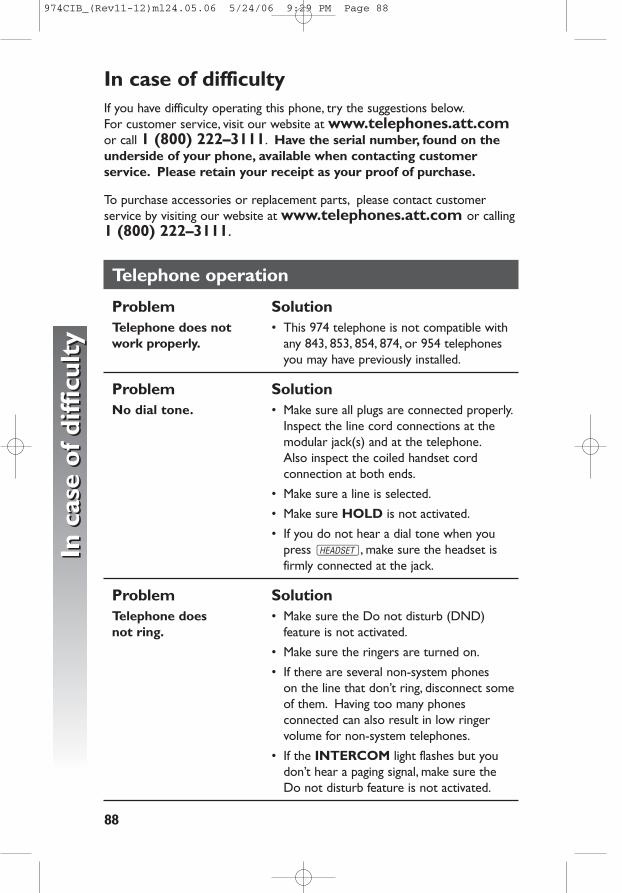
88
If you have difficulty operating this phone, try the suggestions below.For customer service, visit our website at www.telephones.att.comor call 1 (800) 222–3111. Have the serial number, found on theunderside of your phone, available when contacting customerservice. Please retain your receipt as your proof of purchase.
To purchase accessories or replacement parts, please contact customerservice by visiting our website at www.telephones.att.com or calling1 (800) 222–3111.
Telephone operation
Problem SolutionTelephone does not • This 974 telephone is not compatible withwork properly. any 843, 853, 854, 874, or 954 telephones
you may have previously installed.
Problem SolutionNo dial tone. • Make sure all plugs are connected properly.
Inspect the line cord connections at themodular jack(s) and at the telephone.Also inspect the coiled handset cord connection at both ends.
• Make sure a line is selected.
• Make sure HOLD is not activated.
• If you do not hear a dial tone when youpress h, make sure the headset isfirmly connected at the jack.
Problem SolutionTelephone does • Make sure the Do not disturb (DND)not ring. feature is not activated.
• Make sure the ringers are turned on.
• If there are several non-system phones on the line that don’t ring, disconnect someof them. Having too many phonesconnected can also result in low ringervolume for non-system telephones.
• If the INTERCOM light flashes but you don’t hear a paging signal, make sure the Do not disturb feature is not activated.
In c
ase
of d
iffic
ulty
In c
ase
of d
iffic
ulty
In case of difficulty
974CIB_(Rev11-12)ml24.05.06 5/24/06 9:29 PM Page 88
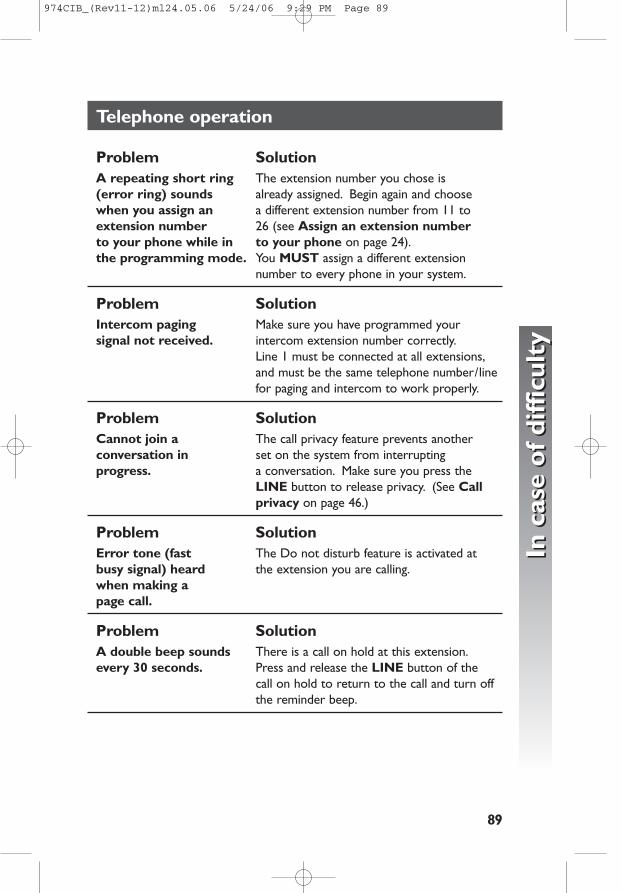
Telephone operation
Problem SolutionA repeating short ring The extension number you chose is(error ring) sounds already assigned. Begin again and choosewhen you assign an a different extension number from 11 to extension number 26 (see Assign an extension numberto your phone while in to your phone on page 24).the programming mode. You MUST assign a different extension
number to every phone in your system.
Problem SolutionIntercom paging Make sure you have programmed yoursignal not received. intercom extension number correctly.
Line 1 must be connected at all extensions,and must be the same telephone number/linefor paging and intercom to work properly.
Problem SolutionCannot join a The call privacy feature prevents anotherconversation in set on the system from interruptingprogress. a conversation. Make sure you press the
LINE button to release privacy. (See Callprivacy on page 46.)
Problem SolutionError tone (fast The Do not disturb feature is activated at busy signal) heard the extension you are calling.when making a page call.
Problem SolutionA double beep sounds There is a call on hold at this extension.every 30 seconds. Press and release the LINE button of the
call on hold to return to the call and turn offthe reminder beep.
89
In c
ase
of d
iffic
ulty
In c
ase
of d
iffic
ulty
974CIB_(Rev11-12)ml24.05.06 5/24/06 9:29 PM Page 89
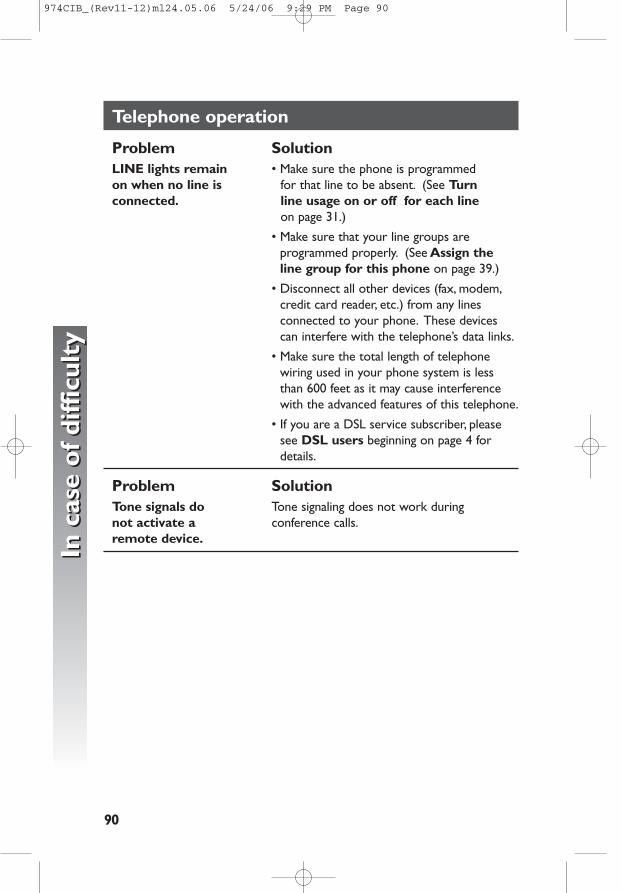
Telephone operation
Problem SolutionLINE lights remain • Make sure the phone is programmedon when no line is for that line to be absent. (See Turnconnected. line usage on or off for each line
on page 31.)
• Make sure that your line groups areprogrammed properly. (See Assign the line group for this phone on page 39.)
• Disconnect all other devices (fax, modem,credit card reader, etc.) from any linesconnected to your phone. These devicescan interfere with the telephone’s data links.
• Make sure the total length of telephonewiring used in your phone system is lessthan 600 feet as it may cause interferencewith the advanced features of this telephone.
• If you are a DSL service subscriber, pleasesee DSL users beginning on page 4 fordetails.
Problem SolutionTone signals do Tone signaling does not work during not activate a conference calls.remote device.
90
In c
ase
of d
iffic
ulty
In c
ase
of d
iffic
ulty
974CIB_(Rev11-12)ml24.05.06 5/24/06 9:29 PM Page 90
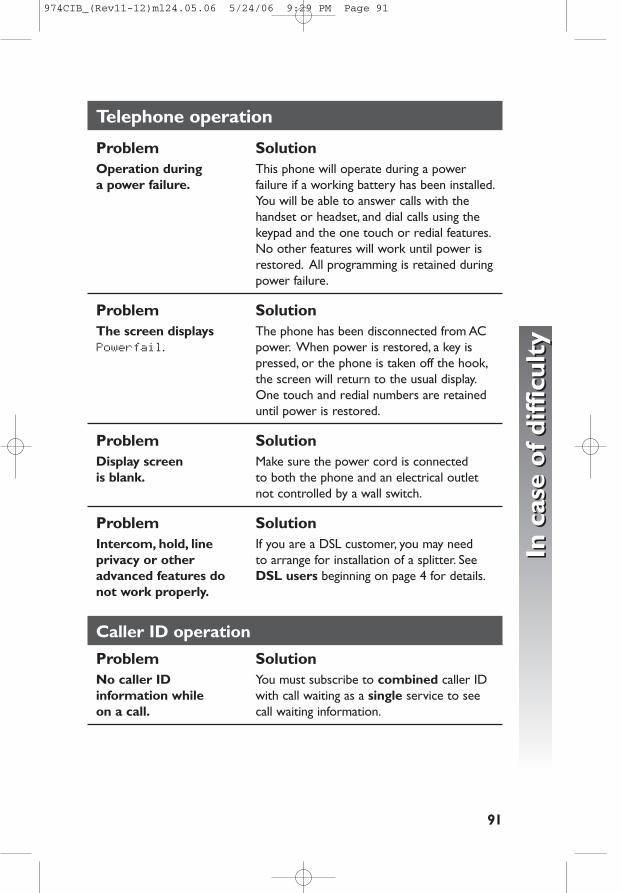
Telephone operation
Problem SolutionOperation during This phone will operate during a powera power failure. failure if a working battery has been installed.
You will be able to answer calls with thehandset or headset, and dial calls using thekeypad and the one touch or redial features.No other features will work until power isrestored. All programming is retained duringpower failure.
Problem SolutionThe screen displays The phone has been disconnected from ACPowerfail. power. When power is restored, a key is
pressed, or the phone is taken off the hook,the screen will return to the usual display.One touch and redial numbers are retaineduntil power is restored.
Problem SolutionDisplay screen Make sure the power cord is connectedis blank. to both the phone and an electrical outlet
not controlled by a wall switch.
Problem SolutionIntercom, hold, line If you are a DSL customer, you may needprivacy or other to arrange for installation of a splitter. Seeadvanced features do DSL users beginning on page 4 for details.not work properly.
Caller ID operation
Problem SolutionNo caller ID You must subscribe to combined caller ID information while with call waiting as a single service to see on a call. call waiting information.
91
In c
ase
of d
iffic
ulty
In c
ase
of d
iffic
ulty
974CIB_(Rev11-12)ml24.05.06 5/24/06 9:29 PM Page 91
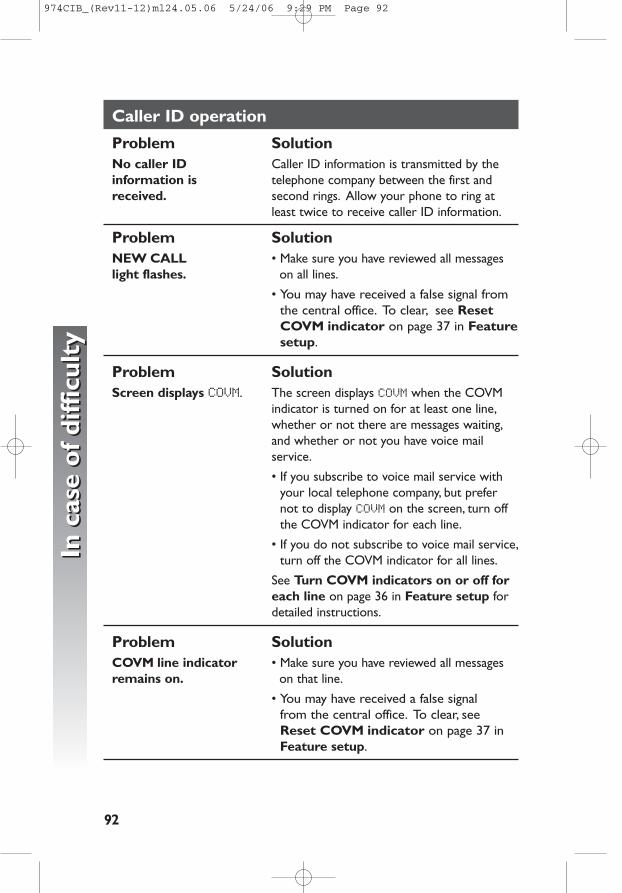
Caller ID operation
Problem SolutionNo caller ID Caller ID information is transmitted by the information is telephone company between the first and received. second rings. Allow your phone to ring at
least twice to receive caller ID information.
Problem SolutionNEW CALL • Make sure you have reviewed all messageslight flashes. on all lines.
• You may have received a false signal fromthe central office. To clear, see ResetCOVM indicator on page 37 in Featuresetup.
Problem SolutionScreen displays COVM. The screen displays COVM when the COVM
indicator is turned on for at least one line,whether or not there are messages waiting,and whether or not you have voice mailservice.
• If you subscribe to voice mail service withyour local telephone company, but prefernot to display COVM on the screen, turn offthe COVM indicator for each line.
• If you do not subscribe to voice mail service,turn off the COVM indicator for all lines.
See Turn COVM indicators on or off foreach line on page 36 in Feature setup fordetailed instructions.
Problem SolutionCOVM line indicator • Make sure you have reviewed all messages remains on. on that line.
• You may have received a false signal from the central office. To clear, seeReset COVM indicator on page 37 inFeature setup.
92
In c
ase
of d
iffic
ulty
In c
ase
of d
iffic
ulty
974CIB_(Rev11-12)ml24.05.06 5/24/06 9:29 PM Page 92
93
Exp
andi
ng t
he p
hone
sys
tem
Exp
andi
ng t
he p
hone
sys
tem
Expanding the phone systemMaximum number of units allowed to be connected in the phone system
1. With the use of ONLY 984, 974 and 945 telephones in a system, thiscombination allows a maximum number of 16 units to be connectedin the system.
2. If the combination includes any of the 944, 955 and 964 telephones,the maximum number of phones that can be connected to thesystem is 12 units.
Maximum number of telephone lines allowed to be connected to the system1. With the use of ONLY 984, 974 and 945 telephones in a system, this
combination allows a maximum number of 19 phone lines to beconnected to the system.
2. If the combination includes any of the 944, 955 and 964 telephones,the maximum number of telephone lines that can be connected tothe system is 15.
�NOTE: All 974 features work as described earlier in this manual.
�NOTE: Please refer to page 13 for the diagram of the Recommendedwiring configuration for phone system.
Line groups
Your 974 telephone is noted for its line-sharing feature. The four-line CO keyindicators show the line status by displaying different colors and modes (on /off / flashing). To have an accurate line status indication, all units which areconnected to the system MUST have their Line 1 jacks connected to thesame telephone line (i.e.TL1), Line 2 jacks connected to the same telephoneline (TL2), and Line 3 jacks connected accordingly to (TL3).
974CIB_(Rev11-12)ml24.05.06 5/24/06 9:29 PM Page 93
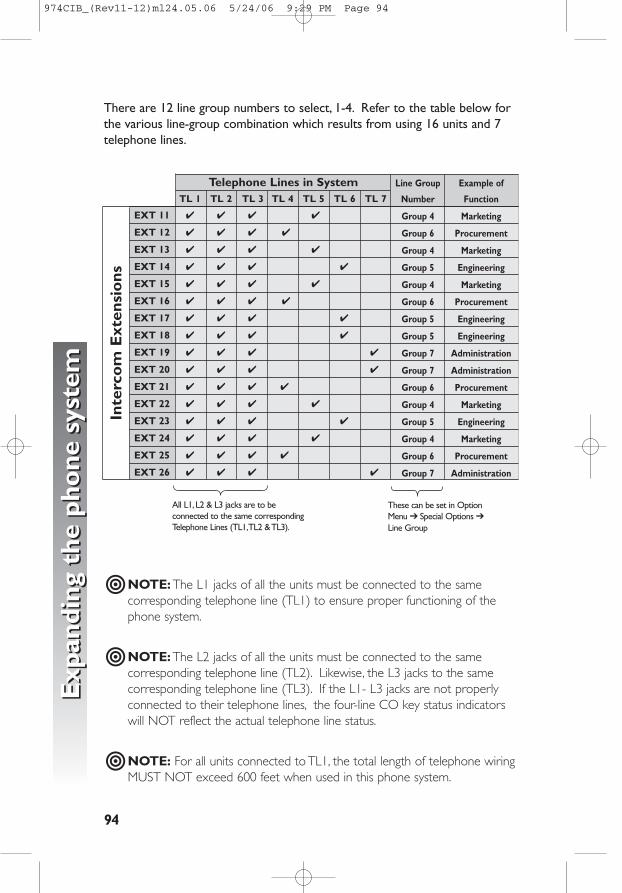
94
Exp
andi
ng t
he p
hone
sys
tem
Exp
andi
ng t
he p
hone
sys
tem
There are 12 line group numbers to select, 1-4. Refer to the table below forthe various line-group combination which results from using 16 units and 7telephone lines.
�NOTE: The L1 jacks of all the units must be connected to the samecorresponding telephone line (TL1) to ensure proper functioning of thephone system.
�NOTE: The L2 jacks of all the units must be connected to the samecorresponding telephone line (TL2). Likewise, the L3 jacks to the samecorresponding telephone line (TL3). If the L1- L3 jacks are not properlyconnected to their telephone lines, the four-line CO key status indicatorswill NOT reflect the actual telephone line status.
�NOTE: For all units connected to TL1, the total length of telephone wiringMUST NOT exceed 600 feet when used in this phone system.
Telephone Lines in SystemTL 1 TL 2 TL 3 TL 4 TL 5 TL 6 TL 7
EXT 11 ✔ ✔ ✔ ✔
EXT 12 ✔ ✔ ✔ ✔
EXT 13 ✔ ✔ ✔ ✔
EXT 14 ✔ ✔ ✔ ✔
EXT 15 ✔ ✔ ✔ ✔
EXT 16 ✔ ✔ ✔ ✔
EXT 17 ✔ ✔ ✔ ✔
EXT 18 ✔ ✔ ✔ ✔
EXT 19 ✔ ✔ ✔ ✔
EXT 20 ✔ ✔ ✔ ✔
EXT 21 ✔ ✔ ✔ ✔
EXT 22 ✔ ✔ ✔ ✔
EXT 23 ✔ ✔ ✔ ✔
EXT 24 ✔ ✔ ✔ ✔
EXT 25 ✔ ✔ ✔ ✔
EXT 26 ✔ ✔ ✔ ✔
Inte
rco
m E
xten
sio
ns
Line Group Example of
Number Function
Group 4 Marketing
Group 6 Procurement
Group 4 Marketing
Group 5 Engineering
Group 4 Marketing
Group 6 Procurement
Group 5 Engineering
Group 5 Engineering
Group 7 Administration
Group 7 Administration
Group 6 Procurement
Group 4 Marketing
Group 5 Engineering
Group 4 Marketing
Group 6 Procurement
Group 7 Administration
All L1, L2 & L3 jacks are to beconnected to the same correspondingTelephone Lines (TL1,TL2 & TL3).
These can be set in OptionMenu ➔ Special Options ➔Line Group
974CIB_(Rev11-12)ml24.05.06 5/24/06 9:29 PM Page 94
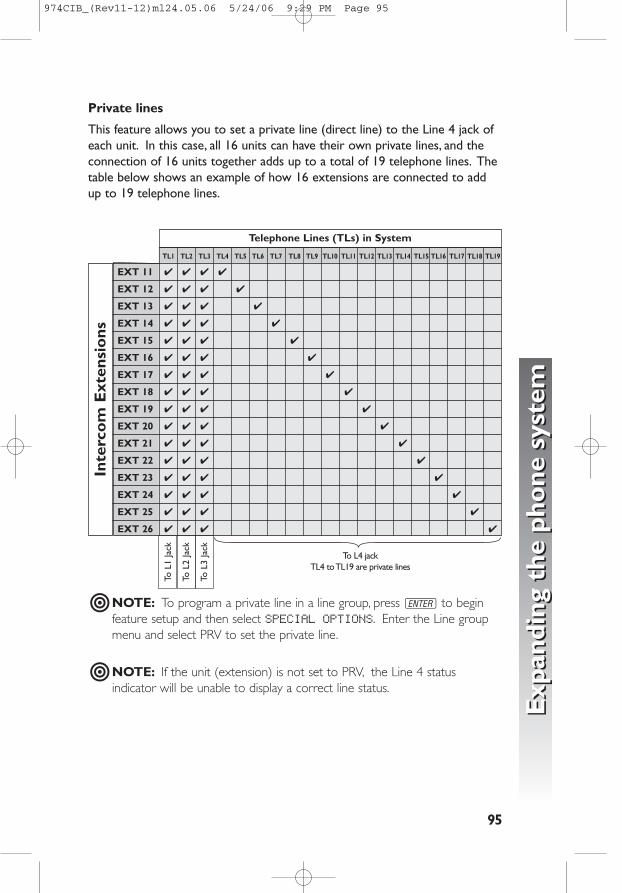
Private lines
This feature allows you to set a private line (direct line) to the Line 4 jack ofeach unit. In this case, all 16 units can have their own private lines, and theconnection of 16 units together adds up to a total of 19 telephone lines. Thetable below shows an example of how 16 extensions are connected to addup to 19 telephone lines.
�NOTE: To program a private line in a line group, press E to beginfeature setup and then select SPECIALhOPTIONS. Enter the Line groupmenu and select PRV to set the private line.
�NOTE: If the unit (extension) is not set to PRV, the Line 4 statusindicator will be unable to display a correct line status.
95
Exp
andi
ng t
he p
hone
sys
tem
Exp
andi
ng t
he p
hone
sys
tem
Inte
rco
m E
xten
sio
ns
Telephone Lines (TLs) in System
TL1 TL2 TL3 TL4 TL5 TL6 TL7 TL8 TL9 TL10 TL11 TL12 TL13 TL14 TL15 TL16 TL17 TL18 TL19
EXT 11 ✔ ✔ ✔ ✔
EXT 12 ✔ ✔ ✔ ✔
EXT 13 ✔ ✔ ✔ ✔
EXT 14 ✔ ✔ ✔ ✔
EXT 15 ✔ ✔ ✔ ✔
EXT 16 ✔ ✔ ✔ ✔
EXT 17 ✔ ✔ ✔ ✔
EXT 18 ✔ ✔ ✔ ✔
EXT 19 ✔ ✔ ✔ ✔
EXT 20 ✔ ✔ ✔ ✔
EXT 21 ✔ ✔ ✔ ✔
EXT 22 ✔ ✔ ✔ ✔
EXT 23 ✔ ✔ ✔ ✔
EXT 24 ✔ ✔ ✔ ✔
EXT 25 ✔ ✔ ✔ ✔
EXT 26 ✔ ✔ ✔ ✔
To L4 jackTL4 to TL19 are private lines
To L
1 Ja
ck
To L
2 Ja
ck
To L
3 Ja
ck
974CIB_(Rev11-12)ml24.05.06 5/24/06 9:29 PM Page 95
Setup checklistBefore expanding your system or installing for Centrex, review theinstallation checklist. If you have Centrex, contact your local telephonecompany for further information about Centrex service.
• The phone number for line 1 must be the same on all phonesin order for the intercom and page features to work.
• Determine the number of phones that will be on the system.• Identify the phone that will be the console phone.• Identify the private line for the console phone. The console
phone must have its own private line. This line is not sharedwith any other phone.
• Follow the regular installation instructions in this manual.• Enable the console phone.• Store the Centrex pickup codes and the seven-digit phone numbers
in one touch locations. (See One touch operation beginning onpage 55.)
Enable the console phoneDetermine which phone will be the console phone for your system andprogram the console following the directions to Set this phone to be theCentrex console phone on page 41. It is recommended that Line 4 of theconsole be programmed as a private line, to make sure a line is available forCentrex access.
Console operationOnce another system phone has enabled its delayed ring, the console phonewill receive those calls. All the 974 features work in the same manner asdescribed in this manual.
The console phone can pick up other Centrex lines through Centrexswitching. You can store the Centrex pickup codes and the seven-digit phone number of each station, except for the console phone, in the onetouch locations.
96
Cen
trex
ope
rati
onC
entr
ex o
pera
tion
Centrex operation
974CIB_(Rev11-12)ml24.05.06 5/24/06 9:29 PM Page 96
97
Cen
trex
ope
rati
onC
entr
ex o
pera
tion
Set ring delay durationThis feature allows other system telephones’ calls to ring at the consolephone. After a specified ring delay, the calls will ring at the console phone.(See Set the Centrex console delayed ring time on page 42.)
Answer a delayed ringThe console phone rings and the screen displays the extension number of the intercom sending the delayed ring.
1. Select a free line.2. Enter the Centrex pickup code.3. Enter the seven-digit phone number of the extension sending
the delayed ring.
�NOTE: If the console is using another line and receives a delayed ring,the console phone can put the other line on hold and follow steps 1-3.If the console is on an intercom call, the intercom call should be endedbefore picking up the ringing phone.
Pick up another station’s line1. Choose a free Centrex line.2. Enter the Centrex pickup code.3. Enter the seven-digit phone number of the line you want.
974CIB_(Rev11-12)ml24.05.06 5/24/06 9:29 PM Page 97
+ 6, 20, 22, 48, 60
- 6, 20, 22, 48, 60
x 20, 60
< 6, 20, 22, 60
> 6, 20, 22, 60
() 20
AA double beep sounds every
30 seconds 49, 89
A repeating short ring (error ring)sounds when assigning anextension number 89
AM/PM 30
Answer a call 43–45
Answer calls 11, 43, 91
AREA CODES 37–38
Auto redial 48, 54
R 47, 48, 56
(AUTO)REDIAL 54
Auto-mute 7, 21, 27–28, 72, 74
Automatic line selection 43, 45
Automatic mode 8, 21, 32–33, 48,59, 71
Aux L3 jack 19
Aux L4 jack 19
BBase unit 2, 8, 11–12, 15, 30, 33,
45, 49, 70
Battery 11, 12, 15, 18, 53, 87, 91
Battery compartment 11, 12
Blind transfer 52
CCall history 75, 79, 80, 81, 82, 83,
84
Call information 75–80
Call privacy 46, 89
Call record 81
Call volume 47
Call waiting 50, 76, 91
Caller ID 1, 5, 8, 60, 75–77, 79
Caller ID information 76–77,91–92
Caller ID with call waiting 1, 5,75–76, 91
Caller identification 5, 75
Caller information 80
Cannot join a conversation inprogress 89
Central Office Voice Mail 5
Centrex 1, 5, 21, 41–42, 96–97
Centrex console delayed ring41–42
Centrex console phone 9, 41–42,96
Centrex pickup code 96, 97
Conference 51, 68
C 51
Conference call 1, 51, 74, 90
Console 9, 21, 96–97
Console phone 41, 96–97.See also Centrex console phone
Convenience ports 1, 19
98
Inde
xIn
dex
Index
974CIB_(Rev11-12)ml24.05.06 5/24/06 9:29 PM Page 98
COVM 5, 79
COVM indicator 8, 36–37, 92
COVM ON/OFF 35–36
COVM RESET 36–37
CSL delay ring 9, 21
DDate 7, 21, 30, 76, 80
Day of the month 30
Day of the week 30
Default mode 7–8, 43–45
Default settings 9, 40
Delay ring 7, 21, 26–27
Delayed ring 27, 96, 97
DIAL ALTERNATE 82
Dial mode 7, 29
Dial options 82
Dial pad key 64
Dial pad keys 38, 56, 61–62, 65
Dial pulse (rotary) 7, 50, 57, 63
Dial tone 15, 18, 43–44, 47, 59, 88
Dialing sequence 57, 62–63
Digital subscriber line 4
Directory 1, 60–62, 64–66, 83
Directory card 55
DIRECTORY FULL! 60
Display screen is blank 91
DND 5, 10, 46, 54
DND light 46
Do not disturb 46, 54, 67, 69, 70,88–89
Do Not Disturb (DND) 5, 67
DSL 4, 91
DSL filters 4
DSL service 4, 5, 67
DSL service provider 4, 5
DSL splitter 4, 5
EEnglish 9, 22
E 6, 20, 30, 37–38, 40, 56–58,60–62, 65, 95
Erase all settings 40
Error ring 11, 24, 89
Error tone (fast busy signal) heard when making an intercom call 89
Espanol 22, 42
EXT button 22, 52, 53, 55, 56, 58,59, 69, 70, 72, 74, 84
Extension 6–7, 10–11, 19, 27–28,31, 36, 47–48, 52–54, 56, 62,69–74, 76, 89, 95
Extension no. 7, 21
Extension number 3, 7, 10–11, 24,52, 67, 71, 89, 97
Extensions 3, 6, 67–68, 85, 89, 91
FFax 19, 90
Fax machine 1, 19, 85
Fax switch 85
Feature setup 20–42
Flash 21, 50, 57, 60, 63
F 50
99
Inde
xIn
dex
974CIB_(Rev11-12)ml24.05.06 5/24/06 9:29 PM Page 99
Français 22, 42
HHands-free 1, 28, 44, 71
Handset 2, 6, 8, 11, 14-16, 18, 33,43, 45, 47-50, 53, 59, 67, 69-72,91
Handset cord 2, 14, 16, 88
Handset tab 16
Headset 8, 11, 33, 43–45, 47–48,50, 53–54, 59, 66, 70-72, 82, 88,91
h 6, 8, 44, 48, 59, 71–73
Headset jack 1, 44
HEADSET light 44
Hearing aid 1
Hold 4, 7, 45, 49-51, 54, 67, 74,88–89, 91, 97
H 49, 51, 53
Hold reminder 7, 21, 29, 49
Home area code 6, 8, 38, 75
Hour 30
IIncoming call 43, 46, 75, 77, 85
Incoming calls 27, 31
Incoming intercom call 10, 54
Initializing 15, 18
Intercom 1, 3–4, 7, 10, 21–24, 31,46, 49, 51, 54, 59, 67-68, 74, 85,87, 89, 91, 96–97 See also Centrex console phone
I 49, 53, 69, 70–74
Intercom call 26, 46, 49, 51, 54, 55,67, 69–71, 97
Intercom conference call 74
INTERCOM light 46, 88
Intercom paging signal notreceived 89
LL1/L2 jack 14, 16, 19
L3/L4 jack 14, 16, 19
Language 9, 21–22, 42
LCD backlight 8, 21, 34
Lights 54
Line 1 phone number 3
LINE button 33, 43–49, 51, 53, 66,82, 89
Line cords 2, 13–14, 16–17
Line group 6, 8, 21, 38–39, 90, 94,95
LINE light 46, 49
LINE lights 85
Line lights remain on 90
Line preference 32
Line privacy 4, 91. See also privateline
Line usage 7, 21, 31, 90
Local area code 6, 8, 37–38, 75
LOW BATT 53
W 55–56, 58–59
MMAIN MENU 20, 29, 42
Make a call 6, 43–44
100
Inde
xIn
dex
974CIB_(Rev11-12)ml24.05.06 5/24/06 9:29 PM Page 100
Menu item 20
Menu operation 20, 52
Message waiting light 79
Microfilters 4
Minute 30
Month 30
Multi-phone system 6
Mute 50, 54
M 50, 72
MUTE light 50, 72
NNavigation buttons 6, 20, 60
NEW CALL light 79
Non-system phone 46, 88
OOne touch 11, 21, 23, 40, 57–58,
91
One touch (EXT) buttons 7
One touch location 56, 84
One touch locations 44, 55, 96
One touch number 59
One touch preference 7, 23, 55,59, 69–70
Outgoing calls 85
Outgoing or transfer calls 31
Outside line 51, 68, 74
PPage 28, 68, 72–73, 96
See also Centrex console phone
Page all 68
Page call 71, 74
Paging only 31
Pause 57, 62
Phone system 3-6, 9, 13, 46, 67, 71,73, 76, 90, 93-94
Power adapter 2, 15-19, 87
Power cord 15, 18, 91
Power failure 11, 15, 18, 91
POWER jack 15–16
Prime line 6, 8, 21, 31–32, 43
Privacy 28, 89
Private line 95–96
Private Name 78
Private Number 78
PRV 8, 39, 95
Pulse 7, 29, 50
RRapid scroll 8, 22, 34
Redial 11, 47–48, 54, 56, 91
Redial memory 47–48
Reminder beep 49, 89
Remove all? 66, 81
Removed! 66, 81
Reset all 9, 21
Reset! 37, 40
Return to the conversation 50
Ring delay 97
Ring pattern 7, 26
Ring setting 27
Ringer 25, 47, 85, 88
Ringer on/off 7, 21
101
Inde
xIn
dex
974CIB_(Rev11-12)ml24.05.06 5/24/06 9:29 PM Page 101
102
Inde
xIn
dex
Ringer type 7, 21, 26
Ringer volume 47, 88
Room monitor 28, 74
SScreen backlight 35
Screen display 8, 11, 20, 22–42, 46,
52–53, 57-58, 60–61, 65–66,
69–70, 72–74, 76, 81–84
Screen displays POWERFAIL 91
Scroll button 22
Scroll rate 8, 21, 34
Single-phone page 67, 72
Speaker 68, 74
K 6, 8, 43, 45, 48, 71, 73
SPEAKER light 43
Speakerphone 1, 3, 8, 33, 43–45,
47–50, 53–54, 59, 66–67, 70–72,
74, 82
Splitter 4–5, 91
Stored! 56
Switch lines 49
Switchhook 16, 50, 63
System phone 6, 46, 52, 74, 96
System phones 1, 4, 6, 46, 67, 73,
88
System-wide page 67, 73
TTelephone does not ring 88
Telephone lines 1, 3, 93–95
Telephone system 1, 3, 11, 24, 67
Telephone wiring 3, 90, 94
Temporary tone 50, 57
Temporary tone signals 63
Three-party call 51
Three-way calling 50
Time 30
Timer 45
t 50
Tone signals do not activate a
remote device 90
Tone 28–29, 57
Touch tone 7, 50, 57
Transfer 52–54
t 52, 53
Transfer ring 53
Two-line adapter 19
UUnknown Name 78
Unknown Number 78
Unused lines 31
VVoice mail 27, 36, 79
Voice mail service 27, 79, 92
VOLUME + 48
VOLUME - 48
974CIB_(Rev11-12)ml24.05.06 5/24/06 9:29 PM Page 102

© 2006 Advanced American Telephones.All rights reserved.AT&T and the Globe Design are trademarks of AT&T Corp., licensed to Advanced American Telephones.
Printed in Singapore. Issue 4AT&T 05/06
In case of difficulty, visit our service center atwww.telephones.att.com or call 1 (800) 222–3111.
974CIB_(Rev11-12)ml24.05.06 5/24/06 9:29 PM Page 103