Embed Size (px)
Citation preview
ABDR Fourth Generation
Help Guide
V 1.8

Table of Contents
2 | Page ABDR Help Guide

1 Introduction
The Australian Bleeding Disorders Registry (ABDR) is a database application that collects clinical information related to the treatment of people with bleeding disorders, like an electronic medical file. This includes information about patient diagnosis, treatment details, hospital admissions and administrative information as well as details on ordering, supply and use of clotting factor products. Information is entered into the ABDR by staff at Haemophilia Treatment Centres (HTCs)
MyABDR is a recording tool now available to registered users. MyABDR is a phone application and website designed to assist users record product deliveries, record treatments and bleeds along with maintaining personal details including height and weight. MyABDR information also flows into ABDR however this information is in read-only format for HTCs..
Access to the ABDR is via the National Blood Authority (NBA)’s BloodPortal at https://portal.blood.gov.au/
ABDR Help Guide Page | 3
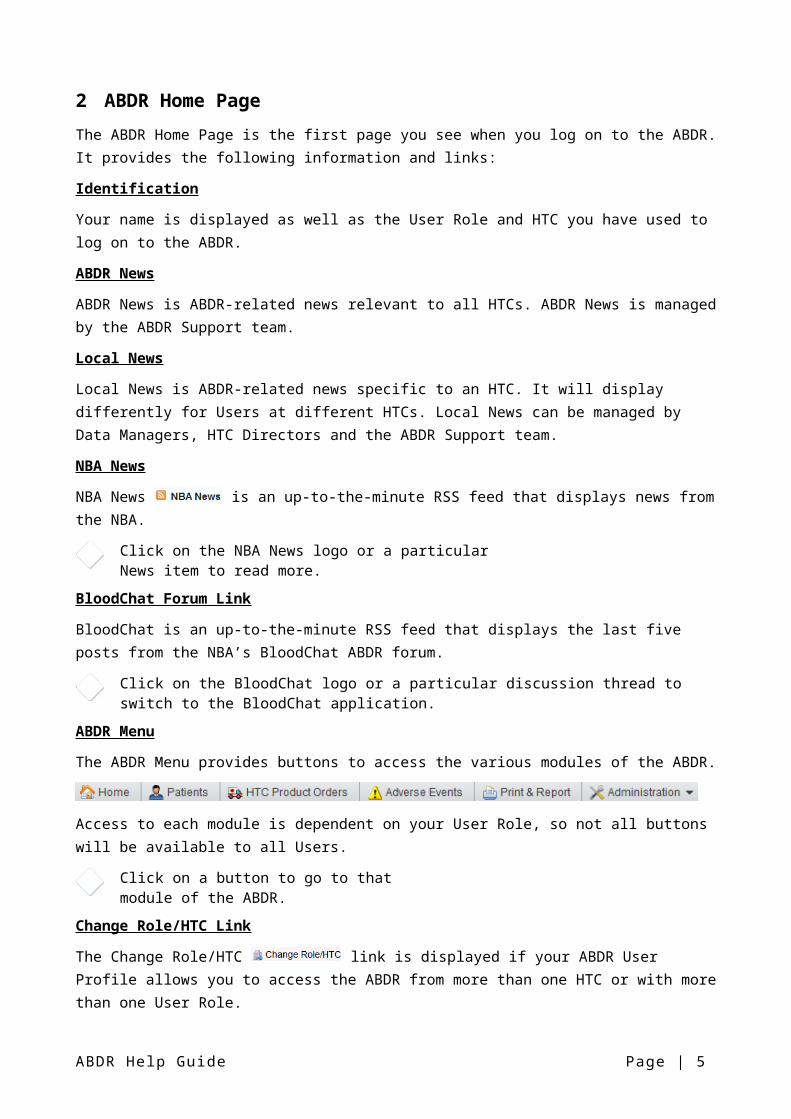
2 ABDR Home Page
The ABDR Home Page is the first page you see when you log on to the ABDR. It provides the following information and links:
Identification
Your name is displayed as well as the User Role and HTC you have used to log on to the ABDR.
ABDR News
ABDR News is ABDR-related news relevant to all HTCs. ABDR News is managed by the ABDR Support team.
Local News
Local News is ABDR-related news specific to an HTC. It will display differently for Users at different HTCs. Local News can be managed by Data Managers, HTC Directors and the ABDR Support team.
NBA News
NBA News is an up-to-the-minute RSS feed that displays news from the NBA.
Click on the NBA News logo or a particular News item to read more.
BloodChat Forum Link
BloodChat is an up-to-the-minute RSS feed that displays the last five posts from the NBA’s BloodChat ABDR forum.
Click on the BloodChat logo or a particular discussion thread to switch to the BloodChat application.
ABDR Menu
The ABDR Menu provides buttons to access the various modules of the ABDR.
Access to each module is dependent on your User Role, so not all buttons will be available to all Users.
Click on a button to go to that module of the ABDR.
Change Role/HTC Link
The Change Role/HTC link is displayed if your ABDR User Profile allows you to access the ABDR from more than one HTC or with more than one User Role.
When you log on to the ABDR, you are assigned to your default User Role and HTC. It is possible for a User to have more than one User Role at an HTC or for a User to have User Roles at more than one HTC, but only one Role/HTC combination can be used at a time when you are using the ABDR.
Click on the Change Role/HTC link to display the Change Role/HTC screen.
The Change Role/HTC screen allows you to make the following changes to your current ABDR session:
Change your User Role for your current ABDR Session. Change your HTC for your current ABDR Session. Set your ABDR Session default Role/HTC combination.
The Role you use to log on to the ABDR will determine the data that you can see and the actions that you can perform in the ABDR.
4 | Page ABDR Help Guide
Help Link
The Help link opens the ABDR Help Page which contains links to the various Help documents, including this Help Guide. The Help link is available from the ABDR header area and from each pop-up window.
Session Timer
Your ABDR session will timeout after 30 minutes of inactivity. A Session Timer is displayed in the header of every ABDR screen. It is reset every time you click on an action button, tab, link or icon.
The Session Timer turns bold and red (and may flash) when you have 3 or less minutes remaining in your Session. If your Session Timer does not get reset within 3 minutes, your ABDR Session will be terminated and you will be automatically logged out.
Access Request Link
The Access Request link allows you to submit a request to access another ABDR User Role and/or HTC.
BloodPortal Link
The BloodPortal link takes you back to the BloodPortal page, allowing you to switch applications.
Logout Link
Use this link to end your current ABDR Session and log you out of the BloodPortal.
ABDR Help Guide Page | 5
3 General System Behaviour
Mandatory Fields
Each component of data in the ABDR requires a minimum set of information and hence there are always some fields that must be entered when a new record is added or edited in the ABDR.
Mandatory fields are indicated by a red asterisk, eg.
Field Validation
Whenever you try to save data in the ABDR, the System performs a series of checks to ensure that the data is valid. Validation checks include:
Ensuring all mandatory fields have been entered. Ensuring that data fits within allowable ranges, eg. Recovery % is greater than or equal to 0 and less
than or equal to 200. Ensuring that data is logical, eg. an interaction cannot occur before a patient’s date of birth.
If you click the Save button and a validation error is detected, each erroneous field is highlighted and a
validation message is displayed, eg.
Grid Behaviour
The following grid behaviour is consistent across the ABDR:
Hovering over a row in a grid turns the background colour of the record to pale orange. It highlights your current cursor position.
Click on the highlighted row to select it. This turns the background colour of the selected record to a darker orange and also causes a preview screen of the record to be displayed, showing all data stored for the selected record.
Each grid row has in-line Edit and Delete icons, and sometimes a Print icon also. Note that these icons are only displayed if your User Role gives you permission to perform these functions.
Multi-select List Boxes
Many screens in the ABDR allow you to select more than one value from a drop down list, for example, a physiotherapy session may involve administering more than one treatment.
To individually select/deselect values in a multi-select list, hold down the CTRL key and then click on the required values in the list.
6 | Page ABDR Help Guide

4 Patients
The Patients module provides the following functionality:
Add a new patient to the ABDR. Search for and select a patient already saved in the ABDR. View a summary of patient and contact details for a patient. View and maintain patient details – demographics, address details and contact persons for a
patient. View and maintain patient notes. View and maintain clinical details for a patient – diagnoses, treatment plans, ITT programmes,
patient measurements, viruses, and mortality details. View and maintain interactions had with a patient – treatments, haemophilia clinic reviews,
phone/mail consultations, pathology tests, DDAVP challenges, pharmacokinetic studies, target joints, radiology, physiotherapy sessions, surgery/procedures, hospitalisations, social worker sessions and genetic testing.
View and maintain product orders for a patient and generate a Product Order Form for a supplier. Transition a patient, permanently or on a shared basis, to another HTC. View MyABDR patient entered information including treatments, bleeds, surgeries, stock on hand
and memos (these items cannot be edited by HTC Staff. If errors are detected, request the MyABDR User to update the record/s)
Change the status of a patient to Active or Inactive. Delete a patient from the ABDR.
When a new patient is added to the ABDR or an existing patient has been selected via the Patient Search, the Patient Summary screen is populated and the Patient Menu is displayed.
ABDR Help Guide Page | 7

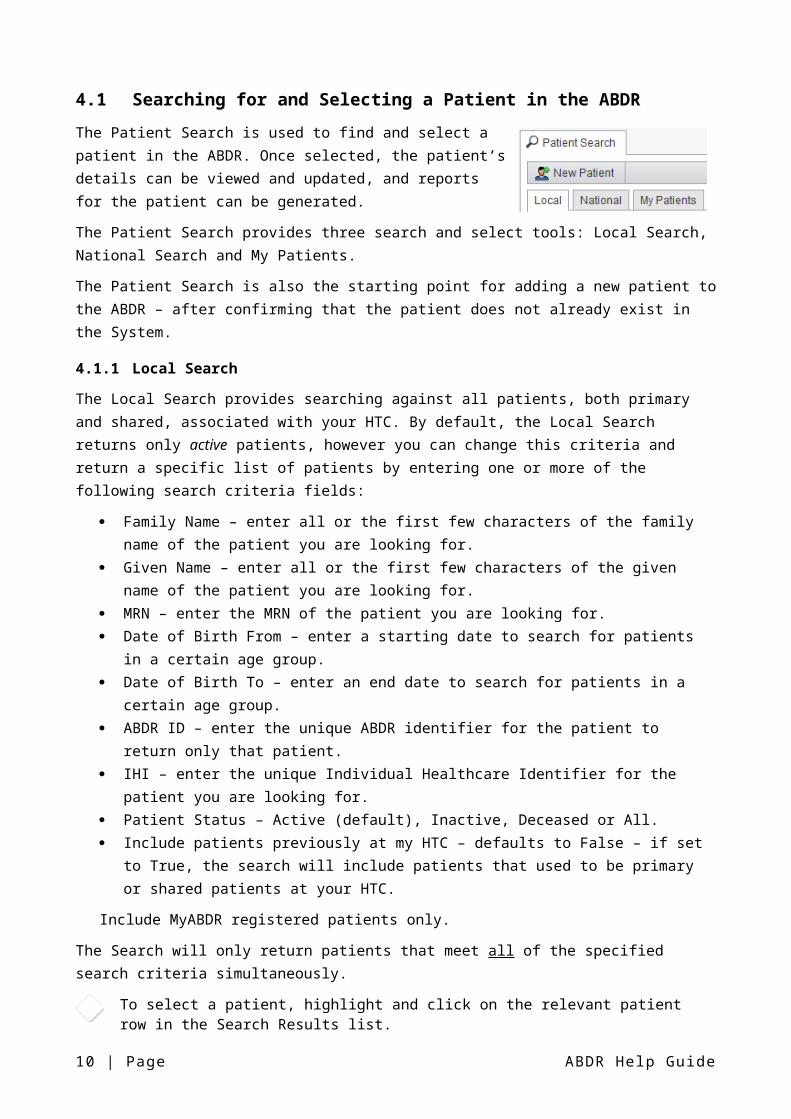
4.1 Searching for and Selecting a Patient in the ABDR
The Patient Search is used to find and select a patient in the ABDR. Once selected, the patient’s details can be viewed and updated, and reports for the patient can be generated.
The Patient Search provides three search and select tools: Local Search, National Search and My Patients.
The Patient Search is also the starting point for adding a new patient to the ABDR – after confirming that the patient does not already exist in the System.
4.1.1 Local Search
The Local Search provides searching against all patients, both primary and shared, associated with your HTC. By default, the Local Search returns only active patients, however you can change this criteria and return a specific list of patients by entering one or more of the following search criteria fields:
Family Name – enter all or the first few characters of the family name of the patient you are looking for.
Given Name – enter all or the first few characters of the given name of the patient you are looking for.
MRN – enter the MRN of the patient you are looking for. Date of Birth From – enter a starting date to search for patients in a certain age group. Date of Birth To – enter an end date to search for patients in a certain age group. ABDR ID – enter the unique ABDR identifier for the patient to return only that patient. IHI – enter the unique Individual Healthcare Identifier for the patient you are looking for. Patient Status – Active (default), Inactive, Deceased or All. Include patients previously at my HTC – defaults to False – if set to True, the search will include
patients that used to be primary or shared patients at your HTC.
Include MyABDR registered patients only.
The Search will only return patients that meet all of the specified search criteria simultaneously.
To select a patient, highlight and click on the relevant patient row in the Search Results list.
To add a patient to your My Patient’s list, click on the in-line Add to My Patients icon in the Local Search Results list for the relevant patient.
MyABDR registered patients can be identified by the presence of icon next to the personal details within the seach results.
Note that when a patient is already a member of your My Patient’s list, the Add to My Patients in-line icon will not be displayed.
4.1.2 National Search
The National Search provides searching against all patients recorded in the ABDR. By default, the National Search returns only active patients, however you can change this criteria and return a specific list of patients by entering one or more of the following search criteria fields:
Family Name – enter all or the first few letters of the family name of the patient you are looking for. Given Name – enter all or the first few letters of the given name of the patient you are looking for.
8 | Page ABDR Help Guide
MRN – enter the MRN of the patient you are looking for. The Search will return all patients that have the specified MRN at any HTC.
Date of Birth From – enter a starting date to search for patients in a certain age group. Date of Birth To – enter an end date to search for patients in a certain age group. ABDR ID – enter the unique ABDR identifier for the patient to return only that patient. IHI – enter the unique Individual Healthcare Identifier for the patient you are looking for. Patient Status – Active (default), Inactive, Deceased or All.
The Search will only return patients that meet all of the specified search criteria simultaneously.
Note that if a patient is currently shared to one or more HTCs, the patient will be repeated in the Search Results list – once for each primary and shared HTC they are associated with.
To select a patient, highlight and click on the relevant patient row in the Search Results list.
4.1.3 My Patients
The My Patients list provides the facility to create a subset of patients that belong to your HTC (primary or shared) which are of particular interest to you. This is handy because it means that you do not need to search for them each time you use the ABDR.
A patient is added to your My Patients list via the Local Search.
Each User has their own My Patients list. If a User has ABDR Roles at more than one HTC, they have a different My Patients list at each HTC.
To select a patient, highlight and click on the relevant patient row in your My Patients list.
To remove a patient from your My Patients list, highlight the patient to be deleted and click on the
in-line Delete icon. You must confirm this action.
ABDR Help Guide Page | 9
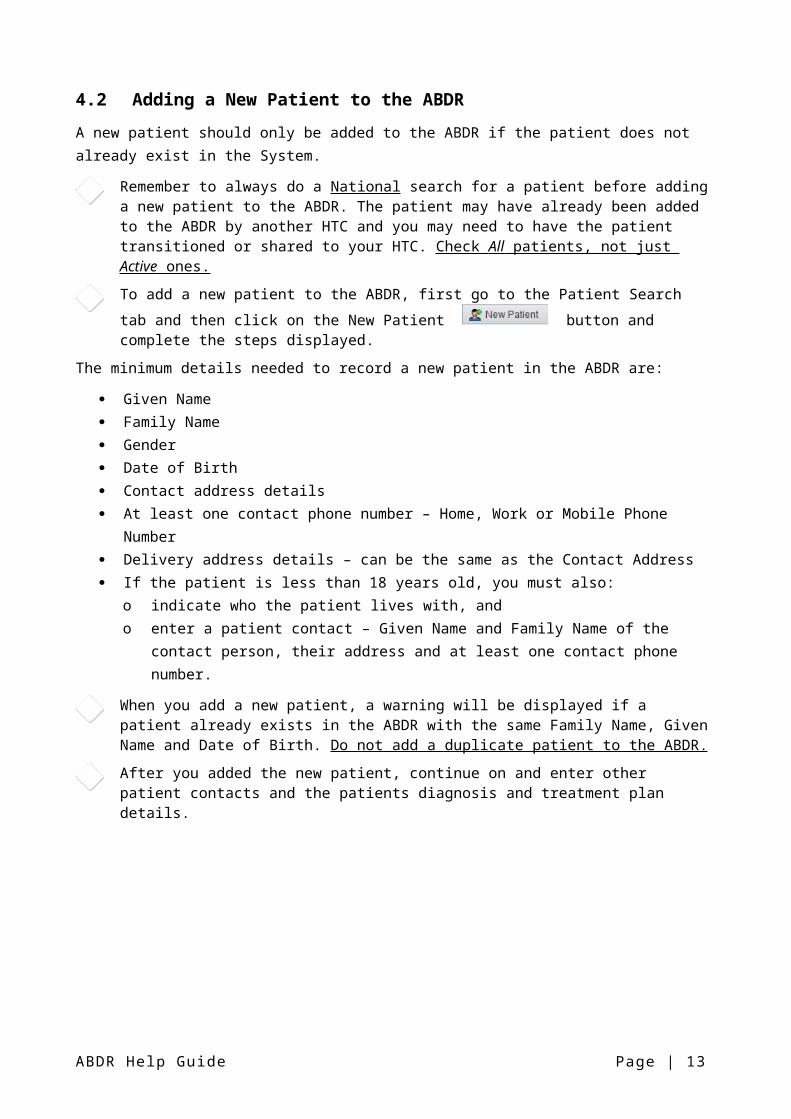
4.2 Adding a New Patient to the ABDR
A new patient should only be added to the ABDR if the patient does not already exist in the System.
Remember to always do a National search for a patient before adding a new patient to the ABDR. The patient may have already been added to the ABDR by another HTC and you may need to have the patient transitioned or shared to your HTC. Check All patients, not just Active ones.
To add a new patient to the ABDR, first go to the Patient Search tab and then click on the New
Patient button and complete the steps displayed.
The minimum details needed to record a new patient in the ABDR are:
Given Name Family Name Gender Date of Birth Contact address details At least one contact phone number – Home, Work or Mobile Phone Number Delivery address details – can be the same as the Contact Address If the patient is less than 18 years old, you must also:
o indicate who the patient lives with, and o enter a patient contact – Given Name and Family Name of the contact person, their address
and at least one contact phone number.
When you add a new patient, a warning will be displayed if a patient already exists in the ABDR with the same Family Name, Given Name and Date of Birth. Do not add a duplicate patient to the ABDR.
After you added the new patient, continue on and enter other patient contacts and the patients diagnosis and treatment plan details.
10 | Page ABDR Help Guide
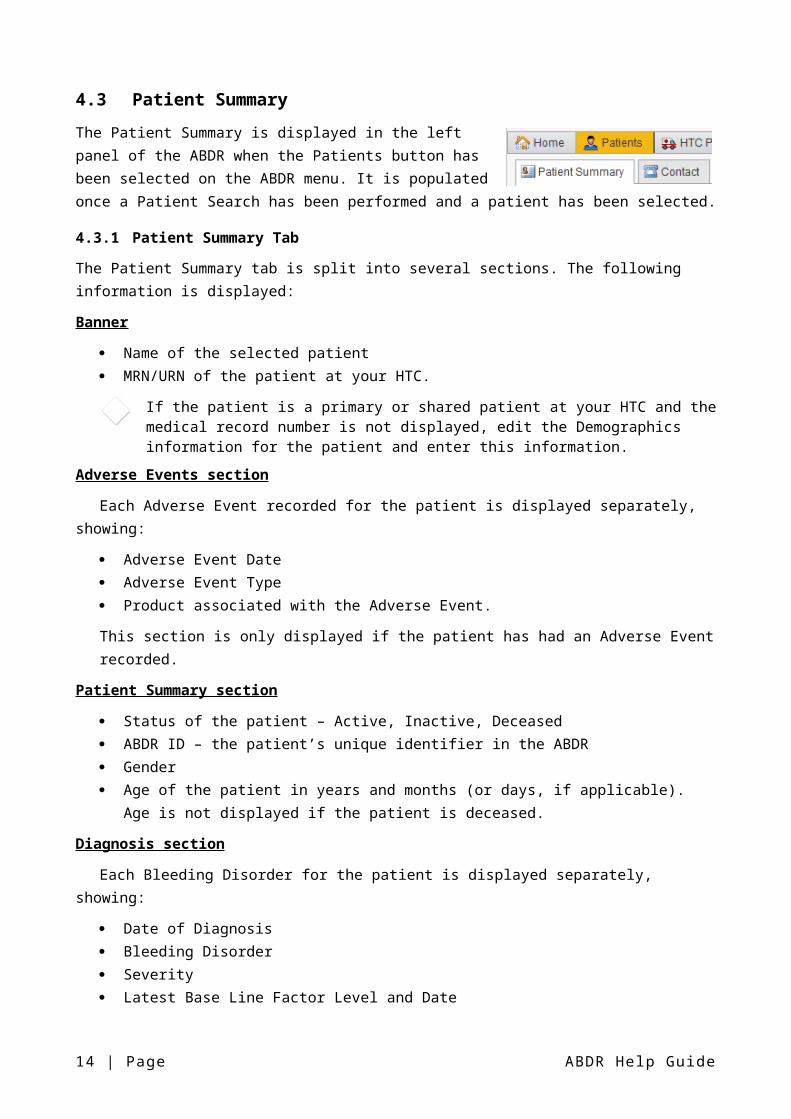
4.3 Patient Summary
The Patient Summary is displayed in the left panel of the ABDR when the Patients button has been selected on the ABDR menu. It is populated once a Patient Search has been performed and a patient has been selected.
4.3.1 Patient Summary Tab
The Patient Summary tab is split into several sections. The following information is displayed:
Banner
Name of the selected patient MRN/URN of the patient at your HTC.
If the patient is a primary or shared patient at your HTC and the medical record number is not displayed, edit the Demographics information for the patient and enter this information.
Adverse Events section
Each Adverse Event recorded for the patient is displayed separately, showing:
Adverse Event Date Adverse Event Type Product associated with the Adverse Event.
This section is only displayed if the patient has had an Adverse Event recorded.
Patient Summary section
Status of the patient – Active, Inactive, Deceased ABDR ID – the patient’s unique identifier in the ABDR Gender Age of the patient in years and months (or days, if applicable). Age is not displayed if the patient is
deceased.
Diagnosis section
Each Bleeding Disorder for the patient is displayed separately, showing:
Date of Diagnosis Bleeding Disorder Severity Latest Base Line Factor Level and Date
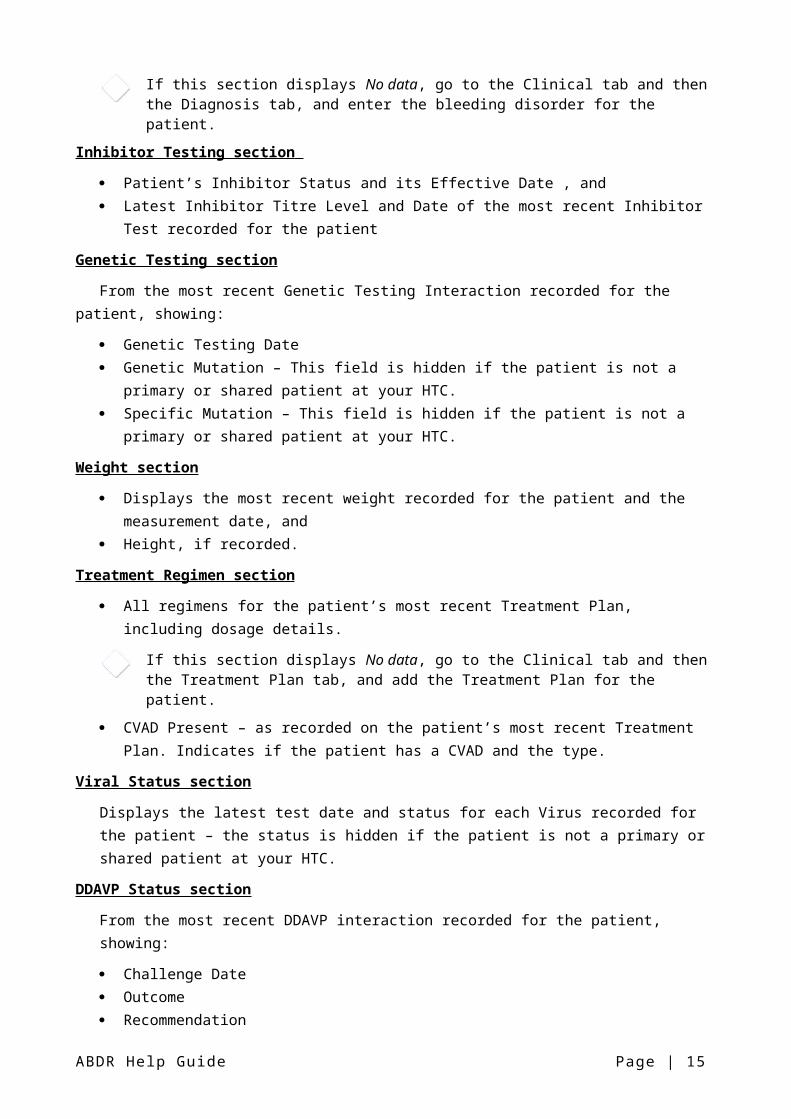
If this section displays No data, go to the Clinical tab and then the Diagnosis tab, and enter the bleeding disorder for the patient.
Inhibitor Testing section
Patient’s Inhibitor Status and its Effective Date , and Latest Inhibitor Titre Level and Date of the most recent Inhibitor Test recorded for the patient
Genetic Testing section
From the most recent Genetic Testing Interaction recorded for the patient, showing:
Genetic Testing Date Genetic Mutation – This field is hidden if the patient is not a primary or shared patient at your HTC.
ABDR Help Guide Page | 11
Specific Mutation – This field is hidden if the patient is not a primary or shared patient at your HTC.
Weight section
Displays the most recent weight recorded for the patient and the measurement date, and Height, if recorded.
Treatment Regimen section
All regimens for the patient’s most recent Treatment Plan, including dosage details.
If this section displays No data, go to the Clinical tab and then the Treatment Plan tab, and add the Treatment Plan for the patient.
CVAD Present – as recorded on the patient’s most recent Treatment Plan. Indicates if the patient has a CVAD and the type.
Viral Status section
Displays the latest test date and status for each Virus recorded for the patient – the status is hidden if the patient is not a primary or shared patient at your HTC.
DDAVP Status section
From the most recent DDAVP interaction recorded for the patient, showing:
Challenge Date Outcome Recommendation
HTCs section
Current primary HTC of the patient and, if applicable, each shared HTC. The MRN/URN of the patient at each HTC is also displayed, if recorded.
4.3.2 Contact Tab
The following information is displayed:
Contact Details section
Displays the contact address, and home, work and mobile phone numbers of the patient.
Emergency Contact section
Displays the name and home, work and mobile phone numbers of all Emergency Contacts for the patient. (More than one Emergency Contact can be recorded for a patient.)
If this section displays No data, go to the Patient Details tab and then the Patient Contacts tab, and add an Emergency Contact.
Patient Contacts section
Displays all other Patient Contacts (not Emergency Contacts) for the patient and phone or email details from their preferred contact method.
Email addresses are actively linked to Mail system.
12 | Page ABDR Help Guide
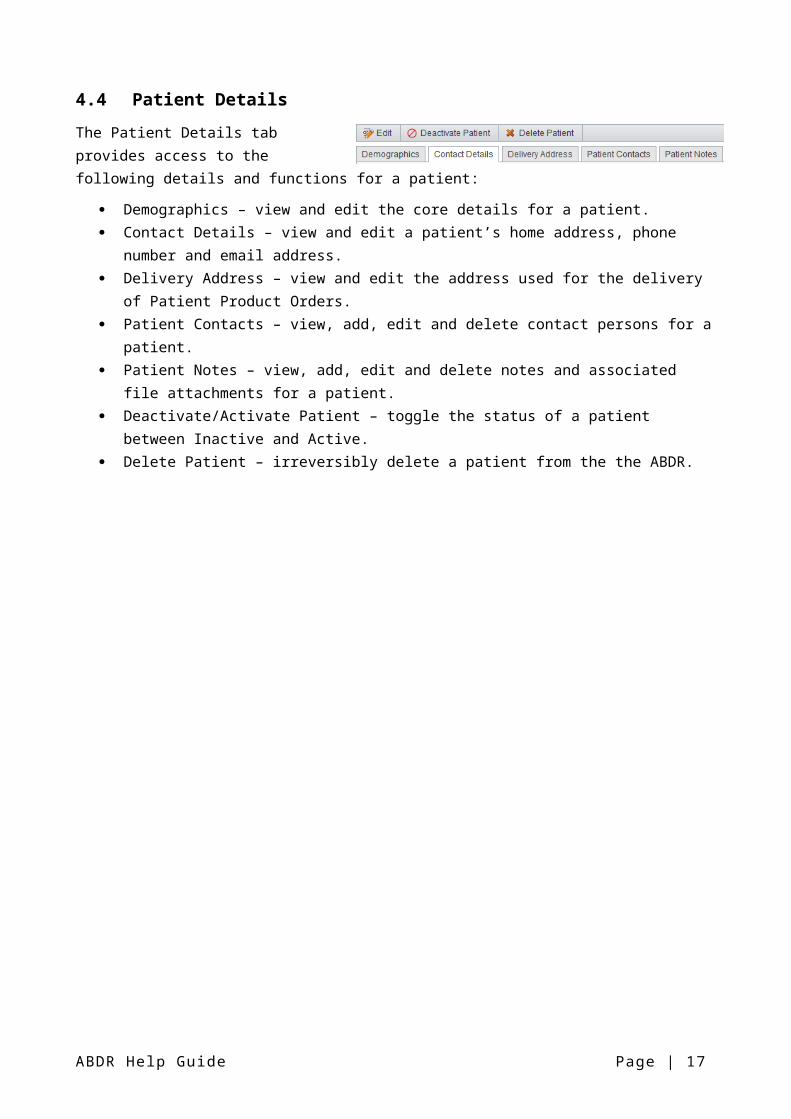
4.4 Patient Details
The Patient Details tab provides access to the following details and functions for a patient:
Demographics – view and edit the core details for a patient. Contact Details – view and edit a patient’s home address, phone number and email address. Delivery Address – view and edit the address used for the delivery of Patient Product Orders. Patient Contacts – view, add, edit and delete contact persons for a patient. Patient Notes – view, add, edit and delete notes and associated file attachments for a patient. Deactivate/Activate Patient – toggle the status of a patient between Inactive and Active. Delete Patient – irreversibly delete a patient from the the ABDR.
ABDR Help Guide Page | 13
4.4.1 Demographics
The Demographics tab is used to view and edit the core person data for a patient.
To display the Demographics information for a patient, first search for and select the patient, go to the Patient Details tab and then the Demographics tab.
To edit the Demographics information for the patient, click on the Edit button. The Edit Demographics screen is displayed.
The following Demographics information is stored for a patient:
ABDR ID – the unique identifier for the patient in the ABDR. This is assigned to a new patient automatically by the ABDR.
MRN/URN – the identifier for the patient at your HTC. MRN/URN History – the HTC identifier for the patient recorded at HTCs other than your own. IHI – Individual Healthcare Identifier, a unique 16 digit identifier assigned to an Australian Resident
by Medicare Australia. Title – Mr, Mrs, Miss, etc. Given Name Alias/Known As name Second Name or Initial Family Name Previous Family Name Gender Date of Birth Age – calculated from Date of Birth Australian Resident Status Country of Birth Ethnicity
14 | Page ABDR Help Guide
4.4.2 Contact Details
The Contact Details tab is used to view and edit the home address and phone numbers for the patient.
To display the contact details for a patient, first search for and select the patient, go to the Patient Details tab and then the Contact Details tab.
To edit the contact details for the patient, click on the Edit button. The Edit Contact Details screen is displayed.
The following contact details are stored for a patient:
Address Line 1, 2 and 3 Suburb, State and Postcode Country – defaults to Australia, but can be changed for patient’s that usually reside overseas. Address type – used to indicate if the Contact Address refers to a permanent or temporary address
for the patient. Home Phone Number, Work Phone Number and Mobile Phone Number – at least one phone
number must be entered. Home Email Address and Work Email Address The patient’s preferred contact method. If the patient is less than 18 years old, you are required to indicate who the patient usually lives
with, ie. their Mother and Father, Mother, Father, Guardian, etc. MyABDR users are also able to update these details. If a MyABDR user has updated these details
the Last Modified by ….. information will include the MyABDR user name followed by the time and date .
ABDR Help Guide Page | 15
4.4.3 Delivery Address
The Delivery Address screen is used to record the default address used for the delivery of Patient Product Orders, along with any special delivery instructions.
To display the delivery address details for a patient, first search for and select the patient, go to the Patient Details tab and then the Delivery Address tab.
To edit the delivery address details for the patient, click on the Edit button. The Edit Delivery Address screen is displayed.
To flag that the delivery address for the patient is the same as their home address, click on the Same
as Home Address checkbox.
The following delivery address details are stored for a patient:
Address Line 1, 2 and 3 Suburb, State and Postcode Country – defaults to Australia, but can be changed for patient’s that usually require product to be
delivered overseas Delivery Instructions.
MyABDR users are also able to update these details. If a MyABDR user has updated these details the Last
Modified by….information will include the MyABDR user name followed by the time and date.
16 | Page ABDR Help Guide
4.4.4 Patient Contacts
The Patient Contacts screen is used to record different contact persons for a patient. At least one contact person must be recorded if the patient that is less than 18 years old.
All contact persons recorded for a patient are listed in the Patient Contacts grid.
The following types of Patient Contacts can be recorded:
Mother Father Guardian Grandparent Emergency Contact Friend Partner/Spouse General Practitioner Haematologist Other – please specify.
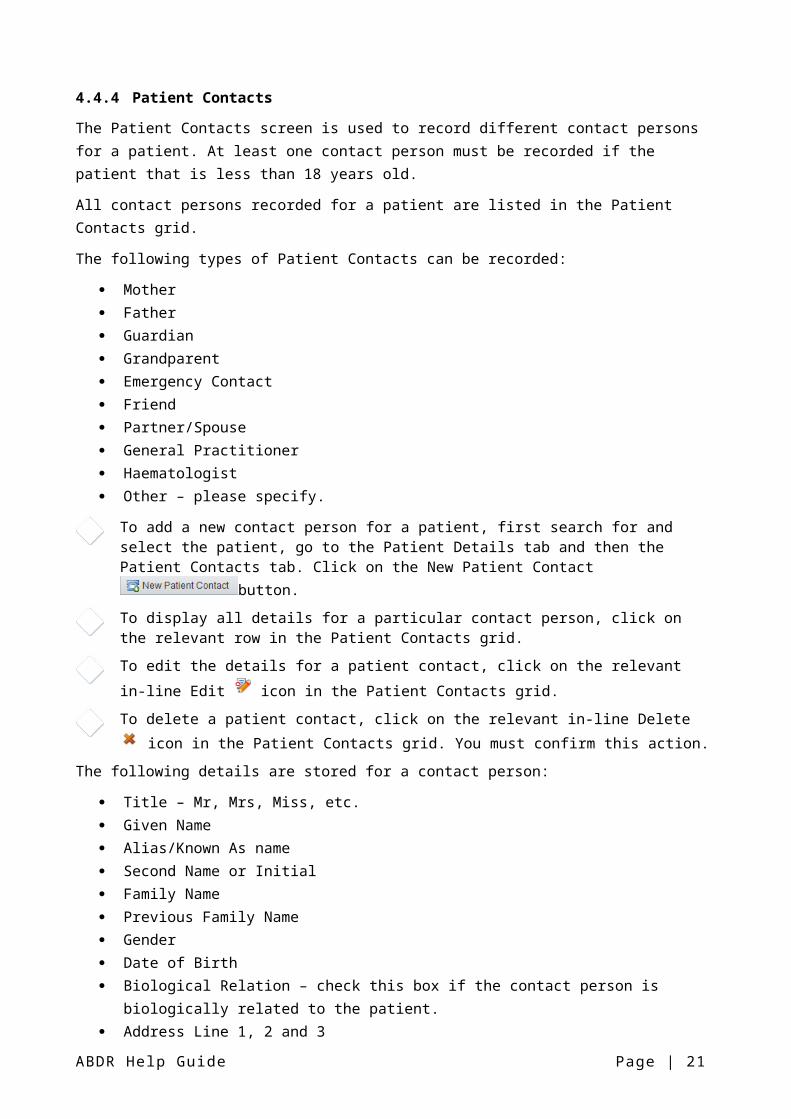
To add a new contact person for a patient, first search for and select the patient, go to the Patient Details tab and then the Patient Contacts tab. Click on the New Patient Contact button.
To display all details for a particular contact person, click on the relevant row in the Patient Contacts grid.
To edit the details for a patient contact, click on the relevant in-line Edit icon in the Patient Contacts grid.
To delete a patient contact, click on the relevant in-line Delete icon in the Patient Contacts grid. You must confirm this action.
The following details are stored for a contact person:
Title – Mr, Mrs, Miss, etc. Given Name Alias/Known As name Second Name or Initial Family Name Previous Family Name Gender Date of Birth Biological Relation – check this box if the contact person is biologically related to the patient. Address Line 1, 2 and 3 Suburb, State and Postcode Country – defaults to Australia but can be changed. Home Phone Number, Work Phone Number and Mobile Phone Number – at least one phone
number must be entered. Home Email Address and Work Email Address The contact person’s preferred contact method.
ABDR Help Guide Page | 17

MyABDR users are also able to update these details. If a MyABDR user has updated these details the Last
Modified by…. Information will include the MyABDR user name followed by the time and date.
4.4.5 Patient Notes
The Patient Notes screen can be used to record information, comments, medical notes, reports, letters, etc. associated with a patient. You can enter free-form text and/or attach one or more files to a Patient Note.
All Patient Notes recorded for a patient are listed in the Patient Notes grid.
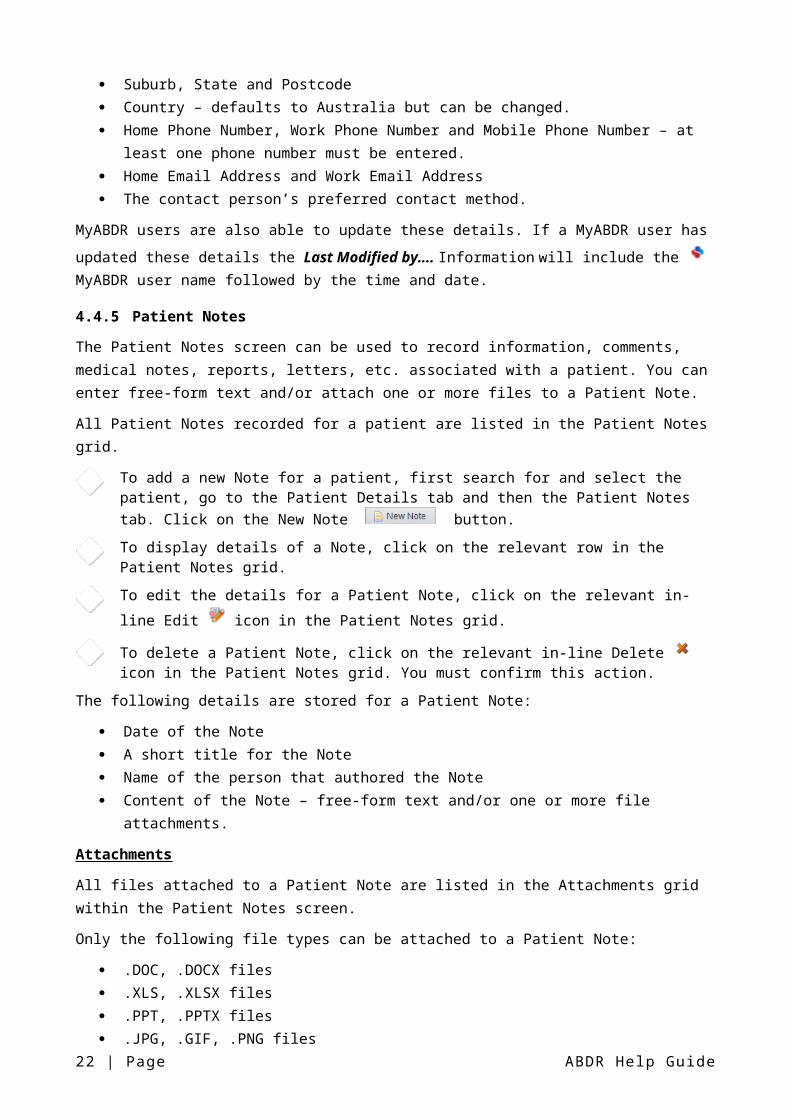
To add a new Note for a patient, first search for and select the patient, go to the Patient Details tab and then the Patient Notes tab. Click on the New Note button.
To display details of a Note, click on the relevant row in the Patient Notes grid.
To edit the details for a Patient Note, click on the relevant in-line Edit icon in the Patient Notes grid.
To delete a Patient Note, click on the relevant in-line Delete icon in the Patient Notes grid. You must confirm this action.
The following details are stored for a Patient Note:
Date of the Note A short title for the Note Name of the person that authored the Note Content of the Note – free-form text and/or one or more file attachments.
Attachments
All files attached to a Patient Note are listed in the Attachments grid within the Patient Notes screen.
Only the following file types can be attached to a Patient Note:
.DOC, .DOCX files .XLS, .XLSX files .PPT, .PPTX files .JPG, .GIF, .PNG files .TXT files .PDF files.
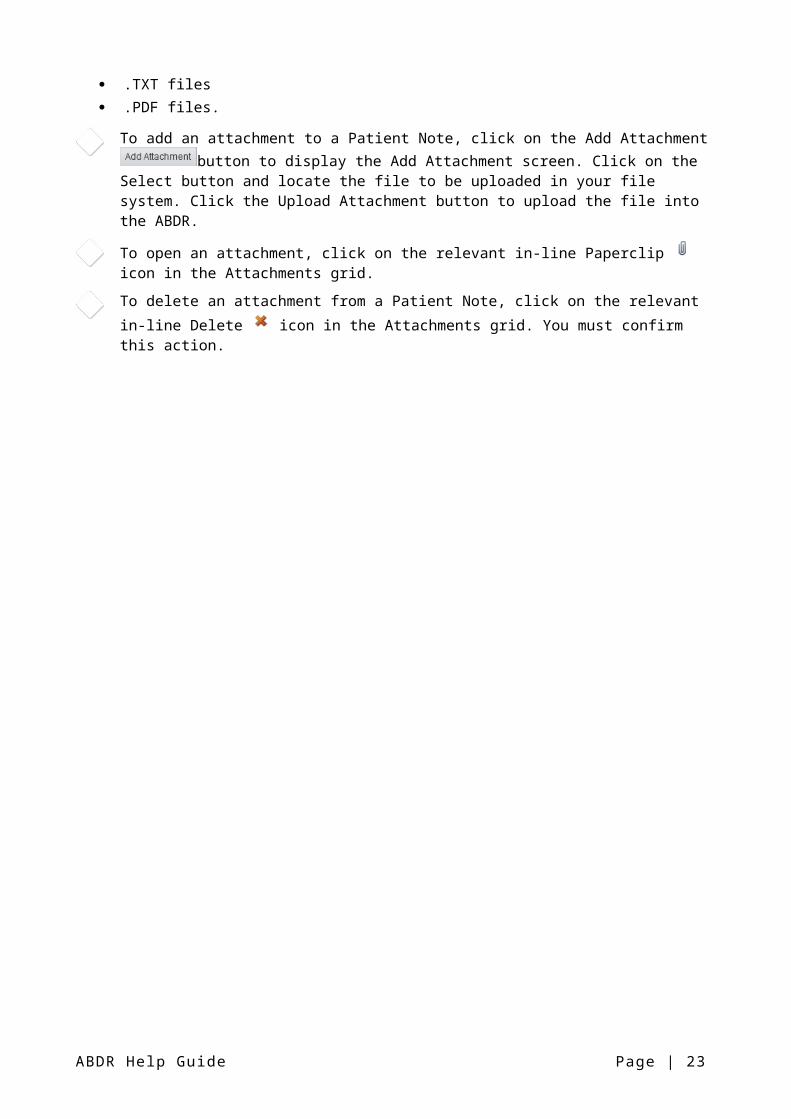
To add an attachment to a Patient Note, click on the Add Attachment button to display the Add Attachment screen. Click on the Select button and locate the file to be uploaded in your file system. Click the Upload Attachment button to upload the file into the ABDR.
To open an attachment, click on the relevant in-line Paperclip icon in the Attachments grid.
To delete an attachment from a Patient Note, click on the relevant in-line Delete icon in the Attachments grid. You must confirm this action.
18 | Page ABDR Help Guide
4.4.6 Activating and Deactivating a Patient
A patient has one of three statuses in the ABDR:
Active – a patient has a status of Active if they are responsive and interactive with one or more HTCs.
Inactive – a patient has a status of Inactive if the patient has become lost or unresponsive to their primary HTC.
Deceased – a patient’s status is displayed as Deceased if mortality details have been recorded for the patient.
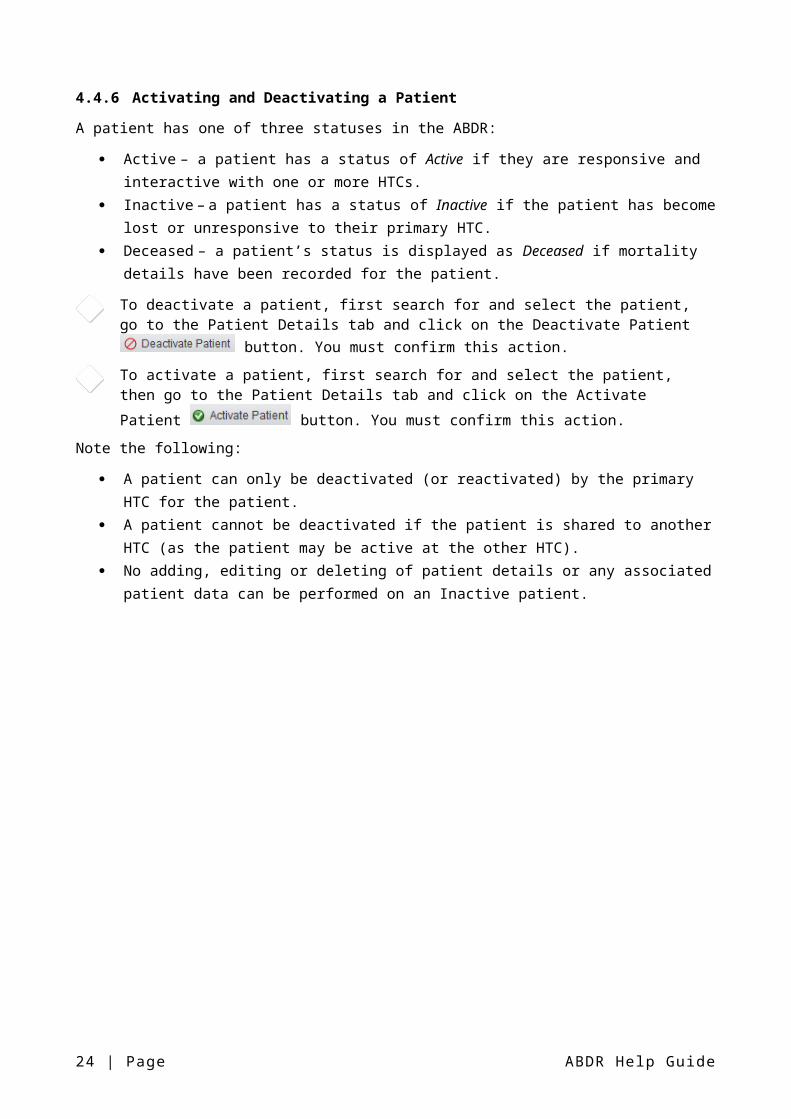
To deactivate a patient, first search for and select the patient, go to the Patient Details tab and click on the Deactivate Patient button. You must confirm this action.
To activate a patient, first search for and select the patient, then go to the Patient Details tab and
click on the Activate Patient button. You must confirm this action.
Note the following:
A patient can only be deactivated (or reactivated) by the primary HTC for the patient. A patient cannot be deactivated if the patient is shared to another HTC (as the patient may be
active at the other HTC). No adding, editing or deleting of patient details or any associated patient data can be performed on
an Inactive patient.
ABDR Help Guide Page | 19
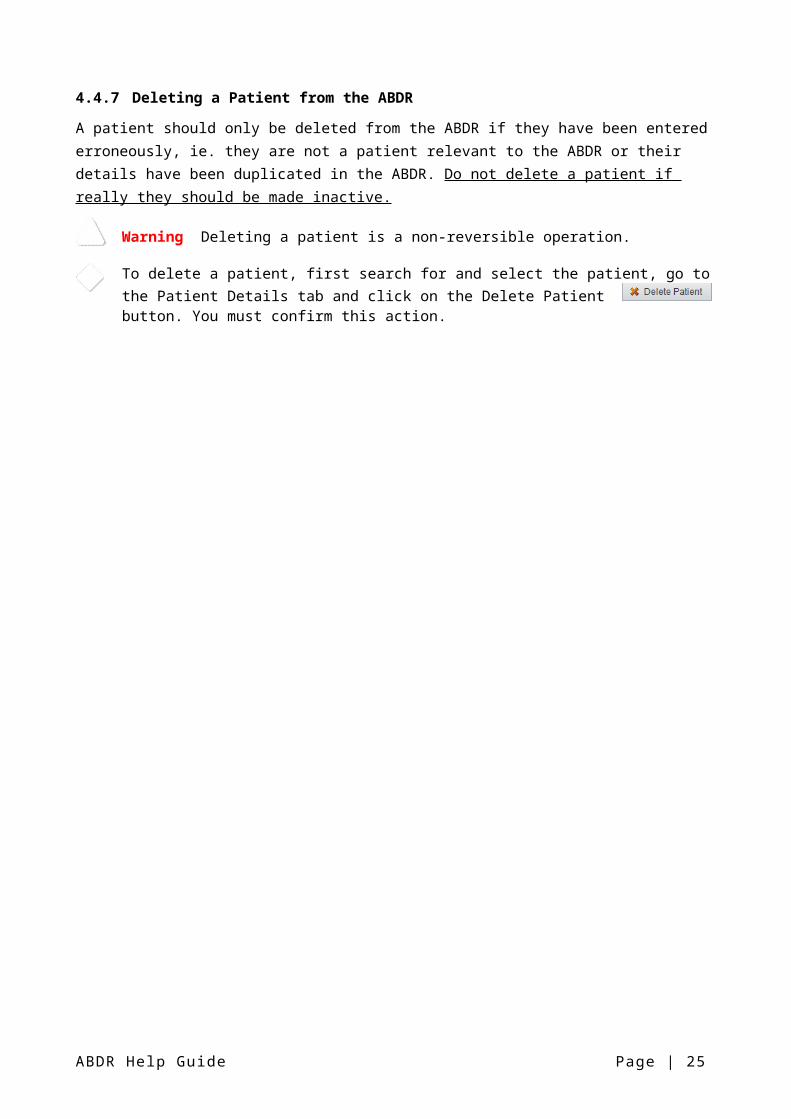
4.4.7 Deleting a Patient from the ABDR
A patient should only be deleted from the ABDR if they have been entered erroneously, ie. they are not a patient relevant to the ABDR or their details have been duplicated in the ABDR. Do not delete a patient if really they should be made inactive.
Warning Deleting a patient is a non-reversible operation.
To delete a patient, first search for and select the patient, go to the Patient Details tab and click on the Delete Patient button. You must confirm this action.
20 | Page ABDR Help Guide
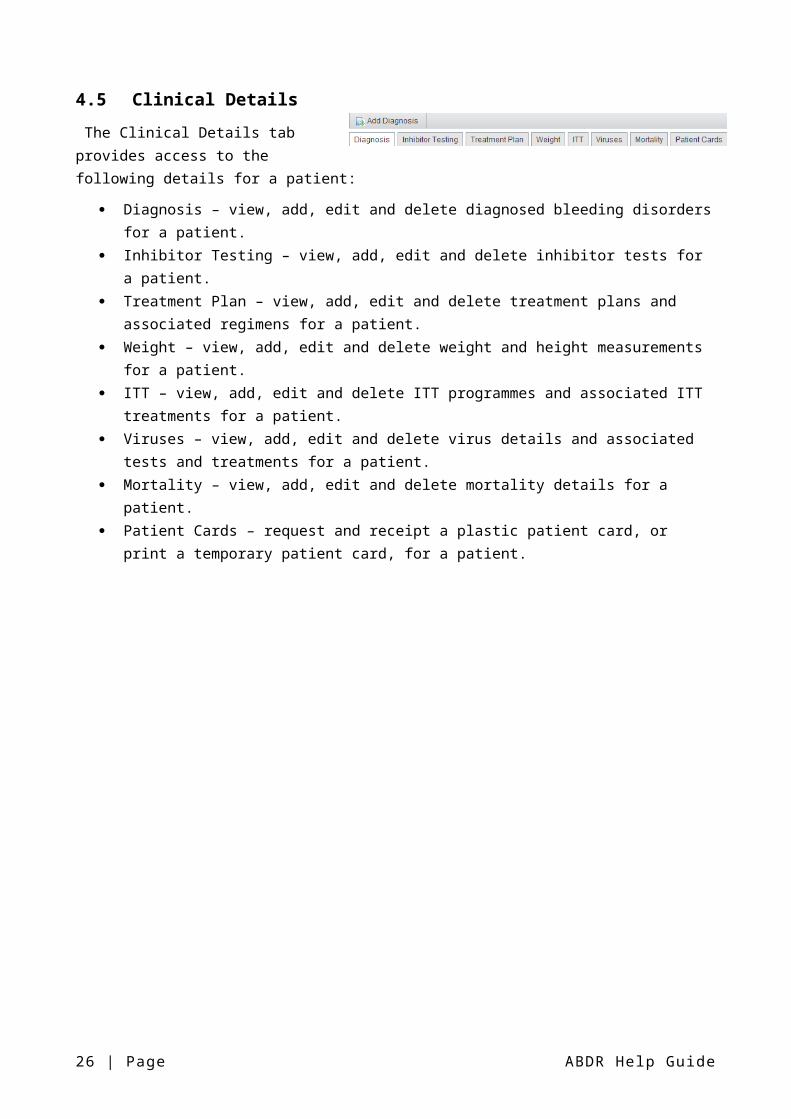
4.5 Clinical Details
The Clinical Details tab provides access to the following details for a patient:
Diagnosis – view, add, edit and delete diagnosed bleeding disorders for a patient. Inhibitor Testing – view, add, edit and delete inhibitor tests for a patient. Treatment Plan – view, add, edit and delete treatment plans and associated regimens for a patient. Weight – view, add, edit and delete weight and height measurements for a patient. ITT – view, add, edit and delete ITT programmes and associated ITT treatments for a patient. Viruses – view, add, edit and delete virus details and associated tests and treatments for a patient. Mortality – view, add, edit and delete mortality details for a patient. Patient Cards – request and receipt a plastic patient card, or print a temporary patient card, for a
patient.
ABDR Help Guide Page | 21
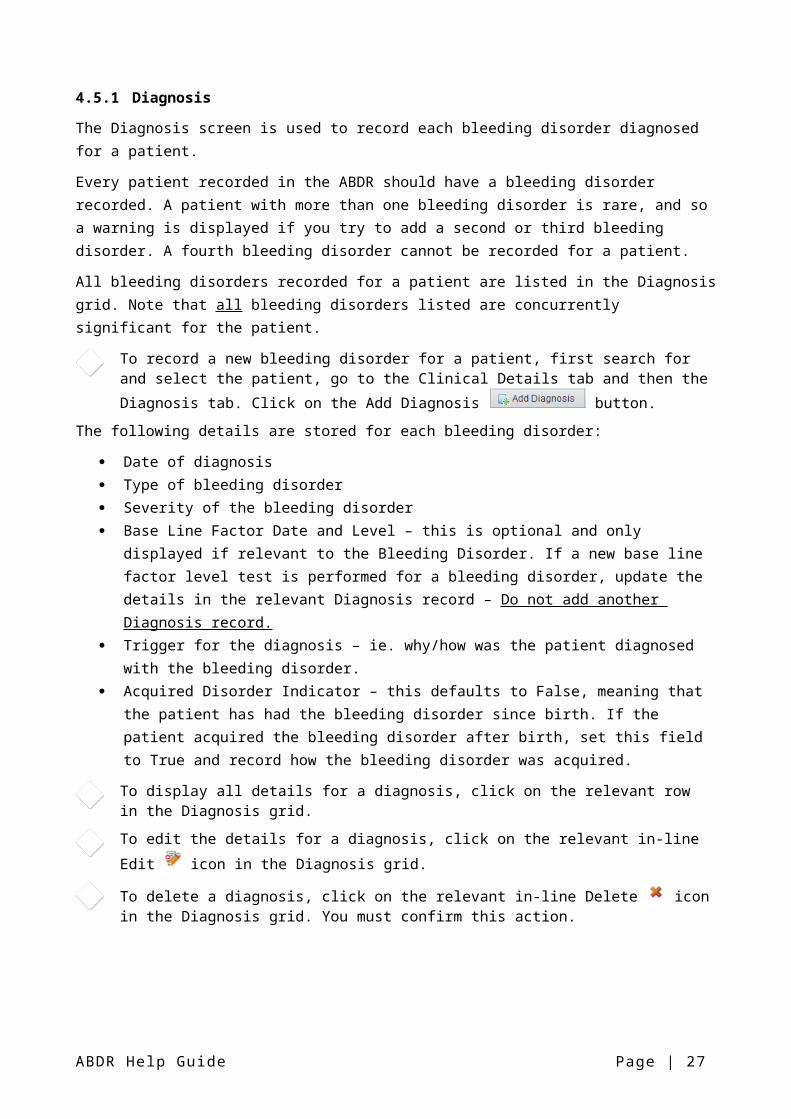
4.5.1 Diagnosis
The Diagnosis screen is used to record each bleeding disorder diagnosed for a patient.
Every patient recorded in the ABDR should have a bleeding disorder recorded. A patient with more than one bleeding disorder is rare, and so a warning is displayed if you try to add a second or third bleeding disorder. A fourth bleeding disorder cannot be recorded for a patient.
All bleeding disorders recorded for a patient are listed in the Diagnosis grid. Note that all bleeding disorders listed are concurrently significant for the patient.
To record a new bleeding disorder for a patient, first search for and select the patient, go to the
Clinical Details tab and then the Diagnosis tab. Click on the Add Diagnosis button.
The following details are stored for each bleeding disorder:
Date of diagnosis Type of bleeding disorder Severity of the bleeding disorder Base Line Factor Date and Level – this is optional and only displayed if relevant to the Bleeding
Disorder. If a new base line factor level test is performed for a bleeding disorder, update the details in the relevant Diagnosis record – Do not add another Diagnosis record.
Trigger for the diagnosis – ie. why/how was the patient diagnosed with the bleeding disorder. Acquired Disorder Indicator – this defaults to False, meaning that the patient has had the bleeding
disorder since birth. If the patient acquired the bleeding disorder after birth, set this field to True and record how the bleeding disorder was acquired.
To display all details for a diagnosis, click on the relevant row in the Diagnosis grid.
To edit the details for a diagnosis, click on the relevant in-line Edit icon in the Diagnosis grid.
To delete a diagnosis, click on the relevant in-line Delete icon in the Diagnosis grid. You must confirm this action.
22 | Page ABDR Help Guide
4.5.2 Inhibitor Testing
The Inhibitor Testing screen is used to record a) the patients initial inhibitor status b) any screening tests c) each inhibitor test performed for a patient.
Recording Screening tests for a Patient
To add a screening test for the patient click on the button.
The following details are mandatory:
Date of Screening Test Screening Test Result
If the screening test result is Negative this is the only time that the inhibitor status field will be generated and can be recorded.
Recording a new Inhibitor Test for a Patient
All inhibitor tests recorded for a patient are listed in the Inhibitor Test grid.
To record a new inhibitor test for a patient, first search for and select the patient, go to the Clinical
Details tab and then the Inhibitor Testing tab. Click on the button.
The following details are stored for each inhibitor test:
Inhibitor Titre Date Inhibitor Titre Level Inhibitor Status Factor Level (%) - optional Comments – optional
To edit the details for an inhibitor test, click on the relevant in-line Edit icon in the Inhibitor Test grid.
To delete an inhibitor test, click on the relevant in-line Delete icon in the Inhibitor Test grid. You must confirm this action.
The initial inhibitor status will appear as the date of birth of the patient. It can be only added at one point in time and no inhibitor test can be added to be before that period. The status can only be edited, not deleted and if the status is unclear it can be set as unknown.
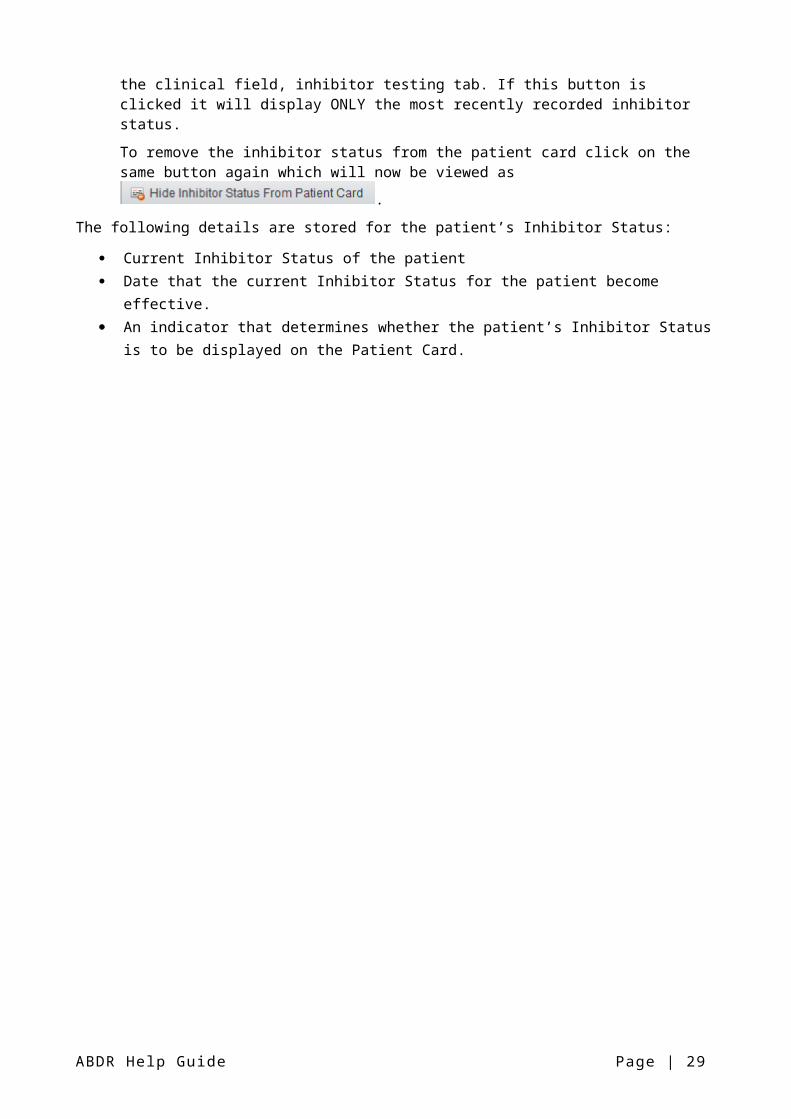
Updating a Current Inhibitor Status display on Patient Card
To display the lastest inhibitor test on the patient’s card click on the
button which is available under the clinical field, inhibitor testing tab. If this button is clicked it will display ONLY the most recently recorded inhibitor status.
To remove the inhibitor status from the patient card click on the same button again which will now
be viewed as .
The following details are stored for the patient’s Inhibitor Status:
Current Inhibitor Status of the patient Date that the current Inhibitor Status for the patient become effective. An indicator that determines whether the patient’s Inhibitor Status is to be displayed on the Patient
Card.
ABDR Help Guide Page | 23
4.5.3 Treatment Plan
The Treatment Plan screen is used to record ongoing treatment plan changes for a patient. A treatment plan should have one or more treatment regimens, however a Treatment Plan can be saved without a regimen.
The Treatment Plans grid displays the history of treatment plans recorded for a patient, with the most recent treatment plan displayed at the top.
To add a new treatment plan, first search for and select the patient, go to the Clinical Details tab and then the Treatment Plan tab. Click on the Add Treatment Plan button.
The ABDR provides a copy function so that the last treatment plan for a patient can be used as the basis for the new treatment plan. The copy function copies all details from the previous Treatment Plan except the Treatment Plan Effective Date (which defaults to the current date), and the Weight and Height (which default to the last recorded measurements for the patient).
To add a new treatment plan for a patient by copying the previous Treatment plan, first select the Add Treatment Plan button, then click on the Copy Previous Treatment Plan
link. Check and update the new treatment plan details as required.
The following details are stored for a treatment plan:
Effective date of the treatment plan Weight – this will default to the most recent Weight recorded for the patient, if recorded. Update
the patient’s weight here if required. Height – this will default to the most recent Height recorded for the patient, if recorded. Update
the patient’s height here if required. If a Central Venous Access Device (CVAD) is present for the patient and if so, the CVAD type. Person that usually administers a treatment to the patient. Treatment Comments – this text is printed on the patient’s Patient Card. The comments are meant
to advise the clinician who is shown the card by the patient when they present at a hospital/GPs for a treatment.
Notes for Patient – this text is printed on the patient’s Take Home Sheet informing them of details relevant to treatments that they might administer at home.
Each current treatment regimen. Regimens can be of different types:o On Demand – a bleed prevention treatment to be administered for a spontaneous or
severe/traumatic bleed.o Prophylaxis – a regular bleed-prevention treatment.o Secondary Prophylaxis – an alternative bleed-prevention treatment, should the regular
prophylaxis treatment be ineffectiveo Tolerisation – a treatment to be administered in conjunction with ITT.
The following details are stored for each regimen of a treatment plan (depending on the regimen type):
Product to be administered for a treatment Frequency of the treatment (specifying the day(s) of the week or periodicity of the frequency, if
applicable) Dose of the product to be administered for the treatment – spontaneous bleed dose,
severe/traumatic bleed dose, prophylactic dose or tolerisation dose. Indicator for if the treatment product can be administered at home (Home Therapy) Indicator for if the treatment product can be home delivered to the patient (Home Delivery)
24 | Page ABDR Help Guide
Date that the patient’s Annual Home Delivery agreement was last reviewed. Minimum stock level of the treatment product that the patient should have at home before they
should replenish their stock. Maximum stock level of the treatment product that the patient should keep at home. Method used by the patient to record treatments administered and actual product use.
To display all details for a treatment plan, click on the relevant row in the Treatment Plans grid.
To edit the details for a treatment plan, click on the relevant in-line Edit icon in the Treatment Plans grid.
To delete a treatment plan, click on the relevant in-line Delete icon in the Treatment Plans grid. You must confirm this action.
It is important that treatment plans for patients are up to date before MyABDR Accounts Requests are approved. They should also remain accurate as MyABDR Users can view treatment plan and regimen details to check instructions from their HTC when administering home treatments.
ABDR Help Guide Page | 25
4.5.4 Weight
The Weight screen is used to record ongoing weight and height measurements for a patient.
The Weights grid displays the history of measurements recorded for a patient, with the most recent measurements displayed at the top.
To record a new measurement for a patient, first search for and select the patient, go to the Clinical Details tab and then the Weight tab. Click on the Add Weight button.
The following details are stored for a measurement record:
Measurement Date Weight Height.
Note that the most recent weight recorded for a patient is used as the default weight for a new Treatment Plan, Treatment Interaction and DDAVP Challenge Interaction for the patient.
To display all details for a measurement, click on the relevant row in the Weights grid.
To edit the details for a measurement, click on the relevant in-line Edit icon in the Weights grid.
To delete a measurement, click on the relevant in-line Delete icon in the Weights grid. You must confirm this action.
MyABDR Users are also able to update these details. If a MyABDR user has updated a weight or height
measurement, you will see displayed next to the entry date.
26 | Page ABDR Help Guide
4.5.5 ITT
The Immune Tolerance Therapy (ITT) screen is used to record ITT episodes for a patient.
The ITT grid displays the history of ITT episodes recorded for a patient, with the most recent ITT episode displayed at the top.
To record an ITT episode for a patient, first search for and select the patient, go to the Clinical Details tab and then the ITT tab. Click on the Add ITT button.
The following details are stored for an ITT episode:
ITT Episode Date - ITT Start Date ITT End Date – recorded at the end of the ITT episode Date of Maximum Inhibitor Titre – recorded at the end of the ITT episode Maximum Inhibitor Titre amount – recorded at the end of the ITT episode Intravenous Access Family History of Inhibitor Details of Family History Each Tolerisation Advisory Committee consultation held in association with the ITT Date and type of each Adjuvant Therapy administered in association with the ITT
To display all details for an ITT episode, click on the relevant row in the ITT grid.
Note that when viewing the details of an ITT episode, all associated ITT activity recorded in the ABDR is displayed in descending date order in the ITT preview pane. This includes the following events and information:
Treatment Plan Regimens active during the ITT episode
Inhibitor Tests performed during the ITT episode
Pharmacokinetic Studies performed during the ITT episode
Adjuvant Therapies administered during the ITT episode
TAC Consultations held during the ITT episode.
To edit the details for an ITT episode, click on the relevant in-line Edit icon in the ITT grid.
To delete an ITT episode record, click on the relevant in-line Delete icon in the ITT grid. You must confirm this action.
ABDR Help Guide Page | 27

4.5.6 Viruses
The Viruses screen is used to record the ongoing viral status for a patient, and for a positive virus status, the ongoing tests and treatments associated with that virus.
Virus types of interest to the ABDR are HAV, HBV, HCV and HIV. Other viruses of potential interest, eg. CJD, vCJD can also be recorded using the Other virus type.
The Viruses grid displays the history of virus statuses recorded for a patient, grouped by virus type, with the most recent virus status displayed at the top of each group.
To record a new virus status for a patient, first search for and select the patient, go to the Clinical Details tab and then the Viruses tab. Click on the Add Virus button and select the type of virus to be added from the drop down list.
Each virus status diagnosed for a patient should be recorded as a new entry.
The following details are stored for each virus type:
HAV
The HAV Virus screen allows you to record the following information:
Viral Status Date, including recording the date that the Viral Status is deemed Unknown or Not Tested.
Viral Statuso Immunisedo Past infection, now immuneo Antibody negative (-)o Not Testedo Unknown
Date Immunised – if relevant and known
HBV
The HBV Virus screen allows you to record the following information:
Viral Status Date, including recording the date that Viral Status is deemed Unknown or Not Tested. Viral Status
o Immunisedo Past infection, now immuneo Carrier – Surface Ag positive (+)o Antibody negative (-)o Not Testedo Unknown
Date Immunised – if relevant and known Boosters – Booster Date for each booster, if relevant
If the Viral Status is Carrier – Surface Ag positive (+), the following extra data can be recorded if relevant:
Date of Viral Load Viral Load amount
HCV
The HCV Virus screen allows you to record the following information:
28 | Page ABDR Help Guide
Viral Status Date, including recording the date that Viral Status is deemed Unknown or Not Tested. Viral Status
o Antibody positive (+)o Antibody negative (-)o Not Testedo Unknown
If the Viral Status is Antibody positive (+), the following extra information can be recorded:
HCV Genotype Ongoing PCR Tests – PCR Test Date and PCR Viral Status. The most recent of these test results is
displayed in the Patient Summary screen against this virus type. Ongoing Viral Loads – Date of Viral Load and Viral Load amount. Ongoing Liver Health Tests – Test Date, Liver Health test and result, associated Comments. Ongoing Treatments – Treatment Attempt, Treatment Start Date, Treatment type, Treatment
Duration (in weeks), Treatment Outcome, Treatment Comments, Why treatment data is unavailable.
Ongoing ALT Tests – ALT Date and ALT amount
HIV
The HIV Virus screen allows you to record the following information:
Viral Status Date, including recording the date that Viral Status is deemed Unknown or Not Tested. Viral Status
o Antibody positive (+)o Antibody negative (-)o Not Testedo Unknown
If the Viral Status is Antibody positive (+), the following extra information can be recorded:
Ongoing CD4 Count Tests – Test Date and CD4 Count. Ongoing Viral Loads – Date of Viral Load and Viral Load amount. Ongoing Treatments – Treatment Start Date, Treatment type and Treatment Comments. Ongoing tests for AIDS Defining Illnesses – Date that the AIDS Defining Illness Developed and the
type of AIDS Defining Illness identified.
Other
The Other Virus screen allows you to record the following information:
Viral Status Date, including recording the date that Viral Status is deemed Unknown or Not Tested. Viral Type – the name of the Virus/Pathogen Viral Status
o Antibody positive (+)o Antibody negative (-)o Not Testedo Unknown
Date Immunised – if relevant and known Boosters – Booster Date for each booster, if relevant
If the Viral Status is Antibody positive (+), the following extra information can be recorded if relevant:
ABDR Help Guide Page | 29
Date of Viral Load Viral Load amount
To display all details for a virus status record, click on the relevant row in the Virus grid.
To edit the details for a virus status record, click on the relevant in-line Edit icon in the Virus grid.
To delete a virus status record and all associated test and treatment data, click on the relevant in-
line Delete icon in the Virus grid. You must confirm this action.
30 | Page ABDR Help Guide
4.5.7 Mortality
The Mortality tab is used to record, view and edit mortality details for a patient.
To record the death of a patient, first search for and select the patient, go to the Clinical Details tab
and then the Mortality tab. Click on the Record Mortality button.
The following Mortality details are stored for a patient:
Date Notified – date that the HTC was informed of the patient’s death Date of Death – actual date of death of the patient, if known Cause of Death Comments pertaining to the patient’s death.
To edit mortality details for a patient, click on the Edit Mortality button.
To delete the mortality record for a patient (assuming it has been entered erroneously), click on the Delete Mortality button. You must confirm this action.
Note that, to allow for retrospective entry of patient interactions and adverse events, recording a patient’s death does not prevent you from updating/recording other information for the patient.
ABDR Help Guide Page | 31
4.5.8 Patient Cards
Hard plastic patient cards can be issued to patients registered in the ABDR. A patient card is provided to a patient so that they can present it at a non-HTC Hospital/GPs if they require a treatment to be administered. A new patient card needs to be issued to a patient whenever the patient’s name, diagnosis information, inhibitor status or treatment plan changes.
The Patient Cards tab is used by an HTC to request the ABDR Support team to produce a plastic patient card for a patient, and for the HTC to record that the patient card has been received by the HTC and also to record when the patient card has been delivered to the patient. The HTC can also record if a patient card is disposed of (destroyed) because it could not be delivered to the patient or the information on the card is no longer current.
The Patient Cards tab can also be used to print a temporary (paper) patient card in lieu of a plastic patient card, typically until a requested plastic patient card has been made and is available to be given to the patient.
The Patient Cards Grid displays the history of all plastic patient cards requested for a patient.
Creating a Patient Card Request
To request a new plastic patient card for a patient, first search for and select the patient, go to the Clinical Details tab and then the Patient Cards tab. Click on the Request Patient Card
button.
The following actions must be performed to request a plastic patient card:
Check that all the details to be printed on the card are correct . If the details are not correct, do not save the card request. Update the details for the patient in the ABDR accordingly and start a new card request.
Enter the number of cards required. Enter any special instructions for the ABDR Support team regarding the production or delivery of
the patient card. Confirm that all details to be printed on the card are correct.
To display all details for a patient card request, click on the relevant row in the Patient Cards grid.
To edit the details for a patient card request, click on the relevant in-line Edit icon in the Patients Card grid.
Note that a patient card request can only be edited if the status of the request is Requested.
Note that only the Number of Cards Requested and the Special Instructions for ABDR Support fields can be edited. The information to be printed on the Card cannot be edited. If the information to be printed on the Card is not correct, you must delete the patient card request, update the information in the ABDR accordingly, and add a new patient card request.
To delete a patient card request, click on the relevant in-line Delete icon in the Patient Cards grid. You must confirm this action.
Note that a patient card request can only be deleted if the status of the request is Requested.
Note that you cannot request another plastic patient card for a patient whilst a current request is active (ie. the status of an existing request is Requested or Sent to HTC or Received by HTC). Another patient card
32 | Page ABDR Help Guide
cannot be requested until the last requested patient card has been delivered to the patient or disposed of (destroyed) by the HTC.
Once a patient card has been requested, the ABDR Support team will produce the Card and send it to the HTC. Once received, the HTC must receipt the Card and deliver it to the patient.
Receipting a Patient Card
Once a patient card has been received from ABDR Support, the status of the Card request must be changed to Received by HTC. This action can be performed for a single patient/card request from the Patient Cards tab or in a batch mode for multiple patients/card requests from the Administration – Patient Card Requests function. Refer to the Administration section of this Guide for details of this second option.
To mark a patient card as received by the HTC, click on the relevant in-line Mark Patient Card as Received icon in the Patient Cards grid. You must confirm this action.
Note that a patient card can only be marked as received if the status of the request is Sent to HTC. Marking the card as received changes the status of the request to Received by HTC.
Delivering/Destroying a Patient Card
A patient card remains with the HTC until it is either delivered to the patient or disposed of (destroyed) by the HTC. A patient card might be delivered to a patient either by the HTC posting the card to the patient, or by giving it to them at their next HTC visit.
To mark a patient card as delivered to the patient or destroyed by the HTC, click on the relevant in-line Mark Patient Card as Delivered/Destroyed icon in the Patient Cards grid. Enter the date that
the Card was delivered or destroyed and click on the appropriate button.
Note that a patient card can only be marked as delivered or destroyed if the status of the request is Received by HTC. Marking the card as delivered changes the status of the request to Delivered to Patient. Marking the card as destroyed changes the status of the request to Destroyed by HTC.
Printing a Temporary Patient Card
A temporary patient card for a patient can be printed from the Patient Cards tab or from the Reports menu of the ABDR.
To print a temporary (paper) patient card for a patient, first search for and select the patient, go to the Clinical Details tab and then the Patient Cards tab. Click on the Print Temporary Patient Card
button.
ABDR Help Guide Page | 33
4.6 Transitions
The Transition screen is used to permanently change the primary HTC for a patient or to share a patient to another HTC.
The Transitions grid lists a history of all permanent transitions recorded for a patient and any current shared transitions for the patient.
To display the Transition history for a patient, first search for and select the patient, then go to the Transition tab.
To add a transition for a patient, click on the New Transition button. Only the primary HTC for a patient can add a transition.
To add a transition, you must enter the following details:
Type of Transitiono Permanent – Used when the patient wants to change the primary HTC that they belong to
(because they have moved address, primary care provider, etc.). As a result of this type of transition, the HTC recording the transition will lose the ability to add, edit and delete data for the patient, but they will retain the ability to view the data that their HTC has entered. The current permanent transition is displayed with the symbol.
o Shared – Used when a patient visits a second HTC (frequently, occasionally or as a one-off). Sharing a patient with another HTC enables the second HTC to update Patient Details and add new Clinical Details, Interactions and Adverse Events that occur at their HTC. Shared transitions are displayed with the symbol.
Date that the transition will become effective – this can be today or a future date. HTC where the patient will transition to.
The symbol in each row in the Transitions grid indicates the primary HTC for the patient when the transition is complete.
Future transitions are displayed with the clock symbol. If a future transition has been recorded, no other transitions can be recorded until the future transition comes into effect.
Both future (permanent and shared) transitions and current shared transitions can be deleted.
To delete a future transition, click on the relevant in-line Delete icon in the Transitions grid. A future transition can only be deleted by the current primary HTC for the patient. A future transition for a patient can only be deleted if it has not yet come into effect.
To delete a shared transition, click on the relevant in-line Delete icon in the Transitions grid. A shared transition for a patient can be deleted by either the primary HTC or the shared HTC for the patient.
34 | Page ABDR Help Guide

4.7 Interactions
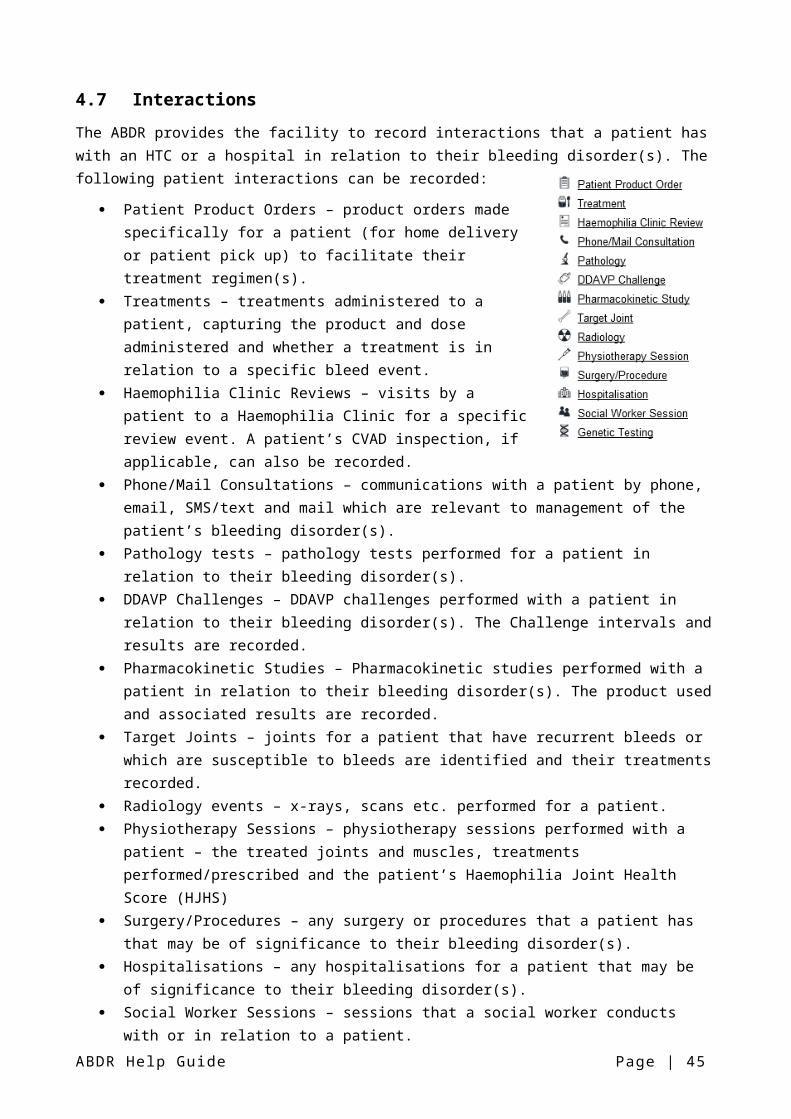
The ABDR provides the facility to record interactions that a patient has with an HTC or a hospital in relation to their bleeding disorder(s). The following patient interactions can be recorded:
Patient Product Orders – product orders made specifically for a patient (for home delivery or patient pick up) to facilitate their treatment regimen(s).
Treatments – treatments administered to a patient, capturing the product and dose administered and whether a treatment is in relation to a specific bleed event.
Haemophilia Clinic Reviews – visits by a patient to a Haemophilia Clinic for a specific review event. A patient’s CVAD inspection, if applicable, can also be recorded.
Phone/Mail Consultations – communications with a patient by phone, email, SMS/text and mail which are relevant to management of the patient’s bleeding disorder(s).
Pathology tests – pathology tests performed for a patient in relation to their bleeding disorder(s).
DDAVP Challenges – DDAVP challenges performed with a patient in relation to their bleeding disorder(s). The Challenge intervals and results are recorded.
Pharmacokinetic Studies – Pharmacokinetic studies performed with a patient in relation to their bleeding disorder(s). The product used and associated results are recorded.
Target Joints – joints for a patient that have recurrent bleeds or which are susceptible to bleeds are identified and their treatments recorded.
Radiology events – x-rays, scans etc. performed for a patient. Physiotherapy Sessions – physiotherapy sessions performed with a patient – the treated joints and
muscles, treatments performed/prescribed and the patient’s Haemophilia Joint Health Score (HJHS) Surgery/Procedures – any surgery or procedures that a patient has that may be of significance to
their bleeding disorder(s). Hospitalisations – any hospitalisations for a patient that may be of significance to their bleeding
disorder(s). Social Worker Sessions – sessions that a social worker conducts with or in relation to a patient. Genetic Testing – genetic testing performed for a patient in relation to their bleeding disorder(s).
Limited Treatment Interaction information is displayed to MyABDR users, refer to section 4.7.4 Treatments for details.
4.7.1 Interactions Grid
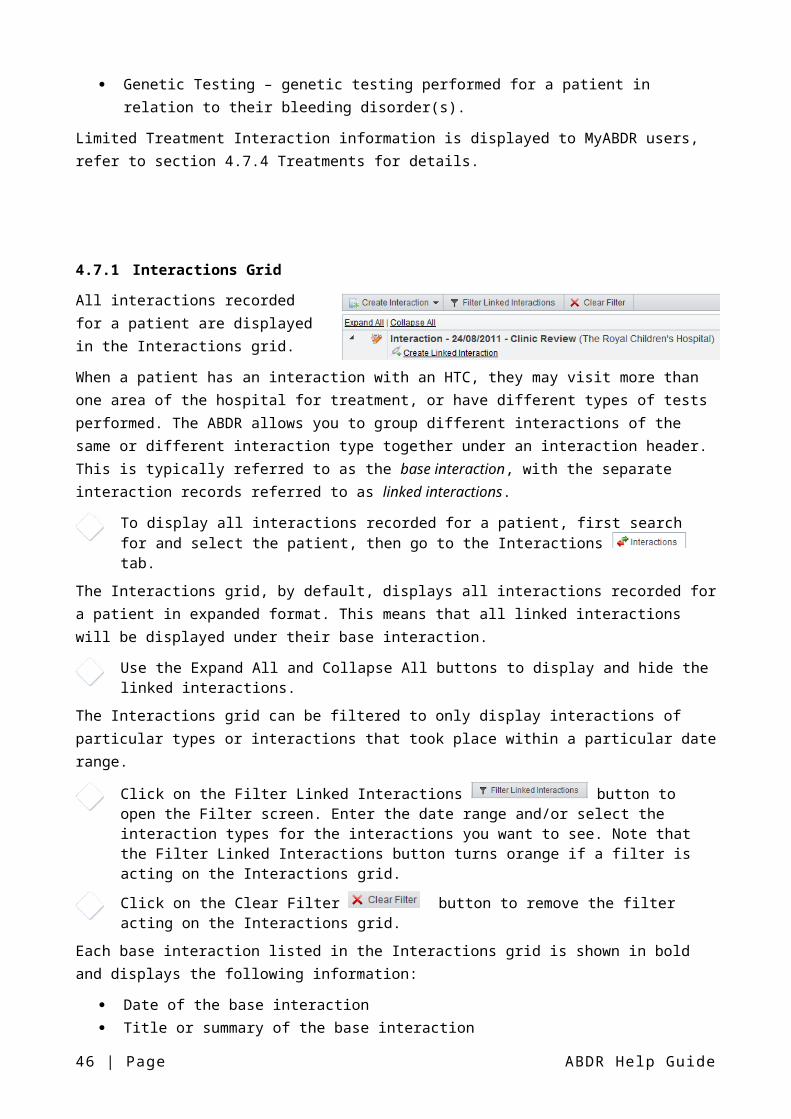
All interactions recorded for a patient are displayed in the Interactions grid.
When a patient has an interaction with an HTC, they may visit more than one area of the hospital for treatment, or have different types of tests performed. The ABDR allows you to group different interactions of the same or different interaction type together under an interaction header. This is ABDR Help Guide Page | 35
typically referred to as the base interaction, with the separate interaction records referred to as linked interactions.
To display all interactions recorded for a patient, first search for and select the patient, then go to the Interactions tab.
The Interactions grid, by default, displays all interactions recorded for a patient in expanded format. This means that all linked interactions will be displayed under their base interaction.
Use the Expand All and Collapse All buttons to display and hide the linked interactions.
The Interactions grid can be filtered to only display interactions of particular types or interactions that took place within a particular date range.
Click on the Filter Linked Interactions button to open the Filter screen. Enter the date range and/or select the interaction types for the interactions you want to see. Note that the Filter Linked Interactions button turns orange if a filter is acting on the Interactions grid.
Click on the Clear Filter button to remove the filter acting on the Interactions grid.
Each base interaction listed in the Interactions grid is shown in bold and displays the following information:
Date of the base interaction Title or summary of the base interaction The HTC that created the base interaction – note that a linked interaction can only be attached to a
base interaction by a User at the same HTC.
Each linked interaction listed in the Interactions grid displays the following information:
Type of the interaction Date of the interaction A summary of key data recorded for the interaction – this varies depending on the type of
interaction.
To display all details for an interaction, click on the relevant row in the Interactions grid.
To edit the details for an interaction, click on the relevant in-line Edit icon in the Interactions grid.
To delete an interaction, click on the relevant in-line Delete icon in the Interactions grid. You must confirm this action.
36 | Page ABDR Help Guide

4.7.2 Adding Base and Linked Interactions
The ABDR provides two approaches for recording interactions:
1. Create a base interaction and then separately create linked interactions.
Linked interactions can be created by any users from the same HTC as the base interaction.
To record a new base interaction for a patient, first search for and select the patient, then go to the
Interactions tab. Hover over the Create Interaction button and click on the Interaction option from the drop down list.
To record a linked interaction, first, in the Interactions grid, select the base interaction that the linked interaction is to be associated with, then click on the in-line Create Linked Interaction
link and select the type of interaction to be recorded.
2. Create a base and linked interaction in a single step, eg. Interaction + Treatment.
To record a base and linked interaction in a single step, hover over the Create Interaction button and click on the Interaction + (Interaction Type) option from the drop
down list.
Note that not all linked Interactions for a base interaction may happen on the same date, but they must happen on or after the base Interaction with which they are associated.
ABDR Help Guide Page | 37
4.7.3 Patient Product Orders
A Patient Product Order is a product order made for a specific patient to support the patient’s treatment plan. A product order is made with a specific supplier, who must deliver the product(s) to the patient via the specified delivery arrangement on the specified delivery date.
To add a new order for a patient, select the or as required and complete the steps displayed.
The following details are stored for a patient product order:
Order Date Order Reason – ie. is the patient making an order to enable their Prophylaxis, On Demand or ITT
regimen. If the order reason is for On Demand, specify the On Demand Reason:o Home Supply – the patient’s home supply has been gradually used up and/or is out of date and
needs to be replenished.o Injury/Accident – the patient had a specific injury/accident and as a result, needs further stock
and/or needs to replenish their home supply.o Interstate Travel – the patient is intending to travel interstate and needs some additional stock
to take with them.o Overseas Travel – the patient is intending to travel overseas and needs some additional stock
to take with them.o Spontaneous Bleed – the patient had a specific spontaneous bleed event and as a result, needs
further stock and/or needs to replenish their home supply.o Surgery/Procedure – the patient had or is intending to have a surgery/procedure and as a
result, needs further stock and/or needs to replenish their home supply.o Other – please specify
Delivery arrangement agreed with the patient for receiving their order. Note that:o When Supplier to Home Deliver is selected, the patient’s delivery address and phone numbers
are used as the default delivery address for the Order, but they can be changed.o When Patient to Pick Up from HTC is selected, the HTC’s address and phone numbers are used
as the default delivery address for the Order, but they can be changed. Delivery address for the order, ie. where should the supplier deliver the order, and any special
delivery instructions. Date agreed with the patient for delivery of the order Name of the supplier for the product(s) required – note that all products on a single order must be
supplied by the same supplier. Name of the product(s) required and the vial size and quantity of each.
To facilitate making repeat orders for a patient, the ABDR provides an order copy function. The copy function copies all details from the previous order for the patient except the Order Date and the Delivery Date.
To add a new order for a patient by copying the previous order, first select the or as required, then click on the Copy Previous Order link.
Check that all the new order details are correct and enter the Delivery Date for the new order.
Each new order is assigned a unique Order Number.
When a new Order is saved for the first time, the ABDR asks you if you want to print the Patient Product Order Form. You can choose to print it immediately or at a later time.
38 | Page ABDR Help Guide
A pre-filled Patient Product Order Form can be printed for a product order for a patient from the patient’s
Interactions grid or from the Print and Report module of the ABDR.
To print a Patient Product Order for a patient, first locate the product order in the patient’s Interactions grid, then click on the relevant in-line Print icon. The pre-filled Patient Product Order Form will open as a formatted PDF document.
ABDR Help Guide Page | 39
4.7.4 Treatments
The Treatment interaction is used to record factor treatments administered to a patient and whether a treatment was in relation to a specific bleed event. As much as possible, all treatments administered to a patient whilst at home as well as treatments administered to the patient in an HTC or hospital setting should be recorded.
The following details are stored for a treatment:
Date of the treatment Source of the product used in the treatment – was the product supplied from the patient’s stock or
the HTC’s stock? Place where the treatment was administered Name of the medical contact that assisted with the treatment, if relevant Reason for the treatment - and if the treatment was in association with a bleed event, the date of
the bleed event, body area, bleed location and cause of the bleed. Number of days since factor was last administered to the patient (prior to this treatment), if known Weight of the patient on the day of the treatment Name of the product administered for the treatment Dose/kg of the patient’s weight of the product used for the treatment Total dose of the product administered to the patient Free-text for notes and/or after care issues relating to the treatment
Limited Treatment interaction details are included in the MyABDR Treatments list, however they cannot be edited. Details displayed to MyABDR users include date, treatment type, bleed date and bleed location (if applicable), product and total dose administered during the treatment.
40 | Page ABDR Help Guide

4.7.5 Haemophilia Clinic Review
The Haemophilia Clinic Review interaction is used to record when a patient comes into the HTC for a scheduled review session. This interaction is also used to record if a patient’s CVAD is inspected during the review session. Files/documents can be attached to a Haemophilia Clinic Review interaction.
(Note that a Haemophilia Clinic Review is distinct from a Physiotherapy Clinic Review which is recorded within the Physiotherapy Session Interaction.)
The following fields are stored for a Haemophilia Clinic Review:
Review Date – the date that the Haemophilia Clinic review occurred. Notes – optional comments. CVAD Inspected – if applicable, you can record whether the patient’s CVAD was inspected during
this review session. CVAD Inspection Notes – if the patient’s CVAD was inspected, you can optionally enter any relevant
comments. Attachments – one or more files can be attached to a Haemophilia Clinic Review interaction.
Attachments
All files attached to a Haemophilia Clinic Review Interaction are listed in the Attachments grid within the Haemophilia Clinic Review screen.
Only the following file types can be attached to an Haemophilia Clinic Review Interaction:
.DOC, .DOCX files .XLS, .XLSX files .PPT, .PPTX files .JPG, .GIF, .PNG files .TXT files .PDF files.
To add an attachment to a Haemophilia Clinic Review Interaction, click on the Add Attachment button to display the Add Attachment screen. Click on the Select button and locate the
file to be uploaded in your file system. Click the Upload Attachment button to upload the file into the ABDR.
To open an attachment, click on the relevant in-line Paperclip icon in the Attachments grid.
To delete an attachment from a Haemophilia Clinic Review Interaction, click on the relevant in-line
Delete icon in the Attachments grid. You must confirm this action.
ABDR Help Guide Page | 41
4.7.6 Phone/Mail Consultation
The Phone/Mail Consultation interaction is used to record a phone, email, SMS/text or mail communication with a patient. Files/documents can be attached to a Phone/Mail Consultation interaction.
(Note that a Phone/Mail Consultation interaction is distinct from a Physiotherapy phone consultation which relates to a specific treatment or a Social Worker session that is conducted over the phone – these activities are recorded within the Physiotherapy Session interaction and Social Worker Session interaction respectively.)
The communication with the patient may be initiated by the patient, a representative of the patient, (eg. the patient’s mother) or by the HTC.
The following fields must be recorded for a Phone/Mail Consultation interaction:
Consultation Date and Time Consultation Method – Phone, Email, SMS/Text, Mail. Consultation Initiated By – Patient, Patient Representative, HTC. Consultation Reason – Clinical Consultation, General Enquiry, Product Order Enquiry. Consultation Outcome – Ongoing or Resolved. HTC Contact Person – who in the HTC handled this consultation? Defaults to the name of the User
recording the interaction, but should be changed accordingly. Notes – a comment detailing this consultation. Attachments – optional – one or more files can be attached to a Phone/Mail Consultation
interaction.
A record of the Phone/Mail Consultation can be printed if required, to be stored on the patient’s medical file.
To print a Phone/Mail Consultation Record for a patient, first locate the Phone/Mail Consultation interaction in the patient’s Interactions grid, then click on the relevant in-line Print icon. The Phone/Mail Consultation Record will open as a formatted PDF document.
Attachments
All files attached to a Phone/Mail Consultation interaction are listed in the Attachments grid within the Phone/Mail Consultation screen.
Only the following file types can be attached to a Phone/Mail Consultation interaction:
.DOC, .DOCX files .XLS, .XLSX files .PPT, .PPTX files .JPG, .GIF, .PNG files .TXT files .PDF files.
To add an attachment to a Phone/Mail Consultation Interaction, click on the Add Attachment button to display the Add Attachment screen. Click on the Select button and locate the
file to be uploaded in your file system. Click the Upload Attachment button to upload the file into the ABDR.
To open an attachment, click on the relevant in-line Paperclip icon in the Attachments grid.
42 | Page ABDR Help Guide
To delete an attachment from a Phone/Mail Consultation Interaction, click on the relevant in-line
Delete icon in the Attachments grid. You must confirm this action.
ABDR Help Guide Page | 43
4.7.7 Pathology
The Pathology interaction allows for the following pathology results to be recorded for a patient:
Date and time of the pathology test Blood group PT – Prothrombin Time (in seconds) APTT – Activated Partial Thromboplastin Time (in seconds) TCT – Thrombin Clotting Time (in seconds) Fib – Fibrinogen (in g/L) VII – Coagulation Factor VII test (%) VIIIc – Coagulation Factor VIIIc test (%) VIIIAg – Coagulation Factor VIII Antigen test (%) VIII Chrom – Coagulation Factor VIII Chromogenic test (%) IXc – Coagulation Factor IXc test (%) vWFAg – von Willebrand Factor Antigen test (%) vWFCBA – von Willebrand Factor Collagen Binding Assay (%) vWFRCoF – von Willebrand Factor Ristocetin Cofactor test (%) vWFAct – von Willebrand Factor Activity test (%) vWF FVIII Binding – von Willebrand Factor to FVIII Binding test (%) Multimer – free-form text pertaining to any multimer tests performed. Platelet Studies – free-form text pertaining to any platelet test(s) performed. Other factor tests, if performed – Factor type and level.
44 | Page ABDR Help Guide
4.7.8 DDAVP Challenge
The DDAVP Challenge interaction is used to record a DDAVP challenge administered to a patient and the challenge interval test results.
The following fields are stored for a DDAVP Challenge interaction:
Date of the DDAVP challenge Weight of the patient on the DDAVP Challenge date Dose/kg of the patient’s weight of DDAVP to be administered to the patient Total dose of DDAVP to be administered to the patient Test results prior to the DDAVP dose and then at each measurement interval
o Interval period – Pre dose, 30 minutes, 1 hour, 90 minutes, 2 hours, 3 hours, 4 hours, 24 hours, other – please specify.
o VIIIc – Coagulation Factor VIIIc test (%)o VIII Chrom – Coagulation Factor VIII Chromogenic test (%)o vWFAg – von Willebrand Factor Antigen test (%)o vWFCBA – von Willebrand Factor Collagen Binding Assay (%)o vWFRCoF – von Willebrand Factor Ristocetin Cofactor test (%)o vWFAct – von Willebrand Factor Activity test (%)o vWF FVIII Binding – von Willebrand Factor to FVIII Binding test (%)o Sodium Na+ – Sodium testo Platelet Studies – free-form text pertaining to any platelet test(s) performed.o Other factor tests, if performed – Factor type and level.
Free-form text for recording any side effects caused by the DDAVP Outcome of the DDAVP challenge Free-form text for recording the recommendation resulting from the DDAVP challenge.
Note that the status of the DDAVP challenge (Challenge Date, Outcome and Recommendation) is displayed in the Patient Summary.
ABDR Help Guide Page | 45
4.7.9 Pharmacokinetic Study
The Pharmacokinetic Study interaction is used to record a pharmacokinetic study of a patient.
The following fields are stored for a Pharmacokinetic Study interaction:
Date of the pharmacokinetic study Study type – FVIII, FIX or Other – please specify Product administered for the study Dose/kg of the patient’s weight of product to be administered to the patient Total dose of product to be administered to the patient Recovery % Half-life (in hours) Number of hours that the study was performed over Free-form text detailing the results of the study.
46 | Page ABDR Help Guide
4.7.10 Target Joint
The Target Joint interaction is used to record a patient’s joint that has recurrent bleeds or is susceptible to bleeds, and the specific treatment(s) for the joint.
The following fields are stored for a Target Joint interaction:
Date that the target joint is identified Name of the joint Bleed frequency for the joint Treatment(s) applied to the joint Indicator as to whether problems with the target joint have been resolved Date that the problems with the target joint were deemed resolved.
ABDR Help Guide Page | 47
4.7.11 Radiology
The Radiology interaction is used to record each x-ray, scan etc. taken for a patient.
The following fields are stored for a Radiology interaction:
Date of the radiology event Type of radiology performed Joint and/or muscle and/or other body location that was the subject of the radiology event Free-form text outlining the findings of the radiology event.
48 | Page ABDR Help Guide
4.7.12 Physiotherapy Session
The Physiotherapy Session interaction is used to record each time that a patient interacts with a physiotherapist in relation to their bleeding disorder. The Physiotherapy Session interaction also allows for the UK Modified Haemophilia Joint Health Score (HJHS) to be recorded for the patient.
The following fields are stored for a Physiotherapy Session interaction:
Date of the physiotherapy session Location of the physiotherapy session Reason(s) for the physiotherapy session – this can be just to record the UK Modified Haemophilia
Joint Health Score (HJHS). Treatment(s) administered during the physiotherapy session A record of any mobility aids used by the patient at the physiotherapy session A record of any orthotics used by the patient at the physiotherapy session A list of the muscles and/or joints treated at the physiotherapy session UK Modified Haemophilia Joint Health Score (HJHS), if relevant. Free-form text for recording any notes relevant to the physiotherapy session.
Haemophilia Joint Health Score
The HJHS screen uses the same format as the UK Modified Haemophilia Joint Health Score (Mod-HJHS) paper form used by physiotherapists for recording the HJHS for a patient.
To record the UK Modified Haemophilia Joint Health Score (HJHS) for a patient, in Step 1 of recording a physiotherapy session, select the Session Reason of UK MOD HJHS, then in Step 2, click on the Enter Scores button. The scoring grid will be displayed.
You must enter a joint score in every box of the scoring grid.
When you click within a particular field, Help information is displayed which explains the scoring criteria for the field. Note that a score of 9 in any of the fields indicates that the joint score is Not Evaluable and is not included in the HJHS.
A record of the Physiotherapy Session can be printed if required, to be stored on the patient’s medical file.
To print a Physiotherapy Session Record for a patient, first locate the Physiotherapy Session interaction in the patient’s Interactions grid, then click on the relevant in-line Print icon. The Physiotherapy Session Record will open as a formatted PDF document.
ABDR Help Guide Page | 49
4.7.13 Surgery/Procedure
The Surgery/Procedure interaction is used to record any surgery or procedures that a patient has that may be of significance or in relation to their bleeding disorder(s).
The following fields are stored for a Surgery/Procedure interaction:
Date of the surgery or procedure Name of the surgeon performing the surgery/procedure. Facility where the surgery/procedure was performed – indicate if it was at a Day Surgery Centre or
the HTC’s Hospital, or Other – please specify. Type of surgery or procedure
o Orthopaedic – record the joint and type of surgery performed, and any after care issueso Surgery – record the surgery performed and site of the surgeryo Procedure – record the procedure performed and site of the procedure.
Free-form text for recording any notes relevant to the surgery or procedure.
50 | Page ABDR Help Guide
4.7.14 Hospitalisation
The Hospitalisation interaction is used to record any hospitalisations for a patient that may be of significance or in relation to their bleeding disorder(s).
The following fields are stored for a Hospitalisation interaction:
Date that the patient was admitted to hospital Date that the patient was discharged from hospital Duration (in days, inclusive) of the patient’s stay in hospital is calculated Facility (name of the hospital) where the patient was admitted, particularly if not at the same
hospital as the HTC. Type of admission – elective or emergency Free-form text detailed the reason for the hospital admission.
ABDR Help Guide Page | 51
4.7.15 Social Worker Session
The Social Worker interaction is used to record when a patient or someone associated with the patient attends a session with a social worker.
The following fields are stored for a Social Worker Session interaction:
Session Date – the date that Social Worker Session occurred. Session Location – Clinic Appointment, Email, Group Session, Home Visit, Hospital Emergency
Department, inpatient Visit, Outpatient Visit, Outreach Clinic, Phone Consultation. Relationship to Patient – ie. who is the Social Worker Session with? - Patient, Parent,
Partner/Spouse, Sibling, Carrier, Family Member, Fried/Boyfriend/Girlfriend, Other. Type of Intervention – Advocacy, Counselling, Education, Resource Provision. Social Worker Name – Name of the social worker that conducted the session. Defaults to your
name, but can be changed.
52 | Page ABDR Help Guide

4.7.16 Genetic Testing
The Genetic Testing interaction is used to record the results of genetic testing performed for a patient in relation to their bleeding disorder(s).
The following fields are stored for a Genetic Testing interaction:
Date of the genetic testing Whether consent has been given by the patient to inform other related persons of the genetic
testing results. Carrier status of the patient Genetic mutation Specific mutation Whether the patient has been referred to genetic counselling Date that the patient was referred to genetic counselling Genetic File Number for the patient Name of the lab that performed the genetic testing Free-form text for recording notes specific to the genetic testing.
Note that Genetic Mutation and Specific Mutation results are displayed in the Patient Summary.
4.8. MyABDR
The MyABDR tab all entries recorded by MyABDR users for the selected patient it includes, Treatments, Bleeds, Surgeries Stock on Hand and Memos. Information is read only and cannot be edited by the HTC.
10.1 Treatments
A complete history of Treatments recorded by MyABDR users for the patient with the most recent record displayed first. The details of each treatment are displayed including,
Treatment Date/Time Treatment Type Product Pard of Body if Treatment Type = Bleed Dose Treatment notes, if recorded.
10.2 Bleeds
A complete history of Bleeds recorded by MyABDR users for the patient , withthe most recent record displayed first. The details for each bleed are displayed including:
Bleed Date, Part of Body, Reason (same as ‘Cause’ when bleeds are recorded in ABDR Severity of Bleed Time to Treatment.
ABDR Help Guide Page | 53
Bleed Notes, if recorded.
10.3 Surgeries
A limited history of Surgeries and Procedures recorded by MyABDR users for the patient, very basic detail is captured and it is not associated to information recorded in ABDR Surgery/Procedure Interactions. The details for each Surgery/Procecdure are
Surgery Date Description.
10.4 Stock on Hand
Stock on Hand shows the current inventory level for the patient, listed by Product name, vial size, batch number and expriy date. Batch number and expiry date are not mandatory fields however MyABDR users are encouraged to use autocomplete features to capture this information.
Stock on Hand is calculated by subtracting product used in Treatments and Discards from Received Products.
10.5 Memos
Memos refer to notes recorded by the MyABDR user which are not associated with a particular treatment or bleed event.
54 | Page ABDR Help Guide

5 HTC Product Orders
The HTC Product Orders module allows you to create, view, update, print and delete product orders for an HTC. The HTC Product Orders grid displays a list of all non-patient-specific product orders for a specific HTC.
To display all details for an HTC Product Order, click on the relevant row in the HTC Product Orders grid.
To edit the details for an HTC Product Order, click on the relevant in-line Edit icon in the HTC Product Orders grid. You will be asked: Do you want to copy the existing data forward? Click Cancel.
Be careful to make the distinction between adding a new HTC Product Order and editing an existing HTC Product Order.
To delete an HTC Product Order, click on the relevant in-line Delete icon in the HTC Product Orders grid. You must confirm this action.
The HTC Product Orders grid can be filtered to display a subset of Orders based on the following criteria:
Order Number Supplier Product Order Date From Order Date To.
Click on the Filter Product Orders button to open the Filter screen. Enter the order number, date range and/or select the supplier and/or product for the orders you want to see. Note that the Filter Product Orders button turns orange if a filter is acting on the HTC Product Orders grid.
Click on the Clear Filter button to remove the filter acting on the HTC Product Orders grid.
A new HTC Product Order can be made in two ways, via:
Add a new order – this starts a completely new product order for which you must enter all the delivery and product details.
Copy forward a previous order – this copies all of the delivery details except the Order Date (which defaults to today’s date) and the Delivery Date, and product details, from the selected HTC Product Order into your new order. You can then modify these details to meet your new order requirements. This is a simple way of repeating an HTC Product Order or using an existing HTC Product Order as the basis for your new order.
To add a new HTC Product Order from scratch, click on the Add Product Order button.
To add a new HTC Product Order by copying forward an existing order, first select the existing order in the HTC Product Orders grid and check that it has the details that you want to copy, the click on
the in-line Edit icon for the order. You will be asked: Do you want to copy the existing data forward? Click OK.
The following details are stored for an HTC Product Order:
Order Number Order Date Delivery arrangement
ABDR Help Guide Page | 55
Delivery address for the order, ie. where should the supplier deliver the order, and any special delivery instructions. Note that for a new order, this defaults to the address of the HTC if the Delivery Arrangement is not Regional Hospital or Other.
Date for delivery of the order Name of the supplier for the product(s) required – note that all products on a single order must be
supplied by the same supplier. Name of the product(s) required and the vial size and quantity of each.
Each Order is assigned a unique Order Number.
When a new Order is saved for the first time, the ABDR asks you if you want to print the HTC Product Order Form. You can choose to print it immediately or at a later time.
A pre-filled HTC Product Order Form can be printed from either the HTC Product Order grid or from the
Print and Report module of the ABDR.
To print an HTC Product Order, first locate the product order in the HTC Product Orders grid, then click on the relevant in-line Print icon. The pre-filled HTC Product Order Form will open as a formatted PDF document.
56 | Page ABDR Help Guide
6 Adverse Events
The Adverse Events module allows you to create, view, edit and delete Adverse Events possibly associated with a treatment/product for a patient at your HTC. You can also view Adverse Events recorded for patients belonging to your HTC even if the Adverse Event did not occur at your HTC.
The Adverse Events grid displays all Adverse Events recorded at a User’s HTC. Each Adverse Event is assigned a unique Adverse Event ID.
To display all details for an Adverse Event, click on the relevant row in the Adverse Events grid.
To edit the details for an Adverse Event, click on the relevant in-line Edit icon in the Adverse Events grid.
To delete an Adverse Event, click on the relevant in-line Delete icon in the Adverse Events grid. You must confirm this action.
The Adverse Events grid can be filtered based on the following criteria:
Adverse Event ID Event Date From Event Date To Event Type Product associated with an Adverse Event.
Click on the Filter Adverse Events button to open the Filter screen. Enter the date range and/or select the Event Type and/or product for the Adverse Events you want to see. Note that the Filter Adverse Events button turns orange if a filter is acting on the Adverse Events grid.
Click on the Clear Filter button to remove the filter acting on the Adverse Events grid.
The following types of Adverse Events affecting a patient should be recorded:
An allergic or acute reaction possibly linked to a treatment administered to the patient. A transfusion transmitted infection possibly linked to a treatment administered to the patient. A malignancy possibly acquired from a treatment administered to the patient. Thrombosis possibly caused by a treatment administered to the patient. The development of an inhibitor possibly caused by a treatment administered to the patient. Death of the patient possibly linked to a treatment administered to the patient. Poor efficacy or other adverse event possibly linked to a treatment administered to the patient.
To record a new Adverse Event for a patient, hover over the Add Adverse Event button and click on the relevant Adverse Event Type from the drop down list. Complete the steps displayed.
Allergic or Acute Reaction
The following fields are stored for an Allergic or Acute Reaction Adverse Event:
Date of the Adverse Event Patient – Use the Select Patient link to search for and select the affected patient. Allergic/Acute Reaction Type – this a multi-select list Indicate if the patient has suffered this type of reaction before
ABDR Help Guide Page | 57
Reaction Outcome Total number of lifetime exposure days to Factor Concentrate The list of products (each product and vial) used by the patient in the 3 months prior to the Adverse
Event – Product name, vial size, batch number of the product/vial, date and time last used, likelihood that the product was associated with the Adverse Event.
Indicate if whole blood was also given to the patient in the 3 months prior to the Adverse Event Comments – optional Attachments – any number of files can be attached to an Adverse Event record.
Transfusion Transmitted Infection
The following fields are stored for a Transfusion Transmitted Infection Adverse Event:
Date of the Adverse Event Patient – Use the Select Patient link to search for and select the affected patient. Type of infection Indicate if the date of the last negative test for the infection is available, and if so, record the date
of this test Record the date of the first positive test for the infection Total number of lifetime exposure days to Factor Concentrate The list of products (each product and vial) used by the patient in the 3 months prior to the Adverse
Event – Product name, vial size, batch number of the product/vial, date and time last used, likelihood that the product was associated with the Adverse Event.
Indicate if whole blood was also given to the patient in the 3 months prior to the Adverse Event Comments – optional Attachments – any number of files can be attached to an Adverse Event record.
Inhibitor Development
The following fields are stored for an Inhibitor Development Adverse Event:
Date of the Adverse Event Patient – Use the Select Patient link to search for and select the affected patient. Indicate if this is the first time that an inhibitor has developed in the patient, and if no, provide
details. Indicate if any previous inhibitor tests have been performed for the patient, and if yes, indicate the
date of the last negative inhibitor test. Record the date of the first positive inhibitor test and the inhibitor titre level Record the date of the second positive inhibitor test and the inhibitor titre level Record the cut-off level for a positive inhibitor test in your HTC Type of assay used Total number of lifetime exposure days to FVIII or FIX concentrate The list of products (each product and vial) used by the patient in the 3 months prior to the Adverse
Event – Product name, vial size, batch number of the product/vial, date and time last used, likelihood that the product was associated with the Adverse Event.
Indicate if whole blood was also given to the patient in the 3 months prior to the Adverse Event Comments – optional Attachments – any number of files can be attached to an Adverse Event record.
58 | Page ABDR Help Guide
Thrombosis
The following fields are stored for a Thrombosis Adverse Event:
Date of the Adverse Event Patient – Use the Select Patient link to search for and select the affected patient. Thrombotic Event Type Indicate if the patient was on prophylaxis treatment when the Event occurred. Indicate if the thrombosis was associated with a CVAD, and is so, the type of CVAD used by the
patient. Indicate if the patient had surgery in the 3 months prior to the Adverse Event, and if so, the type of
surgery and whether thromboprophylaxis was given in relation to the surgery. Other risk factors associated with the patient
o Thrombophilia?o Pregnancy?o Oral Contraceptive Pill?o Hormone Replacement Therapy?o Diabetes?o Hyperlipidaemia?o BMI > 30?o Any personal past history of MI/Stroke/Deep Vein Thrombosis (DVT)/PE?o Any first degree relatives with MI/Stroke?o Any first degree relatives with DVT or PE?o HIV Positive?o On HAART (Highly Active Anti-Retroviral Therapy)?o Smoking Status
The list of products (each product and vial) used by the patient in the 3 months prior to the Adverse Event – Product name, vial size, batch number of the product/vial, date and time last used, likelihood that the product was associated with the Adverse Event.
Indicate if whole blood was also given to the patient in the 3 months prior to the Adverse Event Comments – optional Attachments – any number of files can be attached to an Adverse Event record.
Malignancy
The following fields are stored for a Malignancy Adverse Event:
Date of the Adverse Event Patient – Use the Select Patient link to search for and select the affected patient. Type of malignancy Indicate whether the patient, prior to the Adverse Event, has ever undergone radioactivity
synovectomy Indicate whether the patient, in the 10 years prior to the Adverse Event, received Plasma Derived
Concentrate/FFP/Cryoprecipitate Indicate whether the patient, in the 10 years prior to the Adverse Event, received Recombinant
Concentrate Indicate if the patient was HIV positive at the time of the Adverse Event Indicate if the patient was HBV positive at the time of the Adverse Event Indicate if the patient was HCV positive (PCR positive) at the time of the Adverse Event
ABDR Help Guide Page | 59

The list of products (each product and vial) used by the patient in the 3 months prior to the Adverse Event – Product name, vial size, batch number of the product/vial, date and time last used, likelihood that the product was associated with the Adverse Event.
Indicate if whole blood was also given to the patient in the 3 months prior to the Adverse Event Comments – optional Attachments – any number of files can be attached to an Adverse Event record.
Death
The following fields are stored for an Adverse Event resulting in Death:
Date of the Adverse Event Patient – Use the Select Patient link to search for and select the affected patient. Cause of death Indicate of the cause of death was confirmed by an autopsy Indicate if the patient had an inhibitor present at the time of the death Indicate if the patient was HIV positive at the time of the death Indicate if the patient was HBV positive at the time of the death Indicate if the patient was HCV positive (PCR positive) at the time of the death The list of products (each product and vial) used by the patient in the 3 months prior to the Adverse
Event – Product name, vial size, batch number of the product/vial, date and time last used, likelihood that the product was associated with the Adverse Event.
Indicate if whole blood was also given to the patient in the 3 months prior to the Adverse Event Comments – optional Attachments – any number of files can be attached to an Adverse Event record.
Poor Efficacy/Other Event
The following fields are stored for a Malignancy Adverse Event:
Date of the Adverse Event Patient – Use the Select Patient link to search for and select the affected patient. Type of event – Poor Efficacy or Other The list of products (each product and vial) used by the patient in the 3 months prior to the Adverse
Event – Product name, vial size, batch number of the product/vial, date and time last used, likelihood that the product was associated with the Adverse Event.
Indicate if whole blood was also given to the patient in the 3 months prior to the Adverse Event Comments – optional Attachments – any number of files can be attached to an Adverse Event record.
Attachments
All files attached to an Adverse Event are listed in the Attachments grid within the Adverse Events screen.
Only the following file types can be attached to an Adverse Event:
.DOC, .DOCX files .XLS, .XLSX files .PPT, .PPTX files .JPG, .GIF, .PNG files .TXT files .PDF files.
60 | Page ABDR Help Guide
To add an attachment to an Adverse Event, click on the Add Attachment button to display the Add Attachment screen. Click on the Select button and locate the file to be uploaded in your file system. Click the Upload Attachment button to upload the file into the ABDR.
To open an attachment, click on the relevant in-line Paperclip icon in the Attachments grid.
To delete an attachment from an Adverse Event, click on the relevant in-line Delete icon in the Attachments grid. You must confirm this action.
ABDR Help Guide Page | 61

7 Administration
The options available in the Administration area of the ABDR include the following functions:
Patient Card Requests – processing of plastic patient cards; Product Management – adding and (de)activating products; editing product details; maintaining
product unit costs; maintaining product vial sizes. Supplier Management – adding and (de)activating suppliers; editing supplier details; maintaining
the list of products supplied by the supplier. User Management – adding and (de)activating ABDR Users; editing the Roles and HTCs that a user
can access; initiating a password reset for a User. Site Management – adding and (de)activating HTCs; editing HTC details. IP Address Management – maintaining the list of static IP Addresses from which users can log on to
the ABDR without requiring 2-factor authorisation. ABDR News Management – editing the ABDR National News content. Local News Management – editing the ABDR Local News content for an HTC. Reference Data Management – maintaining the ABDR lists of values. HTC Access Request Management – Approving or rejecting a request for access to an HTC from a
User requesting access to an HTC-specific role. NBA Access Request Management – Approving or rejecting a request for access to the ABDR from a
User. Help Management – adding and updating Help documents on the ABDR Help page. MyABDR Access Request Management – “Actioning” MyABDR user account requests to either
accept, reject or reassign requests to linkto an ABDR patient. MyABDR User Account Management – Managing MyABDR user accounts, resetting passwords,
deactivating patients or adding patients to a user account. Contact details of the MyABDR user can also be viewd but cannot be edited..
62 | Page ABDR Help Guide
7.1 Patient Card Requests
The Patient Card Requests grid displays requests submitted from HTCs to ABDR Support for the production of a plastic patient card.
If a User is logged on as an ABDR Support user, the Patient Card Requests grid is, by default, filtered to list all patient card requests with a status of Requested. This facilitates the ABDR Support user to work through the list of requested patient cards, produce them and dispatch them to an HTC, then mark them as Sent to HTC.
If a User is logged on at an HTC, the Patient Card Requests grid is, by default, filtered to list all patient card requests with a status of Sent to HTC. This facilitates an HTC User to receipt a batch of patient cards received from ABDR Support.
The Patient Card Requests grid can be filtered to display requests at different statuses or from different HTCs (ABDR Support Users only).
Click on the Filter Card Requests button to open the Filter screen. Enter the Status and/or select the HTC (if displayed) for the requests you want to see. Note that the Filter Card Requests button turns orange if a filter is acting on the Patient Card Requests grid.
Click on the Clear Filter button to remove the filter acting on the Patient Card Requests grid.
Processing a Patient Card Request (ABDR Support users only)
To process a patient card request with the status of Requested, the following tasks need to be performed:
1. Note the Card Request ID.2. Verify that the information that is to be printed on the card appears to be correct, ie. there are
no obvious spelling mistakes or erroneous content.3. If there appears to be a problem with the card information, reject the card.
a. Click on the relevant in-line Process Patient card icon in the Patient Card Requests grid.b. Enter a comment for the HTC explaining the reason for the rejected request.
c. Click on the Reject Request button. You will be asked to confirm this action. The status of the request will be set to Rejected by ABDR Support.
4. If the information on the card appears to be correct, produce the card.a. Note the number of cards to be produced.b. Note any special instructions entered by the HTC for the attention of the ABDR Support
team.c. Produce the patient card on the card machine.d. Verify that the information on the card has been printed correctly and that there are no
flaws in the produced card.e. Dispatch the card to the HTC.f. Click on the relevant in-line Process Patient card icon in the Patient Card Requests grid.g. Enter a comment for the HTC if required.
h. Click on the Mark as Sent to HTC button. You will be asked to confirm this action. The status of the request will be set to Sent to HTC.
If the status of the card is incorrectly set, click on the relevant in-line Edit icon in the Patient Card Requests grid to amend the status of the request.
ABDR Help Guide Page | 63
Receipting a Patient Card Request (HTC-based users only)
Once a patient card has been received from ABDR Support, the status of the Card request must be changed to Received by HTC.
To mark a patient card as received by the HTC, click on the relevant in-line Mark Patient Card as Received icon in the Patient Card Requests grid. You must confirm this action.
Note that a patient card can only be marked as received if the status of the request is Sent to HTC. Marking the card as received changes the status of the request to Received by HTC.
Delivering/Destroying a Patient Card (HTC-based users only)
A patient card remains with the HTC until it is either delivered to the patient or disposed of (destroyed) by the HTC. A patient card might be delivered to a patient either by the HTC posting the Card to the Patient, or by giving it to them at their next HTC visit.
To mark a patient card as delivered to the patient or destroyed by the HTC, click on the relevant in-line Mark Patient Card as Delivered/Destroyed icon in the Patient Card Requests grid.
Enter the date that the Card was delivered or destroyed and click on the relevant
button.
Note that a patient card can only be marked as delivered or destroyed if the status of the request is Received by HTC. Marking the card as delivered changes the status of the request to Delivered to Patient. Marking the card as destroyed changes the status of the request to Destroyed by HTC.
64 | Page ABDR Help Guide
7.2 Product Management
The Product Management grid displays all products used in the ABDR.
The following information is stored for a product:
Name of the product Type of product Product storage requirements for the product Shelf life of the product Default measurement units used when administering the product Whether the product is allowed to be ordered via an HTC Product Order or Patient Product Order. Date that the product first became useable in the ABDR. Date that the product ceased being useable in the ABDR, if applicable. History of unit costs for the product – effective from date and unit cost (to 4 decimal places). List of vial sizes available with this product – the vial size (in the specified measurement unit) and
the unique identifier for this product vial size combination.
To add a new product, click on the Add Product button.
To display all details for a product, click on the relevant row in the Product Management grid.
To edit the details for a product, click on the relevant in-line Edit icon in the Product Management grid.
To delete a product, click on the relevant in-line Delete icon in the Product Management grid. You must confirm this action.
Note that the product is not actually deleted from the ABDR as it is likely that Orders and Treatments have been recorded for the product. It is however deactivated, meaning that new Orders and Treatments cannot use this product.
To reactivate a deleted product, click on the relevant in-line Reactivate icon in the Product Management grid. You must confirm this action.
Note that a product that has been deactivated cannot be edited.
ABDR Help Guide Page | 65
7.3 Supplier Management
The Supplier Management grid displays all suppliers used in the ABDR.
The following information is stored for a supplier:
Name of the supplier Address Line 1, 2 and 3 of the supplier’s address Suburb, state, postcode and country of the supplier’s address Contact person for the supplier – title, given name, initial, family name Contact phone number, fax number and email address for the supplier List of products supplied by the supplier.
To add a new supplier, click on the Add Supplier button.
To display all details for a supplier, click on the relevant row in the Supplier Management grid.
To edit the details for a supplier, click on the relevant in-line Edit icon in the Supplier Management grid.
To delete a supplier, click on the relevant in-line Delete icon in the Supplier Management grid. You must confirm this action.
Note that the supplier is not actually deleted from the ABDR as it is likely that Orders have been recorded for the supplier. It is however deactivated, meaning that new Orders cannot use this supplier.
To reactivate a deleted supplier, click on the relevant in-line Reactivate icon in the Supplier Management grid. You must confirm this action.
Note that a supplier that has been deactivated cannot be edited.
66 | Page ABDR Help Guide
7.4 User Management
User Management facilitates managing the list Users allowed to access the ABDR, as well as their User Roles and HTCs. Depending on your own User Role, you will be able to view either:
only Users in your HTC, or all Users in the ABDR.
The User Management screen lists the following details for each User:
User Name, ie. the username that a User uses to log in to the ABDR Surname and Given Name of the user Each of the Role and HTC combinations that a User has.
To add a new User, click on the Add User button. Note that to add a new User to the ABDR, the User must already have a BloodPortal Account.
To edit the Roles and/or HTCs for a User, click on the relevant in-line Edit icon in the User Management grid.
Note that each User must have a default Role and HTC combination – this is used as the default on Role and HTC that the User is assigned when they log on to the ABDR.
To delete a User, click on the relevant in-line Delete icon in the User Management grid. You must confirm this action.
Note that the User is not actually deleted from the ABDR. They are however deactivated, meaning that the User cannot log on to the ABDR.
To reactivate a deleted User, click on the relevant in-line Reactivate icon in the User Management grid. You must confirm this action.
To reset the password for a User, click on the relevant in-line Reset Password link in the User Management grid. You must confirm this action.
The User whose password will be reset will be sent an automated email with their new password details.
ABDR Help Guide Page | 67
7.5 Site Management
The Site Management grid displays all HTCs used in the ABDR.
The following information is stored for a site:
A unique ABDR HTC identifier Site name – the name of the Haemophilia Clinic Hospital name – the name of the hospital where the HTC is located MRN/URN label – the characters used to prefix the medical record number at the HTC, eg. MRN,
UR, URN, etc. Type of site for the HTC – Adult and/or Paediatric. Address Line 1, 2 and 3 of the HTC’s address Suburb, state, postcode and country of the HTC’s address Phone number, fax number, email address for the HTC On-Call Haematologist (After Hours) Phone Number for the HTC.
To add a new site, click on the Add Site button.
To display all details for a site, click on the relevant row in the Site Management grid.
To edit the details for a site, click on the relevant in-line Edit icon in the Site Management grid.
To delete a site, click on the relevant in-line Delete icon in the Site Management grid. You must confirm this action.
Note that a site cannot be deleted if there are any patients associated with that site or if there are any Users whose default User Role is associated with that site.
To reactivate a deleted site, click on the relevant in-line Reactivate icon in the Site Management grid. You must confirm this action.
Note that a site that has been deactivated cannot be edited.
68 | Page ABDR Help Guide
7.6 IP Address Management
Access to the ABDR requires either 1-factor or 2-factor authorisation:
A User that attempts to access the ABDR via a device with an authorised IP Address is only required to log on to the ABDR using their BloodPortal Account. This is 1-factor authorisation. Typically, all Users that access the ABDR locally or from an HTC will be using an authorised IP Address and will only require 1-factor authorisation.
A User that attempts to access the ABDR via a device for which the IP Address is unauthorised is required to perform RSA security validation as well as log on to the ABDR using their BloodPortal Account. This is 2-factor authorisation. 2-factor authorisation is required by Users that need to access the ABDR away from their usual workplace, eg. from home or whilst travelling. A User that requires this sort of access needs to be issued with an RSA key by ABDR Support.
The IP Address Management function of the ABDR provides the facility to store IP Addresses that have been authorised to access the ABDR, thereby permitting all Users who attempt to access the ABDR from such an IP Address to only require 1-factor authorisation.
Each IP Address entry requires a range of IP Addresses to be recorded – this can be the same value if only a single IP Address is required. An HTC may have a range of IP Addresses defined for accessing the internet.
The following information is stored for an IP Address entry:
Lower Boundary IP Address value Upper Boundary IP Address value HTC Name and/or Comment - this explains the HTC or workplace for which the IP Address range
applies.
To add a new IP Address Range, click on the Add IP Address Range button.
To edit the details for an IP Address Range, click on the relevant in-line Edit icon in the IP Address Management grid.
To delete an IP Address Range, click on the relevant in-line Delete icon in the IP Address Management grid. You must confirm this action.
ABDR Help Guide Page | 69
7.7 ABDR News Management
ABDR News Management allows you to change the National News that is displayed to all ABDR Users on the ABDR Home Page.
The Update National News screen is used to change the News text.
To edit the News text, make changes to the displayed text as required and format the text using the HTML toolbar.
Click the Preview button to review the text and layout as it will appear on the ABDR Home Page.
If you want to reverse all unsaved changes, click on the Reset button.
When you are happy with the changes, click on the Save button.
Warning As soon as you save the National News, it will be visible to all Users of the ABDR.
70 | Page ABDR Help Guide

7.8 Local News Management
Local News Management allows you to change the HTC specific News that is displayed on the ABDR Home for Users at a particular HTC.
The Update Local News screen is used to change the News text.
To edit the News text, make changes to the displayed text as required and format the text using the HTML toolbar.
Click the Preview button to review the text and layout as it will appear on the ABDR Home Page.
If you want to reverse all unsaved changes, click on the Reset button.
When you are happy with the changes, click on the Save button.
Warning As soon as you save the Local News, it will be visible to all Users of the ABDR at the relevant HTC.
Note that when you save the Local News, an email is automatically generated and sent to all Data Managers and HTC Directors in the relevant HTC, as well as the ABDR Administrator.
ABDR Help Guide Page | 71
7.9 Reference Data Management
Reference Data Management provides the facility to maintain the ABDR lists of values. The following functionality is provided:
A new value can be added to an existing list An existing value can be edited to change the display name and/or description The display/sort order of the list can be changed. Note that lists always display in sort order, then
alphabetical-within-sort-order order. A list value can be identified as the default value for a list. A list value can be deactivated if it should not be available for selection any longer. A list value can be reactivated if required.
To display all values in a Reference list, select the relevant Reference Type. All existing list values will be displayed
To add a new value to a Reference list, first display the relevant Reference list, then click on the Add
… button, eg. . Enter the Code, Name, Description, Sort Order and Is Default indicator and click Save.
To edit a Reference list value, first display the relevant Reference list, then click on the relevant in-
line Edit icon for the value to be edited. Make the necessary changes and click Save.
To delete a Reference list value, first display the relevant Reference list, then click on the relevant
in-line Delete icon for the value to be deleted. You must confirm this action.
To reactivate a deleted Reference list value, first display the relevant Reference list, then click on the relevant in-line Reactivate icon. You must confirm this action.
72 | Page ABDR Help Guide
7.10 HTC Access Request Management
HTC Access Request Management provides the facility to process an Access Request from a user wanting to access ABDR data at a specific HTC.
An Access Request for a User Role at an HTC can only be approved/rejected by an existing ABDR User that has the authority to process requests at the specified HTC. This is typically the HTC’s Director.
Following approval by the HTC, the Access Request will be sent to the NBA delegated approver for the next step in the approval process.
The HTC Access Requests grid is, by default, filtered to list all Access Requests with a status of Pending. This facilitates an HTC Access Request Approver to process all Access Requests awaiting their action.
The HTC Access Requests grid can be filtered to display requests at different statuses or from different users.
Click on the Filter Access Requests button to open the Filter screen. Enter the Status and/or user details for the requests you want to see. Note that the Filter Access Requests button turns orange if a filter is acting on the HTC Access Requests grid.
Click on the Clear Filter button to remove the filter acting on the HTC Access Requests grid.
Actioning an Access Request
To action an Access Request, click on the relevant inline Action link in the HTC Access Requests grid. The Action Access Request screen will be displayed.
Review the request details and select an outcome – Approved or Rejected. If necessary, enter a comment regarding your decision.
If you reject the Access Request, the requester is sent a Rejection email with the comment you have recorded.
If you approve the Access Request, the request will next be considered by the NBA Delegate. Once processed by the NBA, the user will receive an email outlining the outcome of their request. If the request is rejected, the relevant HTC Director(s) will also receive an email outlining the outcome.
ABDR Help Guide Page | 73
7.11 NBA Access Request Management
All requests for user access to the ABDR must be approved by the NBA Delegate.
NBA Access Request Management provides the facility to process an Access Request from a user wanting to access the ABDR. If the Access Request is for a User Role that is specific to an HTC, the Access Request must first be approved by the relevant HTC Access Request Approver.
The NBA Access Requests grid is, by default, filtered to list all Access Requests with a status of Pending. This facilitates an NBA Access Request Approver to process all Access Requests awaiting their action.
The NBA Access Requests grid can be filtered to display requests at different statuses or from different users.
Click on the Filter Access Requests button to open the Filter screen. Enter the Status and/or user details for the requests you want to see. Note that the Filter Access Requests button turns orange if a filter is acting on the NBA Access Requests grid.
Click on the Clear Filter button to remove the filter acting on the NBA Access Requests grid.
Actioning an Access Request
To action an Access Request, click on the relevant inline Action link in the NBA Access Requests grid. The Action Access Request screen will be displayed.
Review the request details and select an outcome – Approved or Rejected. If necessary, enter a comment regarding your decision.
The user is sent an email advising them of the outcome of their request, including any comment you have recorded. If the request has been rejected and the request was for an HTC specific role, the relevant HTC Director(s) will also receive an email outlining the outcome.
74 | Page ABDR Help Guide

7.12 Help Management
The ABDR Help page displays a range of Help documents. The Help Management function allows documents to be added and removed from this page, and for new versions of documents to be uploaded.
The Help Documents grid
The following information is stored for a Help document:
Title of the Help document Description for the Help document Sort Order – controls the display order of documents on the Help page Help File – the source file for the Help document
To add a new Help document, click on the Add Help File button.
To change the title, description or display order of the Help document on the ABDR Help page, click
on the relevant in-line Edit icon in the Help Documents grid.
To upload a new version of a Help document, click on the relevant Upload New File link in the Help Documents grid.
To remove a Help document from the ABDR Help Page, click on the relevant in-line Delete icon in the Help documents grid. You must confirm this action.
ABDR Help Guide Page | 75

7.13 MyABDR Access Request Management
The MyABDR access request management page gives users with appropriate access to action requests as they come through as well as being able to filter access requests by status .
MyABDR users need to submit an access request for each ABDR patient they wish to access through the MyABDR application. These requests are then actioned by HTC staff by either accepting, rejecting or reassigning each request after it has been assessed, taking relationship to HTC, relationship to patient and patient privacy (consent where required) into consideration.
The MyABDR Access Request page defaults to requests with a status of Pending which are displayed with oldest date first.
To action a request the administrator clicks on on the left of the request. Select the appropriate patient displayed in search results. If there is no match on patient details
supplied, the user can update the information and search again. Confirm the information supplied is correct and that the requesting user is known to the patient
and if necessary to obtain consent from the patient where the requesting user is not known to the HTC. Users are encouraged to enter pertinent details into the ‘Notes’ field when approving requests.
Click “approve” to complete the request.
Only the Patients Primary HTC can approve MyABDR requests, click on “reassign to primary HTC” to reallocate the request.
If the individual seeking access to MyABDR is not known to the HTC and the patient has not provided consent for them to their access their record, click on “reject”. If the individual’s circumstances change at a later date, or the request was rejected in error the individual must submit another request.
If more information is required before the request can be actioned click on “cancel” to return to the MyABDR Access Request page and return to the request at a later date.
76 | Page ABDR Help Guide
7.14 MyABDR User Account Management
The MyABDR user account management screen is for users with appropriate access to reset passwords, search for, add patients to and remove patients from for MyABDR users.
To Search for User Accounts:
Search for the MyABDR User account using the parameters under “search users”. Patient’s or MyABDR Account holder’s details can be used in the search.
The ‘Include MyABDR Users associated to my HTC’ will be checked when the page is first displayed, uncheck it to find other users (similar to national patient search) who do not currently have access to patients associated to your HTC.
To Reset a MyABDR User Account Password:
In the Search Results grid, click on the ‘Reset password’ link to generate a temporary password.
Click to confirm you know the identity of the user and that they will receive the temporary password via the nominated contact details.
If you cannot guarantee the users identity click and instruct the user to call 13 000 BLOOD (13 000 25663) for support or email [email protected]
To add a patient to an exisiting MyABDR user account:
In the Search Results grid, click on the Edit icon to access the users record.
Under the heading “Associated Patients” click to enter patient details in the Find and Select Patient section.
Click on to find the requested patient, once the patient has been located click. on the patient to select them.
Select the appropriate ‘Relationship to patient’ value using the drop down menu add any notes to
capture any consent requirements that may be relevant, then click and confirm the link between MyABDR User and Patient is correct.
The new patient will be displayed in the “Associated Patients secton for the Users.
To deactivate (remove) an existing patient for a MyABDR User account:
Click the icon on the right of the patient record.
Click on to confirm access to the patient should be removed.
IMPORTANT NOTE: ABDR users cannot edit MyABDR user account details, the MyABDR user must log on to the MyABDR Web Application to edit their own details. ABDR users are limited to managing the relationship between MyABDR Users and ABDR Primary Patients at their HTC.
ABDR Help Guide Page | 77
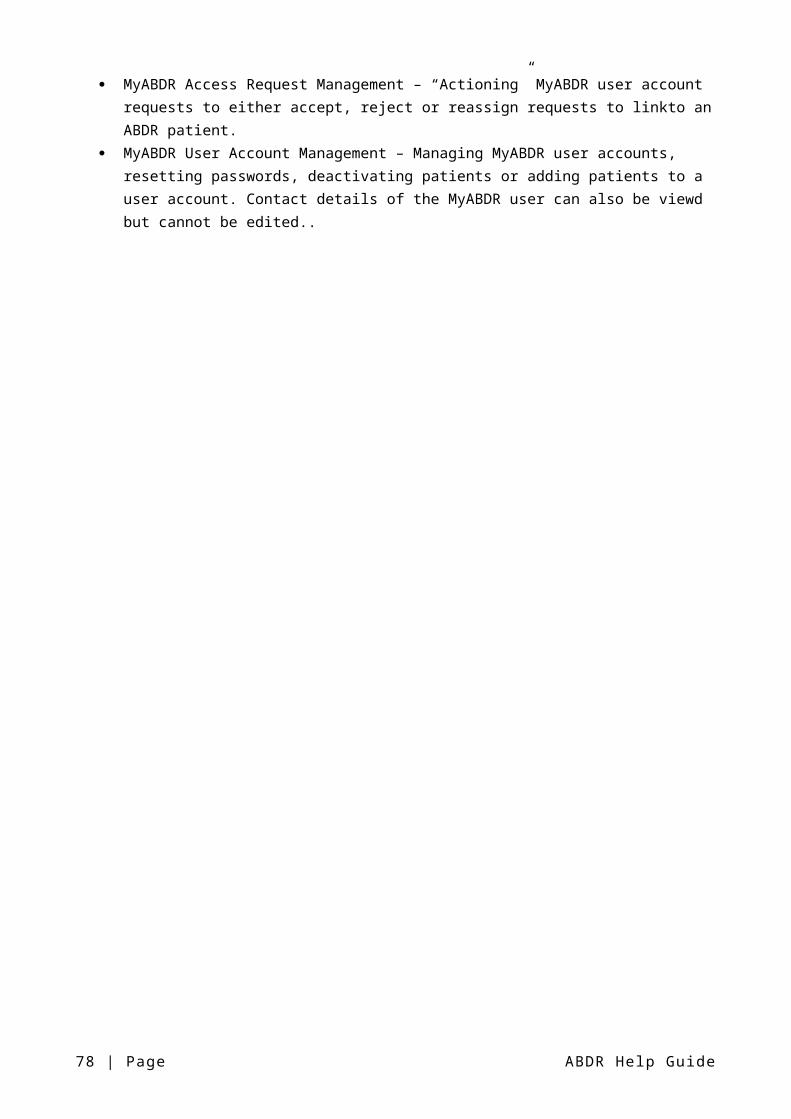
8 Reports
The ABDR Reports suite is accessed from the Print and Report button on the ABDR menu.
To run a report, click on the report name link on the Print and Report screen. The selection criteria screen for the selected report will be displayed.
When a report is generated, the report is displayed in the Report Viewer its own Browser window. Note that the ABDR Session Timer keeps counting down when you are looking at a report.
The Report Viewer provides the following functions:
Paging forwards and backwards through the report. Returning to previous/upper level report (for drill-down reports only). Zooming, ie. changing the display size of the report in the Report Viewer. Searching for data displayed in the report. Exporting the report output to PDF, Word or Excel. Refreshing the data displayed in the report. Some reports also allow you to change the report selection criteria directly from the Report Viewer,
eg. changing the Month and Year criteria. If you change the report criteria, you need to click on the View Report button to re-run the report.
To export a report from the Report Viewer, click on the Export icon and choose the format required. Reports can be exported to a PDF document, MS Word document, or MS Excel document. Each report will be best suited to one of these formats. Some reports open directly as PDF documents.
To print a report, first run the report and then export it to PDF, Word or Excel as required. You can print the report from any of these applications.
78 | Page ABDR Help Guide
8.1 Patient Reports
8.1.1 Temporary Patient Card
A temporary patient card can be provided to a patient by an HTC in lieu of a plastic patient card, typically until a requested plastic patient card has been made and is available to be given to the patient.
A patient card is provided to a patient so that they can present it at a non-HTC Hospital/GPs if they require a treatment to be administered.
The temporary patient card displays the following information (the same information as on the plastic patient card):
Name and phone numbers of the issuing HTC Patient’s name, date of birth, MRN of the patient at the issuing HTC and IHI (Individual Healthcare
Identifier) of the patient, if recorded Each Bleeding Disorder recorded for the patient and its Severity, and Base Line Factor Level Latest Inhibitor Status of the patient, if recorded Product(s) (from the patient’s Treatment Plan) that can be used for a treatment. If no regimen has
been recorded on the patient’s Treatment Plan, the Product field will display Refer to Haematologist
Notes directed to the clinician that help inform the clinician of the patient’s condition and provide them with the necessary information required to correctly administer a treatment to the patient.
Card issue date.
The selection criteria for this report are:
ADBR ID or MRN
If a patient is currently selected in the ABDR, then the ABDR ID field will default to this patient.
Note that the entered ABDR ID/MRN must be for a primary or shared patient at your HTC.
ABDR Help Guide Page | 79
8.1.2 Patient Take Home Sheet
The Patient Take Home Sheet is used to provide a patient with a print out of their Treatment Plan Regimen(s). It details the Treatment Plan Effective Date and the product(s), dosage and treatment frequency for each regimen, as well as any special instructions for the patient regarding their Treatment Plan.
A new Take Home Sheet should be given to the patient whenever their Treatment Plan is changed so that their have this information for reference.
The selection criteria for this report are:
ADBR ID or MRN
If a patient is currently selected in the ABDR, then the ABDR ID field will default to this patient.
Note that the entered ABDR ID/MRN must be for a primary or shared patient at your HTC.
80 | Page ABDR Help Guide

8.1.3 Patient Dashboard Report
The Patient Dashboard report provides a snapshot of data for a patient at a particular point in time. It displays the following information:
Core patient data – Name, Date of Birth, Country of Birth, etc. Each Bleeding Disorder of the patient at the specified reporting date. Graph of fiscal YTD (relevant to the specified reporting date) planned versus actual product usage
over the previous 24 months. Graph of patient measurements (Weight and Height) changes for the patient. Graph of planned product usage (previous 24 months + 6 future months from specified reporting
date against actual product usage (previous 24 months prior to specified reporting date) for each product prescribed to the patient (from their relevant Treatment Plans) and from their Patient Product Orders and Treatments.
Indicators over the previous 24 months prior to the specified reporting date when key changes occurred to the patient, ie. a Weight change, a Treatment Plan change, an Inhibitor Status change
Indicators of all Interactions recorded in the 24 months prior to the specified reporting date Graph of Interaction counts recorded in the 24 months prior to the specified reporting date Listing of all Interactions (including the Interaction summary data) recorded in the 24 months prior
to the specified reporting date
The selection criteria for this report are:
ABDR ID – defaults to the currently selected patient, if applicable. Month and Year – defaults to the current month and year.
Note that you can only generate the Patient Dashboard report for a primary or shared patient at your HTC.
ABDR Help Guide Page | 81
8.2 HTC Reports
8.2.1 Patient Product Orders Report
The Patient Product Orders Report provides a listing of Patient Products Orders for a Patient, HTC or nationally.
The selection criteria for this report are:
HTC – defaults to the User’s HTC and cannot be changed. Order Date From Order Date To Product ABDR ID – optional – defaults to the currently selected patient, if applicable. (This field is not
available to all User Roles.)
Note that if you specify an ABDR ID, the patient must be a primary or shared patient at your HTC.
Note that if no ABDR ID is specified, the report will display all Patient Product Orders in the specified date range that were recorded at your HTC, however if you do specify an ABDR ID, the report will display all Patient Product Orders in the specified date range for the patient regardless of the HTC where the interaction was recorded.
The following information is included in this report for each Order:
State of Supply Supplying HTC ABDR ID Age (at Order Date) Gender State of Residence Australian Resident Status Country of Birth Each Bleeding Disorder for the patient at the Order Date
o Bleeding Disordero Severity
Regimen(s) for the patient current at the Order Date Order Date Order Number Order Reason On Demand Reason (if applicable) Supplier Product Supplier Product Identifier Vial Size Units Number of Vials Ordered Total Units Ordered Cost per Unit Total Cost of Order Item
82 | Page ABDR Help Guide
8.2.2 Current Patients Report
The Current Patients Report provides a listing of all Active patients, both primary and shared, at your HTC at the time that the report is generated, ie. Inactive and deceased patients are not included in this report.
This report is available in two versions:
Full Version – provides a full range of details about each patient. This format is suitable for on-screen analysis and exporting to MS Excel.
Print Version – provides a cut-down list of details about each patient (indicated with a # below). This format is suitable for on-screen analysis and printing on A4 paper.
The selection criteria for this report are:
HTC – defaults to your HTC and cannot be changed. Layout – Full Version or Print Version.
The following information is included in this report for each patient:
ABDR ID # MRN/URN at your HTC # Family Name # Given Name # Date of Birth # Age (now) # Gender # Residential State # Primary HTC # Each Shared HTC # Each Bleeding Disorder
o Date of Diagnosiso Bleeding Disordero Severity
Weight (latest) Height (latest) Treatment Plan Effective Date (current) CVAD Present indicator CVAD Type (if applicable) Each Regimen in the current Treatment Plan
o Regimen Typeo Producto Frequencyo Doseo Home Therapy indicatoro Home Delivery indicator
ABDR Help Guide Page | 83
8.2.3 Physiotherapy Sessions Report
The Physiotherapy Sessions Report
The selection criteria for this report are:
Session Date From Session Date To ABDR ID – optional – defaults to the currently selected patient, if applicable.
Note that if you specify an ABDR ID, the patient must be a primary or shared patient at your HTC.
Note, if no ABDR ID is specified, the report will display all Physiotherapy Session interactions in the specified date range that were recorded at your HTC, however if you do specify an ABDR ID, the report will display all Physiotherapy Session interactions in the specified date range for the patient regardless of the HTC where the interaction was recorded.
The following information is included in this report for each physiotherapy session:
Session Date ABDR ID MRN/URN of the patient at the HTC where the Session was recorded Family Name Given Name Date of Birth Age (at Session Date) Gender Session Location Session Reason(s) Session Treatment(s) Joint(s) Treated Muscle(s) Treated HJHS (if applicable) Recorded at HTC – indicates which HTC recorded the Session
84 | Page ABDR Help Guide
8.2.4 Treatments and Bleeds Report
The Treatment and Bleeds Report provides a listing of Treatments, with associated Bleed data, administered at an HTC or for a patient and includes treatments and bleeds recorded in MyABDR.
The selection criteria for this report are:
Treatment Date From Treatment Date To ABDR ID – optional – defaults to the currently selected patient, if applicable.
Note that if you specify an ABDR ID, the patient must be a primary or shared patient at your HTC.
Note, if no ABDR ID is specified, the report will display all Treatment interactions in the specified date range that were recorded at your HTC, however if you do specify an ABDR ID, the report will display all Treatment interactions in the specified date range for the patient regardless of the HTC where the interaction was recorded. MyABDR Treatments will be included regardless of whether the patient is a Primary or Shared patient at the HTC.
Report header includes the caveat: Total Cost is calculated based on cost per unit for product at date of treatment NOT date of order (which is the date Suppliers use to invoice the NBA). When a change to cost of product occurs care should be taken if this report is used to reconcile product costs.
The following information is included in this report for each Treatment:
Treatment Date ABDR ID MRN/URN of the patient at the HTC where the Treatment was administered Family Name Given Name Date of Birth Age (at Treatment Date) Gender Weight (at Treatment Date) Treatment Reason Administration Place (N/A for MyABDR Treatments) Product Source (will display MyABDR Inventory for MyABDR treatments) Product Total Dose Cost Per Unit ($) Total Cost ($) Bleed Event Date (if applicable) Bleed Location (if applicable) Bleed Cause (if applicable) Base Interaction Summary (ABDR Treatment Inteactions only; N/A for MyABDR Treatments) Base InteractionID (ABDR Treatment Inteactions only; N/A for MyABDR Treatments) BleedID/SurgeryID (MyABDR Treatment Records only) Recorded at HTC – indicates which HTC administered the Treatment (will display MyABDR for
MyABDR treatments)
ABDR Help Guide Page | 85
8.2.5 Patient Details Extract
The Patient Details Extract provides a listing of all patients, both Active and Inactive (but not deceased), for one or all HTCs, showing fields useful for contacting patients and for mail merging.
The selection criteria for this report are:
HTC – defaults to your HTC and cannot be changed.
The following information is included in this report for each Patient:
ABDR ID MRN/URN Status – Active or Inactive Title Family Name Given Name Second Given Name Date of Birth Age (now) Gender Address Line 1 Address Line 2 Address Line 3 Suburb Residential State Postcode Country Home Phone Work Phone Mobile Phone Home Email Work Email Mother Father Each Bleeding Disorder
o Date of Diagnosiso Bleeding Disordero Severity
Primary HTC
86 | Page ABDR Help Guide
8.2.6 Patient Data Integrity Reports
The Patient Data Integrity Reports check patient details and report patients for which data may be missing, possibly erroneous or requires updating. These reports help you to keep your data accurate and up-to-date.
Note that not all reports may be relevant for all HTCs.
You can choose to check the data in your HTC for any of the following conditions:
Potential duplicate patient records. Patient Diagnosis details, includes:
o Patients with no Bleeding Disorder recorded.o Patients with more than one Bleeding Disorder recorded, and hence possibly erroneous.
Patient Treatment Plan details, includes:o Patients with no Treatment Plan recorded.o Patients whose latest Treatment Plan was modified more than 12 months ago.
Patient Measurement details, includes:o Patients with no Weight recorded.o Patients whose latest Weight is greater than 200kg, and hence possibly erroneous.
Patient Haemophilia Clinic Review details, includes:o Patients with no Haemophilia Clinic Review interaction recorded.o Patients whose latest Haemophilia Clinic Review occurred more than 12 months ago.
Patients who were admitted to Hospital more than 1 month ago and no Discharge Date has been recorded.
Patients who receive Product via Home Delivery whose Annual Home Delivery Review Date was more than 12 months ago.
Patients with a CVAD whose last CVAD Inspection was performed more than 12 months ago (as recorded in a Haemophilia Clinic Review interaction).
The selection criteria for this report are:
HTC – defaults to your HTC and cannot be changed.
The following information is included in this report for each Patient:
ABDR ID MRN/URN Family Name Given Name Date of Birth Gender Primary HTC Comment – an explanation of the data integrity issue.
ABDR Help Guide Page | 87
8.2.7 Patient Distribution Report
The Patient Distribution Report graphs the number of current patients (Active and not deceased) by:
Residential Postcode – displayed by geographical distribution on a map of Australiao By Severity
Gender by Age Group Residential State by Age Group Bleeding Disorder Severity by Age Group Treatment Plan Regimen Type by Age Group
o By Product Primary HTC by Age Group
o By Gender Bleeding Disorder by Age Group
o By Severityo By Gender
Ethnicity by Age Groupo By Gender.
Depending on your own User Role, you will be able to view patient distribution by either:
only patients in your HTC, or all patients in the ABDR.
Additionally, you can filter the report to only include patients with specific bleeding disorders.
The selection criteria for this report are:
HTC – defaults to your HTC and cannot be changed (depending on your User Role). Bleeding Disorder – multi selection – all or specific.
88 | Page ABDR Help Guide
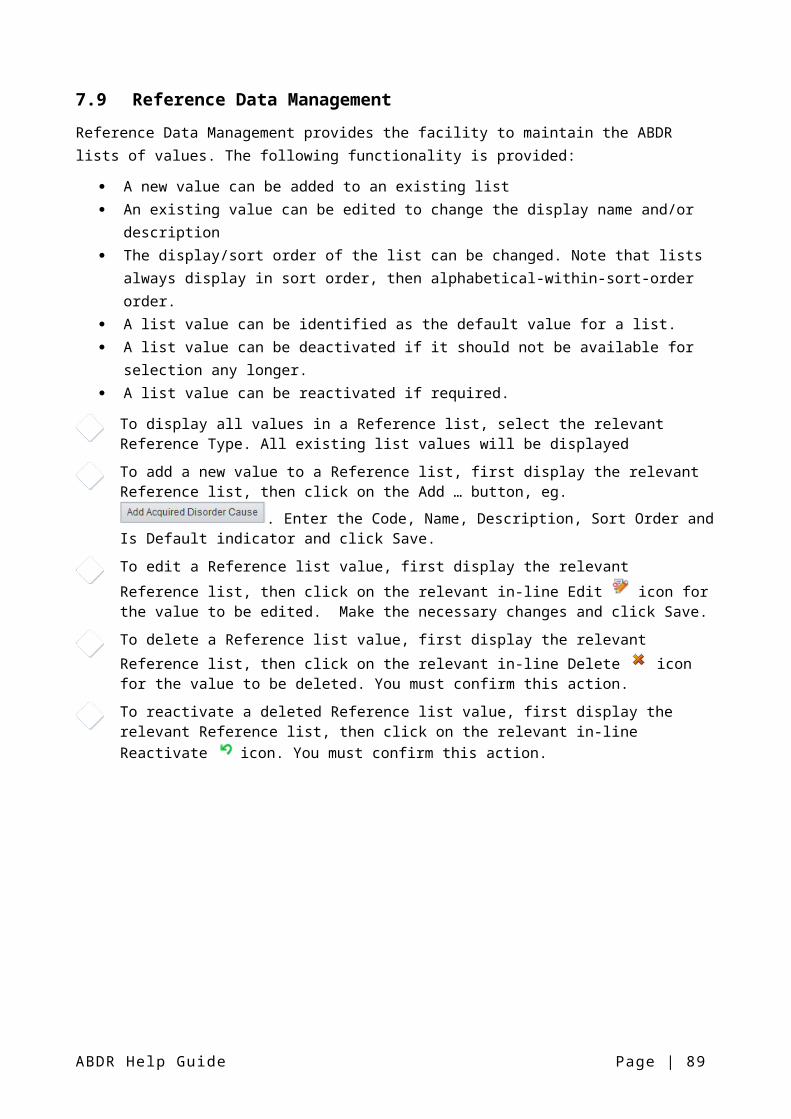
8.2.8 HTC Dashboard Report
The HTC Dashboard report provides a snapshot of an HTC at a particular point in time. It displays the following information:
Patient Types Patient Transitions Interactions Top 10 Products Ordered
The HTC Dashboard report can drill down to the following sub-reports:
HTC Patient Type Reporto HTC Patient Type Data Extract
HTC Patient Transition HTC Patient Interaction Report, with further drill down to:
o HTC Patient Interaction Data Extract HTC Product Order Summary Report
The selection criteria for this report are:
HTC – defaults to your HTC and cannot be changed. Month and Year – defaults to the current month and year.
ABDR Help Guide Page | 89
8.2.9 National Product Use Report
The National Product Use Report lists all patient product usage, nationally, for a selected date range. Patient product usage is determined from Patient Product Orders plus Treatments from HTC Stock.
This report is used to load data into the Big Red data warehouse.
The selection criteria for this report are:
From Date To Date
The following information is included in this report for each patient product usage instance:
State of Supply ABDR ID Age (at product usage date) Weight (at product usage date) Gender Australian Resident Status Country of Birth Each Bleeding Disorder for the patient at the product usage date
o Diagnosiso Severity
Inhibitor Status Treatment Regimen(s) for the patient at the product usage date Supplier Product Supplier Product Identifier Vial Size Number of Vials Order Number/Stock Purpose On Demand Reason Order/Usage Date State of Residence Supplying HTC Total Vial or Usage Quantity Units Cost per Unit Total Cost
90 | Page ABDR Help Guide
8.2.10 Virus Report
The Virus Report includes provides a listing of all Virus records for all Primary and Shared patients at a selected HTC. The report can be optionally filtered for a single Virus Type and/or a single patient, and for viruses recorded in a specific date range.
The selection criteria for this report are:
HTC From Viral Status Date – optional To Viral Status Date – optional Virus Type – optional – if blank, Virus records of all types will be included in the report. ABDR ID – optional – if entered, only Virus records for the specified patient will be included in the
report.
Note that if you specify an ABDR ID, the patient must be a primary or shared patient at your HTC.
The following information is included in this report for each Virus record satisfying the selection criteria:
ABDR ID of the patient MRN/URN of the patient Family Name of the patient Given Name of the patient Date of Birth of the patient Deceased indicator – Yes/No Virus Type for the record Viral Status Date Date of Immunisation – for HAV, HBV and Other Virus records only Booster Date – for HBV and Other Virus records only Viral Loads – for HBV, HCV, HIV and Other Virus records only – shows each Viral Load Date and
Viral Load amount HCV Genotype – for HCV Virus records only HCV PCR Tests – for HCV Virus records only – shows each PCR Test Date and PCR Viral Status HCV Treatments – for HCV Virus records only – shows each Treatment Attempt, Treatment Start
Date, Treatment Name, Treatment Outcome, Treatment Duration, Treatment Comments and Treatment Data Unavailable Reason
HCV ALT Tests – for HCV Virus records only – shows each ALT Date and ALT amount HIV CD4 Counts Tests – for HIV Virus records only – shows each CD4 Count Date and CD4 Count HIV Treatments – for HIV Virus records only – shows each Treatment Start Date, Treatment Name
and Treatment Comment HIV AIDS Defining Illnesses – for HIV Virus records only – shows each AIDS Illness Developed Date
and the Illness Name
ABDR Help Guide Page | 91
8.2.11 New Patients Report
The New Patients Report lists all patient movements into the ABDR and between HTCs in the ABDR. It includes new patients and Permanent patient transitions (both the from HTC and to HTC).
This report is used to load data into the Big Red data warehouse.
The selection criteria for this report are:
From Date To Date
The following information is included in this report for each new and transitioned patient:
State HTC Diagnoses Severity Type – indicates a new patient or a patient transition Gender Age Group Country of Birth Australian Resident Status Ethnicity Total New Patients Diagnosis Total of new patients HTC Total of new patients State Total of new patients National Total
92 | Page ABDR Help Guide
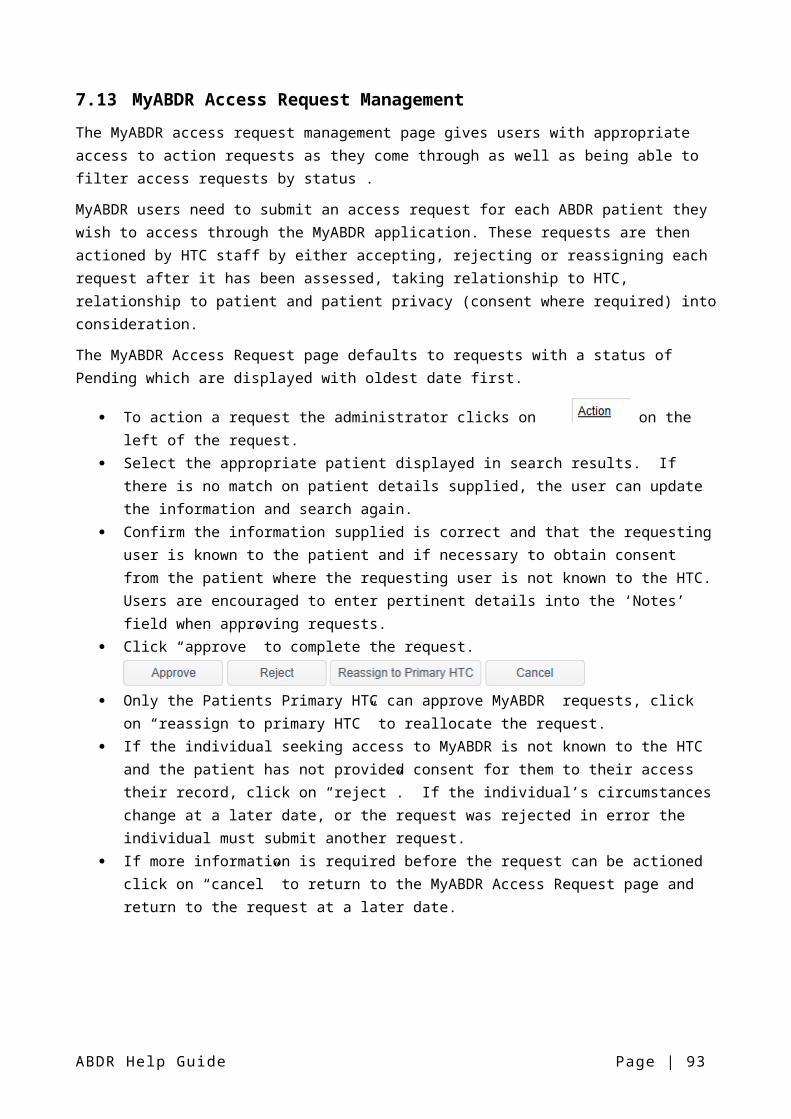
8.2.12 Bleeding Disorder Demographics Report
The Bleeding Disorder Demographics Report includes Bleeding Disorder data about either:
patients who have had a new bleeding disorder diagnosed in the specified date range, or patients whose mortality was recorded in the ABDR during the specified date range.
This report is used to load data into the Big Red data warehouse.
The selection criteria for this report are:
From Date To Date Patient Status – Current (not deceased) or Deceased
The following information is included in this report for each new and transitioned patient:
State HTC Diagnoses Severity Male – number of male patients for the same HTC, Diagnosis, Severity and Age Cohort Female – number of female patients for the same HTC, Diagnosis, Severity and Age Cohort Age Cohort Average Weight – average weight of all patients for the same HTC, Diagnosis, Severity and Age
Cohort Total – number of patients for the same HTC, Diagnosis, Severity and Age Cohort Diagnosis Total – total number of patients for the same HTC and Diagnosis HTC Total – total number of patients for the same HTC State Total – total number of patients for the same State National – total number of patients included in the report.
ABDR Help Guide Page | 93

8.3 Product Order Forms
8.3.1 HTC Product Order Form
The HTC Product Order Form can be printed for one or more HTC Product Orders.
The selection criteria for this report are a comma-separated list of Order Numbers.
Note that you can only print Orders for your HTC.
8.3.2 Patient Product Order Form
The Patient Product Order Form can be printed for one or more Patient Product Orders.
The selection criteria for this report are a comma-separated list of Order Numbers.
Note that you can only print Orders for primary or shared patients at your HTC.
94 | Page ABDR Help Guide
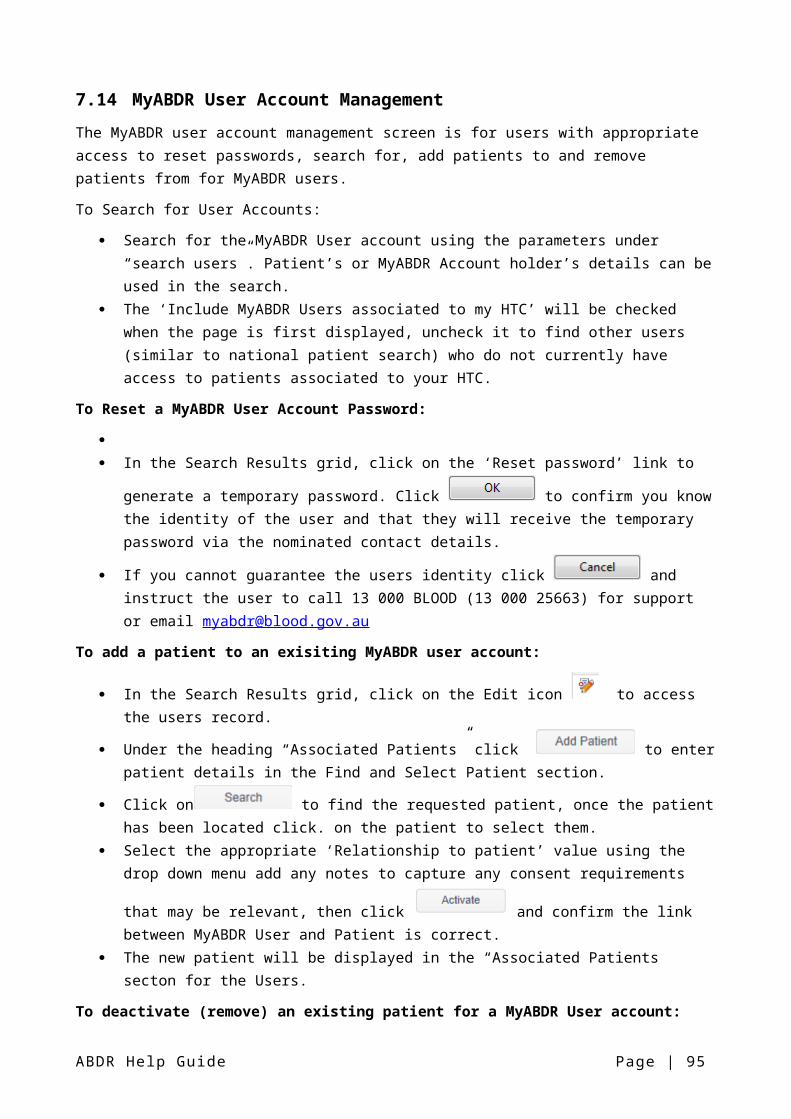
8.4 Audit Reports
8.4.1 Logon Audit Report
The Logon Audit Report lists all Users that have logged on to the ABDR in a specified date range. The report can be further filtered for all Users in a specific HTC or for a specific User if required.
The selection criteria for this report are:
Date From Date To Username HTC – defaults to your HTC and cannot be changed.
The following information is included in this report:
Date and time that the User logged on to the ABDR Username of the User Given Name of the User Surname of the User HTC that the User logged on to. Role that the User logged on with.
ABDR Help Guide Page | 95
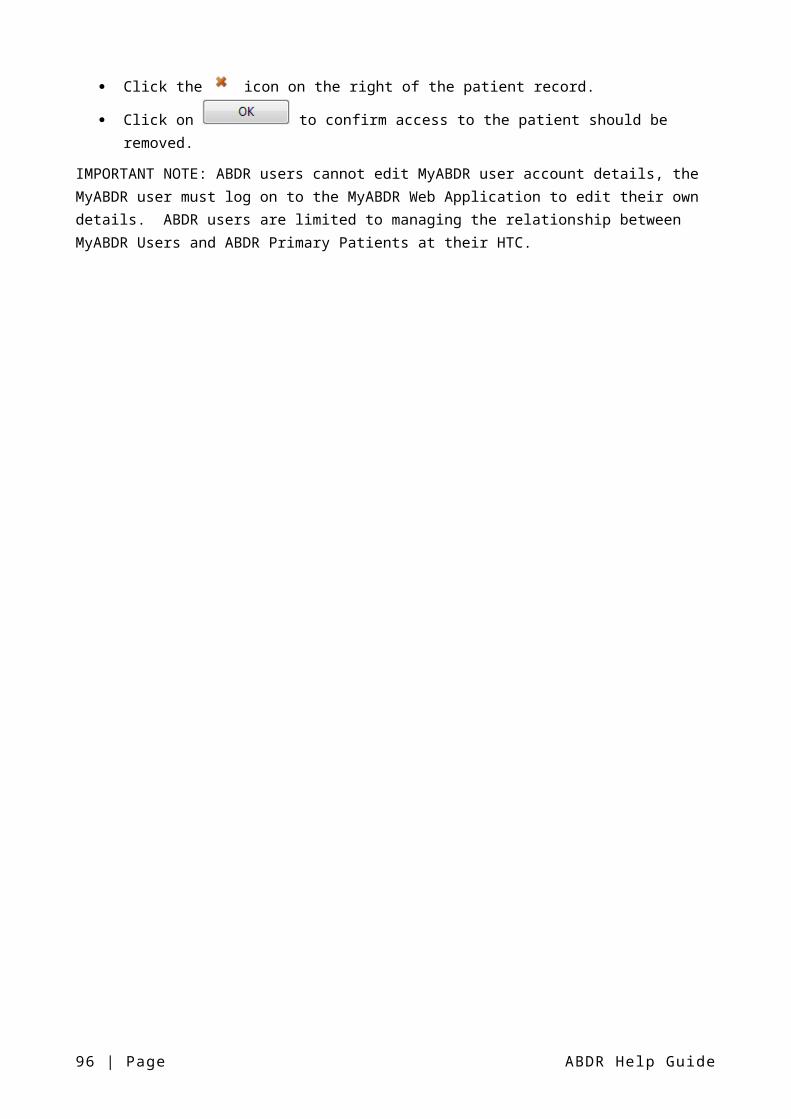
8.4.2 View Audit Report
The View Audit Report lists all Users that have performed searches, viewed data, or run reports in the ABDR in a specified date range. The report can be further filtered to display all viewing activity for:
a specific User a specific patient a specific area of the ABDR, eg. Patient Details, Clinical Details, etc. a specific audited action, eg. View Transitions, View Contact Details, etc.
The selection criteria for this report are:
Date From Date To Username ABDR ID Area Action Type
The following information is included in this report:
Date and time that the User performed the view action Username of the User that performed the audited action Area of the ABDR where data was viewed Action Type performed Parameters relevant to the action, ie. the search parameters used or the report criteria entered.
96 | Page ABDR Help Guide
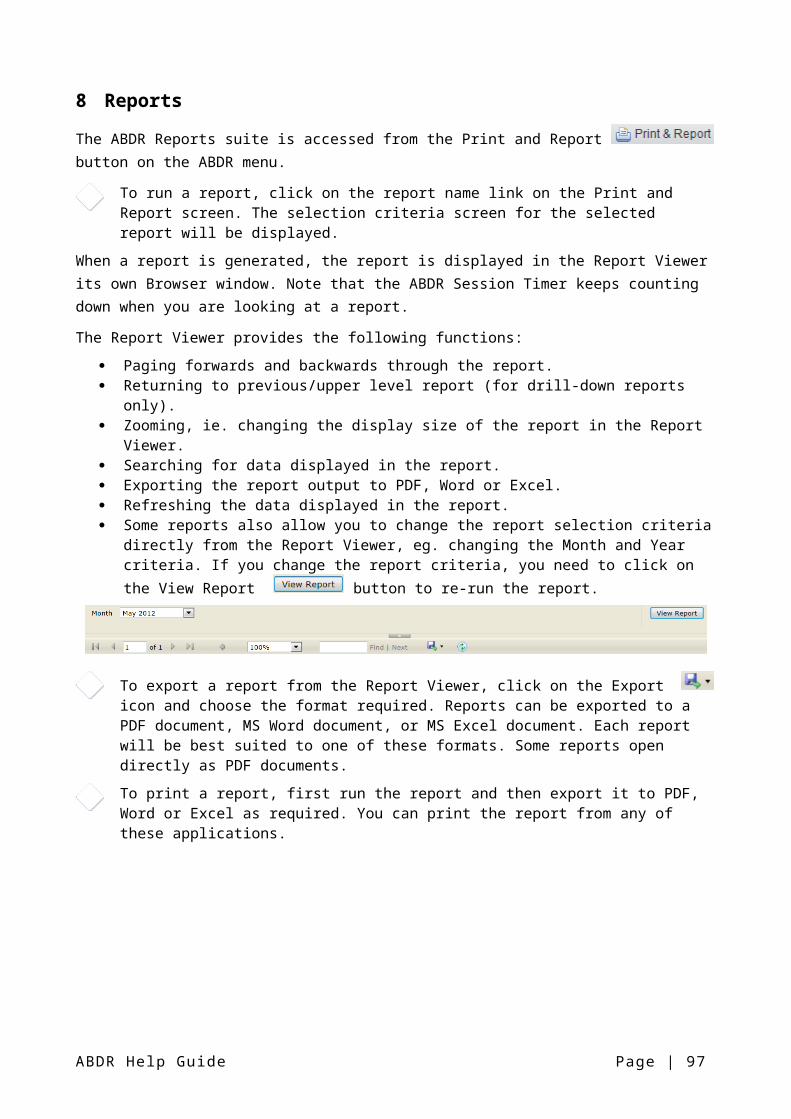
8.4.3 Update Audit Report
The Update Audit Report displays all activity associated with inserting, updating and deleting of data in the ABDR database in a specified date range. The report can be further filtered to display all viewing activity for:
a specific database table a specific User
The selection criteria for this report are:
Table Name Date From Date To Username
The following information is included in this report:
Date and time that the User performed the action Transaction ID of the action Type of action performed: Insert, Update, or Delete Username of the User that performed the audited action Record Key
The Transaction ID field provides a further drill down report that displays the before and after values for each field for the updated record.
ABDR Help Guide Page | 97
9 Security of Patient Data
The following table outlines the security applied to patient data based on a patient’s association with the HTC of the logged on User.
HTC Relationship to Patient
Patient Patient Details
(not Patient Notes)
Patient Notes
Clinical Details
Interactions
Transitions
Adverse Events
User’s HTC is the current Primary HTC for the patient
ActivateDeactivat
eDelete
View allAddEdit
Delete
View allAdd
Edit ownDelete
own
View allAdd
Edit ownDelete
own
View allAdd
Edit ownDelete
own
View allAdd
Permanent
Add SharedDelete Future Delete Shared
View allAdd
Edit ownDelete
own
User’s HTC is a current Shared HTC for the patient
View allAddEdit
Delete
View allAdd
Edit ownDelete
own
View allAdd
Edit ownDelete
own
View allAdd
Edit ownDelete
own
View allDelete Shared
View allAdd
Edit ownDelete
own
User’s HTC was a previous Primary HTC for the patient
View all View own View own View all View ownEdit ownDelete
own
User’s HTC was a previous Shared HTC for the patient
View all View own View own View all View ownEdit ownDelete
own
User’s HTC has never been a Primary or Shared HTC for the patient
View all View all
ABDR Help Guide Page | 98
ABDR Help Guide Page | 99