Embed Size (px)
DESCRIPTION
Authenticating UNIX-Linux to Windows 2008
Citation preview
Authenticating UNIX/Linux to Windows 2008R2. Part 1 : Set up Windows
Background
Prior to using Windows, UNIX (eg Solaris) managed users and groups using /etc/passwd, /etc/group files, or using NIS or NIS+. Since Solaris 8, NIS+
was deprecated, with LDAP being the preferred authentication method.
However, whilst Windows 2008R2 Active Directory does act as a LDAP server, it doesn’t provide any authentication. Authentication is done via
Kerberos/V5. This blog will document the steps required to set up Windows 2008R2 to act as a Kerberos and LDAP server to support both Linux and
Solaris.
VMware Workstation will be used to do the Proof-of-concept. It is expected that the SPARC version of Solaris 10 would act the same as the Intel
version of Solaris 10.
The following Guest UNIX Operating systems will be tested:
Solaris 10 Update 9, (x86_64)
Red Hat Enterprise Linux 5 Update 6 (x86_64)
Red Hat Enterprise Linux 6 (x86_64)
Windows 2008R2 (x64) Standard Edition will be used.
Requirements
VMware Workstation 7.1.4 used as the proof-of-concept hosting platform.
Active Directory must be the source of truth.
Windows 2008R2 will also provide DNS.
No Additional self-supported software allowed.
Configuration files may be edited and documented (eg pam.conf)
Encryption must be used (ie LDAPS, not LDAP).
Certificates must be used to provide positive authentication of servers (to prevent spoofing). This applies to both LDAP and Kerberos.
Users must be able to manage their own passwords (ie this isn’t password synchronisation).
Password expiry controls must be honoured.
Kerberos features, such as single sign on (from Windows to UNIX, or UNIX to UNIX) must be supported.
Network and Host IP Addresses
1. Subnet: 192.168.102.0/24
2. Default Router: None
3. DNS Domain: example.com
4. Kerberos Realm: EXAMPLE.COM
5. AD server hostname: adserver.example.com
6. AD server IP address: 192.168.102.10
7. Solaris guest 1 hostname: sol10host1.example.com
8. Solaris guest 1 IP address: 192.168.102.20
9. Solaris guest 2 hostname: sol10host2.example.com
10. Solaris guest 2 IP address: 192.168.102.30
11. RHEL5.6 guest 1 hostname: rhel5host1.example.com
12. RHEL5.6 guest 1 IP address: 192.168.102.40
13. RHEL5.6 guest 2 hostname: rhel5host2.example.com
14. RHEL5.6 guest 2 IP address: 192.168.102.50
15. RHEL6.0 guest 1 hostname: rhel6host1.example.com
16. RHEL6.0 guest 1 IP address: 192.168.102.60
17. RHEL6.0 guest 2 hostname: rhel6host2.example.com
18. RHEL6.0 guest 2 IP address: 192.168.102.70
Method
Windows Setup
1. Create a Windows 2008R2 VM, with the following configuration:
1. Custom Config, VMware Workstation 6.5 compatible
2. I will install the operating system later.
3. Guest OS : Microsoft Windows, Windows Server 2008 R2 x64
4. VM Name: “adserver”

5. 1 Processor, 1 Core per Processor
6. 1024MB Memory
7. Use Host-Only Networking
8. IDE Controller type: ATAPI
9. SCSI Controller type: LSI Logic SAS
10. Disk: Create a new virtual disk, SCSI, Maximum Disk size, 40GB, Store as Single File, adserver.vmdk (on an NTFS filesystem).
11. Insert the Windows installer CD (build 59754),
12. Power on and Boot from CD.
2. Install Windows 2008R2:
1. Select English Language, English (Australian) Time/Currency, US Keyboard
2. Install Now
3. Select Windows 2008 R2 Standard (Full Installation)
4. Accept the License Terms
5. Select Custom->Advanced
6. Select Drive 0, Unallocated Space
7. Set hostname, timezone,
8. Install VMware Tools. Use Typical Setup.
9. Set VMware tools to use Time Synchronisation between the VM and the host.
10. Reboot
11. Configure Networking, using Static IPv4 address. Disable IPv6.
12. Allow Remote Desktop, if required
13. Disable Firewall
3. Install AD Server Role, run “dcpromo”
1. Advanced Mode Installation: yes
2. New domain in a new forest: yes
3. Domain FQDN: example.com
4. Domain NETBIOS name: EXAMPLE
5. Forest Functional Level: Windows Server 2008 R2
6. Select the DNS Server Additional Option
7. Use the standard folder names
8. Enter a Directory Services Restore Mode Administrator Password
9. Reboot
10. Set the nameserver (same as parent folder) NS to use the FQDN. “adserver.example.com.”
11. Set the nameserver for the Network Connection to “127.0.0.1″
12. Set the DNS suffix for this connection to “example.com”
4. Install the Identity Management for UNIX Role Service
5. Install the Active Directory Certificate Services Role:
1. Install just the Certificate Authority
2. Setup Type : Enterprise
3. CA Type: Root CA
4. Private Key : Create a new private key
5. Cryptographic Service Provider : RSA (default)
6. Key Length : 2048 (default)
7. Hashing Algorithm: SHA1 (default)
8. Common Name for the CA : example-ADSERVER-CA
9. Distinguished Name Suffix : DC=example,DC=com
10. Validity Period : 5 Years
6. Start Active Directory Users and Computers
1. Create a user for doing LDAP bind (anonymous binds are not supported):
1. Name the user
(eg. “ldapsearch”).
2. Set the password:
(eg “ld@p53arch”)
3. Set the user password to never expire, and not be changeable.
4. The user must be a member of “Domain Users” (by default, it is).

2. Create an OU, if required to contain UNIX objects,
(eg. “OU=UNIX,DC=example,DC=com”).
3. Create UNIX groups, as required:
1. Create a Global Security Group. Name the group
(eg. “unixgrp1″).
2. Select the properties, UNIX Attibutes tab, and set as follows:
3. NIS Domain: EXAMPLE
4. GID: 10000
5. Primary Group: 10000
4. Create UNIX users, as required:
1. Name the user, and give it a password.
2. Select the properties, UNIX Attibutes tab, and set as follows:
3. NIS Domain: EXAMPLE
4. UID: 10000
5. Login Shell: /bin/bash
6. Home Directory: /home/unix1
7. Primary Group: unixgrp1
7. Using DNS Management, Add DNS entries for the hosts.
Create A record, and PTR record
8. Start Certificate Services (certsrv.msc), and export the certificate for “example-ADSERVER-CA”:
1. Select Base-64 encoding X.509 (.CER)
2. Save the file to “rootCA.cer”.
9. Start Active Directory Users and Computers
1. Create a computer object for each host. This will be used to map Kerberos host principals to a user.
Next up, setting up clients, Solaris 10, RHEL5.6, and RHEL6.
Authenticating UNIX/Linux to Windows 2008R2. Part 2 : Solaris 10
Background
Continuation of setting up LDAP/Kerberos clients to use Windows 2008R2 Server as the “source of truth”.
See the previous blog , for the steps for how Windows was set up.
Installation of Solaris
1. Create a Solaris 10 x64 VM, with the following configuration:
1. Custom Config, VMware Workstation 6.5 compatible
2. I will install the operating system later.
3. Guest OS : Sun Solaris, Solaris 10 64-bit
4. VM Name: “sol10host1″
5. 1 Processor, 1 Core per Processor
6. 1024MB Memory
7. Use Host-Only Networking
8. IDE Controller type: ATAPI
9. SCSI Controller type: LSI Logic
10. Disk: Create a new virtual disk, SCSI, Maximum Disk size, 10GB, Store as Single File, sol10host1.vmdk (on an NTFS filesystem).
11. Insert the Solaris installer CD (Solaris 10 Update 9),
12. Power on and Boot from CD.
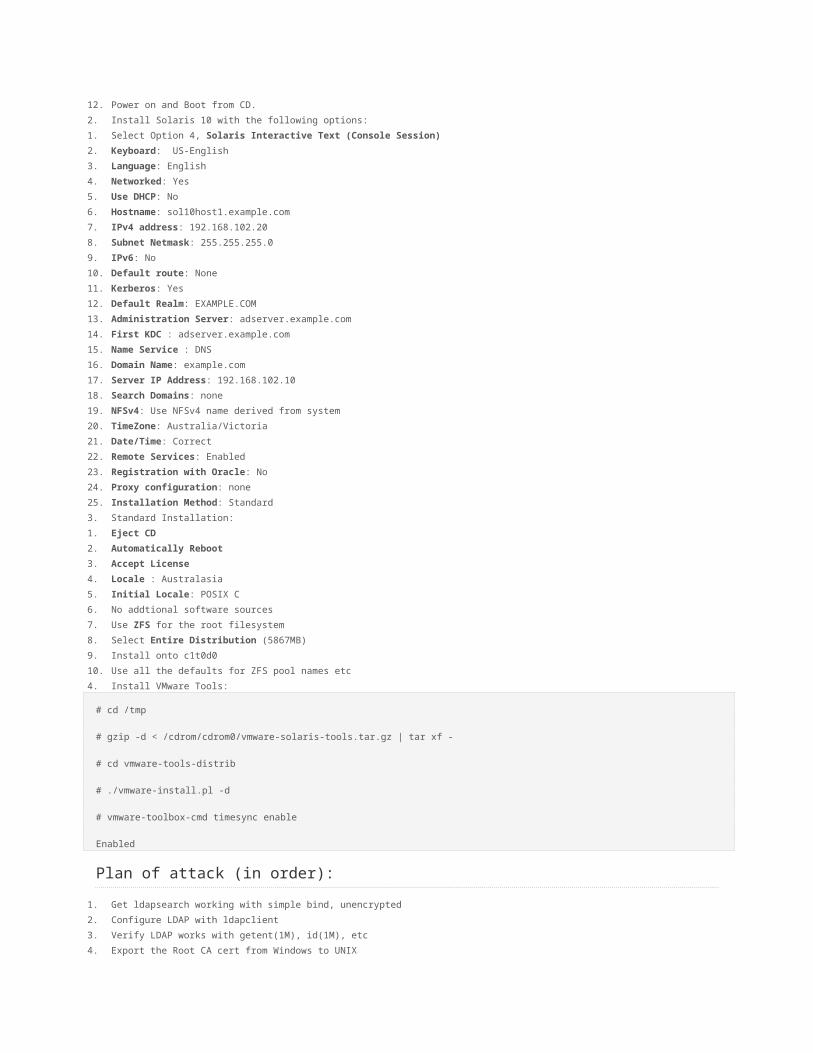
2. Install Solaris 10 with the following options:
1. Select Option 4, Solaris Interactive Text (Console Session)
2. Keyboard: US-English
3. Language: English
4. Networked: Yes
5. Use DHCP: No
6. Hostname: sol10host1.example.com
7. IPv4 address: 192.168.102.20
8. Subnet Netmask: 255.255.255.0
9. IPv6: No
10. Default route: None
11. Kerberos: Yes
12. Default Realm: EXAMPLE.COM
13. Administration Server: adserver.example.com
14. First KDC : adserver.example.com
15. Name Service : DNS
16. Domain Name: example.com
17. Server IP Address: 192.168.102.10
18. Search Domains: none
19. NFSv4: Use NFSv4 name derived from system
20. TimeZone: Australia/Victoria
21. Date/Time: Correct
22. Remote Services: Enabled
23. Registration with Oracle: No
24. Proxy configuration: none
25. Installation Method: Standard
3. Standard Installation:
1. Eject CD
2. Automatically Reboot
3. Accept License
4. Locale : Australasia
5. Initial Locale: POSIX C
6. No addtional software sources
7. Use ZFS for the root filesystem
8. Select Entire Distribution (5867MB)
9. Install onto c1t0d0
10. Use all the defaults for ZFS pool names etc
4. Install VMware Tools:
# cd /tmp
# gzip -d < /cdrom/cdrom0/vmware-solaris-tools.tar.gz | tar xf -
# cd vmware-tools-distrib
# ./vmware-install.pl -d
# vmware-toolbox-cmd timesync enable
Enabled
Plan of attack (in order):
1. Get ldapsearch working with simple bind, unencrypted
2. Configure LDAP with ldapclient
3. Verify LDAP works with getent(1M), id(1M), etc
4. Export the Root CA cert from Windows to UNIX
5. Check the CA cert works with OpenSSL
6. Import the CA cert
7. Get LDAPS working with ldapsearch
8. Change ldapclient to use LDAPS rather than LDAP
9. Verify Kerberos works: Initially, without a host principal (krb5.keytab)
10. Configure PAM to use Kerberos (edit /etc/pam.conf)
11. Verify that services like login can use kerberised IDs and that the password works
12. Create a host principal keytab in Windows. Import it into UNIX.
13. Verify that kinit -k works
14. Edit /etc/krb5/krb5.conf to include “verify_ap_req_nofail = true” in the [libdefaults] section. This will secure the UNIX box to prove it is talking with
the bonefide KDC.
15. Get Single-Sign-On working
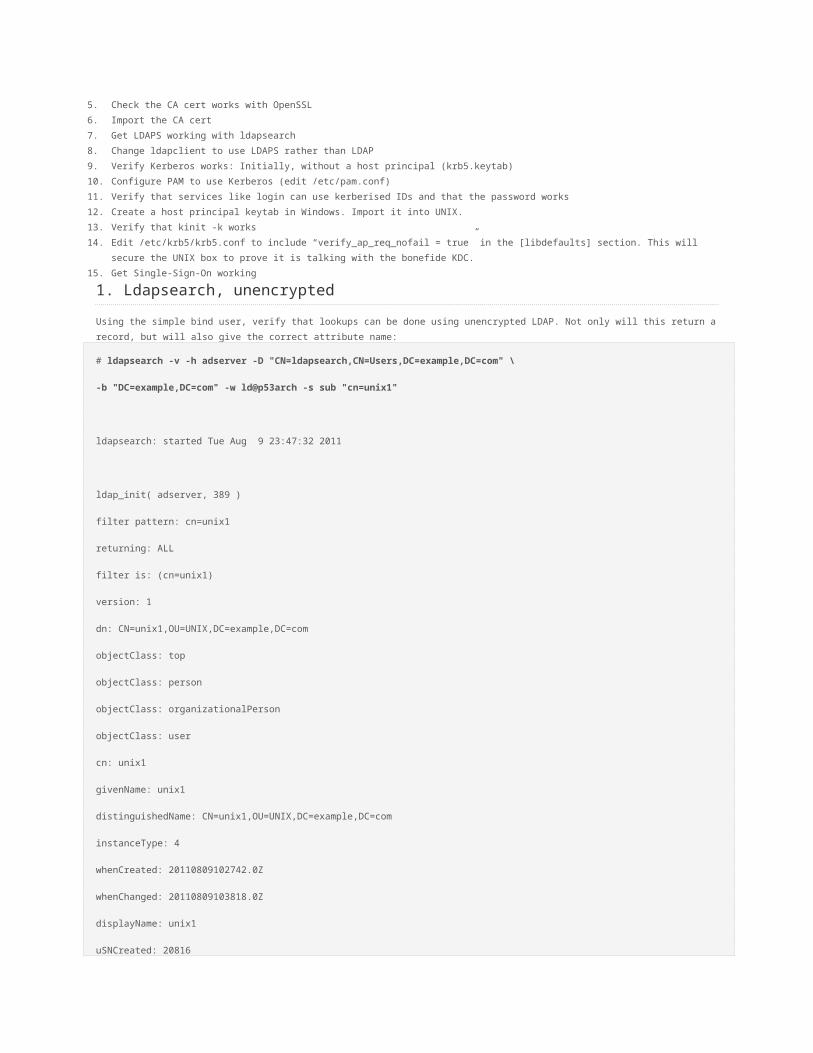
1. Ldapsearch, unencrypted
Using the simple bind user, verify that lookups can be done using unencrypted LDAP. Not only will this return a record, but will also give the correct
attribute name:
# ldapsearch -v -h adserver -D "CN=ldapsearch,CN=Users,DC=example,DC=com" \
-b "DC=example,DC=com" -w ld@p53arch -s sub "cn=unix1"
ldapsearch: started Tue Aug 9 23:47:32 2011
ldap_init( adserver, 389 )
filter pattern: cn=unix1
returning: ALL
filter is: (cn=unix1)
version: 1
dn: CN=unix1,OU=UNIX,DC=example,DC=com
objectClass: top
objectClass: person
objectClass: organizationalPerson
objectClass: user
cn: unix1
givenName: unix1
distinguishedName: CN=unix1,OU=UNIX,DC=example,DC=com
instanceType: 4
whenCreated: 20110809102742.0Z
whenChanged: 20110809103818.0Z
displayName: unix1
uSNCreated: 20816
uSNChanged: 20823
name: unix1
objectGUID:: 8dUSWOctkEaf5x7FkpXrgw==

userAccountControl: 512
badPwdCount: 0
codePage: 0
countryCode: 0
badPasswordTime: 0
lastLogoff: 0
lastLogon: 0
pwdLastSet: 129573592626212649
primaryGroupID: 513
objectSid:: AQUAAAAAAAUVAAAA9P+gsh3KJO48P5XaUAQAAA==
accountExpires: 9223372036854775807
logonCount: 0
sAMAccountName: unix1
sAMAccountType: 805306368
userPrincipalName: [email protected]
objectCategory: CN=Person,CN=Schema,CN=Configuration,DC=example,DC=com
dSCorePropagationData: 16010101000000.0Z
uid: unix1
msSFU30Name: unix1
msSFU30NisDomain: example
uidNumber: 10000 gidNumber: 10000
unixHomeDirectory: /home/unix1
loginShell: /bin/sh
Unfollowed continuation reference(s):
ldap://ForestDnsZones.example.com/DC=ForestDnsZones,DC=example,DC=com
Unfollowed continuation reference(s):
ldap://DomainDnsZones.example.com/DC=DomainDnsZones,DC=example,DC=com
Unfollowed continuation reference(s):
ldap://example.com/CN=Configuration,DC=example,DC=com
1 matches
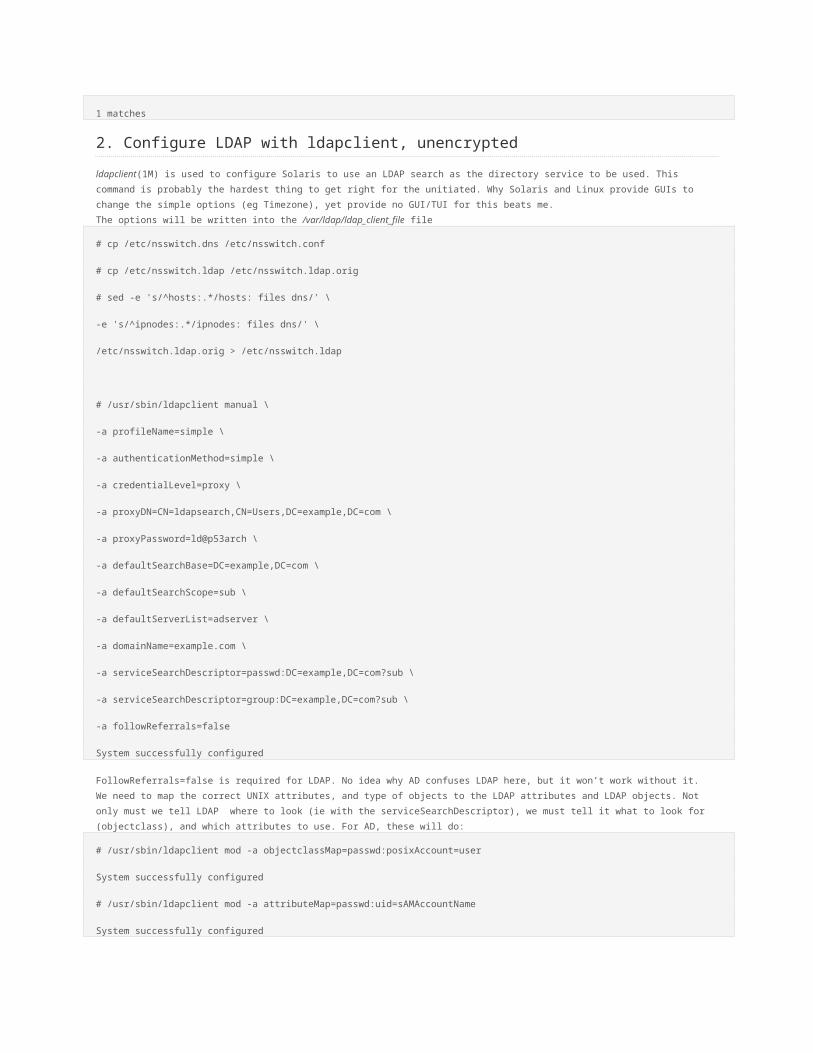
2. Configure LDAP with ldapclient, unencrypted
ldapclient(1M) is used to configure Solaris to use an LDAP search as the directory service to be used. This command is probably the hardest thing to
get right for the unitiated. Why Solaris and Linux provide GUIs to change the simple options (eg Timezone), yet provide no GUI/TUI for this beats me.
The options will be written into the /var/ldap/ldap_client_file file
# cp /etc/nsswitch.dns /etc/nsswitch.conf
# cp /etc/nsswitch.ldap /etc/nsswitch.ldap.orig
# sed -e 's/^hosts:.*/hosts: files dns/' \
-e 's/^ipnodes:.*/ipnodes: files dns/' \
/etc/nsswitch.ldap.orig > /etc/nsswitch.ldap
# /usr/sbin/ldapclient manual \
-a profileName=simple \
-a authenticationMethod=simple \
-a credentialLevel=proxy \
-a proxyDN=CN=ldapsearch,CN=Users,DC=example,DC=com \
-a proxyPassword=ld@p53arch \
-a defaultSearchBase=DC=example,DC=com \
-a defaultSearchScope=sub \
-a defaultServerList=adserver \
-a domainName=example.com \
-a serviceSearchDescriptor=passwd:DC=example,DC=com?sub \
-a serviceSearchDescriptor=group:DC=example,DC=com?sub \
-a followReferrals=false
System successfully configured
FollowReferrals=false is required for LDAP. No idea why AD confuses LDAP here, but it won’t work without it.
We need to map the correct UNIX attributes, and type of objects to the LDAP attributes and LDAP objects. Not only must we tell LDAP where to look
(ie with the serviceSearchDescriptor), we must tell it what to look for (objectclass), and which attributes to use. For AD, these will do:
# /usr/sbin/ldapclient mod -a objectclassMap=passwd:posixAccount=user
System successfully configured
# /usr/sbin/ldapclient mod -a attributeMap=passwd:uid=sAMAccountName
System successfully configured
/usr/sbin/ldapclient mod -a attributeMap=passwd:uidnumber=uidNumber
System successfully configured
/usr/sbin/ldapclient mod -a attributeMap=passwd:gidnumber=gidNumber

System successfully configured
/usr/sbin/ldapclient mod -a attributeMap=passwd:gecos=cn
System successfully configured
/usr/sbin/ldapclient mod -a attributeMap=passwd:homedirectory=unixHomeDirectory
System successfully configured
/usr/sbin/ldapclient mod -a attributeMap=passwd:loginshell=loginShell
System successfully configured
# /usr/sbin/ldapclient mod -a objectclassMap=group:posixAccount=group
System successfully configured
/usr/sbin/ldapclient mod -a attributeMap=group:gidnumber=gidNumber
System successfully configured
At this stage, /etc/nsswitch.conf file will try to use LDAP for everything. It’s probably easiest if we just return the /etc/nsswitch.conf using dns, and
change the right lines:
# cp /etc/nsswitch.ldap.orig /etc/nsswitch.ldap
# sed -e 's/^passwd:.*/passwd: files ldap/' \
-e 's/^group:.*/group: files ldap/' \
/etc/nsswitch.dns > /etc/nsswitch.conf
Now we can test whether LDAP queries are working. Firstly, disable ldap:
# svcadm disable ldap/client
Manually start it with debugging options
# /usr/lib/ldap/ldap_cachemgr -d 6 -l /tmp/myfile
3. Verify getent(1M) works
Now, Lookups should work:
# getent group unixgrp1
unixgrp1::10000:
# getent passwd unix1
unix1:x:10000:10000:unix1:/home/unix1:/bin/sh
Now we can enable LDAP cachemgr:
# /usr/lib/ldap/ldap_cachemgr -K # svcadm enable ldap/client
4. Import the root CA Certificates
The .PEM format rootCA.cer file should be copied (probably with psftp.exe) to the Solaris system. For the purposes of this instruction it is saved in
/rootCA.cer.

5. Verify that the certificate file is ok with OpenSSL
# /usr/sfw/bin/openssl x509 -in /rootCA.cer -subject -issuer -purpose
subject= /DC=com/DC=example/CN=example-ADSERVER-CA
issuer= /DC=com/DC=example/CN=example-ADSERVER-CA
Certificate purposes:
SSL client : Yes
SSL client CA : Yes
SSL server : Yes
SSL server CA : Yes
Netscape SSL server : No
Netscape SSL server CA : Yes
S/MIME signing : Yes
S/MIME signing CA : Yes
S/MIME encryption : No
S/MIME encryption CA : Yes
CRL signing : Yes
CRL signing CA : Yes
Any Purpose : Yes
Any Purpose CA : Yes
OCSP helper : Yes
OCSP helper CA : Yes
-----BEGIN CERTIFICATE-----
MIIDczCCAlugAwIBAgIQGGdCEtXMnZ9CxrbAG8zNEjANBgkqhkiG9w0BAQUFADBM
MRMwEQYKCZImiZPyLGQBGRYDY29tMRcwFQYKCZImiZPyLGQBGRYHZXhhbXBsZTEc
MBoGA1UEAxMTZXhhbXBsZS1BRFNFUlZFUi1DQTAeFw0xMTA4MDkwOTI0NTBaFw0x
NjA4MDkwOTM0NDlaMEwxEzARBgoJkiaJk/IsZAEZFgNjb20xFzAVBgoJkiaJk/Is
ZAEZFgdleGFtcGxlMRwwGgYDVQQDExNleGFtcGxlLUFEU0VSVkVSLUNBMIIBIjAN
BgkqhkiG9w0BAQEFAAOCAQ8AMIIBCgKCAQEAoeQeyJYdYiftNx0g2GOlDxWxo2ah
qsC5h7ryVEwr5BHv39aD33l+DZCHIKWRJA2DQk/xmyzElQhIAI1A7ikR9pPDegVP
eKNhl1n/I5KHrzWhJFCaMYcCmwf6H0X7HaYtDw2Ya2Qv9+s31yIXInA6b49vpXF/
/lkh8NeAh4lHCFBEOzLEaV9Oks6B+ZoSk47PWOFObbafIOY23keabekVn6DFekG5
h+WqihGaVjL7kpSJixyTDcY1WGAaBmiqPgVeCoNsMDIvdrflRIEO5yirQIGayzYN

IuW3HhiiuWkH48iwzcScKc0YMVTnRve5sJ6aQVEiUXvFaw8LDcX628upyQIDAQAB
o1EwTzALBgNVHQ8EBAMCAYYwDwYDVR0TAQH/BAUwAwEB/zAdBgNVHQ4EFgQU3ijY
Of/XO1EuaGxon2AQGtZ1AGUwEAYJKwYBBAGCNxUBBAMCAQAwDQYJKoZIhvcNAQEF
BQADggEBAD6Hy40U1CFMDRQ1lQxJsShFc1VqPION/49OYxM7NN07hLbC07VYwNdH
OpK0GvfAL8EExF5yX07NxTWZu1An8eZy1NzhSEdIsEo4wwMlej68DUuZaUK5azV9
EAPcVwQtWVqCowRNWR35VcSx8pYLxyCthNMj9uNjiGgXH7rgSf61JGRkzwnTEkUc
woi84vMGGVGqKNAqm0n0hlJgYGWmVKWfqs8GFwXP99VNTdNJqiJp4EmFiZyeZCRw
m7zKVvmPgQ7l9gq1zNBQ3E4eCj7gtvTKfJDk35uxk3IdOuWaKnDLrtHstb+SWkry
FIes6uSRw9XMupknrR3Og0MHXbx+UZU=
-----END CERTIFICATE-----
6. Import the Root CA Certificate
The certificate should be imported into /var/ldap:
# /usr/sfw/bin/certutil -A -n rootCA -t "CT,C,C" -d /var/ldap -i /rootCA.cer
# /usr/sfw/bin/certutil -L -d /var/ldap
Certificate Nickname Trust Attributes
SSL,S/MIME,JAR/XPI
rootCA CT,C,C
There’s also a nasty little issue. The *.db files need to be readable by users, otherwise programs like id will fail if run by other than root if name-
services-cachemgr isn’t running:
# chmod a+r /var/ldap/*.db
LDAPS can be tested that it is using the rootCA certificate as follows:
# /usr/sfw/bin/openssl s_client -connect adserver:636 -CAfile /rootCA.cer < /dev/null
CONNECTED(00000004)
depth=1 /DC=com/DC=example/CN=example-ADSERVER-CA
verify return:1
depth=0 /CN=adserver.example.com
verify return:1
---
Certificate chain
0 s:/CN=adserver.example.com

i:/DC=com/DC=example/CN=example-ADSERVER-CA
---
Server certificate
-----BEGIN CERTIFICATE-----
MIIF7jCCBNagAwIBAgIKEbgl6gAAAAAAAjANBgkqhkiG9w0BAQUFADBMMRMwEQYK
CZImiZPyLGQBGRYDY29tMRcwFQYKCZImiZPyLGQBGRYHZXhhbXBsZTEcMBoGA1UE
AxMTZXhhbXBsZS1BRFNFUlZFUi1DQTAeFw0xMTA4MDkxNzAyMTRaFw0xMjA4MDgx
NzAyMTRaMB8xHTAbBgNVBAMTFGFkc2VydmVyLmV4YW1wbGUuY29tMIIBIjANBgkq
hkiG9w0BAQEFAAOCAQ8AMIIBCgKCAQEA16Aa3EZH2wW+6N0nWJ8oQvpsgha3AsBS
+iGuuMb9zMj+w5Ulj7tMO1EBQJNJ9Nmlk0kbjbs4+hLD+Jwknxzy4WXSN3yOVIpe
7f/2WJ2a35BXb0AHoMUrtk0UBNhBJgCN3ujxrmm5wWIIKIy9QhqMIFrP9O37XVdX
j6bWRB/5g3qIvpPdsrjizFcVuSx9fZ6apYwsE7E8sDV7IYHKZP7N12wKHXqgxVhQ
BTATusYvyfbLTDoNL/eg3kXcnmZefABhqjJh+Id9peAKTokhyC6KpYnmElm/4gzd
dJ2B4UIQfaL0iHUq5qB5i69jTR5hfQMJ6vHqDdG60e32Ga6oHYHeIwIDAQABo4IC
/TCCAvkwLwYJKwYBBAGCNxQCBCIeIABEAG8AbQBhAGkAbgBDAG8AbgB0AHIAbwBs
AGwAZQByMB0GA1UdJQQWMBQGCCsGAQUFBwMCBggrBgEFBQcDATAOBgNVHQ8BAf8E
BAMCBaAweAYJKoZIhvcNAQkPBGswaTAOBggqhkiG9w0DAgICAIAwDgYIKoZIhvcN
AwQCAgCAMAsGCWCGSAFlAwQBKjALBglghkgBZQMEAS0wCwYJYIZIAWUDBAECMAsG
CWCGSAFlAwQBBTAHBgUrDgMCBzAKBggqhkiG9w0DBzAdBgNVHQ4EFgQUMF1hyvrm
NUeMP6yIPklWxNlUEpQwHwYDVR0jBBgwFoAU3ijYOf/XO1EuaGxon2AQGtZ1AGUw
gdIGA1UdHwSByjCBxzCBxKCBwaCBvoaBu2xkYXA6Ly8vQ049ZXhhbXBsZS1BRFNF
UlZFUi1DQSxDTj1hZHNlcnZlcixDTj1DRFAsQ049UHVibGljJTIwS2V5JTIwU2Vy
dmljZXMsQ049U2VydmljZXMsQ049Q29uZmlndXJhdGlvbixEQz1leGFtcGxlLERD
PWNvbT9jZXJ0aWZpY2F0ZVJldm9jYXRpb25MaXN0P2Jhc2U/b2JqZWN0Q2xhc3M9
Y1JMRGlzdHJpYnV0aW9uUG9pbnQwgcUGCCsGAQUFBwEBBIG4MIG1MIGyBggrBgEF
BQcwAoaBpWxkYXA6Ly8vQ049ZXhhbXBsZS1BRFNFUlZFUi1DQSxDTj1BSUEsQ049
UHVibGljJTIwS2V5JTIwU2VydmljZXMsQ049U2VydmljZXMsQ049Q29uZmlndXJh
dGlvbixEQz1leGFtcGxlLERDPWNvbT9jQUNlcnRpZmljYXRlP2Jhc2U/b2JqZWN0
Q2xhc3M9Y2VydGlmaWNhdGlvbkF1dGhvcml0eTBABgNVHREEOTA3oB8GCSsGAQQB
gjcZAaASBBDVqLtSbD/oR6YHGq+PNID0ghRhZHNlcnZlci5leGFtcGxlLmNvbTAN
BgkqhkiG9w0BAQUFAAOCAQEAM7RqqBlu7t4fcqECr2wo4JxNhcvx3X/neTQwgGKA
s0ORxikhEw8/MofzzTOzcABx8mlG2XcjBjOjlTq3ezUqgVQB3SggqM8R3btlVCt0
1CYCKxb7g1w+IOyeU/LjXZhmk1lnPmysZgEkT1VfBx4xowHAmlZO48TcjhA/5+Fu
PcmeSXkGau20kFu11Y49aj5/sYGAK2WNgkDzCxo7vz/mSlyjEDFVT66NHVl3juVF
Y/Ymj0GPsW9Nh/3/y2VYKJFxVIPGEHSH9eSvtPUu++TgtNkxfKxPgjOu0vTIKisy
RR6i66q5Y+szSHxpXvW0StmvBZskbJmuSnQC6QdnSvoZVw==
-----END CERTIFICATE-----
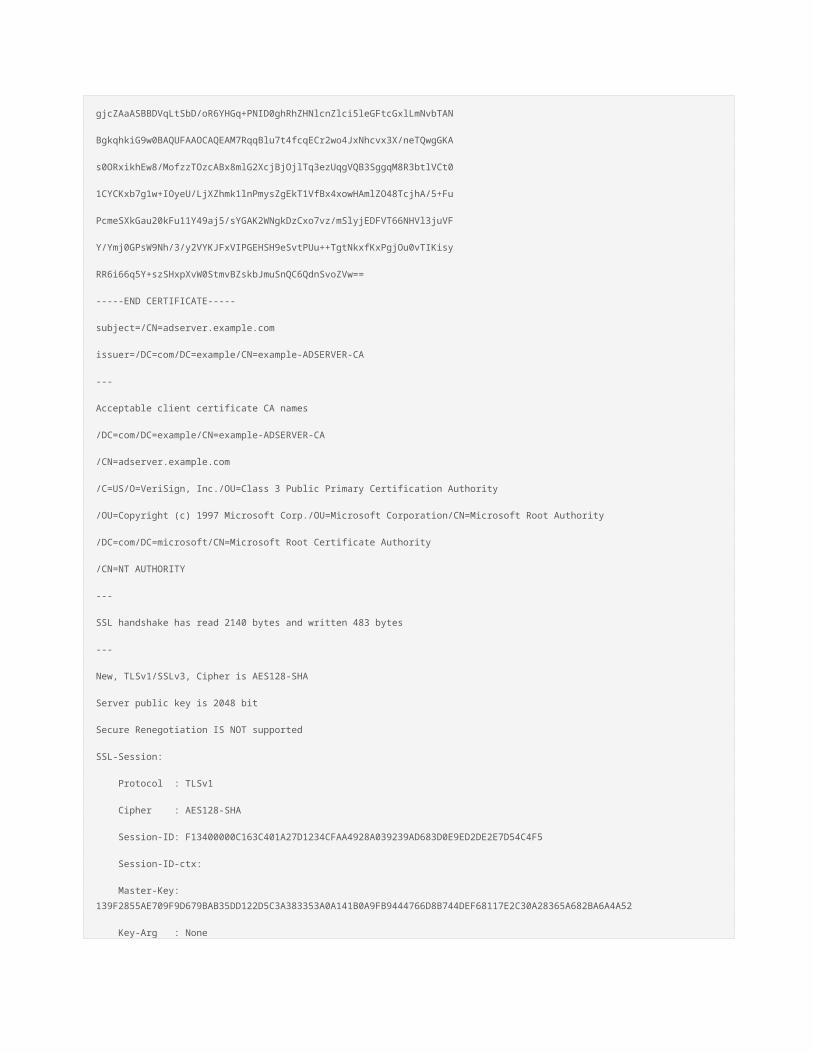
subject=/CN=adserver.example.com
issuer=/DC=com/DC=example/CN=example-ADSERVER-CA
---
Acceptable client certificate CA names
/DC=com/DC=example/CN=example-ADSERVER-CA
/CN=adserver.example.com
/C=US/O=VeriSign, Inc./OU=Class 3 Public Primary Certification Authority
/OU=Copyright (c) 1997 Microsoft Corp./OU=Microsoft Corporation/CN=Microsoft Root Authority
/DC=com/DC=microsoft/CN=Microsoft Root Certificate Authority
/CN=NT AUTHORITY
---
SSL handshake has read 2140 bytes and written 483 bytes
---
New, TLSv1/SSLv3, Cipher is AES128-SHA
Server public key is 2048 bit
Secure Renegotiation IS NOT supported
SSL-Session:
Protocol : TLSv1
Cipher : AES128-SHA
Session-ID: F13400000C163C401A27D1234CFAA4928A039239AD683D0E9ED2DE2E7D54C4F5
Session-ID-ctx:
Master-Key:
139F2855AE709F9D679BAB35DD122D5C3A383353A0A141B0A9FB9444766D8B744DEF68117E2C30A28365A682BA6A4A52
Key-Arg : None
Start Time: 1313110928
Timeout : 300 (sec)
Verify return code: 0 (ok)

---
DONE
7. Test ldapsearch works with LDAPS
# ldapsearch -v -h adserver.example.com -p 636 -Z -P /var/ldap -D "cn=ldapsearch,cn=Users,dc=example,dc=com" -w
ld@p53arch -b "dc=example,dc=com" "cn=unix1"
ldapsearch: started Wed Aug 10 13:42:37 2011
ldap_init( adserver.example.com, 636 )
filter pattern: cn=unix1
returning: ALL
filter is: (cn=unix1)
version: 1
dn: CN=unix1,OU=UNIX,DC=example,DC=com
objectClass: top
objectClass: person
objectClass: organizationalPerson
objectClass: user
cn: unix1
distinguishedName: CN=unix1,OU=UNIX,DC=example,DC=com
instanceType: 4
whenCreated: 20110809102742.0Z
whenChanged: 20110809135807.0Z
uSNCreated: 20816
uSNChanged: 20918
name: unix1
objectGUID:: 8dUSWOctkEaf5x7FkpXrgw==
userAccountControl: 512
badPwdCount: 0
codePage: 0
countryCode: 0
badPasswordTime: 0
lastLogoff: 0

lastLogon: 0
pwdLastSet: 129573592626212649
primaryGroupID: 513
objectSid:: AQUAAAAAAAUVAAAA9P+gsh3KJO48P5XaUAQAAA==
accountExpires: 9223372036854775807
logonCount: 0
sAMAccountName: unix1
sAMAccountType: 805306368
userPrincipalName: [email protected]
objectCategory: CN=Person,CN=Schema,CN=Configuration,DC=example,DC=com
dSCorePropagationData: 16010101000000.0Z
uid: unix1
msSFU30Name: unix1
msSFU30NisDomain: example
uidNumber: 10000
gidNumber: 10000
unixHomeDirectory: /home/unix1
loginShell: /bin/sh
Unfollowed continuation reference(s):
ldaps://ForestDnsZones.example.com/DC=ForestDnsZones,DC=example,DC=com
Unfollowed continuation reference(s):
ldaps://DomainDnsZones.example.com/DC=DomainDnsZones,DC=example,DC=com
Unfollowed continuation reference(s):
ldaps://example.com/CN=Configuration,DC=example,DC=com
1 matches
NB. Fully qualified host names must be used, since those names are in ther certifcate. Short host names won’t work:
# ldapsearch -v -h adserver -p 636 -Z -P /var/ldap -D "cn=ldapsearch,cn=Users,>
ldapsearch: started Wed Aug 10 13:43:09 2011
ldap_init( adserver, 636 )
ldap_simple_bind: Can't contact LDAP server

8. Change ldapclient to use LDAPS rather than LDAP
We already know that LDAP works. We need to change the mechanism from simple to simple over TLS. Again we also must be careful to use the
FQDN:
# /usr/sbin/ldapclient mod -a authenticationMethod=tls:simple
System successfully configured
# /usr/sbin/ldapclient mod -a defaultServerList=adserver.example.com
System successfully configured
We can verify that lookups are now working:
# getent passwd unix1
unix1:x:10000:10000:unix1:/home/unix1:/bin/sh
# id unix1
uid=10000(unix1) gid=10000(unixgrp1)
And moreover, a snoop of port 389 will show no unencrypted traffic being used.
9. Verify that Kerberos works
We can use a user’s ID and password to verify that kerberos works for user principals:
# kinit [email protected]
Password for [email protected]:
# klist -e
Ticket cache: FILE:/tmp/krb5cc_0
Default principal: [email protected]
Valid starting Expires Service principal
08/10/11 14:06:08 08/11/11 00:06:10 krbtgt/[email protected]
renew until 08/17/11 14:06:08, Etype(skey, tkt): AES-256 CTS mode with 96-bit SHA-1 HMAC, AES-256 CTS mode with
96-bit SHA-1 HMAC
/etc/krb5/krb5.conf must be edited to specify the default realm. And “verify_ap_req_nofail = false” can be added to ignore missing host principals
(/etc/krb5/krb5.keytab) until they have been set up.
# cat /etc/krb5/krb5.conf
[libdefaults]
default_realm = EXAMPLE.COM
verify_ap_req_nofail = false
[realms]
EXAMPLE.COM = {

kdc = adserver.example.com
admin_server = adserver.example.com
}
[domain_realm]
.example.com = EXAMPLE.COM example.com = EXAMPLE.COM
[logging]
default = FILE:/var/krb5/kdc.log
kdc = FILE:/var/krb5/kdc.log
kdc_rotate = {
# How often to rotate kdc.log. Logs will get rotated no more
# often than the period, and less often if the KDC is not used# frequently.
period = 1d
# how many versions of kdc.log to keep around (kdc.log.0, kdc.log.1, ...)
version = 10
}
[appdefaults]
kinit = {
renewable = true
forwardable= true
}
Now for this to be useful, PAM must be configured to use kerberos
10. Configure PAM to use Kerberos
Edit /etc/pam.conf to add the pam_krb5.so.1 and pam_ldap.so.1 library files at these locations:
....
login auth requisite pam_authtok_get.so.1
login auth required pam_dhkeys.so.1
login auth required pam_unix_cred.so.1

login auth sufficient pam_krb5.so.1
login auth required pam_unix_auth.so.1
login auth required pam_dial_auth.so.1
#
other auth requisite pam_authtok_get.so.1
other auth required pam_dhkeys.so.1
other auth required pam_unix_cred.so.1
other auth sufficient pam_krb5.so.1
other auth required pam_unix_auth.so.1
....
other account requisite pam_roles.so.1
other account sufficient pam_ldap.so.1 other account required pam_unix_account.so.1
#
# Default definition for Session management
# Used when service name is not explicitly mentioned for session management
....
other password required pam_dhkeys.so.1
other password requisite pam_authtok_get.so.1
other password requisite pam_authtok_check.so.1
other password sufficient pam_krb5.so.1
other password required pam_authtok_store.so.1
....
11. Verifying Services
Before verifying services, create a home directory for the user:
# mkdir -m 700 /home/unix1
# chown unix1:unixgrp1 /home/unix1
Then check all the authentication methods (eg telnet, ssh, direct console, dtlogin)
Login:
sol10host1.example.com console login: unix1
Password:
Last login: Fri Aug 12 11:14:50 from 192.168.102.1
Oracle Corporation SunOS 5.10 Generic Patch January 2005
$ exit

Telnet:
# telnet localhost
Trying ::1...
telnet: connect to address ::1: Network is unreachable
Trying 127.0.0.1...
Connected to localhost.
Escape character is '^]'.
login: unix1
Password:
Last login: Fri Aug 12 11:22:39 from localhost
Oracle Corporation SunOS 5.10 Generic Patch January 2005
$ exit
Connection to localhost closed by foreign host.
SSH:
# ssh unix1@localhost
Password:
Last login: Fri Aug 12 11:19:40 2011
Oracle Corporation SunOS 5.10 Generic Patch January 2005
$ exit
Connection to localhost closed.
Changing Password:
The user can change their password with the kpasswd(1) command:
$ kpasswd
kpasswd: Changing password for [email protected].
Old password:
New password:
New password (again):
Kerberos password changed.
12. Create a host principal keytab in Windows.
To create a host keytab in Windows, first a computer account must exist (this was created in the previous blog). Then create a host principal mapped to
that user.
NB. Keytabs need to use the fully qualified domain name.
NB. Keytabs must use encryption which is supported by both ends. Suggestion: Either use /crypto all, or a known cryptosystem which is
supported (eg AES256-SHA1).

There is a Security Policy, which has a checkbox list of all the Supported types:
Security Settings -> Local Policies -> Security Options -> Network Security: Configure encryption types allowed for Kerberos
DES_CBC_CRC
DES_CBC_MD5
RC4_HMAC_MD5
AES128_HMAC_SHA1
AES256_HMAC_SHA1
Future Encryption Types
eg (line split for easy reading)
C:\>C:\>ktpass /princ host/[email protected] \
/ptype KRB5_NT_PRINCIPAL /out C:\temp\sol10host1.keytab /pass mypass \
/crypto AES256-SHA1 /mapuser EXAMPLE\sol10host1
Targeting domain controller: adserver.example.com
Successfully mapped host/sol10host1.example.com to SOL10HOST1$.
WARNING: Account SOL10HOST1$ is not a user account (uacflags=0x1021).
WARNING: Resetting SOL10HOST1$'s password may cause authentication problems if SOL10HOST1$ is being used as a
server.
Reset SOL10HOST1$'s password [y/n]? y
Password succesfully set!
WARNING: pType and account type do not match. This might cause problems.
Key created.
Output keytab to C:\temp\sol10host1.keytab:
Keytab version: 0x502
keysize 90 host/[email protected] ptype 1 (KRB5_NT_PRINCIPAL) v
no 12 etype 0x12 (AES256-SHA1) keylength 32 (0x8664b66dd9235158a7097c60e5d57e6b7
73d092696bf71bb3dfa8fc2dc149b79)
This file can now be copied to /etc/krb5/krb5.keytab, and verified as follows:
# klist -ke
Keytab name: FILE:/etc/krb5/krb5.keytab
KVNO Principal
---- --------------------------------------------------------------------------
12 host/[email protected] (AES-256 CTS mode with 96-bit SHA-1 HMAC)
# kinit -k
If kinit doesn’t complain, then principal keytab is working, however, this might not be the end of the story. If an encryption scheme is not allowed, the
following message may occur:

PAM-KRB5 (auth): krb5_verify_init_creds failed: Key table entry not found
or
kinit(v5): Key table entry not found while getting initial credentials
See This Blog for information on keytabs and encryption.
Authenticating UNIX/Linux to Windows 2008R2. Part 3 : RHEL 5.6
Installation of RHEL5.6
1. Create a Red Hat Linux 5 Kickstart configuration:
2. install
3. text
4. reboot
5. cdrom
6. key --skip
7. lang en_US.UTF-8
8. keyboard us
9. xconfig --disabled
10. network --device eth0 --bootproto dhcp
11. rootpw password
12. firewall --disabled
13. authconfig --useshadow --enablemd5
14. selinux --disabled
15. timezone --utc Australia/Melbourne
16. bootloader --location=mbr --driveorder=sda --append="rhgb quiet"
17. clearpart --all --initlabel --drives=sda
18. part /boot --fstype ext3 --size=100 --ondisk=sda
19. part pv.1 --size=1 --grow --ondisk=sda
20. volgroup vg_rhel56 --pesize=4096 pv.1
21. logvol / --fstype ext3 --name=lv_root --vgname=vg_rhel56 --size=1024 --grow
22. logvol swap --fstype swap --name=lv_swap --vgname=vg_rhel56 --size=1024 --grow --maxsize=2048
23.
24. %packages
25. @base

openldap-clients
26. Save this file on a VFAT/FAT floppy disk as ks.cfg
27. Create a Red Hat Linux 5 x64 VM, with the following configuration:
1. Custom Config, VMware Workstation 6.5 compatible
2. I will install the operating system later.
3. Guest OS : Linux, Red Hat Enterprise Linux 5 64-bit
4. VM Name: “rhel5host1″
5. 1 Processor, 1 Core per Processor
6. 1024MB Memory
7. Use Host-Only Networking
8. IDE Controller type: ATAPI
9. SCSI Controller type: LSI Logic
10. Disk: Create a new virtual disk, SCSI, Maximum Disk size, 10GB, Store as Single File, rhel5host1.vmdk (on an NTFS filesystem).
11. Insert the Red Hat installer CD (Red Hat 5 Update 6)
12. Power on and Boot from CD.
13. Enter the following command line arguments:
linux ks=floppy://ks.cfg
14. Install VMware Tools:
15. # mount -o ro /dev/cdrom /mnt
16. # cp /mnt/VMware* /tmp
17. # umount /mnt
18. # cd /tmp
19. # tar xfz VMware*
20. # cd vmware-tools-distrib
21. # ./vmware-install.pl -d
22. # vmware-toolbox-cmd timesync enable
Enabled
23. Reconfigure the VM to use static IP addresses, and set the hostname, and DNS parameters
24. # system-config-network-tui
# service network restart
Plan of attack (in order):
1. Get ldapsearch working with simple bind, unencrypted
2. Configure LDAP
3. Verify LDAP works with getent(1), id(1), etc
4. Export the Root CA cert from Windows to UNIX
5. Check the CA cert works with OpenSSL
6. Import the CA cert
7. Get LDAPS working with ldapsearch
8. Change LDAP to use LDAPS rather than LDAP
9. Verify Kerberos works: Initially, without a host principal (krb5.keytab)
10. Configure PAM to use Kerberos (edit /etc/pam.conf)

11. Verify that services like login can use kerberised IDs and that the password works
12. Create a host principal keytab in Windows. Import it into UNIX.
13. Verify that kinit -k works
14. Edit /etc/krb5/krb5.conf to include “verify_ap_req_nofail = true” in the [libdefaults] section. This will secure the UNIX box to prove it is talking with
the bonefide KDC.
15. Get Single-Sign-On working
1. Ldapsearch, unencrypted
ldapsearch on Linux is very similar but not identical to Solaris. Some of the command line options are subtly different. (eg the -x flag is required to
use simple authentication, and URIs are supported)
Using the simple bind user, verify that lookups can be done using unencrypted LDAP. Not only will this return a record, but will also give the correct
attribute name:
# ldapsearch -v -x -H ldap://adserver -D "CN=ldapsearch,CN=Users,DC=example,DC=com" \
-b "DC=example,DC=com" -w ld@p53arch -s sub "cn=unix1"
ldap_initialize( ldap://adserver )
filter: cn=unix1
requesting: All userApplication attributes
# extended LDIF
#
# LDAPv3
# base <DC=example,DC=com> with scope subtree
# filter: cn=unix1
# requesting: ALL
#
# unix1, UNIX, example.com
dn: CN=unix1,OU=UNIX,DC=example,DC=com
objectClass: top
objectClass: person
objectClass: organizationalPerson
objectClass: user
cn: unix1
distinguishedName: CN=unix1,OU=UNIX,DC=example,DC=com
instanceType: 4
whenCreated: 20110809102742.0Z
whenChanged: 20110810132335.0Z
uSNCreated: 20816

memberOf: CN=unixgrp1,OU=UNIX,DC=example,DC=com
uSNChanged: 21194
name: unix1
objectGUID:: 8dUSWOctkEaf5x7FkpXrgw==
userAccountControl: 512
badPwdCount: 0
codePage: 0
countryCode: 0
badPasswordTime: 129574586131856092
lastLogoff: 0
lastLogon: 129574589801917979
pwdLastSet: 129574562159321288
primaryGroupID: 513
objectSid:: AQUAAAAAAAUVAAAA9P+gsh3KJO48P5XaUAQAAA==
accountExpires: 9223372036854775807
logonCount: 72
sAMAccountName: unix1
sAMAccountType: 805306368
userPrincipalName: [email protected]
objectCategory: CN=Person,CN=Schema,CN=Configuration,DC=example,DC=com
dSCorePropagationData: 16010101000000.0Z
lastLogonTimestamp: 129574227701101793
uid: unix1
msSFU30Name: unix1
msSFU30NisDomain: example
uidNumber: 10000
gidNumber: 10000
unixHomeDirectory: /home/unix1
loginShell: /bin/sh
# search reference
ref: ldap://ForestDnsZones.example.com/DC=ForestDnsZones,DC=example,DC=com

# search reference
ref: ldap://DomainDnsZones.example.com/DC=DomainDnsZones,DC=example,DC=com
# search reference
ref: ldap://example.com/CN=Configuration,DC=example,DC=com
# search result
search: 2
result: 0 Success
# numResponses: 5
# numEntries: 1
# numReferences: 3
2. Configure LDAP, unencrypted
LDAP on Linux is configured by using /etc/ldap.conf and /etc/openldap/ldap.conf.
The /etc/openldap/ldap.conf file is used for searching with ldapsearch (eg the location of keys is required in this file) . /etc/ldap.conf is used for lookups.
Confusing.
1. Configure /etc/ldap.conf
uri ldap://adserver/
ldap_version 3
binddn CN=ldapsearch,CN=Users,DC=example,DC=com
bindpw ld@p53arch
scope sub
timelimit 30
bind_timelimit 30
bind_policy hard
idle_timelimit 3600
pam_password clear
nss_base_passwd dc=example,dc=com?sub
nss_base_group dc=example,dc=com?sub
nss_base_shadow dc=example,dc=com?sub

# User Stuff:
pam_filter objectclass=user
nss_map_objectclass posixAccount user
nss_map_objectclass shadowAccount user
nss_map_attribute uid sAMAccountName
nss_map_attribute homeDirectory unixHomeDirectory
pam_login_attribute sAMAccountName
nss_map_attribute shadowLastChange pwdLastSet
# Group Stuff:
nss_map_objectclass posixGroup group
nss_map_attribute gid gidNumber
2. Configure /etc/nsswitch.conf
The following lines should be changed to use ldap after files:
passwd: files ldap
shadow: files ldap
group: files ldap
3. Verify getent(1) works
Now, Lookups should work:
# getent group unixgrp1
unixgrp1:*:10000:
# getent passwd unix1
unix1:*:10000:10000:unix1:/home/unix1:/bin/sh
# id -a unix1
uid=10000(unix1) gid=10000(unixgrp1) groups=10000(unixgrp1)
4. Import the root CA Certificates
The .PEM format rootCA.cer file should be copied (probably with psftp.exe) to the RedHat system. For the purposes of this instruction it is saved in
/root/rootCA.cer.
5. Verify that the certificate file is ok with OpenSSL
# openssl x509 -in /root/rootCA.cer -subject -issuer -purpose
subject= /DC=com/DC=example/CN=example-ADSERVER-CA
issuer= /DC=com/DC=example/CN=example-ADSERVER-CA

Certificate purposes:
SSL client : Yes
SSL client CA : Yes
SSL server : Yes
SSL server CA : Yes
Netscape SSL server : No
Netscape SSL server CA : Yes
S/MIME signing : Yes
S/MIME signing CA : Yes
S/MIME encryption : No
S/MIME encryption CA : Yes
CRL signing : Yes
CRL signing CA : Yes
Any Purpose : Yes
Any Purpose CA : Yes
OCSP helper : Yes
OCSP helper CA : Yes
-----BEGIN CERTIFICATE-----
MIIDczCCAlugAwIBAgIQGGdCEtXMnZ9CxrbAG8zNEjANBgkqhkiG9w0BAQUFADBM
MRMwEQYKCZImiZPyLGQBGRYDY29tMRcwFQYKCZImiZPyLGQBGRYHZXhhbXBsZTEc
MBoGA1UEAxMTZXhhbXBsZS1BRFNFUlZFUi1DQTAeFw0xMTA4MDkwOTI0NTBaFw0x
NjA4MDkwOTM0NDlaMEwxEzARBgoJkiaJk/IsZAEZFgNjb20xFzAVBgoJkiaJk/Is
ZAEZFgdleGFtcGxlMRwwGgYDVQQDExNleGFtcGxlLUFEU0VSVkVSLUNBMIIBIjAN
BgkqhkiG9w0BAQEFAAOCAQ8AMIIBCgKCAQEAoeQeyJYdYiftNx0g2GOlDxWxo2ah
qsC5h7ryVEwr5BHv39aD33l+DZCHIKWRJA2DQk/xmyzElQhIAI1A7ikR9pPDegVP
eKNhl1n/I5KHrzWhJFCaMYcCmwf6H0X7HaYtDw2Ya2Qv9+s31yIXInA6b49vpXF/
/lkh8NeAh4lHCFBEOzLEaV9Oks6B+ZoSk47PWOFObbafIOY23keabekVn6DFekG5
h+WqihGaVjL7kpSJixyTDcY1WGAaBmiqPgVeCoNsMDIvdrflRIEO5yirQIGayzYN
IuW3HhiiuWkH48iwzcScKc0YMVTnRve5sJ6aQVEiUXvFaw8LDcX628upyQIDAQAB
o1EwTzALBgNVHQ8EBAMCAYYwDwYDVR0TAQH/BAUwAwEB/zAdBgNVHQ4EFgQU3ijY
Of/XO1EuaGxon2AQGtZ1AGUwEAYJKwYBBAGCNxUBBAMCAQAwDQYJKoZIhvcNAQEF
BQADggEBAD6Hy40U1CFMDRQ1lQxJsShFc1VqPION/49OYxM7NN07hLbC07VYwNdH

OpK0GvfAL8EExF5yX07NxTWZu1An8eZy1NzhSEdIsEo4wwMlej68DUuZaUK5azV9
EAPcVwQtWVqCowRNWR35VcSx8pYLxyCthNMj9uNjiGgXH7rgSf61JGRkzwnTEkUc
woi84vMGGVGqKNAqm0n0hlJgYGWmVKWfqs8GFwXP99VNTdNJqiJp4EmFiZyeZCRw
m7zKVvmPgQ7l9gq1zNBQ3E4eCj7gtvTKfJDk35uxk3IdOuWaKnDLrtHstb+SWkry
FIes6uSRw9XMupknrR3Og0MHXbx+UZU=
-----END CERTIFICATE-----
The CA root certificate can be tested as follows:
# openssl s_client -connect adserver.example.com:636 -CAfile /etc/openldap/cacerts/rootCA.cer < /dev/null
CONNECTED(00000003)
depth=1 /DC=com/DC=example/CN=example-ADSERVER-CA
verify return:1
depth=0 /CN=adserver.example.com
verify return:1
---
Certificate chain
0 s:/CN=adserver.example.com
i:/DC=com/DC=example/CN=example-ADSERVER-CA
---
Server certificate
-----BEGIN CERTIFICATE-----
MIIF7jCCBNagAwIBAgIKEbgl6gAAAAAAAjANBgkqhkiG9w0BAQUFADBMMRMwEQYK
CZImiZPyLGQBGRYDY29tMRcwFQYKCZImiZPyLGQBGRYHZXhhbXBsZTEcMBoGA1UE
AxMTZXhhbXBsZS1BRFNFUlZFUi1DQTAeFw0xMTA4MDkxNzAyMTRaFw0xMjA4MDgx
NzAyMTRaMB8xHTAbBgNVBAMTFGFkc2VydmVyLmV4YW1wbGUuY29tMIIBIjANBgkq
hkiG9w0BAQEFAAOCAQ8AMIIBCgKCAQEA16Aa3EZH2wW+6N0nWJ8oQvpsgha3AsBS
+iGuuMb9zMj+w5Ulj7tMO1EBQJNJ9Nmlk0kbjbs4+hLD+Jwknxzy4WXSN3yOVIpe
7f/2WJ2a35BXb0AHoMUrtk0UBNhBJgCN3ujxrmm5wWIIKIy9QhqMIFrP9O37XVdX
j6bWRB/5g3qIvpPdsrjizFcVuSx9fZ6apYwsE7E8sDV7IYHKZP7N12wKHXqgxVhQ
BTATusYvyfbLTDoNL/eg3kXcnmZefABhqjJh+Id9peAKTokhyC6KpYnmElm/4gzd
dJ2B4UIQfaL0iHUq5qB5i69jTR5hfQMJ6vHqDdG60e32Ga6oHYHeIwIDAQABo4IC
/TCCAvkwLwYJKwYBBAGCNxQCBCIeIABEAG8AbQBhAGkAbgBDAG8AbgB0AHIAbwBs
AGwAZQByMB0GA1UdJQQWMBQGCCsGAQUFBwMCBggrBgEFBQcDATAOBgNVHQ8BAf8E

BAMCBaAweAYJKoZIhvcNAQkPBGswaTAOBggqhkiG9w0DAgICAIAwDgYIKoZIhvcN
AwQCAgCAMAsGCWCGSAFlAwQBKjALBglghkgBZQMEAS0wCwYJYIZIAWUDBAECMAsG
CWCGSAFlAwQBBTAHBgUrDgMCBzAKBggqhkiG9w0DBzAdBgNVHQ4EFgQUMF1hyvrm
NUeMP6yIPklWxNlUEpQwHwYDVR0jBBgwFoAU3ijYOf/XO1EuaGxon2AQGtZ1AGUw
gdIGA1UdHwSByjCBxzCBxKCBwaCBvoaBu2xkYXA6Ly8vQ049ZXhhbXBsZS1BRFNF
UlZFUi1DQSxDTj1hZHNlcnZlcixDTj1DRFAsQ049UHVibGljJTIwS2V5JTIwU2Vy
dmljZXMsQ049U2VydmljZXMsQ049Q29uZmlndXJhdGlvbixEQz1leGFtcGxlLERD
PWNvbT9jZXJ0aWZpY2F0ZVJldm9jYXRpb25MaXN0P2Jhc2U/b2JqZWN0Q2xhc3M9
Y1JMRGlzdHJpYnV0aW9uUG9pbnQwgcUGCCsGAQUFBwEBBIG4MIG1MIGyBggrBgEF
BQcwAoaBpWxkYXA6Ly8vQ049ZXhhbXBsZS1BRFNFUlZFUi1DQSxDTj1BSUEsQ049
UHVibGljJTIwS2V5JTIwU2VydmljZXMsQ049U2VydmljZXMsQ049Q29uZmlndXJh
dGlvbixEQz1leGFtcGxlLERDPWNvbT9jQUNlcnRpZmljYXRlP2Jhc2U/b2JqZWN0
Q2xhc3M9Y2VydGlmaWNhdGlvbkF1dGhvcml0eTBABgNVHREEOTA3oB8GCSsGAQQB
gjcZAaASBBDVqLtSbD/oR6YHGq+PNID0ghRhZHNlcnZlci5leGFtcGxlLmNvbTAN
BgkqhkiG9w0BAQUFAAOCAQEAM7RqqBlu7t4fcqECr2wo4JxNhcvx3X/neTQwgGKA
s0ORxikhEw8/MofzzTOzcABx8mlG2XcjBjOjlTq3ezUqgVQB3SggqM8R3btlVCt0
1CYCKxb7g1w+IOyeU/LjXZhmk1lnPmysZgEkT1VfBx4xowHAmlZO48TcjhA/5+Fu
PcmeSXkGau20kFu11Y49aj5/sYGAK2WNgkDzCxo7vz/mSlyjEDFVT66NHVl3juVF
Y/Ymj0GPsW9Nh/3/y2VYKJFxVIPGEHSH9eSvtPUu++TgtNkxfKxPgjOu0vTIKisy
RR6i66q5Y+szSHxpXvW0StmvBZskbJmuSnQC6QdnSvoZVw==
-----END CERTIFICATE-----
subject=/CN=adserver.example.com
issuer=/DC=com/DC=example/CN=example-ADSERVER-CA
---
Acceptable client certificate CA names
/DC=com/DC=example/CN=example-ADSERVER-CA
/CN=adserver.example.com
/C=US/O=VeriSign, Inc./OU=Class 3 Public Primary Certification Authority
/OU=Copyright (c) 1997 Microsoft Corp./OU=Microsoft Corporation/CN=Microsoft Root Authority
/DC=com/DC=microsoft/CN=Microsoft Root Certificate Authority
/CN=NT AUTHORITY
---

SSL handshake has read 2140 bytes and written 459 bytes
---
New, TLSv1/SSLv3, Cipher is AES128-SHA
Server public key is 2048 bit
Secure Renegotiation IS NOT supported
Compression: NONE
Expansion: NONE
SSL-Session:
Protocol : TLSv1
Cipher : AES128-SHA
Session-ID: 0908000095B93DAB72C80378CB4A9A87C116CBFA47B3046953BDC5D0A123FBF9
Session-ID-ctx:
Master-Key:
605B7D5B698F92AE6350A8D98A9FFFBB3C19688060100C899F6447F097B2BEB132687079F0D05092612F462E458EDCA8
Key-Arg : None
Krb5 Principal: None
Start Time: 1313109018
Timeout : 300 (sec)
Verify return code: 0 (ok)
---
DONE
6. Import the Root CA Certificate
The certificate should be copied into /etc/openldap/cacerts:
# cp /root/rootCA.cer /etc/openldap/cacerts
# cacertdir_rehash /etc/openldap/cacerts
7. Test ldapsearch works with LDAPS
This line must be present in /etc/openldap/ldap.conf:
TLS_CACERTDIR /etc/openldap/cacerts
Now LDAPS searches can be performed:
# ldapsearch -v -x -H ldaps://adserver.example.com/ \
-D "CN=ldapsearch,CN=Users,DC=example,DC=com" -b "DC=example,DC=com" \
-w ld@p53arch -s sub "cn=unix1"

ldap_initialize( ldaps://adserver.example.com/ )
filter: cn=unix1
requesting: All userApplication attributes
# extended LDIF
#
# LDAPv3
# base <DC=example,DC=com> with scope subtree
# filter: cn=unix1
# requesting: ALL
#
# unix1, UNIX, example.com
dn: CN=unix1,OU=UNIX,DC=example,DC=com
objectClass: top
objectClass: person
objectClass: organizationalPerson
objectClass: user
cn: unix1
distinguishedName: CN=unix1,OU=UNIX,DC=example,DC=com
instanceType: 4
whenCreated: 20110809102742.0Z
whenChanged: 20110810132335.0Z
uSNCreated: 20816
memberOf: CN=unixgrp1,OU=UNIX,DC=example,DC=com
uSNChanged: 21194
name: unix1
objectGUID:: 8dUSWOctkEaf5x7FkpXrgw==
userAccountControl: 512
badPwdCount: 0
codePage: 0
countryCode: 0
badPasswordTime: 129574586131856092

lastLogoff: 0
lastLogon: 129574589801917979
pwdLastSet: 129574562159321288
primaryGroupID: 513
objectSid:: AQUAAAAAAAUVAAAA9P+gsh3KJO48P5XaUAQAAA==
accountExpires: 9223372036854775807
logonCount: 72
sAMAccountName: unix1
sAMAccountType: 805306368
userPrincipalName: [email protected]
objectCategory: CN=Person,CN=Schema,CN=Configuration,DC=example,DC=com
dSCorePropagationData: 16010101000000.0Z
lastLogonTimestamp: 129574227701101793
uid: unix1
msSFU30Name: unix1
msSFU30NisDomain: example
uidNumber: 10000
gidNumber: 10000
unixHomeDirectory: /home/unix1
loginShell: /bin/sh
# search reference
ref: ldaps://ForestDnsZones.example.com/DC=ForestDnsZones,DC=example,DC=com
# search reference
ref: ldaps://DomainDnsZones.example.com/DC=DomainDnsZones,DC=example,DC=com
# search reference
ref: ldaps://example.com/CN=Configuration,DC=example,DC=com
# search result
search: 2

result: 0 Success
# numResponses: 5
# numEntries: 1
# numReferences: 3
#
NB. Fully qualified host names must be used, since those names are in ther certifcate. Short host names won’t work:
# ldapsearch -v -x -H ldaps://adserver/ \
-D "CN=ldapsearch,CN=Users,DC=example,DC=com" -b "DC=example,DC=com" \
-w ld@p53arch -s sub "cn=unix1"
ldap_initialize( ldaps://adserver/ )
ldap_bind: Can't contact LDAP server (-1)
additional info: TLS: hostname does not match CN in peer certificate
8. Change /etc/ldap.conf to use LDAPS rather than LDAP
We already know that LDAP works. We need to change the mechanism from simple to simple over TLS. Again we also must be careful to use the
FQDN:
Change/Add these lines:
uri ldaps://adserver.example.com/
tls_cacertdir /etc/openldap/cacerts
We can verify that lookups are now working:
# getent passwd unix1
unix1:x:10000:10000:unix1:/home/unix1:/bin/sh
# getent group unixgrp1
unixgrp1:*:10000:
# id -a unix1
uid=10000(unix1) gid=10000(unixgrp1) groups=10000(unixgrp1)
And moreover, a tcpdump of port 389 will show no unencrypted traffic being used.
9. Verify that Kerberos works
Edit the krb5.conf file to specify the domain and REALM:
/etc/krb5.conf:
[logging]
default = FILE:/var/log/krb5libs.log
kdc = FILE:/var/log/krb5kdc.log
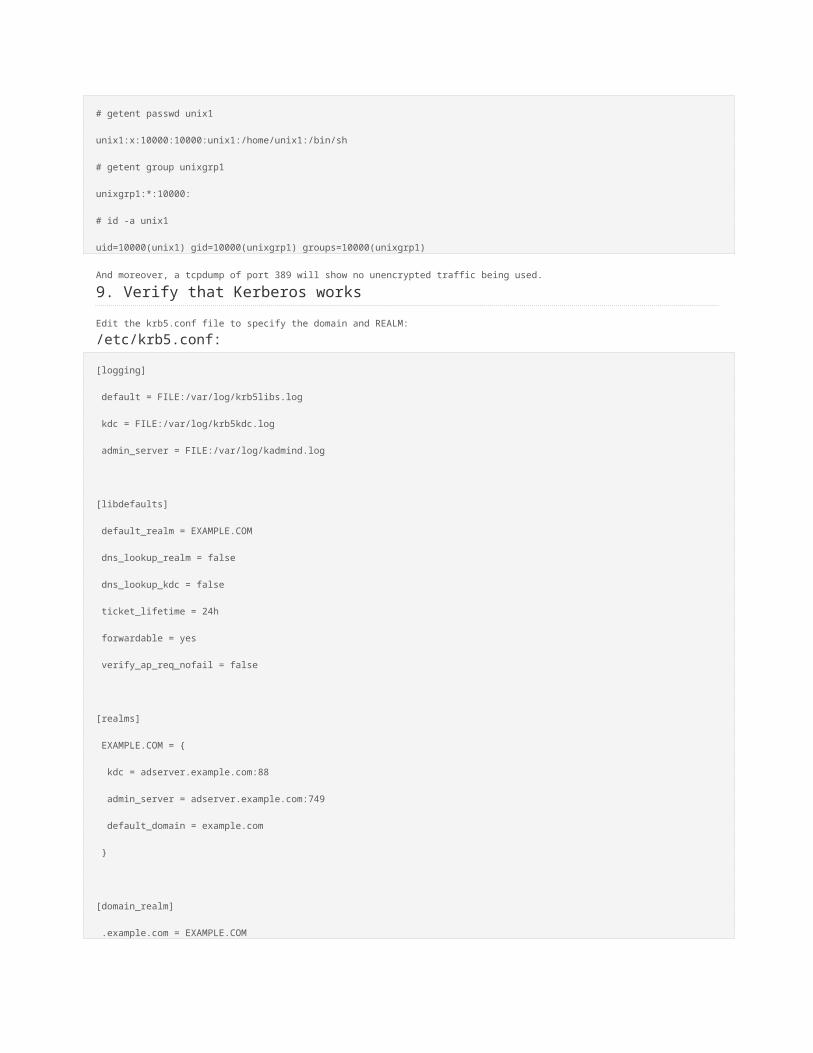
admin_server = FILE:/var/log/kadmind.log
[libdefaults]
default_realm = EXAMPLE.COM
dns_lookup_realm = false
dns_lookup_kdc = false
ticket_lifetime = 24h
forwardable = yes
verify_ap_req_nofail = false
[realms]
EXAMPLE.COM = {
kdc = adserver.example.com:88
admin_server = adserver.example.com:749
default_domain = example.com
}
[domain_realm]
.example.com = EXAMPLE.COM
example.com = EXAMPLE.COM
[appdefaults]
pam = {
debug = false
ticket_lifetime = 36000
renew_lifetime = 36000
forwardable = true
krb4_convert = false
}
We can use a user’s ID and password to verify that kerberos works for user principals:
# kinit [email protected]
Password for [email protected]:

# klist -e
Ticket cache: FILE:/tmp/krb5cc_0
Default principal: [email protected]
Valid starting Expires Service principal
08/11/11 10:32:29 08/11/11 20:32:31 krbtgt/[email protected]
renew until 08/12/11 10:32:29, Etype (skey, tkt): AES-256 CTS mode with 96-bit SHA-1 HMAC, AES-256 CTS
mode with 96-bit SHA-1 HMAC
Kerberos 4 ticket cache: /tmp/tkt0
klist: You have no tickets cached
/etc/krb5.conf must be edited to specify the default realm. And “verify_ap_req_nofail = false” can be added to ignore missing host principals
(/etc/krb5/krb5.keytab) until they have been set up.
Now for this to be useful, PAM must be configured to use kerberos
10. Configure PAM to use Kerberos
Linux PAM is divided into multiple files.
Edit /etc/pam.conf to add the pam_krb5.so.1 library file at these locations:
/etc/pam.d/system-auth-ac
#%PAM-1.0
# This file is auto-generated.
# User changes will be destroyed the next time authconfig is run.
auth required pam_env.so
auth sufficient pam_unix.so nullok try_first_pass
auth requisite pam_succeed_if.so uid >= 500 quiet
auth sufficient pam_krb5.so use_first_pass
auth required pam_deny.so
account required pam_unix.so
account sufficient pam_succeed_if.so uid < 500 quiet
account [default=bad success=ok user_unknown=ignore] pam_krb5.so
account required pam_permit.so
password requisite pam_cracklib.so try_first_pass retry=3
password sufficient pam_unix.so md5 shadow nullok try_first_pass use_authtok
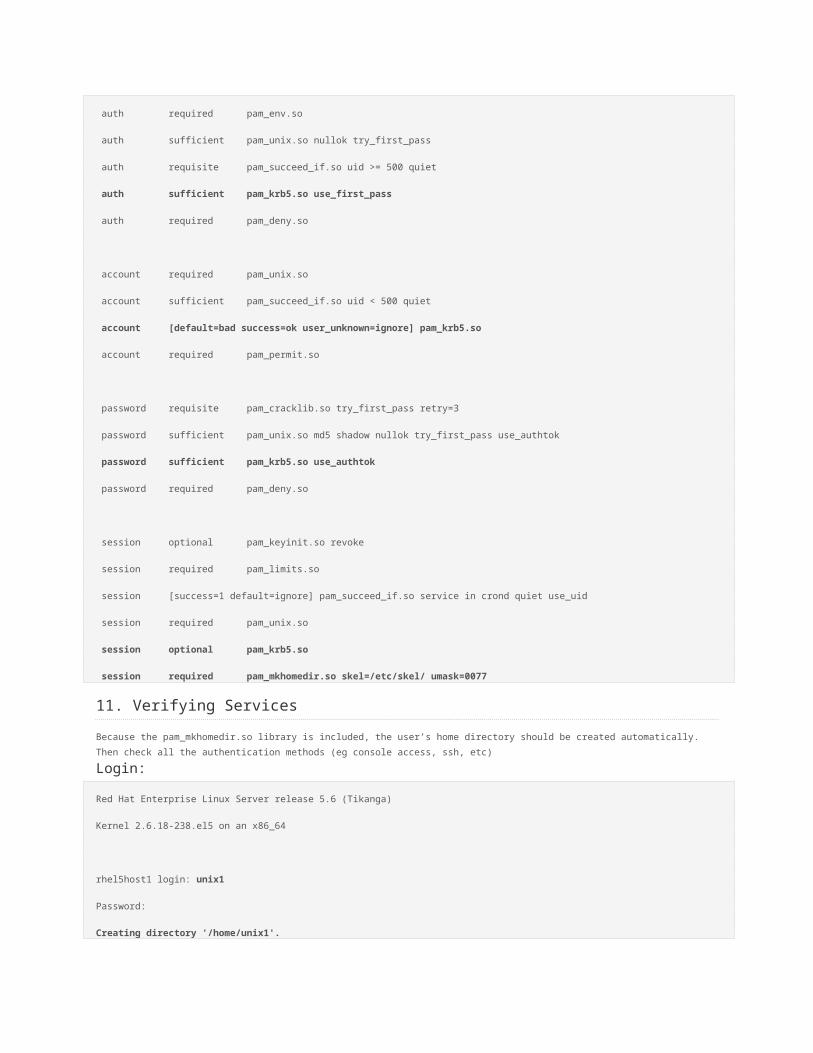
password sufficient pam_krb5.so use_authtok
password required pam_deny.so
session optional pam_keyinit.so revoke
session required pam_limits.so
session [success=1 default=ignore] pam_succeed_if.so service in crond quiet use_uid
session required pam_unix.so
session optional pam_krb5.so
session required pam_mkhomedir.so skel=/etc/skel/ umask=0077
11. Verifying Services
Because the pam_mkhomedir.so library is included, the user’s home directory should be created automatically. Then check all the authentication
methods (eg console access, ssh, etc)
Login:
Red Hat Enterprise Linux Server release 5.6 (Tikanga)
Kernel 2.6.18-238.el5 on an x86_64
rhel5host1 login: unix1
Password:
Creating directory '/home/unix1'.
Last login: Thu Aug 11 10:58:42 on tty1
-sh-3.2$
SSH:
# ssh unix1@localhost
The authenticity of host 'localhost (127.0.0.1)' can't be established.
RSA key fingerprint is 8a:88:23:62:85:62:49:41:07:ab:6d:d2:90:a7:4c:bb.
Are you sure you want to continue connecting (yes/no)? yes
Warning: Permanently added 'localhost' (RSA) to the list of known hosts.
unix1@localhost's password:
Last login: Thu Aug 11 11:00:53 2011
-sh-3.2$ exit
12. Create a host principal keytab in Windows.
To create a host keytab in Windows, first a computer account must exist (this was created in the previous blog). Then create a host principal mapped to
that user.

NB. Keytabs need to use the fully qualified domain name.
NB. Keytabs must use encryption which is supported by both ends.
Suggestion: Either use /crypto all, or a known cryptosystem which is supported (eg AES256-SHA1).
There is a Security Policy, which has a checkbox list of all the Supported types:
Security Settings -> Local Policies -> Security Options -> Network Security: Configure encryption types allowed for Kerberos
DES_CBC_CRC
DES_CBC_MD5
RC4_HMAC_MD5
AES128_HMAC_SHA1
AES256_HMAC_SHA1
Future Encryption Types
eg (line split for easy reading)
C:\>ktpass /princ host/[email protected] \
/ptype KRB5_NT_PRINCIPAL /out C:\temp\rhel5host1.keytab /pass mypass \
/crypto AES256-SHA1 /mapuser EXAMPLE\rhel5host1
Targeting domain controller: adserver.example.com
Successfully mapped host/rhel5host1.example.com to RHEL5HOST1$.
WARNING: Account RHEL5HOST1$ is not a user account (uacflags=0x1021).
WARNING: Resetting RHEL5HOST1$'s password may cause authentication problems if R
HEL5HOST1$ is being used as a server.
Reset RHEL5HOST1$'s password [y/n]? y
Password succesfully set!
WARNING: pType and account type do not match. This might cause problems.
Key created.
Output keytab to C:\temp\rhel5host1.keytab:
Keytab version: 0x502
keysize 90 host/[email protected] ptype 1 (KRB5_NT_PRINCIPAL) v
no 3 etype 0x12 (AES256-SHA1) keylength 32 (0x620811baa774cc27f00f95152c7a92f8c4
f0a1faa00f532391dbc7ad394fecb4)
This file can now be copied to /etc/krb5.keytab, and verified as follows:
# klist -ke
Keytab name: FILE:/etc/krb5.keytab
KVNO Principal
---- --------------------------------------------------------------------------
3 host/[email protected] (AES-256 CTS mode with 96-bit SHA-1 HMAC)
# kinit -k

If kinit doesn’t complain, then principal keytab is working, however, this might not be the end of the story. If an encryption scheme is not allowed, the
following message may occur:
Aug 11 11:09:22 localhost sshd[14627]: pam_krb5[14627]: TGT failed verification using keytab and key for
‘host/[email protected]’: Key table entry not found
Aug 11 11:09:22 localhost sshd[14627]: pam_krb5[14627]: authentication fails for ‘unix1′ ([email protected]): Authentication failure (Success)
Aug 11 11:09:24 localhost sshd[14627]: Failed password for unix1 from 127.0.0.1 port 45476 ssh2
See This Blog for information on keytabs and encryption.