Embed Size (px)
Citation preview

Azeron Gaming Keypad Manual
MANUAL V3.0

Page | 1 AZERON GAMING KEYPAD | Manual
TABLE OF CONTENTS
1. INTRODUCTION…………………………………………………………………….. 2
2. FEATURES / PACKAGE CONTENTS…………………………………………. 3
3. DEVICE LAYOUT……………………………………………………………………. 4
4. SETUP YOUR AZERON KEYPAD……………………………………………… 5
5. HOW TO UPDATE FIRMWARE MANUALLY……………………………. 6
6. HOW TO USE AZERON SOFTWARE………………………………………… 8
6.1 INSTALLING AZERON SOFTWARE………………………….. 8
6.2 WORKING WITH SOFTWARE…………………………………. 9
6.2.1 INTERFACE OVERVIEW…………………………….. 10
6.2.2 BUTTON SETUP………………………………………… 11
6.2.3 THUMBSTICK SETUP………………………………… 13
6.2.4 CALIBRATING DEADZONES………………………. 14
6.2.5 PROFILES…………………………………………………. 15
6.2.6 SOFTWARE OPTIONS (ABOUT PAGE)……….. 17
7. TIPS AND TRICKS…………………………………………………………………….. 19

Page | 2 AZERON GAMING KEYPAD | Manual
1. INTRODUCTION
The Azeron gaming keypad is a simple Plug-and-Play controller that sets
up easily with our software. It can function as a joystick or as a keyboard
or in hybrid mode.
The keypad comes with 26 programmable buttons and an analog
thumbstick for complete control and maneuverability over your game.
Its ergonomic wrist pad, adjustable key towers and adjustable thumb
module delivers a perfect fit for your arm and minimized fatigue over
extended gameplay.
Page | 3 AZERON GAMING KEYPAD | Manual
2. FEATURES
19 programmable buttons on towers
7 programmable thumb buttons
A programmable analog thumbstick
Adjustable button positions to fit your hand
Stable metal base with antislip silicon pads
Braided tower cables
2 meter (6.5 feet) USB cable
Programmable Teensy++ 2.0 brain
Easy accessible reset button
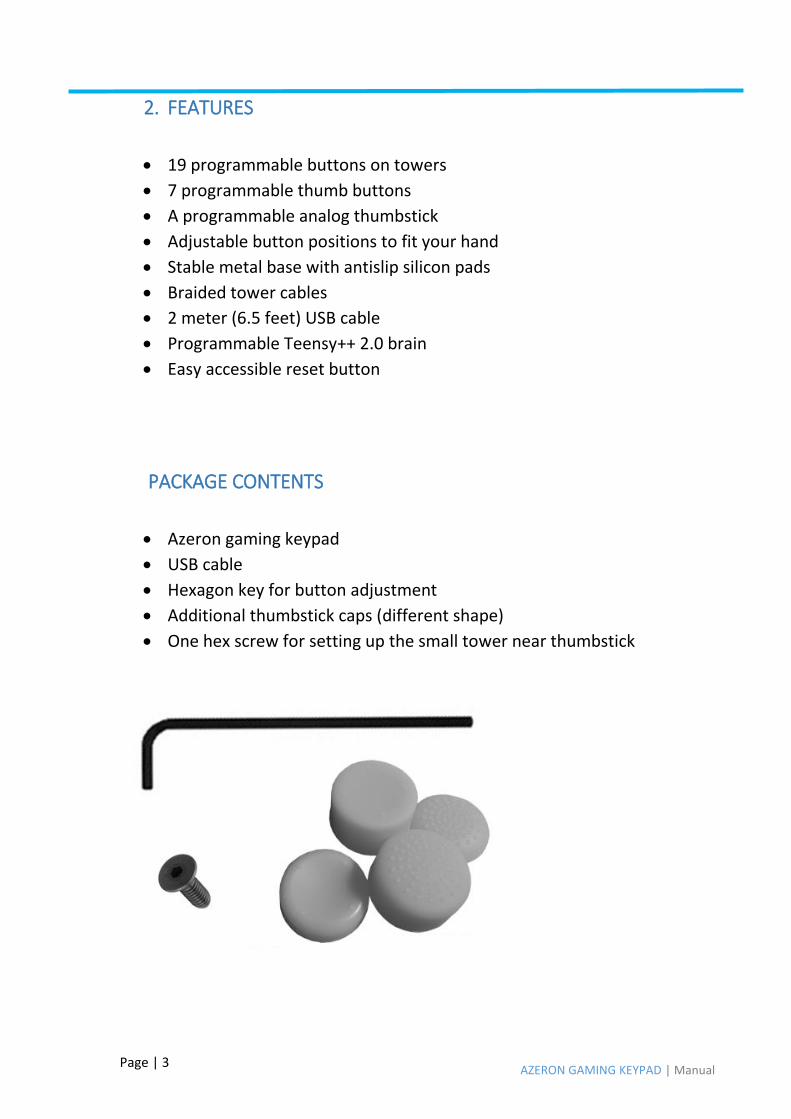
PACKAGE CONTENTS
Azeron gaming keypad
USB cable
Hexagon key for button adjustment
Additional thumbstick caps (different shape)
One hex screw for setting up the small tower near thumbstick

Page | 4 AZERON GAMING KEYPAD | Manual
3. DEVICE LAYOUT

Page | 5 AZERON GAMING KEYPAD | Manual
4. SETUP YOUR AZERON KEYPAD
By using the included Hex key, it is possible to adjust each key tower
position for your hand.

Page | 6 AZERON GAMING KEYPAD | Manual
5. HOW TO UPDATE FIRMWARE MANUALLY
Warning! By updating the firmware, you may lose your saved profile
settings.
Step 1:
Connect keypad to USB slot (don’t connect to USB 3.0 if you don’t have
USB 3.0 drivers installed)
Step 2:
Open teensy.exe software
Step 3:
Press on first button to load hex file (for example, “Firmware.hex”)
Step 4:
Reset Azeron keypad by pressing reset button in the hole shown in the
picture (you can use the included hex key):

Page | 7 AZERON GAMING KEYPAD | Manual
Step 5:
Wait until button 2 is available in Teensy software. Then press button 2 to upload
firmware.
Step 6:
After that, press button 3, to restart Teensy. Wait until at least one Profile LED has
turned on at the side of the keypad (that means, keypad is on and running).
Now unplug and replug the USB cable in PC, before launching Azeron software.
Done!
Page | 8 AZERON GAMING KEYPAD | Manual
6. HOW TO USE AZERON SOFTWARE
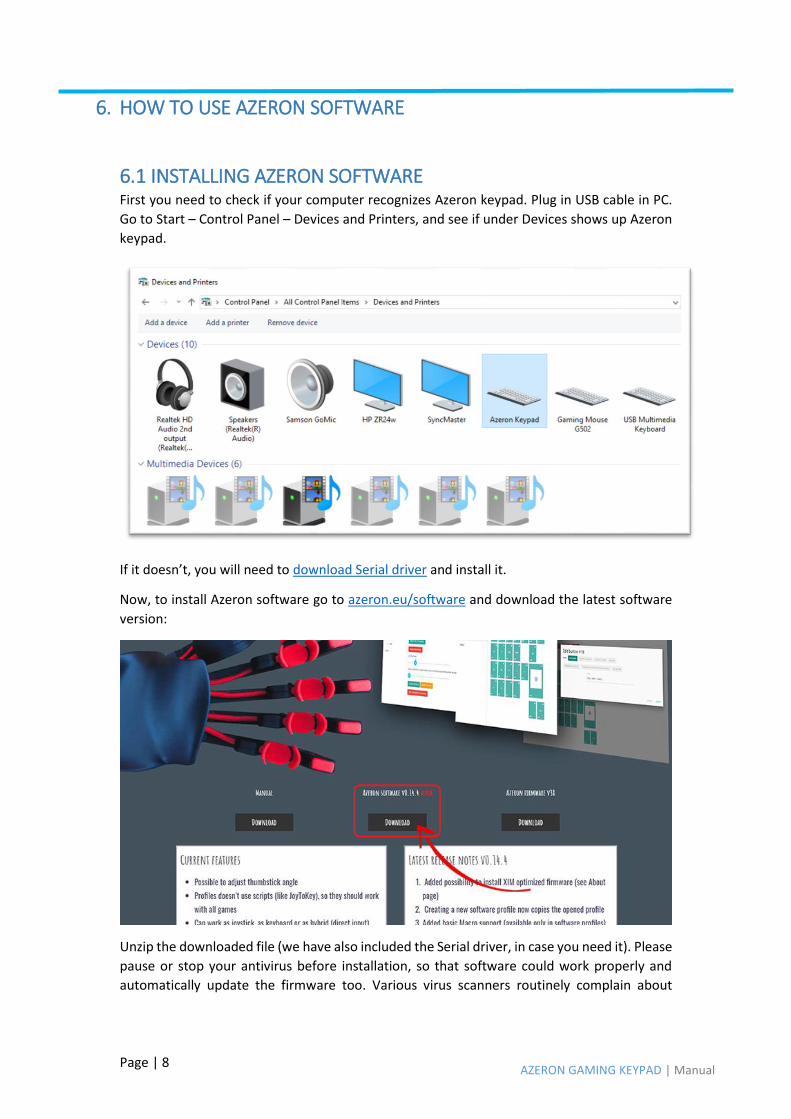
6.1 INSTALLING AZERON SOFTWARE First you need to check if your computer recognizes Azeron keypad. Plug in USB cable in PC.
Go to Start – Control Panel – Devices and Printers, and see if under Devices shows up Azeron
keypad.
If it doesn’t, you will need to download Serial driver and install it.
Now, to install Azeron software go to azeron.eu/software and download the latest software
version:
Unzip the downloaded file (we have also included the Serial driver, in case you need it). Please
pause or stop your antivirus before installation, so that software could work properly and
automatically update the firmware too. Various virus scanners routinely complain about

Page | 9 AZERON GAMING KEYPAD | Manual
installer. This is because it’s a new program to them. You can check out the installer by using
VirusTotal and satisfy yourself before you install.
Double click on azeron-setup-v0.14.4.exe to install it. Sometimes Windows may prevent
installation, because it is a new software it doesn’t recognize:
Just click on the “More info” and then on “Run anyway”.
After that, the software will start to install. When it’s done, there will be a shortcut icon on
Desktop and in the Start menu.
6.2 WORKING WITH SOFTWARE Plug in the keypad USB cable in PC and then launch the Azeron software.
In case the Azeron software doesn’t show profiles in onboard memory and a lot of features
are missing in About page, then you should close the software, unplug USB cable, wait until
Windows no longer see the keypad, then plug in back the USB cable, turn on software again.
Here you can see comparison. In first picture the software does not recognize the keypad fully
(missing profiles in On-board memory). In second picture the software has all the features.

Page | 10 AZERON GAMING KEYPAD | Manual
6.2.1 INTERFACE OVERVIEW There are 2 profile types available on-board and software. On-board profiles are saved in the
keypad memory (so you can use the keypad on other PC or consoles (through XIM) and it will
work with the saved settings). If you are using only on-board profiles, then Azeron software
doesn’t need to run while gaming, it is used just to setup buttons. If you are using software
profile, then the Azeron software needs to run while playing the game.

Page | 11 AZERON GAMING KEYPAD | Manual
6.2.2 BUTTON SETUP When pressing button on the keypad, the corresponding button will light up in the Azeron
software.
To setup buttons, click on the button you wish to setup, then choose between several modes:
keyboard, joystick, mouse, toggle or no action.
For keyboard mode you can setup any keyboard button to be used on Azeron keypad. It is
also possible to setup button combinations on one key press.

Page | 12 AZERON GAMING KEYPAD | Manual
In joystick mode the keypad will act as a joystick button (it can be used in games which require
gaming controllers (direct input)). If you are using Azeron keypad on consoles through XIM
device, then you need to setup all buttons as joystick buttons.
In Joystick D-Pad mode the button can be setup as any function of the D-Pad (Up, Right, Down
Left, Left, etc.).
In Mouse mode the button can be setup as mouse button left click, right click, mid-click,
forward and backward.
On the keypad there is only one thumbstick, but you can setup a button to switch between
two thumbstick settings. In Toggle R/L Joystick mode, a button press will toggle between 2
settings in the Thumbstick options. If thumbstick is setup as an analog stick, then it will switch
between Left and Right analog stick. If thumbstick is setup as a keyboard (WASD for example),
then you can setup also what keyboard buttons will be on the second thumbstick (for example
QWES).

Page | 13 AZERON GAMING KEYPAD | Manual
Mode Toggle R/L joystick while held down works the same as mode above, but the second
thumbstick settings will work only while button is held down.
In no action mode the button will be “empty” and do nothing.
6.2.3 THUMBSTICK SETUP Thumbstick has 2 modes – it acts as analog stick or as a keyboard buttons.
With angle setting it is possible to rotate the forward direction for thumbstick:

Page | 14 AZERON GAMING KEYPAD | Manual
Deadzone is an area from the center of the
thumbstick that won’t recognize input if the stick is
moved within it. The setting is percentage 0-100%
starting from center.
When we think about dead zones, this is usually the
kind of thing we’re envisioning: a very small area in
the center of the stick within which input is ignored.
The size of the area is simply our best guess at how
far a loose, worn-out stick is likely to wiggle on its
own, without physical input.
If you are not sure what deadzone settings you should use, just go through the Calibrate
Deadzones wizard, and the software will choose the best settings for your thumbstick.
Sensitivity setting controls how sensitive thumbstick feels as percentage 0-100%. The lower
the value the more sensitive is the thumbstick. Default is 3 or 4.
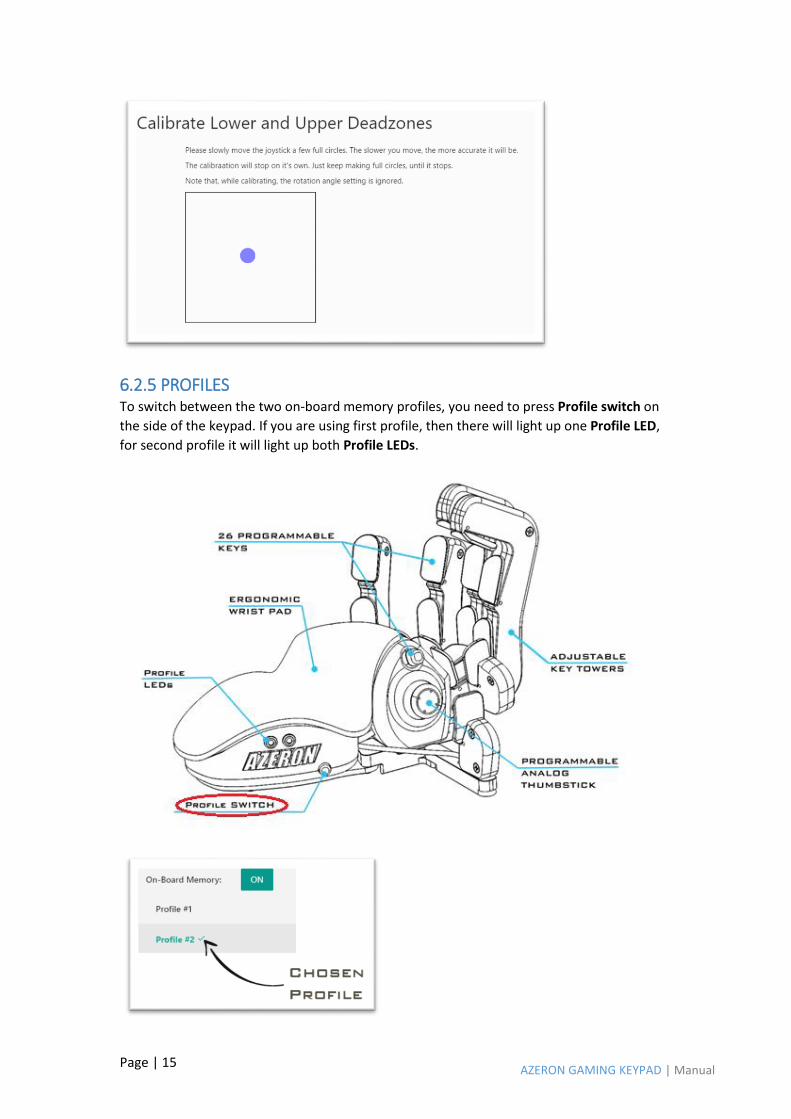
6.2.4 CALIBRATING DEADZONES In thumbstick options you can use Calibrate Deadzones wizard, which will setup the best
deadzone settings for your thumbstick (thumbstick on each keypad may differ a little due to
the analog stick manufacturing tolerances and quality control). When opening the Wizard, it
will instruct you step by step what must be done. First step is leaving the thumbstick still for
2 seconds (that will calibrate the lower deadzone). Second step is slowly rotating thumbstick
in circles (that will setup the upper deadzone).
Note! Calibration must be done for each profile separately.
Page | 15 AZERON GAMING KEYPAD | Manual
6.2.5 PROFILES To switch between the two on-board memory profiles, you need to press Profile switch on
the side of the keypad. If you are using first profile, then there will light up one Profile LED,
for second profile it will light up both Profile LEDs.

Page | 16 AZERON GAMING KEYPAD | Manual
To work with software profiles, you need to turn them on by pressing ON button near
“Profiles:”.
Note! When using software profiles, the Azeron software must be running in the background
while playing the game.
If you are running on Software profiles, it is possible to choose 2 profiles as favorite and then
switch between them with Profile switch. Or you can activate any selected profile with
Activate button.
Any software profile can also be sent to On-board memory, by pressing OBM#1 or OBM#2.
At the bottom of the profile list is button + Add, which will create a new profile by copying
already selected profile.

Page | 17 AZERON GAMING KEYPAD | Manual
6.2.6 SOFTWARE OPTIONS (ABOUT PAGE) (1) At the top of the About page you can see the software version number and also what
firmware your keypad has and if there is available newer version firmware.
(2) To update to newer firmware version, just press the button Update and follow the
instructions on the screen: at first step you will have to press on the Update button when
ready, then by using included hex screwdriver you need to press Reset button under your
keypad, and then just wait until everything is updated. After a firmware is updated we highly
recommend re-plugging USB cable and restarting software.
(3) If you are using Azeron keypad on consoles through XIM device, then it is possible to Install
XIM optimized firmware, which removes all unnecessary features, leaving only one profile in
the on-board memory with joystick settings, but still keeping possibility to adjust thumbstick
angle, deadzones and sensitivity.
(4) Turn LEDs off will completely turn off the Profile LEDs on the side of the keypad.
(5) Switch to left handed will switch the button interface for keypad that is meant for left
handed people (keypad in right hand, mouse in left hand):

Page | 18 AZERON GAMING KEYPAD | Manual
(6) Enable PIN editing is meant for advanced button settings, if you ever need to change the
PIN layout on the Teensy++ 2.0 board.
(7) LED brightness slider adjusts the Profile LEDs on the side of the keypad. The higher the
value, the brighter the LEDs will glow.
(8) Button throttle. In case one or more of the buttons are starting to make double clicks, you
can setup button throttle here in milliseconds. That is the time that must pass between keypad
will register next keypress on the same button.
Note! The button throttle currently works on all buttons in the same time, it can’t be setup
separately for each button.
(9) Import / Export Profiles. You can back up all of your profiles in one .JSON file, to prevent
any accidental deletion when reinstalling software or Windows, updating firmware, etc.
(10) Reset hardware to defaults. This option will delete all on-board memory profiles, restores
everything to default settings. It is the same as reinstalling firmware in the keypad.

Page | 19 AZERON GAMING KEYPAD | Manual
7. TIPS AND TRICKS
It is recommended to setup space bar button on the mouse, so
the running and jumping in the same time is effortless
It is possible to setup button combinations, by putting Shift (or
Ctrl, or Alt) on the mouse and combine it with buttons on the
keypad, to setup more than 22 commands. For example, Shift + 1,
Shift + A, Ctrl + W etc.
To make it easier to get used to the key setup – we recommend
creating a new character in the game and learn new skills one by
one together with your character
In case the software doesn’t recognize keypad, you need to close
the software, remove USB cable from PC, wait until Windows no
longer see the keypad, then plug in back the USB cable, turn on
the software again (see page 9 and 10)
WARNING! Do not keep the keypad near heat sources or in hot places!
Contact for more information: [email protected]
Facebook: https://www.facebook.com/Azeron.Gaming.Keypad/
Webpage: azeron.eu