Embed Size (px)
Citation preview
www.ACLS123.com 818-909-7234
Basic Life Support
Study Guide
Critical Care Training Center
Critical Care Training Center www.ACLS123.com Page 1
Use promotional code “Study” for 10% off your total price.
Course Overview
This study guide is an outline of content that will be taught in the American Heart Association Accredited Basic Life Support (BLS) Course. It is intended to summarize important content, but since all BLS content cannot possibly be absorbed in a class given every two years, it is expected that the student will have the 2010 Updated ECC Handbook readily available for review as a reference. The student is also required to have the AHA BLS Textbook available for reference and study for more in depth content.
Evidence Based Updates
Approximately every 5 years the AHA updates the guidelines for CPR and Emergency Cardiovascular Care. These updates are necessary to ensure that all AHA courses contain the best information and recommendations that can be supported by current scientific evidence experts from outside the United States and outside the AHA. The guidelines were then
classified as to the strength of evidence that supports the recommendation.
2010 AHA Guidelines for CPR and ECC Science Update
The 2010 American Heart Association Guidelines for Cardiopulmonary Resuscitation and Emergency Cardiovascular Care recommendations for healthcare providers include the following key changes and issues:
Changes in basic life support (BLS sequence)
Continued emphasis on high-quality CPR, with minor changes in compression rate and depth
Additional changes regarding cricoid pressure, pulse check and AED use in infants
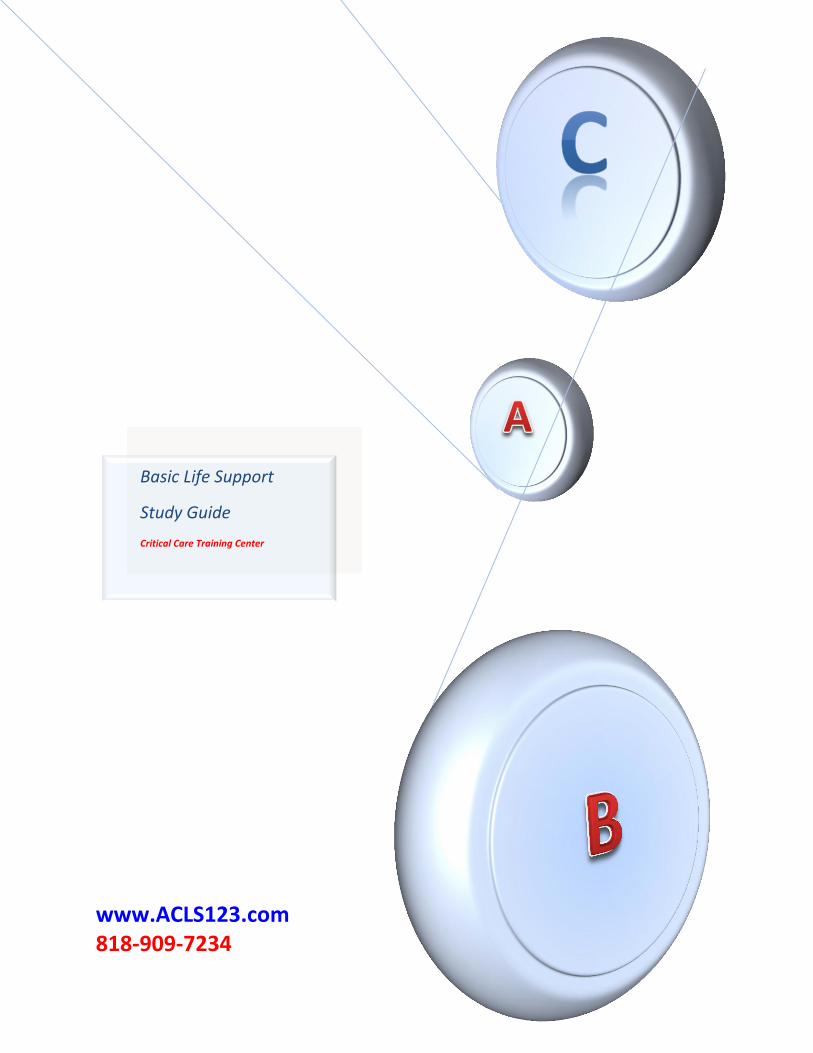
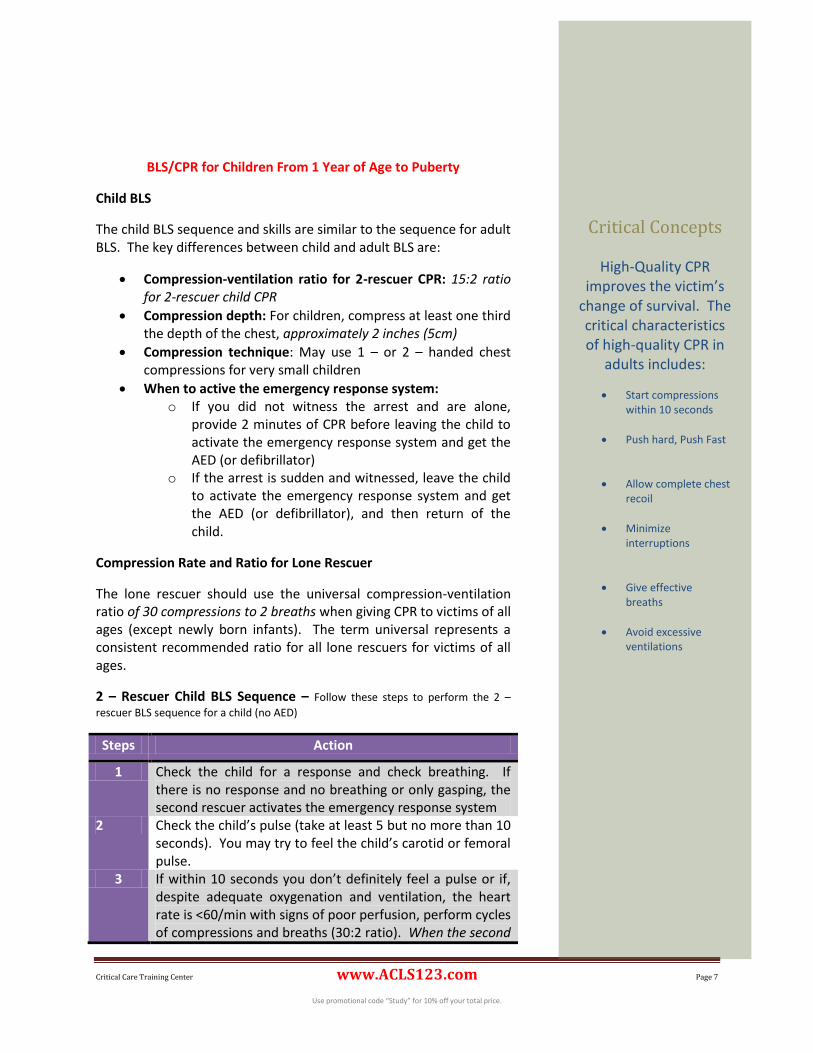
Critical Concepts
High-quality CPR improves a victim’s chances of survival. The critical characteristics of high-quality CPR include.
Start Compressions within 10 seconds
Push Hard, Push Fast
Allow complete Chest recoil
Minimize interruptions
Give effective Breaths
Avoid Excessive Ventilations
Critical Care Training Center www.ACLS123.com Page 2
Use promotional code “Study” for 10% off your total price.
Changes in Sequence:
C-A-B – NOT – A-B-C
In the A-B-C sequence, chest compressions were often delayed while the rescuer opened the airway to give mouth-to-mouth breaths, retrieved a barrier device, or gathered and assembled ventilation equipment. By changing the sequence to C-A-B, rescuers can start chest compressions sooner, and the delay in giving breaths should be minimal (only the tie required to deliver the first cycle of 30 chest compression, or approximately 18 seconds or less; for 2-rescuer infant or child CPR, the delay will be even shorter).
Emphasis on High-Quality CPR
A compression rate of at least 100/min (this is a change from “approximately 100/min)
A compression depth of at least 2 inches (5cm) in adult and a compression depth of at least one third of the anterior-posterior diameter of the chest in infants and children. This is approximately 1 ½ inches (4cm) in infants and 2 inches (5cm) in children. Note that the range of 1 ½ to 2 inches is no longer used for adults, and the absolute depth specified for children and infants is deeper than in previous versions of the AHA Guidelines for CPR and ECC.
Allow complete chest recoil, minimizing interruptions in compressions, and avoiding excessive ventilation continues to be important components of high-quality CPR.
Continued de-emphasis of the pulse check
It can be difficult to determine the presence or absence of pulse within 10 seconds, especially in an emergency, and studies show that both healthcare providers and lay rescuers are unable to reliably detect a pulse
If a victim is unresponsive and not breathing or only gasping, healthcare providers may take up to 10 seconds to attempt to feel for a pulse (brachial in an infant and carotid or femoral in a child)
If within 10 seconds you don’t feel a pulse or are not sure if you feel a pulse, begin chest compressions.
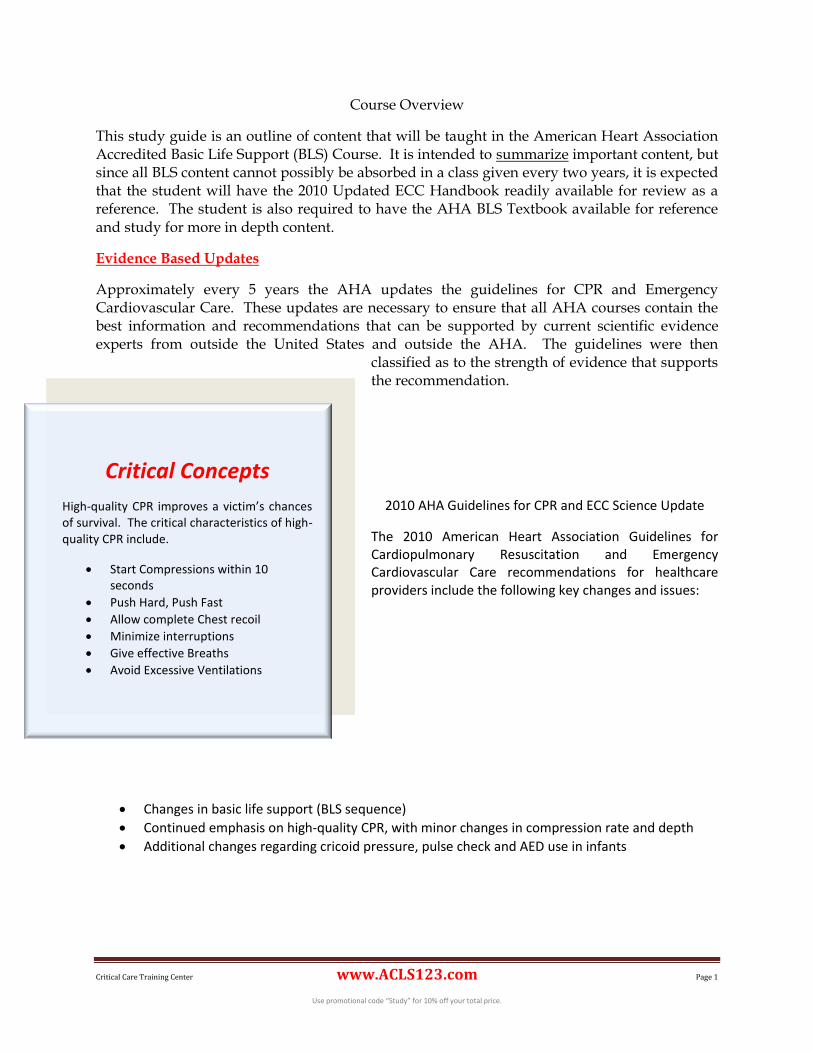
The Routine use of cricoid pressure in
cardiac arrest is not recommended
It may block ventilation
Delay the placement of an
advance airway
Difficult to train rescuers how to
do this
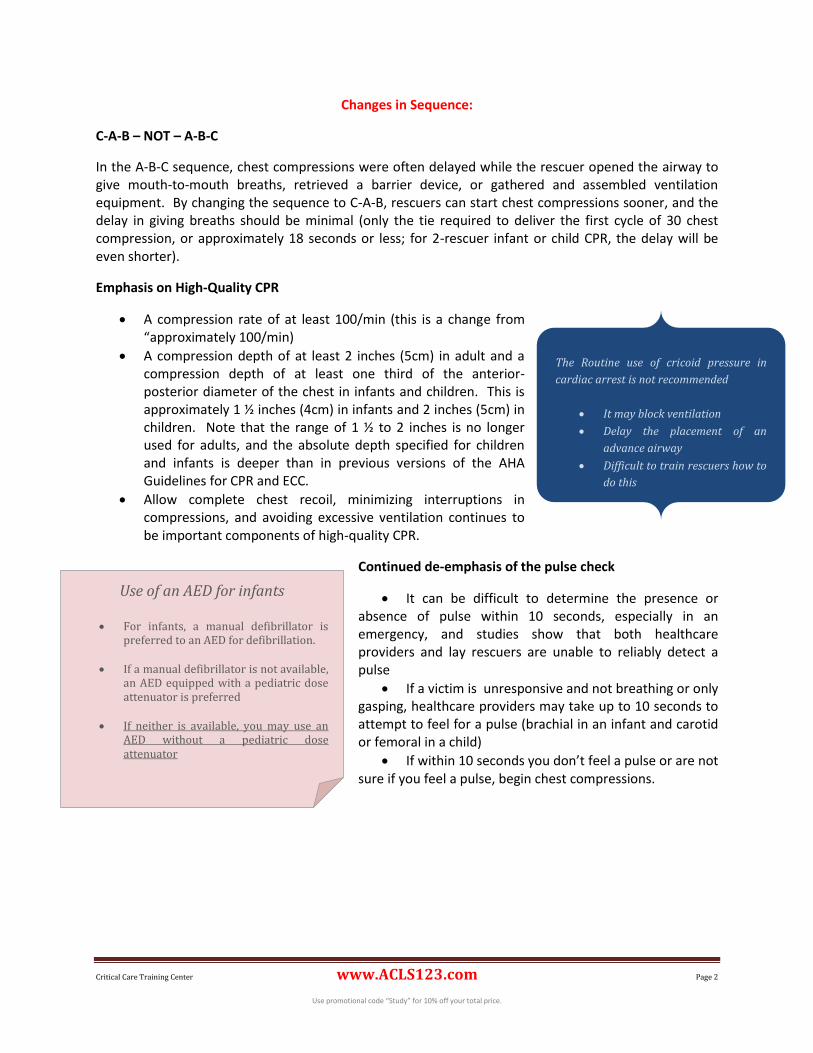
Use of an AED for infants
For infants, a manual defibrillator is preferred to an AED for defibrillation.
If a manual defibrillator is not available, an AED equipped with a pediatric dose attenuator is preferred
If neither is available, you may use an AED without a pediatric dose attenuator
Critical Care Training Center www.ACLS123.com Page 3
Use promotional code “Study” for 10% off your total price.
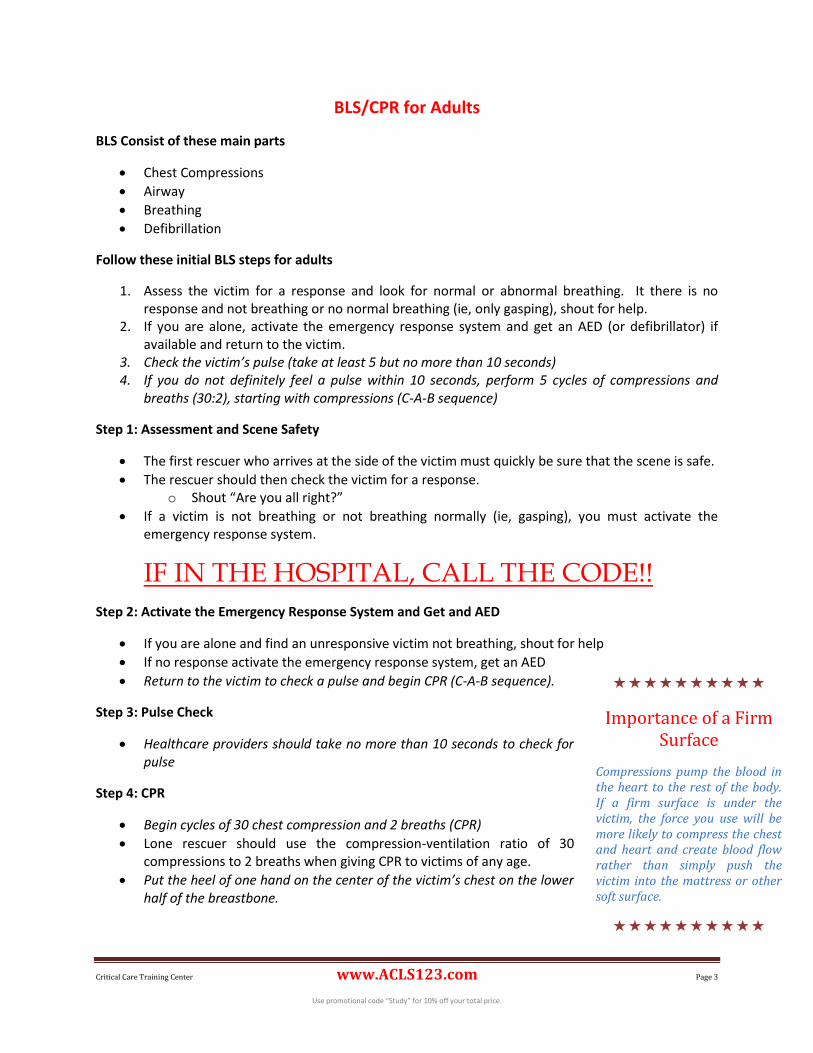
Importance of a Firm Surface
Compressions pump the blood in the heart to the rest of the body. If a firm surface is under the victim, the force you use will be more likely to compress the chest and heart and create blood flow rather than simply push the victim into the mattress or other soft surface.
BLS/CPR for Adults
BLS Consist of these main parts
Chest Compressions
Airway
Breathing
Defibrillation
Follow these initial BLS steps for adults
1. Assess the victim for a response and look for normal or abnormal breathing. It there is no response and not breathing or no normal breathing (ie, only gasping), shout for help.
2. If you are alone, activate the emergency response system and get an AED (or defibrillator) if available and return to the victim.
3. Check the victim’s pulse (take at least 5 but no more than 10 seconds) 4. If you do not definitely feel a pulse within 10 seconds, perform 5 cycles of compressions and
breaths (30:2), starting with compressions (C-A-B sequence)
Step 1: Assessment and Scene Safety
The first rescuer who arrives at the side of the victim must quickly be sure that the scene is safe.
The rescuer should then check the victim for a response. o Shout “Are you all right?”
If a victim is not breathing or not breathing normally (ie, gasping), you must activate the emergency response system.
IF IN THE HOSPITAL, CALL THE CODE!!
Step 2: Activate the Emergency Response System and Get and AED
If you are alone and find an unresponsive victim not breathing, shout for help
If no response activate the emergency response system, get an AED
Return to the victim to check a pulse and begin CPR (C-A-B sequence).
Step 3: Pulse Check
Healthcare providers should take no more than 10 seconds to check for pulse
Step 4: CPR
Begin cycles of 30 chest compression and 2 breaths (CPR)
Lone rescuer should use the compression-ventilation ratio of 30 compressions to 2 breaths when giving CPR to victims of any age.
Put the heel of one hand on the center of the victim’s chest on the lower half of the breastbone.
Critical Care Training Center www.ACLS123.com Page 4
Use promotional code “Study” for 10% off your total price.
Moving the Victim
Do not move the victim while CPR is in progress unless the victim is in dangerous environment (such as a burning building) or if you believe you cannot perform CPR effectively in the victim’s present position or location.
Opening the Airway for Breaths: Head Tilt-Chin Lift
1. Place on hand on the victim’s forehead and push with your palm to tilt the head back 2. Place the fingers of the other hand under the bony part of the lower jaw near the chin 3. Lift the jaw to bring the chin forward
Giving Mouth – to – Mask Breaths
1. Position yourself at the victim’s side 2. Place the mask on the victim’s face, using the bridge of the nose as a guide for correct position. 3. Seal the mask against the face:’
a. Using the hand that is closer to the top of the victim’s head, place your index finger and thumb along the edge of the mask.
b. Place the thumb of your second hand along the bottom edge of the mask 4. Place the remaining fingers of your second hand along the bony margin of the jaw and lift the
jaw. Perform a head tilt-chin lift to open the airway 5. While you lift the jaw, press firmly and completely around the outside edge of the mask to seal
the mask against the face. 6. Deliver air over 1 second to make the victim’s chest rise.
Using the Bag-Mask During 2-Rescuer CPR
1. Position yourself directly above the victim’s head 2. Place the mask on the victim’s face, using the bridge of the as a
guide for correct position 3. Use the E – C clamp technique to hold the mask in place while you
lift the jaw to hold the airway open a. Perform a head tilt b. Place the mask on the face with the narrow portion of the
bridge of the nose c. Use the thumb and index finger of one hand to make a “C” on the side of the mask,
pressing the edges of the mask to the face. d. Using the remaining fingers to lift the angles of the jaw (3 fingers form an “E”) open the
airway and press the face to the mask 4. Squeeze the bag to give breaths (1 second each) while watching for chest rise. Deliver all
breaths over 1 second whether or not you use supplemental oxygen.
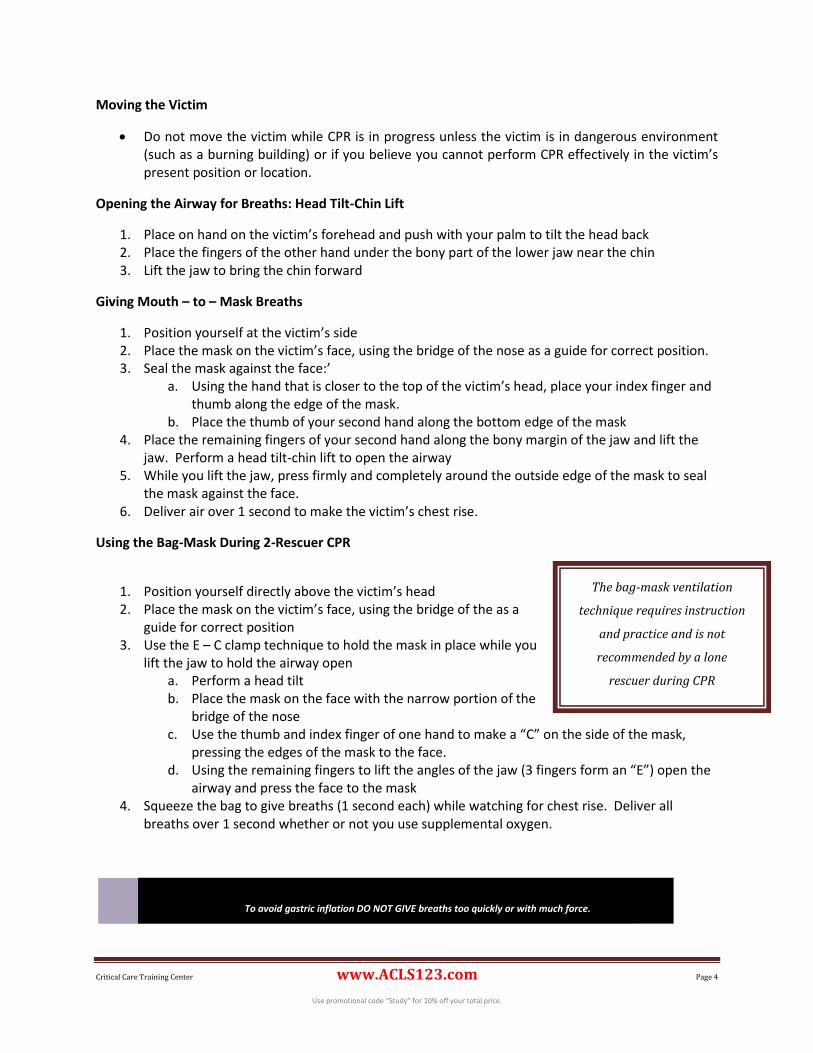
To avoid gastric inflation DO NOT GIVE breaths too quickly or with much force.
The bag-mask ventilation
technique requires instruction
and practice and is not
recommended by a lone
rescuer during CPR
Critical Care Training Center www.ACLS123.com Page 5
Use promotional code “Study” for 10% off your total price.
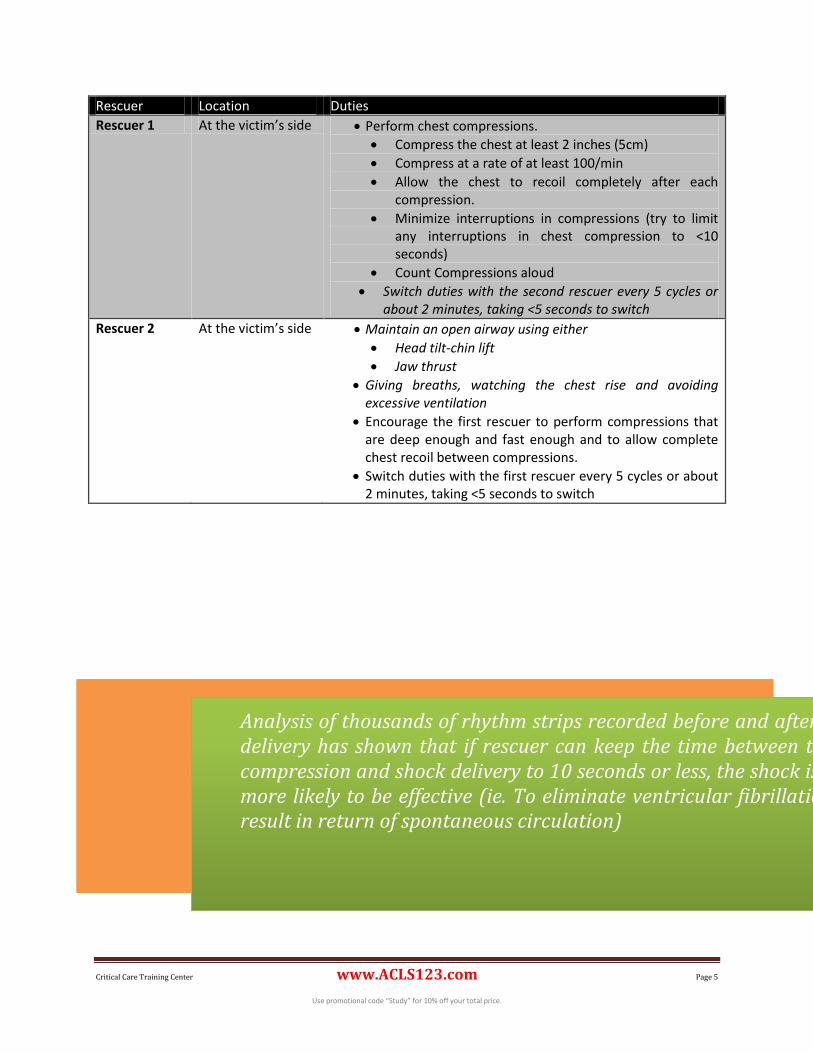
Rescuer Location Duties
Rescuer 1 At the victim’s side Perform chest compressions.
Compress the chest at least 2 inches (5cm)
Compress at a rate of at least 100/min
Allow the chest to recoil completely after each compression.
Minimize interruptions in compressions (try to limit any interruptions in chest compression to <10 seconds)
Count Compressions aloud
Switch duties with the second rescuer every 5 cycles or about 2 minutes, taking <5 seconds to switch
Rescuer 2 At the victim’s side Maintain an open airway using either
Head tilt-chin lift
Jaw thrust
Giving breaths, watching the chest rise and avoiding excessive ventilation
Encourage the first rescuer to perform compressions that are deep enough and fast enough and to allow complete chest recoil between compressions.
Switch duties with the first rescuer every 5 cycles or about 2 minutes, taking <5 seconds to switch
Analysis of thousands of rhythm strips recorded before and after shock delivery has shown that if rescuer can keep the time between the last compression and shock delivery to 10 seconds or less, the shock is much more likely to be effective (ie. To eliminate ventricular fibrillation and result in return of spontaneous circulation)
Critical Care Training Center www.ACLS123.com Page 6
Use promotional code “Study” for 10% off your total price.
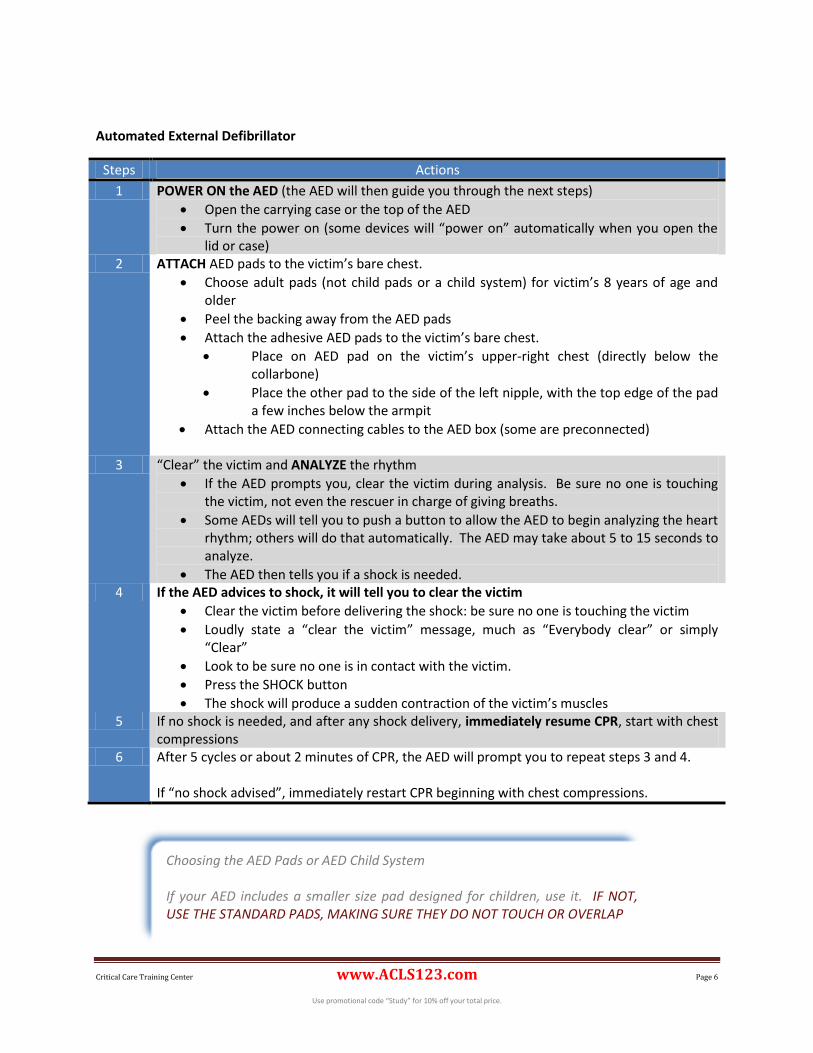
Automated External Defibrillator
Steps Actions
1 POWER ON the AED (the AED will then guide you through the next steps)
Open the carrying case or the top of the AED
Turn the power on (some devices will “power on” automatically when you open the lid or case)
2 ATTACH AED pads to the victim’s bare chest.
Choose adult pads (not child pads or a child system) for victim’s 8 years of age and older
Peel the backing away from the AED pads
Attach the adhesive AED pads to the victim’s bare chest.
Place on AED pad on the victim’s upper-right chest (directly below the collarbone)
Place the other pad to the side of the left nipple, with the top edge of the pad a few inches below the armpit
Attach the AED connecting cables to the AED box (some are preconnected)
3 “Clear” the victim and ANALYZE the rhythm
If the AED prompts you, clear the victim during analysis. Be sure no one is touching the victim, not even the rescuer in charge of giving breaths.
Some AEDs will tell you to push a button to allow the AED to begin analyzing the heart rhythm; others will do that automatically. The AED may take about 5 to 15 seconds to analyze.
The AED then tells you if a shock is needed. 4 If the AED advices to shock, it will tell you to clear the victim
Clear the victim before delivering the shock: be sure no one is touching the victim
Loudly state a “clear the victim” message, much as “Everybody clear” or simply “Clear”
Look to be sure no one is in contact with the victim.
Press the SHOCK button
The shock will produce a sudden contraction of the victim’s muscles 5 If no shock is needed, and after any shock delivery, immediately resume CPR, start with chest
compressions 6 After 5 cycles or about 2 minutes of CPR, the AED will prompt you to repeat steps 3 and 4.
If “no shock advised”, immediately restart CPR beginning with chest compressions.
Choosing the AED Pads or AED Child System If your AED includes a smaller size pad designed for children, use it. IF NOT, USE THE STANDARD PADS, MAKING SURE THEY DO NOT TOUCH OR OVERLAP
Critical Care Training Center www.ACLS123.com Page 7
Use promotional code “Study” for 10% off your total price.
BLS/CPR for Children From 1 Year of Age to Puberty
Child BLS
The child BLS sequence and skills are similar to the sequence for adult BLS. The key differences between child and adult BLS are:
Compression-ventilation ratio for 2-rescuer CPR: 15:2 ratio for 2-rescuer child CPR
Compression depth: For children, compress at least one third the depth of the chest, approximately 2 inches (5cm)
Compression technique: May use 1 – or 2 – handed chest compressions for very small children
When to active the emergency response system: o If you did not witness the arrest and are alone,
provide 2 minutes of CPR before leaving the child to activate the emergency response system and get the AED (or defibrillator)
o If the arrest is sudden and witnessed, leave the child to activate the emergency response system and get the AED (or defibrillator), and then return of the child.
Compression Rate and Ratio for Lone Rescuer
The lone rescuer should use the universal compression-ventilation ratio of 30 compressions to 2 breaths when giving CPR to victims of all ages (except newly born infants). The term universal represents a consistent recommended ratio for all lone rescuers for victims of all ages.
2 – Rescuer Child BLS Sequence – Follow these steps to perform the 2 –
rescuer BLS sequence for a child (no AED)
Steps Action
1 Check the child for a response and check breathing. If there is no response and no breathing or only gasping, the second rescuer activates the emergency response system
2 Check the child’s pulse (take at least 5 but no more than 10 seconds). You may try to feel the child’s carotid or femoral pulse.
3 If within 10 seconds you don’t definitely feel a pulse or if, despite adequate oxygenation and ventilation, the heart rate is <60/min with signs of poor perfusion, perform cycles of compressions and breaths (30:2 ratio). When the second
Critical Concepts
High-Quality CPR improves the victim’s
change of survival. The critical characteristics of high-quality CPR in
adults includes:
Start compressions within 10 seconds
Push hard, Push Fast
Allow complete chest recoil
Minimize interruptions
Give effective breaths
Avoid excessive ventilations
Critical Care Training Center www.ACLS123.com Page 8
Use promotional code “Study” for 10% off your total price.
rescuer arrives, use compressions – to – breaths ratio of 15:2.
BLS / CPR for Infants
For the purposes of the BLS sequence described in the Pediatric BLS Algorithm, the term infant means infants to 1 years of age (12 months), excluding newly born infants in the delivery room. For BLS for children 1 years and older, see “BLS/CPR for Children 1 Year of Age to Puberty”
The infant BLS sequence and skills are very similar to those used for child and adult CPR. They key differences for infant BLS are:
The location of pulse check: brachial artery in infants
Technique of delivering compressions: 2 fingers for single rescuer and 2 thumb – encircling hands technique for 2 rescuers
Compression depth: at least one third and chest depth, approximately 1 ½ inches (4cm)
Compression-ventilation rate and ratio for 2 rescuers: same as for child – 15:2 ratio for 2 rescuers
When to active the emergency response system (same as for child): o If you did not witness the arrest and are alone, provide 2 minutes of CPR before leaving
the infant to active the emergency response system and get the AED (or defibrillator). o If the arrest is sudden and witnessed, leave the infant to phone 911 and get the AED (or
defibrillator), then return to the infant.
2 – Finger Chest Compression Technique
Follow these steps to give chest compressions to an infant using the 2-finger technique.
Steps Actions
1 Place the infant on a firm, flat surface 2 Place 2 fingers in the center of the infant’s chest just below the nipple line. Do not press on
the bottom of the breastbone 3 Push hard and fast. To give chest compressions, press the infant’s breastbone down at least
one third the depth of the chest (approximately 1 ½ inches (4cm). Deliver compressions in a smooth fashion at a rate of at least 100/min
4 At the end of each compression, make sure you allow the chest to recoil (reexpand) completely. Chest recoil allows blood to flow into the heart and is necessary to create blood flow during chest compressions. Incomplete chest recoil will reduce the blood flow created by chest compressions. Chest compressions and chest recoil/relaxation times should be approximately equal.
5 Minimize interruptions in chest compressions.
Critical Care Training Center www.ACLS123.com Page 9
Use promotional code “Study” for 10% off your total price.
2 Thumb – Encircling Hands Chest Compression Technique
Follow these steps to give chest compressions to an infant using the 2 thumb – encircling hand technique.
1. Place both thumbs side by side in the center of the infant’s chest on the lower half of the breastbone. The thumbs may overlap in very small infants.
2. Encircle the infant’s chest and support the infant’s back with the fingers of both hands.
3. With your hands encircling the chest, use both thumbs to depress the breastbone approximately one third of the depth of the infant’s chest (approximately 1 ½ inches {4cm})
4. Deliver compressions in a smooth fashion at a rate of at least 100/min
5. After compressions, completely release the pressure on the breastbone and allow the chest to recoil completely
6. After every 15 compressions, pause briefly for the second rescuer to open the airway with the head tilt-chin lift and given 2 breaths. The chest should rise with each breath.
7. Continue compressions and breaths in a ratio of 15:2 (for 2 rescuers), switching roles every 2 minutes to avoid rescuer fatigue.
CPR With an Advanced Airway
Ventilation Technique
Compressions to Breaths (Adult) Compressions to Breaths (Child and Infant)
No Advanced Airway (mouth-to-mouth, mouth-to-mask, bag-mask)
30 compressions to 2 breaths
Compression rate of at least 100/min
15 compressions to 2 breaths
Compression rate of at least 100/min
Advanced airway (endotracheal intubation, laryngeal mask airway, supraglottic)
Compression rate of at least 100/min without pauses for breaths
1 breath every 6 to 8 seconds (8 to 10 breaths per minute)
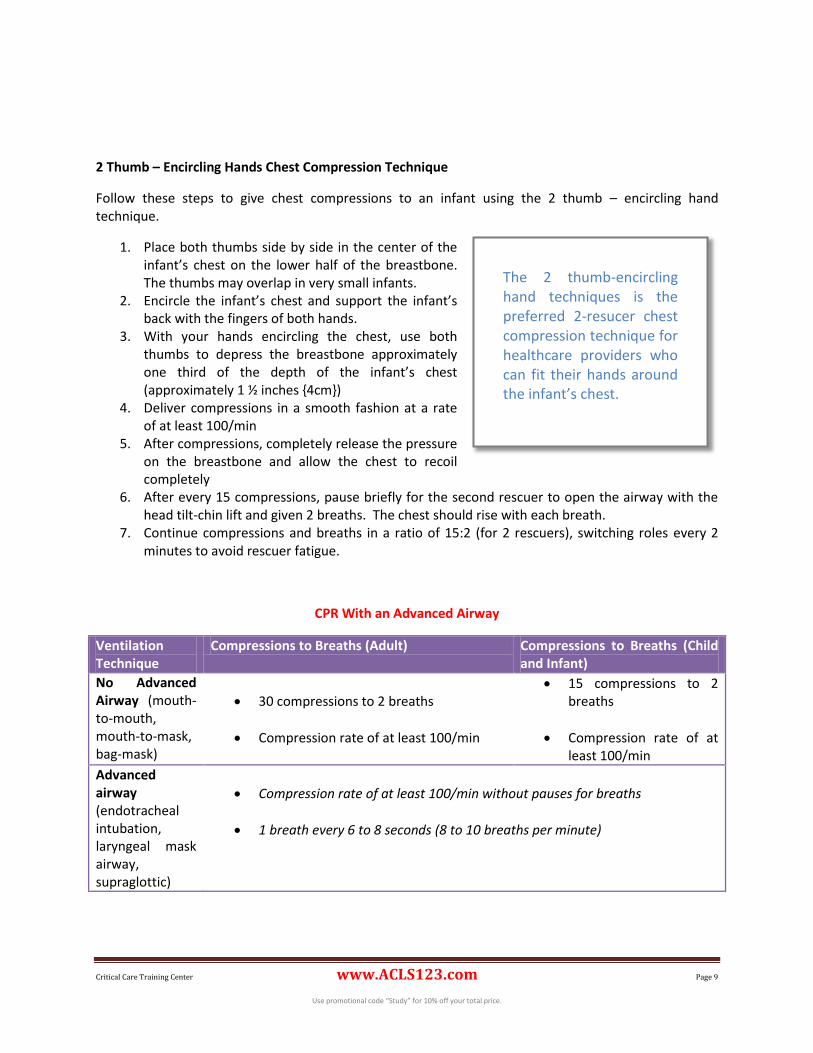
The 2 thumb-encircling hand techniques is the preferred 2-resucer chest compression technique for healthcare providers who can fit their hands around the infant’s chest.
Critical Care Training Center www.ACLS123.com Page 10
Use promotional code “Study” for 10% off your total price.
Adult, Child, and Infant Rescue Breathing
Rescue Breathing
When an adult, child, or infant has a pulse but is not breathing effectively, rescuers should give breaths without chest compression. This is rescue breathing.
Rescue Breathing for Adults Rescue Breathing for Infants and Children
Given 1 breath every 5 to 6 seconds (about 10 to 12 breaths per minute)
Given 1 breath every 3 to 5 seconds (about 12 to 20 breaths per minute)
Give each breath in 1 second
Each breath should result in visible chest rise
Check the pulse about every 2 minutes
Relieving Choking in an Unresponsive Victim 1 year of Age or Older
Choking victim initially may be responsive and then become unresponsive. In this circumstance you know that choking caused the victim’s symptoms, and you know to look for a foreign object in the throat.
If a choking victim becomes unresponsive, activate the emergency response system. Lower the victim to the ground and begin CPR, starting with compressions (do not check for a pulse)
For adults or child victim, every time you open the airway you give breaths, open the victim’s mouth wide and look for the object. If you see an object that can easily be moved, move it with your fingers. If you do not see an object, keep doing CPR. After about 5 cycles or 2 minutes of CPR, activate the emergency response system if someone has not already done so.
Sometimes the choking victim may be unresponsive when you first encounter him or her. In this circumstance you probably will not know that an airway obstruction exists. Activate the emrengcy response system and start CPR (C-A-B sequence).
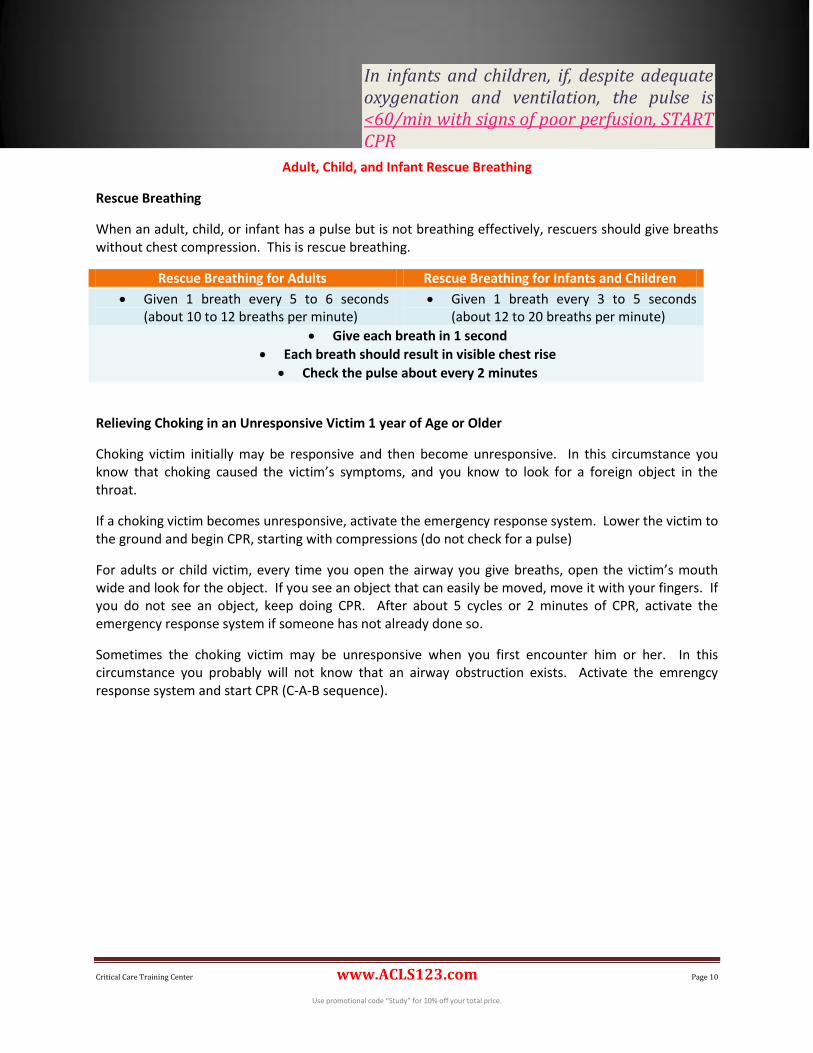
In infants and children, if, despite adequate oxygenation and ventilation, the pulse is <60/min with signs of poor perfusion, START CPR
Critical Care Training Center www.ACLS123.com Page 11
Use promotional code “Study” for 10% off your total price.
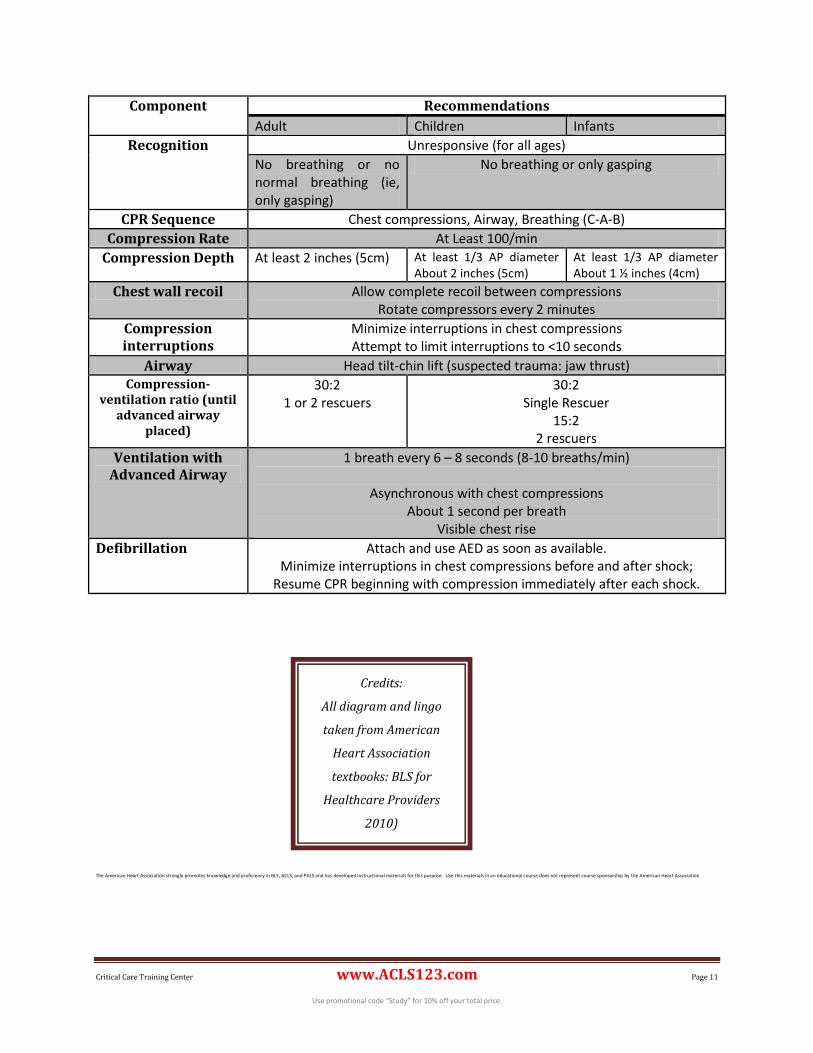
Component Recommendations
Adult Children Infants
Recognition Unresponsive (for all ages)
No breathing or no normal breathing (ie, only gasping)
No breathing or only gasping
CPR Sequence Chest compressions, Airway, Breathing (C-A-B)
Compression Rate At Least 100/min
Compression Depth At least 2 inches (5cm) At least 1/3 AP diameter About 2 inches (5cm)
At least 1/3 AP diameter About 1 ½ inches (4cm)
Chest wall recoil Allow complete recoil between compressions Rotate compressors every 2 minutes
Compression interruptions
Minimize interruptions in chest compressions Attempt to limit interruptions to <10 seconds
Airway Head tilt-chin lift (suspected trauma: jaw thrust) Compression-
ventilation ratio (until advanced airway
placed)
30:2 1 or 2 rescuers
30:2 Single Rescuer
15:2 2 rescuers
Ventilation with Advanced Airway
1 breath every 6 – 8 seconds (8-10 breaths/min)
Asynchronous with chest compressions About 1 second per breath
Visible chest rise
Defibrillation Attach and use AED as soon as available. Minimize interruptions in chest compressions before and after shock;
Resume CPR beginning with compression immediately after each shock.
The American Heart Association strongly promotes knowledge and proficiency in BLS, ACLS, and PALS and has developed instructional materials for this purpose. Use this materials in an educational course does not represent course sponsorship by the American Heart Association.
Credits:
All diagram and lingo
taken from American
Heart Association
textbooks: BLS for
Healthcare Providers
2010)