Embed Size (px)
Citation preview
Basic Video Shooting Skills, Page 1 of 6
LESSON PLAN TOPIC: BASIC VIDEO SHOOTING SKILLS
LEARNING GOALS/PURPOSE: Charles Layton from the American Journalism Review reported in 2008 that news reporters and photographers were lining up at a multimedia workshop to pay $850 each to learn how to create professional videos for their newsroom web sites. In fact, jobs for good videographers are opening up in many industries around the country as more and more print publications go the way of the dinosaur. Videographers still need to report the story, but they can use multimedia options that print reporters never could. In this lesson, students will learn how to shoot a variety of shots that will enable them to edit a simple action sequence. They may edit together upwards of 30 or 40 clips to produce 60 seconds of quality action video. The edits will appear “seamless” if students learn the rules of shooting different types of shots (close-‐ups, wide-‐shots) and the rules for visual continuity. Students will need to learn the vocabulary (jargon and acronyms) of video production, and they will need to learn how use the equipment in a professional manner.
DAYS NEEDED FOR THIS LESSON PLAN: The assignment for this lesson plan may take three or four days (based on 50-‐minute periods of class time). The students view training videos and then work in three to four person groups to plan, coordinate, stage, and shoot the video clips that they will edit into a sequence in the next lesson plan. The finished productions should be ready for viewing in class in eight to ten days. NOTE: Lesson plan times will vary depending on the number of students and the availability of equipment.
LESSON PLAN -- SHOOTING GOOD, EDITABLE VIDEO (This usually takes 3 to 4 days for each member of a four-‐person crew to shoot all the video needed to create a well edited short movie): After getting familiar with the equipment in earlier lesson plans, students will now work in groups of three or four to plan and shoot videos of very simple activities like two people throwing a ball, or two martial artists staging a fight, or two chess players engaged in a rapid-‐moves game. Before the students start shooting, they will learn basic types of shots and terminology. Step 1—show me what I need to know: To begin the lesson, students will watch a short training video from Video Maker. This 10 minute video video shows students the most basic types of shots like Extreme Close-‐Ups (ECU), Close-‐Ups (CU), Medium Shots (MS), Wide Shots (WS). The DVD also explains how these different shots will later be edited together in a seamless sequence to communicate a short, visual story. Students will also learn about framing shots using the rule of thirds, jump-‐cuts caused by violating the 180-‐degree rule or but splicing together two scenes where the action or position of the subject in scene one does not match the action of position of the subject in scene two. Students will see how to shoot clips that will allow them to edit on the action. For this lesson plan at ASNE, these rules and concepts are illustrated below; however these images are borrowed and not the ones I would typically use in class for training purposes. I have handouts from my textbooks that the students will put in their binders. I also have lists of video terminology that they will be able to reference as they learn the jargon of the profession.

Basic Video Shooting Skills, Page 2 of 6
Meanwhile, from the DVD, students will also learn how to shoot the most common shots needed to create inserts, cutaways, and parallel edits for story-‐=telling continuity. Although the students will be creating action videos in their activity for this lesson plan, they will learn 10-‐second rule for tripod shots, and they will be instructed to keep the camera lens Wide open for even for close-‐up shots. The trick for shooting good video is to move the tripod-‐mounted camera closer to the action rather than use zooms, dollies, pans, and tilts to follow the action. Step 2—Pre-Production Process: After students learn the basic shots, they will decide what activity they want to shoot. Then, they will create a simple storyboard, using stick figure images to depict the action and the camera angles they will use to cover the action. Over the course of two or three class periods, each student may shoot a total of three or four minutes of raw video, recording the action in a variety of close-‐up, medium, and wide shots from multiple angles. The storyboard and pre-‐production process for this first assignment will be very simple. Later, in creating more complex projects, we will introduce more steps in this part of the process. Step 3—Production Process: After student storyboards are approved, they will go outside the classroom to use natural light while shooting these action sequences. All the students in each group will get to perform all the roles including director, videographer, and actor. After the students finish shooting their raw footage, they will be ready for the next lesson plan: editing in the Post Production Process.
COMMON CORE STANDARDS: This lesson plan is aimed at beginning-‐level videographers. Therefore, the applicable Common Core Standards listed below are from grades 9 to 10:
• Career Readiness Reading Standard 7: Integrate and evaluate content presented in diverse formats and media • Career Readiness Writing Standard 4: Produce clear and coherent writing in which the development, organization, and style
are appropriate to task, purpose, and audience. • Career Readiness Writing Standard 6: Use technology, including the Internet, to produce and publish writing and to interact
and collaborate with others. • Career Readiness Speaking and Listening Standard 5: Make strategic use of digital media and visual displays of data to
express information and enhance understanding of presentations. • Career Readiness Language Standard 4: Determine or clarify the meaning of unknown and multiple-‐meaning words and
phrases by using context clues, analyzing meaningful word parts, and consulting general and specialized reference materials, as appropriate.
Basic Video Shooting Skills, Page 3 of 6
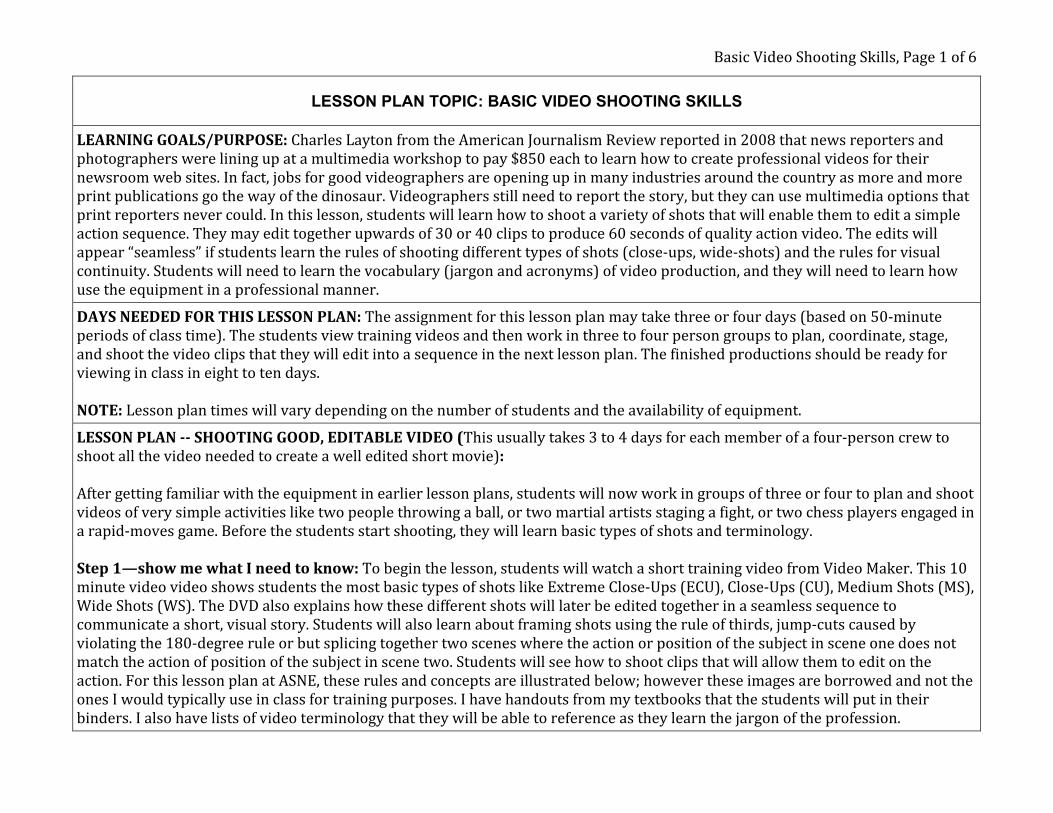
SUPPLIES/MATERIALS NEEDED: • Cameras • SD cards • Tripods
• Textbooks/handouts/Keynotes • Movie clips to show edited sequences • VideoMaker DVD training videos (cheap)
We use Canon Vixia HD cameras that have ports for microphone and headphone cables. The shoot high quality images, even in low light, and they have 40x zoom capability. However, students should taught to move the camera, not zoom shots.
Like many other digital cameras, the Canons will use up to 16g SD cards, but 8g cards are cheaper and accommodate about two hours of video.
Students should learn to shoot from tripods. This limits “firehosing” video shots. They should compose the shot, roll at least 10-‐seconds, and not touch the tripod at all during the shot.
TEACHING METHODS: • Mini lecture DVD (10-‐15 minutes) • Keynotes with video clips • Video terminology handouts for binders • Grading/peer evaluation rubrics
• Training videos (VideoMaker) • Activity/story ideas • Textbooks/vocabulary handouts showing important concepts • Story board worksheets
Basic Video Shooting Skills, Page 4 of 6
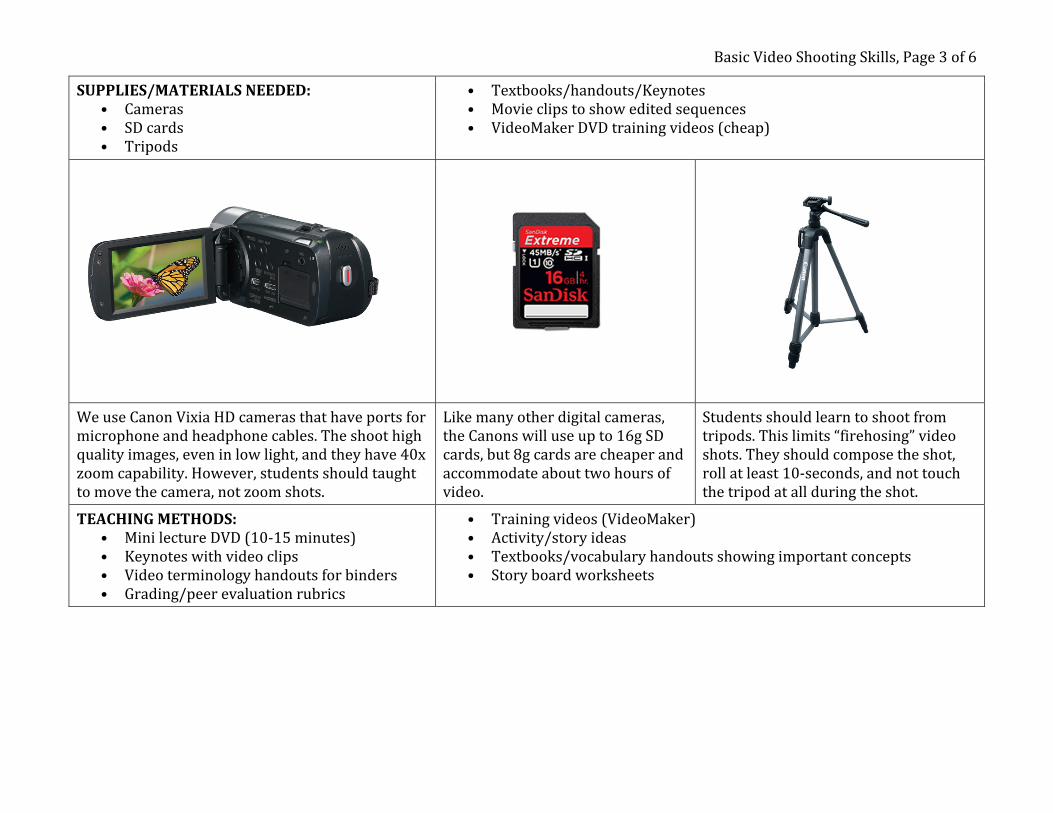
IMPORTANT CONCEPT 1 • 180-degree rule: the “Line of Action” image
from www.flickr.com, helps students understand why they should not cross the 180-‐degree line when moving their camera positions to capture an action sequence involving two people. When school starts this fall, this image will be replaced with one from our textbooks. If students shoot a video clip that is on the other side of the line then the viewer of the movie will see a “flipped” sequence. The characters will suddenly be facing each other from the opposite side of the screen, which is very jarring. Good video editing should create a sequence of shots that establish continuity in the action.
IMPORTANT CONCEPT 2 • Rule of Thirds: Professional photographers
always instruct students to use the rule of thirds. Basically, subjects in still shots and videos are supposed to more interesting to viewers if the subjects appear where the grid lines cross in each third of the image. The Canon cameras actually provide students with a little tic-‐tac-‐toe grid to help them remember where to put subjects in the frame. This image came from a Facebook page and may be copyrighted.
Basic Video Shooting Skills, Page 5 of 6
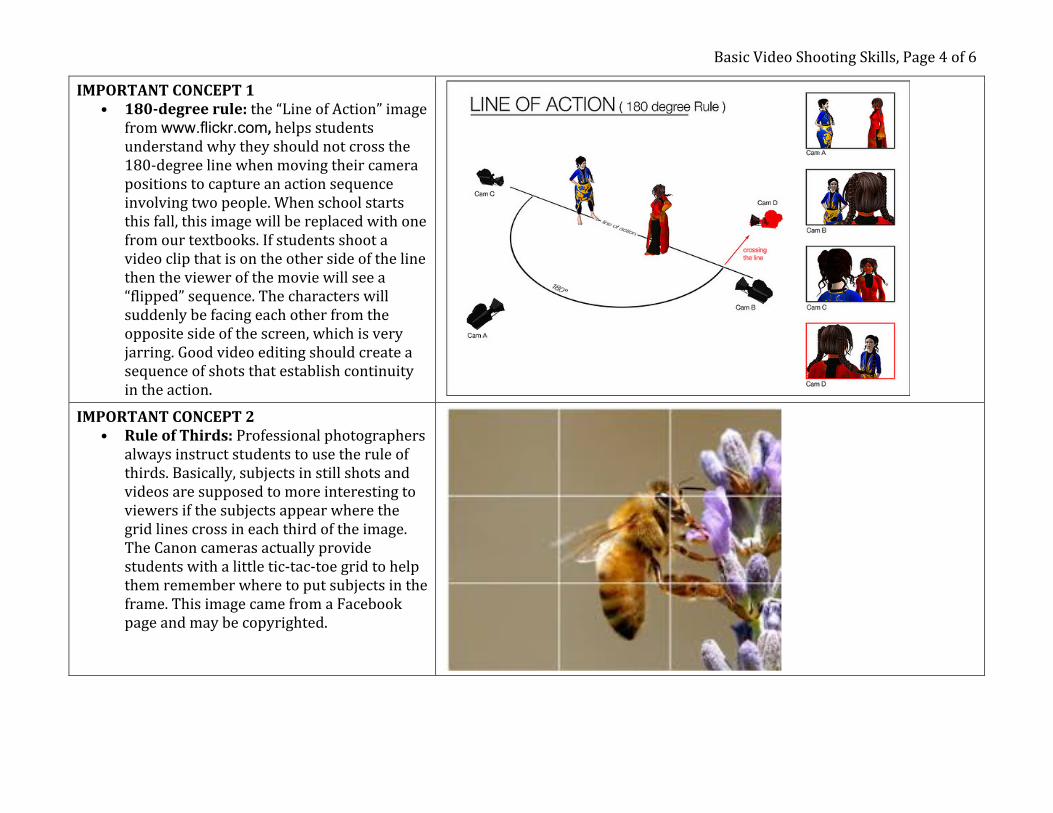
IMPORTANT CONCEPT 3 • Editing on the action: If a student uses a wide
shot (WS) of someone walking, and then cuts to a close up (CU) of the action, the student needs to select the CU image that matches the WS action. While shooting raw video on location, the student should have the subject repeat the same walking action several times so the student can shoot the same action from different distances and different angles. Shifting or editing from a wide shot to a close up looks more natural if the students edits on the action. For example, in the walking sequence (from www.clker.com), the second figure shows the right arm of the character swinging down toward the hips. If the student inserts a close-‐up of this action, it will be jarring for the viewer if the arm is in a different position.
Good: editing on action
Bad: action in CU does not match the WS. Creates a jump cut.
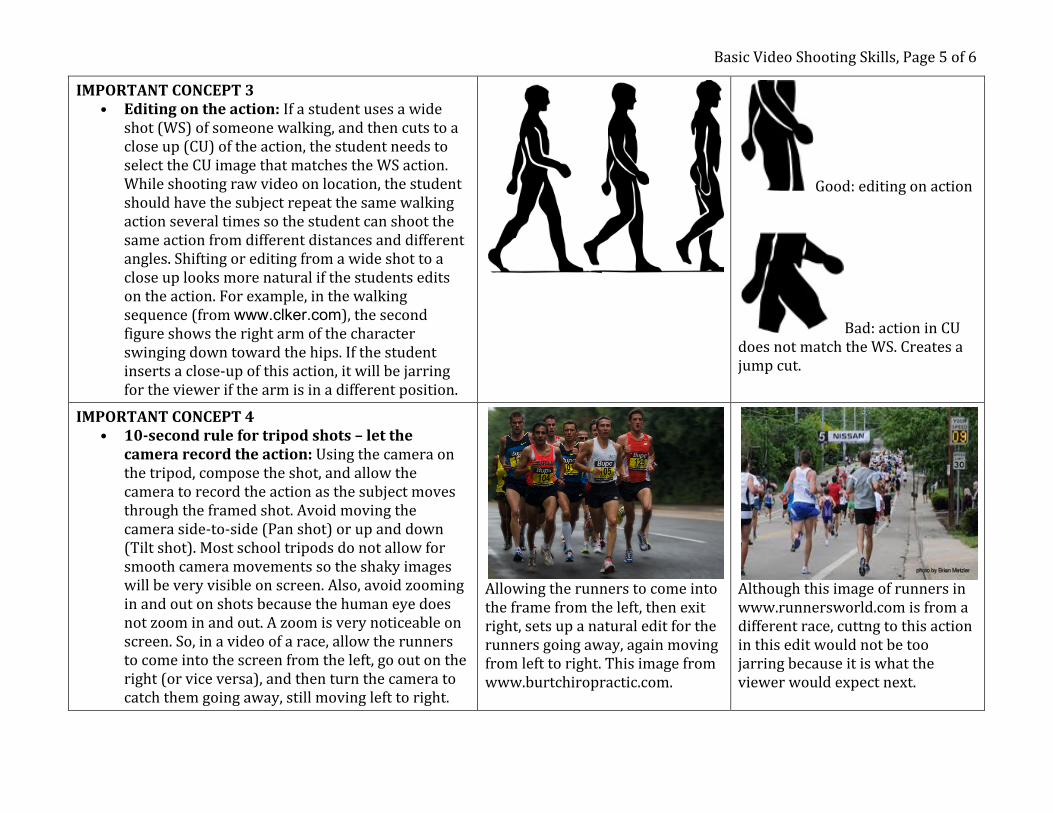
IMPORTANT CONCEPT 4 • 10-second rule for tripod shots – let the
camera record the action: Using the camera on the tripod, compose the shot, and allow the camera to record the action as the subject moves through the framed shot. Avoid moving the camera side-‐to-‐side (Pan shot) or up and down (Tilt shot). Most school tripods do not allow for smooth camera movements so the shaky images will be very visible on screen. Also, avoid zooming in and out on shots because the human eye does not zoom in and out. A zoom is very noticeable on screen. So, in a video of a race, allow the runners to come into the screen from the left, go out on the right (or vice versa), and then turn the camera to catch them going away, still moving left to right.
Allowing the runners to come into the frame from the left, then exit right, sets up a natural edit for the runners going away, again moving from left to right. This image from www.burtchiropractic.com.
Although this image of runners in www.runnersworld.com is from a different race, cuttng to this action in this edit would not be too jarring because it is what the viewer would expect next.
Basic Video Shooting Skills, Page 6 of 6 STUDENT PRODUCTS:
• Story boards • Videos Sequences
• DVDs or portfolios for clips • Journals and production logs
LOCATIONS: • Classroom Studio (including green screen) • Campus (around the outer perimeter of the video production classroom)
EVALUATION: Video production is a collaborative process that allows for formative and summative assessments, peer review, and self-‐evaluations throughout the whole process. As students become more competent producing visual stories, they become more discerning about the quality or their work, less self-‐conscious about identifying flaws, and more flexible about re-‐shooting, re-‐editing, and re-‐burning their projects before distribution for public consumption. For this first assignment, I use simple video evaluation rubric and generously award points to anything the students turn-‐in. We will still evaluate it critically to show how the production can be improved, but it is more important for the students to learn the important concepts in this lesson so they can apply them in future productions. CELEBRATIONS AND DISTRIBUTION: This first project will certainly be aired for evaluation in class. If we have some very good sequences, then will upload them to the web site as an incentive for students to continue improving the quality of their work.