Embed Size (px)
Citation preview
Battery Power for LED Pixels and StripsCreated by Phillip Burgess
Last updated on 2016-09-07 07:38:57 AM UTC
2358
141518
Guide Contents
Guide ContentsOverviewAbout BatteriesDiode Fix for Alkaline BatteriesPowering the MicrocontrollerEstimating Running TimeTips for Larger Projects
© Adafruit Industries https://learn.adafruit.com/battery-power-for-led-pixels-and-strips Page 2 of 19
Overview
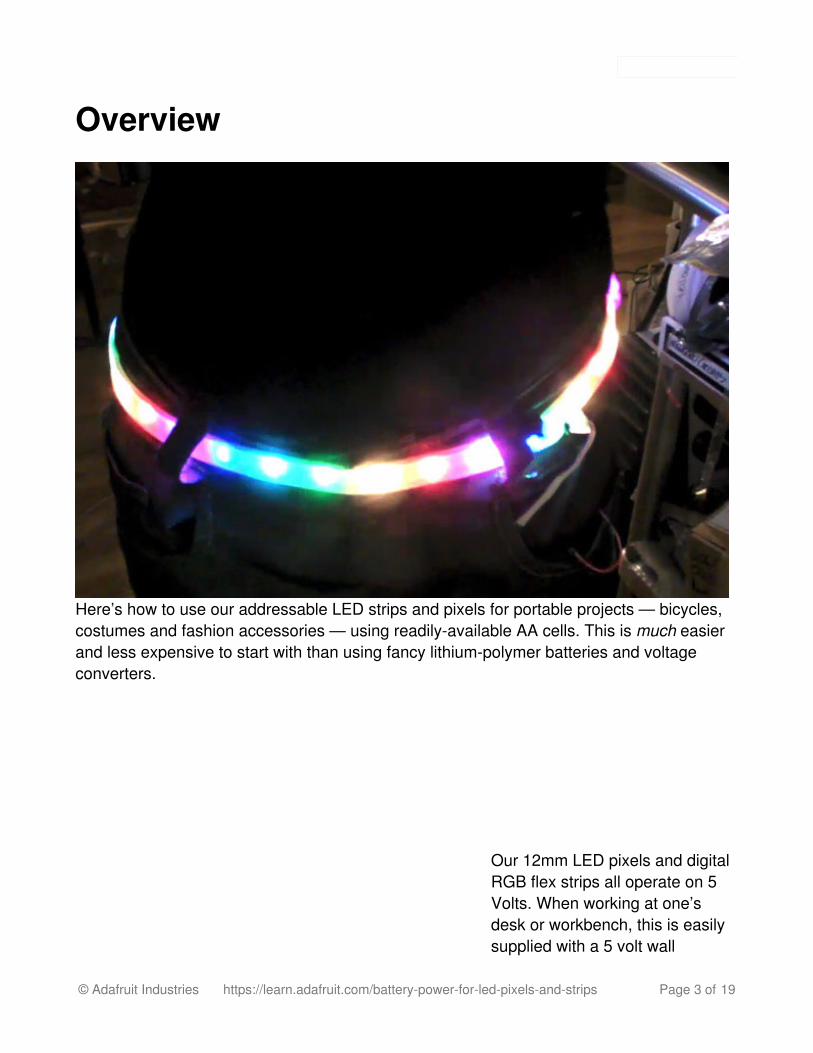
Here’s how to use our addressable LED strips and pixels for portable projects — bicycles,costumes and fashion accessories — using readily-available AA cells. This is much easierand less expensive to start with than using fancy lithium-polymer batteries and voltageconverters.
Our 12mm LED pixels and digitalRGB flex strips all operate on 5Volts. When working at one’sdesk or workbench, this is easilysupplied with a 5 volt wall
© Adafruit Industries https://learn.adafruit.com/battery-power-for-led-pixels-and-strips Page 3 of 19
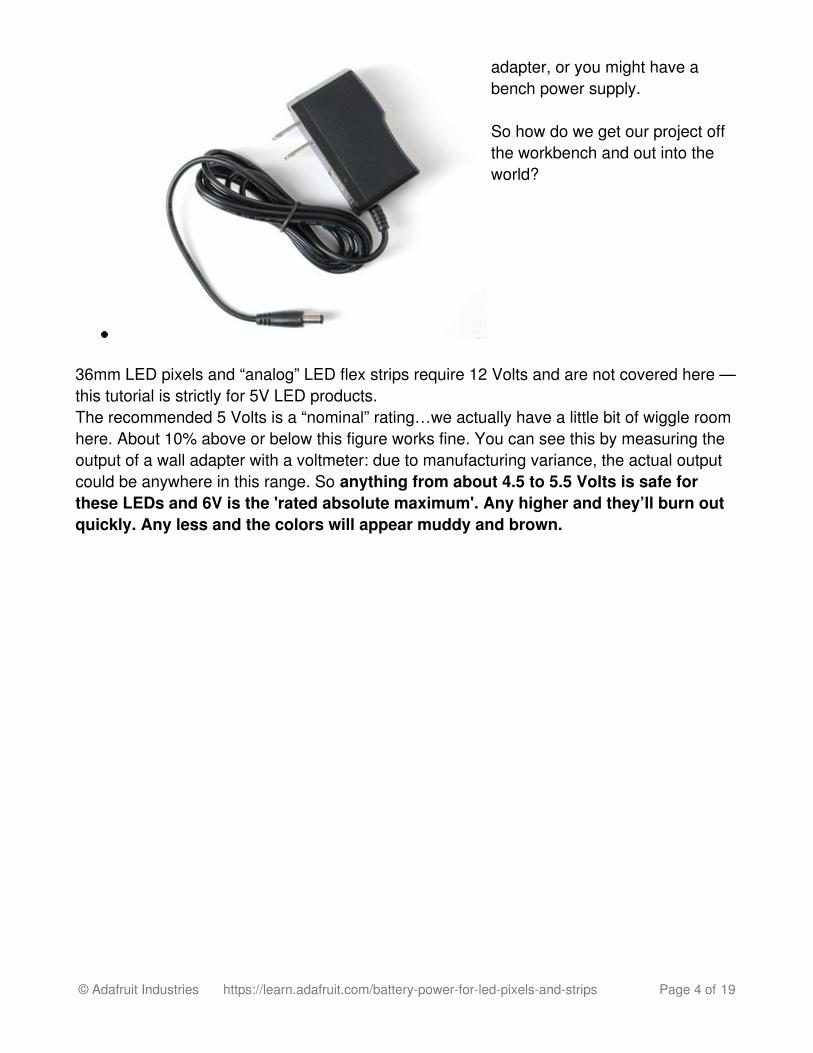
adapter, or you might have abench power supply.
So how do we get our project offthe workbench and out into theworld?
36mm LED pixels and “analog” LED flex strips require 12 Volts and are not covered here —this tutorial is strictly for 5V LED products.The recommended 5 Volts is a “nominal” rating…we actually have a little bit of wiggle roomhere. About 10% above or below this figure works fine. You can see this by measuring theoutput of a wall adapter with a voltmeter: due to manufacturing variance, the actual outputcould be anywhere in this range. So anything from about 4.5 to 5.5 Volts is safe forthese LEDs and 6V is the 'rated absolute maximum'. Any higher and they’ll burn outquickly. Any less and the colors will appear muddy and brown.
© Adafruit Industries https://learn.adafruit.com/battery-power-for-led-pixels-and-strips Page 4 of 19

About BatteriesDifferent battery types have different output voltages…a function of their internalchemistry. Among common household batteries — the kinds you might find at the grocerystore — there are two major types:
Rechargeable nickel metalhydride (NiMH) cells output 1.2Volts, as do nickel cadmium(NiCd) cells. The latter havefallen out of favor for a numberof reasons, but maybe you stillhave a few around the house.
These cells are more expensiveup front, and require a charger.But for frequent use, they can bemore economical in the long run.
Single-use, disposable alkalinecells output 1.5 Volts.
Though not reusable, foroccasional use they maybe more economical. But themain benefit is their ubiquity —replacements can be boughtalmost anywhere, importantwhen you’re away from homeand a charger.
(We’re using approximate numbers here. Actual output will vary by some fraction of a voltdepending on the cell’s age, state of discharge, temperature and other factors. For mostcasual projects, these small factors can be ignored for simplicity’s sake.)
© Adafruit Industries https://learn.adafruit.com/battery-power-for-led-pixels-and-strips Page 5 of 19
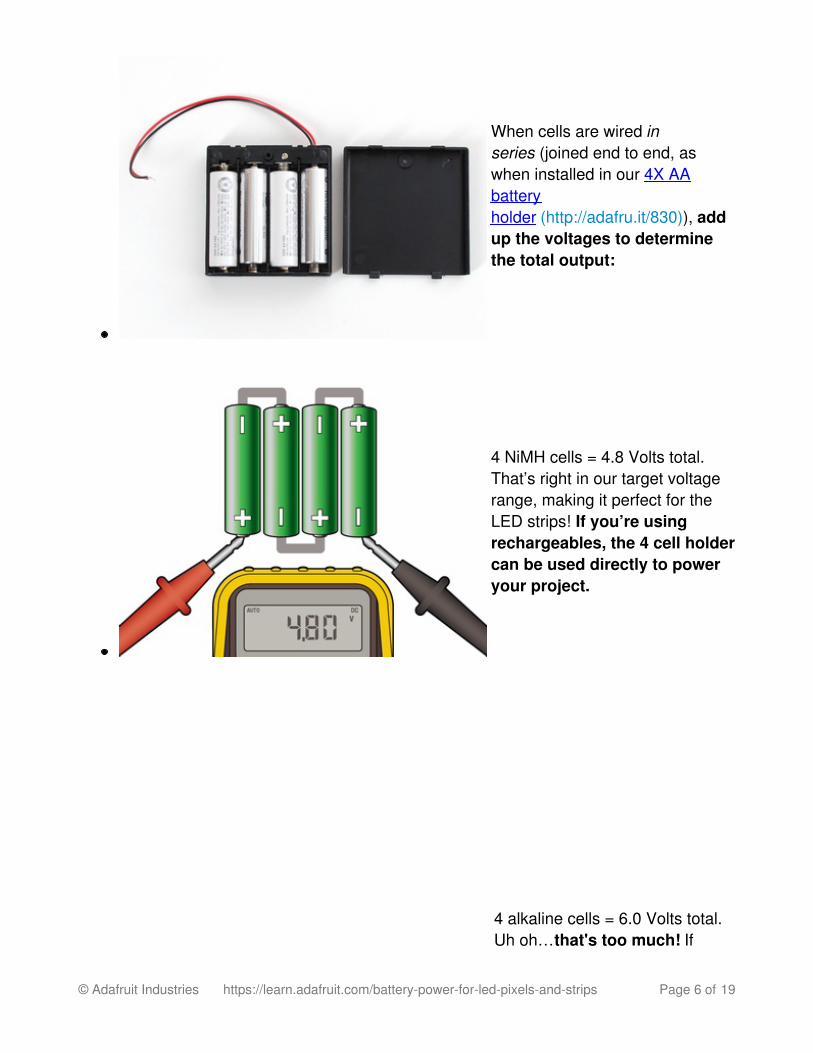
When cells are wired inseries (joined end to end, aswhen installed in our 4X AAbatteryholder (http://adafru.it/830)), addup the voltages to determinethe total output:
4 NiMH cells = 4.8 Volts total.That’s right in our target voltagerange, making it perfect for theLED strips! If you’re usingrechargeables, the 4 cell holdercan be used directly to poweryour project.
4 alkaline cells = 6.0 Volts total.Uh oh…that's too much! If
© Adafruit Industries https://learn.adafruit.com/battery-power-for-led-pixels-and-strips Page 6 of 19
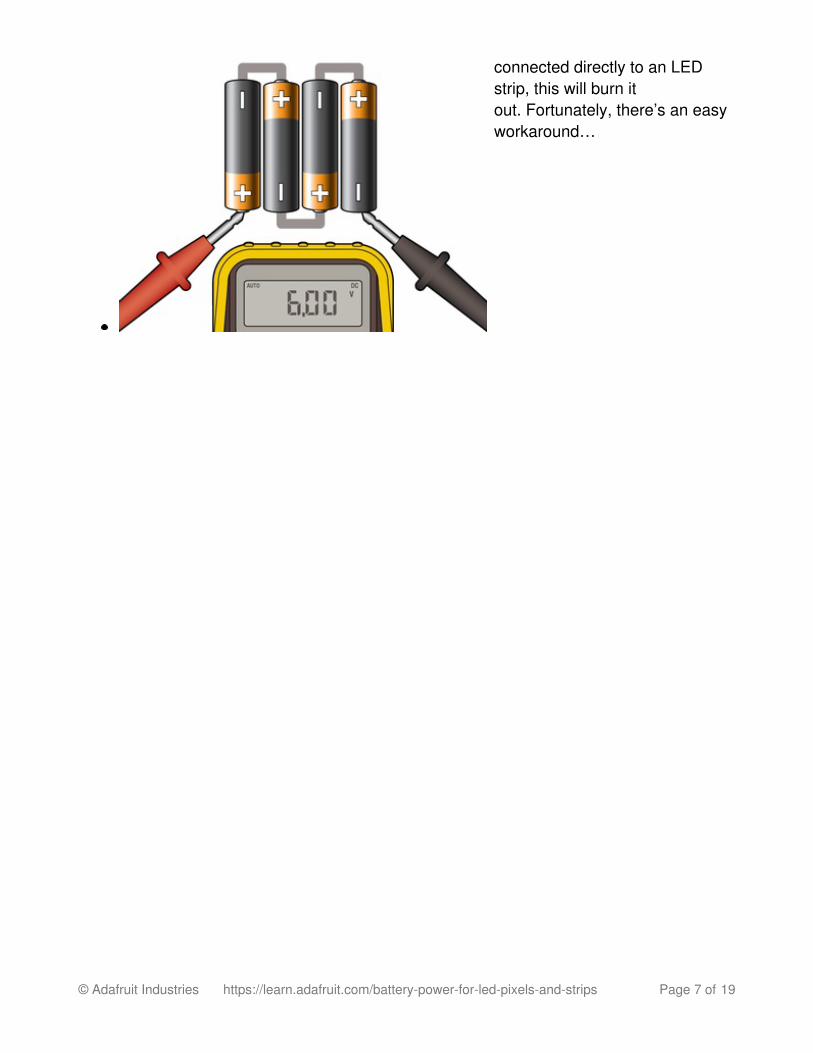
connected directly to an LEDstrip, this will burn itout. Fortunately, there’s an easyworkaround…
© Adafruit Industries https://learn.adafruit.com/battery-power-for-led-pixels-and-strips Page 7 of 19
Diode Fix for Alkaline Batteries“I don’t know if you wanna trust the safety of our country to some, uh…siliconediode!”
— General Beringer, WarGames
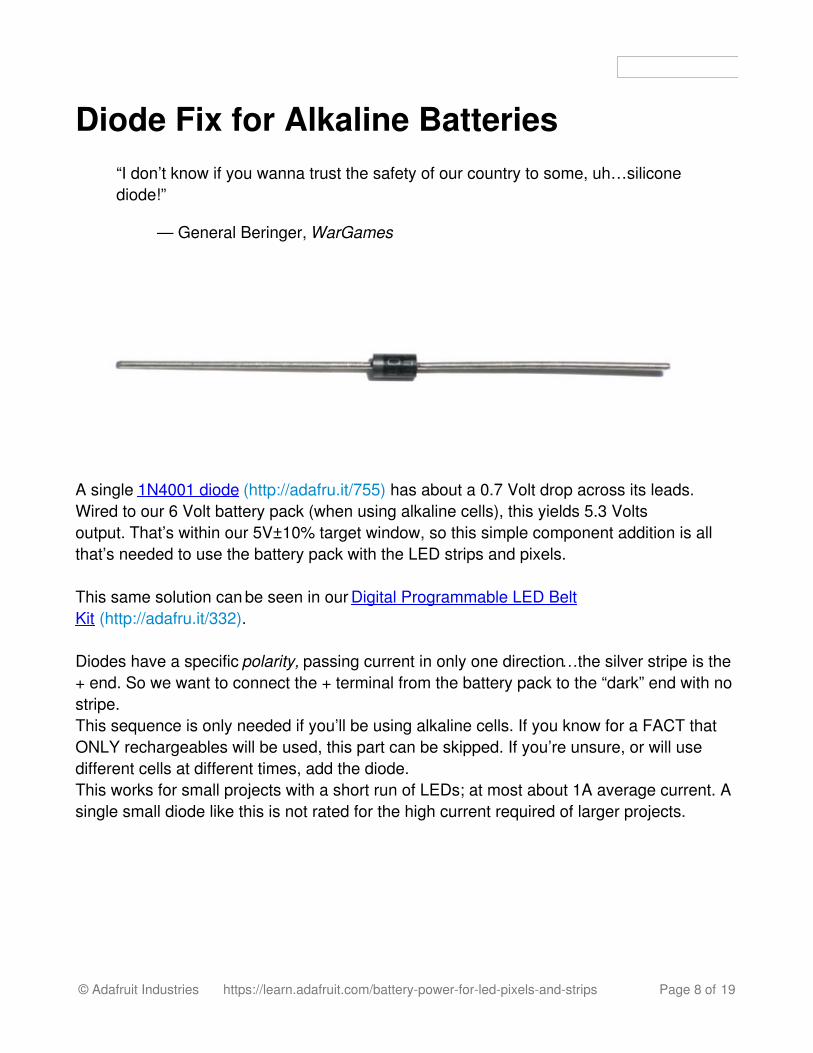
A single 1N4001 diode (http://adafru.it/755) has about a 0.7 Volt drop across its leads.Wired to our 6 Volt battery pack (when using alkaline cells), this yields 5.3 Voltsoutput. That’s within our 5V±10% target window, so this simple component addition is allthat’s needed to use the battery pack with the LED strips and pixels.
This same solution can be seen in our Digital Programmable LED BeltKit (http://adafru.it/332).
Diodes have a specific polarity, passing current in only one direction…the silver stripe is the+ end. So we want to connect the + terminal from the battery pack to the “dark” end with nostripe.This sequence is only needed if you’ll be using alkaline cells. If you know for a FACT thatONLY rechargeables will be used, this part can be skipped. If you’re unsure, or will usedifferent cells at different times, add the diode.This works for small projects with a short run of LEDs; at most about 1A average current. Asingle small diode like this is not rated for the high current required of larger projects.
© Adafruit Industries https://learn.adafruit.com/battery-power-for-led-pixels-and-strips Page 8 of 19
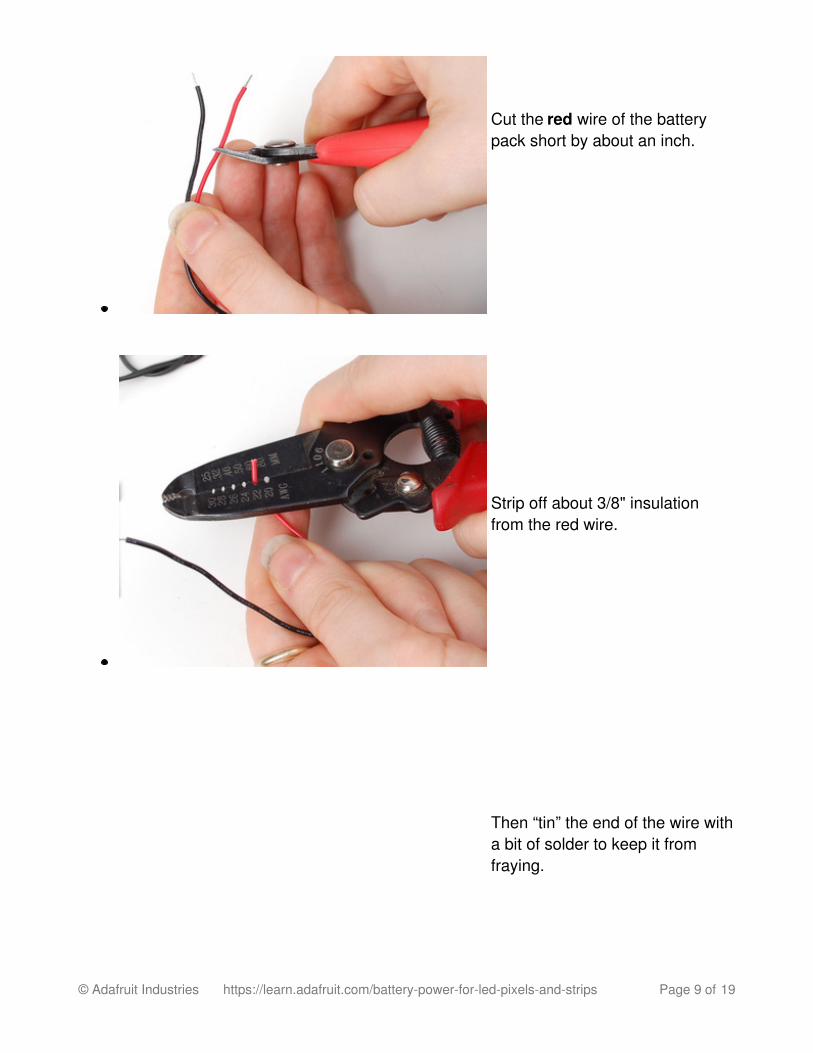
Cut the red wire of the batterypack short by about an inch.
Strip off about 3/8" insulationfrom the red wire.
Then “tin” the end of the wire witha bit of solder to keep it fromfraying.
© Adafruit Industries https://learn.adafruit.com/battery-power-for-led-pixels-and-strips Page 9 of 19

Clip the end of the diode (the“dark” end, without a silverstripe) to a similar length, thensolder the red wire to this.
Clip the other end of thediode (the side with a silverstripe).
Cut off and slide a 2" piece ofheat shrink tube onto the redwire. Keep sliding it all the waypast the diode.
© Adafruit Industries https://learn.adafruit.com/battery-power-for-led-pixels-and-strips Page 10 of 19
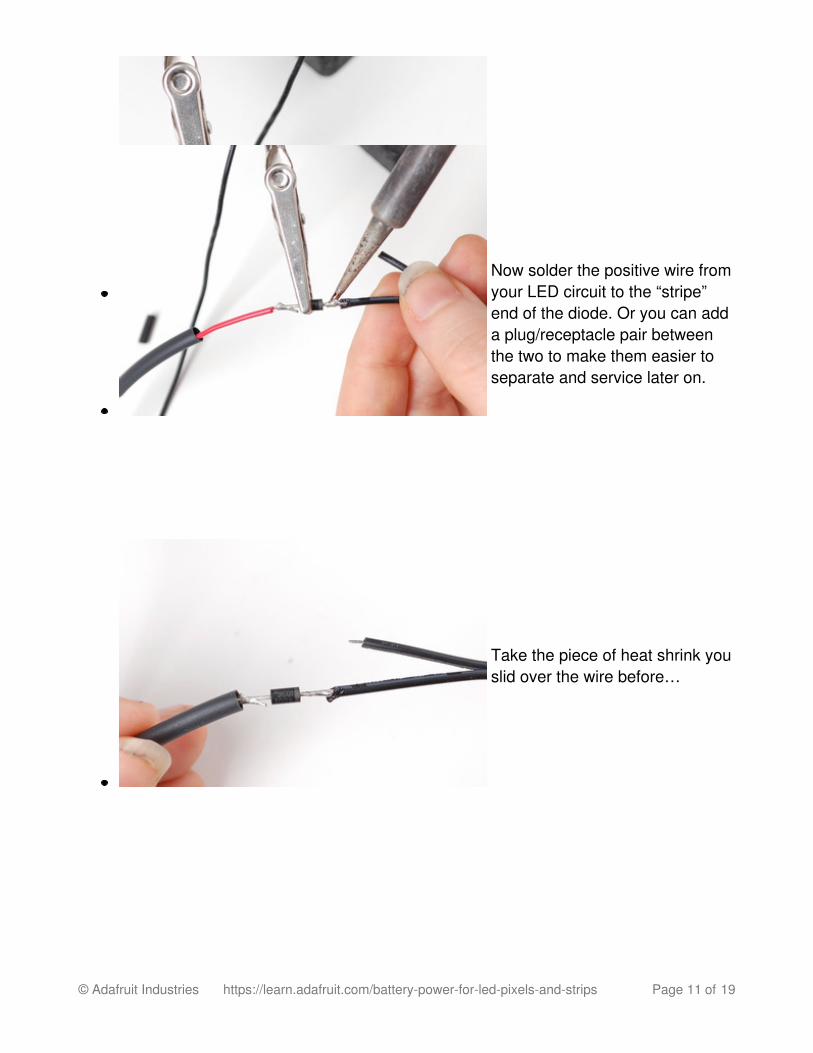
Now solder the positive wire fromyour LED circuit to the “stripe”end of the diode. Or you can adda plug/receptacle pair betweenthe two to make them easier toseparate and service later on.
Take the piece of heat shrink youslid over the wire before…
© Adafruit Industries https://learn.adafruit.com/battery-power-for-led-pixels-and-strips Page 11 of 19
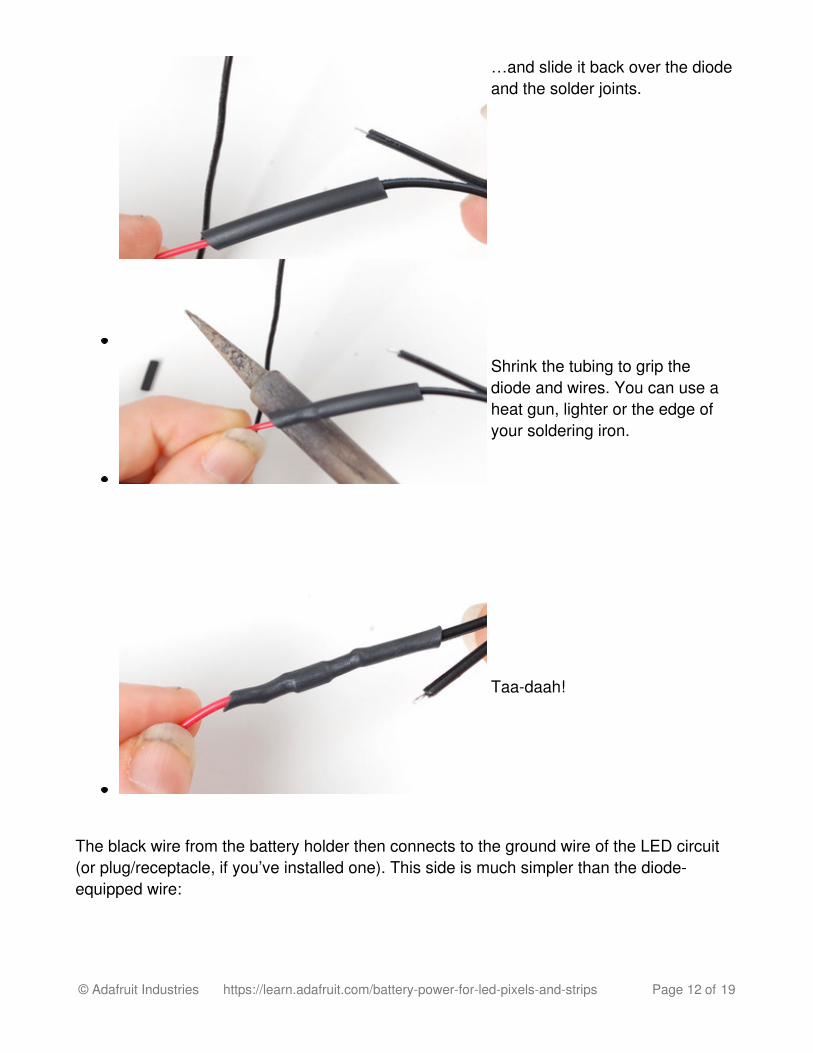
…and slide it back over the diodeand the solder joints.
Shrink the tubing to grip thediode and wires. You can use aheat gun, lighter or the edge ofyour soldering iron.
Taa-daah!
The black wire from the battery holder then connects to the ground wire of the LED circuit(or plug/receptacle, if you’ve installed one). This side is much simpler than the diode-equipped wire:
© Adafruit Industries https://learn.adafruit.com/battery-power-for-led-pixels-and-strips Page 12 of 19

Slide a small 1" piece of heatshrink onto the black wire (thisimage shows a much shorterpiece…oops…go a little longerthan this).
Solder together the ends of thewires. The dreaded inline splice!
Then slide and shrink as you didbefore. Done!
© Adafruit Industries https://learn.adafruit.com/battery-power-for-led-pixels-and-strips Page 13 of 19
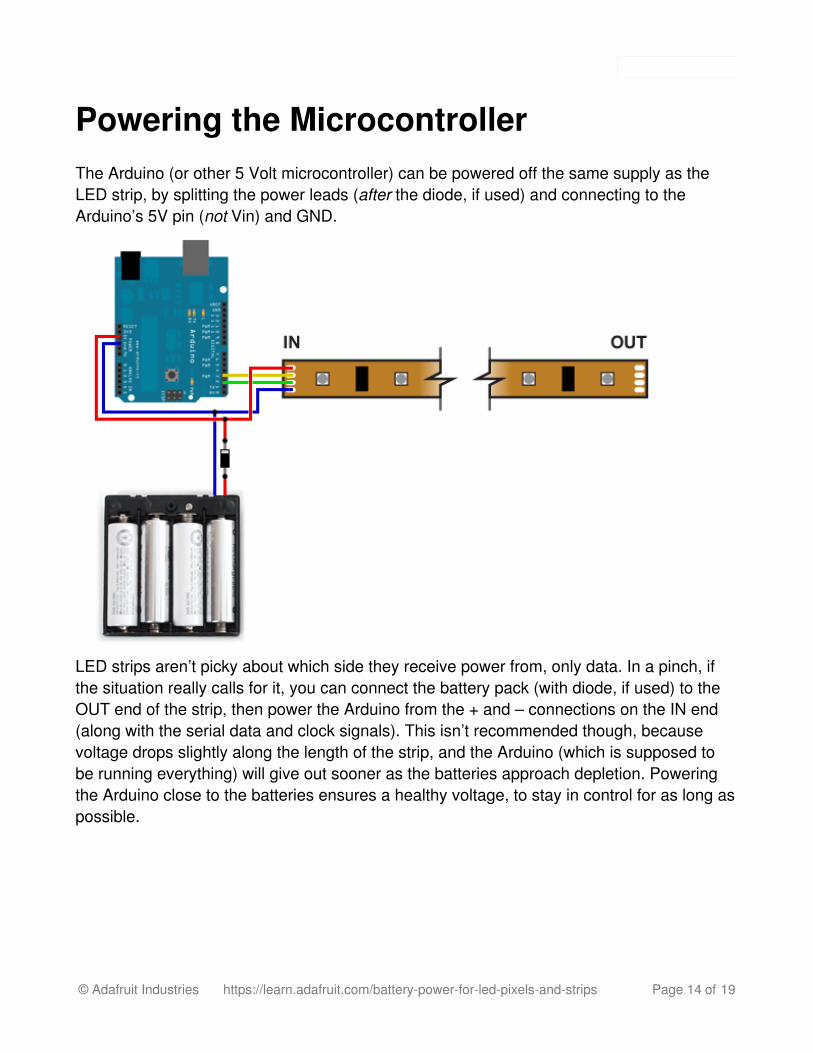
Powering the MicrocontrollerThe Arduino (or other 5 Volt microcontroller) can be powered off the same supply as theLED strip, by splitting the power leads (after the diode, if used) and connecting to theArduino’s 5V pin (not Vin) and GND.
LED strips aren’t picky about which side they receive power from, only data. In a pinch, ifthe situation really calls for it, you can connect the battery pack (with diode, if used) to theOUT end of the strip, then power the Arduino from the + and – connections on the IN end(along with the serial data and clock signals). This isn’t recommended though, becausevoltage drops slightly along the length of the strip, and the Arduino (which is supposed tobe running everything) will give out sooner as the batteries approach depletion. Poweringthe Arduino close to the batteries ensures a healthy voltage, to stay in control for as long aspossible.
© Adafruit Industries https://learn.adafruit.com/battery-power-for-led-pixels-and-strips Page 14 of 19
Estimating Running TimeHow long will one set of batteries last?This can be fiendishly difficult to predict! Sometimes the only way to be sure is to plug it inwith a fresh set of batteries and check the circuit and a clock periodically, until the LEDsfade or start to act erratically.Why is it so difficult to predict?Digital LEDs seldom run in one fixed state — they’re usually animated. We can estimate thepower use for a steady configuration, but animation is constantly in flux.
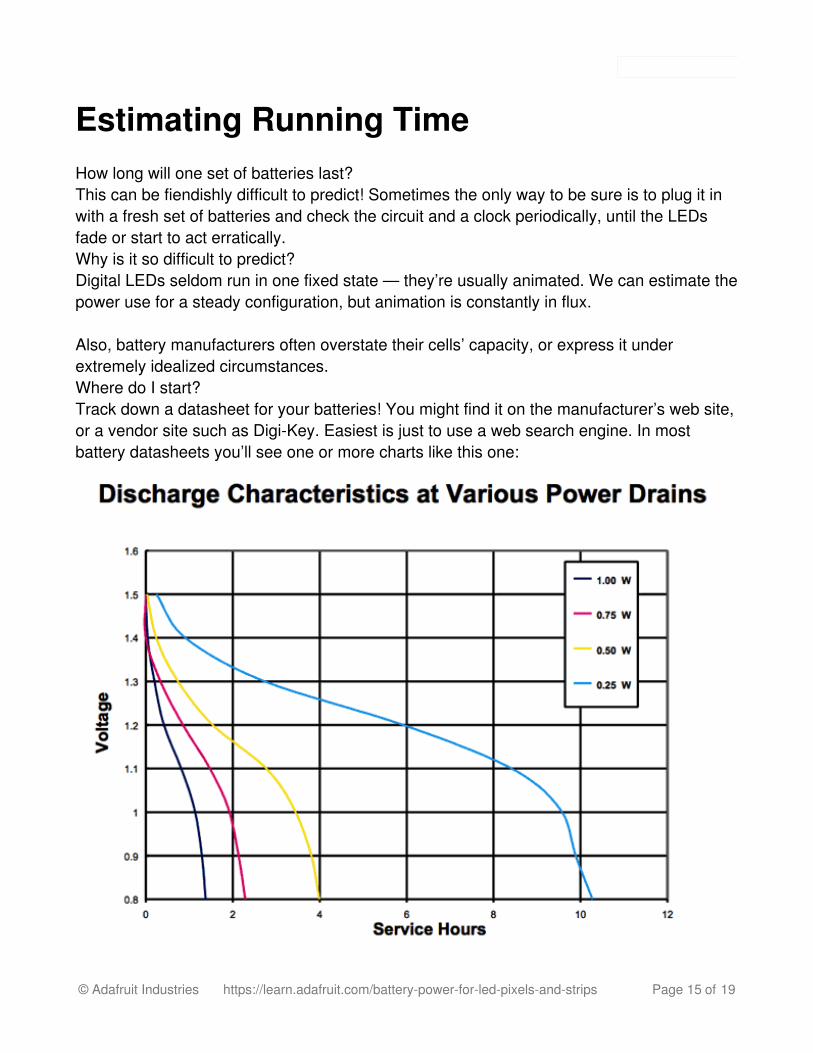
Also, battery manufacturers often overstate their cells’ capacity, or express it underextremely idealized circumstances.Where do I start?Track down a datasheet for your batteries! You might find it on the manufacturer’s web site,or a vendor site such as Digi-Key. Easiest is just to use a web search engine. In mostbattery datasheets you’ll see one or more charts like this one:
© Adafruit Industries https://learn.adafruit.com/battery-power-for-led-pixels-and-strips Page 15 of 19
This chart shows the cell’s output voltage over time, at different discharge rates. You cansee that the expected service life is not directly proportional to power drain — halving thelatter more than doubles the former. Again, with a fixed configuration, we could plan forthis, but our LEDs are in motion, which doesn’t make things any easier. You’ll probably justhave to come up with an informed average.
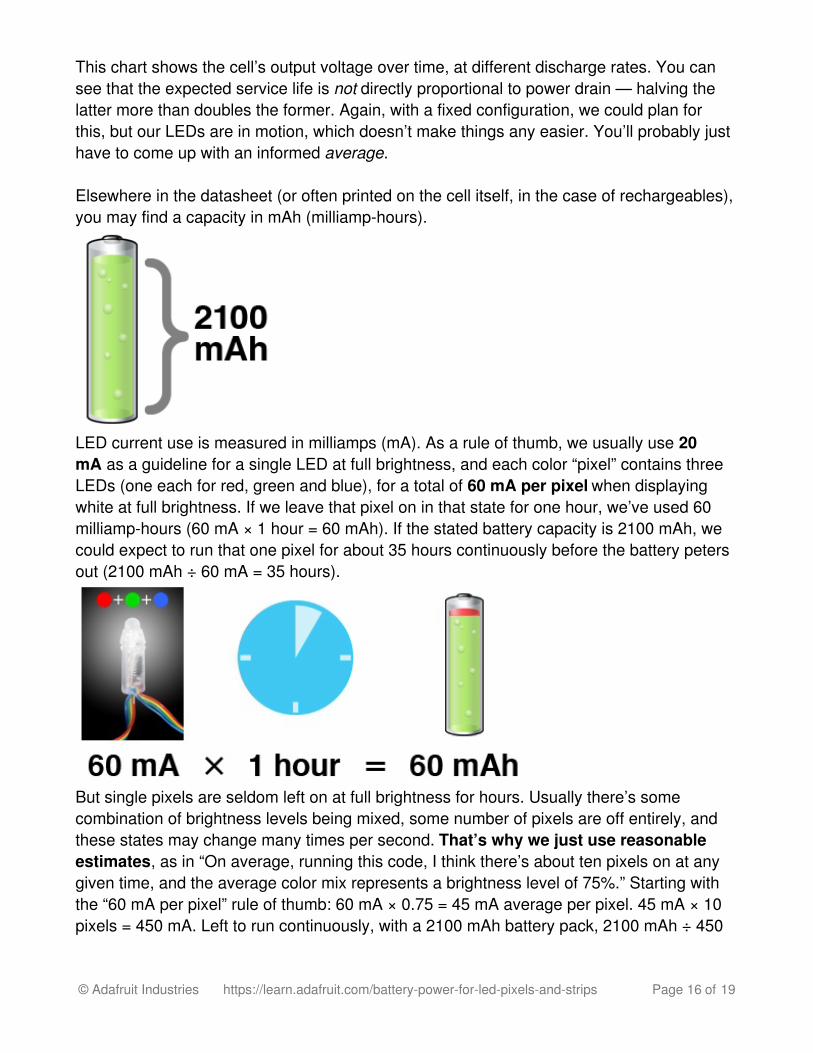
Elsewhere in the datasheet (or often printed on the cell itself, in the case of rechargeables),you may find a capacity in mAh (milliamp-hours).
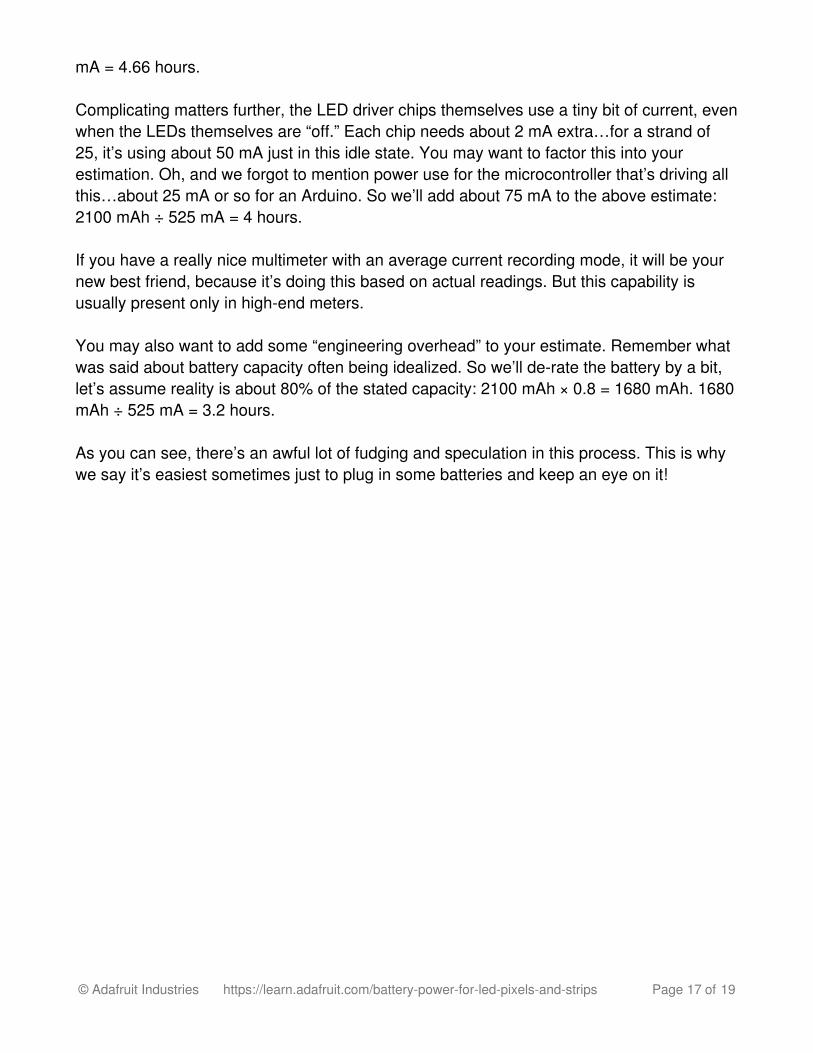
LED current use is measured in milliamps (mA). As a rule of thumb, we usually use 20mA as a guideline for a single LED at full brightness, and each color “pixel” contains threeLEDs (one each for red, green and blue), for a total of 60 mA per pixel when displayingwhite at full brightness. If we leave that pixel on in that state for one hour, we’ve used 60milliamp-hours (60 mA × 1 hour = 60 mAh). If the stated battery capacity is 2100 mAh, wecould expect to run that one pixel for about 35 hours continuously before the battery petersout (2100 mAh ÷ 60 mA = 35 hours).
But single pixels are seldom left on at full brightness for hours. Usually there’s somecombination of brightness levels being mixed, some number of pixels are off entirely, andthese states may change many times per second. That’s why we just use reasonableestimates, as in “On average, running this code, I think there’s about ten pixels on at anygiven time, and the average color mix represents a brightness level of 75%.” Starting withthe “60 mA per pixel” rule of thumb: 60 mA × 0.75 = 45 mA average per pixel. 45 mA × 10pixels = 450 mA. Left to run continuously, with a 2100 mAh battery pack, 2100 mAh ÷ 450
© Adafruit Industries https://learn.adafruit.com/battery-power-for-led-pixels-and-strips Page 16 of 19
mA = 4.66 hours.
Complicating matters further, the LED driver chips themselves use a tiny bit of current, evenwhen the LEDs themselves are “off.” Each chip needs about 2 mA extra…for a strand of25, it’s using about 50 mA just in this idle state. You may want to factor this into yourestimation. Oh, and we forgot to mention power use for the microcontroller that’s driving allthis…about 25 mA or so for an Arduino. So we’ll add about 75 mA to the above estimate:2100 mAh ÷ 525 mA = 4 hours.
If you have a really nice multimeter with an average current recording mode, it will be yournew best friend, because it’s doing this based on actual readings. But this capability isusually present only in high-end meters.
You may also want to add some “engineering overhead” to your estimate. Remember whatwas said about battery capacity often being idealized. So we’ll de-rate the battery by a bit,let’s assume reality is about 80% of the stated capacity: 2100 mAh × 0.8 = 1680 mAh. 1680mAh ÷ 525 mA = 3.2 hours.
As you can see, there’s an awful lot of fudging and speculation in this process. This is whywe say it’s easiest sometimes just to plug in some batteries and keep an eye on it!
© Adafruit Industries https://learn.adafruit.com/battery-power-for-led-pixels-and-strips Page 17 of 19
Tips for Larger Projects
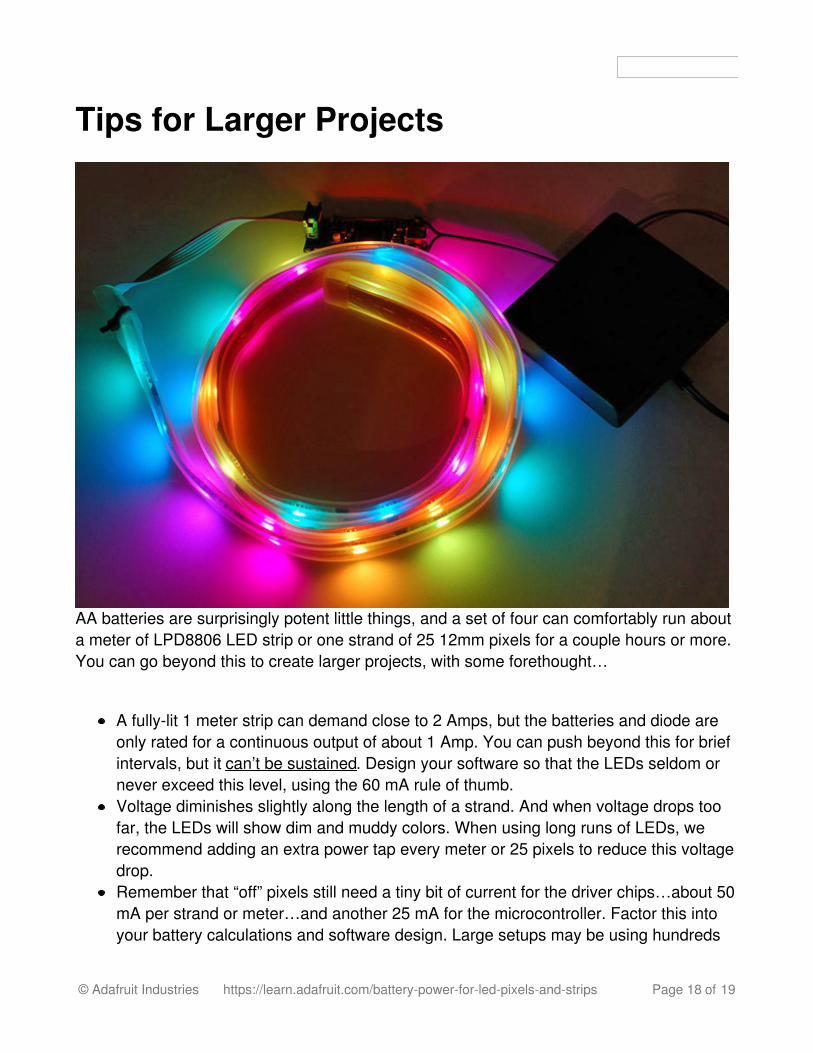
AA batteries are surprisingly potent little things, and a set of four can comfortably run abouta meter of LPD8806 LED strip or one strand of 25 12mm pixels for a couple hours or more.You can go beyond this to create larger projects, with some forethought…
A fully-lit 1 meter strip can demand close to 2 Amps, but the batteries and diode areonly rated for a continuous output of about 1 Amp. You can push beyond this for briefintervals, but it can’t be sustained. Design your software so that the LEDs seldom ornever exceed this level, using the 60 mA rule of thumb.Voltage diminishes slightly along the length of a strand. And when voltage drops toofar, the LEDs will show dim and muddy colors. When using long runs of LEDs, werecommend adding an extra power tap every meter or 25 pixels to reduce this voltagedrop.Remember that “off” pixels still need a tiny bit of current for the driver chips…about 50mA per strand or meter…and another 25 mA for the microcontroller. Factor this intoyour battery calculations and software design. Large setups may be using hundreds
© Adafruit Industries https://learn.adafruit.com/battery-power-for-led-pixels-and-strips Page 18 of 19
of milliamps that are never seen, but continuously pass through that diode with its 1Amp ceiling.C or D cells have more capacity for extra run time (up to 12,000 mAh with top-of-the-line NiMH D cells). We don't stock battery holders for these, but suitable ones can befound at Radio Shack and elsewhere. The 1N4001 diode is still rated for 1 Ampcontinuous output though…so for a larger project with many LEDs simultaneously lit,you might need to swap this out for a beefier diode such as a 1N5400, good for up to3 Amps. This may get hot, so don’t leave it exposed to curious fingers.
© Adafruit Industries Last Updated: 2016-09-07 07:38:56 AM UTC Page 19 of 19