Embed Size (px)
Citation preview
Page 1 of 28
Battle of Mimban Table Guide By ShoryukenToTheChin
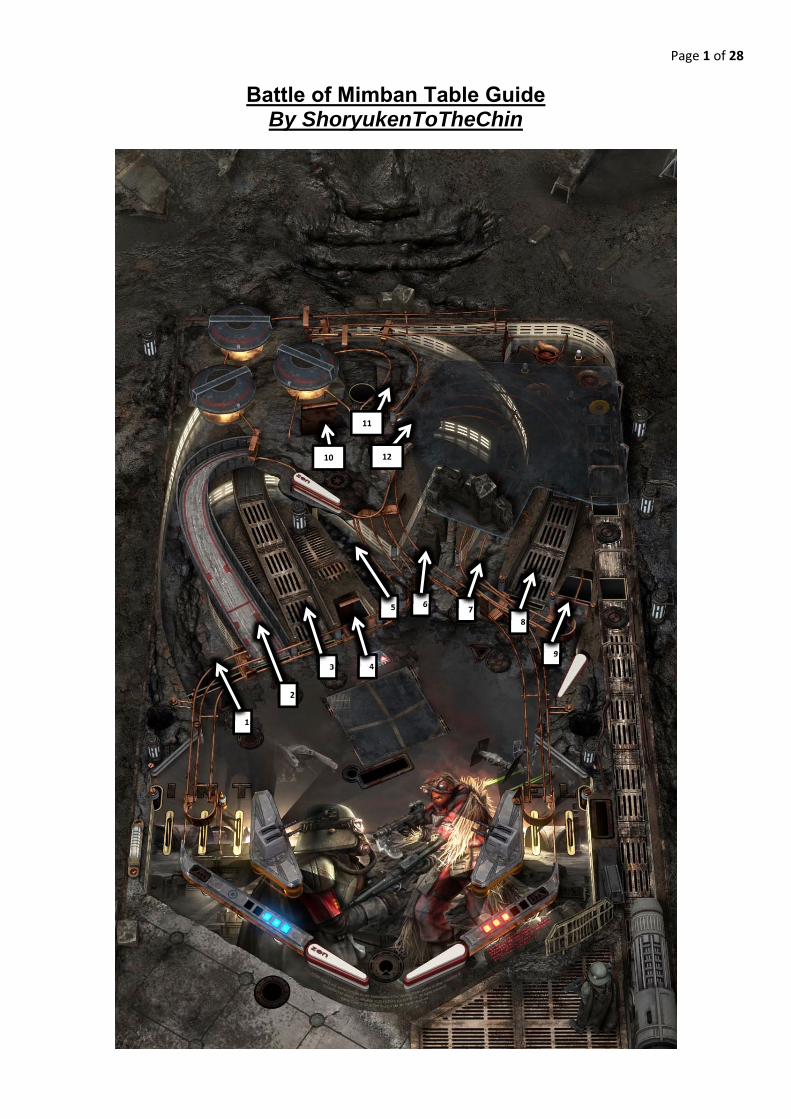
1
2
3 4
65 7
8
9
10
11
12
Page 2 of 28
Key to Table Overhead Image –
1. Left Orbit 2. Left Ramp 3. Centre Ramp 4. Left Sink Hole 5. Centre Orbit 6. Centre Sink Hole 7. Right Orbit 8. Right Ramp 9. Vari-Target 10. Attack Sink Hole 11. Bumper Lane 12. Infiltration Lane
In this guide when I mention a Ramp, Lane, Hole etc. I will put a number in brackets which will correspond to the above Key, so that you know where on the Table that feature is located.
Page 3 of 28
TABLE SPECIFICS
Notice: This Guide is based off the Pinball FX3 (PS4) version of the Table on default controls. Some of the controls will be different on the other versions (Steam, etc...), but everything else in the Guide remains
the same.
INTRODUCTION This Table came about because of the ongoing partnership between Zen Studios and LucasArts; this license allowed Zen to produce Tables based on the Star Wars License. This new Star Wars Pinball Pack; which included such Tables as Solo, Calrissian Chronicles & Battle of Mimban. This Table is of course the Star Wars: Battle of Mimban; which is a Table that pays homage to the battle which takes place in Blockbuster Film, Solo. The Table pits you against the Mimbanese Army, your goal is to help the Imperial Forces to overcome them. This is achieved via its many Modes. The Artwork and Audio cues are spot on once again, adding that unique originality to the Table’s Playfield. I hope my Guide will help you understand the Table better.
Page 4 of 28
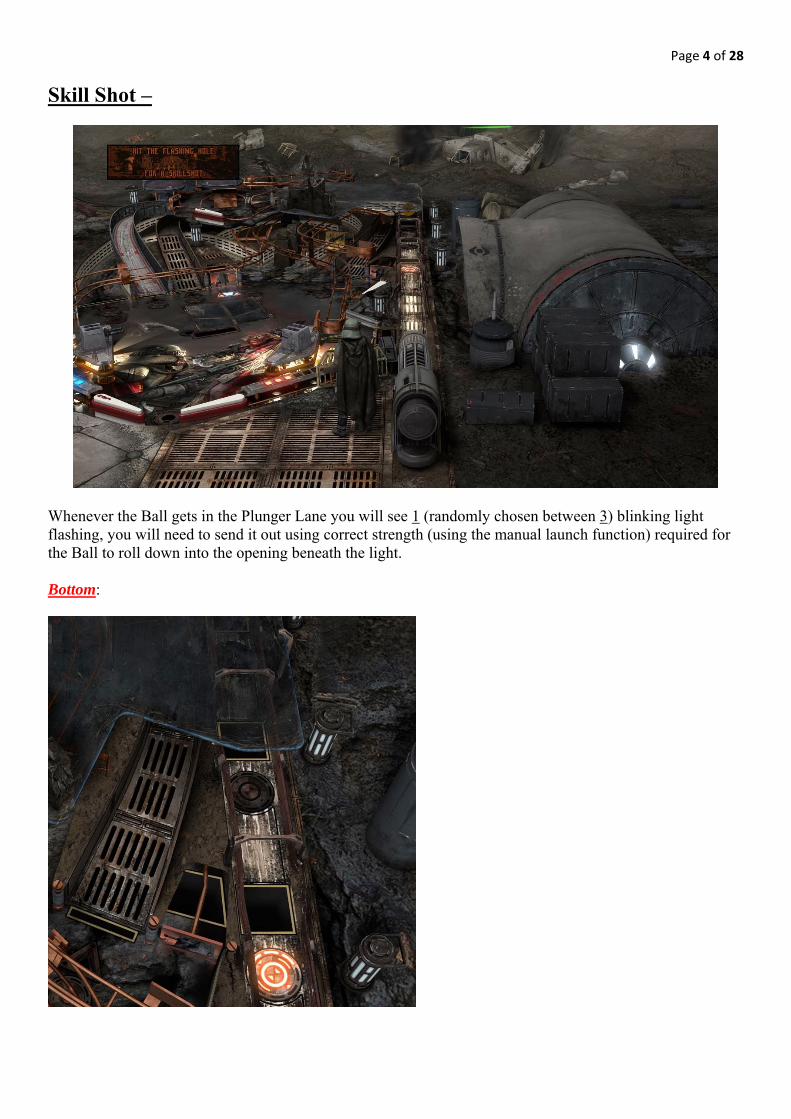
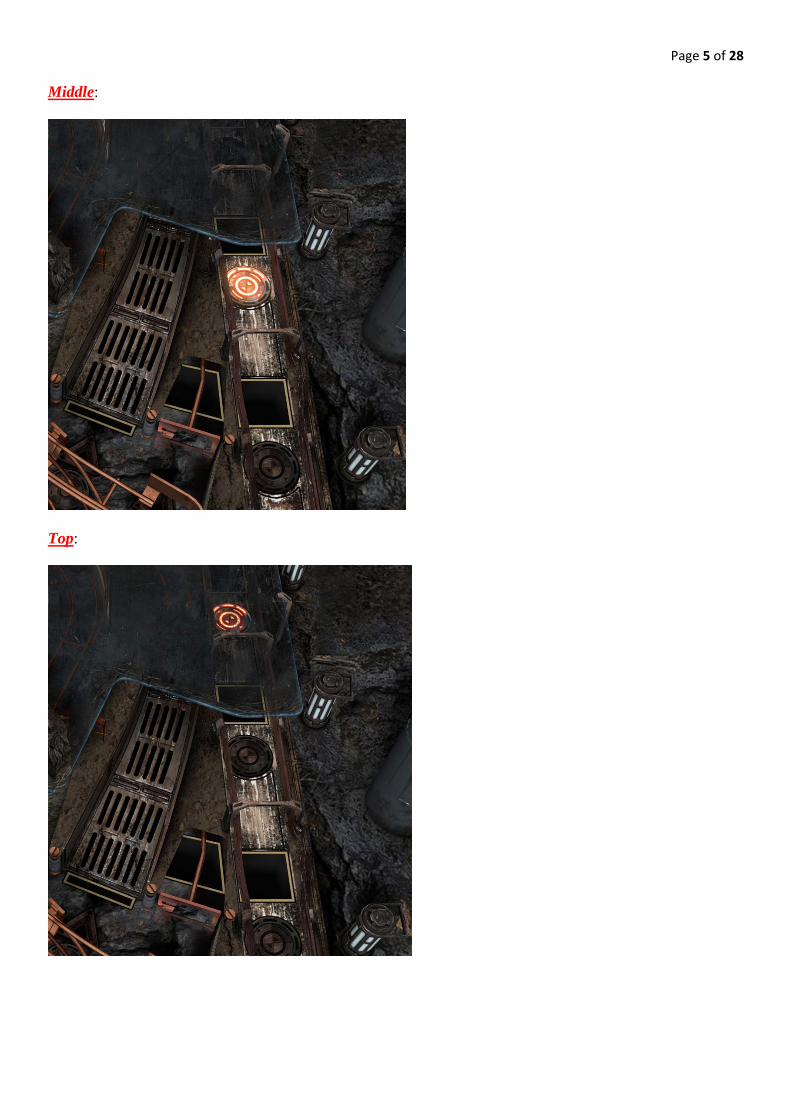
Skill Shot –
Whenever the Ball gets in the Plunger Lane you will see 1 (randomly chosen between 3) blinking light flashing, you will need to send it out using correct strength (using the manual launch function) required for the Ball to roll down into the opening beneath the light. Bottom:
Page 5 of 28
Middle:
Top:
Page 6 of 28
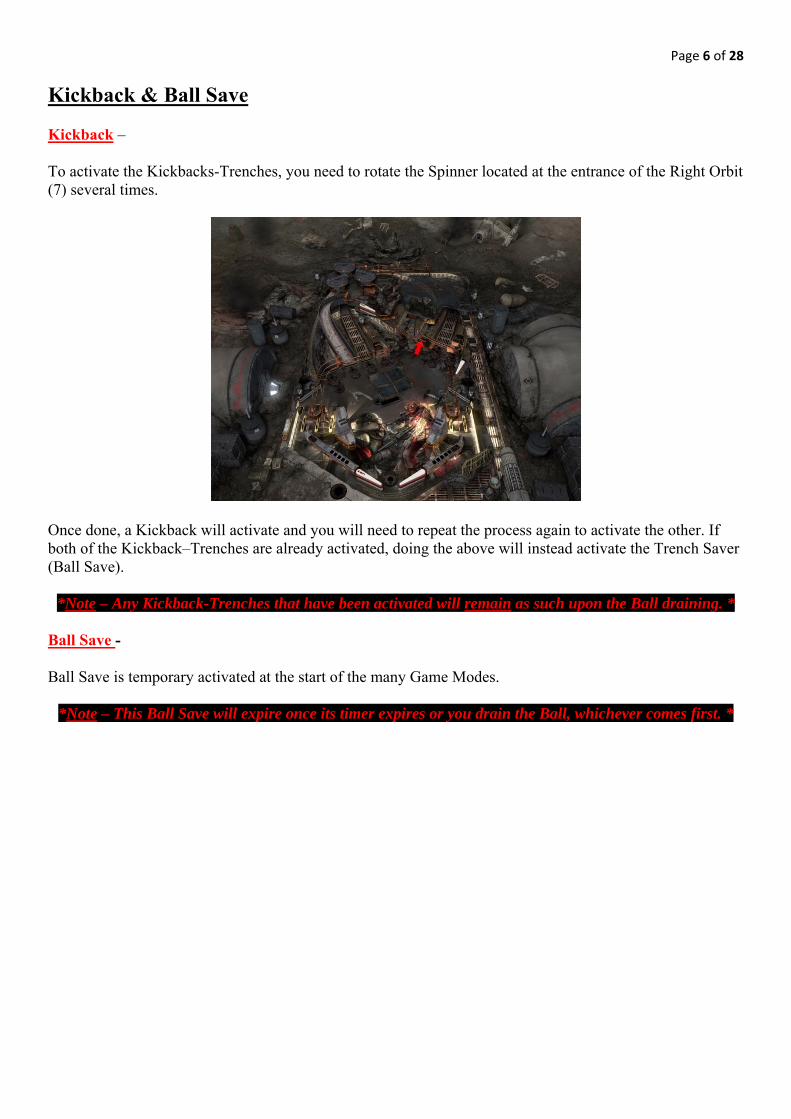
Kickback & Ball Save Kickback – To activate the Kickbacks-Trenches, you need to rotate the Spinner located at the entrance of the Right Orbit (7) several times.
Once done, a Kickback will activate and you will need to repeat the process again to activate the other. If both of the Kickback–Trenches are already activated, doing the above will instead activate the Trench Saver (Ball Save).
*Note – Any Kickback-Trenches that have been activated will remain as such upon the Ball draining. * Ball Save - Ball Save is temporary activated at the start of the many Game Modes.
*Note – This Ball Save will expire once its timer expires or you drain the Ball, whichever comes first. *
Page 7 of 28
Extra Balls There are 5 Ways to achieve an Extra Ball; sink the Ball into the Left Sink Hole (4) to collect it once you have achieved either of the below methods.
Method 1: Random Award; look later in the section titled “Side Modes – Penal Pit” for information on how to get this Extra Ball.
Method 2: Winning 2 Attacks; look later in the Guide under “Battles - Attacking” section for
information on how.
Method 3: Surviving a Defence Mode; look later in the Guide under “Battles – Defending” section for information on how.
Method 4: Take down 20 Mimbanese Soldiers; look later in the Guide under “Battles - Attacking”
section for information on how.
Method 5: Completing the Infiltration Mini-Playfield; look later in the Guide under “Imperial Army vs. Mimban Forces – Weakening the Mimbanese Army” section for information on how.
Page 8 of 28
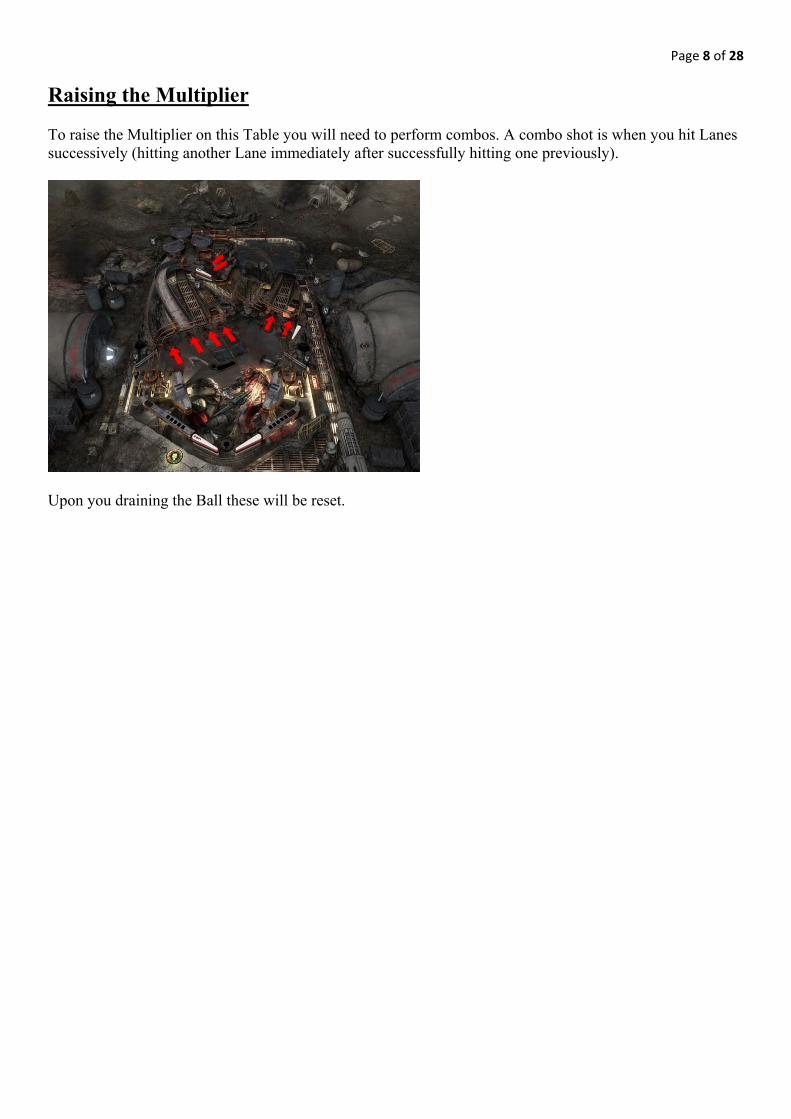
Raising the Multiplier To raise the Multiplier on this Table you will need to perform combos. A combo shot is when you hit Lanes successively (hitting another Lane immediately after successfully hitting one previously).
Upon you draining the Ball these will be reset.
Page 9 of 28
Side Game Modes
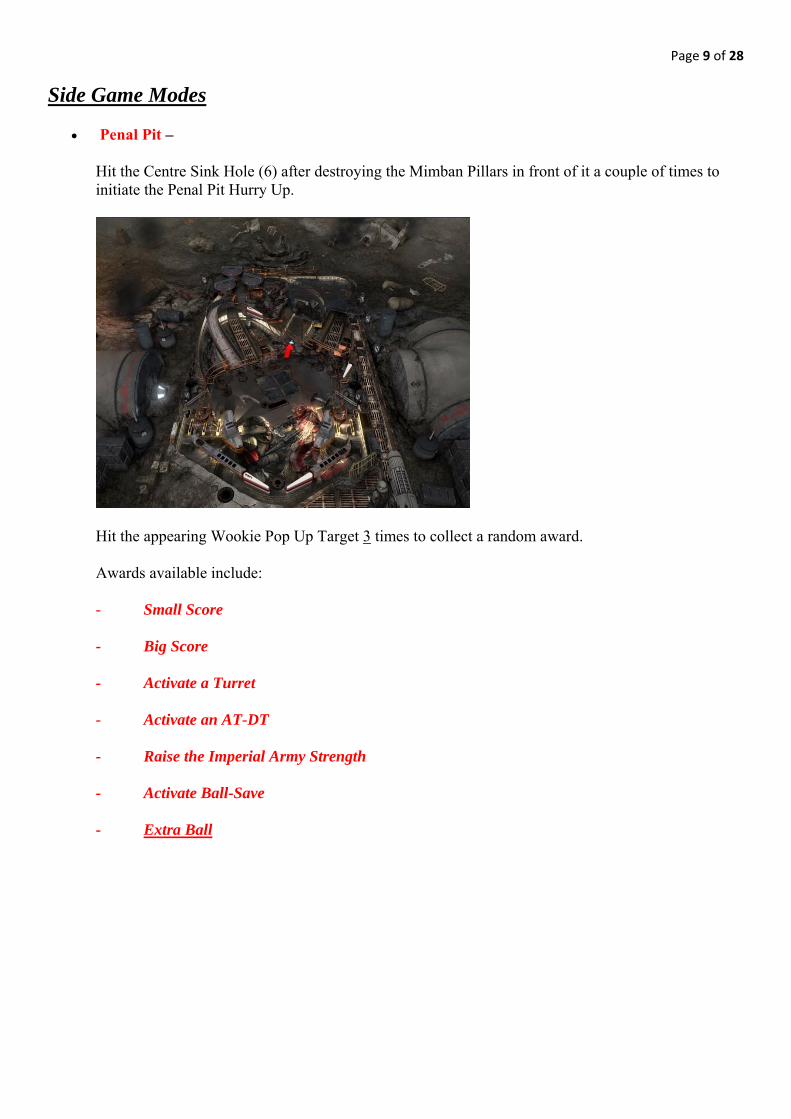
Penal Pit – Hit the Centre Sink Hole (6) after destroying the Mimban Pillars in front of it a couple of times to initiate the Penal Pit Hurry Up.
Hit the appearing Wookie Pop Up Target 3 times to collect a random award. Awards available include: - Small Score - Big Score - Activate a Turret - Activate an AT-DT - Raise the Imperial Army Strength - Activate Ball-Save - Extra Ball
Page 10 of 28
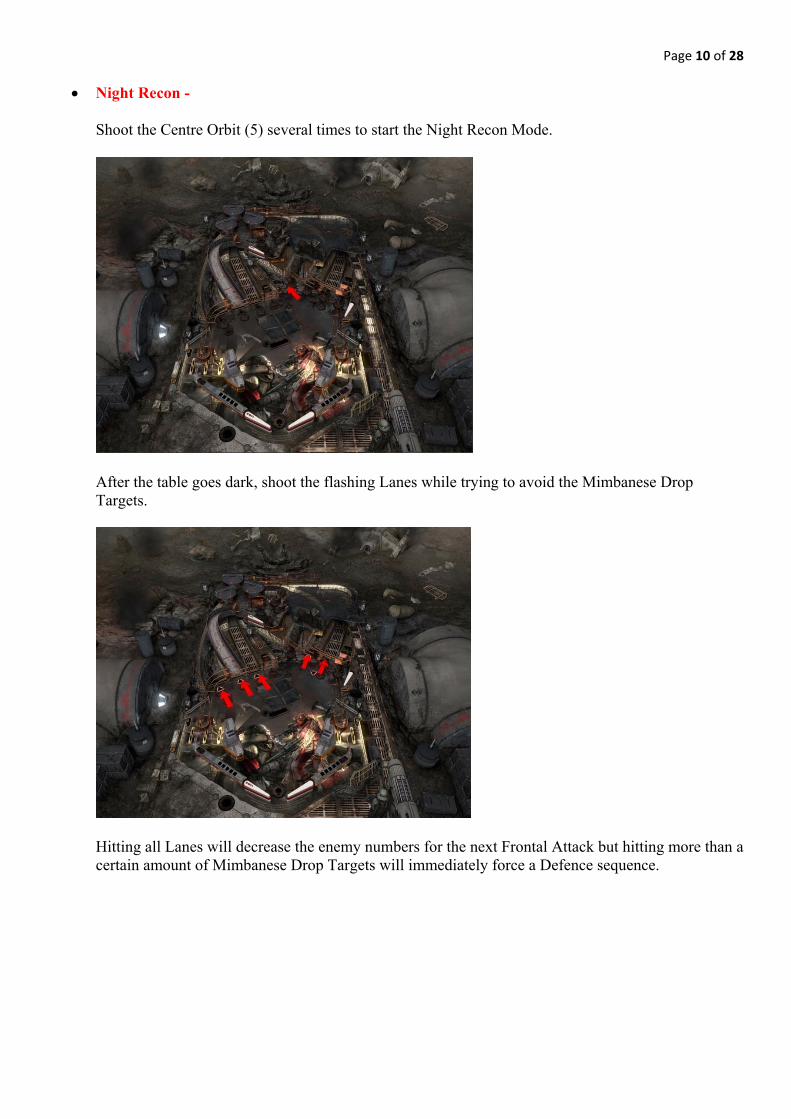
Night Recon - Shoot the Centre Orbit (5) several times to start the Night Recon Mode.
After the table goes dark, shoot the flashing Lanes while trying to avoid the Mimbanese Drop Targets.
Hitting all Lanes will decrease the enemy numbers for the next Frontal Attack but hitting more than a certain amount of Mimbanese Drop Targets will immediately force a Defence sequence.
Page 11 of 28
Multiball Modes –
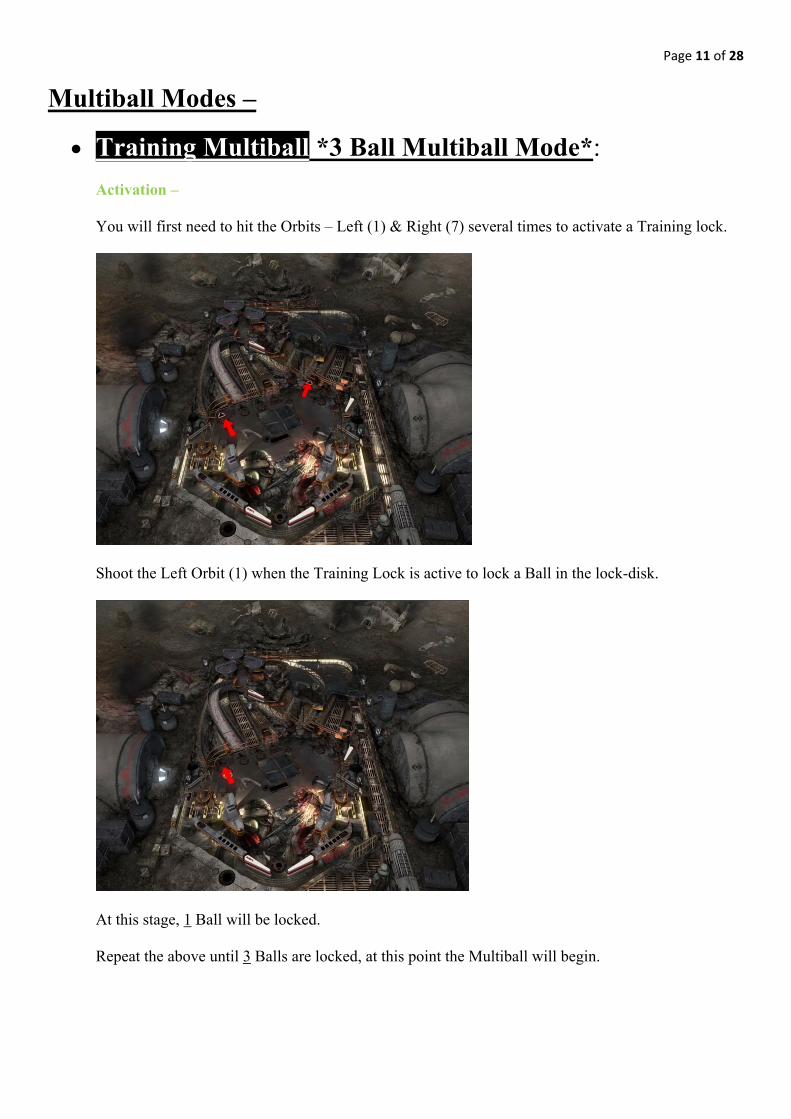
Training Multiball *3 Ball Multiball Mode*: Activation – You will first need to hit the Orbits – Left (1) & Right (7) several times to activate a Training lock.
Shoot the Left Orbit (1) when the Training Lock is active to lock a Ball in the lock-disk.
At this stage, 1 Ball will be locked. Repeat the above until 3 Balls are locked, at this point the Multiball will begin.

Page 12 of 28
Mode itself - The 3 Ball Multiball begins; Hit the flashing Lanes to collect Jackpots.
This Multiball Mode will continue if you have more than a single Ball alive on the Playfield. Otherwise the Mode will end, and you will need to repeat the above activation process to re-enter this Mode.
Page 13 of 28
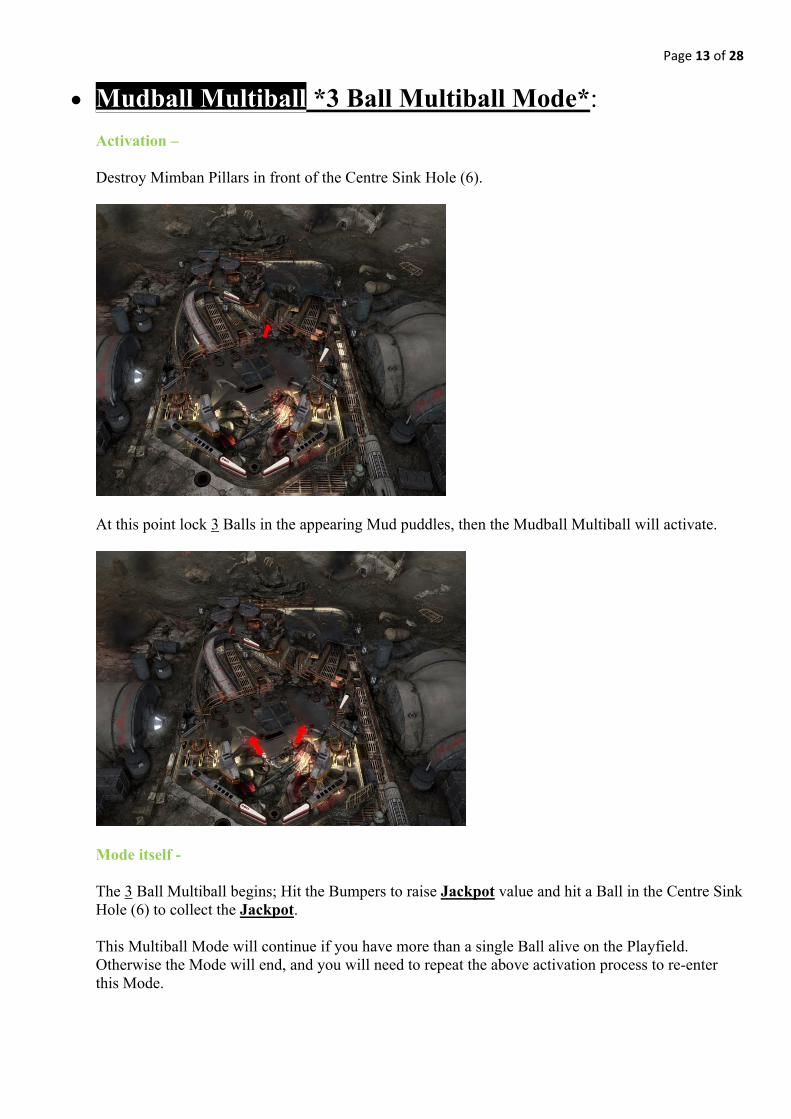
Mudball Multiball *3 Ball Multiball Mode*: Activation – Destroy Mimban Pillars in front of the Centre Sink Hole (6).
At this point lock 3 Balls in the appearing Mud puddles, then the Mudball Multiball will activate.
Mode itself - The 3 Ball Multiball begins; Hit the Bumpers to raise Jackpot value and hit a Ball in the Centre Sink Hole (6) to collect the Jackpot. This Multiball Mode will continue if you have more than a single Ball alive on the Playfield. Otherwise the Mode will end, and you will need to repeat the above activation process to re-enter this Mode.
Page 14 of 28
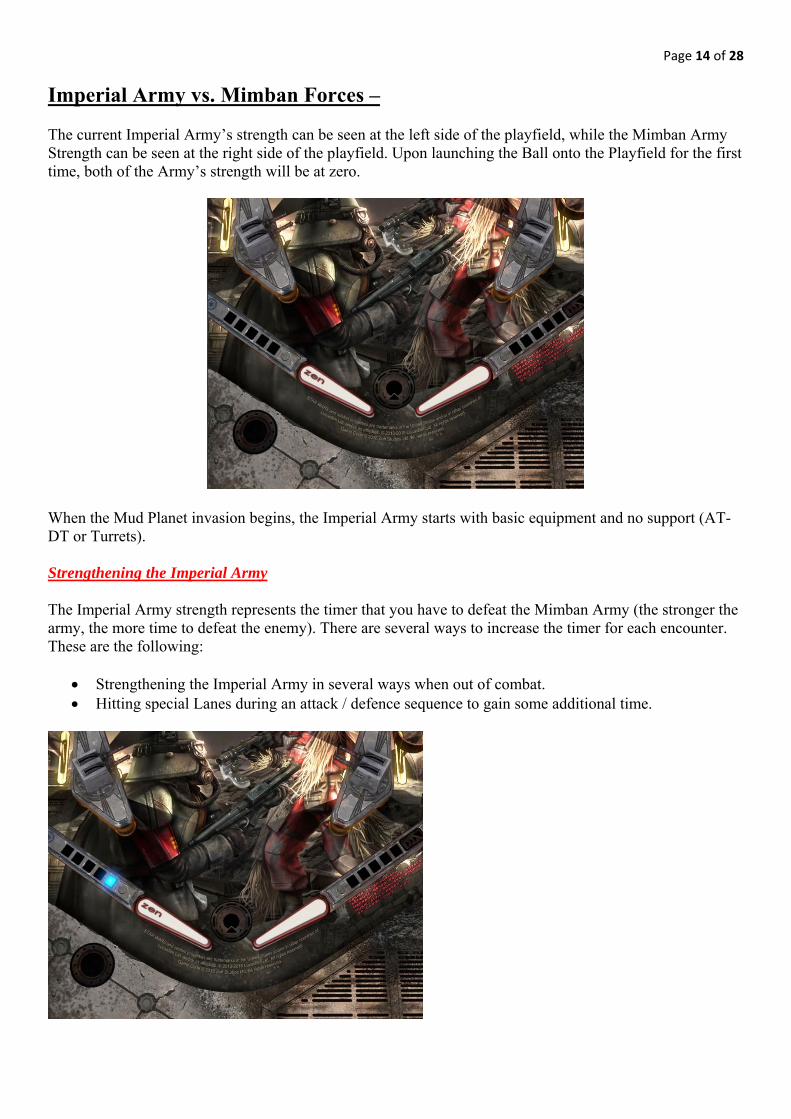
Imperial Army vs. Mimban Forces – The current Imperial Army’s strength can be seen at the left side of the playfield, while the Mimban Army Strength can be seen at the right side of the playfield. Upon launching the Ball onto the Playfield for the first time, both of the Army’s strength will be at zero.
When the Mud Planet invasion begins, the Imperial Army starts with basic equipment and no support (AT-DT or Turrets). Strengthening the Imperial Army The Imperial Army strength represents the timer that you have to defeat the Mimban Army (the stronger the army, the more time to defeat the enemy). There are several ways to increase the timer for each encounter. These are the following:
Strengthening the Imperial Army in several ways when out of combat. Hitting special Lanes during an attack / defence sequence to gain some additional time.

Page 15 of 28
There are several methods to strengthen the Imperial Army before attacking the Mimbanese or defending the home base:
Repair or re-equip weapons and armour of the Imperial Troops. Re-equipping Weaponry Rotate the Spinner at the entrance of the Right Orbit (7) several times to Re-equip weaponry when there is no attack or defence sequence is running.
This will either activate 1 of the Kickbacks, or if they are both activated, a Ball Save will be granted.
Recruiting new members for the Army.
Recruit Troops: Hit the Left (2) or the Right Ramp (8) several times to start the Recruit Mode.
Hit Left (2) - Right Ramp (8) combos rapidly to recruit new troopers and raise the Imperial Army Strength.
Page 16 of 28
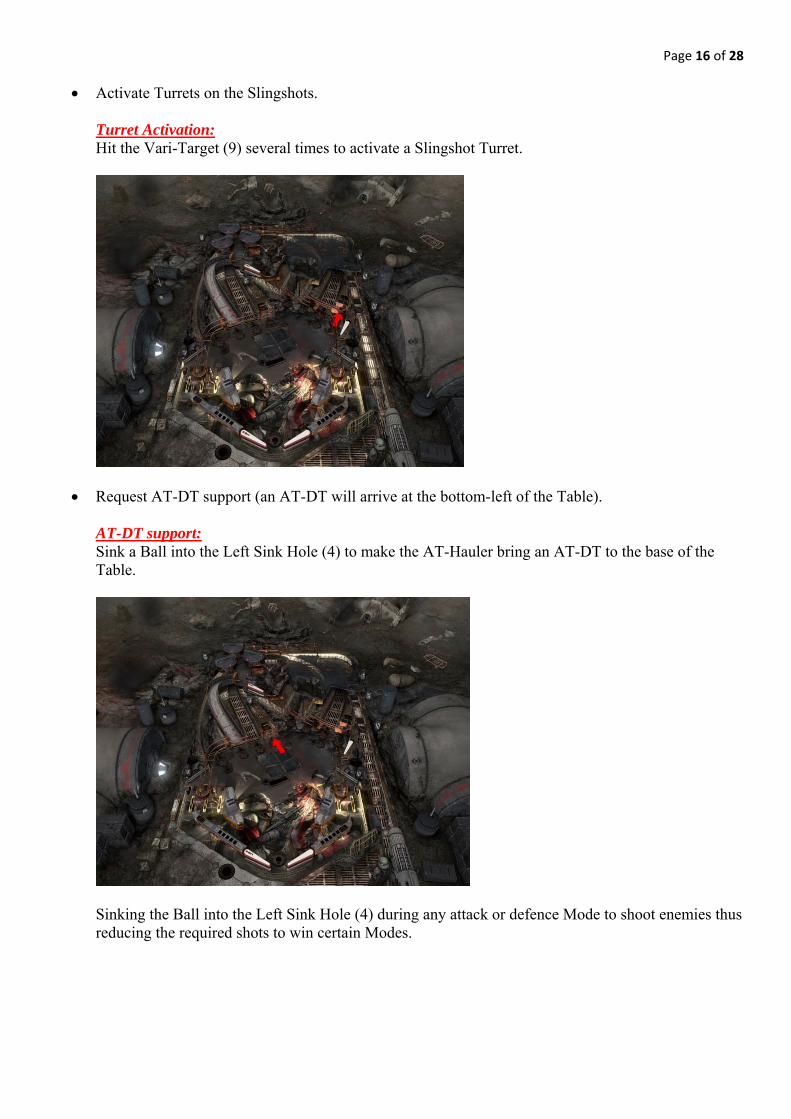
Activate Turrets on the Slingshots. Turret Activation: Hit the Vari-Target (9) several times to activate a Slingshot Turret.
Request AT-DT support (an AT-DT will arrive at the bottom-left of the Table). AT-DT support: Sink a Ball into the Left Sink Hole (4) to make the AT-Hauler bring an AT-DT to the base of the Table.
Sinking the Ball into the Left Sink Hole (4) during any attack or defence Mode to shoot enemies thus reducing the required shots to win certain Modes.
Page 17 of 28
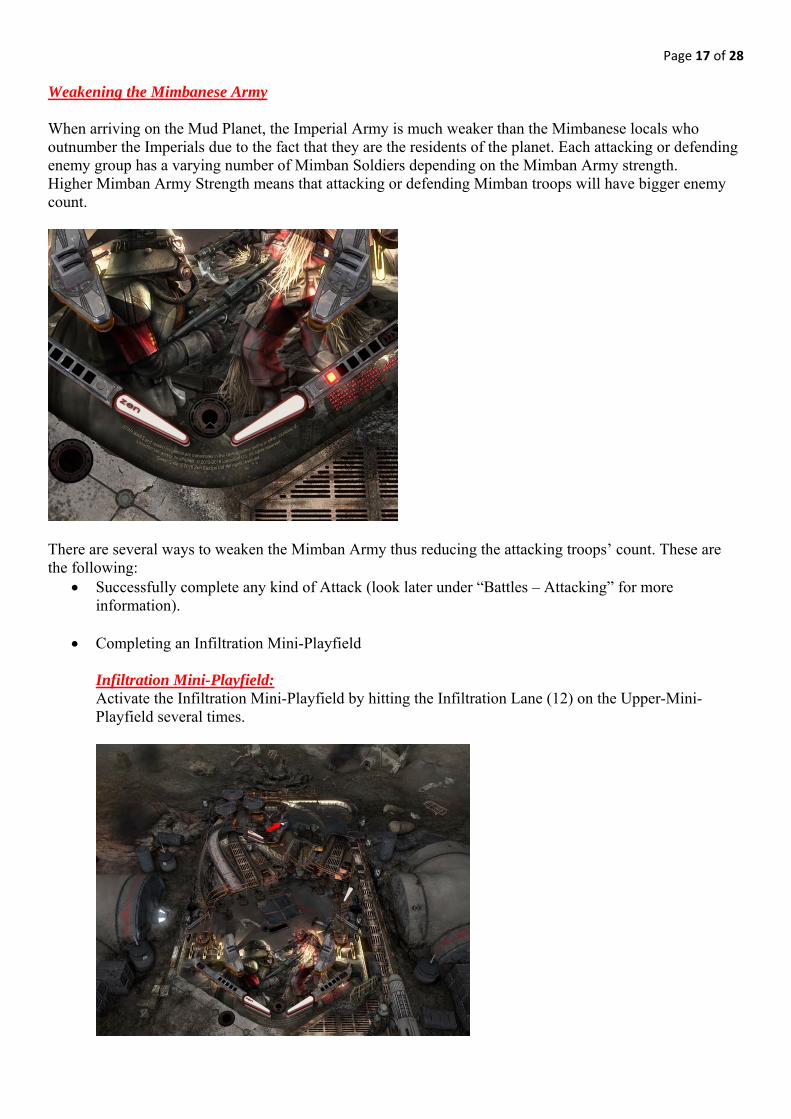
Weakening the Mimbanese Army When arriving on the Mud Planet, the Imperial Army is much weaker than the Mimbanese locals who outnumber the Imperials due to the fact that they are the residents of the planet. Each attacking or defending enemy group has a varying number of Mimban Soldiers depending on the Mimban Army strength. Higher Mimban Army Strength means that attacking or defending Mimban troops will have bigger enemy count.
There are several ways to weaken the Mimban Army thus reducing the attacking troops’ count. These are the following:
Successfully complete any kind of Attack (look later under “Battles – Attacking” for more information).
Completing an Infiltration Mini-Playfield Infiltration Mini-Playfield: Activate the Infiltration Mini-Playfield by hitting the Infiltration Lane (12) on the Upper-Mini-Playfield several times.
Page 18 of 28
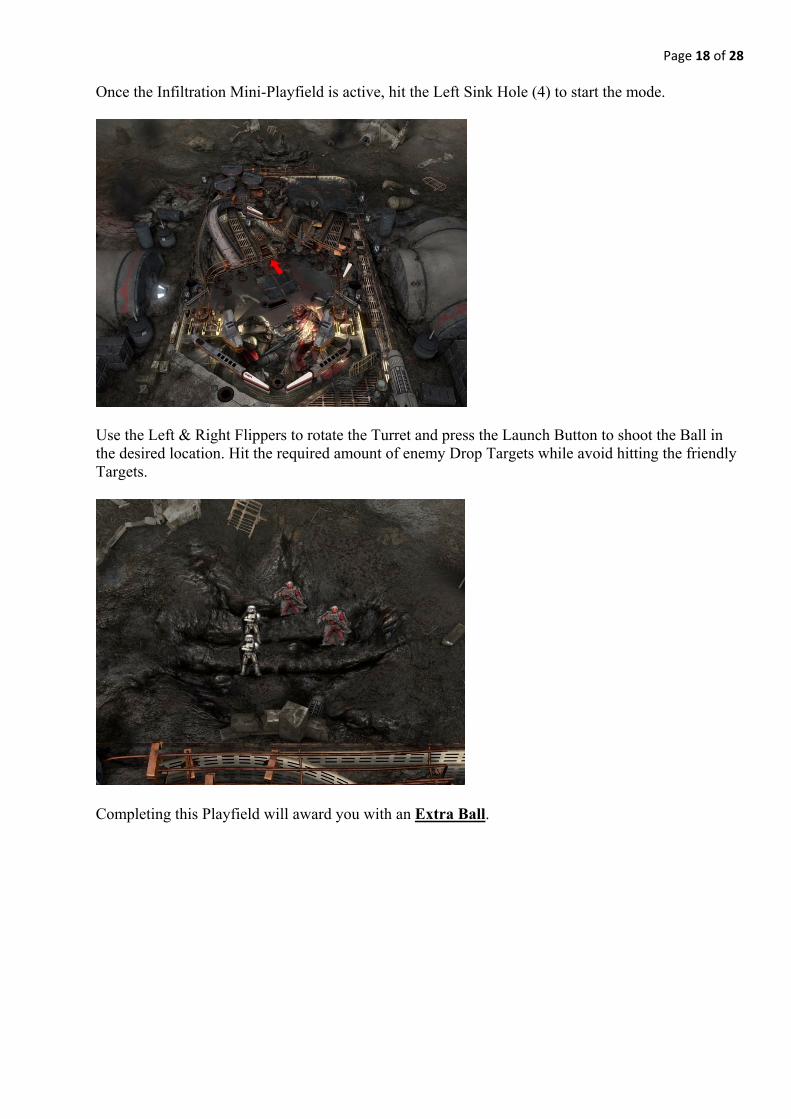
Once the Infiltration Mini-Playfield is active, hit the Left Sink Hole (4) to start the mode.
Use the Left & Right Flippers to rotate the Turret and press the Launch Button to shoot the Ball in the desired location. Hit the required amount of enemy Drop Targets while avoid hitting the friendly Targets.
Completing this Playfield will award you with an Extra Ball.

Page 19 of 28
Battles Attacking There are 2 ways to attack the enemy: Frontal attack: To start a frontal attack on an enemy base, hit the Ball to the elevated Mini-Playfield and hit the Bumpers several times via the Bumper Lane (11).
After the Bumpers have been hit enough times the Attack Sink Hole (10) will be activated on the elevated Playfield. Hit the Ball into that Sink Hole to start a frontal attack.
Then you will be able to select any of the 5 enemy territories to begin the invasion. Use the Flipper Buttons to cycle through the territories available and press the Launch Button to select which one you wish to play-through.
Page 20 of 28
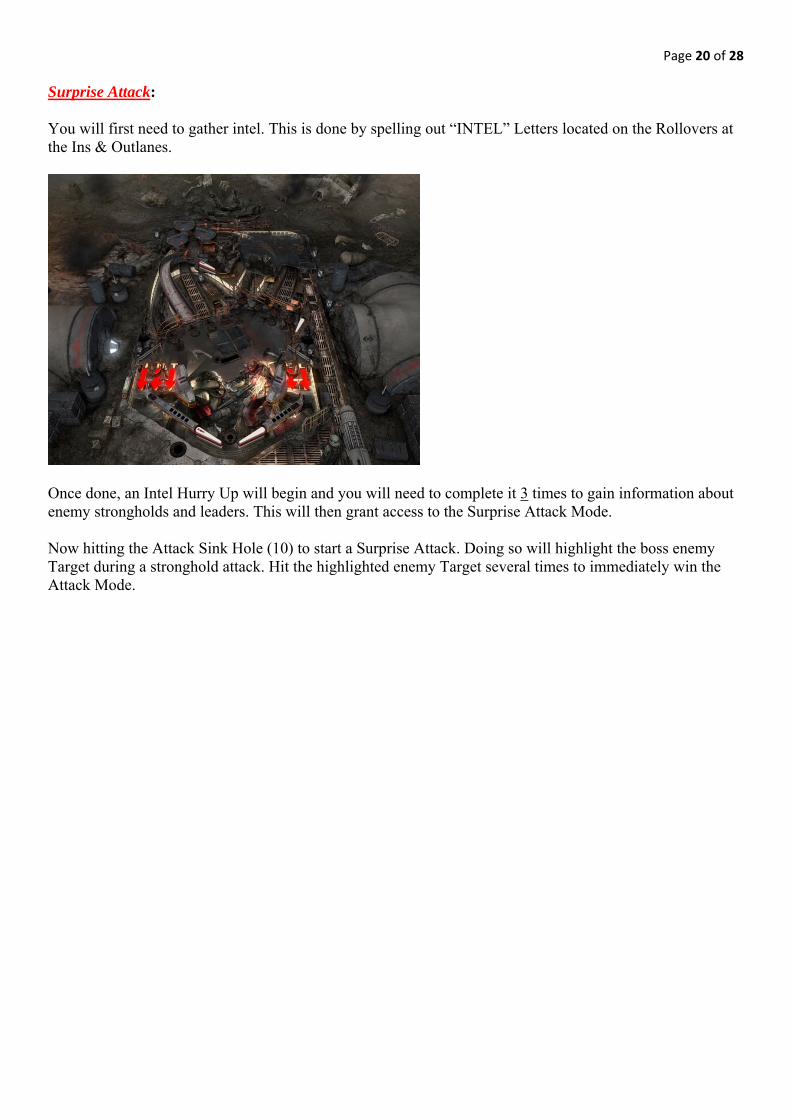
Surprise Attack: You will first need to gather intel. This is done by spelling out “INTEL” Letters located on the Rollovers at the Ins & Outlanes.
Once done, an Intel Hurry Up will begin and you will need to complete it 3 times to gain information about enemy strongholds and leaders. This will then grant access to the Surprise Attack Mode. Now hitting the Attack Sink Hole (10) to start a Surprise Attack. Doing so will highlight the boss enemy Target during a stronghold attack. Hit the highlighted enemy Target several times to immediately win the Attack Mode.
Page 21 of 28
Defending Defence Preparation: When no Attack is running, a random timer starts counting down (visible on the Dot-Matrix). During this countdown, the Defence Preparation sequence is active. During the Defence Preparation, you can use a Counterattack or set up an Ambush (explained below). Counterattack Hurry Up: During the Defence Preparation, you can use an AT-DT counterattack to make the enemies retreat thus cancelling the Defence timer. You will need to have an AT-DT to be able to use this attack. Activating the option for an AT-DT Attack can be achieved in the following ways:
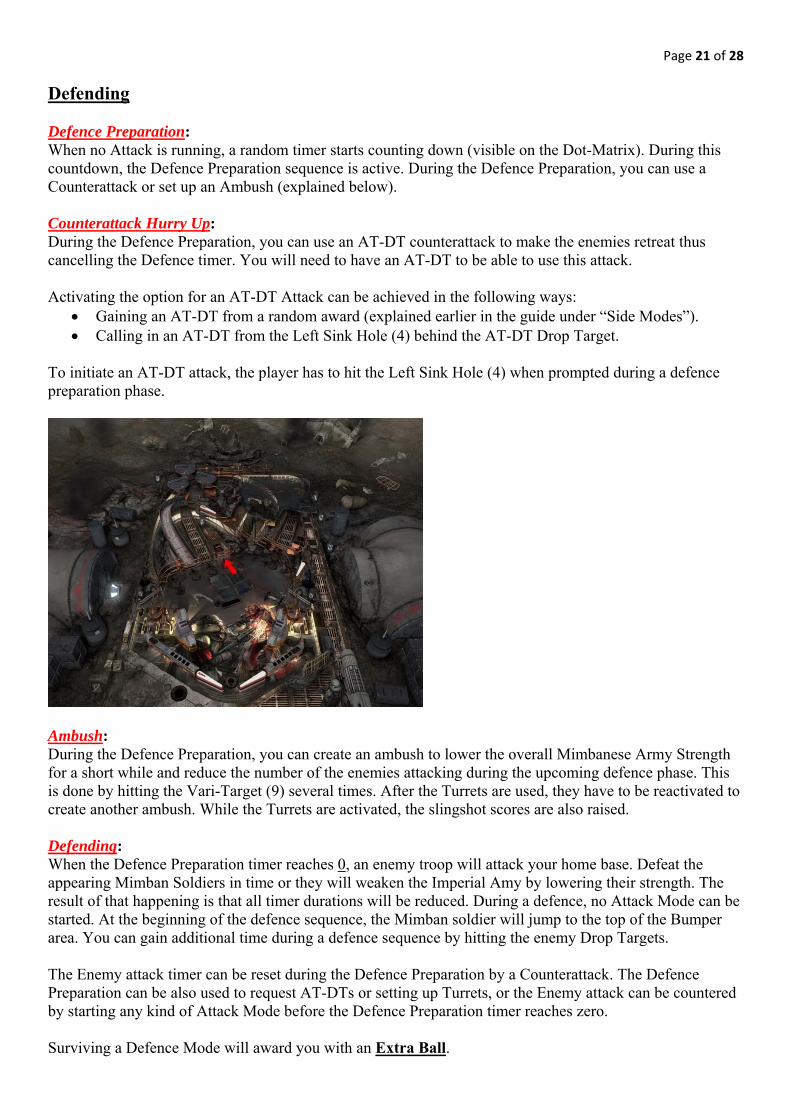
Gaining an AT-DT from a random award (explained earlier in the guide under “Side Modes”). Calling in an AT-DT from the Left Sink Hole (4) behind the AT-DT Drop Target.
To initiate an AT-DT attack, the player has to hit the Left Sink Hole (4) when prompted during a defence preparation phase.
Ambush: During the Defence Preparation, you can create an ambush to lower the overall Mimbanese Army Strength for a short while and reduce the number of the enemies attacking during the upcoming defence phase. This is done by hitting the Vari-Target (9) several times. After the Turrets are used, they have to be reactivated to create another ambush. While the Turrets are activated, the slingshot scores are also raised. Defending: When the Defence Preparation timer reaches 0, an enemy troop will attack your home base. Defeat the appearing Mimban Soldiers in time or they will weaken the Imperial Amy by lowering their strength. The result of that happening is that all timer durations will be reduced. During a defence, no Attack Mode can be started. At the beginning of the defence sequence, the Mimban soldier will jump to the top of the Bumper area. You can gain additional time during a defence sequence by hitting the enemy Drop Targets. The Enemy attack timer can be reset during the Defence Preparation by a Counterattack. The Defence Preparation can be also used to request AT-DTs or setting up Turrets, or the Enemy attack can be countered by starting any kind of Attack Mode before the Defence Preparation timer reaches zero. Surviving a Defence Mode will award you with an Extra Ball.
Page 22 of 28
AttackingtheEnemyTerritories(MainGameModes)
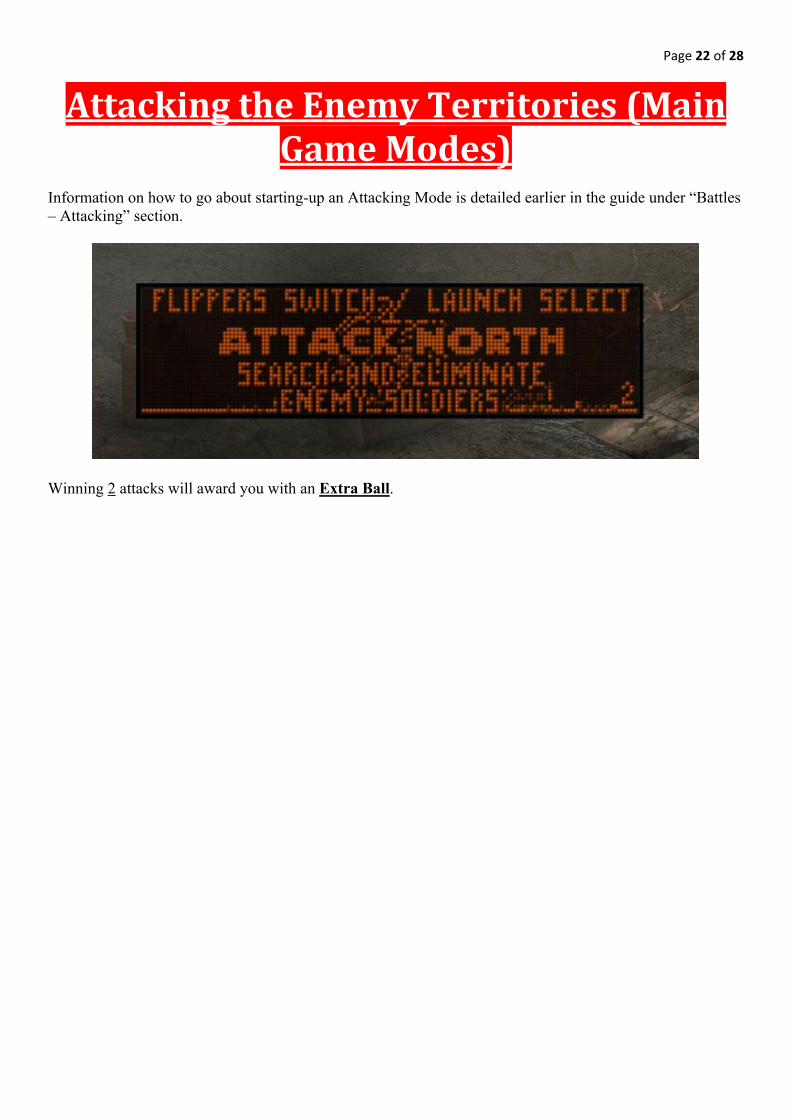
Information on how to go about starting-up an Attacking Mode is detailed earlier in the guide under “Battles – Attacking” section.
Winning 2 attacks will award you with an Extra Ball.
Page 23 of 28
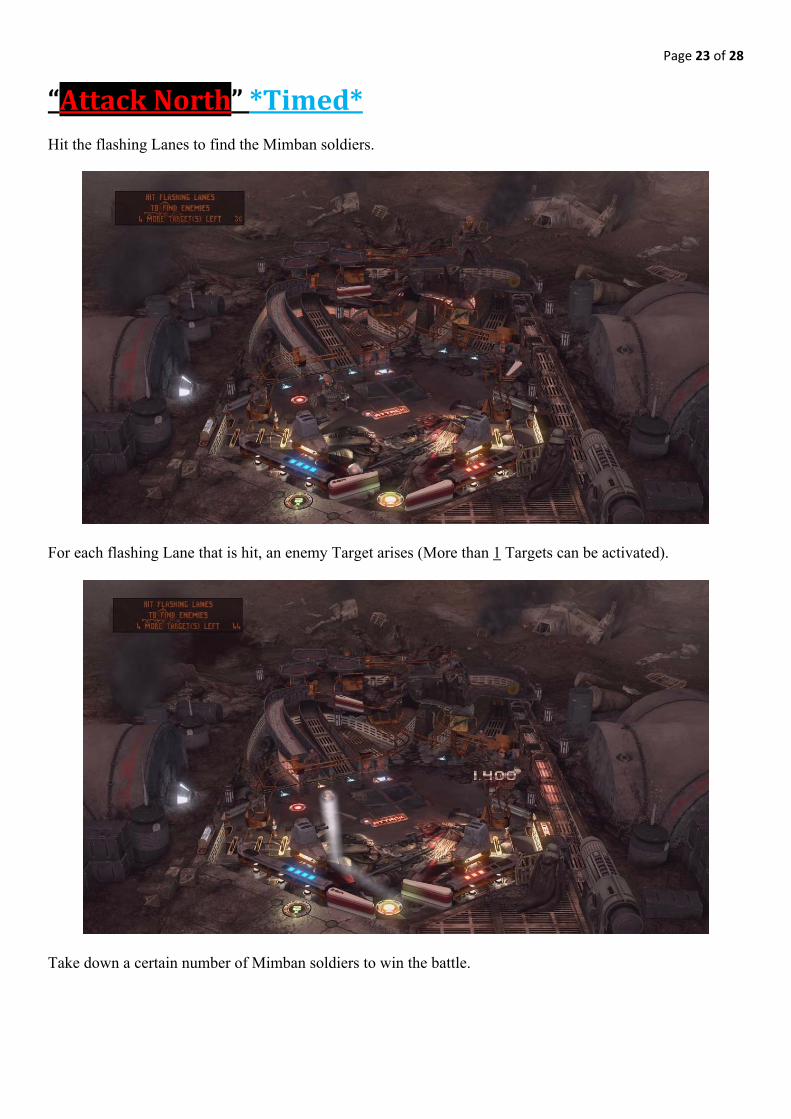
“AttackNorth”*Timed* Hit the flashing Lanes to find the Mimban soldiers.
For each flashing Lane that is hit, an enemy Target arises (More than 1 Targets can be activated).
Take down a certain number of Mimban soldiers to win the battle.
Page 24 of 28
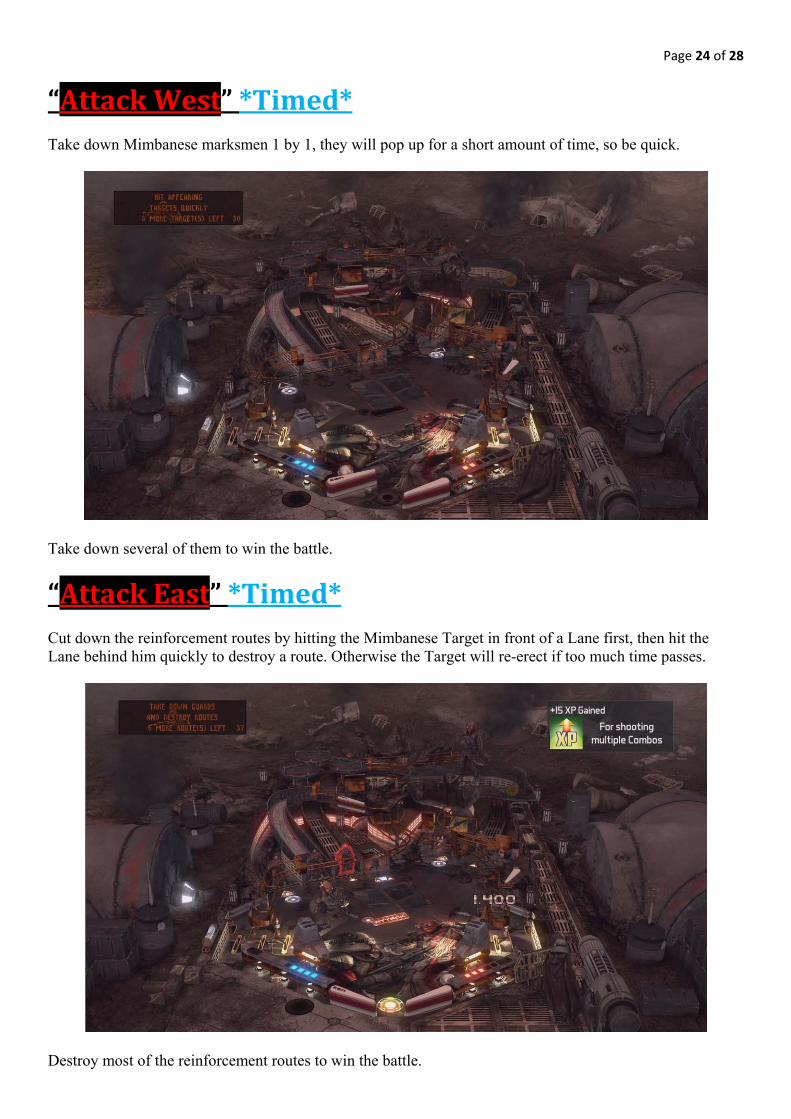
“AttackWest”*Timed* Take down Mimbanese marksmen 1 by 1, they will pop up for a short amount of time, so be quick.
Take down several of them to win the battle.
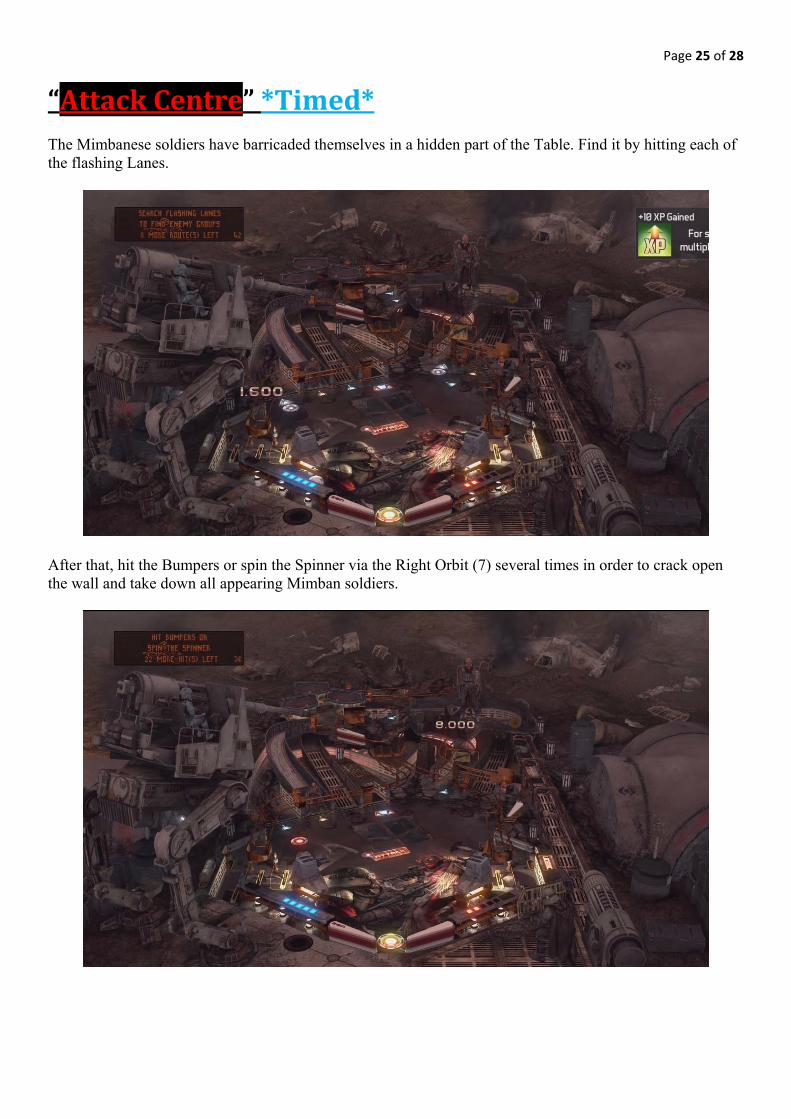
“AttackEast”*Timed* Cut down the reinforcement routes by hitting the Mimbanese Target in front of a Lane first, then hit the Lane behind him quickly to destroy a route. Otherwise the Target will re-erect if too much time passes.
Destroy most of the reinforcement routes to win the battle.
Page 25 of 28
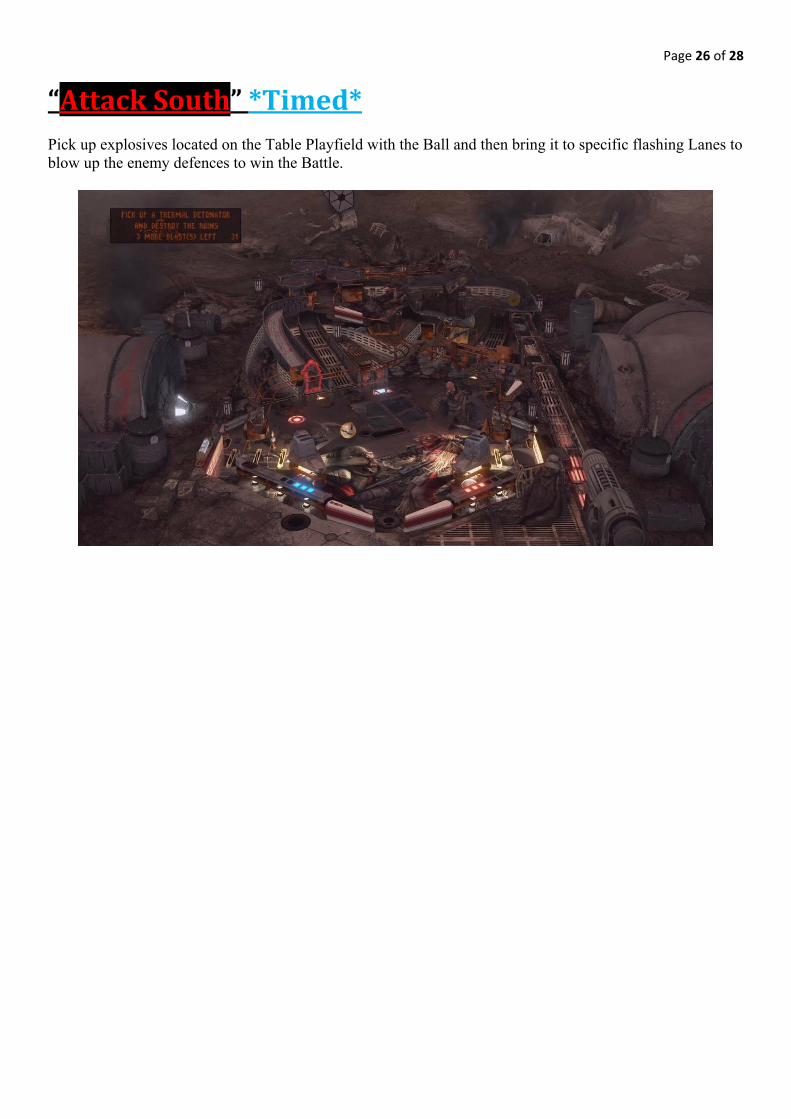
“AttackCentre”*Timed* The Mimbanese soldiers have barricaded themselves in a hidden part of the Table. Find it by hitting each of the flashing Lanes.
After that, hit the Bumpers or spin the Spinner via the Right Orbit (7) several times in order to crack open the wall and take down all appearing Mimban soldiers.
Page 26 of 28
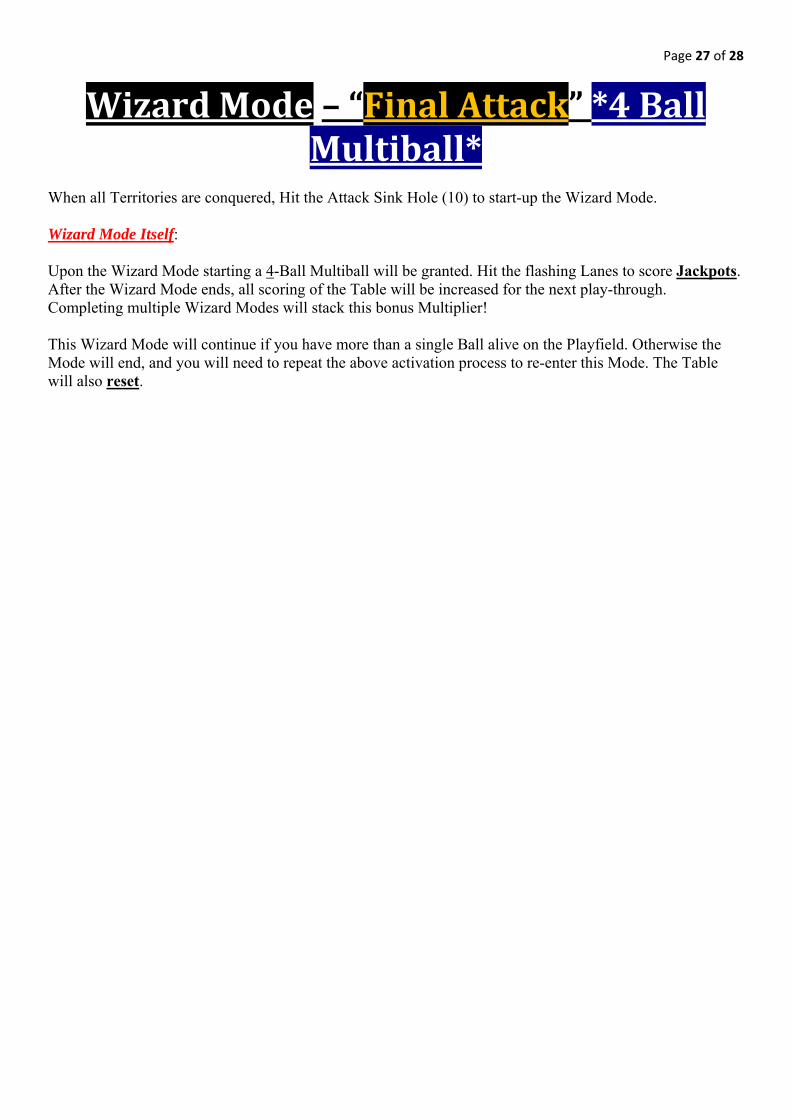
“AttackSouth”*Timed* Pick up explosives located on the Table Playfield with the Ball and then bring it to specific flashing Lanes to blow up the enemy defences to win the Battle.
Page 27 of 28
WizardMode–“FinalAttack”*4BallMultiball*
When all Territories are conquered, Hit the Attack Sink Hole (10) to start-up the Wizard Mode. Wizard Mode Itself: Upon the Wizard Mode starting a 4-Ball Multiball will be granted. Hit the flashing Lanes to score Jackpots. After the Wizard Mode ends, all scoring of the Table will be increased for the next play-through. Completing multiple Wizard Modes will stack this bonus Multiplier! This Wizard Mode will continue if you have more than a single Ball alive on the Playfield. Otherwise the Mode will end, and you will need to repeat the above activation process to re-enter this Mode. The Table will also reset.
Page 28 of 28
Special Thanks to all the Zen Studios Forum Community! Members such as shogun00, Cloda, Ty-43, Peter Horvath (yoyo) (without his help this guide wouldn’t have been possible!), Captain B. Z., Deep, wims, skyway73, tenorhero, DiscoKing & surf1der. I couldn’t have completed the Guide without your help either directly or indirectly - you are all awesome!!!
In closing I hope you enjoyed this Table, I certainly have and I hope by using this Guide it increases that Fun factor for you and everyone else who plays with you.
Check out the other Tables available, they are all available to download on the Xbox Live Marketplace in Add-Ons section or download it straight from the PFX2 Platform itself. Zen Pinball 2 on PlayStation Network, Zen Pinball on the Apple AppStore, Zen Pinball 3D on Nintendo 3DS and Zen Pinball THD on Android Marketplace. Thanks for viewing my Guide; any feedback would be greatly appreciated -
“Push the Flippers forward into the enemy territory!!!” Yours ShoryukenToTheChin