Embed Size (px)
Citation preview

Beaker User GuideRelease dev
Red Hat, Inc.
January 15, 2013

CONTENTS
1 Scope of document 1
2 Audience 3
3 Contents 53.1 The bkr command-line client . . . . . . . . . . . . . . . . . . . . . . . . . . . . . . . . . . . . . . 53.2 Beaker interface . . . . . . . . . . . . . . . . . . . . . . . . . . . . . . . . . . . . . . . . . . . . . 63.3 Beaker Makefile . . . . . . . . . . . . . . . . . . . . . . . . . . . . . . . . . . . . . . . . . . . . . 323.4 Workflow . . . . . . . . . . . . . . . . . . . . . . . . . . . . . . . . . . . . . . . . . . . . . . . . . 393.5 Tests . . . . . . . . . . . . . . . . . . . . . . . . . . . . . . . . . . . . . . . . . . . . . . . . . . . 45
i

ii
CHAPTER
ONE
SCOPE OF DOCUMENT
This document covers interacting with Beaker through the web and command line interfaces, as well as covering thesteps involved in writing new Beaker tasks.
1

Beaker User Guide, Release dev
2 Chapter 1. Scope of document
CHAPTER
TWO
AUDIENCE
This document is aimed at developers and quality assurance engineers that need to work with Beaker, writing, runningand interpreting the results of Beaker tasks.
3

Beaker User Guide, Release dev
4 Chapter 2. Audience

CHAPTER
THREE
CONTENTS
3.1 The bkr command-line client
3.1.1 Installing and configuring the client
Pre-built Beaker packages are available from the Download section of Beaker’s web site. Download the repo file thatsuits your requirements and copy it to /etc/yum.repos.d.
Install the beaker-client package:
$ sudo yum install beaker-client
The client’s configuration is in /etc/beaker/client.conf. If you prefer you can copy the configuration file to~/.beaker_client/config and edit it there.
First, set the URL of your Beaker server without trailing slash:
HUB_URL = "http://mybeaker.example.com/bkr"
You’ll then need to configure how your Beaker client authenticates with the Beaker server. You can use either passwordauthentication, or Kerberos authentication. For password authentication, add the following:
AUTH_METHOD = "password"USERNAME = "username"PASSWORD = "password"
If instead Kerberos authentication is preferred:
AUTH_METHOD = "krbv"KRB_REALM = "REALM.EXAMPLE.COM"
To verify it is working properly:
$ bkr whoami
It should print your username.
3.1.2 Using the client
For full details about the bkr client and its subcommands, refer to the Beaker client man pages. A summary of somecommon commands is given below.
To create a simple Job workflow, the beaker client comes with the command bkr workflow-simple. This simpleJob workflow will create the XML for you from various options passed at the shell prompt, and submit this to the
5

Beaker User Guide, Release dev
Beaker server. To see all the options that can be passed during invocation of workflow-simple, use the followingcommand:
$ bkr workflow-simple --help
A common set of parameters that may be passed to the workflow-simple options would be the following:
$ bkr workflow-simple --username=<user> --password=<passwd> --dryrun \--arch=<arch> --distro=<distro_name> --task=<task_name> \--type=<TYPE> --whiteboard=<whiteboard_name> --debug > my_job.xml
To submit an existing Job workflow:
$ bkr job-submit job_xml
If successful, you will be shown the Job ID and the progress of your Job.
To watch a Job:
$ bkr job-watch J:job_id
To cancel a Job you have created:
$ bkr job-cancel J:job_id
To show all Tasks available for a given distro:
$ bkr task-list distro
To add a Task:
$ bkr task-add task_rpm
3.2 Beaker interface
3.2.1 Systems
Beaker provides an inventory of Systems(These could be a physical machine,laptop,virtual guest, or resource) attachedto lab controllers. Systems can be added, removed, have details changed, and be provisioned among other things.
System searching
System searches are conducted by clicking on one of the items of the “System” menu at the top of the page.
• System Searches
– All
* Will search through all Systems listed in Beaker.
– Available
* Will search through only Systems that the currently logged in user has permission to reserve.
– Free
* Will search through only Systems that the currently logged in user has permission to reserve and arecurrently free.
6 Chapter 3. Contents

Beaker User Guide, Release dev
Figure 3.1: System Menu
The search panel has two modes; simple and advanced. The simple search is the default, and the default search is ofthe System name, using the “contains” operator. To toggle between the two search modes, press the “Toggle Search”link.
The first column (“Table”) is the attribute on which the search is being performed; The second (“Operation”) is thetype of search, and the third (“Value”) is the actual value to search on. To add another search criteria (row), click the“Add(+)” link just below the “Table” column. When using more than just one search criteria, the default operationbetween the criteria is an SQL AND operation. The operators change depending on what type of attribute is beingsearched.
Wildcards
No operator provides explicit wildcards other than the is operation, which allows the * wildcard when searching anattribute which is a string.
The kind of data returned in the System search can be changed by adding/removing the result columns. To do this the“Toggle Result Columns” link is pressed and the columns checked/unchecked.
Shortcut for finding systems you are using
The top right hand corner has a menu which starts with Hello, followed by the name of the user currently logged in.Click on this, then down to “My Systems”
Adding a system
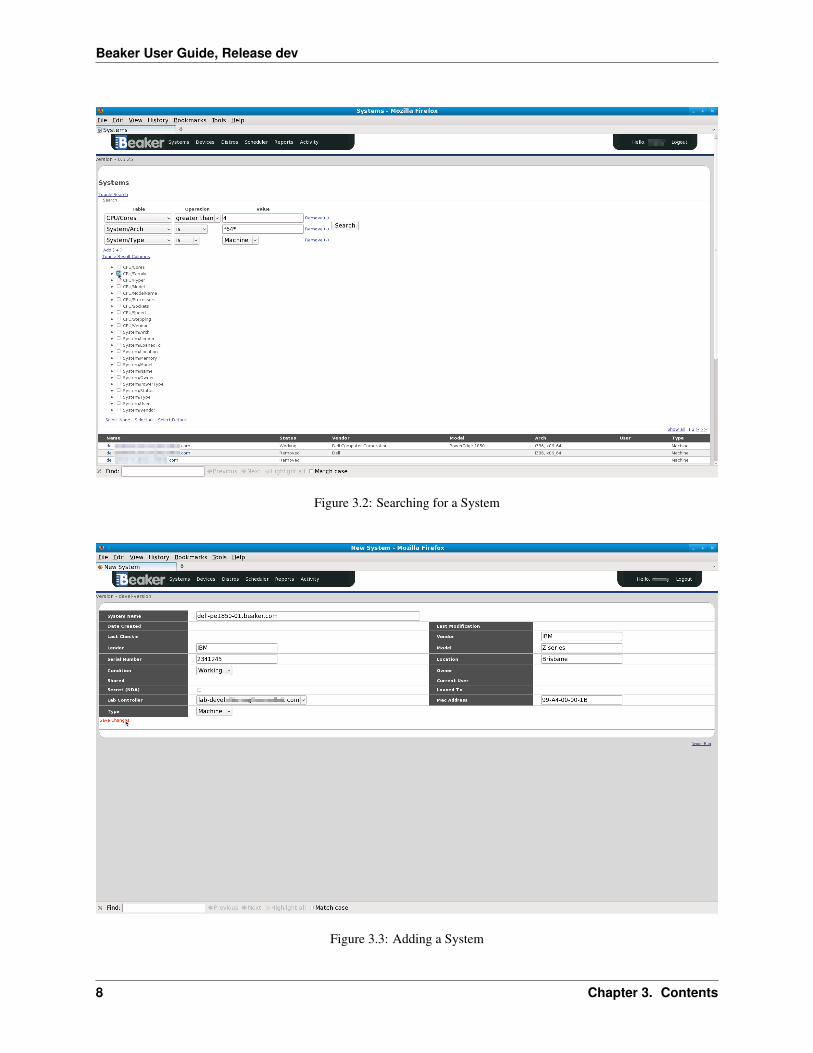
To add a System, go to any System search page, and click on the “Add(+)” link on the bottom left. You must be loggedin to do this. After filling in the details, press the “Save Changes” button on the bottom left hand corner.
3.2. Beaker interface 7
Beaker User Guide, Release dev
Figure 3.2: Searching for a System
Figure 3.3: Adding a System
8 Chapter 3. Contents

Beaker User Guide, Release dev
You will then need to update the Power details. To test they work, try hitting the power action buttons to ensure thesystem is responding correctly. The Arch details should then be updated, and then update the Install options withconsole=ttyS1,115200n8 ksdevice=link for each arch. See System details tabs. You’ll need to ensurethat your System is hooked up to the conserver. Try provisioning a system (see Provisioning a system). You can watchthe provisioning process through the console. Please, be patient. The provisioning may take some time.
Once the System has been added, you may want to create a job with the /distribution/inventory task (this is availablein the task repo) on the machine. The XML will probably look something like this, although substituting the distroand system name details.
<job retention_tag="scratch"><whiteboard>
inventory</whiteboard><recipeSet priority="Normal">
<recipe kernel_options="ksdevice=link " kernel_options_post="" ks_meta="" role="RECIPE_MEMBERS" whiteboard=""><autopick random="false"/><watchdog panic="ignore"/><packages/><ks_appends/><repos/><distroRequires>
<and><distro_variant op="=" value="Server"/><distro_name op="=" value="RHEL6-Server-6.0"/><distro_arch op="=" value="i386"/><distro_virt op="=" value=""/><distro_family op="=" value="RedHatEnterpriseLinux6"/>
</and></distroRequires><hostRequires>
<and><system_type op="=" value="Machine"/><hostname op="=" value="example.hostname.com"/>
</and></hostRequires><partitions/><task name="/distribution/install" role="STANDALONE">
<params><param name="PKGARGNAME" value="smolt"/>
</params></task><task name="/distribution/inventory" role="None">
<params/></task>
</recipe></recipeSet>
</job>
Adding a driver disk
Some systems may need a driver disk to be able to install certain releases. In order to use a driver disk you need tohost the driver disk under the TFTP server so that it’s available during netboot. You also need to tell Beaker whichfamilies the driver disk is needed for.
• First step is to install the driver disk on your lab controller(s).
– The following example assumes tftpboot is under /var/lib/tftpboot; this is true for RHEL6 and newer
3.2. Beaker interface 9
Beaker User Guide, Release dev
distros.
– Make a directory to host the driver disk.
# mkdir -p /var/lib/tftpboot/dd/rhel6
– Copy the driver disk to this directory.
# cp dd.img /var/lib/tftpboot/dd/rhel6
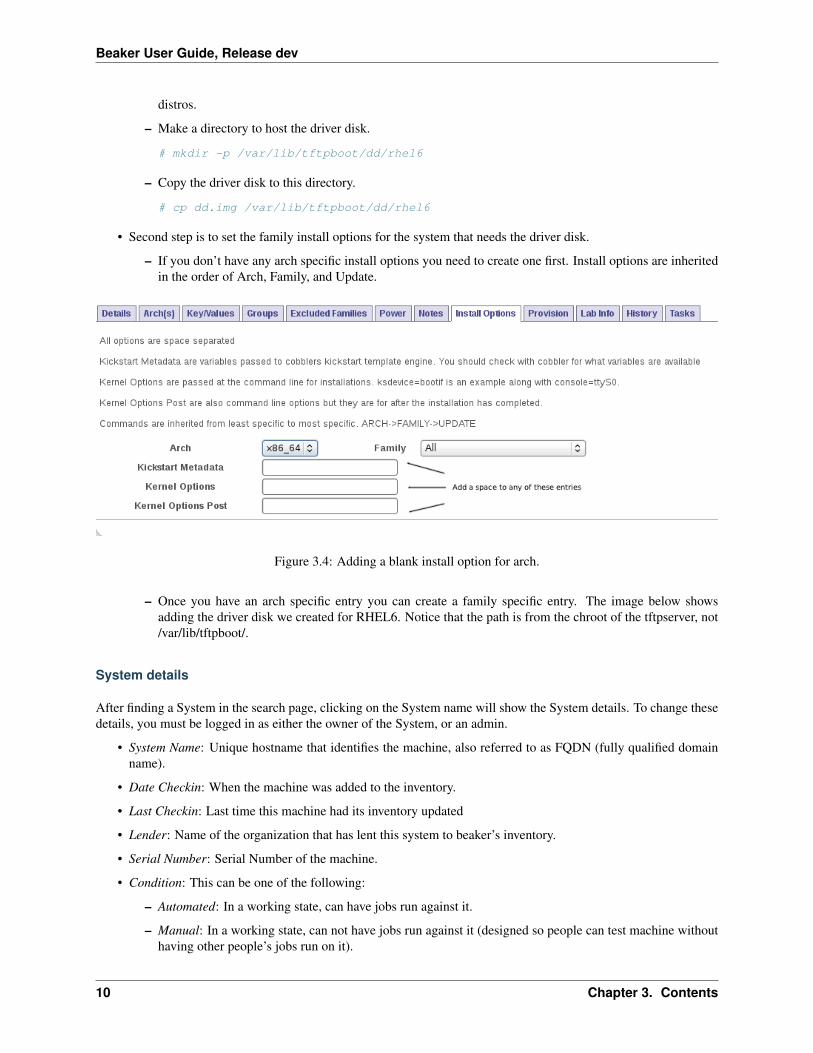
• Second step is to set the family install options for the system that needs the driver disk.
– If you don’t have any arch specific install options you need to create one first. Install options are inheritedin the order of Arch, Family, and Update.
Figure 3.4: Adding a blank install option for arch.
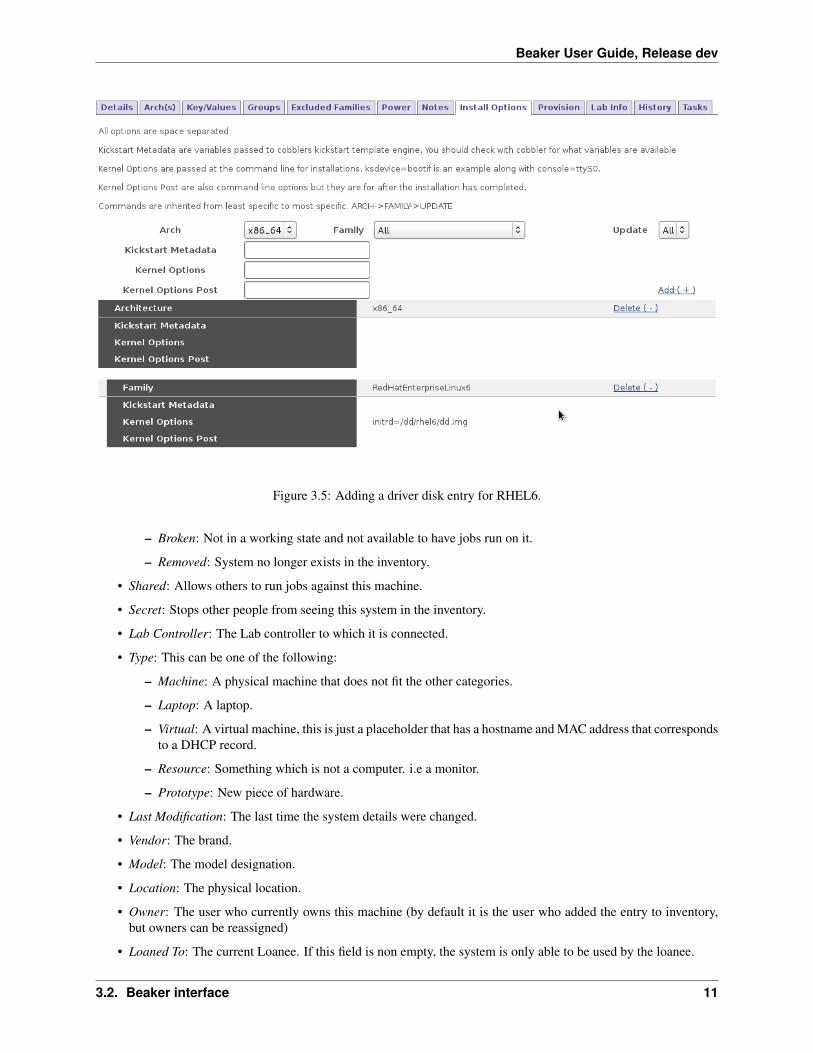
– Once you have an arch specific entry you can create a family specific entry. The image below showsadding the driver disk we created for RHEL6. Notice that the path is from the chroot of the tftpserver, not/var/lib/tftpboot/.
System details
After finding a System in the search page, clicking on the System name will show the System details. To change thesedetails, you must be logged in as either the owner of the System, or an admin.
• System Name: Unique hostname that identifies the machine, also referred to as FQDN (fully qualified domainname).
• Date Checkin: When the machine was added to the inventory.
• Last Checkin: Last time this machine had its inventory updated
• Lender: Name of the organization that has lent this system to beaker’s inventory.
• Serial Number: Serial Number of the machine.
• Condition: This can be one of the following:
– Automated: In a working state, can have jobs run against it.
– Manual: In a working state, can not have jobs run against it (designed so people can test machine withouthaving other people’s jobs run on it).
10 Chapter 3. Contents
Beaker User Guide, Release dev
Figure 3.5: Adding a driver disk entry for RHEL6.
– Broken: Not in a working state and not available to have jobs run on it.
– Removed: System no longer exists in the inventory.
• Shared: Allows others to run jobs against this machine.
• Secret: Stops other people from seeing this system in the inventory.
• Lab Controller: The Lab controller to which it is connected.
• Type: This can be one of the following:
– Machine: A physical machine that does not fit the other categories.
– Laptop: A laptop.
– Virtual: A virtual machine, this is just a placeholder that has a hostname and MAC address that correspondsto a DHCP record.
– Resource: Something which is not a computer. i.e a monitor.
– Prototype: New piece of hardware.
• Last Modification: The last time the system details were changed.
• Vendor: The brand.
• Model: The model designation.
• Location: The physical location.
• Owner: The user who currently owns this machine (by default it is the user who added the entry to inventory,but owners can be reassigned)
• Loaned To: The current Loanee. If this field is non empty, the system is only able to be used by the loanee.
3.2. Beaker interface 11

Beaker User Guide, Release dev
• MAC Address: The MAC address of the network device.
System details tabs
The system page also has a number of tabs with additional information:
Details Shows the details of the System’s CPU, as well as Devices attached to the System.
Arch(es) Shows the architectures supported by the system.
Key/Values Shows further hardware details.
Groups Shows the groups of which this System is a member.
Excluded Families Are the list of Distros that this System does not support.
Power Allows the powering off/on and rebooting of this System. These options are only available if you are thecurrent user of this System, in the admin group or are part of a group that has been given admin rights over themachine. Also the machine must be “taken”.
Notes Any info about the system that you want others to see and doesn’t fit in anywhere else. If you have admin rightsover the system you will be able to add and delete notes, as well as show previously deleted notes.
Install Options These are default options which will be used when a system is provisioned. You can create differentoptions per Arch/Distro combination.
Provision Allows the user of this System to install a Distro on it.
Lab Info Will display practical details of the System like cost, power usage, weight etc.
History Shows the activity on this System for the duration of the systems life as an inventory item in Beaker. Theseactivities can also be searched. By default, the simple search does a “contains” search on the Field attribute.Please see System searching for details on searching.
System activity
To search through the historical activity of all Systems, navigate to “Activity>Systems” at the top of the page.
To search the history of a specific system, you can also use the “History” tab on the system page. See System detailstabs.
3.2.2 Distros
Beaker can keep a record of Distros that are available to install on Systems in its Inventory.
Distro searching
The find a particular Distro, click “Distros>All”. The default search is on the Distro’s name, with a “contains” clause
Distro activity
To search through the historical activity of all Distros, navigate to “Activity>Distros” at the top of the page. Thedefault search is “contains” on the “Property” attribute.
12 Chapter 3. Contents

Beaker User Guide, Release dev
Figure 3.6: Searching through all Systems’ activity
3.2.3 Jobs
The purpose of a Job is to provide an encapsulation of Tasks. It is to provide a single point of submission of theseTasks, and a single point of reviewing the output and results of these Tasks. The Tasks within a Job may or may notbe related to each other; although it would make sense to define Jobs based on the relationship of the Tasks within it.Once a Job has been submitted you can not alter its contents, or pause it. You can however cancel it (see Job results),and alter its Recipe Set’s priorities (you can only lower the priority level if you are not in the admin group). Adjustingthis priority upwards will change which Recipe Set is run sooner, and vice a versa.
Job workflow
To create a simple Job workflow, see the bkr workflow-simple command in bkr client.
Job searching
To search for a Job, navigate to “Scheduler>Jobs” at the top of the page. To look up the “Job ID”, enter a number inthe search box and press the “Lookup ID button”. See System searching for further details on searching.
Quick Searches
By pressing the “Running”, “Queued”, or “Completed” buttons you can quickly display Recipes that have a status ofrunning,queued, and completed respectively.
3.2. Beaker interface 13
Beaker User Guide, Release dev
Job submission
There are two ways of submitting a Job through the web app.They are outlined below.
Submitting a new job
Once you have created an XML Job workflow, you are able to submit it as a new “Job”. To do this, go to the “Scheduler> New Job”. Click “Browse” to select your XML file, and then hit the “Submit Data” button. The next page showngives you an opportunity to check/edit your XML before queuing it as a Job by pressing the “Queue” button.
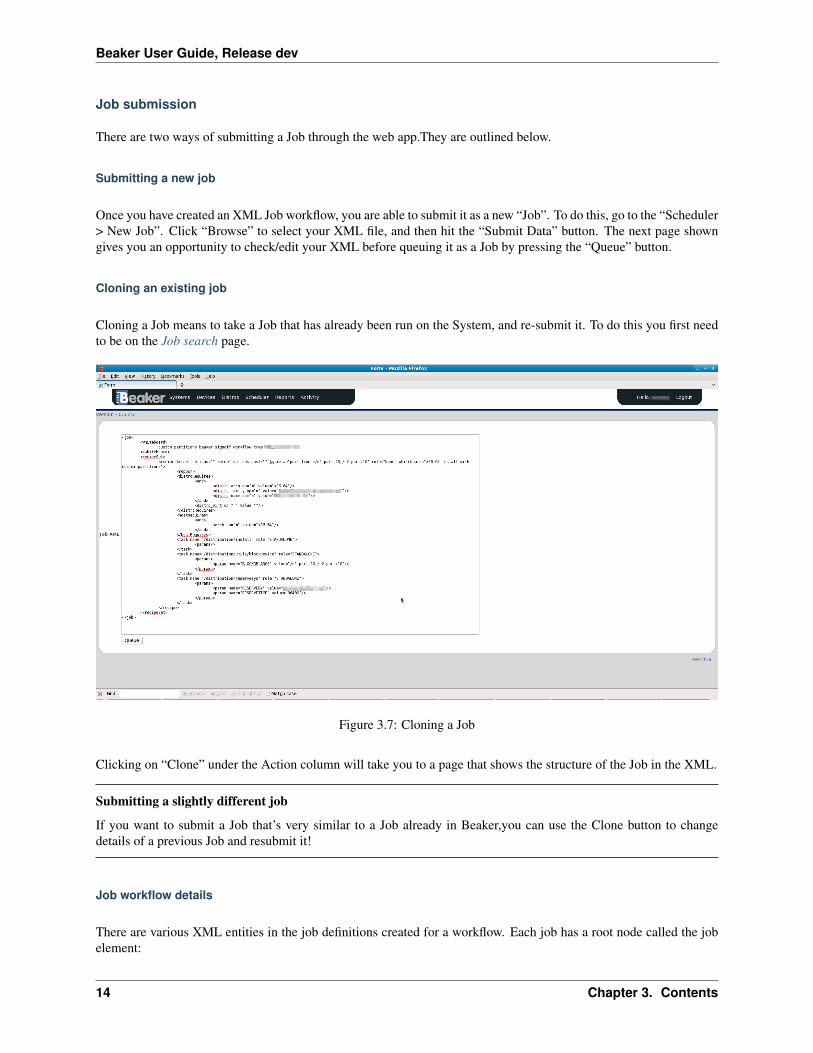
Cloning an existing job
Cloning a Job means to take a Job that has already been run on the System, and re-submit it. To do this you first needto be on the Job search page.
Figure 3.7: Cloning a Job
Clicking on “Clone” under the Action column will take you to a page that shows the structure of the Job in the XML.
Submitting a slightly different job
If you want to submit a Job that’s very similar to a Job already in Beaker,you can use the Clone button to changedetails of a previous Job and resubmit it!
Job workflow details
There are various XML entities in the job definitions created for a workflow. Each job has a root node called the jobelement:
14 Chapter 3. Contents
Beaker User Guide, Release dev
<job></job>
A direct child is the “whiteboard” element. The content is normally a mnemonic piece of text describing the job:
<job><whiteboard>
Apache 2.2 test</whiteboard></ob>
The next element is the “recipeSet” (which describes a recipe set. See Recipes for full details). A job workflow canhave one or more of these elements, which contain one or more “recipe” elements. Whereas tasks within a recipe arerun in sequence on a single system, all recipes within a recipe set are run simultaneously on systems controlled by acommon lab controller. This makes recipe sets useful for scheduling multihost jobs, where recipes playing differentroles (e.g. client, server) run concurrently on separate systems.
When multiple recipe sets are defined in a single job, they are run in no predetermined order, are not necessarilyscheduled concurrently and may run on systems controlled by different lab controllers. The advantage of combiningthem into one job is that they will report a single overall result (as well as a result for each recipe set) and can bemanaged (e.g. submitted, cancelled) as a single unit.
<job><whiteboard>Apache 2.2 test
</whiteboard><recipeset></recipeset>
</job>
As noted above, the “recipeSet” element contains “recipe” elements. Individual recipes can have the following at-tributes
• “kernel_options”
– vnc Setting this will do a vnc install
• “kernel_options_post”
• “ks_meta”
– manual minimal kickstart, should also use mode=vnc
– mode=text|cmdline|graphical|vnc Specify what mode to use for install, default is either text or cmdline
– firewall=port:protocol<,port:protocol> Default is firewall disabled, Example: fire-wall=imap:tcp,1234:ucp,47
– keyboard=us Specify Keyboard, Default is us
– lang=en_US.UTF-8 Specify install language, Default is en_US.UTF-8
– password=<encrypted> Override default password value, must be encrypted
– selinux=–enforcing Selinux is enabled by default, –disabled or –permissive are valid choices
– timezone=America/New_York TimeZone to use, default to America/New_York
– scsidevices=qla2xxx,megaraid_mbox Only load these scsi modules if set
– ethdevices=tg3,e1000 Only load these network modules if set
3.2. Beaker interface 15
Beaker User Guide, Release dev
– no_TYPE_repos If this option is specified it will omit repos of TYPE from the kickstart, TYPE can beone of debug, optional, adddon or variant. You can see the different types of repos available for a distro onthe /distrotrees page under the repo tab.
– skipx Do the install without setting up graphics. This is needed for headless systems.
– ignoredisk Use this to ignore certain disks for install. For example: ignoredisk=–only-use=sda
– rootfstype Specifies root filesystem type
– fstype Specifies filesystem type for all volumes
• role In a Multihost environment, it could be either SERVERS, CLIENT or STANDALONE. If it is not important,it can be None.
• whiteboard Text that describes the Recipe
Here is an example:
<job><whiteboard>Apache 2.2 test
</whiteboard><recipeset>
<recipe kernel_options="" kernel_options_post="" ks_meta="" role="None" whiteboard="Lab Controller"></recipe>
</recipeset></job>
Avoid having many recipes in one recipe set
Because recipes within a recipe set are required to run simultaneously, no recipe will commence execution until allother sibling recipes are ready. This involves each recipe reserving a system, and waiting until every other recipe hasalso reserved a system. This can tie up resources and keep them idle for long amounts of time. It is thus worth limitingthe recipes in each recipeset to only those that actually need to run simultaneously (i.e multihost jobs)
Within the recipe element, you can specify what packages need to be installed on top of anything that comesinstalled by default.
<job><whiteboard>Apache 2.2 test
</whiteboard><recipeSet>
<recipe kernel_options="" kernel_options_post="" ks_meta="" role="None" whiteboard="Lab Controller"><packages><package name="emacs"/><package name="vim-enhanced"/><package name="unifdef"/><package name="mysql-server"/><package name="MySQL-python"/><package name="python-twill"/>
</packages></recipe>
</recipeSet></job>
If you would like you can also specify your own repository that provides extra packages that your job requires. Usethe repo tag for this. You can use any text you like for the name attribute.
16 Chapter 3. Contents

Beaker User Guide, Release dev
<job><whiteboard>
Apache 2.2 test</whiteboard><recipeSet>
<recipe kernel_options="" kernel_options_post="" ks_meta="" role="None" whiteboard="Lab Controller"><packages><package name="emacs"/><package name="vim-enhanced"/><package name="unifdef"/><package name="mysql-server"/><package name="MySQL-python"/><package name="python-twill"/>
</packages>
<repos><repo name="myrepo_1" url="http://my-repo.com/tools/beaker/devel/"/>
</repos>
</recipe></recipeSet>
</job>
To actually determine what distro will be installed, the <distroRequires/> needs to be populated. Within, wecan specify such things as as <distro_arch/>, <distro_name/> and <distro_method/>. This relatesto the Distro architecture, the name of the Distro, and it’s install method (i.e nfs,ftp etc) respectively. The op deter-mines if we do or do not want this value i.e = means we do want that value, != means we do not want that value.<distro_virt/> will determine whether we install on a virtual machine or not.
<job><whiteboard>Apache 2.2 test
</whiteboard><recipeSet>
<recipe kernel_options="" kernel_options_post="" ks_meta="" role="None" whiteboard="Lab Controller"><packages><package name="emacs"/><package name="vim-enhanced"/><package name="unifdef"/><package name="mysql-server"/><package name="MySQL-python"/><package name="python-twill"/>
</packages>
<repos><repo name="myrepo_1" url="http://my-repo.com/tools/beaker/devel/"/>
</repos><distroRequires><and>
<distro_arch op="=" value="x86_64"/><distro_name op="=" value="RHEL5-Server-U4"/><distro_method op="=" value="nfs"/>
</and><distro_virt op="=" value=""/>
</distroRequires></recipe>
</recipeSet></job>
3.2. Beaker interface 17
Beaker User Guide, Release dev
<hostRequires/> has similar attributes to <distroRequires/>
<job><whiteboard>Apache 2.2 test
</whiteboard><recipeSet>
<recipe kernel_options="" kernel_options_post="" ks_meta="" role="None" whiteboard="Lab Controller"><packages>
<package name="emacs"/><package name="vim-enhanced"/><package name="unifdef"/><package name="mysql-server"/><package name="MySQL-python"/><package name="python-twill"/>
</packages><repos><repo name="myrepo_1" url="http://my-repo.com/tools/beaker/devel/"/>
</repos><distroRequires><and>
<distro_arch op="=" value="x86_64"/><distro_name op="=" value="RHEL5-Server-U4"/><distro_method op="=" value="nfs"/>
</and><distro_virt op="=" value=""/>
</distroRequires><hostRequires><and>
<arch op="=" value="x86_64"/><hypervisor op="=" value=""/>
</and></hostRequires>
</recipe></recipeSet>
</job>
Bare metal vs hypervisor guests
Beaker supports direct provisioning of hypervisor guests. These hypervisor guests live on non volatile machines, andcan be provisioned as a regular bare metal system would. They look the same as regular system entries, except theirHypervisor attribute is set. If your recipe requires a bare metal machine, be sure to include <hypervisor op=”=”value=”“/> in your <hostRequires/>
All that’s left to populate our XML with, are the ‘task’ elements. The two attributes we need to specify are the nameand the role. You can find which tasks are available by searching the task library. Also note that we’ve added in a<param/> element as a descendant of <task/>. The value of this will be assigned to a new environment variablespecified by name.
<job><whiteboard>Apache 2.2 test
</whiteboard><recipeSet>
<recipe kernel_options="" kernel_options_post="" ks_meta="" role="None" whiteboard="Lab Controller"><packages><package name="emacs"/>
18 Chapter 3. Contents

Beaker User Guide, Release dev
<package name="vim-enhanced"/><package name="unifdef"/><package name="mysql-server"/><package name="MySQL-python"/><package name="python-twill"/>
</packages>
<repos><repo name="myrepo_1" url="http://my-repo.com/tools/beaker/devel/"/>
</repos><distroRequires><and>
<distro_arch op="=" value="x86_64"/><distro_name op="=" value="RHEL5-Server-U4"/><distro_method op="=" value="nfs"/>
</and><distro_virt op="=" value=""/>
</distroRequires>
<task name="/distribution/install" role="STANDALONE"><params>
<param name="My_ENV_VAR" value="foo"/></params>
</task>
</recipe></recipeSet>
</job>
By default, the kickstart fed to Anaconda is a generalized kickstart for a specific distro major version. However, thereare a couple of ways to pass in a customized kickstart.
One method is to pass the ks key/value to the kernel_options parameter of the recipe element. Using thismethod the kickstart will be used by Anaconda unaltered.
<recipe kernel_options=’ks=http://example.com/ks.cfg’ />
Alternatively, the kickstart can be written out within the recipe element.
<kickstart>installkey --skiplang en_US.UTF-8skipxkeyboard usnetwork --device eth0 --bootproto dhcprootpw --plaintext testingpasswordfirewall --disabledauthconfig --enableshadow --enablemd5selinux --permissivetimezone --utc Europe/Prague
bootloader --location=mbr --driveorder=sda,sdb# Clear the Master Boot Record
zerombr# Partition clearing information
clearpart --all --initlabel# Disk partitioning information
part /RHTSspareLUN1 --fstype=ext3 --size=20480 --asprimary --label=sda_20GB --ondisk=sda
3.2. Beaker interface 19

Beaker User Guide, Release dev
part /RHTSspareLUN2 --fstype=ext3 --size=1 --grow --asprimary --label=sda_rest --ondisk=sdapart /boot --fstype=ext3 --size=200 --asprimary --label=BOOT --ondisk=sdb
# part swap --fstype=swap --size=512 --asprimary --label=SWAP_007 --ondisk=sdbpart / --fstype=ext3 --size=1 --grow --asprimary --label=ROOT --ondisk=sdb
reboot
%packages --excludedocs --ignoremissing --nobase</kickstart>
When passed a custom kickstart in this manner, Beaker will add extra entries into the kickstart. These will come frominstall options that have been specified for that system, arch and distro combination; partitions, packages and reposthat have been specified in the recipe element; the relevant snippets needed for running the harness. For furtherinformation on how Beaker processes kickstarts and how to utilize their templating language, see kickstarts.
Job results
The whole purpose of Jobs is to view the output of the Job, and more to the point, Tasks that ran within the Job. To dothis, you must first go to the Job search screen. After finding the Job you want to see the results of, click on the link inthe “ID” column.You don’t have to wait until the Job has completed to view the results. Of course only the results ofthose Tasks that have already finished running will be available.
The Job results page is divided by recipe set. To show the results of each Recipe within these Recipe Sets, click the“Show All Results” button. You can just show the tasks that have a status of “Fail” by clicking “Show Failed Results.”
While your Job is still queued it’s possible to change the priority. You can change the priority of individual Recipe Setsby changing the value of “Priority”, or you can change all the Job’s Recipe Sets at once by clicking an option besidethe text “Set all RecipeSet priorities”, which is at the top right of the page. If successful, a green success message willbriefly display, otherwise a red error message will be shown.
Priority permissions
If you are not an Admin you will only be able to lower the priority. Admins can lower and raise the priority
Result Details
• Run
– This is the “ID” of the instance of the particular Task.
• Task
– A Task which is part of our current Job.
• Start
– The time at which the Task commenced.
• Finish
– The time at which the Task completed.
• Duration
– Time the Task took to run.
• Logs
– This is a listing of all the output logs generated during the running of this Task.
• Status
20 Chapter 3. Contents
Beaker User Guide, Release dev
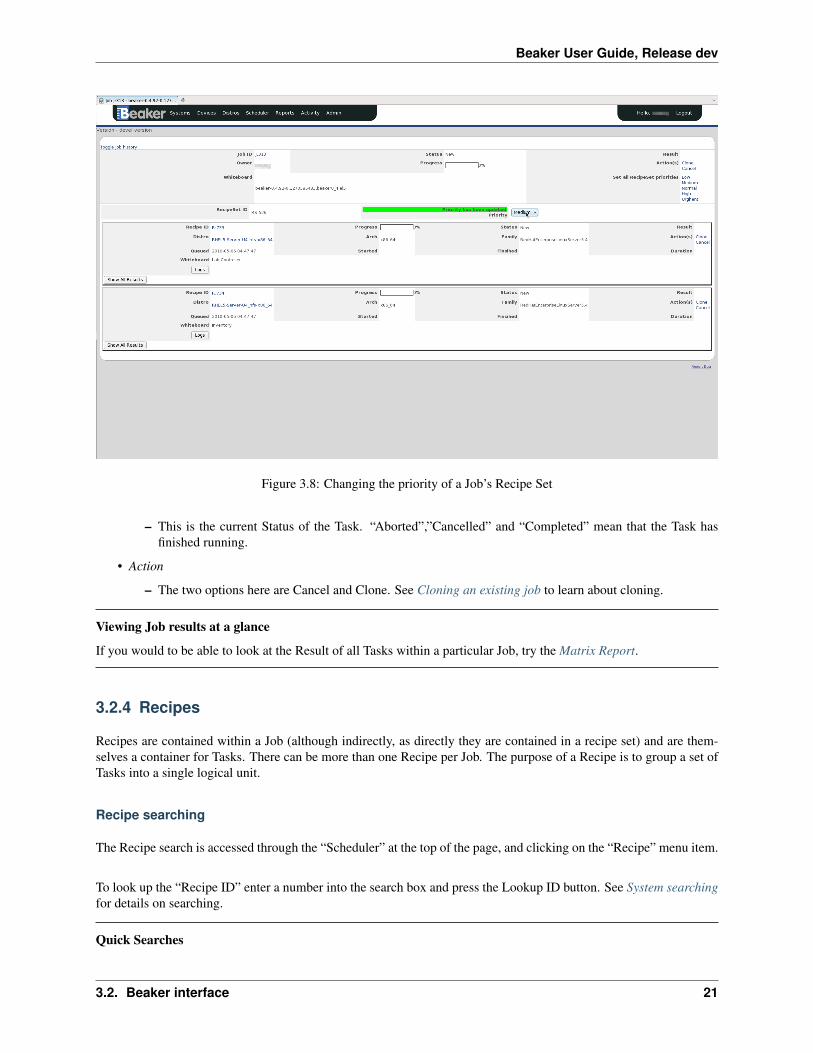
Figure 3.8: Changing the priority of a Job’s Recipe Set
– This is the current Status of the Task. “Aborted”,”Cancelled” and “Completed” mean that the Task hasfinished running.
• Action
– The two options here are Cancel and Clone. See Cloning an existing job to learn about cloning.
Viewing Job results at a glance
If you would to be able to look at the Result of all Tasks within a particular Job, try the Matrix Report.
3.2.4 Recipes
Recipes are contained within a Job (although indirectly, as directly they are contained in a recipe set) and are them-selves a container for Tasks. There can be more than one Recipe per Job. The purpose of a Recipe is to group a set ofTasks into a single logical unit.
Recipe searching
The Recipe search is accessed through the “Scheduler” at the top of the page, and clicking on the “Recipe” menu item.
To look up the “Recipe ID” enter a number into the search box and press the Lookup ID button. See System searchingfor details on searching.
Quick Searches
3.2. Beaker interface 21

Beaker User Guide, Release dev
Figure 3.9: Searching for a Recipe
By pressing the “Running”, “Queued”, or “Completed” buttons you can quickly display Recipes that have a status ofrunning,queued, and completed respectively.
Recipe actions
At any time you may wish to cancel the Recipe, you may press the “Cancel” link that is placed under the “Action”column.
3.2.5 Tasks
Tasks are the lowest unit in the Job hierarchy, and running a Task is the primary purpose of running a Job. Therepurpose is to run one or more commands, and then collect the results of those commands in a way that other entitiescan access them. You can run as many or as few Tasks in a Job as you like.
Creating a task
A Beaker task consists of three primary files: PURPOSE, runtest.sh and a Makefile. There can be other filesas needed for the task. PURPOSE is a text file that describes the task in some detail. There is no restriction on thelength of the description. The core of each Beaker task is the runtest.sh shell script. It performs the testing (ordelegates the work by invoking another script or executable) and reports the results. You may either write all the codethat performs the test in the runtest.sh script or, when appropriate, call an external executable that does the bulkof the work. This external executable can be in any other language as long as it is appropriately executed from theruntest.sh script. This script uses BeakerLib functions to setup, start, stop and cleanup after the task has beenrun. Once you have written your test in this script, you can either run it locally (when appropriate) or package it as anRPM package and upload it to Beaker. The Makefile defines targets to carry out these and other related functions.
22 Chapter 3. Contents

Beaker User Guide, Release dev
The beaker-wizard utility provides a guided step by step method to create a task without the need to manuallycreate the above files. To get a basic idea of how we can use beaker-wizard, we will create a new task which willcheck the support for the ext4 filesystem. If you have the beaker-client package installed, you should already havebeaker-wizard available. You will also need to install the rhts-devel package. Create a new directory, where wewill create the task. In most cases, your task will be meant to test a particular package. Hence, you should createa directory with the package name if that’s the case. In this case, we will simply create a directory with the namemytask. From your terminal, type:
$ mkdir mytask$ cd mytask$ beaker-wizard
You will see a welcome message as follows:
Welcome to The Beaker Wizard!~~~~~~~~~~~~~~~~~~~~~~~~~~~~~~~~~~~~~~~~~~~~~~~~~~~~~~~~~~~~It seems, you’re running the beaker-wizard for the first time.I’ll try to be a little bit more verbose. Should you needany help in the future, just try using the "?" character.
Bugs or CVE’s related to the test~~~~~~~~~~~~~~~~~~~~~~~~~~~~~~~~~~~~~~~~~~~~~~~~~~~~~~~~~~~~~~~~~~~~~~~~~~~~~Supply one or more bug or CVE numbers (e.g. 123456 or 2009-7890). Usethe ’+’ sign to add the bugs instead of replacing the current list.[None?]
If you are writing this task to write a test related to a specific bug, enter the bug number here. In our case, we are not,so simply press the return key. The wizard will then proceed to ask you several questions regarding the test such as thedescription, the type of test, and others. The wizard gives you choices for the answer wherever relevant, but also has adefault answer when one is not provided. Either enter your own option or press return to accept the default answer:
Test name~~~~~~~~~~~~~~~~~~~~~~~~~~~~~~~~~~~~~~~~~~~~~~~~~~~~~~~~~~~~~~~~~~~~~~~~~~~~~Use few, well chosen words describing what the test does. Specialchars will be automatically converted to dashes.[a-few-descriptive-words?] ext4-test
What is the type of test?~~~~~~~~~~~~~~~~~~~~~~~~~~~~~~~~~~~~~~~~~~~~~~~~~~~~~~~~~~~~~~~~~~~~~~~~~~~~~Possible values: Regression, Performance, Stress, Certification,Security, Durations, Interoperability, Standardscompliance,Customeracceptance, Releasecriterium, Crasher, Tier1, Tier2, Alpha,KernelTier1, KernelTier2, Multihost, MultihostDriver, Install,FedoraTier1, FedoraTier2, KernelRTTier1, KernelReporting, SanityTest type must be exactly one from the list above.[Sanity?]
Namespace~~~~~~~~~~~~~~~~~~~~~~~~~~~~~~~~~~~~~~~~~~~~~~~~~~~~~~~~~~~~~~~~~~~~~~~~~~~~~Possible values: distribution, installation, kernel, desktop, tools,CoreOS, cluster, rhn, examples, performance, ISV, virtProvide a root namespace for the test.[CoreOS?] installation
Short description~~~~~~~~~~~~~~~~~~~~~~~~~~~~~~~~~~~~~~~~~~~~~~~~~~~~~~~~~~~~~~~~~~~~~~~~~~~~~Provide a short sentence describing the test.[What the test does?] Check whether ext4 filesystem is supported out of the box
3.2. Beaker interface 23
Beaker User Guide, Release dev
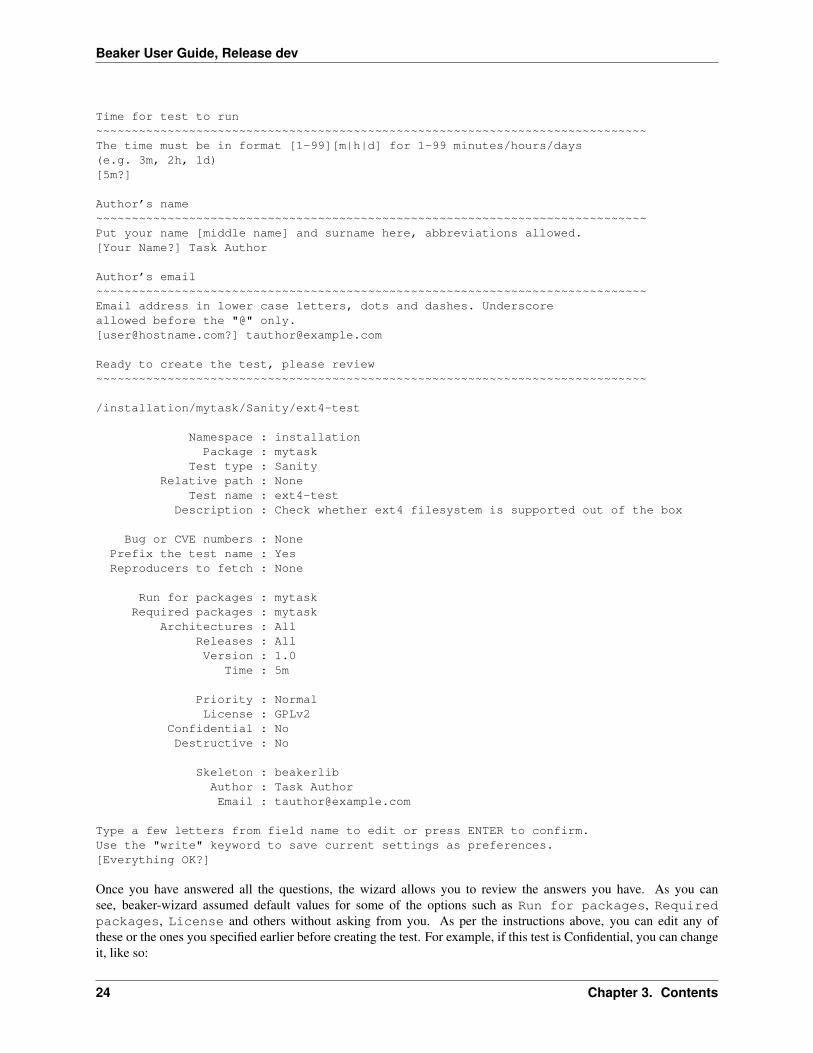
Time for test to run~~~~~~~~~~~~~~~~~~~~~~~~~~~~~~~~~~~~~~~~~~~~~~~~~~~~~~~~~~~~~~~~~~~~~~~~~~~~~The time must be in format [1-99][m|h|d] for 1-99 minutes/hours/days(e.g. 3m, 2h, 1d)[5m?]
Author’s name~~~~~~~~~~~~~~~~~~~~~~~~~~~~~~~~~~~~~~~~~~~~~~~~~~~~~~~~~~~~~~~~~~~~~~~~~~~~~Put your name [middle name] and surname here, abbreviations allowed.[Your Name?] Task Author
Author’s email~~~~~~~~~~~~~~~~~~~~~~~~~~~~~~~~~~~~~~~~~~~~~~~~~~~~~~~~~~~~~~~~~~~~~~~~~~~~~Email address in lower case letters, dots and dashes. Underscoreallowed before the "@" only.[[email protected]?] [email protected]
Ready to create the test, please review~~~~~~~~~~~~~~~~~~~~~~~~~~~~~~~~~~~~~~~~~~~~~~~~~~~~~~~~~~~~~~~~~~~~~~~~~~~~~
/installation/mytask/Sanity/ext4-test
Namespace : installationPackage : mytask
Test type : SanityRelative path : None
Test name : ext4-testDescription : Check whether ext4 filesystem is supported out of the box
Bug or CVE numbers : NonePrefix the test name : YesReproducers to fetch : None
Run for packages : mytaskRequired packages : mytask
Architectures : AllReleases : AllVersion : 1.0
Time : 5m
Priority : NormalLicense : GPLv2
Confidential : NoDestructive : No
Skeleton : beakerlibAuthor : Task AuthorEmail : [email protected]
Type a few letters from field name to edit or press ENTER to confirm.Use the "write" keyword to save current settings as preferences.[Everything OK?]
Once you have answered all the questions, the wizard allows you to review the answers you have. As you cansee, beaker-wizard assumed default values for some of the options such as Run for packages, Requiredpackages, License and others without asking from you. As per the instructions above, you can edit any ofthese or the ones you specified earlier before creating the test. For example, if this test is Confidential, you can changeit, like so:
24 Chapter 3. Contents
Beaker User Guide, Release dev
[Everything OK?] Confi
Confidential~~~~~~~~~~~~~~~~~~~~~~~~~~~~~~~~~~~~~~~~~~~~~~~~~~~~~~~~~~~~~~~~~~~~~~~~~~~~Possible values: Yes, No[No?] Yes
Ready to create the test, please review~~~~~~~~~~~~~~~~~~~~~~~~~~~~~~~~~~~~~~~~~~~~~~~~~~~~~~~~~~~~~~~~~~~~~~~~~~~~....
Once you have changed the value of Confidential, you will again be able to review all the options (and change ifnecessary). Finally, when you are satisfied, press the enter key to create the test:
Directory Sanity/ext4-test createdFile Sanity/ext4-test/PURPOSE writtenFile Sanity/ext4-test/runtest.sh writtenFile Sanity/ext4-test/Makefile written
In the Sanity/ext4-test directory, you will notice that the three files: PURPOSE, runtest.sh and a Makefile havebeen created. You will see that PURPOSE will have the test description you entered earlier along with the author’sdetails. The runtest.sh file will have the following contents:
#!/bin/bash# vim: dict=/usr/share/beakerlib/dictionary.vim cpt=.,w,b,u,t,i,k# ~~~~~~~~~~~~~~~~~~~~~~~~~~~~~~~~~~~~~~~~~~~~~~~~~~~~~~~~~~~~~~~~~~~~## runtest.sh of /installation/mytask/Sanity/ext4-test# Description: Check whether ext4 filesystem is supported out of the box# Author: Task Author <[email protected]>## ~~~~~~~~~~~~~~~~~~~~~~~~~~~~~~~~~~~~~~~~~~~~~~~~~~~~~~~~~~~~~~~~~~~~## Copyright (c) 2012 Red Hat, Inc. All rights reserved.## This copyrighted material is made available to anyone wishing# to use, modify, copy, or redistribute it subject to the terms# and conditions of the GNU General Public License version 2.## This program is distributed in the hope that it will be# useful, but WITHOUT ANY WARRANTY; without even the implied# warranty of MERCHANTABILITY or FITNESS FOR A PARTICULAR# PURPOSE. See the GNU General Public License for more details.## You should have received a copy of the GNU General Public# License along with this program; if not, write to the Free# Software Foundation, Inc., 51 Franklin Street, Fifth Floor,# Boston, MA 02110-1301, USA.## ~~~~~~~~~~~~~~~~~~~~~~~~~~~~~~~~~~~~~~~~~~~~~~~~~~~~~~~~~~~~~~~~~~~~
# Include Beaker environment. /usr/bin/rhts-environment.sh || exit 1. /usr/share/beakerlib/beakerlib.sh || exit 1
PACKAGE="mytask"
rlJournalStart
3.2. Beaker interface 25

Beaker User Guide, Release dev
rlPhaseStartSetuprlAssertRpm $PACKAGErlRun "TmpDir=\$(mktemp -d)" 0 "Creating tmp directory"rlRun "pushd $TmpDir"
rlPhaseEnd
rlPhaseStartTestrlRun "touch foo" 0 "Creating the foo test file"rlAssertExists "foo"rlRun "ls -l foo" 0 "Listing the foo test file"
rlPhaseEnd
rlPhaseStartCleanuprlRun "popd"rlRun "rm -r $TmpDir" 0 "Removing tmp directory"
rlPhaseEndrlJournalPrintTextrlJournalEnd
The GPLv2 license header in the beginning is default for a task. You can change the license to something moreappropriate for your needs during the task creation. beaker-wizard will try to find a license header correspondingto the specified license and if it is not present will insert a default text where you can insert the appropriate headerinformation and copyright notice. Please consult the beaker-wizard man page for details on how you can addyour own license text using a preference file.
The package for which this task is defined is declared in the PACKAGE variable. We will simply delete this linesince this task is not for testing a package. Every beaker test must begin with rlJournalStart. This initializesthe journaling functionality so that the logging mechanism is initialized so that your test results can be saved. Thefunctionality of a test is divided into three stages: setup, start and cleanup indicated by the rlPhaseStartSetup,rlPhaseStartTest and rlPhaseStartCleanup functions respectively. The setup phase first checks if thepackage which we want to test is available and then creates a temporary directory and moves there so that all the testactivities are performed in that directory. The rlPhaseStartTest and its corresponding rlPhaseEnd, enclosesthe core test logic. Here, as you can see, the test is checking whether an empty file has been created successfully ornot. We will replace these lines to include our own logic to check for the presence of ext4 support. The cleanup phaseis used to cleanup the working directory created for the test and change back to the original working directory. For ourtask, we don’t need this. The modified runtest.sh file looks like:
#!/bin/bash# vim: dict=/usr/share/beakerlib/dictionary.vim cpt=.,w,b,u,t,i,k# ~~~~~~~~~~~~~~~~~~~~~~~~~~~~~~~~~~~~~~~~~~~~~~~~~~~~~~~~~~~~~~~~~~~~## runtest.sh of /installation/mytask/Sanity/ext4-test# Description: Check whether ext4 filesystem is supported out of the box# Author: Task Author <[email protected]>## ~~~~~~~~~~~~~~~~~~~~~~~~~~~~~~~~~~~~~~~~~~~~~~~~~~~~~~~~~~~~~~~~~~~~## Copyright (c) 2012 Red Hat, Inc. All rights reserved.## This copyrighted material is made available to anyone wishing# to use, modify, copy, or redistribute it subject to the terms# and conditions of the GNU General Public License version 2.## This program is distributed in the hope that it will be# useful, but WITHOUT ANY WARRANTY; without even the implied# warranty of MERCHANTABILITY or FITNESS FOR A PARTICULAR# PURPOSE. See the GNU General Public License for more details.#
26 Chapter 3. Contents

Beaker User Guide, Release dev
# You should have received a copy of the GNU General Public# License along with this program; if not, write to the Free# Software Foundation, Inc., 51 Franklin Street, Fifth Floor,# Boston, MA 02110-1301, USA.## ~~~~~~~~~~~~~~~~~~~~~~~~~~~~~~~~~~~~~~~~~~~~~~~~~~~~~~~~~~~~~~~~~~~~
# Include Beaker environment. /usr/bin/rhts-environment.sh || exit 1. /usr/share/beakerlib/beakerlib.sh || exit 1
rlJournalStartrlPhaseStartTest
rlRun "cat /proc/filesystems | grep ’ext4’" 0 "Check if ext4 is supported"rlPhaseEnd
rlJournalPrintTextrlJournalEnd
You can now run this test locally to see if everything is correctly working using make run:
# make runtest -x runtest.sh || chmod a+x runtest.sh./runtest.sh
:::::::::::::::::::::::::::::::::::::::::::::::::::::::::::::::::::::::::::::::::: [ LOG ] :: Test::::::::::::::::::::::::::::::::::::::::::::::::::::::::::::::::::::::::::::::::
ext4:: [ PASS ] :: Check if ext4 is supported
:::::::::::::::::::::::::::::::::::::::::::::::::::::::::::::::::::::::::::::::::: [ LOG ] :: TEST PROTOCOL::::::::::::::::::::::::::::::::::::::::::::::::::::::::::::::::::::::::::::::::
:: [ LOG ] :: Test run ID : oCNr6jM:: [ LOG ] :: Package : unknown:: [ LOG ] :: Test started : 2012-11-07 02:58:07 EST:: [ LOG ] :: Test finished : 2012-11-07 02:58:07 EST:: [ LOG ] :: Test name : /installation/mytask/Sanity/ext4-test:: [ LOG ] :: Distro: : Red Hat Enterprise Linux Server release 6.3 (Santiago):: [ LOG ] :: Hostname : hostname.example.com:: [ LOG ] :: Architecture : x86_64
:::::::::::::::::::::::::::::::::::::::::::::::::::::::::::::::::::::::::::::::::: [ LOG ] :: Test description::::::::::::::::::::::::::::::::::::::::::::::::::::::::::::::::::::::::::::::::
PURPOSE of /installation/mytask/Sanity/ext4-testDescription: Check whether ext4 filesystem is supported out of the boxAuthor: Task Author <[email protected]>
:::::::::::::::::::::::::::::::::::::::::::::::::::::::::::::::::::::::::::::::::: [ LOG ] :: Test::::::::::::::::::::::::::::::::::::::::::::::::::::::::::::::::::::::::::::::::
:: [ PASS ] :: Check if ext4 is supported:: [ LOG ] :: Duration: 0s
3.2. Beaker interface 27

Beaker User Guide, Release dev
:: [ LOG ] :: Assertions: 1 good, 0 bad:: [ PASS ] :: RESULT: Test
:::::::::::::::::::::::::::::::::::::::::::::::::::::::::::::::::::::::::::::::::: [ LOG ] :: /installation/mytask/Sanity/ext4-test::::::::::::::::::::::::::::::::::::::::::::::::::::::::::::::::::::::::::::::::
:: [ LOG ] :: Phases: 1 good, 0 bad:: [ PASS ] :: RESULT: /installation/mytask/Sanity/ext4-test:: [02:58:07] :: JOURNAL XML: /tmp/beakerlib-oCNr6jM/journal.xml:: [02:58:07] :: JOURNAL TXT: /tmp/beakerlib-oCNr6jM/journal.txt
As you can see, the test passes with the logs saved in the above files. Before we can upload this task to Beaker, wewill have to package this is an RPM. Both these steps can be accomplished via make bkradd (assuming you haveset your beaker client configuration successfully). If you do not see any errors here, then you should see that this taskhas been uploaded to the task library http://your-beaker-root/tasks/.
To learn more about the functions used to write the test, please see the BeakerLib documentation. You can learn moreabout beaker-wizard from its man page.
Running the task
Once the task is available in the “Task Library”, you have to write a job description (XML file) to run this test on asystem provisioned in Beaker. A sample job description that runs this task would be as follows:
<job><whiteboard>ext4 test
</whiteboard><recipeSet><recipe>
<distroRequires><distro_arch op="=" value="x86_64" />
</distroRequires>
<hostRequires><system_type value="Machine"/>
</hostRequires>
<task name="/installation/mytask/Sanity/ext4-test" role="STANDALONE"/>
</recipe></recipeSet>
</job>
You can then submit the job. After the job has completed, you can access the logs as described in Job results. You willsee that on success, the TESTOUT.log file will contain the same log as when it was run locally. You can also obtainthe logs using the bkr job-logs command. In some cases, in addition to the log files you may also want to retrieve somefiles from the test system. For example, in this case you may want to examine the contents of /proc/filesystemson the system that run the test. This can be done using the Beakerlib function rlFileSubmit.
The overall workflow of creating a task for a test, submitting a job to run the test and accessing the test results areillustrated in chronological-overview.
28 Chapter 3. Contents

Beaker User Guide, Release dev
Updating a task
To upload newer versions of your task, you will need to update the VERSION variable in your Makefile, else Beakerwill not add it saying that its already present in the task library.
Version Control for your Tests
If you plan to work on revisions of your test in future, it is a good idea to initialize a repository in your task directory(i.e. mytask in this case). If you are using git, for example, you can create a tag for your task using make tag andmake bkradd will automatically use the most recent tag for adding versioning information to your task and henceyou don’t have to change the VERSION variable in the Makefile yourself.
Makefile
As you have seen so far, we have used the Makefile to run a test locally and also building and uploading the RPMto Beaker. See Beaker Makefile.
Task searching
To search for a Task, go to “Scheduler>Task” Library at the top of the page. The default search is on the “Name”property, with the “contains” operator. See System searching for further details.
Once you’ve found a particular Task, you can see its details by clicking on the Link in the “Name” column.
It’s also possible to search on the history of the running of Tasks. This is made possible by the “Executed Tasks”search, which is accessed by clicking on a task.
Adding a new task
If you already have a task packaged as an RPM, click “Scheduler>New Task” from the main menu bar. You will needto click on “Browse” to locate your task, and then add it with the “Submit Data” button. See the beaker client manpage for how to do this via the beaker client.
If you are trying to update an existing task, the version of the new task RPM will need to be higher. This can be achievedby running make tag (if in a local checkout of a git or CVS repo), or manually adjusting the TESTVERSION in thetask’s Makefile (see TESTVERSION).
3.2.6 Reports
Beaker offers a few different reports. They can be accessed from the Reports menu at the top of the page.
External reports
In some instances it may be preferential to provide Beaker related reports external to the Beaker server itself. If youradministrator has configured any links to such reports, they will be displayed here.
3.2. Beaker interface 29

Beaker User Guide, Release dev
Figure 3.10: Generating a Matrix report from the Job’s Whiteboard
Matrix report
The “Matrix” report gives a user an overall picture of results for any given Job, or number of Jobs combined. It showsa matrix of Tasks run and the Arch that they were run on. The “Reports->Matrix” is accessible from the top menu.
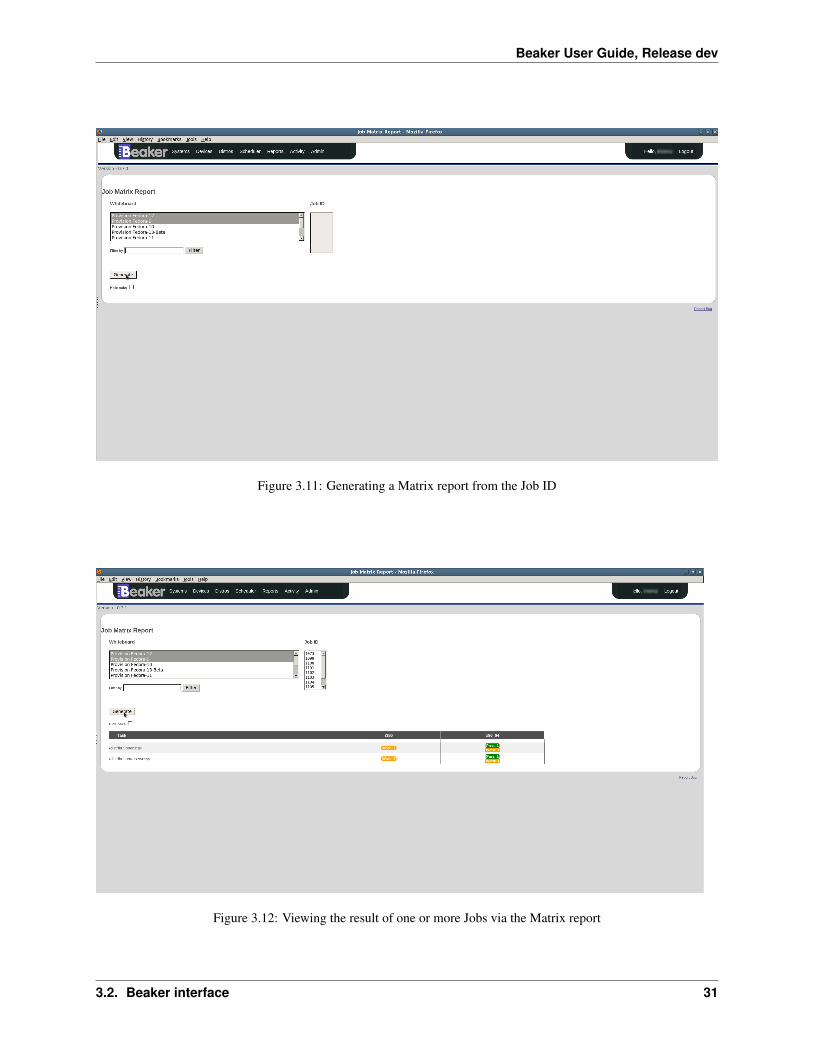
There are two ways of defining what Job results to display. You can select the Job by its “Whiteboard”, or by its “JobID”. To show a Job’s Matrix report from its Whiteboard, click on the Whiteboard text in the Whiteboard select box(or select multiple whiteboards with the Ctrl key). If you wish to select the Job by its ID, enter the Job ID into the“Job ID” text area. The Job Whiteboard and the Job ID are mutually exclusive when generating the Matrix report. Tochange between the two, click on their respective input areas. Click the “Generate” button to create the report.
Filtering Whiteboards
You can filter what is displayed in the “Whiteboard” select box by typing text into the “Filter by” field, and thenclicking the Filter button
Displaying reports of any combination of jobs
Displaying the Matrix reports of any Jobs together, is possible when selecting by “Job ID”. Enter in all the relevant“Job ID”s separate by whitespace or a newline.
The generated Matrix report shows the result of each Task with its corresponding Arch and Recipe Whiteboard. Thepoints in the matrix describe the result of the Task, and how many occurrences of that result there are. Clicking onthese results will take you to the “Executed Tasks” page. See Task searching for further details.
30 Chapter 3. Contents
Beaker User Guide, Release dev
Figure 3.11: Generating a Matrix report from the Job ID
Figure 3.12: Viewing the result of one or more Jobs via the Matrix report
3.2. Beaker interface 31

Beaker User Guide, Release dev
3.2.7 User preferences
The preferences page allows the user to configure their email address, SSH public keys and root password for provi-sioned systems.
Either a hashed password (in crypt format) or a cleartext password may be entered as a root password. If a plaintextpassword is entered, it will first be hashed before being stored. This password will be used as the root password onsystems provisioned by the user.
If Beaker is configured to limit the validity of users’ root passwords, the expiry date and time for your password willbe shown here. After that time, you will be required to change or clear it in order to submit jobs or provision systems.
If no password is entered, the Beaker default root password will be used instead.
SSH public keys (e.g. the contents of ~/.ssh/id_rsa.pub) may be added to a users account. These will be addedto the authorized_keys file for the root user on provisioned hosts.
3.3 Beaker Makefile
This guide provide in depth information for the required and optional Makefile variables in an Beaker test. Asample Makefile is copied into the local directory when rhts-create-new-test tool is invoked (or can be found at/usr/share/doc/beaker-devel-x.y/Makefile.template).
3.3.1 PACKAGE_NAME
# The name of the package under test:PACKAGE_NAME=gcc
The package under test is the common command or executable being tested. This must be the name of an installableRPM in the distribution. If the focus of your test is a third party application, set PACKAGE_NAME equal to theprimary package used by the third party application. For example, if you are writing a Beaker test to test a webapplication based on CGI, set PACKAGE_NAME to perl.
3.3.2 TOPLEVEL_NAMESPACE
# The toplevel namespace within which the test lives.TOPLEVEL_NAMESPACE=CoreOS
The Makefile contains three hierarchies resembling file systems, each with their own collections of paths. Inorder to ensure consistency between test creators and tests, the provided Makefile should be used to manage thesehierarchies. Thus, the scheme in the Makefile template does all the work.
For clarity, it is worth noting the hierarchies at this time:
• installation tests are built as packages for clean deployment on test machines. More than one test can be run ona given machine, so there is a hierarchy below /mnt/tests which keeps the files of the individual tests separatefrom each other. This is set in each test’s Makefile.
• result namespace a hierarchical namespace for results. For example, tests relating to the kernel report theirresults somewhere within the /kernel subtree, and tests relating to the NFS file system (as a part of the kernel)report their results inside /kernel/filesystems/nfs/. Each test “owns” a subtree of the namespace, specified by theName: field of the metadata. Many tests report only a single result, but it is possible for a test to write out acomplex hierarchy of results below its subtree.
32 Chapter 3. Contents

Beaker User Guide, Release dev
The following top level reporting namespaces are predefined and should used to ensure consistent reporting of testresults. These are the only valid accepted namespaces.
• distribution contains tests that involve the distribution as a whole, or a large number of packages, for example/distribution/standards/posixtestsuite
• kernel contains tests results relating to the kernel, for example /kernel/xen/xm/dmesg
– The kernel namespace is unique in that it is also the name of a package. In this case it is usually best todefine the TOPLEVEL_NAMESPACE like this:
# The toplevel namespace definition for kernel testsTOPLEVEL_NAMESPACE=$(PACKAGE_NAME)
• Desktop contains tests results relating to desktop packages, for example/desktop/evolution/first-time-wizard-password-settings, which is a specific testrelating to evolution
• Tools contains tests results relating to the tool chain, for example /tools/gcc/testsuite/3.4
• CoreOS all test results relating to user-space packages not covered by any of the above namespaces
• Examples example tests that illustrate usage and functionality and are not actively maintained. This is a goodplace to experiment when you are getting hang of Beaker or to place simple examples to help others.
3.3.3 RELATIVE_PATH
# The path of the test below the package:RELATIVE_PATH=example-compilation
An implementation of Beaker should run the test from the directory containing the runtest.sh, as listed in theRELATIVE_PATH file of the Makefile. If the test needs to move around, store this somewhere with DIR=pwd oruse pushd and popd.
3.3.4 TESTVERSION
# Version of the Test. Used with make tag.export TESTVERSION=1.0
This is used when building a package of a test, and provides the “version” component of the RPM name-version-releasetriplet.
• The value must be valid as an RPM version string.
• It may consist of numbers, letters, and the dot symbol.
• It may not include a dash symbol this is used by RPM to delimit the version string within the name-version-release triplet.
When writing a test from scratch, use 0.1 and increment gradually until the test has reached a level of robustnessto merit a “1.0” release. When wrapping a test from an upstream location, use the upstream version string here, asclosely as possibly given the restrictions on valid characters. The version should be incremented each time a changeis made to the Makefile or test files and a RPM is created from these files to be publicly consumed in a test reviewor submission to a lab scheduler.
3.3. Beaker Makefile 33

Beaker User Guide, Release dev
3.3.5 TEST
# The compiled namespace of the test.export TEST=$(TOPLEVEL_NAMESPACE)/$(PACKAGE_NAME)/$(RELATIVE_PATH)
This variable defines the path to a test. This path should also be the same in source control.
3.3.6 BUILT_FILES
BUILT_FILES=hello-world
List the files that need to be compiled to be used in the test.
3.3.7 FILES
FILES=$(METADATA) runtest.sh Makefile PURPOSE hello-world.c \verify-hello-world-output.sh
List all of the files needed to run the test to insure that there are no packaging errors when the test is built binariesshould be pulled in via BUILT_FILES.
3.3.8 Targets
Each test must supply a run target which allows an implementation of the framework to invoke make run. It isusually best to have this as the first target defined in the Makefile so that a simple invocation of make will use it asthe default, and run the test. Note how the build target is set up as a dependency of run to ensure that this happensif necessary.
Additional targets and variables supplied by the include for /usr/share/beaker/lib/beaker-make.include.This file is supplied with beaker-devel as seen below.
[root@dhcp83-5 example-compilation]# cat /usr/share/rhts/lib/rhts-make.include# Copyright (c) 2006 All rights reserved. This copyrighted material l# is made available to anyone wishing to use, modify, copy, or# redistribute it subject to the terms and conditions of the GNU General# Public License v.2.## This program is distributed in the hope that it will be useful, but WITHOUT AN Y# WARRANTY; without even the implied warranty of MERCHANTABILITY or FITNESS FOR A# PARTICULAR PURPOSE. See the GNU General Public License for more details.## You should have received a copy of the GNU General Public License# along with this program; if not, write to the Free Software# Foundation, Inc., 51 Franklin Street, Fifth Floor, Boston, MA 02110-1301, USA.## Author: Your Name <[email protected]>
## rhts-make.include## default rules and settings for rhts makefiles#
# Common Variables.
34 Chapter 3. Contents
Beaker User Guide, Release dev
TEST_DIR=/mnt/tests$(TEST)INSTALL_DIR=$(DEST)$(TEST_DIR)METADATA=testinfo.desc
# tag: mark the test source as a release
tag:rhts-mk-tag-release
release: tag
# prep: prepare the test(s) for packaging
install: $(FILES) runtest.sh testinfo.descmkdir -p $(INSTALL_DIR)cp -a $(FILES) Makefile $(INSTALL_DIR)install -m 0755 runtest.sh $(INSTALL_DIR)
# package: build the test package
package:rhts-mk-build-package
# submit: submit the test package to RHTS
submit:rhts-mk-build-package -s $(TESTSERVER)
################################################### example makefile## include ~/devel/rhts/greg/rhts_nb/make.include## FILES=prog1.c prog2.c## ARENA=$(DEST)/mnt/tests/glibc/double-free-exploit## install:# mkdir -p $(ARENA)# cp -a runtest.sh $(FILES) $(ARENA)## run: tests# runtest.sh## tests: prog2 prog2
The tag target is used to tag a package in anticipation of submitting it to a test lab.
The submit target is used to submit a package to a test lab and requires the TESTSERVER variable to be defined. Itbuilds an RPM of the test (if necessary) and uploads the test package to a test lab controller where it can be used toschedule tests.
3.3.9 $(METADATA)
Following is an example of the METADATA section needed to execute a basic test. Following subsections will commentbriefly on the values that must be set manually (not set by variables) and optional values to enhance test reporting and
3.3. Beaker Makefile 35
Beaker User Guide, Release dev
execution.
$(METADATA): Makefile@touch $(METADATA)@echo "Owner: Your Name <[email protected]>" > $(METADATA)@echo "Name: $(TEST)" >> $(METADATA)@echo "Path: $(TEST_DIR)" >> $(METADATA)@echo "License: GPLv2" >> $(METADATA)@echo "TestVersion: $(TESTVERSION)" >> $(METADATA)@echo "Description: Ensure that compiling a simple .c file works as expected" >> $(METADATA)@echo "TestTime: 1m" >> $(METADATA)@echo "RunFor: $(PACKAGE_NAME)" >> $(METADATA) # add any other packages for which your test ought to run here@echo "Requires: $(PACKAGE_NAME)" >> $(METADATA) # add any other requirements for the script to run here
3.3.10 Owner
Owner: (optional) is the person responsible for this test. Initially for Beaker, this will be whoever committed the testto Subversion. A naming policy may have to be introduced as the project develops. Acceptable values are a subset ofthe set of valid email addresses, requiring the form: “Owner: human readable name <username@domain>”.
3.3.11 Name
Name:(required) It is assumed that any result-reporting framework will organize all available tests into a hierarchicalnamespace, using forward-slashes to separate names (analogous to a path). This field specifies the namespace wherethe test will appear in the framework, and serves as a unique ID for the test. Tests should be grouped logicallyby the package under test. This name should be consistent with the name used in source control too. Since someimplementations will want to use the file system to store results, make sure to only use characters that are usablewithin a file system path.
3.3.12 Description
Description(required) must contain exactly one string.
For example:
Description: This test tries to map five 1-gigabyte files with a single process.Description: This test tries to exploit the recent security issue for large pix map files.Description: This test tries to panic the kernel by creating thousands of processes.
3.3.13 TestTime
Every Makefile must contain exactly one TestTime value. It represent the upper limit of time that theruntest.sh script should execute before being terminated. That is, the API should automatically fail the testafter this time period has expired. This is to guard against cases where a test has entered an infinite loop or caused asystem to hang. This field can be used to achieve better test lab utilization by preventing the test from running on asystem indefinitely.
The value of the field should be a number followed by either the letter “m” or “h” to express the time in minutes orhours. It can also be specified it in seconds by giving just a number. It is recommended to provide a value in minutes,for readability.
The time should be the absolute longest a test is expected to take on the slowest platform supported, plus a 10% marginof error. It is usually meaningless to have a test time of less than a minute, since some implementations of the API may
36 Chapter 3. Contents

Beaker User Guide, Release dev
be attempting to communicate with a busy server such as writing back to an NFS share or performing an XML-RPCcall.
For example:
TestTime: 90 # 90 secondsTestTime: 1m # 1 minuteTestTime: 2h # 2 hours
3.3.14 Requires
Requires one or more. This field indicates the packages that are required to be installed on the test machine forthe test to work. The package being tested is automatically included via the PACKAGE_NAME variable. Anythingruntest.sh needs for execution must be included here.
This field can occur multiple times within the metadata. Each value should be a space-separated list of packagenames, or of Kickstart package group names preceded with an @ sign. Each package or group must occur within thedistribution tree under test (specifically, it must appear in the comps.xml file).
For example:
@echo "Requires: gdb" >> $(METADATA)@echo "Requires: @legacy-software-development" >> $(METADATA)@echo "Requires: @kde-software-development" >> $(METADATA)@echo "Requires: -pdksh" >> $(METADATA)
The last example above shows that we don’t want a particular package installed for this test. Normally you shouldn’thave to do this unless the package is installed by default.
In a lab implementation, the dependencies of the packages listed can be automatically loaded using yum.
Note that unlike an RPM spec file, the names of packages are used rather than Provides: dependencies. If one of thedependencies changes name between releases, one of these approaches below may be helpful:
• for major changes, split the test, so that each release is a separate test in a sub-directory, with the common filesbuilt from a shared directory in the Makefile.
• if only a dependency has changed name, specify the union of the names of dependencies in the Requires: field;an implementation should silently ignore unsolvable dependencies.
• it may be possible to work around the differences by logic in the section of the Makefile that generates thetestinfo.desc file.
When writing a multihost test involving multiple roles client(s) and server(s), the union of the requirements for all ofthe roles must be listed here.
3.3.15 RhtsRequires
RhtsRequires one or more. This field indicates the other beaker tests that are required to be installed on the testmachine for the test to work.
This field can occur multiple times within the metadata. Each value should be a space-separated list of its task nameenclosed in test(). Each task must exist on the Beaker Scheduler.
For example:
@echo "RhtsRequires: test(/distribution/rhts/common)" >> $(METADATA)
3.3. Beaker Makefile 37
Beaker User Guide, Release dev
3.3.16 RunFor
RunFor allows for the specification of the packages which are relevant for the test. This field is the hook to be used forlocating tests by package. For example, when running all tests relating to a particular package[1], an implementationshould use this field. Similarly, when looking for results on a particular package, this is the field that should be usedto locate the relevant test runs.
When testing a specific package, that package must be listed in this field. If the test might reasonably be affected bychanges to another package, the other package should be listed here. If a package changes name in the various releasesof the distribution, all its names should be listed here.
This field is optional; and can occur multiple times within the metadata. The value should be a space-separated list ofpackage names.
3.3.17 Releases
Some tests are only applicable to certain distribution releases. For example, a kernel bug may only be applicableto RHEL3 which contains the 2.4 kernel. Limiting the release should only be used when a test will not execute on aparticular release. Otherwise, the release should not be restricted so that your test can run on as many different releasesas possible.
• Valid Releases are anything that is a valid Family in Beaker, such as:
– RedHatEnterpriseLinux3
– RedHatEnterpriseLinux4
– RedHatEnterpriseLinuxServer5
– RedHatEnterpriseLinuxClient5
– FedoraCore6
– Fedora7
– Fedora8
• Releases can be used in two ways:
– specifying releases you want run your test for : For example, if you want to run your test on RHEL3and RHEL4 only, add “Releases: RedHatEnterpriseLinux3 RedHatEnterpriseLinux4” to your MakefileMETADATA variable, i.e.:...@echo "Requires: openldap-servers" >> $(METADATA)@echo "Releases: RedHatEnterpriseLinux3 RedHatEnterpriseLinux4" >> $(METADATA)@echo "Priority: Normal" >> $(METADATA)...
– specifying releases you don’t want run your test for (using “-” sign before given releases): For example,if you don’t want to run your test on RHEL3, but the other releases are valid for your test, add “Releases:-RedHatEnterpriseLinux3” to your Makefile METADATA variable, i.e.:...@echo "Requires: openldap-servers" >> $(METADATA)@echo "Releases: -RedHatEnterpriseLinux3" >> $(METADATA)@echo "Priority: Normal" >> $(METADATA)...
38 Chapter 3. Contents

Beaker User Guide, Release dev
3.4 Workflow
3.4.1 Virtualization workflow
Virtualization workflow is designed to take advantage all Beaker offers to be used for virtualization testing. Theaudience of this tutorial is expected to have basic familiarity with Beaker.
Virtualization testing framework in Beaker utilizes libvirt tools, particularly virt-install program to have a frame-work abstracted from the underlying virtualization technology of the OS. The crux of virtualization test framework isguestrecipe. Each virtual machine is defined in its own guestrecipe and guestrecipes are a part of the host’s (dom0)recipe. To illustrate, let’s say, we would like to create a job that will create a host and 2 guests, named guest1 andguest2 respectively. The skeleton of the recipe will look like this:
<recipe>...(dom0 test recipe)...<guestrecipe guestname=guest1 ...>...(guest1 test recipe)...
</guestrecipe><guestrecipe guestname=guest2 ...>...(guest2 test recipe)...
</guestrecipe>
</recipe>
Here is a sample xml that can be passed into Beaker to get a system reserved.
- Request a host with the following:- CPU Vendor GenuineIntel- > 3 CPUs- Supports KVM-> 4096Mb of Ram- > 75000Mb of Diskspace- x86_64 Arch
- The that will be built is the following:- KVM guest- 1024Mb ram- 1 CPU- File System size 20Mb
All that you need to do is replace ##USERNAMEHERE## with your real kerberos username. Then use bkr to submit it.
Anything that can be described inside a recipe can also be described inside a guestrecipe. This allows the testers torun any existing Beaker test inside the guest just like it’d be run inside a baremetal machine.
When Beaker encounters a guestrecipe it does create an environmental variable to be passed on to virtinstall test. Thetester-supplied elements of this variable all come from the guestrecipe element. Consequently, it’s vital that the testerfully understand the properties of this element. guestrecipe element guestname and guestargs elements. guestname isthe name of the guest you would like to give and is optional. If you omit this property then the Beaker will assign thehostname of the guest as the name of the guest. guestargs is where you define your guest. The values given here willbe same as what one would pass to virt-install program with the following exceptions:
3.4. Workflow 39

Beaker User Guide, Release dev
• Name argument must not be passed on inside guestargs. As mentioned above, it should be passed with guest-name property..
• Other than name , -mac, -location, -cdrom (-c) , and -extra-args ks= must not be passed. Beaker does thosebased on distro information passed inside the guestrecipe.
• In addition to what can be passed to virt-install, extra arguments -lvm or -part or -kvm can also be passed toguestargs, to indicate lvm-based or partition- based guests or kvm guests (instead of xen guests).
• If neither one of -lvm or -part options are given, then a filebased guest will be installed. If -kvm option is notgiven then xen guests will be installed. See below for lvm-,partition-based guests section for more info on thistopic.
• The virtinstall test is very forgiving for the missed arguments, it’ll use some default when it can. Currently thesearguments can be omitted:
– -ram or -r , a default of 512 is used
– 1.-nographics or -vnc, if the guest is a paravirtualized guest, then -nographics option will be used, if theguest is an hvm guest, then -vnc option will be used.
– 1.-file-size or -s, a default of 10 will be used.
– -file or -f, if the guest is a filebased guest, then the default will be /var/lib/xen/images/${guestname}.img .For lvm-based and block-device based guest, this option MUST be provided.
KVM vs. Xen guests
Starting with RHEL 5.4, both Xen and KVM hypervisors are shipped with the distro. To handle this situation, guestinstall tests take an extra argument (-kvm) to identify which type of guests will be installed. By default, kernel-xenkernel is installed hence the guests are Xen guests. If -kvm is given in the guestargs, then the installation programdecides that kvm guests are intended to be tested, so boots into the base kernel and then installs the guests. There canonly be one hypervisor at work at one moment, and hence the installation test expects them all to be either kvm or xenguest, but not a mix of both.
Dynamic partitioning/LVM
Telling Beaker to create partitions/lvm. On Beaker, each machine has its own kickstart for each OS family it supports.In it the partitioning area is marked so that it can be overwritten to allow having dynamic partitions/lvms in your tests.
The easiest way to specify dynamic partitions is to use the xml workflow and specify it in your xml file. Syntax of thepartition tags is below:
<partitiontype = type <!- required ->name = name <!- required ->size = size in GB <!- required ->fs = filesystem to format <!- optional, defaulted to ext3 ->
</>
<partitions> is the xml element that holds all partition elements.
• <partition> is the xml element for the partitioning. You can have multiple partition elements in a partitionselement. It has type, name, size and fs text contents all of which except for fs is required. Detailed informationfor each are:
– type: Type of partition you’d like to use. This can be either part of lvm .
40 Chapter 3. Contents

Beaker User Guide, Release dev
– name: If the type is part, then this will be the mount point of the partition. For example, if you wouldlike the partition to be mounted to /mnt/temppartition then just put it in here. For the lvm type, thiswill be the name of the volume and all custom volumes will go under its own group, prefixed withTestVolumeGroup? . For example, if you name your lvm type as “mytestvolume”, it’s go into /TestVol-umeGroup??/mytestvolume.
– size: The size of the partition or volume in GBs .
– fs:This will be the filesystem the partition will be formatted in. If omitted, the partition will be formattedwith ext3. By default, anaconda mounts all partitions. If you need the partition to be unmounted at the timeof the test, you can use the blockdevice utility which is a test that lives on /distribution/utils/blockdevice .This test unmounts the specified partitions/volumes and lets users manage custom partitions thru its ownscripts.
Dynamic partitioning from your workflow
If you are using a different workflow and would like to add dynamic partitioning capability, you can do it by utilizingaddPartition() call to the recipe object. An example can be :
rec = BeakerRecipe()# create an ext3 partition of size 1 gig and mount it on /mnt/block1rec.addPartition(name=’/mnt/block1’, type=’part’, size=1)# create an lvm called mylvm with fs ext3 and 5 gig sizerec.addPartition(name=’mylvm’, type=’lvm’, size=5)# change the default fs from ext3 to ext4rec.addPartition(name=’/mnt/block4ext4’, type=’part’, fs=’ext4dev’, size=1)# create an lvm but change the default fs from ext3 to ext4.rec.addPartition(name=’mylvm4ext4’, type=’lvm’, fs=’ext4dev’, size=5)
Helper programs installed with Virtinstall
Virtinstall test also installs a few scripts that can later on be utilized in the tests. These are completely non-vital scripts,provided only for convenience to the testers.
guestcheck4up:
• Usage: guestcheck4up <guestname>
• Description: checks whether or not the guest is live or not.
• Returns: 0 if guest is not shutoff, 1 if it is.
guestcheck4down:
• Usage: guestcheck4down <guestname>
• Description: checks whether or not the guest is live or not.
• Returns: 0 if guest is shutoff, 1 if it is not.
startguest:
• Usage: startguest <guestname> [timeout]
• Description: Starts a guest and makes sure that it’s console is reachable within optional $timeout seconds. Iftimeout value is omitted the default is 300 seconds.
• Returns: 0 if the guest is started and a connection can be made to its console within $timeout seconds, 1 if itcan’t.
stopguest:
3.4. Workflow 41

Beaker User Guide, Release dev
• Usage: stopguest <guestname> [timeout]
• Description: stops a guests and waits for shutdown by waiting for the “System Halted.” string within the optional$timeout seconds. If timeout is omitted , then the default is 300 seconds.
• Returns: 0 if the shutdown was successful, 1 if it wasn’t.
getguesthostname:
• Usage: getguesthostname <guestname>
• Returns: A string that contains the hostname of the guest if successful, or an error string if it’s an error.
wait4login:
• Usage: wait4login <guestname> [timeout]
• Description: It waits until it gets login: prompt in the guest’s console within $timeout seconds. If timeoutargument is not given, it’ll wait indefinitely, unless there is an error!
• Returns: 0 on success , or 1 if it encounters an error.
fwait4shutdown:
• Usage: wait4shutdown <guestname> [timeout]
• Description: It waits until it gets shutdown message in the guest’s console within $timeout seconds. If timeoutargument is not given, it’ll wait indefinitely, unless there is an error!
• Returns: 0 on success , or 1 if it encounters an error.
3.4.2 Provisioning a system
If you would like to use one of these System you will need to provision it. Provisioning a System means to have thesystem loaded with an Operating System and reserved for the user. There are a couple of ways of doing this, whichare outlined below.
Provision by system
Go to the System details page (see Section 5.1.3, “System Details Tabs”) of a System that is free (see Section 5.1.1,“System Searching”) and click on Take in the Current User field. After successfully taking the System, click theProvision tab of the System details page to provision the System.
Returning a System
After provisioning a system, you can manually return it by going to the above mentioned system details page, clickingon the “Return” link in the “Current User” field. However this is only allowed if the system was provisioned manually(i.e not via a recipe)
Provision by distro
Go to the distro search page and search for a Distro you would like to provision onto a System. Once you have foundthe Distro you require, click Provision System, which is located in the far right column of your search results. If the“Provision System” link is not there, it’s because there is no suitable System available to use with that Distro.
The resulting page lists the Systems you can use. Systems with “Reserve Now” in the far right column mean thatno on else is using them and you can reserve them immediately, otherwise you will see “Queue Reservation”; which
42 Chapter 3. Contents

Beaker User Guide, Release dev
Figure 3.13: Provision by System
means that someone is currently using the System but you can be appended to the queue of people wanting to use thisSystem.
After choosing your System and clicking on the the aforementioned links, you will be presented with a form with thefollowing fields:
• System To Provision This is our System we will provision.
• Distro To Provision The Distro we will be installing on the System.
• Job Whiteboard This is a reference that will be displayed in Jobs list. You can enter anything in here.
• KickStartMetaData Arguments passed to the KickStart script.
• Kernel Options (Install)
• Kernel Options (Post)
Pressing the “Queue Job” button will submit this provisioning as a Job and redirect us to the details of the newlycreated Job.
Reserve Workflow
The Reserve Workflow page is accessed from the top menu by going to “Scheduler > Reserve”. The Reserve Workflowprocess allows the ability to select which System and Distro is to be provisioned based on the following:
• Arch Architecture of the System we want to provision.
• Distro Family The family of Distro we want installed.
• Method How we want the distro to be installed.
3.4. Workflow 43
Beaker User Guide, Release dev
• Tag The Distro’s tag.
• Distro Based on the above refinements we will be presented with a list of Distro’s available to be installed.
Selecting values for the above items should be done in a top to bottom fashion, staring at “Arch” and ending with“Distro”.
Once the Distro to be installed is selected you have the option of showing a list of System’s that you are able toprovision (“Show Systems” button), or you can have Beaker automatically pick a system for you (“Auto pick System”).If you choose “Show Systems” you will be presented with a list of Systems you are able to provision. Ones that areavailable now show the link “Reserve now” beside them. This indicates the System is available to be provisionedimmediately. If the System is currently in use it will have the link “Queue Reservation” instead. This indicates thatthe System is currently in use, but can be provisioned for a later time.
Whether you choose to automatically pick a system or to pick one yourself, you will be presented with a page thatasks you for the following options:
• Job Whiteboard
• KickStart MetaData
• Kernel Options (Install)
• Kernel Options (Post)
See Provision by distro where the above are explained. Once you are ready you can provision your System with yourselected Distro by pressing “Queue Job”.
3.4.3 Submitting and reviewing a job
To submit a Job you must create a Job description. This is an XML file containing the tasks you want to run, as wellas special environment variables and other options you want to setup for your Job.
Valid Job Specs
If this is the first time running this Job make sure that at least one system with the specified architecture has accessto the specified distro and all the relevant tasks are available to Beaker. To do this, See System searching, Distrosearching and Task searching respectively.
To submit the Job, either use the bkr client or submit the job via the UI.
Once Submitted you can view the progress of the Job by going to the job search page. Once your Job is Completed,see the job results page.
3.4.4 Job XML
You can specify Beaker jobs using an XML file. This allows users a more consistent, maintainable way of storing andsubmitting jobs. You can specify and save entire jobs, including many recipes and recipesets in them in XML files andsave them as regression test suites and such.
The various elements along with their attributes and the values they can take are described in the RELAX NG schemadescribed in the file beaker-job.rng. See also Job workflow details.
44 Chapter 3. Contents

Beaker User Guide, Release dev
3.5 Tests
3.5.1 Test architecture considerations
If you want your test to be smart, that intelligence must be in the test; the Beaker API can help. A test running in anautomated environment does not have intelligence, hunches, or the ability to notice unusual activity. This intelligencemust be programmed into the test. Naturally the return on investment for time required to add this intelligence shouldbe considered, however the more intelligence a test has to handle false failures and false passes, the more valuable theautomation is to the entity running it. Contrasted with manual testing where tests are run on a local workstation andsuspicious results can be investigated easily, many organizations find that well written tests which can be trusted savetime that can be used for any number of other activities.
Questions to consider
• What is needed for a test run to return PASS?
• What is needed for a test run to return FAIL?
• How will PASS and FAIL conditions be determined pragmatically?
• If it is not possible for a test to ever FAIL, does it make sense to automate it?
Things to Keep in Mind
• Assume that nothing works:
– The test could be running in an unstable test environment.
– The package under test might be broken.
– An apparently-unrelated component might cause your test to fail in an unexpected way.
– The system might not be configured in the manner in which you expect.
– The test may be buggy, reporting false positives or false negatives.
• Identifying potential problem sections in a test can save someone, possibly you, hours of debugging time.
Writing Good Test Code
• Check everything: all exit statuses, return values from function calls, etc. Unfortunately there are plenty ofprograms which return success codes even when a failure occurs.
• Capture all debug output that might indicate an error; it may give clues as to what is going wrong when a testfails.
• Comment your tests; good comments should describe the intent of what you are doing, along with caveats beingfollowed, rather than simply parroting the code back as pseudo code.
• In most (ideally all) situations a test should report true PASS and FAIL results, but test code is still code, andwill invariably contain bugs.
• Program defensively so that errors in test code report false FAIL results rather than false PASSes. For example,initialize a result variable to FAIL and only set it to PASS if no errors are detected.
• Do not initialize a variable to PASS which fails only on a specific error – what if you missed another error?What if the shell function you called failed to execute?
• It is easier to investigate and fix a failed test than a test that always passes (which it should not be).
3.5. Tests 45

Beaker User Guide, Release dev
3.5.2 Writing and running multihost tasks
All of the examples so far have run on a single host. Beaker has support for tasks that run on multiple hosts, e.g. fortesting the interactions of a client and a server.
When a multihost task is run in the lab, a machine will be allocated to each role in the test. Each machine has its ownrecipe.
Each machine under test will need to synchronize to ensure that they start the test together, and may need to synchro-nize at various stages within the test. Beaker has three notional roles: client, server and driver.
For many purposes all you will need are client and server roles. For a test involving one or more clients talking toone or more servers, a typical approach would be for the clients to block whilst the servers get ready. Once all serversare ready, the clients perform whatever testing they need, using the services provided by the server machines, andeventually report results back to the test system. Whilst this is happening the server tests block; the services runningon these machines are carrying out work for the clients in parallel. Once all clients have finished testing, the servertests finish, and report their results.
Each participant in a test will be reporting results within the same job, and so must report to different places withinthe result hierarchy. For example, the server part of the test may PASS if it survives the load, but the client part mightFAIL upon, say, getting erroneous data from the server; this would lead to an overall FAIL for the test.
If you have a more complex arrangement, it is possible to have a driver machine which controls all of the testing.
All of the participants in a multihost test share a single runtest.sh, which must perform every role within thetest (e.g. the client role and server role). When a multihost test is run in the lab, the framework automatically setsenvironment variables to allow the various participants to know what their role should be, which other machines theyshould be talking to, and what roles those other machines are performing in the test. You will need to have logicin your runtest.sh to examine these variables, and perform the necessary role accordingly. These variables areshared by all instances of the runtest.sh within a recipeset:
• CLIENTS contains a space-separated list of hostnames of clients within this recipeset.
• SERVERS contains a space-separated list of hostnames of servers within this recipeset.
• DRIVER is the hostname of the driver of this recipeset, if any.
The variable HOSTNAME can be used by runtest.sh to determine its identity. It is set by rhts-environment.sh, and willbe unique for each host within a recipeset.
Your test can thus decide whether it is a client, server or driver by investigating these variables: see the example below.
When you are developing your test outside the lab environment, only HOSTNAME is set for you (when sourcing therhts-environment.sh script). Typically you will copy your test to multiple development machines, set up CLIENTS,SERVERS and DRIVER manually within a shell on each machine, and then manually run the runtest.sh on each one,debugging as necessary.
A multihost test needs to be marked as such in theType: Multihost.
In it’s simplest form, a job with multihost testing can look like:
<job><RecipeSet>
<recipe><task role=’STANDALONE’ name=’/distribution/install’/><task role=’SERVERS’ name=’/my/multihost/test’/>
</recipe><recipe>
<task role=’STANDALONE’ name=’/distribution/install’/><task role=’CLIENTS’ name=’/my/multihost/test’/>
</recipe>
46 Chapter 3. Contents
Beaker User Guide, Release dev
</RecipeSet></job>
Note: For brevity some necessary parts are left out in the above job description
Submitting the job above will export environmental variables SERVERS and CLIENTS set to their respective host-names. This allows a tester to write tests for each machines. So the runtest.sh in /my/multihost/test test might looklike:
Server() {# .. server code here
}
Client() {# .. client code here
}
if test -z "$JOBID" ; thenecho "Variable jobid not set! Assume developer mode"SERVERS="test1.example.com"CLIENTS="test2.example.com"DEVMODE=true
fi
if [ -z "$SERVERS" -o -z "$CLIENTS" ]; thenecho "Can not determine test type! Client/Server Failed:"RESULT=FAILEDreport_result $TEST $RESULT
fi
if $(echo $SERVERS | grep -q $HOSTNAME); thenTEST="$TEST/Server"Server
fi
if $(echo $CLIENTS | grep -q $HOSTNAME); thenTEST="$TEST/Client"Client
fi
Let’s dissect the code. First of, we have Server() and Client() functions which will be executed on SERVERS andCLIENTS machines respectively. Then we have an if block to determine if this is running as an beaker test, or if it’sbeing run on the test developer’s machine(s) to test it out. The last couple if blocks determine what code to run onthis particular machine. As mentioned before, SERVERS and CLIENTS environmental variables will be set to theirrespective machines’ names and exported on both machines.
Obviously, there will have to be some sort of coordination and synchronization between the machines and the executionof the test code on both sides. Beaker offers two utilities for this purpose, rhts-sync-set and rhts-sync-block . rhts-sync-set is used to setting a state on a machine. rhts-sync-block is used to block the execution of the code until acertain state on certain machine(s) are reached. Those familiar with parallel programming can think of this as a barrieroperation . The detailed usage information about both of this utilities is below:
• rhts-sync-set: It does set the state of the current machine. State can be anything. Syntax: rhts-sync-set -s STATE
• rhts-sync-block: It blocks the code and doesn’t return until a desired STATE is set on desired machine(s) . Youcan actually look for a certain state on multiple machines.. Syntax: rhts-sync-block -s STATE [-s STATE1 -sSTATE2] machine1 machine2 ...
3.5. Tests 47

Beaker User Guide, Release dev
There are a couple of important points to pay attention. First of, the multihost testing must be on the same chronologicalorder on all machines. For example, the below will fail:
<recipe><task role=’STANDALONE’ name=’/distribution/install’/><task role=’STANDALONE’ name=’/my/test/number1’/><task role=’SERVERS’ name=’/my/multihost/test’/>
</recipe><recipe>
<task role=’STANDALONE’ name=’/distribution/install’/><task role=’CLIENTS’ name=’/my/multihost/test’/>
</recipe>
This will fail, because the multihost test is the 3rd test on the server side and it’s the 2nd test on the client side.. Tofix this, you can pad in dummy test cases on the side that has fewer test cases. There is a dummy test that lives in/distribution/utils/dummy for this purpose. So, the above can be fixed as:
<recipe><task role=’STANDALONE’ name=’/distribution/install’/><task role=’STANDALONE’ name=’/my/test/number1’/><task role=’SERVERS’ name=’/my/multihost/test’/>
</recipe><recipe><task role=’STANDALONE’ name=’/distribution/install’/><task role=’STANDALONE’ name=’/distribution/utils/dummy’/><task role=’CLIENTS’ name=’/my/multihost/test’/>
</recipe>
One shortcoming of the rhts-sync-block utility is that it blocks forever, so if there are multiple things being donein your test between the hosts, your test will timeout without possibly a lot of code being executed. There is autility, blockwrapper.exp which can be used to put a limit on how many second it should block. The script lives in/CoreOS/common test, so be sure to add that test before your multihost tests in your recipes. The usage is exactlysame as that of rhts-sync-block with the addition of a timeout value at the end, i.e.:
blockwrapper.exp -s STATE machine N
where N is the timeout value in seconds. If the desired state in the desired machine(s) haven’t been set in N seconds,then the script will exit with a non-zero return code. In case of success it’ll exit with code 0 .
Synchronization commands
Synchronization of machines within a multihost test is performed using per-host state strings managed on the Beakerserver. Each machine’s starting state is the empty string.
rhts-sync-set -s state
The rhts-sync-set command sets the state of this machine within the test to the given value.
rhts-sync-block -s state [hostnames...]
The rhts-sync-block command blocks further execution of this instance of the script until all of the listed hosts are inthe given state.
Unfortunately, there is currently no good way to run these commands in the standalone helper environment.
48 Chapter 3. Contents

Beaker User Guide, Release dev
Example of a runtest.sh for a multihost test
#!/bin/sh# Source the common test script helpers. /usr/bin/rhts_environment.sh
# Save STDOUT and STDERR, and redirect everything to a file.exec 5>&1 6>&2exec >> "${OUTPUTFILE}" 2>&1
client(){
echo "-- wait the server to finish."rhts_sync_block -s "DONE" ${SERVERS}
user="finger1"for i in ${SERVERS}do
echo "-- finger user \"$user\" from server \"${i}\"."./finger_client "${i}" "${user}"# It returns non-zero for failure.if [ $? -ne 0 ]; then
rhts_sync_set -s "DONE"report_result "${TEST}" "FAIL" 0exit 1
fidone
echo "-- client finishes."rhts_sync_set -s "DONE"result="PASS"
}
server(){
# Start server and check it is up and running./sbin/chkconfig finger on && sleep 5if ! netstat -a | grep "finger" ; then
rhts_sync_set -s "DONE"report_result "${TEST}" "FAIL" 0exit 1
fiuseradd finger1echo "-- server finishes."rhts_sync_set -s "DONE"rhts_sync_block -s "DONE" ${CLIENTS}result="PASS"
}
# ---------- Start Test -------------result="FAIL"if echo "${CLIENTS}" | grep "${HOSTNAME}" >/dev/null; then
echo "-- run finger test as client."TEST=${TEST}/clientclient
fiif echo "${SERVERS}" | grep "${HOSTNAME}" >/dev/null; then
echo "-- run finger test as server."
3.5. Tests 49
Beaker User Guide, Release dev
TEST=${TEST}/serverserver
fiecho "--- end of runtest.sh."report_result "${TEST}" "${result}" 0exit 0
Tuning up multihost tests
Multihost tests can be easily tuned up outside Beaker using following code snippet based on $JOBID variable(which is set when running in Beaker environment). Just log in to two machines (let’s say: client.example.comand server.example.com) and add following lines at the beginning of your runtest.sh script.
# decide if we’re running on RHTS or in developer modeif test -z $JOBID ; then
echo "Variable JOBID not set, assuming developer mode"CLIENTS="client.example.com"SERVERS="server.example.com"
elseecho "Variable JOBID set, we’re running on RHTS"
fiecho "Clients: $CLIENTS"echo "Servers: $SERVERS"
Then you just run the script on both client and server. When scripts reach one of the synchronization commands(rhts-sync-set or rhts-sync-block) you will be asked for supplying actual state of the client/server by keyboard (usuallyjust confirm readiness by hitting Enter). That’s it! :-)
3.5.3 Reporting results
The philosophy of Beaker is that the engineers operating the system will want to quickly survey large numbers of tests,and thus the report should be as simple and clear as possible. “PASS” indicates that everything completed as expected.“FAIL” indicates that something unexpected occurred.
In general, a test will perform some setup (perhaps compiling code or configuring services), attempt to perform someactions, and then report on how well those actions were carried out. Some of these actions are your responsibility tocapture or generate in your script:
• a PASS or FAIL and optionally a value indicating a test-specific metric, such as a performance figure.
• a debug log of information – invaluable when troubleshooting an unexpected test result. A test can have a singlelog file and report it into the root node of your results tree, or gather multiple logs, reporting each within theappropriate child node.
Other components of the result can be provided automatically by the framework when in a test lab environment:
• the content of the kernel ring buffer (from dmesg). Each report clears the ring buffer, so that if your test reportsmultiple results, each will contain any messages logged by the kernel since the last report was made.
• a list of all packages installed on the machine under test (at the time immediately before testing began), includingname, version/release, and architecture.
• a separate report of the packages listed in the RunFor of the metadata including name, version/release, andarchitecture (since these versions are most pertinent to the test run).
• if a kernel panic occurs on the machine under test, this is detected for you from the console log output, and willcause a Panic result in place of a PASS or FAIL for that test.
50 Chapter 3. Contents

Beaker User Guide, Release dev
In addition, the Beaker framework provides a hierarchical namespace of results, and each test is responsible for asubtree of this namespace. Many simple tests will only return one result (the node they own), but a complex test canreturn an entire subtree of results as desired. The location in the namespace is determined by the value of variablesdefined in the Makefile. These variables will be discussed in the Packaging section.
A test may be testing a number of related things with a common setup (e.g. a setup phase of a server package onto local-host, followed by a collection of tests as a client). Some of these things may not work across every version/architecturecombination. This will produce a list of “subresults”, each of which could be classified as one of:
• expected success: will lead to a PASS if nothing else fails
• expected failure: should be as a PASS (as you were expecting it).
• unexpected success: can be treated as a PASS (since it’s a success), or a FAIL (since you were not expecting it).
• unexpected failure: should always be a FAIL
Given that there may be more than one result, the question arises as to how to determine if the whole test passes orfails. One way to verify regression tests is to write a script that compares a set of outputs to an expected “gold” set ofoutputs which grants PASS or FAIL based on the comparison.
It is possible to write a script that silently handles unexpected successes, but it is equally valid for a script to report aFAIL on an unexpected success, since this warrants further investigation (and possible updating of the script).
To complicate matters further, expected success/failure may vary between versions of the package under test, andarchitecture of the test machine.
If the test is checking multiple bugs, some of which are known to work, and some of which are due to be fixed invarious successive (Fedora) updates, ensure that the test checks everything that ought to work, reporting PASS andFAIL accordingly. If the whole test is reporting a single result, it will typically report this by ensuring that all expectedthings work; as bugs are fixed, more and more of the test is expected to work and can cause an overall FAIL.
If it is reporting the test using a hierarchy of results, the test can have similar logic for the root node, and can avoidreporting a result for a subtree node for a known failure until the bug is fixed in the underlying packages, and avoidaffecting the overall result until the bug(s) is fixed.
As a general Beaker rule of thumb, a FAIL anywhere within the result subtree of the test will lead to the result for theoverall test being a FAIL.
Logging tips
Indicate failure-causing conditions in the log clearly, with “FAIL” in upper case to make it easier to grep for.
Good log messages should contain three things: # what it is that you are attempting to do (e.g. checking to see whatls reports for the permission bits that are set on file foo) # what it is that you expect to happen (e.g. an expectation ofseeing “-rw-r–r–” ) # what the actual result was an example of a test log showing success might look like:
Checking ls output: "foo" ought to have permissions "-rw-r--r--"Success: "foo" has permissions: "-rw-r--r--"
An example of a failure might look like:
Checking ls output: "foo" ought to have permissions "-rw-r--r--"FAIL: ls exit status 2
For multihost tests, time stamp all your logs, so you can interleave them.
Use of tee is also helpful to ensure that the output at the terminal as you debug a test is comparable to that logged fromOUTPUTFILE in the lab environment.
Past experiences has shown problems where people confuse overwriting versus appending when writing out each lineof a log file. Use tee -a $OUTPUT rather than tee > $OUTPUT or tee >> $OUTPUT.
3.5. Tests 51

Beaker User Guide, Release dev
Include a final message in the log, stating that this is the last line, and (for a single-result test) whether the result is asuccess or failure; for example:
echo "----- Test complete: result=$RESULT -----" | tee -a $OUTPUTFILE
Finish your runtest.sh: (after the report_result) to indicate that the final line was reached; for example:
echo "***** End of runtest.sh *****"
Passing parameters to tasks
When you need a test to perform different steps in some specific situations there is an option available through SimpleWorkflow command line interface called –test-params which allows you to pass the supplied parameter to runtest.shwhere you can access it by TEST_PARAM_NAME=value.
For example you can launch the single workflow with a command line like this:
bkr workflow-simple --arch=i386 --family=RedHatEnterpriseLinuxServer5 --task=/distribution/install --taskparam="SUBMITTED_FROM=CLIENT"
And then make use of the passed parameter inside the runtest.sh script:
if [[ TEST_PARAM_PAR1 == 1 ]] ; then do something; fi
3.5.4 Test writing tips
Reboot count. Sometimes it can be useful to ascertain how many times the system has rebooted. To do this, you canuse the environment variable REBOOTCOUNT. Each time the reserved machine is rebooted, REBOOTCOUNT will beincremented by one.
Using the startup_test function
The startup_test function can be used to provide a primitive smoke-test of a program, by setting a shell variable namedresult. You will need to use report_result if you use it. The syntax is:
startup_test program [arg1] [arg2] [arg3]
The function takes the name of a program, along with up to three arguments. It fakes an X server for the test byensuring that Xvfb is running (and setting DISPLAY accordingly), then enables core-dumping, and runs the programwith the arguments provided, piping standard output and error into OUTPUTFILE (overwriting, not appending).
The function then checks various things:
• any Gtk-CRITICAL warnings found in the resulting OUTPUTFILE cause result to be WARN.
• that the program can be found in the PATH, using the which command; if it is not found it causes result to beFAIL, appending the problem to OUTPUTFILE
• for binaries, it uses ldd to detect missing libraries; if any are missing it causes result to be FAIL, appending theproblems to OUTPUTFILE
• if any core dumps are detected it causes result to be FAIL
Finally, it kills the fake X server. You then need to report the result.
#!/bin/sh
# source the test script helpers. /usr/bin/rhts-environment.sh
52 Chapter 3. Contents

Beaker User Guide, Release dev
# ---- do the actual testing ----result=PASS 1startup_test /usr/bin/evolutionreport_result $TEST $result 2
Normally it’s a bad idea to start with a PASS and try to detect a FAIL, since an unexpected error that prevents furthersetting of the value will lead to a false PASS rather than a false FAIL. Unfortunately in this case the startup_testfunction requires it.
report_result $TEST $result
We report the result, using the special result shell variable set by startup_test
3.5.5 Checklist discussed
Quality of code
Check for the following:
• Commenting: Test code is commented and complex routines sufficiently documented.
• PURPOSE file: Test code directory contains a plain text file called PURPOSE which explains what the testaddresses along with any other information useful for troubleshooting or understanding it better.
• Language-Review: Optional, but preferred: review by someone with language-of-implementation knowledge.
• Functional-Review: Optional, but preferred: functionality peer-reviewed (i.e. by someone else) with knowledgeof the given domain.
Quality of logs
Check the following attributes to ensure the quality of logs:
• Detail of logging
– Test logs should be verbose logging activity for both successful and unsuccessful operations. At a mini-mum these conditions should be recorded:
* Name of Test (or subtest; something unique)
* Expected Result
* Actual Result
* Whether items 2 and 3 constitute a PASS or a FAIL.
– This should help with questions such as:
* How many tests ran?
* What went wrong on FAILed cases?
* How many PASSes/FAILs were there?
• And, associating the Name+Result with prior runs:
– How well are we doing?
3.5. Tests 53
Beaker User Guide, Release dev
Correctness
Correctness has following parameters:
• True PASS and true FAIL results
– The test runs and generates true PASS and true FAIL results as appropriate. It is permissible for a testto FAIL even if the expected result is PASS if the software under test has a known defect that has beenreported. The applicable bug number should be referenced in the error message so that it is easy to researchthe failure.
• Watch for bogus success values
– The test verifies PASS and FAIL results (versus returning the success or failure from a particular shellcommand... many shell commands return success because they successfully ran, not that they returnedexpected data. This usually requires user verification)
• Security review
– A cursory review of the code should be performed to make sure it does not contain obviously maliciousor suspicious routines which appear more focused on damaging or casing the testing infrastructure versusperforming a valid test.
Packaging
Check the following attributes to ensure the correctness of Packaging:
• Makefile
– make package works correctly, generating an RPM with the expected payload. The RPM should suc-cessfully install correctly without any errors or dependency problems.
– make clean should clean up all generated files that will not be stored in source control
– All unneeded comments and unused variable should be removed from the Makefile.The Makefile tem-plate contains lots of FIXME comments indicating what to put where. These comments should be removedfrom the final Makefile
– Metadata section of Makefile should have these fields filled properly:
* Releases (only few tests can correctly run on everything from RHEL-2.1 to F8)
* RunFor (some tests stresses a lot of RHEL components, so they could be all here)
* Bug (lot of tests tests specific bug number, it is not enough to have it in test name)
– Permissions: File permissions should be set appropriately on built packages and verified by run-ningrpm -qplv [package name]. For example:
File permissions should be set appropriately on built packages and verified by running rpm -qplv [package name]. For example:
* runtest.sh should be executable by all users
* any other executables should be executable by all users
* PURPOSE and generated testinfo.desc should be 644
– Correct namespace For Correct namespace, double check the following:
* Confirm that the test is included in the correct namespace and has followed the proper naming con-ventions. Refer to the [TOPLEVEL_NAMESPACE] to make sure that the underlying package beingtested is reporting results in the correct namespace.
54 Chapter 3. Contents

Beaker User Guide, Release dev
* The Makefile variables and test names should also correspond to the correct path in source control.For example:
[grover@dhcp83-5 smoke-high-load]# pwd/home/grover/rhts/tests/bind/smoke-high-load
Here are the applicable variables from the Makefile:
# The toplevel namespace within which the test lives.TOPLEVEL_NAMESPACE=CoreOS
# The name of the package under test:PACKAGE_NAME=bind
# The path of the test below the package:RELATIVE_PATH=smoke-high-load
3.5. Tests 55