Embed Size (px)
Citation preview
ESSENTIALS OF GENETICS
LABORATORY MANUAL
DEPARTEMENT OF BIOLOGY
VIRTUAL UNIVERSITY OF
PAKISTAN
BIO 301

Contents
index Name of experiment page
1 Sources and Recovery of DNA 3
2 Methods of DNA extraction and
purification
6
3 Methods of RNA purification from blood 22
4 Quantification of Nucleic acids: 26
5 Affinity purification of total RNA 30
6 Chromosome staining, banding of
chromosomes (C, Q, R, T)
34
7 PCR and its types 39
8 Southern blotting 47
9 Northern blotting 50
10 Western blotting 52
11 Genetics problems 54
Practical 1:
Sources and Recovery of DNA
Sources of DNA Purified DNA is required for a variety of molecular biology applications. DNA can be
purified from any living organism and its living parts
Origin of Samples:
1. Human tissues i.e histological samples, prenatal samples, postmortem harvesting.
2. Blood, (EDTA).
3. Hair, (follicle part of the hair to be specific.
4. Rodent tissues, as rats are the most common lab mammals used in labs.
5. Leaf.
6. Bacteria, Bacterial cultures.
7. Yeast, yeast cultures.
8. Fungi.
9. Insect, i.e Drosophila melanogaster
10. Stool.
11. Body fluids, i.e semen.
12. Spores.
13. Soil.
14. Clinical samples (e.g. biopsy samples, fine needle aspirates).
15. Forensic samples (e.g. dried blood spots, buccal swabs finger prints).
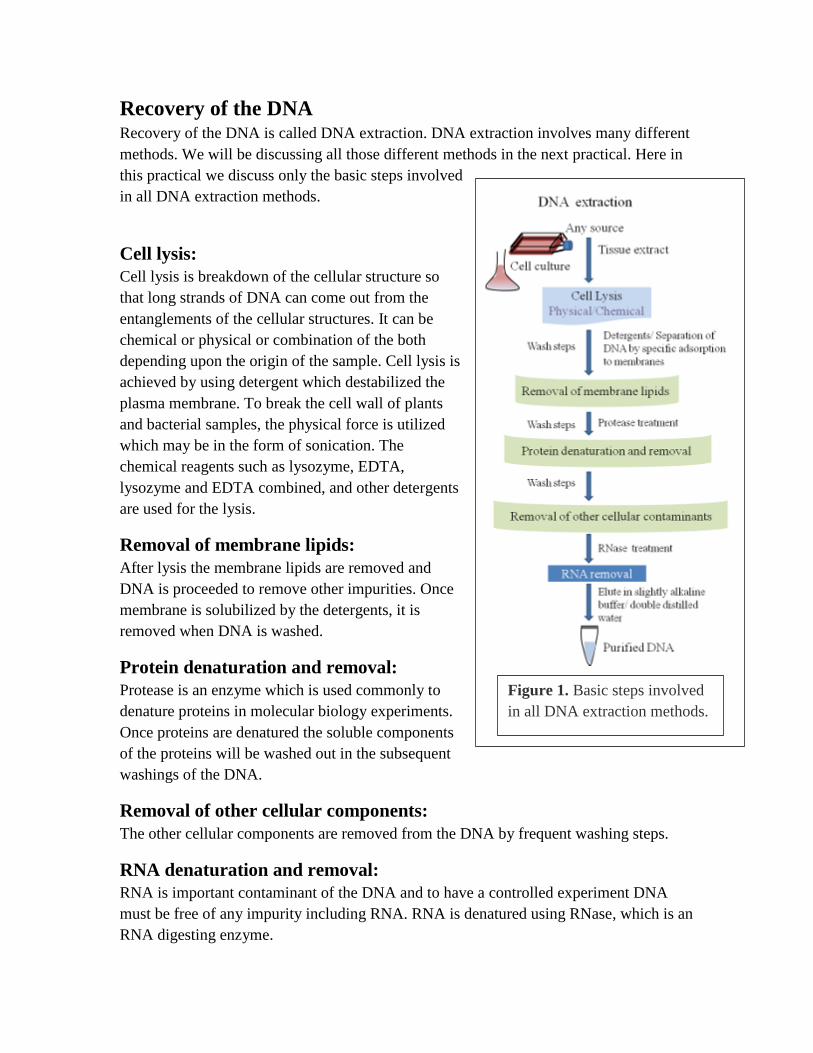
Recovery of the DNA Recovery of the DNA is called DNA extraction. DNA extraction involves many different
methods. We will be discussing all those different methods in the next practical. Here in
this practical we discuss only the basic steps involved
in all DNA extraction methods.
Cell lysis:
Cell lysis is breakdown of the cellular structure so
that long strands of DNA can come out from the
entanglements of the cellular structures. It can be
chemical or physical or combination of the both
depending upon the origin of the sample. Cell lysis is
achieved by using detergent which destabilized the
plasma membrane. To break the cell wall of plants
and bacterial samples, the physical force is utilized
which may be in the form of sonication. The
chemical reagents such as lysozyme, EDTA,
lysozyme and EDTA combined, and other detergents
are used for the lysis.
Removal of membrane lipids:
After lysis the membrane lipids are removed and
DNA is proceeded to remove other impurities. Once
membrane is solubilized by the detergents, it is
removed when DNA is washed.
Protein denaturation and removal:
Protease is an enzyme which is used commonly to
denature proteins in molecular biology experiments.
Once proteins are denatured the soluble components
of the proteins will be washed out in the subsequent
washings of the DNA.
Removal of other cellular components:
The other cellular components are removed from the DNA by frequent washing steps.
RNA denaturation and removal:
RNA is important contaminant of the DNA and to have a controlled experiment DNA
must be free of any impurity including RNA. RNA is denatured using RNase, which is an
RNA digesting enzyme.
Figure 1. Basic steps involved
in all DNA extraction methods.

DNA elution and storage:
DNA is eluted in an alkaline buffer solution or in double distilled water. Purified DNA is
stored at -20°C preferably.
Practical: 2
Methods of DNA extraction and purification
The basic criteria a method of DNA isolation from any sample type should meet include
1. Efficient extraction
2. Sufficient amount of DNA extracted for downstream processes
3. Removal of contaminants
4. Quality and purity of DNA
Based on these criteria following different methods are used for the extraction of the
DNA.
Organic method
INTRODUCTION
Of all the methods of DNA extraction, the organic method (also known as the
phenol- chloroform method has been the longest in use. This is because it is the most
effective at extracting the large amounts of high molecular weight DNA that were
required for the RFLPs that created the first DNA fingerprints in the 1980s. This protocol
describes the standard method for nucleic acid purification by extraction first with
phenol: chloroform and then with chloroform to remove any remaining phenol.
PRINCIPLE:
Organic extractions or Phenol–chloroform extraction is a liquid-liquid extraction
technique in biochemistry and molecular biology for purifying nucleic acids and
eliminating proteins. In brief, aqueous samples are mixed with equal volumes of a
phenol: chloroform mixture. After mixing, the mixture is centrifuged and two distinct
phases are formed, because the phenol: chloroform mixture is immiscible with water. The
aqueous phase is on top because it is less dense than the organic phase (phenol:
chloroform). The proteins will partition into the lower organic phase while the nucleic
acids (as well as other contaminants such as salts, sugars, etc.) remain in the upper
aqueous phase. The upper aqueous phase is pipetted off and care is taken to avoid
pipetting any of the organic phase or material at the interface. This procedure is often
performed multiple times to increase the purity of the DNA.
MATERIALS
Reagents
Chloroform
Ethanol
Ether (optional)
Nucleic acid solution to be purified
Phenol: Chloroform (1:1)
Tris EDTA (pH 7.8) (optional)
3 M sodium acetate pH 5.2 or 5 M ammonium acetate
100% ethanol
Equipment
Automatic pipette fitted with a disposable tip
Pipettes, large-bore (optional)
Polypropylene tube
Rotating wheel (optional)
METHOD
1. Transfer the nucleic acid sample to a polypropylene tube and add an equal
volume of phenol: chloroform.
(After mixing and centrifugation this will result in to two phases, lower organic phase
and upper aqueous phase. The DNA is in the aqueous phase and will be extracted
from it later. The nucleic acid will tend to partition into the organic phase if the
phenol has not been adequately equilibrated to a pH of 7.8-8.0.)
2. Mix the contents of the tube until an emulsion forms.
3. Centrifuge the mixture at 80% of the maximum speed that the tubes can bear
for 1 minute at room temperature. If the organic and aqueous phases are not
well separated, centrifuge again for a longer time.
4. Use a pipette to transfer the aqueous phase to a fresh tube. For small volumes
(<200μL), use an automatic pipettor fitted with a disposable tip. Discard the
interface and organic phase.
5. Repeat Steps 1-4 until no protein is visible at the interface of the organic and
aqueous phases.
6. Add an equal volume of chloroform and repeat Steps 2-4.
7. To recover DNA measure the volume of the aqueous phase.
8. Add 1/10 volume of sodium acetate, pH 5.2, (final concentration of 0.3 M.
9. Mix well and add 2 to 2.5 volumes of cold 100% ethanol (calculated after salt
addition).
10. Mix well.
11. Place on ice or at -20 degrees C for >20 minutes.
12. Spin a maximum speed in a microfuge 10-15 min.
13. Carefully decant supernatant.
14. Add 1 ml 70% ethanol. Mix. Spin briefly. Carefully decant supernatant.
15. Air dry or briefly vacuum dry pellet.
16. Resuspended pellet in the appropriate volume of Tris EDTA buffer or double
distilled water.
17. Proceed with quantification and intended use after storage.
ADVANTAGES AND DISADVANTAGES:
Its other main advantage is the fact that it can be used on a wide range of samples.
However, this method does also have some disadvantages including being very labor
intensive, being easily contaminated and exposing the scientist carrying out the
extraction to dangerous chemicals.
READINGS:
http://www.fastbleep.com/biology-notes/41/122/1216
http://cshprotocols.cshlp.org/content/2006/1/pdb.prot4455
http://www.med.upenn.edu/lamitinalab/documents/EthanolPrecipitationofD
NA.
http://bitesizebio.com/384/the-basics-how-phenol-extraction-works/

http://physiology.med.cornell.edu/faculty/mason/lab/zumbo/files/PHENOL-
CHLOROFORM.pdf
Silica Adsorption Method:
INTRODUCTION:
Silica DNA extraction methods have become the staple for many labs as it is quick
reliable and produces very high quality DNA.
PRINCIPLE:
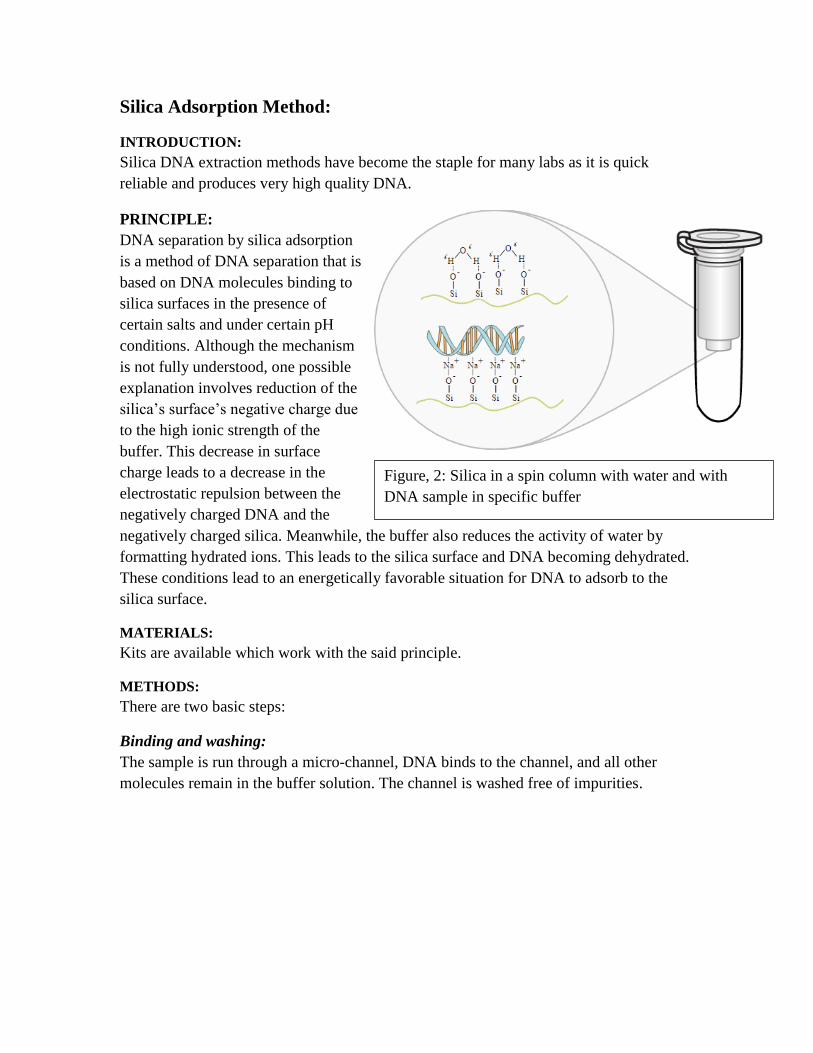
DNA separation by silica adsorption
is a method of DNA separation that is
based on DNA molecules binding to
silica surfaces in the presence of
certain salts and under certain pH
conditions. Although the mechanism
is not fully understood, one possible
explanation involves reduction of the
silica’s surface’s negative charge due
to the high ionic strength of the
buffer. This decrease in surface
charge leads to a decrease in the
electrostatic repulsion between the
negatively charged DNA and the
negatively charged silica. Meanwhile, the buffer also reduces the activity of water by
formatting hydrated ions. This leads to the silica surface and DNA becoming dehydrated.
These conditions lead to an energetically favorable situation for DNA to adsorb to the
silica surface.
MATERIALS:
Kits are available which work with the said principle.
METHODS:
There are two basic steps:
Binding and washing:
The sample is run through a micro-channel, DNA binds to the channel, and all other
molecules remain in the buffer solution. The channel is washed free of impurities.
Figure, 2: Silica in a spin column with water and with
DNA sample in specific buffer
Elution:
The silica is then dried and DNA is eluted using water or a low salt buffer. An elution
buffer removes the DNA from channel walls, and the DNA is collected at the end of the
channel.
ADVANTAGES & DISADVANTGES:
It is a quick, reliable method which produces high quality DNA. It is an expensive
method and if chewing gum is the source of DNA, the process can be interfered by
chewing gum.
READINGS: http://www.ncbi.nlm.nih.gov/pubmed/9986822
http://bitesizebio.com/13516/how-dna-extraction-rna-miniprep-kits-work/
http://herpesvirus.tripod.com/research/protoDNA.htm
Non-organic method:
INTRODUCTION:
In this method no organic solvents are used that’s why it is termed as non-organic
method.
PRINCIPLE:
Addition of Proteinase K to nucleic acid preparations rapidly inactivates nucleases that
might otherwise degrade the DNA or RNA during purification.
MATERIALS
Solutions/reagents:
Digestion Buffer (10mM NaCl, 10mM TRIS (pH 8.0), 10mM EDTA (pH 8.0),
0.5% SDS)
Proteinase K (20mg/ml)
Sodium Acetate pH 5.2 (3M)
Ice-cold 98% ethanol
Ice-cold 70% ethanol
1X TE
Water
Tissue
Equipment:
Incubator
Centrifuge
Sterile 1.5-ml micro-centrifuge tubes
METHODS:
Tissue Digestion
Measure out Digestion Buffer into sterile 1.5-ml microcentrifuge tube.
Add 0.005 volumes Proteinase K.
That is, for each ml of Digestion Buffer, add 5 µl of ProteinaseK.
Homogenize tissue in solution.
Incubate at 55°C for 1 - 12 hours (overnight).
Vortex the mixture for a few seconds.
Centrifuge at maximum speed for 2 minutes at 4°C and aspirate out the top layer.
Transfer top aqueous layer into sterile 1.5-ml microcentrifuge tube.
Discard bottom layer.
Precipitation of Protein and Cell Debris
Add 0.1 volume Sodium Acetate pH 5.2 to sterile 1.5-ml microcentrifuge tube.
Close the tube tightly and gently mix the contents by inverting the tube.
Incubate at -20°C for 15 minutes.
Centrifuge at maximum speed for 20 minutes at 4°C and aspirate out the top
layer.
Transfer top aqueous layer into sterile 1.5-ml microcentrifuge tube.
Discard bottom layer.
Be careful not to transfer any of the white solid (cell debris and SDS) into the
fresh tube.
Precipitation of Nucleic Acids
Add 2 volumes ice-cold 98% ethanol to sterile 1.5-ml microcentrifuge tube.
Close the tube tightly and gently mix the contents by inverting the tube.
Incubate at -20°C for 15 minutes.
Centrifuge at maximum speed for 20 minutes at 4°C, gently aspirate out the
supernatant and discard it.
Add 1 ml of ice-cold 98% ethanol.
Vortex the mixture for a few seconds.
Centrifuge at maximum speed for 5 minutes at 4°C, gently aspirate out the
supernatant and discard it.
Add 1 ml of ice-cold 70% ethanol.
Vortex the mixture for a few seconds.
Centrifuge at maximum speed for 5 minutes at 4°C, gently aspirate out the
supernatant and discard it.
(Optional) Add 1 ml of ice-cold 70% ethanol.
Vortex the mixture for a few seconds.
Centrifuge at maximum speed for 5 minutes at 4°C, gently aspirate out the
supernatant and discard it.
Dry the pellet in air.
Option 1: Add 10 µl of 1X TE (or) Option 2: Add 10 µl of water.
Resuspend the pellet by vortexing/by shaking vigorously.
Ensure to dry the pelleted DNA completely before attempting to resuspend.
ADVANTAGES & DISADVANTGES:
It is highly suited to this application since the enzyme is active in the presence of
chemicals that denature proteins, such as SDS and urea, chelating agents such as EDTA,
sulfhydryl reagents, as well as trypsin or chymotrypsin inhibitors. Proteinase K is used

for the destruction of proteins in cell lysates (tissue, cell culture cells) and for the release
of nucleic acids, since it very effectively inactivates DNases and RNases.
READINGS:
http://www.ncbi.nlm.nih.gov/pmc/articles/PMC3792701/
Chelex™ method
INTRODUCTION:
Chelex is one of the oldest methods of DNA extraction and utilizes a chelating resin.
PRINCIPLE
Chelex resin is often used for DNA extraction in preparation for PCR. The Chelex™
protects the sample from DNAases that might remain active after the boiling and could
subsequently destroy the DNA. DNAases are enzymes, which naturally occur in all body
tissues; they cut DNA into small fragments, rendering it unsuitable for PCR. Magnesium
ions are essential cofactors for DNases. Chelex™ resin binds with cations including
Mg2+. By binding with magnesium ions, the Chelex™ resin renders DNases inoperable,
thus protecting DNA from their action.
MATARIALS
Chelex 300 µL
Heating Block
ddH2O
Sterile Forceps
Vortex
Centrifuge tubes
METHODS
1. Remove premade tubes filled with 300µL 10% Chelex from refrigerator. You will
need for each sample, plus 1 extra for a control. Handle the container with gloves and
shake out the number you need into your gloved hand. Do not put extra tubes back into
jar.
2. Label each Chelex tube to correspond to your sample listed on your Chelex worksheet.
Label the tubes on the cap. Put as much information as you can manage, but keep labels
legible. Adding initials and a date is always a good idea. Avoid labeling on the side of
tube as this writing can be washed off during the incubation stage.
3. Turn on heating block. Set to 95°C. Fill holes with ddH2O water.
4. Dip forceps into ethanol, then wave forceps through flame of an alcohol burner to
ignite. When you are certain that the flame on the forceps has extinguished, repeat 2
times.
5. Using the sterile forceps, remove a small piece of tissue from your sample; uncap the
tube of Chelex, place sample in the appropriately labeled tube and close lid. The piece of
tissue should be big enough to be visible, but not so big as to be easily visible. Imagine
cutting a 0.2mm section of a standard staple. This is plenty big. Too much tissue may
inhibit your reactions. The piece of tissue should be about as big as a period.
6. Repeat (step 5) with each sample in a new Chelex tube, being sure to sterilize forceps 3
times between samples (step 4). When finished, make a negative Chelex control by
dipping your sterilized forceps into a tube of Chelex slurry. (It may be necessary to wipe
excess tissue from forceps with a Kim wipe prior to flame sterilization)
7. When finished with all tubes, vortex samples in Chelex slurry for 10-15 seconds. Be
sure lids are snapped on tightly before beginning
8. Spin samples briefly (10-15 sec) at high speed in a microcentrifuge. This step is to
ensure that the sample is inside the slurry of Chelex.
9. Incubate samples for 20 minutes at 95°C. The block temperature may drop slightly
when doing this step. This drop is normal. Check tubes while incubating to ensure that
lids have not popped off.
10. Vortex samples again for 10-15 seconds (Be careful as steam may pop lid off of
centrifuge tube. Hold lids down).
11. Spin tubes again at high speed in microcentrifuge to ensure that all contents are in the
bottom of the microcentrifuge tube.
12. Samples are ready to use (or not, see below). ONLY USE SUPERNATE FOR PCR
REACTIONS. CHELEX BEAD WILL INACTIVATE TAQ!
ADVANTAGES & DISADVANTAGES
This is an effective method of DNA extraction. Its advantages are that it is cheap, quick,
has a low contamination rate and does not use any dangerous chemicals. However, it’s
disadvantages include being inefficient for use on blood samples, producing low purity
DNA samples and being unsuitable for restriction fragment length polymorphism DNA
profiling.
READINGS
https://www.ncbi.nlm.nih.gov/pubmed/1867860
https://www.eeb.ucla.edu/Faculty/Barber/Web%20Protocols/Protocol2.pdf
http://www.fastbleep.com/biology-notes/41/122/1216
Fast Technology Analysis Method
INTRODUCTION:
The FTA is an acronym for fast technology analysis. The FTA paper extraction method
was initially used as a method of DNA collection in forensic science but due to the ease
of the process has become a popular method of extraction.
Its Basic methodology is that
1. Sample source (usually blood) is dropped onto the paper and as it dries the cells are
lysed and the DNA becomes trapped within the matrix of the paper.
2. The paper is punched to create discs, which are washed in a test tube.
3. The discs are then washed with a solvent and added to the PCR mix
PRINCIPLE
Biological samples, such as blood and saliva, adhere to the paper through the mechanism
of entanglement, while the mixture of chemicals lyses cells and denatures proteins.
Because nucleases are inactivated, the DNA is essentially stable when the sample is
properly dried and stored. Nucleic acid damage from nucleases, oxidation, ultraviolet
light (UV) damage, microbes, and fungus is reduced when samples are stored on the FTA
card
MATARIALS
FTA Purification Reagent
TE Buffer (10 mM Tris-HCL, 0.1 mM EDTA, pH 8.0)
Solution 1: 0.1N NaOH, 0.3mM EDTA, pH 13.0
Solution 2: 0.1M Tris-HCL, pH 7.0
METHODS
Procedure for wash protocol
1. Take a 6 mm punch using a regular single-hole paper punch from a dry spot and place
in a 1.5 mL microtube. To ensure that there is no cross-contamination, rinse the
cutting end of the punch with ethanol and let it dry between samples.
2. Add 1000 μl of FTA Purification Reagent to microtube and flash vortex 5 times or
manually to mix.
3. Incubate for 5 minutes at room temperature (tube may be given moderate manual
mixing or vortex if desired).
4. Remove and discard all spent FTA Purification Reagent using a pipette.
5. Repeat steps 2-4 twice, for a total of three (3) washes with FTA Purification Reagent.
6. Add 1000 μl of TE Buffer.
7. Incubate for 5 minutes at room temperature.
8. Remove and discard all spent TE Buffer with a pipette.
9. Repeat steps 6-8 twice for a total of three (3) washes with TE Buffer (punch should
look white or pale with most of the blood removed).
Procedure for pH treatment
Time scheme: High pH for 5 minutes, neutralized for 10 minutes
1. Add 140 μl of Solution 1 to a 6 mm punch washed as above.
2. Incubate 5 minutes at 65oC (deviation from FTA company protocol which incubates
at room temperature).
3. Add 260 μl of Solution 2 and flash vortex 5 times to mix.
4. Incubate 10 minutes at room temperature.
5. Flash vortex 10 times.
6. Remove punch and squeeze to recover maximum volume of elute (can use a clean
pipette tip to remove punch).
Elute contains gDNA in TE (66mM Tris-HCL, 0.1nm EDTA). Use 0.5μl for a 25μl PCR
reaction.
ADVANTAGES & DISADVANTAGES
A marketable advantage of the FTA® technology is that samples spotted on treated cards
may be stored at room temperature. The chemicals on the FTA cards enhance the
preservation of the DNA and inactivate many dangerous pathogens that may be found in
liquid blood samples or dried biological stains. Because the cards are small in size
(approximately 3.5” x 5”), they are easily packaged, shipped, and stored for data basing
.its other advantages include being easily repeated, easily automated and the added bonus
that there is no need to quantify DNA extracted by FTA before PCR. However, due to the
smaller nature of the “discs” of DNA obtained by this method, static electricity often
causes them to jump out of their set location, leading to contamination.
READINGS
http://www.fastbleep.com/biology-notes/41/122/1216
https://www.promega.com/~/media/files/resources/application%20notes/genetic%20ident
ity/an102%20extraction%20and%20isolation%20of%20dna%20from%20blood%20cards
%20and%20buccal%20swabs%20in%20a%2096%20well%20format.pdf?la=en
https://www.gelifesciences.com/gehcls_images/GELS/Related%20Content/Files/139281
8611307/litdoc28982222_20140311044843.pdf

Differential method
INTRODUCTION:
Differential extraction methods are used to separate spermatozoa from other cell types.
Spermatozoa are more difficult to lyse than other cells and conditions can be set so that
all cells except spermatozoa are lysed. The supernatant containing the DNA from these
cells is removed from the sperm cells, which can then be lysed separately.
PRINCIPLE
Differential extraction (also known as differential lysis) refers to the process by which the
DNA from two different types of cells can be extracted without mixing their contents.
The most common application of this method is the extraction of DNA from vaginal
epithelial cells and sperm cells from sexual assault cases in order to determine the DNA
profiles of the victim and the perpetrator. Its success is based on the fact that sperm cells
have protein disulfide bonds in their outer membrane which makes them more resilient to
extraction than epithelial cells.
MATARIALS & METHODS
The differential extraction steps are:
Optional wash step
o Some laboratories have incorporated an optional wash step at the
beginning of the procedure to remove cellular debris and contaminants.
The sample is gently washed in a buffer and detergent and the supernatant
is removed (wash fraction). This can be done under refrigerated conditions
or at room temperature.
Non-sperm cell lysis
o An extraction buffer containing a buffer, detergent, and Proteinase K is
added to the sample and incubated. This step lyses all cells except
spermatozoa. The supernatant containing the DNA from the lysed cells
(fraction 1) is removed after pelleting the spermatozoa. The sperm pellet is
often washed numerous times with a buffer to remove excess DNA from
this lysis step. If this wash is not done, it is not unusual to see a low level
of fraction 1 DNA in fraction 2. If any of the sperm cells are weak or
otherwise compromised, these may lyse in the first step, leaving a low
level of fraction 2 DNA in fraction 1.
Sperm cell lysis
o The pelleted sperm cells are lysed under more stringent conditions, using a
buffer, detergent, DTT, and a higher concentration of Proteinase K
(fraction 2), and are subsequently incubated.
o Both fractions (including the wash fraction, if appropriate) are extracted
separately with the phenol/chloroform/isoamyl alcohol combination and
purified.
ADVANTAGES & DISADVANTAGES
The success of differential extraction depends on the sperm head resisting the processes
that readily lyse epithelial and white blood cells. Separating the sources of DNA from
different contributors to a stain, namely a male donor and female victim, lessens the
difficulty associated with mixture interpretation during data analysis, source attribution,
and/or statistical calculations. The value of differential extraction is demonstrated by the
requirement in the Quality Assurance Standards (QAS) for inclusion in the laboratory’s
recorded procedures. Details of the method are provided in the laboratory manual.
READINGS
http://www.nature.com/app_notes/nmeth/2012/120805/pdf/an8507.pdf
http://www.biotype.de/fileadmin/user/Dokumente/20120821_Biotype_Differential_Lysis_SOP.p
df
http://projects.nfstc.org/pdi/Subject03/pdi_s03_m02_03.htm
Practical: 3
Methods of RNA purification from blood
INTRODUCTION:
RNA extraction is the purification of RNA from biological samples. This procedure is
complicated by the ubiquitous presence of ribonuclease enzymes in cells and tissues,
which can rapidly degrade RNA. Several methods are used in molecular biology to
isolate RNA from samples; the most common of these is TRIzol extraction.
Note:
This protocol assumes the investigator is beginning this with one full Yellow-Top (type
A) BD Vacutainer tube of human blood (equals roughly 8 ml) to yield approximately 30
µg of RNA.
Additional Note:
RNA is very easily degraded by ever-present RNAses. Therefore, all of the tubes and
solutions in this protocol must be RNAse-free (autoclaving does NOT inactivate
RNAses). One cannot overemphasize the need for a clean work environment when
working with RNA.
PRINCIPLE:
Guanidinium isothiocyanate (powerful protein denaturant)
Inactivation of RNases
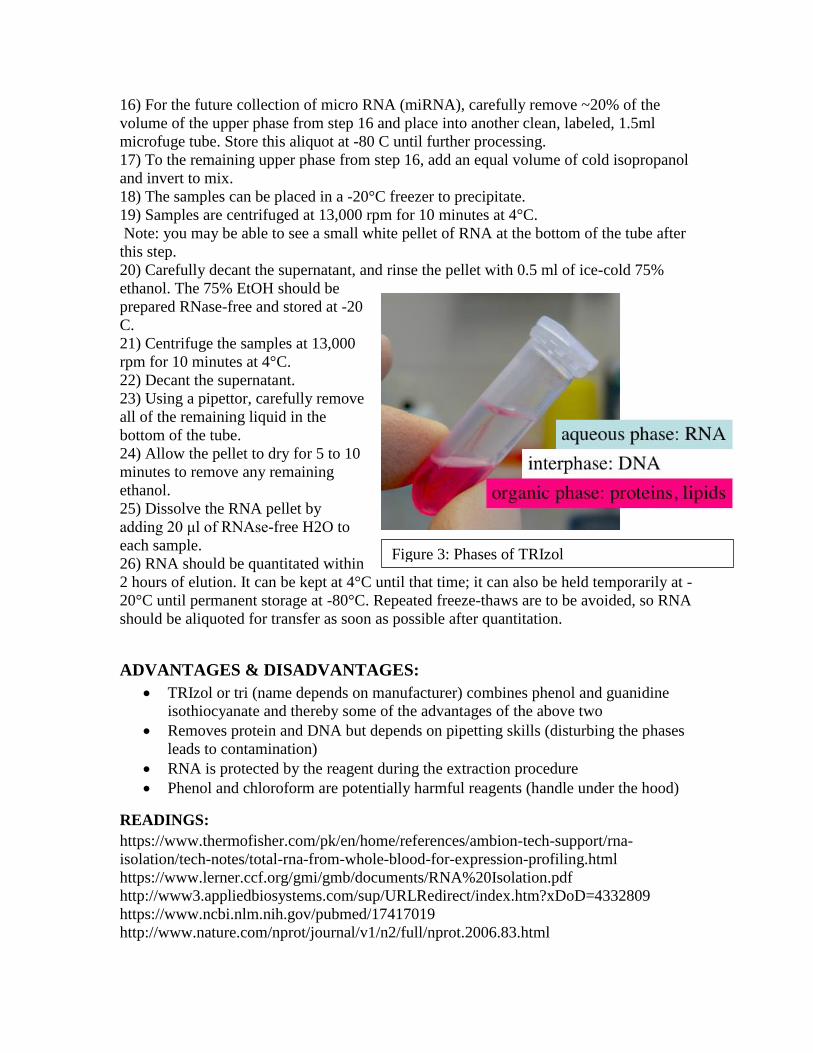
Acidic phenol/chloroform
Partitioning of RNA into aqueous supernatant for separation
Note: low pH is crucial since at neutral pH DNA not RNA partitions into the aqueous
phase.
MATERIALS:
10x RBC Lysis Buffer
10.0 g KHCO3
2.0 ml 0.5 M EDTA
89.9 g NH4Cl
Dissolve the above in approximately 800 ml ddH2O and adjust pH to 7.3. QS To 1 liter
and mix thoroughly. This solution is stable for 6 months at 2 – 8° C in a tightly closed
bottle.
1x RBC Lysis Buffer
Simply dilute the 10x stock solution 1:10 with ddH2O. This is Stable for 1 week at room
temperature.
TRIzol Reagent OR RNA STAT-60 Reagent
TRIzol Reagent Invitrogen Life Technologies: Cat No. 15596018
or
RNA STAT-60 Reagent Tel-Test: Cat No. CS-111
Other Reagents Needed
Phosphate Buffered Saline (PBS)
Isopropanol (2-propanol)
Ethanol
RNAse-free water
RNAse-Away (a cleaning solution that neutralizes RNAses on bench tops,
pipettor, centrifuges, and other equipment.
METHODS:
1) Transfer contents of tube into a 50 ml polypropylene conical centrifuge tube.
2) Bring volume to 45 ml with RBC Lysis Buffer (recipe follows protocol).
3) Let stand at room temperature for 10 minutes.
4) Pellet cells at 600 x g (approx. 1,400 rpm) for 10 minutes in a room temp centrifuge
(program#3).
5) Carefully decant supernatant.
6) Gently resuspend the pellet in 1 ml of RBC Lysis Buffer and transfer to a 1.5 ml
microcentrifuge tube. – Let stand for 5 minutes.
7) Pellet cells for 2 minutes by centrifuging in a microfuge at room temperature at 3000
rpm.
8) Carefully aspirate the supernatant.
9) Resuspend the pellet in 1 ml of sterile DPBS.
10) Pellet cells as in step 7.
11) Carefully aspirate the supernatant.
12) Add 1200 μl of TRIzol solution to each tube and resuspend the cells. Note: for a full
8 ml blood tube, the 1200 µl TRIzol solution can be split into 2, 600 μl aliquots and
frozen at -80 C until further processing.
13) Add 0.2 ml of Chloroform (CHCl3) and vortex each tube for 15 seconds, ONE AT A
TIME.
14) Centrifuge the samples at 13,000 rpm for 10 minutes at 4°C.
15) Remove the upper phase and transfer to a clean microcentrifuge tube. Be careful not
to remove any of the white interface when collecting the upper phase of the extraction
16) For the future collection of micro RNA (miRNA), carefully remove ~20% of the
volume of the upper phase from step 16 and place into another clean, labeled, 1.5ml
microfuge tube. Store this aliquot at -80 C until further processing.
17) To the remaining upper phase from step 16, add an equal volume of cold isopropanol
and invert to mix.
18) The samples can be placed in a -20°C freezer to precipitate.
19) Samples are centrifuged at 13,000 rpm for 10 minutes at 4°C.
Note: you may be able to see a small white pellet of RNA at the bottom of the tube after
this step.
20) Carefully decant the supernatant, and rinse the pellet with 0.5 ml of ice-cold 75%
ethanol. The 75% EtOH should be
prepared RNase-free and stored at -20
C.
21) Centrifuge the samples at 13,000
rpm for 10 minutes at 4°C.
22) Decant the supernatant.
23) Using a pipettor, carefully remove
all of the remaining liquid in the
bottom of the tube.
24) Allow the pellet to dry for 5 to 10
minutes to remove any remaining
ethanol.
25) Dissolve the RNA pellet by
adding 20 μl of RNAse-free H2O to
each sample.
26) RNA should be quantitated within
2 hours of elution. It can be kept at 4°C until that time; it can also be held temporarily at -
20°C until permanent storage at -80°C. Repeated freeze-thaws are to be avoided, so RNA
should be aliquoted for transfer as soon as possible after quantitation.
ADVANTAGES & DISADVANTAGES:
TRIzol or tri (name depends on manufacturer) combines phenol and guanidine
isothiocyanate and thereby some of the advantages of the above two
Removes protein and DNA but depends on pipetting skills (disturbing the phases
leads to contamination)
RNA is protected by the reagent during the extraction procedure
Phenol and chloroform are potentially harmful reagents (handle under the hood)
READINGS:
https://www.thermofisher.com/pk/en/home/references/ambion-tech-support/rna-
isolation/tech-notes/total-rna-from-whole-blood-for-expression-profiling.html
https://www.lerner.ccf.org/gmi/gmb/documents/RNA%20Isolation.pdf
http://www3.appliedbiosystems.com/sup/URLRedirect/index.htm?xDoD=4332809
https://www.ncbi.nlm.nih.gov/pubmed/17417019
http://www.nature.com/nprot/journal/v1/n2/full/nprot.2006.83.html
Figure 3: Phases of TRIzol
https://www.ncbi.nlm.nih.gov/pubmed/16028681
http://openwetware.org/wiki/RNA_extraction_using_trizol/tri
http://openwetware.org/wiki/RNA_extraction#TRIzol_or_tri_followed_by_chloroform_a
nd_precipitation
Practical: 4
Quantification of Nucleic acids: Quantitation of nucleic acids is commonly performed to determine the average
concentrations of DNA or RNA present in a mixture, as well as their purity. Reactions
that use nucleic acids often require particular amounts and purity for optimum
performance. There are several methods to establish the concentration of a solution of
nucleic acids, including spectrophotometric quantification and UV fluorescence in
presence of a DNA dye.
Spectrophotometry
INTRODUCTION:
Nucleic acids absorb ultraviolet light in a specific pattern. In a spectrophotometer, a
sample is exposed to ultraviolet light at 260 nm, and a photo-detector measures the light
that passes through the sample. The more light absorbed by the sample, the higher the
nucleic acid concentration in the sample.
PRINCIPLE:
Using the Beer-Lambert Law it is possible to relate the amount of light absorbed to the
concentration of the absorbing molecule. At a wavelength of 260 nm, the
average extinction coefficient for double-stranded DNA is 0.020 (μg/ml) −1 cm−1, for
single-stranded DNA it is 0.027 (μg/ml) −1 cm−1, for single-stranded RNA it is 0.025
(μg/ml) −1 cm−1 and for short single-stranded oligonucleotides it is dependent on the
length and base composition. Thus, an Absorbance (A) of 1 corresponds to a
concentration of 50μg/ml for double-stranded DNA. This method of calculation is valid
for up to an A of at least 2. A more accurate extinction coefficient may be needed for
oligonucleotides; these can be predicted using the nearest-neighbor model.
MATERIALS:
UV/VIS Spectrophotometer
1 mL quartz cuvette
DNA sample(s)
TE Buffer
Disposable 1 mL polyethylene Transfer Pipettes (Berol) [2 per group]
Eppendorf tubes (1.5 mL) [2 per group]
Ruler
Kimwipes
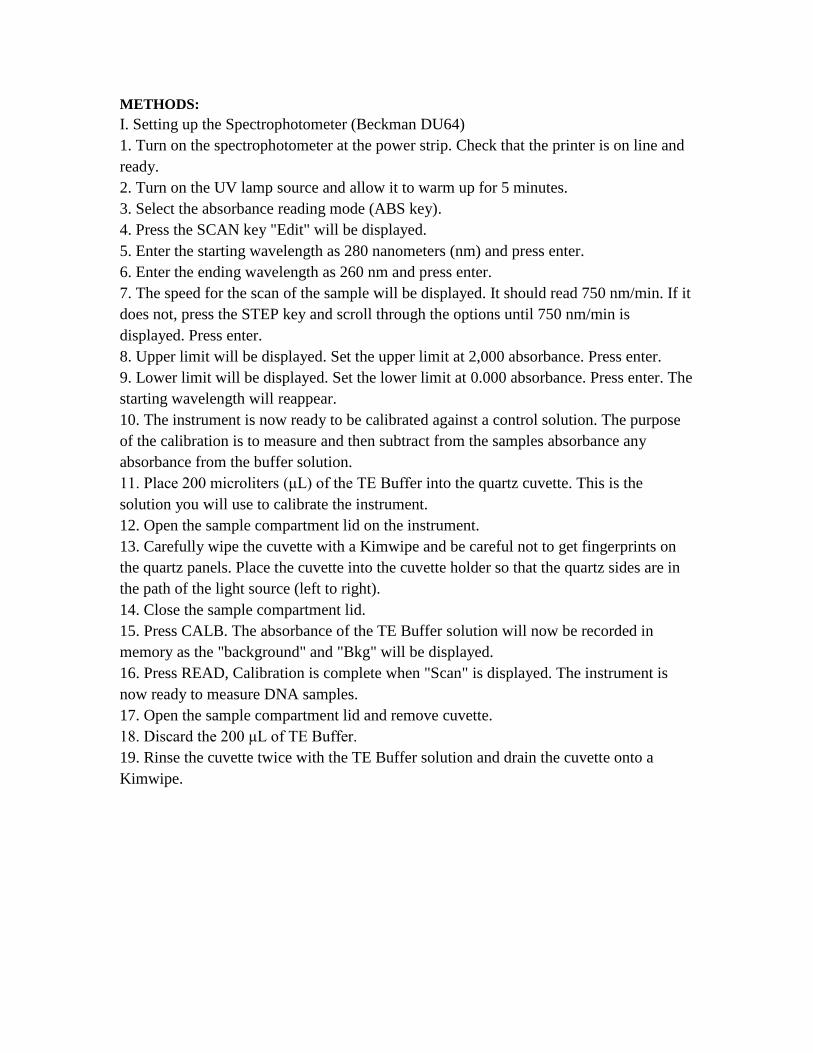
METHODS:
I. Setting up the Spectrophotometer (Beckman DU64)
1. Turn on the spectrophotometer at the power strip. Check that the printer is on line and
ready.
2. Turn on the UV lamp source and allow it to warm up for 5 minutes.
3. Select the absorbance reading mode (ABS key).
4. Press the SCAN key "Edit" will be displayed.
5. Enter the starting wavelength as 280 nanometers (nm) and press enter.
6. Enter the ending wavelength as 260 nm and press enter.
7. The speed for the scan of the sample will be displayed. It should read 750 nm/min. If it
does not, press the STEP key and scroll through the options until 750 nm/min is
displayed. Press enter.
8. Upper limit will be displayed. Set the upper limit at 2,000 absorbance. Press enter.
9. Lower limit will be displayed. Set the lower limit at 0.000 absorbance. Press enter. The
starting wavelength will reappear.
10. The instrument is now ready to be calibrated against a control solution. The purpose
of the calibration is to measure and then subtract from the samples absorbance any
absorbance from the buffer solution.
11. Place 200 microliters (μL) of the TE Buffer into the quartz cuvette. This is the
solution you will use to calibrate the instrument.
12. Open the sample compartment lid on the instrument.
13. Carefully wipe the cuvette with a Kimwipe and be careful not to get fingerprints on
the quartz panels. Place the cuvette into the cuvette holder so that the quartz sides are in
the path of the light source (left to right).
14. Close the sample compartment lid.
15. Press CALB. The absorbance of the TE Buffer solution will now be recorded in
memory as the "background" and "Bkg" will be displayed.
16. Press READ, Calibration is complete when "Scan" is displayed. The instrument is
now ready to measure DNA samples.
17. Open the sample compartment lid and remove cuvette.
18. Discard the 200 μL of TE Buffer.
19. Rinse the cuvette twice with the TE Buffer solution and drain the cuvette onto a
Kimwipe.
28
II. Sample Preparation
20. Place 200 μL of the DNA sample in the cuvette and place the cuvette in the sample holder.
21. Press READ. The absorbance of the sample between 260 and 280 nm will be measured and
plotted as a graph on the printer.
22. Repeat steps 20 and 21 for any other DNA samples that you have been assigned.
ADVANTGES & DISADVATAGES
It is an easier and cost effective method with reliable results if performed adequately. The protein
contamination cannot be reliably assessed with a 260:280ratio; this also means that it contributes
little error to DNA quantity estimation.
READINGS
http://www2.le.ac.uk/departments/emfpu/genetics/explained/quantification
https://www.ncbi.nlm.nih.gov/pubmed/18201813
https://www.ncbi.nlm.nih.gov/pubmed/7702855

29
Agarose Gel Electrophoresis
INTRODUCTION:
Agarose gel electrophoresis is another way to quickly estimate DNA concentration.
PRINCIPLE
The negatively charged DNA backbone migrates toward the anode. Since small DNA fragments
migrate faster, the DNA is separated by size. The percentage of agarose in the gel will determine
what size range of DNA will be resolved with the greatest clarity. Any RNA, nucleotides and
protein in the sample migrate at different rates compared to the DNA so the band(s) containing
the DNA will be distinct.
MATERIALS
To use this method, a horizontal gel electrophoresis tank with an external power supply,
analytical-grade agarose, an appropriate running buffer (e.g., 1X TAE) and an intercalating DNA
dye along with appropriately sized DNA standards are required.
METHODS:
A sample of the isolated DNA is loaded into a well of the agarose gel and then exposed to an
electric field. Concentration and yield can be determined after gel electrophoresis is completed
by comparing the sample DNA intensity to that of a DNA quantitation standard. For example, if
a 2µl sample of undiluted DNA loaded on the gel has the same approximate intensity as the
100ng standard, then the solution concentration is 50ng/µl (100ng divided by 2µl). Standards
used for quantitation should be labeled as such and be the same size as the sample DNA being
analyzed. In order to visualize the DNA in the agarose gel, staining with an intercalating dye
such as ethidium bromide or SYBR® Green is required. Because ethidium bromide is a known
mutagen, precautions need to be taken for its proper use and disposal.
ADVANTGES & DISADVATAGES
Easiest and quick method
Ethidium bromide is a known mutagen; precautions need to be taken for its proper use
and disposal.
READINGS
https://worldwide.promega.com/resources/pubhub/enotes/how-do-i-determine-the-concentration-
yield-and-purity-of-a-dna-sample/
http://www.ncbi.nlm.nih.gov/pubmed/21638536
30
Practical: 5
Affinity purification of total RNA.
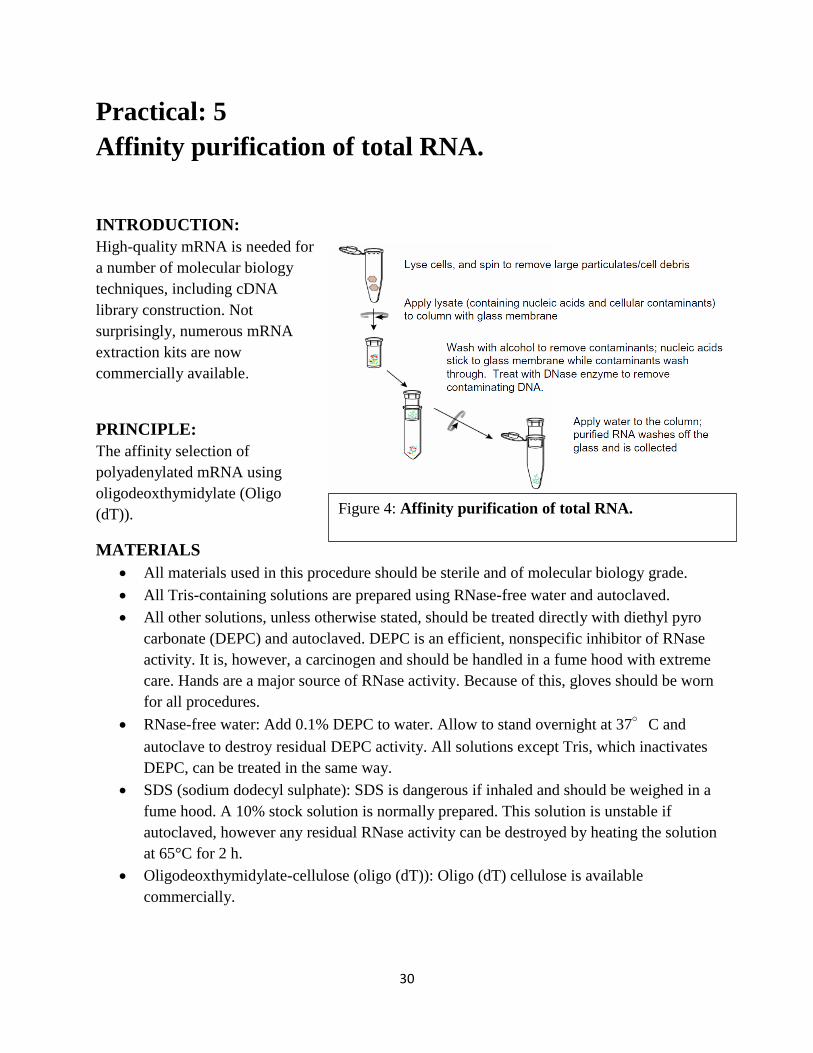
INTRODUCTION:
High-quality mRNA is needed for
a number of molecular biology
techniques, including cDNA
library construction. Not
surprisingly, numerous mRNA
extraction kits are now
commercially available.
PRINCIPLE:
The affinity selection of
polyadenylated mRNA using
oligodeoxthymidylate (Oligo
(dT)).
MATERIALS
All materials used in this procedure should be sterile and of molecular biology grade.
All Tris-containing solutions are prepared using RNase-free water and autoclaved.
All other solutions, unless otherwise stated, should be treated directly with diethyl pyro
carbonate (DEPC) and autoclaved. DEPC is an efficient, nonspecific inhibitor of RNase
activity. It is, however, a carcinogen and should be handled in a fume hood with extreme
care. Hands are a major source of RNase activity. Because of this, gloves should be worn
for all procedures.
RNase-free water: Add 0.1% DEPC to water. Allow to stand overnight at 37°C and
autoclave to destroy residual DEPC activity. All solutions except Tris, which inactivates
DEPC, can be treated in the same way.
SDS (sodium dodecyl sulphate): SDS is dangerous if inhaled and should be weighed in a
fume hood. A 10% stock solution is normally prepared. This solution is unstable if
autoclaved, however any residual RNase activity can be destroyed by heating the solution
at 65°C for 2 h.
Oligodeoxthymidylate-cellulose (oligo (dT)): Oligo (dT) cellulose is available
commercially.
Figure 4: Affinity purification of total RNA.
31
Although the binding capacity of oligo(dT) cellulose varies between different suppliers, a
general rule is to use 25 mg of oligo(dT) for each 1 mg of total RNA. Suspend oligo (dT)
cellulose in loading buffer at a concentration of 5 mg per 1 mL loading buffer.
Oligo (dT) is insoluble and should be resuspended by gentle tapping or inversion. Do not
put it in a vortex. It can be stored either dry at 4°C or in suspended in loading buffer at –
20°C.
RNase-free glass wool and Pasteur pipets: Wrap both the glass wool and pipets in
aluminium foil and bake at 200°C for 2–4 h to remove any RNase activity.
5 M NaCl: Store at room temperature.
3 M Sodium acetate pH6: Store at room temperature.
Absolute alcohol: Store at –20°C.
70% ethanol: Prepare this solution using DEPC-treated water. Store at 4°C.
Loading buffer: 0.5 M NaCl in 0.5% SDS, 1 mM EDTA, 10 mM Tris-HCl, pH 7.5 Store
at room temperature.
Elution buffer: 1 mM EDTA, 10 mM Tris-HCl, pH 7.5. The buffer can be stored at room
temperature but should be preheated to 65°C prior to use.
Recycling buffer: 0.1 M NaOH, which should be prepared immediately before use and
used fresh.
METHODS
Preparing an Oligo (dT) Column
Oligo (dT) columns are available commercially or can be prepared by using a 1–3 mL syringe.
Preparing your own columns is both easy and cheap.
1. Remove the plunger from the syringe and plug the base with glass wool.
2. Add oligo (dT) cellulose to the syringe using a sterile RNase-free Pasteur pipet. The oligo (dT)
cellulose will collect, as a column, above the glass wool. The loading buffer will escape through
the glass wool and can be discarded. To ensure that the oligo (dT) cellulose is packed and free
from air locks, add 3 volumes of loading buffer using a pipette and allow the solution to run
through the column. The column is now ready for immediate use and should not be allowed to
run dry.
Isolation of Poly (A+) RNA:
1. Resuspend the RNA pellet in loading buffer or, if the buffer is in solution, add 1/10th volume
of 5 M NaCl (see Note 1).
2. Heat denature the RNA and immediately load it onto the column and apply 3 volume of
loading buffer.
3. Reapply the eluate to the column.
4. Wash with 3 volume of loading buffer (see Note 4). Discard eluate.
5. Recover the bound poly (A+) mRNA by adding 3 volume elution buffer. Collect the mRNA in
a sterile tube on ice (see Note 5).
32
6. The mRNA is precipitated by adding 1/10th volume of 3 M sodium acetate and 2 volume of
ice-cold absolute ethanol. An overnight precipitation at –20°C maximizes the precipitation of
RNA.
7. Centrifuge at 15,000g for 15 min to pellet the RNA. Discard the supernatant.
8. Wash the RNA pellet in ice-cold 70% ethanol. Centrifuge at 15,000g for 5 min to repellet the
RNA which may have been disturbed by washing. Discard the supernatant.
Isolation of mRNA:
9. Dry the RNA pellet. Once it is dry, resuspend it in DEPC-treated water.
10. Assess the purity and integrity of mRNA.
ADVANTGES & DISADVANTAGES:
Eliminates need for organic solvents
Compatible with a variety of sample types (tissue, tissue culture cells, white blood cells,
plant cells, bacteria, yeast, etc.)
DNase treatment eliminates contaminating genomic DNA
Excellent RNA purity and integrity
Less amount of RNA obtained.
Expensive
READINGS
https://lifescience.roche.com/wcsstore/RASCatalogAssetStore/Articles/NAPI_Manual_page_166-
169.pdf
http://www.sabiosciences.com/newsletter/RNA.html
http://www.gelifesciences.com/webapp/wcs/stores/servlet/CategoryDisplay?categoryId=11763&catalo
gId=10101&productId=&top=Y&storeId=11765&langId=-1
http://www.thermofisher.com/pk/en/home/life-science/dna-rna-purification-analysis/rna-
extraction/rna-types/mrna-extraction.html

33
34
Practical: 6
Chromosome staining, banding of chromosomes (C, Q,
R, T).
INTRODUCTION:
Chromosomes display a banded pattern when treated with some stains. Bands are alternating
light and dark stripes that appear along the lengths of chromosomes.
Unique banding patterns are used to identify chromosomes and to diagnose chromosomal
aberrations, including chromosome breakage, loss, duplication, translocation or inverted
segments.
A range of different chromosome treatments produce a range of banding patterns: Q-bands, R-
bands, C-bands and T-bands.
In recent years a number of chromosome banding techniques have been developed that employ
molecular cytogenetic techniques, for example fluorescence in situ hybridization (FISH).
Chromosome structure and bands
The chromosomes of eukaryotes are composed of a combination of nuclear DNA and proteins.
During mitosis chromosomes replicate and condensed through coiling forming chromosomes
consisting of two chromatids joined at the centromere. Each chromatid condenses approximately
ten-thousand fold reaching maximal condensation at metaphase – DNA of roughly 5 cm in
length is condensed to 5 micrometers in a metaphase chromosome. These condensed
chromosomes are visible under the light microscope.
During the condensation process DNA is looped around protein complexes called nucleosomes.
This primary structure then undergoes more cycles of coiling producing the well-known
metaphase chromosome structure. Some of the looped segments of DNA are close together and
condense more than others, forming regions known as domains. These closely condensed
domains tend to stain more darkly than the areas where the loops are more loosely arranged.
In the order Diptera, which includes Drosophila, salivary gland chromosomes undergo repeated
rounds of replication without cell division forming highly replicated chromosomes – polytene
chromosomes. A polytene chromosome in a Drosophila salivary gland cell can contain as many
as five thousand alternating dark and light bands. In these chromosomes the dark bands
correspond to highly condensed domains and the lighter bands to less condensed DNA. It is in
the less condensed areas where active genes can be identified. A gene becomes active by
35
unravelling to permit transcription into messenger RNA. These unravelled regions are observed
as “puffs” under the microscope. The gene becomes inactive by resolving the “puff” through
condensation.
C-Banding
C-banding stains areas of heterochromatin, which is tightly packed and repetitive DNA. C-
banding is specifically useful in humans to stain the centromeric chromosome regions and other
regions containing constitutive heterochromatin - secondary constrictions of human
chromosomes 1, 9, 16, and the distal segment of the Y chromosome long arm.
Q-Banding
Quinacrine mustard, an alkylating agent, was the first chemical to band chromosomes viewed
under a fluorescence microscope. Quinacrine dihydrochloride has subsequently been substituted
by quinacrine mustard. The alternating bands of bright and dull fluorescence are called Q bands.
The bright bands are primary composed of DNA rich in adenine and thymine, while the dull
bands are rich in guanine and cytosine.
Q bands are especially useful for distinguishing the human Y chromosome and various
chromosome polymorphisms involving satellites and centromeres of specific chromosomes.
R-banding
Reverse banding (R-banding) involves the incubation of slides containing metaphase
chromosomes in hot phosphate buffer and stained with Giemsa. The banding pattern that results
is essentially the reverse of G bands. R bands are GC-rich. The AT-rich regions are selectively
denatured by heat leaving the GC-rich regions intact. Fluorochromes that are GC specific also
produce a reverse chromosome banding pattern. R-banding is helpful for analyzing the structure
of chromosome ends, since these areas usually stain light with G-banding.
T-Banding
T-banding involves the staining of telomeric regions of chromosomes using either Giemsa or
acridine orange after controlled thermal denaturation. T bands apparently represent a subset of
the R bands because they are smaller than the corresponding R bands and are more strictly
telomeric.
MATERIALS & METHODS
Harvesting of culture
Spindle inhibitors – Colchicine/colcemed (0.1g/ml)
Hypotonic treatment – 0.075M KCl
Fixation (3:1 methanol : acetic acid)
Preparation of slides
Slides stained with 4% Giemsa for 20-25min
Screening of slides to study the morphology of chromosome
36
Construction of karyotype
C-banding
Treat the slides in 0.2 N HCI for one hr at room temperature.
Rinse in de-ionized water.
Immerse in 1% barium hydroxide at 50°C for 5-15 min.
Rinse in deionized water.
Incubate at 60°C in 2XSSC buffer for one hr.
Rinse in de-ionized water and stain in 4% Giemsa stain for 90 min.
Rinse in de-ionized water, dry and examine under oil immersion.
Q-banding
Dehydrate the slides by dipping in alcohol with decreasing concentration 90%, 70% and
50% one min each.
Rinse in distilled water. .
Wash the slide in phosphate buffer at pH 6.8.
Stain the slide in quinacrine mustard (5 mg in 100 mI) or in quinacrine dihydrochloride
5% for 20 min.
Rinse in phosphate buffer and mount in the same buffer.
Examine under fluorescent microscope.
R-banding
Age the slides for 7 -10 days .
Place the slides in a Coplinjar containing phosphate buffer ofpH 6.5 at 85°C and incubate
for 20-25 min.
Stain the slides in 0.01% acridine orange in the phosphate buffer pH 6.5 for 4-6 min.
Rinse in phosphate buffer and mount in the same buffer.
Examine under fluorescent microscope.
T -banding
Age the slide for 7 days.
Place the slides in PBS pH 5.0 for 20-60 min at 87°C.
Rinse in PBS.
Stain in 3% Giemsa in phosphate buffer pH 6.8 at 87°C, leave for 5-30 min and rinse.
Slides are stained in Hoechst 33258 stain for 10 min (Hoechst stain 0.5 pg/m1 of
phosphate buffer).Rinse in phosphate buffer and examine in fluorescent microscope.
Alternatively, the stained slides are covered with a cover slip and placed in a wet
chamber under UV lamp for 2 to 3 hrs or under direct sunlight for 2 hrs.
Remove the cover slip and stain in Giemsa stain for 10 min.
Rinse in buffer, dry and mount in DPX.
37
READINGS:
http://geneticssuite.net/node/25
https://www.researchgate.net/file.PostFileLoader.html?id...assetKey...
www.pathology.washington.edu/.../main.php?file=banding%20patterns
www.pitt.edu/~super7/31011-32001/31081.ppt

38

39
Practical: 7
PCR and its types: (Nested, Multiplex, Reverse transcriptase, Real time, hot start, Asymmetric, Long, Allele
specific, colony, In-situ, Inverse, AFLP PCR).
INTRODUCTION:
The polymerase chain reaction (PCR) is a technology in molecular biology used to amplify a
single copy or a few copies of a piece of DNA across several orders of magnitude, generating
thousands to millions of copies of a particular DNA sequence. Developed in 1983 by Kary
Mullis, PCR is now a common and often indispensable technique used in medical and biological
research labs for a variety of applications. These include DNA cloning for sequencing, DNA-
based phylogeny, or functional analysis of genes; the diagnosis of hereditary diseases; the
identification of genetic fingerprints (used in forensic sciences and DNA paternity testing); and
the detection and diagnosis of infectious diseases. In 1993, Mullis was awarded the Nobel Prize
in Chemistry along with Michael Smith for his work on PCR.
PRINCIPLE
The method relies on thermal cycling, consisting of cycles of repeated heating and cooling of the
reaction for DNA melting and enzymatic replication of the DNA. Primers, the short DNA
fragments containing sequences complementary to the target region along with a DNA
polymerase, are key components to enable selective and repeated amplification. As PCR
progresses, the DNA generated is itself used as a template for replication, setting in motion a
chain reaction in which the DNA template is exponentially amplified. PCR can be extensively
modified to perform a wide array of genetic manipulations.
MATERIALS
Almost all PCR applications employ a heat-stable DNA polymerase, such as Taq polymerase (an
enzyme originally isolated from the bacterium Thermus aquaticus). This DNA polymerase
enzymatically assembles a new DNA strand from DNA building-blocks, the nucleotides, by
using single-stranded DNA as a template and DNA oligonucleotides (also called DNA primers),
which are required for initiation of DNA synthesis.
Following reagents are required for PCR
DNA template that contains the DNA region (target) to amplify
Two primers that are complementary to the 3' (three prime) ends of each of the sense and
anti-sense strand of the DNA target
Taq polymerase or another DNA polymerase with a temperature optimum at around 70
°C
Deoxynucleoside triphosphates (dNTPs, sometimes called "deoxynucleotide
triphosphates"; nucleotides containing triphosphate groups), the building-blocks from
which the DNA polymerase synthesizes a new DNA strand
40
Buffer solution, providing a suitable chemical environment for optimum activity and
stability of the DNA polymerase
Bivalent cations, magnesium or manganese ions; generally Mg2+ is used, but Mn2+ can
be used for PCR-mediated DNA mutagenesis, as higher Mn2+ concentration increases
the error rate during DNA synthesis
Monovalent cation potassium ions
METHODS
The vast majority of PCR methods use thermal cycling, i.e., alternately heating and cooling the
PCR sample through a defined series of temperature steps. In the first step, the two strands of the
DNA double helix are physically separated at a high temperature in a process called DNA
melting. In the second step, the temperature is lowered and the two DNA strands become
templates for DNA polymerase to selectively amplify the target DNA. The selectivity of PCR
results from the use of primers that are complementary to the DNA region targeted for
amplification under specific thermal cycling conditions.
Typically, PCR consists of a series of 20–40 repeated temperature changes, called cycles, with
each cycle commonly consisting of 2–3 discrete temperature steps, usually three (Figure below).
The cycling is often preceded by a single temperature step at a high temperature (>90 °C), and
followed by one hold at the end for final product extension or brief storage. The temperatures
used and the length of time they are applied in each cycle depend on a variety of parameters.
These include the enzyme used for DNA synthesis, the concentration of divalent ions and dNTPs
in the reaction, and the melting temperature (Tm) of the primers.
Initialization step:
This step consists of heating the reaction to a temperature of 94–96 °C (or 98 °C if extremely
thermostable polymerases are used), which is held for 1–9 minutes.
Denaturation step:
This step is the first regular cycling event and consists of heating the reaction to 94–98 °C for
20–30 seconds. It causes DNA melting of the DNA template by disrupting the hydrogen bonds
between complementary bases, yielding single-stranded DNA molecules.
Annealing step:
The reaction temperature is lowered to 50–65 °C for 20–40 seconds allowing annealing of the
primers to the single-stranded DNA template. This temperature must be low enough to allow
for hybridization of the primer to the strand, but high enough for the hybridization to be specific,
i.e., the primer should only bind to a perfectly complementary part of the template. If the
41
temperature is too low, the primer could bind imperfectly. If it is too high, the primer might not
bind. Typically the annealing temperature is about 3–5 °C below the Tm of the primers used.
Stable DNA–DNA hydrogen bonds are only formed when the primer sequence very closely
matches the template sequence. The polymerase binds to the primer-template hybrid and begins
DNA formation. It is very vital to determine the annealing temperature in PCR. This is because
in PCR, efficiency and specificity are affected by the annealing temperature. An incorrect
annealing temperature will cause an error in the test.
Extension/elongation step:
The temperature at this step depends on the DNA polymerase used; Taq polymerase has its
optimum activity temperature at 75–80 °C, and commonly a temperature of 72 °C is used with
this enzyme. At this step the DNA polymerase synthesizes a new DNA strand complementary to
the DNA template strand by adding dNTPs that are complementary to the template in 5' to 3'
direction, condensing the 5'-phosphate group of the dNTPs with the 3'-hydroxyl group at the end
of the nascent (extending) DNA strand. The extension time depends both on the DNA
polymerase used and on the length of the DNA fragment to amplify. As a rule-of-thumb, at its
optimum temperature, the DNA polymerase polymerizes a thousand bases per minute. Under
optimum conditions, i.e., if there are no limitations due to limiting substrates or reagents, at each
extension step, the amount of DNA target is doubled, leading to exponential (geometric)
amplification of the specific DNA fragment.
Final elongation
This single step is occasionally performed at a temperature of 70–74 °C (this is the temperature
needed for optimal activity for most polymerases used in PCR) for 5–15 minutes after the last
PCR cycle to ensure that any remaining single-stranded DNA is fully extended.
Final hold:
This step at 4–15 °C for an indefinite time may be employed for short-term storage of the
reaction.

42
ADVANTGES & DISADVATAGES
Selective DNA isolation, Amplification and quantification of DNA, Disease diagnosis,
DNA polymerase is prone to error, which in turn causes mutations in the PCR fragments that are
made. Additionally, the specificity of the PCR fragments can mutate to the template DNA, due to
nonspecific binding of primers. Furthermore, prior information on the sequence is necessary in
order to generate the primers
PCR VARIATIONS:
Nested PCR:
It Increases the specificity of DNA amplification, by reducing background due to non-specific
amplification of DNA. Two sets of primers are used in two successive PCRs. In the first
reaction, one pair of primers is used to generate DNA products, which besides the intended
target, may still consist of non-specifically amplified DNA fragments. The product(s) are then
used in a second PCR with a set of primers whose binding sites are completely or partially
different from and located 3' of each of the primers used in the first reaction. Nested PCR is often
more successful in specifically amplifying long DNA fragments than conventional PCR, but it
requires more detailed knowledge of the target sequences.
Figure 5: Polymerase Chain Reaction
43
Multiplex-PCR:
It consists of multiple primer sets within a single PCR mixture to produce amplicons of varying
sizes that are specific to different DNA sequences. By targeting multiple genes at once,
additional information may be gained from a single test-run that otherwise would require several
times the reagents and more time to perform. Annealing temperatures for each of the primer sets
must be optimized to work correctly within a single reaction, and amplicon sizes. That is, their
base pair length should be different enough to form distinct bands when visualized by gel
electrophoresis.
Reverse Transcription PCR (RT-PCR):
It is useful for amplifying DNA from RNA. Reverse transcriptase reverse
transcribes RNA into cDNA, which is then amplified by PCR. RT-PCR is widely used
in expression profiling, to determine the expression of a gene or to identify the sequence of an
RNA transcript, including transcription start and termination sites. If the genomic DNA sequence
of a gene is known, RT-PCR can be used to map the location of exons and introns in the gene.
The 5' end of a gene (corresponding to the transcription start site) is typically identified
by RACE-PCR (Rapid Amplification of cDNA Ends).
Quantitative PCR (qPCR):
It is used to measure the quantity of a target sequence (commonly in real-time). It quantitatively
measures starting amounts of DNA, cDNA, or RNA. Quantitative PCR is commonly used to
determine whether a DNA sequence is present in a sample and the number of its copies in the
sample. Quantitative PCR has a very high degree of precision. Quantitative PCR methods use
fluorescent dyes, such as Sybr Green, EvaGreen or fluorophore-containing DNA probes, such
as TaqMan, to measure the amount of amplified product in real time. It is also sometimes
abbreviated to RT-PCR (real-time PCR) but this abbreviation should be used only for reverse
transcription PCR. qPCR is the appropriate contractions for quantitative PCR (real-time PCR).
Hot start PCR:
A technique that reduces non-specific amplification during the initial set up stages of the PCR. It
may be performed manually by heating the reaction components to the denaturation temperature
(e.g., 95 °C) before adding the polymerase. Specialized enzyme systems have been developed
that inhibit the polymerase's activity at ambient temperature, either by the binding of an antibody
or by the presence of covalently bound inhibitors that dissociate only after a high-temperature
activation step. Hot-start/cold-finish PCR is achieved with new hybrid polymerases that are
inactive at ambient temperature and are instantly activated at elongation temperature.
Asymmetric PCR:
Preferentially amplifies one DNA strand in a double-stranded DNA template. It is used
in sequencing and hybridization probing where amplification of only one of the two
44
complementary strands is required. PCR is carried out as usual, but with a great excess of the
primer for the strand targeted for amplification. Because of the slow (arithmetic) amplification
later in the reaction after the limiting primer has been used up, extra cycles of PCR are
required. A recent modification on this process, known as Linear-After-The-Exponential-PCR
(LATE-PCR), uses a limiting primer with a higher melting temperature (Tm) than the excess
primer to maintain reaction efficiency as the limiting primer concentration decreases mid-
reaction.
Nanoparticle-Assisted PCR (nanoPCR):
In recent years, it has been reported that some nanoparticles (NPs) can enhance the efficiency of
PCR (thus being called nanoPCR), and some even perform better than the original PCR
enhancers. It was also found that quantum dots (QDs) can improve PCR specificity and
efficiency. Single-walled carbon nanotubes (SWCNTs) and multi-walled carbon nanotubes
(MWCNTs) are efficient in enhancing the amplification of long PCR. Carbon nanopowder
(CNP) was reported be able to improve the efficiency of repeated PCR and long PCR. ZnO,
TiO2, and Ag NPs were also found to increase PCR yield. Importantly, already known data has
indicated that non-metallic NPs retained acceptable amplification fidelity. Given that many NPs
are capable of enhancing PCR efficiency, it is clear that there is likely to be great potential for
nanoPCR technology improvements and product development.
Allele-specific PCR:
A diagnostic or cloning technique based on single-nucleotide variations (SNVs not to be
confused with SNPs) (single-base differences in a patient). It requires prior knowledge of a DNA
sequence, including differences between alleles, and uses primers whose 3' ends encompass the
SNV (base pair buffer around SNV usually incorporated). PCR amplification under stringent
conditions is much less efficient in the presence of a mismatch between template and primer, so
successful amplification with an SNP-specific primer signals presence of the specific SNP in a
sequence.
Inverse PCR:
It is commonly used to identify the flanking sequences around genomic inserts. It involves a
series of DNA digestions and self-ligation, resulting in known sequences at either end of the
unknown sequence.
Colony PCR:
Colony PCR is a method used to screen for plasmids containing a desired insert directly from
bacterial colonies without the need for culturing or plasmid purification steps.
In situ PCR:
In situ PCR is a method in which the polymerase chain reaction actually takes place in the cell on
a slide, and the product can be visualized in the same way as in traditional in situ hybridization.
45
AFLP-PCR:
AFLP-PCR uses restriction enzymes to digest genomic DNA, followed by ligation of adaptors to
the sticky ends of the restriction fragments. A subset of the restriction fragments is then selected
to be amplified. This selection is achieved by using primers complementary to the adaptor
sequence, the restriction site sequence and a few nucleotides inside the restriction site fragments.
The amplified fragments are separated and visualized on denaturing polyacrylamide gels, either
through autoradiography or fluorescence methodologies, or via automated capillary sequencing
instruments.
READINGS
https://en.wikipedia.org/wiki/Polymerase_chain_reaction
file:///C:/Users/User/Desktop/Polymerase_chain_reaction.svg
http://link.springer.com/protocol/10.1385%2F1-59259-384-4%3A3
https://www.ncbi.nlm.nih.gov/pubmed/2999980
http://www.nobelprize.org/nobel_prizes/chemistry/laureates/1993/mullis-lecture.html
http://www.ncbi.nlm.nih.gov/tools/epcr/

46
47
Practical: 8
Southern blotting
INTRODUCTION:
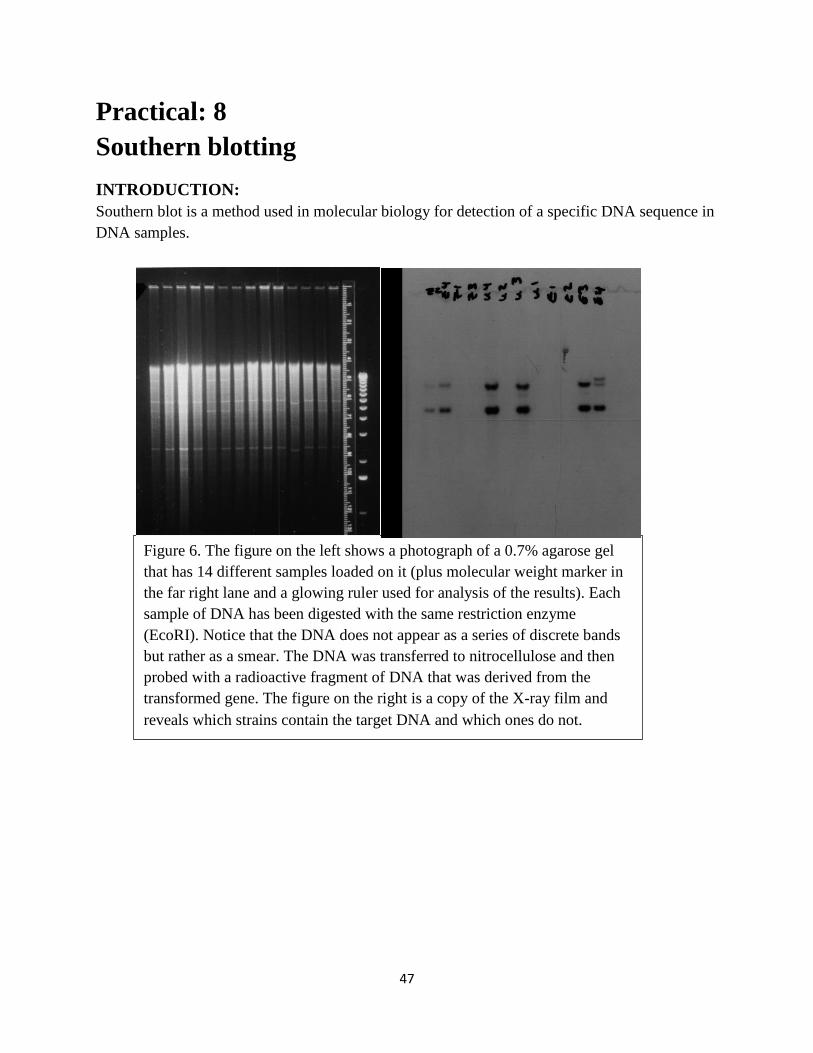
Southern blot is a method used in molecular biology for detection of a specific DNA sequence in
DNA samples.
Figure 6. The figure on the left shows a photograph of a 0.7% agarose gel
that has 14 different samples loaded on it (plus molecular weight marker in
the far right lane and a glowing ruler used for analysis of the results). Each
sample of DNA has been digested with the same restriction enzyme
(EcoRI). Notice that the DNA does not appear as a series of discrete bands
but rather as a smear. The DNA was transferred to nitrocellulose and then
probed with a radioactive fragment of DNA that was derived from the
transformed gene. The figure on the right is a copy of the X-ray film and
reveals which strains contain the target DNA and which ones do not.
48
PRINCIPLE:
Southern blotting combines transfer of electrophoresis-separated DNA fragments to a filter
membrane and subsequent fragment detection by probe hybridization.
MATERIALS &METHODS:
1) DNA (genomic or other source) is digested with a restriction enzyme and separated
by gel electrophoresis, usually an agarose gel. Because there are so many different
restriction fragments on the gel, it usually appears as a smear rather than discrete
bands. The DNA is denatured into single strands by incubation with NaOH.
2) The DNA is transferred to a membrane which is a sheet of special blotting paper.
The DNA fragments retain the same pattern of separation they had on the gel.
3) The blot is incubated with many copies of a probe which is single-stranded DNA.
This probe will form base pairs with its complementary DNA sequence and bind to
form a double-stranded DNA molecule. The probe cannot be seen but it is either
radioactive or has an enzyme bound to it (e.g. alkaline phosphatase or horseradish
peroxidase).
4) The location of the probe is revealed by incubating it with a colorless substrate that
the attached enzyme converts to a colored product that can be seen or gives off light
which will expose X-ray film. If the probe was labeled with radioactivity, it can
expose X-ray film directly.
ADVANTGES & DISADVATAGES
Southern blots allow investigators to determine the molecular weight of a restriction fragment
and to measure relative amounts in different samples.
READINGS
http://www.bio.davidson.edu/genomics/method/Southernblot.html
https://en.wikipedia.org/wiki/Southern_blot
https://askabiologist.asu.edu/southern-blotting
https://www.mun.ca/biology/scarr/Gr12-18.html

49
50
Practical: 9
Northern blotting
INTRODUCTION:
The northern blot is a technique used in molecular biology research to study gene expression by
detection of RNA (or isolated mRNA) in a sample
PRINCIPLE:
Northern blotting involves the use of electrophoresis to separate RNA samples by size and
detection with a hybridization probe complementary to part of or the entire target sequence. The
term 'northern blot' actually refers specifically to the capillary transfer of RNA from the
electrophoresis gel to the blotting membrane. However, the entire process is commonly referred
to as northern blotting.
MATERIALS & METHODS
Northern blots allow investigators to determine the molecular weight of an mRNA and to
measure relative amounts of the mRNA present in different samples.
1) RNA (either total RNA or just mRNA) is separated by gel electrophoresis, usually an agarose
gel. Because there are so many different RNA molecules on the gel, it usually appears as a smear
rather than discrete bands.
2) The RNA is transferred to a sheet of special blotting paper called nitrocellulose, though other
types of paper, or membranes, can be used. The RNA molecules retain the same pattern of
separation they had on the gel.
3) The blot is incubated with a probe which is single-stranded DNA. This probe will form base
pairs with its complementary RNA sequence and bind to form a double-stranded RNA-DNA
molecule. The probe cannot be seen but it is either radioactive or has an enzyme bound to it (e.g.
alkaline phosphatase or horseradish peroxidase).
4) The location of the probe is revealed by incubating it with a colorless substrate that the
attached enzyme converts to a colored product that can be seen or gives off light which will
expose X-ray film. If the probe was labeled with radioactivity, it can expose X-ray film directly.
ADVANTGES & DISADVATAGES
Analysis of gene expression northern blotting is able to detect small changes in gene expression
that microarrays cannot. The microarrays have over northern blots is that thousands of genes can
be visualized at a time, while northern blotting is usually looking at one or a small number of
genes.
A problem in northern blotting is often sample degradation by RNAses. The chemicals used in
most northern blots can be a risk to the researcher, since formaldehyde, radioactive material;
51
ethidium bromide, DEPC, and UV light are all harmful under certain exposures. Compared to
RT-PCR, northern blotting has a low sensitivity, but it also has a high specificity, which is
important to reduce false positive results.
The advantages of using northern blotting include the detection of RNA size, the observation of
alternate splice products, the use of probes with partial homology, the quality and quantity of
RNA can be measured on the gel prior to blotting, and the membranes can be stored and
reprobed for years after blotting.
READINGS
http://www.bio.davidson.edu/courses/genomics/method/northernblot.html
https://www.thermofisher.com/pk/en/home/life-science/dna-rna-purification-analysis/nucleic-
acid-gel-electrophoresis/northern-blotting.html
http://www.nature.com/scitable/definition/northern-blot-287
52
Practical: 10
Western blotting.
INTRODUCTION:
The western blot (sometimes called the protein
immunoblotting) is a widely used analytical
technique used to detect specific proteins in a
sample of tissue homogenate or extract.
PRINCIPLE
It uses gel electrophoresis to separate native
proteins by 3-D structure or denatured proteins
by the length of the polypeptide. The proteins
are then transferred to a membrane (typically
nitrocellulose or PVDF), where they are stained
with antibodies specific to the target protein. The
gel electrophoresis step is included in western
blot analysis to resolve the issue of the cross-reactivity of antibodies.
MATERIALS & METHODS:
Western blots allow investigators to determine the molecular weight of a protein and to measure
relative amounts of the protein present in different samples.
1. Proteins are separated by gel electrophoresis, usually SDS-PAGE.
2. The proteins are transferred to a sheet of special blotting paper called nitrocellulose,
though other types of paper, or membranes, can be used. The proteins retain the same
pattern of separation they had on the gel.
3. The blot is incubated with a generic protein (such as milk proteins) to bind to any
remaining sticky places on the nitrocellulose. An antibody is then added to the solution
which is able to bind to its specific protein. The antibody has an enzyme (e.g. alkaline
phosphatase or horseradish peroxidase) or dye attached to it which cannot be seen at this
time.
4. The location of the antibody is revealed by incubating it with a colorless substrate that the
attached enzyme converts to a colored product that can be seen and photographed.
ADVANTGES & DISADVATAGES
The confirmatory HIV test employs a western blot to detect anti-HIV antibody in a
human serum sample. Proteins from known HIV-infected cells are separated and blotted
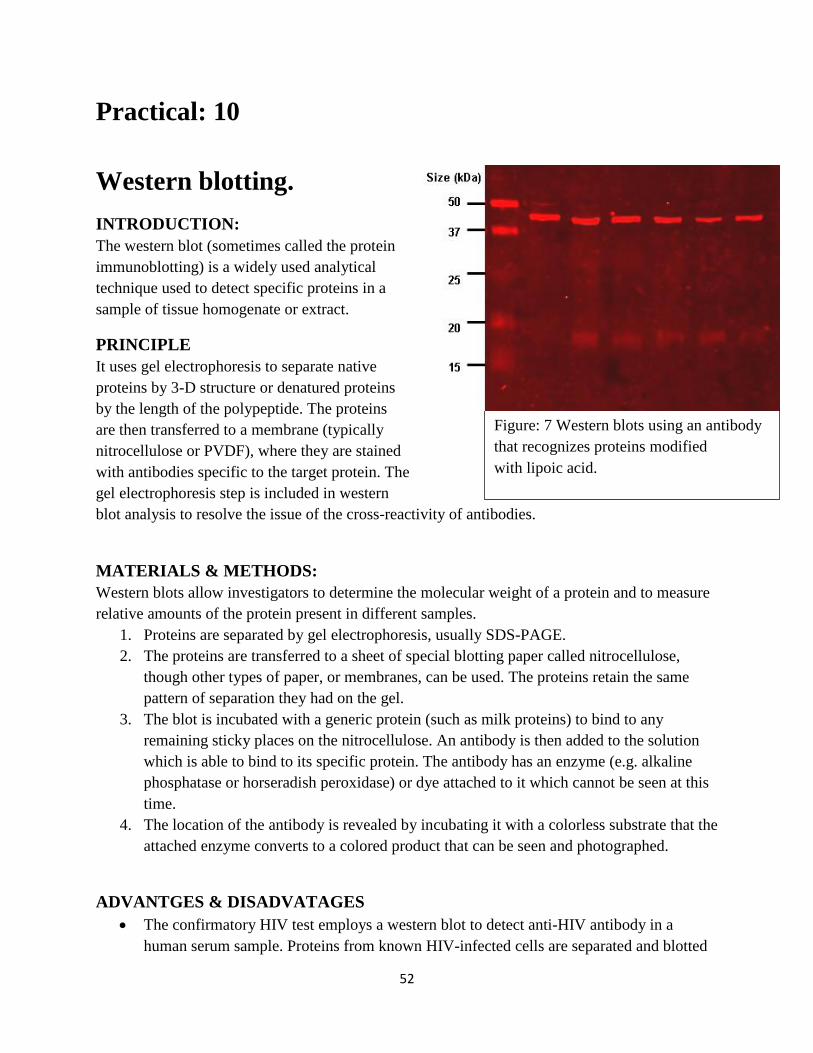
Figure: 7 Western blots using an antibody
that recognizes proteins modified
with lipoic acid.
53
on a membrane as above. Then, the serum to be tested is applied in the primary antibody
incubation step; free antibody is washed away, and a secondary anti-human antibody
linked to an enzyme signal is added. The stained bands then indicate the proteins to
which the patient's serum contains antibody.
A western blot is also used as the definitive test for bovine spongiform
encephalopathy (BSE, commonly referred to as 'mad cow disease').
Some forms of Lyme disease testing employ western blotting.
A western blot can also be used as a confirmatory test for Hepatitis B infection.
In veterinary medicine, a western blot is sometimes used to confirm FIV+ status in cats.
READINGS:
https://en.wikipedia.org/wiki/Western_blot
http://www.ncbi.nlm.nih.gov/pmc/articles/PMC3456489/
https://www.thermofisher.com/pk/en/home/life-science/protein-biology/protein-biology-learning-
center/protein-biology-resource-library/pierce-protein-methods/overview-western-blotting.html
https://www.abdserotec.com/western-blotting.html
http://www.bio-rad.com/en-us/applications-technologies/introduction-western-blotting
http://www.nature.com/scitable/definition/western-blot-288
http://www.bio.davidson.edu/courses/genomics/method/westernblot.html
54
Practical: 11
Genetics problems
Simple Genetics Practice Problems
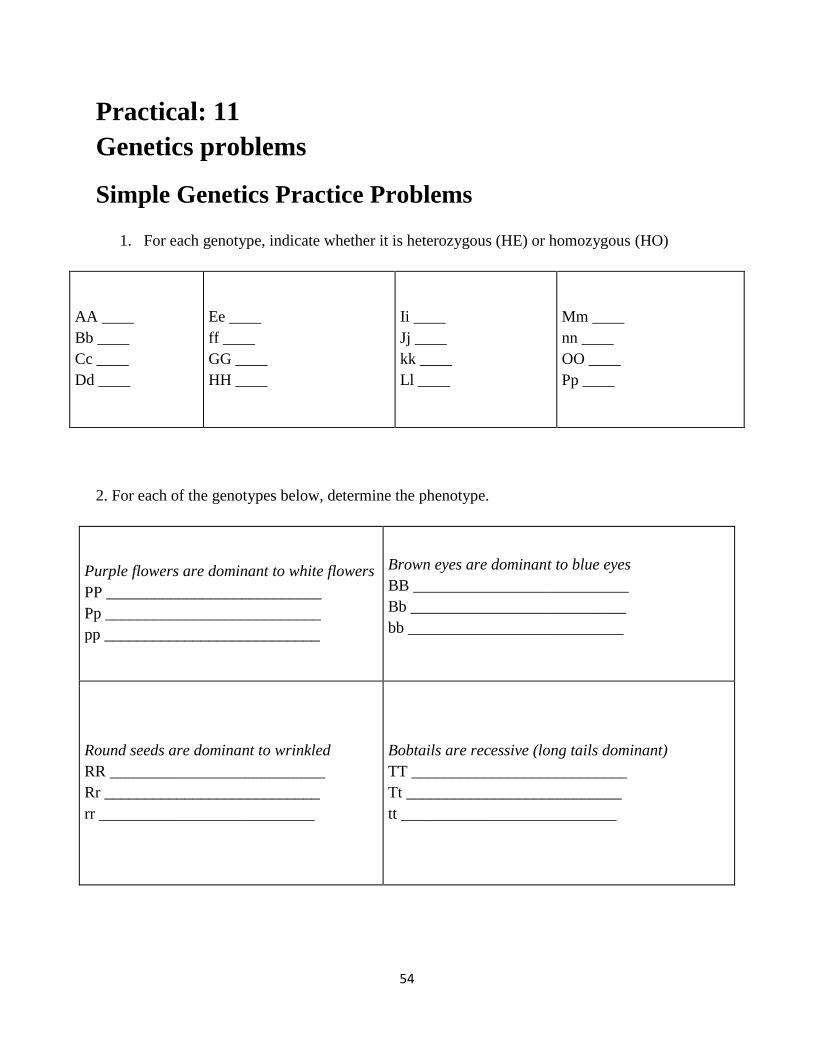
1. For each genotype, indicate whether it is heterozygous (HE) or homozygous (HO)
AA ____
Bb ____
Cc ____
Dd ____
Ee ____
ff ____
GG ____
HH ____
Ii ____
Jj ____
kk ____
Ll ____
Mm ____
nn ____
OO ____
Pp ____
2. For each of the genotypes below, determine the phenotype.
Purple flowers are dominant to white flowers
PP ___________________________
Pp ___________________________
pp ___________________________
Brown eyes are dominant to blue eyes
BB ___________________________
Bb ___________________________
bb ___________________________
Round seeds are dominant to wrinkled
RR ___________________________
Rr ___________________________
rr ___________________________
Bobtails are recessive (long tails dominant)
TT ___________________________
Tt ___________________________
tt ___________________________
55
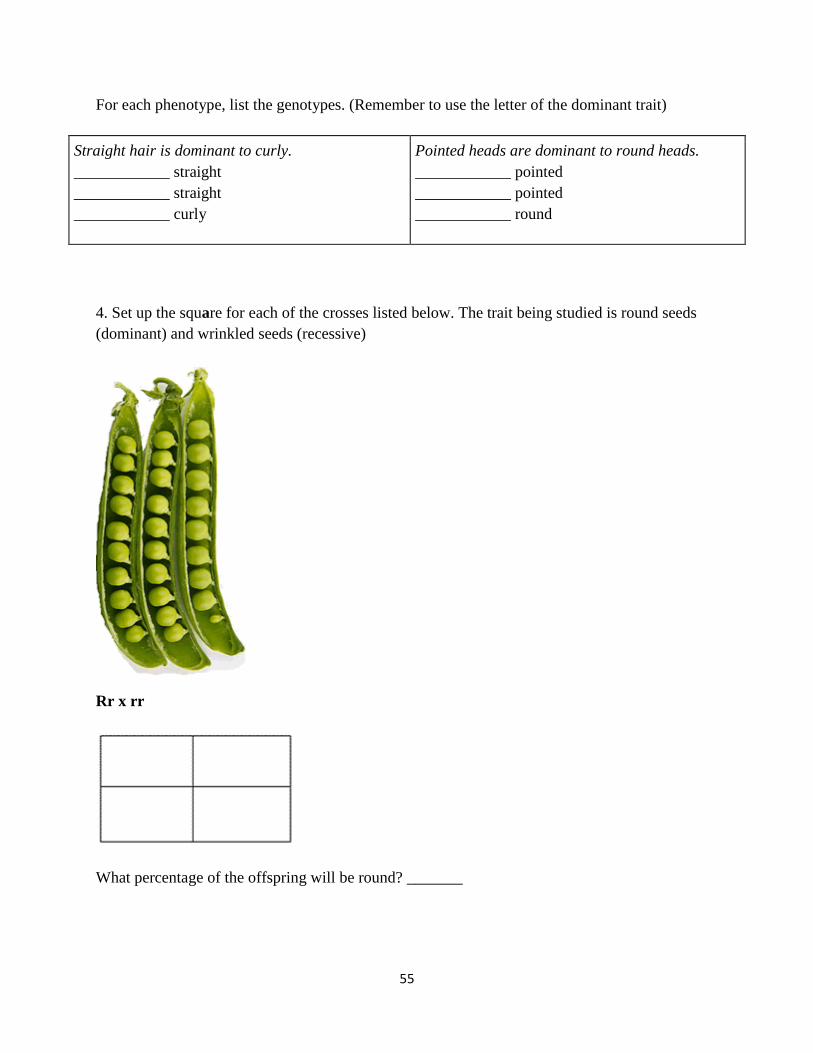
For each phenotype, list the genotypes. (Remember to use the letter of the dominant trait)
Straight hair is dominant to curly.
____________ straight
____________ straight
____________ curly
Pointed heads are dominant to round heads.
____________ pointed
____________ pointed
____________ round
4. Set up the square for each of the crosses listed below. The trait being studied is round seeds
(dominant) and wrinkled seeds (recessive)
Rr x rr
What percentage of the offspring will be round? _______
56
Rr x R r
What percentage of the offspring will be round? _______
RR x Rr
What percentage of the offspring will be round? ___________
Practice with Crosses. Show all work!
5. A TT (tall) plant is crossed with a tt (short plant).
What percentage of the offspring will be tall? ___________
6. A Tt plant is crossed with a Tt plant.
What percentage of the offspring will be short? ______
7. A heterozygous round seeded plant (Rr) is crossed with a homozygous round seeded plant
(RR). What percentage of the offspring will be homozygous (RR)? ____________
8. A homozygous round seeded plant is crossed with a homozygous wrinkled seeded plant. What
are the genotypes of the parents? __________ X __________
What percentage of the offspring will also be homozygous? ______________
9. In pea plants purple flowers are dominant to white flowers. If two white flowered plants are
cross, what percentage of their offspring will be white flowered? ______________
10. A white flowered plant is crossed with a plant that is heterozygous for the trait. What
percentage of the offspring will have purple flowers? _____________

57
11. Two plants, both heterozygous for the gene that controls flower color are crossed. What
percentage of their offspring
will have purple flowers? ______________.
What percentage will have white flowers? ___________
12. In guinea pigs, the allele for short hair is dominant.
What genotype would a heterozygous short haired guinea pig have? _______
What genotype would a purebreeding short haired guinea pig have? _______
What genotype would a long haired guinea pig have? ________
13. Show the cross for a pure breeding short haired guinea pig and a long haired guinea pig.
What percentage of the offspring will have short hair? __________
14. Show the cross for two heterozygous guinea pigs.
What percentage of the offspring will have short hair? ________.
What percentage of the offspring will have long hair? _______
15. Two short haired guinea pigs are mated several times. Out of 100 offspring, 25 of them have
long hair. What are the probable genotypes of the parents?
________ X ___________ Show the cross to prove it!