Embed Size (px)
Citation preview

See Page 1 for Quick Start Checklist
Song Meter SM4BAT FS B I O A C O U S T I C S R E C O R D E R

Wildlife Acoustics, Inc. page ii
C O N T E N T S
1 Quick Start Checklist 12 Overview 2
2.1 Introduction......................................................................................22.2 VisualTour........................................................................................32.3 TheMainMenu.................................................................................4
3 Setup and Installation 53.1 OpeningtheRecorder.......................................................................53.2 TurningPowerOnandOff.................................................................63.3 InstallingInternalBatteries...............................................................63.4 ConnectingExternalPower...............................................................73.5 InsertingSDMemoryCards...............................................................83.6 ConnectinganExternalMicrophone..................................................93.7 ConnectingtheGPSAccessory........................................................113.8 SecuringtheRecorder.....................................................................123.9 MountingtheRecorder...................................................................123.10ReplacingtheClockBattery.............................................................133.11ReadingtheRecorderTemperature................................................13
4 Settings 144.1 NavigatingtheMenus.....................................................................144.2 SettingtheDateandTime...............................................................144.3 SettingtheDevicePrefixforRecordedFiles....................................154.4 SettingtheLocationandTimeZone................................................154.5 SettingtheSolarCalculationMethod..............................................164.6 SettingaMinimumExternalBatteryVoltage...................................164.7 AudioSettings.................................................................................174.8 SettingaDelayedStart....................................................................204.9 SettingtheLEDIndicatorMode.......................................................20
5 Making Scheduled Recordings 215.1 RecordingOperationOverview.......................................................215.2 UsingaQuickStartSchedule...........................................................215.3 TheRecordingScreens....................................................................225.4 CheckingtheStatusoftheRecorder................................................235.5 StoppingaRecordingSchedule.......................................................245.6 MakinganInstantRecording...........................................................245.7 RecordingFiles................................................................................245.8 RecordingMetadata.......................................................................255.9 RecordingSummaryTextFile..........................................................255.10AnalyzingBatRecordings................................................................26

Song Meter SM4BAT FS User Guide Contents
Wildlife Acoustics, Inc. page iii
6 Creating Custom Schedules 276.1 ScheduleBlocks..............................................................................276.2 SM4ConfiguratorSoftware.............................................................286.3 EditingaSchedule...........................................................................286.4 AddingorDeletingScheduleBlocks.................................................296.5 ScheduleBlockExamples................................................................306.6 ImportingaSchedule......................................................................316.7 ExportingaSchedule.......................................................................32
7 Utilities 347.1 ExportingDiagnostics......................................................................347.2 ResettingtoFactoryDefaultSettings..............................................347.3 CalibratingMicrophones.................................................................347.4 MonitoringUltrasoundinTimeExpansionMode............................367.5 FormattingSDMemoryCards.........................................................387.6 UpdatingtheFirmware...................................................................38
8 Specifications 398.1 Physical...........................................................................................398.2 Power.............................................................................................398.3 SDMemoryCards...........................................................................408.4 UltrasonicAudio.............................................................................408.5 ExternalSMM-U1UltrasonicMicrophone.......................................40
9 Warranty and Disclosures 43

Song Meter SM4BAT FS User Guide 1 Quick Start Checklist
Wildlife Acoustics, Inc. page 1
1 Quick Start Checklist q Release the side latch, open the security cover, and then open the middle
section to access the battery bay. q Install four (4) new alkaline or NiMH D batteries. Close the middle section.
(To use external batteries, see Connecting External Power.) q Insert one SD memory card in slot A and an optional second card in slot B. q Slide the power switch down to INT for internal battery power. The recorder
powers on and the main menu appears on the display. (If using an external power source, slide the switch up to EXT.)
q Press CHECK STATUS to verify the time, microphone, firmware, SD memory cards, battery voltage, and temperature.
q (Optional) Attach the GPS to auto-set the date, time, and location. A number sign (#) appears in between the date and time on the check status screen when the data setup is complete. Disconnect the GPS.
q Use the keypad to select Quick Start and choose a recording schedule. q For schedules that start or end at times relative to sunrise or sunset (for
example, Record Sunset->Rise), you must set the latitude and longitude, date, time, and time zone. If you attached the available GPS accessory in an earlier step, the location, date, and time are set for you automatically; however, you must always set the time zone. It is not set by the GPS.
q Press the SCHEDULE START button. The schedule begins: ■ The SM4BAT FS sleeps (display goes blank) to conserve battery power if a
recording is not scheduled in the next 45 seconds. ■ The SM4BAT FS wakes (display illuminates) at the next scheduled
recording start time and saves recordings to the SD memory card(s). ■ The display shows the next recording period and ARMED when listening
for bats. TRIGGERED appears when a recording is in process. q Close the security cover and latch. To secure the recorder, attach an optional
lock. Mount the recorder in a suitable location for recording. You can leave the recorder unattended after this step.
q When the deployment ends, press and hold SCHEDULE STOP to finish recording. Eject the SD memory card(s) and review the recordings.
Contacting Support
For issues or questions not addressed in this guide, contact the Wildlife Acoustics Support Team:
■ Email: [email protected] ■ North America (toll-free): 1-888-733-0200 ■ Outside North America: US+1 978-369-5225 (Toll charges may apply.)

Song Meter SM4BAT FS User Guide 2 Overview
Wildlife Acoustics, Inc. page 2
2 Overview 2.1 Introduction
The latest generation in the Song Meter series, the SM4BAT FS is a weatherproof, programmable, single channel, full-spectrum, ultrasonic recorder designed for the periodic, seasonal, and long-term monitoring of bats and other ultrasound wildlife in almost any environmental condition. The SM4BAT FS creates high-quality, full-spectrum 16-bit WAV recordings that can be easily viewed or analyzed using our Kaleidoscope software (or third-party software). You can schedule daily recordings to meet a variety of needs including times that are relative to sunrise and sunset, specific duty cycles with on/off recording patterns, and continuous monitoring all day and all night. The SM4BAT FS optimizes battery life and memory capacity to record for extended periods of time. Using both memory slots and new alkaline batteries, a typical deployment can record for up to 400 hours spanning weeks or months. Features
■ Lightweight, portable, and completely weatherproof ■ One-channel full-spectrum 16-bit WAV recorder ■ Intelligent recording trigger and noise scrubber to minimize false
recordings of non-bat activity ■ Up to 40 nightly 10-hour recordings using four (4) alkaline D batteries ■ SMM-U1 microphone (3-meter cable included) can be extended with up
to 100 meters of cable ■ Supports one or two standard SDHC or SDXC memory cards ■ Weatherproof keypad and backlit display for easy entry and status ■ Dual-color LED indicator provides recording feedback ■ Integrated top and bottom mounting flanges are designed to work with
cable locks, screws, radiator clamps, bungee cords, and other fasteners ■ Easy to set up and use with convenient Quick Start daily recording
schedules and one-touch start ■ Customize schedules and estimate impacts on SD memory cards and
battery life with the available SM4 Configurator software ■ One-touch status check shows memory card utilization, battery voltage,
and other recorder health information without interrupting recordings ■ External power option using an SM3/SM4 power cable (sold separately) ■ Self-generated diagnostics assist in basic troubleshooting ■ Internal temperature and battery voltage logging ■ Headphone port for real-time monitoring and system verification ■ Optional GPS accessory automatically sets the date, time, latitude, and
longitude and logs recording coordinates

Song Meter SM4BAT FS User Guide 2 Overview
Wildlife Acoustics, Inc. page 3
2.2 VisualTour
ITEM: DESCRIPTION: Security Cover Protects the recorder. The cover swings open/closed and can
be secured with a standard lock (sold separately). LED Status Indicator Flashes ☼ green every second when recording and every
minute when sleeping. Flashes ☼ red every second when armed and waiting for a triggered recording to start.
Latch Grip and pull to open the security cover. To close, push the security cover down until the latch clicks.
Keypad Press the keypad buttons to navigate the menus and options on the display. Buttons include ▲Up or ▼Down, ◄Left or ►Right, ENTER, SCHEDULE START, SCHEDULE STOP, and CHECK STATUS.
Mounting Flanges Rugged and ready for almost any environment. Use the top and bottom cutouts to mount the recorder.
Power Switch Slide down to turn power on using internal battery (INT). Slide up to use optional external power (EXT) or to turn off (if no external power).
Display Backlit screen displays all main menu items, settings, values, message prompts, and status information.
Memory Slots A and B Insert removable SD memory cards to store recordings. Lock Ring Insert the shackle of an optional key or combination lock
to secure your recorder. GPS Connection Use the available GPS option to automatically set the
date, time, and location settings. Pressure Vent Temperature, UV, and water-resistant vent protects the
enclosure from condensation. Headphone Jack Connect headphones and listen to live bat activity in
Time Expansion mode as it is being recorded.
Security Cover
Latch
Mounting Flange
Display
Memory Slot A
Keypad
Power Switch
Memory Slot B
Pressure Vent
GPS Connection
Lock Ring
LED Indicator
Headphone Jack

Song Meter SM4BAT FS User Guide 2 Overview
Wildlife Acoustics, Inc. page 4
2.3 TheMainMenu
Refer to the following table when navigating the main menu on the display. Menu Item Description
Quick Start Record Sunset->Rise Based on your location, date, and sunrise/sunset
settings, records continuously from sunset until sunrise. Record Always Records continuously 24 hours a day.
Settings
Audio Configure audio settings for recordings.
Date and Time Set the local date and time for your recorder.
Location Set the recorder prefix ID and the latitude, longitude, and time zone for your location.
Sunrise/Sunset Type Set the method used to calculate the sunrise and sunset times. Choices include astronomical, civil, or nautical twilights or the actual sunrise/set times
Delay Start Delay the start of your daily schedule until midnight on a specified date.
Battery Cutoff Set the cutoff voltage for external batteries. To prevent battery damage, the recorder automatically shuts down if the voltage drops below this level.
LED Indicator Choose to display LED indicators always or only for the first several minutes after you start the schedule.
Schedule
Edit Schedule Add, modify, or delete schedule blocks.
Import Sched+Setts Import a schedule and settings from an SD card.
Export Sched+Setts Export the current schedule and settings to an SD card.
Utilities
Time Expansion Mode Listen to ultrasound through headphones.
Export Diagnostics Save status and troubleshooting information to an SD card to send to the Wildlife Acoustics Support Team.
Set factory default Restore the original recorder settings to their factory-fresh values and revert to a like-new state. CAUTION: Any custom schedules or settings are replaced.
Calibrate Mic Test the sensitivity levels of the connected microphone with the available Ultrasonic Calibrator.
Format all cards Erase and reformat the SD memory cards. CAUTION: All data on the cards is permanently lost.
Firmware Update Update the recorder with a new firmware file that you download to an SD memory card.

Song Meter SM4BAT FS User Guide 3 Setup and Installation
Wildlife Acoustics, Inc. page 5
3 Setup and Installation 3.1 OpeningtheRecorder
When instructed by the procedures in this guide to open the recorder, follow the steps below.
1. Locate the handle for the security cover on the front right side of the
recorder as shown. 2. Grip the handle and lightly pull it to release the latch. The cover flips open
and rotates along its hinged spine like a book, exposing the display and keypad in the middle section. At this point, you can insert memory cards, adjust the power switch, and connect an optional GPS or headphones. Continue with the next step only when you are installing batteries.
3. Press the small circular indentation between SD memory card slots A and B with your thumb to release the middle section. If it is difficult to release the section, press down closer to the gasket seam. This section swings open exposing the battery bay.
To close the cover, reverse the steps: 1. Gently and firmly push the middle section (display and keypad) down until it
snaps into place. 2. Gently and firmly push the security cover down until it snaps into place. 3. Align the security cover latch with the locking ring and snap into place.
Song Meter SM4BAT FS User Guide 3 Setup and Installation
Wildlife Acoustics, Inc. page 6
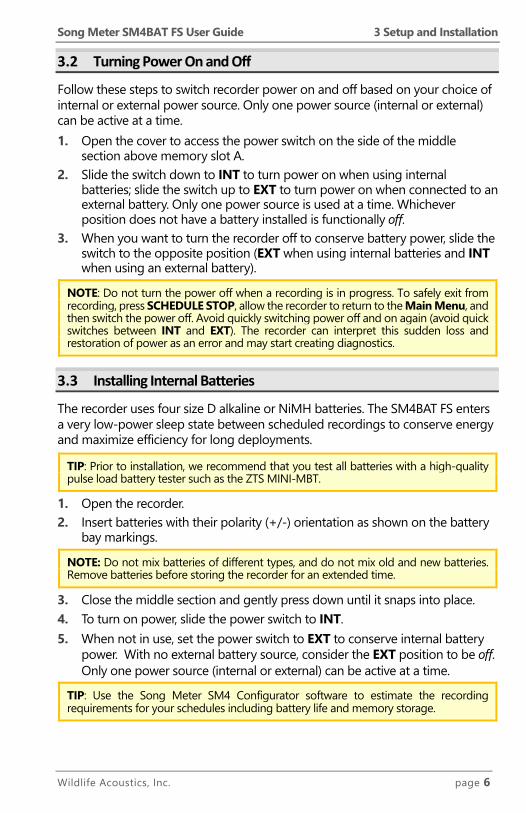
3.2 TurningPowerOnandOff
Follow these steps to switch recorder power on and off based on your choice of internal or external power source. Only one power source (internal or external) can be active at a time. 1. Open the cover to access the power switch on the side of the middle
section above memory slot A. 2. Slide the switch down to INT to turn power on when using internal
batteries; slide the switch up to EXT to turn power on when connected to an external battery. Only one power source is used at a time. Whichever position does not have a battery installed is functionally off.
3. When you want to turn the recorder off to conserve battery power, slide the switch to the opposite position (EXT when using internal batteries and INT when using an external battery).
NOTE: Do not turn the power off when a recording is in progress. To safely exit from recording, press SCHEDULE STOP, allow the recorder to return to the Main Menu, and then switch the power off. Avoid quickly switching power off and on again (avoid quick switches between INT and EXT). The recorder can interpret this sudden loss and restoration of power as an error and may start creating diagnostics.
3.3 InstallingInternalBatteries
The recorder uses four size D alkaline or NiMH batteries. The SM4BAT FS enters a very low-power sleep state between scheduled recordings to conserve energy and maximize efficiency for long deployments.
TIP: Prior to installation, we recommend that you test all batteries with a high-quality pulse load battery tester such as the ZTS MINI-MBT.
1. Open the recorder. 2. Insert batteries with their polarity (+/-) orientation as shown on the battery
bay markings.
NOTE: Do not mix batteries of different types, and do not mix old and new batteries. Remove batteries before storing the recorder for an extended time.
3. Close the middle section and gently press down until it snaps into place. 4. To turn on power, slide the power switch to INT. 5. When not in use, set the power switch to EXT to conserve internal battery
power. With no external battery source, consider the EXT position to be off. Only one power source (internal or external) can be active at a time.
TIP: Use the Song Meter SM4 Configurator software to estimate the recording requirements for your schedules including battery life and memory storage.

Song Meter SM4BAT FS User Guide 3 Setup and Installation
Wildlife Acoustics, Inc. page 7
3.4 ConnectingExternalPower
With the optional external power cable, the power connector can accept voltages from 5-17 volts DC. It is intended for 6 or 12-volt external batteries.
CAUTION: If you are unfamiliar with configuring external battery and power systems, consult a local installer for assistance.
1. Each power cable is shipped with a snap-on ferrite to meet standards limiting electromagnetic emissions and protecting against electrostatic discharge. Install the ferrite near the end of the cable as close to the recorder as possible.
2. Loop the cable through and snap the ferrite shut. A zip tie is included for further securing the ferrite. The image shows the ferrite as shipped (right) and as installed (left).
3. Align and seat the cable into the EXT POWER port on the side of the recorder. Turn the grey locking ring (black on older SM3 cables) clockwise P firmly until it locks into place.
4. The external power cable includes F2-size spade connectors and ring terminals. Connect the cable to a 6 or 12-volt battery using one of the connectors provided. The SM4BAT FS provides protection against accidental reverse polarity connections.
5. Open the security cover and slide the power switch up to EXT. 6. (Optional) Set a minimum voltage to prevent damage to lead-acid batteries
that are not designed for deep discharge. See Setting a Minimum External Battery Voltage.
7. When not in use, set the power switch down to INT to conserve external battery power. With no internal batteries installed, consider the INT position to be off.

Song Meter SM4BAT FS User Guide 3 Setup and Installation
Wildlife Acoustics, Inc. page 8
3.5 InsertingSDMemoryCards
Insert at least one SD memory card to save your recordings. On a typical night with bat activity (and no rain or gusty wind), the recorder might use no more than half a gigabyte (0.5 GB). With considerable bat activity it is possible to use several gigabytes per night. The following table shows the total recording capacity in hours for each card size by sampling rate to help you choose the right memory card size. This is the total time of all triggered or non-triggered WAV files.
SD Memory Card (GB)
Sample Rate: 192 kHz 256 kHz 384 kHz 500 kHz
16 12 9 6 5 32 23 17 12 9 64 46 35 23 18 128 93 70 47 36 256 185 139 93 71 512 370 278 185 142
1. Open the security cover and locate memory slots A and B on the side below the power switch.
2. Insert one required SD memory card in slot A or B. Push the card straight in until it clicks into place.
3. (Optional) To extend deployments, insert a second SD memory card in the remaining slot.
4. To remove a card, push it in and release it. The spring-loaded slot ejects your card so you can pull it away safely.
NOTE: You can use slot A, slot B, or both for recording; however, when importing and exporting schedules or updating the firmware you must use slot A.
If the recorder is unable to access or write to your card, an error message appears on the display. If no card is present, insert one. Make sure the small read/write switch on the card is set to allow write access. Use a new memory card, or copy old data to another card or hard disk and then reformat the card to restore its full capacity. To reformat a card, see Formatting SD Memory Cards in Chapter 7: Utilities.
NOTE: Do not remove SD memory cards while the SM4BAT FS is recording. This could corrupt the card.

Song Meter SM4BAT FS User Guide 3 Setup and Installation
Wildlife Acoustics, Inc. page 9
3.6 ConnectinganExternalMicrophone
You must connect an available SMM-U1 external microphone to record bats. The SMM-U1 is a highly sensitive and low-noise ultrasonic microphone designed for recording ultrasound up to 250 kHz when operating with an SM4BAT FS. The microphone has a differential output which significantly reduces noise from electromagnetic sources.
NOTE: Mounting cabled microphones on ungrounded non-conductive masts, especially in dry or windy conditions, could result in microphone damage from electro-static build-up. Check with a professional licensed electrician or installer with experience in outdoor antennas or weather instruments for advice suitable to your situation.
1. Each extension cable is shipped with a snap-on ferrite to meet standards limiting electromagnetic emissions and protecting against electrostatic discharge. Install the ferrite near the end of the cable as close to the recorder as possible.
2. Loop the cable through and snap the ferrite shut. A zip tie is included for further securing the ferrite. The image shows the ferrite as shipped (right) and as installed (left).
3. Align and seat the cable into the keyed MIC connector. 4. Turn the grey locking ring (black on SM3 cables) on the microphone or
cable clockwise P firmly until it locks into place. 5. Replace the windscreen when the foam begins to break down and flake.
With normal outdoor use over time, the foam windscreen fades to brown; however, color degradation does not indicate a loss of integrity.
When installed correctly, the SMM-U1 microphone is completely weatherproof. It features a hydrophobic membrane that is transparent to acoustic or ultrasound signals. This membrane prevents unpressurized water from entering the microphone.

Song Meter SM4BAT FS User Guide 3 Setup and Installation
Wildlife Acoustics, Inc. page 10
In gusty, windblown rain, water may infiltrate the membrane. To protect the internal ultrasonic transducer from water damage, install the included windscreen. We also recommend positioning the microphone so that it is aimed at least slightly downward to minimize water entry. Bat activity from above is still recorded in this orientation because the microphone is omnidirectional. The microphone includes a 3-meter cable. The microphone can be extended up to 100 meters with available extension cables in 10 and 50-meter lengths with no signal attenuation or degradation. All connections are fully waterproof. To learn more about the SMM-U1, see Specifications. Ultrasonic Directional Horn
The omnidirectional SMM-U1 is ideal for unattended monitoring where the precise direction of bat activity is not known in advance. In applications requiring more directionality, the microphone can be adapted for directional sensitivity with the available directional horn. The Ultrasonic Directional Horn converts the SMM-U1 into a highly directional microphone, while preserving echolocation call quality. The attachment remains weatherproof at angles up to 45-degrees from horizontal. Microphone Windscreens
Windscreens should be installed for long-term deployments in all areas susceptible to heavy wind-driven rain which, if not mitigated, can result in permanent damage to the microphone element due to water penetration. The risk is greater when deployed with the Ultrasonic Directional Horn. For short-term deployments with less severe weather forecasts or in dry climates, windscreens are not necessary. Secure the windscreen to the SMM-U1 microphone with the included C-clip. Allow an air gap between the windscreen and the microphone as shown.

Song Meter SM4BAT FS User Guide 3 Setup and Installation
Wildlife Acoustics, Inc. page 11
For the SMX-Horn directional attachment, secure the large windscreen with the included zip-tie as shown below.
Windscreens attenuate ultrasound by only a few dB when dry. However, they block most ultrasound when soaked with water, until they dry. Drying time can vary significantly based on temperature, humidity, and wind conditions.
3.7 ConnectingtheGPSAccessory
The optional GPS accessory automatically sets the date, time, latitude, and longitude of the recorder. If you have several SM4BAT FS recorders to deploy in the field, you can use a single GPS accessory to set them up. 1. Open the security cover and plug
the GPS cable into the GPS port on the side of the recorder.
2. The recorder automatically detects the presence of the GPS. When the recorder wakes up, the GPS is powered up.
3. Press the CHECK STATUS button. A question mark (?) appears between the date and time to indicate that the GPS accessory is attempting to acquire satellite data:
2017-Oct-14?14:50:48 R:1.0.0 Mic0:A2 1:A2 SDA: 6/32 B: 0/32 Bat: 5.9V Temp:16.70
4. When the GPS has successfully acquired satellite data, the question mark changes to a number sign (#) indicating that the location and clock have been set.
NOTE: The Location Settings coordinates as seen on the display in the main menu are read-only when the GPS is attached. You cannot change them.
5. Disconnect the GPS. The available GPS accessory consumes about 90 mA of additional current—more than four times the current of the recorder itself. For passive recording, we recommend that you use the GPS to automatically set the clock and location at the beginning of the deployment but do not keep it attached for the duration of the deployment.

Song Meter SM4BAT FS User Guide 3 Setup and Installation
Wildlife Acoustics, Inc. page 12
6. Navigate to Main Menu > Settings > Location > Timezone and set the time zone. Even with the GPS accessory installed, you must manually set the time zone. The observation of time zones varies worldwide by region.
NOTE: If you are still prompted for latitude and longitude when starting a schedule, it most likely means the GPS accessory does not yet have a fix. Be aware that it can be difficult to acquire a GPS signal in thick vegetation. Also note that the GPS cannot be used for precision time synchronization on the SM4BAT FS as it can on the SM3BAT.
3.8 SecuringtheRecorder
Close the cover to protect the recorder from environmental conditions. To secure the recorder with a standard key or combination lock, press the latch down and insert the lock shackle through the lock ring.
Observe the following size requirements for the lock:
Minimum: Maximum: Shackle Diameter 1/8 inch (3 mm) 3/8 inch (9 mm) Vertical Clearance 5/8 inch (16 mm) 1.0 inch (25 mm) Horizontal Clearance 1/2 inch (13 mm) 1.0 inch (25 mm)
NOTE: The lock should be rated for outdoor use.
3.9 MountingtheRecorder
Use the holes in the top and bottom mounting bracket for mounting the recorder with cable locks, screws, radiator clamps, bungee cords, or other fasteners. The enclosure is fully weatherproof and does not require additional protection.

Song Meter SM4BAT FS User Guide 3 Setup and Installation
Wildlife Acoustics, Inc. page 13
3.10 ReplacingtheClockBatteryA separate button cell CR2032 lithium clock battery maintains real-time clock settings when the four main D batteries are being exchanged or are no longer operational. The included battery should last up to 3 years. Use the steps below to replace the internal clock battery. 1. Open the security cover and the middle section to access the battery bay. 2. Locate the circular CLOCK BATTERY bay behind the display and keypad
opposite the main battery bay. 3. Gently insert a flathead screwdriver to pry the old battery out and replace it
with a new one. The side with the CR2032 lettering faces you.
3.11 ReadingtheRecorderTemperature
The recorder includes an integrated temperature sensor to log temperatures inside the enclosure. This is intended for diagnostics only. Heat from the electronics and/or sunlight on the enclosure can significantly increase the temperature reading above ambient air conditions. Press the CHECK STATUS button to view the current temperature reading.

Song Meter SM4BAT FS User Guide 4 Settings
Wildlife Acoustics, Inc. page 14
4 Settings 4.1 NavigatingtheMenus
To navigate the main menu, select items, and configure the values for various settings, use the following basic steps. All procedures in this guide assume you are familiar with these steps. 1. Press ▲ Up or ▼ Down and ENTER to navigate any menu.
For example, navigate to Main Menu > Settings > LED Indicator. 2. Press ENTER or ► Right to select menu items and continue to the next
editable item. (ENTER and ► Right are interchangeable in the menus with the exception of the line where schedule blocks are added and deleted.)
3. Press ▲ Up or ▼ Down to select values.
Tip: To accelerate the pace when selecting higher or lower values, press and continue to hold down the ▲ Up or ▼ Down arrow buttons.
4. Press ENTER or ► Right to save your edits. 5. Repeat these steps as required. The exact buttons used may vary by setting. 6. Press ◄ Left to exit a line without saving or to return to the previous menu.
TIP: For improved visibility in low-light environments, press any button on the keypad to illuminate the display. The backlight remains lit while you continue operating the recorder and turns itself off after 30 seconds of inactivity.
4.2 SettingtheDateandTime
Follow these steps to set the date and time manually unless you are using the available GPS accessory to automatically set the current date and time.
NOTE: The recorder does not automatically adjust for Daylight Saving Time.
1. Navigate to Main Menu > Settings > Date and Time. The date and time appear on one line in the following format: YYYY-MMM-DD HH:MM:SS
2017-Oct-22 20:17:45
2. Press ► Right to set the date (year, month, and calendar day). As you adjust the month and day, the corresponding sunrise and sunset times appear (according to the Sunrise/Sunset Type setting) for that date.
3. Press ► Right to set the time (hours, minutes, and seconds). 4. To adjust any value, press ▲ Up or ▼ Down. 5. Press ENTER when finished.

Song Meter SM4BAT FS User Guide 4 Settings
Wildlife Acoustics, Inc. page 15
4.3 SettingtheDevicePrefixforRecordedFiles
The prefix appears in the name of every recording file to easily identify the recordings made on a specific recorder or from a common shared schedule. The default prefix combines the model number with the serial number. You can specify a custom filename prefix of up to 12 characters to identify each recorder. 1. Navigate to Main Menu > Settings > Location > Prefix. 2. Specify a 1 to 12 character prefix from left to right:
a. At the first position, press ▲ Up to cycle through the alphabetic characters A to Z. Press ▼ Down to cycle through the numbers 9 to 0. You can also select a hyphen (it is above the digit 9).
b. Press ► Right to advance to the next position in the prefix and repeat the previous step.
3. To erase characters, select the blank character that is above the hyphen and below the letter A. All of the characters to the right of the blank character are erased.
4. When finished, press ► Right to advance to the last position and then press ENTER.
NOTE: The prefix can only contain capital letters, numbers, and hyphens. When you change the default prefix, the serial number of the recorder no longer appears in the recording file names; however, it does still appear in the metadata inside the file.
4.4 SettingtheLocationandTimeZone
The selections you make for latitude, longitude, and time zone enable the recorder to determine the specific sunrise and sunset times for each day. If you are not using the available GPS accessory to automatically set the latitude and longitude, you must manually set these parameters. The time zone cannot be set automatically by the GPS and must also be set manually.
NOTE: Schedules and settings exported from one recorder and imported on a second recorder do not overwrite the Prefix, Latitude and Longitude, Time Zone, or Battery Cutoff settings on the second recorder. Schedules created or edited by the Song Meter SM4 Configurator software can selectively overwrite any setting upon import.
Specify the local time zone (as used to set the clock) in hours relative to UTC (Universal Time Coordinated). Exact hour, half, and quarter time zones (:00 :15 :30 :45) are supported. 1. Navigate to Main Menu > Settings > Location > Latitude.
Enter the north or south latitude. 2. Navigate to Main Menu > Settings > Location > Longitude.
Enter the east or west longitude. 3. Navigate to Main Menu > Settings > Location > Timezone.
Enter the time zone relative to UTC.

Song Meter SM4BAT FS User Guide 4 Settings
Wildlife Acoustics, Inc. page 16
NOTE: The recorder does not automatically adjust for Daylight Saving Time.
4.5 SettingtheSolarCalculationMethod
The SM4BAT FS can schedule recordings relative to sunrise and sunset times, and adjusts these times as they change during the year. You can choose from four different methods of calculating the sunrise and sunset. 1. Navigate to Main Menu > Settings > Sunrise/Sunset Type. 2. Select one of the following solar calculation types:
■ sunrise/set: When the sun is just below the horizon. ■ civil: When the sun is 6 degrees below the horizon. ■ nautical: When the sun is 12 degrees below the horizon. ■ astronomical: When the sun is 18 degrees below the horizon.
3. The calculated sunrise and sunset times for the method that you select appear for today. For example:
Sunrise/Sunset Type -Solar nautical Rise 05:12 Set 18:57
4. Press ENTER to save your changes.
NOTE: Sunrise and sunset calculations also require other settings including the date and time, latitude and longitude, and time zone.
4.6 SettingaMinimumExternalBatteryVoltage
You can set a minimum voltage cutoff to help prevent damage to external lead acid batteries from over-discharge. If the external battery voltage falls below this cutoff, the schedule is suspended. The SM4BAT FS then wakes every 24 hours to check the voltage and resumes the schedule if the voltage is restored. 1. Navigate to Main Menu > Settings > Battery Cutoff. 2. Press ▲ Up or ▼ Down to adjust the power cutoff in volts from 0.0 to 12.0
in 0.1-volt increments. 3. Press ENTER to save your changes.
NOTE: Leave the cutoff value at 0.0 if you are using internal alkaline batteries. Any non-zero setting decreases internal battery life as the recorder prematurely suspends operation. Also use a setting of 0.0 for external batteries that are designed for deep discharge.
Song Meter SM4BAT FS User Guide 4 Settings
Wildlife Acoustics, Inc. page 17
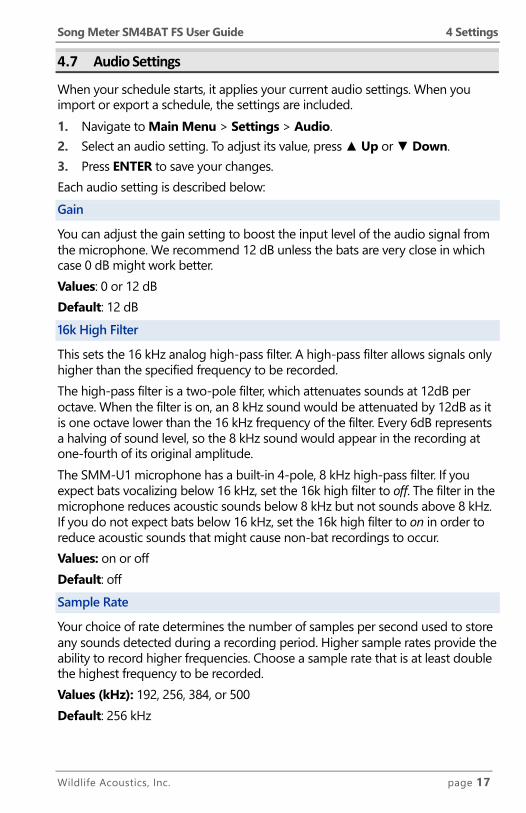
4.7 AudioSettings
When your schedule starts, it applies your current audio settings. When you import or export a schedule, the settings are included. 1. Navigate to Main Menu > Settings > Audio. 2. Select an audio setting. To adjust its value, press ▲ Up or ▼ Down. 3. Press ENTER to save your changes. Each audio setting is described below: Gain
You can adjust the gain setting to boost the input level of the audio signal from the microphone. We recommend 12 dB unless the bats are very close in which case 0 dB might work better. Values: 0 or 12 dB Default: 12 dB 16k High Filter
This sets the 16 kHz analog high-pass filter. A high-pass filter allows signals only higher than the specified frequency to be recorded. The high-pass filter is a two-pole filter, which attenuates sounds at 12dB per octave. When the filter is on, an 8 kHz sound would be attenuated by 12dB as it is one octave lower than the 16 kHz frequency of the filter. Every 6dB represents a halving of sound level, so the 8 kHz sound would appear in the recording at one-fourth of its original amplitude. The SMM-U1 microphone has a built-in 4-pole, 8 kHz high-pass filter. If you expect bats vocalizing below 16 kHz, set the 16k high filter to off. The filter in the microphone reduces acoustic sounds below 8 kHz but not sounds above 8 kHz. If you do not expect bats below 16 kHz, set the 16k high filter to on in order to reduce acoustic sounds that might cause non-bat recordings to occur. Values: on or off Default: off Sample Rate
Your choice of rate determines the number of samples per second used to store any sounds detected during a recording period. Higher sample rates provide the ability to record higher frequencies. Choose a sample rate that is at least double the highest frequency to be recorded. Values (kHz): 192, 256, 384, or 500 Default: 256 kHz

Song Meter SM4BAT FS User Guide 4 Settings
Wildlife Acoustics, Inc. page 18
Min Duration
Sets the minimum duration of a signal in the specified frequency range that qualifies as a valid signal for the scrubber. The scrubber automatically rejects recordings if it detects no suitable bat echolocation call. The scrubber looks for at least two narrow-band signals of at least this minimum duration, shorter than the maximum duration, and within the frequency range you specified. If two such signals exist, the file is saved; otherwise, the file is not saved. A value of 1.5 ms is recommended for recording bats.
NOTE: To disable the scrubber, set Min Duration and Max Duration to none.
Range: none, 0.1 to 99.9 milliseconds in 0.1-millisecond increments Default: 1.5 ms Max Duration
Sets the maximum duration of a signal in the specified frequency range that qualifies as a valid signal for the scrubber. A value of none is recommended for recording bats. Range: none, 1 to 500.0 milliseconds in 1-millisecond increments Default: none Min Trig Freq
Use this command to set the lower bound for the frequencies of interest to the triggering mechanism and noise scrubber. Echolocation calls or other signals occurring below this frequency do not cause a trigger and are considered noise to the scrubber. A setting of 16 kHz works well for most bat applications. It may be necessary to reduce this setting for recording lower-frequency species. Range: 6 to 99 kHz in 1-kHz increments Default: 16 kHz Trigger Level
Specifies the digital trigger level. The trigger is satisfied if a signal exceeds the specified dB level and is above the frequency defined by Min Trig Freq. The recorder creates an individual time-stamped WAV file for each triggered event during the scheduled recording period.
NOTE: The trigger is inactive for up to a second after the end of a triggered recording to allow time for the file to be written.
Turning on the trigger also activates file scrubbing. For information on the scrubber, including how to turn it off, see Min Duration. When you turn off the trigger level setting, the Trigger Window, Min Trig Freq, Min Duration, and Max Duration settings are ignored and continuous

Song Meter SM4BAT FS User Guide 4 Settings
Wildlife Acoustics, Inc. page 19
recordings are made as defined in the recording schedule. Max Length dictates the maximum file length for non-triggered recordings. Range: off, 6, 12, 18, or 24 dB Default: 12 dB Trigger Window
The recording continues for this amount of time after the last signal that satisfies the trigger. (The recording is also truncated when it reaches the maximum recording duration set by Max Length.) Set the trigger window setting long enough to avoid a recording that ends after one echolocation call. For example, if bat echolocation calls occur every 0.5 seconds and trigger window is 0.1 seconds, you would get a new trigger with every single echolocation call. Three (3.0) seconds is a good default value.
NOTE: Some standards describe a specific recording trigger window as a bat pass.
Values: 1 to 15 seconds in 1-second increments Default: 3 seconds Max Length
You can specify the maximum length (time duration) of recordings to comply with file size restrictions set by your analysis software or to define a valid bat pass based on a theoretical maximum recording duration. The recorder also enforces its own 2.0 GB maximum recording file size. When a recording reaches either maximum, it ends and a new recording file starts. Values: 1 second to 60 minutes 1-second increments Default: 00m:15s

Song Meter SM4BAT FS User Guide 4 Settings
Wildlife Acoustics, Inc. page 20
4.8 SettingaDelayedStart
The Delay Start setting waits until a future date to start your schedule. The recorder delays the start of the schedule until midnight of the specified day. 1. Navigate to Main Menu > Settings > Delay Start. 2. Set a future start date and set Enable to yes.
NOTE: You can use this feature to synchronize the start of two or more recorders.
When you start the schedule, a warning appears reminding you of the delayed start. If the date is in the past, no warning appears and the schedule starts without delay.
4.9 SettingtheLEDIndicatorMode
The LED indicator in the keypad blinks to indicate the recorder status. It blinks green once per second during a recording and once per minute when the recorder is sleeping. The LED blinks red when in an armed state waiting for a trigger. This light is visible on the front of the recorder even when the security cover is closed. 1. Navigate to Main Menu > Settings > LED Indicator. 2. Choose always or 5 minutes only.
When you choose 5 minutes only, the LED only appears for approximately the first five (5) minutes of recording after you press SCHEDULE START or CHECK STATUS or until the first time the unit sleeps. This setting minimizes drawing attention to the recorder and allows you to maintain some level of camouflage when recorder security or visibility is a concern.

Song Meter SM4BAT FS User Guide 5 Making Scheduled Recordings
Wildlife Acoustics, Inc. page 21
5 Making Scheduled Recordings 5.1 RecordingOperationOverview
The SM4BAT FS is a full-spectrum recorder. It samples audio signals at a specified sample rate and saves full-spectrum 16-bit WAV files to SD memory cards. The recording schedule determines when each day the SM4BAT FS records and when it sleeps while waiting for a recording period. In most cases, the recorder is configured to make triggered recordings of bat activity. Recordings are initiated with the configurable trigger and saved only if they make it through the configurable noise scrubber, which automatically deletes recordings that do not appear to contain bats. You can also configure the recorder to make non-triggered recordings which record all the time during the scheduled recording periods defined by the schedule. You can also deactivate the scrubber to avoid deleting non-bat recordings. This chapter guides you in using the Quick Start schedules. The next chapter covers creating your own schedules as well as importing and exporting them.
5.2 UsingaQuickStartSchedule
The Quick Start menu includes pre-configured schedules intended to satisfy most customer requirements. They also serve as excellent starting points for editing your own custom schedules as described in the next chapter. 1. Navigate to Main Menu > Quick Start. 2. Choose one of following Quick Start schedules and press ENTER.
Name Definition of schedule Record Sunset->Rise Based on your location, date and sunrise/sunset settings,
records continuously from sunrise until sunset. Record Always Records continuously 24 hours a day.
3. When you change schedules, a confirmation message appears: Overwrite Schedule? -No -Yes
■ Select No to keep the previously loaded schedule and exit. ■ Select Yes to continue loading the selected schedule. This overwrites the
old schedule. All other settings are unchanged.
Tip: If you want to save any custom edits or blocks you made to a schedule, select No here to go back and export that schedule to a memory card. Then, you can choose a new schedule and select Yes here with confidence knowing that your previous schedule was backed up.

Song Meter SM4BAT FS User Guide 5 Making Scheduled Recordings
Wildlife Acoustics, Inc. page 22
4. Press SCHEDULE START to start the schedule. If you are not ready to start it yet, press ◄ Left to return to the Quick Start menu.
NOTE: The recorder automatically attempts to start the current schedule after three (3) minutes of inactivity.
5. When you press SCHEDULE START, warning messages may alert you about required settings, missing SD memory cards, or incompatible or missing microphones. Each warning appears for several seconds. ■ Press ▼ Down to proceed to the next warning. After the last warning, the
recorder attempts to run the schedule. ■ Press SCHEDULE STOP or ◄ Left to avoid running the schedule and
return to the main menu. Adjust any settings or hardware to resolve the warnings. Press SCHEDULE START again when you are ready.
6. The recorder shows Preparing to record and indicates if the next recording period is continuous or covers a specific timespan:
2017-Dec-05 10:58:37 Preparing to record A CONTINUOUS #00001
2017-Apr-25 10:59:37 Preparing to record B 11:00-17:00 #00088
If the first recording period start time is more than 45 seconds into the future, the recorder goes to sleep to conserve power:
2017-Feb-10 11:05:00 Going to sleep until 2017-Feb-10 19:15:00
The recorder wakes up 30 seconds before the next scheduled recording period so that it is ready to record on time.
5.3 TheRecordingScreensThe following screens appear when recording with the trigger on:
2017-Apr-25 23:50:48 Currently Recording: B 18:45-07:15 #00101 PREPARING @ SR=384k
2017-Apr-25 23:50:48 Currently Recording: B 18:45-07:15 #00101 ARMED @ SR=384k
2017-May-22 23:50:48 Currently Recording: B 18:45-07:15 #00101 TRIGGERED @ SR=384k

Song Meter SM4BAT FS User Guide 5 Making Scheduled Recordings
Wildlife Acoustics, Inc. page 23
The following screen appears when recording with the trigger off: 2017-Apr-25 23:50:48 Currently Recording: B 18:45-07:15 #00102 RECORD @ SR=384k
These example screens show the following details: Line 1: The current date and time. Line 2: The Currently Recording: status message. Line 3: The current SD memory card slot that the recorder is writing to (A or B), followed by the beginning and ending times of the current recording period or CONTINUOUS if the schedule is set to record all the time (the Quick Start Record Always schedule for example). On the right side of the same line is the running count of recording files saved since the recorder was last powered on. Line 4: The state of the device and the sample rate.
■ PREPARING: the recorder is writing the file to the SD memory card. ■ ARMED: the recorder is waiting for audio activity to trigger a recording. ■ TRIGGERED: the recorder is making a triggered recording. ■ RECORD: a non-triggered recording is being made.
5.4 CheckingtheStatusoftheRecorder
We recommend that you perform this procedure to check the status of the recorder and SD memory cards before every deployment. 1. Press the CHECK STATUS button. If the recorder is sleeping, press and hold
the button. The following status information appears for ten (10) seconds: 2017-Oct-23 09:14:48 R:1.0.0 Mic:U1 SDA: 7/64 B: EMPTY Bat: 5.2V Temp:16.70
■ Line 1: The current date and time. ■ Line 2: The installed firmware version and connected microphone:
U1: SMM-U1 microphone NA: no microphone is connected
■ Line 3: The consumed memory as a fraction of the total capacity in GB for the SD memory cards in slots A and B. In this example, 7 GB have already been used on a 64 GB card in slot A and there is no card in slot B.
■ Line 4: The internal battery or external power supply voltage, and the internal temperature in degrees Celsius.
NOTE: The internal temperature of the recorder is intended for diagnostics and not as an accurate measurement of outside air temperature.
2. Press the CHECK STATUS button again to return to the previous screen.

Song Meter SM4BAT FS User Guide 5 Making Scheduled Recordings
Wildlife Acoustics, Inc. page 24
NOTE: When the recorder is sleeping, the Going to sleep until screen is shown first, and another press of the Check Status button is required to see the information screen.
5.5 StoppingaRecordingSchedule
When a schedule is running, or scheduled to run, you have the option to stop it. 1. Press and hold the SCHEDULE STOP button for several seconds. 2. When you stop a running schedule, the current recording is saved to the SD
memory card before it ends. 3. The recorder automatically attempts to resume the current recording
schedule after three (3) minutes of inactivity. When not recording for an extended period of time, power the recorder off.
5.6 MakinganInstantRecording
In addition to running a schedule, you can start an instant recording anytime. Starting an instant recording is like forcing the Quick Start Record Always schedule for 24 hours. 1. Verify the recorder is turned on and displaying the main menu. If the
recorder is sleeping, press and hold SCHEDULE STOP to wake it. 2. Press and hold both the ▲ Up and ▼ Down keys at the same time. 3. After showing Preparing to record, the recorder immediately starts
recording based on your audio settings. 4. Press SCHEDULE STOP to stop instant recording. After 24 hours, instant
recording will automatically stop and the current schedule will start.
5.7 RecordingFiles
Audio recording files are saved in the Data folder on each SD memory card and use the following naming convention:
PREFIX_YYYYMMDD_HHMMSS.wav PREFIX: The current prefix as set in the location settings. YYYYMMDD_HHMMSS: The date-time stamp including the year, month, day, hour, minute, and second when the recording started. .wav: The audio file name extension for Waveform Audio File Format (WAVE)

Song Meter SM4BAT FS User Guide 5 Making Scheduled Recordings
Wildlife Acoustics, Inc. page 25
5.8 RecordingMetadata
Values for the attributes listed below are stored as metadata in your recordings. The Wildlife Acoustics Support Team can use the metadata when troubleshooting issues.
NOTE: You can open a recording in the SM4 Configurator computer software to view the schedule and settings used to make the recording. Also, some of the metadata information is visible in the available Kaleidoscope computer software. Kaleidoscope has the ability to add additional metadata relating to analysis of the recording.
Device Model: The device model name. For example, SM4BAT FS. Device Serial Number: The unique serial number of your recorder. Firmware Version: The firmware version installed on the recorder. Prefix: The prefix assigned to the recorder in the location settings. Timestamp: The date and time when the recording started. GPS Coordinates: The location of the SM4BAT FS when the recording first started. The metadata store the location coordinates that you manually entered on the recorder as well as the coordinates from the GPS accessory if attached. Schedule and Settings: The schedule and all settings in use when the recording was made.
5.9 RecordingSummaryTextFile
Approximately once per minute during a recording, the SM4BAT FS appends a line to the summary text (.txt) file. This file is in comma-separated values (.csv) format. You can open it in Microsoft Excel, in database software, or in a text editor. The file begins with a header line which identifies the fields that appear in each line of summary data:
DATE,TIME,LAT,,LON,,POWER(V),TEMP(C),#FILES,#SCRUBBED,MIC0 TYPE
Three (3) lines from an example summary file appear below: 2017-Jan-22,17:15:24,42.00000,N,71.00000,W,5.9,12.00,1,1,U1
2017-Jan-22,17:16:38,42.20000,N,71.10000,W,5.9,11.75,0,4,U1 2017-Jan-22,17:17:47,42.35000,N,71.18200,W,5.9,11.75,2,2,U1
DATE & TIME: The date and time for each entry. This is the time taking into account the time zone set in the location settings. LAT & LON: If the GPS accessory is installed, the latitude and longitude are given with identifiers for north (N), south (S), east (E), and west (W). Without GPS, the latitude and longitude values are 0. POWER(V): The internal battery or external power supply voltage. In the example, the voltage is 5.9 volts. TEMP(C): The temperature in degrees Celsius inside the recorder. In the example, the internal temperature has fallen from 12.00 to 11.75 degrees.

Song Meter SM4BAT FS User Guide 5 Making Scheduled Recordings
Wildlife Acoustics, Inc. page 26
#FILES: The number of recording files written since the previous summary file line. Since a new summary line is written once per minute, if your recording is longer than 1 minute, a zero appears on all lines until the recording ends. In the example, 1, 0, and 2 files were written during each respective one-minute period. #SCRUBBED: This is the number of WAV files that were scrubbed, based on the audio settings, since the previous summary file line. These files were not saved on the SD memory card. In the example 1, 4, and 2 files were scrubbed during each respective one-minute period. MIC_TYPE: The microphone type attached during recording. U1 indicates the SMM-U1 microphone.
5.10 AnalyzingBatRecordingsYour recording files are compatible with all popular third-party full-spectrum analysis programs available. Wildlife Acoustics recommends and supports our Kaleidoscope software, which allows you to easily view and classify your recordings.

Song Meter SM4BAT FS User Guide 6 Creating Custom Schedules
Wildlife Acoustics, Inc. page 27
6 Creating Custom Schedules In addition to using one of the Quick Start schedules, you can also create your own schedule using the built-in editor, or import a schedule from an SD memory card. You can export the current schedule to an SD memory card. You can also use the Song Meter SM4 Configurator software on your computer to create and edit schedules, which can be imported to the recorder. SM4BAT FS schedules are flexible and portable. Schedules exported from recorders or created by the Song Meter SM4 Configurator software include all configurable settings. The appropriate settings are applied when a schedule is imported. This coupling of schedules with their settings enables you to share entire configurations from one recorder to another.
6.1 ScheduleBlocks
Schedule blocks are the core components that define a daily recording schedule. Every schedule has at least one block. A block has the following three lines:
START: time hh:mm or rise +/-hh:mm or set +/-hh:mm DUTY: always or ON hh:mm OFF hh:mm END: time hh:mm or rise +/-hh:mm or set +/-hh:mm
Each block defines a single continuous recording period between its START and END times if DUTY is always, or a series of smaller periods if DUTY is on that repeat between the START and END times. The combination of all the duty cycles and recording periods generated by all the blocks makes up the daily recording schedule. The START and END times for the block can be a fixed time or relative to sunset or sunrise. Times are specified using a 24-hour clock (HH:MM). When relative to sunset or sunrise, a positive (+) or negative (−) offset can be specified. The DUTY cycle determines how often recording occurs between the start and end times. When set to always, recording is continuous between the start and end times. When set to ON and OFF, recording occurs for the specified number of hours and minutes (ON) followed by a period of inactivity (OFF). The duty cycle repeats as many times as possible before the END time is reached. The duty cycle begins at the START time, not when you begin running the schedule. For example, if you begin the following schedule by pressing

Song Meter SM4BAT FS User Guide 6 Creating Custom Schedules
Wildlife Acoustics, Inc. page 28
SCHEDULE START at 10:50, the recorder sleeps until the next 15-minute ON duty cycle occurs at 11:00.
START: time 07:00 DUTY:ON00:15OFF00:45 END: time 19:00 01/01 [ADD]
A typical schedule might only need one block; however, you can combine up to ten (10) blocks in a single schedule and can even overlap them. The SM4BAT FS scans all blocks and combines all their recording periods. For example, you can create a schedule to record continuously from sunset to sunrise in one block and to record 5 minutes on the hour throughout the whole day (24 hours) in another block. The recorder combines these, resulting in 5-minute recordings during the days and continuous recordings during the nights. In another example, if one block generates a recording period from 08:00 to 10:00, and a second block generates a recording period from 09:00 to 11:00, the resulting schedule yields a single recording period from 08:00 to 11:00.
6.2 SM4ConfiguratorSoftware
In addition to configuring schedules and settings on the recorder, you can use the Song Meter SM4 Configurator software to confirm schedule behavior on a graphical calendar and to estimate power consumption and SD memory card usage for schedules that you plan to run. We recommend using the software to configure the recorder settings and schedule when possible as the additional visualization and information it provides allows you to be sure that your schedule and settings will perform as intended. The software is available for Mac, Windows, and Linux at no cost on our website at www.wildlifeacoustics.com.
6.3 EditingaSchedule
Use this procedure to edit a schedule directly on the recorder using the display and buttons. We recommend that you edit schedules using the Song Meter SM4 Configurator software whenever possible; however, if you are in the field and need to edit a schedule, this method is convenient.

Song Meter SM4BAT FS User Guide 6 Creating Custom Schedules
Wildlife Acoustics, Inc. page 29
The recorder comes from the factory with the Record Always Quick Start schedule pre-loaded. You can select or import another schedule if that provides a better starting point for your custom schedule. 1. Navigate to Main Menu > Schedule > Edit Schedule. 2. Edit any of the three lines of a schedule block:
a. START: Press ▲ Up or ▼ Down to select rise, set, or a specific time. Press ▲ Up or ▼ Down to adjust the + plus or – minus sign for times that are relative to sunrise or sunset. For example, enter rise -01:15 to start recording one hour and fifteen minutes before the calculated sunrise time.
b. DUTY: Schedules can record continuously between the START and END times (always) or for a specific repeating duty cycle within those times (ON & OFF). To learn more, see the schedule examples in this chapter.
c. END: Press ▲ Up or ▼ Down to select rise, set, or a specific time. Press ▲ Up or ▼ Down to adjust the + plus or – minus sign for times that are relative to sunrise or sunset. For example, enter rise -01:15 to start recording one hour and fifteen minutes before the calculated sunrise time.
3. Press ENTER to save your changes.
TIP: To undo your changes in any line, you can press ◄ Left to return to the start of the line and revert to its original value.
6.4 AddingorDeletingScheduleBlocks
When you edit a schedule, you can add or delete schedule blocks. To add a new block: 1. Press ▼ Down repeatedly to navigate to the bottom line of the last block in
the schedule. 2. Press ► Right to advance to the [ADD] label and press ENTER to add
another block. The bottom line below the block shows the number of the block you are viewing and the total number of blocks.
START: time 00:00 DUTY: always END: time 00:00 02/02 [ADD] [DEL]
TIP: To move to the previous schedule block, press ▲ Up when on the START line. To move to the next schedule block, press ▼ Down when on the bottom line.
To delete a block: 1. Press ▲ Up or ▼ Down to navigate to the bottom line of the block you
want to remove. 2. Press ► Right to advance to [DEL] and press ENTER.

Song Meter SM4BAT FS User Guide 6 Creating Custom Schedules
Wildlife Acoustics, Inc. page 30
The following example stretches the display to demonstrate the concept of stacking code blocks in a series:
START: set -00:05 DUTY: always END: rise +00:00 01/03 [DEL]
START: time 09:15 DUTY: always END: time 11:15 02/03 [DEL]
START: set +02:15 DUTY: always END: rise +01:30 03/03 [ADD] [DEL]
6.5 ScheduleBlockExamples
This section provides recording schedule examples that demonstrate how schedule blocks work. A schedule specifies when the SM4BAT FS records but does not necessarily result in a single file for the entire period. If you are making triggered recordings, then the number of recordings for a given schedule will be determined by the trigger and scrubber settings and by bat activity. If you are making non-triggered recordings, then the number of recordings for a given schedule will be determined by the Max Length setting. Record Continuously All Hours of Every Day
The following schedule records continuously all day and night, 24 hours per day: START: time 00:00 DUTY: always END: time 00:00 01/01 [ADD]
This schedule appears under the Quick Start menu as Record Always. It runs continuously until you press SCHEDULE STOP or it runs out of power or SD memory card space. Whenever the start and end times are identical and DUTY is set to always, your schedule is essentially the same as the Record Always schedule. Record Continuously for a Portion of Each Day
The following schedule records continuously for the same six (6) hours daily: START: time 04:00 DUTY: always END: time 10:00 01/01 [ADD]

Song Meter SM4BAT FS User Guide 6 Creating Custom Schedules
Wildlife Acoustics, Inc. page 31
Record in 5-Minute Segments Every Hour
The following schedule records for 5 minutes at the beginning of each hour all day and continues indefinitely:
START: time 00:00 DUTY:ON00:05OFF00:55 END: time 00:00 01/01 [ADD]
NOTE: The ON and OFF periods need not add up to an hour, but if they do not add up to a factor of 24 hours, the duty cycle truncates and restarts at the start time. For example, a duty cycle with ON 00:04 and OFF 00:03 divides 24 hours into 205 7-minute cycles plus one 5-minute partial cycle. In the 206th cycle, the schedule records for 4 minutes and then pauses for only 1 minute (instead of 3). This pattern repeats daily.
Record Continuously from Sunset to Sunrise
The following schedule starts every day at sunset and records continuously until sunrise on the following day:
START: set -00:00 DUTY: always END: rise +00:00 01/01 [ADD]
This schedule appears under the Quick Start menu as Record Sunset->Rise. Record in Multiple Blocks Relative to Sunset and Sunrise
The following schedule uses two blocks: START: rise -01:00 DUTY: always END: rise +01:00 01/02 [DEL]
START: set -01:00 DUTY: always END: set +01:00 02/02 [ADD] [DEL]
The first block defines a period relative to sunrise and the second block defines a period relative to sunset. The combined result records for two hours centered at sunrise and two hours centered at sunset.
6.6 ImportingaSchedule
You can import a schedule file (for example, mySchedule.SM4S) from an SD memory card. The imported schedule also includes settings.

Song Meter SM4BAT FS User Guide 6 Creating Custom Schedules
Wildlife Acoustics, Inc. page 32
1. Save a custom schedule to the top-level directory (not in a folder) of an SD memory card from the Song Meter SM4 Configurator software, or export a schedule to an SD memory card from another recorder.
2. Insert the SD memory card in slot A of the recorder. 3. Navigate to Main Menu > Schedule > Import Sched+Setts. 4. At the Select Schedule File prompt, press ▲ Up or ▼Down to select a
schedule file on your SD memory card. Press ENTER.
NOTE: The file name can only be 28 characters or less. The SM4BAT FS will not recognize or display file names of longer length on the import screen.
5. If no warnings or errors are found, the following message appears: Schedule imported
The imported schedule is now the current schedule. 6. Press ◄ Left to return to the Schedule menu. 7. You can perform any of the following actions on the imported schedule:
■ Edit the schedule. ■ Export the schedule to an SD memory card. ■ Start the schedule.
NOTE: Schedules exported from a recorder and imported on another will not override the second recorder’s Prefix, Latitude, Longitude, Time zone, or Battery Cutoff settings. Schedules created or edited by the Song Meter SM4 Configurator software can selectively override any setting upon import.
6.7 ExportingaSchedule
You can export the current schedule including settings to an SD memory card. When you import a schedule, its settings are applied. 1. Insert an SD memory card in slot A. 2. Navigate to Main Menu > Schedule > Export Sched+Setts.
The following message appears: Schedule exported
3. (Optional) Remove the SD memory card. The exported file is named with the recorder prefix and the .SM4S extension. For example:
SM400155.SM4S
The default prefix is the device model and serial number. You can specify a new prefix on the recorder or in a custom schedule.
CAUTION: If a file with that name already exists on the SD memory card, it is overwritten.
Song Meter SM4BAT FS User Guide 6 Creating Custom Schedules
Wildlife Acoustics, Inc. page 33
After exporting the schedule, you can share it with others, load it on another recorder, or edit it using the SM4 Configurator software.
NOTE: Schedules exported from a recorder and imported on another will not override the second recorder’s Prefix, Latitude, Longitude, Time zone, or Battery Cutoff settings. Schedules created or edited by the Song Meter SM4 Configurator software can selectively override any setting upon import.

Song Meter SM4BAT FS User Guide 7 Utilities
Wildlife Acoustics, Inc. page 34
7 Utilities 7.1 ExportingDiagnostics
This procedure exports a diagnostic file that can be used to assess the audio performance, settings, schedule, and status of the recorder. The Wildlife Acoustics Support Team can use this information to help diagnose problems. 1. Insert an SD memory card into slot A. 2. Navigate to Main Menu > Utilities > Export Diagnostics. 3. The recorder performs internal diagnostic tests and then exports the test
results, the current schedule, and the settings to a file. The file is named with the recorder prefix, the date and time, and the .sm4dump extension: PREFIX_YYYYMMDD_hhmmss.sm4dump
4. Remove the SD memory card and insert it into a computer in order to send the file to Wildlife Acoustics.
7.2 ResettingtoFactoryDefaultSettings
This procedure restores all recorder settings to their original default values as they were configured when your recorder was first assembled and tested. 1. Navigate to Main Menu > Utilities > Set factory default. 2. Select Yes on the confirmation screen.
CAUTION: When you select Yes and reset defaults, your custom settings and any edited schedules are erased.
7.3 CalibratingMicrophones
Use the available Ultrasonic Calibrator to calibrate an attached SMM-U1 microphone. Since ultrasound is beyond the range of human hearing, verifying performance requires special equipment. The Ultrasonic Calibrator helps you test both the microphone and the full recorder system. The calibrator uses a 9V alkaline battery (included with the calibrator). When the battery is depleted, the calibrator can no longer provide a tone and its LED no longer illuminates. While the recorder may still emit sound at this point, it cannot be used as an accurate calibrator until the battery is replaced. The calibrator offers two modes of operation:
■ CAL: Calibration mode is used to test the microphone at close range. ■ CHIRP: Chirp mode is used to test the entire system at a greater
distance.

Song Meter SM4BAT FS User Guide 7 Utilities
Wildlife Acoustics, Inc. page 35
7.3.1 CalibrationModeMicrophoneTesting
1. Verify that you have attached an SMM-U1 ultrasonic microphone. 2. Navigate to Main Menu > Utilities > Calibrate Mic. Wait a moment for
the following screen to appear: MICROPHONE CALIBRATE @40KHZ Ch 0:-80.59 dBv
3. Turn the calibrator ON and set the mode toggle switch to CAL. The calibrator generates a 40 kHz tone. You are now ready to test.
4. (Optional) To cancel testing and exit the utility, press ◄ Left. 5. Install the clear calibrator microphone adapter by sliding it onto the
calibrator from the bottom (the end with the Wildlife Acoustics logo) until it is touching the toggle switches. Position the side with the smaller diameter hole near the toggle switches.
6. Place the microphone in the calibrator microphone adapter. Insert the microphone until it rests against the smaller opening of the adapter circle.
7. While looking at the dBv level on the SM4BAT FS display, slowly rotate the microphone 360 degrees. Note the largest (least negative) number: ■ If the value is higher (less negative) than -38 dB your microphone has
passed and is ready to use. ■ If the value is lower (more negative)
your microphone has lost some or all of its sensitivity and should be replaced.
8. Press ◄ Left when finished to exit the calibration utility.

Song Meter SM4BAT FS User Guide 7 Utilities
Wildlife Acoustics, Inc. page 36
7.3.2 ChirpModeSystemTesting
To test the system, use the Ultrasonic Calibrator to emit loud ultrasonic signals that can be picked up by the recorder from some distance. Analyze the recording files later to verify that the SM4BAT FS settings are appropriate and the system is functioning as expected. 1. Prepare the SM4BAT FS for recording and
place it no more than 20 meters away from the calibrator.
2. Remove the microphone adapter from the calibrator as shown.
3. Before continuing with the next step, read the WARNING below.
4. Set the toggle switch to CHIRP. 5. The calibrator emits a 100ms
40kHz (+/- 10Hz) tone every 500ms. The amplitude of the tone is 104dB SPL (+/- 3dB) at 10cm. The signal can be picked up by the SM4BAT FS recorder at distances up to 20 meters.
6. Begin recording using Instant Recording and monitor with headphones (see Monitoring Ultrasound in Time Expansion Mode below) to verify that the signal is being picked up. Or, analyze the recording files to verify the system is operating as expected.
WARNING! Do not place the Ultrasonic Calibrator near your ears! In CHIRP mode, the calibrator emits a 40 kHz signal at over 100 dB SPL. Prolonged exposure to high intensity ultrasonic signals may cause permanent hearing loss at audible frequencies.
7.4 MonitoringUltrasoundinTimeExpansionMode
For real-time ultrasonic monitoring, the recorder can continually capture brief intervals of signals and play them back at a slower rate that is translated within the range of human hearing. The Time Expansion Mode utility divides the frequencies of ultrasonic signals by a selectable factor of 10 or 20, allowing you to monitor them with headphones. This mode scans for ultrasonic signals that satisfy the trigger level and frequency settings in the Audio menu and then captures for the duration you specify in the Buffer Time setting. After that time, or when the capture buffer is full, the recorder plays back at reduced speed and then repeats this cycle. 1. Navigate to Main Menu > Utilities > Time Expansion Mode:
Time Expansion Mode -Expansion Factor 10 -Buffer time 1000 ms -Start monitoring...

Song Meter SM4BAT FS User Guide 7 Utilities
Wildlife Acoustics, Inc. page 37
2. To adjust the Expansion Factor, press ENTER. Press ▲ Up to toggle the ratio value from 10 to 20. The default value is 10. Press ENTER to save your changes or ◄ Left to go back.
3. To adjust the Buffer time, press ▼ Down and then press ENTER and then press ▲ Up or ▼ Down to set a buffer time between 50 milliseconds and 5,000 milliseconds (5 seconds) in 50-millisecond increments. Press ENTER to save or ◄ Left to go back.
4. Verify that you have attached an ultrasonic mic and headphones.
5. When you are ready, select Start monitoring and press ENTER.
The following screen appears: TIME EXPANSION MODE Ratio: 10 X Buffer: 2200 ms ARMED...............
CAUTION: Initial headphone volume may be loud. Also, the volume is not adjusted during playback, but the button presses are logged and then the volume is adjusted for the next playback. This can create a very high setting if you press the button many times during the previous playback. Adjust with only one press at a time to be safe.
6. Press ▲ Up or ▼ Down to control the volume during playback. TIME EXPANSION MODE Ratio: 10 X Buffer: 2200 ms PLAYBACK............
7. Press SCHEDULE STOP or ◄ Left to exit time expansion mode and return to the Utilities menu.

Song Meter SM4BAT FS User Guide 7 Utilities
Wildlife Acoustics, Inc. page 38
7.5 FormattingSDMemoryCards
This procedure formats the inserted SD memory cards. Use this procedure prior to all deployments for optimal performance.
WARNING! This procedure erases all data on the SD memory card. Verify that you have saved any important schedules or recording files before running this utility.
1. Insert an SD memory card in slot A and an optional second card in slot B. 2. Navigate to Main Menu > Utilities > Format All Cards. 3. At the Confirm: Format All? prompt:
■ Select No to cancel this procedure. Any existing data files remain on the SD memory card(s).
■ Select Yes to format the SD memory cards in both slots. 4. If you select Yes, progress messages appear, and then the display returns to
the Utilities menu.
7.6 UpdatingtheFirmware
The SM4BAT FS is field-upgradeable. Firmware updates are periodically available with fixes or improvements. 1. Download new firmware from www.wildlifeacoustics.com. (While visiting our
website, you can join our mailing list to receive important notices about your SM4BAT FS and related products.)
2. Save or copy the firmware file to the top-level directory (not in a folder) of an SD memory card and insert it into the recorder in slot A.
3. Navigate to Main Menu > Utilities > Firmware Update. The recorder scans the SD memory card for .SM4 firmware files.
4. At the Select upgrade file prompt, select the firmware update file and press ENTER. The recorder applies the new firmware and restarts.

Song Meter SM4BAT FS User Guide 8 Specifications
Wildlife Acoustics, Inc. page 39
8 Specifications
8.1 Physical
Length: 8.6 inches (218 mm) Width: 5.9 inches (150 mm) Depth: 2.8 inches (71 mm) Weight: 1.6 pounds (0.73 kg)
Weight with 4 D Batteries: 2.9 pounds (1.3 kg) Operating Temperature: -4°F to 122°F (-20°C to 50°C)
Enclosure: Weatherproof durable polycarbonate. A pressure vent and a self-regenerating desiccant packet control humidity and prevent condensation.
8.2 Power
Battery Specifications: The recorder uses four (4) standard D size disposable alkaline batteries or rechargeable NiMH batteries. Estimated Recording Time (dependent on bat activity): Alkaline batteries (14,000 milliamp-hours at 1.5V each): 275 to 400 hours (27 – 40 ten hour nights) NiMH LSD batteries (9,500 milliamp-hours at 1.2V each): 150 to 250 hours (15 – 25 ten hour nights)
NOTE: SD memory cards consume more than half of all the power used by the recorder. The recording time provided by different card types and manufacturers can vary by as much as 50%. Based on their low power consumption in our tests, we recommend SanDisk SDHC/SDXC cards; however, third-party card performance cannot be guaranteed and other brands may also offer similar performance. Other factors, such as card capacity, battery type and quality (including rechargeable batteries), temperature, and recorder configuration can also affect recording time.
External Power Voltage: 5 – 17 volts DC Clock Backup Battery Type: 3.0-volt lithium CR2032 (approximate 3-year life) Internal Clock Accuracy: 3.5ppm from -40ºC to 0ºC, 2.0ppm from 0ºC to 40ºC (Temperature-Compensated Crystal)

Song Meter SM4BAT FS User Guide 8 Specifications
Wildlife Acoustics, Inc. page 40
8.3 SDMemoryCards
Type: Supports up to 32 GB (SDHC) or up to 512 GB (SDXC) per slot. Supports up to 1.0 terabyte total capacity using two 512 GB SDXC cards. Formats: FAT32 for SDHC or exFAT for SDXC
8.4 UltrasonicAudio
Channels: 1 Recording Format: 16-bit PCM WAV Supported Sample Rates (kHz): 192, 256, 384, and 500 Amplifier Gain: 0 or 12 dB High Pass Filter: Selectable 2-pole at 16 kHz Anti-alias Filter: 2-pole at 156 kHz Equivalent Input Noise: in dBVrms (>10kHz, 0dB gain)
Gain and High Pass Filter 256 and 192 kHz 384 kHz 500 kHz
0dB -82.4 -81.4 -83.6 0dB+16kHz -82.4 -81.5 -83.5
12dB -86.9 -85.2 -85.5 12dB+16kHz -87.0 -85.5 -85.8
8.5 ExternalSMM-U1UltrasonicMicrophone
Enclosure: Weatherproof stainless steel Directional Capability: Omnidirectional Element: Knowles FG Output: Differential Built in high pass filter: 4-pole at 8 kHz

Song Meter SM4BAT FS User Guide 8 Specifications
Wildlife Acoustics, Inc. page 41

Song Meter SM4BAT FS User Guide 8 Specifications
Wildlife Acoustics, Inc. page 42

Song Meter SM4BAT FS User Guide 9 Warranty and Disclosures
Wildlife Acoustics, Inc. page 43
9 Warranty and Disclosures Exceptasspecificallyprovidedherein,WildlifeAcousticsmakesnowarrantyofanykind,expressorimplied,withrespecttothisproduct.
HardwareLimitedWarrantyProduct Components Warranty Period Song Meter SM4BAT FS
All components (excluding microphones and accessories) 3 Years Microphones and accessories 1 Year
WildlifeAcoustics,Inc.LimitedWarrantyHARDWARE: Wildlife Acoustics, Inc. (“WAI”) warrants to theoriginalenduser(“Customer”)thatnewWAIbrandedproductswillbefreefromdefectsinworkmanshipandmaterials,undernormaluse.RefertotheHardwareLimitedWarrantytableatthetop of this page for the applicable warranty period from theoriginaldateofpurchase.WAI warrants refurbishedWAI products,marked and sold assuch,forninety(90)daysfromtheoriginalpurchasedate.SOFTWARE:WAIwarrantstoCustomerthatanyWAIbrandedsoftware will perform in substantial conformance to theirschedulespecificationsforaperiodofninety(90)daysfromthedateof original purchase.WAIwarrants themedia containingsoftwareagainstfailureduringthewarrantyperiod.WAImakesnowarrantyorrepresentationthattheoperationofthesoftwareproductswillbeuninterruptedorerrorfree,orthatalldefectsinthesoftwareproductswillbecorrected.EXCLUSIONS:Thiswarrantyexcludes(1)physicaldamagetothesurface of the product, including cracks or scratches on theoutsidecasing;(2)damagecausedbymisuse,neglect,improperinstallationortesting,unauthorizedattemptstoopen,repair,ormodifytheproduct,oranyothercausebeyondtherangeoftheintended use; (3) damage caused by accident, fire, powerchanges,otherhazards,oractsofGod;or(4)useoftheproductwith any non-WAI device or service if such device or servicecausestheproblem.Anythirdpartyproducts,includingsoftware,includedwithWAIproductsarenotcoveredbythisWAIwarrantyandWAImakesnorepresentationsorwarrantiesonbehalfofsuchthirdparties.Anywarrantyonsuchproductsisfromthesupplierorlicensoroftheproduct.No warranty is provided by WAI unless the product waspurchasedfromanauthorizeddistributororauthorizedreseller.EXCLUSIVEREMEDIES:Shouldacovereddefectoccurduringthewarranty period and you notifyWAI, your sole and exclusiveremedyshallbe,atsoleoptionandexpenseofWAI,torepairorreplacetheproductorsoftware.IfWAIcannotreasonablyrepairnor replace then WAI may, in its sole discretion, refund thepurchasepricepaid for theproduct.Replacementproductsorpartsmaybeneworreconditionedorcomparableversionsofthedefectiveitem.WAIwarrantsanyreplacedorrepairedproduct,part,orsoftwareforaperiodofninety(90)daysfromshipment,orthroughtheendoftheoriginalwarranty,whicheverislonger.OBTAININGWARRANTYSERVICE:CustomershouldrefertotheWAI website at www.wildlifeacoustics.com/support/contact-support for information on obtaining warranty serviceauthorization.MethodsforobtainingwarrantyservicemayvarydependingonwhetherpurchasesweremadefromanauthorizedproviderofWAIproductsorfromWAIdirectly.Allrequestsforwarranty service authorization must be made within theapplicablewarrantyperiod.Datedproofoforiginalpurchasewillberequired.ProductsorpartsshippedbyCustomertoWAImustbe sent postage-paid and packaged appropriately for safeshipment.WAIisnotresponsibleforCustomerproductsreceived
withoutawarrantyserviceauthorizationandmayberejected.RepairedorreplacementproductswillbeshippedtoCustomeratWAIexpense.Allproductsorpartsthatarereplacedbecometheproperty of WAI. WAI shall not be responsible for Customersoftware,firmware,information,ormemorydatacontainedin,storedon,orintegratedwithanyproductsreturnedtoWAIforrepair, whether under warranty or not. The repair andreplacementprocessforproductsorpartsinlocationsoutsideoftheUnitedStateswillvarydependingonCustomer’slocation.WARRANTIESEXCLUSIVE:THEFOREGOINGWARRANTIESANDREMEDIES ARE EXCLUSIVE AND IN LIEU OF ALL OTHERWARRANTIES, TERMSORCONDITIONS, EXPRESS, IMPLIEDORSTATUTORY, INCLUDINGWARRANTIESOFMERCHANTABILITY,FITNESS FOR A PARTICULAR PURPOSE, ACCURACY,CORRESPONDENCE WITH DESCRIPTION, SATISFACTORYQUALITY AND NON-INFRINGEMENT, ALL OF WHICH AREEXPRESSLYDISCLAIMEDBYWAIANDITSSUPPLIERS.LIMITATIONSOF LIABILITY:NEITHERWAINOR ITS SUPPLIERSSHALLBELIABLEFORINCIDENTAL,CONSEQUENTIAL,INDIRECT,SPECIAL, OR PUNITIVE DAMAGES OF ANY KIND, LOSS OFINFORMATIONORDATA,LOSSOFREVENUE,LOSSOFBUSINESSOROTHERFINANCIALLOSSARISINGOUTOFORINCONNECTIONWITHTHESALEORUSEOFTHISPRODUCT,WHETHERBASEDINCONTRACT,TORT(INCLUDINGNEGLIGENCE),STRICTPRODUCTLIABILITY OR ANY OTHER THEORY, EVEN IF WAI HAS BEENADVISEDOFTHEPOSSIBILITYOFSUCHDAMAGESANDEVENIFANYLIMITEDREMEDYSPECIFIEDINTHISLICENSEAGREEMENTISDEEMEDTOHAVEFAILEDOF ITS ESSENTIALPURPOSE.WAI’SENTIRELIABILITYSHALLBELIMITEDTOREPLACEMENT,REPAIR,ORREFUNDOFTHEPURCHASEPRICEPAID,ATWAI’SOPTION.INNOEVENTSHALLWAI’SLIABILITYFORALLDAMAGESRELATEDTOTHEPURCHASEOFPRODUCTEXCEEDTHEAMOUNTPAIDFORTHEAPPLICABLEPRODUCT.THEFOREGOINGLIMITATIONSWILLAPPLYEVENIFTHEABOVESTATEDREMEDYFAILSOFITSESSENTIALPURPOSE.DISCLAIMER:Somecountries,states,orprovincesdonotallowtheexclusionorlimitationofimpliedwarrantiesorthelimitationofincidentalorconsequentialdamagessotheabovelimitationsandexclusionsmaybelimitedintheirapplicationtoyou.Whenimpliedwarrantiesmaynotbeexcludedintheirentirety,theywillbelimitedtothedurationoftheapplicablewrittenwarranty.Thiswarrantygivesyouspecificlegalrights;youmayhaveotherrightsthatmayvarydependingonlocallaw.Yourstatutoryrightsarenotaffected.GOVERNINGLAW:ThisLimitedWarrantyshallbegovernedbythe lawsof theCommonwealthofMassachusetts,andby thelaws of the United States, excluding their conflicts of lawsprinciples.TheUnitedNationsConventiononContractsfortheInternationalSaleofGoodsisherebyexcludedinitsentiretyfromapplicationtothisLimitedWarranty.

Song Meter SM4BAT FS User Guide 9 Warranty and Disclosures
Wildlife Acoustics, Inc. page 44
DECLARATIONOFCONFORMITY(EN45014)Manufacturer:WildlifeAcoustics,Inc.3ClockTowerPlace,Suite210Maynard,MA01754UnitedStatesofAmerica
Declaresthatthefollowingproduct:ProductName:SongMeterProductModelNumber:SM4BATFSProductType:BioacousticsRecorderConformstotheappropriatecountrystandardsandgoverningregulationslistedbelowand/oronthefollowingpage.Asthemanufacturer,wearefullyresponsibleforthedesignandproductionoftheabove-mentionedequipment.FederalCommunicationsCommissionRulesPart15,ClassAAS/NZSCISPR11,2011,Industrial,scientificandmedical(ISM)radio-frequencyequipment–electromagneticdisturbancecharacteristics–limitsandmethodsofmeasurement,ClassAEN55011,2009/A1,2010,Industrial,scientificandmedical(ISM)radio-frequencyequipment–Electromagneticdisturbancecharacteristics–Limitsandmethodsofmeasurement,ClassAICES-003,2012,IndustryCanada,Interference-CausingEquipmentStandard,DigitalApparatus,ClassAEN61326,2006ElectricalEquipmentforMeasurement,ControlandLaboratoryuseEMCEN61000-4-2ElectrostaticDischargeEN61000-4-3RadiatedElectromagneticFieldsThisproductwastestedinatypicalconfiguration.
IanAgranat,PresidentWildlifeAcoustics,Inc.January19,2016
ELECTROMAGNETICINTERFERENCEThisequipmenthasbeentestedandfoundtocomplywiththelimitsforaClassBdigitaldevice,pursuanttoPart15oftheFCCRules.These limits are designed to provide reasonable protectionagainstharmfulinterferencewhentheequipmentisoperatedinacommercialenvironment.Thisequipmentgenerates,uses,andcanradiateradiofrequencyenergyand,ifnotinstalledandusedinaccordancewiththeinstructionmanual,maycauseharmfulinterference to radio communications. Operation of thisequipment in a residential area is likely to cause harmfulinterferenceinwhichcasetheuserwillberequiredtocorrecttheinterferenceathisownexpense.Changes or modifications not expressly approved by WildlifeAcoustics, Inc. could void the user's authority to operate theequipment.Note:Useofferriteclampedcablesarerequiredtocomplywiththe Class B limits in part 15 of the FCC rules. A Fair-Rite0431164181ferriteclamp(orequivalent)mustbeplacedoneachcableneartherecorderwiththeferriteresidingwithinoneloopofthecable.ThisclampisprovidedwithallcablessoldbyWildlifeAcoustics.
PRODUCTDOCUMENTATION©2016WildlifeAcoustics,Inc.AllRightsReserved.Thisdocumentationmaynotbereproducedordistributedinanyform or by any means, graphic, electronic, or mechanical,includingbutnot limitedtophotocopying,scanning,recording,taping,e-mailing,orstoringininformationstorageandretrievalsystems without the written permission ofWildlife Acoustics.ProductsthatarereferencedinthisdocumentsuchasMicrosoftWindows®maybetrademarksand/orregisteredtrademarksoftheir respective owners.Wildlife Acousticsmakes no claim tothesetrademarks.Whileeveryprecautionhasbeentakeninthepreparationofthisdocument,individually,asaseries,inwhole,or in part, Wildlife Acoustics, the publisher, and the authorassumenoresponsibility forerrorsoromissions, includinganydamages resulting from the express or implied application ofinformation contained in this document or from the use ofproducts, services, or programs thatmay accompany it. In noeventshallWildlifeAcoustics,publishers,authors,oreditorsofthisguidebeliableforanylossofprofitoranyothercommercialdamage caused or alleged to have been caused directly orindirectlybythisdocument.

Song Meter SM4BAT FS User Guide 9 Warranty and Disclosures
Wildlife Acoustics, Inc. page 45
SongMeterSM4BATFSB I O A C O U S T I C S R E C O R D E R
User Guide
©2016WildlifeAcoustics,Inc.AllRightsReserved.UpdatedonJanuary19,2016
WildlifeAcoustics,KaleidoscopeandSongMeter
areregisteredwiththeU.S.PatentandTrademarkOffice.SM4BATFSisatrademarkofWildlifeAcoustics,Inc.
Allothertrademarksarethepropertyoftheirrespectiveowners.TheSongMeterispatented(U.S.Pat.No.7,782,195B2).
AdditionalU.S.andinternationalpatentsandtrademarksarepending.
WildlifeAcoustics,Inc.3ClockTowerPlace,Suite210
Maynard,MA01754(978)369-5225ortoll-freeintheU.S.(888)733-0200
www.wildlifeacoustics.com