Embed Size (px)
Citation preview

Knowledge Base
Article Type: Instructions
Pneumatic Controls, Air Settings,
Hydraulic adjustments on; Models
22HF, 16HF & 1600 machines
WARNING Never work on, clean or service this unit, control panel or any machine or open or remove any protective cover, guard, grate, door, or maintenance panel until the power or energy sources has been turned off, locked out / tagged out, and all moving parts have come to a complete stop and or blocked to prevent movement. Machinery is dangerous – avoid personal injury and or death by following manufacture, Local, and OHSA safety procedures. Contact Columbia Machine for safety decals, guards, horns and beacons.
Description:
Instruction sheet on how to make proper pneumatic air adjustments
Pallet Table, Compression Beam, Clutch-Brake. Rotary Valve adjustment,
Compression Beam Stop settings, Hydraulic Valve adjustments, and
cylinder adjustments.

1
Air SettingsBlock Machine settings are very important
1. PRESSURE GAUGE2. COMPRESSION BEAM REGULATOR3. FRONT LOW PRESSURE REGULATOR4. FRONT HIGH PRESSURE REGULATOR5. REAR LOW PRESSURE REGULATOR6. REAR HIGH PRESSURE REGULATOR8. CLUTCH PRESSURE REGULATOR9. BRAKE PRESSURE REGULATOR
6
2
34
5
11
89

2
Air SettingsRecommended Block Machine settings
Pneumatic Adjustments
After start-up, adjustment of pneumatic control settings may be required to compensate for differences in material. To ensure the best quality block production, the following is offered as an aid to be applied in relation to an inspection of the block.
Pallet Table High Pressure: This pressure should be set just high enough to hold the pallet firmly against the mold during compression. In general, a pressure that is too low will be indicated by a feather
edge at the bottom of the block. The front and rear pressures do not necessarily have to be the same.
Pallet Table Low Pressure. This pressure affects the proper filling of the mold and, consequently, block texture. In general, if block texture is loose or flaky, this pressure should be increased. The front and
rear pressures do not necessarily have to be the same.
Compression Beam Pressure: Proper setting of this pressure establishes even block texture. If blocks have uneven texture or if cracks appear in the block web, decrease compression beam air pressure slightly.
Clutch Pressure: Proper setting of this pressure insures smooth operation and extended life of the clutch. Too low a pressure will cause slippage and excessive heat build up. Too high a pressure causes
undue wear of clutch parts and possible damage to the motor.
Brake Pressure: This pressure affects braking action of the vibrator shaft. Too low a pressure causes slow stop time. Too high a pressure causes high stress on brake parts.
3
Air SettingsRecommended Block Machine settings
Pneumatic Controls —
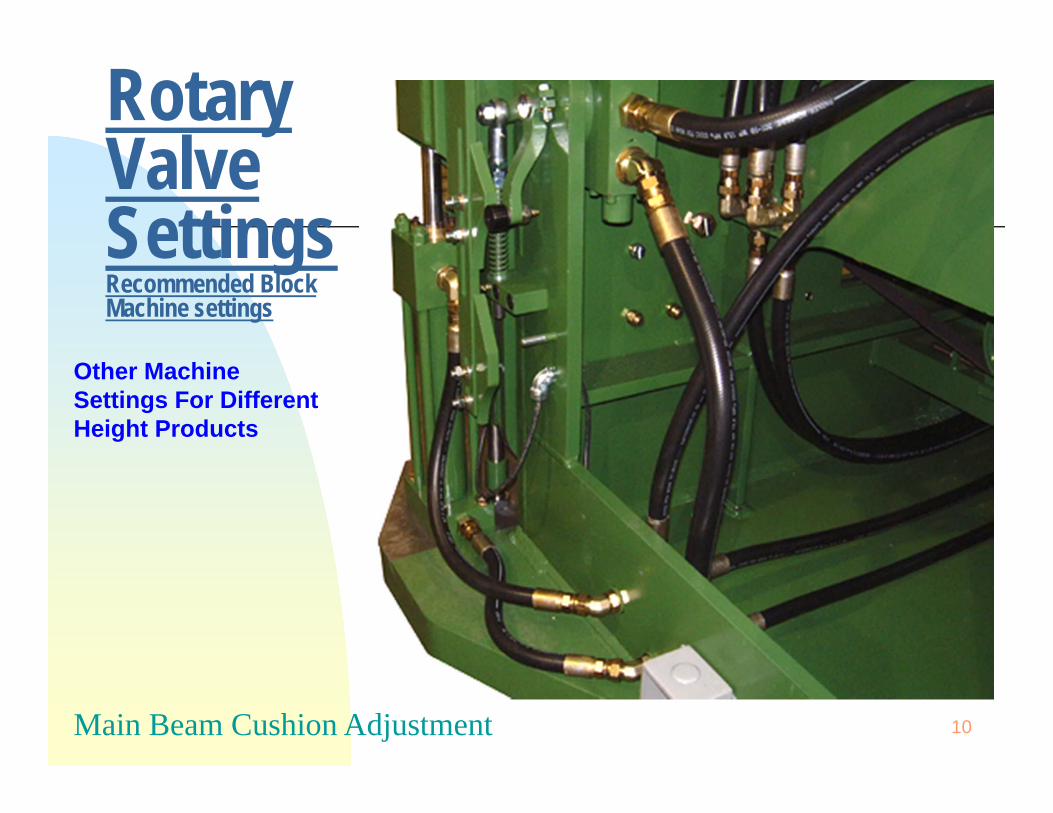
Make the following preliminary pressure settings:
Pallet Table Front High - 85 psi Pallet Table Rear High - 85 psiPallet Table Front Low- 40 psiPallet Table Rear Low- 40 psi Compression Beam - 70 psi Clutch - 40-50 psi Brake - 40-50 psi

4
Air SettingsRecommended Block Machine settingsPneumatic Controls — Adjustment for Compression Head Air May Vary Depending On ProductSettings should be 10-15 psi lower than High Table Air or just enough air to keep the head from bouncing during compression cycle

5
Air SettingsRecommended Block Machine settings
Pallet Table and Compression Beam air pressure settings may vary according to block configuration and mix design. Preliminary settings are given as nominal. Avoid excessive pressures which can intensify vibration in the block machine.Place pallet table mode selector to MANUAL and make the following preliminary pressure settings:
Pallet Table Front Low - 40 psi
Pallet Table Rear Low - 40 psi

6
Air SettingsRecommended Block Machine settings
Pallet Table Adjustment
When a new mold is installed, the distance between the pallet table and mold must be adjusted to ensure proper pallet clearance. Two basic pallet table settings are suggested (see Figure 18).1. Pavers or low height solids - Tight Pallet
Check that pallet table surface is clean and free of all objects.
Check that AUTO switch is in OFF position.
Depress PUMP START pushbutton and open main shut-off valve.
Close return line orifice valve.
Switch the following manual selector switches in the sequence noted:
COMPRESSION BEAM UP
STRIPPER BEAM UP
PALLET FEED BACK

7
Air SettingsRecommended Block Machine settings
Pallet Table Adjustment cont.
Exercise extreme caution while performing this adjustment with the pump unit on.Turn eccentric to the top position (mold in its up position)
Place a clean pallet on the pallet table
Turn the air to the pallet table to auto position
With proper spacers under the pallet table as determined by mold height, run the stripper beam to its up position.
The pallet should contact the mold and slightly depress air bags.
8
Table SettingsRecommended Block Machine settings
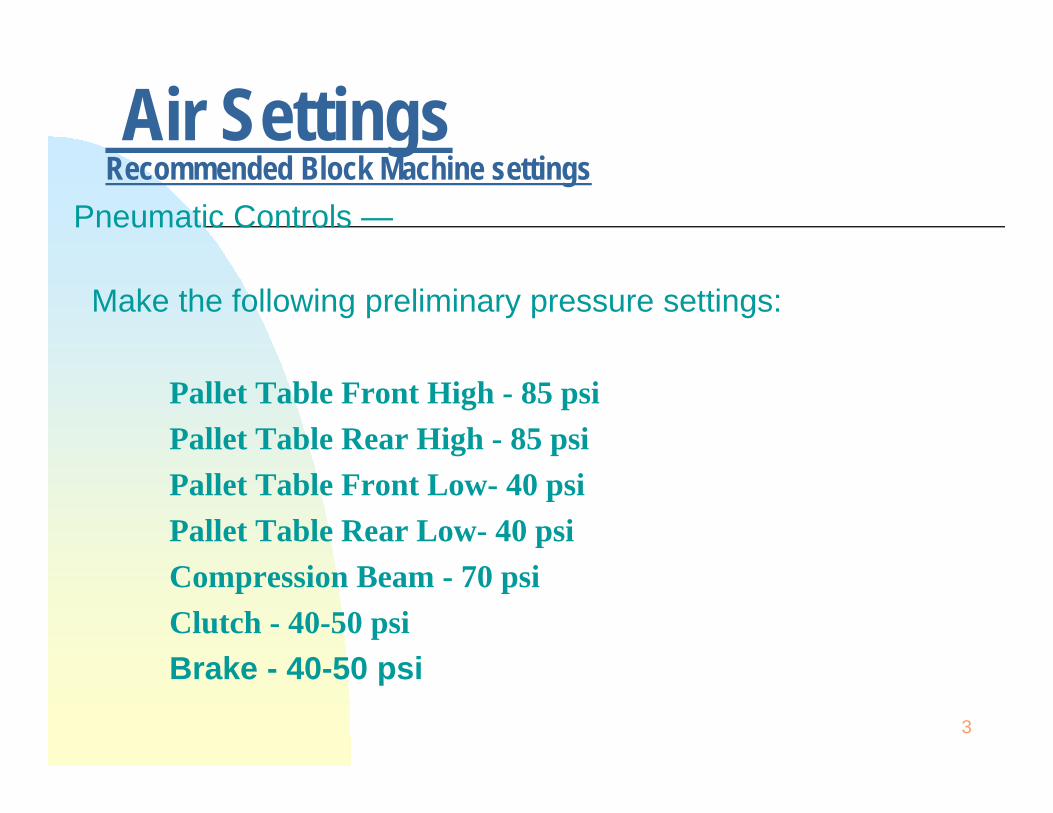
Pallet Table Adjustment cont.
•With clamp bolts loose, turn adjustable bushings until a gap is obtained between the head of the bolt and the adjustable bushing. This gap should be .030" and can be checked with a feeler gauge.
Adjustable Bushing
Feeler Gauge
Bolt .030 GapClamp Bolt
2-1/8” Min.
•Set all four bolts and bushings exactly the same

9
Table SettingsRecommended Block Machine settings
Pallet Table Adjustment cont.
When adjusting table height, do not collapse air bags to less than 2-1/8" high. A lesser height will cause damage to the air bag. If a lower height is required, remove spacers from under pallet table assembly.
Turn off air and tighten clamp bolts to 100 ft. lbs. Maximum Torque should never exceed 150 ft. lbs.
This is only recommended as an initial set up. There are various methods that may be used depending on your mix, air pressures and product to be made. Contact the Columbia Block Service Dept. for help in determining how your pallet table should be set.
General Block - Loose Pallet
Follow the same procedure as above, except turn eccentric to the bottom position (mold in its down position).
10
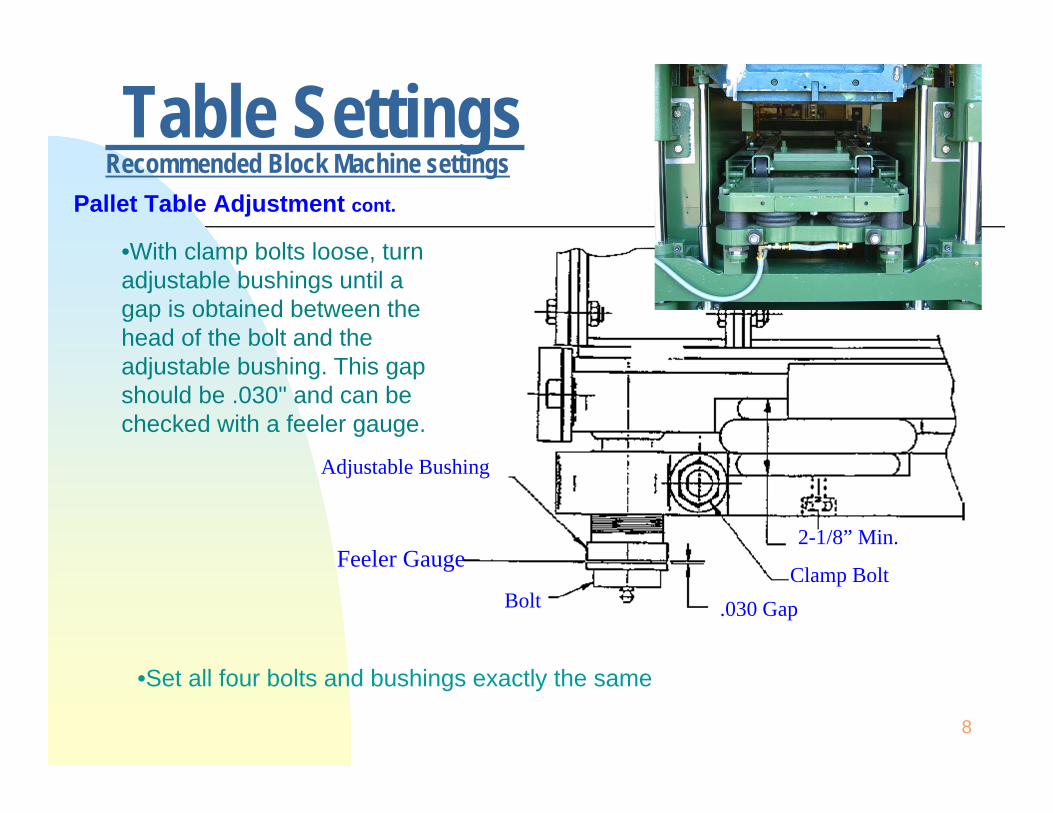
Rotary Valve SettingsRecommended Block Machine settings
Other Machine Settings For Different Height Products
Main Beam Cushion Adjustment
11
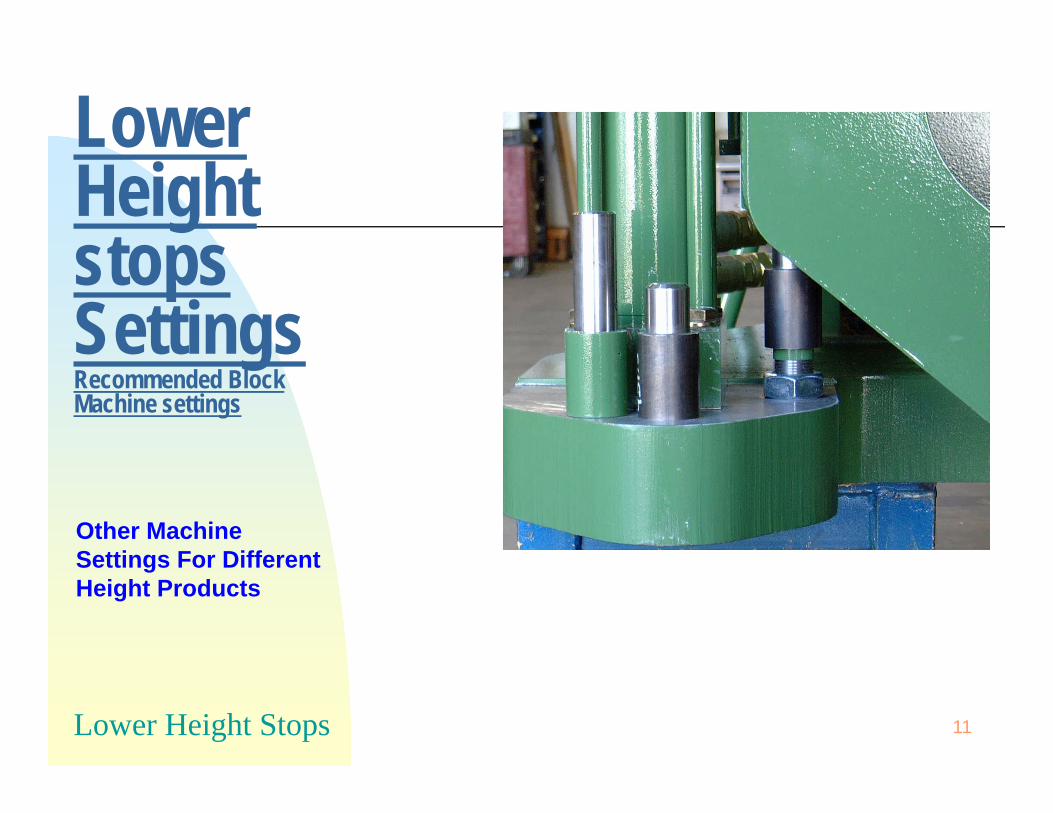
Lower Height stops SettingsRecommended Block Machine settings
Other Machine Settings For Different Height Products
Lower Height Stops
12
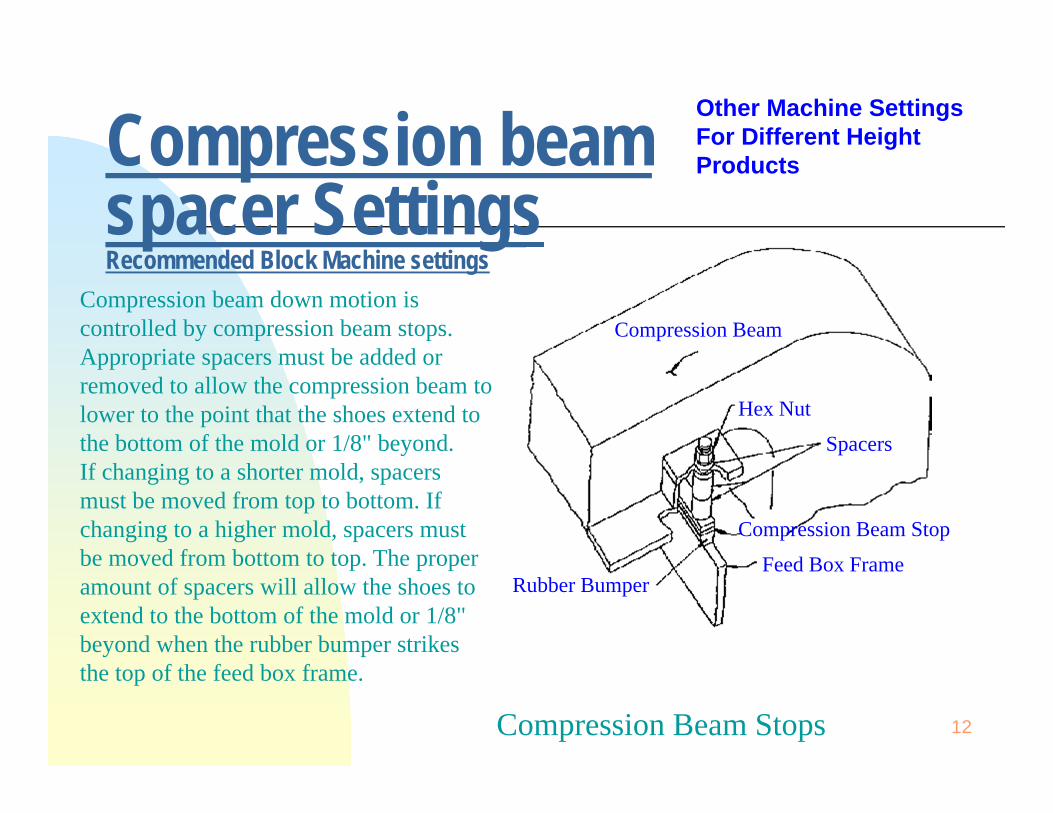
Compression beam spacer Settings Recommended Block Machine settings
Other Machine Settings For Different Height Products
Compression Beam Stops
Compression beam down motion is controlled by compression beam stops. Appropriate spacers must be added or removed to allow the compression beam to lower to the point that the shoes extend to the bottom of the mold or 1/8" beyond.If changing to a shorter mold, spacers must be moved from top to bottom. If changing to a higher mold, spacers must be moved from bottom to top. The proper amount of spacers will allow the shoes to extend to the bottom of the mold or 1/8" beyond when the rubber bumper strikes the top of the feed box frame.
Compression Beam
Hex Nut
Spacers
Rubber Bumper
Compression Beam Stop
Feed Box Frame

13
Valve Adjustment SettingsRecommended Block Machine settings
Valve Adjustments

14
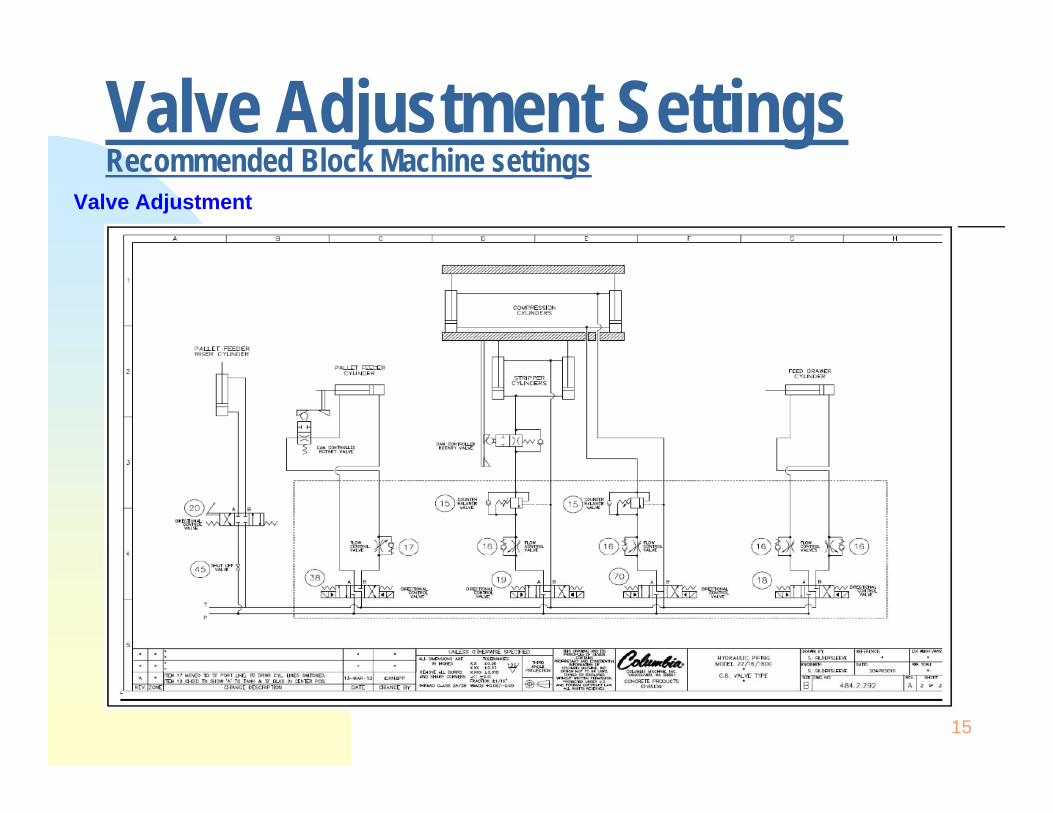
Valve adjustment SettingsRecommended Block Machine settings
Valve Adjustment
15
Valve Adjustment SettingsRecommended Block Machine settings
Valve Adjustment

16
Compression cyl. Adjustment Recommended Block Machine settings
Cylinder Adjustment

17
Stripper cyl. AdjustmentRecommended Block Machine settings
Stripper Cushion Adjustment

18
ConclusionWith Quality Molds & Proper Machine Setups
Results Will Give You Quality Product