Embed Size (px)
Citation preview
Yihui Xie, Amber Thomas, Alison Presmanes Hill
blogdown: Creating Websites withR Markdown

百千万劫弹指过,春夏秋⼼凭谁托。
日月星灭观夜落,天地⼈间对⽂酌。
Life is short. Write for eternity.

Contents
List of Tables vii
List of Figures ix
Preface xi
About the Authors xix
1 Get Started 11.1 Installation . . . . . . . . . . . . . . . . . . . . . . 1
1.1.1 Update . . . . . . . . . . . . . . . . . . . . 21.2 A quick example . . . . . . . . . . . . . . . . . . . 21.3 RStudio IDE . . . . . . . . . . . . . . . . . . . . . 51.4 Global options . . . . . . . . . . . . . . . . . . . . 111.5 R Markdown vs. Markdown . . . . . . . . . . . . . 131.6 Other themes . . . . . . . . . . . . . . . . . . . . . 191.7 A recommended workflow . . . . . . . . . . . . . . 21
2 Hugo 252.1 Static sites and Hugo . . . . . . . . . . . . . . . . . 252.2 Configuration . . . . . . . . . . . . . . . . . . . . . 27
2.2.1 TOML Syntax . . . . . . . . . . . . . . . . . 282.2.2 Options . . . . . . . . . . . . . . . . . . . . 30
2.3 Content . . . . . . . . . . . . . . . . . . . . . . . . 332.3.1 YAML metadata . . . . . . . . . . . . . . . . 332.3.2 Body . . . . . . . . . . . . . . . . . . . . . . 342.3.3 Shortcode . . . . . . . . . . . . . . . . . . . 34
2.4 Themes . . . . . . . . . . . . . . . . . . . . . . . . 362.4.1 The default theme . . . . . . . . . . . . . . . 36
2.5 Templates . . . . . . . . . . . . . . . . . . . . . . . 40
iii

iv Contents
2.5.1 A minimal example . . . . . . . . . . . . . . 412.5.2 Implementing more features . . . . . . . . . 55
2.6 Custom layouts . . . . . . . . . . . . . . . . . . . . 622.7 Static files . . . . . . . . . . . . . . . . . . . . . . . 64
3 Deployment 673.1 Netlify . . . . . . . . . . . . . . . . . . . . . . . . . 683.2 GitHub Pages . . . . . . . . . . . . . . . . . . . . . 703.3 Travis + GitHub . . . . . . . . . . . . . . . . . . . . 733.4 GitLab Pages . . . . . . . . . . . . . . . . . . . . . 77
4 Migration 794.1 From Jekyll . . . . . . . . . . . . . . . . . . . . . . 804.2 From WordPress . . . . . . . . . . . . . . . . . . . 844.3 From other systems . . . . . . . . . . . . . . . . . . 85
5 Other Generators 875.1 Jekyll . . . . . . . . . . . . . . . . . . . . . . . . . 875.2 Hexo . . . . . . . . . . . . . . . . . . . . . . . . . 925.3 Default site generator in rmarkdown . . . . . . . . 935.4 pkgdown . . . . . . . . . . . . . . . . . . . . . . . 95
Appendix 97
A R Markdown 97
B Website Basics 101B.1 HTML . . . . . . . . . . . . . . . . . . . . . . . . . 103B.2 CSS . . . . . . . . . . . . . . . . . . . . . . . . . . 107B.3 JavaScript . . . . . . . . . . . . . . . . . . . . . . . 113B.4 Useful resources . . . . . . . . . . . . . . . . . . . 117
B.4.1 File optimization . . . . . . . . . . . . . . . 117B.4.2 Helping people find your site . . . . . . . . . 117
C Domain Name 119C.1 Registration . . . . . . . . . . . . . . . . . . . . . . 120C.2 Nameservers . . . . . . . . . . . . . . . . . . . . . 120C.3 DNS records . . . . . . . . . . . . . . . . . . . . . 121
Contents v
D Advanced Topics 125D.1 More global options . . . . . . . . . . . . . . . . . . 125D.2 LiveReload . . . . . . . . . . . . . . . . . . . . . . 126D.3 Building a website for local preview . . . . . . . . . 128D.4 Functions in the blogdown package . . . . . . . . . 130
D.4.1 Exported functions . . . . . . . . . . . . . . 131D.4.2 Non-exported functions . . . . . . . . . . . 132
D.5 Paths of figures and other dependencies . . . . . . . 132D.6 HTML widgets . . . . . . . . . . . . . . . . . . . . 134D.7 Version control . . . . . . . . . . . . . . . . . . . . 135D.8 The default HTML template . . . . . . . . . . . . . 137D.9 Different building methods . . . . . . . . . . . . . 139
E Personal Experience 141
Bibliography 145
Index 147


List of Tables
1.1 Global options that affect the behavior of blogdown. . 121.2 Differences among the three document formats. . . . 14
D.1 A few more advanced global options. . . . . . . . . . 125
vii


List of Figures
1.1 The homepage of the default new site. . . . . . . . . 41.2 Create a new post using the RStudio addin. . . . . . 71.3 Update the metadata of an existing post using the
RStudio addin. . . . . . . . . . . . . . . . . . . . . 81.4 Insert an image to an existing post using the RStudio
addin. . . . . . . . . . . . . . . . . . . . . . . . . . 81.5 Overwrite the image you are inserting in your blog
post. . . . . . . . . . . . . . . . . . . . . . . . . . . 91.6 Create a new website project in RStudio. . . . . . . . 91.7 Create a website project based on blogdown. . . . . . 101.8 RStudio project options. . . . . . . . . . . . . . . . 11
2.1 Possible files and folders created when you create anew site using blogdown. . . . . . . . . . . . . . . . 27
2.2 A tweet by Jeff Leek. . . . . . . . . . . . . . . . . . . 352.3 Edit a text file online on GitHub. . . . . . . . . . . . 62
3.1 Example settings of a website deployed on Netlify. . . 69
B.1 Developer Tools in Google Chrome. . . . . . . . . . . 102
C.1 Some DNS records of the domain yihui.org on Cloud-flare. . . . . . . . . . . . . . . . . . . . . . . . . . . 122
ix


Preface
In the summer of 2012, I did my internship at AT&T Labs Research,1
where I attended a talk given by Carlos Scheidegger (https://cscheid.net), and Carlos said something along the lines of “if you don’t have awebsite nowadays, you don’t exist.” Later I paraphrased it as:
“I web, therefore I am a spiderman.”
Carlos’s words resonated very well with me, although they were a lit-tle exaggerated. A well-designed and maintained website can be ex-tremely helpful for other people to know you, and you do not need towait for suitable chances at conferences or other occasions to intro-duce yourself in person to other people. On the other hand, a websiteis also highly useful for yourself to keep track of what you have doneand thought. Sometimes you may go back to a certain old post of yoursto relearn the tricks or methods you once mastered in the past but haveforgotten.
We introduce an R package, blogdown, in this short book, to teach youhow to create websites using R Markdown and Hugo. If you have ex-perience with creating websites, you may naturally ask what the ben-efits of using R Markdown are, and how blogdown is different fromexisting popular website platforms, such as WordPress. There are twomajor highlights of blogdown:
1. It produces a static website, meaning the website only con-
1In this book, “I” and “my” refer to Yihui unless otherwise noted.
xi

xii Preface
sists of static files such as HTML, CSS, JavaScript, and im-ages, etc. You can host the website on any web server (seeChapter 3 for details). The website does not require server-side scripts such as PHP or databases like WordPress does.It is just one folder of static files. We will explain more ben-efits of static websites in Chapter 2, when we introduce thestatic website generator Hugo.
2. The website is generated from R Markdown documents (R isoptional, i.e., you can use plain Markdown documents with-out R code chunks). This brings a huge amount of benefits,especially if your website is related to data analysis or (R) pro-gramming. Being able to use Markdown implies simplicityand more importantly, portability (e.g., you are giving your-self the chance to convert your blog posts to PDF and publishto journals or even books in the future). R Markdown givesyou the benefits of dynamic documents — all your results,such as tables, graphics, and inline values, can be computedand rendered dynamically from R code, hence the results youpresent on your website are more likely to be reproducible.An additional yet important benefit of using R Markdownis that you will be able to write technical documents easily,due to the fact that blogdown inherits the HTML output for-mat from bookdown (Xie, 2016). For example, it is possibleto write LaTeX math equations, citations, and even theoremsand proofs if you want.
Please do not be misled by the word “blog” in the package name: blog-down is for general-purpose websites, and not only for blogs. For ex-ample, all authors of this book have their personal websites, where youcan find information about their projects, blogs, package documenta-tions, and so on.2 All their pages are built from blogdown and Hugo.
2Yihui’s homepage is at https://yihui.org. He writes blog posts in both Chinese(https://yihui.org/cn/) and English (https://yihui.org/en/), and documents hissoftware packages such as knitr (https://yihui.org/knitr/) and animation (https://yihui.org/animation/). Occasionally he also writes articles like https://yihui.org/rlp/ when he finds interesting topics but does not bother with a formal journal sub-mission. Amber’s homepage is at https://amber.rbind.io, where you can find her

Preface xiii
If you do not prefer using Hugo, there are other options, too. Chapter5 presents possibilities of using other site generators, such as Jekylland rmarkdown’s default site generator.
This book has been published by Chapman & Hall/CRC3. The on-line version of this book is licensed under the Creative CommonsAttribution-NonCommercial-ShareAlike 4.0 International License4.
Structure of the book
Chapter 1 aims at getting you started with a new website based onblogdown: it contains an installation guide, a quick example, an in-troduction to RStudio addins related to blogdown, and comparisonsof different source document formats. All readers of this book shouldfinish at least this chapter (to know how to create a website locally) andSection 3.1 (to know how to publish a website). The rest of the book ismainly for those who want to further customize their websites.
Chapter 2 briefly introduces the static website generator Hugo, onwhich blogdown is based. We tried to summarize the official Hugodocumentation in a short chapter. You should consult the official doc-umentation when in doubt. You may skip Section 2.5 if you do not havebasic knowledge of web technologies. However, this section is criti-cal for you to fully understand Hugo. We have spent the most timeon this section in this chapter. It is very technical, but should be help-ful nonetheless. Once you have learned how to create Hugo templates,you will have the full freedom to customize your website.
Chapter 3 tells you how to publish a website, so that other people canvisit it through a link. Chapter 4 shows how to migrate existing web-sites from other platforms to Hugo and blogdown. Chapter 5 gives afew other options if you do not wish to use Hugo as your site genera-tor.
blog and project pages. Alison’s website is at https://alison.rbind.io, which usesan academic theme at the moment.
3https://www.crcpress.com/p/book/97808153637294http://creativecommons.org/licenses/by-nc-sa/4.0/

xiv Preface
Appendix A is a quick tutorial on R Markdown, the prerequisite ofblogdown if you are going to write R code in your posts. AppendixB contains basic knowledge about websites, such as HTML, CSS, andJavaScript. If you really care about your website, you will have to learnthem someday. If you want to have your own domain name, AppendixC provides an introduction to how it works. We have also coveredsome optional topics in Appendix D for advanced users.
Software information and conventions
The R session information when compiling this book is shown below:
sessionInfo()
## R version 3.6.3 (2020-02-29)## Platform: x86_64-apple-darwin15.6.0 (64-bit)## Running under: macOS Catalina 10.15.3#### Matrix products: default#### locale:## [1] en_US.UTF-8/en_US.UTF-8/en_US.UTF-8/C/en_US.UTF-8/en_US.UTF-8#### attached base packages:## [1] stats graphics grDevices utils datasets## [6] methods base#### loaded via a namespace (and not attached):## [1] bookdown_0.18 htmltools_0.4.0 rmarkdown_2.1## [4] blogdown_0.18.1 knitr_1.28.1
We do not add prompts (> and +) to R source code in this book, andwe comment out the text output with two hashes ## by default, as youcan see from the R session information above. This is for your conve-

Preface xv
nience when you want to copy and run the code (the text output willbe ignored since it is commented out). Package names are in bold text(e.g., rmarkdown), and inline code and filenames are formatted in atypewriter font (e.g., knitr::knit('foo.Rmd')). Function names are fol-lowed by parentheses (e.g., blogdown::serve_site()). The double-colonoperator :: means accessing an object from a package.
A trailing slash often indicates a directory name, e.g., content/ meansa directory named content instead of a file named content. A lead-ing slash in a path indicates the root directory of the website, e.g.,/static/css/style.css means the file static/css/style.css under theroot directory of your website project instead of your operating sys-tem. Please note that some directory names are configurable, such aspublic/, but we will use their default values throughout the book. Forexample, your website will be rendered to the public/ directory by de-fault, and when you see public/ in this book, you should think of it asthe actual publishing directory you set if you have changed the defaultvalue. Rmd stands for R Markdown in this book, and it is the filenameextension of R Markdown files.
A “post” often does not literally mean a blog post, but refers to anysource documents (Markdown or R Markdown) in the website project,including blog posts and normal pages. Typically blog posts are storedunder the content/post/ directory, and pages are under other directo-ries (including the root content/ directory and its subdirectories), butHugo does not require this structure.
The URL http://www.example.com is used only for illustration purposes.We do not mean you should actually visit this website. In most cases,you should replace www.example.com with your actual domain name.
An asterisk * in a character string often means an arbitrary string.For example, *.example.com denotes an arbitrary subdomain of exam-ple.com. It could be foo.example.com or 123.example.com. Actually, fooand bar also indicate arbitrary characters or objects.

xvi Preface
Acknowledgments
Originally I planned to write only one sentence in this section: “I thankTareef.” This book and the blogdown package would not have been fin-ished without Tareef, the president of RStudio. He has been “gentlynudging” me every week since Day 1 of blogdown. As a person with-out strong self-discipline and working remotely, I benefited a lot fromweekly meetings with him. He also gave me a lot of good technical sug-gestions on improving the package. Actually, he was one of the veryearliest users of blogdown.
Of course, I’d like to thank RStudio for the wonderful opportunity towork on this new project. I was even more excited about blogdownthan bookdown (my previous project). I started blogging 12 years ago,and have used and quit several tools for building websites. Finally Ifeel satisfied with my own dog food.
Many users have provided helpful feedback and bug reports throughGitHub issues (https://github.com/rstudio/blogdown/issues). Twoof my favorites are https://github.com/rstudio/blogdown/issues/40and https://github.com/rstudio/blogdown/issues/97. Some users havealso contributed code and improved this book through pull requests(https://github.com/rstudio/blogdown/pulls). You can find the listof contributors at https://github.com/rstudio/blogdown/graphs/contributors. Many users followed my suggestion to ask questions onStackOverflow (https://stackoverflow.com/tags/blogdown) instead ofusing GitHub issues or Emails. I appreciate all your help, patience,and understanding. I also want to make special mention of my littlefriend Jerry Han, who was probably the youngest blogdown user.
For this book, I was fortunate enough to work with my co-authors Am-ber and Alison, who are exceptionally good at explaining things to be-ginners. That is the ability I desire most. Needless to say, they havemade this book friendlier to beginners. In addition, Sharon Machliscontributed some advice on search engine optimization in this book(https://github.com/rstudio/blogdown/issues/193). Raniere Silva con-tributed Section 3.4 (https://github.com/rstudio/blogdown/pull/225).

Preface xvii
I’d like to thank all Hugo authors and contributors (Bjørn Erik Peder-sen and Steve Francia et al.) for such a powerful static site generator.At least it made me enjoy building static websites and blogging again.
For some reason, a part of the R community started to adopt the“sticker-driven development” model when developing packages. I washoping blogdown could have a hexbin sticker, too, so I asked for helpon Twitter (https://twitter.com/xieyihui/status/907269861574930432)and got tons of draft logos. In particular, I want to thank Thomas LinPedersen for his hard work on a very clever design. The final versionof the logo was provided by Taras Kaduk and Angelina Kaduk, and Itruly appreciate it.
This is the third book I have published with my editor at Chapman &Hall/CRC, John Kimmel. I always love working with him. Rebecca Con-dit and Suzanne Lassandro proofread the manuscript, and I learneda lot from their comments and professional suggestions.
Yihui XieElkhorn, Nebraska


About the Authors
Yihui is the main developer of the blogdown package. He did not startworking on the systematic documentation (i.e., this book) until fourmonths after he started the blogdown project. One day, he found avery nice blogdown tutorial on Twitter written by Amber Thomas. Be-ing surprised that she could create a great personal website usingblogdown and write a tutorial when there was no official documentation,Yihui immediately invited her to join him to write this book, althoughthey had never met each other before. This definitely would not havehappened if Amber did not have a website. By the way, Amber askedthe very first question5 with the blogdown tag on StackOverflow.
About half a year later, Yihui noticed another very well-written blog-down tutorial by Alison on her personal website, when this book wasstill not complete. The same story happened, and Alison became thethird author of this book. The three authors have never met each other.
Hopefully, you can better see why you should have a website now.
Yihui Xie
Yihui Xie (https://yihui.org) is a software engineer at RStudio (https://www.rstudio.com). He earned his PhD from the Department of Statis-tics, Iowa State University. He is interested in interactive statisti-cal graphics and statistical computing. As an active R user, he hasauthored several R packages, such as knitr, bookdown, blogdown,xaringan, animation, DT, tufte, formatR, fun, mime, highr, servr,and Rd2roxygen, among which the animation package won the 2009
5https://stackoverflow.com/q/41176194/559676
xix

xx About the Authors
John M. Chambers Statistical Software Award (ASA). He also co-authored a few other R packages, including shiny, rmarkdown, andleaflet.
In 2006, he founded the Capital of Statistics (https://cosx.org), whichhas grown into a large online community on statistics in China. He ini-tiated the Chinese R conference in 2008, and has been involved in or-ganizing R conferences in China since then. During his PhD trainingat Iowa State University, he won the Vince Sposito Statistical Comput-ing Award (2011) and the Snedecor Award (2012) in the Department ofStatistics.
He occasionally rants on Twitter (https://twitter.com/xieyihui), andmost of the time you can find him on GitHub (https://github.com/yihui).
He enjoys spicy food as much as classical Chinese literature.
Amber Thomas
Amber Thomas (https://amber.rbind.io) is a data journalist and“maker” at the online publication of visual essays: The Pudding (https://pudding.cool). Her educational background, however, was in quite adifferent field altogether: marine biology. She has a bachelor’s degreein marine biology and chemistry from Roger Williams University anda master’s degree in marine sciences from the University of New Eng-land. Throughout her academic and professional career as a marine bi-ologist, she realized that she had a love of data analysis, visualization,and storytelling and thus, she switched career paths to something abit more data focused.
While looking for work, she began conducting personal projects to ex-pand her knowledge of R’s inner workings. She decided to put all ofher projects in a single place online (so that she could be discovered,naturally) and after lots of searching, she stumbled upon an early re-lease of the blogdown package. She was hooked right away and spent afew days setting up her personal website and writing a tutorial on how

About the Authors xxi
she did it. You can find that tutorial and some of her other projects andmusings on her blogdown site.
When she is not crunching numbers and trying to stay on top of heremail inbox, Amber is usually getting some fresh Seattle air or cud-dling with her dog, Sherlock. If you are looking for her in the digitalworld, try https://twitter.com/ProQuesAsker.
Alison Presmanes Hill
Alison (https://alison.rbind.io) is a professor of pediatrics at Ore-gon Health and Science University’s (OHSU) Center for Spoken Lan-guage Understanding in Portland, Oregon. Alison earned her PhD indevelopmental psychology with a concentration in quantitative meth-ods from Vanderbilt University in 2008. Her current research focuseson developing better outcome measures to evaluate the impact ofnew treatments for children with autism and other neurodevelopmen-tal disorders, using natural language processing and other computa-tional methods. Alison is the author of numerous journal articles andbook chapters, and her work has been funded by the National Insti-tutes of Health, the Oregon Clinical and Translational Research Insti-tute, and Autism Speaks.
In addition to research, Alison teaches graduate-level courses inOHSU’s Computer Science program (https://www.ohsu.edu/csee) onstatistics, data science, and data visualization using R. She has alsodeveloped and led several R workshops and smaller team-based train-ing sessions, and loves to train new “useRs.” You can find some ofher workshop and teaching materials on GitHub (https://github.com/apreshill) and, of course, on her blogdown site.
Being a new mom, Alison’s current favorite books are The Circus Shipand Bats at the Ballgame. She also does rousing renditions of mostEmily Arrow songs (for private audiences only).


1Get Started
In this chapter, we show how to create a simple website from scratch.The website will contain a home page, an “About” page, one R Mark-down post, and a plain Markdown post. You will learn the basic con-cepts for creating websites with blogdown. For beginners, we recom-mend that you get started with the RStudio IDE, but it is not reallyrequired. The RStudio IDE can make a few things easier, but you arefree to use any editor if you do not care about the extra benefits inRStudio.
1.1 Installation
We assume you have already installed R (https://www.r-project.org)(R Core Team, 2020) and the RStudio IDE (https://www.rstudio.com).If you do not have RStudio IDE installed, please install Pandoc (http://pandoc.org). Next we need to install the blogdown package in R. It isavailable on CRAN and GitHub, and you can install it with:
## Install from CRANinstall.packages('blogdown')## Or, install from GitHubif (!requireNamespace("devtools")) install.packages('devtools')devtools::install_github('rstudio/blogdown')
Since blogdown is based on the static site generator Hugo (https://gohugo.io), you also need to install Hugo. There is a helper function inblogdown to download and install it automatically on major operatingsystems (Windows, macOS, and Linux):
1

2 1 Get Started
blogdown::install_hugo()
By default, it installs the latest version of Hugo, but you can choose aspecific version through the version argument if you prefer.
For macOS users, install_hugo() uses the package manager Home-brew (https://brew.sh) if it has already been installed, otherwise it justdownloads the Hugo binary directly.
1.1.1 Update
To upgrade or reinstall Hugo, you may use blogdown::update_hugo(),which is equivalent to install_hugo(force = TRUE). You can check theinstalled Hugo version via blogdown::hugo_version(), and find the lat-est version of Hugo at https://github.com/gohugoio/hugo/releases.
1.2 A quick example
From our experience, Hugo’s documentation may be a little dauntingto read and digest for beginners.1 For example, its “Quickstart” guideused to have 12 steps, and you can easily get lost if you have not useda static website generator before. For blogdown, we hope users of alllevels can at least get started as quickly as possible. There are manythings you may want to tweak for the website later, but the first stepis actually fairly simple: create a new project under a new directory inthe RStudio IDE (File -> New Project), and call the function in the Rconsole of the new project:
blogdown::new_site()
Then wait for this function to create a new site, download the defaulttheme, add some sample posts, open them, build the site, and launch
1One day I was almost ready to kill myself when I was trying to figure out how_index.md works by reading the documentation over and over again, and desperatelysearching on the Hugo forum.

1.2 A quick example 3
it in the RStudio Viewer, so you can immediately preview it. If you donot use the RStudio IDE, you need to make sure you are currently inan empty directory,2 in which case new_site() will do the same thing,but the website will be launched in your web browser instead of theRStudio Viewer.
Now you should see a bunch of directories and files under the RStu-dio project or your current working directory. Before we explain thesenew directories and files, let’s introduce an important and helpfultechnology first: LiveReload. This means your website3 will be auto-matically rebuilt and reloaded in your web browser4 when you modifyany source file of your website and save it. Basically, once you launchthe website in a web browser, you do not need to rebuild it explic-itly anymore. All you need to do is edit the source files, such as RMarkdown documents, and save them. There is no need to click anybuttons or run any commands. LiveReload is implemented via blog-down::serve_site(), which is based on the R package servr (Xie, 2020c)by default.5
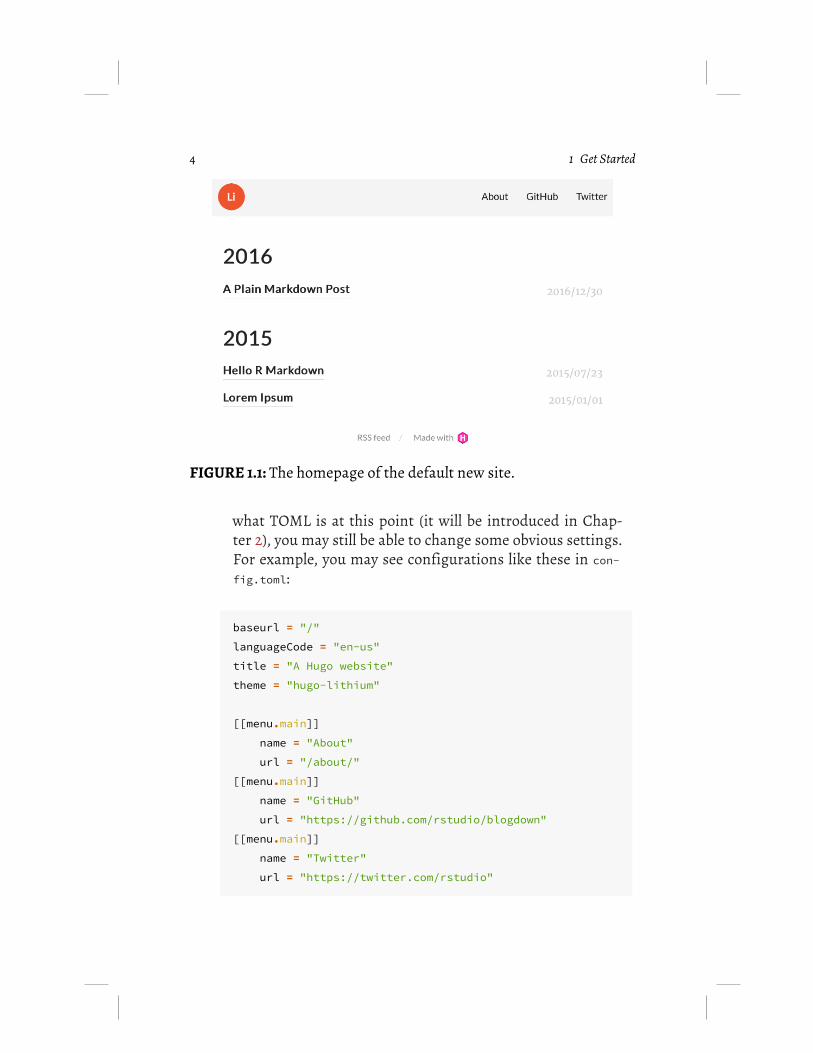
The new_site() function has several arguments, and you may checkout its R help page (?blogdown::new_site) for details. A minimal defaulttheme named “hugo-lithium” is provided as the default theme of thenew site,6 and you can see what it looks like in Figure 1.1.
You have to know three most basic concepts for a Hugo-based website:
1. The configuration file config.toml, in which you can specifysome global settings for your site. Even if you do not know
2Check the output of list.files('.') in R, and make sure it does not include filesother than LICENSE, the RStudio project file (*.Rproj), README or README.md.
3Until you set up your website to be deployed, LiveReload only updates the localversion of your website. This version is only visible to you. In order to make yourwebsite searchable, discoverable, and live on the internet you will need to uploadyour website’s files to a site builder. See Chapter 3 for details.
4You can also think of the RStudio Viewer as a web browser.5Hugo has its own LiveReload implementation. If you want to take advantage
of it, you may set the global option options(blogdown.generator.server = TRUE). SeeSection D.2 for more information.
6You can find its source on GitHub: https://github.com/yihui/hugo-lithium. Thistheme was forked from https://github.com/jrutheiser/hugo-lithium-theme and mod-ified to work better with blogdown.
4 1 Get Started
FIGURE 1.1: The homepage of the default new site.
what TOML is at this point (it will be introduced in Chap-ter 2), you may still be able to change some obvious settings.For example, you may see configurations like these in con-fig.toml:
baseurl = "/"languageCode = "en-us"title = "A Hugo website"theme = "hugo-lithium"
[[menu.main]]name = "About"url = "/about/"
[[menu.main]]name = "GitHub"url = "https://github.com/rstudio/blogdown"
[[menu.main]]name = "Twitter"url = "https://twitter.com/rstudio"

1.3 RStudio IDE 5
You can change the website title, e.g., title = "My own coolwebsite", and update the GitHub and Twitter URLs.
2. The content directory (by default, content/). This is whereyou write the R Markdown or Markdown source files for yourposts and pages. Under content/ of the default site, you cansee about.md and a post/directory containing a few posts. Theorganization of the content directory is up to you. You canhave arbitrary files and directories there, depending on thewebsite structure you want.
3. The publishing directory (by default, public/). Your websitewill be generated to this directory, meaning that you do notneed to manually add any files to this directory.7 Typicallyit contains a lot of *.html files and dependencies like *.css,*.js, and images. You can upload everything under public/to any web server that can serve static websites, and yourwebsite will be up and running. There are many options forpublishing static websites, and we will talk more about themin Chapter 3 if you are not familiar with deploying websites.
If you are satisfied with this default theme, you are basically ready tostart writing and publishing your new website! We will show how touse other themes in Section 1.6. However, please keep in mind that amore complicated and fancier theme may require you to learn moreabout all the underlying technologies like the Hugo templating lan-guage, HTML, CSS, and JavaScript.
1.3 RStudio IDE
There are a few essential RStudio addins to make it easy to edit andpreview your website, and you can find them in the menu “Addins” onthe RStudio toolbar:
7By running either serve_site() or build_site(), files will be generated and pub-lished in your publishing directory automatically.

6 1 Get Started
• “Serve Site”: This addin calls blogdown::serve_site() to continuouslyserve your website locally using the LiveReload technology, so youcan live preview the website. You can continue to edit material foryour site while you are previewing it.
• “New Post”: This addin provides a dialog box for you to enter themetadata of your blog post, including the title, author, date, and soon. See Figure 1.2 for an example. This addin actually calls the func-tion blogdown::new_post() under the hood, but does a few things au-tomatically:
– As you type the title of the post, it will generate a filename foryou, and you can edit it if you do not like the automatically gen-erated one. In fact, you can also use this addin to create normalpages under any directories under content/. For example, if youwant to add a resume page, you can change the filename to re-sume.md from the default post/YYYY-mm-dd-resume.md.
– You can select the date from a calendar widget provided byShiny.8
– It will scan the categories and tags of existing posts, so whenyou want to input categories or tags, you can select them fromthe dropdown menus, or create new ones.
– After a new post is created, it will be automatically opened, soyou can start writing the content immediately.
• “Update Metadata”: This addin allows you to update the YAML meta-data of the currently opened post. See Figure 1.3 for an example. Themain advantage of this addin is that you can select categories andtags from dropdown menus instead of having to remember them.
• “Insert Image”: This addin allows you to insert any image in yourcomputer to your currently opened post.9 Figure 1.4 shows how theaddin looks like. This addin copies the image to the final location for
8Shiny is an R package for building interactive web apps using R. Using thisaddin, the calendar widget allows you to view an interactive calendar by month toselect dates. This is a simple use of Shiny, but you can read more about Shiny appshere: https://shiny.rstudio.com.
9Check https://lcolladotor.github.io/2018/03/07/blogdown-insert-image-addin

1.3 RStudio IDE 7
your post files, and adds the Markdown/HTML code to embed theimage. You can specify the width and height of the image, as wellas the alternative text. The addin will show the final image file pathafter the image is uploaded. You can edit the path if necessary. Ifthe image already exists, the addin will ask you whether you want tooverwrite it as in Figure 1.5: when in doubt, change the name in the“Target file path” text input to avoid a conflict with previous imagesyou have inserted.
FIGURE 1.2: Create a new post using the RStudio addin.
With these addins, you should rarely need to run any R commandsmanually after you have set up your website, since all your posts willbe automatically compiled whenever you create a new post or modifyan existing post due to the LiveReload feature.
If your RStudio version is at least v1.1.383,10 you can actually create a
for a more in-depth explanation and for how to insert an image without using thisaddin.
10You may download all RStudio official releases including v1.1.383 from https://www.rstudio.com/products/rstudio/download/.

8 1 Get Started
FIGURE 1.3: Update the metadata of an existing post using the RStu-dio addin.
FIGURE 1.4: Insert an image to an existing post using the RStudioaddin.

1.3 RStudio IDE 9
FIGURE 1.5: Overwrite the image you are inserting in your blog post.
website project directly from the menu File -> New Project -> NewDirectory (see Figure 1.6 and 1.7).
FIGURE 1.6: Create a new website project in RStudio.
If your website was created using the function blogdown::new_site()instead of the RStudio menu for the first time, you can quit RStudioand open the project again. If you go to the menu Tools -> Project

10 1 Get Started
FIGURE 1.7: Create a website project based on blogdown.
Options, your project type should be “Website” like what you can see inFigure 1.8.
Then you will see a pane in RStudio named “Build,” and there isa button “Build Website.” When you click this button, RStudio willcall blogdown::build_site() to build the website. This will automat-ically generate files in the public/ directory.11 If you want to buildthe website and publish the output files under the public/ manu-ally, you are recommended to restart your R session and click this“Build Website” button every time before you publish the website, in-stead of publishing the public/ folder generated continuously and au-tomatically by blogdown::serve_site(), because the latter calls blog-down::build_site(local = TRUE), which has some subtle differenceswith blogdown::build_site(local = FALSE) (see Section D.3 for details).
We strongly recommend that you uncheck the option “Preview siteafter building” in your RStudio project options (Figure 1.8).12 You
11Or wherever your publishing directory is located. It is public/ by default, but itcan be changed by specifying the publishDir = "myNewDirectory" in the config.tomlfile.
12In case you wonder why: unless you have set the option relativeurls to truein config.toml, it requires a web server to preview the website locally, otherwise

1.4 Global options 11
can also uncheck the option “Re-knit current preview when support-ing files change,” since this option is not really useful after you callserve_site().
FIGURE 1.8: RStudio project options.
1.4 Global options
Depending on your personal preferences, you can set a few global op-tions before you work on your website. These options should be setusing options(name = value), and currently available options are pre-sented in Table 1.1.
We recommend that you set these options in your R startup profile file.You can check out the help page ?Rprofile for more details, and here is
even if you can see the homepage of your website in the RStudio Viewer, most linkslike those links to CSS and JavaScript files are unlikely to work. When the RStudioViewer shows you the preview, it does not actually launch a web server.

12 1 Get Started
TABLE 1.1: Global options that affect the behavior of blogdown.
Option name Default Meaning
servr.daemon interactive() Use a daemonized server?blogdown.author The default author of new postsblogdown.ext .md Default extension of new postsblogdown.subdir post A subdirectory under content/blogdown.yaml.empty TRUE Preserve empty fields in YAML?
a simplified introduction. A startup profile file is basically an R scriptthat is executed when your R session is started. This is a perfect placeto set global options, so you do not need to type these options againevery time you start a new R session. You can use a global profile file~/.Rprofile,13 or a per-project file .Rprofile under the root directory ofyour RStudio project. The former will be applied to all R sessions thatyou start, unless you have provided the latter to override it. The easiestway to create such a file is to use file.edit() in RStudio, e.g.,
file.edit('~/.Rprofile')# or file.edit('.Rprofile')
Suppose you always prefer writing Rmd posts (instead of the default*.md), and want the author of new posts to be “John Doe” by default.You can set these options in the profile file:
options(blogdown.ext = '.Rmd', blogdown.author = 'John Doe')
A nice consequence of setting these options is that when you use theRStudio addin “New Post,” the fields “Author,” “Subdirectory,” and“Format” will be automatically populated, so you do not need to ma-nipulate them every time unless you want to change the defaults (oc-casionally).
R only reads one startup profile file. For example, if you have a .Rpro-file under the current directory and a global ~/.Rprofile, only the for-
13The tilde ~ denotes your home directory in your system.

1.5 R Markdown vs. Markdown 13
mer one will be executed when R starts up from the current directory.This may make it inconvenient for multiple authors collaborating onthe same website project, since you cannot set author-specific options.In particular, it is not possible to set the blogdown.authoroption in a sin-gle .Rprofile, because this option should be different for different au-thors. One workaround is to set common options in .Rprofile underthe root directory of the website project, and also execute the global~/.Rprofile if it exists. Author-specific options can be set in the global~/.Rprofile on each author’s computer.
# in .Rprofile of the website projectif (file.exists('~/.Rprofile')) {
base::sys.source('~/.Rprofile', envir = environment())}# then set options(blogdown.author = 'Your Name') in ~/.Rprofile
Note that R will silently ignore the last line of your .Rprofile14 if it doesnot have a trailing newline, so please make sure you add at least onenewline to the end of your .Rprofile.
1.5 R Markdown vs. Markdown
If you are not familiar with R Markdown, please see Appendix A fora quick tutorial. When you create a new post, you have to decidewhether you want to use R Markdown or plain Markdown, as you cansee from Figure 1.2.
Table 1.2 summarizes the main differences between the three options,followed by detailed explanations below.
14https://yihui.org/en/2018/04/rprofile-trailing-newline/

14 1 Get Started
TABLE 1.2: Differences among the three document formats.
Feature .Rmd .Rmarkdown .md
Run R code yes yes noBibliography yes no noTask list maybe yes yesMathJax yes maybe maybeHTML widgets yes no no
1. You cannot execute any R code in a plain Markdown docu-ment, whereas in an R Markdown document, you can embedR code chunks (```{r}). However, you can still embed R codein plain Markdown using the syntax for fenced code blocks```r (note there are no curly braces {}). Such code blocks willnot be executed and may be suitable for pure demonstrationpurposes. Below is an example of an R code chunk in R Mark-down:
```{r cool-plot, fig.cap='A cool plot.'}plot(cars, pch = 20) # not really cool```
And here is an example of an R code block in plain Mark-down:
```r1 + 1 # not executed```
2. A plain Markdown post is rendered to HTML through Black-friday15 (a package written in the Go language and adoptedby Hugo). An R Markdown document is compiled throughthe packages rmarkdown, bookdown, and Pandoc, which
15https://gohugo.io/overview/configuration/

1.5 R Markdown vs. Markdown 15
means you can use most features of Pandoc’s Markdown16
and bookdown’s Markdown extensions17 in blogdown. Ifyou use R Markdown (Allaire et al., 2020) with blogdown, werecommend that you read the documentation of Pandoc andbookdown at least once to know all the possible features. Wewill not repeat the details in this book, but list the featuresbriefly below, which are also demonstrated on the examplewebsite https://blogdown-demo.rbind.io.
•Inline formatting: _italic_ / **bold** text and `inlinecode`.
•Inline elements: subscripts (e.g., H~2~0) and super-scripts (e.g., R^2^); links ([text](url)) and images ; footnotes text^[footnote].
•Block-level elements: paragraphs; numbered and un-numbered section headers; ordered and unorderedlists; block quotations; fenced code blocks; tables; hori-zontal rules.
•Math expressions and equations.
•Theorems and proofs.
•R code blocks that can be used to produce text output(including tables) and graphics. Note that equations,theorems, tables, and figures can be numbered andcross-referenced.
•Citations and bibliography.
•HTML widgets, and Shiny apps embedded via <iframe>.
There are many differences in syntax between Blackfriday’s Mark-down and Pandoc’s Markdown. For example, you can write a task listwith Blackfriday but you could not with Pandoc until recently:18
16http://pandoc.org/MANUAL.html#pandocs-markdown17https://bookdown.org/yihui/bookdown/components.html18Support for task lists was added to Pandoc with version 2.6, released on January
201919.

16 1 Get Started
- [x] Write an R package.- [ ] Write a book.- [ ] ...- [ ] Profit!
Similarly, Blackfriday does not support LaTeX math and Pandoc does.We have added the MathJax20 support to the default theme (hugo-lithium21) in blogdown to render LaTeX math on HTML pages, butthere is a caveat for plain Markdown posts: you have to include in-line math expressions in a pair of backticks `$math$`, e.g., `$S_n =\sum_{i=1}^n X_i$`. Similarly, math expressions of the display stylehave to be written in `$$math$$`. For R Markdown posts, you can use$math$ for inline math expressions, and $$math$$ for display-style ex-pressions.22
If you find it is a pain to have to remember the differences betweenR Markdown and Markdown, a conservative choice is to always useR Markdown, even if your document does not contain any R codechunks. Pandoc’s Markdown is much richer than Blackfriday, andthere are only a small number of features unavailable in Pandoc butpresent in Blackfriday. The main disadvantages of using R Markdownare:
1. You may sacrifice some speed in rendering the website, butthis may not be noticeable due to a caching mechanismin blogdown (more on this in Section D.3). Hugo is veryfast when processing plain Markdown files, and typically itshould take less than one second to render a few hundredMarkdown files.
20https://www.mathjax.org/#docs21https://github.com/yihui/hugo-lithium22The reason that we need the backticks for plain Markdown documents is that
we have to prevent the LaTeX code from being interpreted as Markdown by Black-friday. Backticks will make sure the inner content is not translated as Markdown toHTML, e.g., `$$x *y* z$$` will be converted to <code>$$x *y* z$$</code>. Withoutthe backticks, it will be converted to $$x <em>y</em> z$$, which is not a valid LaTeXmath expression for MathJax. Similar issues can arise when you have other specialcharacters like underscores in your math expressions.

1.5 R Markdown vs. Markdown 17
2. You will have some intermediate HTML files in the source di-rectory of your website, because blogdown has to call rmark-down to pre-render *.Rmd files into *.html. You will alsohave intermediate folders for figures (*_files/) and cache(*_cache/) if you have plot output in R code chunks or have en-abled knitr’s caching. Unless you care a lot about the “clean-ness” of the source repository of your website (especiallywhen you use a version control tool like GIT), these interme-diate files should not matter.
In this book, we usually mean .Rmd files when we say “R Markdowndocuments,” which are compiled to .html by default. However, thereis another type of R Markdown document with the filename extension.Rmarkdown. Such R Markdown documents are compiled to Markdowndocuments with the extension .markdown, which will be processed byHugo instead of Pandoc. There are two major limitations of using.Rmarkdown compared to .Rmd:
• You cannot use Markdown features only supported by Pandoc, suchas citations. Math expressions only work if you have installed thexaringan package (Xie, 2020d) and applied the JavaScript solutionmentioned in Section B.3.
• HTML widgets are not supported.
The main advantage of using .Rmarkdown is that the output files arecleaner because they are Markdown files. It can be easier for you toread the output of your posts without looking at the actual web pagesrendered. This can be particularly helpful when reviewing GitHubpull requests. Note that numbered tables, figures, equations, and the-orems are also supported. You cannot directly use Markdown syn-tax in table or figure captions, but you can use text references as aworkaround (see bookdown’s documentation).
For any R Markdown documents (not specific to blogdown), youhave to specify an output format. There are many possible outputformats23 in the rmarkdown package (such as html_document andpdf_document) and other extension packages (such as tufte::tufte_html
23http://rmarkdown.rstudio.com/lesson-9.html

18 1 Get Started
and bookdown::gitbook). Of course, the output format for websitesshould be HTML. We have provided an output format function blog-down::html_page in blogdown, and all R Markdown files are ren-dered using this format. It is based on the output format book-down::html_document2, which means it has inherited a lot of featuresfrom bookdown in addition to features in Pandoc. For example, youcan number and cross-reference math equations, figures, tables, andtheorems, etc. See Chapter 2 of the bookdown book (Xie, 2016) formore details on the syntax.
Note that the output format bookdown::html_document2 in turn inher-its from rmarkdown::html_document, so you need to see the help page?rmarkdown::html_document for all possible options for the format blog-down::html_page. If you want to change the default values of the optionsof this output format, you can add an output field to your YAML meta-data. For example, we can add a table of contents to a page, set thefigure width to be 6 inches, and use the svg device for plots by settingthese options in YAML:
---title: "My Awesome Post"author: "John Doe"date: "2017-02-14"output:blogdown::html_page:
toc: truefig_width: 6dev: "svg"
---
To set options for blogdown::html_page() globally (i.e., apply certain op-tions to all Rmd files), you can create a _output.yml file under the rootdirectory of your website. This YAML file should contain the outputformat directly (do not put the output format under the outputoption),e.g.,

1.6 Other themes 19
blogdown::html_page:toc: truefig_width: 6dev: "svg"
At the moment, not all features of rmarkdown::html_document are sup-ported in blogdown, such as df_print, code_folding, code_download, andso on.
If your code chunk has graphics output, we recommend that you avoidspecial characters like spaces in the chunk label. Ideally, you shouldonly use alphanumeric characters and dashes, e.g., ```{r, my-label}instead of ```{r, my label}.
It is not recommended to change the knitr chunk options fig.path orcache.path in R Markdown. The default values of these options workbest with blogdown. Please read Section D.5 to know the technical rea-sons if you prefer.
If you are working on an R Markdown post, but do not want blogdownto compile it, you can temporarily change its filename extension from.Rmd to another unknown extension such as .Rmkd.
1.6 Other themes
In Hugo, themes control the entire appearance and functionality ofyour site. So, if you care a lot about the appearance of your website,you will probably spend quite a bit of time in the beginning looking fora Hugo theme that you like from the collection listed at http://themes.gohugo.io. Please note that not all themes have been tested againstblogdown. If you find a certain theme does not work well with blog-down, you may report to https://github.com/rstudio/blogdown/issues,and we will try to investigate the reason, but it can be time-consumingto learn and understand how a new theme works, so we recommendthat you learn more about Hugo by yourself before asking, and we alsoencourage users to help each other there.

20 1 Get Started
After you have found a satisfactory theme, you need to figure outits GitHub username and repository name,24 then either install thetheme via blogdown::install_theme(), or just create a new site underanother new directory and pass the GitHub repository name to thetheme argument of new_site(). We recommend that you use the sec-ond approach, because Hugo themes could be very complicated andthe usage of each theme can be very different and highly dependenton config.toml. If you install a theme using install_theme() insteadof new_site() you’ll need to manually create the config.toml file in theroot directory of your website to match the newly installed theme.25
# for example, create a new site with the academic themeblogdown::new_site(theme = 'gcushen/hugo-academic')
To save you some time, we list a few themes below that match ourtaste:
• Simple/minimal themes: XMin,26 Tanka,27 simple-a,28 and ghost-writer.29
• Sophisticated themes: hugo-academic30 (strongly recommendedfor users in academia), hugo-tranquilpeak-theme,31 hugo-creative-portfolio-theme,32 and hugo-universal-theme.33
• Multimedia content themes: If you are interested in adding multi-
24For most themes, you can find this by navigating to the theme of your choicefrom http://themes.gohugo.io and then clicking on Homepage.
25In a workaround, if you used install_theme() and set the theme_example argu-ment to TRUE, then you can access an example config.toml file. In the themes/ di-rectory, navigate to the file for your newly downloaded theme and find example-Site/config.toml. This file can be copied to your root directory (to replace the con-fig.toml file from your original theme) or used as a template to correctly write anew config.toml file for your new theme.
26https://github.com/yihui/hugo-xmin27https://github.com/road2stat/hugo-tanka28https://github.com/AlexFinn/simple-a29https://github.com/jbub/ghostwriter30https://github.com/gcushen/hugo-academic31https://github.com/kakawait/hugo-tranquilpeak-theme32https://github.com/kishaningithub/hugo-creative-portfolio-theme33https://github.com/devcows/hugo-universal-theme

1.7 A recommended workflow 21
media content to your site (such as audio files of a podcast), the cas-tanet34 theme provides an excellent framework tailored for this ap-plication. An example of a site using blogdown with the castanettheme is the R-Podcast.35
If you do not understand HTML, CSS, or JavaScript, and have no expe-rience with Hugo themes or templates, it may take you about 10 min-utes to get started with your new website, since you have to accept ev-erything you are given (such as the default theme); if you do have theknowledge and experience (and desire to highly customize your site),it may take you several days to get started. Hugo is really powerful. Becautious with power.
Another thing to keep in mind is that the more effort you make in acomplicated theme, the more difficult it is to switch to other themesin the future, because you may have customized a lot of things that arenot straightforward to port to another theme. So please ask yourselfseriously, “Do I like this fancy theme so much that I will definitely notchange it in the next couple of years?”
If you choose to dig a rather deep hole, someday you will have nochoice but keep on digging, even with tears.
— Liyun Chen36
1.7 A recommended workflow
There are a lot of ways to start building a website and deploy it. Be-cause of the sheer number of technologies that you need to learn to
34https://github.com/mattstratton/castanet35https://www.r-podcast.org36Translated from her Chinese Weibo.

22 1 Get Started
fully understand how a website works, we’d like to recommend oneworkflow to beginners, so that hopefully they do not need to digestthe rest of this book. This is definitely not the most optimal workflow,but requires you to know the fewest technical details.
To start a new website:
1. Carefully pick a theme at http://themes.gohugo.io, and findthe link to its GitHub repository, which is of the formhttps://github.com/user/repo.
2. Create a new project in RStudio, and type the code blog-down::new_site(theme = 'user/repo') in the R console, whereuser/repo is from the link in Step 1.
3. Play with the new site for a while and if you do not like it, youcan repeat the above steps, otherwise edit the options in con-fig.toml. If you do not understand certain options, go to thedocumentation of the theme, which is often the READMEpage of the GitHub repository. Not all options have to bechanged.
To edit a website:
1. Click the RStudio addin “Serve Site” to preview the site inRStudio Viewer. This only needs to be done once every timeyou open the RStudio project or restart your R session. Donot click the Knit button on the RStudio toolbar.
2. Use the “New Post” addin to create a new post or page, thenstart writing the content.
3. Use the “Update Metadata” addin to modify the YAML meta-data if necessary.
To publish a website if you are not familiar with GIT or GitHub:
1. Restart the R session, and run blogdown::hugo_build(). Youshould get a public/ directory under the root directory ofyour project.

1.7 A recommended workflow 23
2. Log into https://www.netlify.com (you can use a GitHub ac-count if you have one). If this is the first time you have pub-lished this website, you can create a new site, otherwise youmay update the existing site you created last time. You candrag and drop the public/ folder from your file viewer to theindicated area on the Netlify web page, where it says “Drag afolder with a static site here.”
3. Wait for a few seconds for Netlify to deploy the files, andit will assign a random subdomain of the form random-word-12345.netlify.com to you. You can (and should) change thisrandom subdomain to a more meaningful one if it is stillavailable.
It can be much easier to publish a website if you are familiar with GITand GitHub. We recommend that you create a new site on Netlify fromyour GitHub repository that contains the source files of your website,so that you can enjoy the benefits of continuous deployment instead ofmanually uploading the public/ folder every time. With this approach,you do not need to run blogdown::hugo_build() locally, because the web-site can be built on Netlify via Hugo. See Chapter 3 for more informa-tion.


2Hugo
In this chapter, we will briefly introduce Hugo (https://gohugo.io),the static site generator on which blogdown is based. This chapter isnot meant to replace the official Hugo documentation, but provide aguide to those who are just getting started with Hugo. When in doubt,please consult the official Hugo documentation.
2.1 Static sites and Hugo
A static site often consists of HTML files (with optional external de-pendencies like images and JavaScript libraries), and the web serversends exactly the same content to the web browser no matter who vis-its the web pages. There is no dynamic computing on the server whena page is requested. By comparison, a dynamic site relies on a server-side language to do certain computing and sends potentially differ-ent content depending on different conditions. A common languageis PHP, and a typical example of a dynamic site is a web forum. Forexample, each user has a profile page, but typically this does not meanthe server has stored a different HTML profile page for every singleuser. Instead, the server will fetch the user data from a database, andrender the profile page dynamically.
For a static site, each URL you visit often has a corresponding HTMLfile stored on the server, so there is no need to compute anything be-fore serving the file to visitors. This means static sites tend to be fasterin response time than dynamic sites, and they are also much easier todeploy, since deployment simply means copying static files to a server.A dynamic site often relies on databases, and you will have to installmore software packages to serve a dynamic site. For more advantages
25

26 2 Hugo
of static sites, please read the page “Benefits of Static Site Generators1”on Hugo’s website.
There are many existing static site generators, including Hugo,Jekyll,2 and Hexo,3 etc. Most of them can build general-purpose web-sites but are often used to build blogs.
We love Hugo for many reasons, but there are a few that stand out.Unlike other static site generators, the installation of Hugo is very sim-ple because it provides a single executable without dependencies formost operating systems (see Section 1.1). It was also designed to ren-der hundreds of pages of content faster than comparable static sitegenerators and can reportedly render a single page in approximately1 millisecond. Lastly, the community of Hugo users is very active bothon the Hugo discussion forum4 and on GitHub issues.5
Although we think Hugo is a fantastic static site generator, there is re-ally one and only one major missing feature: the support for R Mark-down. That is basically the whole point of the blogdown package.6 Thismissing feature means that you cannot easily generate results using Rcode on your web pages, since you can only use static Markdown doc-uments. Besides, Hugo’s default Markdown engine is “Blackfriday”,which is less powerful than Pandoc.7
1https://gohugo.io/about/benefits/2http://jekyllrb.com3https://hexo.io4https://discuss.gohugo.io5https://github.com/gohugoio/hugo/issues6Another motivation was an easier way to create new pages or posts. Static site
generators often provide commands to create new posts, but you often have to openand modify the new file created by hand after using these commands. I was veryfrustrated by this, because I was looking for a graphical user interface where I canjust fill out the title, author, date, and other information about a page, then I canstart writing the content right away. That is why I provided the RStudio addin “NewPost” and the function blogdown::new_post(). In the past few years, I hated it everytime I was about to create a new post either by hand or via the Jekyll command line.Finally, I felt addicted to blogging again after I finished the RStudio addin.
7The Pandoc support has been added in a Hugo pull request: https://github.com/gohugoio/hugo/pull/4060. However, I think the support is quite limited, and I’d rec-ommend that you use the R Markdown format instead, because with the officialPandoc support in Hugo, you cannot customize the Pandoc command-line options,

2.2 Configuration 27
Hugo uses a special file and folder structure to create your website(Figure 2.1). The rest of this chapter will give more details on the fol-lowing files and folders:
• config.toml• content/• static/• themes/• layouts/
FIGURE 2.1: Possible files and folders created when you create a newsite using blogdown.
2.2 Configuration
The first file that you may want to look at is the configuration or configfile in your root directory, in which you can set global configurationsof your site. It may contain options like the title and description ofyour site, as well as other global options like links to your social net-works, the navigation menu, and the base URL for your website.
When generating your site, Hugo will search for a file called con-fig.toml first. If it cannot find one, it will continue to search for con-
rendering is not cached (it could be slow), and you will not be able to use any Mark-down extensions from the bookdown package (such as numbering figure captions).

28 2 Hugo
fig.yaml.8 Since most Hugo themes contain example sites that shipconfig.toml files, and the TOML (Tom’s Obvious, Minimal Language)format appears to be more popular in the Hugo community, we willmainly discuss config.toml here.
We recommend that you use the TOML syntax only for the configfile (you can also use YAML if you prefer), and use YAML as thedata format for the metadata of (R) Markdown pages and posts,because R Markdown and blogdown fully support only YAML.9 Ifyou have a website that has already used TOML, you may use blog-down::hugo_convert(unsafe = TRUE) to convert TOML data to YAML, butplease first make sure you have backed up the website because it willoverwrite your Markdown files.
The Hugo documentation does not use TOML or YAML consistently inits examples, which can be confusing. Please pay close attention to theconfiguration format when copying examples to your own website.
2.2.1 TOML Syntax
If you are not familiar with the TOML Syntax, we will give a briefoverview and you may read the full documentation10 to know the de-tails.
TOML is made up of key-value pairs separated by equal signs:
key = value
When you want to edit a configuration in the TOML file, simplychange the value. Values that are character strings should be in quotes,whereas Boolean values should be lowercase and bare.
For example, if you want to give your website the title “My Awesome
8Hugo also supports config.json, but blogdown does not support it, so we do notrecommend that you use it.
9TOML has its advantages, but I feel they are not significant in the context ofHugo websites. It is a pain to have to know yet another language, TOML, when YAMLstands for “Yet Another Markup Language.” I’m not sure if the XKCD comic appliesin this case: https://xkcd.com/927/.
10https://github.com/toml-lang/toml
2.2 Configuration 29
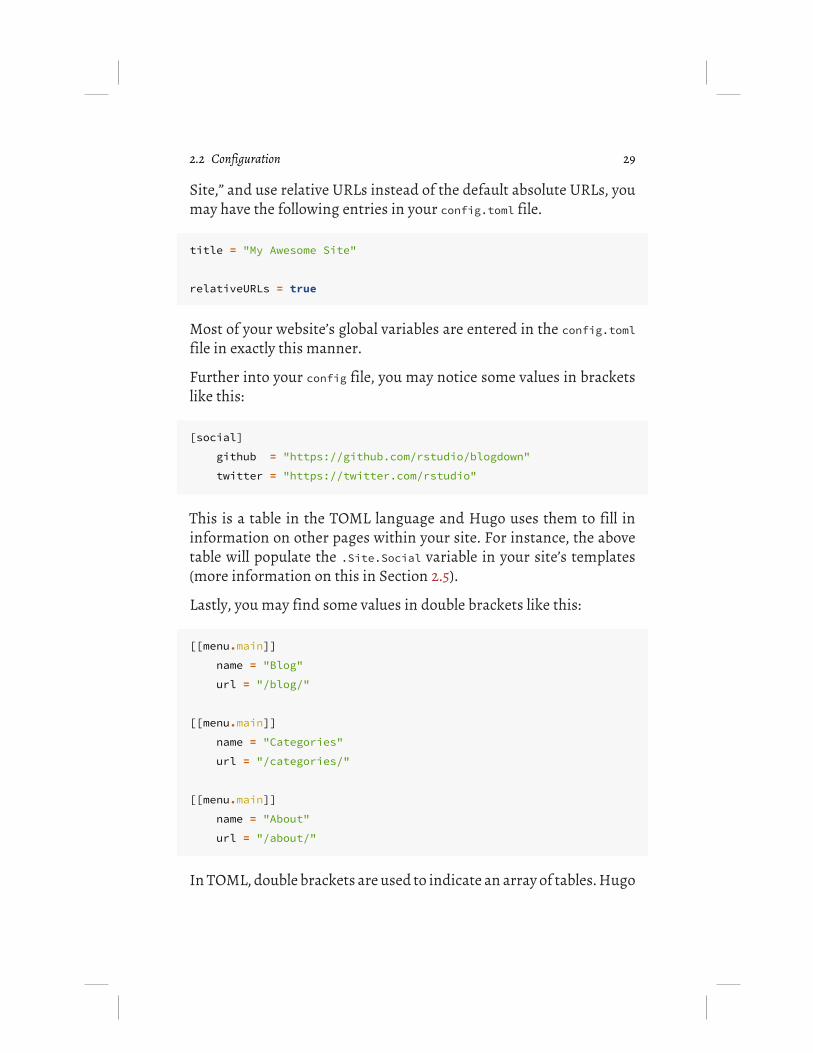
Site,” and use relative URLs instead of the default absolute URLs, youmay have the following entries in your config.toml file.
title = "My Awesome Site"
relativeURLs = true
Most of your website’s global variables are entered in the config.tomlfile in exactly this manner.
Further into your config file, you may notice some values in bracketslike this:
[social]github = "https://github.com/rstudio/blogdown"twitter = "https://twitter.com/rstudio"
This is a table in the TOML language and Hugo uses them to fill ininformation on other pages within your site. For instance, the abovetable will populate the .Site.Social variable in your site’s templates(more information on this in Section 2.5).
Lastly, you may find some values in double brackets like this:
[[menu.main]]name = "Blog"url = "/blog/"
[[menu.main]]name = "Categories"url = "/categories/"
[[menu.main]]name = "About"url = "/about/"
In TOML, double brackets are used to indicate an array of tables. Hugo

30 2 Hugo
interprets this information as a menu. If the code above was foundin a config.toml file, the resulting website would have links to Blog,Categories, and About pages in the site’s main menu. The location andstyling of that menu are specified elsewhere, but the names of eachmenu’s choices and the links to each section are defined here.
The config.toml file is different for each theme. Make sure that whenyou choose a theme, you read its documentation thoroughly to get anunderstanding of what each of the configuration options does (moreon themes in Section 2.4).
2.2.2 Options
All built-in options that you may set for Hugo are listed at https://gohugo.io/overview/configuration/. You can change any of these op-tions except contentDir, which is hard-coded to content in blogdown.Our general recommendation is that you’d better not modify the de-faults unless you understand the consequences. We list a few optionsthat may be of interest to you:
• baseURL: Normally you have to change the value of this optionto the base URL of your website. Some Hugo themes mayhave it set to http://replace-this-with-your-hugo-site.com/ orhttp://www.example.com/ in their example sites, but please make sureto replace them with your own URL (see Chapter 3 and Appendix Cfor more information on publishing websites and obtaining domainnames). Note that this option can be a URL with a subpath, if yourwebsite is to be published under a subpath of a domain name, e.g.,http://www.example.com/docs/.
• enableEmoji: You may set it to true so that you can use Emoji emoti-cons11 like :smile: in Markdown.
• permalinks: Rules to generate permanent links of your pages. By de-fault, Hugo uses full filenames under content/ to generate links, e.g.,content/about.md will be rendered to public/about/index.html, andcontent/post/2015-07-23-foo.mdwill be rendered to public/post/2015-07-23-foo/index.html, so the actual links are /about/ and /post/2015-
11http://www.emoji-cheat-sheet.com

2.2 Configuration 31
07-23-foo/ on the website. Although it is not required to set customrules for permanent links, it is common to see links of the form/YYYY/mm/dd/post-title/. Hugo allows you to use several pieces of in-formation about a source file to generate a link, such as the date(year, month, and day), title, and filename, etc. The link can be inde-pendent of the actual filename. For example, you may ask Hugo torender pages under content/post/ using the date and title for theirlinks:
[permalinks]post = "/:year/:month/:day/:title/"
Personally, I recommend that you use the :slug variable12 instead of:title:
[permalinks]post = "/:year/:month/:day/:slug/"
This is because your post title may change, and you probably do notwant the link to the post to change, otherwise you have to redirectthe old link to the new link, and there will other types of trouble likeDisqus comments. The :slug variable falls back to :title if a fieldnamed slug is not set in the YAML metadata of the post. You can seta fixed slug so that the link to the post is always fixed and you willhave the freedom to update the title of your post.
You may find a list of all possible variables that you can use in thepermalinks option at https://gohugo.io/extras/permalinks/.
• publishDir: The directory under which you want to generate the web-site.
12A slug is simply a character string that you can use to identify a specific post. Aslug will not change, even if the title changes. For instance, if you decide to changethe title of your post from “I love blogdown” to “Why blogdown is the best packageever,” and you used the post’s title in the URL, your old links will now be broken.If instead, you specified the URL via a slug (something like “blogdown-love”), thenyou can change the title as many times as you’d like and you will not end up with anybroken links.

32 2 Hugo
• theme: The directory name of the Hugo theme under themes/.
• ignoreFiles: A list of filename patterns (regular expressions) forHugo to ignore certain files when building the site. I recommendthat you specify at least these patterns ["\\.Rmd$", "\\.Rmarkdown$","_files$", "_cache$"]. You should ignore .Rmd files because blog-down will compile them to .html, and it suffices for Hugo to use the.html files. There is no need for Hugo to build .Rmd files, and actuallyHugo does not know how. Directories with suffixes _filesand _cacheshould be ignored because they contain auxiliary files after an Rmdfile is compiled, and blogdown will store them. Hugo should not copythem again to the public/ directory.
• uglyURLs: By default, Hugo generates “clean” URLs. This may be alittle surprising and requires that you understand how URLs workwhen your browser fetches a page from a server. Basically, Hugogenerates foo/index.html for foo.md by default instead of foo.html,because the former allows you to visit the page via the clean URLfoo/ without index.html. Most web servers understand requests likehttp://www.example.com/foo/ and will present index.html under foo/to you. If you prefer the strict mapping from *.md to *.html, you mayenable “ugly” URLs by setting uglyURLs to true.
• hasCJKLanguage: If your website is primarily in CJK (Chinese, Korean,and Japanese), I recommend that you set this option to true, so thatHugo’s automatic summary and word count work better.
Besides the built-in Hugo options, you can set other arbitrary optionsin config.toml. For example, it is very common to see an option namedparams, which is widely used in many Hugo themes. When you see avariable .Site.Params.FOO in a Hugo theme, it means an option FOO thatyou set under [params] in config.toml, e.g., .Site.Params.author is FridaGomam with the following config file:
[params]author = "Frida Gomam"dateFormat = "2006/01/02"
The goal of all these options is to avoid hard-coding anything in Hugo

2.3 Content 33
themes, so that users can easily edit a single config file to apply thetheme to their websites, instead of going through many HTML filesand making changes one by one.
2.3 Content
The structure of the content/ directory can be arbitrary. A commonstructure is that there are a few static pages under the root of content/,and a subdirectory post/ containing blog posts:
├── _index.md├── about.md├── vitae.md├── post/│ ├── 2017-01-01-foo.md│ ├── 2017-01-02-bar.md│ └── ...└── ...
2.3.1 YAML metadata
Each page should start with YAML metadata specifying informationlike the title, date, author, categories, tags, and so on. Depending onthe specific Hugo theme and templates you use, some of these fieldsmay be optional.
Among all YAML fields, we want to bring these to your attention:
• draft: You can mark a document as a draft by setting draft: truein its YAML metadata. Draft posts will not be rendered if the site isbuilt via blogdown::build_site()or blogdown::hugo_build(), but will berendered in the local preview mode (see Section D.3).
• publishdate: You may specify a future date to publish a post. Simi-lar to draft posts, future posts are only rendered in the local previewmode.

34 2 Hugo
• weight: This field can take a numeric value to tell Hugo the order ofpages when sorting them, e.g., when you generate a list of all pagesunder a directory, and two posts have the same date, you may assigndifferent weights to them to get your desired order on the list.
• slug: A character string as the tail of the URL. It is particularly use-ful when you define custom rules for permanent URLs (see Section2.2.2).
2.3.2 Body
As we mentioned in Section 1.5, your post can be written in either RMarkdown or plain Markdown. Please be cautious about the syntaxdifferences between the two formats when you write the body of apost.
2.3.3 Shortcode
Besides all Markdown features, Hugo provides a useful feature named“shortcodes.” You can use a shortcode in the body of your post. WhenHugo renders the post, it can automatically generate an HTML snip-pet based on the parameters you pass to the shortcode. This is con-venient because you do not have to type or embed a large amount ofHTML code in your post. For example, Hugo has a built-in shortcodefor embedding Twitter cards. Normally, this is how you embed a Twit-ter card (Figure 2.2) on a page:
<blockquote class="twitter-tweet"><p lang="en" dir="ltr">Anyone know of an R package for
interfacing with Alexa Skills?<a href="https://twitter.com/thosjleeper">@thosjleeper</a><a href="https://twitter.com/xieyihui">@xieyihui</a><a href="https://twitter.com/drob">@drob</a><a href="https://twitter.com/JennyBryan">@JennyBryan</a><a href="https://twitter.com/HoloMarkeD">@HoloMarkeD</a> ?
</p>— Jeff Leek (@jtleek)<a href="https://twitter.com/jtleek/status/852205086956818432">

2.4 Content 35
April 12, 2017</a>
</blockquote><script async src="//platform.twitter.com/widgets.js" charset="utf-8"></script>
FIGURE 2.2: A tweet by Jeff Leek.
If you use the shortcode, all you need in the Markdown source docu-ment is:
{{< tweet 852205086956818432 >}}
Basically, you only need to pass the ID of the tweet to a shortcodenamed tweet. Hugo will fetch the tweet automatically and renderthe HTML snippet for you. For more about shortcodes, see https://gohugo.io/extras/shortcodes/.
Shortcodes are supposed to work in plain Markdown documents only.To use shortcodes in R Markdown instead of plain Markdown, youhave to call the function blogdown::shortcode(), e.g.,
```{r echo=FALSE}blogdown::shortcode('tweet', '852205086956818432')```

36 2 Hugo
2.4 Themes
A Hugo theme is a collection of template files and optional website as-sets such as CSS and JavaScript files. In a nutshell, a theme defineswhat your website looks like after your source content is renderedthrough the templates.
Hugo has provided a large number of user-contributed themes athttps://themes.gohugo.io. Unless you are an experienced web de-signer, you’d better start from an existing theme here. The quality andcomplexity of these themes vary a lot, and you should choose one withcaution. For example, you may take a look at the number of stars of atheme repository on GitHub, as well as whether the repository is stillrelatively active. We do not recommend that you use a theme that hasnot been updated for more than a year.
In this section, we will explain how the default theme in blogdownworks, which may also give you some ideas about how to get startedwith other themes.
2.4.1 The default theme
The default theme in blogdown, hugo-lithium, is hosted on GitHubat https://github.com/yihui/hugo-lithium. It was originally written byJonathan Rutheiser, and I have made several changes to it. This themeis suitable for those who prefer minimal styles, and want to build awebsite with a few pages and some blog posts.
Typically a theme repository on GitHub has a README file, which alsoserves as the documentation of the theme. After you read it, the nextfile to look for is config.toml under the exampleSite directory, whichcontains sample configurations for a website based on this theme. Ifa theme does not have a README file or exampleSite directory, you prob-ably should not use it.
The config.toml of the theme hugo-lithium contains the following op-tions:

2.4 Themes 37
baseurl = "/"relativeurls = falselanguageCode = "en-us"title = "A Hugo website"theme = "hugo-lithium"googleAnalytics = ""disqusShortname = ""ignoreFiles = ["\\.Rmd$", "\\.Rmarkdown", "_files$", "_cache$"]
[permalinks]post = "/:year/:month/:day/:slug/"
[[menu.main]]name = "About"url = "/about/"
[[menu.main]]name = "GitHub"url = "https://github.com/rstudio/blogdown"
[[menu.main]]name = "Twitter"url = "https://twitter.com/rstudio"
[params]description = "A website built through Hugo and blogdown."
highlightjsVersion = "9.12.0"highlightjsCDN = "//cdnjs.cloudflare.com/ajax/libs"highlightjsLang = ["r", "yaml"]highlightjsTheme = "github"
MathJaxCDN = "//cdnjs.cloudflare.com/ajax/libs"MathJaxVersion = "2.7.5"
[params.logo]url = "logo.png"width = 50

38 2 Hugo
height = 50alt = "Logo"
Some of these options may be obvious to understand, and some mayneed explanations:
• baseurl: You can configure this option later, after you have a domainname for your website. Do not forget the trailing slash.
• relativeurls: This is optional. You may want to set it to true only ifyou intend to view your website locally through your file viewer, e.g.,double-click on an HTML file and view it in your browser. This optiondefaults to false in Hugo, and it means your website must be viewedthrough a web server, e.g., blogdown::serve_site() has provided a lo-cal web server, so you can preview your website locally when rela-tiveurls = false.
• title: The title of your website. Typically this is displayed in a webbrowser’s title bar or on a page tab.
• theme: The directory name of the theme. You need to be very carefulwhen changing themes, because one theme can be drastically differ-ent from another theme in terms of the configurations. It is quitepossible that a different theme will not work with your current con-fig.toml. Again, you have to read the documentation of a theme toknow what options are supported or required.
• googleAnalytics: The Google Analytics tracking ID (like UA-000000-2).You can sign up at https://analytics.google.com to obtain a trackingID.
• disqusShortname: The Disqus ID that you created during the accountsetup process at https://disqus.com. This is required to enable com-menting on your site.13 Please note that you have to set up a func-
13As we mentioned in Section 2.1, blogdown generates static and unchangingcontent. To add something dynamic and always changing (like the ability for yourfans to leave comments), you must incorporate an outside commenting system likeDisqus.

2.4 Themes 39
tional baseurl and publish your website before Disqus comments canwork.
• ignoreFiles and permalinks: These options have been explained inSection 2.2.2.
• menu: This list of options specifies the text and URL of menu items atthe top. See Figure 1.1 for a sample page. You can change or add moremenu items. If you want to order the items, you may assign a weightto each item, e.g.,
[[menu.main]]name = "Home"url = "/"weight = 1
[[menu.main]]name = "About"url = "/about/"weight = 2
[[menu.main]]name = "GitHub"url = "https://github.com/rstudio/blogdown"weight = 3
[[menu.main]]name = "CV"url = "/vitae/"weight = 4
[[menu.main]]name = "Twitter"url = "https://twitter.com/rstudio"weight = 5
In the above example, I added a menu item CV with the URL /vitae/,and there is supposed to be a corresponding source file vitae.md un-der the content/ directory to generate the page /vitae/index.html, sothe link will actually function.
• params: Miscellaneous parameters for the theme.
40 2 Hugo
– description: A brief description of your website. It is not visibleon web pages (you can only see it from the HTML source), butshould give search engines a hint about your website.
– highlightjs*: These options are used to configure theJavaScript library highlight.js14 for syntax highlighting ofcode blocks on the web pages. You can change the ver-sion (e.g., 9.12.0), the CND host (e.g., using cdnjs15: //cd-njs.cloudflare.com/ajax/libs), add more languages (e.g., ["r","yaml", "tex"]), and change the theme (e.g., atom-one-light).See https://highlightjs.org/static/demo/ for all languagesand themes that highlight.js supports.
– MathJax*: The JavaScript library MathJax can render La-TeX math expressions on web pages. Similar to high-lightjsCDN, you can specify the CDN host of MathJax, e.g.,//cdnjs.cloudflare.com/ajax/libs, and you can also specify theversion of MathJax.
– logo: A list of options to define the logo of the website. By de-fault, the image logo.png under the static/ directory is used.
If you want to be a theme developer and fully understand all the tech-nical details about these options, you have to understand Hugo tem-plates, which we will introduce in Section 2.5.
2.5 Templates
A Hugo theme consists of two major components: templates, and webassets. The former is essential, and tells Hugo how to render a page.16
The latter is optional but also important. It typically consists of CSSand JavaScript files, as well as other assets like images and videos.
14https://highlightjs.org15https://cdnjs.com16The most common functionality of templates is to render HTML pages, but
there can also be special templates, for example, for RSS feeds and sitemaps, whichare XML files.

2.5 Templates 41
These assets determine the appearance and functionality of your web-site, and some may be embedded in the content of your web pages.
You can learn more about Hugo templates from the official docu-mentation (https://gohugo.io/templates/overview/). There are a greatmany different types of templates. To make it easier for you to mas-ter the key ideas, I created a very minimal Hugo theme, which coversmost functionalities that an average user may need, but the total num-ber of lines is only about 150, so we can talk about all the source codeof this theme in the following subsection.
2.5.1 A minimal example
XMin17 is a Hugo theme I wrote from scratch in about 12 hours.Roughly half an hour was spent on templates, 3.5 hours were spenton tweaking the CSS styles, and 8 hours were spent on the documen-tation (https://xmin.yihui.org). I think this may be a representativecase of how much time you would spend on each part when design-ing a theme. It is perhaps our nature to spend much more time oncosmetic stuff like CSS than essential stuff like templates. Meanwhile,coding is often easier than documentation.
We will show the source code of the XMin theme. Because the thememay be updated occasionally in the future, you may follow this linkto obtain a fixed version that we will talk about in this section: https://github.com/yihui/hugo-xmin/tree/4bb305. Below is a tree view of allfiles and directories in the theme:
hugo-xmin/├── LICENSE.md├── README.md├── archetypes│ └── default.md├── layouts│ ├── 404.html│ ├── _default
17https://github.com/yihui/hugo-xmin
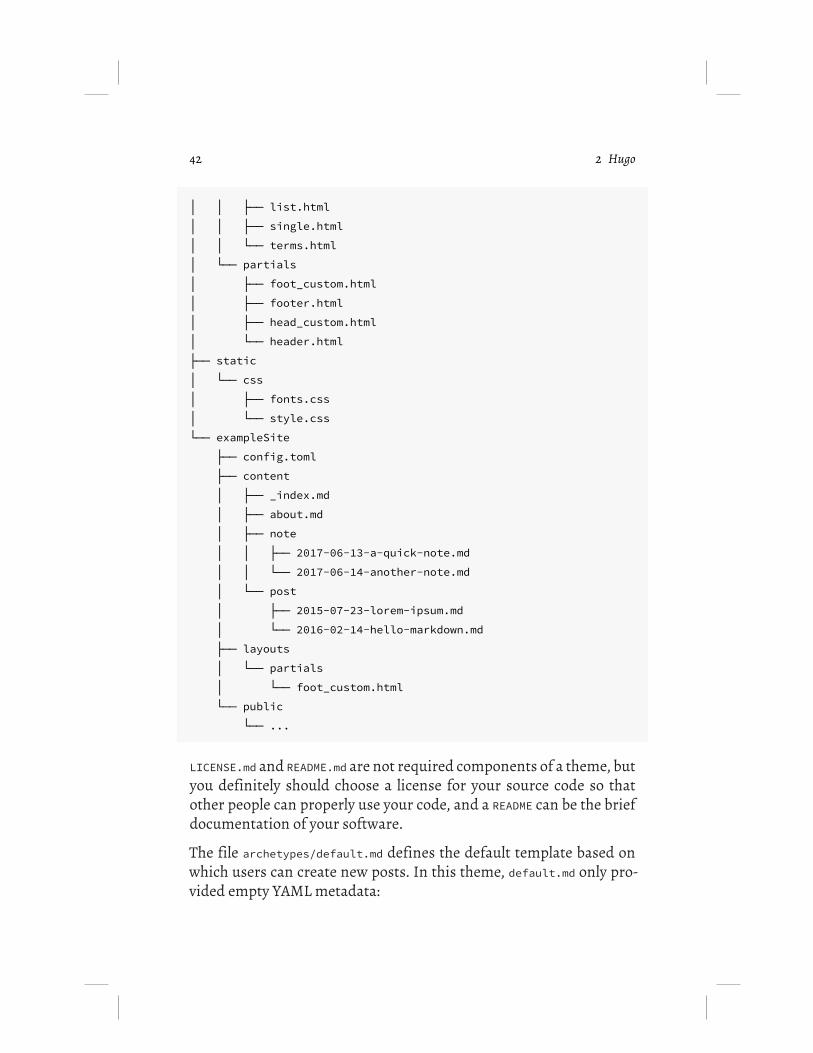
42 2 Hugo
│ │ ├── list.html│ │ ├── single.html│ │ └── terms.html│ └── partials│ ├── foot_custom.html│ ├── footer.html│ ├── head_custom.html│ └── header.html├── static│ └── css│ ├── fonts.css│ └── style.css└── exampleSite
├── config.toml├── content│ ├── _index.md│ ├── about.md│ ├── note│ │ ├── 2017-06-13-a-quick-note.md│ │ └── 2017-06-14-another-note.md│ └── post│ ├── 2015-07-23-lorem-ipsum.md│ └── 2016-02-14-hello-markdown.md├── layouts│ └── partials│ └── foot_custom.html└── public
└── ...
LICENSE.md and README.md are not required components of a theme, butyou definitely should choose a license for your source code so thatother people can properly use your code, and a README can be the briefdocumentation of your software.
The file archetypes/default.md defines the default template based onwhich users can create new posts. In this theme, default.md only pro-vided empty YAML metadata:

2.5 Templates 43
------
The most important directories of a theme are layouts/ and static/.HTML templates are stored under layouts/, and assets are stored un-der static/.
To understand layouts/, you must know some basics about HTML (seeSection B.1) because the templates under this directory are mostlyHTML documents or fragments. There are many possible types of sub-directories under layouts/, but we are only going to introduce twohere: _default/ and partials/.
• The _default/ directory is where you put the default templates foryour web pages. In the XMin theme, we have three templates: sin-gle.html, list.html, and terms.html.
– single.html is a template for rendering single pages. A sin-gle page basically corresponds to a Markdown document un-der content/, and it contains both the (YAML) metadata andcontent. Typically we want to render the page title, author,date, and the content. Below is the source code of XMin’s sin-gle.html:
{{ partial "header.html" . }}<div class="article-meta"><h1><span class="title">{{ .Title }}</span></h1>{{ with .Params.author }}<h2 class="author">{{ . }}</h2>{{ end }}{{ if .Params.date }}<h2 class="date">{{ .Date.Format "2006/01/02" }}</h2>{{ end }}</div>
<main>{{ .Content }}

44 2 Hugo
</main>
{{ partial "footer.html" . }}
You see a lot of pairs of double curly braces {{}}, and that is howyou program the templates using Hugo’s variables and func-tions.
The template starts with a partial template header.html, forwhich you will see the source code soon. For now, you canimagine it as all the HTML tags before the body of your page(e.g., <html><head>). Partial templates are mainly for reusingHTML code. For example, all HTML pages may share very simi-lar <head></head> tags, and you can factor out the common partsinto partial templates.
The metadata of a page is included in a <div> element with theclass article-meta. We recommend that you assign classes toHTML elements when designing templates, so that it will beeasier to apply CSS styles to these elements using class names.In a template, you have access to many variables provided byHugo, e.g., the .Title variable stores the value of the page ti-tle, and we write the title in a <span> in a first-level header <h1>.Similarly, the author and date are written in <h2>, but only ifthey are provided in the YAML metadata. The syntax {{ withFOO }}{{ . }}{{ end }} is a shorthand of {{if FOO }}{{ FOO }}{{end }}, i.e., it saves you the effort of typing the expression FOOtwice by using {{ . }}. The method .Format can be applied toa date object, and in this theme, we format dates in the formYYYY/mm/dd (2006/01/02 is the way to specify the format in Go).
Then we show the content of a page, which is stored in the vari-able .Content. The content is wrapped in a semantic HTML tag<main>.
The template is finished after we include another partial tem-plate footer.html (source code to be shown shortly).

2.5 Templates 45
To make it easier to understand how a template works, we showa minimal example post below:
---title: Hello Worldauthor: Frida Gomamdate: 2017-06-19---
A single paragraph.
Using the template single.html, it will be converted to an HTMLpage with source code that looks more or less like this (with theheader and footer omitted):
<div class="article-meta"><h1><span class="title">Hello World</span></h1><h2 class="author">Frida Gomam</h2><h2 class="date">2017/06/19</h2>
</div>
<main><p>A single paragraph.</p>
</main>
For a full example of a single page, you may see https://xmin.yihui.org/about/.
– list.html is the template for rendering lists of pages, such as alist of blog posts, or a list of pages within a category or tag. Hereis its source code:
{{ partial "header.html" . }}
{{if not .IsHome }}<h1>{{ .Title }}</h1>{{ end }}

46 2 Hugo
{{ .Content }}
<ul>{{ range (where .Data.Pages "Section" "!=" "") }}<li>
<span class="date">{{ .Date.Format "2006/01/02" }}</span><a href="{{ .URL }}">{{ .Title }}</a>
</li>{{ end }}
</ul>
{{ partial "footer.html" . }}
Again, it uses two partial templates header.htmland footer.html.The expression {{if not .IsHome }} means, if this list is not thehome page, show the page title. This is because I do not wantto display the title on the homepage. It is just my personal pref-erence. You can certainly display the title in <h1> on the homepage if you want.
The {{ .Content }} shows the content of the list. Please note thattypically .Content is empty, which may be surprising. This is be-cause a list page is not generated from a source Markdown fileby default. However, there is an exception. When you write aspecial Markdown file _index.md under a directory correspond-ing to the list name, the .Content of the list will be the contentof this Markdown file. For example, you can define the contentof your homepage in content/_index.md, and the content of thepost list page under content/post/_index.md.
Next we generate the list using a loop (range) through all pagesfiltered by the condition that the section of a page should notbe empty. “Section” in Hugo means the first-level subdirec-tory name under content/. For example, the section of con-tent/post/foo.md is post. Therefore the filter means that wewill list all pages under subdirectories of content/. This will

2.5 Templates 47
exclude pages under the root content/ directory, such as con-tent/about.md.
Please note that the variable .Data is dynamic, and its valuechanges according to the specific list you want to generate. Forexample, the list page https://xmin.yihui.org/post/ only con-tains pages under content/post/, and https://xmin.yihui.org/note/ only contains pages under content/note/. These list pagesare automatically generated by Hugo, and you do not need toexplicitly loop through the sections post and note. That is, a sin-gle template list.html will generate multiple lists of pages ac-cording to the sections and taxonomy terms (e.g., categoriesand tags) you have on your website.
The list items are represented by the HTML tags <li> in <ul>.Each item consists of the date, link, and title of a page. Youmay see https://xmin.yihui.org/post/ for a full example of a listpage.
– terms.html is the template for the home page of taxonomyterms. For example, you can use it to generate the full list ofcategories or tags. The source code is below:
{{ partial "header.html" . }}
<h1>{{ .Title }}</h1>
<ul class="terms">{{ range $key, $value := .Data.Terms }}<li>
<a href='{{ (print "/" $.Data.Plural "/" $key) | relURL }}'>{{ $key }}
</a>({{ len $value }})
</li>{{ end }}
</ul>

48 2 Hugo
{{ partial "footer.html" . }}
Similar to list.html, it also uses a loop. The variable .Data.Termsstores all terms under a taxonomy, e.g., all category names. Youcan think of it as a named list in R (called a map in Go), withthe names being the terms and the values being lists of pages.The variable $key denotes the term and $value denotes the listof pages associated with this term. What we render in each <li>is a link to the term page as well as the count of posts that usedthis term (len is a Go function that returns the length of an ob-ject).
Hugo automatically renders all taxonomy pages, and the pathnames are the plural forms of the taxonomies, e.g., https://xmin.yihui.org/categories/ and https://xmin.yihui.org/tags/.That is the meaning of .Data.Plural. The leading $ is requiredbecause we are inside a loop, and need to access variables fromthe outside scope. The link of the term is passed to the Hugofunction relURL via a pipe | to make it relative, which is goodpractice because relative links are more portable (independentof the domain name).
• The partials/ directory is the place to put the HTML fragments tobe reused by other templates via the partial function. We have fourpartial templates under this directory:
– header.html main defines the <head> tag and the navigationmenu in the <nav> tag.
<!DOCTYPE html><html lang="{{ .Site.LanguageCode }}"><head>
<meta charset="utf-8"><title>{{ .Title }} | {{ .Site.Title }}</title><link href='{{ "/css/style.css" | relURL }}'
rel="stylesheet" />

2.5 Templates 49
<link href='{{ "/css/fonts.css" | relURL }}'rel="stylesheet" />
{{ partial "head_custom.html" . }}</head>
<body><nav><ul class="menu">
{{ range .Site.Menus.main }}<li><a href="{{ .URL | relURL }}">{{ .Name }}</a></li>{{ end }}
</ul><hr/></nav>
The <head> area should be easy to understand if you are famil-iar with HTML. Note that we also included a partial templatehead_custom.html, which is empty in this theme, but it will makeit much easier for users to add customized code to <head> with-out rewriting the whole template. See Section 2.6 for more de-tails.
The navigation menu is essentially a list, and each item of thelist is read from the variable .Site.Menus.main. This means userscan define the menu in config.toml, e.g.,
[[menu.main]]name = "Home"url = "/"
[[menu.main]]name = "About"url = "/about/"
It will generate a menu like this:

50 2 Hugo
<ul class="menu"><li><a href="/">Home</a></li><li><a href="/about/">About</a></li>
</ul>
Hugo has a powerful menu system, and we only used the sim-plest type of menu in this theme. If you are interested in morefeatures like nested menus, please see the full documentationat http://gohugo.io/extras/menus/.
– footer.html defines the footer area of a page and closes theHTML document:
<footer>{{ partial "foot_custom.html" . }}{{ with .Site.Params.footer }}<hr/>{{ . | markdownify }}{{ end }}</footer></body>
</html>
The purpose of the partial template foot_custom.html is thesame as head_custom.html; that is, to allow the user to add cus-tomized code to the <footer> without rewriting the whole tem-plate.
Lastly, we use the variable .Site.Params.footer to generate apage footer. Note we used the with function again. Recallthat the syntax {{ with .Site.Params.footer }}{{ . }}{{end }} is a shorthand for {{if .Site.Params.footer }}{{.Site.Params.footer }}{{ end }}. This syntax saves you from typ-ing the expression .Site.Params.footer twice by using {{ . }} asa placeholder for the variable footer, which is defined as a siteparameter in our config.toml file. The additional function mark-downify can convert Markdown to HTML (i.e., {{ . | markdown-

2.5 Templates 51
ify }}. Altogether, this sequence means we can define a footeroption using Markdown under params in config.toml, e.g.,
[params]footer = "© [Yihui Xie](https://yihui.org) 2017"
There is a special template 404.html, which Hugo uses to create the 404page (when a page is not found, this page is displayed):
{{ partial "header.html" . }}
404 NOT FOUND
{{ partial "footer.html" . }}
With all templates above, we will be able to generate a website fromMarkdown source files. You are unlikely to be satisfied with the web-site, however, because the HTML elements are not styled at all, andthe default appearance may not look appealing to most people. Youmay have noticed that in header.html, we have included two CSS files,/css/style.css and /css/fonts.css.
You can find many existing open-source CSS frameworks online thatmay be applied to a Hugo theme. For example, the most popular CSSframework may be Bootstrap: http://getbootstrap.com. When I wasdesigning XMin, I wondered how far I could go without using anyof these existing frameworks, because they are usually very big. Forexample, bootstrap.css has nearly 10000 lines of code when not min-imized. It turned out that I was able to get a satisfactory appearancewith about 50 lines of CSS, which I will explain in detail below:
• style.css defines all styles except the typefaces:
body {max-width: 800px;margin: auto;padding: 1em;

52 2 Hugo
line-height: 1.5em;}
The maximum width of the page body is set to 800 pixels because anexcessively wide page is difficult to read (800 is an arbitrary thresh-old that I picked). The body is centered using the CSS trick margin:auto, which means the top, right, bottom, and left margins are auto-matic. When a block element’s left and right margins are auto, it willbe centered.
/* header and footer areas */.menu li { display: inline-block; }.article-meta, .menu a {
text-decoration: none;background: #eee;padding: 5px;border-radius: 5px;
}.menu, .article-meta, footer { text-align: center; }.title { font-size: 1.1em; }footer a { text-decoration: none; }hr {border-style: dashed;color: #ddd;
}
Remember that our menu element is a list <ul class="menu"> definedin header.html. I changed the default display style of <li> within themenu to inline-block, so that they will be laid out from left to rightas inline elements, instead of being stacked vertically as a bullet list(the default behavior).
For links (<a>) in the menu and the metadata area of an article, thedefault text decoration (underlines) is removed, and a light back-ground color is applied. The border radius is set to 5 pixels so thatyou can see a subtle round-corner rectangle behind each link.

2.5 Templates 53
The horizontal rule (<hr>) is set to a dashed light-gray line to make itless prominent on a page. These rules are used to separate the articlebody from the header and footer areas.
/* code */pre {
border: 1px solid #ddd;box-shadow: 5px 5px 5px #eee;padding: 1em;overflow-x: auto;
}code { background: #f9f9f9; }pre code { background: none; }
For code blocks (<pre>), I apply light gray borders with drop-shadoweffects. Every inline code element has a very light gray background.These decorations are merely out of my own peculiar interest andemphasis in code.
/* misc elements */img, iframe, video { max-width: 100%; }main { hyphens: auto; }blockquote {background: #f9f9f9;border-left: 5px solid #ccc;padding: 3px 1em 3px;
}
table {margin: auto;border-top: 1px solid #666;border-bottom: 1px solid #666;
}table thead th { border-bottom: 1px solid #ddd; }th, td { padding: 5px; }tr:nth-child(even) { background: #eee }

54 2 Hugo
Embedded elements like images and videos that exceed the pagemargin are often ugly, so I restrict their maximum width to 100%.Hyphenation is turned on for words in <main>. Blockquotes have agray left sidebar and a light gray background. Tables are centered bydefault, with only three horizontal rules: the top and bottom bordersof the table, and the bottom border of the table head. Table rows arestriped to make it easier to read the table especially when the table iswide.
• fonts.css is a separate style sheet because it plays a critical role inthe appearance of a website, and it is very likely that you will want tocustomize this file. In most cases, your readers will spend the mosttime on reading the text on your pages, so it is important to makethe text comfortable to read. I’m not an expert in web design, andI just picked Palatino for the body and Lucida Console or Monaco(whichever is available in your system) for the code. It is common touse Google web fonts nowadays. You may try some web fonts andsee if you like any of them.
body {font-family: "Palatino Linotype", "Book Antiqua", Palatino, serif;
}code {font-family: "Lucida Console", Monaco, monospace;font-size: 85%;
}
The two CSS files are placed under the static/css/ directory of thetheme. In the HTML template header.html, the path /css/style.cssrefers to the file static/css/style.css.
Lastly, this theme provided an example site under exampleSite/. Thedirectory structure may be a little confusing because this is a themeinstead of a website. In practice, everything under exampleSite/ shouldbe under the root directory of a website, and the top-level hugo-xmin/directory should be under the themes/ directory of this website, i.e.,

2.5 Templates 55
├── config.toml├── content/├── ...├── themes/│ └── hugo-xmin/│└── ...
The example site provides a sample config.toml, a home page _in-dex.md, an about page about.md, two posts under note/ and two underpost/. It also overrides the foot_custom.html in the theme.
2.5.2 Implementing more features
The XMin is actually a highly functional theme, but we understandthat it may be too minimal for you. There are a few commonly used fea-tures (intentionally) missing in this theme, and we will teach you howto add them by yourself if desired. All these features and the sourcecode can be applied to other themes, too.
• Enable Google Analytics. Hugo has provided a built-in partial tem-plate. For XMin, you can add
{{ template "_internal/google_analytics.html" . }}
to layouts/partials/foot_custom.html under the root directory ofyour website (instead of themes/hugo-xmin/), and configure google-Analytics in the config.toml. See https://github.com/yihui/hugo-xmin/pull/3 for details, and the HTML source of this page for theJavaScript rendered from the template: https://deploy-preview-3--hugo-xmin.netlify.com.
• Enable Disqus comments. Similar to Google Analytics, you can addthe built-in template
{{ template "_internal/disqus.html" . }}

56 2 Hugo
to foot_custom.html, and configure the Disqus shortname in con-fig.toml. See https://github.com/yihui/hugo-xmin/pull/4 for details,and a preview at https://deploy-preview-4--hugo-xmin.netlify.com.
• Enable syntax highlighting via highlight.js. Add this tohead_custom.html
<link href="//YOUR-CDN-LINK/styles/github.min.css" rel="stylesheet">
and this to foot_custom.html:
<script src="//YOUR-CDN-LINK/highlight.min.js"></script><script src="//YOUR-CDN-LINK/languages/r.min.js"></script>
<script>hljs.configure({languages: []});hljs.initHighlightingOnLoad();</script>
Remember to replace YOUR-CDN-LINK with the link toyour preferred CDN host of highlight.js, e.g., cd-njs.cloudflare.com/ajax/libs/highlight.js/9.12.0. For moreinformation about highlight.js, please see its homepage:https://highlightjs.org. If you need to use other CDN hosts, cd-njs.com is a good choice: https://cdnjs.com/libraries/highlight.jsYou can also see which languages and CSS themes are supportedthere.
You may see https://github.com/yihui/hugo-xmin/pull/5 for an ac-tual implementation, and a sample page with syntax highlight-ing at https://deploy-preview-5--hugo-xmin.netlify.com/post/2016/02/14/a-plain-markdown-post/.
• Support math expressions through MathJax. Add the code below tofoot_custom.html.

2.5 Templates 57
<script src="//yihui.org/js/math-code.js"></script><script asyncsrc="//YOUR-CDN-LINK/MathJax.js?config=TeX-MML-AM_CHTML"></script>
This requires substantial knowledge of JavaScript and familiaritywith MathJax to fully understand the code above, and we will leavethe explanation of the code to Section B.3.
Remember to replace YOUR-CDN-LINK with the linkto your preferred CDN host of MathJax, e.g., cd-njs.cloudflare.com/ajax/libs/mathjax/2.7.5.
• Show the table of contents (TOC). To show a TOC for R Markdownposts, you only need to add the output format blogdown::html_pagewith the option toc: true to YAML:
output:blogdown::html_page:
toc: true
For plain Markdown posts, you have to modify the template sin-gle.html. The TOC of a post is stored in the Hugo template vari-able .TableOfContents. You may want an option to control whetherto show the TOC, e.g., you may add an option toc: true to the YAMLmetadata of a Markdown post to show the TOC. The code below canbe added before the content of a post in single.html:
{{ if .Params.toc }}{{ .TableOfContents }}{{ end }}
See https://github.com/yihui/hugo-xmin/pull/7 for an implementa-tion with examples.
• Display categories and tags in a post if provided in its YAML. Add

58 2 Hugo
the code below where you want to place the categories and tags insingle.html, e.g., in <div class="article-meta"></div>.
<p class="terms">{{ range $i := (slice "categories" "tags") }}{{ with ($.Param $i) }}{{ $i | title }}:{{ range $k := . }}<a href='{{ relURL (print "/" $i "/" $k | urlize) }}'>{{$k}}</a>{{ end }}{{ end }}{{ end }}
</p>
Basically the code loops through the YAML metadata fields cate-gories and tags, and for each field, its value is obtained from .Param,then we use an inside loop to write out the terms with links of theform <a href="/tags/foo/">foo</a>.
You may see https://github.com/yihui/hugo-xmin/pull/2 for the com-plete implementation and a preview at https://deploy-preview-2--hugo-xmin.netlify.com/post/2016/02/14/a-plain-markdown-post/.
• Add pagination. When you have a large number of posts on a web-site, you may not want to display the full list on a single page, butshow N posts (e.g., N = 10) per page. It is easy to add pagination toa website using Hugo’s built-in functions and templates. Instead oflooping through all posts in a list template (e.g., range .Data.Pages),you paginate the full list of posts using the function .Paginate (e.g.,range (.Paginate .Data.Pages)). Below is a template fragment thatyou may insert to your template file list.html:
<ul>{{ $paginator := .Paginate .Data.Pages }}{{ range $paginator.Pages }}<li>
<span class="date">{{ .Date.Format "2006/01/02" }}</span>

2.5 Templates 59
<a href="{{ .URL }}">{{ .Title }}</a></li>{{ end }}
</ul>{{ template "_internal/pagination.html" . }}
See https://github.com/yihui/hugo-xmin/pull/16 for a full implemen-tation.
• Add a GitHub Edit button or link to a page. If none of the above fea-tures look exciting to you (which would not surprise me), this littlefeature is really a great example of showing you the power of plain-text files and static websites, when combined with GitHub (or otherservices that support the online editing of plain-text files). I believeit would be difficult, if not impossible, to implement this feature indynamic website frameworks like WordPress.
Basically, when you browse any text files in a repository on GitHub,you can edit them right on the page by hitting the Edit button (seeFigure 2.3 for an example) if you have a GitHub account. If youhave write access to the repository, you can commit the changes di-rectly online, otherwise GitHub will fork the repository for you au-tomatically, so that you can edit the file in your own repository, andGitHub will guide you to create a pull request to the original reposi-tory. When the original owner sees the pull request, he/she can seethe changes you made and decide whether to accept them or not orask you to make further changes. Although the terminology “pull re-quest” is highly confusing to beginners,18 it is probably the singlegreatest feature invented by GitHub, because it makes it so mucheasier for people to make contributions.
What is really handy is that all you need is aURL of a fixed form to edit a file on GitHub:https://github.com/USER/REPO/edit/BRANCH/PATH/TO/FILE. For ex-ample, https://github.com/rbind/yihui/edit/master/content/knitr/
18In my opinion, it really should be called “merge request” instead.

60 2 Hugo
faq.md, where USER is rbind, REPO is yihui, BRANCH is master, and the filepath is content/knitr/faq.md.
The key to implementing this feature is the variable .File.Path,which gives us the source file path of a page under content/,e.g., post/foo.md. If your website only uses plain Markdownfiles, the implementation will be very simple. I omitted thefull GitHub URL in ... below, of which an example could behttps://github.com/rbind/yihui/edit/master/content/.
{{ with .File.Path }}<a href="https://github.com/.../{{ . }}">Edit this page</a>{{ end }}
However, the case is a little more complicated for blogdown users,when R Markdown posts are involved. You cannot just use .File.Pathbecause it actually points to the .html output file from an .Rmd file,whereas the .Rmd file is the actual source file. The Edit button or linkshould not point to the .html file. Below is the complete implemen-tation that you may add to a template file depending on where youwant to show the Edit link (e.g., footer.html):
{{ if .File.Path }}
{{ $Rmd := (print .File.BaseFileName ".Rmd") }}
{{ if (where (readDir (print "content/" .File.Dir)) "Name" $Rmd) }}{{ $.Scratch.Set "FilePath" (print .File.Dir $Rmd) }}
{{ else }}{{ $.Scratch.Set "FilePath" .File.Path }}
{{ end }}
{{ with .Site.Params.GithubEdit}}<a href='{{ . }}{{ $.Scratch.Get "FilePath" }}'>Edit this page</a>{{ end }}
{{ end }}

2.5 Templates 61
The basic logic is that for a file, if the same filename with the ex-tension .Rmd exists, we will point the Edit link to the Rmd file. First,we define a variable $Rmd to be the filename with the .Rmd extension.Then we check if it exists. Unfortunately, there is no function inHugo like file.exists() in R, so we have to use a hack: list all filesunder the directory and see if the Rmd file is in the list. $.Scratch19 isthe way to dynamically store and obtain variables in Hugo templates.Most variables in Hugo are read-only, and you have to use $.Scratchwhen you want to modify a variable. We set a variable FilePath in$.Scratch, whose value is the full path to the Rmd file when the Rmdfile exists, and the path to the Markdown source file otherwise. Fi-nally, we concatenate a custom option GithubEdit in config.toml withthe file path to complete the Edit link <a>. Here is an example of theoption in config.toml:
[params]GithubEdit = "https://github.com/rbind/yihui/edit/master/content/"
Please note that if you use Hugo on Windows to build and deployyour site, you may have to change the file path separators frombackslashes to forward slashes, e.g., you may need {{ $.Scratch.Set"FilePath" (replace ($.Scratch.Get "FilePath") "\\" "/") }} in thetemplate. To avoid this complication, we do not recommend that youdeploy your site through Windows (see Chapter 3 for deploymentmethods).
You may see https://github.com/yihui/hugo-xmin/pull/6 for an ac-tual implementation with R Markdown examples, and see the footerof this page for the Edit link: https://deploy-preview-6--hugo-xmin.netlify.com. You can actually see a link in the footer of every page,except the lists of pages (because they do not have source files).
After you digest the XMin theme and the implementations of addi-tional features, it should be much easier to understand other people’stemplates. There are a large number of Hugo themes but the primary
19http://gohugo.io/extras/scratch/

62 2 Hugo
FIGURE 2.3: Edit a text file online on GitHub.
differences among them are often in styles. The basic components oftemplates are often similar.
2.6 Custom layouts
It is very likely that you want to customize a theme unless you de-signed it. The most straightforward way is to simply make changesdirectly in the theme,20 but the problem is that a Hugo theme maybe constantly updated by its original author for improvements or bugfixes. Similar to the “you break it, you buy it” policy (the Pottery Barnrule21), once you touch someone else’s source code, you will be respon-sible for its future maintenance, and the original author should not be
20If you are new to web development, be careful changing content within thetheme. Minor changes like colors and font sizes can be found within the CSS filesof the theme and can be altered simply with minimal risk of breaking the theme’sfunctionality.
21https://en.wikipedia.org/wiki/Pottery_Barn_rule

2.6 Custom layouts 63
responsible for the changes you made on your side. That means it maynot be easy to pull future updates of this theme to your website (youhave to carefully read the changes and make sure they do not conflictwith your changes), but if you are completely satisfied with the cur-rent state of the theme and do not want future updates, it is fine tomodify the theme files directly.
A theme author who is aware of the fact that users may customize hertheme will typically provide two ways: one is to provide options in con-fig.toml, so that you can change these options without touching thetemplate files; the other is to leave a few lightweight template filesunder layouts/ in the theme, so that you can override them withouttouching the core template files. Take the XMin theme for example:
I have two empty HTML files head_custom.html and foot_custom.htmlunder layouts/partials/ in the theme. The former will be added in-side <head></head> of a page, e.g., you can load JavaScript libraries orinclude CSS style sheets via <link>. The latter will be added before thefooter of a page, e.g., you may load additional JavaScript libraries orembed Disqus comments there.
The way that you customize these two files is not to edit them directlyin the theme folder, but to create a directory layouts/partials/ underthe root directory of your website, e.g., your directory structure maylook like this:
your-website/├── config.toml├── ...├── themes/│ └── hugo-xmin/│ ├── ...│ └── layouts/│ ├── ...│ └── partials│ ├── foot_custom.html│ ├── footer.html│ ├── head_custom.html

64 2 Hugo
│ └── header.html└── layouts
└── partials├── foot_custom.html└── head_custom.html
All files under layouts/ under the root directory will override fileswith the same relative paths under themes/hugo-xmin/layouts/, e.g., thefile layouts/partials/foot_custom.html, when provided, will overridethemes/hugo-xmin/layouts/partials/foot_custom.html. That means youonly need to create and maintain at most two files under layouts/ in-stead of maintaining all files under themes/. Note that this overridingmechanism applies to all files under layouts/, and is not limited to thepartials/directory. It also applies to any Hugo theme that you actuallyuse for your website, and is not limited to hugo-xmin.
2.7 Static files
All files under the static/ directory are copied to public/ when Hugorenders a website. This directory is often used to store static web as-sets like images, CSS, and JavaScript files. For example, an imagestatic/foo/bar.png can be embedded in your post using the Mark-down syntax .22
Usually a theme has a static/ folder, and you can partially overrideits files using the same mechanism as overriding layouts/ files, i.e.,static/file will override themes/theme-name/static/file. In the XMintheme, I have two CSS files style.css and fonts.css. The former is themain style sheet, and the latter is a quite small file to define typefaces
22The link of the image depends on your baseurl setting in config.toml. If it doesnot contain a subpath, /foo/bar.png will be the link of the image, otherwise you mayhave to adjust it, e.g., for baseurl = "http://example.com/subpath/", the link to theimage should be /subpath/foo/bar.png.

2.7 Static files 65
only. You may want to define your own typefaces, and you can onlyprovide a static/css/fonts.css to override the one in the theme, e.g.,
body {font-family: "Comic Sans MS", cursive, sans-serif;
}code {font-family: "Courier New", Courier, monospace;
}
To R Markdown users, another important application of the static/directory is to build Rmd documents with custom output formats,i.e., Rmd documents not using the blogdown::html_page() format (seeSection 1.5). For example, you can generate a PDF or presentationsfrom Rmd documents under this directory, so that Hugo will notpost-process them but simply copies them to public/ for publishing.To build these Rmd files, you must provide a custom build scriptR/build.R (see Section D.9). You can write a single line of code in thisscript:
blogdown::build_dir("static")
The function build_dir() finds all Rmd files under a directory, andcalls rmarkdown::render() to build them to the output formats speci-fied in the YAML metadata of the Rmd files. If your Rmd files shouldnot be rendered by a simple rmarkdown::render() call, you are free toprovide your own code to render them in R/build.R. There is a built-in caching mechanism in the function build_dir(): an Rmd file willnot be compiled if it is older than its output file(s). If you do not wantthis behavior, you can force all Rmd files to be recompiled every time:build_dir(force = TRUE).
I have provided a minimal example in the GitHub repositoryyihui/blogdown-static,23 where you can find two Rmd examplesunder the static/ directory. One is an HTML5 presentation based on
23https://github.com/yihui/blogdown-static

66 2 Hugo
the xaringan package, and the other is a PDF document based onbookdown.
You need to be cautious about arbitrary files under static/, due toHugo’s overriding mechanism. That is, everything under static/ willbe copied to public/. You need to make sure that the files you ren-der under static/ will not conflict with those files automatically gen-erated by Hugo from content/. For example, if you have a source filecontent/about.md and an Rmd file static/about/index.Rmd at the sametime, the HTML output from the latter will overwrite the former (bothHugo and you will generate an output file with the same name pub-lic/about/index.html).

3Deployment
Since the website is basically a folder containing static files, it is mucheasier to deploy than websites that require dynamic server-side lan-guages such as PHP or databases. All you need is to upload the files toa server, and usually your website will be up and running shortly. Thekey question is which web server you want to use. If you do not haveyour own server, you may try the ones listed in this chapter. Most ofthem are free (except Amazon S3), or at least provide free plans. Dis-claimer: the authors of this book are not affiliated with any of theseservices or companies, and there is no guarantee that these serviceswill be provided forever.1
Considering the cost and friendliness to beginners, we currently rec-ommend Netlify (https://www.netlify.com). It provides a free plan thatactually has quite a lot of useful features. If you have no experiencein publishing websites before, just log in using your GitHub accountor other accounts, drag the public/ folder built by blogdown for yourwebsite to the Netlify page, and your website will be online in a fewseconds with a random subdomain name of the form random-word-12345.netlify.com provided by Netlify (you can customize the name).You can easily automate this process (see Section 3.1 for more details).You do not need to wrestle with ssh or rsync -zrvce anymore, if youknow what these commands mean.
If you do not mind using command-line tools or are familiar withGIT/GitHub, you can certainly consider services like GitHub Pages,Travis CI, or Amazon S3 to build or host your websites. No matterwhich service you use, please keep in mind that none of them can reallylock you in and you are always free to change the service. As we have
1You can easily find other similar services if you use your search engine.
67

68 3 Deployment
mentioned before, one great advantage of blogdown is that your web-site will be a folder of static files that you can move to any web server.
3.1 Netlify
As we just mentioned, Netlify allows you to quickly publish a websiteby uploading the public/ folder through its web interface, and youwill be assigned a random subdomain *.netlify.com.2 This approachis good for those websites that are not updated frequently (or at all).However, it is unlikely that you will not need to update your website,so we introduce a better approach in this section,3 which will take youa few more minutes to complete the configurations. Once it is prop-erly configured, all you need to do in the future is to update the sourcerepository, and Netlify will call Hugo to render your website automat-ically.
Basically, you have to host all source files of your website in a GITrepository.4 You do not need to put the public/directory under versioncontrol5 because it will be automatically generated. Currently, Netlifysupports GIT repositories hosted on GitHub, GitLab, and BitBucket.With any of these accounts, you can log into Netlify from its homepageand follow the guide to create a new site from your GIT repository.
Netlify supports several static website generators, including Jekylland Hugo. For a new site, you have to specify a command to buildyour website, as well as the path of the publish directory. Netlify alsosupports multiple versions of Hugo, so the build command can bethe default hugo. The default version is 0.17, which is too old, and we
2You don’t have to keep the *.netlify.com domain. See Appendix C for more in-formation.
3Please bear in mind that the purpose of this section is to outline the basic stepsof publishing a website with Netlify, and the technical details may change from timeto time, so the official Netlify documentation should be the most reliable source ifyou have any questions or anything we introduced here does not work.
4If the contents of your blogdown site are not in the root directory of your GITrepository, Netlify will not build.
5You can add public to .gitignore to ignore it in GIT.

3.1 Netlify 69
recommend that you use at least version 0.20. To specify a Hugo ver-sion greater or equal to 0.20, you need to create an environment vari-able HUGO_VERSION on Netlify. See the Netlify documentation6 for moreinformation. The publish directory should be public unless you havechanged it in your config.toml. Figure 3.1 shows the settings of the web-site https://t.yihui.org. You do not have to follow the exact settingsfor your own website; in particular, you may need to change the valueof the environment variable HUGO_VERSION to a recent version of Hugo.7
FIGURE 3.1: Example settings of a website deployed on Netlify.
It may take a minute or two to deploy your website on Netlify forthe first time, but it can be much faster later (a few seconds) whenyou update your website source, because Netlify deploys incrementalchanges in the public/ directory, i.e., only the newer files compared tothe last time are deployed.
6https://www.netlify.com/docs/continuous-deployment/7By the time when this book is published, the version 0.24.1 may be too old.

70 3 Deployment
After your GIT repository is connected with Netlify, the last issue youmay want to solve is the domain name, unless you are satisfied withthe free Netlify subdomain. If you want to use a different domain, youneed to configure some DNS records of the domain to point it to theNetlify server. See Appendix C for some background knowledge ondomain names.
If you are not familiar with domain names or do not want tolearn more about them, something to consider is a free subdomain*.rbind.io offered by RStudio, PBC. Please visit the Rbind supportwebsite https://support.rbind.io to learn how to apply for a subdo-main. In fact, the Rbind organization also offers free help on how toset up a website based on blogdown, thanks to a lot of volunteers fromthe R and statistics community.
Netlify is the only solution in this chapter that does not require you toprebuild your website. You only need to update the source files, pushthem to GitHub, and Netlify will build the website for you.8 The rest ofthe solutions in this chapter will require you to build your website lo-cally and upload the public/ folder explicitly or implicitly. That said,you can certainly prebuild your website using any tools, push it toGitHub, and Netlify is still able to deploy it for you. What you needto do is leave the build command empty, and tell Netlify your publishdirectory (e.g., Hugo’s default public/, but if your prebuilt website isunder the root directory, specify . as the publish directory instead).Then Netlify simply uploads all files under this directory to its serverswithout rebuilding your website.
3.2 GitHub Pages
GitHub Pages (https://pages.github.com) is a very popular way to hoststatic websites (especially those built with Jekyll), but its advantagesare not obvious or appealing compared to Netlify. We recommendthat you consider Netlify + Hugo due to these reasons:
8This is called “continuous deployment.”

3.2 GitHub Pages 71
• Redirecting URLs is awkward with GitHub Pages but much morestraightforward with Netlify.9 This is important especially when youhave an old website that you want to migrate to Hugo; some linksmay be broken, in which case you can easily redirect them withNetlify.
• One of the best features of Netlify that is not available with GitHubPages is that Netlify can generate a unique website for preview whena GitHub pull request is submitted to your GitHub repository. Thisis extremely useful when someone else (or even yourself) proposeschanges to your website, since you have a chance to see what the web-site would look like before you merge the pull request.
Basically, Netlify can do everything that GitHub Pages can, but thereis still one little missing feature, which is closely tied to GitHubitself, which is GitHub Project Pages.10 This feature allows you tohave project websites in separate repositories, e.g., you may havetwo independent websites https://username.github.io/proj-a/ andhttps://username.github.io/proj-b/, corresponding to GitHub repos-itories username/proj-a and username/proj-b, respectively. However,since you can connect any GitHub repositories with Netlify, and eachrepository can be associated with a domain or subdomain name,you may replace GitHub Project Pages with different subdomainslike proj-a.netlify.com and proj-b.netlify.com. The actual limitationis that you cannot use subpaths in the URL but you can use any(sub)domain names.
Although GitHub does not officially support Hugo (only Jekyll is sup-ported), you can actually publish any static HTML files on GitHubPages, even if they are not built with Jekyll. The first requirement forusing GitHub Pages is that you have to create a GitHub repositorynamed username.github.io under your account (replace username withyour actual GitHub username), and what’s left is to push your websitefiles to this repository. The comprehensive documentation of GitHubPages is at https://pages.github.com, and please ignore anything re-
9GitHub Pages uses a Jekyll plugin to write an HTTP-REFRESH meta tag to redirectpages, and Netlify can do pattern-based 301 or 302 redirects, which can notify searchengines that certain pages have been moved (permanently or temporarily).
10https://help.github.com/articles/user-organization-and-project-pages/

72 3 Deployment
lated to Jekyll there unless you actually use Jekyll instead of Hugo. Tomake sure GitHub does not rebuild your website using Jekyll and justpublish whatever files you push to the repository, you need to createa (hidden) file named .nojekyll in the repository.11 GitHub offers afree subdomain username.github.io, and you can use your own domainname by configuring its A or CNAME records to point it to GitHubPages (consult the GitHub Pages documentation for instructions).
Your public/ directory should be the GIT repository. You have two pos-sible choices for setting up this repository locally. The first choice is tofollow the default structure of a Hugo website like the diagram below,and initialize the GIT repository under the public/ directory:
source/│├── config.toml├── content/├── themes/├── ...└── public/
|├── .git/├── .nojekyll├── index.html├── about/└── ...
If you know how to use the command line, change the working direc-tory to public/, and initialize the GIT repository there:
cd publicgit initgit remote add origin https://github.com/username/username.github.io
11You may use the R function file.create('.nojekyll') to create this file if you donot know how to do this.

3.3 Travis + GitHub 73
The other choice is to clone the GitHub repository you created to thesame directory as your website source:
git clone https://github.com/username/username.github.io
And the structure looks like this:
source/│├── config.toml├── content/├── themes/└── ...
username.github.io/│├── .git/├── .nojekyll├── index.html├── about/└── ...
The source directory and the username.github.io directory are underthe same parent directory. In this case, you need to set the option pub-lishDir = "../username.github.io" in source/config.toml.
3.3 Travis + GitHub
If you decide not to follow our recommendation to use Netlify to de-ploy your website, we should warn you that the approach in this sec-tion will require substantial knowledge about GIT, GitHub, Travis CI(https://travis-ci.org), and the Linux command line, which we willleave for you to learn on your own. The major advantage of publishingvia Travis CI is that you can compile all your Rmd posts on Travis CI(on the cloud) instead of your local computer.

74 3 Deployment
In case you are not familiar with Travis, it is a service to continuouslycheck your software in a virtual machine whenever you push changesto GitHub. It is primarily for testing software, but since you can runa lot of commands in its virtual machine, you can certainly use thevirtual machine to do other things, e.g., install R and the blogdownpackage to build websites. Before I show you how, I’d like to mentiontwo issues that you should be aware of:
• Personally, I prefer taking a look at the output in GIT to see thechanges when I have any output that is dynamically computed fromR, so that I know for sure what I’m going to publish exactly. WithTravis, it is somewhat unpredictable because it is fully automatic andyou do not have a chance to see the new content or results to be pub-lished. There are many factors that could affect building the site: theR version, availability of certain R packages, system dependencies,and network connection, etc.
• The time required to compile all Rmd files may be very long andcause timeouts on Travis, depending on how time-consuming yourR code is. There is a caching mechanism in blogdown to speed upthe building of your site (see Section D.9), and if you use Travisto build your website, you will not benefit from this caching mech-anism unless you take advantage of Travis’s caching. You have tocache the directories content/, static/, and blogdown/, but Travis’scache is a little fragile in my experience. Sometimes the cache maybe purged for unknown reasons. What is more, you cannot directlycache content/ and static/, because Travis clones your repository be-fore restoring the cache, which means old files from the cached con-tent/ and static/ may overwrite new files you pushed to GitHub.
The second problem can be solved, but I do not want to explain howin this book since the solution is too involved. If you really want to useTravis to build your website and run into this problem, you may filean issue to the GitHub repository https://github.com/yihui/travis-blogdown. In fact, this repository is a minimal example I created toshow how to build a website on Travis and publish to GitHub Pages.
The Travis documentation shows how to deploy a site to GitHubPages: https://docs.travis-ci.com/user/deployment/pages/, but does

3.3 Travis + GitHub 75
not show how to build a site. Here is the Travis configuration file,.travis.yml, for the travis-blogdown repository:
language: rdist: xeniallatex: false
branches:only:
- master
cache:packages: yesdirectories:
- $HOME/bin
script:- Rscript -e 'blogdown::install_hugo()'- Rscript -e 'blogdown::build_site()'
deploy:provider: pagesskip_cleanup: truegithub_token: $GITHUB_TOKENon:
branch: masterlocal_dir: publicfqdn: travis-blogdown.yihui.name
The key is that we install Hugo via blogdown::install_hugo() and buildthe site via blogdown::build_site(). To trick Travis into building thisrepository like an R package, you must have a DESCRIPTION file in therepository, otherwise your website will not be built.
Package: placeholderType: Website

76 3 Deployment
Title: Does not matter.Version: 0.0.1Imports: blogdownRemotes: rstudio/blogdown
There are a few more things to explain and emphasize in .travis.yml:
• The branches option specifies that only changes in the master branchwill trigger building on Travis.
• The cache option specifies all R packages to be cached, so the nexttime it will be faster to build the site (R packages do not need to bereinstalled from source). The bin/ directory in the home directory isalso cached because Hugo is installed there, and the next time Hugodoes not need to be reinstalled.
• For the deploy option, there is an environment variable namedGITHUB_TOKEN, and I have specified its value to be a GitHub personalaccess token via the Travis settings of this repository, so that Traviswill be able to write to my repository after the website is built. The op-tion on specifies that the deployment will only occur when the masterbranch is built. The local_dir option is the publish directory, whichshould default to public in Hugo. By default, the website is pushed tothe gh-pages branch of this repository. The fqdn option specifies thecustom domain of the website. I have set a CNAME record (see Ap-pendix C) to point travis-blogdown.yihui.org to yihui.github.io, sothat GitHub is able to serve this website through this domain (in fact,Travis will write a CNAME file containing the domain to the gh-pagesbranch).
If you use the username.github.io repository on GitHub, the websitemust be pushed to its master branch instead of gh-pages (this is theonly exception). I recommend that you separate the source repositoryand the output repository. For example, you may have a website-sourcerepository with the same settings as the above .travis.yml except fortwo new options under deploy:

3.4 GitLab Pages 77
deploy:...repo: username/username.github.iotarget_branch: master
This means the website will be pushed to the master branch of therepository username/username.github.io (remember to replace usernamewith your actual username).
You can also deploy your website to Amazon S3, and the setup onthe R side is very similar to what we have introduced for GitHubPages. The only difference is in the last step, where you change the tar-get from GitHub Pages to Amazon S3. For more information, pleasesee the documentation on Travis: https://docs.travis-ci.com/user/deployment/s3/.
3.4 GitLab Pages
GitLab (http://gitlab.com) is a very popular way to host the sourcecode of your project. GitLab has a built in Continuous Integration& Deployment (CI/CD) service12 that can be used to host static web-sites, named GitLab Pages13. The major advantage of using GitLabPages is that you will be able to compile all your Rmd posts throughits CI/CD service instead of your local computer and any generatedcontent, such as HTML files, will be automatically copied to the webserver. Please note that this approach has similar issues as the Travis+ GitHub approach in Section 3.3.
GitLab’s CI/CD service uses the instructions stored in the YAMLfile .gitlab-ci.yml in the repository. Here is a sample configurationfile .gitlab-ci.yml from the example repository https://gitlab.com/rgaiacs/blogdown-gitlab:
12https://about.gitlab.com/features/gitlab-ci-cd/13https://about.gitlab.com/features/pages/

78 3 Deployment
image: debian:buster-slim
before_script:- apt-get update && apt-get -y install pandoc r-base- R -e "install.packages('blogdown',repos='http://cran.rstudio.com')"- R -e "blogdown::install_hugo()"
pages:script:
- R -e "blogdown::build_site()"artifacts:
paths:- public
only:- master
The image option specifies what Docker14 image will be use as a startpoint. We are using a Debian image but any image from Docker Hub15
can be used. Other settings and options are similar to .travis.ymlin Section 3.3. The above example generates the website at https://rgaiacs.gitlab.io/blogdown-gitlab.
14https://www.docker.com15https://hub.docker.com/

4Migration
Usually, it is easier to start a new website than migrating an old oneto a new framework, but you may have to do it anyway because of theuseful content on the old website that should not simply be discarded.A lazy solution is to leave the old website as is, start a new websitewith a new domain, and provide a link to the old website. This may bea hassle to your readers, and they may not be able to easily discoverthe gems that you created on your old website, so I recommend thatyou migrate your old posts and pages to the new website if possible.
This process may be easy or hard, depending on how complicated yourold website is. The bad news is that there is unlikely to be a universal ormagical solution, but I have provided some helper functions in blog-down as well as a Shiny application to assist you, which may make ita little easier for you to migrate from Jekyll and WordPress sites.
To give you an idea about the possible amount of work required, Ican tell you that it took me a whole week (from the morning to mid-night every day) to migrate several of my personal Jekyll-based web-sites to Hugo and blogdown. The complication in my case was notonly Jekyll, but also the fact that I built several separate Jekyll websites(because I did not have a choice in Jekyll) and I wanted to unite themin the same repository. Now my two blogs (Chinese and English), theknitr (Xie, 2020b) package documentation, and the animation pack-age (Xie, 2018) documentation are maintained in the same repository:https://github.com/rbind/yihui. I have about 1000 pages on this web-site, most of which are blog posts. It used to take me more than 30 sec-onds to preview my blog in Jekyll, and now it takes less than 2 secondsto build the site in Hugo.
Another complicated example is the website of Rob J Hyndman(https://robjhyndman.com). He started his website in 1993 (12 years be-
79

80 4 Migration
fore me), and had accumulated a lot of content over the years. Youcan read the post https://support.rbind.io/2017/05/15/converting-robjhyndman-to-blogdown/ for the stories about how he migrated hisWordPress website to blogdown. The key is that you probably needa long international flight when you want to migrate a complicatedwebsite.
A simpler example is the Simply Statistics blog (https://simplystatistics.org). Originally it was built on Jekyll1
and the source was hosted in the GitHub repository https://github.com/simplystats/simplystats.github.io. I volunteered tohelp them move to blogdown, and it took me about four hours. Mytime was mostly spent on cleaning up the YAML metadata of postsand tweaking the Hugo theme. They had about 1000 posts, whichsounds like a lot, but the number does not really matter, becauseI wrote an R script to process all posts automatically. The newrepository is at https://github.com/rbind/simplystats.
If you do not really have too many pages (e.g., under 20), I recommendthat you cut and paste them to Markdown files, because it may actuallytake longer to write a script to process these pages.
It is likely that some links will be broken after the migration becauseHugo renders different links for your pages and posts. In that case,you may either fix the permanent links (e.g., by tweaking the slug of apost), or use 301 redirects (e.g., on Netlify).
4.1 From Jekyll
When converting a Jekyll website to Hugo, the most challenging partis the theme. If you want to keep exactly the same theme, you will haveto rewrite your Jekyll templates using Hugo’s syntax (see Section 2.5).However, if you can find an existing theme in Hugo (https://themes.gohugo.io), things will be much easier, and you only need to move the
1It was migrated from WordPress a few years ago. The WordPress site was actu-ally migrated from an earlier Tumblr blog.

4.1 From Jekyll 81
content of your website to Hugo, which is relatively easy. Basically, youcopy the Markdown pages and posts to the content/ directory in Hugoand tweak these text files.
Usually, posts in Jekyll are under the _posts/ directory, and you canmove them to content/post/ (you are free to use other directories).Then you need to define a custom rule for permanent URLs in con-fig.toml like (see Section 2.2.2):
[permalinks]post = "/:year/:month/:day/:slug/"
This depends on the format of the URLs you used in Jekyll (see thepermalink option in your _config.yml).
If there are static assets like images, they can be moved to the static/directory in Hugo.
Then you need to use your favorite tool with some string manipulationtechniques to process all Markdown files. If you use R, you can listall Markdown files and process them one by one in a loop. Below isa sketch of the code:
files = list.files('content/', '[.](md|markdown)$', full.names = TRUE,recursive = TRUE
)for (f in files) {blogdown:::process_file(f, function(x) {
# process x here and return the modified xx
})}
The process_file() function is an internal helper function in blog-down. It takes a filename and a processor function to manipulate thecontent of the file, and writes the modified text back to the file.
To give you an idea of what a processor function may look like, I pro-

82 4 Migration
vided a few simple helper functions in blogdown, and below are twoof them:
blogdown:::remove_extra_empty_lines
function(...) process_file(..., FUN = function(x) {x = paste(gsub('\\s+$', '', x), collapse = '\n')trim_ws(gsub('\n{3,}', '\n\n', x))
})<bytecode: 0x7ffad170e9f0><environment: namespace:blogdown>
blogdown:::process_bare_urls
function(...) process_file(..., FUN = function(x) {gsub('\\[([^]]+)]\\(\\1/?\\)', '<\\1>', x)
})<bytecode: 0x7ffad178c238><environment: namespace:blogdown>
The first function substitutes two or more empty lines with a sin-gle empty line. The second function replaces links of the form[url](url) with <url>. There is nothing wrong with excessive emptylines or the syntax [url](url), though. These helper functions maymake your Markdown text a little cleaner. You can find all suchhelper functions at https://github.com/rstudio/blogdown/blob/master/R/clean.R. Note they are not exported from blogdown, so you needtriple colons to access them.
The YAML metadata of your posts may not be completely clean,especially when your Jekyll website was actually converted froman earlier WordPress website. The internal helper function blog-down:::modify_yaml() may help you clean up the metadata. For exam-ple, below is the YAML metadata of a blog post of Simply Statisticswhen it was built on Jekyll:

4.1 From Jekyll 83
---id: 4155title: Announcing the JHU Data Science Hackathon 2015date: 2015-07-28T13:31:04+00:00author: Roger Penglayout: postguid: http://simplystatistics.org/?p=4155permalink: /2015/07/28/announcing-the-jhu-data-science-hackathon-2015pe_theme_meta:- 'O:8:"stdClass":2:{s:7:"gallery";O:8:"stdClass":...}'
al2fb_facebook_link_id:- 136171103105421_837886222933902
al2fb_facebook_link_time:- 2015-07-28T17:31:11+00:00
al2fb_facebook_link_picture:- post=http://simplystatistics.org/?al2fb_image=1
dsq_thread_id:- 3980278933
categories:- Uncategorized
---
You can discard the YAML fields that are not useful in Hugo. For ex-ample, you may only keep the fields title, author, date, categories,and tags, and discard other fields. Actually, you may also want to adda slug field that takes the base filename of the post (with the lead-ing date removed). For example, when the post filename is 2015-07-28-announcing-the-jhu-data-science-hackathon-2015.md, you may wantto add slug: announcing-the-jhu-data-science-hackathon-2015 to makesure the URL of the post on the new site remains the same.
Here is the code to process the YAML metadata of all posts:
for (f in files) {blogdown:::modify_yaml(f, slug = function(old, yaml) {
# YYYY-mm-dd-name.md -> name

84 4 Migration
gsub('^\\d{4}-\\d{2}-\\d{2}-|[.](md|markdown)', '', f)}, categories = function(old, yaml) {
# remove the Uncategorized categorysetdiff(old, 'Uncategorized')
}, .keep_fields = c('title', 'author', 'date', 'categories', 'tags', 'slug'
), .keep_empty = FALSE)}
You can pass a file path to modify_yaml(), define new YAML values (orfunctions to return new values based on the old values), and decidewhich fields to preserve (.keep_fields). You may discard empty fieldsvia .keep_empty = FALSE. The processed YAML metadata is below, whichlooks much cleaner:
---title: Announcing the JHU Data Science Hackathon 2015author: Roger Pengdate: '2015-07-28T13:31:04+00:00'slug: announcing-the-jhu-data-science-hackathon-2015---
4.2 From WordPress
From our experience, the best way to import WordPress blog posts toHugo is to import them to Jekyll, and write an R script to clean up theYAML metadata of all pages if necessary, instead of using the migra-tion tools listed on the official guide,2 including the WordPress pluginwordpress-to-hugo-exporter.
To our knowledge, the best tool to convert a WordPress website toJekyll is the Python tool Exitwp.3 Its author has provided detailed in-
2https://gohugo.io/tools/3https://github.com/thomasf/exitwp

4.3 From other systems 85
structions on how to use it. You have to know how to install Pythonlibraries and execute Python scripts. If you do not, I have providedan online tool at https://github.com/yihui/travis-exitwp. You can up-load your WordPress XML file there, and get a download link to a ZIParchive that contains your posts in Markdown.
The biggest challenge in converting WordPress posts to Hugo is toclean up the post content in Markdown. Fortunately, I have done thisfor three different WordPress blogs,4 and I think I have managed toautomate this process as much as possible. You may refer to the pullrequest I submitted to Karl Broman to convert his WordPress posts toMarkdown (https://github.com/kbroman/oldblog_xml/pull/1), in whichI provided both the R script and the Markdown files. I recommendthat you go to the “Commits” tab and view all my GIT commits one byone to see the full process.
The key is the R script https://github.com/yihui/oldblog_xml/blob/master/convert.R, which converts the WordPress XML file to Mark-down posts and cleans them. Before you run this script on your XMLfile, you have to adjust a few parameters, such as the XML filename,your old WordPress site’s URL, and your new blog’s URL.
Note that this script depends on the Exitwp tool. If you do not knowhow to run Exitwp, please use the online tool I mentioned before(travis-exitwp), and skip the R code that calls Exitwp.
The Markdown posts should be fairly clean after the conversion, butthere may be remaining HTML tags in your posts, such as <table> and<blockquote>. You will need to manually clean them, if any exist.
4.3 From other systems
If you have a website built by other applications or systems, your bestway to go may be to import your website to WordPress first, export it
4The RViews blog (https://rviews.rstudio.com), the RStudio blog (https://blog.rstudio.com), and Karl Broman’s blog (http://kbroman.org). The RViews blog took mea few days. The RStudio blog took me one day. Karl Broman’s blog took me an hour.

86 4 Migration
to Jekyll, and clean up the Markdown files. You can try to search forsolutions like “how to import blogger.com to WordPress” or “how toimport Tumblr to WordPress.”
If you are very familiar with web scraping techniques, you can alsoscrape the HTML pages of your website, and convert them to Mark-down via Pandoc, e.g.,
rmarkdown::pandoc_convert('foo.html', to = 'markdown', output = 'foo.md'
)
I have actually tried this way on a website, but was not satisfied, sinceI still had to heavily clean up the Markdown files. If your website issimpler, this approach may work better for you.

5Other Generators
We mentioned the possibility to bypass Hugo and use your own build-ing method in Section D.9. Basically you have to build the site usingblogdown::build_site(method = "custom"), and provide your own build-ing script /R/build.R. In this chapter, we show you how to work withother popular static site generators like Jekyll and Hexo. Besides thesestatic site generators written in other languages, there is actually asimple site generator written in R provided in the rmarkdown pack-age (Allaire et al., 2020), and we will introduce it in Section 5.3.
5.1 Jekyll
For Jekyll (https://jekyllrb.com) users, I have prepared a minimal ex-ample in the GitHub repository yihui/blogdown-jekyll.1 If you cloneor download this repository and open blogdown-jekyll.Rproj in RStu-dio, you can still use all addins mentioned in Section 1.3, such as “NewPost,” “Serve Site,” and “Update Metadata,” but it is Jekyll instead ofHugo that builds the website behind the scenes now.
I assume you are familiar with Jekyll, and I’m not going to introducethe basics of Jekyll in this section. For example, you should know whatthe _posts/ and _site/ directories mean.
The key pieces of this blogdown-jekyll project are the files .Rprofile,R/build.R, and R/build_one.R. I have set some global R options for thisproject in .Rprofile:2
1https://github.com/yihui/blogdown-jekyll2If you are not familiar with this file, please read Section 1.4.
87

88 5 Other Generators
options(blogdown.generator = "jekyll",blogdown.method = "custom",blogdown.subdir = "_posts"
)
First, the website generator was set to jekyll using the option blog-down.generator, so that blogdown knows that it should use Jekyll tobuild the site. Second, the build method blogdown.method was set tocustom, so that we can define our custom R script R/build.R to buildthe Rmd files (I will explain the reason later). Third, the default sub-directory for new posts was set to _posts, which is Jekyll’s convention.After you set this option, the “New Post” addin will create new postsunder the _posts/ directory.
When the option blogdown.method is custom, blogdown will call the Rscript R/build.R to build the site. You have full freedom to do whateveryou want in this script. Below is an example script:
build_one = function(io) {# if output is not older than input, skip the compilationif (!blogdown:::require_rebuild(io[2], io[1])) return()
message('* knitting ', io[1])if (blogdown:::Rscript(shQuote(c('R/build_one.R', io))) != 0) {
unlink(io[2])stop('Failed to compile ', io[1], ' to ', io[2])
}}
# Rmd files under the root directoryrmds = list.files('.', '[.]Rmd$', recursive = T, full.names = T)files = cbind(rmds, xfun::with_ext(rmds, '.md'))
for (i in seq_len(nrow(files))) build_one(files[i, ])

5.1 Jekyll 89
system2('jekyll', 'build')
• Basically it contains a function build_one() that takes an argumentio, which is a character vector of length 2. The first element is the in-put (Rmd) filename, and the second element is the output filename.
• Then we search for all Rmd files under the current directory, pre-pare the output filenames by substituting the Rmd file extensionswith .md, and build the Rmd files one by one. Note there is a cachingmechanism in build_one() that makes use of an internal blogdownfunction require_rebuild(). This function returns FALSE if the outputfile is not older than the input file in terms of the modification time.This can save you some time because those Rmd files that have beencompiled before will not be compiled again every time. The key stepin build_one() is to run the R script R/build_one.R, which we will ex-plain later.
• Lastly, we build the website through a system call of the commandjekyll build.
The script R/build_one.R looks like this (I have omitted some non-essential settings for simplicity):
local({# fall back on "/" if baseurl is not specifiedbaseurl = blogdown:::get_config2("baseurl", default = "/")knitr::opts_knit$set(base.url = baseurl)knitr::render_jekyll() # set output hooks
# input/output filenames as two arguments to Rscripta = commandArgs(TRUE)d = gsub("^_|[.][a-zA-Z]+$", "", a[1])knitr::opts_chunk$set(
fig.path = sprintf("figure/%s/", d),cache.path = sprintf("cache/%s/", d)
)
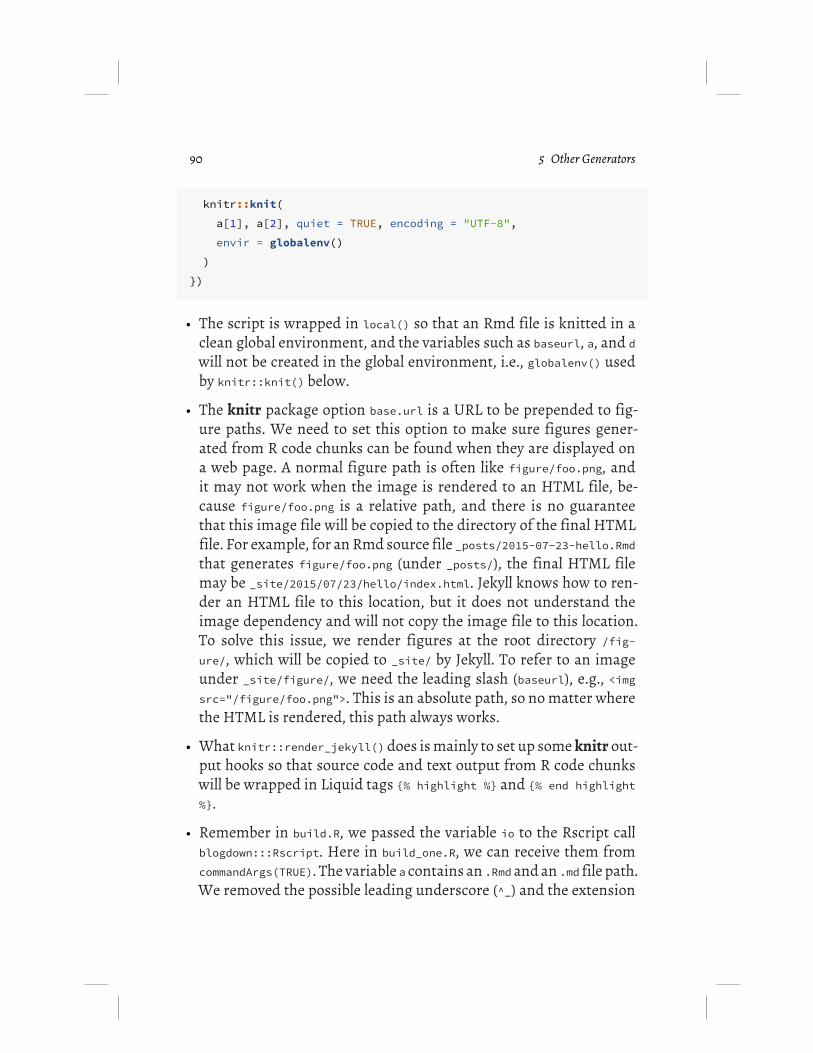
90 5 Other Generators
knitr::knit(a[1], a[2], quiet = TRUE, encoding = "UTF-8",envir = globalenv()
)})
• The script is wrapped in local() so that an Rmd file is knitted in aclean global environment, and the variables such as baseurl, a, and dwill not be created in the global environment, i.e., globalenv() usedby knitr::knit() below.
• The knitr package option base.url is a URL to be prepended to fig-ure paths. We need to set this option to make sure figures gener-ated from R code chunks can be found when they are displayed ona web page. A normal figure path is often like figure/foo.png, andit may not work when the image is rendered to an HTML file, be-cause figure/foo.png is a relative path, and there is no guaranteethat this image file will be copied to the directory of the final HTMLfile. For example, for an Rmd source file _posts/2015-07-23-hello.Rmdthat generates figure/foo.png (under _posts/), the final HTML filemay be _site/2015/07/23/hello/index.html. Jekyll knows how to ren-der an HTML file to this location, but it does not understand theimage dependency and will not copy the image file to this location.To solve this issue, we render figures at the root directory /fig-ure/, which will be copied to _site/ by Jekyll. To refer to an imageunder _site/figure/, we need the leading slash (baseurl), e.g., <imgsrc="/figure/foo.png">. This is an absolute path, so no matter wherethe HTML is rendered, this path always works.
• What knitr::render_jekyll() does is mainly to set up some knitr out-put hooks so that source code and text output from R code chunkswill be wrapped in Liquid tags {% highlight %} and {% end highlight%}.
• Remember in build.R, we passed the variable io to the Rscript callblogdown:::Rscript. Here in build_one.R, we can receive them fromcommandArgs(TRUE). The variable a contains an .Rmd and an .md file path.We removed the possible leading underscore (^_) and the extension

5.2 Jekyll 91
([.][a-zA-Z]$) in the path. Next we set figure and cache paths usingthis string. For example, for a post _posts/foo.Rmd, its figures will bewritten to figure/foo/ and its cache databases (if there are any) willbe stored under cache/foo/. Both directories are under the root direc-tory of the project.
• Lastly, we call knitr::knit() to knit the Rmd file to a Markdown out-put file, which will be processed by Jekyll later.
A small caveat is that since we have both .Rmd and .md files, Jekyll willtreat both types of files as Markdown files by default. You have to askJekyll to ignore .Rmd files and only build .md files. You can set the optionexclude in _config.yml:
exclude: ['*.Rmd']
Compared to the Hugo support in blogdown, this approach is limitedin a few aspects:
1. It does not support Pandoc, so you cannot use Pandoc’sMarkdown. Since it uses the knitr package instead ofrmarkdown, you cannot use any of bookdown’s Markdownfeatures, either. You are at the mercy of the Markdown ren-derers supported by Jekyll.
2. Without rmarkdown, you cannot use HTML widgets. Basi-cally, all you can have are dynamic text output and R graph-ics output from R code chunks. They may or may not suffice,depending on your specific use cases.
It may be possible for us to remove these limitations in a future ver-sion of blogdown, if there are enough happy Jekyll users in the R com-munity.

92 5 Other Generators
5.2 Hexo
The ideas of using Hexo (https://hexo.io) are very similar to what wehave applied to Jekyll in the previous section. I have also prepared aminimal example in the GitHub repository yihui/blogdown-hexo.3
The key components of this repository are still .Rprofile, R/build.R,and R/build_one.R. We set the option blogdown.generator to hexo, thebuild.method to custom, and the default subdirectory for new posts tosource/_posts.
options(blogdown.generator = 'hexo',blogdown.method = 'custom',blogdown.subdir = 'source/_posts'
)
The script R/build.R is similar to the one in the blogdown-jekyll repos-itory. The main differences are:
1. We find all Rmd files under the source/ directory instead ofthe root directory, because Hexo’s convention is to put allsource files under source/.
2. We call system2('hexo', 'generate') to build the website.
For the script R/build_one.R, the major difference with the script inthe blogdown-jekyll repository is that we set the base.dir option forknitr, so that all R figures are generated to the source/ directory. Thisis because Hexo copies everything under source/ to public/, whereasJekyll copies everything under the root directory to _site/.
local({# fall back on '/' if baseurl is not specified
3https://github.com/yihui/blogdown-hexo

5.3 Default site generator in rmarkdown 93
baseurl = blogdown:::get_config2('root', '/')knitr::opts_knit$set(
base.url = baseurl, base.dir = normalizePath('source'))
# input/output filenames as two arguments to Rscripta = commandArgs(TRUE)d = gsub('^source/_?|[.][a-zA-Z]+$', '', a[1])knitr::opts_chunk$set(
fig.path = sprintf('figure/%s/', d),cache.path = sprintf('cache/%s/', d)
)knitr::knit(
a[1], a[2], quiet = TRUE, encoding = 'UTF-8', envir = .GlobalEnv)
})
This repository is also automatically built and deployed throughNetlify when I push changes to it. Since Hexo is a Node package, andNetlify supports Node, you can easily install Hexo on Netlify. For ex-ample, this example repository uses the command npm install && hexogenerate to build the website; npm install will install the Node pack-ages specified in packages.json (a file under the root directory of therepository), and hexo generate is the command to build the websitefrom source/ to public/.
5.3 Default site generator in rmarkdown
Before blogdown was invented, there was actually a relatively simpleway to render websites using rmarkdown. The structure of the web-site has to be a flat directory of Rmd files (no subdirectories for Rmdfiles) and a configuration file in which you can specify a navigationbar for all your pages and output format options.
You can find more information about this site generator in its doc-

94 5 Other Generators
umentation at http://rmarkdown.rstudio.com/rmarkdown_websites.html,and we are not going to repeat the documentation here, but just wantto highlight the major differences between the default site generatorin rmarkdown and other specialized site generators like Hugo:
• The rmarkdown site generator requires all Rmd files to be under theroot directory. Hugo has no constraints on the site structure, andyou can create arbitrary directories and files under /content/.
• Hugo is a general-purpose site generator that is highly customizable,and there are a lot of things that rmarkdown’s default site generatordoes not support, e.g., RSS feeds, metadata especially common inblogs such as categories and tags, and customizing permanent linksfor certain pages.
There are still legitimate reasons to choose the rmarkdown defaultsite generator, even though it does not appear to be as powerful asHugo, including:
• You are familiar with generating single-page HTML output from RMarkdown, and all you want is to extend this to generating multiplepages from multiple Rmd files.
• It suffices to use a flat directory of Rmd files. You do not write a blogor need RSS feeds.
• You prefer the Bootstrap styles. In theory, you can also apply Boot-strap styles to Hugo websites, but it will require you to learn moreabout Hugo. Bootstrap is well supported in rmarkdown, and you canspend more time on the configurations instead of learning the tech-nical details about how it works.
• There are certain features in rmarkdown HTML output that aremissing in blogdown. For example, currently you cannot easily printdata frames as paged tables, add a floating table of contents, orfold/unfold code blocks dynamically in the output of blogdown. Allthese could be implemented via JavaScript and CSS, but it is cer-tainly not as simple as specifying a few options in rmarkdown liketoc_float: true.
Please note that the rmarkdown site generator is extensible, too. For

5.4 pkgdown 95
example, the bookdown package (Xie, 2020a) is essentially a customsite generator to generate books as websites.
5.4 pkgdown
The pkgdown package (Wickham and Hesselberth (2020), https://github.com/hadley/pkgdown) can help you quickly turn the R documen-tation of an R package (including help pages and vignettes) into a web-site. It is independent of blogdown and solves a specific problem. Itis not a general-purpose website generator. We want to mention it inthis book because it is very easy to use, and also highly useful. You canfind the instructions on its website or in its GitHub repository.


AR Markdown
R Markdown (Allaire et al., 2020) is a plain-text document format con-sisting of two components: R (or other computing languages) andMarkdown. Markdown makes it easy for authors to write a documentdue to its simple syntax. Program code (such as R code) can be embed-ded in a source Markdown document to generate an output documentdirectly: when compiling the source document, the program code willbe executed and its output will be intermingled with the Markdowntext.
R Markdown files usually use the filename extension .Rmd. Below is aminimal example:
---title: A Simple Linear Regressionauthor: Yihui Xie---
We build a linear regression below.
```{r}fit = lm(dist ~ speed, data = cars)b = coef(summary(fit))plot(fit)```
The slope of the regression is `r b[2, 1]`.
Such a document can be compiled using the function rmark-down::render(), or equivalently, by clicking the Knit button in RStudio.Under the hood, an R Markdown document is first compiled to
97
98 A R Markdown
Markdown through knitr (Xie, 2020b), which executes all programcode in the document. Then the Markdown output document iscompiled to the final output document through Pandoc, such asan HTML page, a PDF document, a Word document, and so on.It is important to know this two-step process, otherwise you maynot know which package documentation to look up when you havequestions. Basically, for anything related to the (R) code chunks,consult the knitr documentation (https://yihui.org/knitr/); foranything related to Markdown, consult the Pandoc documentation(https://pandoc.org).
An R Markdown document typically consists of YAML metadata (op-tional) and the document body. YAML metadata are written between apair of --- to set some attributes of the document, such as the title, au-thor, and date, etc. In the document body, you can mix code chunksand narratives. A code block starts with a chunk header ```{r} andends with ```. There are many possible chunk options that you can setin the chunk header to control the output, e.g., you can set the figureheight to 4 inches using ```{r fig.height=4}. For all possible chunkoptions, see https://yihui.org/knitr/options/.
Pandoc supports a large variety of output document formats. Forblogdown, the output format is set to HTML (blogdown::html_page),since a website typically consists of HTML pages. If you want other for-mats, please see Section 2.7. To create an R Markdown post for blog-down, it is recommended that you use the RStudio “New Post” (Figure1.2) or the function blogdown::new_post(), instead of the RStudio menuFile -> New File -> R Markdown.
You are strongly recommended to go through the documentation ofknitr chunk options and Pandoc’s manual at least once to have an ideaof all possibilities. The basics of Markdown are simple enough, butthere are many less well-known features in Pandoc’s Markdown, too.As we mentioned in Section 1.5, blogdown’s output format is basedon bookdown (Xie, 2020a), which contains several other Markdownextensions, such as numbered equations and theorem environments,and you need to read Chapter 2 of the bookdown book (Xie, 2016) tolearn more about these features.
A.0 99
You can find an R Markdown cheat sheet and a reference guide athttps://www.rstudio.com/resources/cheatsheets/, which can be handyafter you are more familiar with R Markdown.
With R Markdown, you only need to maintain the source documents;all output pages can be automatically generated from source docu-ments. This makes it much easier to maintain a website, especiallywhen the website is related to data analysis or statistical computingand graphics. When the source code is updated (e.g., the model or datais changed), your web pages can be updated accordingly and automat-ically. There is no need to run the code separately and cut-and-pasteagain. Besides the convenience, you gain reproducibility at the sametime.


BWebsite Basics
If you want to tweak the appearance of your website, or even designyour own theme, you must have some basic knowledge of web de-velopment. In this appendix, we briefly introduce HTML, CSS, andJavaScript, which are the most common components of a web page,although CSS and JavaScript are optional.
We only aim at getting you started with HTML, CSS, and JavaScript.HTML is relatively simple to learn, but CSS and JavaScript can bemuch more complicated, depending on how much you want to learnand what you want to do with them. After reading this appendix, youwill have to use other resources to teach yourself. When you search forthese technologies online, the most likely websites that you may hitare MDN1 (Mozilla Developer Network), w3schools.com,2 and Stack-Overflow.3 Among these websites, w3schools often provides simple ex-amples and tutorials that may be friendlier to beginners, but we oftenhear negative comments4 about it, so please use it with caution. I oftenread all three websites when looking for solutions.
If we were only allowed to give one single most useful tip about web de-velopment, it would be: use the Developer Tools of your web browser.Most modern web browsers provide these tools. For example, you canfind these tools from the menu of Google Chrome View -> Developer,Firefox’s menu Tools -> Web Developer, or Safari’s menu Develop ->Show Web Inspector. Figure B.1 is a screenshot of using the DeveloperTools in Chrome.
Typically you can also open the Developer Tools by right-clicking on1https://developer.mozilla.org2https://www.w3schools.com3https://stackoverflow.com4https://meta.stackoverflow.com/q/280478/559676
101

102 B Website Basics
FIGURE B.1: Developer Tools in Google Chrome.
a certain element on the web page and selecting the menu item In-spect (or Inspect Element). In Figure B.1, I right-clicked on the profileimage of my website https://yihui.org and inspected it, and Chromehighlighted its HTML source code <img src="..." ... /> in the leftpane. You can also see the CSS styles associated with this img elementin the right pane. What is more, you can interactively change the stylesthere if you know CSS, and see the (temporary) effects in real time onthe page! After you are satisfied with the new styles, you can write theCSS code in files.
There are a lot of amazing features of Developer Tools, which makethem not only extremely useful for debugging and experimentation,but also helpful for learning web development. These tools are in-dispensable to me when I develop anything related to web pages. I

B.1 HTML 103
learned a great deal about CSS and JavaScript by playing with thesetools.
B.1 HTML
HTML stands for Hyper Text Markup Language, and it is the languagebehind most web pages you see. You can use the menu View -> ViewSource or the context menu View Page Source to see the full HTMLsource of a web page in your browser. All elements on a page are repre-sented by HTML tags. For example, the tag <p> represents paragraphs,and <img> represents images.
The good thing about HTML is that the language has only a limitednumber of tags, and the number is not very big (especially the numberof commonly used tags). This means there is hope that you can masterthis language fully and quickly.
Most HTML tags appear in pairs, with an opening tag and a closingtag, e.g., <p></p>. You write the content between the opening and clos-ing tags, e.g., <p>This is a paragraph.</p>. There are a few exceptions,such as the <img> tag, which can be closed by a slash / in the openingtag, e.g., <img src="foo.png" />. You can specify attributes of an ele-ment in the opening tag using the syntax name=value (a few attributesdo not require value).
HTML documents often have the filename extension .html (or .htm).Below is an overall structure of an HTML document:
<html>
<head></head>
<body></body>

104 B Website Basics
</html>
Basically an HTML document consists a head section and body section.You can specify the metadata and include assets like CSS files in thehead section. Normally the head section is not visible on a web page. Itis the body section that holds the content to be displayed to a reader.Below is a slightly richer example document:
<!DOCTYPE html><html>
<head><meta charset="utf-8" />
<title>Your Page Title</title>
<link rel="stylesheet" href="/css/style.css" /></head>
<body><h1>A First-level Heading</h1>
<p>A paragraph.</p>
<img src="/images/foo.png" alt="A nice image" />
<ul><li>An item.</li><li>Another item.</li><li>Yet another item.</li>
</ul>
<script src="/js/bar.js"></script></body>

B.1 HTML 105
</html>
In the head, we declare the character encoding of this page to be UTF-8 via a <meta> tag, specify the title via the <title> tag, and include astylesheet via a <link> tag.
The body contains a first-level section heading <h1>,5 a paragraph <p>,an image <img>, an unordered list <ul> with three list items <li>, andincludes a JavaScript file in the end via <script>.
There are much better tutorials on HTML than this section, such asthose offered by MDN and w3schools.com, so we are not going tomake this section a full tutorial. Instead, we just want to provide a fewtips on HTML:
• You may validate your HTML code via this service: https://validator.w3.org. This validator will point out potential prob-lems of your HTML code. It actually works for XML and SVGdocuments, too.
• Among all HTML attributes, file paths (the src attribute of some tagslike <img>) and links (the href attribute of the <a> tag) may be the mostconfusing to beginners. Paths and links can be relative or absolute,and may come with or without the protocol and domain. You have tounderstand what a link or path exactly points to. A full link is of theform http://www.example.com/foo/bar.ext, where http specifies theprotocol (it can be other protocols like https or ftp), www.example.comis the domain, and foo/bar.ext is the file under the root directory ofthe website.
– If you refer to resources on the same website (the same pro-tocol and domain), we recommend that you omit the proto-col and domain names, so that the links will continue to workeven if you change the protocol or domain. For example, a link<a href="/hi/there.html"> on a page http://example.com/foo/refers to http://example.com/hi/there.html. It does not matter ifyou change http to https, or example.com to another-domain.com.
5There are six possible levels from h1, h2, …, to h6.

106 B Website Basics
– Within the same website, a link or path can be relative or ab-solute. The meaning of an absolute path does not change nomatter where the current HTML file is placed, but the mean-ing of a relative path depends on the location of the currentHTML file. Suppose you are currently viewing the page exam-ple.com/hi/there.html:
* A absolute path /foo/bar.ext always means exam-ple.com/foo/bar.ext. The leading slash means the rootdirectory of the website.
* A relative path ../images/foo.png means exam-ple.com/images/foo.png (.. means to go one level up).However, if the HTML file there.html is moved to exam-ple.com/hey/again/there.html, this path in there.html willrefer to example.com/hey/images/foo.png.
* When deciding whether to use relative or absolute paths,here is the rule of thumb: if you will not move the resourcesreferred or linked to from one subpath to another (e.g.,from example.com/foo/ to example.com/bar/), but only movethe HTML pages that use these resources, use absolutepaths; if you want to change the subpath of the URL of yourwebsite, but the relative locations of HTML files and the re-sources they use do not change, you may use relative links(e.g., you can move the whole website from example.com/ toexample.com/foo/).
* If the above concepts sound too complicated, a better wayis to either think ahead carefully about the structure ofyour website and avoid moving files, or use rules of redi-rects if supported (such as 301 or 302 redirects).
– If you link to a different website or web page, you have toinclude the domain in the link, but it may not be necessaryto include the protocol, e.g., //test.example.com/foo.cssis a valid path. The actual protocol of this path matchesthe protocol of the current page, e.g., if the cur-rent page is https://example.com/, this link meanshttps://test.example.com/foo.css. It may be beneficial

B.2 CSS 107
to omit the protocol because HTTP resources cannot beembedded on pages served through HTTPS (for securityreasons), e.g., an image at http://example.com/foo.png can-not be embedded on a page https://example.com/hi.htmlvia <img src="http://example.com/foo.png" />, but <imgsrc="//example.com/foo.png" /> will work if the image can beaccessed via HTTPS, i.e., https://example.com/foo.png. Themain drawback of not including the protocol is that suchlinks and paths do not work if you open the HTML file locallywithout using a web server, e.g., only double-click the HTMLfile in your file browser and show it in the browser.6
– A very common mistake that people make is a link withoutthe leading double slashes before the domain. You may thinkwww.example.com is a valid link. It is not! At least it does not linkto the website that you intend to link to. It works when youtype it in the address bar of your browser because your browserwill normally autocomplete it to http://www.example.com. How-ever, if you write a link <a href="www.example.com">See thislink</a>, you will be in trouble. The browser will interpretthis as a relative link, and it is relative to the URL ofthe current web page, e.g., if you are currently viewinghttp://yihui.org/cn/, the link www.example.com actually meanshttp://yihui.org/cn/www.example.com! Now you should knowthe Markdown text [Link](www.example.com) is typically a mis-take, unless you really mean to link to a subdirectory of the cur-rent page or a file with literally the name www.example.com.
B.2 CSS
The Cascading Stylesheets (CSS) language is used to describe the lookand formatting of documents written in HTML. CSS is responsible for
6That is because without a web server, an HTML file is viewed via the protocolfile. For example, you may see a URL of the form file://path/to/the/file.html in theaddress bar of your browser. The path //example.com/foo.png will be interpreted asfile://example.com/foo.png, which is unlikely to exist as a local file on your computer.

108 B Website Basics
the visual style of your site. CSS is a lot of fun to play with, but it canalso easily steal your time.
In the Hugo framework (https://gohugo.io/tutorials/creating-a-new-theme/), CSS is one of the major “non-content” files that shapesthe look and feel of your site (the others are images, JavaScript, andHugo templates). What does the “look and feel”7 of a site mean? “Look”generally refers to static style components including, but not limitedto
• color palettes,• images,• layouts/margins, and• fonts.
whereas “feel” relates to dynamic components that the user interactswith like
• dropdown menus,• buttons, and• forms.
There are 3 ways to define styles. The first is in line with HTML. Forexample, this code
<p>Marco! <em>Polo!</em></p>
would produce text that looks like this: Marco! Polo!
However, this method is generally not preferred for numerous rea-sons.8
A second way is to internally define the CSS by placing a style sectionin your HTML:
<html><style>
7https://en.wikipedia.org/wiki/Look_and_feel8https://stackoverflow.com/q/12013532/559676

B.2 CSS 109
#favorite {font-style: italic;
}</style><ul id="tea-list"><li>Earl Grey</li><li>Darjeeling</li><li>Oolong</li><li>Chamomile</li><li id="favorite">Chai</li>
</ul></html>
In this example, only the last tea listed, Chai, is italicized.
The third method is the most popular because it is more flexible andthe least repetitive. In this method, you define the CSS in an externalfile that is then referenced as a link in your HTML:
<html><link rel="stylesheet" href="/css/style.css" />
</html>
What goes inside the linked CSS document is essentially a list of rules(the same list could appear internally between the style tags, if you areusing the second method). Each rule must include both a selector orgroup of selectors, and a declarations block within curly braces thatcontains one or more property: value; pairs. Here is the general struc-ture for a rule9:
/* CSS pseudo-code */selectorlist {
property: value;
9https://developer.mozilla.org/en-US/docs/Web/CSS/Reference

110 B Website Basics
/* more property: value; pairs*/}
Selectors10 can be based on HTML element types or attributes, such asid or class (and combinations of these attributes):
/* by element type */li {
color: yellow; /* all <li> elements are yellow */}
/* by ID with the # symbol */#my-id {
color: yellow; /* elements with id = "my-id" are yellow */}
/* by class with the . symbol */.my-class {
color: yellow; /* elements with class = "my-class" are yellow */}
Because each HTML element may match several different selectors,the CSS standard determines which set of rules has precedence forany given element, and which properties to inherit. This is where thecascade algorithm comes into play. For example, take a simple un-ordered list:
<ul id="tea-list"><li>Earl Grey</li><li>Darjeeling</li><li>Oolong</li><li>Chamomile</li><li>Chai</li>
</ul>
10https://developer.mozilla.org/en-US/docs/Web/CSS/Reference#Selectors

B.2 CSS 111
Now, let’s say we want to highlight our favorite teas again, so we’ll usea class attribute.
<ul id="tea-list"><li>Earl Grey</li><li class="favorite">Darjeeling</li><li>Oolong</li><li>Chamomile</li><li class="favorite">Chai</li>
</ul>
We can use this class attribute as a selector in our CSS. Let’s say wewant our favorite teas to be in bold and have a background color ofyellow, so our CSS would look like this:
.favorite {font-weight: bold;background-color: yellow;
}
Now, if you want every list item to be italicized with a white back-ground, you can set up another rule:
li {font-style: italic;background-color: white;
}
If you play with this code (which you can do easily using sites like http://jsbin.com, https://jsfiddle.net, or https://codepen.io/pen/), you’llsee that the two favorite teas are still highlighted in yellow. This is be-cause the CSS rule about .favorite as a class is more specific than therule about li type elements. To override the .favorite rule, you needto be as specific as you can be when choosing your group of selectors:

112 B Website Basics
ul#tea-list li.favorite {background-color: white;
}
This example just scratches the surface of cascade and inheritance.11
For any Hugo theme that you install, you can find the CSS file in thethemes/ folder. For example, the default lithium theme is located in:themes/hugo-lithium/static/css/main.css. Once you are familiar withCSS, you can understand how each set of rules work to shape the vi-sual style of your website, and how to alter the rules. For some themes(i.e., the hugo-academic theme12), you have the option of linking to acustom CSS,13 which you can use to further customize the visual styleof your site.
A few one-line examples illustrate how simple CSS rules can be usedto make dramatic changes:
• To make circular or rounded images, you may assign a class img-circle to images (e.g., <img class="img-circle" src="foo.png" />) anddefine the CSS:
.img-circle {border-radius: 50%;
}
• To make striped tables, you can add background colors to odd oreven rows of the table, e.g.,
tr:nth-child(even) {background: #eee;
}
11https://developer.mozilla.org/en-US/docs/Learn/CSS/Introduction_to_CSS/Cascade_and_inheritance
12https://github.com/gcushen/hugo-academic13https://gist.github.com/gcushen/d5525a4506b9ccf83f2bce592a895495

B.3 JavaScript 113
• You can append or prepend content to elements via pseudo-elements ::after and ::before. Here is an example of adding a periodafter section numbers: https://github.com/rstudio/blogdown/issues/80.
B.3 JavaScript
It is way more challenging to briefly introduce JavaScript than HTMLand CSS, since it is a programming language. There are many booksand tutorials about this language. Anyway, we will try to scratch thesurface for R users in this section.
In a nutshell, JavaScript is a language that is typically used to manip-ulate elements on a web page. An effective way to learn it is throughthe JavaScript console in the Developer Tools of your web browser (seeFigure B.1), because you can interactively type code in the console andexecute it, which feels similar to executing R code in the R console(e.g., in RStudio). You may open any web page in your web browser(e.g., https://yihui.org), then open the JavaScript console, and try thecode below on any web page:
document.body.style.background = 'orange';
It should change the background color of the page to orange, unlessthe page has already defined background colors for certain elements.
To effectively use JavaScript, you have to learn both the basic syntaxof JavaScript and how to select elements on a page before you canmanipulate them. You may partially learn the former from the shortJavaScript snippet below:
var x = 1; // assignments1 + 2 - 3 * 4 / 5; // arithmetic
if (x < 2) console.log(x); // "print" x

114 B Website Basics
var y = [9, 1, 0, 2, 1, 4]; // array
// functionvar sum = function(x) {var s = 0;// a naive way to compute the sumfor (var i=0; i < x.length; i++) {
s += x[i];}return s;
};
sum(y);
var y = "Hello World";y = y.replace(" ", ", "); // string manipulation
You may feel the syntax is similar to R to some degree. JavaScript is anobject-oriented language, and usually there are several methods thatyou can apply to an object. The string manipulation above is a typicalexample of the Object.method() syntax. To know the possible methodson an object, you can type the object name in your JavaScript consolefollowed by a dot, and you should see all candidates.
R users have to be extremely cautious because JavaScript objects areoften mutable, meaning that an object could be modified anywhere.Below is a quick example:
var x = {"a": 1, "b": 2}; // like a list in Rvar f = function(z) {z.a = 100;
};f(x);x; // modified! x.a is 100 now
There are many mature JavaScript libraries that can help you select

B.3 JavaScript 115
and manipulate elements on a page, and the most popular one may bejQuery.14 However, you should know that sometimes you can proba-bly do well enough without these third-party libraries. There are somebasic methods to select elements, such as document.getElementById()and document.getElementsByClassName(). For example, you can select allparagraphs using document.querySelectorAll('p').
Next we show a slightly advanced application, in which you will seeanonymous functions, selection of elements by HTML tag names, reg-ular expressions, and manipulation of HTML elements.
In Section 2.5.2, we mentioned how to enable MathJax on a Hugo web-site. The easy part is to include the script MathJax.js via a <script> tag,and there are two hard parts:
1. How to protect the math content from the Markdown en-gine (Blackfriday), e.g., we need to make sure underscoresin math expressions are not interpreted as <em></em>. Thisproblem only exists in plain Markdown posts, and has beenmentioned in Section 1.5 without explaining the solution.
2. By default, MathJax does not recognize a pair of single dol-lar signs as the syntax for inline math expressions, but mostusers are perhaps more comfortable with the syntax $x$ than\(x\).
The easiest solution to the first problem may be adding backticksaround math expressions, e.g., `$x_i$`, but the consequence is thatthe math expression will be rendered in <code></code>, and MathJaxignores <code> tags when looking for math expressions on the page.We can force MathJax to search for math expressions in <code>, butthis will still be problematic. For example, someone may want to dis-play inline R code `list$x$y`, and $x$ may be recognized as a mathexpression. MathJax ignores <code> for good reasons. Even if you donot have such expressions in <code>, you may have some special CSSstyles attached to <code>, and these styles will be applied to your mathexpressions, which can be undesired (e.g., a light gray background).
14https://jquery.com

116 B Website Basics
To solve these problems, I have provided a solution in the JavaScriptcode at https://yihui.org/js/math-code.js:
(function() {var i, text, code, codes = document.getElementsByTagName('code');for (i = 0; i < codes.length;) {
code = codes[i];if (code.parentNode.tagName !== 'PRE' &&
code.childElementCount === 0) {text = code.textContent;if (/^\$[^$]/.test(text) && /[^$]\$$/.test(text)) {
text = text.replace(/^\$/, '\\(').replace(/\$$/, '\\)');code.textContent = text;
}if (/^\\\((.|\s)+\\\)$/.test(text) ||
/^\\\[(.|\s)+\\\]$/.test(text) ||/^\$(.|\s)+\$$/.test(text) ||/^\\begin\{([^}]+)\}(.|\s)+\\end\{[^}]+\}$/.test(text)) {
code.outerHTML = code.innerHTML; // remove <code></code>continue;
}}i++;
}})();
It is not a perfect solution, but it should be very rare that you runinto problems. This solution identifies possible math expressions in<code>, and strips the <code> tag, e.g., replaces <code>$x$</code> with\(x\). After this script is executed, we load the MathJax script. Thisway, we do not need to force MathJax to search for math expressionsin <code> tags, and your math expressions will not inherit any stylesfrom <code>. The JavaScript code above is not too long, and should beself-explanatory. The trickiest part is i++. I will leave it to readers tofigure out why the for loop is not the usual form for (i = 0; i <codes.length; i++). It took me quite a few minutes to realize my mis-take when I wrote the loop in the usual form.

B.4 Useful resources 117
B.4 Useful resourcesB.4.1 File optimization
Although static websites are fast in general, you can certainly furtheroptimize them. You may search for “CSS and JavaScript minifier,” andthese tools can compress your CSS and JavaScript files, so that theycan be loaded faster. Since there are a lot of tools, I will not recom-mend any here.
You can also optimize images on your website. I frequently use acommand-line tool named optipng15 to optimize PNG images. It is alossless optimizer, meaning that it reduces the file size of a PNG imagewithout loss of quality. From my experience, it works very well on PNGimages generated from R, and can reduce the file size by at least 30%(sometimes even more than 50%). Personally I also use online tools likehttp://optimizilla.com to optimize PNG and JPEG images. For GIF im-ages, I often use https://ezgif.com/optimize to reduce the file sizes ifthey are too big.
Note that Netlify has provided the optimization features on the serverside for free at the moment, so you may just want to enable them thereinstead of doing all the hard work by yourself.
B.4.2 Helping people find your site
Once your site is up and running, you probably want people to find it.SEO — Search Engine Optimization — is the art of making a websiteeasy for search engines like Google to understand. And, hopefully, ifthe search engine knows what you are writing about, it will presentlinks to your site high in results when someone searches for topicsyou cover.
Entire books have been written about SEO, not to mention the manycompanies that are in the business of offering (paid) technical andstrategic advice to help get sites atop search-engine rankings. If youare interested in finding out more, a good place to start is the Google
15http://optipng.sourceforge.net

118 B Website Basics
Search Engine Optimization Starter Guide (http://bit.ly/google-seo-starter). Below are a few key points:
1. The title that you select for each page and post is a very impor-tant signal to Google and other search engines telling themwhat that page is about.
2. Description tags are also critical to explain what a page isabout. In HTML documents, description tags16 are one wayto provide metadata about the page. Using blogdown, the de-scription may end up as text under the page title in a search-engine result. If your page’s YAML does not include a descrip-tion, you can add one like description: "A brief descriptionof this page."; the HTML source of the rendered page wouldhave a <meta> tag in <head> like <meta name="description"content="A brief description of this page.">. Not allthemes support adding the description to your HTML page(although they should!)
3. URL structure also matters. You want your post’s slug to haveinformative keywords, which gives another signal of whatthe page is about. Have a post with interesting things to doin San Francisco? san-francisco-events-calendar might be abetter slug than my-guide-to-fun-things-to-do.
16https://www.w3schools.com/tags/tag_meta.asp

CDomain Name
While you can use the free subdomain names like those provided byGitHub or Netlify, it may be a better idea to own a domain name ofyour own. The cost of an apex domain is minimal (typically the yearlycost is about US$10), and you will enter a much richer world after youpurchase a domain name. For example, you are free to point your do-main to any web servers, you can create as many subdomain names asyou want, and you can even set up your own email accounts using thedomain or subdomains. In this appendix, we will explain some basicconcepts of domain names, and mention a few (free) services to helpyou configure your domain name.
Before we dive into the details, we want to outline the big picture ofhow a URL works in your web browser. Suppose you typed or clickeda link http://www.example.com/foo/index.html in your web browser.What happens behind the scenes before you see the actual web page?
First, the domain name has to be resolved through the nameserversassociated with it. A nameserver knows the DNS (Domain Name Sys-tem) records of a domain. Typically it will look up the “A records” topoint the domain to the IP address of a web server. There are severalother types of DNS records, and we will explain them later. Once theweb server is reached, the server will look for the file foo/index.htmlunder a directory associated with the domain name, and return itscontent in the response. That is basically how you can see a web page.
119

120 C Domain Name
C.1 Registration
You can purchase a domain name from many domain name registrars.To stay neutral, we are not going to make recommendations here. Youcan use your search engine to find a registrar by yourself, or ask yourfriends for recommendations. However, we would like to remind youof a few things that you should pay attention to when looking for adomain name registrar:
• You should have the freedom to transfer your domain from the cur-rent registrar to other registrars, i.e., they should not lock you intheir system. To transfer a domain name, you should be given a codeknown as the “Transfer Auth Code” or “Auth Code” or “Transfer Key”or something like that.
• You should be able to customize the nameservers (see Section C.2) ofyour domain. By default, each registrar will assign their own name-servers to you, and these nameservers typically work very well. How-ever, there are some special nameservers that provide services morethan just DNS records, and you may be interested in using them.
• Other people can freely look up your personal information, such asyour email or postal address, after you register a domain and submitthis information to the registrar. This is called the “WHOIS Lookup.”You may want to protect your privacy, but your registrar may requirean extra payment.
C.2 Nameservers
The main reason why we need nameservers is that we want to use do-mains instead of IP addresses, although a domain is not strictly nec-essary for you to be able to access a website. You could use the IP ad-dress if you have your own server with a public IP, but there are manyproblems with this approach. For example, IP addresses are limited

C.3 DNS records 121
(in particular IPv4), not easy to memorize, and you can only host onewebsite per IP address (without using other ports).
A nameserver is an engine that directs the DNS records of your do-main. The most common DNS record is the A record, which maps adomain to an IP address, so that the hosting server can be found viaits IP address when a website is accessed through a domain. We willintroduce two more types of DNS records in Section C.3: CNAME andMX records.
In most cases, the default nameservers provided by your domain reg-istrar should suffice, but there is a special technology missing in mostnameservers: CNAME flattening. You only need this technology if youwant to set a CNAME record for your apex domain. The only use caseto my knowledge is when you host your website via Netlify, but wantto use the apex domain instead of the www subdomain, e.g., you wantto use example.com instead of www.example.com. To make use of this tech-nology, you could consider Cloudflare,1 which provides this DNS fea-ture for free. Basically, all you need to do is to point the nameservers ofyour domain to the nameservers provided by Cloudflare (of the form*.ns.cloudflare.com).
C.3 DNS records
There are many types of DNS records, and you may see a full liston Wikipedia.2 The most commonly used types may be A, CNAME,and MX records. Figure C.1 shows a subset of DNS records of my do-main yihui.org on Cloudflare, which may give you an idea of whatDNS records look like. You may query DNS records using command-line tools such as dig3 or an app provided by Google: https://toolbox.googleapps.com/apps/dig/.
An apex domain can have any number of subdomains. You can setDNS records for the apex domain and any subdomains. You can see
1https://www.cloudflare.com2https://en.wikipedia.org/wiki/List_of_DNS_record_types3https://en.wikipedia.org/wiki/Dig_(command)

122 C Domain Name
FIGURE C.1: Some DNS records of the domain yihui.org on Cloud-flare.
from Figure C.1 that I have several subdomains, e.g., slides.yihui.organd xran.yihui.org.
As we have mentioned, an A record points a domain or subdomain toan IP address of the host server. I did not use any A records for my do-mains since all services I use, such as GitHub Pages and Netlify, sup-port CNAME records well. A CNAME record is an alias, pointing onedomain to another domain. The advantage of using CNAME over A isthat you do not have to tie a domain to a fixed IP address. For exam-ple, the CNAME record for t.yihui.org is twitter-yihui.netlify.com.The latter domain is provided by Netlify, and I do not need to knowwhere they actually host the website. They are free to move the hostof twitter-yihui.netlify.com, and I will not need to update my DNS

C.3 DNS records 123
record. Every time someone visits the website t.yihui.org, the webbrowser will route the traffic to the domain set in the CNAME record.Note that this is different from redirection, i.e., the URL t.yihui.orgwill not be explicitly redirected to twitter-yihui.netlify.com (you stillsee the former in the address bar of your browser).
Normally, you can set any DNS records for the apex domain exceptCNAME, but I set a CNAME record for my apex domain yihui.org,and that is because Cloudflare supports CNAME flattening. For moreinformation on this topic, you may read the post “To WWW or notWWW,”4 by Netlify. Personally, I prefer not using the subdomainwww.yihui.org to keep my URLs short, so I set a CNAME record for boththe apex domain yihui.org and the www subdomain, and Netlify will au-tomatically redirect the www subdomain to the apex domain. That said,if you are a beginner, it may be a little easier to configure and use thewww subdomain, as suggested by Netlify. Note www is a conventional sub-domain that sounds like an apex domain, but really is not; you can fol-low this convention or not as you wish.
For email services, I was an early enough “netizen”,5 and when I reg-istered my domain name, Google was still offering free email servicesto custom domain owners. That is how I can have a custom [email protected]. Now you will have to pay for G Suite.6 In Figure C.1 youcan see I have set some MX (stands for “mail exchange”) records thatpoint to some Google mail servers. Of course, Google is not the onlypossible choice when it comes to custom mailboxes. Migadu7 claimsto be the “most affordable email hosting.” You may try its free plan andsee if you like it. Unless you are going to use your custom mailbox ex-tensively and for professional purposes, the free plan may suffice. Infact, you may create an alias address on Migadu to forward emails toyour other email accounts (such as Gmail) if you do not care about anactual custom mailbox. Migadu has provided detailed instructions onhow to set the MX records for your domain.
4https://www.netlify.com/blog/2017/02/28/to-www-or-not-www/5https://en.wikipedia.org/wiki/Netizen6https://gsuite.google.com7https://www.migadu.com


DAdvanced Topics
In this appendix, we talk about a few advanced topics that may be ofinterest to developers and advanced users.
D.1 More global options
There are a few more advanced global options in addition to those in-troduced in Section 1.4, and they are listed in Table D.1.
If you want to install Hugo to a custom path, you can set the global op-tion blogdown.hugo.dir to a directory to store the Hugo executable be-fore you call install_hugo(), e.g., options(blogdown.hugo.dir = '~/Down-loads/hugo_0.20.1/'). This may be useful for you to use a specific ver-sion of Hugo for a specific website,1 or store a copy of Hugo on a USBFlash drive along with your website.
The option blogdown.method is explained in Section D.9.1You can set this option per project. See Section 1.4 for details.
TABLE D.1: A few more advanced global options.
Option name Default Meaning
blogdown.hugo.dir The directory of the Hugo executableblogdown.method html The building method for R Markdownblogdown.publishDir The publish dir for local previewblogdown.new_bundle FALSE Create a new post in a bundle?blogdown.widgetsID TRUE Incremental IDs for HTML widgets?
125

126 D Advanced Topics
When your website project is under version control in the RStudioIDE, continuously previewing the site can be slow, if it contains hun-dreds of files or more. The default publish directory is public/ un-der the project root directory, and whenever you make a change inthe source that triggers a rebuild, RStudio will be busy tracking filechanges in the public/ directory. The delay before you see the websitein the RStudio Viewer can be 10 seconds or even longer. That is why weprovide the option blogdown.publishDir. You may set a temporary pub-lish directory to generate the website, and this directory should notbe under the same RStudio project, e.g., options(blogdown.publishDir ='../public_site'), which means the website will be generated to the di-rectory public_site/ under the parent directory of the current project.
To understand the option blogdown.new_bundle, you have to know theconcept of page bundles2 in Hugo. When this option is set to TRUE, thefunction blogdown::new_site() (or the RStudio addin “New Post”) willcreate a new post as the index file of a page bundle, e.g., post/2015-07-23-bye-world/index.md instead of post/2015-07-23-bye-world.md. Onebenefit of using a page bundle instead of a normal page file is thatyou can put resource files associated with the post (such as images)under the same directory of the post. This means you no longer haveto put them under the static/ directory, which is often confusing toHugo beginners.
The option blogdown.widgetsID is only relevant if your website sourceis under version control and you have HTML widgets on the website.If this option is TRUE (default), the random IDs of HTML widgets willbe changed to incremental IDs in the HTML output, so these IDs areunlikely to change every time you recompile your website; otherwise,every time you will get different random IDs.
D.2 LiveReload
As we briefly mentioned in Section 1.2, you can use blog-down::serve_site() to preview a website, and the web page will
2https://gohugo.io/content-management/page-bundles/

D.2 LiveReload 127
be automatically rebuilt and reloaded in your web browser when thesource file is modified and saved. This is called “LiveReload.”
We have provided two approaches to LiveReload. The default ap-proach is through servr::httw(), which will continuously watch thewebsite directory for file changes, and rebuild the site when changesare detected. This approach is relatively slow because the website isfully regenerated every time. This may not be a real problem for Hugo,because Hugo is often fast enough: it takes about a millisecond togenerate one page, so a website with a thousand pages may only takeabout one second to be fully regenerated.
If you are not concerned about the above issue, we recommend thatyou use the default approach, otherwise you can set the global op-tion options(blogdown.generator.server = TRUE) to use an alternativeapproach to LiveReload, which is based on the native support forLiveReload from the static site generator. At the moment, this has onlybeen tested against Hugo-based websites. It does not work with Jekylland we were not successful with Hexo, either.
This alternative approach requires an additional R packages to beinstalled: processx (Csárdi and Chang, 2020). You may use this ap-proach when you primarily work on plain Markdown posts instead ofR Markdown posts, because it can be much faster to preview Mark-down posts using the web server of Hugo. The web server can bestopped by blogdown::stop_server(), and it will always be stoppedwhen the R session is ended, so you can restart your R session ifstop_server() fails to stop the server for some reason.
The web server is established via the command hugo server (see itsdocumentation3 for details). You can pass command-line argumentsvia the global option blogdown.hugo.server. The default value for thisoption is c('-D', '-F'), which means to render draft and futureposts in the preview. We want to highlight a special argument --navigateToChanged in a recent version of Hugo, which asks Hugo to au-tomatically navigate to the changed page. For example, you can set theoptions:
3https://gohugo.io/commands/hugo_server/

128 D Advanced Topics
options(blogdown.hugo.server = c('-D', '-F', '--navigateToChanged'))
Then, when you edit a source file under content/, Hugo will automati-cally show you the corresponding output page in the web browser.
Note that Hugo renders and serves the website from memory by de-fault, so no files will be generated to public/. If you need to publishthe public/ folder manually, you will have to manually build the web-site via blogdown::hugo_build() or blogdown::build_site().
D.3 Building a website for local preview
The function blogdown::build_site() has an argument local that de-faults to FALSE, which means building the website for publishing in-stead of local previewing. The mode local = TRUE is primarily for blog-down::serve_site() to serve the website locally. There are three majordifferences between local = FALSE and TRUE. When local = TRUE:
• The baseurl option in config.toml is temporarily overridden by "/"even if you have set it to a full URL like "http://www.example.com/".4
This is because when a website is to be previewed locally, links shouldrefer to local files. For example, /about/index.html should be usedinstead of the full link http://www.example.com/about/index.html; thefunction serve_site() knows that /about/index.html means the fileunder the public/ directory, and can fetch it and display the con-tent to you, otherwise your browser will take you to the websitehttp://www.example.com instead of displaying a local file.
• Draft and future posts are always rendered when local = TRUE, butnot when local = FALSE. This is for you to preview draft and futureposts locally. If you know the Hugo command line,5 it means the hugo
4If your baseurl contains a subdirectory, it will be overridden by the sub-directory name. For example, for baseurl = "http://www.example.com/project/",build_site(local = TRUE) will temporarily remove the domain name and only usethe value /project/.
5https://gohugo.io/commands/hugo/

D.3 Building a website for local preview 129
command is called with the flags -D -F, or equivalently, --buildDrafts--buildFuture.
• There is a caching mechanism to speed up building your website:an Rmd file will not be recompiled when its *.html output file isnewer (in terms of file modification time). If you want to forcebuild_site(local = TRUE) to recompile the Rmd file even if it is olderthan the HTML output, you need to delete the HTML output, or editthe Rmd file so that its modification time will be newer, or click theRStudio addin “Touch File”. This caching mechanism does not applyto local = FALSE, i.e., build_site(local = FALSE) will always recompileall Rmd files, because when you want to publish a site, you may needto recompile everything to make sure the site is fully regenerated. Ifyou have time-consuming code chunks in any Rmd files, you have touse either of these methods to save time:
– Turn on knitr’s caching for time-consuming code chunks, i.e.,the chunk option cache = TRUE.
– Do not call build_site(), but blogdown::hugo_build() instead.The latter does not compile any Rmd files, but simply runs thehugo command to build the site. Please use this method only ifyou are sure that your Rmd files do not need to be recompiled.
You do not need to worry about these details if your website is auto-matically generated from source via a service like Netlify, which willmake use of baseurl and not use -D -F by default. If you manually pub-lish the public/ folder, you need to be more careful:
• If your website does not work without the full baseurl, or you donot want the draft or future posts to be published, you should notpublish the public/ directory generated by serve_site(). Always runblogdown::build_site() or blogdown::hugo_build() before you uploadthis directory to a web server.
• If your drafts and future posts contain (time-)sensitive information,you are strongly recommended to delete the /public/ directory be-fore you rebuild the site for publishing every time, because Hugonever deletes it, and your sensitive information may be renderedby a certain build_site(local = TRUE) call last time and left in the
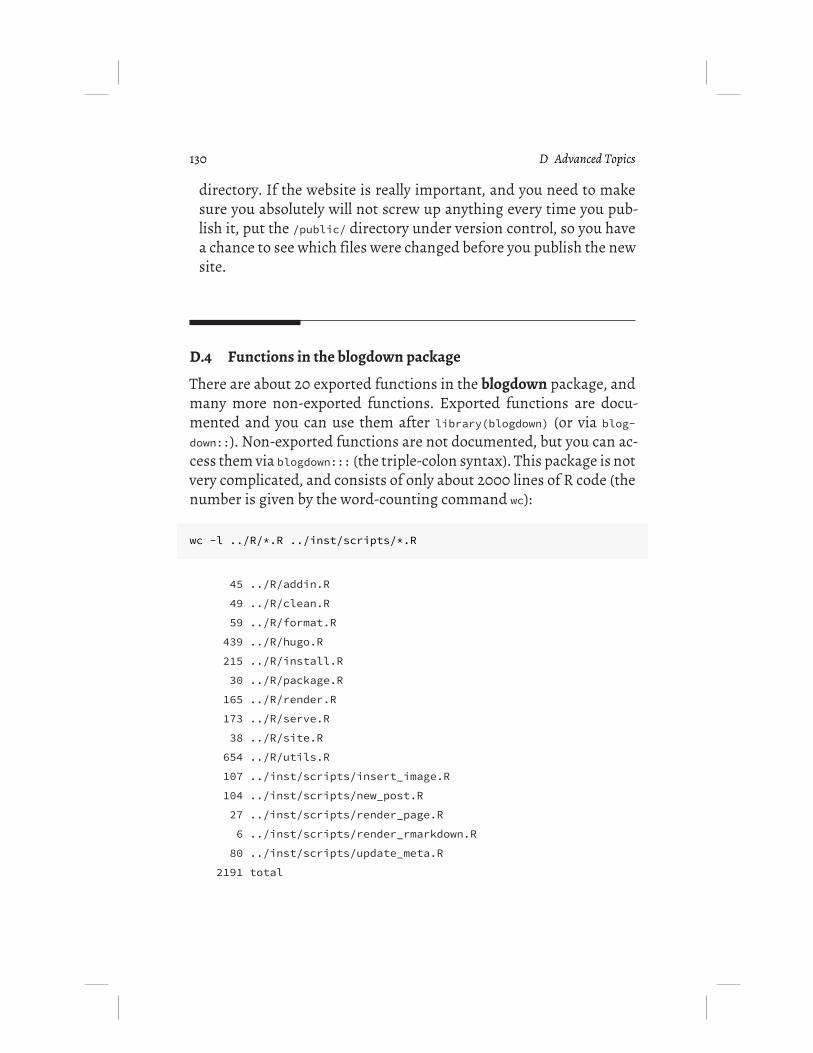
130 D Advanced Topics
directory. If the website is really important, and you need to makesure you absolutely will not screw up anything every time you pub-lish it, put the /public/ directory under version control, so you havea chance to see which files were changed before you publish the newsite.
D.4 Functions in the blogdown package
There are about 20 exported functions in the blogdown package, andmany more non-exported functions. Exported functions are docu-mented and you can use them after library(blogdown) (or via blog-down::). Non-exported functions are not documented, but you can ac-cess them via blogdown::: (the triple-colon syntax). This package is notvery complicated, and consists of only about 2000 lines of R code (thenumber is given by the word-counting command wc):
wc -l ../R/*.R ../inst/scripts/*.R
45 ../R/addin.R49 ../R/clean.R59 ../R/format.R439 ../R/hugo.R215 ../R/install.R30 ../R/package.R165 ../R/render.R173 ../R/serve.R38 ../R/site.R654 ../R/utils.R107 ../inst/scripts/insert_image.R104 ../inst/scripts/new_post.R27 ../inst/scripts/render_page.R6 ../inst/scripts/render_rmarkdown.R80 ../inst/scripts/update_meta.R
2191 total

D.4 Functions in the blogdown package 131
You may take a look at the source code (https://github.com/rstudio/blogdown) if you want to know more about a non-exported function. Inthis section, we selectively list some exported and non-exported func-tions in the package for your reference.
D.4.1 Exported functions
Installation: You can install Hugo with install_hugo(), update Hugowith update_hugo(), and install a Hugo theme with install_theme().
Wrappers of Hugo commands: hugo_cmd() is a general wrapper of sys-tem2('hugo', ...), and all later functions execute specific Hugo com-mands based on this general wrapper function; hugo_version() exe-cutes the command hugo version (i.e., system2('hugo', 'version') inR); hugo_build() executes hugo with optional parameters; new_site()executes hugo new site; new_content() executes hugo new to create anew content file, and new_post() is a wrapper based on new_content()to create a new blog post with appropriate YAML metadata and file-name; hugo_convert() executes hugo convert; hugo_server() executeshugo server.
Output format: html_page() is the only R Markdown output formatfunction in the package. It inherits from bookdown::html_document2(),which in turn inherits from rmarkdown::html_document(). You need toread the documentation of these two functions to know the possiblearguments. Section 1.5 has more detailed information about it.
Helper functions: shortcode() is a helper function to write a Hugoshortcode {{% %}} in an Rmd post; shortcode_html() writes out {{< >}}.
Serving a site: serve_site() starts a local web server to build and pre-view a site continuously; you can stop the server via stop_server(), orrestart your R session.
Dealing with YAML metadata: find_yaml() can be used to find con-tent files that contain a specified YAML field with specified values;find_tags() and find_categories() are wrapper functions based onfind_yaml() to match specific tags and categories in content files, re-spectively; count_yaml() can be used to calculate the frequencies ofspecified fields.

132 D Advanced Topics
D.4.2 Non-exported functions
Some functions are not exported in this package because averageusers are unlikely to use them directly, and we list a subset of thembelow:
• You can find the path to the Hugo executable via blog-down:::find_hugo(). If the executable can be found via the PATHenvironment variable, it just returns 'hugo'.
• The helper function modify_yaml() can be used to modify the YAMLmetadata of a file. It has a ... argument that takes arbitrary YAMLfields, e.g., blogdown:::modify_yaml('foo.md', author = 'Frida Gomam',date = '2015-07-23') will change the author field in the file foo.md toFrida Gomam, and date to 2015-07-23. We have shown the advancedusage of this function in Section 4.1.
• We have also mentioned a series of functions to clean up Mark-down posts in Section 4.1. They include process_file(), re-move_extra_empty_lines(), process_bare_urls(), normalize_chars(),remove_highlight_tags(), and fix_img_tags().
• In Section D.3, we mentioned a caching mechanism basedon the file modification time. It is implemented in blog-down:::require_rebuild(), which takes two arguments of filenames.The first file is the output file, and the second is the source file.When the source file is older than the output file, or the output filedoes not exist or is empty, this function returns TRUE.
• The function blogdown:::Rscript() is a wrapper function to executethe command Rscript, which basically means to execute an R scriptin a new R session. We mentioned this function in Chapter 5.
D.5 Paths of figures and other dependencies
One of the most challenging tasks in developing the blogdown pack-age is to properly handle dependency files of web pages. If all pagesof a website were plain text without dependencies like images or

D.5 Paths of figures and other dependencies 133
JavaScript libraries, it would be much easier for me to develop theblogdown package.
After blogdown compiles each Rmd document to HTML, it will try todetect the dependencies (if there are any) from the HTML source andcopy them to the static/ folder, so that Hugo will copy them to public/later. The detection depends on the paths of dependencies. By default,all dependencies, like R plots and libraries for HTML widgets, are gen-erated to the foo_files/ directory if the Rmd is named foo.Rmd. Specif-ically, R plots are generated to foo_files/figure-html/ and the rest offiles under foo_files/ are typically from HTML widgets.
R plots under content/*/foo_files/figure-html/ are copied tostatic/*/foo_files/figure-html/, and the paths in HTML tags like<img src="foo_files/figure-html/bar.png" /> are substituted with/*/foo_files/figure-html/bar.png. Note the leading slash indicatesthe root directory of the published website, and the substitutionworks because Hugo will copy */foo_files/figure-html/ from static/to public/.
Any other files under foo_files/ are treated as dependency filesof HTML widgets, and will be copied to static/rmarkdown-libs/.The original paths in HTML will also be substituted accordingly,e.g., from <script src="foo_files/jquery/jquery.min.js"> to <scriptsrc="/rmarkdown-libs/jquery/jquery.min.js">. It does not matterwhether these files are generated by HTML widgets or not. The linkson the published website will be correct and typically hidden fromthe readers of the pages.6
You should not modify the knitr chunk option fig.path or cache.pathunless the above process is completely clear to you, and you want tohandle dependencies by yourself.
In the rare cases when blogdown fails to detect and copy some ofyour dependencies (e.g., you used a fairly sophisticated HTML widgetpackage that writes out files to custom paths), you have two possiblechoices:
6For example, a reader will not see the <script> tag on a page, so it does not reallymatter what its src attribute looks like as long as it is a path that actually exists.

134 D Advanced Topics
• Do not ignore _files$ in the option ignoreFiles in config.toml, do notcustomize the permalinks option, and set the option uglyURLs to true.This way, blogdown will not substitute paths that it cannot recog-nize, and Hugo will copy these files to public/. The relative file lo-cations of the *.html file and its dependencies will remain the samewhen they are copied to public/, so all links will continue to work.
• If you choose to ignore _files$ or have customized the permalinks op-tion, you need to make sure blogdown can recognize the dependen-cies. One approach is to use the path returned by the helper func-tion blogdown::dep_path() to write out additional dependency files.Basically this function returns the current fig.path option in knitr,which defaults to *_files/figure-html/. For example, you can gener-ate a plot manually under dep_path(), and blogdown will process itautomatically (copy the file and substitute the image path accord-ingly).
If you do not understand all these technical details, we recommendthat you use the first choice, and you will have to sacrifice custompermanent links and clean URLs (e.g., /about.html instead of /about/).With this choice, you can also customize the fig.path option for codechunks if you want.
D.6 HTML widgets
We do not recommend that you use different HTML widgets frommany R packages on the same page, because it is likely to cause con-flicts in JavaScript. For example, if your theme uses the jQuery library,it may conflict with the jQuery library used by a certain HTML wid-get. In this case, you can conditionally load the theme’s jQuery libraryby setting a parameter in the YAML metadata of your post and revis-ing the Hugo template that loads jQuery. Below is the example codeto load jQuery conditionally in a Hugo template:

D.7 Version control 135
{{ if not .Params.exclude_jquery}}<script src="path/to/jquery.js"></script>{{ end }}
Then if you set exclude_jquery: true in the YAML metadata of a post,the theme’s jQuery will not be loaded, so there will not be conflictswhen your HTML widgets also depend on jQuery.
Another solution is the widgetframe package7 (Karambelkar, 2017). Itsolves this problem by embedding HTML widgets in <iframe></iframe>.Since an iframe is isolated from the main web page on which it is em-bedded, there will not be any JavaScript conflicts.
A widget is typically not of full width on the page. To set its width to100%, you can use the chunk option out.width = "100%".
D.7 Version control
If your website source files are under version control, we recommendthat you add at least these two folder names to your .gitignore file:
blogdownpublic
The blogdown/ directory is used to store cache files, and they are mostlikely to be useless to the published website. Only knitr may use them,and the published website will not depend on these files.
The public/ directory should be ignored if your website is to going tobe automatically (re)built on a remote server such as Netlify.
As we mentioned in Section D.5, R plots will be copied to static/, soyou may see new files in GIT after you render an Rmd file that has
7https://github.com/bhaskarvk/widgetframe

136 D Advanced Topics
graphics output. You need to add and commit these new files in GIT,because the website will use them.
Although it is not relevant to blogdown, macOS users should remem-ber to ignore .DS_Store and Windows users should ignore Thumbs.db.
If you are relatively familiar with GIT, there is a special technique thatmay be useful for you to manage Hugo themes, which is called “GITsubmodules.” A submodule in GIT allows you to manage a particularfolder of the main repository using a different remote repository. Forexample, if you used the default hugo-lithium from my GitHub repos-itory, you might want to sync it with my repository occasionally, be-cause I may update it from time to time. You can add the GIT submod-ule via the command line:
git submodule add \https://github.com/yihui/hugo-lithium.git \themes/hugo-lithium
If the folder themes/hugo-lithium exists, you need to delete it beforeadding the submodule. Then you can see a SHA string associated withthe “folder” themes/hugo-lithium in the GIT status of your main repos-itory indicating the version of the submodule. Note that you will onlysee the SHA string instead of the full content of the folder. Next timewhen you want to sync with my repository, you may run the command:
git submodule update --recursive --remote
In general, if you are happy with how your website looks, you do notneed to manage the theme using GIT submodules. Future updates inthe upstream repository may not really be what you want. In that case,a physical and fixed copy of the theme is more appropriate for you.

D.8 The default HTML template 137
D.8 The default HTML template
As we mentioned in Section 1.5, the default output format for an Rmddocument in blogdown is blogdown::html_page. This format passes aminimal HTML template to Pandoc by default:
$for(header-includes)$$header-includes$$endfor$$if(highlighting-css)$<style type="text/css">$highlighting-css$</style>$endif$$for(css)$<link rel="stylesheet" href="$css$" type="text/css" />
$endfor$
$for(include-before)$$include-before$$endfor$$if(toc)$<div id="$idprefix$TOC">$toc$</div>$endif$
$body$
$for(include-after)$$include-after$$endfor$
You can find this template file via blogdown:::pkg_file('resources','template-minimal.html') in R, and this file path is the default value

138 D Advanced Topics
of the template argument of html_page(). You may change this defaulttemplate, but you should understand what this template is supposedto do first.
If you are familiar with Pandoc templates, you should realize that thisis not a complete HTML template, e.g., it does not have the tags <html>,<head>, or <body>. That is because we do not need or want Pandoc toreturn a full HTML document to us. The main thing we want Pandocto do is to convert our Markdown document to HTML, and give us thebody of the HTML document, which is in the template variable $body$.Once we have the body, we can further pass it to Hugo, and Hugo willuse its own template to embed the body and generate the full HTMLdocument. Let’s explain this by a minimal example. Suppose we havean R Markdown document foo.Rmd:
---title: "Hello World"author: "Yihui Xie"---
I found a package named **blogdown**.
It is first converted to an HTML file foo.html through html_page(), andnote that YAML metadata are ignored for now:
I found a package named <strong>blogdown</strong>.
Then blogdown will read the YAML metadata of the Rmd source file,and insert the metadata into the HTML file so it becomes:
---title: "Hello World"author: "Yihui Xie"---
I found a package named <strong>blogdown</strong>.

D.9 Different building methods 139
This is the file to be picked up by Hugo and eventually converted toan HTML page of a website. Since the Markdown body has been pro-cessed to HTML by Pandoc, Hugo will basically use the HTML. That ishow we bypass Hugo’s Markdown engine BlackFriday.
Besides $body$, you may have noticed other Pandoc template variableslike $header-includes$, $css$, $include-before$, $toc$, and $include-after$. These variables make it possible to customize the html_page for-mat. For example, if you want to generate a table of contents, and ap-ply an additional CSS stylesheet to a certain page, you may set toc totrue and pass the stylesheet path to the css argument of html_page(),e.g.,
---title: "Hello World"author: "Yihui Xie"output:blogdown::html_page:
toc: truecss: "/css/my-style.css"
---
D.9 Different building methods
If your website does not contain any Rmd files, it is very straightfor-ward to render it — just a system call to the hugo command. Whenyour website contains Rmd files, blogdown has provided two render-ing methods to compile these Rmd files. A website can be built usingthe function blogdown::build_site():
build_site(local = FALSE, method = c("html", "custom"),run_hugo = TRUE)
As mentioned in Section 1.4, the default value of the method argument

140 D Advanced Topics
is determined by the global option blogdown.method, and you can setthis option in .Rprofile.
For method = 'html', build_site() renders *.Rmd to *.html, and *.Rmark-down to *.markdown, and keeps the *.html/*.markdown output files underthe same directory as *.Rmd/*.Rmarkdown files.
An Rmd file may generate two directories for figures (*_files/) andcache (*_cache/), respectively, if you have plot output or HTML wid-gets (Vaidyanathan et al., 2019) in your R code chunks, or enabledthe chunk option cache = TRUE for caching. In the figure directory,there will be a subdirectory figure-html/ that contains your plot outputfiles, and possibly other subdirectories containing HTML dependen-cies from HTML widgets (e.g., jquery/). The figure directory is movedto /static/, and the cache directory is moved to /blogdown/.
After you run build_site(), your website is ready to be compiled byHugo. This gives you the freedom to use deploying services like Netlify(Chapter 3), where neither R nor blogdown is available, but Hugo is.
For method = 'custom', build_site() will not process any R Mark-down files, nor will it call Hugo to build the site. No matter whichmethod you choose to use, build_site() will always look for an R script/R/build.R and execute it if it exists. This gives you the complete free-dom to do anything you want for the website. For example, you cancall knitr::knit() to compile Rmd to Markdown (*.md) in this R scriptinstead of using rmarkdown::render(). This feature is designed for ad-vanced users who are really familiar with the knitr package8 and Hugoor other static website generators (see Chapter 5).
When R/build.R exists and method = 'html', the R Markdown files areknitted first, then the script R/build.R is executed, and lastly Hugo iscalled to build the website.
8Honestly, it was originally designed for Yihui himself to build his own website,but he realized this feature could actually free users from Hugo. For example, it ispossible to use Jekyll (another popular static site generator) with blogdown, too.

EPersonal Experience
I started blogging at blogchina.com in 2005, moved to blog.com.cn,then MSN Space, and finally purchased my own domain yihui.organd a virtual host. I first used a PHP application named Bo-Blog,then switched to WordPress, and then Jekyll. Finally I moved to Hugo.Although I have moved several times, all my posts have been pre-served, and you can still see my first post in Chinese in 2005. I of-ten try my best not to introduce broken links (which lead to the404 page) every time I change the backend of my website. Whenit is too hard to preserve the original links of certain pages, I willredirect the broken URLs to the new URLs. That is why it is im-portant for your system to support redirections, and in particu-lar, 301 redirections (Netlify does a nice job here). Here are someof my redirection rules: https://github.com/rbind/yihui/blob/master/static/_redirects. For example, http://yihui.org/en/feed/ was theRSS feed of my old WordPress and Jekyll blogs in English, and Hugogenerates the RSS feed to /en/index.xml instead, so I need to redirect/en/feed/ to /en/index.xml.
Google has provided several tools to help you know more informationabout your website. For example, Google Analytics1 can collect visitorstatistics and give speed suggestions for your website. Google Web-masters2 can show you the broken links it finds. I use these tools fre-quently by myself.
I firmly believe in the value of writing. Over the years, I have writ-ten more than 1000 posts in Chinese and English. Some are long, andmost are short. The total size of these text files is about 5 Mb. In retro-spect, most posts are probably not valuable to general readers (some
1https://analytics.google.com2https://www.google.com/webmasters/
141

142 E Personal Experience
are random thoughts, and some are my rants), but I feel I benefitteda lot from writing in two aspects:
1. If I sit down and focus on writing a small topic for a while,I often feel my thoughts will become clearer. A major differ-ence between writing and talking is that you can always reor-ganize things and revise them when writing. I do not thinkwriting on social media counts. 140 characters may well bethoughtful, but I feel there is so much chaos there. It is hardto lay out systematic thoughts only through short messages,and these quick messages are often quickly forgotten.
2. I know some bloggers are very much against comments, sothey do not open comments to the public. I have not hada very negative experience with comments yet. On the con-trary, I constantly find inspirations from comments. For ex-ample, I was thinking3 if it was possible to automaticallycheck R packages on the cloud through Travis CI. At that time(April 2013), I believe not many people in the R communityhad started using Travis CI, although I’m not sure if I wasthe first person experimenting with this idea. I felt Travis CIcould be promising, but it did not support R back then. Some-one named Vincent Arel-Bundock (I still do not know him)told me a hack in a comment, which suddenly lit up my mindand I quickly figured out a solution. In October 2013, CraigCitro started more solid work on the R support on Travis CI. Ido not know if he saw my blog post. Anyway, I think Travis CIhas made substantial impact on R package developers, whichis a great thing for the R community.
Yet another relatively small benefit is that I often go to my own posts tolearn some technical stuff that I have forgotten. For example, I find itdifficult to remember the syntax of different types of zero-width asser-tions in Perl-like regular expressions: (?=...), (?!...), (?<=...), and(?<!...). So I wrote a short blog post and gave myself a few minimal
3https://yihui.org/en/2013/04/travis-ci-for-r/

E.0 143
examples. After going back to that post a few times, finally I can re-member how to use these regular expressions.

Bibliography
Allaire, J., Xie, Y., McPherson, J., Luraschi, J., Ushey, K., Atkins, A.,Wickham, H., Cheng, J., Chang, W., and Iannone, R. (2020). rmark-down: Dynamic Documents for R. R package version 2.1.
Csárdi, G. and Chang, W. (2020). processx: Execute and Control SystemProcesses. R package version 3.4.2.
Karambelkar, B. (2017). widgetframe: Htmlwidgets in Responsive iframes.R package version 0.3.1.
R Core Team (2020). R: A Language and Environment for Statistical Com-puting. R Foundation for Statistical Computing, Vienna, Austria.
Vaidyanathan, R., Xie, Y., Allaire, J., Cheng, J., and Russell, K. (2019).htmlwidgets: HTML Widgets for R. R package version 1.5.1.
Wickham, H. and Hesselberth, J. (2020). pkgdown: Make Static HTMLDocumentation for a Package. R package version 1.5.0.
Xie, Y. (2016). bookdown: Authoring Books and Technical Documents withR Markdown. Chapman and Hall/CRC, Boca Raton, Florida. ISBN978-1138700109.
Xie, Y. (2018). animation: A Gallery of Animations in Statistics and Utilitiesto Create Animations. R package version 2.6.
Xie, Y. (2020a). bookdown: Authoring Books and Technical Documents withR Markdown. R package version 0.18.
Xie, Y. (2020b). knitr: A General-Purpose Package for Dynamic Report Gen-eration in R. R package version 1.28.1.
Xie, Y. (2020c). servr: A Simple HTTP Server to Serve Static Files or DynamicDocuments. R package version 0.16.
145

146 E Bibliography
Xie, Y. (2020d). xaringan: Presentation Ninja. R package version 0.16.

Index
_default/, 43404.html, 51
Amazon S3, 77
baseURL, 30, 38Blackfriday, 14blogdown::build_dir(), 65blogdown::build_one(), 89blogdown::build_site(), 128blogdown::hugo_build(), 129blogdown::install_theme(), 20blogdown::new_site(), 2blogdown::serve_site(), 3
CNAME Record, 122config.toml, 3, 27CSS, 107
Dependency Files, 132Directories, 5Disqus Comments, 38, 55DNS Records, 121Domain Name, 70, 119Draft, 33
Emoji, 30
fonts.css, 54footer.html, 50Functions, 130
GIT Submodules, 136
GitHub Edit Page, 59GitHub Pages, 70Global Options, 11, 125Google Analytics, 38, 55
hasCJKLanguage, 32header.html, 48Hexo, 92HTML, 103HTML Widgets, 134Hugo, 1, 25Hugo Lithium Theme, 36
ignoreFiles, 32
JavaScript, 113Jekyll, 80, 87jQuery, 115, 134
knitr::render_jekyll(), 90
list.html, 45LiveReload, 3, 126Logo, 40
Markdown, 13, 97MathJax, 16, 40, 56, 115
Nameservers, 120Netlify, 23, 68, 93
Optimization, 117options, 30
147

148 Index
Pandoc, 1, 14, 137params, 39Partials, 44permalinks, 30pkgdown, 95Post Weight, 34Publish Date, 33
R Markdown, 13, 97R Markdown Site Generator, 93RStudio addins, 5
Shortcode, 34single.html, 43Site Migration, 79Slug, 31Static Directory, 64Static Site, 25Syntax Highlighting, 40, 56
Table of Contents, 57Tags, 58Templates, 40terms.html, 47Themes, 19, 36TOML, 28Travis CI, 73
uglyURLs, 32
Version Control, 135
WordPress, 84
XMin Theme, 41
YAML, 28, 33, 98