Embed Size (px)
Citation preview
Blue Water Quality Spas Spa Owner’s Operation and Installation Guide
Table of Contents 1 Introduction
2 Precautions
3 Site Access
4 Manual Charts
5 Pre- Installation
6 Electrical Requirements
7 Spa Start-up
8 Control Identification
9 Filter Maintenance
10 Spa Care & Maintenance
11 Trouble Shooting Guide
IInnttrroodduuccttiioonn Congratulations on the purchase of your new BlueWater Quality hydrotherapy spa. The spa you have just purchased is considered to be one of the best engineered portable spas in the marketplace today. Your new spa is not only stylish and elegant, it is designed to give you years of safe reliable personal hydrotherapy and entertainment. Your new hydrotherapy spa was designed with consultation from physical therapists, orthopedists and chiropractic doctors to maximize ergonomic design and pinpoint hydrotherapy massage to insure you total relaxation and set you on the pathway to a better lifestyle. Your new spa is manufactured utilizing all the latest modern technology. It is very important that you carefully read this manual to insure years of efficient and safe operation. This manual is particularly directed to safety. We strongly urge you to become thoroughly acquainted with all the safety precautions and practices outlined in this manual and to educate your family in the safe operation of your new Bluewater Spa. Thank you for choosing our Bluewater Quality spa line. We wish you many years of good health and enjoyment.
111
PPrreeccaauuttiioonnss The following warnings and precautions should be observed at all times. We strongly recommend that you carefully read these common sense rules and educate your family in the safe operation of your new spa.
• Persons suffering from heart disease, diabetes, high or low blood pressure, pregnancy, or any other serious ailments, should consult their physician before using any spa.
• Each individual has different tolerances to temperature. Excessive water temperature can be dangerous.
• Do not enter a spa while under the influence of alcohol, and or drugs. Persons under medication, should consult their physician before using a spa.
• Observe reasonable bathing time. Long exposure to high temperature can result in dizziness, and or hypothermia, and could result in unconsciousness.
• Always enter or exit a spa slowly and safely. • Always supervise small children while using a spa. • High temperatures are more dangerous to all children. Please
consult your physician about your child’s limits. • Never place electrical appliances within 10 feet of your new spa. • Never operate or attempt to operate any electrical appliances, light
switches, or wall outlets while wet or inside the spa. • All spas are set to limit temperature to 104 degrees, as required by
the Consumer Product Safety Commission. • Do not attempt to alter factory settings. Unauthorized alterations
to the spa can be dangerous and will void your warranty. • Do not alter electrical requirements when installing your new spa.
222
SSiittee AAcccceessss Site access is one of the most important issues you face when purchasing your new spa. In order to insure the safe and proper delivery of your new spa, the following precautions must be observed.
1. First Identify the spa you have purchased on the chart provided in section 4 (Figure 1) and take note of all dimensions.
2. Identify the access area in the yard in which your new spa will be delivered. 3. Measure the width of the gate (if any) and check it against the depth of your
new spa. Allow an additional two to three inches for delivery. 4. Next measure the distance between the ground and lowest point of the eve
of your home. Check it against the width of your new spa. Allow an extra 10 to 12 inches of clearance for the use of a spa dolly.
5. If all the measures are good for the delivery, then proceed to walk the path by which the spa will travel to its final destination. Check for any obstacles that may impede the delivery. Temporarily remove them prior to the delivery of your new spa if they can be removed. If they cannot be removed please contact us for advice.
The following are the most common obstacles that can impede a safe delivery. Narrow Gates Exterior Pipes or Hose Bibs Short Fences Garden Windows Low Eves Short Porches Low Rain Gutters Shrubbery Air Conditioning or Heater Units Tree Branches Gas or Electric Meters 90 Degree Turn Clearance Please be advised that Bluewater spas offers optional backyard delivery only when adequate height and width clearance and a clear path are provided. There is an additional charge for this service. If a crane is required, it is the financial responsibility of the customer. In the event a delivery cannot be made based on the customer’s incorrect information, the customer may be subject to a re-delivery charge.
333
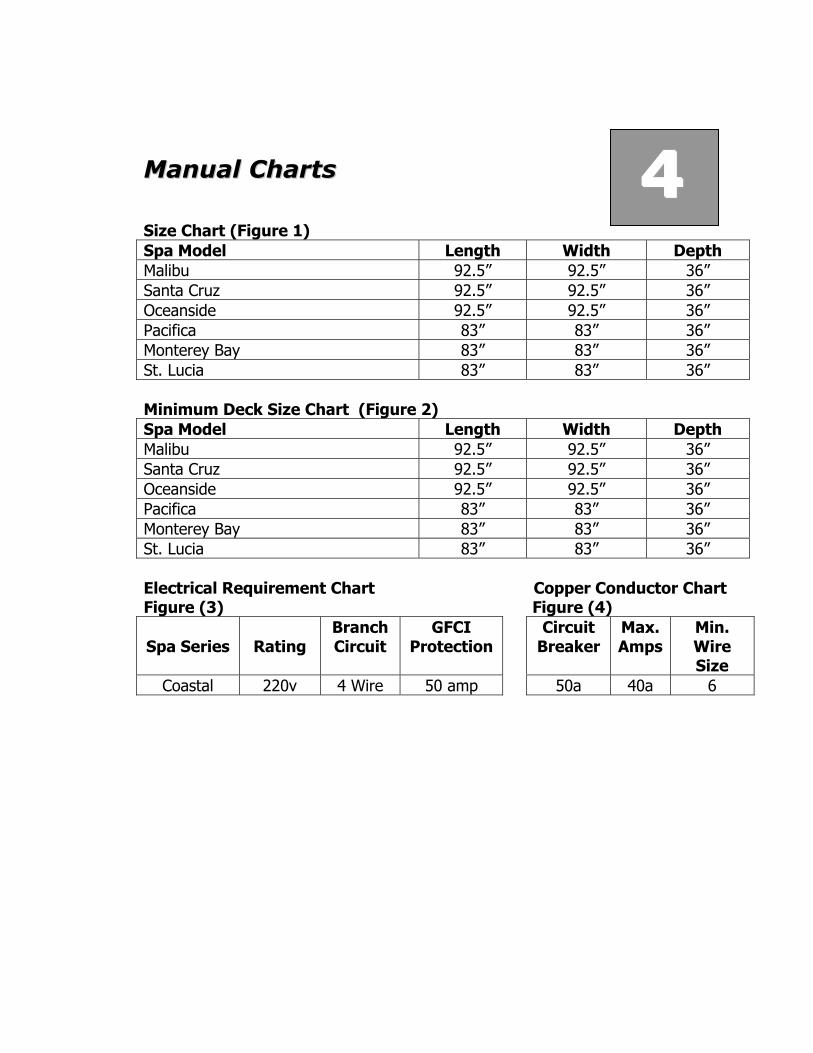
MMaannuuaall CChhaarrttss Size Chart (Figure 1) Spa Model Length Width Depth Malibu 92.5” 92.5” 36” Santa Cruz 92.5” 92.5” 36” Oceanside 92.5” 92.5” 36” Pacifica 83” 83” 36” Monterey Bay 83” 83” 36” St. Lucia 83” 83” 36” Minimum Deck Size Chart (Figure 2) Spa Model Length Width Depth Malibu 92.5” 92.5” 36” Santa Cruz 92.5” 92.5” 36” Oceanside 92.5” 92.5” 36” Pacifica 83” 83” 36” Monterey Bay 83” 83” 36” St. Lucia 83” 83” 36” Electrical Requirement Chart Copper Conductor Chart Figure (3) Figure (4)
Spa Series
Rating
Branch Circuit
GFCI Protection
Circuit Breaker
Max. Amps
Min. Wire Size
Coastal 220v 4 Wire 50 amp 50a 40a 6
444

PPrree--IInnssttaallllaattiioonn Preparing for your new spa: Before installing or using your new spa, please read the following instructions thoroughly. Your new spa is completely self-contained. You can install it just about anywhere. The only requirements are to place the unit on a level surface with adequate drainage. The spa should set completely flat on the factory recommended surface. We strongly recommend that you place your new spa on a concrete or framed pea-gravel surface. However, should you decide to place the spa on a wood deck, raised deck, or a balcony, we recommend that you consult a structural engineer to confirm that the surface will support the weight of a full spa. Please follow these simple guidelines when preparing to install your new spa:
• Position your spa so that the equipment is above the grade and not subject to flooding.
• Water should always drain away from the spa. • Always place the spa so that the equipment is easily accessible. • Always allow additional space around the spa for accessibility to components
and accessories. • Install or redirect yard sprinklers to spray away from the cabinet. • Do not install your spa near any electrical appliances.
The following types of pads are factory recognized:
• Cement Pad: A 4” thick pad is the most universal surface for proper support and long life.
• Pea-Gravel Surface: The pea gravel surface must be at least 4 inches thick with a 4x4 frame crossed in the middle.
(Please refer to Minimum Deck Size Chart (Figure2) in section 4) We also recommend that you install self closing, self locking gates in your fenced yard. Check with your City Codes for proper height requirement for your fence.
555

EElleeccttrriiccaall RReeqquuiirreemmeennttss Preparing the correct electrical installation for your new spa is crucial. The guidelines that are set forth in both this manual and the manuals issued by Hydro Quip Industries meet the National Electrical Standards for the United States. Any Alteration from the standards set forth may void your warranty and cause severe damage to your spa’s electrical system. Your new Bluewater spa is categorized by both Name and Series. Please refer to the Electrical Requirement Chart (Figure 3) in section 4, for your base requirements. We recommend that you consult a state licensed electrician before attempting to hook up your new spa. For proper wire size please refer to the Copper Conductor Chart (Figure 4) in section 4. The following, are the simple requirements for our spas based on series. Please refer to these requirements when consulting your electrician.
1. The System requires a 50 amp. GFCI Circuit Breaker. 2. The System requires a four (4) wire system (2 Hot Wires, 1 Neutral Wire, and
1 Ground Wire). The wire Size depends on the length of the electrical run. Please consult your electrician for wire size.
666

SSppaa SSttaarrtt--uupp In order to properly start up your new spa you will need to become familiar with some of the components shown below. Be sure that the power is completely off before you start the following steps. Shown Below are the Support Equipment Components:
Step 1: Check all Pump Unions and Heater Unions to be sure that they are hand tight. Place a garden hose in the foot well of your spa. (Coil the hose in the foot well a few times to keep it from coming out of the spa.) As the spa fills, check the pump unions and the heater unions periodically to be sure there are no leaks. Step 2: Fill the spa to the proper level as shown in picture. A water level line is shown on the skimmer plate. Water Level Step 3: After removing the garden hose, go to the GFCI Circuit Breaker and turn the power on. Back at your spa, check the slice valves and make sure that all the valves are in the up / open position.
Slice Valve Heater Union Power-On Switch Pump Union
777
SSppaa SSttaarrtt--uupp ccoonntt.. Step 4: Locate the power-on switch and turn the spa on. In most cases the Low Speed pump will come on. Do not be alarmed if it does not. Locate the primary pump button on the spa. (The series of your spa will determine where the button is located) You can determine what type controls you have by looking at the control identification section of this manual. Press the button and the high speed primary pump should activate. If the pump is running, but there is no jet action, the spa may have an air lock not allowing the pump to prime. Follow the next easy steps to unlock an air lock:
• Push the air button and turn the high speed pump off. If the low speed pump is activated, reduce the temperature to the coolest position. The low speed pump should then shut down.
• Locate the Pump Union (Shown on previous page), and lightly loosen the fitting until a constant trickle of water leaks through. (Caution, Do not loosen the fitting to the point that it comes off the pump.) Then tighten the fitting and turn the pump to high speed and let it run for 30 seconds. If the pump does not prime, repeat the process. In some extreme cases it may take 4 to 5 attempts.
• If you have a two pump system, repeat the process on the secondary pump. • If you have an air injection system, the air injection pump does not require
priming. Once all systems are primed, it is time to refer to your equipment owner’s manual for programming and operation instructions. You can cross reference your equipment by identifying the system in the control identification section of this manual. Should any operation on the start up fail to function please refer to the troubleshooting section of this manual, or contact Bluewater spas before proceeding. Caution: allow the spa to run for at least 30 minutes before adding any chemicals to the water.
777

CCoonnttrrooll IIddeennttiiffiiccaattiioonn
The DCS System: This system is a solid state control system. The system is 100% programmable from the spa side control. The programming information is in the Hydro Quip Manual. Refer to the DCS 9000 Series Equipment Section.
The Air System: This system is an air activated control system. This system features a solid state temperature read-out. The filtration and heating cycles are programmed on the Equipment. Refer to the HQ-9000 Series Equipment Section.
The Eco-1 & 2 System: This system is found only on the EX, EC, and PHS series spas only. The system is solid state and is 100% programmable from the top side Control. Please refer to the Eco-1 or Eco-2 System section in the Hydro Quip manual.
The PHS / Ec-300 Control: This system is air activated
only. The thermostat control and the filtration timer is located on the control box. Please refer to the HT-650 section in the Hydro Quip Manual.
DCS Manual Eco-1 Manual Eco-2 Manual Air Manual Please be sure that you have the proper manual for the spa you purchased. Check your electrical requirements against the Hydro Quip Recommended application.
888

CCoonnttrrooll IIddeennttiiffiiccaattiioonn CCoonntt.. The control panel shown below is for reference and control operation only. Your control panel and the location of these controls will vary, depending on what spa you purchased and what options are on the unit.
1 2 3 4 5 6
1. Water Diverter Valve: This is a three position valve. It is designed to add more pressure to certain areas of the spa such as eurotherapy seats or lounges. Pressure can be increased to either seat or both areas at the same time. Depending on the spa that you have purchased, there can be more than one valve in your spa. In some cases there may not be any valve at all. Because of the high volume pumps that are installed in the spa, we strongly recommend that the pump be shut down before switching positions of the valve.
2. Air Control Valve: This valve allows air to mix with water. This is a two position valve. The two settings are maximum and minimum. The minimum position is the off position.
3. Control Center: Please refer to the previous page for your application. The control shown is the DCS System.
888
CCoonnttrrooll IIddeennttiiffiiccaattiioonn CCoonntt.. 4. Safety Grab Bar: The safety grab bar is located in different locations
depending on which model you have purchased. This bar is designed for balance and safety but it is not a handicap lift rail. A handicap rail is available as an option. Contact Bluewater spas for more information.
5. Accessory Valve: This valve is specifically designed to turn on or off the waterfall option. This option is available on all units. However it must be ordered in advance of the purchase of your spa.
6. Accessory Activation Button: This button is designed to activate any electrical option you may have ordered with your spa. It will activate either the Deluxe Fiber Optic Lighting System or the Deluxe Mister System.
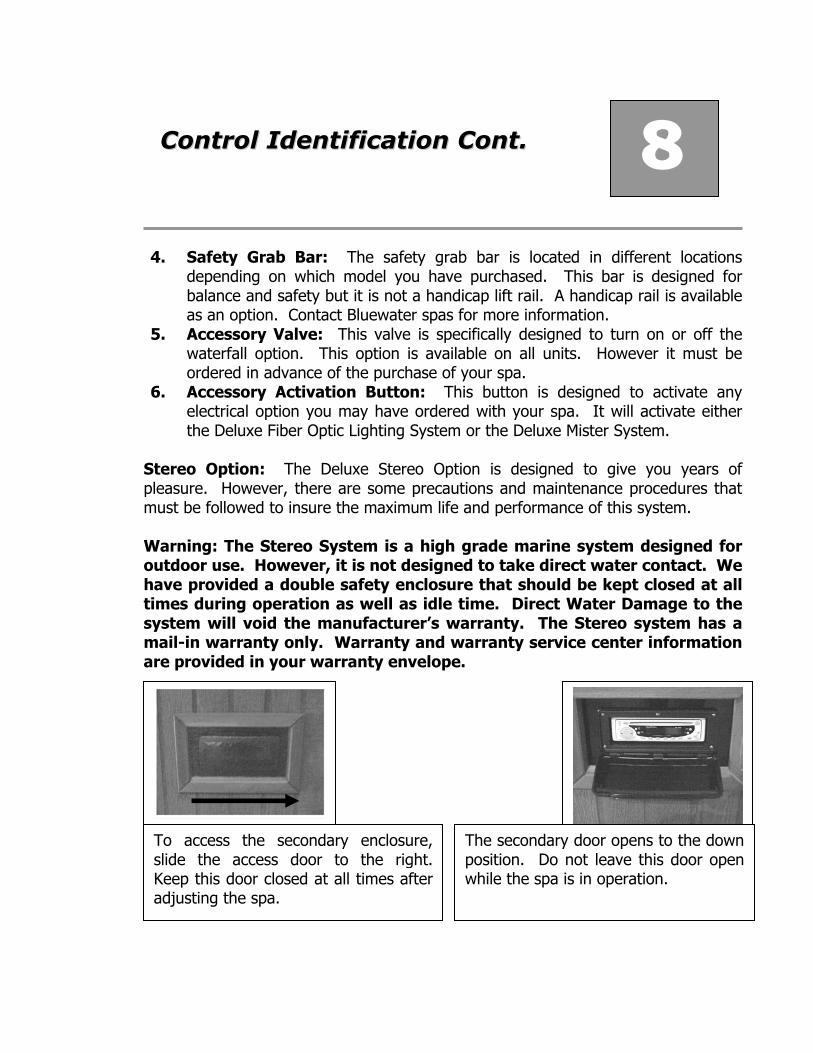
Stereo Option: The Deluxe Stereo Option is designed to give you years of pleasure. However, there are some precautions and maintenance procedures that must be followed to insure the maximum life and performance of this system. Warning: The Stereo System is a high grade marine system designed for outdoor use. However, it is not designed to take direct water contact. We have provided a double safety enclosure that should be kept closed at all times during operation as well as idle time. Direct Water Damage to the system will void the manufacturer’s warranty. The Stereo system has a mail-in warranty only. Warranty and warranty service center information are provided in your warranty envelope.
888
To access the secondary enclosure, slide the access door to the right. Keep this door closed at all times after adjusting the spa.
The secondary door opens to the down position. Do not leave this door open while the spa is in operation.
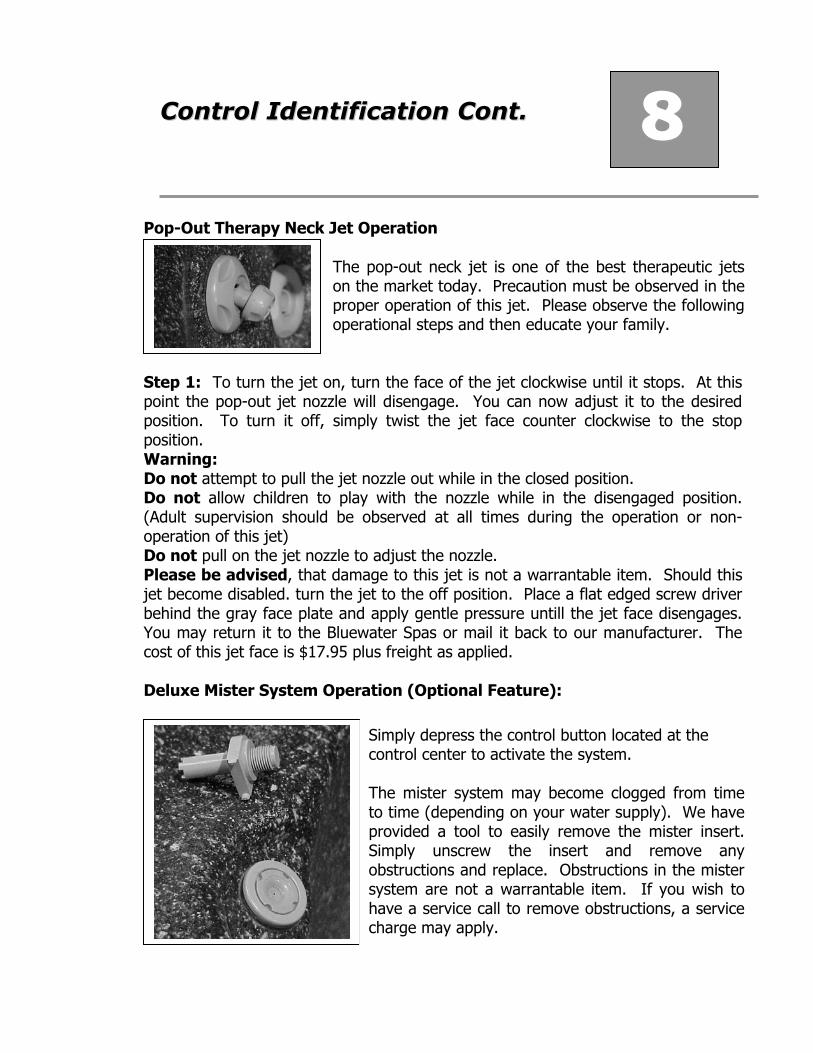
CCoonnttrrooll IIddeennttiiffiiccaattiioonn CCoonntt.. Pop-Out Therapy Neck Jet Operation Step 1: To turn the jet on, turn the face of the jet clockwise until it stops. At this point the pop-out jet nozzle will disengage. You can now adjust it to the desired position. To turn it off, simply twist the jet face counter clockwise to the stop position. Warning: Do not attempt to pull the jet nozzle out while in the closed position. Do not allow children to play with the nozzle while in the disengaged position. (Adult supervision should be observed at all times during the operation or non-operation of this jet) Do not pull on the jet nozzle to adjust the nozzle. Please be advised, that damage to this jet is not a warrantable item. Should this jet become disabled. turn the jet to the off position. Place a flat edged screw driver behind the gray face plate and apply gentle pressure untill the jet face disengages. You may return it to the Bluewater Spas or mail it back to our manufacturer. The cost of this jet face is $17.95 plus freight as applied. Deluxe Mister System Operation (Optional Feature):
CCoonnttrrooll IIddeennttiiffiiccaattiioonn CCoonntt..
888
The pop-out neck jet is one of the best therapeutic jets on the market today. Precaution must be observed in the proper operation of this jet. Please observe the following operational steps and then educate your family.
Simply depress the control button located at the control center to activate the system. The mister system may become clogged from time to time (depending on your water supply). We have provided a tool to easily remove the mister insert. Simply unscrew the insert and remove any obstructions and replace. Obstructions in the mister system are not a warrantable item. If you wish to have a service call to remove obstructions, a service charge may apply.
Fiber Optic Lighting System
888
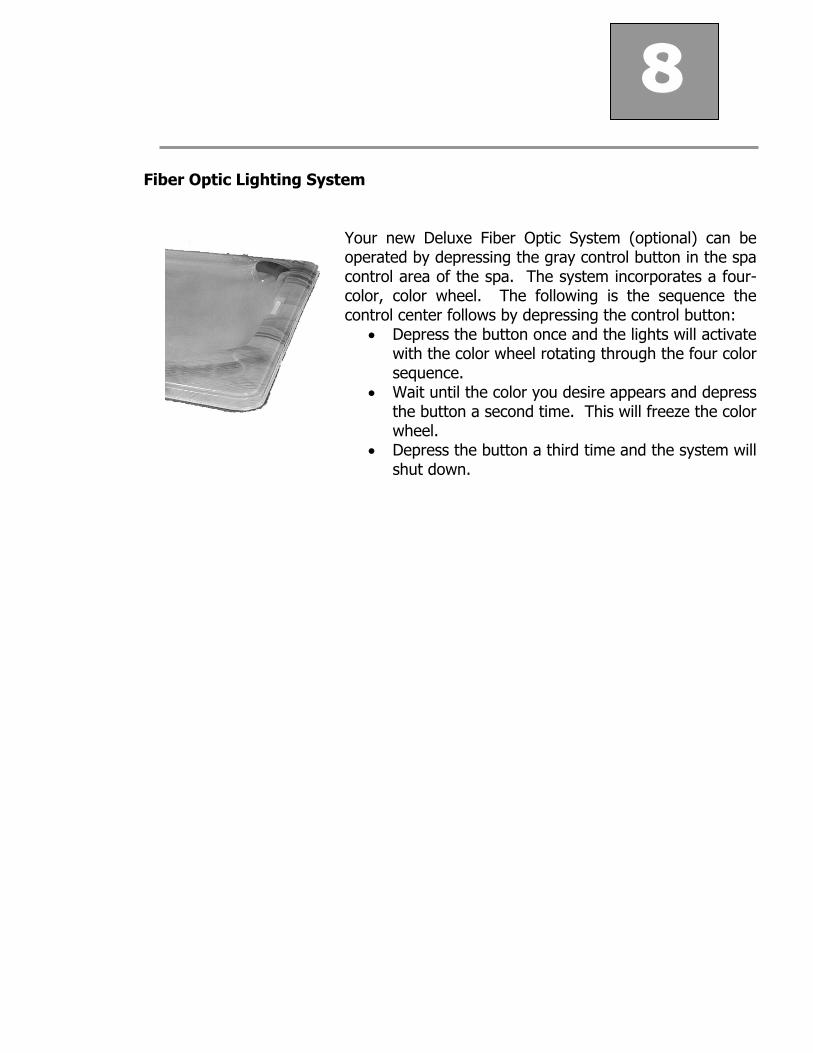
Your new Deluxe Fiber Optic System (optional) can be operated by depressing the gray control button in the spa control area of the spa. The system incorporates a four- color, color wheel. The following is the sequence the control center follows by depressing the control button:
• Depress the button once and the lights will activate with the color wheel rotating through the four color sequence.
• Wait until the color you desire appears and depress the button a second time. This will freeze the color wheel.
• Depress the button a third time and the system will shut down.

FFiilltteerr MMaaiinntteennaannccee
Step 1: Locate the filter system and identify the filter weir gate. In some cases you may have a 50 sq. ft. Filter system instead of the system shown. The cleaning and cartridge removal is the same for both systems. Step 2: Place your fingertips inside the top edge of the weir gate plate. Lift up gently and disengage the plate for the filter assembly. Remove and set aside. Step 3: Locate the weir basket. Slide the weir basket forward. Completely remove the basket and set aside. Step 4: Remove the two filter cartridges by twisting the filter cartridges counter clockwise approximately one half a turn and lift out of the filter assembly.
(Reverse the process to reinstall)
We strongly recommend that you check your filter system weekly. Depending on usage, clean the cartridge monthly. To extend the life of the cartridge, purchase a second set of filters and alternate monthly. To ensure clean water, clean the cartridges with a high pressure hose. Soak the filters in a cleaning solution on a bi-monthly basis. Store alternate cartridges in a warm and dry location. Failure to clean cartridges, will result in poor jet pressure, heater failure, and low pressure flow switch problems.
999
SSppaa CCaarree && MMaaiinntteennaannccee Water Chemistry: Your spa is designed to give you years of safe, dependable use and relaxation. To insure this, you must maintain the water chemistry. Water chemistry will have a direct effect on the support equipment and the spa itself. Raw water chemistry varies depending where you live. We do not provide chemical recommendations due to the wide variety of water conditions. Please consult your local chemical dealer for recommendations regarding your area. Daily Schedule:
• Check Water Chemistry Balance. (pH) • Check Disinfectant Levels (Chlorine, Bromine, or Ozone Gas) • Check Water Levels. (Check levels with no one in the spa) • Set Filtration Cycles. ( We recommend that you cycle your spa at least
twice a day for a minimum of three hours per cycle) Monthly Schedule:
• Lower water level at least 3 inches and clean the water line with a non abrasive cleaner.
• Remove and thoroughly clean filter Cartridges. • Remove and clean both sides of the spa cover.
Quarterly Schedule: • Drain Spa Completely • Sponge down the entire surface of the spa with a disinfectant. • Apply Surface Sealer if Necessary. • Soak Filter Cartridges in a cleaning solution for a minimum of 24 hours, and
rinse thoroughly. • Rub Down Cabinet with Sealer or Stain (durawood or fiberglass exempt). • Treat Spa Cover with Treatment/Cleaner.
Maintenance Precautions: • Add Only One Chemical at a Time. (Do not Pre-Mix Chemicals) • Do Not add Chemicals through Filter Opening. • Never add Acid or Pool Chlorine to the Spa • Allow Spa to Cycle for a minimum of one hour after adding
chemicals before using it. • Always Follow Chemical Suppliers Instructions.
111000
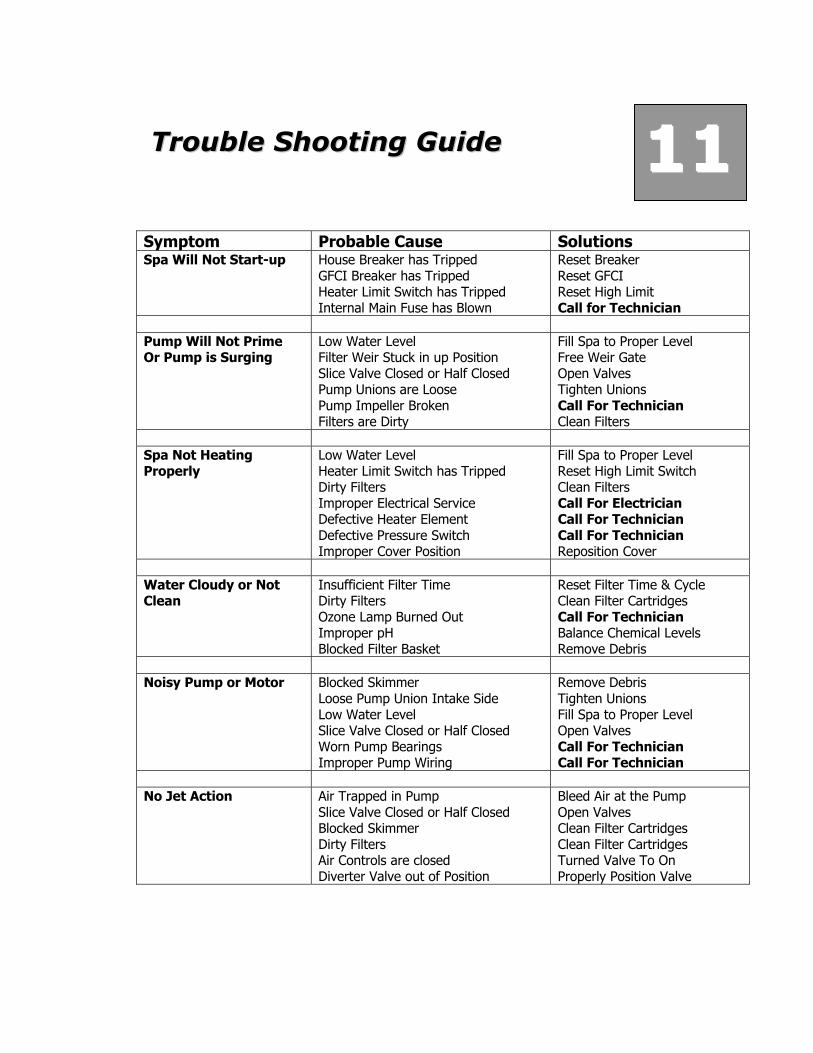
TTrroouubbllee SShhoooottiinngg GGuuiiddee Symptom Probable Cause Solutions Spa Will Not Start-up House Breaker has Tripped
GFCI Breaker has Tripped Heater Limit Switch has Tripped Internal Main Fuse has Blown
Reset Breaker Reset GFCI Reset High Limit Call for Technician
Pump Will Not Prime Or Pump is Surging
Low Water Level Filter Weir Stuck in up Position Slice Valve Closed or Half Closed Pump Unions are Loose Pump Impeller Broken Filters are Dirty
Fill Spa to Proper Level Free Weir Gate Open Valves Tighten Unions Call For Technician Clean Filters
Spa Not Heating Properly
Low Water Level Heater Limit Switch has Tripped Dirty Filters Improper Electrical Service Defective Heater Element Defective Pressure Switch Improper Cover Position
Fill Spa to Proper Level Reset High Limit Switch Clean Filters Call For Electrician Call For Technician Call For Technician Reposition Cover
Water Cloudy or Not Clean
Insufficient Filter Time Dirty Filters Ozone Lamp Burned Out Improper pH Blocked Filter Basket
Reset Filter Time & Cycle Clean Filter Cartridges Call For Technician Balance Chemical Levels Remove Debris
Noisy Pump or Motor Blocked Skimmer
Loose Pump Union Intake Side Low Water Level Slice Valve Closed or Half Closed Worn Pump Bearings Improper Pump Wiring
Remove Debris Tighten Unions Fill Spa to Proper Level Open Valves Call For Technician Call For Technician
No Jet Action Air Trapped in Pump
Slice Valve Closed or Half Closed Blocked Skimmer Dirty Filters Air Controls are closed Diverter Valve out of Position
Bleed Air at the Pump Open Valves Clean Filter Cartridges Clean Filter Cartridges Turned Valve To On Properly Position Valve
111111
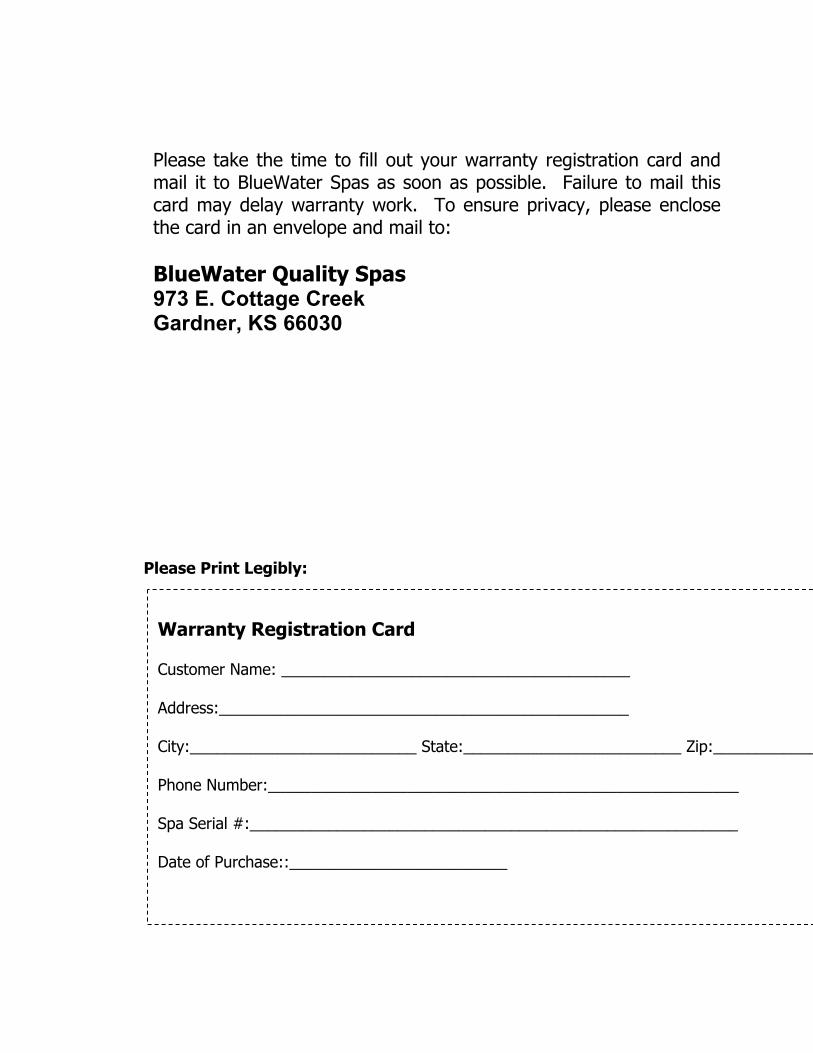
Please Print Legibly:
Warranty Registration Card Customer Name: ________________________________________ Address:_______________________________________________ City:__________________________ State:_________________________ Zip:____________ Phone Number:______________________________________________________ Spa Serial #:________________________________________________________ Date of Purchase::_________________________
Please take the time to fill out your warranty registration card and mail it to BlueWater Spas as soon as possible. Failure to mail this card may delay warranty work. To ensure privacy, please enclose the card in an envelope and mail to: BlueWater Quality Spas 973 E. Cottage Creek Gardner, KS 66030